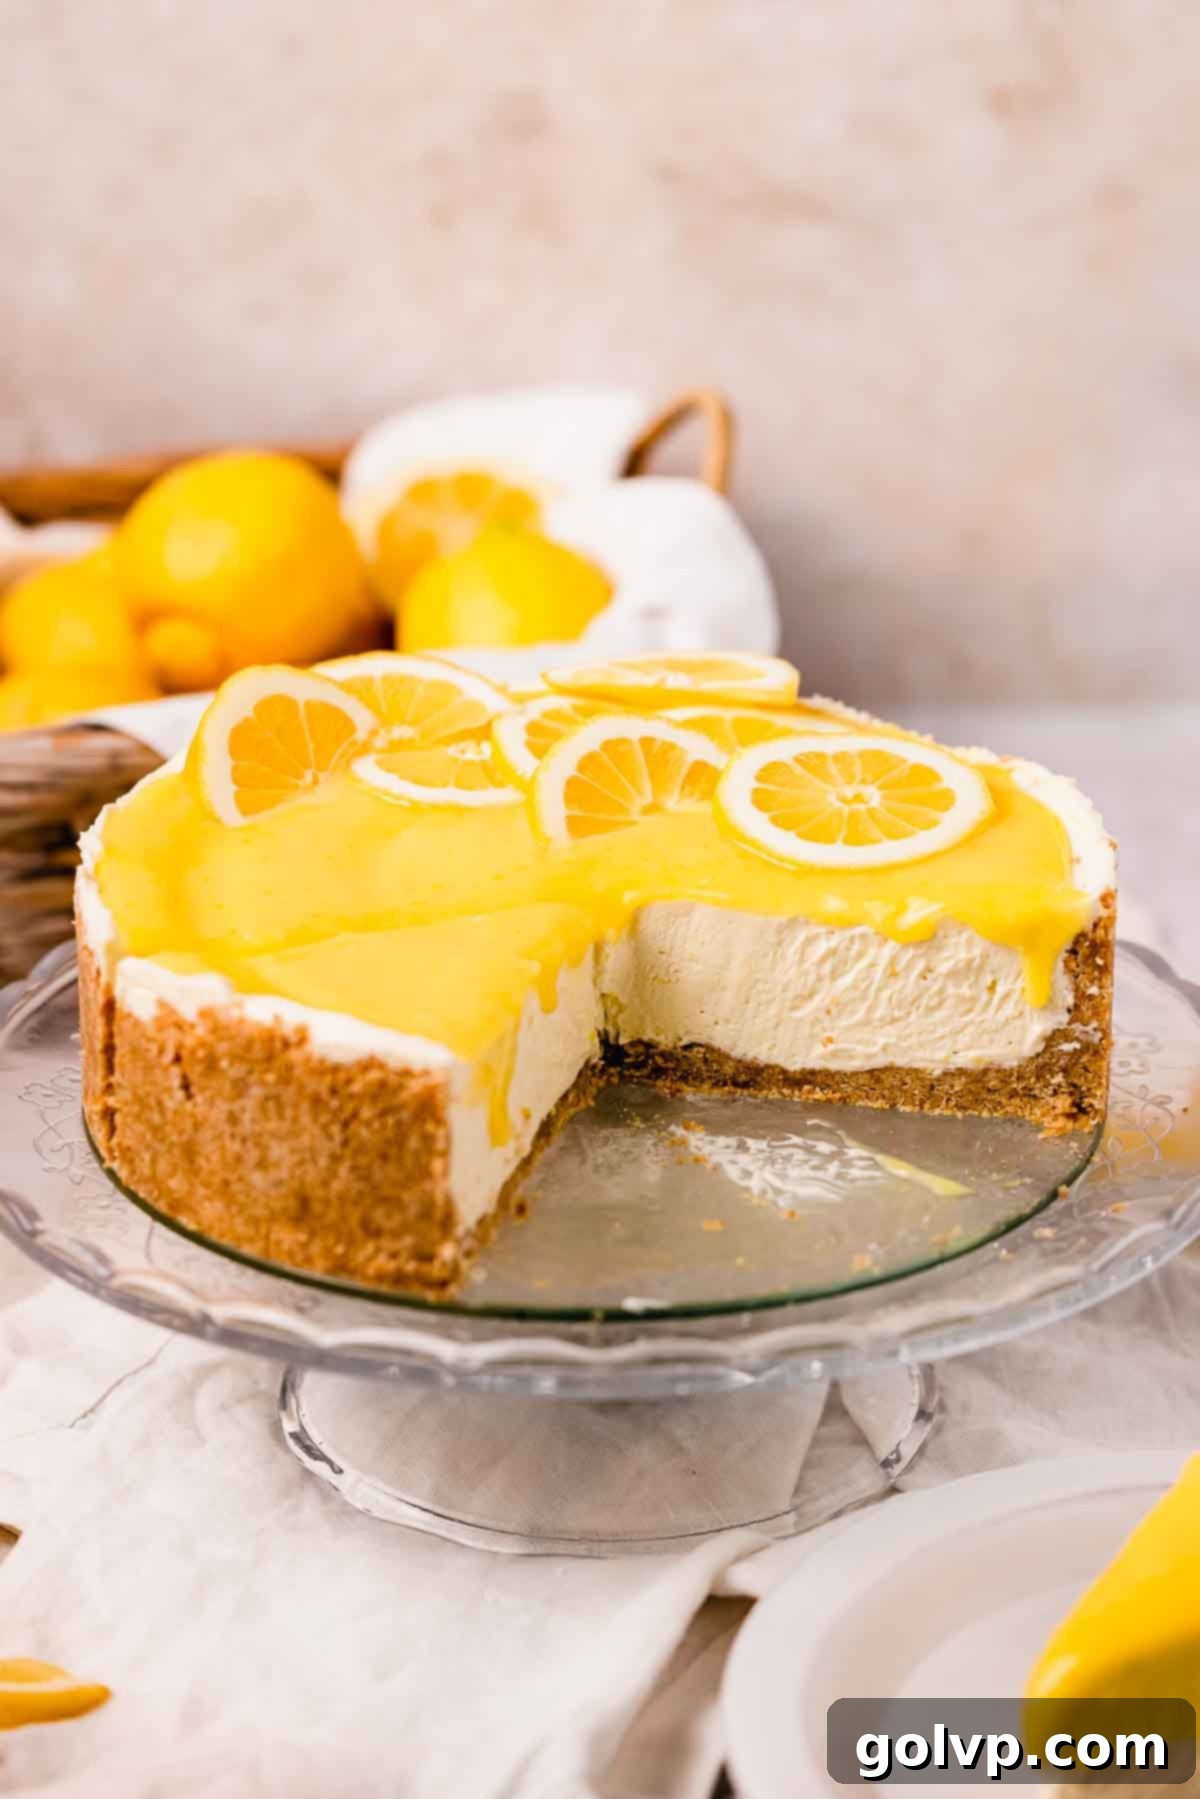
Luscious No-Bake Lemon Curd Cheesecake: Your Ultimate Guide to Creamy, Zesty Perfection
Prepare to be enchanted by the bright, refreshing flavors of this incredible **Lemon Curd Cheesecake**! This isn’t just any cheesecake; it’s a celebration of vibrant lemon, featuring a double dose of homemade (or store-bought!) lemon curd in both the luxuriously creamy filling and as a glossy, irresistible topping. All of this rests upon a sturdy, thick graham cracker crust, creating a harmonious blend of textures and tastes. If you’re searching for an effortlessly elegant dessert, this easy, no-bake cheesecake recipe is your answer. It’s perfectly smooth, delightfully tangy, and requires no oven, making it an ideal treat for warm summer days or any occasion where you crave a fuss-free yet impressive dessert. For those seeking a creative twist or an even quicker shortcut, feel free to use your favorite store-bought lemon curd, or even experiment with a raspberry curd for a delightful berry infusion.
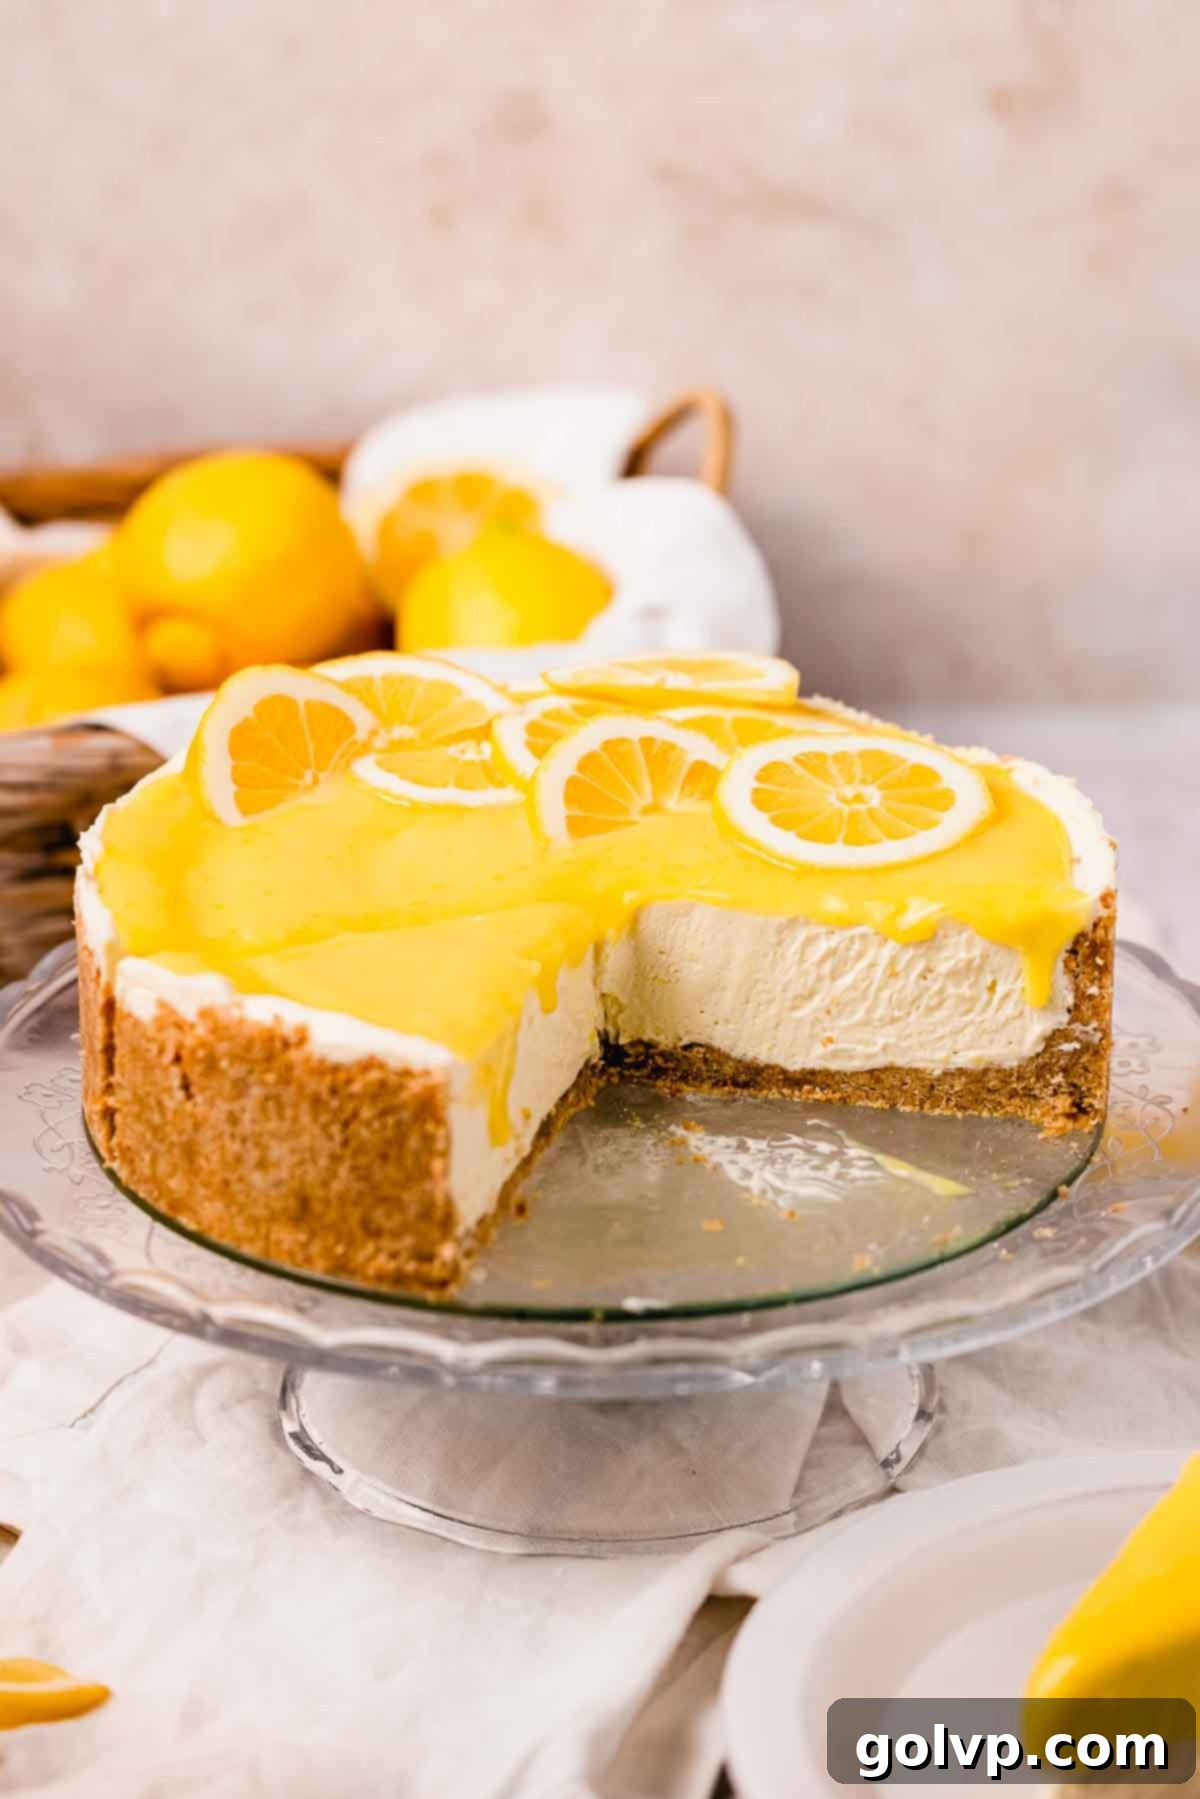
🍋 Why You’ll Fall in Love with This Lemon Cheesecake Recipe
This lemon curd cheesecake is more than just a dessert; it’s an experience. Here’s why it’s destined to become a staple in your recipe collection:
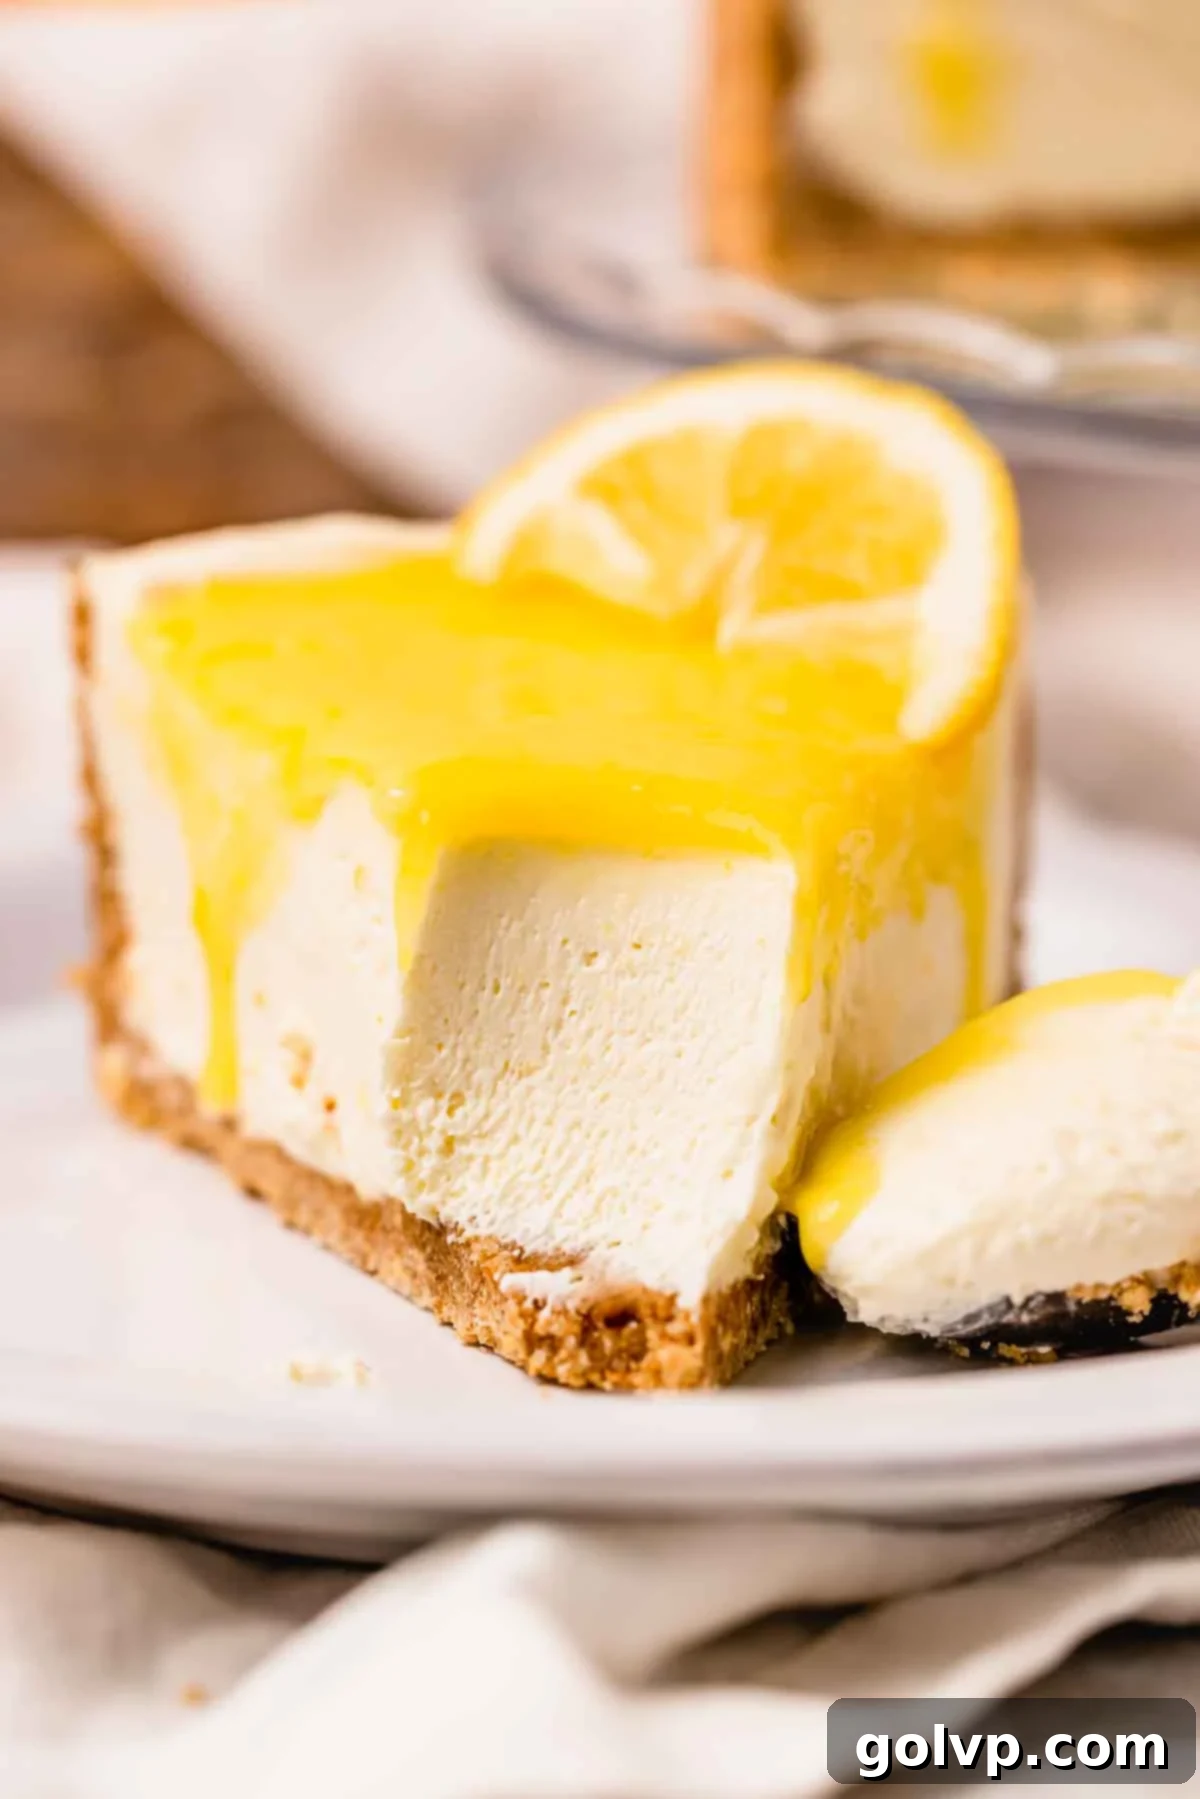
- Unbelievably Creamy Texture: Imagine a dessert that melts in your mouth! This cheesecake boasts an ultra-smooth, mousse-like consistency that is both rich and light. It’s a dreamy, velvety texture that sets it apart from denser baked cheesecakes, offering a luxurious mouthfeel with every spoonful.
- Bursting with Lemon Curd Flavor: We don’t just add a hint of lemon; we embrace it! With lemon curd incorporated directly into the cheesecake filling and generously spread on top, you get an intense, bright, and perfectly tart lemon flavor throughout. This dual application ensures a vibrant citrus punch that true lemon lovers will adore.
- Effortlessly Easy and No-Bake: Forget turning on your oven! This gelatin-free, no-bake cheesecake is incredibly simple to assemble, making it perfect for novice bakers and seasoned pros alike. Its no-bake nature makes it a fantastic choice for entertaining, especially during the sweltering summer months when keeping your kitchen cool is a priority.
- Satisfying Graham Cracker Crust: A truly great cheesecake needs a foundational crust, and ours delivers! A thick, buttery graham cracker crust provides the perfect counterpoint to the creamy, tangy filling, adding a delightful crunch and a hint of warmth that completes the dessert.
- Versatile and Customizable: While lemon is the star, this recipe is wonderfully adaptable. You can easily swap out the lemon curd for another fruit curd, like our luscious raspberry curd, to create a unique berry-flavored cheesecake. The options are endless!
If you’re a fan of baked cheesecakes with a fruity twist, be sure to explore my lemon raspberry cheesecake recipe, which features a beautiful raspberry curd topping.
📝 Essential Ingredients for Your Zesty Lemon Curd Cheesecake
For perfect results, read through these tips on selecting and preparing your key ingredients! Full recipe steps and a complete ingredient list are available in the recipe card below.
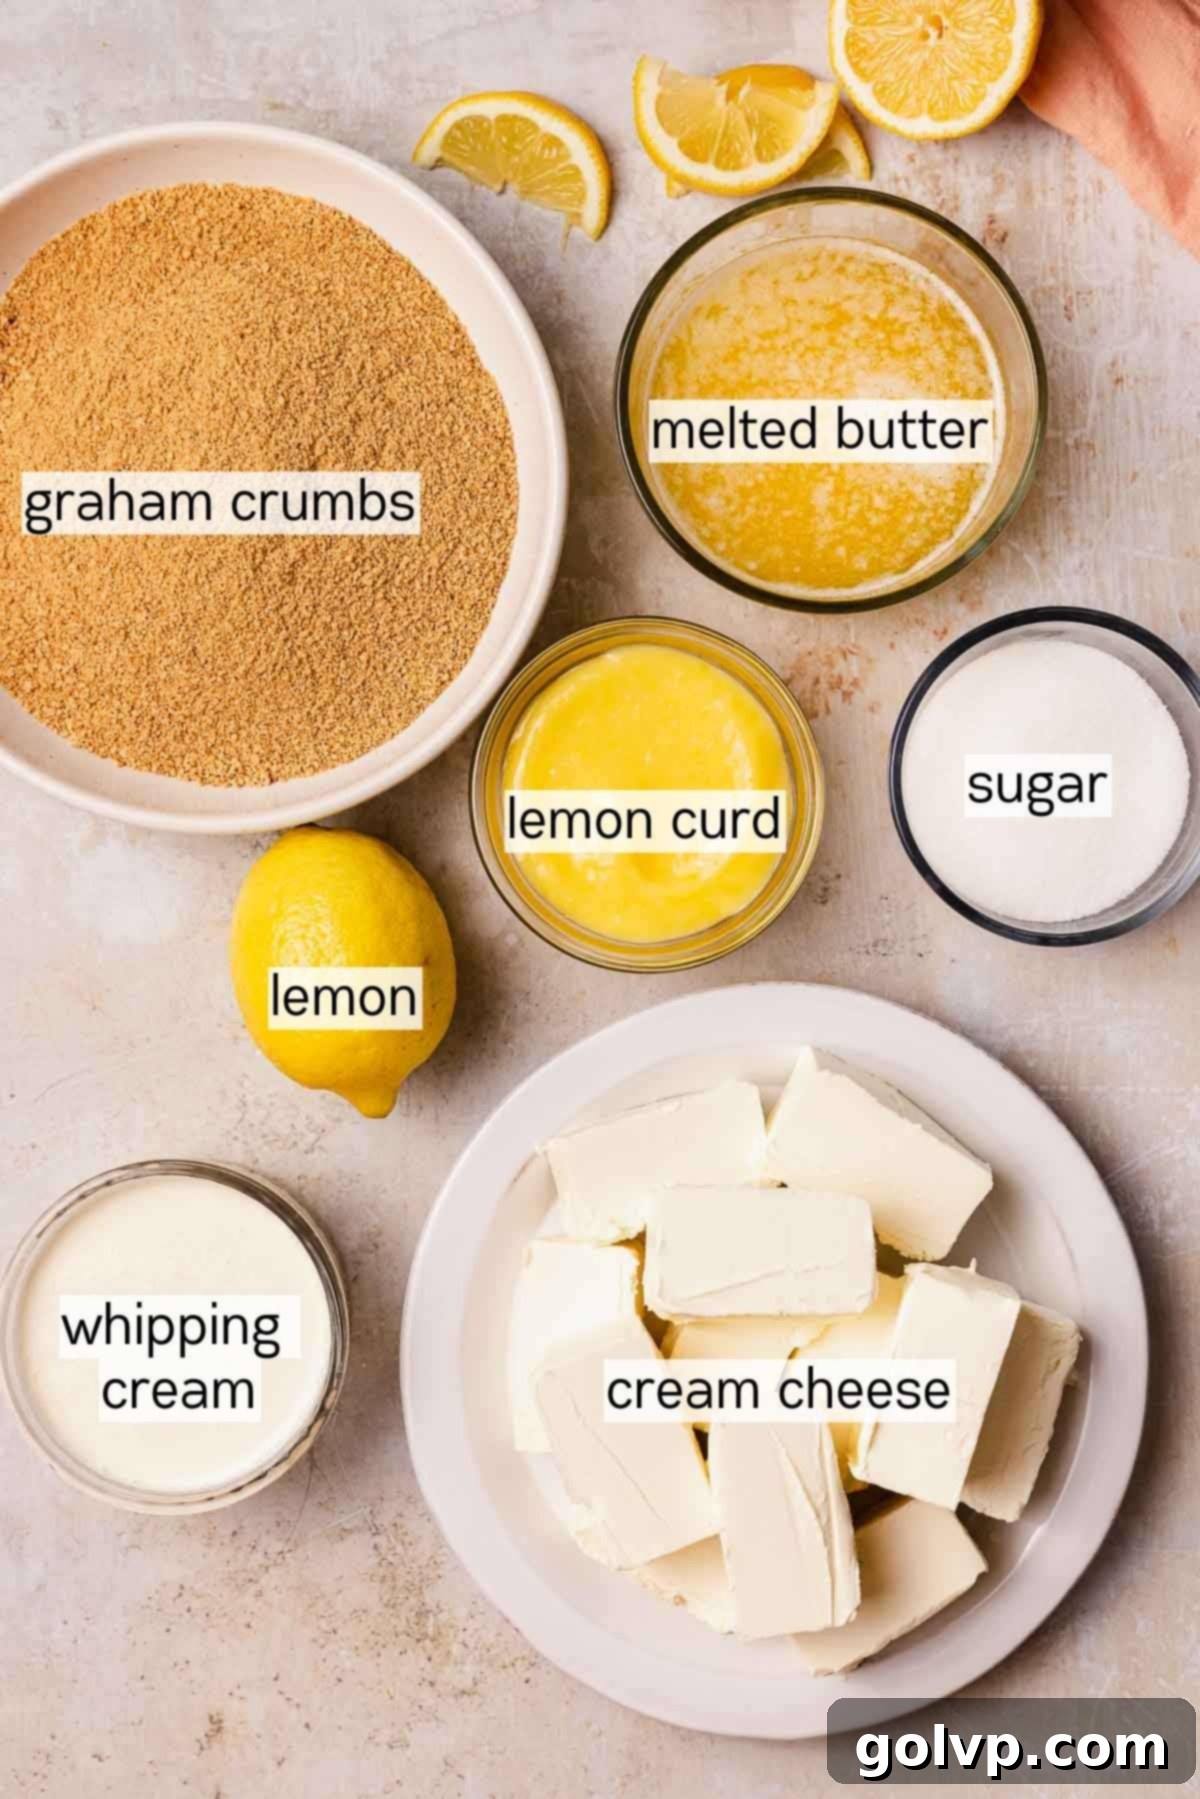
- Heavy Whipping Cream (35% Fat or Higher): This is your secret weapon for a perfectly set, airy, and creamy cheesecake without gelatin. Ensure your cream is very cold before whipping. The high-fat content is essential to achieve stiff peaks, which provide the necessary structure and lift for the filling. A chilled bowl can also significantly aid in whipping.
- Full-Fat Brick Style Cream Cheese: For the best and most reliable results, always opt for full-fat, brick-style cream cheese. Brands like Philadelphia Original are consistently excellent. Avoid low-fat or whipped cream cheese varieties, as their higher water content and altered stabilizers can prevent your cheesecake from setting properly, resulting in a runny texture. Make sure it’s softened to room temperature for a lump-free, smooth filling.
- Lemon Curd: This recipe utilizes lemon curd twice – in the filling and as a glorious topping. While I’ll provide instructions for making a simple lemon curd at home in this recipe, for a more detailed guide with extensive tips and troubleshooting, I highly recommend checking out my dedicated lemon curd recipe. Alternatively, a good quality store-bought lemon curd is a fantastic shortcut!
- Fresh Lemons (Juice and Zest): Beyond the curd, an extra fresh lemon in the cheesecake filling is crucial. The zest provides an intense, aromatic burst of lemon oil, while the fresh juice adds that quintessential tang, elevating the overall zesty flavor profile and contributing to the cheesecake’s unique setting properties.
- Graham Cracker Crumbs: The foundation of this delightful dessert. You can easily make your own by crushing graham crackers in a food processor or by hand in a sealed bag with a rolling pin. Pre-ground graham cracker crumbs are also widely available in the baking aisle of most grocery stores for convenience.
- Unsalted Butter: Used in both the lemon curd and the graham cracker crust. For the crust, melted butter binds the crumbs together to form a firm base. For the curd, cold, cubed butter is whisked in at the end to provide richness, shine, and a smooth texture.
- Granulated Sugar: Sweetens both the lemon curd and the cheesecake filling, balancing the tartness of the lemon.
- Eggs and Egg Yolks: Essential for the homemade lemon curd, contributing to its rich texture and natural thickening when heated.
- Sea Salt: A pinch of salt enhances all the flavors, balancing the sweetness and brightness of the lemon.
✔️ Smart Ingredient Substitutions & Shortcuts
Life gets busy, and sometimes a shortcut is exactly what you need! Here are some excellent substitutions and ways to streamline the process without sacrificing flavor:
- Store-Bought Lemon Curd: The biggest shortcut of all! You’ll need approximately one cup of good quality, pre-made lemon curd for this recipe. This saves a significant amount of time and effort, making the no-bake aspect even quicker.
- Berry Twist with Raspberry Curd: Craving something different? Easily substitute the lemon curd for this delicious raspberry curd. You could also try blueberry or passionfruit curds for equally delightful variations.
- Alternative Crusts: While graham cracker is classic, feel free to get creative with your crust! Crushed vanilla wafers, shortbread cookies, or even digestive biscuits make fantastic alternatives. Just ensure you use the same amount of crumbs and melted butter to maintain the proper consistency.
If you adore creamy, no-bake lemon desserts, you absolutely must try this lemon tiramisu recipe! It also features a gorgeous, glossy lemon curd topping and offers another incredible no-bake experience.
👩🍳 Crafting Your Perfect Lemon Curd Cheesecake: A Step-by-Step Guide
This delightful cheesecake comes together in three main components: the zesty lemon curd, the crunchy graham cracker crust, and the smooth, creamy filling. If you’re using store-bought or pre-made lemon curd, you’ll need about one cup in total, which will save you a step!
Homemade Lemon Curd: Step by Step
Pro Tip: To avoid any metallic taste affecting your delicate lemon curd, always use a non-reactive saucepan. Ceramic or enamel-coated pans are excellent choices. You can prepare the lemon curd several days in advance and store it in the refrigerator, making your cheesecake assembly even smoother.
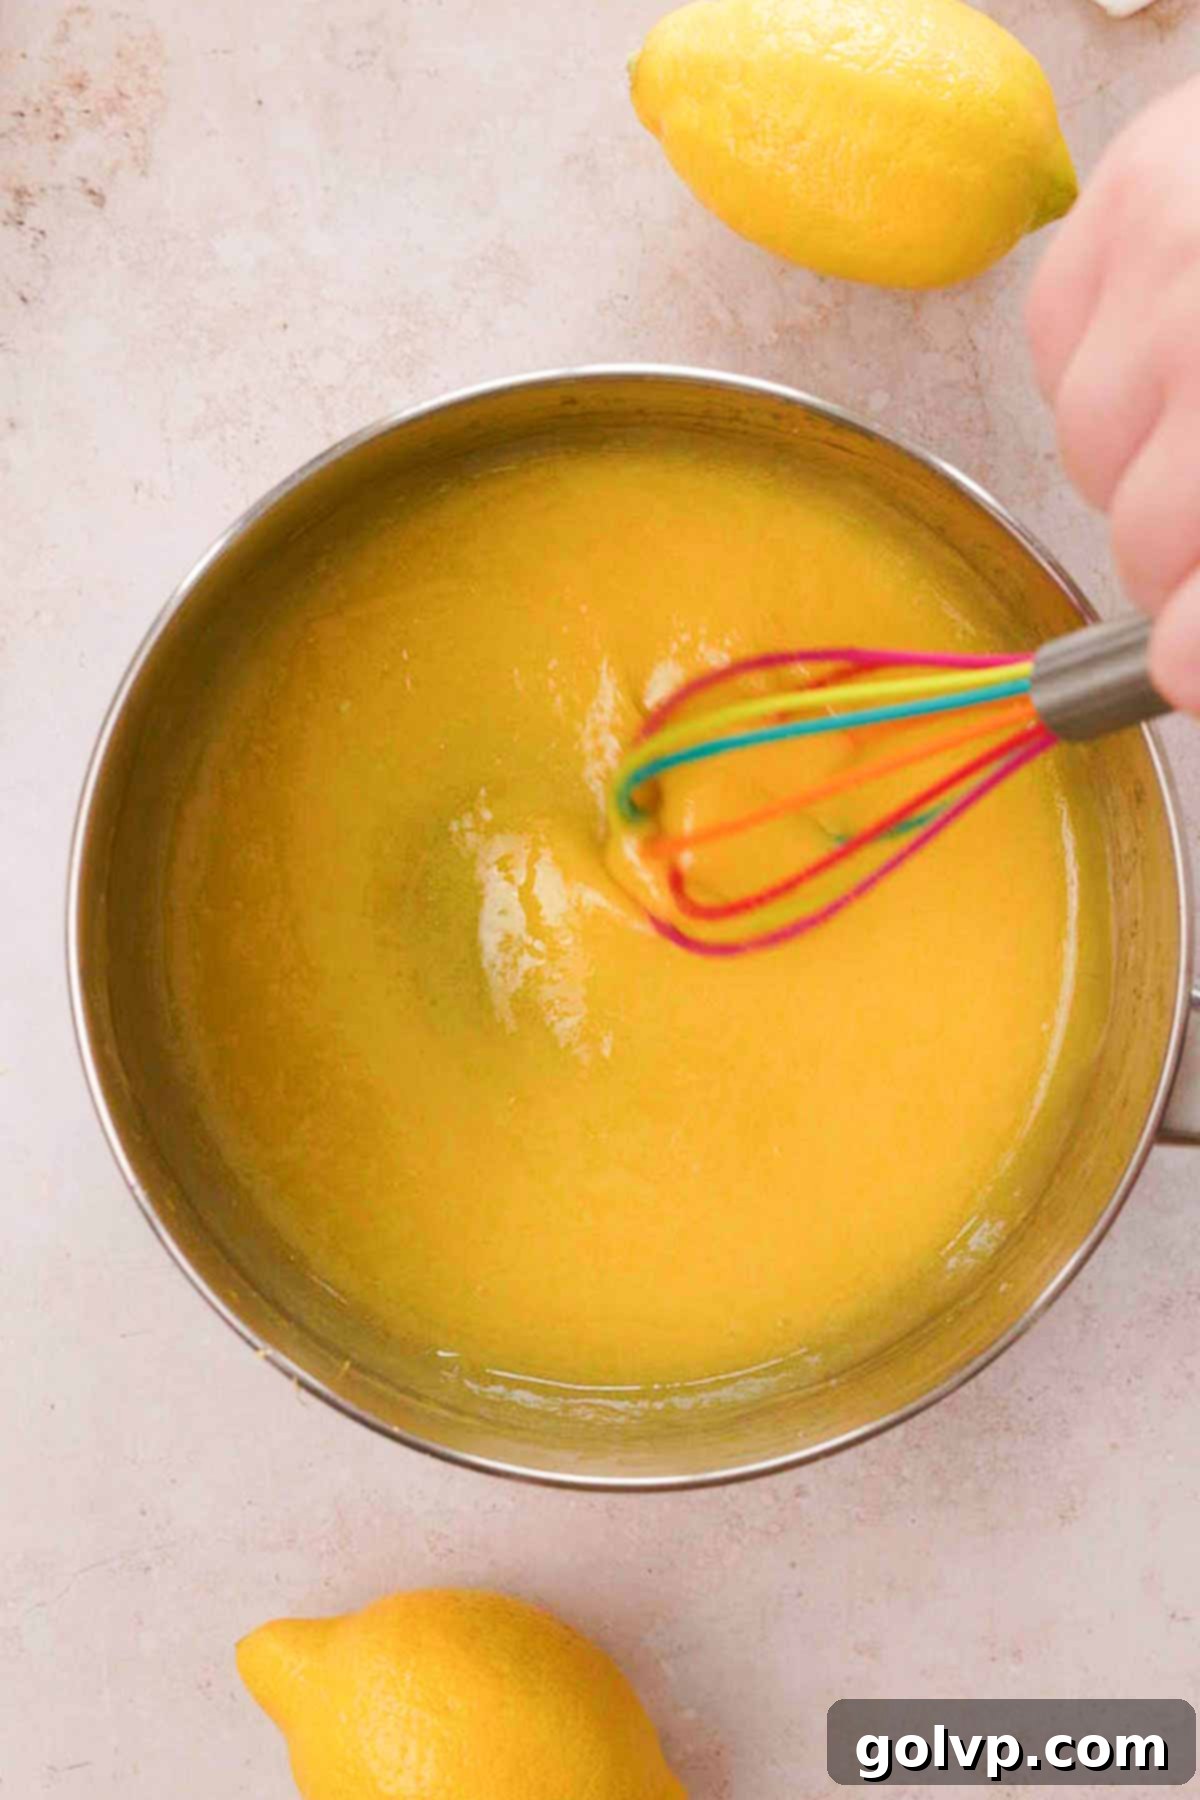
Step 1: Combine and Heat Curd Ingredients
In a medium, non-metal saucepan, whisk together the granulated sugar, large egg, and egg yolks until well combined. Stir in the freshly squeezed lemon juice, fragrant lemon zest, and a pinch of sea salt. Place the saucepan over medium-low heat and cook, stirring frequently with a whisk to prevent scorching, until the mixture begins to simmer and thickens to a pudding-like consistency. This usually takes about 8-10 minutes. It should coat the back of a spoon.
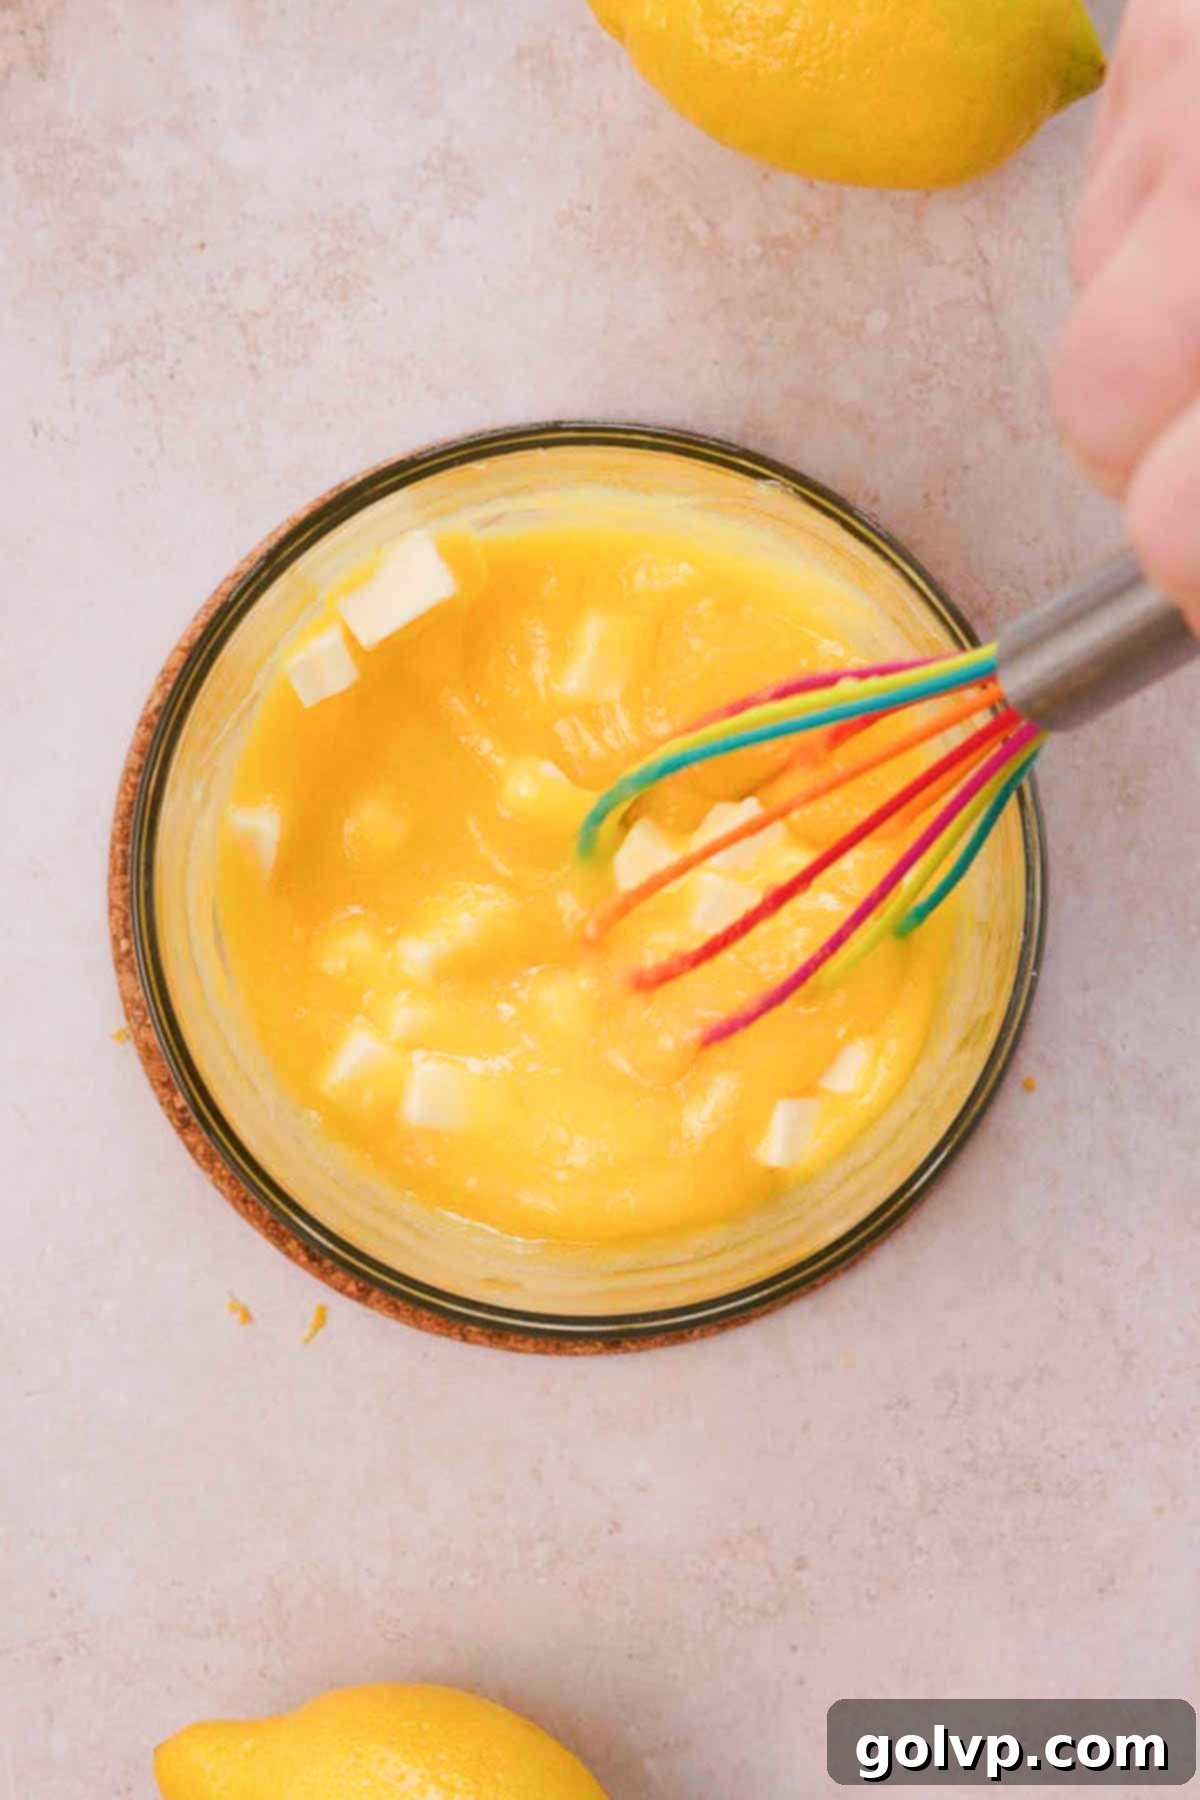
Step 2: Finish and Chill the Curd
Once thickened, immediately pour the hot lemon curd into a clean, non-metal container or jar. Add the cold, unsalted butter, cubed, to the hot curd and stir gently until the butter is completely melted and incorporated, creating a smooth and glossy curd. To prevent a skin from forming, cover the surface of the curd directly with a piece of plastic wrap or parchment paper. Refrigerate for at least 2-3 hours, or until thoroughly chilled and thickened.
Perfect Graham Cracker Crust: Step by Step
Preparation: Before you begin, lightly grease a 9-inch springform pan with a thin layer of vegetable oil or non-stick spray. For effortless removal and a clean presentation, line the bottom of the pan with a round of parchment paper.
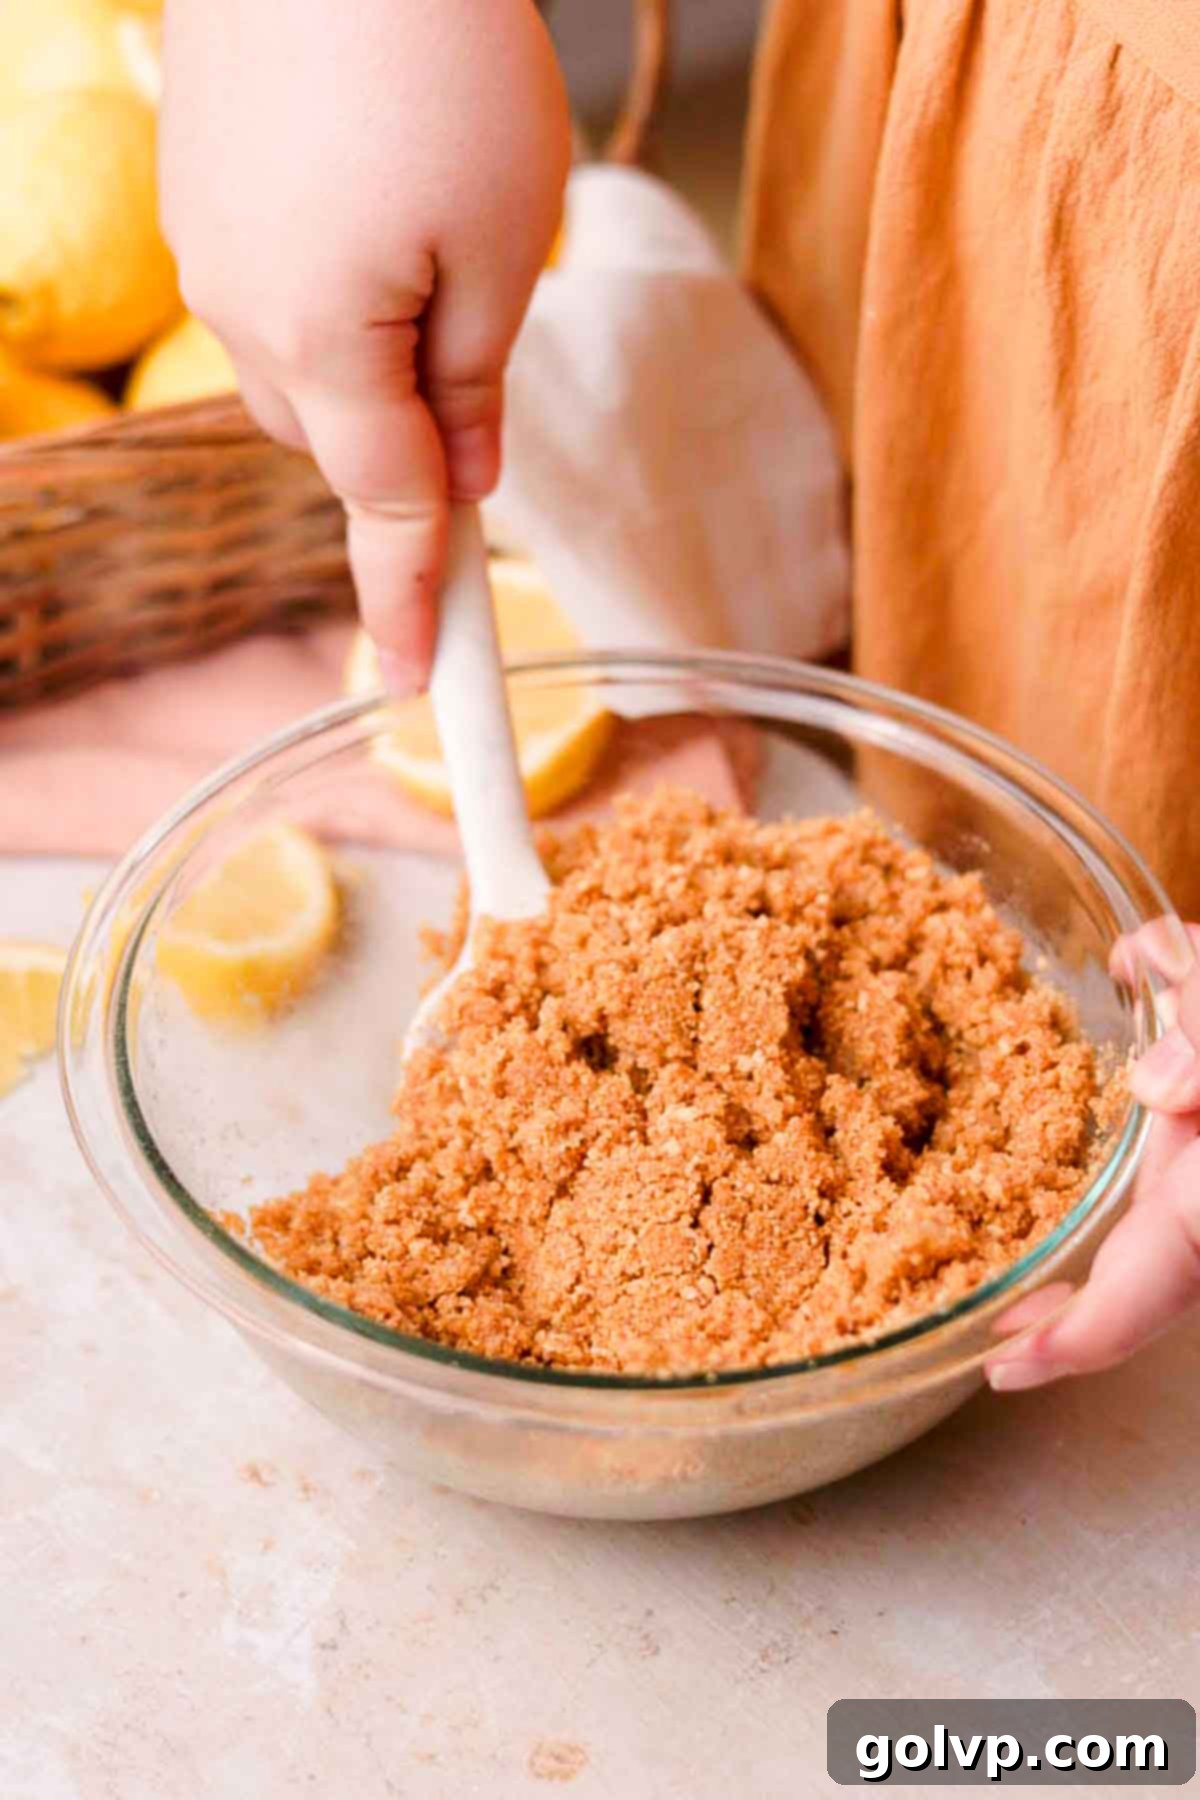
Step 1: Mix Crust Ingredients
In a large mixing bowl, combine the graham cracker crumbs, granulated sugar, and a pinch of sea salt. Pour in the melted and cooled unsalted butter. Stir thoroughly with a spatula or spoon until all the crumbs are evenly moistened and resemble wet sand. This ensures a cohesive and flavorful crust.
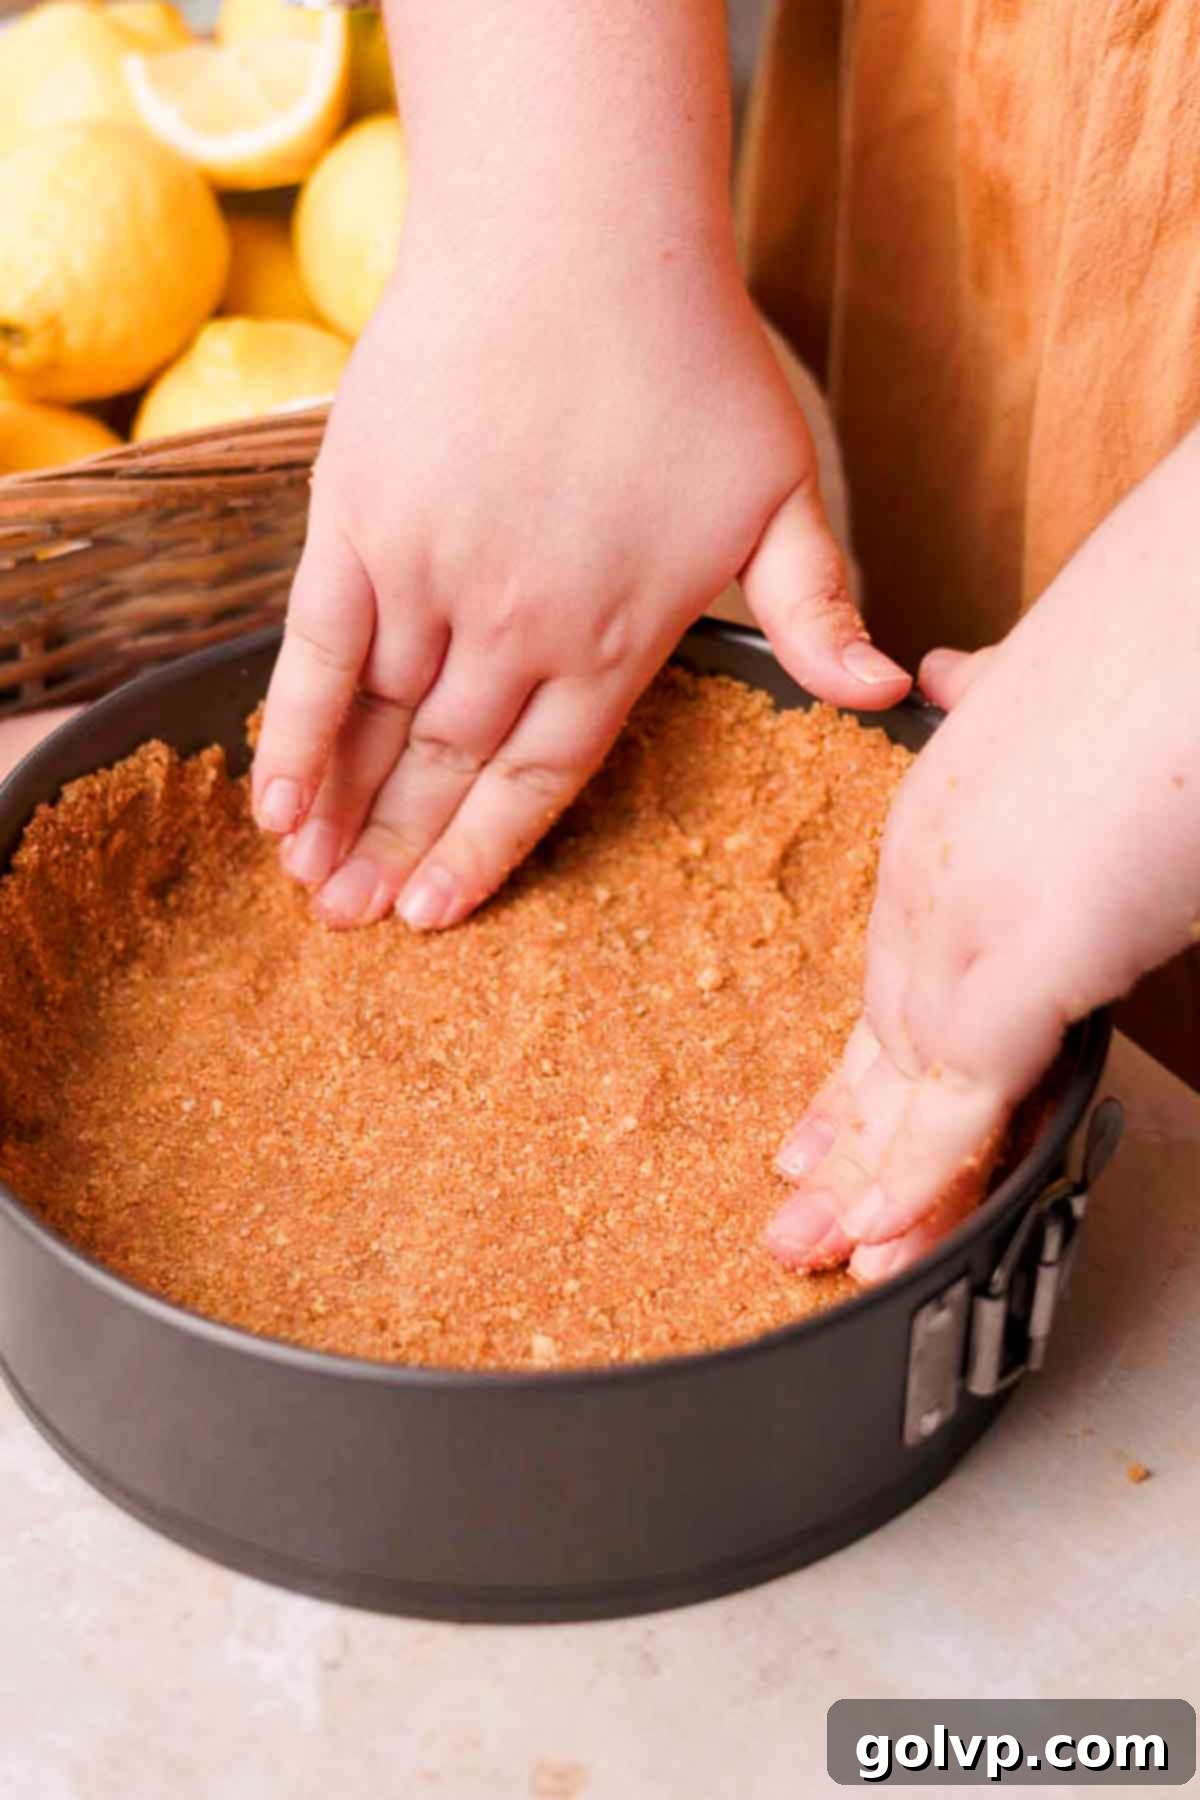
Step 2: Form and Chill the Crust
Transfer the crumb mixture into your prepared springform pan. Begin by firmly pressing the mixture into an even layer across the bottom of the pan. Then, carefully press some of the crust mixture up the sides of the pan, forming a border. Use your fingers or the flat bottom of a glass to tightly pack the crust, ensuring it’s compact and firm. This will prevent it from crumbling when sliced. Place the prepared crust in the refrigerator to chill while you prepare the filling.
Creamy Cheesecake Filling: Step by Step
Step 1: Whip the Heavy Cream
In a well-chilled medium mixing bowl or the bowl of a stand mixer fitted with the whisk attachment, pour the very cold heavy whipping cream. Whip the cream on medium-high speed until stiff peaks form. The cream should be thick and hold its shape firmly. Transfer the whipped cream to the refrigerator immediately and keep it chilled until you’re ready to fold it into the cheesecake mixture. This step is crucial for the cheesecake’s setting and airy texture.
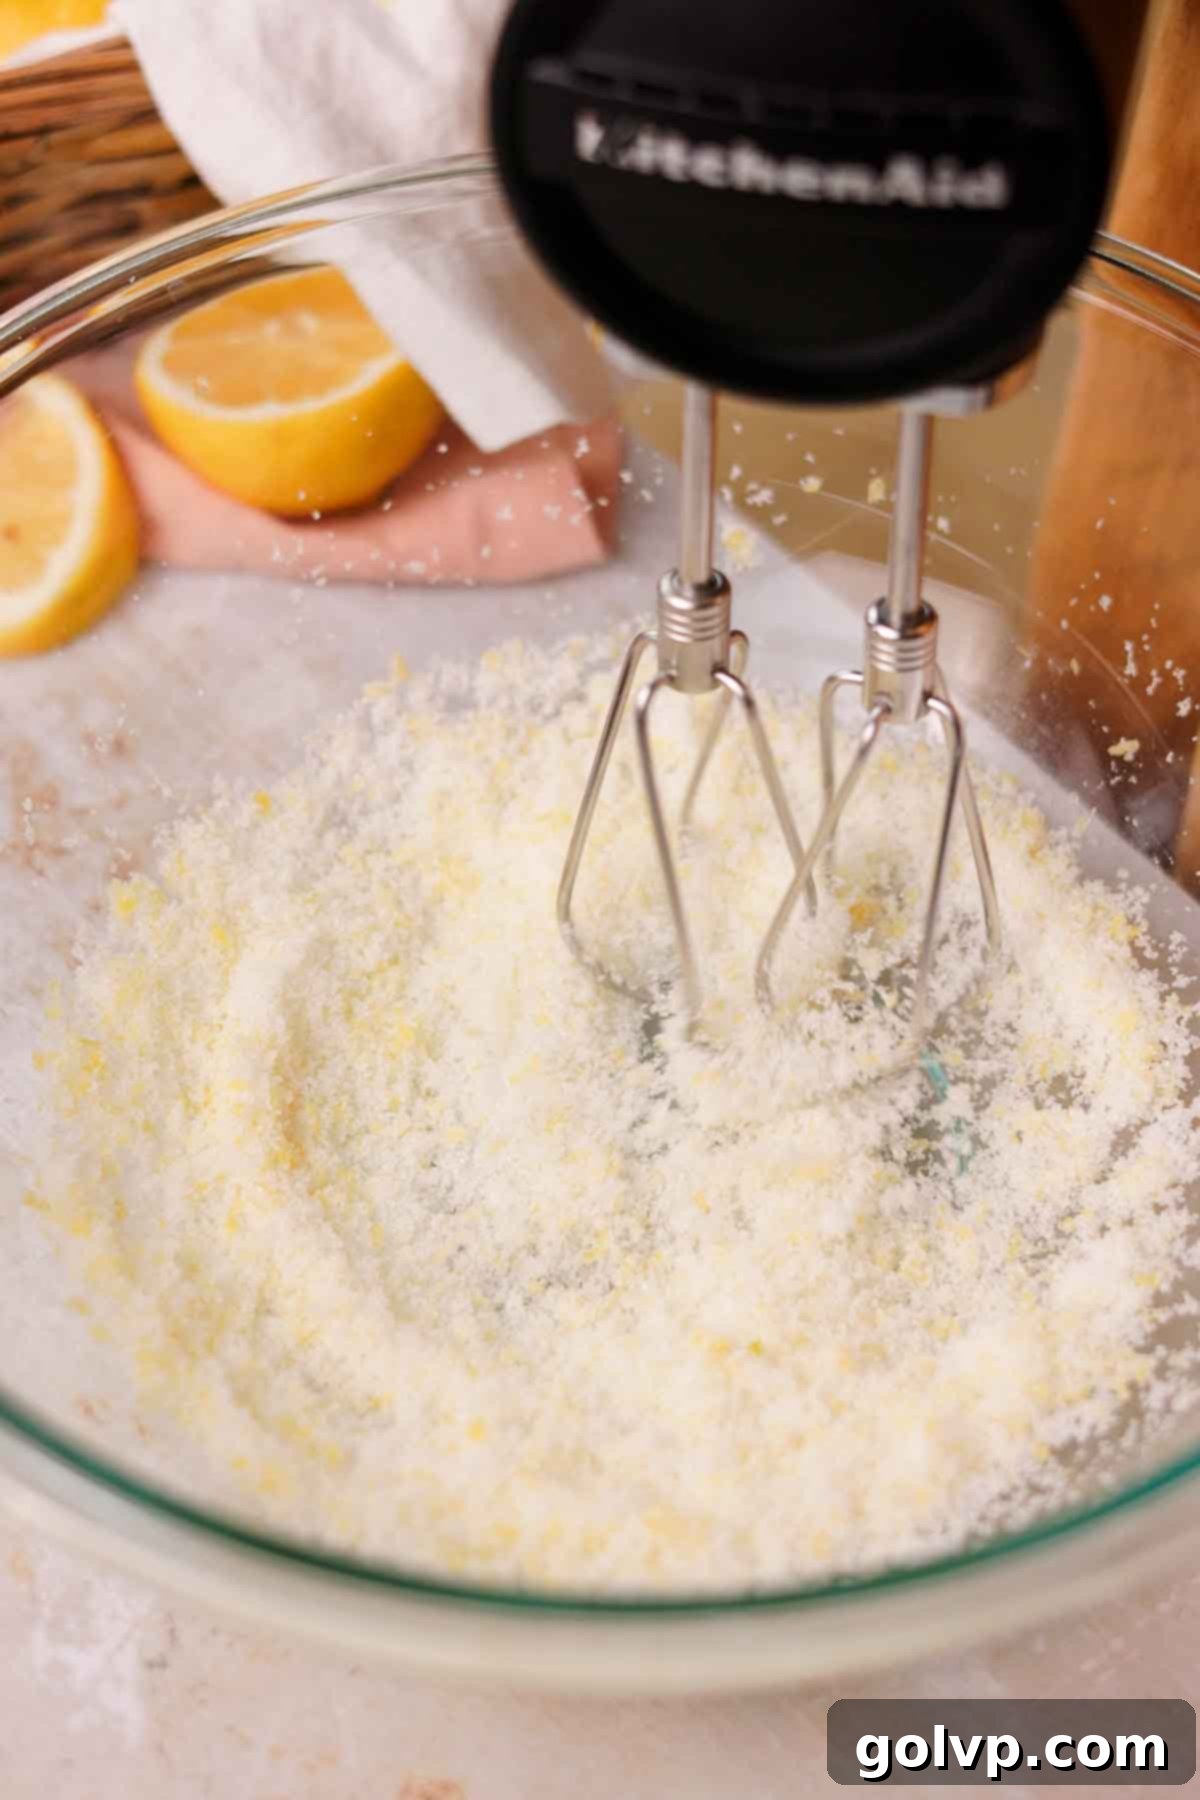
Step 2: Infuse Sugar with Lemon Zest
In a large mixing bowl or the bowl of a stand mixer, combine the grated lemon zest with the granulated sugar. Using an electric mixer, blend these two ingredients together for a minute or two. This process, often called “zest-rubbing,” releases the essential oils from the lemon zest into the sugar, intensifying the lemon flavor and making the filling incredibly fragrant and subtly yellow.
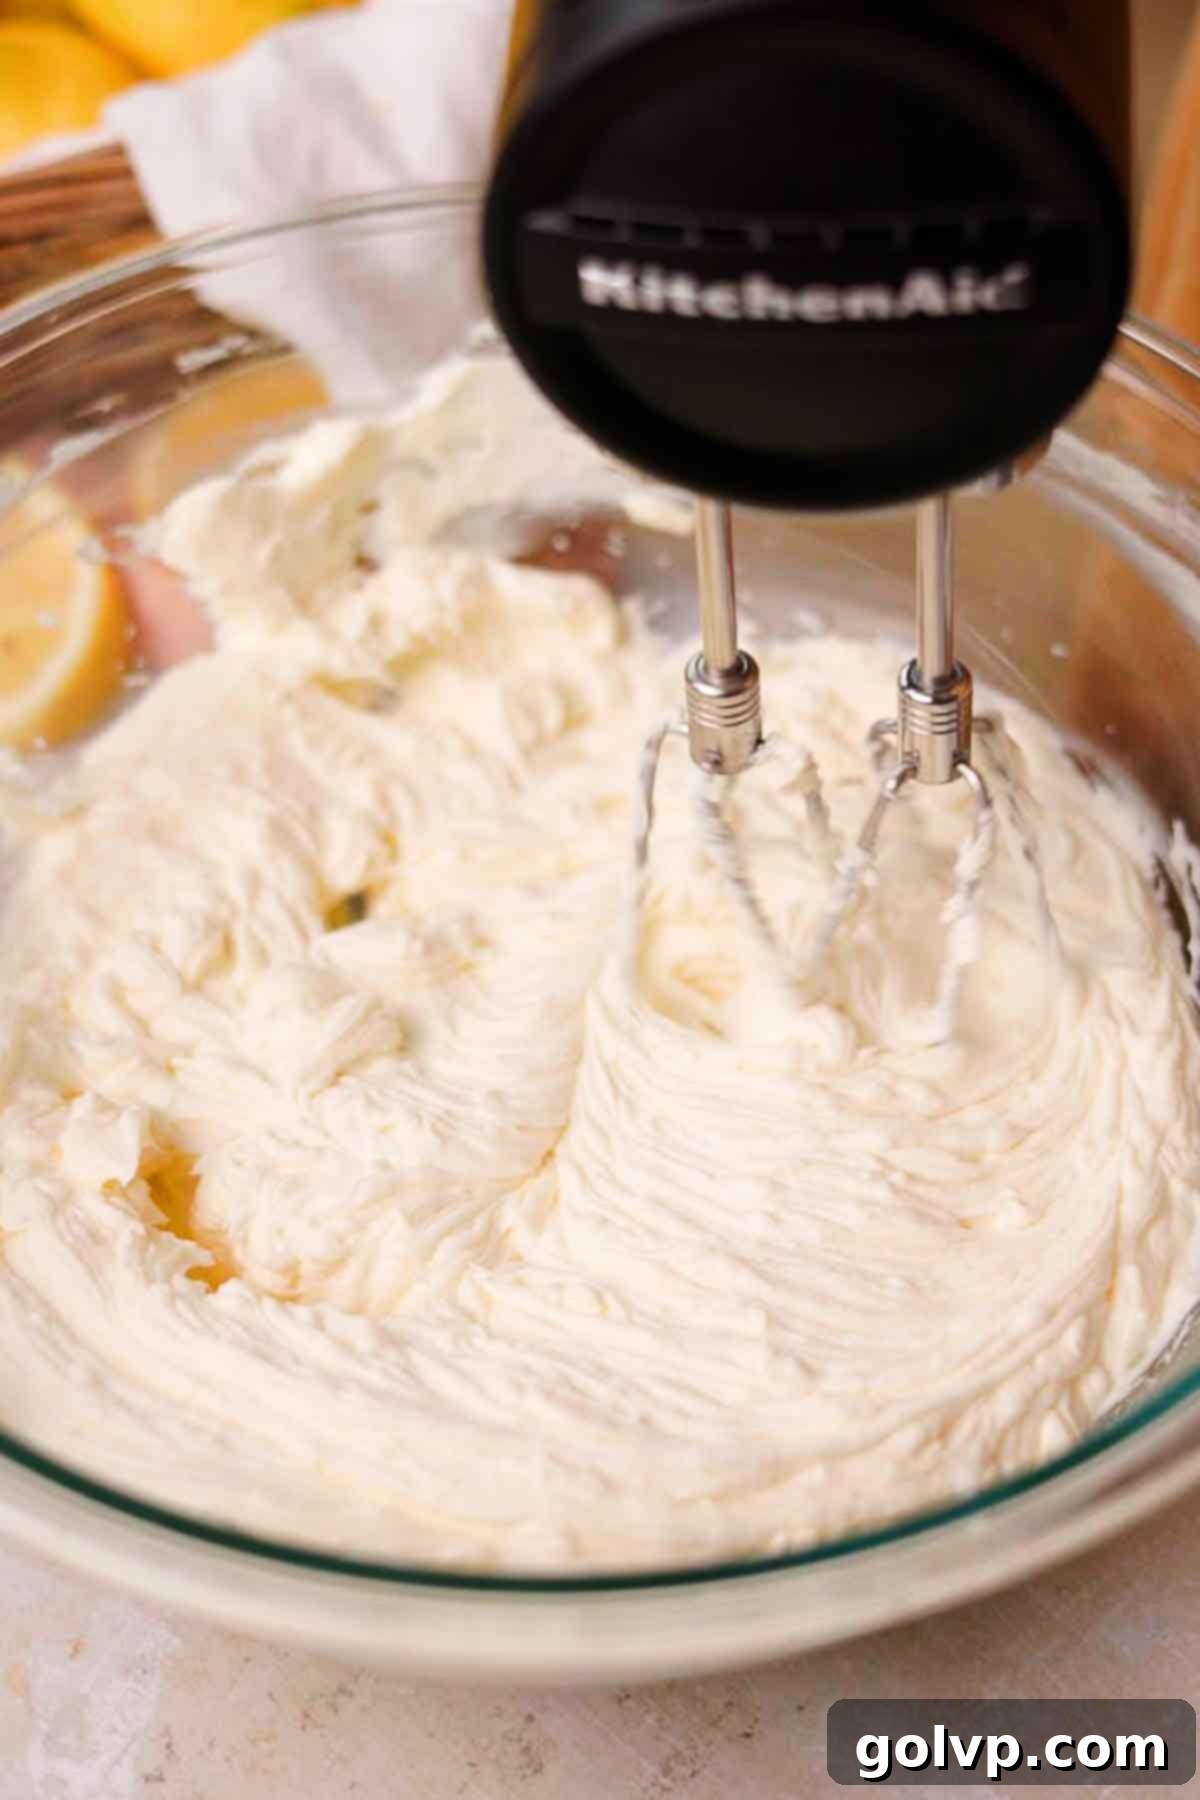
Step 3: Cream the Cheese and Lemon Sugar
Add the softened, full-fat cream cheese to the lemon-infused sugar mixture. Beat with an electric mixer on medium speed until the mixture is completely fluffy, smooth, and creamy. It’s vital to scrape down the sides and bottom of the bowl frequently during this step to ensure there are no lumps of cream cheese, resulting in a silky-smooth filling.
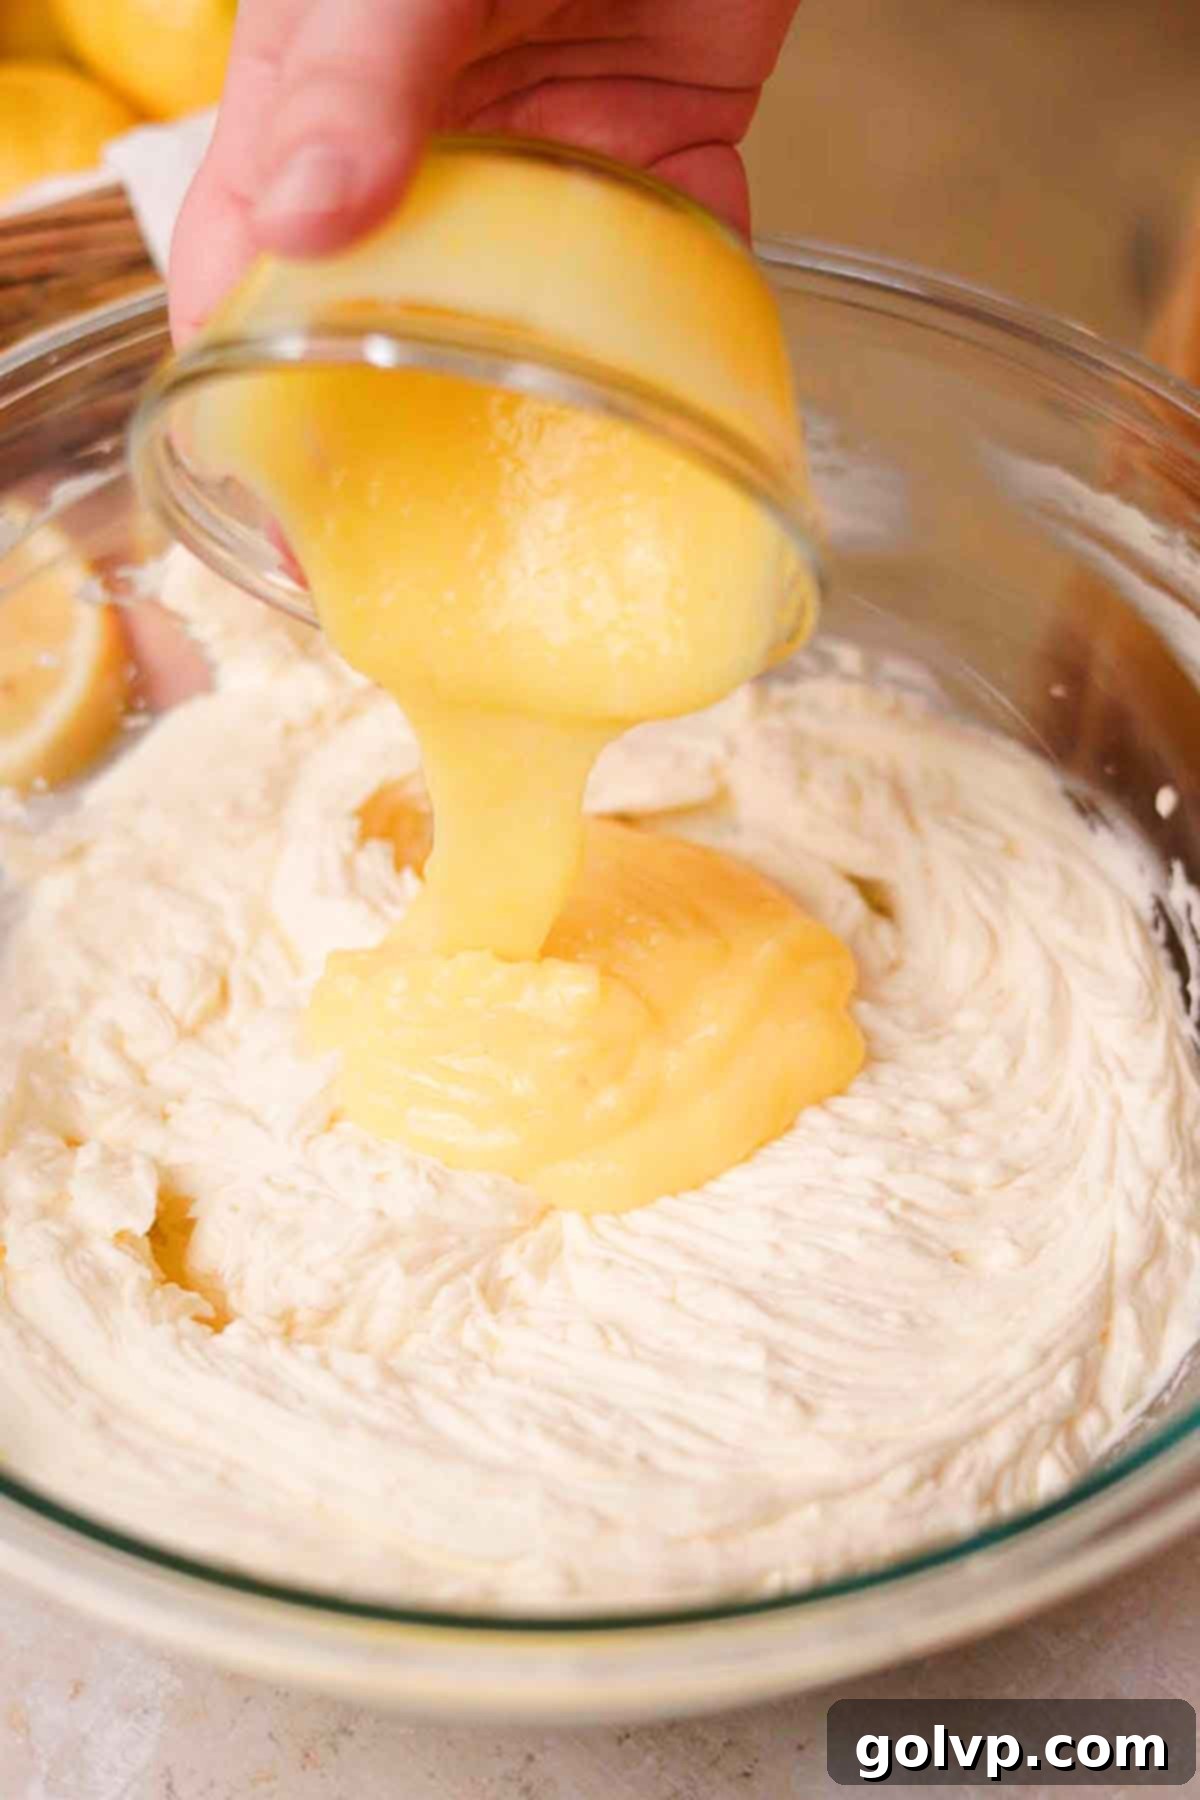
Step 4: Incorporate Lemon Curd and Juice
Gently add the prepared lemon curd (ensure it’s chilled and thickened) and additional fresh lemon juice to the cream cheese mixture. Blend on low speed until everything is just combined and smooth. Again, remember to scrape down the sides of the bowl to ensure even mixing and prevent any unmixed pockets.
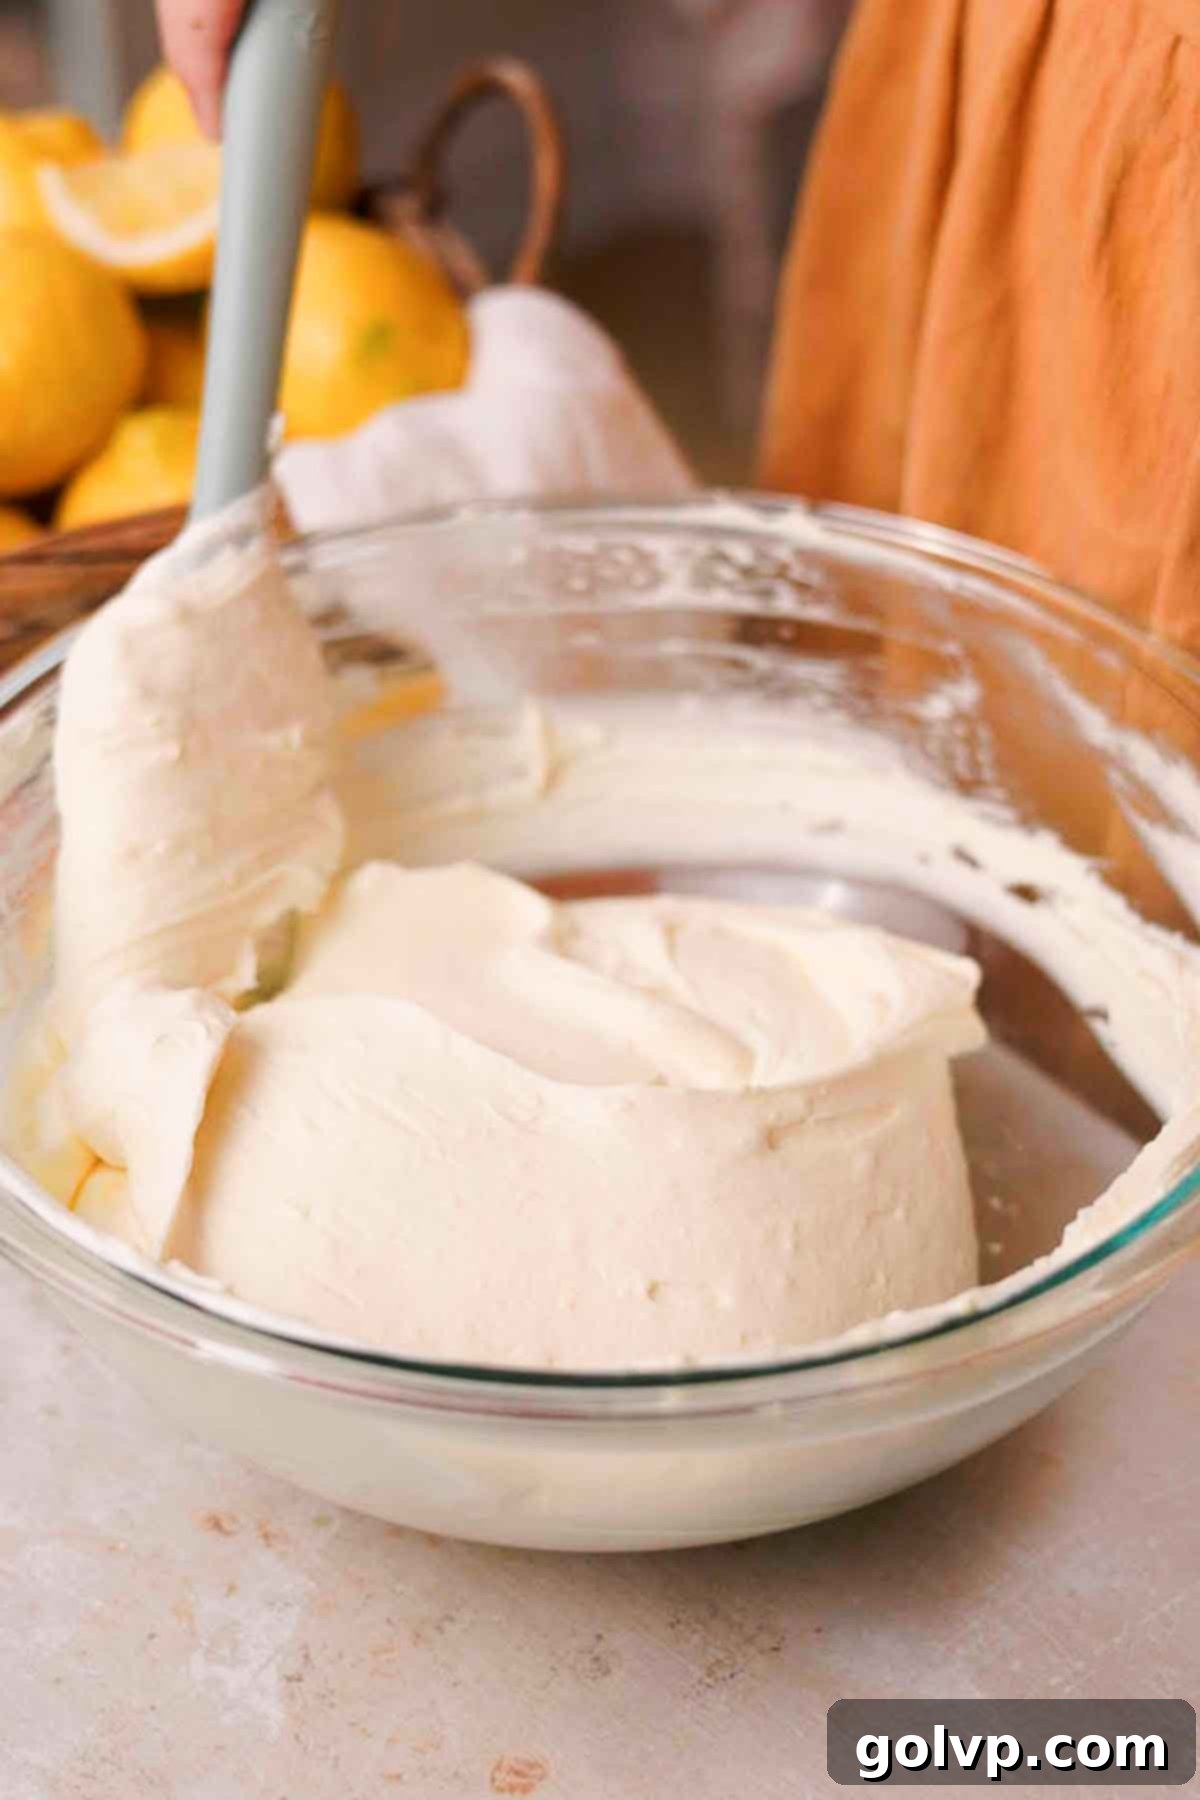
Step 5: Fold in Whipped Cream
Retrieve the stiffly whipped cream from the fridge. Using a rubber spatula, gently fold the whipped cream into the lemon cheesecake mixture. This step requires a delicate hand; fold slowly and carefully to avoid deflating the whipped cream, which is crucial for the cheesecake’s light and airy set. Continue folding until the mixture is uniformly combined, fluffy, and smooth.
Step 6: Assemble and Chill
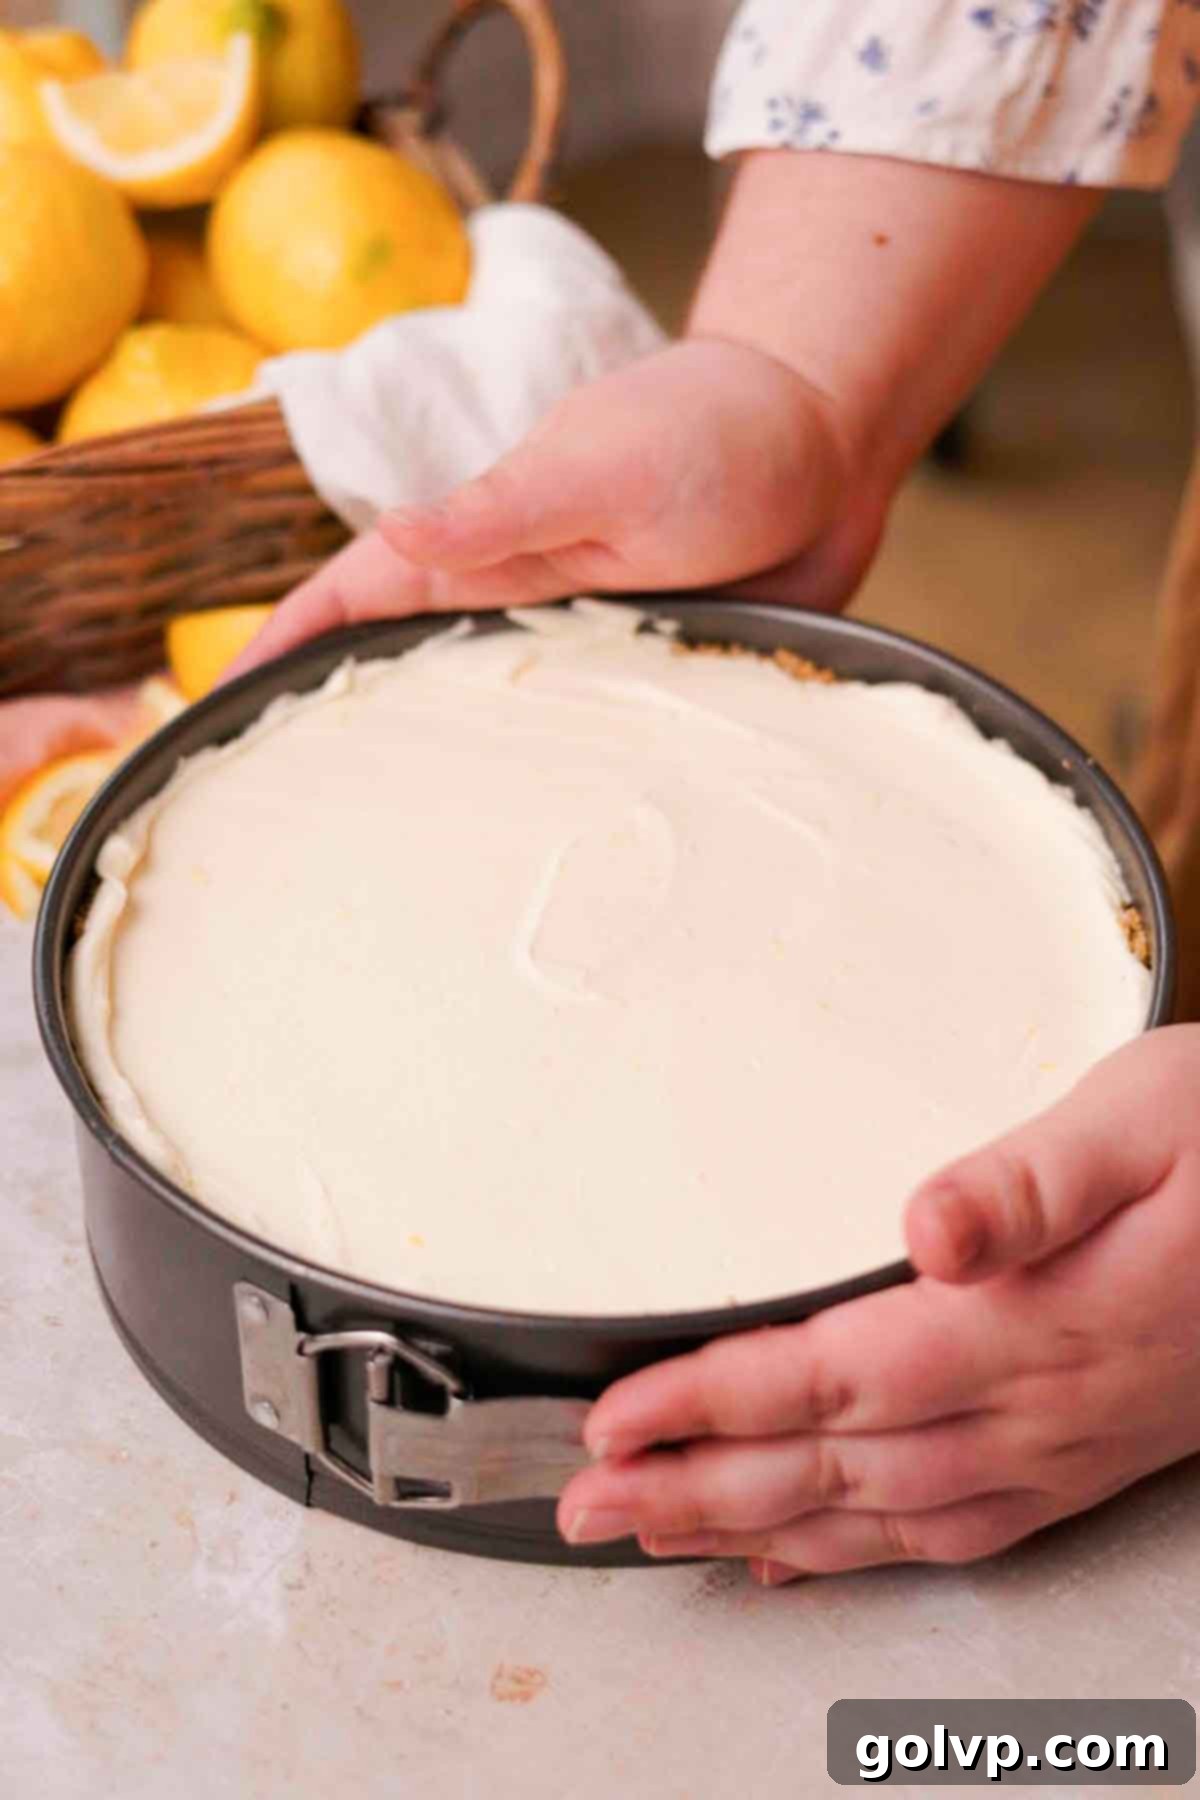
Once your cheesecake filling is an even, fluffy consistency, carefully transfer it into the prepared graham cracker crust. Spread the filling out evenly to the edges of the pan, then use the back of a spoon or an offset spatula to smooth the top. Cover the springform pan tightly with plastic wrap and transfer it to the refrigerator. Allow the cheesecake to chill for at least 8 hours, or preferably overnight. This extended chilling time is essential for the cheesecake to firm up properly and for the flavors to fully develop and meld.
Step 7: Garnish, Slice, and Serve!
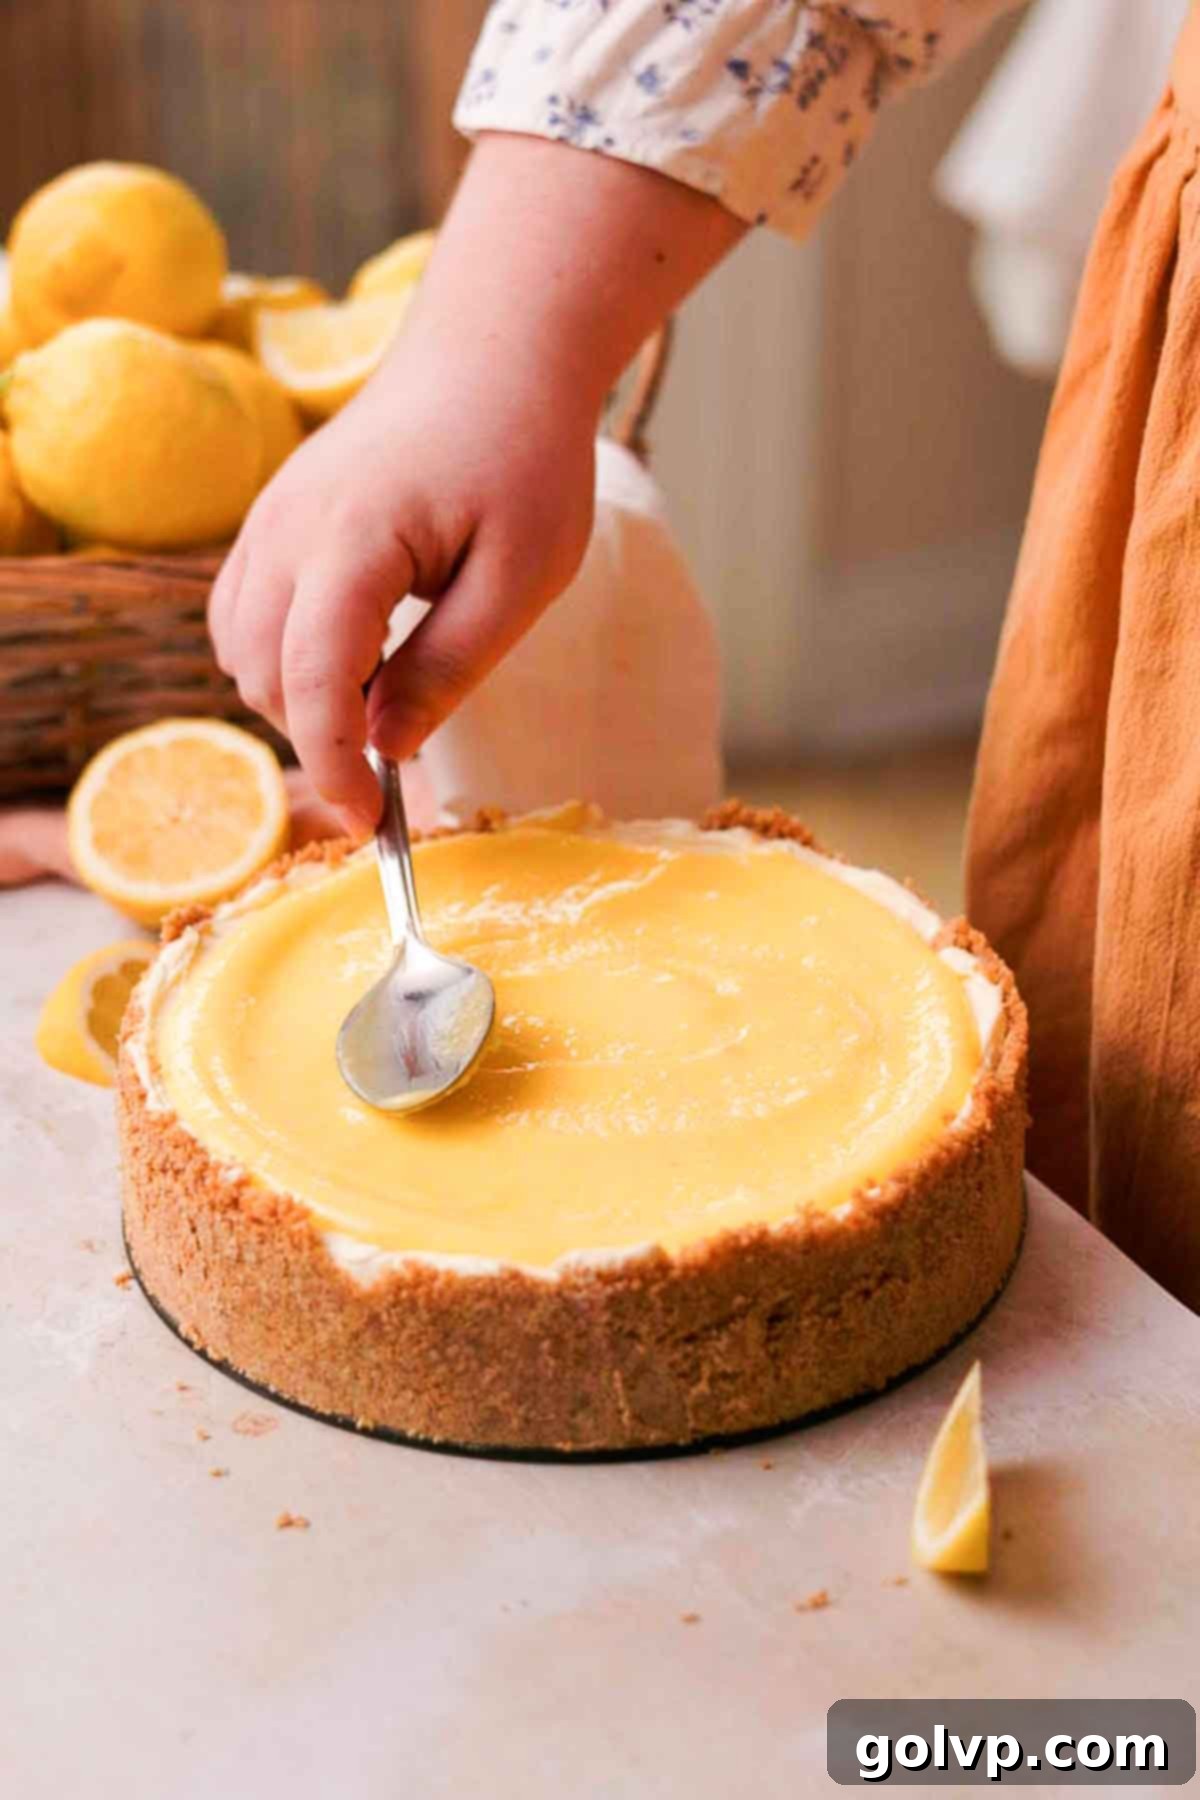
When you’re ready to serve your spectacular dessert, remove the cheesecake from the refrigerator. Gently spread the remaining chilled lemon curd over the top of the cheesecake, creating a vibrant, glossy finish. For an extra touch of elegance, garnish with fresh lemon slices or a sprinkle of lemon zest. To achieve beautifully clean slices, use a large, sharp knife, warming it under hot water and wiping it clean after each cut. Serve immediately and enjoy the reward of your delicious efforts!
📝 Expert No-Bake Cheesecake Tips for Success
Achieving that perfect, creamy, and well-set no-bake cheesecake is all about attention to a few key details. Here are my top tips to ensure your Lemon Curd Cheesecake turns out perfectly every time:
- Whip Your Cream to Stiff Peaks (and Keep it Cold!): This is arguably the most crucial step for a no-bake cheesecake. The stiffly whipped cream provides the primary structure, helping the cheesecake set without the need for gelatin. Ensure your heavy whipping cream is ice-cold. For extra assurance, chill your mixing bowl and whisk attachment in the freezer for 10-15 minutes before whipping. The cream should be able to hold its shape firmly when the whisk is lifted, without being grainy or over-whipped.
- Choose Quality, Full-Fat Cream Cheese: Don’t skimp on your cream cheese! Use a full-fat, brick-style cream cheese (like Philadelphia original). Lower fat versions contain more water, which can prevent your cheesecake from firming up properly. Also, make sure your cream cheese is completely softened to room temperature before mixing. This ensures a lump-free, incredibly smooth and creamy filling.
- Be Gentle When Folding: Once you’ve beaten the cream cheese mixture and whipped the cream, the final step of combining them needs a light touch. Gently fold the whipped cream into the cream cheese mixture using a spatula. Overmixing will deflate the whipped cream, leading to a denser, less airy cheesecake that may not set as desired.
- Prioritize Chilling Time: Patience is a virtue, especially with no-bake cheesecakes! This cheesecake needs at least 8 hours, or ideally overnight, in the refrigerator to firm up properly. This isn’t just for texture; it also allows the vibrant lemon flavors to fully develop and meld together, resulting in a more delicious and cohesive dessert.
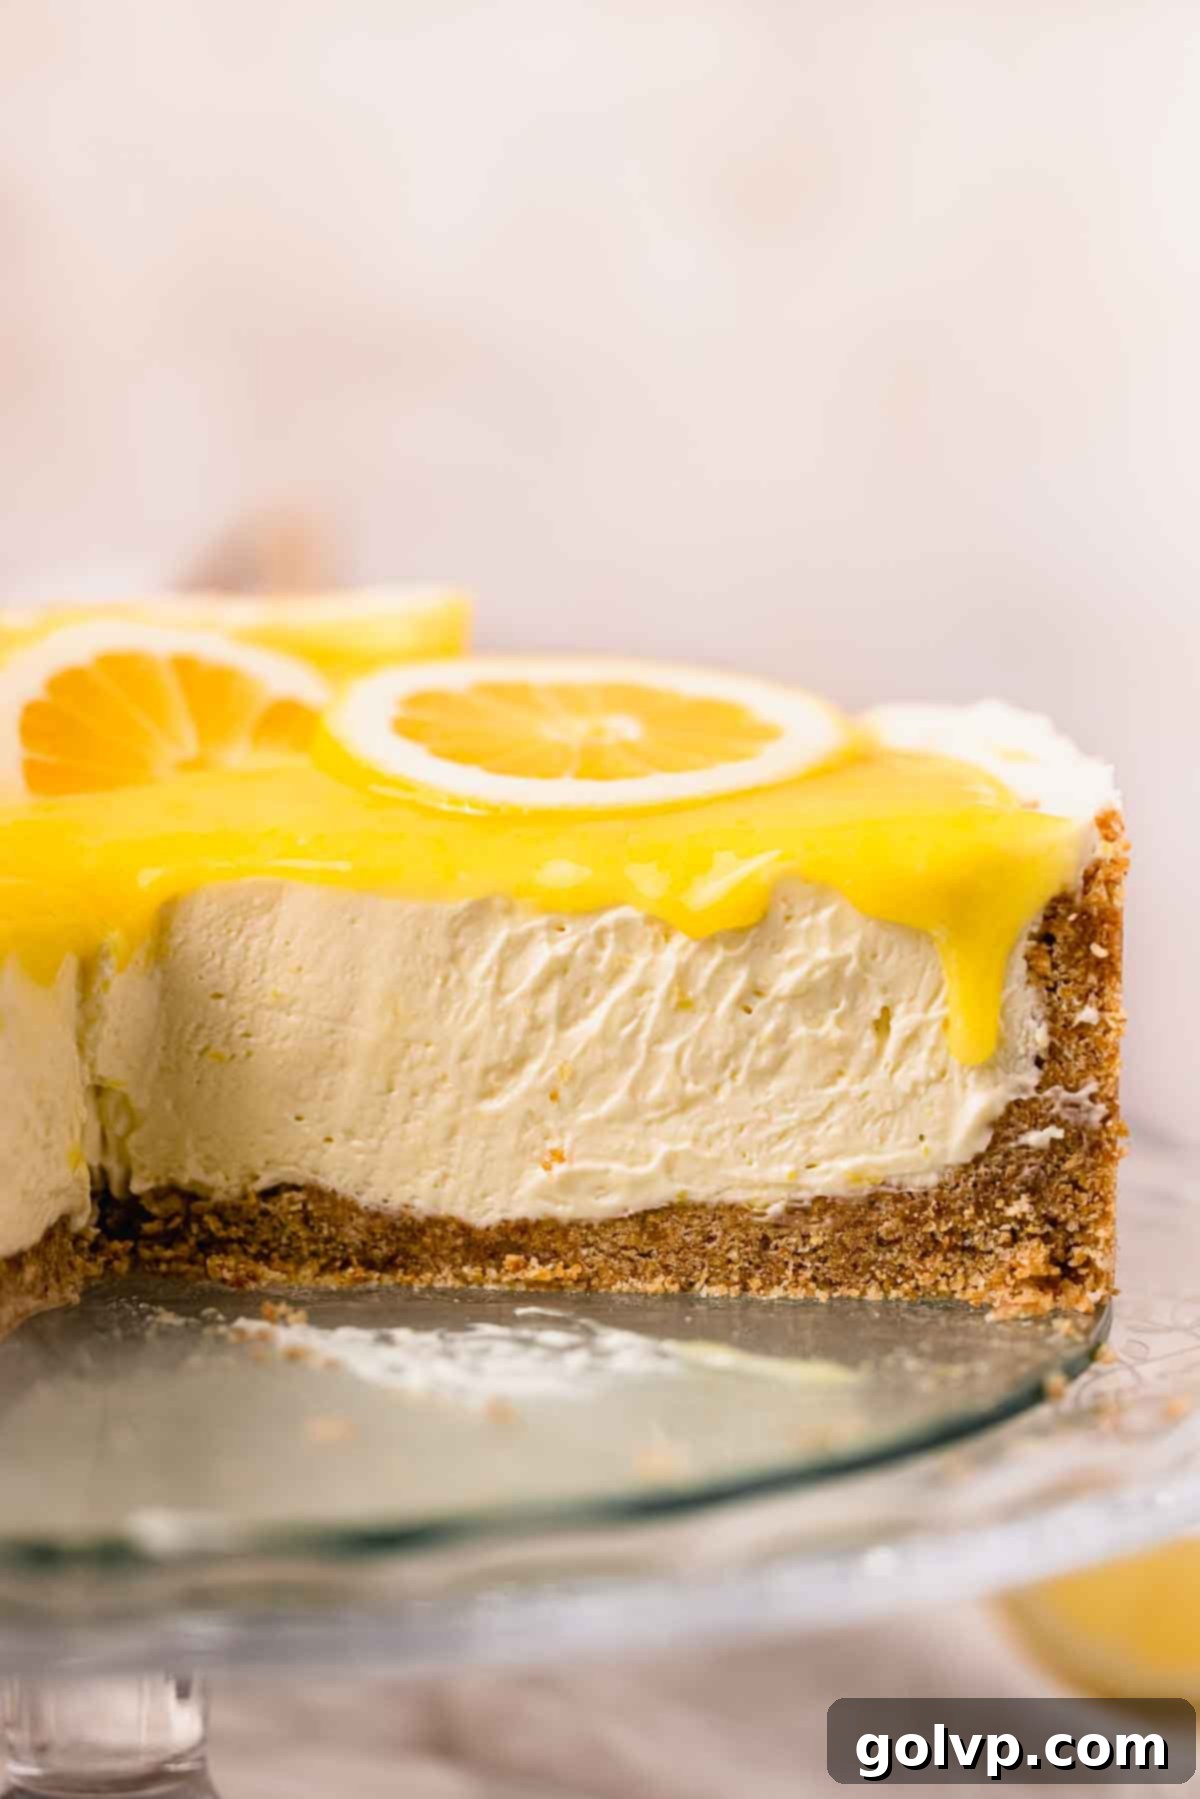
- Achieve Impeccably Clean Slices: For picture-perfect slices, there are a couple of tricks. First, for an extra firm set, you can pop the chilled cheesecake into the freezer for about an hour before slicing. Second, use a large, sharp knife. Run the knife under hot water for a few seconds, then wipe it completely dry. Make each slice, then wipe the blade clean again before the next cut. This prevents sticking and ensures crisp, clean edges.
- Don’t Overmix the Cream Cheese: While you want the cream cheese smooth, be careful not to overbeat it once combined with the sugar. Overmixing can incorporate too much air initially, which can then collapse, affecting the final texture. Beat just until smooth and creamy.

🥄 Make Ahead and Storage Solutions
One of the many beauties of this no-bake lemon curd cheesecake is its excellent make-ahead and storage capabilities, making it perfect for planning ahead for parties or simply enjoying leftovers throughout the week.
- Cheesecake Storage: The assembled cheesecake will keep beautifully in an airtight container or a dedicated cake carrier in the refrigerator for up to 4 days. If you wish to store it for longer, you can freeze the cheesecake for up to 3 months. For freezing, ensure it’s tightly wrapped in plastic wrap and then in aluminum foil to prevent freezer burn. You can even top it with lemon curd before freezing.
- Lemon Curd Storage: Homemade lemon curd can be stored in an airtight container or jar in the refrigerator for up to one week. To extend its shelf life, you can freeze lemon curd for up to 3 months. Store it in a freezer-safe airtight container or a heavy-duty freezer bag. When ready to use, simply defrost it overnight in the refrigerator or at room temperature for an hour. Give it a good stir until it’s smooth before serving.
❔ Can You Use Other Toppings? Absolutely!
While the lemon curd topping is undeniably delicious and perfectly complements the cheesecake, this recipe is incredibly versatile. You can certainly get creative with other toppings or fruit curds to match your preference or the season!
- Fruit Curd Alternatives: As mentioned, raspberry curd is a fantastic choice, offering a sweet-tart berry flavor. Other wonderful options include homemade blueberry curd, vibrant passionfruit curd for a tropical twist, or even a classic lime curd for another citrusy punch.
- Fresh Fruit: A medley of fresh berries (strawberries, blueberries, raspberries) makes a beautiful and refreshing topping. Sliced kiwi or mango can also add a delightful pop of color and flavor.
- Whipped Cream or Meringue: A dollop of freshly whipped cream or a few delicate meringue kisses can add an extra layer of sweetness and textural contrast.
- Chocolate Shavings: For a more decadent touch, finely shaved white chocolate or dark chocolate can be a surprisingly good pairing with lemon.
📖 Recipe FAQs: Your Lemon Curd Cheesecake Questions Answered
Generally, straining lemon curd is only necessary if you find it to be lumpy after cooking, which can happen if the eggs scramble slightly or if your zest wasn’t finely grated. If you cook it gently and stir constantly as instructed, it should turn out smooth and velvety, making straining an optional step that I don’t typically find necessary.
This no-bake cheesecake relies on a clever combination of ingredients to achieve its firm yet creamy set. The key players are the high-fat content of the full-fat cream cheese and, most importantly, the stiffly whipped heavy cream. The acidity from the lemon also plays a role in helping to “set” the dairy proteins. While it won’t be as rigidly firm as a gelatin-stabilized cheesecake, it will hold its shape beautifully when properly chilled. Keep in mind it will be softer if left in a very warm environment for extended periods.
There are a few common reasons why a no-bake cheesecake might not set properly:
- Whipped Cream: The most frequent culprit. Ensure your heavy whipping cream is whipped to very stiff peaks. If it’s not stiff enough, the cheesecake won’t have the necessary structure. Always use cold cream and ideally a chilled bowl.
- Cream Cheese: Using good quality, full-fat, brick-style cream cheese (like Philadelphia) is essential. Low-fat varieties have a higher water content and won’t set as well. Also, ensure it’s softened but not warm.
- Folding Technique: When combining the whipped cream with the cream cheese mixture, fold very gently. Aggressive mixing can deflate the whipped cream, reducing its setting power.
- Chilling Time: It simply needs more time! This cheesecake requires at least 8 hours, or ideally overnight, in the refrigerator to fully firm up. Don’t rush this step.
For those coveted crisp, clean slices, try this professional trick:
- Freeze Briefly: Place the chilled cheesecake in the freezer for about 1 hour before you plan to slice it. This will firm it up just enough without freezing it solid.
- Hot Knife Method: Use a large, sharp knife. Before each cut, dip the knife in hot water for a few seconds, then wipe it completely dry. The warm, clean blade will glide through the cheesecake smoothly. Repeat this process for every single slice.
While the recommended chilling time is 8 hours or overnight for optimal texture and flavor development, I’ve had success with a shortcut: freezing the cheesecake for 3 hours instead of the full 8 hours in the refrigerator. It does firm up enough to slice and serve this way, but the flavor depth and overall texture are noticeably better with the longer refrigerator chill. So, while it works in a pinch, I still strongly recommend the full 8-hour refrigeration for the best possible result.
🍰 Explore More Delicious Related Recipes
- Lemon Raspberry Cheesecake
- Lemon Tiramisu with Lemon Curd
- Funfetti Cheesecake
- Strawberry Crunch Cheesecake
Did you make this recipe? I would love for you to rate this recipe and hear what you think in the comments below! Share your creation on Instagram and tag @flouringkitchen. Follow me on Pinterestto save and for more recipe ideas.
📖 Recipe
Lemon Curd Cheesecake
MaryEquipment
- nine inch springform round baking pan
- electric mixer
Ingredients
Lemon Curd (about 1 cup)
- ⅔ cup granulated sugar
- 1 large egg
- 2 large egg yolks
- ⅓ cup lemon juice freshly squeezed
- 1 lemon zested
- ⅛ teaspoon sea salt
- ⅓ cup unsalted butter cold and cubed
Crust
- 2 cups graham cracker crumbs
- ¼ cup granulated sugar
- ½ cup unsalted butter melted and cooled to room temperature
- ⅛ teaspoon sea salt
Filling
- ¾ cup heavy whipping cream cold
- ½ cup granulated sugar
- 1 lemon zested
- 24 oz cream cheese softened
- ½ cup prepared lemon curd
- 1 tablespoon lemon juice freshly squeezed
Instructions
Lemon Curd (about 1 cup)
- Note: to prevent a metallic flavor, use a coated or non-metal saucepan such as a ceramic or enamel coated pan. The lemon curd can be made a few days ahead of time.
- In a medium saucepan, whisk together sugar, egg, and yolks. Add lemon juice, lemon zest, and salt. Whisk to combine and heat on medium low heat until simmering and thickened. Stir frequently to prevent burning.⅔ cup granulated sugar, 1 large egg, 2 large egg yolks, ⅓ cup lemon juice, 1 lemon, ⅛ teaspoon sea salt
- Pour into a non-metal container or jar, and add unsalted cubed butter. Stir until melted and smooth, cover with a piece of plastic wrap or parchment paper right on the surface. Refrigerate until chilled and thickened.⅓ cup unsalted butter
Crust
- Grease a 9” springform pan with a thin layer of vegetable oil and line the bottom with a round of parchment paper for easy release.
- In a large bowl, combine graham cracker crumbs, sugar, salt, and melted butter. Stir until fully combined.2 cups graham cracker crumbs, ¼ cup granulated sugar, ½ cup unsalted butter, ⅛ teaspoon sea salt
- Pour crust into the prepared springform pan and press the crust up the sides of the pan. Tightly pack the crust into the bottom with your fingers or the bottom of a glass. Set aside.
Filling
- In a chilled medium bowl or stand mixer, whip the cream to stiff peaks. Set aside in the fridge until later.¾ cup heavy whipping cream
- In a large bowl or standmixer, combine grated lemon zest and sugar. Blend the sugar and zest with an electric mixer until very fragrant and yellow in color.½ cup granulated sugar, 1 lemon
- Add softened cream cheese into the lemon sugar. Blend until fluffy and creamy, scraping down the bowl’s sides frequently to prevent lumps.24 oz cream cheese
- Add lemon curd and lemon juice into the mixture, blend well to combine. Scrape down the sides of the bowl frequently.½ cup prepared lemon curd, 1 tablespoon lemon juice
- Add the whipped cream and fold it into the cheesecake mixture very gently to prevent deflating the mixture.
- Once you get an even, fluffy mixture, transfer it into the crust and spread it out to the edges. Smooth the top, cover, and chill for at least 8 hours or overnight.
- Once ready to serve, spread the remaining lemon curd on top of the cheesecake, top with lemon slices, slice (wipe the knife clean with every slice), and serve!
Video
Notes
- The cheesecake will keep well in a container or cake carrier in the fridge for up to 4 days and in the freezer for up to 3 months. It can be topped with lemon curd ahead of time!
- Lemon curd will keep in the fridge in an airtight container or jar for up to one week. To store for longer, store in an airtight container or bag in the freezer for up to 3 months. Defrost overnight in the fridge or at room temperature for an hour. Stir until smooth and serve.
- Whip the whipped cream to stiff peaks. It should hold its shape and not be gloopy. Make sure the cream is cold and use a chilled bowl to help. This is very important to thicken your cheesecake.
- Use good quality, full fat, brick style cream cheese for the cheesecake to set properly – I love using Philadelphia cream cheese.
- The cheesecake needs to set in the fridge for at least 8 hours or overnight to firm up successfully and allow the flavors to develop.
- To get extra clean cuts, freeze the cheesecake for an hour before cutting, and wipe the knife after every cut.
