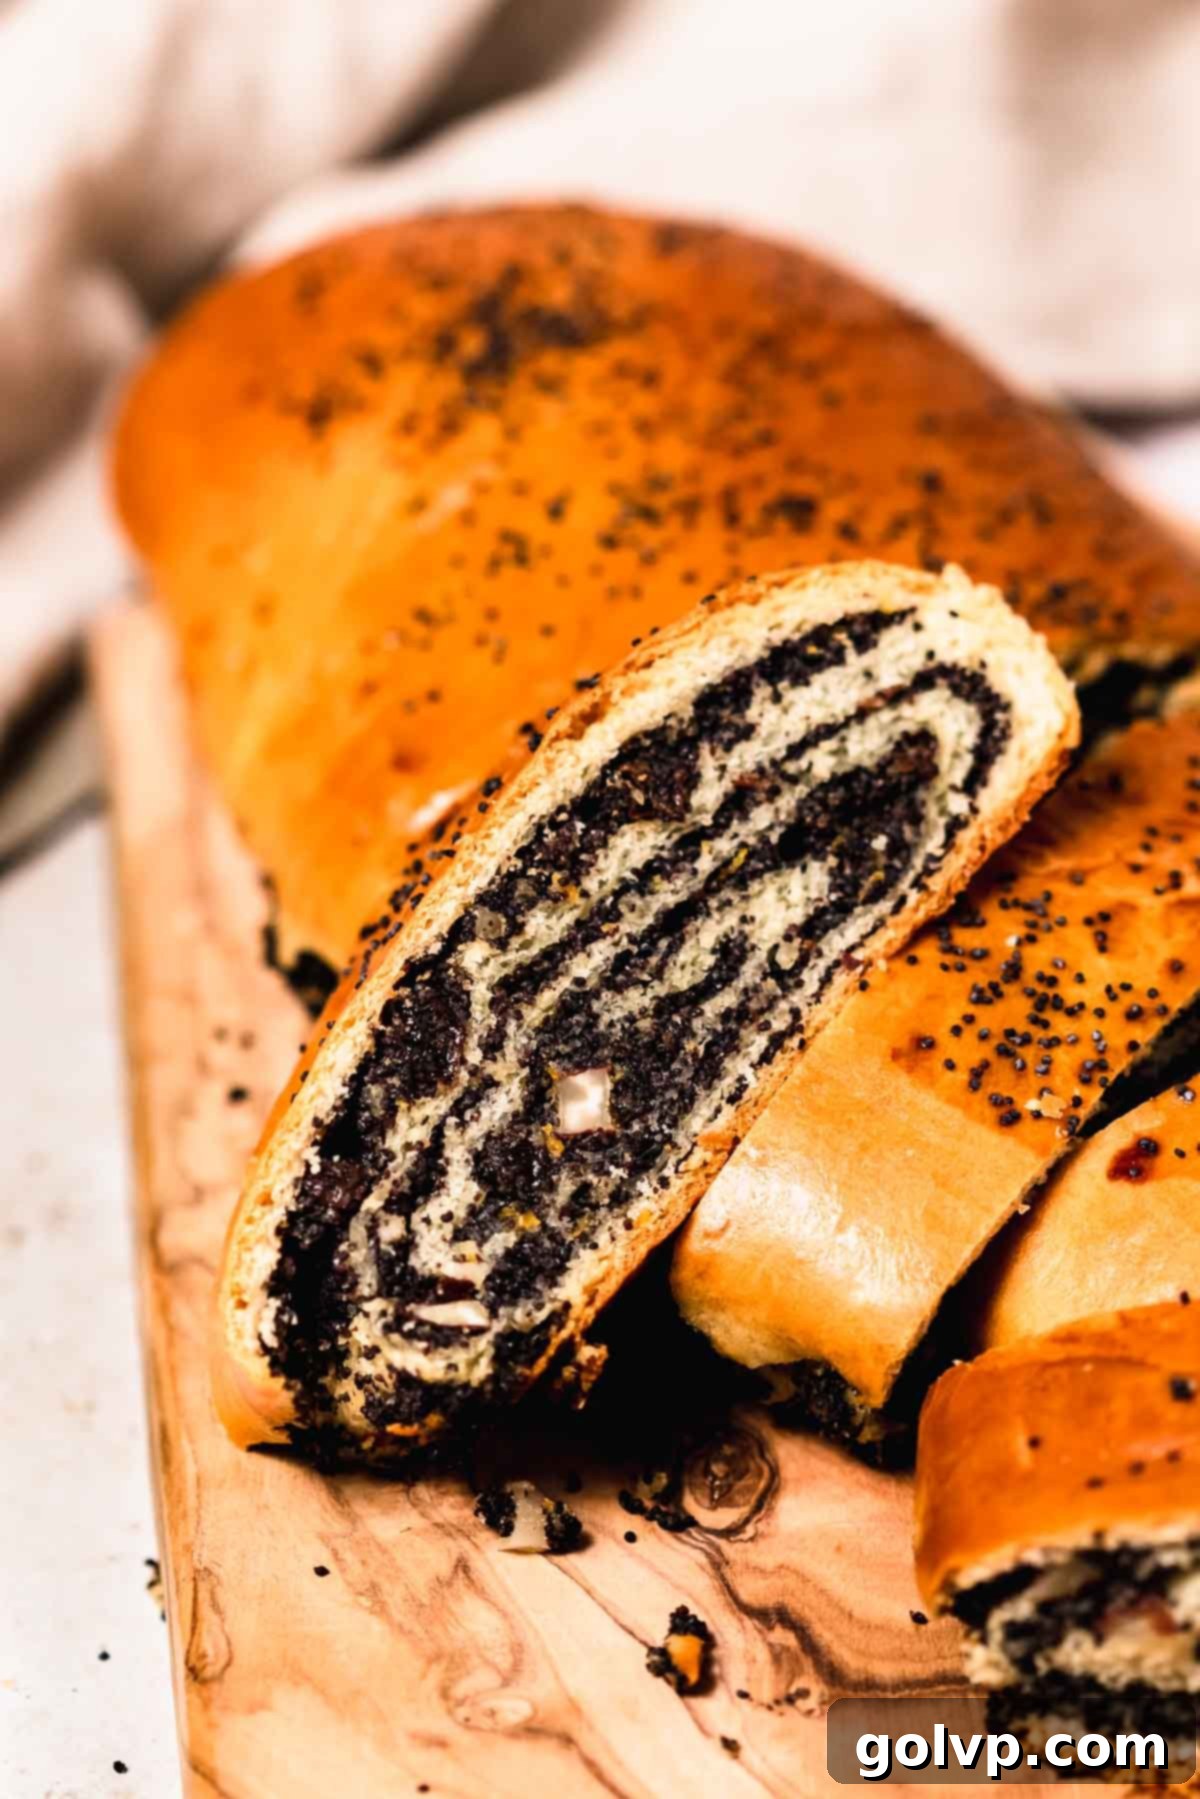
Authentic Ukrainian Poppy Seed Roll (Makovyi Pyrih): A No-Knead Recipe as Good as Grandma’s
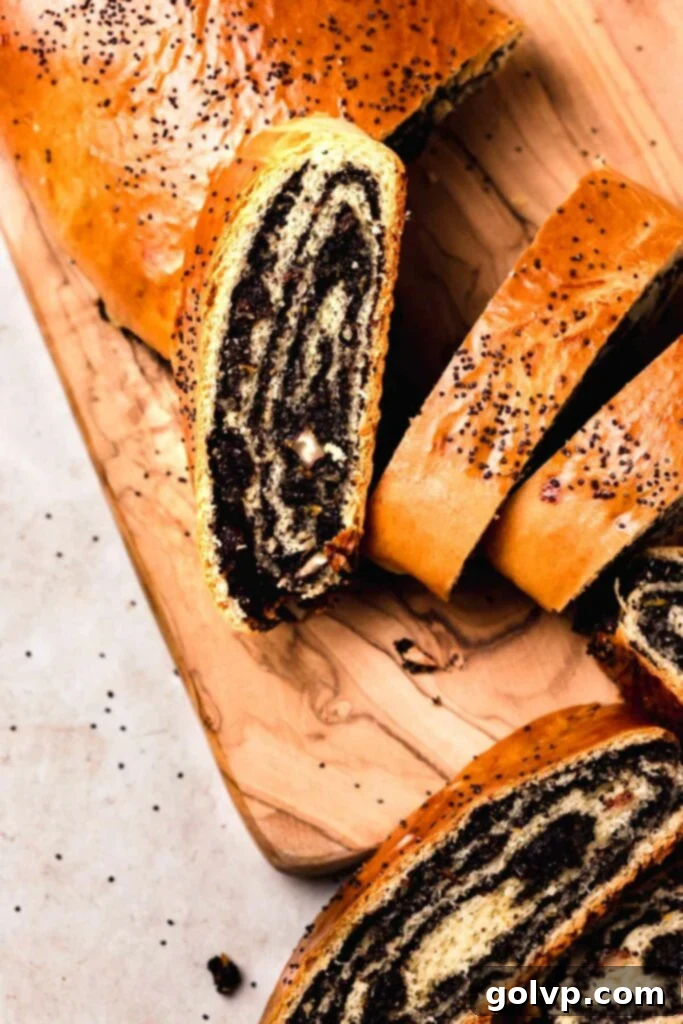
Embark on a culinary journey to the heart of Eastern European traditions with this exquisite Ukrainian poppy seed roll recipe. Known as Makovyi Pyrih or Makoviy Roulade, this beloved sweet bread is a staple for holidays and special occasions, but delightful enough for any day. Our recipe delivers a roll that is remarkably tender, wonderfully moist, and deeply fragrant, captivating your senses from the first bite. It’s generously packed with a rich, flavorful poppy seed filling, brightened with citrus zest, all encased in a soft, buttery no-knead dough that simplifies the baking process without compromising on taste or texture. Prepare to transport your taste buds to cherished, nostalgic teatimes, reminiscent of your grandma’s kitchen. Once you experience the unparalleled joy of baking and tasting this homemade poppy seed roll, you’ll undoubtedly want to make it a cherished tradition in your own home.
Purchasing the items in this post supports this blog, at no additional cost to you. As an Affiliate Product marketer and Amazon Associate, I earn from qualifying purchases.
Why You Will Love This Authentic Makovyi Pyrih Recipe:
- Effortless No-Knead Dough: Say goodbye to strenuous kneading! This recipe features a soft, incredibly buttery dough that requires minimal effort. Simply mix all the ingredients, let it rise to perfection, and you’re halfway to baking success. This forgiving dough is designed for busy home bakers who crave authentic flavors without the extensive labor.
- Rich & Traditional Poppy Seed Filling: The heart of this roll is its deeply flavorful filling. It’s generously packed with finely ground poppy seeds, an assortment of nuts for added crunch, and vibrant orange zest, creating a complex and utterly delicious texture. Every component contributes to the authentic, traditional Ukrainian poppy seed roll flavor profile that has been cherished for generations.
- A Taste of Tradition and Nostalgia: This recipe captures the comforting essence of homemade baking, delivering a taste that rivals even the fondest memories of your Ukrainian grandma’s kitchen. While no one can truly compete with grandma’s touch, this recipe comes incredibly close, bringing warmth, tradition, and a sweet sense of nostalgia to your table with every slice.
[feast_advanced_jump_to]
Essential Tips for Baking a Perfect Poppy Seed Roll:
- Optimal Dough Rising Environment: Yeast doughs thrive in warm, draft-free conditions. To create the ideal environment for your dough to double in size, I recommend a simple oven trick. Turn your oven on its lowest setting for just 30 seconds, then immediately turn it off. This will create a gentle warmth (around 30°C or 85°F) perfect for proofing. Place your covered dough bowl inside and keep a close eye on it. The rising time can vary based on ambient temperature and yeast activity, so remove it as soon as it has approximately doubled in size. Over-proofing can lead to a less desirable texture.
- Gentle Dough Handling for the Perfect Texture: When mixing the dough, stop as soon as the ingredients are just combined and a soft dough forms. Overmixing can develop too much gluten, resulting in a tough roll. After the first rise, gently flatten and fold the dough a few times to ensure even distribution of ingredients and to release any large air pockets, preparing it for a smooth rolling process. This minimal handling maintains the tender crumb characteristic of a no-knead dough.
- Mastering the Art of Rolling and Filling: For that beautiful, even spiral, it’s crucial to roll the dough into a consistent, thin rectangle. Aim for a thickness of about ⅛ to ¼ inch. Spread the filling evenly, leaving a 1-inch border around all edges. This border helps to seal the roll effectively, preventing the filling from oozing out during baking. When rolling, start from the long edge and roll as tightly as possible without tearing the dough. A tight roll ensures a lovely, uniform spiral in your finished product.
- Proper Storage and Freezing for Lasting Freshness: These large, decadent poppy seed rolls are best enjoyed fresh. To keep them at their peak, store wrapped tightly in plastic or in an airtight container at room temperature for up to 3 days. Given that this recipe yields two substantial rolls, freezing is an excellent option for longer storage. Once completely cooled, slice the rolls (or freeze them whole), wrap tightly in an airtight bag or container, and freeze for up to a month. When you’re ready to enjoy, simply thaw at room temperature or gently warm for that fresh-from-the-oven taste. Freezing soon after baking locks in maximum freshness.
- Quality Ingredients Make a Difference: The success of your poppy seed roll largely depends on the quality and freshness of your ingredients. Ensure your poppy seeds are fresh and not rancid – they should have a sweet, subtle aroma. Use active dry yeast that is within its expiry date and foams well, indicating its vitality. Real, good-quality butter will lend an unparalleled richness and flavor to both the dough and the filling.
Key Ingredients for an Authentic Ukrainian Poppy Seed Roll:
While full steps and ingredient measurements are provided in the recipe card below, understanding the role of each key ingredient will ensure your baking success and help you achieve the most authentic flavors.
Poppy Seeds: These are the star of the show. Always ensure your poppy seeds are fresh and not expired, as stale seeds can impart a bitter, unpleasant taste. They should smell sweet with only a subtle bitterness. Grinding them finely just before use (in a coffee grinder or food processor) is essential for releasing their oils and intense flavor, creating a smooth, rich filling. The optional initial soak and dry step, though time-consuming, significantly enhances flavor by removing bitterness and softening the seeds.
Yeast: We recommend active dry yeast for its reliable performance. However, instant yeast can be used as a convenient alternative; just skip the initial activation step and add it directly to the dry ingredients. Always check the expiry date of your yeast and ensure it activates (foams) correctly, as inactive yeast will prevent your dough from rising.
Orange Zest: This ingredient is crucial for adding a bright, fragrant, and traditional flavor to the poppy seed filling and the dough itself. The citrus notes cut through the richness of the poppy seeds and butter, creating a harmonious balance. It imparts a delightful aroma, similar to candied citrus peels often found in Eastern European pastries. If oranges aren’t available, grated lemon zest makes a suitable and delicious substitute.
Butter: Good quality, real butter is paramount for achieving the tender, rich, and flavorful dough, as well as the creamy consistency of the filling. The fat content contributes to the dough’s softness and the filling’s luxurious mouthfeel. For a dairy-free option, plant-based butter can be used, and while the taste is slightly different, it yields a remarkably close result in terms of texture and richness.
Raisins: While sometimes considered a controversial addition, raisins add natural sweetness, a lovely chewiness, and an additional layer of fruity flavor to the filling. Their moisture also contributes to the overall moistness of the roll. If you’re not a fan of raisins, you can substitute them with finely chopped dried prunes for a similar effect or omit them entirely, though the texture and sweetness will be slightly altered.
Almonds: Chopped almonds introduce a delightful crunch and nutty depth to the poppy seed filling. For an even more pronounced flavor, consider lightly toasting the almonds before adding them. Feel free to experiment with your favorite chopped nuts, such as walnuts or pecans, to customize the flavor to your preference.
All-Purpose Flour: The foundation of our no-knead dough. Accurate measurement of flour is critical for the correct dough consistency. The most precise method is to weigh the flour using a kitchen scale. If you don’t have a scale, properly measure by fluffing the flour in its bag, then gently spooning it into a measuring cup without packing it down. Level off the excess with the flat edge of a knife, ensuring not to tap or shake the cup.
Step-by-Step Guide to Preparing the Rich Poppy Seed Filling:
This traditional filling is the soul of your Makovyi Pyrih, so take your time with each step to develop its rich flavor and perfect consistency.
Step 1: Preparing the Poppy Seeds for Optimal Flavor (Highly Recommended):
Place your coarsely ground poppy seeds in a large heat-proof bowl. Pour enough boiling water over them to fully submerge the seeds. Let them sit and soak for 20 minutes; this step helps to remove any residual bitterness and softens the seeds. After soaking, drain the poppy seeds thoroughly through a fine-mesh sieve lined with cheesecloth. To ensure they are as dry as possible, gather the corners of the cheesecloth, tie them, and hang the bundle over a bowl to air dry. Ideally, leave it overnight, or for a minimum of 1 hour. This crucial drying step prevents a watery filling.
Step 2: Cooking the Filling Base to Thick Perfection:
In a medium saucepan, combine the prepared poppy seeds, granulated sugar, a pinch of sea salt, and milk. Place the saucepan over low heat and cook, stirring frequently, until the mixture gradually thickens. The sugar will dissolve, and the milk will reduce, creating a dense, aromatic paste. This process usually takes about 10-15 minutes, ensuring all flavors meld beautifully.
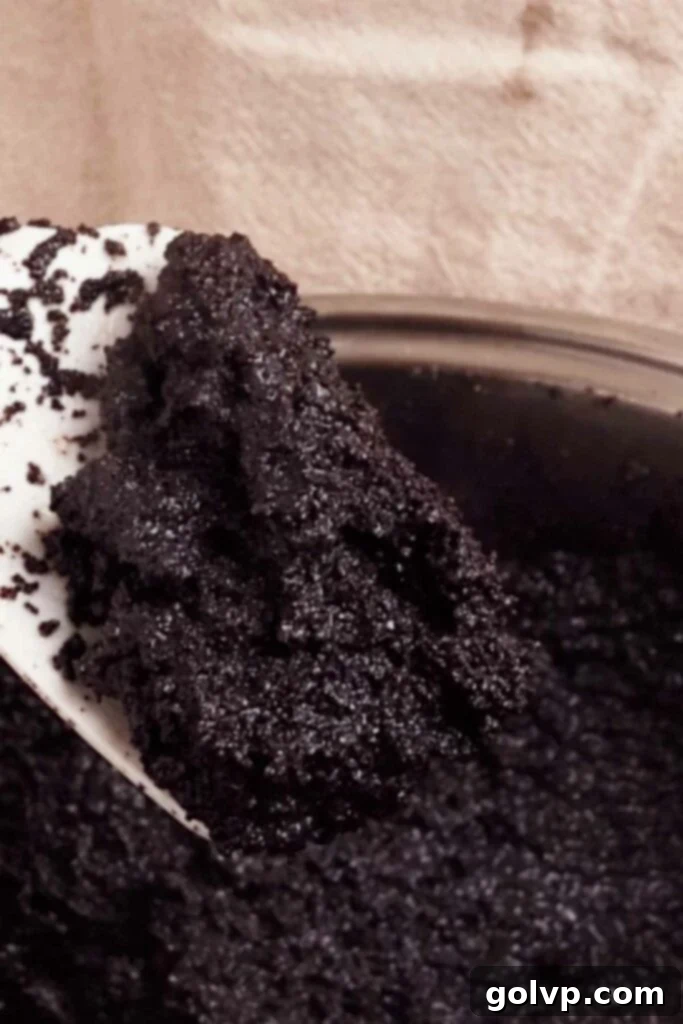
Step 3: Infusing Flavor and Creating a Smooth Consistency:
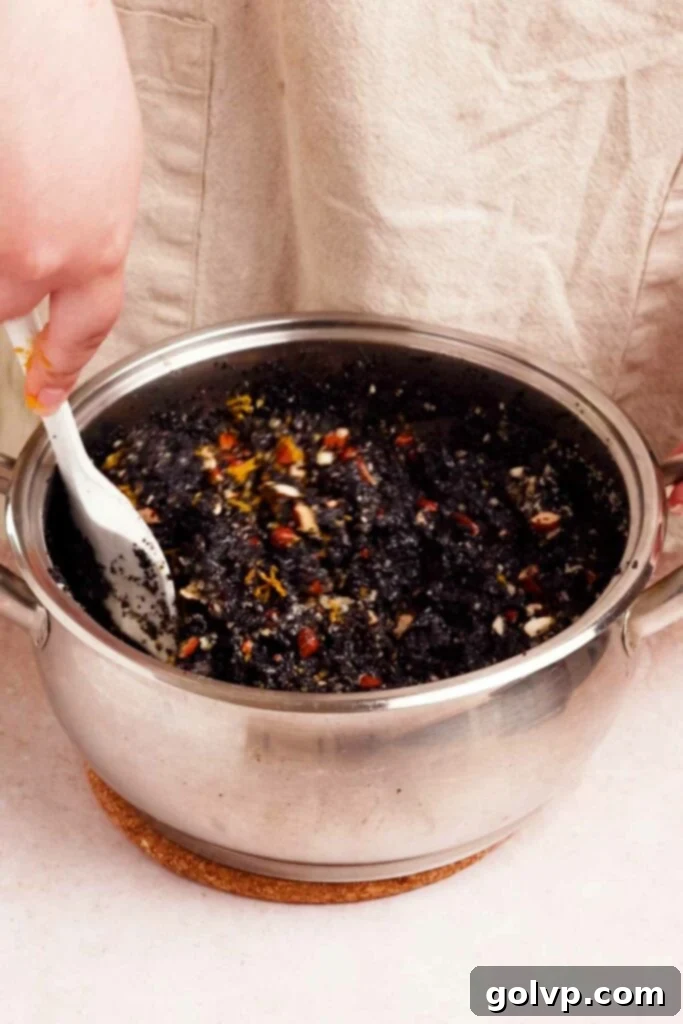
Remove the saucepan from the heat. Add the cold butter (cut into small cubes so it melts quickly), almond extract (if using), pure vanilla extract, finely grated orange zest, chopped raisins, chopped almonds, and breadcrumbs. Stir vigorously until all the ingredients are well incorporated and the mixture becomes smooth and creamy. The cold butter will melt and integrate, adding richness. Finally, beat one egg in a separate bowl and stir it into the filling. The egg acts as a binder, further enriching the filling and helping it set. Set the filling aside in the refrigerator to cool and firm up slightly while you prepare the dough.
Crafting the Easy No-Knead Dough:
This no-knead method ensures a soft, pliable dough with minimal effort, making your baking experience truly enjoyable.
Step 1: Activating the Yeast for a Lively Dough:
In a medium bowl, combine warm water (ensure it’s less than 131°F or 55°C to avoid killing the yeast), 1 teaspoon of granulated sugar, and the active dry yeast. Stir gently to dissolve the yeast and sugar. Let the mixture sit undisturbed for 5-10 minutes. During this time, the yeast should become foamy and bubbly on the surface, indicating it’s active and ready to work. If no foam appears, your yeast may be old or inactive, and you should try a new packet.
Step 2: Mixing the Dough to Soft Perfection:
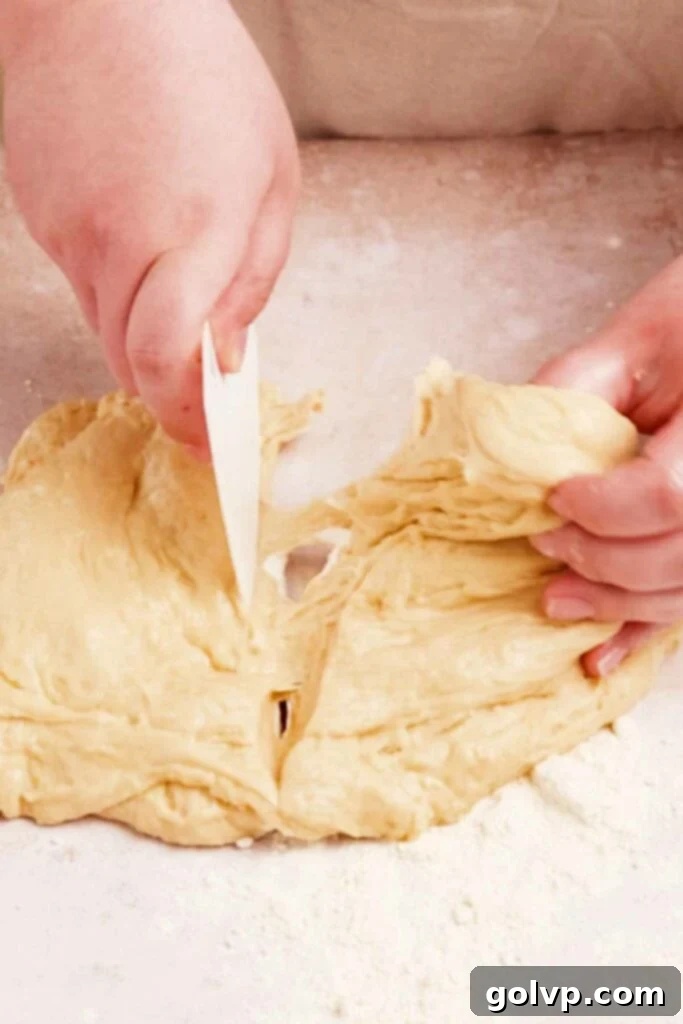
Sift the all-purpose flour into a large mixing bowl. Sifting aerates the flour and prevents lumps. Create a well in the center of the flour. Pour the activated yeast mixture into the well, followed by the remaining dough ingredients: the rest of the granulated sugar, sea salt, softened unsalted butter, whisked egg, warm milk, grated orange zest, and pure vanilla extract. Begin mixing with a large spoon, then transition to mixing with your hands until a soft, shaggy dough just comes together. Avoid overmixing; the goal is to combine, not knead. Cover the bowl and let the dough rise in a warm place until it has doubled in size, which typically takes 30-45 minutes (refer to the “Tips for Success” section for the best rising method). The dough should feel light and airy.
Step 3: Dividing and Rolling the Dough:
Once the dough has risen, gently punch it down to release the air. Briefly mix it again to ensure any uneven bits are incorporated. Divide the dough into two equal halves. Lightly flour your work surface and dump one half of the dough onto it. Sprinkle a little more flour on top and use a rolling pin to roll it into a large, thin rectangle. Aim for a consistent thickness, as this will help ensure an even filling distribution and a beautiful spiral. A rectangle of approximately 16×12 inches is a good target.
Step 4: Filling and Shaping Your First Roll:
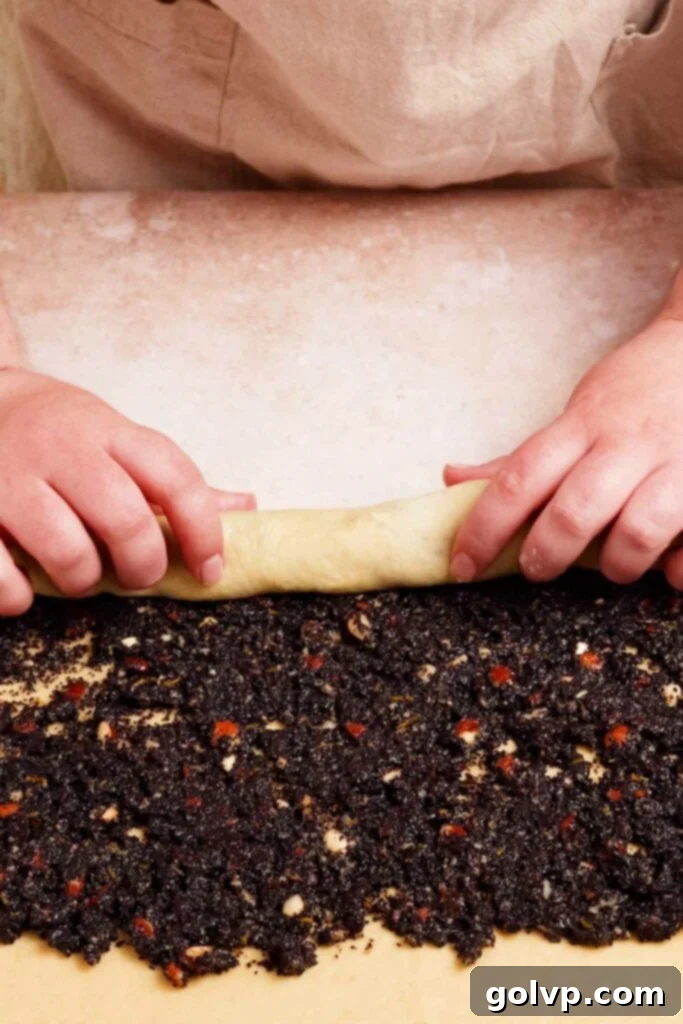
Retrieve the cooled poppy seed filling from the refrigerator. Spread half of the filling evenly over the rolled dough rectangle, making sure to leave a 1-inch border clear around all edges. This border will help seal the roll. Starting from one of the long edges, carefully and tightly roll the dough into a log. Once rolled, gently pinch and tuck the ends of the dough under the roll to seal the filling. This ensures the filling stays put during baking. With a spatula or dough scraper for assistance if needed, quickly and carefully transfer the shaped roll onto a large baking sheet lined with parchment paper.
Step 5: Repeating for the Second Roll:
Repeat the rolling, filling, and shaping process with the second half of the dough and the remaining poppy seed filling. Carefully transfer this second roll onto the same parchment-lined baking sheet, ensuring you leave a few inches of space between the two rolls to allow for their final rise and expansion during baking.
Step 6: Final Proofing for a Light Texture:
Cover the rolls lightly with a clean kitchen towel and let them rise again in a warm, draft-free spot for another 20-30 minutes, or until they have visibly increased in size and appear noticeably puffy. This final proofing ensures a light and airy texture in the baked rolls.
Step 7: Preparing for a Golden Crust:
While the rolls are completing their final rise, preheat your oven to 180°C (350°F). In a small bowl, whisk together one large egg and one tablespoon of milk until completely smooth. This creates an egg wash that will give your rolls a beautiful golden-brown, shiny crust. Gently brush the egg wash evenly over the entire exposed surface of both rolls. For a traditional touch and to allow steam to escape, lightly slash the top of each roll a few times with a sharp knife (this step is optional). Finally, sprinkle a little extra poppy seeds over the top for an attractive finish.
Step 8: Baking to Golden Perfection and Enjoyment:
Carefully place the baking sheet with your prepared poppy seed rolls into the preheated oven. Bake for 45-50 minutes. Begin checking for doneness after 40 minutes, and then every 5 minutes thereafter. The rolls are ready when their tops are a deep golden brown and they sound hollow when lightly tapped. Once baked, remove the rolls from the oven and let them cool in the pan on a wire rack for at least 15-20 minutes before slicing. This allows the filling to set. Then, cut into generous slices and savor the tender, fragrant, and truly authentic Ukrainian poppy seed roll. Enjoy every delicious bite!
Frequently Asked Questions About Poppy Seed Rolls:
There are a few reasons why your poppy seed filling might be too thin. Firstly, it could be due to insufficient cooking time, preventing the milk from reducing and thickening. Secondly, the poppy seeds might not have been drained thoroughly enough after the initial soak, introducing excess moisture. If your filling is too runny, you can easily fix it by stirring in a little more breadcrumbs, one tablespoon at a time, until it reaches your desired consistency. Another option is to return it to low heat and cook it down further, stirring constantly.
Yes, absolutely! While homemade filling offers the freshest and most authentic flavor, store-bought poppy seed filling can be a convenient time-saver and will work well in a pinch. Keep in mind that commercially prepared fillings are often sweeter than homemade versions, so you might want to adjust the sugar content in the dough accordingly if you prefer a less sweet final product. Always check the ingredients list for quality.
Yes, these poppy seed rolls freeze beautifully, making them perfect for meal prep or enjoying a homemade treat whenever you desire. After baking and allowing the rolls to cool completely, you can either freeze them whole or cut them into individual slices. Wrap them tightly in plastic wrap, then place them in an airtight freezer-safe bag or container. They will maintain their quality in the freezer for up to 2 months. To serve, simply let them thaw at room temperature, or gently reheat them in a low oven for a few minutes to restore that freshly baked taste and warmth.
If your dough isn’t rising, the most common culprit is inactive yeast. Ensure your yeast is fresh and within its expiry date. The water used to activate the yeast should be warm (around 105-115°F or 40-46°C), but not too hot, as extreme heat can kill the yeast. A cool environment can also hinder rising; refer to our tip on creating a warm oven environment for optimal proofing. If your yeast mixture didn’t foam in Step 1, it’s best to start over with a new packet of yeast.
Discover More Delicious Baking Recipes:
- Lemon Poppy Seed Scones
- Blueberry Cinnamon Rolls
- Chocolate Tahini Babka [No Knead]
- Strawberry Cinnamon Rolls
Happy baking, and may your kitchen be filled with the wonderful aroma of fresh, homemade treats!
Did you fall in love with this traditional Ukrainian poppy seed roll recipe? We’d be absolutely thrilled if you would take a moment to rate this recipe and share your thoughts in the comments section below! Your feedback helps other bakers. Don’t forget to share your beautiful creations on Instagram and tag @flouringkitchen. For more delicious recipes and baking inspiration, be sure to follow us on Pinterest!
Happy baking! xx
Did you make this recipe? We’d love to hear what you think – please rate it and leave a comment below!
Share your delightful creation on Instagram and tag @flouringkitchen
📖 Recipe
Ukrainian Poppy Seed Roll (Makovyi Pyrih)
Mary
Pin Recipe
Shop Ingredients
Equipment
-
large baking sheet
Ingredients
Poppy seed filling
- 2 cups poppy seed coarsely ground in coffee grinder or food processor
- ⅔ cup sugar
- ¼ teaspoon sea salt
- 1 cup milk
- ⅓ cup cold butter cut into small cubes
- ½ teaspoon almond extract optional
- 1 teaspoon pure vanilla extract
- 1 orange zest, grated or grated lemon zest
- ¾ cup chopped raisins optional
- ⅔ cup chopped almonds or favourite chopped nut
- ⅓ cup breadcrumbs
- 1 egg
Dough
- ½ cup warm water (less than 131°F / 55°C)
- 1 teaspoon granulated sugar
- 2 ¼ teaspoon active dry yeast 1 packet or 7g
- 3 ⅔ cup all purpose flour
- ½ cup granulated sugar
- ¼ teaspoon sea salt
- ⅓ cup unsalted butter softened
- 1 egg whisked with a fork
- ⅔ cup warm milk
- 1 orange zest, grated or grated lemon zest
- 1 teaspoon pure vanilla extract
Egg Wash
- 1 large egg
- 1 tablespoon milk
Shop Ingredients on Jupiter
Instructions
Filling
-
Recommended: This initial step helps to remove bitterness from the poppy seeds and softens them, though you can skip it to save time if needed.
Place your coarsely ground poppy seeds in a large heat-proof bowl. Pour boiling water over them, ensuring they are fully submerged. Let them sit in the boiling water for 20 minutes. Afterward, drain the poppy seeds thoroughly through a fine-mesh sieve lined with cheesecloth. To air dry them effectively, tie all the corners of the cheesecloth together and hang it over a bowl, allowing excess moisture to drip out. Ideally, leave it overnight, or for at least 1 hour. This thorough drying is crucial for a thick, non-watery filling.
2 cups poppy seed -
Combine the prepared poppy seeds, granulated sugar, sea salt, and milk in a medium saucepan. Heat the mixture over low heat, stirring frequently, until it gradually thickens to a dense, spreadable consistency. This typically takes 10-15 minutes as the sugar dissolves and the liquid reduces.⅔ cup sugar, ¼ teaspoon sea salt, 1 cup milk
-
Remove the saucepan from the heat. Stir in the cold butter (cubed), almond extract (if using), pure vanilla extract, finely grated orange zest, chopped raisins, chopped almonds, and breadcrumbs. Mix well until all ingredients are smoothly incorporated. Finally, add the beaten egg and stir until fully combined. Set the filling aside in the refrigerator to cool and firm up slightly while you prepare the dough.⅓ cup cold butter, ½ teaspoon almond extract, 1 teaspoon pure vanilla extract, 1 orange zest, grated, ¾ cup chopped raisins, ⅔ cup chopped almonds, ⅓ cup breadcrumbs, 1 egg
Dough
-
In a medium bowl, dissolve the warm water (ensure it’s not too hot, ideally less than 131°F / 55°C), 1 teaspoon of granulated sugar, and the active dry yeast. Stir gently until the yeast and sugar are dissolved. Let the mixture sit for 5-10 minutes until a foamy layer appears on top, indicating the yeast is active. If it doesn’t foam, your yeast may be inactive, and you should use a new packet.½ cup warm water, 2 ¼ teaspoon active dry yeast, 1 teaspoon granulated sugar
-
Sift the all-purpose flour into a large mixing bowl and create a well in the middle. Pour the activated yeast mixture into the well, followed by the remaining dough ingredients: the ½ cup granulated sugar, ¼ teaspoon sea salt, softened unsalted butter, whisked egg, warm milk, 1 grated orange zest, and 1 teaspoon pure vanilla extract. Mix with a large spoon, then switch to using your hands until a soft, slightly shaggy dough forms and just comes together. Do not overmix. Cover the bowl and let the dough rise in a warm area (see notes for tips) until it has doubled in size, typically 30-45 minutes.3 ⅔ cup all purpose flour, ½ cup granulated sugar, ¼ teaspoon sea salt, ⅓ cup unsalted butter, 1 egg, ⅔ cup warm milk, 1 orange zest, grated, 1 teaspoon pure vanilla extract
-
Gently punch down the risen dough to release the air and mix briefly to incorporate any uneven bits. Divide the dough into two equal halves. Transfer one half onto a lightly floured work surface. Lightly sprinkle with flour and use a rolling pin to roll it into a large, thin rectangle, aiming for consistent thickness (approximately 16×12 inches).
-
Spread half of the cooled poppy seed filling evenly onto the rolled dough, ensuring to leave a 1-inch border clear around all edges. This border will help seal the roll. Beginning from one of the long edges, carefully and tightly roll the dough into a log. Gently pinch and tuck the ends of the dough under the roll to seal the filling completely. Quickly and carefully transfer the shaped roll onto a large baking sheet lined with parchment paper, using a spatula or dough scraper for assistance if needed.
-
Repeat the rolling, filling, and shaping process with the second half of the dough and the remaining filling. Transfer the second roll next to the first on the baking sheet, ensuring there are a few inches of space in between them for rising.
-
Cover the rolls lightly with a clean kitchen towel and let them undergo a final rise for 20-30 minutes, or until they have noticeably increased in size and appear puffy. This step is crucial for a light and airy baked texture.
-
Preheat your oven to 180°C (350°F). In a small bowl, whisk together the large egg and 1 tablespoon of milk until smooth to create an egg wash. Gently brush this mixture over the tops and exposed sides of both rolls, ensuring full coverage for a golden crust. Optionally, lightly slash the top of each roll a few times with a sharp knife to prevent bursting and sprinkle with extra poppy seeds for a traditional finish.1 large egg, 1 tablespoon milk
-
Bake the rolls in the preheated oven for 45-50 minutes, or until they are deeply golden brown on top and sound hollow when lightly tapped. Begin checking for doneness after 40 minutes, then every 5 minutes, as oven temperatures can vary. Let the baked rolls cool in the pan on a wire rack for at least 15-20 minutes before cutting into slices to allow the filling to set. Serve warm or at room temperature and enjoy your delicious Ukrainian poppy seed roll!
Video
Notes
To create an ideal warm environment for your dough, I typically turn my oven on its lowest temperature setting for just 30 seconds, then immediately turn it off. This creates a gentle warmth (around 30°C or 85°F) perfect for proofing. Place your covered dough bowl inside and keep a close eye on it. As soon as it approximately doubles in size, proceed with the next step.
Handling leftover filling:
While you should fill your rolls as generously as possible, if you find yourself with a small amount of leftover filling, don’t let it go to waste! Simply heat the excess filling in a small saucepan over low heat, stirring constantly, until it thickens slightly. This makes a delicious poppy seed spread perfect for bread, bagels, pancakes, or even as a unique topping for ice cream!
Storing your poppy seed rolls:
Keep the baked poppy seed rolls wrapped tightly in plastic wrap or stored in an airtight container at room temperature for up to 3 days to maintain their freshness. As this recipe yields two large rolls, you can easily freeze any leftovers. Once the rolls have completely cooled after baking, wrap them tightly in an airtight bag or container and freeze for up to a month. When thawed at room temperature and/or gently reheated, these frozen rolls will taste just as fresh and delightful as if you had just baked them.
Recipe thoughtfully adapted and enhanced from Food.com, bringing you the best of traditional flavors with modern ease.
