Irresistible Red Velvet Mini Conversation Heart Cakes: Your Easy Valentine’s Day Recipe (No Heart Pans Needed!)
Jump to Recipe
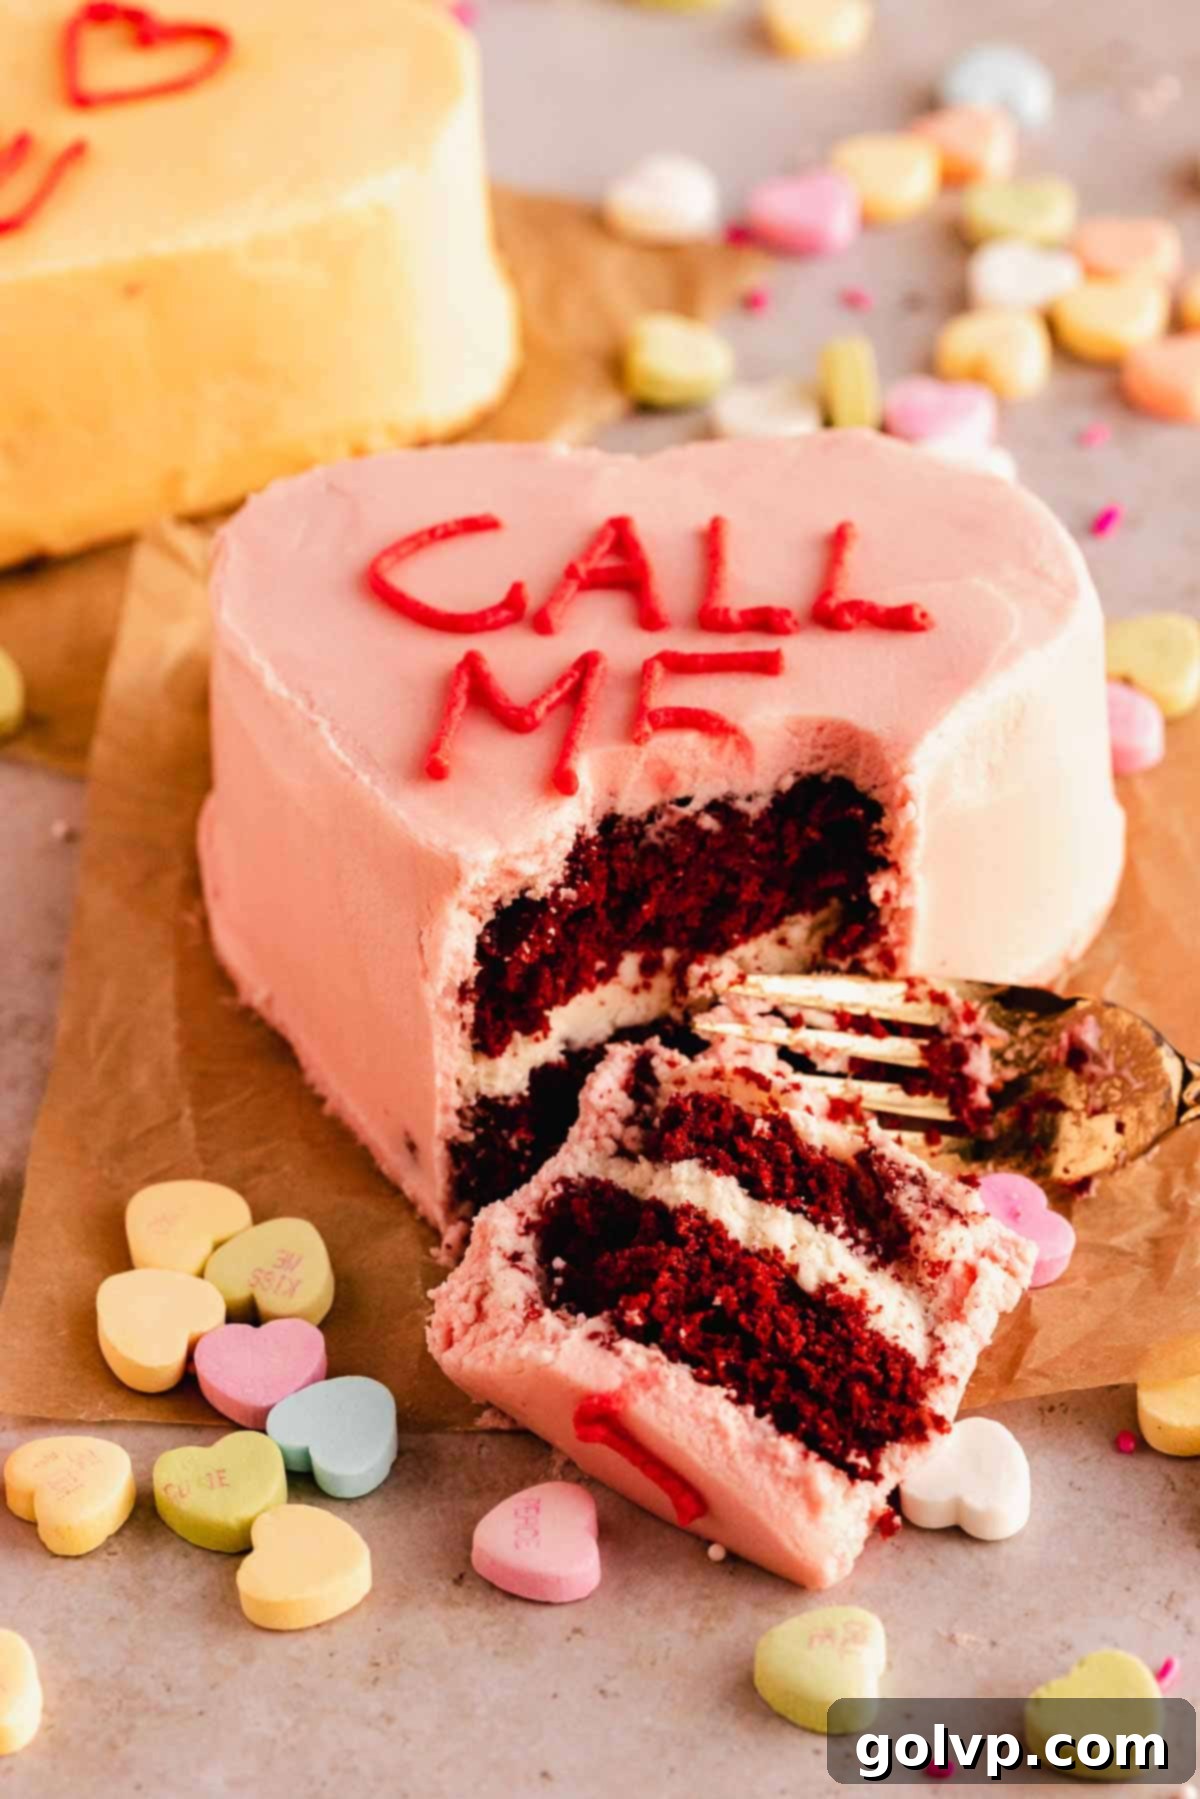
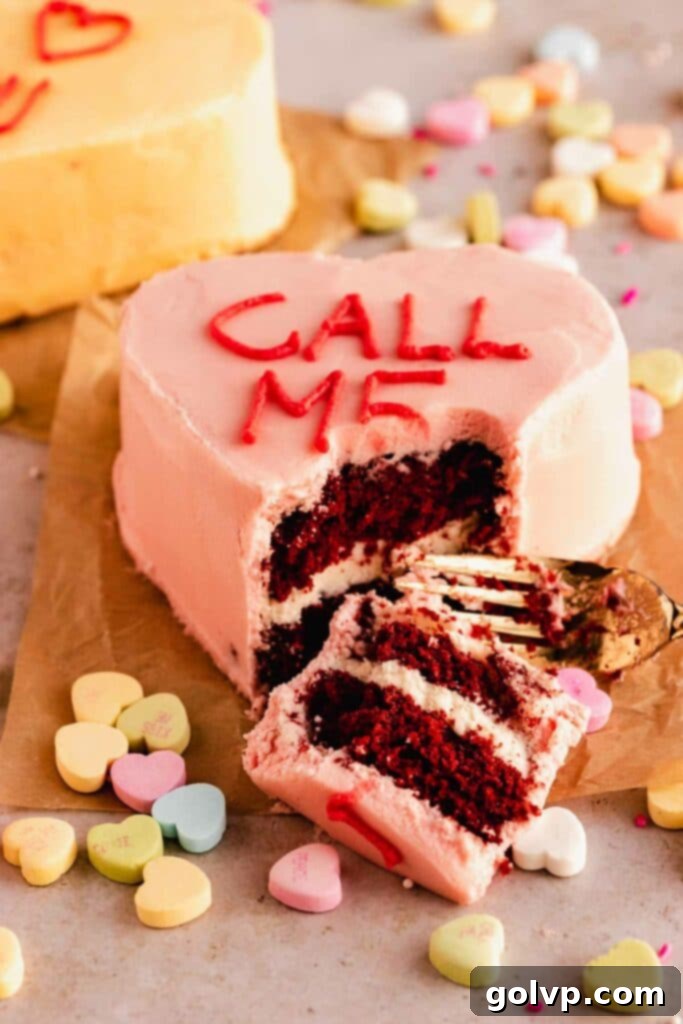
Embrace the season of love with these utterly charming and delicious **Red Velvet Mini Conversation Heart Cakes**! Forget the hassle of special heart-shaped pans; this recipe guides you through a clever, simple geometry trick to transform standard round cakes into adorable heart shapes, perfect for Valentine’s Day or any heartfelt occasion. Each mini cake boasts a soft, tender, and moist red velvet crumb, generously filled and frosted with a rich, fluffy cream cheese frosting. They’re not just a treat for the taste buds, but a delightful canvas for personal messages, making them ideal for gifting to your loved ones, friends, or even for a thoughtful self-care moment.
Whether you’re a seasoned baker or just starting, you’ll find this recipe straightforward and incredibly rewarding. We’ll dive into all the essential tips, from achieving the perfect red velvet color and texture to mastering that perfectly pipeable cream cheese frosting. Get ready to create a memorable dessert that’s as fun to make as it is to eat!
As an Affiliate Product marketer and Amazon Associate, I earn from qualifying purchases made through the links in this post, at no additional cost to you. Your support helps keep this blog running!
Why These Mini Conversation Heart Cakes Will Steal Your Heart:
These aren’t just any mini cakes; they’re a delightful blend of classic flavors and charming presentation, designed to make your baking experience enjoyable and your dessert unforgettable. Here’s why this recipe will quickly become one of your favorites:
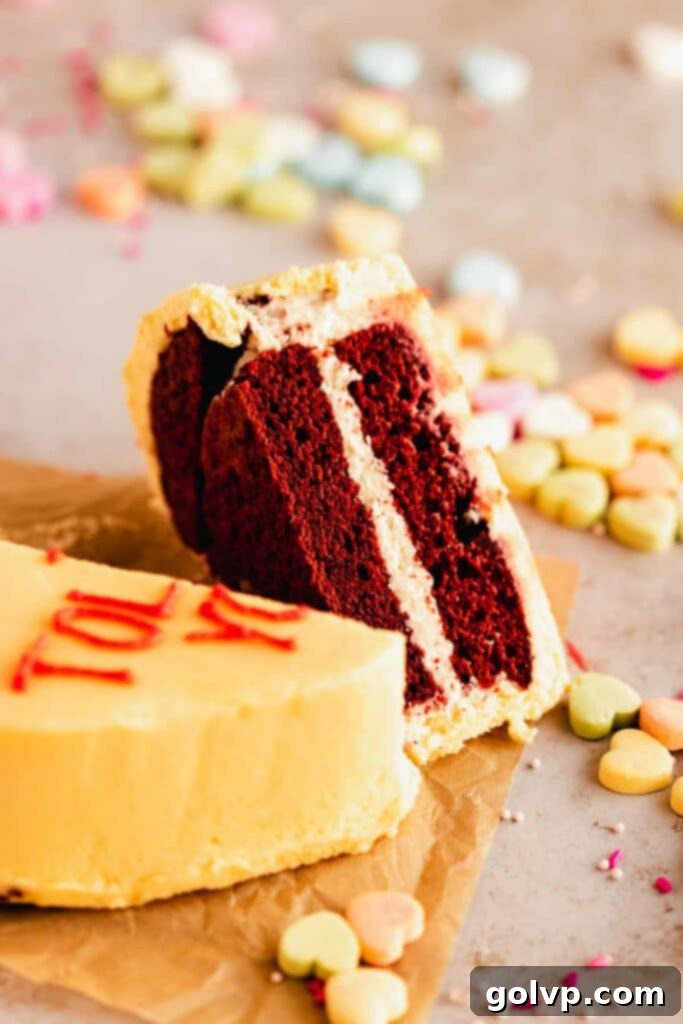
- Classic Red Velvet Perfection: Prepare to fall in love with the layers of our classic red velvet cake. Each bite offers a deep, rich flavor with that signature hint of cocoa, exceptionally soft, tender, and wonderfully moist. The vibrant red hue is as captivating as the taste, promising a truly authentic red velvet experience that stands out.
- Dreamy Cream Cheese Frosting: What’s red velvet without its iconic companion? These cakes are generously filled and covered with a luscious, fluffy cream cheese frosting. We’ve included all the insider tips and tricks to ensure your frosting is perfectly smooth, pipeable, and holds its shape beautifully, creating a professional-looking finish with ease.
- No Special Heart Pans Needed: Don’t have heart-shaped baking pans? No problem! This ingenious recipe shows you how to transform simple round cakes into charming hearts using a clever and easy geometric cutting method. We even offer options for using a sheet cake and cookie cutters for ultimate convenience, making this dessert accessible to everyone.
- Ideal for Gifting & Sharing: These mini cakes are perfectly sized for individual enjoyment or for packaging into adorable take-out style boxes, often called “bento cakes.” They make an incredibly thoughtful and personal gift for anyone you cherish, allowing you to share a little piece of your heart through baking.
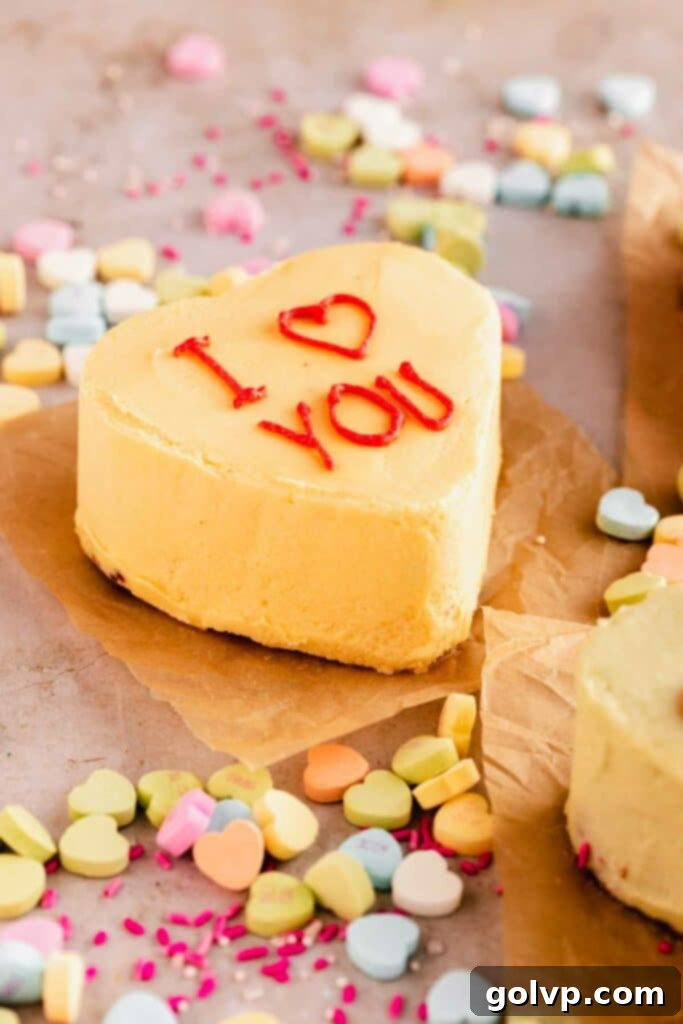
- Adorable Conversation Heart Charm: Beyond their incredible taste and convenient size, these cakes truly shine with their “conversation heart” aesthetic. Decorated with playful messages, they are undeniably cute and bring a nostalgic, whimsical touch, making them absolutely perfect for Valentine’s Day, anniversaries, or just to send a sweet message.
The Secret to Soft, Moist Red Velvet Layers
The foundation of these delightful mini cakes lies in their exceptionally soft and moist red velvet layers. We achieve this signature texture and flavor through a careful balance of key ingredients.
Buttermilk is a non-negotiable component in classic red velvet. Its acidity reacts with the baking soda, contributing to the cake’s tender crumb and subtle tanginess that perfectly complements the cocoa. This reaction also helps in achieving that beautiful red hue when combined with food coloring.
To ensure the cakes remain wonderfully soft and moist for days, we incorporate a touch of **vegetable oil** alongside the butter. While butter provides that incomparable rich flavor we all adore, oil significantly enhances moisture retention, preventing the cake from drying out. This combination truly gives you the best of both worlds: robust flavor and an incredibly tender, melt-in-your-mouth texture that lasts.
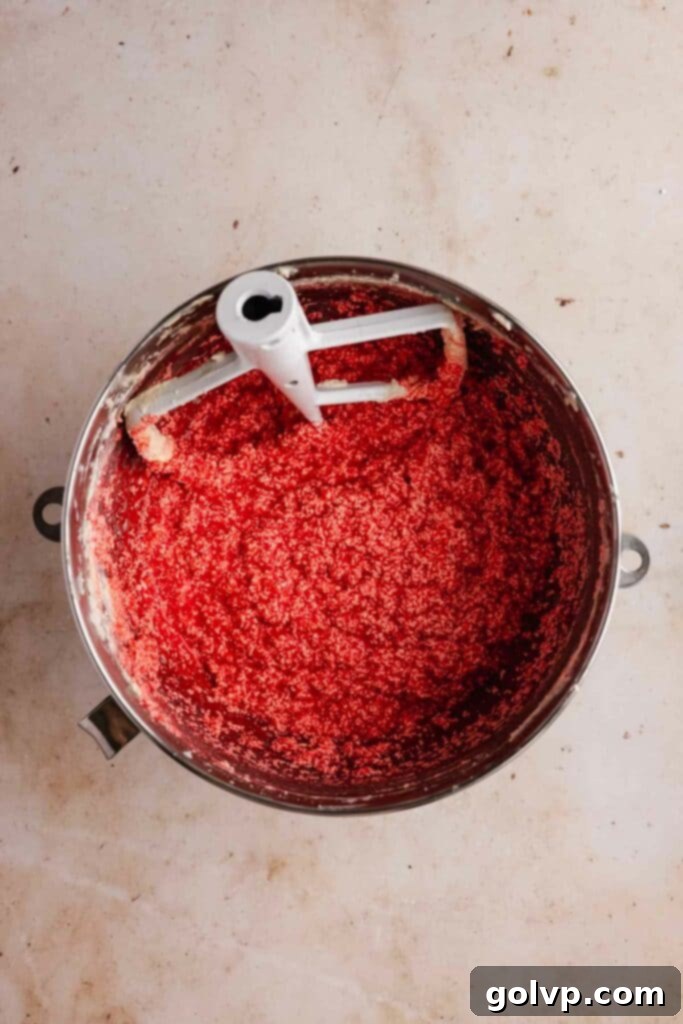
The cake batter itself is surprisingly simple to bring together. You’ll start by creaming together the butter, oil, and sugar until light and fluffy. Then, the remaining wet ingredients, including the buttermilk and red food coloring, are added. Finally, the dry ingredients – flour, cocoa powder, baking powder, and baking soda – are gently mixed in until just combined, ensuring a smooth, lump-free batter ready for baking. The minimal effort for such a decadent result is truly a baker’s dream!
How to Transform a Round Cake into a Perfect Heart Shape (No Special Pans Needed!)
One of the most exciting aspects of this recipe is the clever trick to create a charming heart-shaped cake using only a round baking pan. It’s a simple technique that relies on basic geometry and a little bit of precision, making it accessible for any home baker.
- Prepare Your Cake Layers: Start by baking your round cake layers as instructed in the recipe. Once cooled, level them by trimming off any domed tops to ensure even stacking.
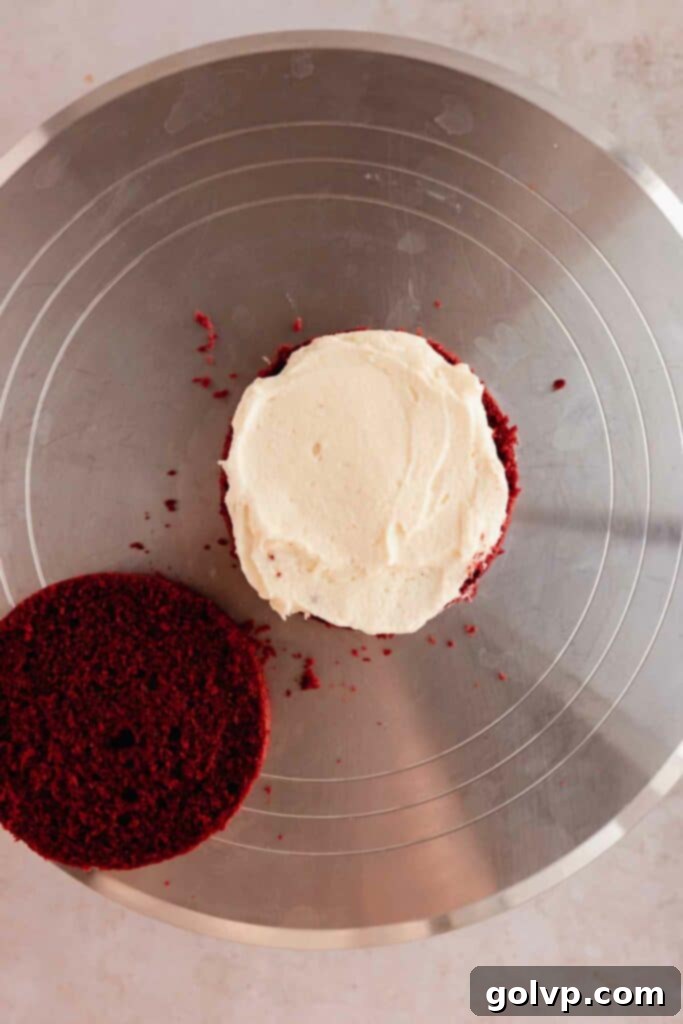
- The “Sandwich” Foundation: Carefully slice each round cake horizontally into two layers. Then, fill and stack two layers together as you would for a standard sandwich cake, spreading a generous amount of cream cheese frosting in between. This forms the base of your mini heart.
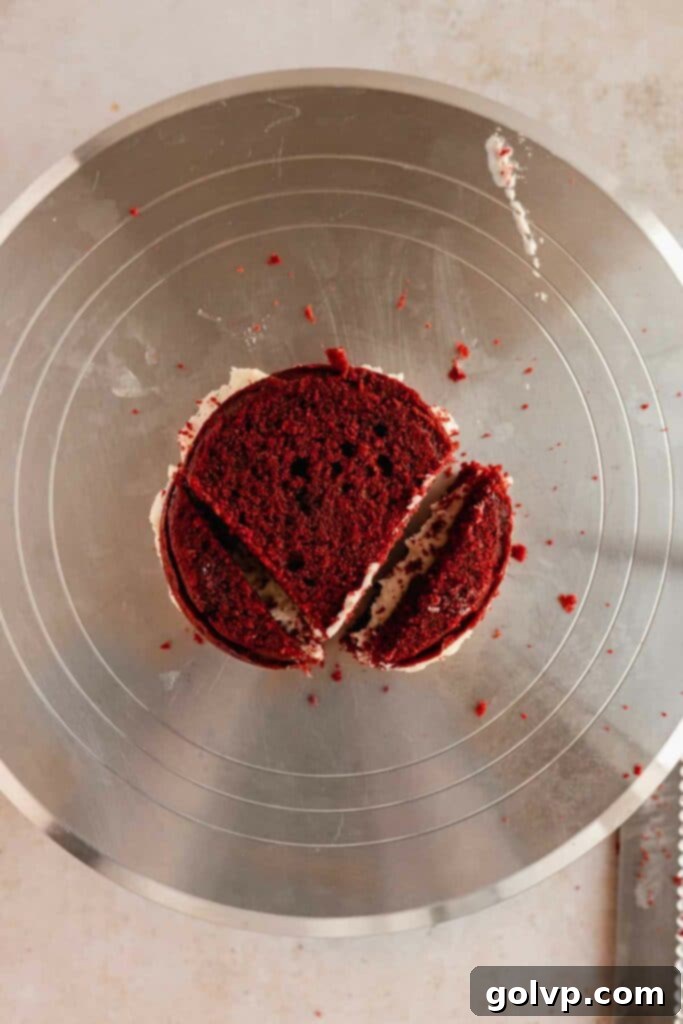
- Creating the Point of the Heart: Now for the magic! Place your stacked round cake on a cutting board. Using a sharp knife, make two diagonal cuts into the bottom half of the round cake to form a “V” shape. This V-cut will become the pointed bottom of your heart. Ensure these cuts are symmetrical for a well-proportioned heart.
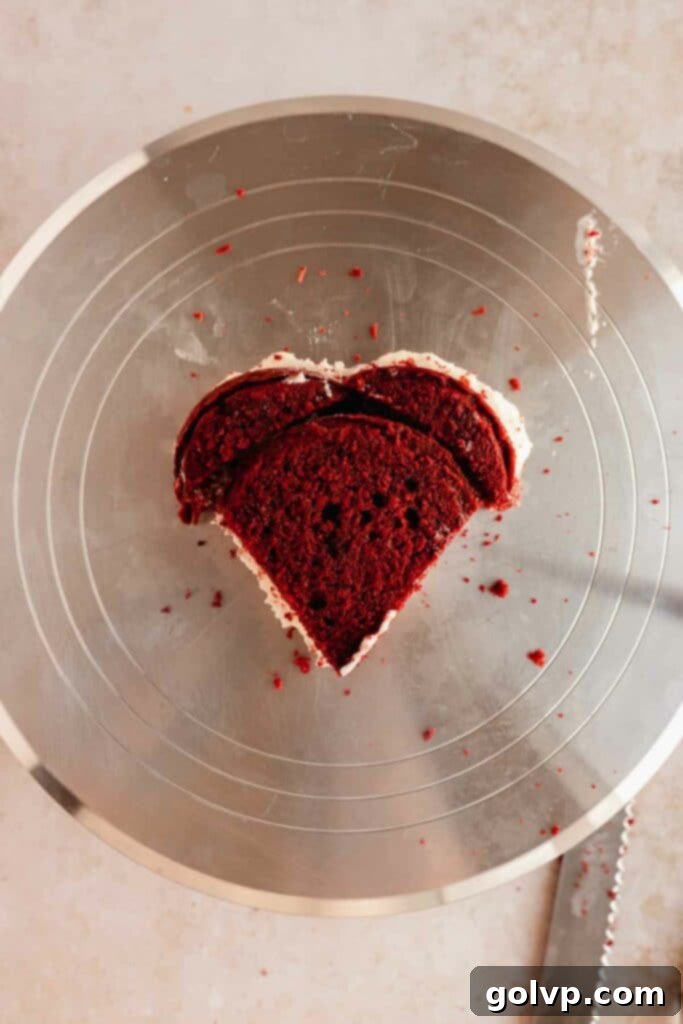
- Forming the Lobes (the “Butt” of the Heart): Take the two semicircular pieces you just cut off from the sides of the “V.” Carefully attach these pieces to the top of your cake. Position them so their rounded edges meet in the middle, forming the two distinct upper lobes of the heart. Use a tiny bit of frosting as “glue” to help them adhere to the main cake body.
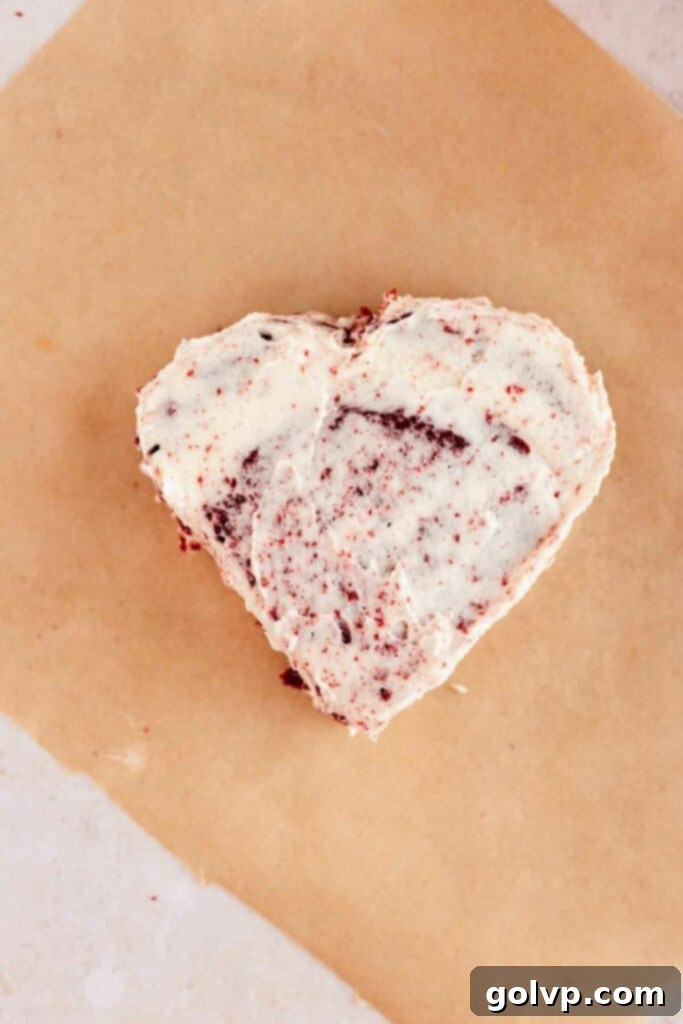
- Refine and Crumb Coat: Once assembled, you might need to gently trim off any sharp edges or uneven bits to create a smooth, rounded heart shape. Don’t worry if it’s not absolutely perfect; the crumb coat will help to smooth everything out. Apply a thin layer of cream cheese frosting (the “crumb coat”) all over the newly formed heart. This crucial step seals in any loose crumbs and creates a stable, even surface for your final frosting layer. Pop the cake into the freezer for about 10-15 minutes to allow the crumb coat to firm up. This makes the final frosting application much easier and cleaner.
With this simple method, you can achieve beautiful heart-shaped cakes without investing in specialized bakeware, making your Valentine’s Day baking both creative and budget-friendly!

Crafting Your Message: Conversation Heart Inspirations
Once your mini heart cakes are beautifully shaped and crumb-coated, the real fun begins: decorating them with personalized messages! This is where the “conversation heart” aspect truly comes to life. You can use a small piping bag fitted with a very fine round tip (like Wilton 1 or 2) or even a Ziploc bag with a tiny corner snipped off for writing. Practice your messages on parchment paper first to get a feel for the consistency of your red writing frosting.
Here are some popular and sweet messages to inspire your creations:
- I ❤️ U / I Love You
- Cutie Pie / Cutie
- DM Me
- Kiss Me
- Crazy 4 U
- Me + You
- BFF (Best Friends Forever)
- Be Mine
- Sweet Pea
- You Rock
- Soul Mate
Feeling a bit cheeky or looking for a laugh? You can also create some humorous or “anti-conversation heart” messages for a more unconventional touch:
- I Tolerate You
- Eww
- Bye
- Bite Me
- Yeah Right
- Nope
- Ugh
- Meh
The possibilities are endless, allowing you to tailor each cake to the recipient’s personality and your relationship with them. This personalized touch makes these mini cakes truly special and memorable.
Achieving the Perfectly Pipeable Cream Cheese Frosting
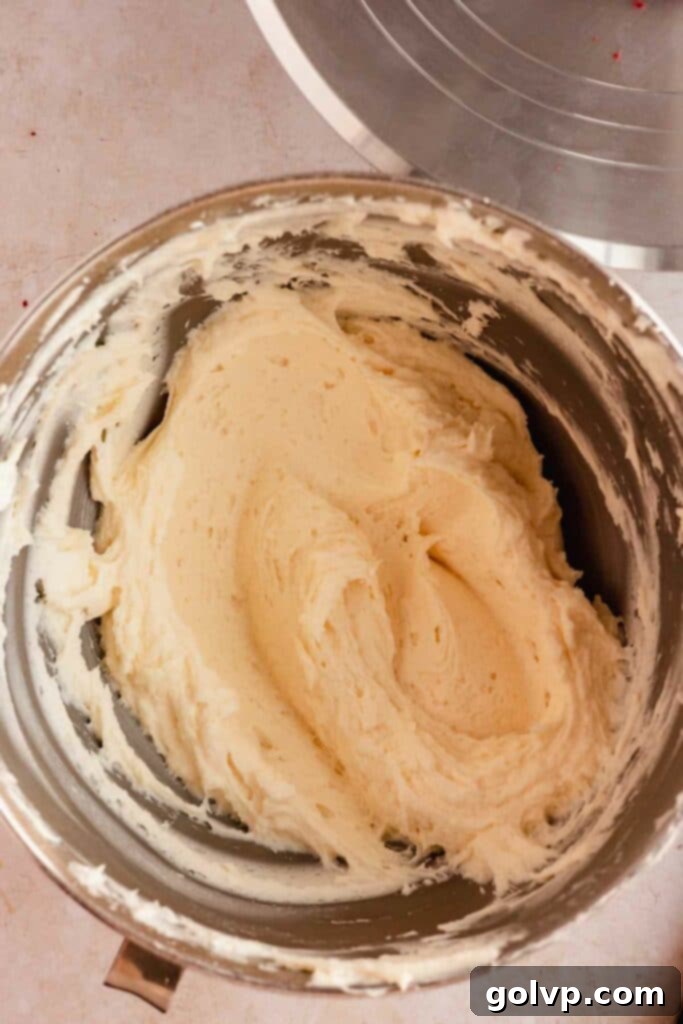
A red velvet cake simply isn’t complete without a luxurious cream cheese frosting, and for these conversation heart cakes, a perfectly pipeable consistency is key. Our recipe guarantees a creamy, fluffy, and stable frosting that holds its shape beautifully for both filling and intricate writing.
The secret lies in the temperature of your ingredients. It’s crucial that your **unsalted butter is softened, but not overly soft or melted**. If your butter is too warm, the frosting will be runny and won’t hold its structure. Similarly, use **cream cheese that is slightly softened, but still cool to the touch** (about 10-15 minutes at room temperature). Using cold cream cheese can lead to lumps, while overly soft cream cheese can make the frosting too thin.
Another game-changer is using **heavy whipping cream** to achieve that light and airy texture. Unlike milk, which can thin out the frosting and make it “gloopy” (a term for a sticky, unmanageable consistency), heavy cream adds richness and helps to whip air into the frosting, making it wonderfully fluffy and stable. Add it gradually, one tablespoon at a time, until you reach your desired consistency. This allows you to control the thickness, ensuring it’s perfect for both spreading and piping fine details.
Troubleshooting: Why is My Cream Cheese Frosting Grainy?
A common issue bakers encounter with cream cheese frosting is a grainy texture. This usually stems from a few factors, but the good news is it’s often fixable!
The most frequent culprit is **butter that is too cold**. When butter is too firm, it won’t cream properly with the sugar, leading to tiny, unmixed butter particles that result in a grainy frosting. You want your butter to be soft enough that you can easily make an indentation with your finger, but it shouldn’t be greasy or shiny – that indicates it’s too warm.
Another reason could be **insufficient beating time for the butter and powdered sugar** or **adding cream cheese that is too cold or directly from the fridge.** Always ensure your powdered sugar is sifted to prevent lumps.
How to Fix Grainy Frosting:
- Warm it up slightly: If your frosting is grainy due to cold butter, try melting about ¼ cup of the frosting in the microwave until it’s just liquid, then slowly add it back into the main batch while beating on low speed. This can help warm up the rest of the butter and integrate it smoothly.
- Add more powdered sugar: Gradually adding more sifted powdered sugar (a ¼ cup at a time) can help to break down any remaining grains and thicken the frosting, improving its texture.
- Continue beating: Sometimes, simply beating the frosting for a few extra minutes on medium-high speed can help smooth out the texture, especially if the butter wasn’t fully creamed initially.
Essential Tips for Perfect Cake Layers
Achieving perfectly baked, evenly risen, and moist cake layers is fundamental to any successful cake project. Here are some key tips to help you get flawless results every time:
- Room Temperature Ingredients: This is a golden rule in baking! Ensure all your cold ingredients like butter, eggs, and buttermilk are at room temperature. This allows them to emulsify and combine much more smoothly, creating a uniform batter and a finely textured crumb.
- Accurate Flour Measurement: Flour is often over-measured, leading to dry cakes. The most accurate way to measure flour is by weight using a kitchen scale. If you don’t have a scale, use the “spoon and level” method: gently spoon flour into your measuring cup until it’s overflowing, then level off the top with the flat edge of a knife without packing it down.
- Don’t Overmix the Batter: Once you add the dry ingredients, mix only until just combined. Overmixing develops the gluten in the flour, which can lead to a tough, dense cake. A few small lumps are perfectly fine!
- Monitor Oven Temperature: Oven temperatures can vary significantly. Investing in an oven thermometer can help you ensure your oven is preheated to the correct temperature.
- The Toothpick Test: For checking doneness, insert a toothpick into the center of the cake. It should come out clean or with a few moist crumbs attached, but no wet batter. Overbaking will result in a dry cake.
- Cooling Properly: Allow cakes to cool in their pans for about 10-15 minutes before inverting them onto a wire rack to cool completely. Cooling too quickly or removing from pans too soon can cause them to break.
Key Ingredients Explained for Success
Understanding the role of each ingredient is crucial for baking success. Here’s a deeper look into the components that make these red velvet mini cakes extraordinary:
- Butter: For both the cake layers and the frosting, high-quality unsalted butter is recommended for the best flavor. If using salted butter for the cake, simply omit the ¼ teaspoon of added sea salt from the recipe. Ensure your butter is at the correct temperature (softened for the cake, slightly cooler for the frosting) as detailed in the instructions.
- Buttermilk: This acidic dairy product is indispensable for red velvet cake. It tenderizes the crumb, activates the baking soda for lift, and contributes to the characteristic tangy flavor. Store-bought buttermilk or even kefir works wonderfully. If you don’t have buttermilk, you can make a DIY version by adding 1 tablespoon of white vinegar or lemon juice to a measuring cup, then filling the rest with milk to ¾ cup, letting it sit for 5-10 minutes until it slightly curdles.
- Food Colouring: To achieve that iconic vibrant red, a good quality **red gel food colouring** is essential. Gel colors are concentrated and won’t thin out your batter or frosting like liquid food colorings can. Start with a pea-sized amount and add more until you reach your desired shade of deep red.
- All-Purpose Flour: The backbone of your cake’s structure. Always measure your flour accurately, preferably by weight (199g as specified) for consistent results. If using measuring cups, remember the “spoon and level” method to avoid a dense cake.
- Cocoa Powder: Red velvet cake contains a small amount of cocoa powder, which provides a subtle chocolatey depth and reacts with the red food coloring to create that rich, deep red color rather than a bright pink. You can use natural or Dutch-processed cocoa powder. Dutch-processed cocoa powder is less acidic and will result in a slightly deeper, more muted red color and a less tangy flavor, which some prefer.
- Cream Cheese: For the frosting, always use a **full-fat, brick-style cream cheese**. Whipped or spreadable cream cheese contains too much water and will result in a runny, unstable frosting. Ensure it’s softened just enough to be workable, but still cool, to maintain frosting consistency.
- Heavy Whipping Cream (35% milk fat or higher):** This is key to a light, fluffy, and stable cream cheese frosting. The higher fat content (at least 32-35%) allows it to whip up beautifully, adding volume and a silky texture without making the frosting loose or gloopy. Do not substitute with milk or half-and-half, as they lack the necessary fat content.

Step by Step: Crafting Your Red Velvet Layers
Follow these detailed steps carefully to ensure your red velvet cake layers are moist, tender, and perfectly baked.
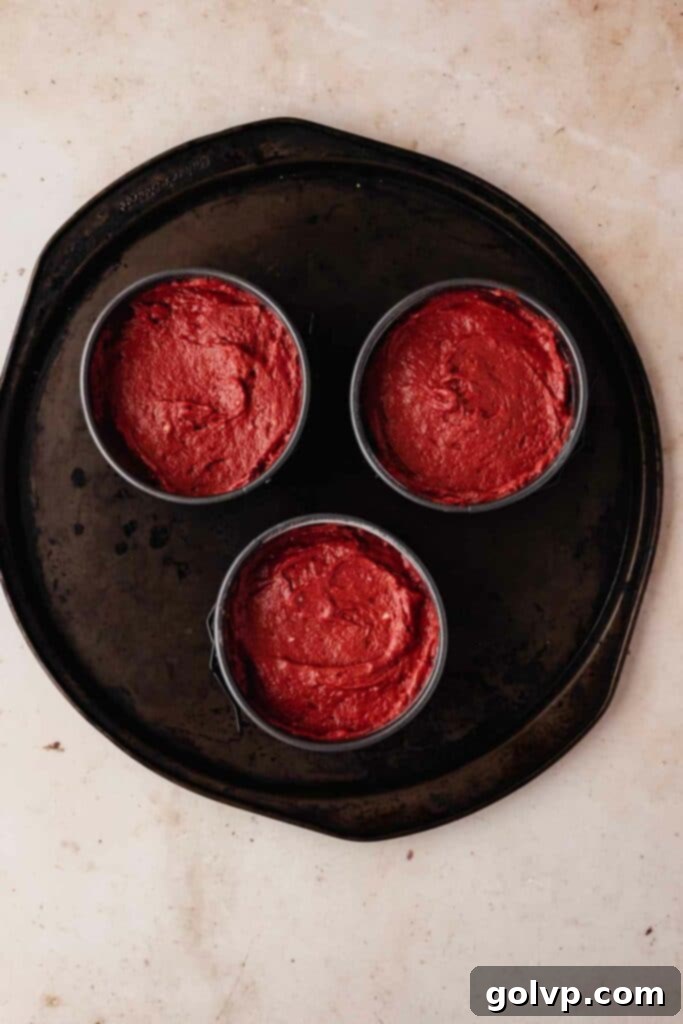
- Prep Your Pans: Preheat your oven to 355°F (180°C). Prepare three 4-inch round baking pans by greasing them thoroughly with a cold piece of butter, then lining the bottoms with parchment paper. This prevents sticking and ensures easy removal.
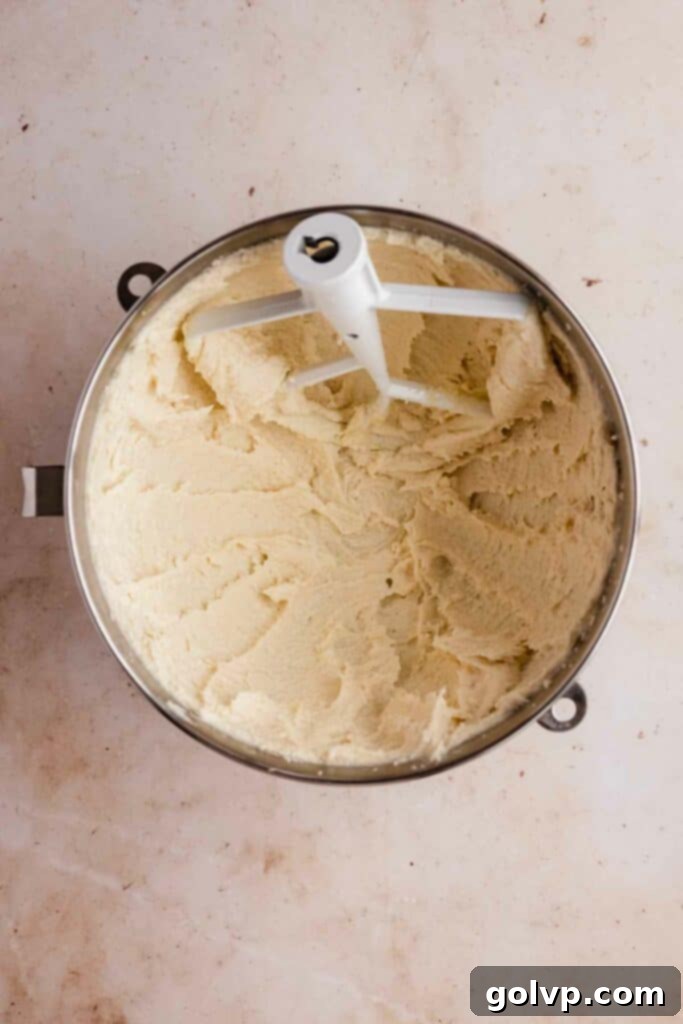
- Cream Fats and Sugar: In a large mixing bowl or the bowl of a stand mixer fitted with the paddle attachment, combine the softened unsalted butter, vegetable oil, granulated sugar, and sea salt. Beat on medium-high speed until the mixture is light, fluffy, and pale in color, typically 3-5 minutes. Remember to scrape down the sides of the bowl halfway through to ensure everything is evenly incorporated.
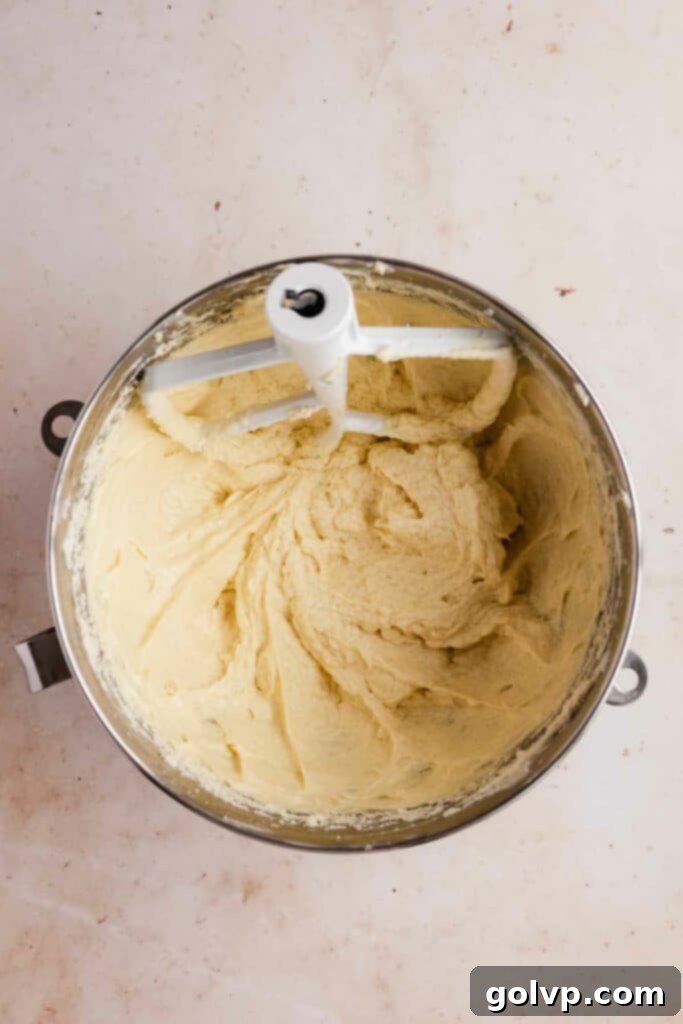
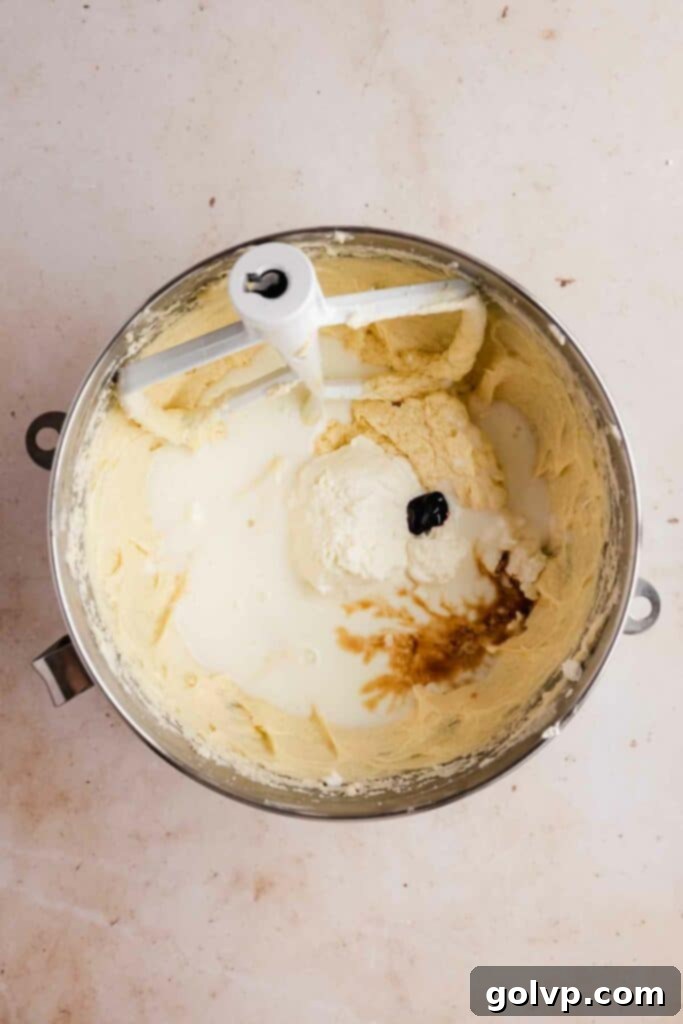
- Incorporate Wet Ingredients: Add the large eggs one by one, beating well after each addition until fully incorporated. Scrape the bowl again. Next, pour in the room temperature buttermilk, pure vanilla extract, and a few drops of red gel food colouring. Mix until just combined. Don’t worry if the mixture appears slightly separated at this stage; it will come together with the dry ingredients.
- Add Dry Ingredients: Sift the all-purpose flour, cocoa powder, baking powder, and baking soda directly into the wet mixture in the same bowl. Gently mix on low speed until the dry ingredients are just incorporated and the batter is smooth. Be careful not to overmix, as this can lead to a tough cake.
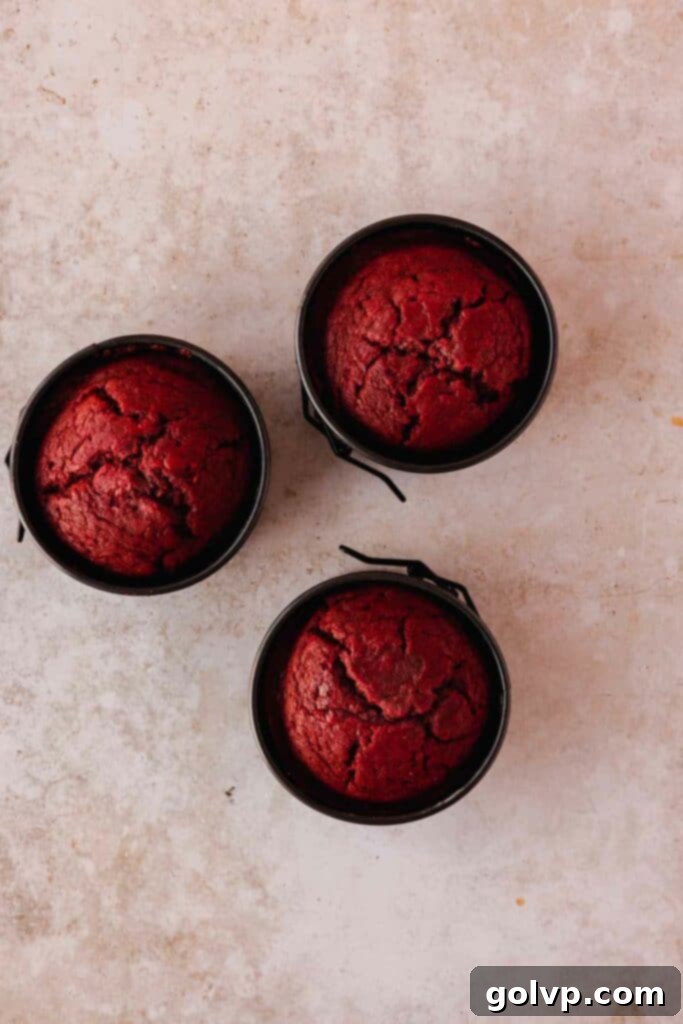
- Bake to Perfection: Divide the vibrant red batter evenly among your three prepared 4-inch pans. Use an offset spatula to smooth the tops. Bake for 22-30 minutes, or until a toothpick inserted into the center of a cake comes out clean or with a few moist crumbs attached.
- Cool Completely: Allow the cakes to cool in their pans on a wire rack for about 10-15 minutes. This cooling period helps them firm up, making them easier to handle. After 10-15 minutes, gently invert the pans onto the wire rack to fully release the cakes and let them cool completely before frosting. This prevents condensation and ensures a stable structure for assembly.
Step by Step: Preparing Your Fluffy Cream Cheese Frosting
Achieving the right consistency for your cream cheese frosting is key to a beautiful finish. Follow these steps carefully:
- Whip Butter and Sugar: In a large bowl or stand mixer with the paddle attachment, beat the softened unsalted butter and 4 cups of powdered sugar until incredibly light and fluffy. This process typically takes about 7-10 minutes. This extended beating time incorporates air, making the frosting airy and pale. Remember to stop and scrape down the sides of the bowl frequently to ensure everything is thoroughly mixed. If needed, add the remaining 1 cup of powdered sugar to reach desired sweetness and consistency.
- Add Vanilla and Cream Cheese: Beat in the pure vanilla extract. Then, add the slightly softened cream cheese one tablespoon at a time, beating well after each addition until fully incorporated. Be cautious not to overmix once the cream cheese is added, as this can make the frosting too soft. Scrape down the bowl periodically.
- Adjust Consistency with Cream: Gradually add the heavy whipping cream, one tablespoon at a time, beating until the frosting achieves a light, fluffy, and pipeable consistency. Stop adding cream when you reach your desired texture. Scrape down the bowl one last time to ensure uniformity.
- Smooth for Piping: For an extra smooth frosting, use a rubber spatula to gently fold the frosting by hand. This helps to release any large air bubbles that may have been incorporated during mixing, resulting in a silkier texture perfect for frosting and piping.
Step by Step: Assembling and Decorating Your Heart Cakes
Now that your cake layers are baked and cooled, and your frosting is prepared, it’s time to bring these adorable conversation heart cakes to life!
- Level Your Cakes: If your cake layers have any dome, gently trim the tops with a serrated knife to create flat surfaces. Then, carefully slice each cake horizontally into two even layers.
- Form the Heart Shape: Take two cake halves and spread a generous layer of cream cheese frosting on one, then top with the second layer, creating a “sandwich.” Place this round cake on your work surface. Using a sharp knife, make two diagonal cuts on one side of the round cake to create a “V” shape – this will be the bottom point of your heart. Take the two semi-circular pieces you just cut off and attach them to the top of the cake, positioning their rounded edges to form the two upper lobes of the heart. Use a little extra frosting to secure these pieces. Refer to the photos in this post for a visual guide.
- Apply a Crumb Coat: Using a small offset spatula, spread a very thin layer of frosting over the entire shaped cake. This “crumb coat” traps any loose crumbs and creates a smooth, stable surface for your final frosting layer. Once coated, place the cake in the freezer for about 10-15 minutes to allow the crumb coat to firm up. Repeat this process for all your mini cakes.
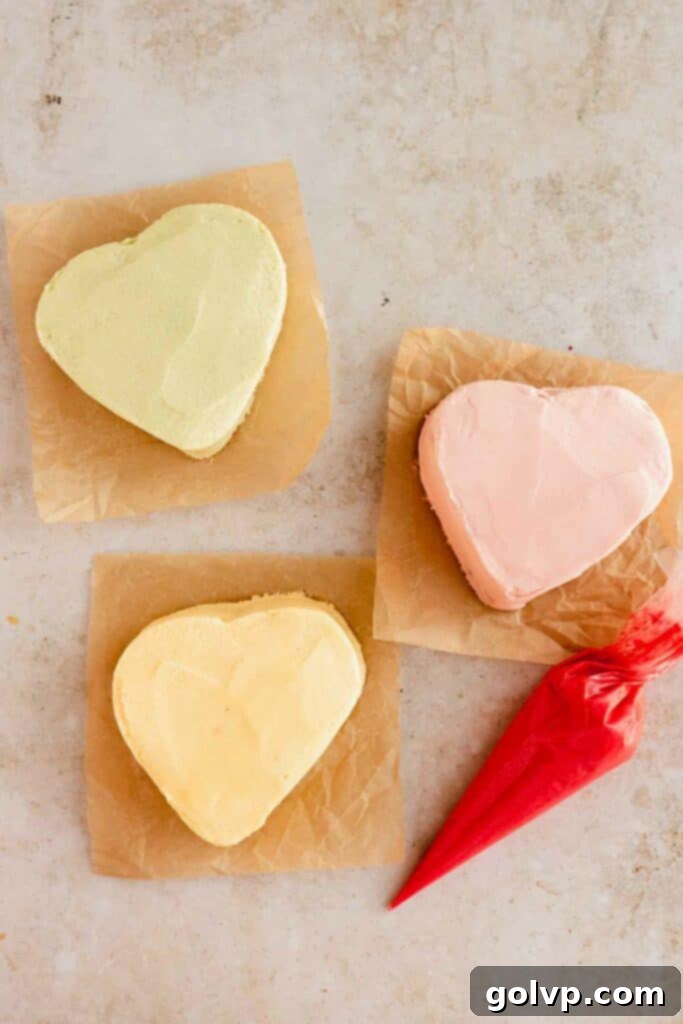
- Prepare Writing Frosting: Scoop out about 4 tablespoons of the prepared cream cheese frosting into a small bowl. Add a few drops of red gel food colouring and mix until you achieve a vibrant red hue. Transfer this red frosting to a piping bag fitted with a small round tip (like Wilton 2) or a small Ziploc bag with a tiny corner snipped off for writing your messages.
- Color Main Frosting: Divide the remaining white cream cheese frosting into three separate bowls. Add a few drops of pink, yellow, and green gel food colouring (or any pastel colors you prefer) to each bowl and mix until evenly colored. Transfer each color to its own piping bag or bowl ready for frosting.
- Apply Final Frosting: Remove the chilled, crumb-coated cakes from the freezer. Using your chosen colored frosting, apply a generous final layer over each cake. For a clean, smooth finish, scrape your spatula clean after each swipe. For an extra polished look, gently warm a metal offset spatula (by running it under hot water and wiping dry, or using a kitchen torch) and smooth over the tops and sides of the cakes.
- Write Your Messages: Once the final frosting is set, use the prepared red writing frosting to pipe your chosen conversation messages onto the cakes. Serve your beautiful mini red velvet conversation heart cakes at room temperature and enjoy the smiles they bring!
Frequently Asked Questions (FAQ)
Yes, absolutely! If you don’t have 4-inch round pans, you can bake all the cake batter in a 9×12 inch sheet pan. Once completely cooled, use a heart-shaped cookie cutter (approximately 3-4 inches wide) or a knife to cut out 6 heart shapes. Each heart will then serve as one layer to make 3 mini cakes in total. Alternatively, you can use a 6-inch round cake pan (ensure it’s at least 3 inches tall to accommodate the rise), cut it into layers, and then shape it into one larger heart following the assembly instructions.
Yes, you can! You can bake the entire batter in a single 6-inch round pan (make sure it’s at least 3 inches tall to prevent overflow). Once baked and cooled, carefully cut the cake in half horizontally to create two layers. Then, proceed with the shaping and decorating steps as outlined in the assembly section to create one larger heart-shaped cake.
A “gloopy” or runny cream cheese frosting often means it’s too warm or has been overmixed. To fix it, try placing the frosting in the refrigerator for 15-20 minutes to firm up slightly. Once chilled, take it out and beat it again on medium speed. If it’s still too thin, gradually add more powdered sugar, ¼ cup at a time, beating until the desired thickness is achieved. Ensure all your ingredients were at the correct temperature to begin with (slightly cool cream cheese, softened but not melted butter).
While you technically can, it’s not recommended for best results. Liquid food colouring is less concentrated than gel food colouring, meaning you’d need to use a larger amount to achieve a vibrant red, which can thin out the cake batter or frosting, affecting its texture and consistency. Gel food colouring provides a much brighter and deeper color without adding excess liquid, making it ideal for both the red velvet cake layers and the frosting.
Frosted cakes should be stored in an airtight cake container in the refrigerator for up to 4 days. Cream cheese frosting requires refrigeration. Before serving, allow the cakes to sit at room temperature for at least 30-60 minutes so that the cake layers and frosting can soften to their ideal texture and flavor. Unfrosted cake layers can be wrapped tightly in plastic wrap and stored at room temperature for 1-2 days, or frozen for up to 1 month.
Serving and Storage Tips
These mini red velvet conversation heart cakes are best served at room temperature, allowing the cake to be tender and the cream cheese frosting to be wonderfully soft and creamy. Remove them from the refrigerator at least 30-60 minutes before serving.
Make Ahead Options:
- Cake Layers: The cake layers can be baked one day in advance. Once fully cooled, wrap them tightly in plastic wrap (or place them back in their pans covered with plastic/beeswax wrap) and store them at room temperature.
- Frosting: For the best results in terms of spreadability and smoothness, it is highly recommended to prepare the cream cheese frosting on the same day you plan to decorate the cakes. If you must make it ahead, store it in an airtight container in the fridge for up to 2 days, then re-whip it for a few minutes before use, adding a splash of heavy cream if needed to restore its fluffy texture.
- Assembled Cakes: Once decorated, the mini cakes will stay fresh in an airtight cake container in the refrigerator for up to 3-4 days. While they are still delicious on day 3 or 4, they are ideally enjoyed within the first 1-2 days for the freshest taste and best texture.
Explore More Delicious Recipes:
- Red Velvet Bundt Cake with Cream Cheese Swirl
- Heart Shaped Chocolate Chip Cookies
- Red Velvet Oreo Cheesecake
- Giant Valentine’s Heart Cookie
Happy baking!
Did you make this recipe? I would love for you to rate this recipe and hear what you think in the comments below! Share your creation on Instagram and tag @flouringkitchen. Follow me on Pinterestto save and for more recipe ideas.
📖 Recipe

Red Velvet Mini Conversation Heart Cakes
Mary
Pin Recipe
Shop Ingredients
Equipment
-
3
