Irresistibly Tangy & Easy Lemon Raspberry Bars with Buttery Shortbread Crust
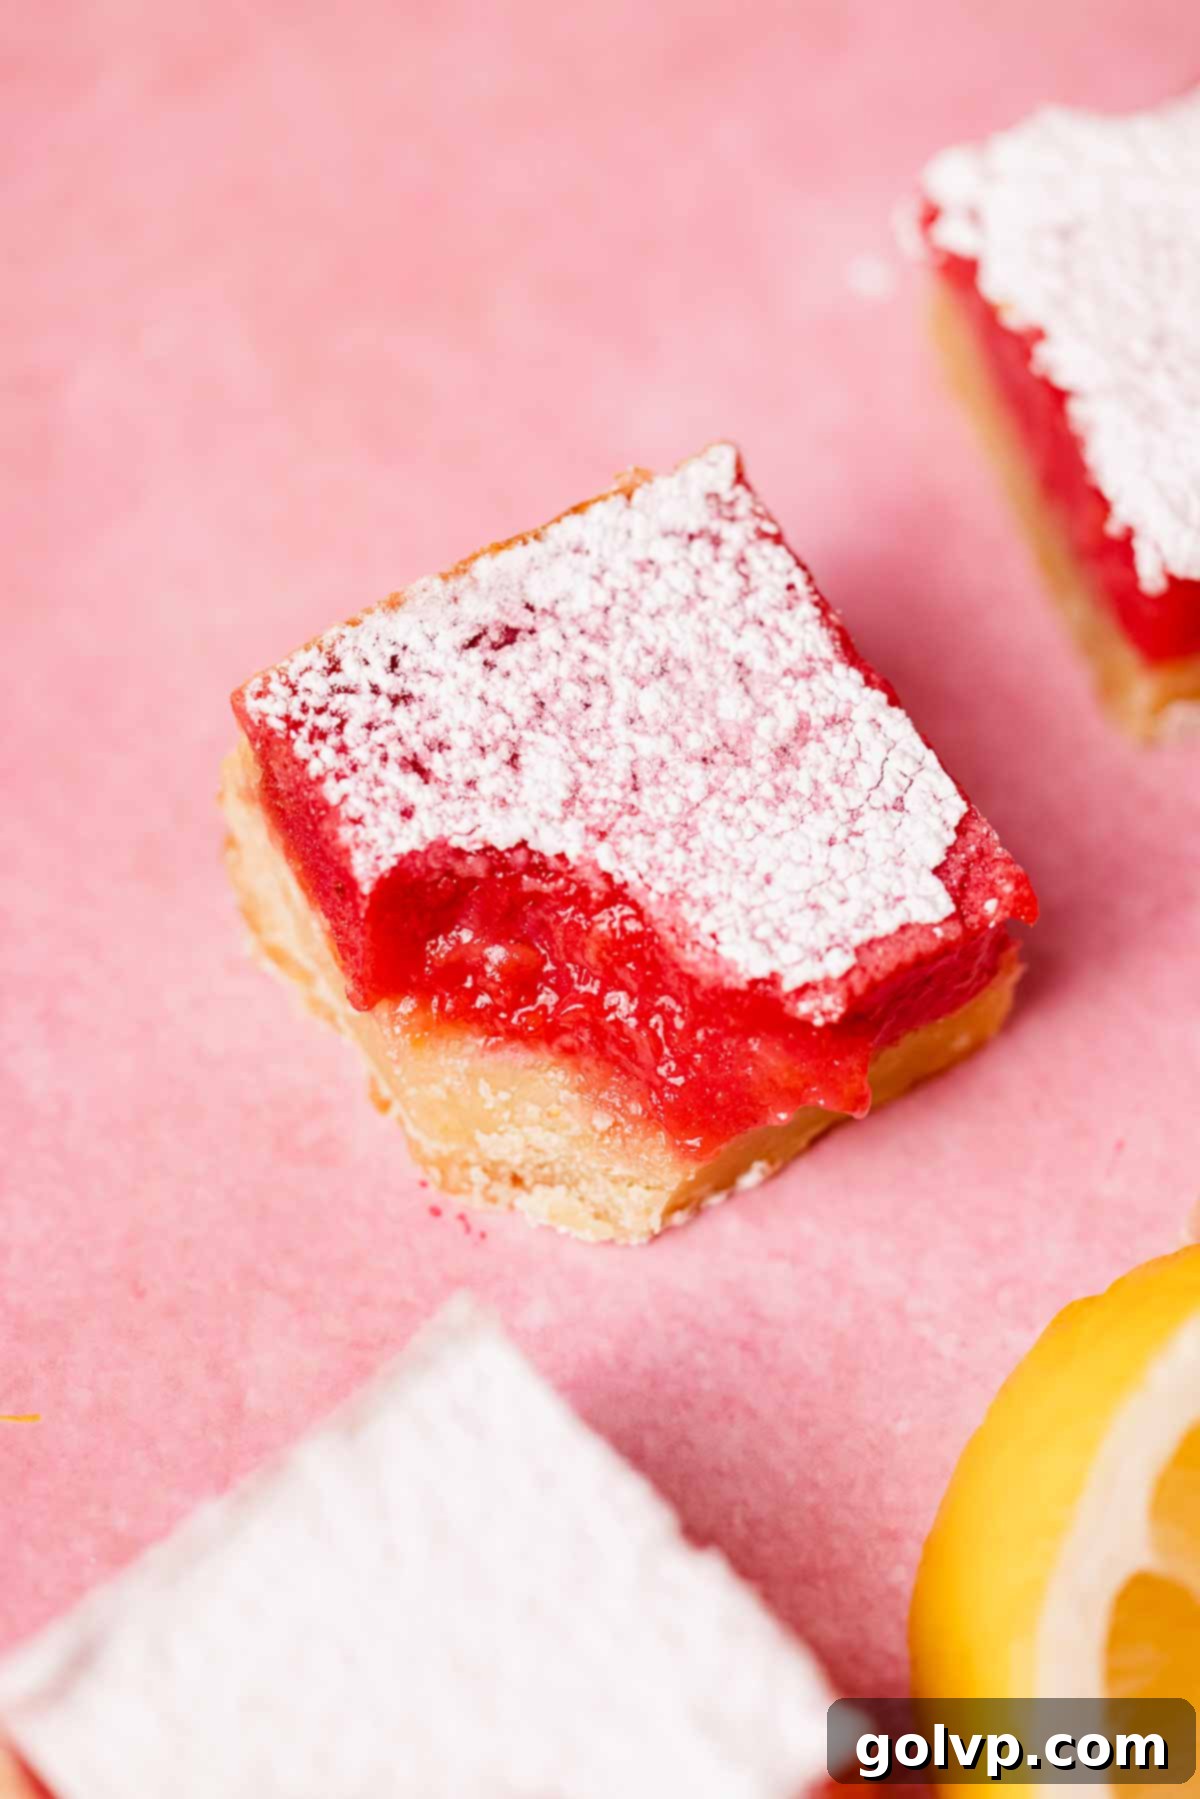
Prepare to fall in love with these amazing Lemon Raspberry Bars! Featuring a rich, thick, and buttery shortbread crust, topped with a luscious, gooey, and intensely flavorful lemon raspberry filling, these bars are a true delight. They offer the perfect balance of sweet and tart, making them an ideal treat for brightening up any spring gathering or cooling down on a warm summer day. Imagine the classic sunshine of lemon squares, elevated with the vibrant, fruity burst of fresh raspberries – that’s exactly what these incredible bars deliver. They are simple to make, yet impressive enough for any occasion, ensuring rave reviews from everyone who tastes them.
If you’re as passionate about the delightful lemon raspberry combination as we are, you absolutely must try our Lemon Raspberry Cookies for a chewy, sweet experience. And for another tangy, creamy sensation, our Luscious Raspberry Curd recipe is a must-make. These bars will quickly become a favorite in your dessert repertoire!

🍋 Why You’ll Absolutely Love These Lemon Raspberry Bars
These lemon raspberry bars aren’t just a dessert; they’re an experience. Here’s why this recipe is destined to become a beloved staple in your kitchen:
- Perfect Harmony of Tangy Lemon & Sweet Raspberries: This recipe perfectly captures the bright, zesty notes of lemon and combines them with the sweet, slightly tart essence of fresh raspberries. The result is a uniquely refreshing, vivid pink filling that tastes like sunshine in every bite. It’s a flavor profile that truly awakens the palate, offering a delightful counterpoint to richer desserts.
- Luxuriously Thick & Gooey Filling: One of the standout features of these bars is their incredible filling. It’s wonderfully thick and gooey, yet it sets perfectly to hold its shape beautifully when sliced. Each bite delivers a satisfying chewiness and a burst of fruity, citrusy flavor that you won’t soon forget. No runny or flimsy fillings here – just pure, delightful indulgence.
- Irresistible Buttery Shortbread Crust: The foundation of these exquisite bars is a homemade shortbread crust that is simply divine. Made with real butter, it’s incredibly tender, rich, and practically melts in your mouth. We enhance its flavor with a hint of lemon zest and pure vanilla, creating a fragrant, perfectly balanced base that complements the tangy fruit filling without overpowering it. This crust isn’t just a vehicle for the filling; it’s a star in its own right.

📝 Key Ingredients for Perfect Lemon Raspberry Bars
Crafting these delectable lemon raspberry bars requires a few essential ingredients for both the rich shortbread base and the vibrant, creamy filling. Understanding the role of each component will help you achieve the best possible results. Remember, quality ingredients make a noticeable difference in the final taste and texture!
For absolute success, take a moment to read through all the tips provided below!
Full steps and precise ingredient measurements can be found in the comprehensive recipe card below.
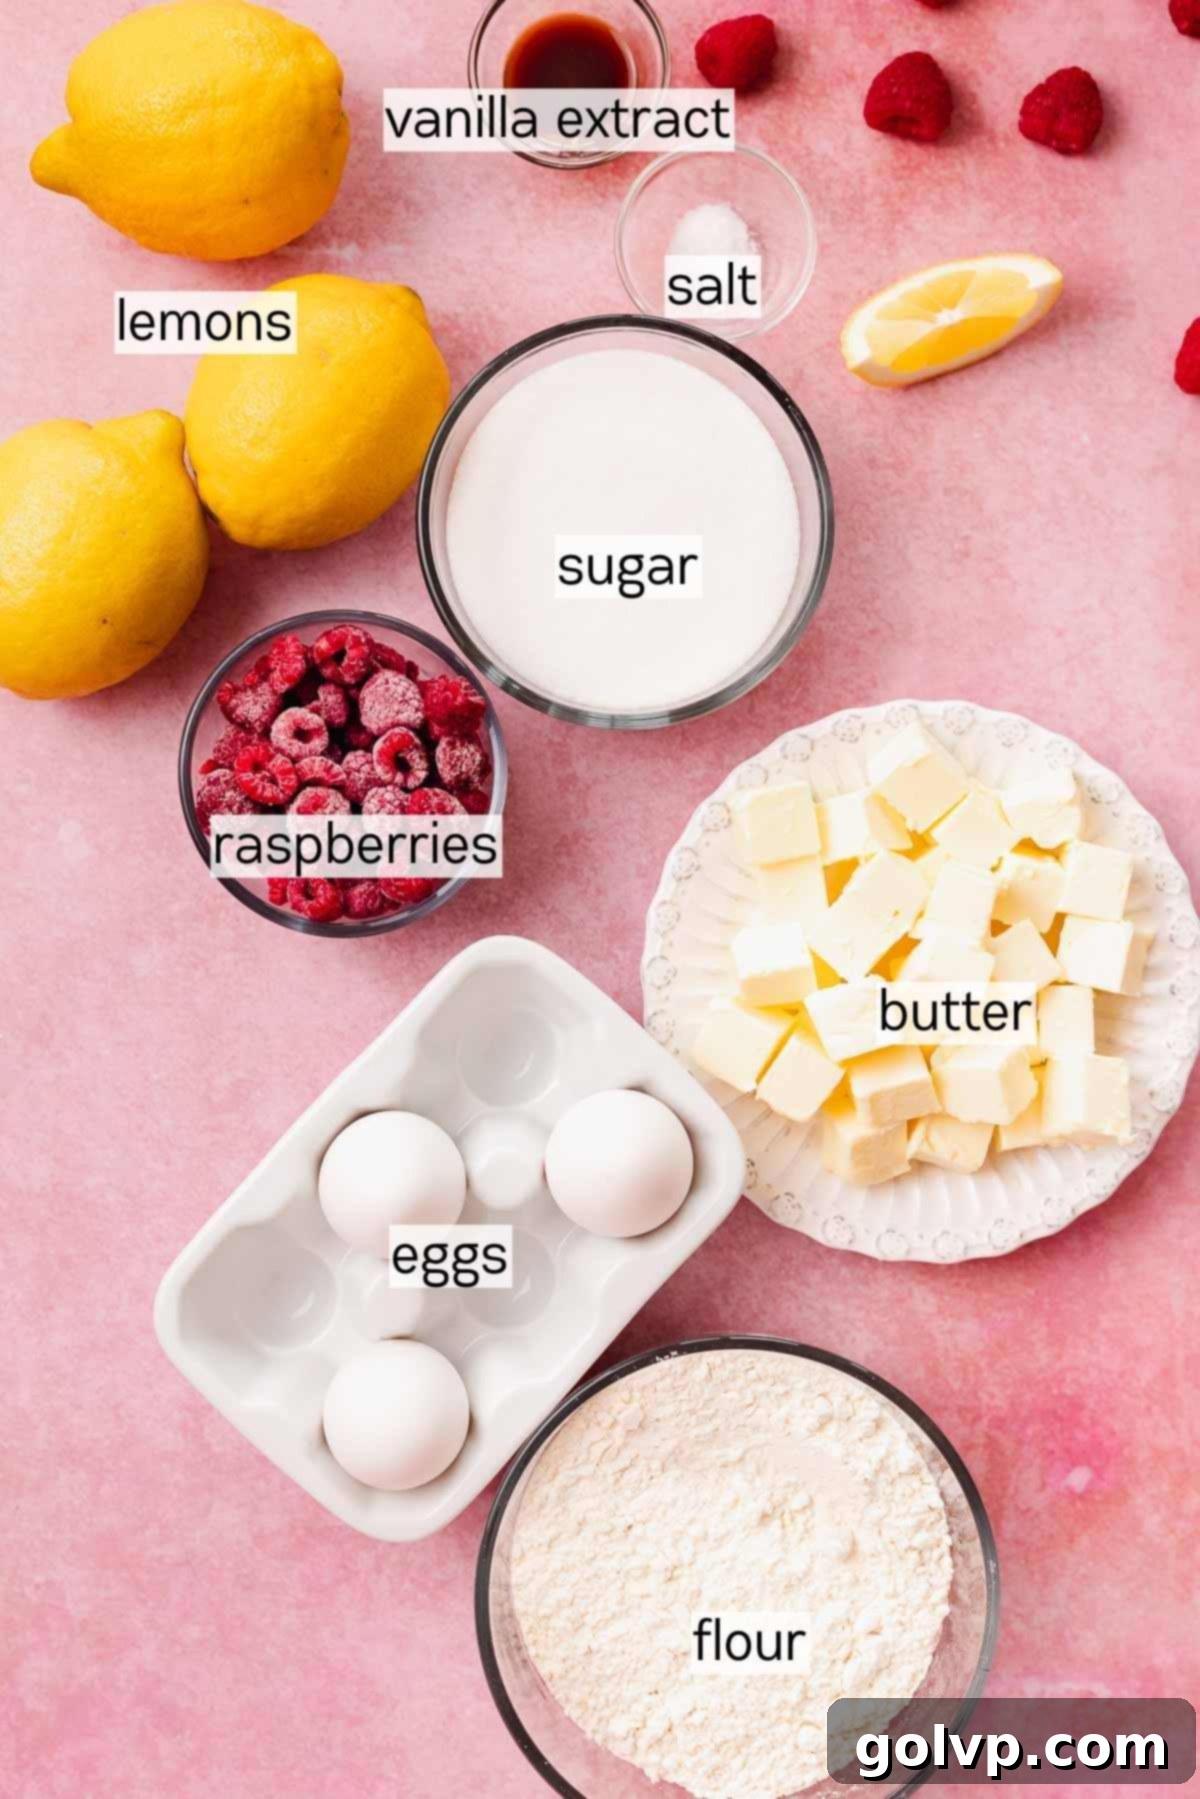
- Raspberries: You can use either fresh or frozen raspberries for this recipe. If you opt for frozen raspberries, be sure to thaw them completely before mashing and straining. Using ripe, flavorful raspberries is key to getting that beautiful tart-sweet balance in the filling.
- Lemons: Fresh lemons are non-negotiable for these bars! You’ll need the zest and juice from approximately 3-4 medium-sized lemons. The zest provides aromatic oils and intense lemon flavor, while fresh juice delivers a bright, tangy punch that bottled lemon juice simply cannot replicate. Bottled juice lacks the vibrant acidity and subtle nuances of fresh lemons, which are crucial for the filling’s signature taste.
- Eggs: Whole large eggs serve as the primary thickener for the creamy lemon raspberry filling. They also contribute to the luxurious richness and smooth texture, ensuring the filling sets beautifully without being rubbery.
- All-Purpose Flour: Accuracy in measuring flour is vital for both the shortbread crust and the filling. For the most consistent and tender results, we highly recommend weighing your flour using a kitchen scale. If you don’t have a scale, properly measure by fluffing the flour in its bag, then gently spooning it into a measuring cup without packing it down. Level off the excess with the flat edge of a knife. This prevents over-measuring, which can lead to a tough crust.
- Unsalted Butter: Essential for the rich, melt-in-your-mouth texture of the shortbread crust. Ensure it’s softened to room temperature for optimal creaming with sugar.
- Granulated Sugar: Provides sweetness and structure for both the crust and the filling, balancing the tartness of the lemon and raspberries.
- Vanilla Extract & Sea Salt: These ingredients enhance the overall flavor profile. Vanilla adds warmth to the crust, while a pinch of salt balances the sweetness and brightens the fruit flavors in both components.
For a classic, intensely lemony experience, you might also enjoy our Lemon Bars with Graham Cracker Crust.
✔️ Ingredient Substitutions for Lemon Raspberry Bars
While this recipe is perfected with the listed ingredients, a few mindful substitutions can adapt it to various dietary needs or preferences:
Gluten-Free Option: If you’re looking to make these delightful bars gluten-free, you can substitute the all-purpose flour with a 1:1 gluten-free flour blend. While I haven’t personally tested this specific adaptation, 1:1 blends are generally designed to work well in baked goods like shortbread and fillings. Ensure your chosen blend contains xanthan gum or add a small amount if it doesn’t, to help with structure.
Dairy-Free Option: For a dairy-free version, swap the unsalted butter in the shortbread crust with a high-quality dairy-free butter substitute that comes in a stick or brick form. Avoid using margarine, as its higher water content and different fat composition can significantly alter the texture of the shortbread, making it less tender and crumbly. Look for plant-based butter specifically formulated for baking.
Exploring Other Berries: While lemon raspberry is a stellar combination, feel free to experiment with other berries to create new flavor variations! Blueberries or strawberries could be fantastic alternatives. The key is to prepare them correctly: mash your chosen berries thoroughly and then pass them through a fine-mesh sieve to remove any seeds or large pieces, creating a smooth puree. Ensure you measure out exactly a quarter cup of this berry puree to maintain the filling’s consistency and moisture balance. This process ensures your filling remains smooth and gooey, regardless of the berry you choose.
If you enjoy tangy cookies, you’ll love these Lemon Curd Cookies, featuring a delightful crinkle cookie filled with luscious lemon curd in the center for an equally vibrant and zesty treat.
👩🍳 How to Make the Best Lemon Raspberry Bars
Creating these irresistible lemon raspberry bars is a straightforward process divided into two main components: the rich, buttery shortbread crust and the vibrant, tangy lemon raspberry filling. Follow these detailed steps to ensure a perfect batch every time.
Crust Step-by-Step Guide

Step 1: Prepare Your Baking Pan. Start by preheating your oven to 355°F (180°C). Lightly brush or wipe the inside of an 8-inch square baking pan with a thin layer of oil. This helps the parchment paper adhere. To line the pan effectively, cut a square of parchment paper a few inches larger than your pan. Place the pan in the center of the parchment, then make one straight slit on each side of the paper, extending from the edge towards the corner of the baking pan. This allows the paper to fit snugly into the pan, with the flaps neatly tucked in, creating a perfect non-stick lining (refer to the photo for visual guidance).
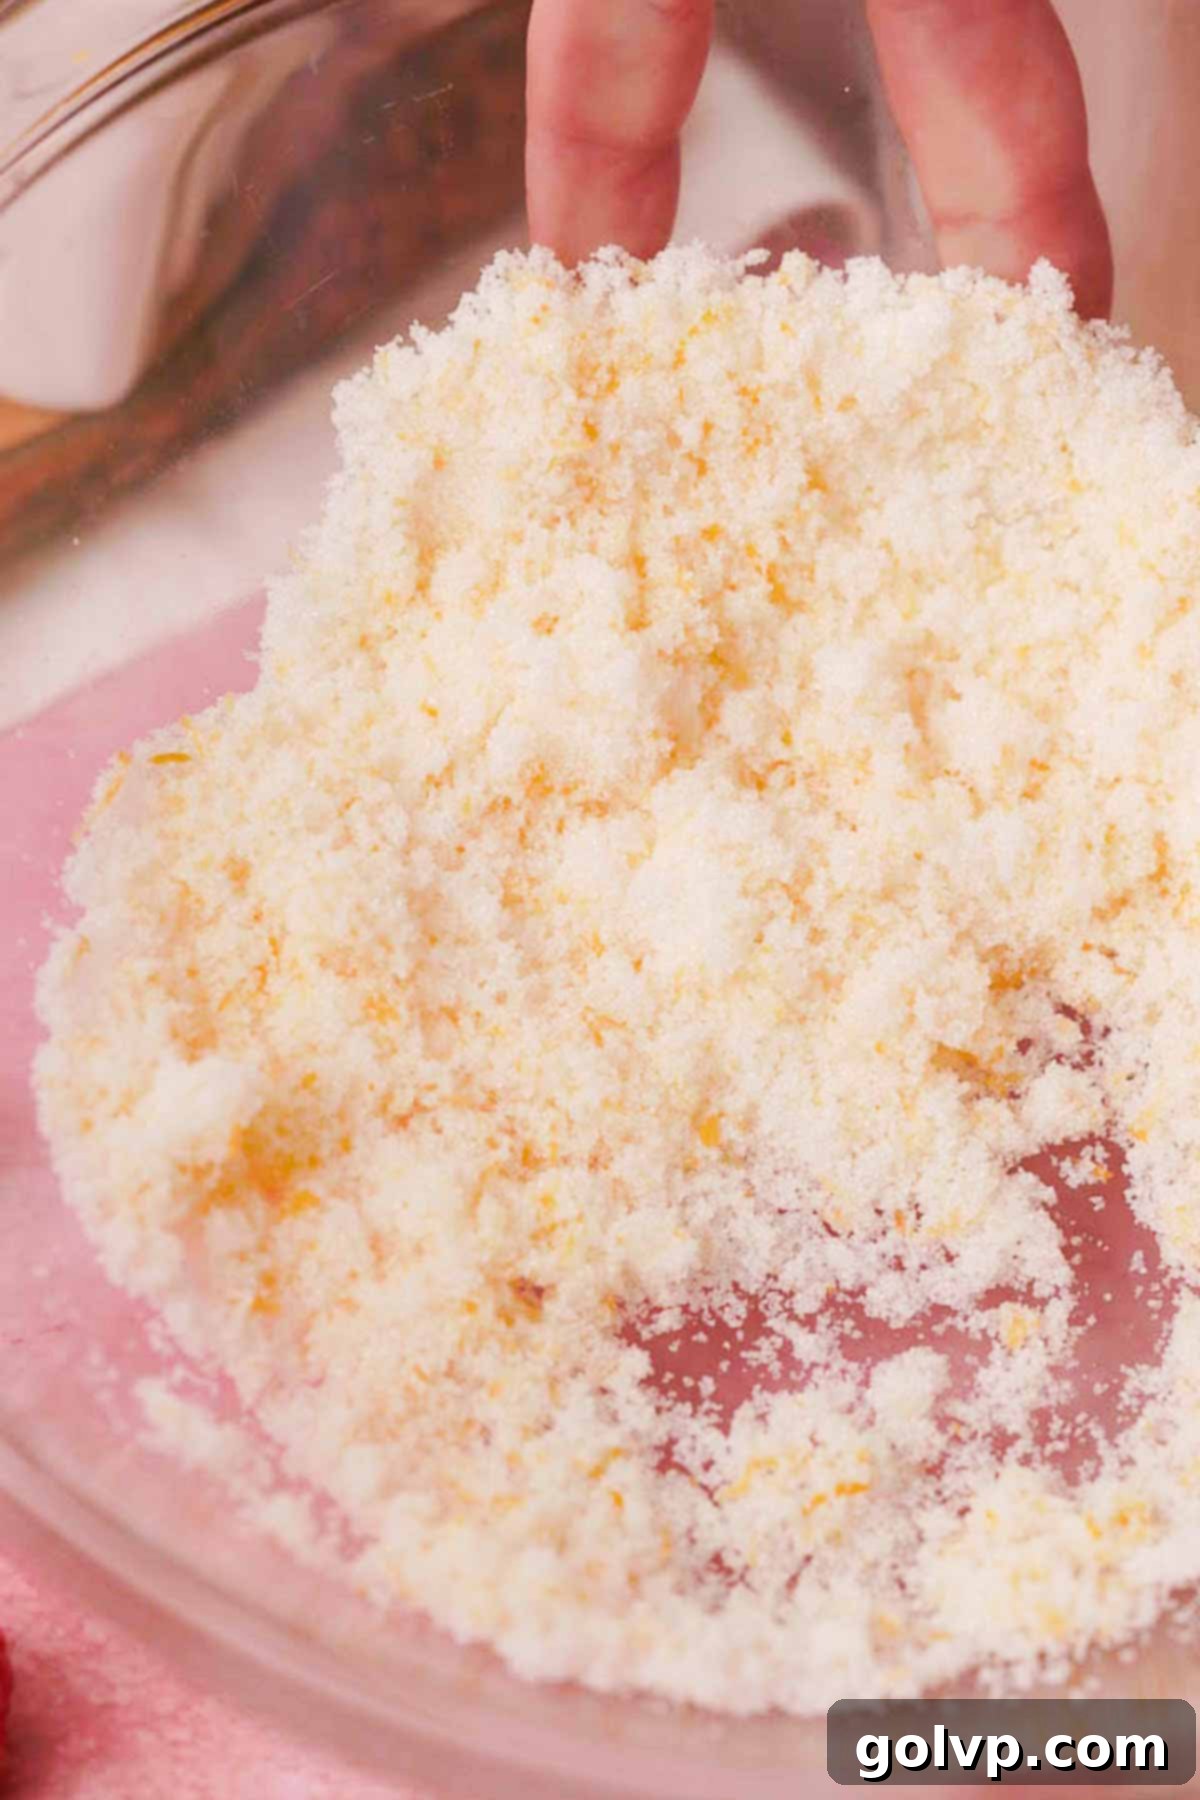
Step 2: Infuse the Sugar with Lemon Zest. In a large glass bowl or the bowl of a stand mixer, combine the granulated sugar and the freshly grated lemon zest. Use your fingertips to rub the zest into the sugar. This crucial step helps release the aromatic oils from the lemon zest, infusing the sugar with a deep, fragrant lemon flavor and slightly moistening it. You’ll notice the sugar becoming beautifully yellow and fragrant.
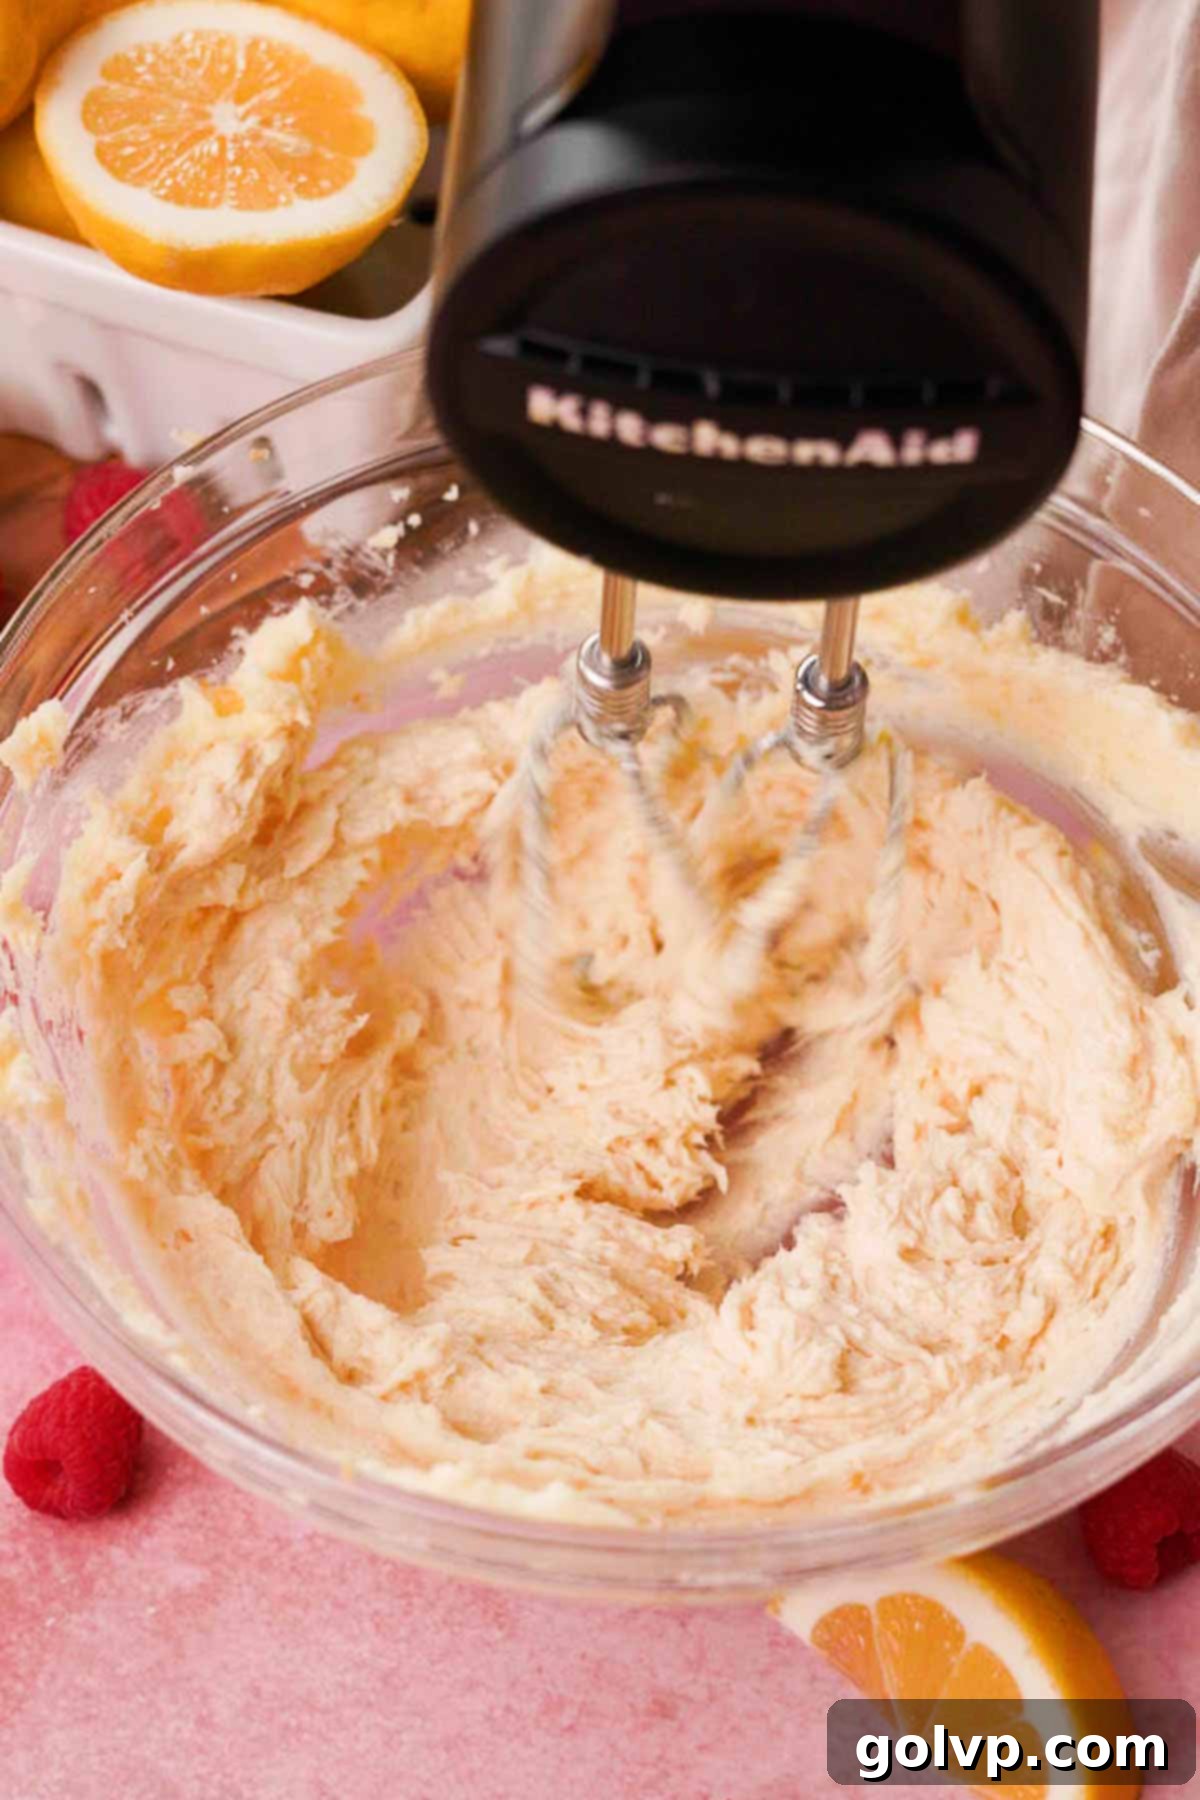
Step 3: Cream Butter and Lemon Sugar. Add the softened unsalted butter into the lemon-infused sugar mixture. Using an electric mixer (handheld or stand mixer), beat the mixture on medium speed until it becomes smooth, creamy, and significantly lighter in color and fluffier in texture. Stop periodically to scrape down the sides and bottom of the bowl with a spatula to ensure all ingredients are consistently incorporated. Finally, add the pure vanilla extract and sea salt, beating briefly until just combined.
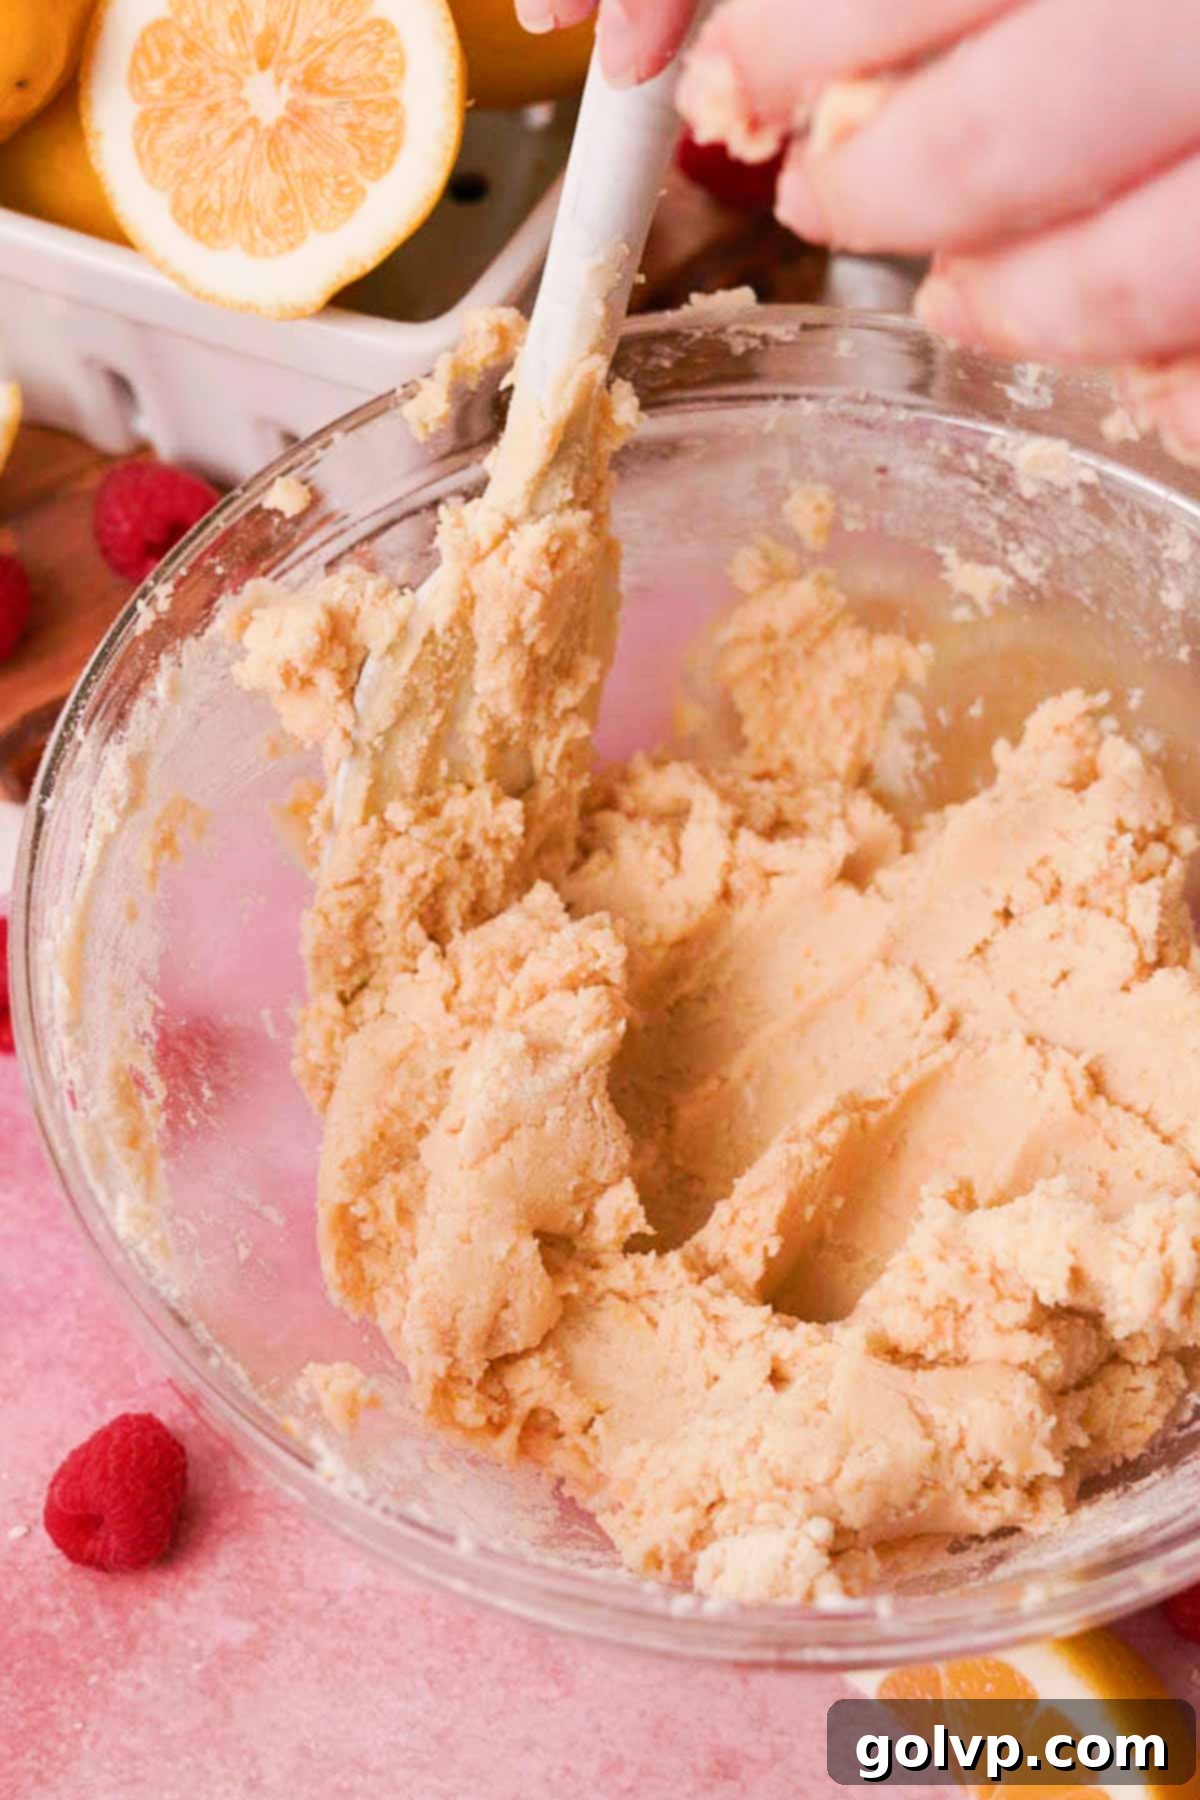
Step 4: Incorporate the Flour. Sift the all-purpose flour directly into the butter mixture. Using a spatula or wooden spoon, gently fold the flour into the wet ingredients. Mix just until no dry streaks of flour are visible. It’s crucial not to overmix the dough at this stage, as over-developing the gluten can result in a tough, rather than tender, shortbread crust. Stop as soon as the flour is fully incorporated.
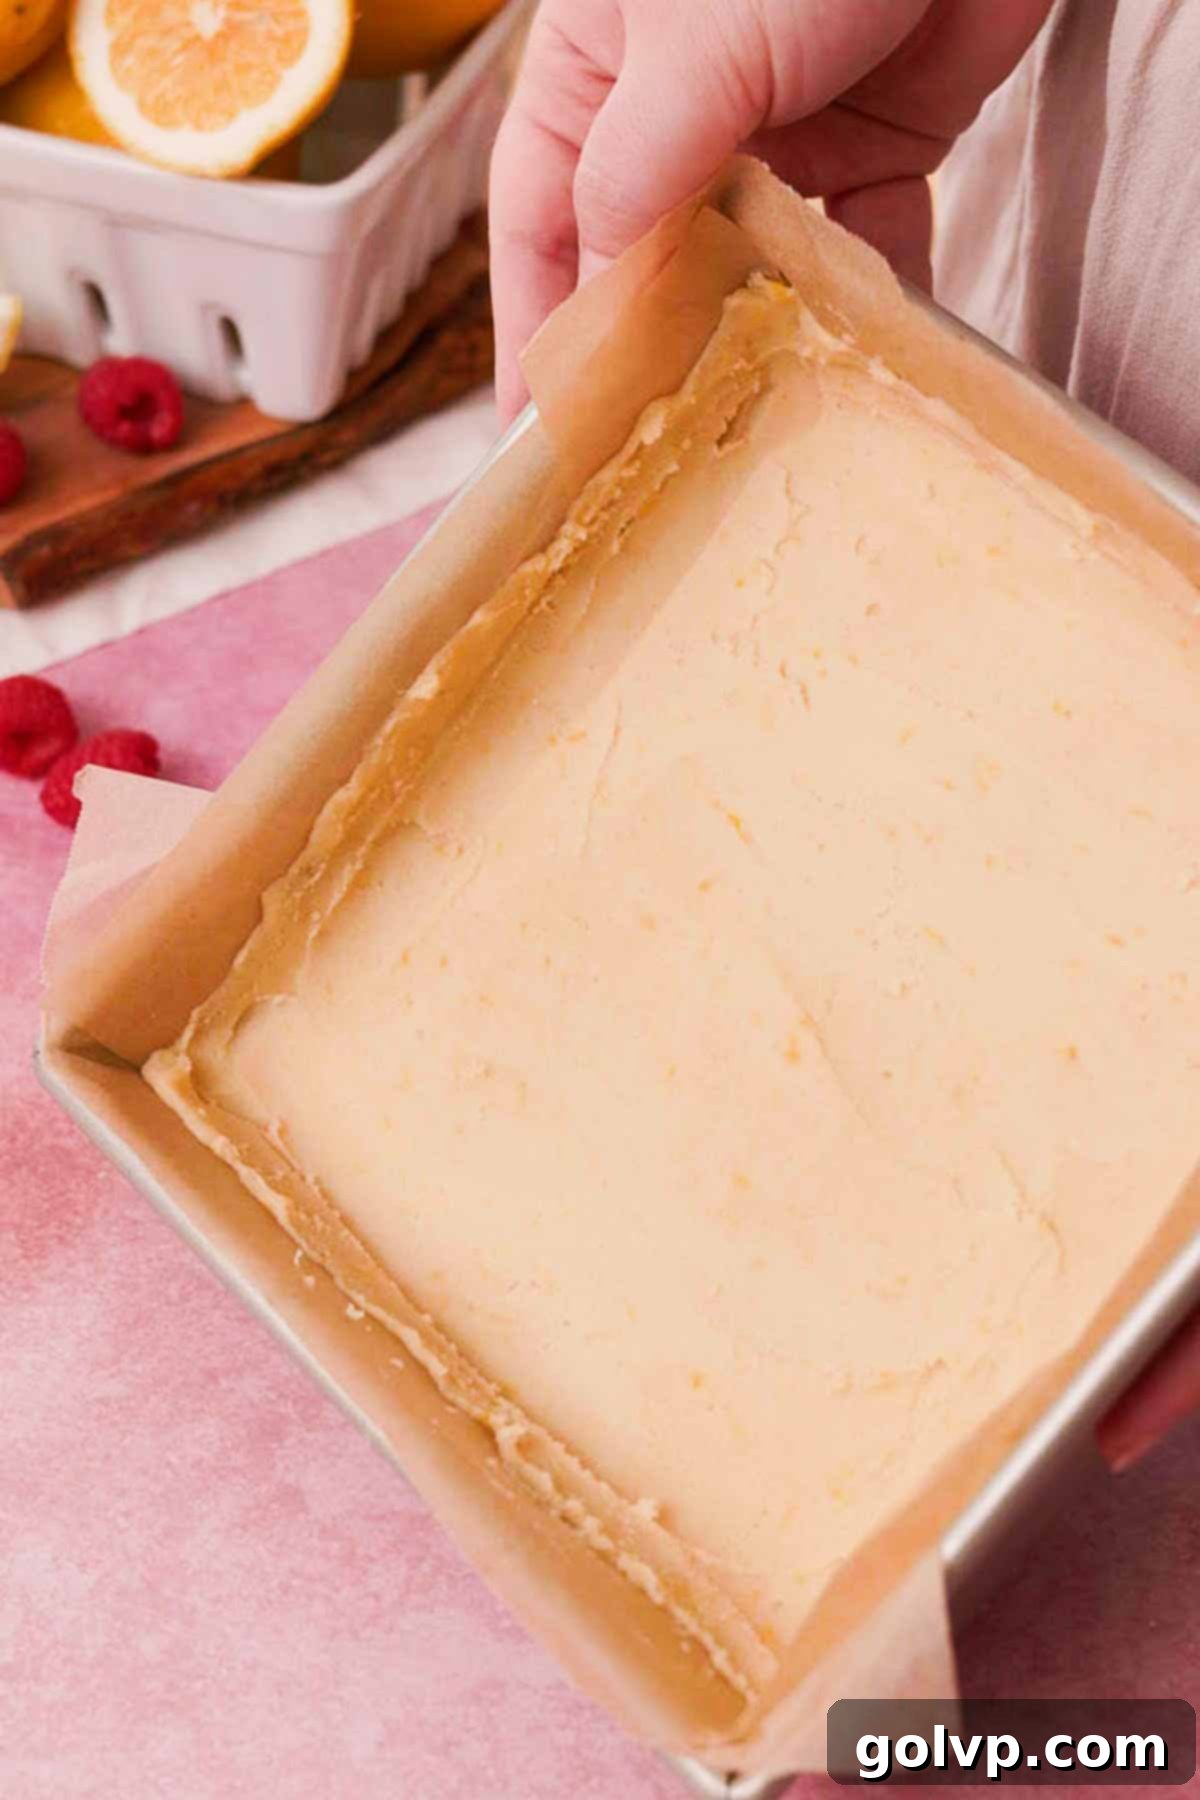
Step 5: Press the Crust into the Pan. Transfer the shortbread dough into your prepared, parchment-lined baking pan. Using your fingertips or the back of a spoon, press the dough out into an even layer across the bottom of the pan. Crucially, push a thin layer of dough up the sides of the pan to create a slight border or edge. This raised border acts as a protective barrier, preventing the gooey lemon raspberry filling from seeping underneath the crust during baking and becoming a sticky mess.
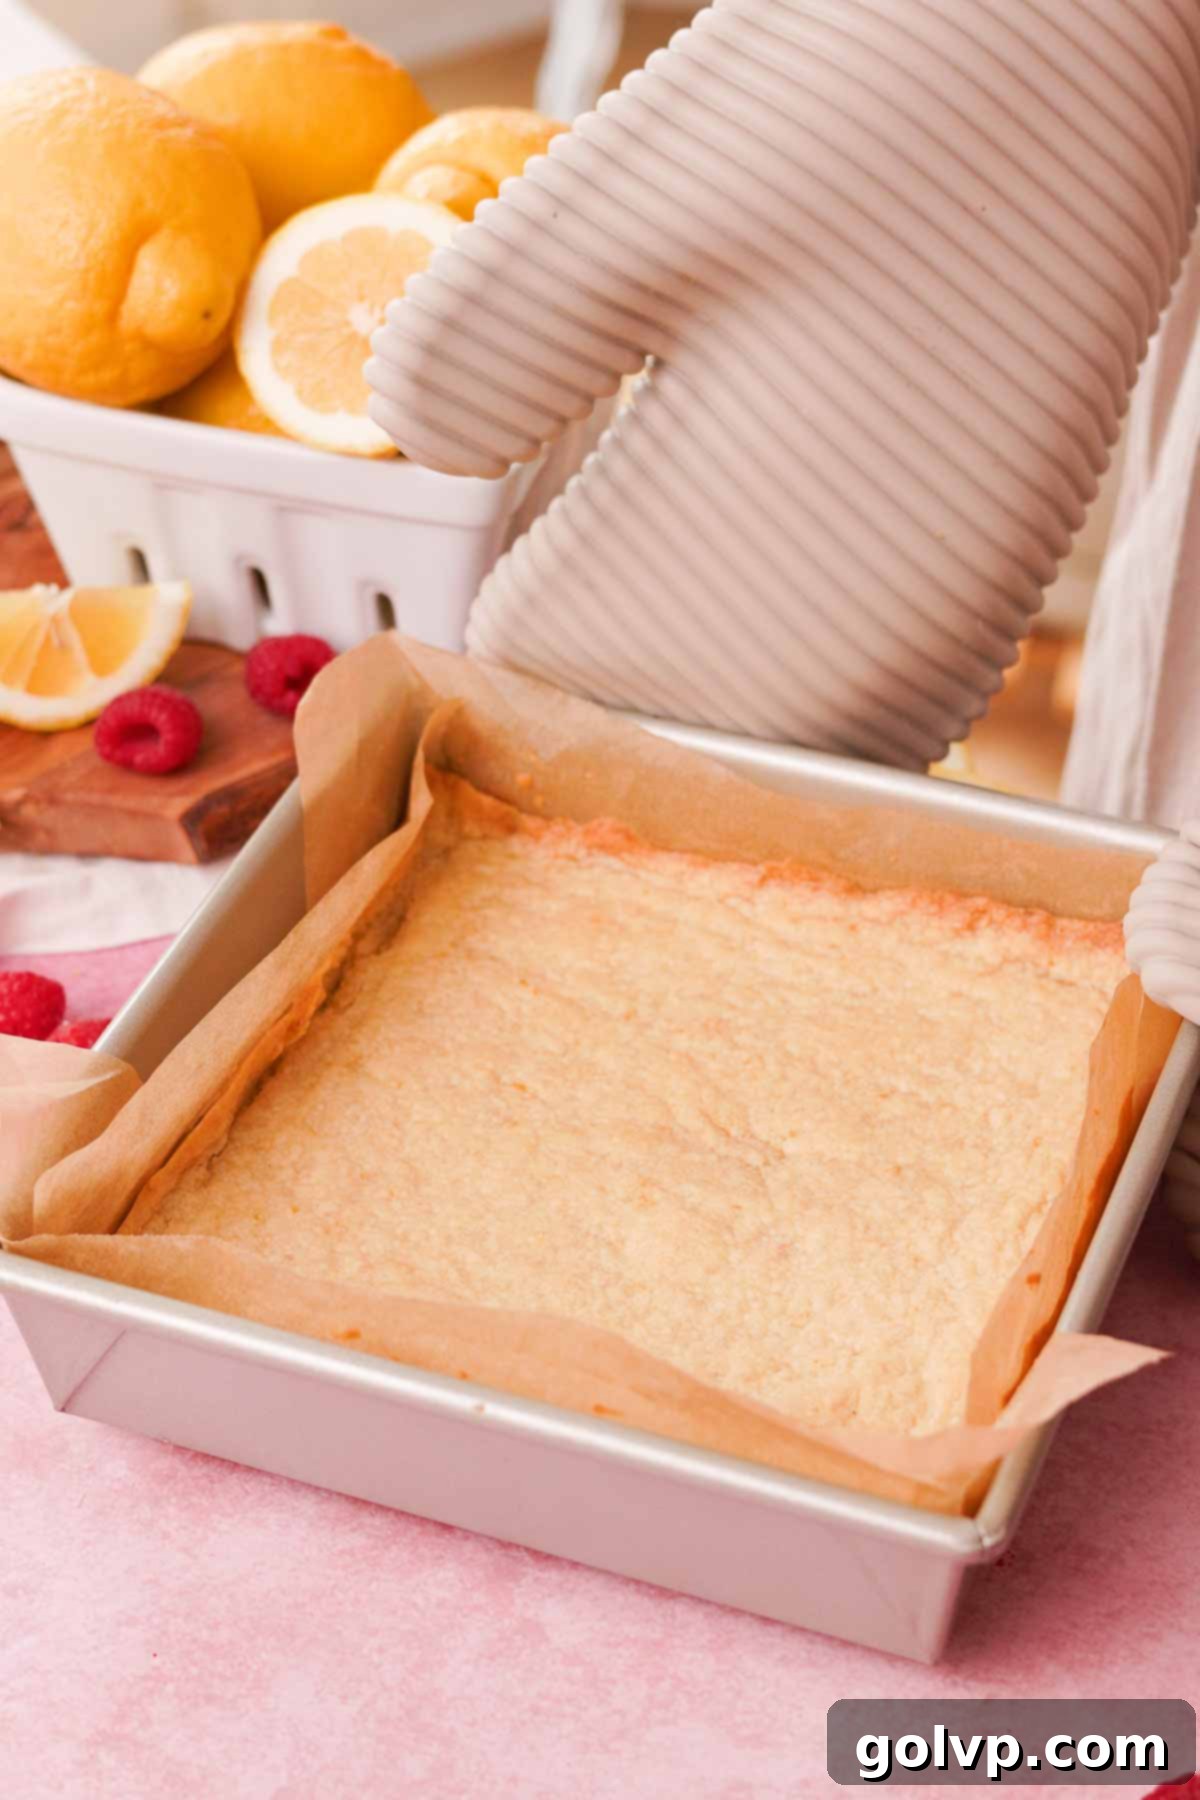
Step 6: Bake the Shortbread Crust. Place the pan with the crust into the preheated oven and bake for 20-25 minutes. The crust is ready when the edges are lightly golden brown and the surface no longer appears shiny or wet. While the crust is baking, you can begin preparing the lemon raspberry filling, ensuring a smooth transition between steps.
✔️ Expert Shortbread Crust Tips for Perfection
- Precision with Flour Measurement: To achieve the most consistently tender and crumbly shortbread crust every single time, utilizing a kitchen scale to weigh your flour is highly recommended. If you don’t own a scale, be meticulous with your cup measurements: gently stir the flour in its bag to aerate it, then spoon it lightly into a dry measuring cup without packing. Level off any excess with the flat edge of a knife. Over-compacted flour leads to a denser, tougher crust.
- Avoid Overmixing the Dough: The moment you incorporate the flour into the butter mixture, exercise restraint. Mix the dough only until the last dry streaks of flour have just disappeared. Continuing to mix beyond this point will overdevelop the gluten, resulting in a shortbread crust that is tough and bread-like, rather than crumbly and tender.
- Crucial Border Creation: Always ensure you form at least a thin, elevated border of crust dough around the entire perimeter of your baking pan. This raised edge is not merely for aesthetics; it acts as a vital barrier to contain the liquid filling. Without it, the filling can seep underneath the crust during baking, creating a messy, hard-to-remove dessert.
- Ensure Complete Baking: A perfectly baked shortbread crust is key. It’s ready when its surface has lost its raw, shiny appearance, and the edges have turned a delicate golden brown. An underbaked crust can lead to a soggy foundation, while an overbaked one can become too hard.
Filling Step-by-Step Guide
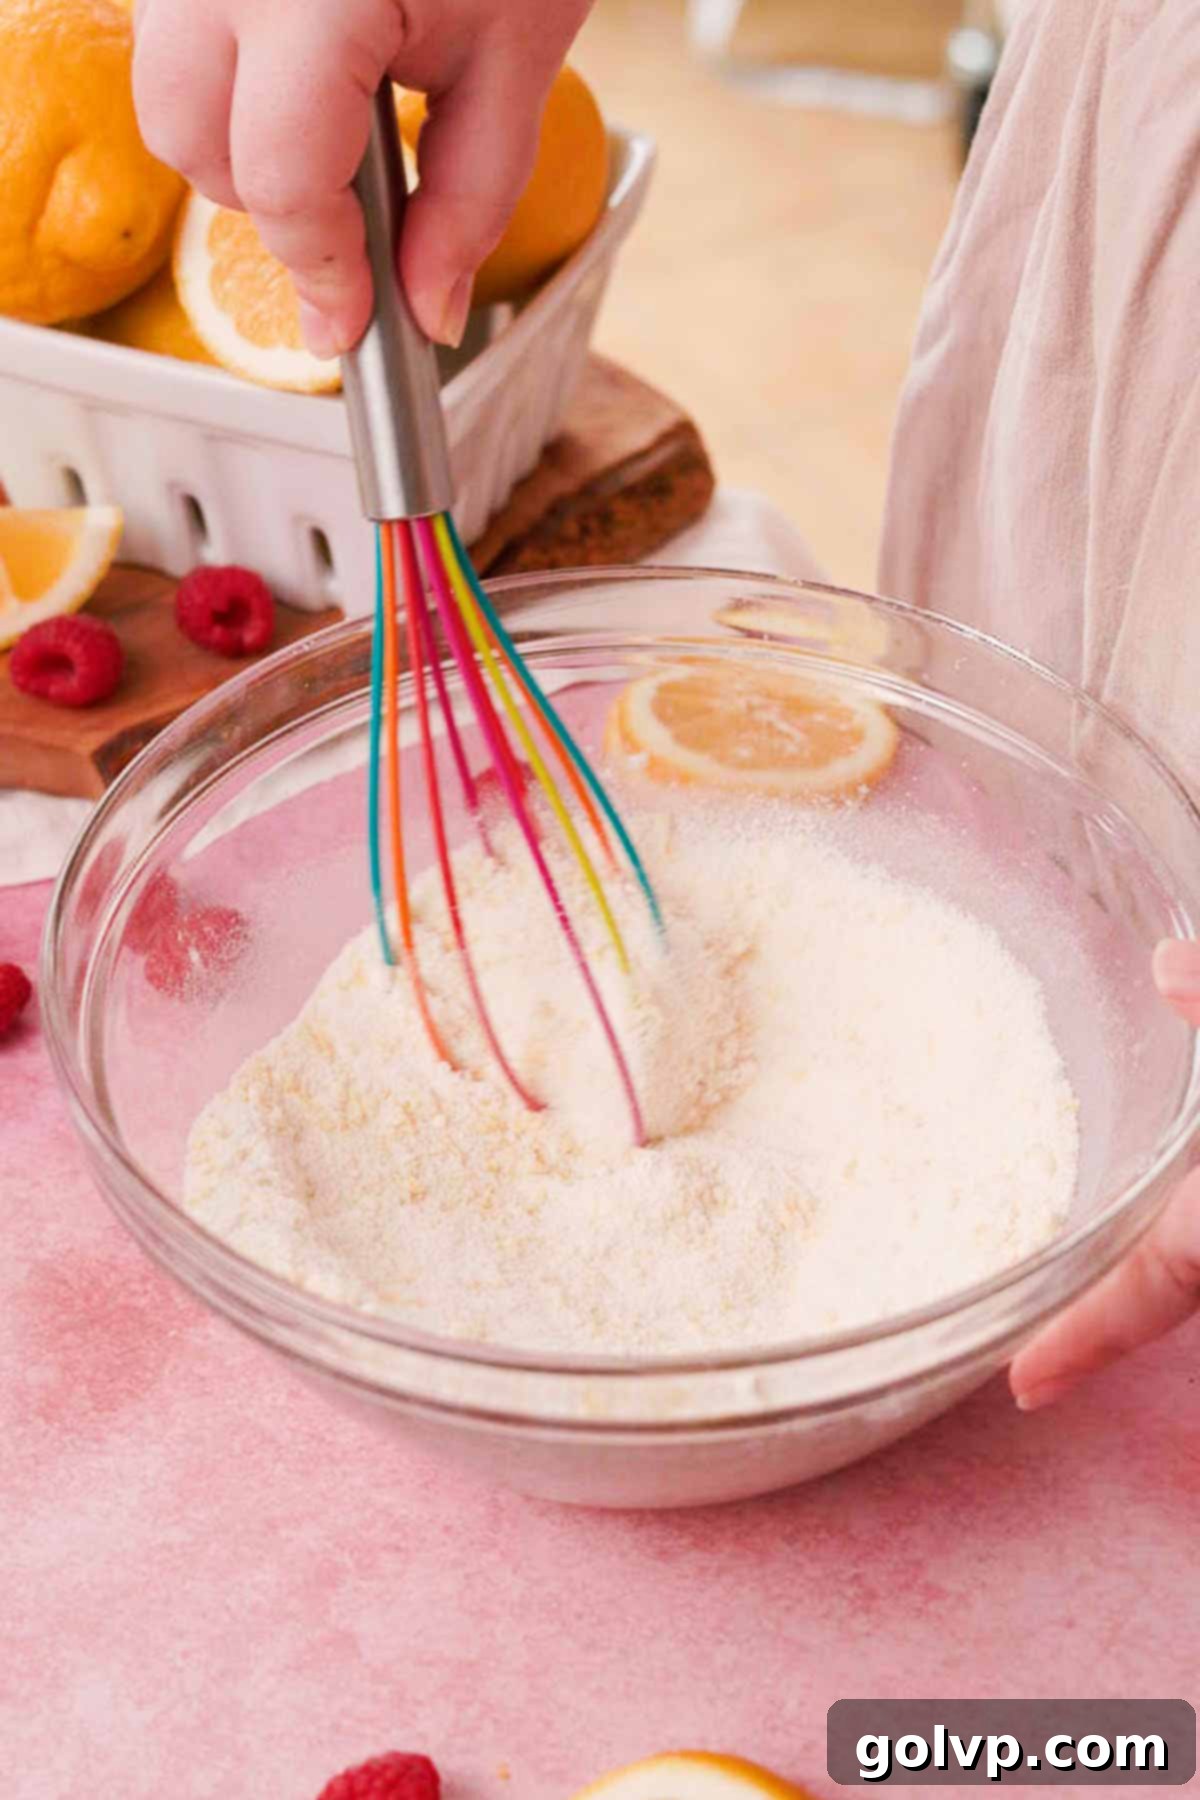
Step 1: Infuse Sugar with Lemon Zest (Again!). In a large, non-metal bowl (this is important to prevent any metallic taste from reacting with the lemon acid), combine the granulated sugar with the grated lemon zest. Use your fingers to rub them together until the mixture is beautifully fragrant and moist, turning a soft yellow color. Then, add the all-purpose flour and whisk thoroughly to eliminate any potential lumps, ensuring a smooth filling.
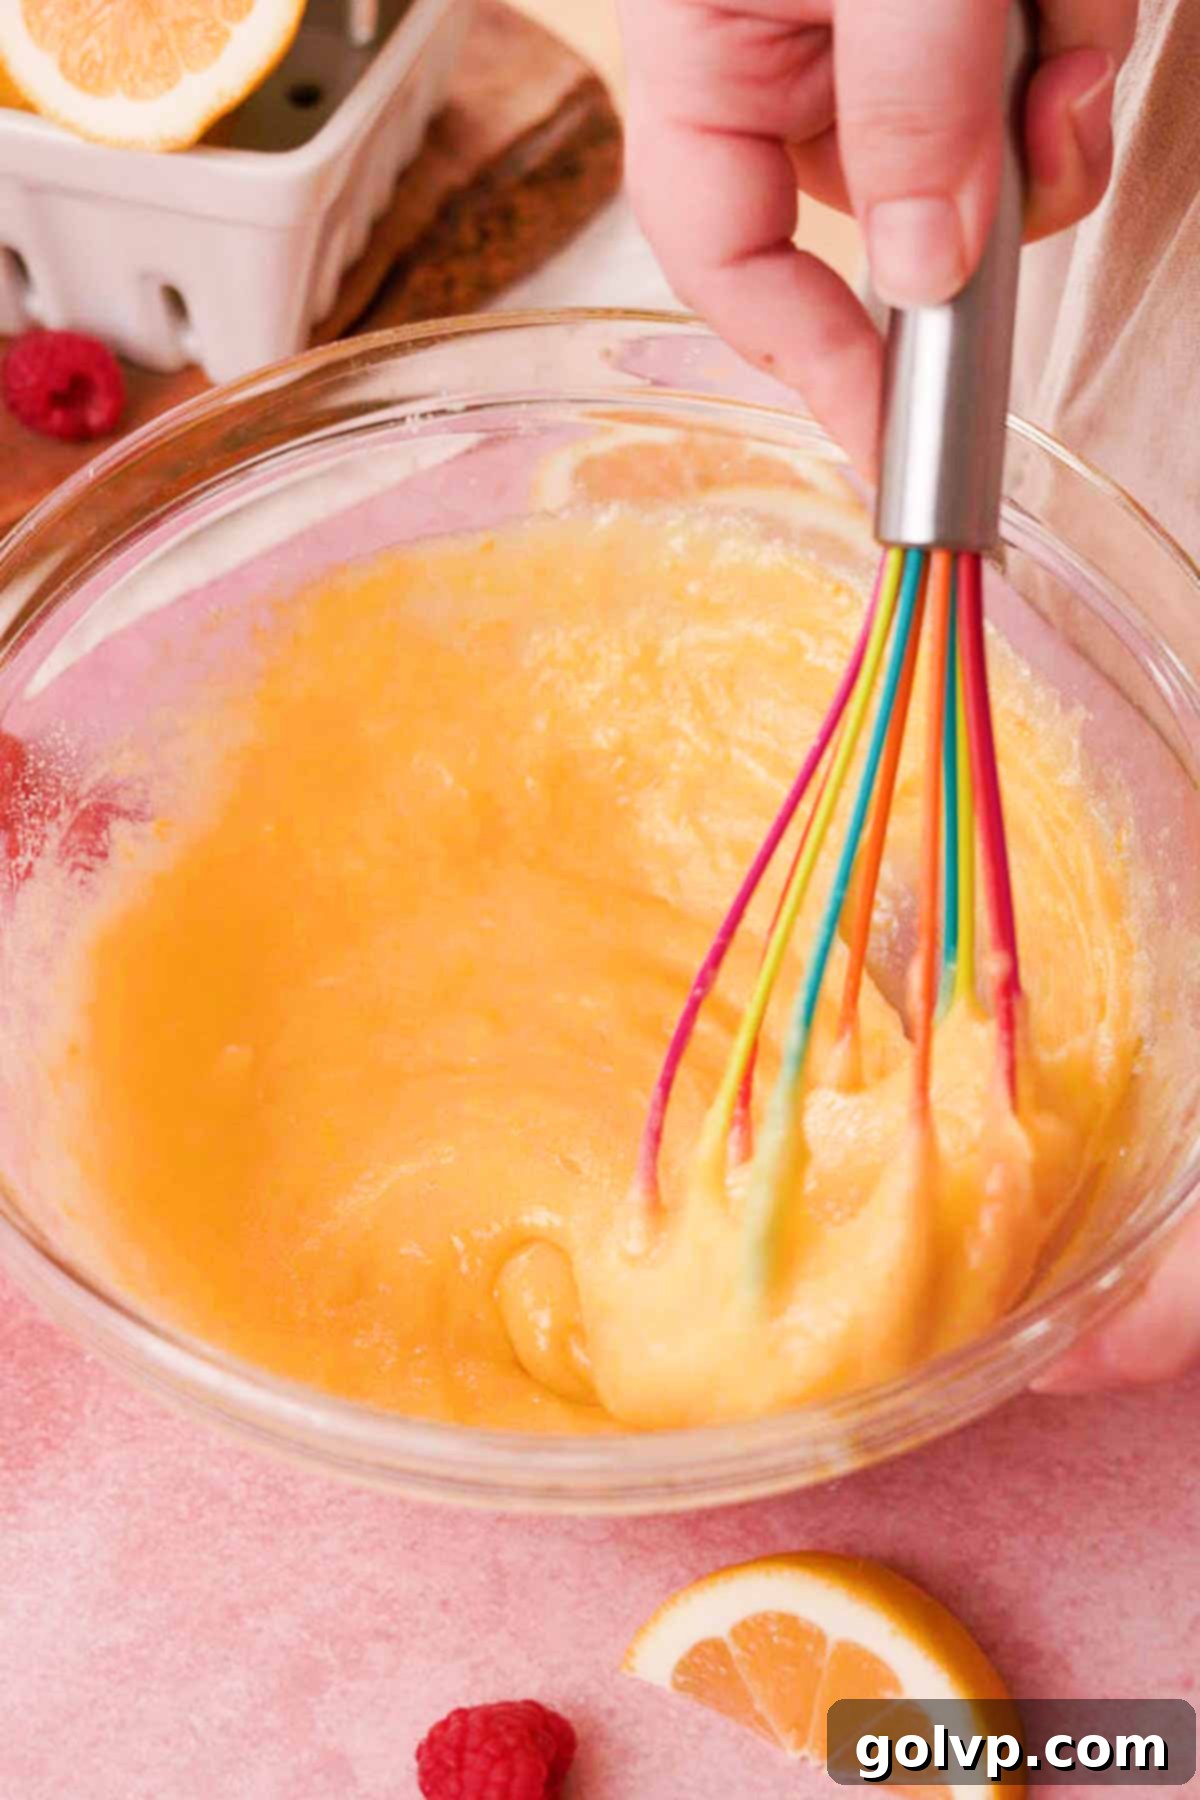
Step 2: Gently Add Eggs and Salt. Incorporate the eggs and a pinch of salt into the lemon sugar-flour mixture. Whisk very gently by hand, just until the eggs are fully smooth and integrated into the mixture. The goal here is to combine, not aerate. Overmixing will introduce too many air bubbles, which can cause an undesirable texture and pockmarks on the surface of your finished bars.
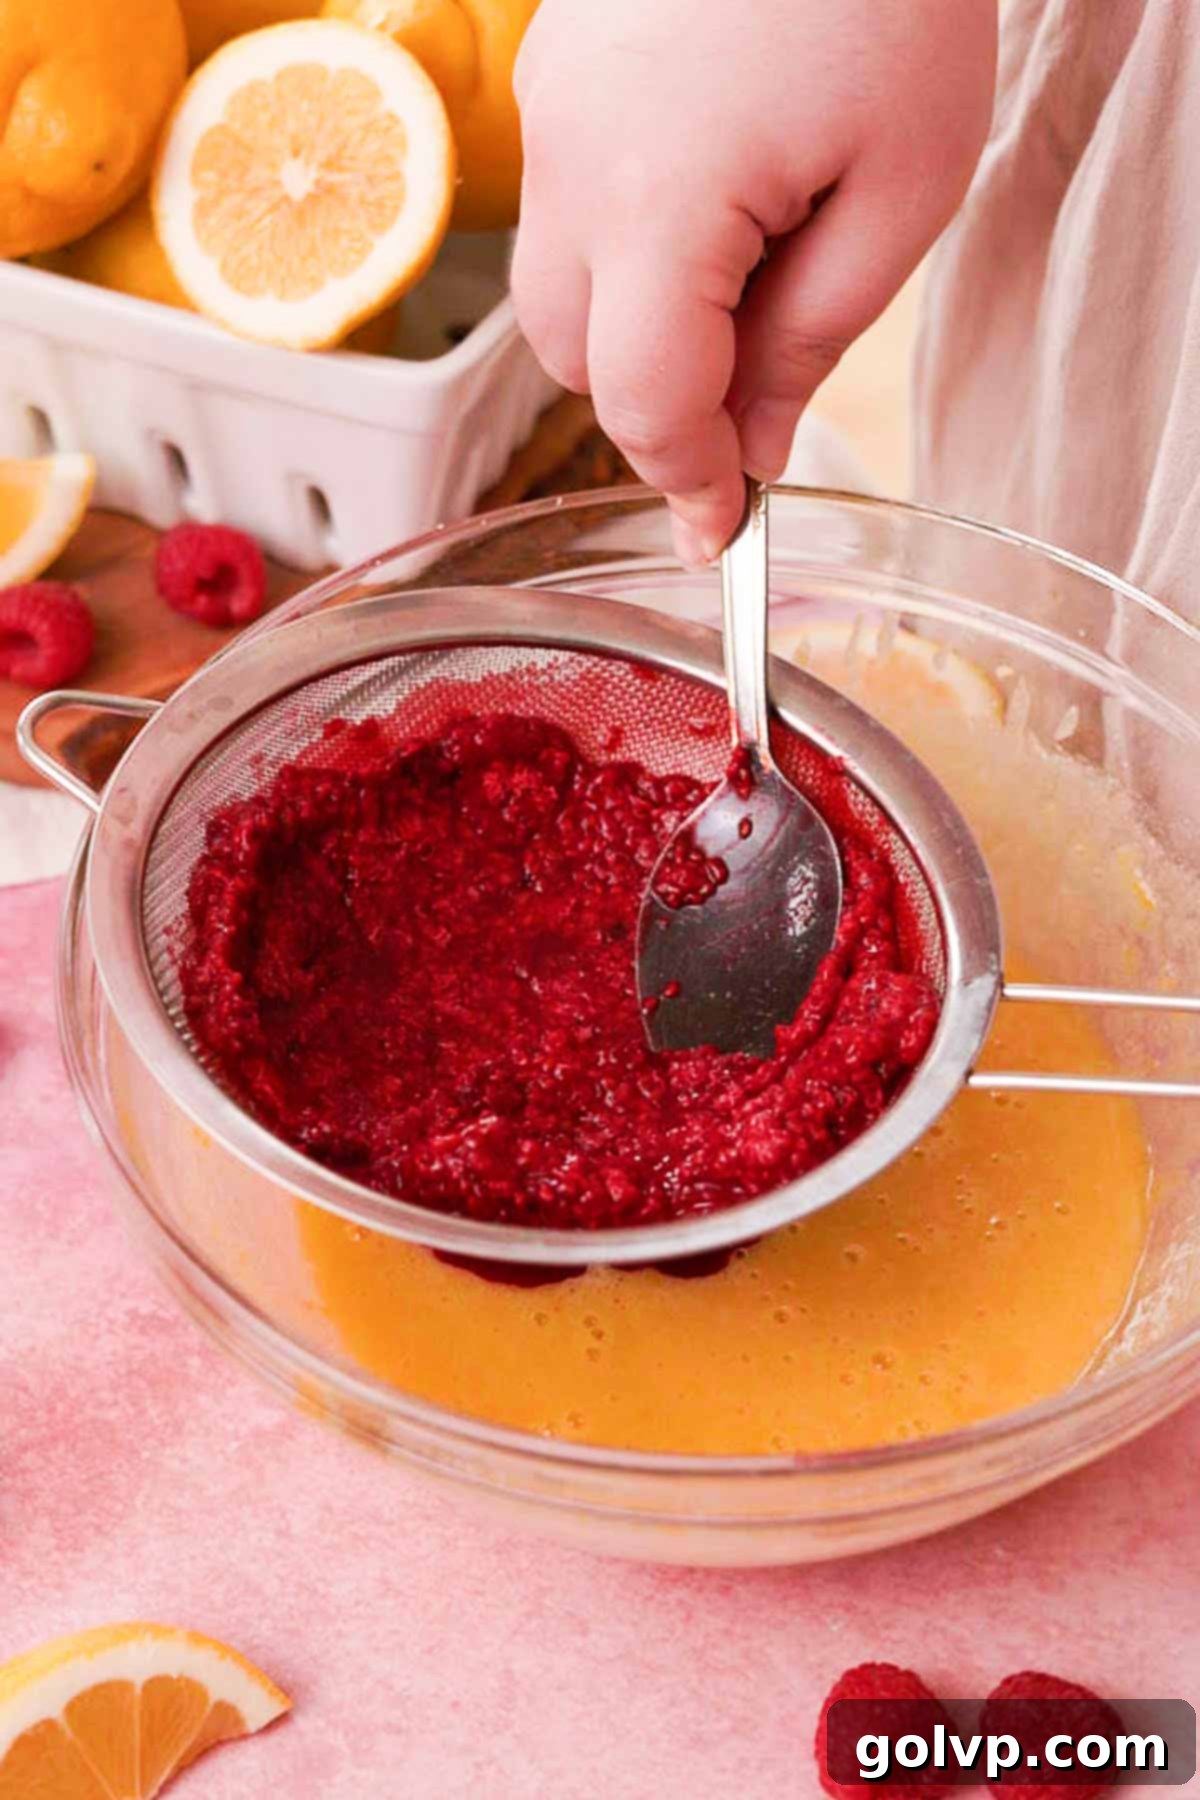
Step 3: Prepare Raspberry Puree. Mash your defrosted raspberries thoroughly. To achieve a silky-smooth filling free of seeds, push the mashed berries through a fine-mesh sieve into a separate bowl. Measure this puree – you need exactly ¼ cup. If your puree is slightly less than ¼ cup, add a tiny bit of water to reach the required volume. This ensures the correct liquid balance in the filling. Discard the seeds.
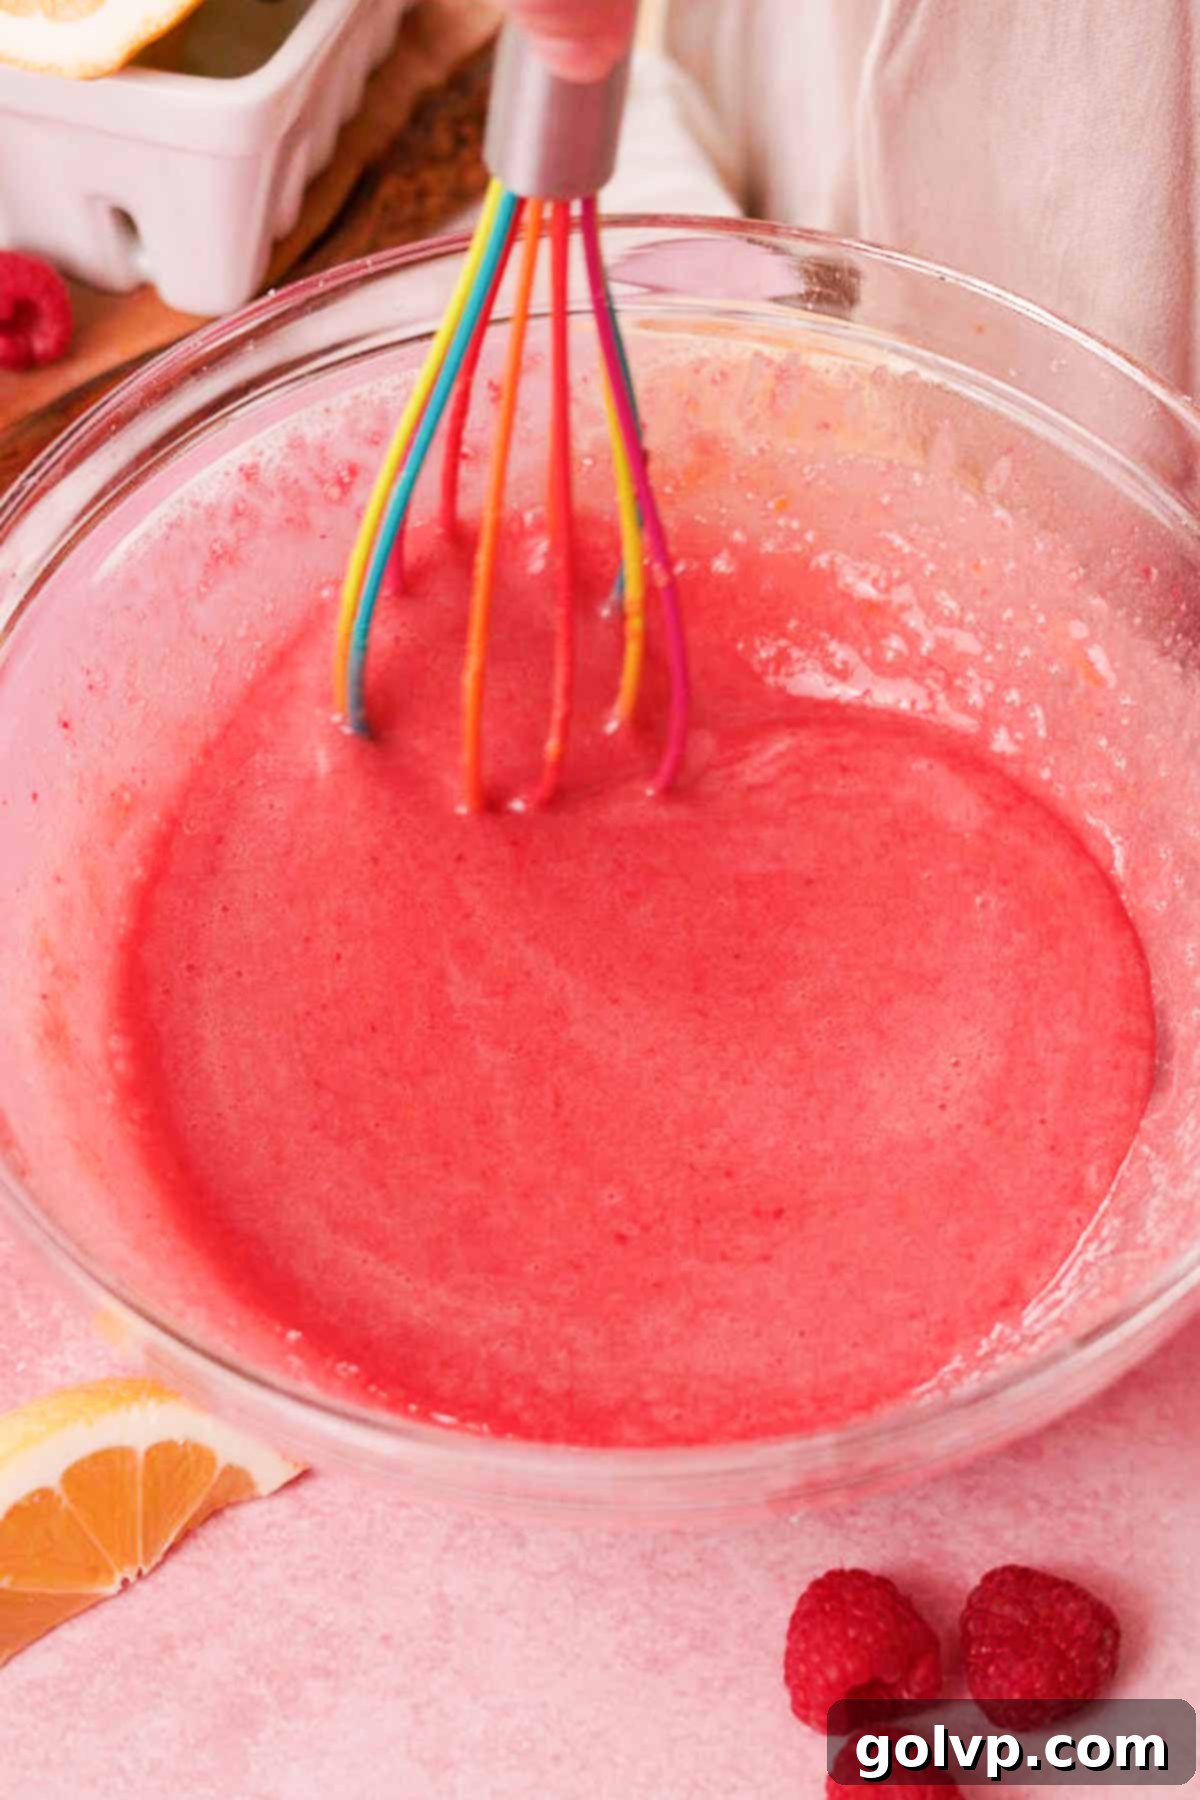
Step 4: Combine Filling Ingredients. Pour the freshly squeezed lemon juice and the prepared raspberry puree into the egg-sugar mixture. Whisk everything gently until all the ingredients are fully combined and the mixture is a beautiful, uniform pink color. Again, avoid vigorous whisking to prevent excess air bubbles.
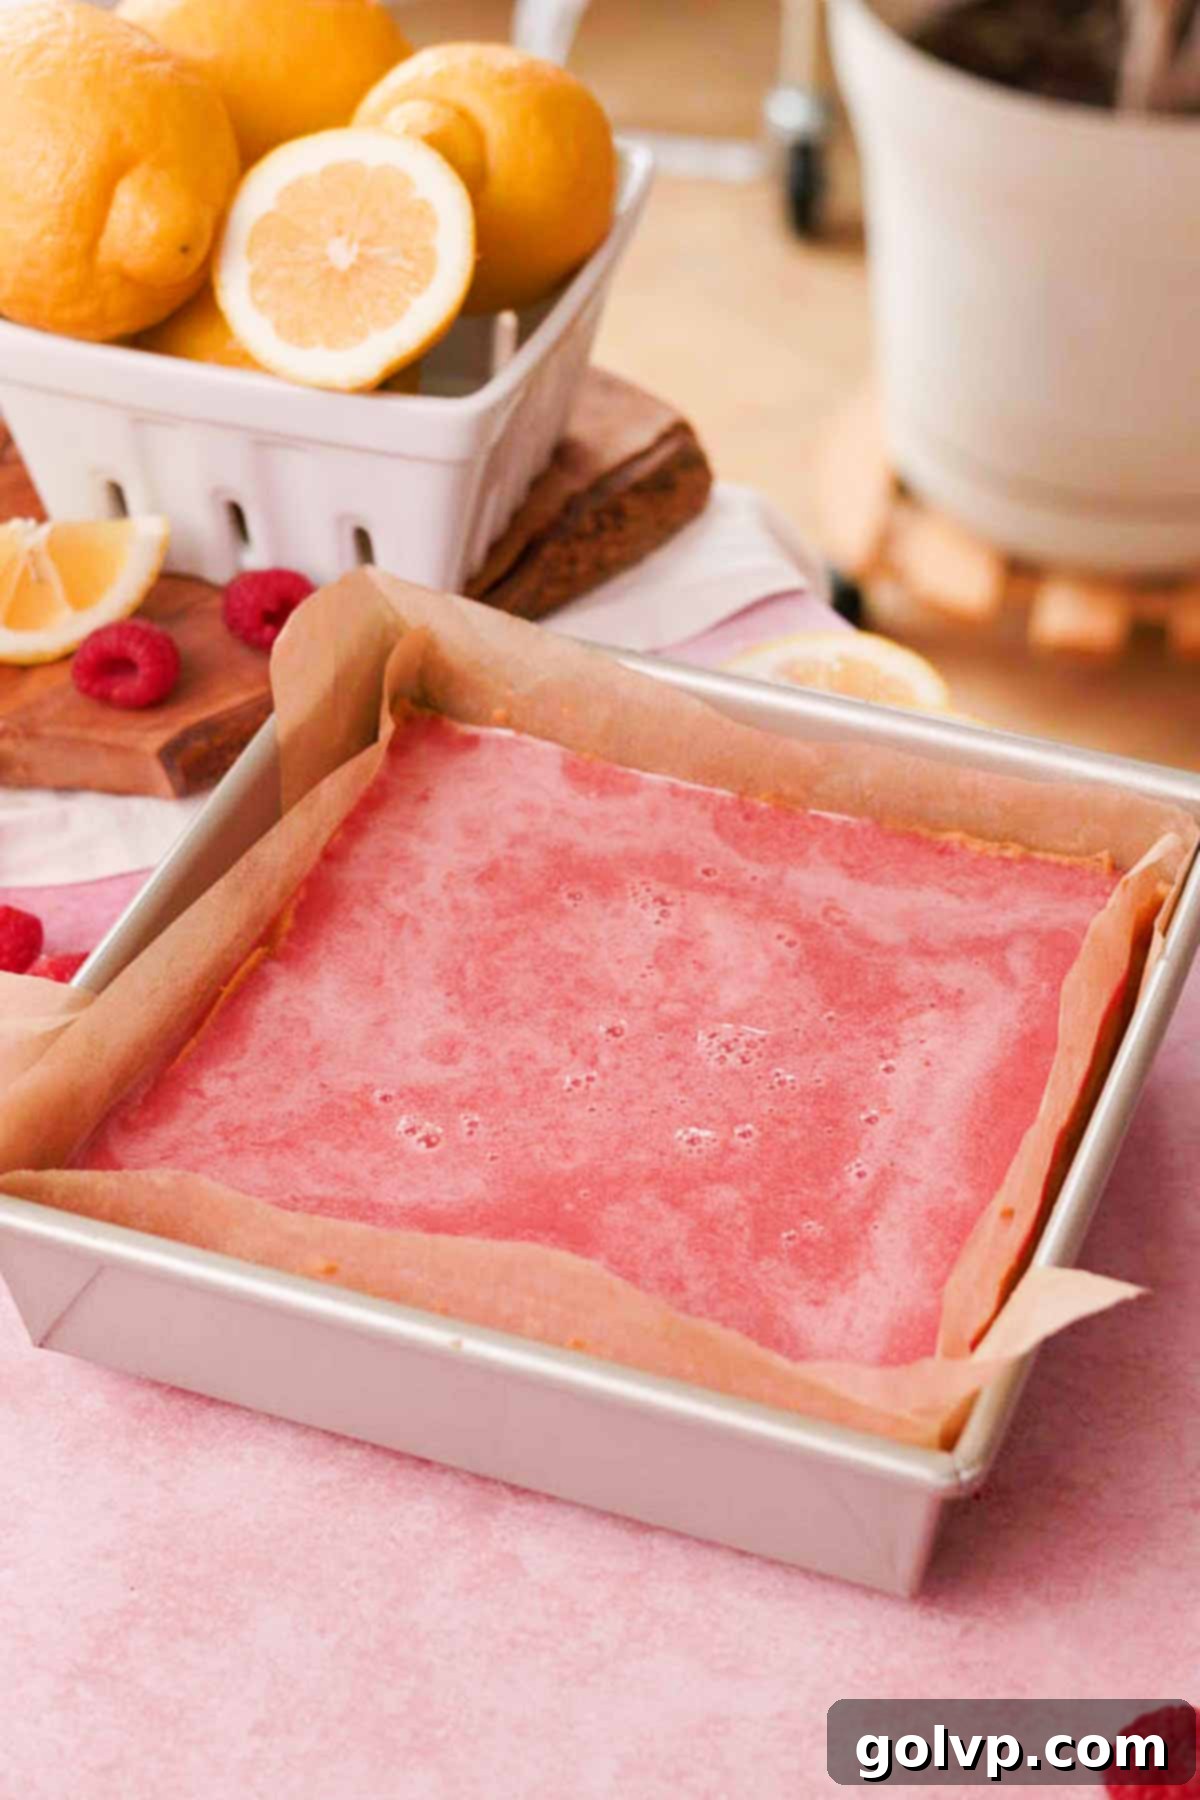
Step 5: Pour Filling Over Warm Crust. As soon as your shortbread crust is done baking, carefully remove the pan from the oven. Resist the urge to adjust the parchment paper or disturb the crust, as this could detach it from the pan sides and create gaps. Immediately and carefully pour the prepared lemon raspberry filling evenly over the warm crust. If you notice any large air bubbles on the surface, gently pop them with a toothpick or lightly pass a kitchen torch over the top to smooth them out.
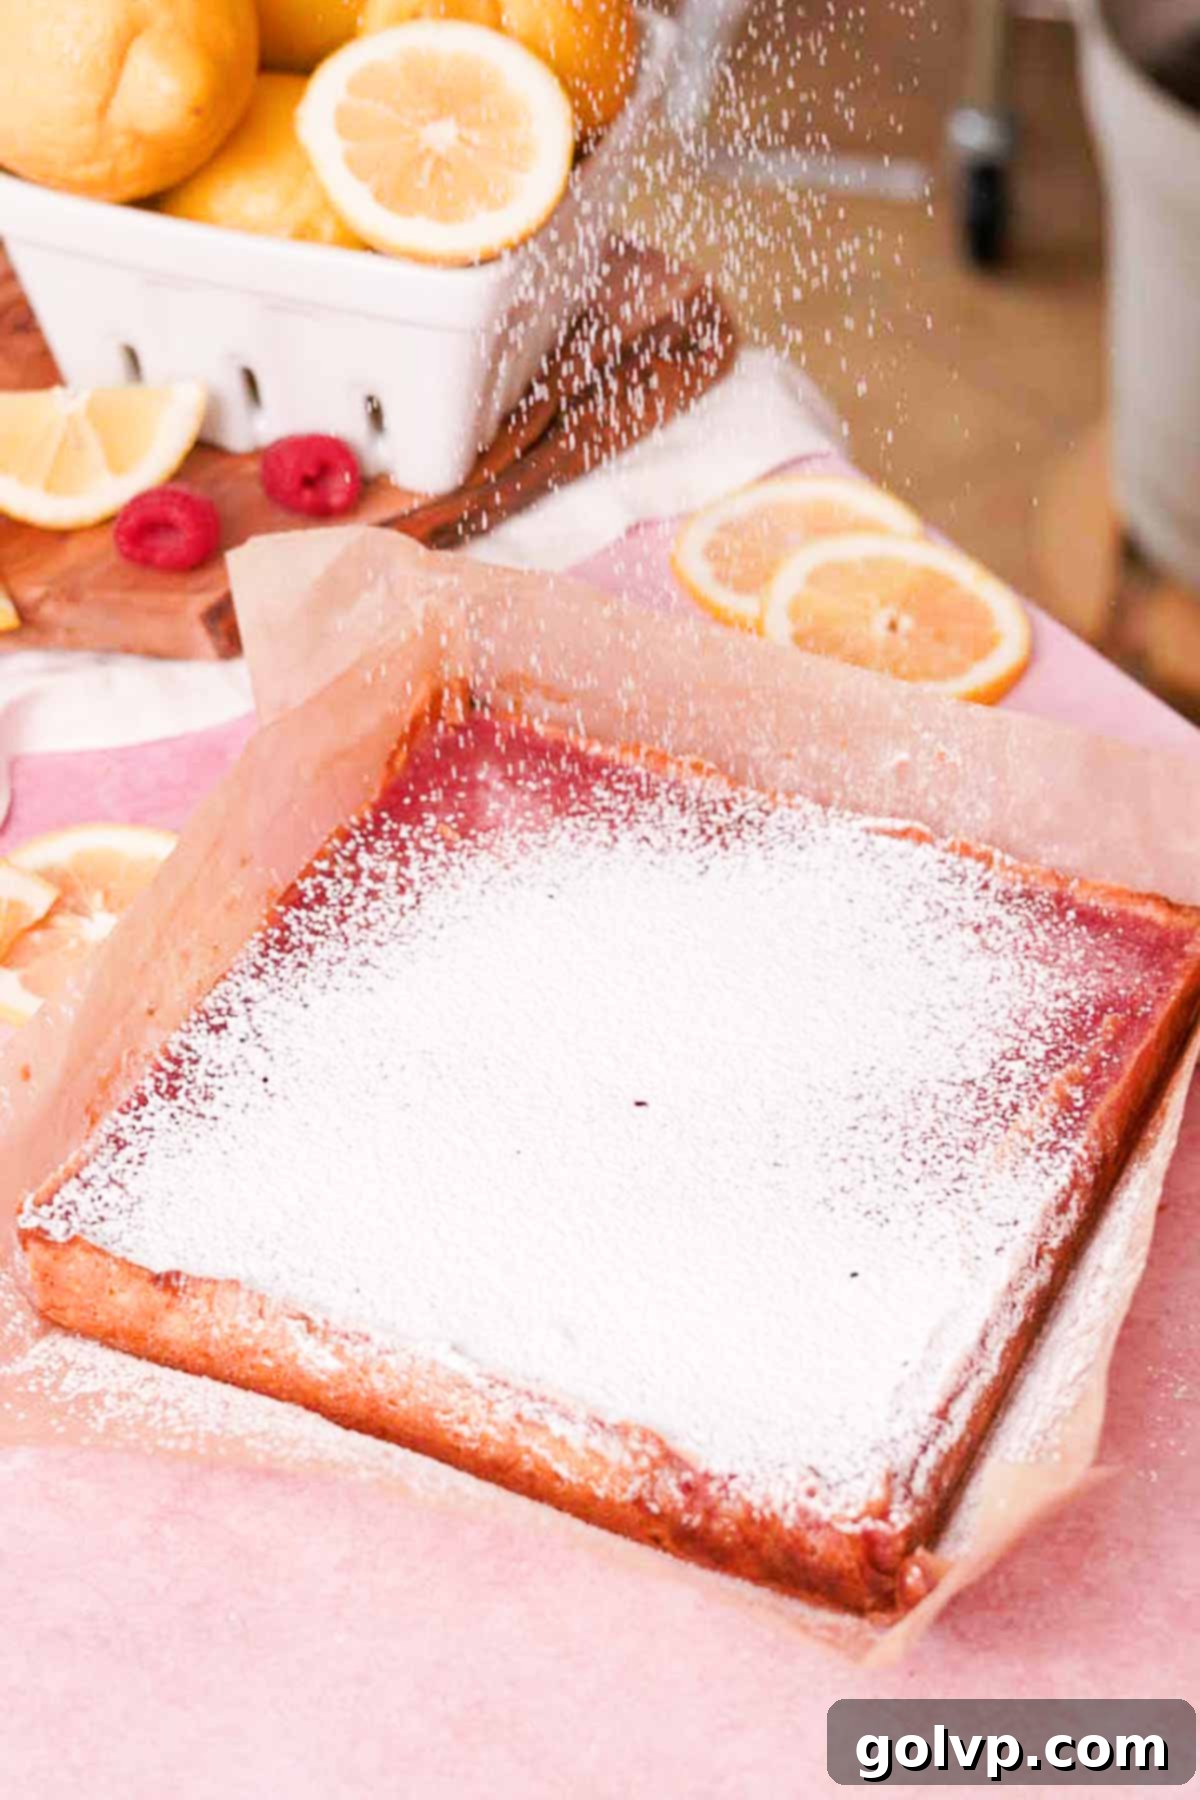
Step 6: Bake, Cool, and Serve. Return the pan to the oven and bake for approximately 17-20 minutes. The bars are ready when the filling is completely set and firm around the edges, with a slight, gentle wiggle in the very center when the pan is carefully shaken (it should definitely not be liquid). Overbaking can lead to cracks. Let the bars cool completely in the pan at room temperature for at least two hours, then transfer to the fridge to chill for an additional hour. This chilling step is crucial for the filling to fully set. Once chilled, gently lift the bars out of the pan using the parchment paper. Dust generously with powdered sugar just before serving (to prevent it from dissolving), then slice into squares and enjoy chilled or at room temperature.
✔️ Expert Lemon Raspberry Bar Filling Tips
- Gentle Mixing is Key: When preparing the filling, remember that gentle mixing is crucial. Avoid over-whisking, as introducing too much air will result in an aerated, foamier texture instead of a dense, gooey one. Excess air bubbles can also rise to the surface during baking, creating unsightly pockmarks on the top of your beautiful bars.
- Do Not Overbake: This is a common pitfall! Overbaking the lemon raspberry filling can lead to a dry, cracked surface and a less creamy interior. The bars are perfectly baked when the edges are visibly set, but the center still has a slight, delicate jiggle when the pan is gently shaken. It should not be watery, but a slight wobble is expected. The filling will continue to firm up and fully set as it cools down at room temperature and then chills in the refrigerator.
- Allow Complete Cooling: Patience is a virtue, especially with these bars! For the best texture and clean cuts, these bars require sufficient cooling time. Allow them to cool completely at room temperature for at least two hours, then transfer them to the refrigerator for a minimum of one hour. This gradual chilling process ensures the filling firms up perfectly, making them thick enough to slice neatly while maintaining their ultra-creamy, luscious consistency.
🥄 Make Ahead and Storage Tips for Lemon Raspberry Bars
These delightful lemon raspberry bars are not only delicious but also convenient for preparing in advance and storing, making them perfect for parties or spontaneous cravings. Proper storage ensures they maintain their optimal texture and flavor.
For the best results, lemon raspberry bars should always be stored in an airtight container in a single layer in the refrigerator. This is crucial for keeping the creamy filling perfectly set. While the bars can comfortably sit at room temperature for a few hours (ideal for serving), prolonged exposure to warmth will cause the filling to soften significantly. To prevent sticking, you can place a piece of parchment paper between layers if stacking, though a single layer is always preferred.
You can easily bake these bars a full day in advance. After they’ve cooled completely at room temperature, simply chill them in the refrigerator overnight. This extended chilling time further enhances their set and makes them even easier to cut. Always remember to dust with powdered sugar right before serving to achieve that fresh, elegant look, as the sugar tends to dissolve over time.
To extend their shelf life even further, these lemon raspberry bars freeze beautifully. Once fully cooled and set, cut them into individual bars. Arrange them in a single layer in an airtight freezer-safe container or wrap each bar individually in plastic wrap, then place them in a container. They can be frozen for up to 2 months. To enjoy, simply thaw them in the refrigerator overnight or at room temperature for a few hours. A light dusting of fresh powdered sugar after thawing will make them look as good as new!
✔️ Why Raising the Edges of the Crust is Absolutely Essential
Achieving perfectly structured lemon raspberry bars relies on a small but crucial detail: creating a raised border with your shortbread crust. This step might seem minor, but it plays a significant role in the success of your dessert.
The primary reason for pushing the shortbread crust up along the edges of the baking pan is to form a protective barrier. The lemon raspberry filling, being liquid before it bakes and sets, needs something to contain it. Without this elevated crust border, you run a high risk of the filling seeping underneath the shortbread. If this happens, once baked, you’ll end up with a sticky, uneven layer of filling beneath your crust instead of a clean, defined top layer. This not only affects the appearance but also makes the bars incredibly difficult to remove from the pan and slice neatly.
Furthermore, once you have baked the crust, it is vital to avoid disturbing the parchment paper or attempting to “fix” the crust edges, even if they appear to have settled slightly. Any movement of the parchment paper after baking can create a gap between the crust and the paper. Should such a gap form, the liquid filling will inevitably find its way into that space during the second bake. While a very small, isolated gap might result in minimal leakage, shifting the paper too much could lead to a substantial amount of filling ending up where it shouldn’t be.
Lastly, we strongly advise against baking these lemon raspberry bars without parchment paper. The filling, especially with its high sugar content, becomes quite sticky once baked. Trying to remove the bars directly from an unlined pan, even a non-stick one, will almost certainly be a frustrating, messy experience, often resulting in broken bars. Parchment paper acts as a built-in lifting mechanism, allowing you to easily remove the entire slab of bars from the pan for effortless cutting and serving.

📖 Recipe FAQs About Lemon Raspberry Bars
Absolutely! If you wish to use an 8″ x 12″ pan, you will need to double the entire recipe – both the shortbread crust and the lemon raspberry filling ingredients. Because of the increased volume, you may also need to adjust the baking times. Expect to add an additional 5-10 minutes to the baking time for both the crust and the filling to ensure they are fully cooked through and set correctly. Keep an eye on them for visual cues of doneness.
While this recipe shines with raspberries, you can certainly get creative and experiment with other berries! Blueberries or strawberries are excellent choices. To maintain the smooth texture of the filling, you’ll need to mash your chosen berries and push them through a fine-mesh sieve to remove any seeds or skins, creating a smooth puree. Ensure that the final amount of puree you add to the filling is exactly a quarter cup to keep the consistency correct. If you try a different berry, we’d love to hear about your experience in the comments below!
Yes, it should be possible to make these bars gluten-free. Simply substitute the all-purpose flour in both the crust and the filling with a 1:1 gluten-free flour blend. While I haven’t personally tested this specific substitution, many 1:1 gluten-free flours are designed to perform similarly to wheat flour in baking. For best results, choose a blend that includes xanthan gum, or add a small pinch if your blend does not. If you give it a try, please let us know how it turns out in the comments!
Yes, this recipe can be easily adapted to be dairy-free. The main dairy component is the butter in the shortbread crust. To make it dairy-free, use a high-quality vegan butter substitute that comes in a solid stick or brick form. It’s important to avoid using margarine, as its different fat and water content can negatively affect the texture and richness of the shortbread, preventing it from baking up as well as traditional butter or a good vegan butter alternative.
If your filling isn’t setting, there are a few common culprits. Firstly, ensure you haven’t underbaked it. The filling should be mostly set around the edges and have a slight, gentle wiggle in the center when the pan is moved. It should definitely not be liquid. Secondly, proper cooling and chilling are absolutely vital. The filling continues to firm up significantly as it cools at room temperature for two hours, and then especially after being refrigerated for at least one hour. Ensure you’re giving it ample time to chill before attempting to cut or serve.
🍋 More Irresistible Lemon & Raspberry Recipes
- Lemon Raspberry Cake
- Raspberry Curd
- Lemon Raspberry Cookies
- Lemon Bars with Graham Cracker Crust
Did you make this recipe for Lemon Raspberry Bars? We would absolutely love to hear your thoughts! Please take a moment to rate this recipe and share your feedback in the comments section below. If you post your beautiful creation on Instagram, don’t forget to tag @flouringkitchen so we can see your culinary masterpiece. For more delicious recipe ideas and to save your favorites, be sure to follow us on Pinterest!
📖 Recipe

Lemon Raspberry Bars
MaryEquipment
- eight inch square baking pan
- parchment paper
Ingredients
Shortbread Base
- ½ cup granulated sugar
- 1 lemon zested (reserve juice for filling)
- 1 cup unsalted butter softened
- 1 teaspoon pure vanilla extract
- ¼ teaspoon sea salt
- 2 cups all purpose flour 240g
Raspberry Lemon Filling
- 2 lemons zested (reserve juice for filling)
- 1 cup granulated sugar
- ½ cup all purpose flour 60g
- 3 large eggs
- ⅛ teaspoon salt
- 1 cup raspberries, packed into the cup defrosted if using frozen
- ½ cup lemon juice freshly squeezed from 2-3 lemons
- 3 tablespoons powdered sugar for topping
Instructions
Shortbread Base
- Preheat oven to 355°F (180°C). Brush or wipe the inside of an 8” square baking pan with a thin layer of oil. Line with parchment paper: Cut a square of parchment paper a few inches larger than the baking pan. Place the parchment paper on a counter and put the baking pan on top in the middle. Cut one straight slit on each side of the parchment that will meet the corner of the baking pan. Place the sheet inside the baking pan, tucking the flaps in (see photo for reference).
- In a large glass bowl or stand mixer, combine sugar and grated lemon zest. Rub together with your fingers until fragrant and moistened.½ cup granulated sugar, 1 lemon
- Add softened butter into the lemon sugar and beat with an electric mixer until smooth, creamy, and lightened in color. Scrape down the bowl so that it mixes consistently. Add vanilla and salt, beat to combine.1 cup unsalted butter, 1 teaspoon pure vanilla extract, ¼ teaspoon sea salt
- Sift flour into the butter mixture, and fold just until no more dry streaks of flour remain.2 cups all purpose flour
- Transfer dough into parchment lined baking pan and spread it out in an even layer. Push a thin layer of dough up the sides to create a border or crust. This will help hold the filling in later on. Bake in the preheated oven for 20-25 minutes – until the edges are lightly golden brown and the top isn’t shiny anymore. Work on the filling while it bakes.
Raspberry Lemon Filling
- Rub the sugar and grated lemon zest with your fingers in a large non-metal bowl until fragrant and yellow. Don’t use a metal bowl to prevent a metallic flavor. Add flour and stir with a whisk to remove any lumps of flour.2 lemons, 1 cup granulated sugar, ½ cup all purpose flour
- Add eggs and salt into the lemon sugar mix and whisk very gently by hand – just until the eggs are smooth. Don’t overmix or you’ll get too many air bubbles.3 large eggs, ⅛ teaspoon salt
- Mash the defrosted raspberries and strain the seeds out by pushing the berries through a sieve. Do this into a separate bowl to make sure you have a ¼ cup of raspberry puree. If you have slightly less, add a bit of water to bring it up to ¼ cup. Add lemon juice and raspberry puree into the filling and whisk gently to stir.1 cup raspberries, packed into the cup, ½ cup lemon juice
- As soon as the crust bakes, remove from the oven. Do not adjust the parchment paper, you don’t want the crust to detach from the sides of the paper and leave a gap. Immediately pour the filling on top of the crust. Remove large bubbles by poking with a toothpick or using a kitchen torch to gently heat the top.
- Bake for about 17-20 minutes. It’ll be ready when the filling is completely set on the edges and slightly set in the middle. If you shake the pan vigorously, the middle will have a slight wiggle – it should NOT be liquid. Let it cool in the pan at room temperature for two hours, and then for one hour in the fridge. It will set as it cools. Remove from the pan by lifting up by the paper.
- Use a sieve to sprinkle powdered sugar on top and cut into bars. Sprinkle powdered sugar on top right before serving so that it doesn’t have time to dissolve. Serve chilled or at room temperature.3 tablespoons powdered sugar
Video
Notes
- Use a scale to weigh the flour for the crust for the most consistent results each time. If you don’t have a scale, measure properly by stirring the bag and spooning gently into a measuring cup. Scrape the excess off the top with the flat edge off a knife without packing it into the cup.
- Don’t overmix the dough. Stop mixing as soon as no more dry streaks of flour remain or you’ll be left with a tough crust.
- Make a border: Have at least a thin border of elevated crust dough around the edges. This will help hold the filling in and prevent it from seeping under the crust and becoming a mess before it bakes.
- Bake completely: It’s ready when the surface stops looking shiny and the edges are golden brown.
- Don’t overmix the filling. You don’t want to add too many air bubbles because they will change the consistency of the filling and make pockmarks into the top after baking.
- Don’t overbake: Or the surface will crack. They’re ready when the edges are set and the filling is a little wiggly but isn’t liquid. It will continue to set as it cools and chills.
- Cool completely: These bars will set completely when they are slightly cooled in the fridge for an hour. This makes them thick enough to cut while still being ultra creamy.
