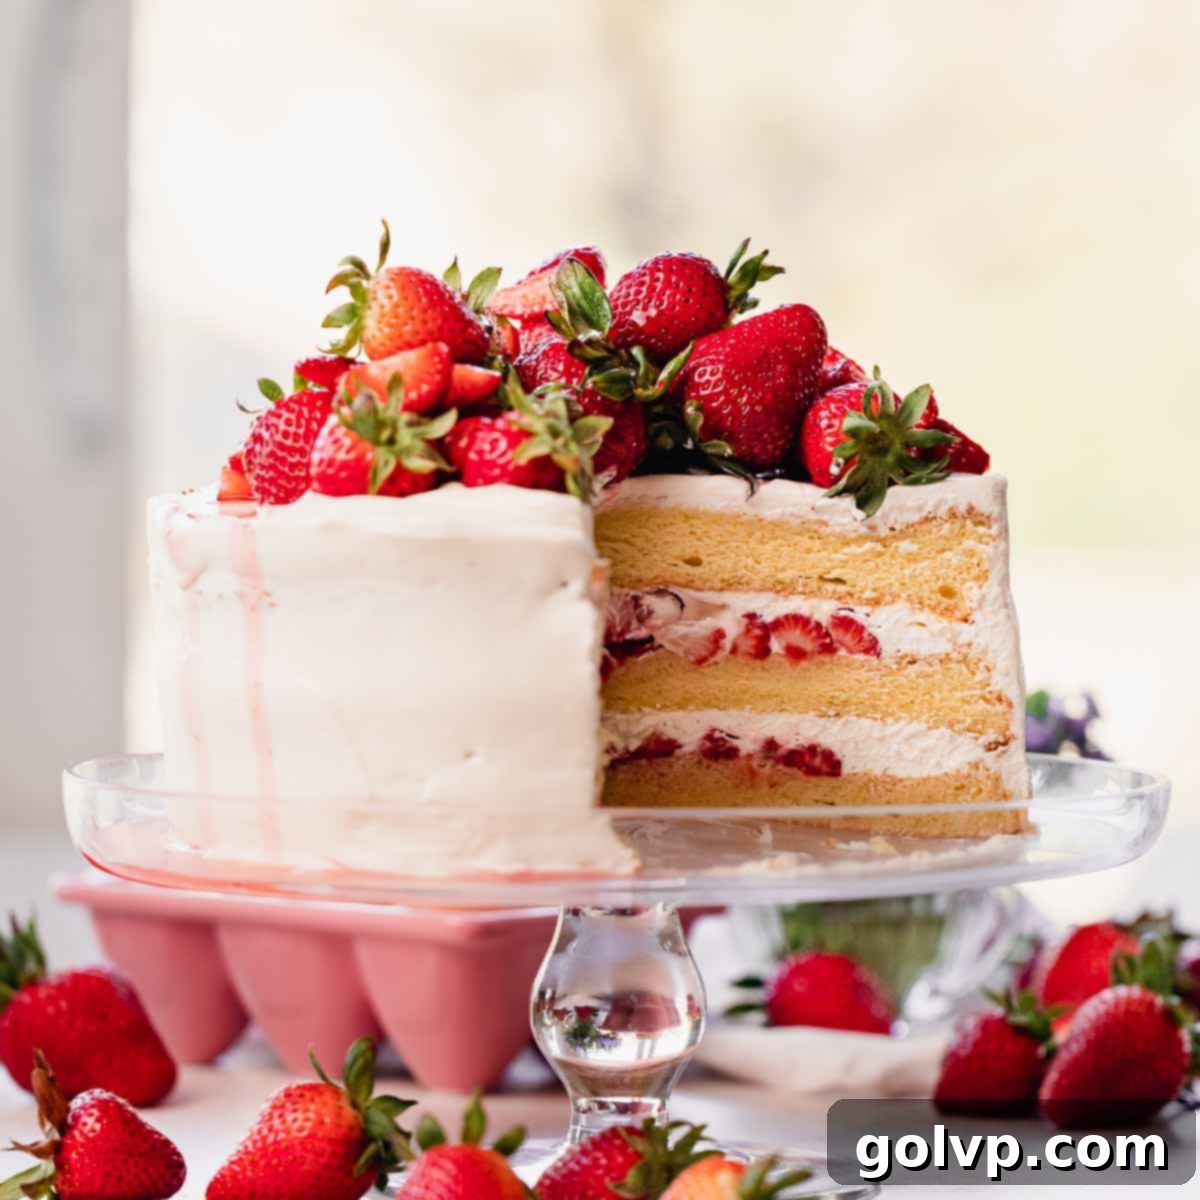
Light & Fluffy Strawberry Vanilla Chiffon Cake with Tangy Yogurt Whipped Cream
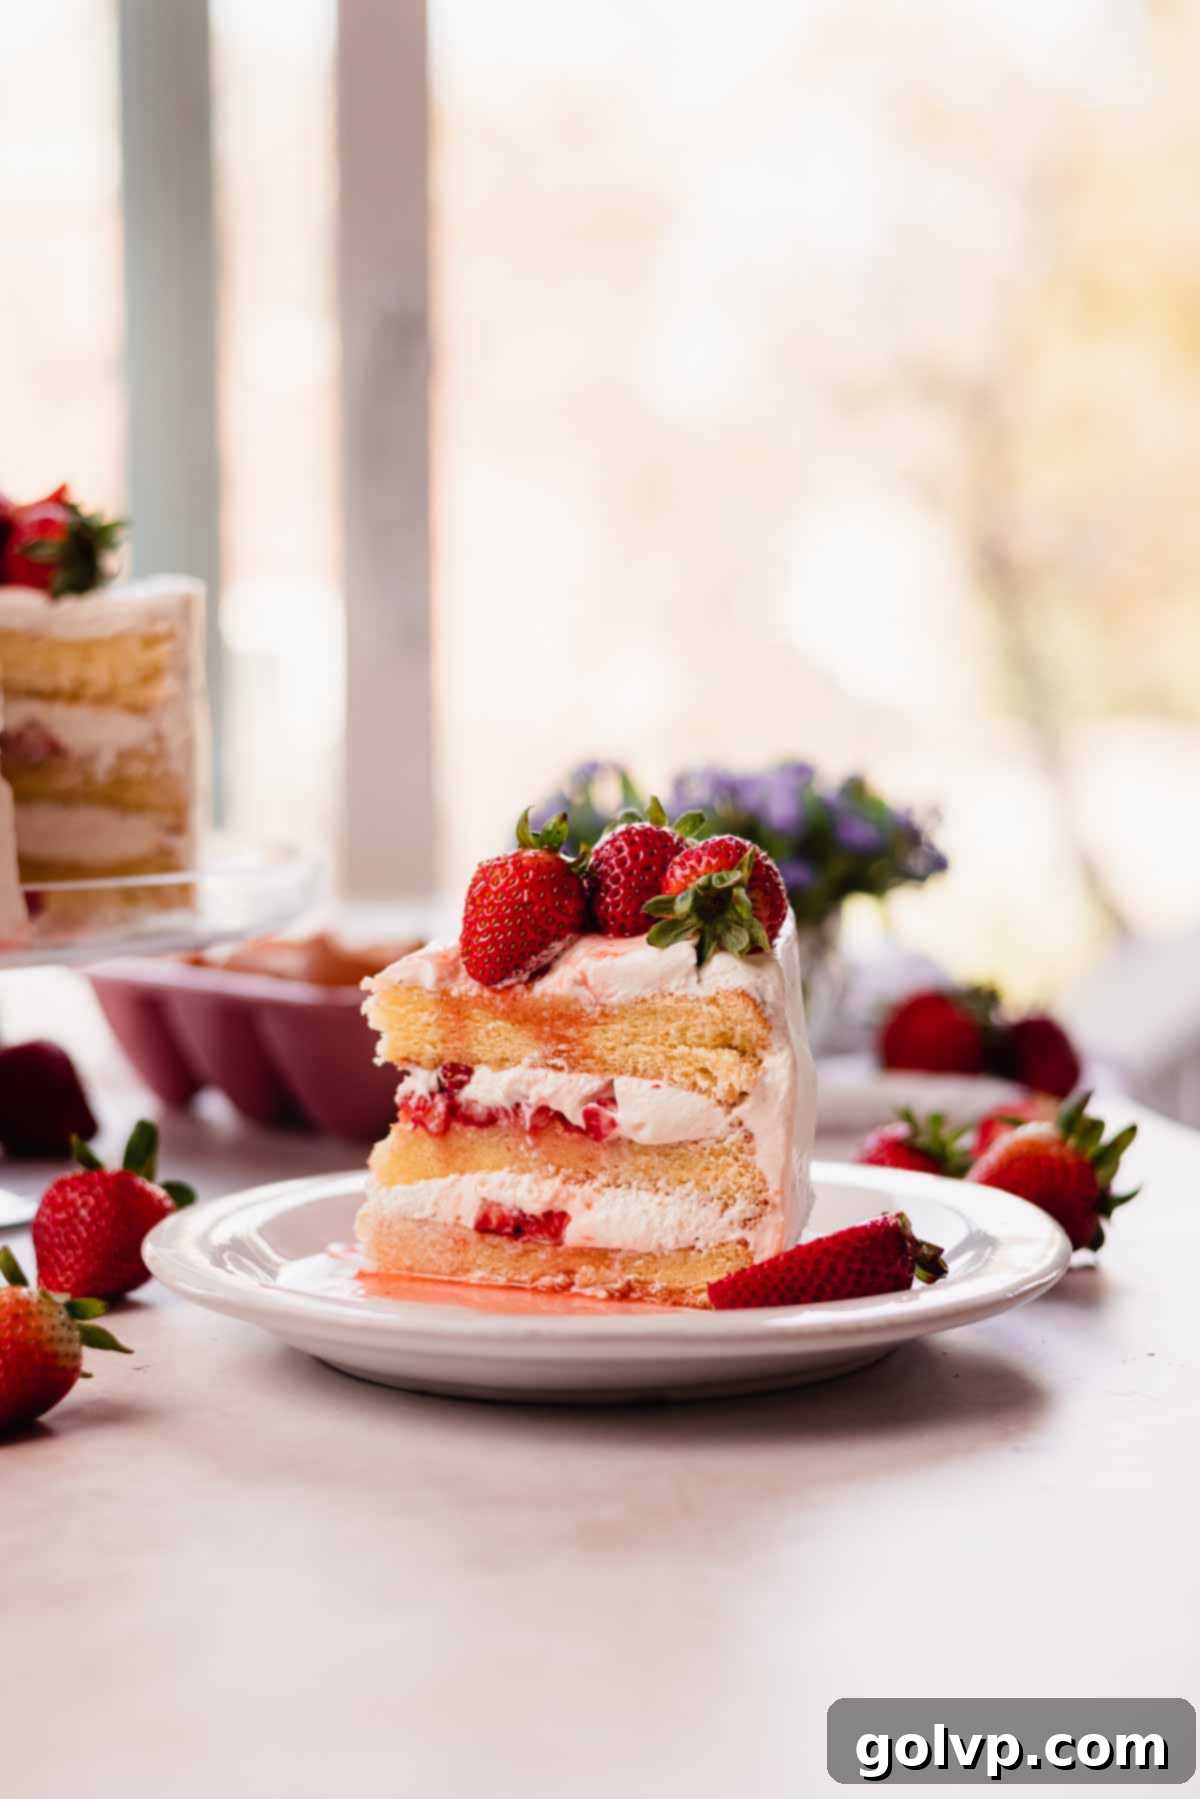
Indulge in the ultimate taste of spring and summer with this exquisite Strawberry Vanilla Chiffon Cake. This isn’t just any cake; it’s a masterpiece of delicate textures and vibrant flavors, designed to be light, airy, and refreshingly not-too-sweet. Imagine layers of incredibly soft, moist chiffon cake, generously filled with luscious, macerated sweet strawberries, and enveloped in a cloud-like, subtly tangy whipped yogurt frosting. The magic truly happens as the sweet syrup from the macerated strawberries seeps into each chiffon layer, infusing them with an irresistible juiciness and intensified berry flavor. The Greek yogurt whipped cream frosting, with its delicate tang, provides the perfect counterpoint to the sweetness and offers exceptional stability, making this a celebration-worthy dessert that holds beautifully.
If you’re a fan of elegant, airy cakes that tantalize your taste buds without being overly sugary, you’ll also adore my blackberry caramel cake, another perfect example of balanced sweetness and delightful texture.
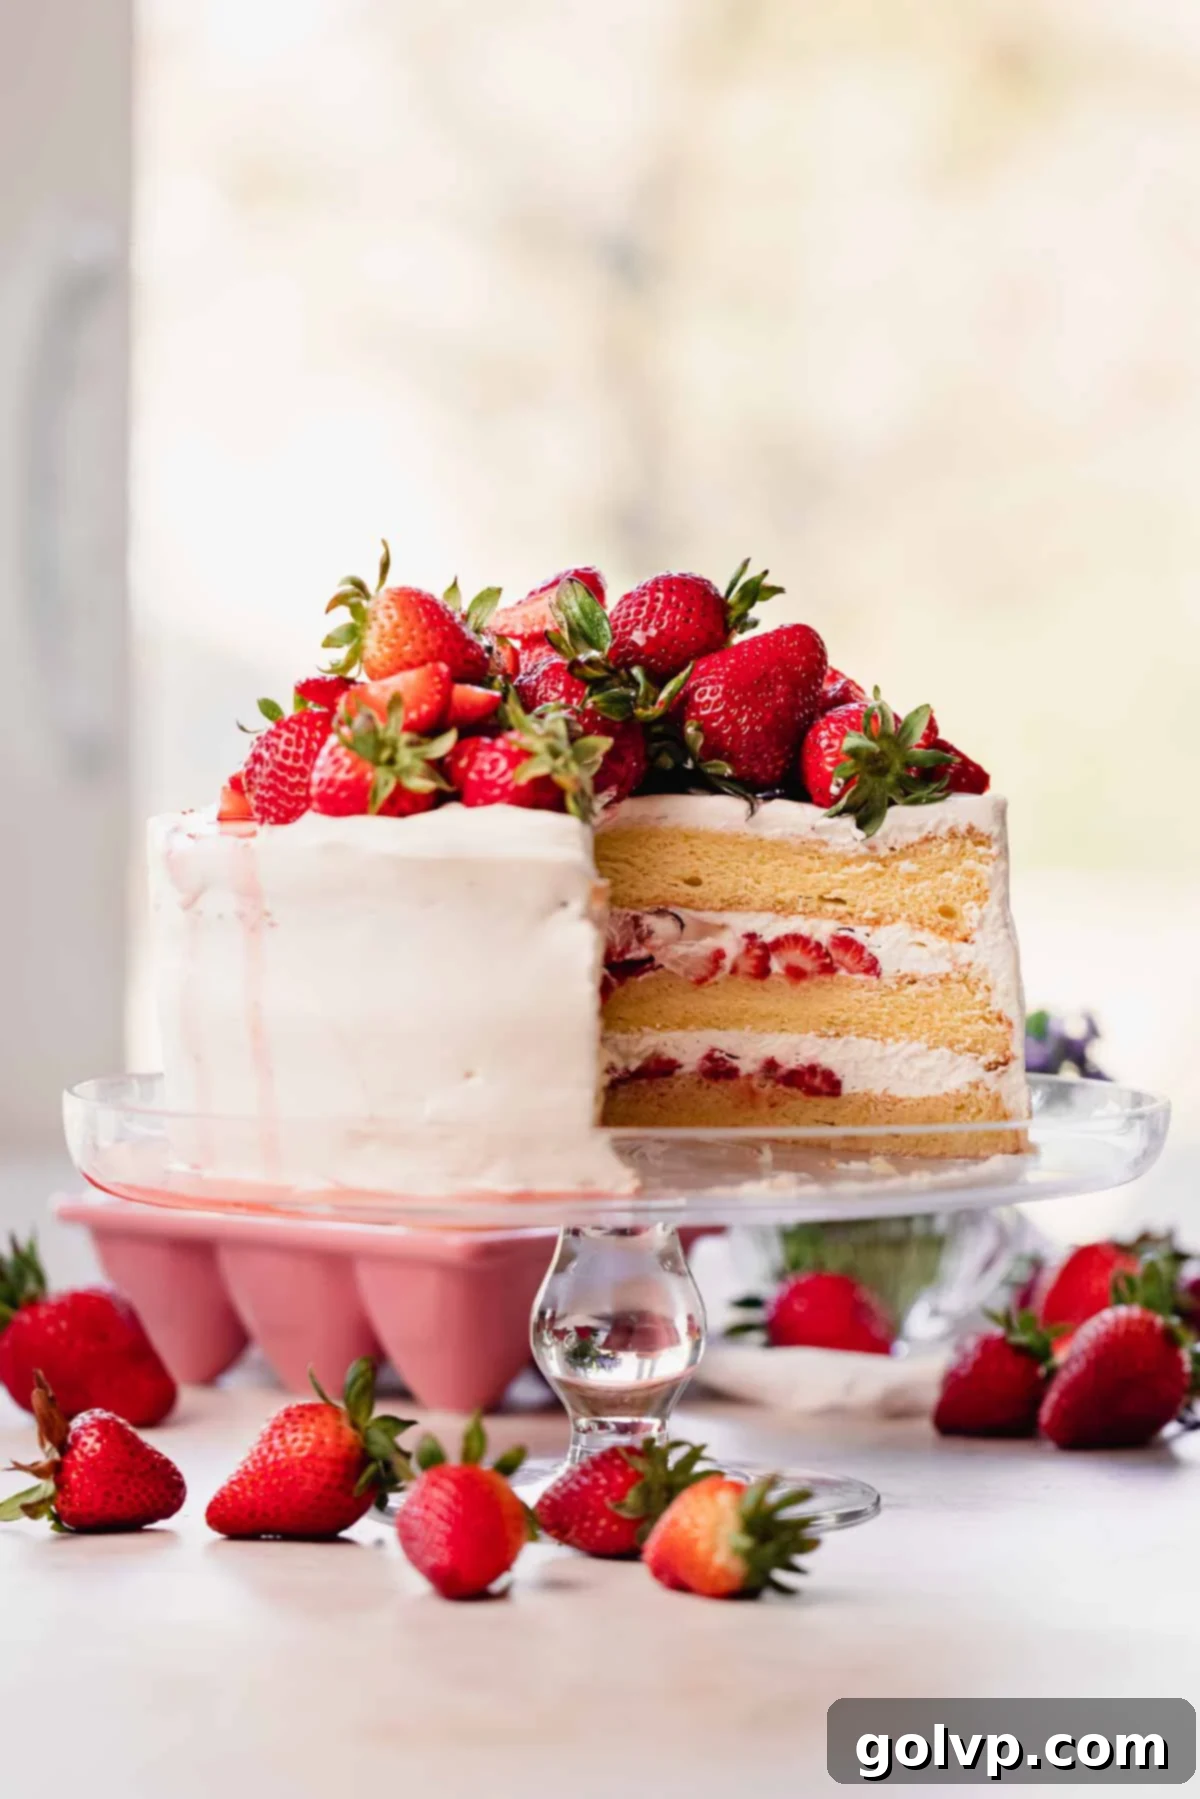
🍰 Why You’ll LOVE This Strawberry Chiffon Cake Recipe
- Chiffon Cake Layers: Prepare to be amazed by the texture of these vanilla chiffon cake layers. They are incredibly soft, supremely moist, and possess an ethereal tenderness, truly melting in your mouth like a cloud. This specific vanilla chiffon recipe ensures a light, elegant base that is never heavy or dense, making it a must-make for any cake enthusiast.
- Macerated Fresh Strawberries: The star of this cake! Transforming fresh strawberries into intensely juicy and sweet morsels couldn’t be simpler. Macerating them with a touch of sugar and lemon not only enhances their natural flavor but also creates a beautiful, vibrant syrup. These flavorful berries are the perfect companion to the delicate chiffon layers, adding bursts of fresh fruitiness in every bite.
- Irresistible Strawberry Syrup: A delightful bonus from the maceration process, this sweet and tangy strawberry syrup is a game-changer. Drizzled generously over each cake layer, it acts as a natural moistening agent, ensuring the chiffon remains incredibly tender and infusing every single crumb with rich strawberry flavor. This simple step elevates the entire cake experience.
- Stable & Tangy Yogurt Whipped Cream: Forget collapsing whipped cream! Our secret ingredient, Greek yogurt, works wonders to stabilize the whipped cream, making it robust enough to beautifully hold together a multi-layered cake. This frosting is intentionally barely sweet, allowing the natural flavors of the strawberries and vanilla to shine. Its subtle tanginess perfectly balances the richness of the cream and beautifully complements the sweet strawberry filling, creating a harmonious flavor profile that is truly unique and refreshing.
📝 Key Ingredients for Your Strawberry Chiffon Cake
Read through for all the tips you will need for success!
Full steps and ingredients in recipe card below.
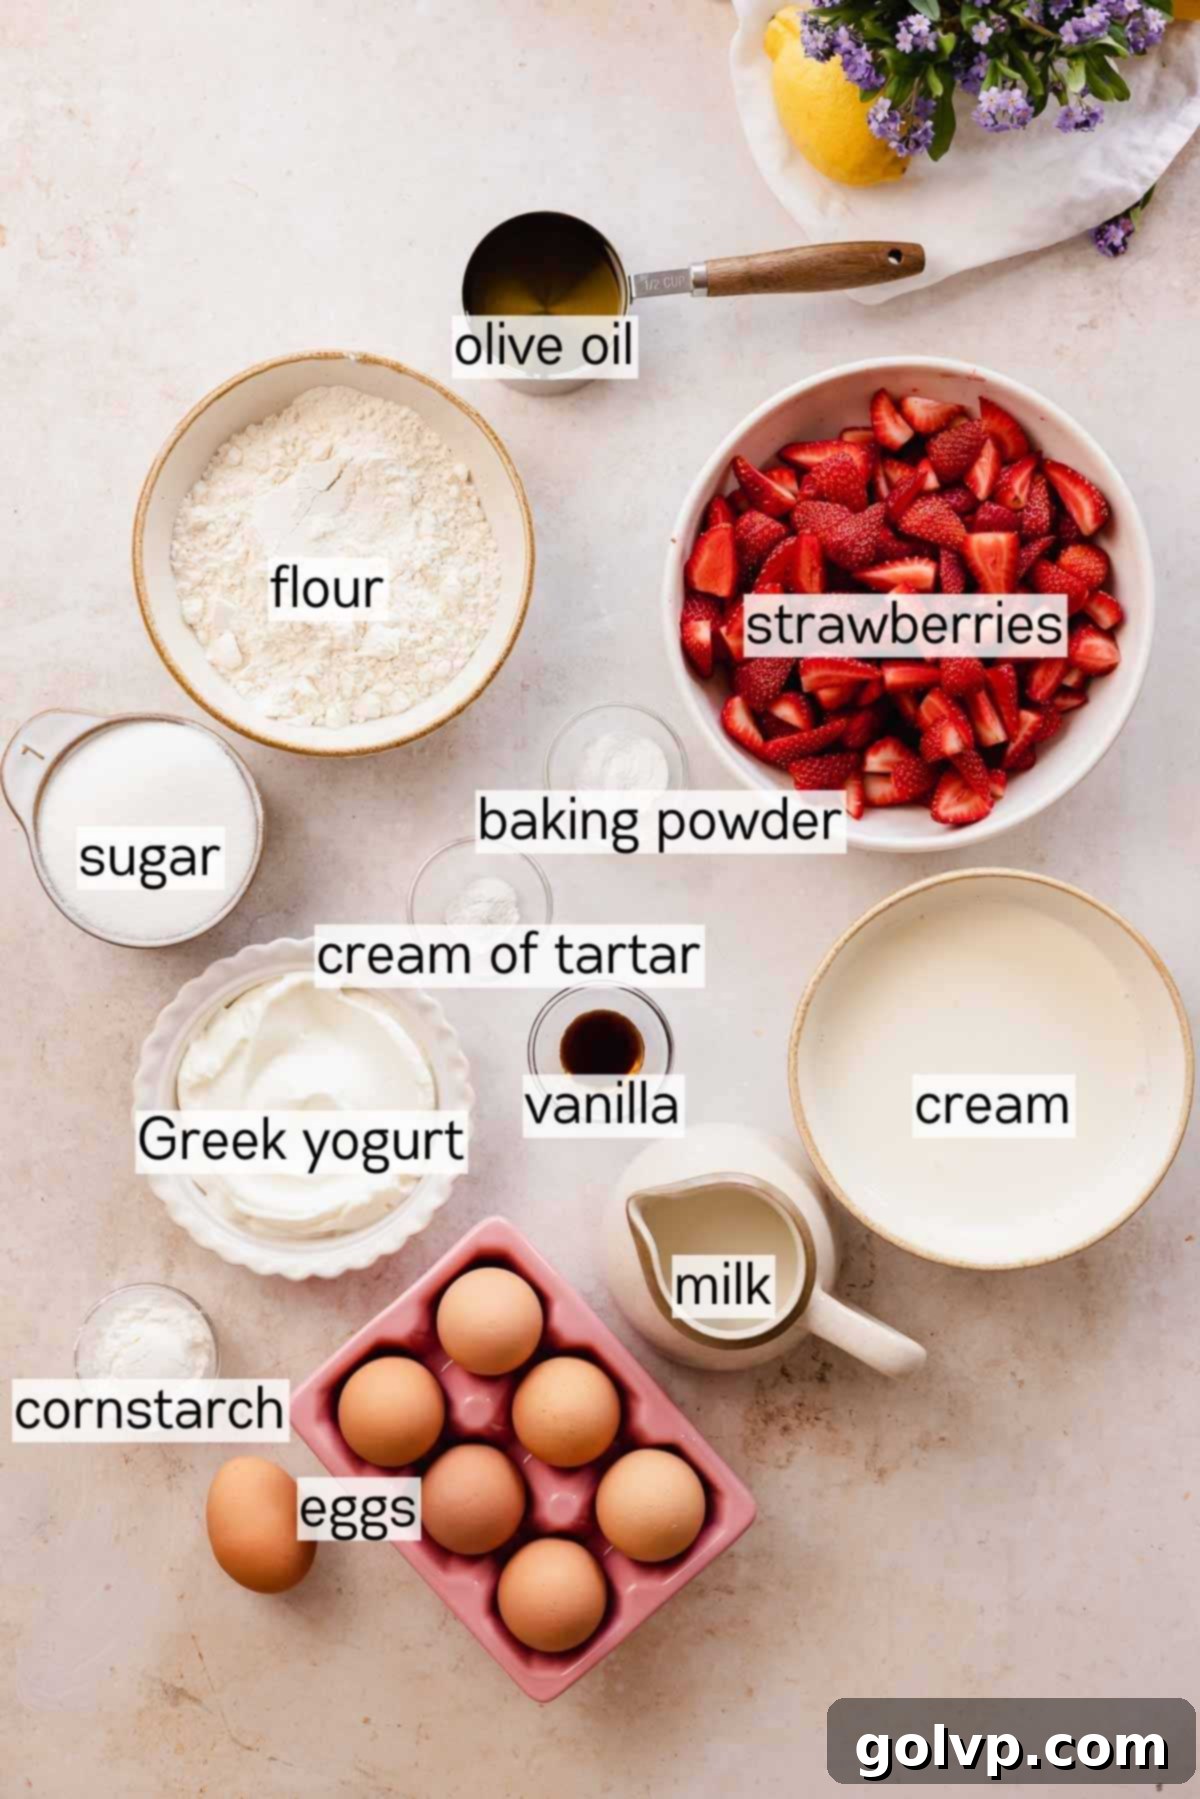
Fresh Strawberries: These vibrant berries are undeniably the centerpiece of this delightful strawberry vanilla cake. For the best flavor and texture, always opt for peak-season, ripe fresh strawberries. While it might be tempting, avoid using frozen strawberries; once defrosted, they tend to become watery and lose their desirable firm texture, making your filling soggy. If your chosen strawberries aren’t as sweet as you’d prefer, don’t fret! The maceration process will work its magic, drawing out their natural juices and intensifying their sweetness and overall flavor significantly.
Plain Greek Yogurt: This ingredient is crucial for creating our signature creamy, stable, and slightly tangy frosting. Greek yogurt, with its inherently thicker consistency compared to regular yogurt, provides the necessary structure to stabilize the whipped cream, ensuring your layered cake stays put. It also introduces a delightful subtle tang that brilliantly cuts through the richness of the cream, balancing the overall sweetness of the cake. For optimal results, stick to plain, unsweetened Greek yogurt; flavored or regular yogurts lack the thickness and neutral base required for this recipe.
Heavy Whipping Cream (35% Fat): To achieve that wonderfully stiff, fluffy, and stable whipped yogurt frosting, heavy whipping cream with a minimum of 35% milk fat is essential. The higher fat content allows the cream to whip up beautifully with strong, defined peaks that hold their shape. Remember to keep your heavy whipping cream ice-cold right up until you begin whipping. Cold cream whips faster and to a much better consistency, giving you that gorgeous, voluminous frosting.
Powdered Sugar (Confectioners’ Sugar): This fine sugar is preferred for the frosting because it dissolves effortlessly and completely into the cream, preventing any grainy texture. It contributes sweetness without adding bulk. The beauty of using powdered sugar in this recipe is its flexibility: the amount can be easily adjusted to match your personal preference for sweetness, allowing you to create a frosting that’s perfectly sweet, or wonderfully less sweet, without compromising its stability or texture.
Eggs: As a chiffon cake, this recipe relies heavily on eggs to achieve its characteristic light, airy, and incredibly fluffy structure. It’s critical to separate the egg yolks from the whites with precision. Even a tiny speck of egg yolk in the whites can prevent them from whipping up properly, so ensure your bowls and whisk are meticulously clean and free of any grease. A slight amount of egg white in the yolks, however, will not pose an issue.
Cream of Tartar: This acidic salt is a vital stabilizer for the egg whites, helping them whip to firm, stable peaks that won’t deflate easily. It ensures the meringue maintains its volume when folded into the batter and throughout the baking process, contributing to the chiffon cake’s signature lift and tenderness. If cream of tartar is unavailable, a small amount of white vinegar or lemon juice can be used as a substitute, although cream of tartar generally yields the most reliable results.
Olive Oil: The choice of oil in a chiffon cake contributes to its moistness and delicate texture. A mild cooking olive oil is recommended here as its flavor is barely discernible in the final cake. For those who enjoy a hint of peppery depth, a more robust olive oil can be used. Conversely, a light olive oil will offer even less flavor. If olive oil is not to your liking or unavailable, any neutral-flavored vegetable oil, such as canola or sunflower oil, can be used as a direct substitute.
All-Purpose Flour: For consistently perfect cake layers, accurate flour measurement is paramount. The most reliable method is to weigh your flour using a kitchen scale. If a scale isn’t available, employ the “spoon and level” technique: gently stir the flour in its bag or container, then spoon it lightly into your measuring cup until it overflows. Use the flat edge of a knife to scrape off the excess, ensuring you don’t pack the flour into the cup. This method prevents over-measuring, which can lead to a dense, dry cake.
Cornstarch: This seemingly small addition plays a significant role in achieving the desired lightness and tenderness of the chiffon cake. By reducing the overall protein content of the flour mixture, cornstarch helps create a more delicate crumb and a remarkably fluffy texture. It’s highly recommended not to skip this ingredient; if necessary, arrowroot starch can serve as an effective substitute.
👩🍳 How to Make The Ultimate Strawberry Vanilla Cake
Macerated Strawberries Step by Step
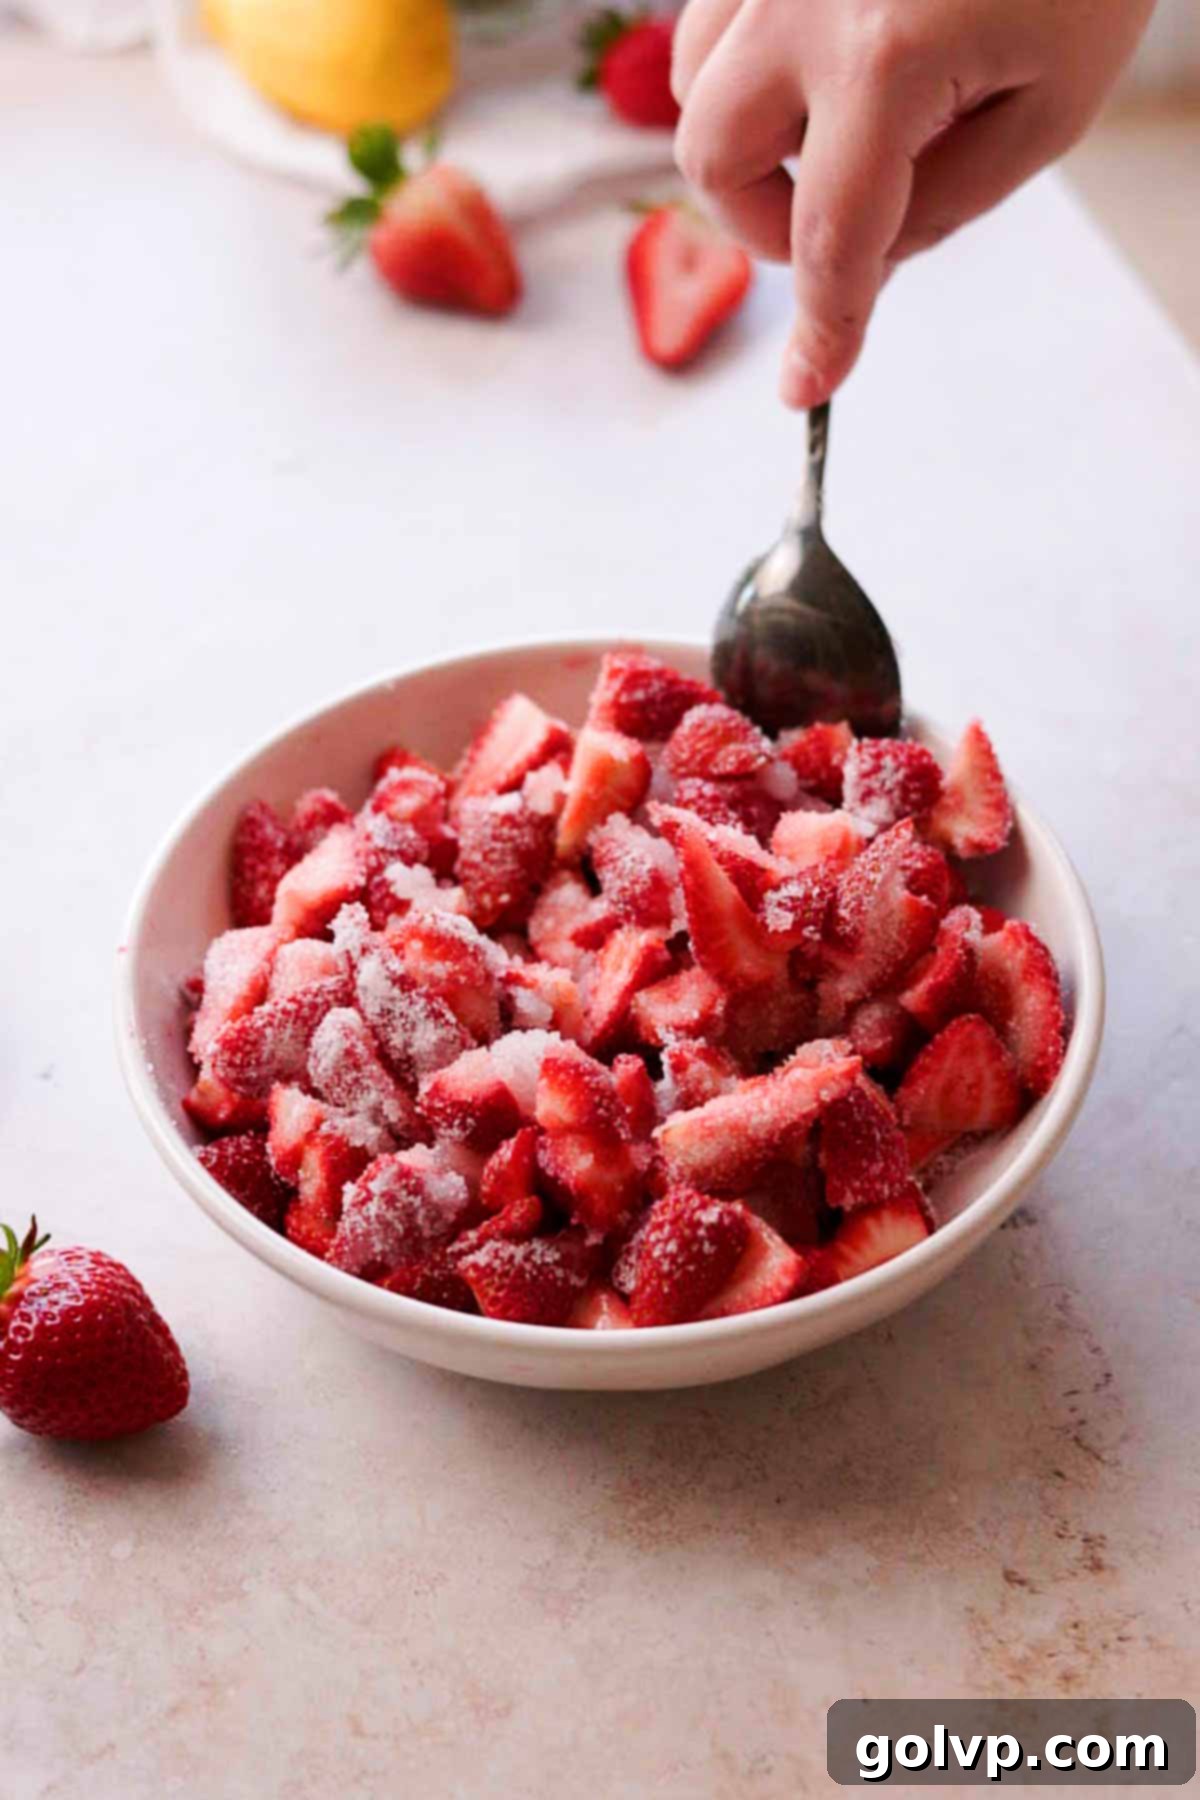
Step 1: Prepare the Strawberries for Maceration. Begin by gently washing your fresh strawberries and carefully trimming off their green tops. You can then cut them into uniform slices or quarter them for larger, chunkier pieces, as shown in the image. Be mindful not to slice them too thinly, as the strawberry pieces will naturally shrink slightly as they sit in the sugar. Once cut, transfer the strawberries to a medium-sized bowl.
Next, evenly sprinkle the granulated sugar, a tablespoon of fresh lemon juice, and a pinch of sea salt over the prepared strawberries. Use a spoon or a rubber spatula to gently toss the strawberries, ensuring each piece is thoroughly and evenly coated with the sugar mixture. This initial coating is key to drawing out their delicious juices.
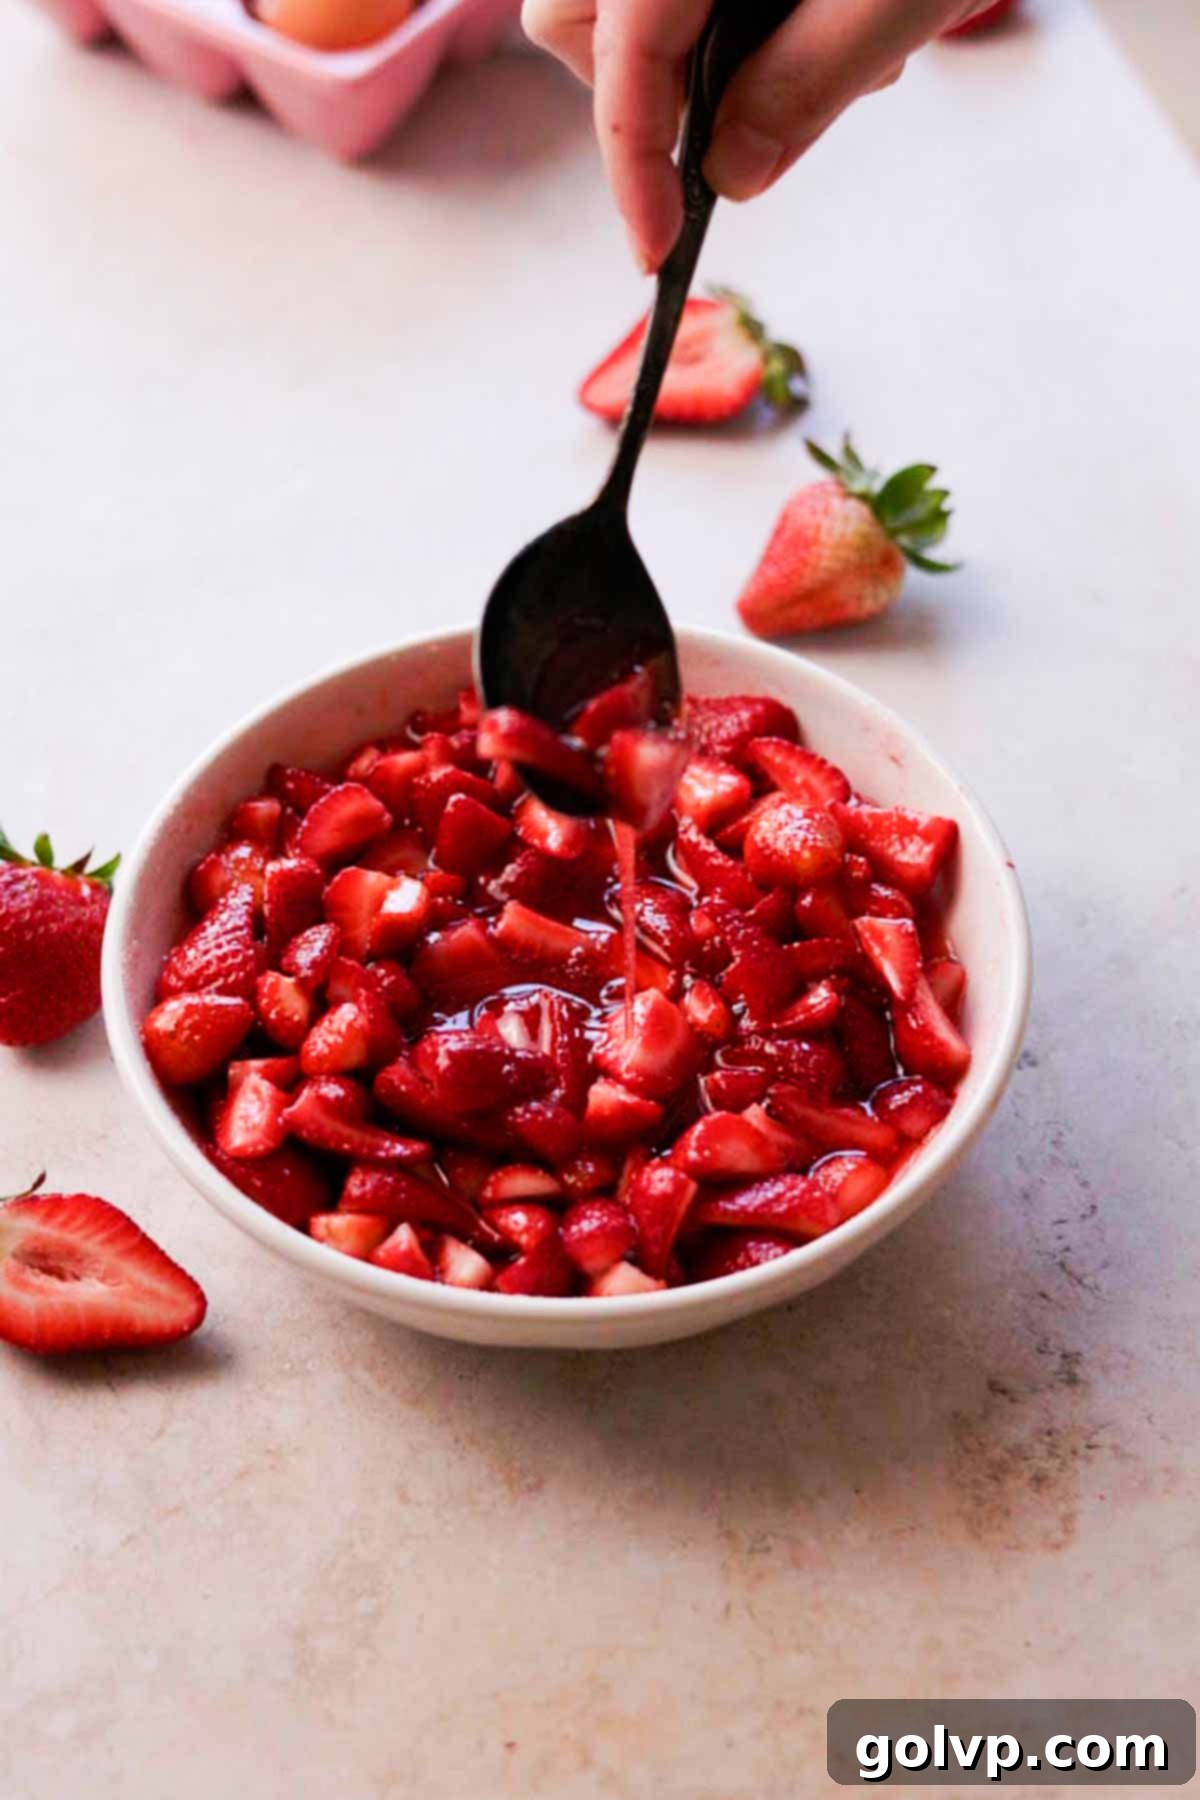
Step 2: Macerate and Develop Syrup. Once coated, cover the bowl tightly with plastic wrap and place the berries in the refrigerator. Allow them to macerate while you proceed with preparing the rest of your cake components. This process typically takes about 30 minutes, during which the sugar will draw out the natural moisture from the strawberries, creating a vibrant, luscious red strawberry syrup around them. The longer they sit (up to 8 hours), the more syrup they will release and the more intensely flavored they will become, without losing too much texture.
Vanilla Chiffon Cake Layers Step by Step
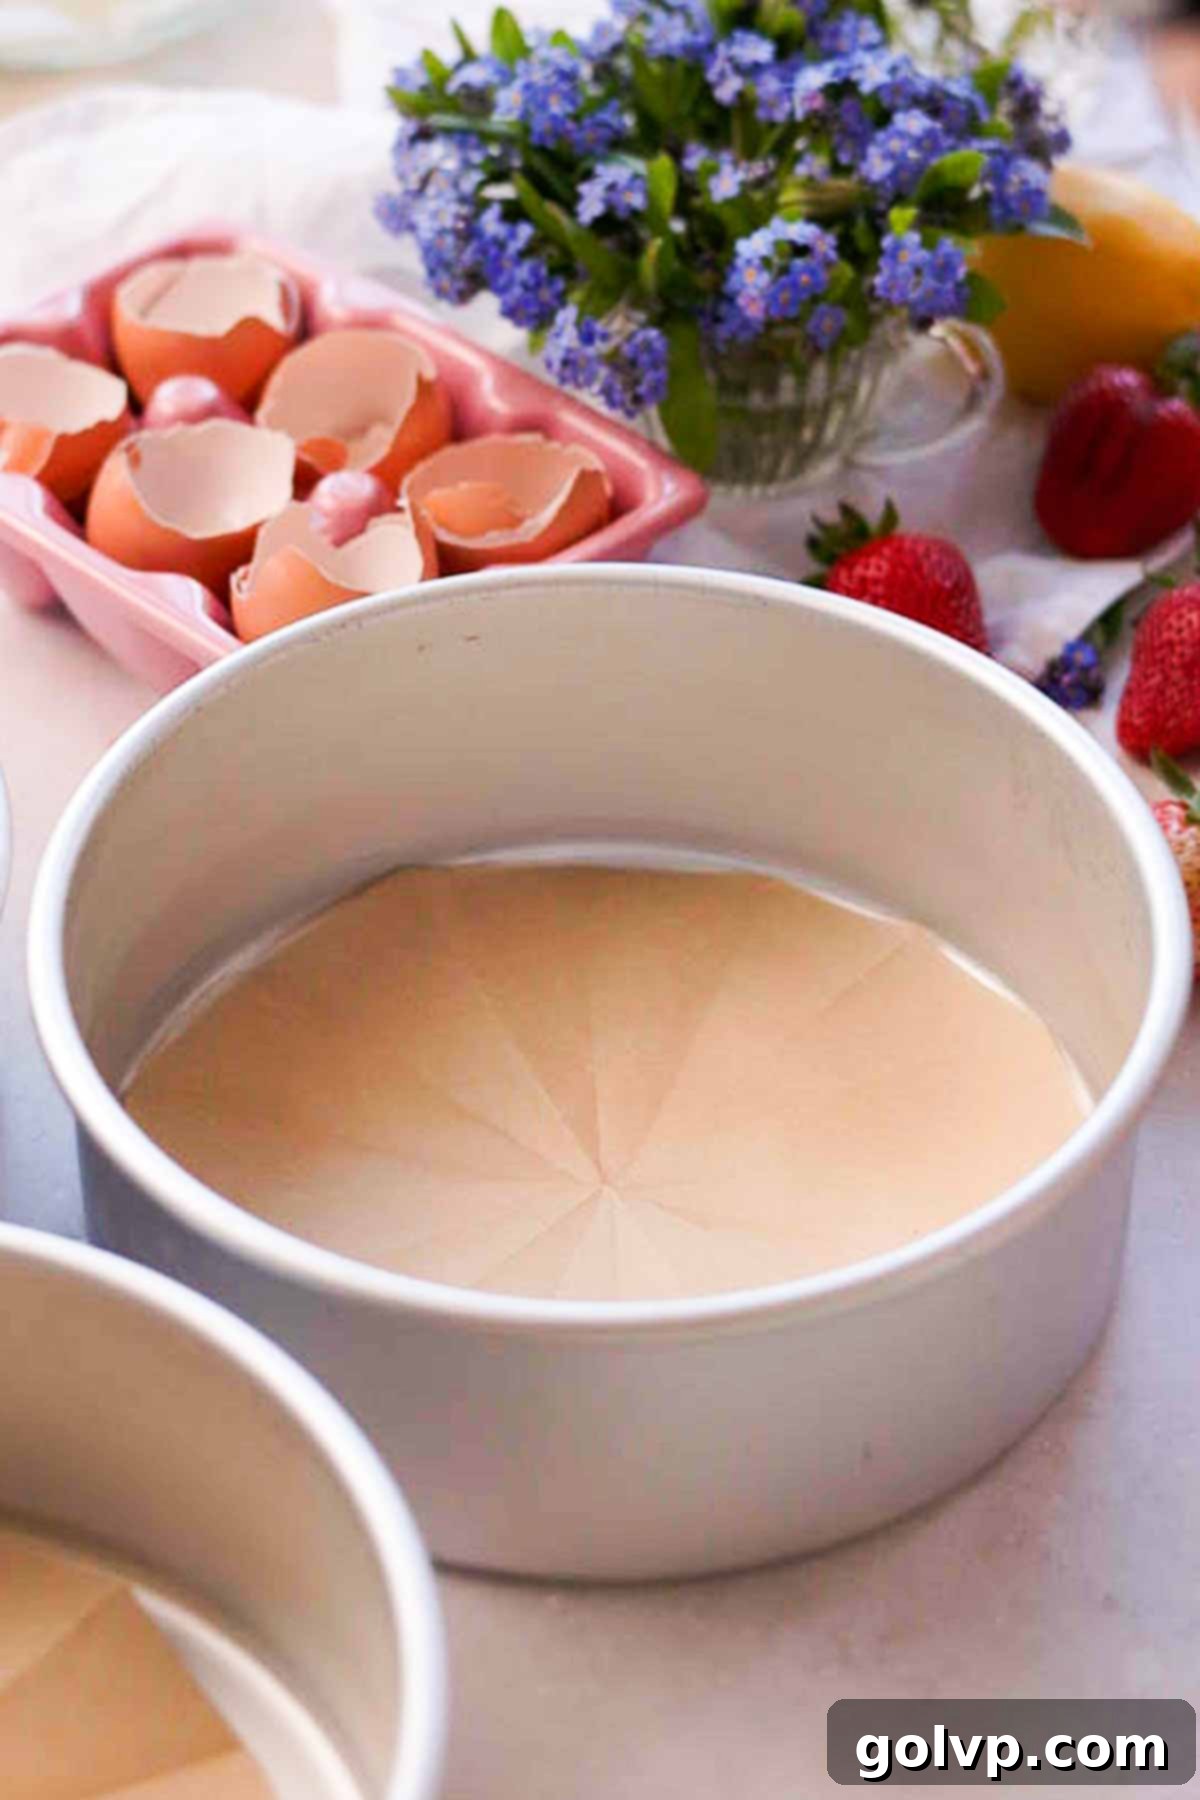
Step 1: Prepare Oven and Pans. Preheat your oven to 355°F (180°C). This ensures the oven is at the correct temperature for even baking from the start. Take three 8-inch round baking pans and line only their bottoms with parchment paper rounds. It is crucial NOT to grease or line the sides of the pans. Chiffon cake batter needs to “climb” the sides of the pan as it bakes to achieve its characteristic height and airy texture. Greasing the sides would prevent this, leading to a flatter cake.
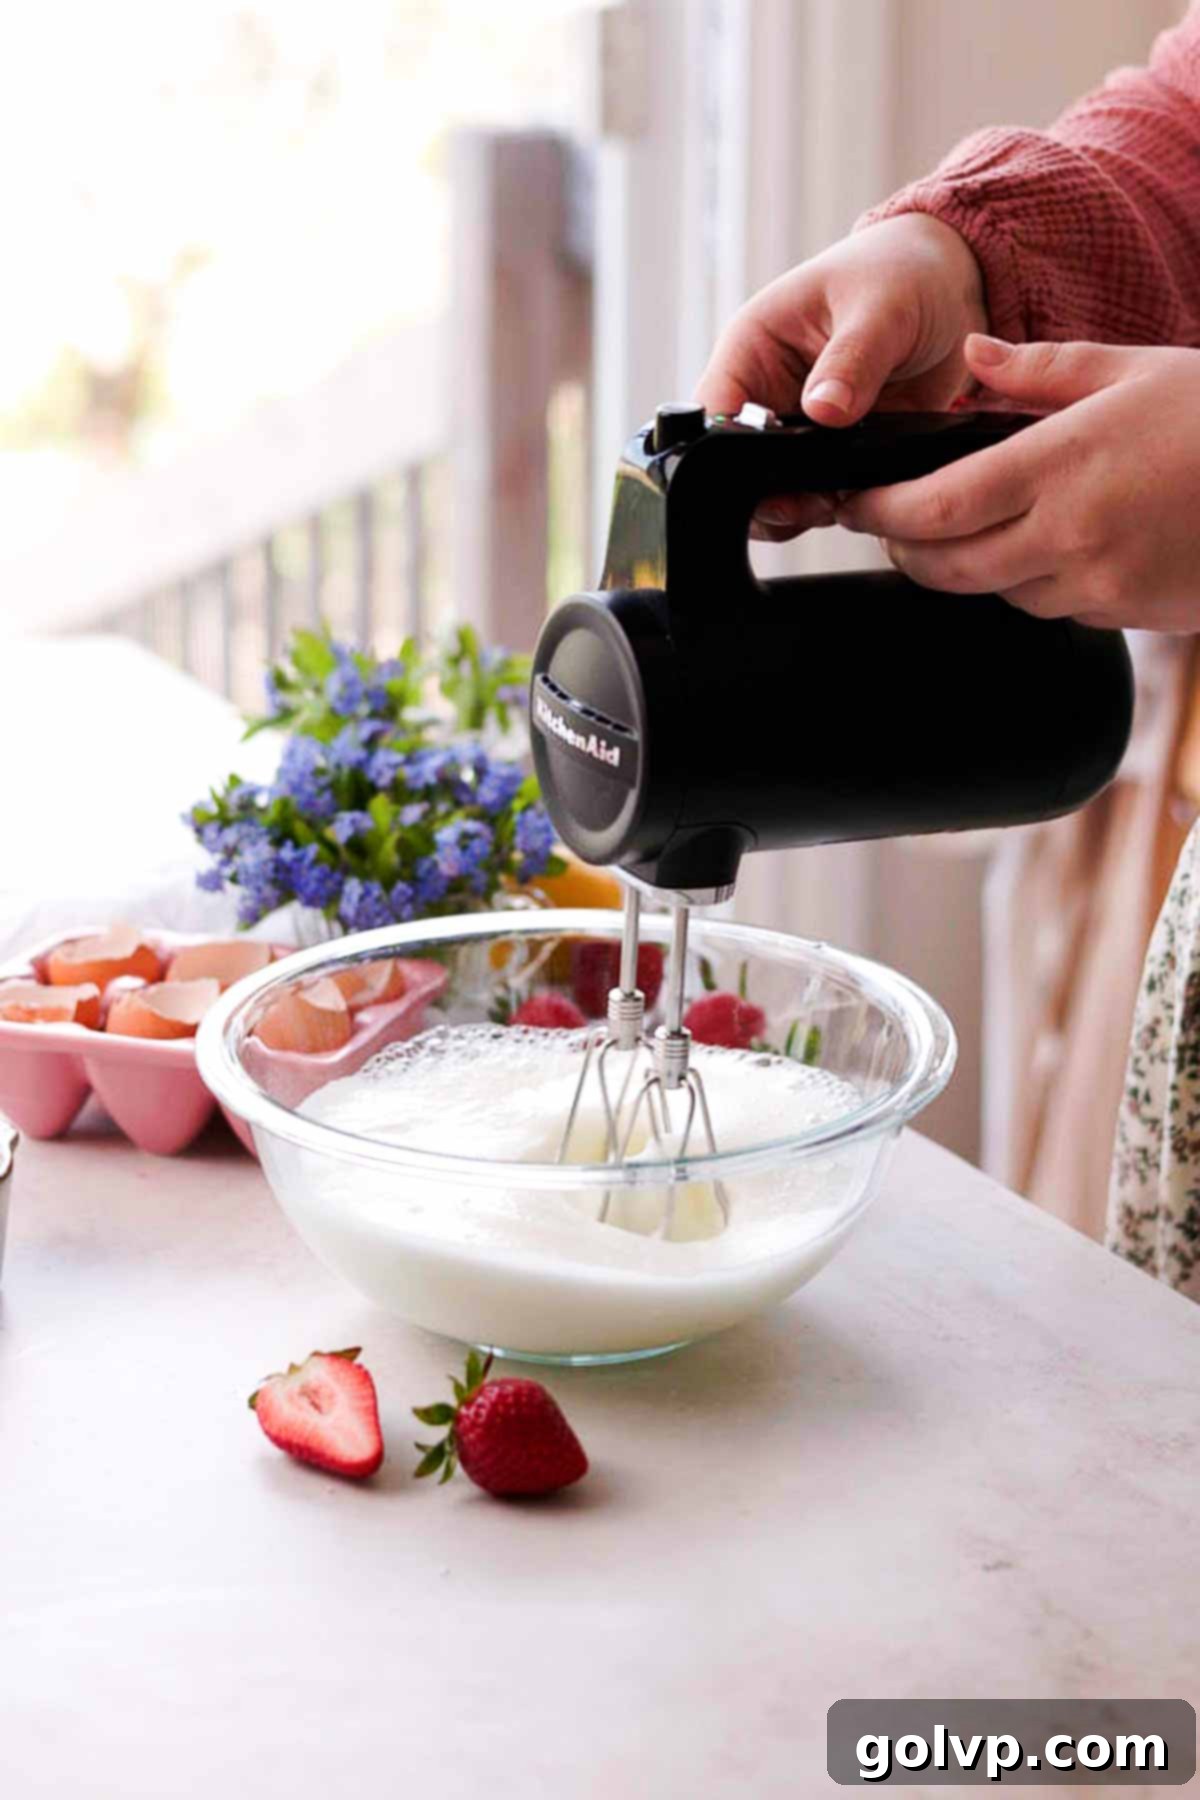
Step 2: Whip Egg Whites. In a large, impeccably clean bowl (preferably glass or metal) or the bowl of a stand mixer fitted with the whisk attachment, combine the room temperature egg whites and the cream of tartar. Begin whisking on medium speed. Continue to whisk until the egg whites transform into soft, medium peaks. This means that when you lift the whisk, the peaks will stand up but gently curl over at the tip.
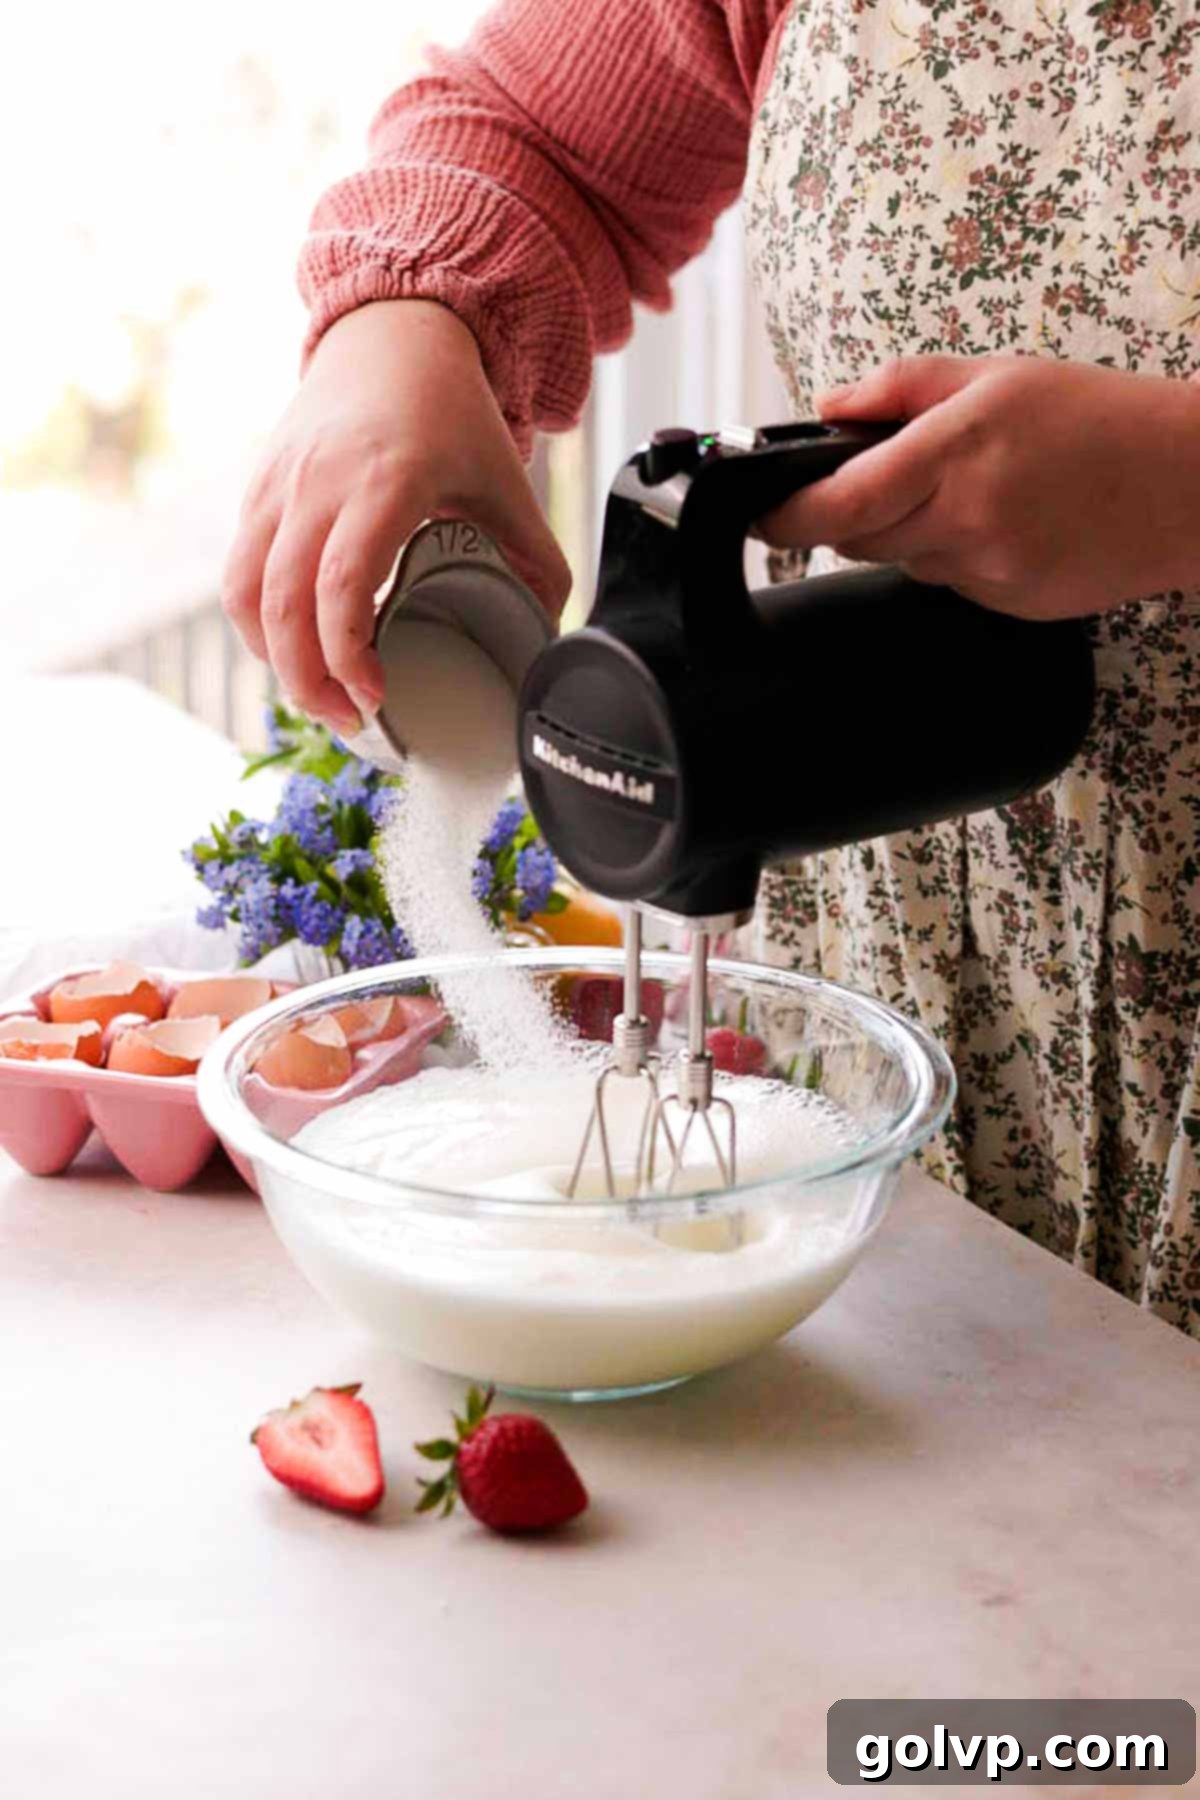
Step 3: Incorporate Sugar into Meringue. With the mixer still running, gradually pour in half a cup of the granulated sugar, adding it slowly in a steady stream. Continue whisking on medium-high speed until the egg whites become glossy and firm, forming stiff peaks. When you lift the whisk, the peaks should stand upright without curling. The mixture should also look smooth and hold its shape.
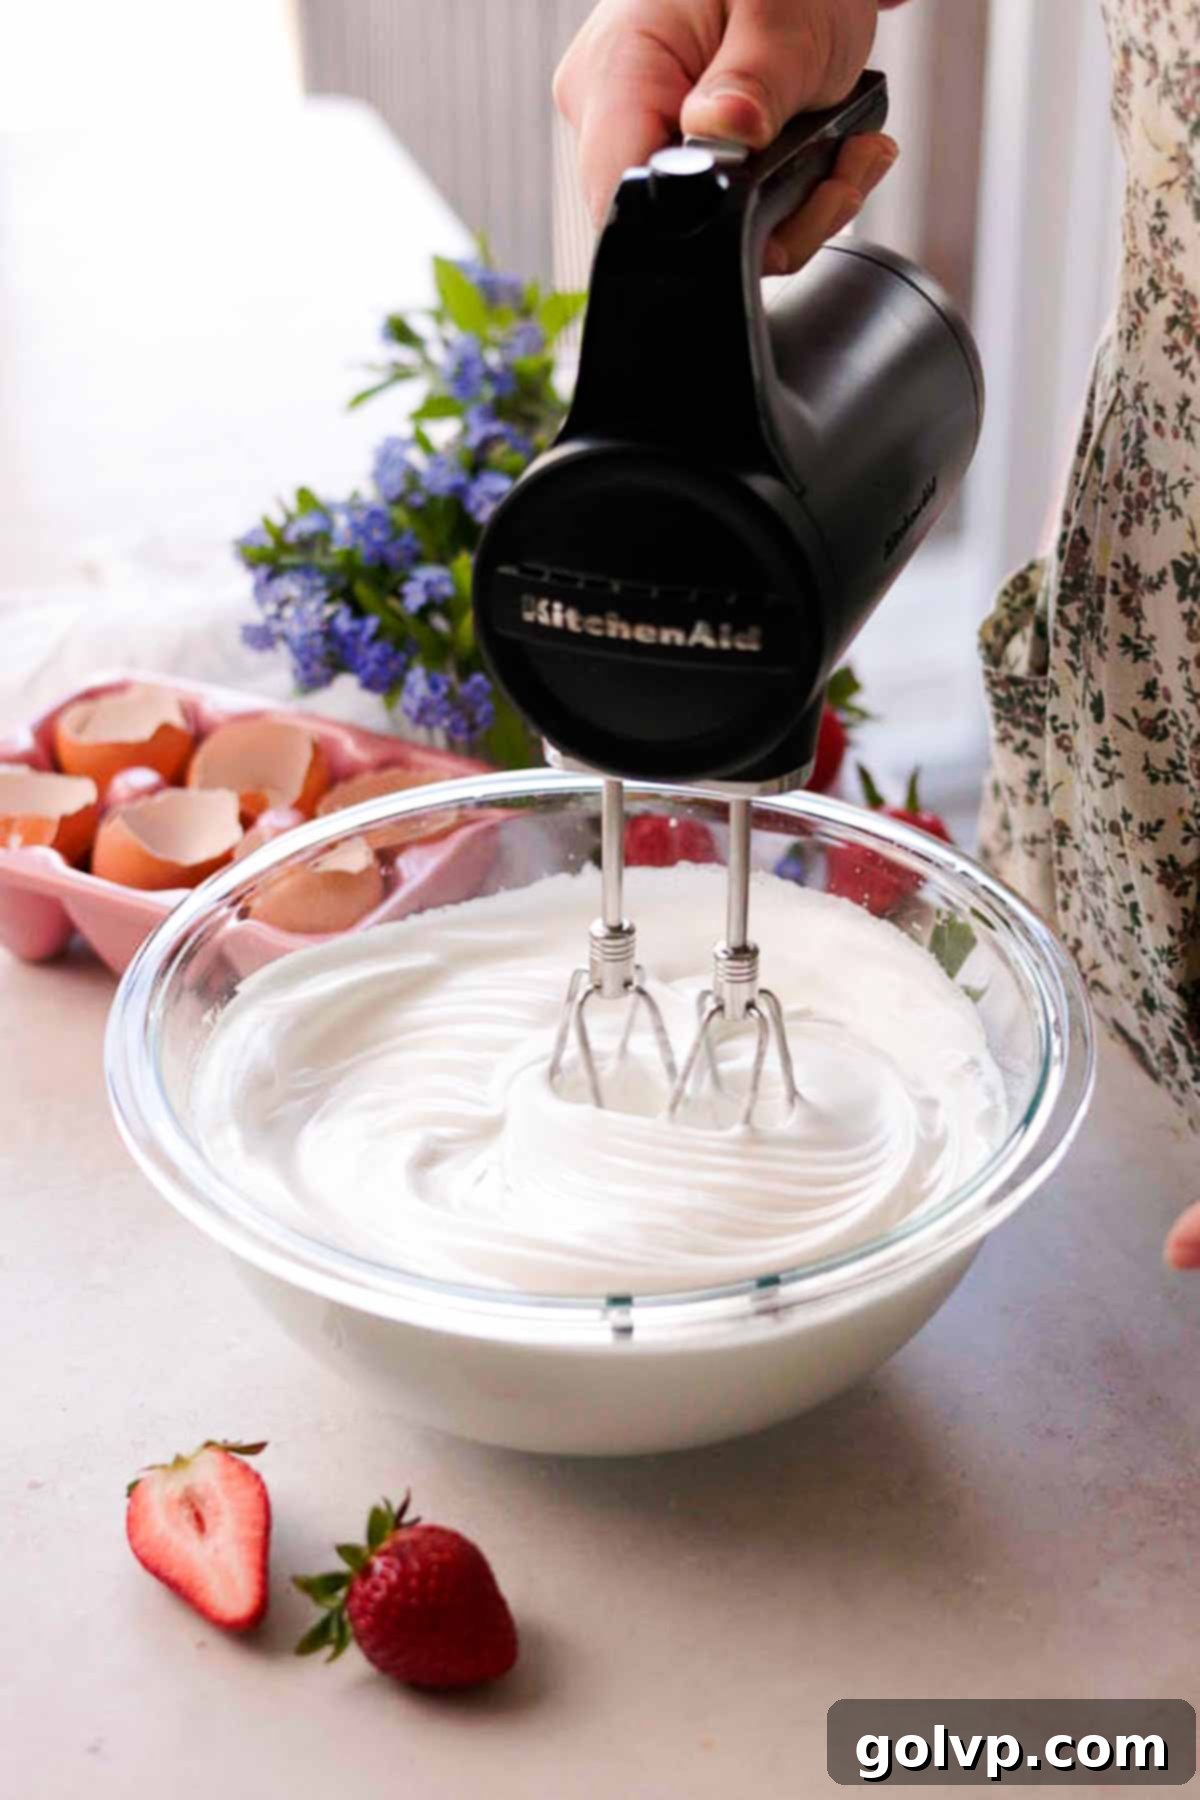
Step 4: Set Aside Whipped Whites. Once stiff peaks are achieved, carefully set the bowl of whisked egg whites aside. Alternatively, gently transfer the meringue to a separate clean bowl. This makes room in your mixing bowl for the next stage: preparing the egg yolk batter. Handle the meringue gently to preserve its volume.
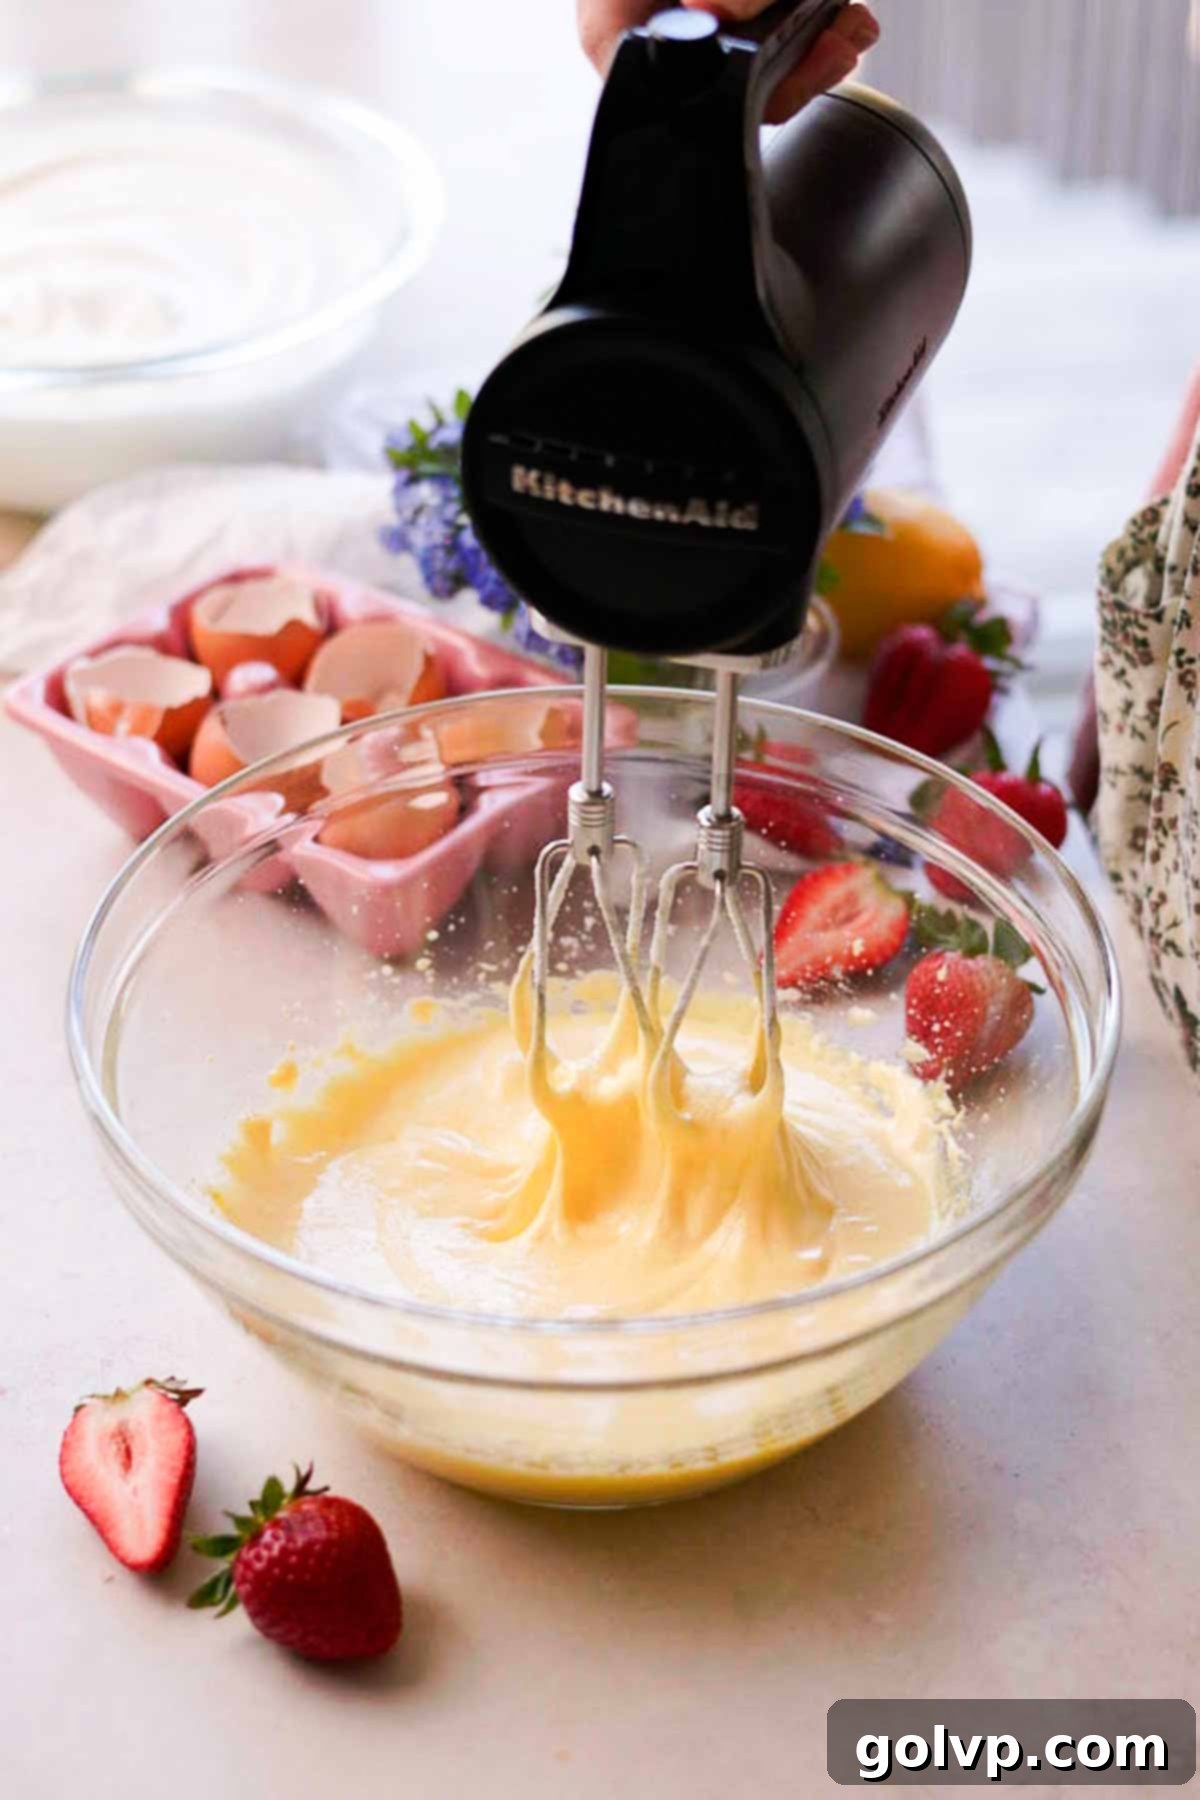
Step 5: Prepare Egg Yolk Base. In the same large bowl (no need to wash after the egg whites, as any residual whites won’t harm the yolks), add the egg yolks and the remaining 1 cup of granulated sugar. Using an electric mixer, beat the egg yolks and sugar together on medium-high speed until the mixture becomes significantly lighter in color and thick. When you lift the whisk, the batter should fall back into the bowl in thick ribbons that slowly disappear, indicating proper aeration and emulsification.
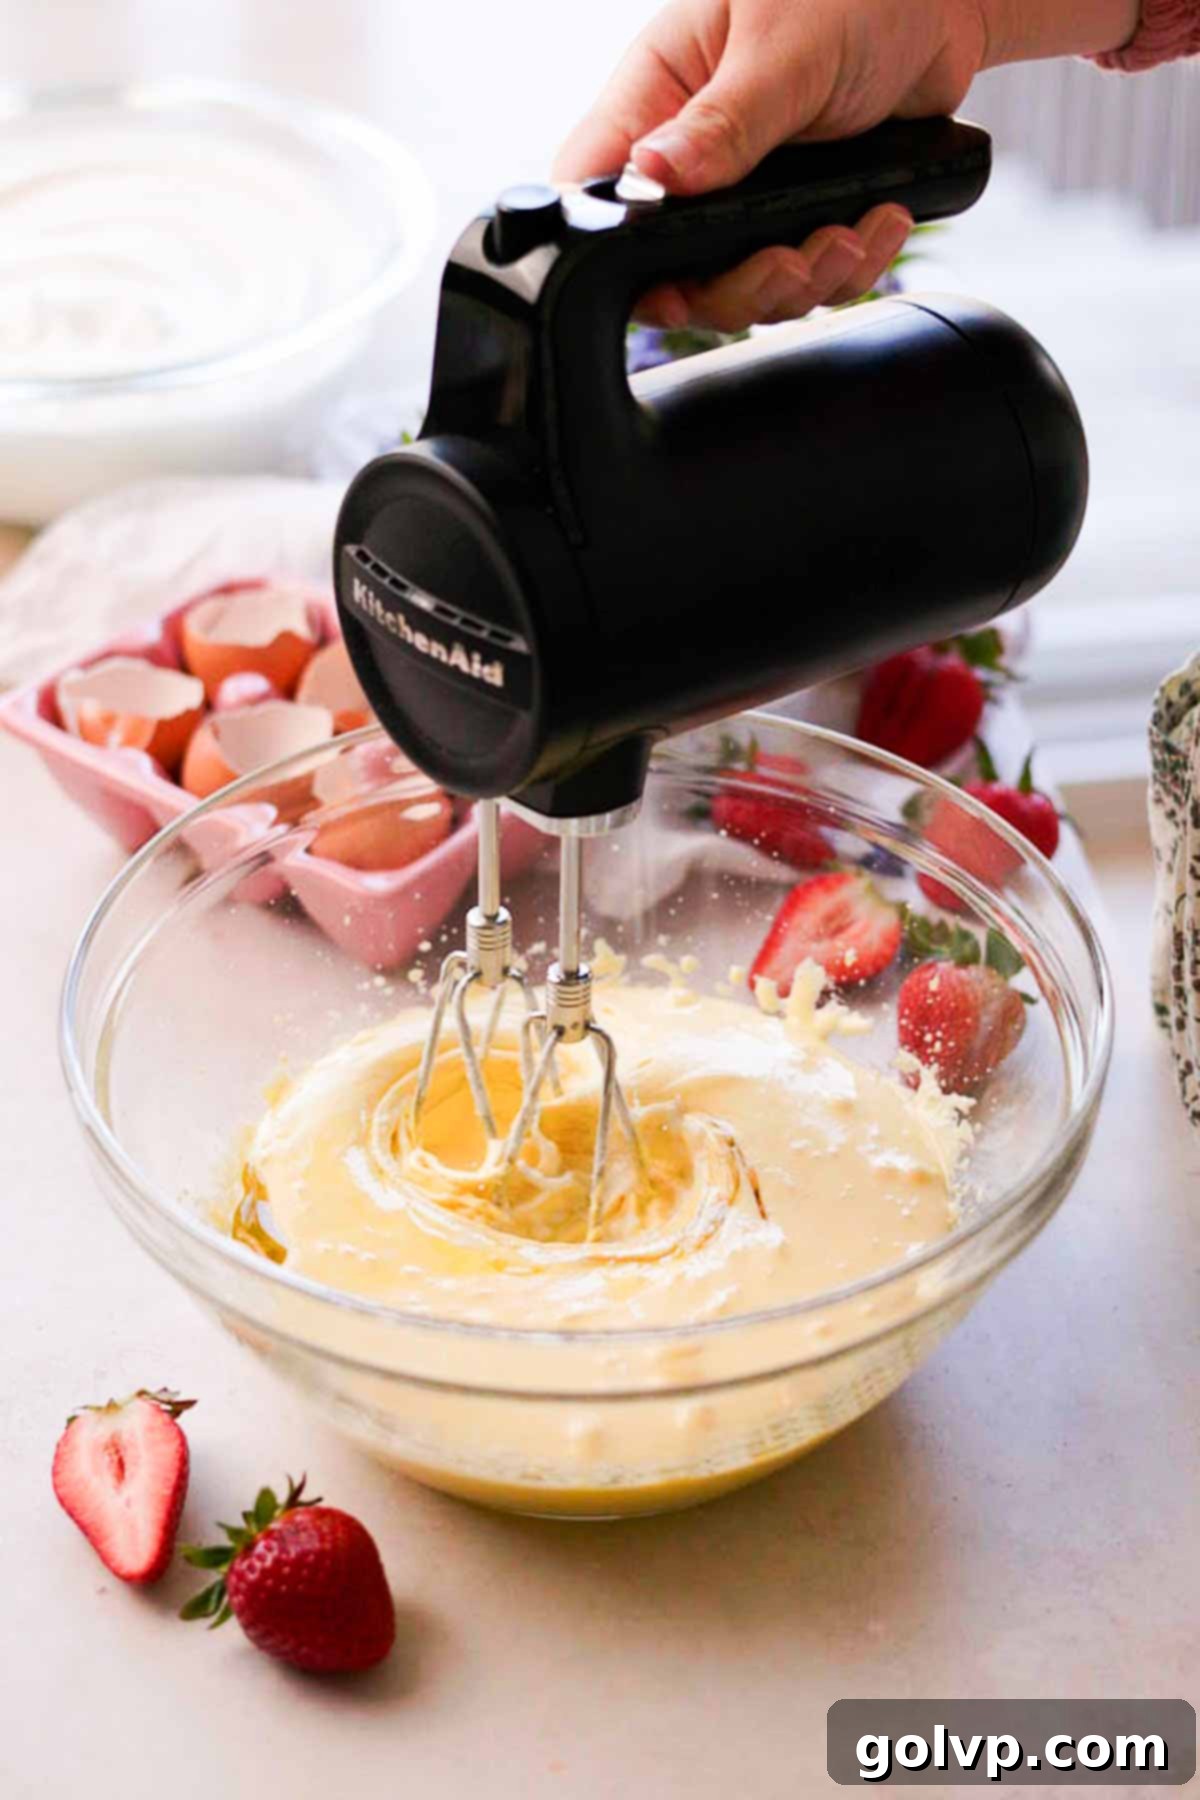
Step 6: Add Wet Ingredients. To the lightened egg yolk mixture, pour in the olive oil (or vegetable oil), milk, pure vanilla extract, and the sea salt. Mix everything together with the electric mixer on low speed just until all the ingredients are well incorporated. Be careful not to overmix at this stage; we simply want to combine the liquids evenly.
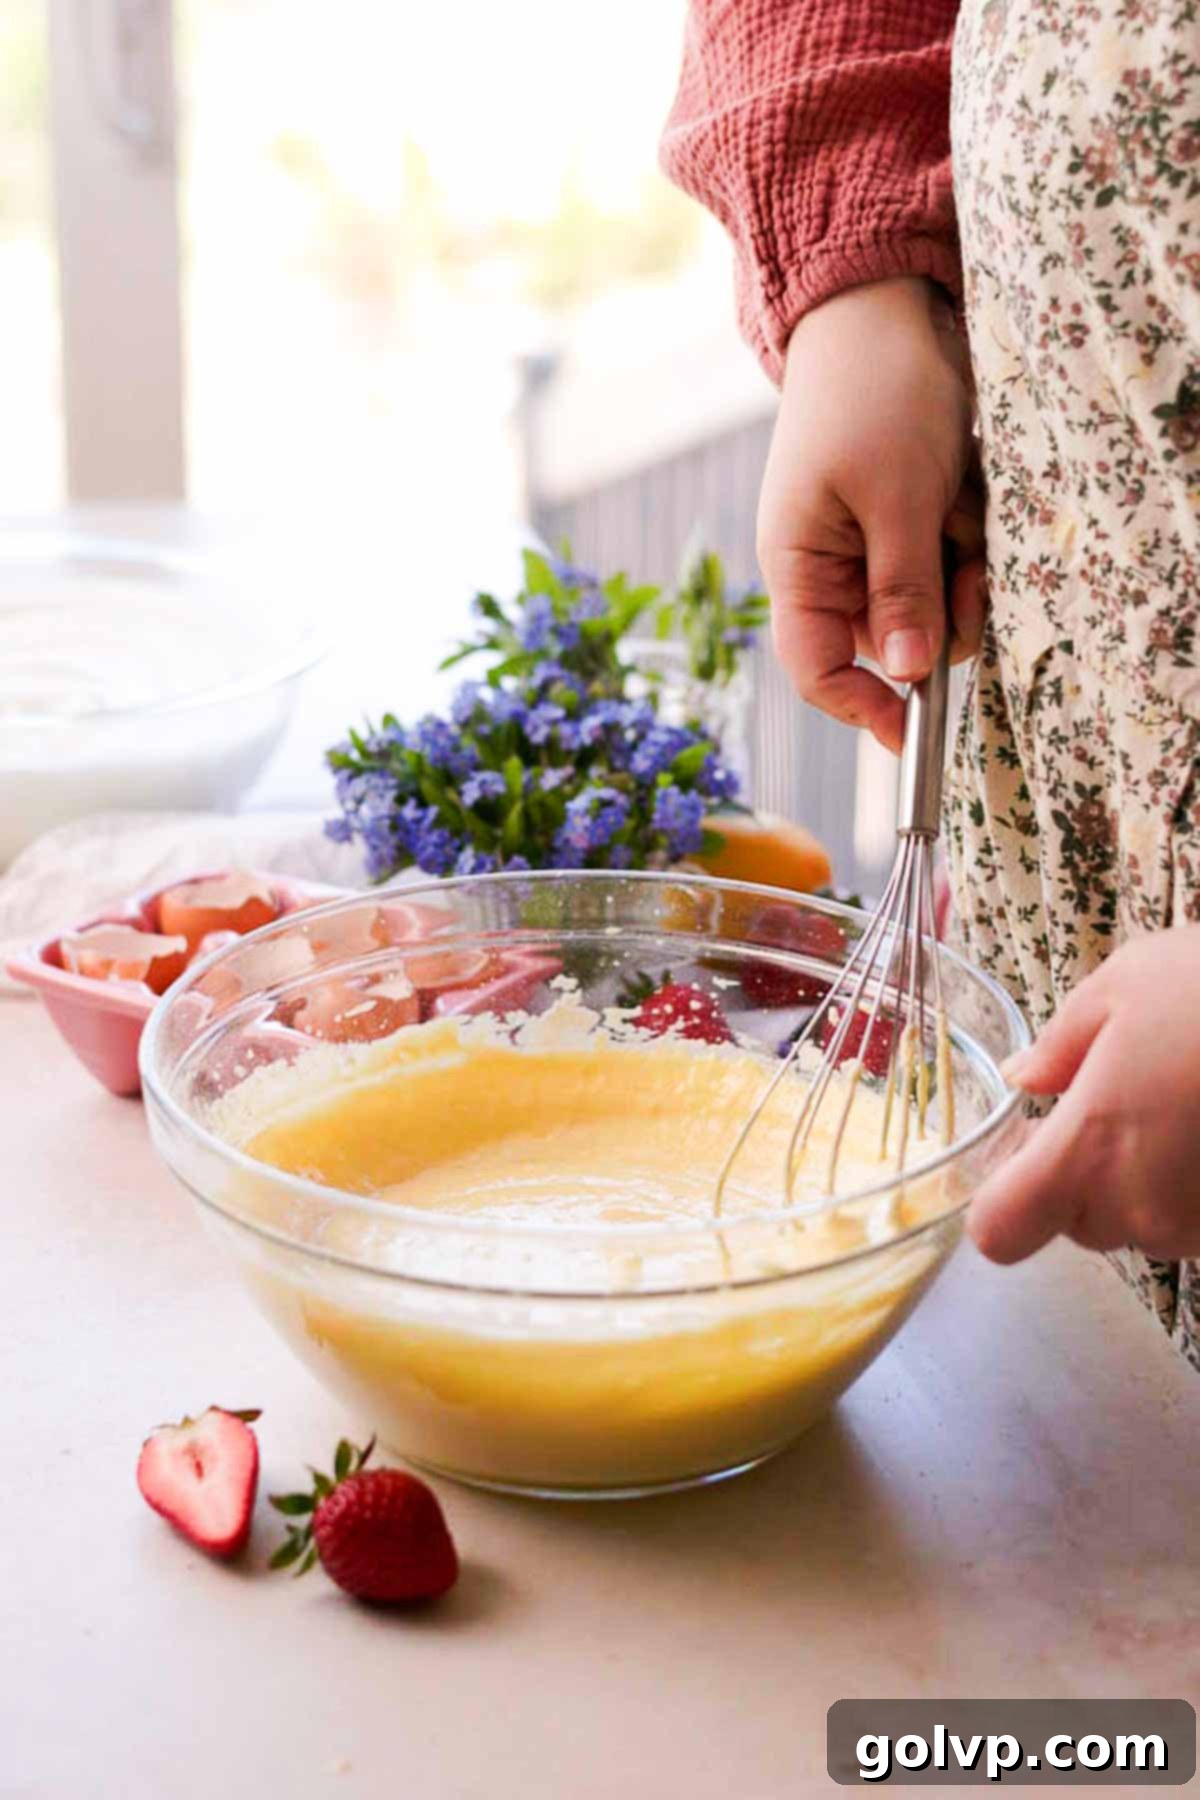
Step 7: Fold in Dry Ingredients. Sift the all-purpose flour, baking powder, and cornstarch directly into the egg yolk mixture. Sifting is important to prevent lumps and ensures a smoother batter. Using a wire whisk, gently fold the dry ingredients into the wet mixture by hand. Be very gentle and fold just until no streaks of dry flour remain. Overmixing here can develop the gluten in the flour, resulting in a tough cake.
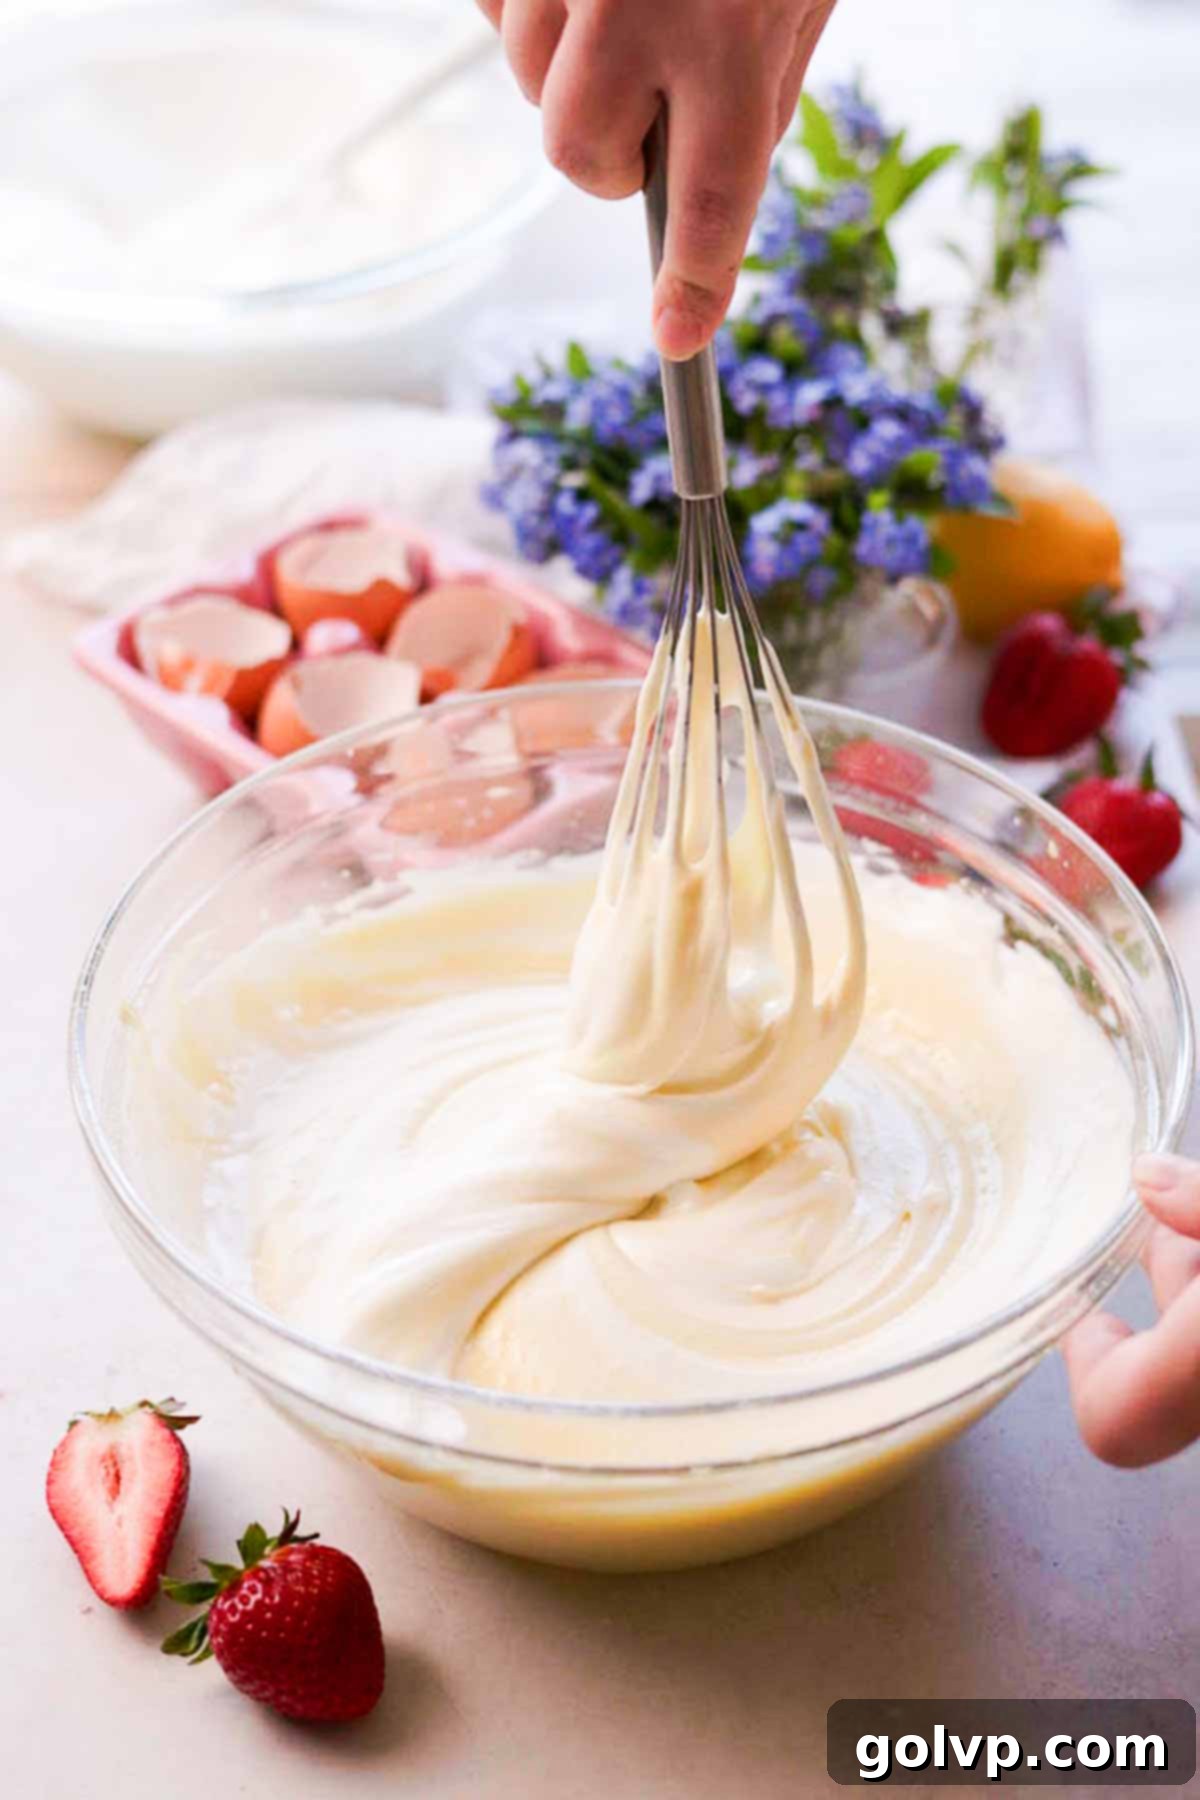
Step 8: Gently Incorporate Meringue. Take a large scoop (about a third) of the whipped egg whites and add it to the egg yolk batter. Gently fold this portion in with your wire whisk (by hand) until it is just evenly mixed. This lightens the batter, making it easier to incorporate the remaining meringue without deflating it. Add the rest of the egg whites to the batter and continue to gently fold until the mixture is uniform and airy. Stop folding as soon as no white streaks are visible, to maintain maximum volume and fluffiness.
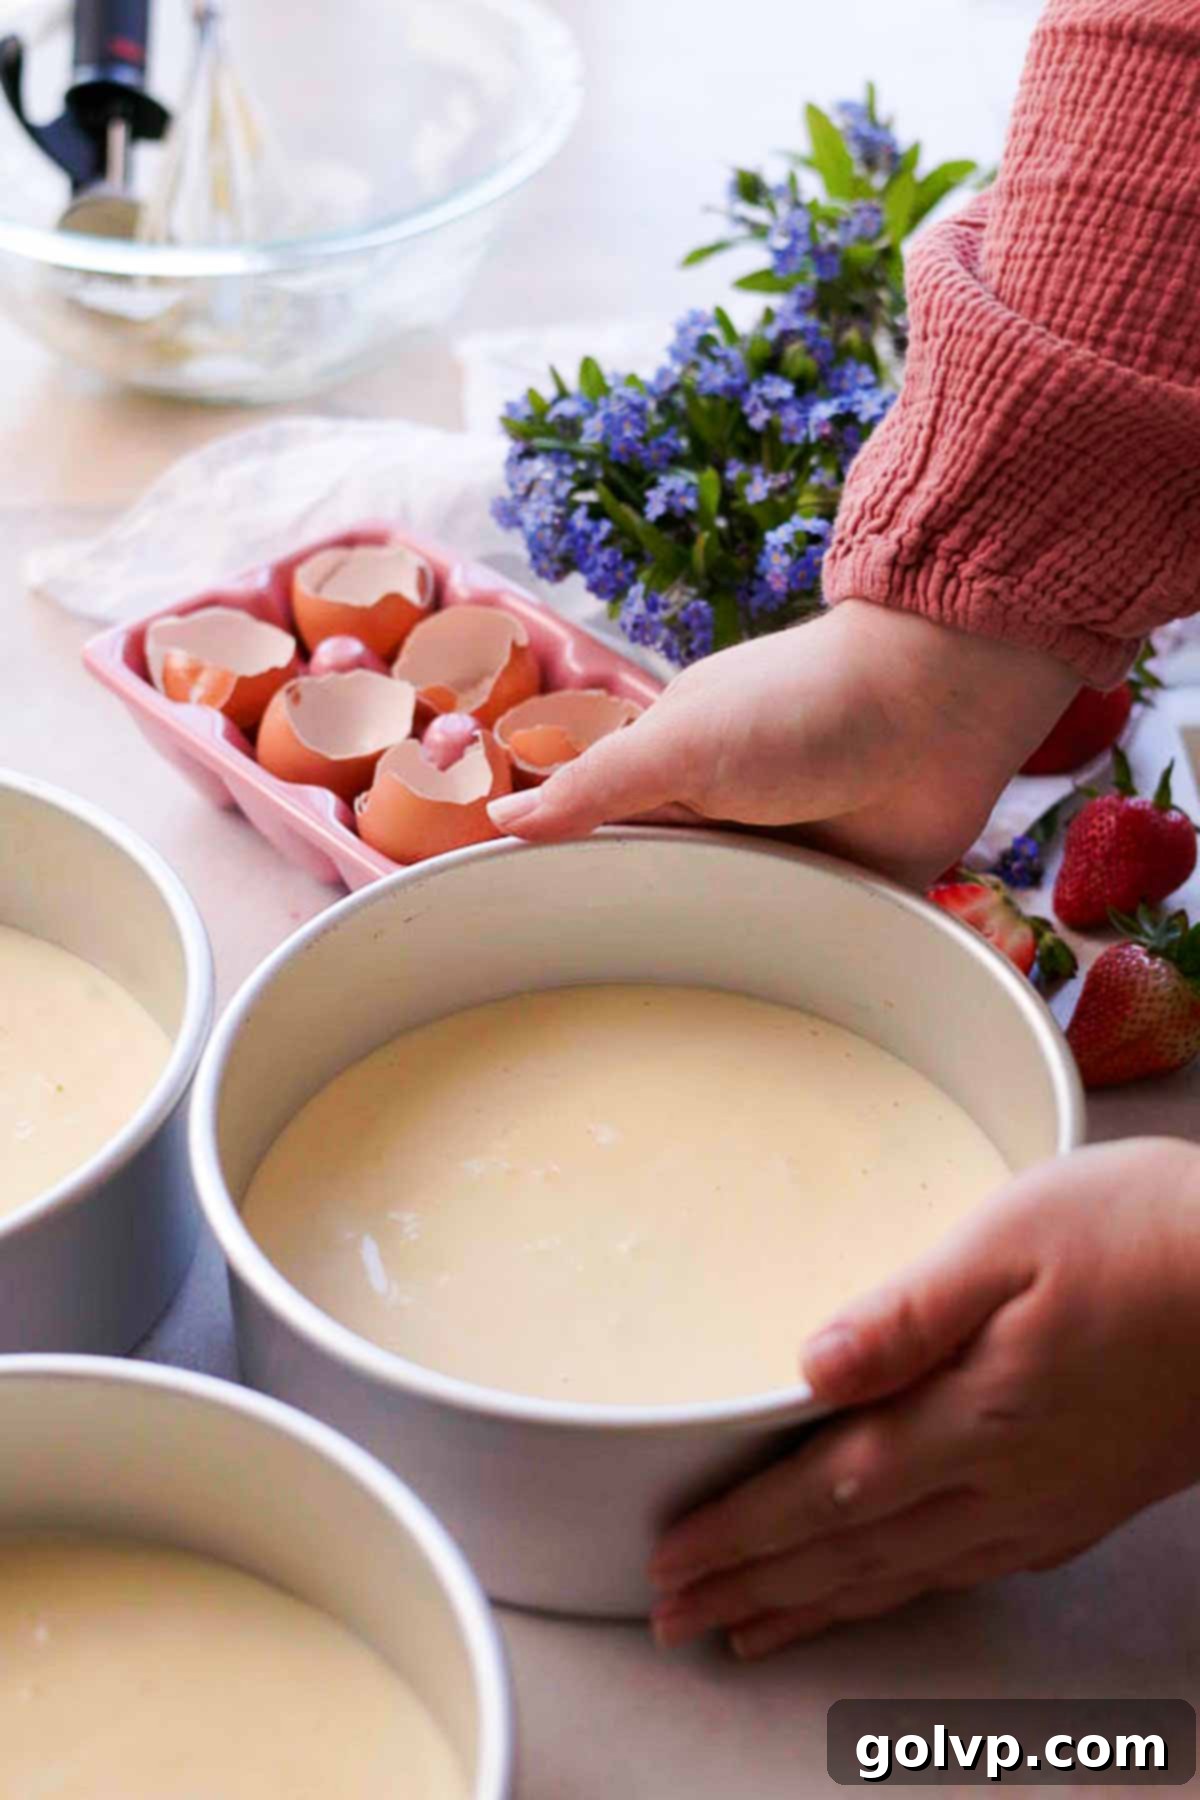
Step 9: Bake the Layers. Divide the chiffon cake batter evenly among the three prepared 8-inch baking pans. For precision and perfectly uniform cake layers, use a large ice cream scoop or a kitchen scale to measure the batter into each pan. Even layers are key for a beautifully presented and balanced cake.
Transfer the pans to your preheated oven and bake for approximately 15 to 18 minutes. The cakes are done when a wooden toothpick or skewer inserted into the center of a cake layer comes out mostly clean, with only a few moist crumbs attached. Avoid overbaking, as this can lead to dry chiffon.
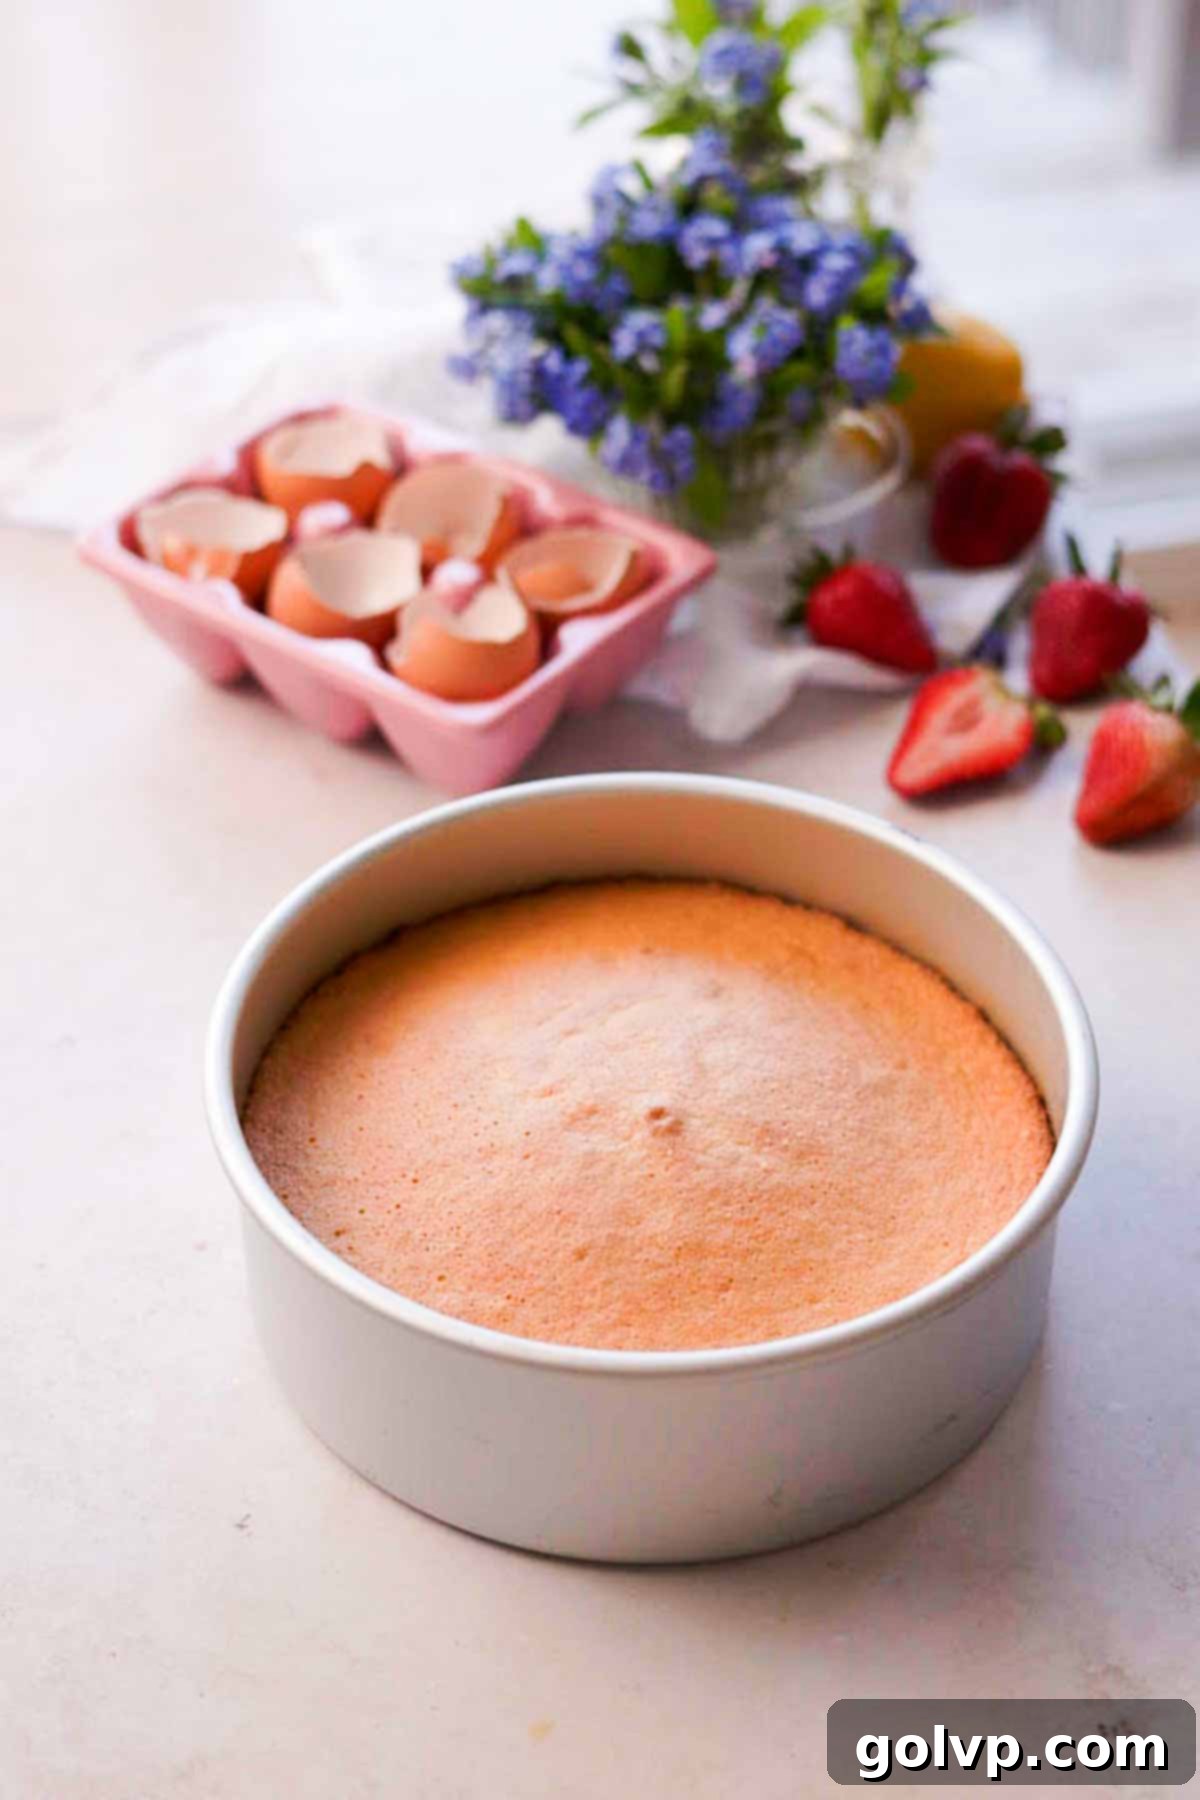
Step 10: Cool Cake Layers Upside Down. This is a crucial step for chiffon cakes! As soon as the baked layers are removed from the oven, immediately flip each pan upside down onto a wire rack. The cake layers should adhere to the sides of the pan. This ingenious technique uses gravity to prevent the delicate chiffon cake from collapsing and compressing as it cools, helping it maintain its airy, lofty structure.
Allow the cakes to cool completely to room temperature while inverted. Once thoroughly cooled, run a thin spatula or knife carefully along the edges of each cake pan to gently release the layers. Then, simply flip the pan over, and the perfectly baked chiffon layer should slide out with ease.
Yogurt Whipped Cream Frosting Step by Step
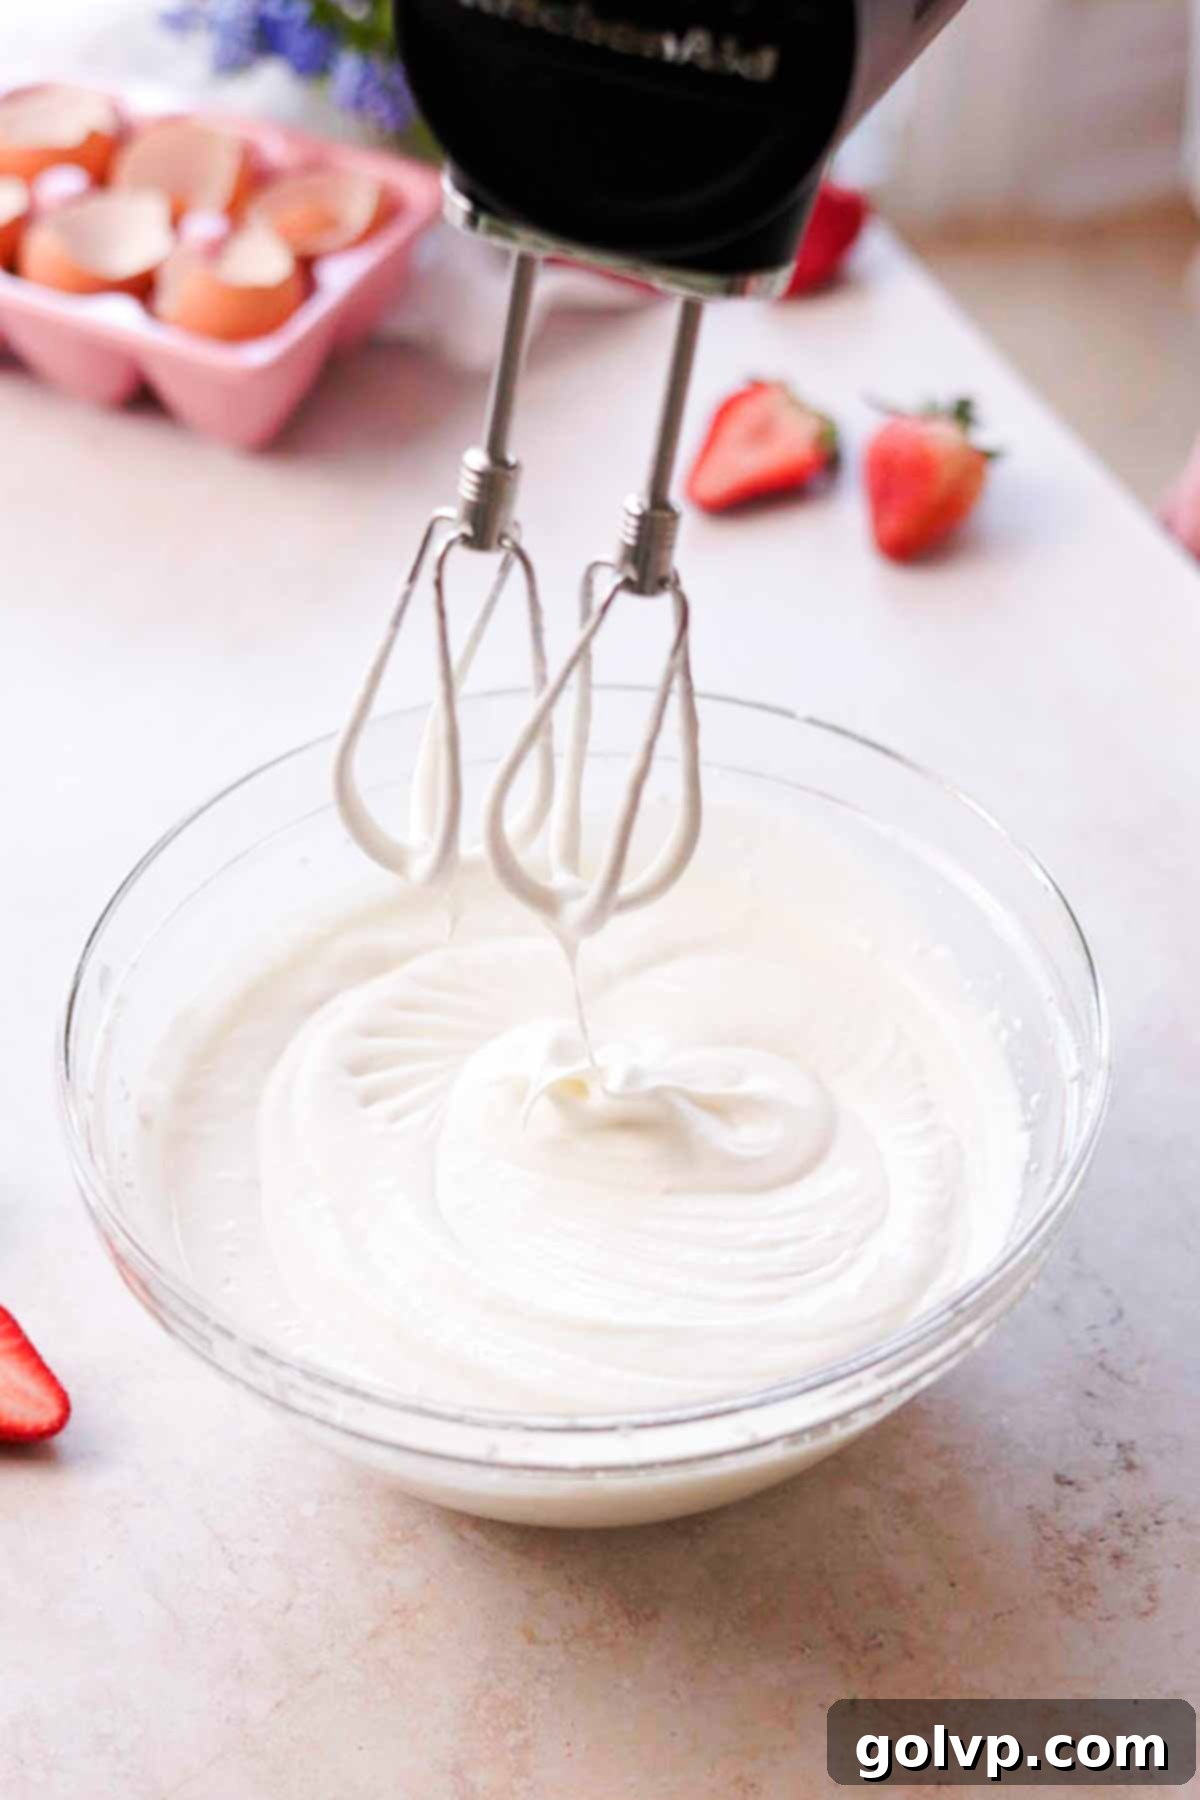
Step 1: Whip Cream to Medium Peaks. In a large, chilled bowl or the bowl of a stand mixer equipped with the whisk attachment, pour in the ice-cold heavy whipping cream and add the powdered sugar. Begin whipping on medium-high speed. Continue to whisk until the cream reaches medium peaks. At this stage, the cream will hold its shape when the whisk is lifted, but the tips will gently curl over. Ensure your cream is very cold for the best results, as this helps it whip up faster and with greater volume.
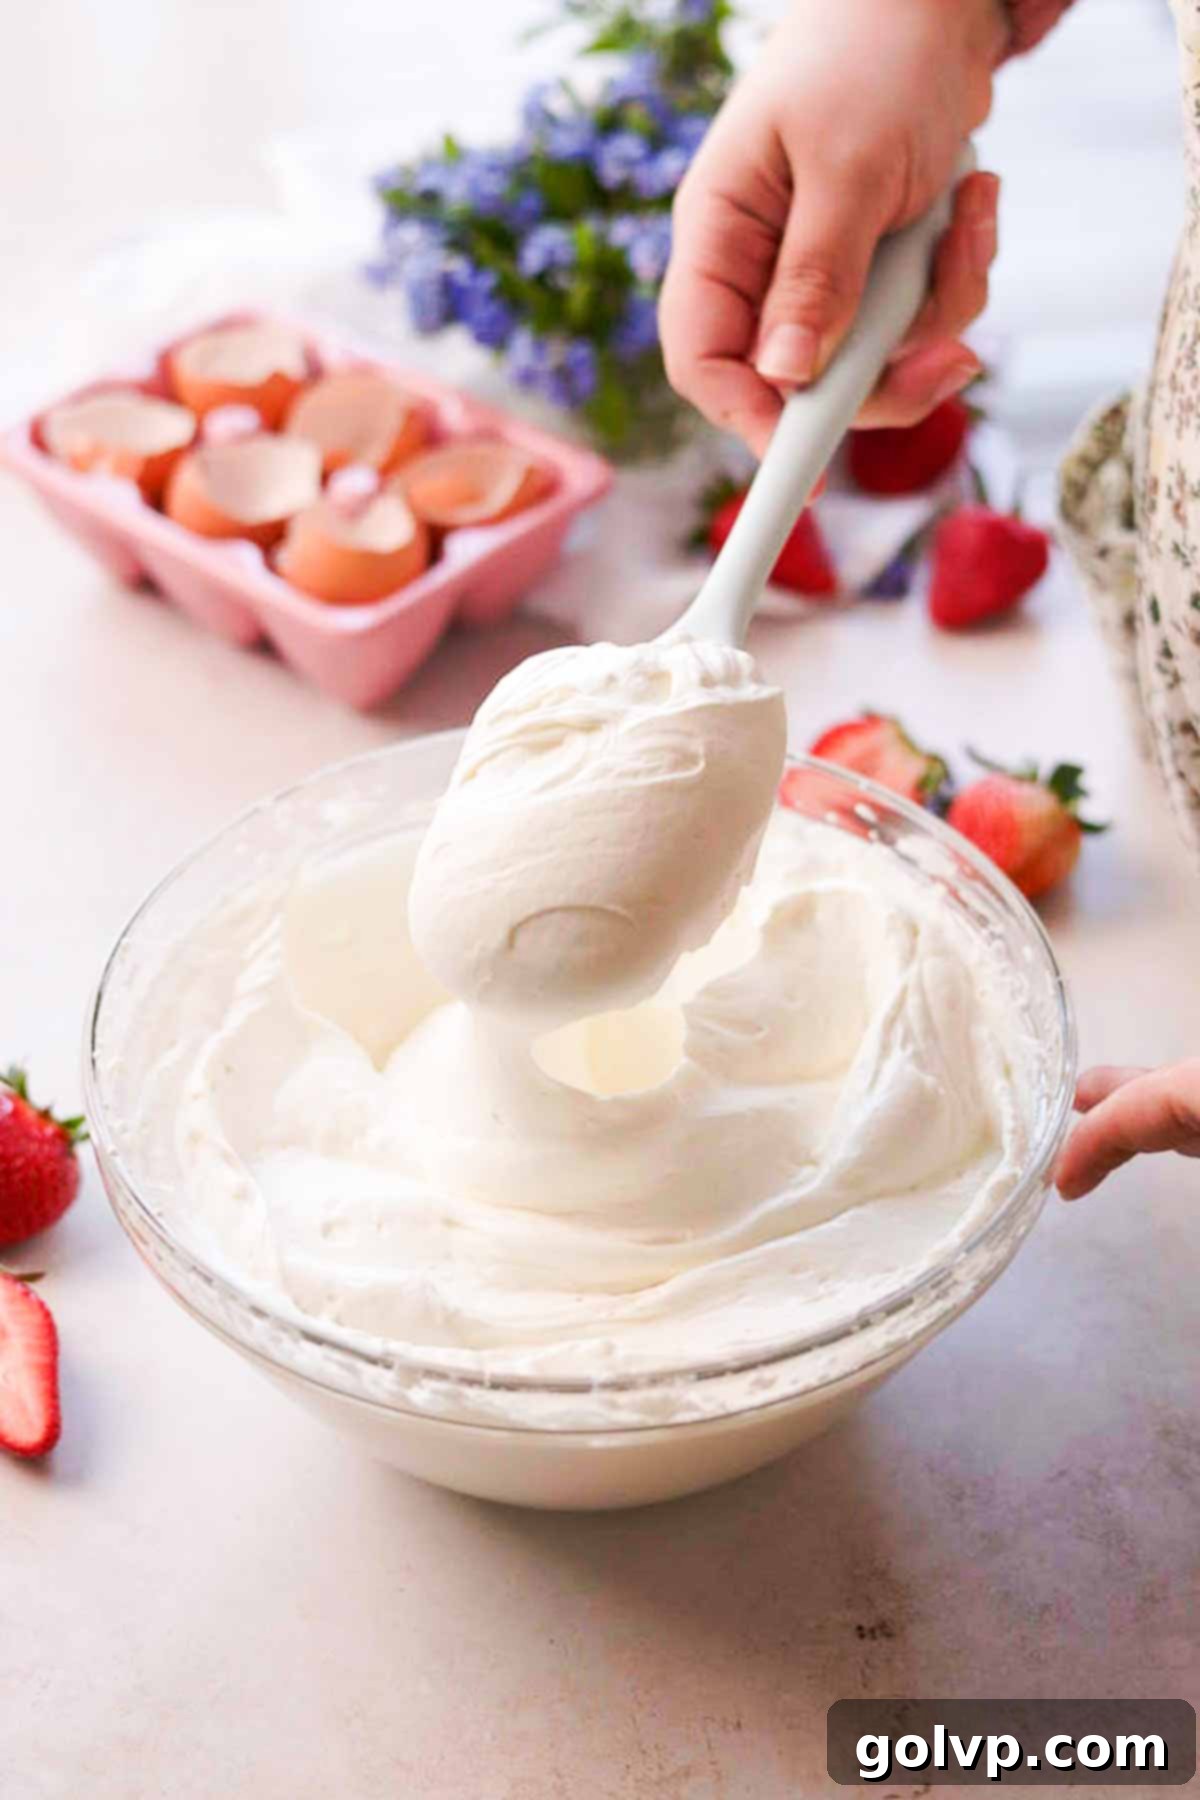
Step 2: Add Yogurt and Flavorings, Whip to Thick and Creamy. Now, carefully add the cold plain Greek yogurt, vanilla extract, and a pinch of sea salt into the bowl with the whipped cream. Resume whipping on medium speed. Continue to whip just until the frosting becomes wonderfully thick, creamy, and holds stiff peaks. It should look fluffy and stable, perfect for piping and spreading. Be very careful not to over-whip the mixture, as this can cause it to become grainy and curdle. As soon as it reaches the desired consistency, stop whipping. Once prepared, transfer the luscious whipped yogurt frosting into a piping bag for easier assembly.
Assembling Layered Strawberry Chiffon Cake Step by Step
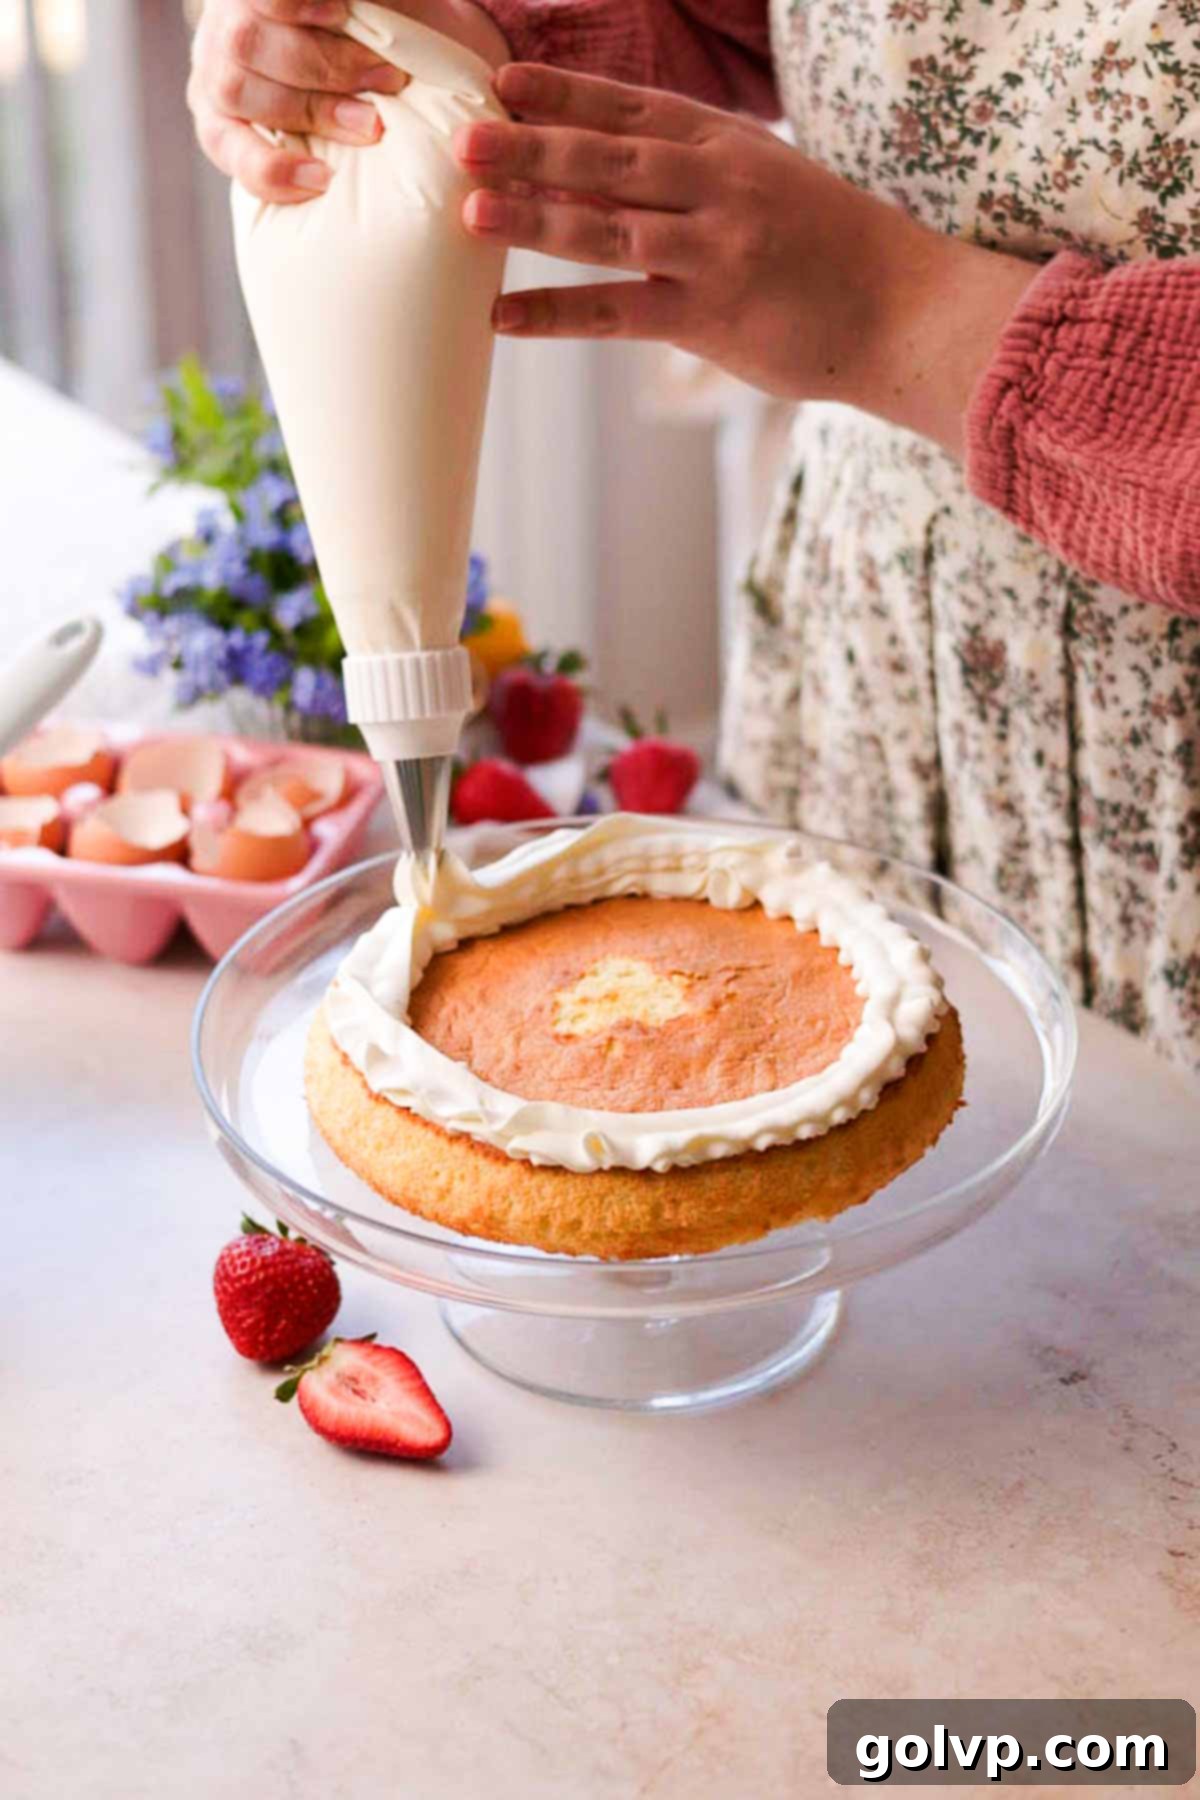
Step 1: Prepare the First Layer. Begin by piping a small dollop of frosting onto the center of your serving plate or cake stand. This acts as an anchor to prevent the cake from sliding. Carefully place the first cooled chiffon cake layer on top of this frosting dollop. Using your piping bag filled with the whipped yogurt frosting, pipe a thick, even border of frosting around the perimeter of this first cake layer. This creates a “dam” that will hold the strawberry filling in place.
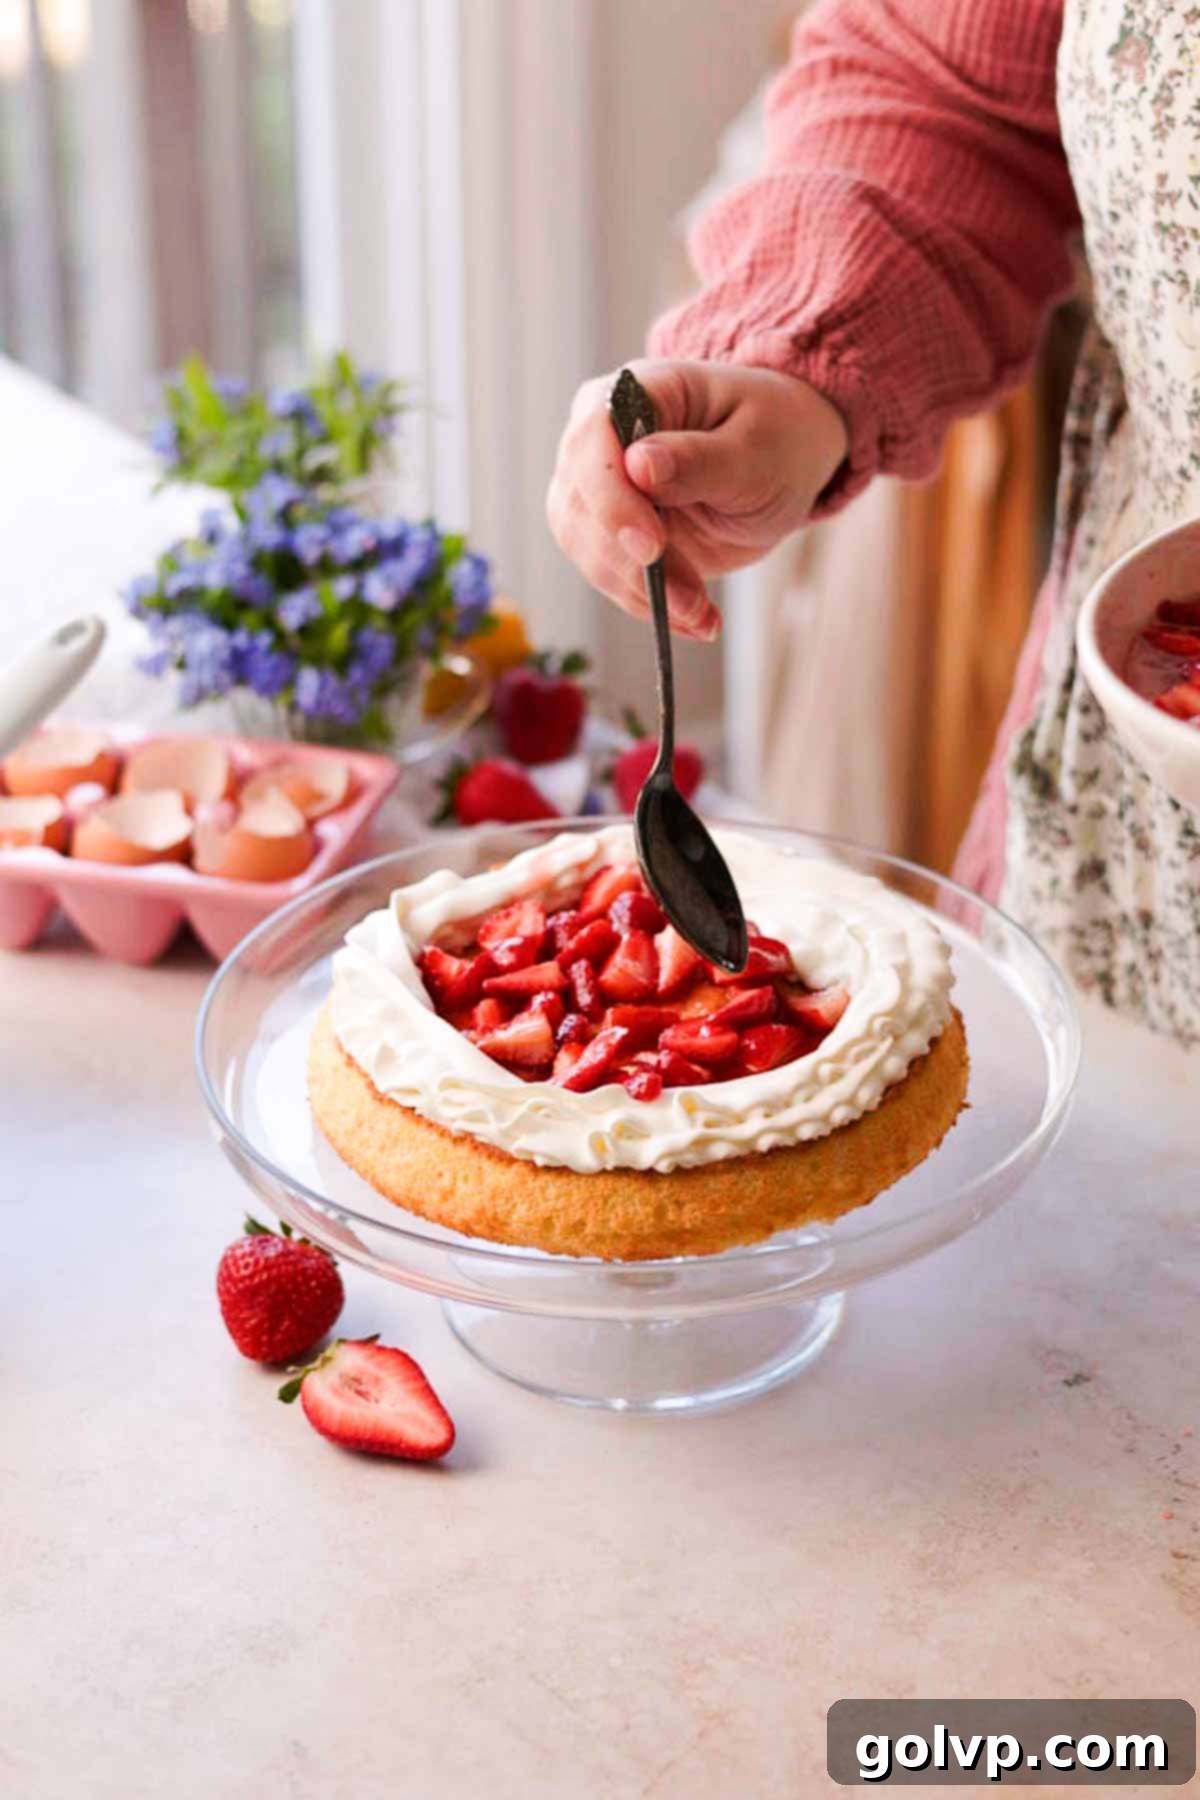
Step 2: Fill with Macerated Strawberries. Once your frosting border is in place, spoon a generous amount of the juicy, macerated strawberries into the center of the cake layer, inside the frosting dam. Spread them out evenly. Don’t forget to drizzle some of that exquisite strawberry syrup from the bowl over the berries and onto the cake layer itself – this adds incredible moisture and flavor!
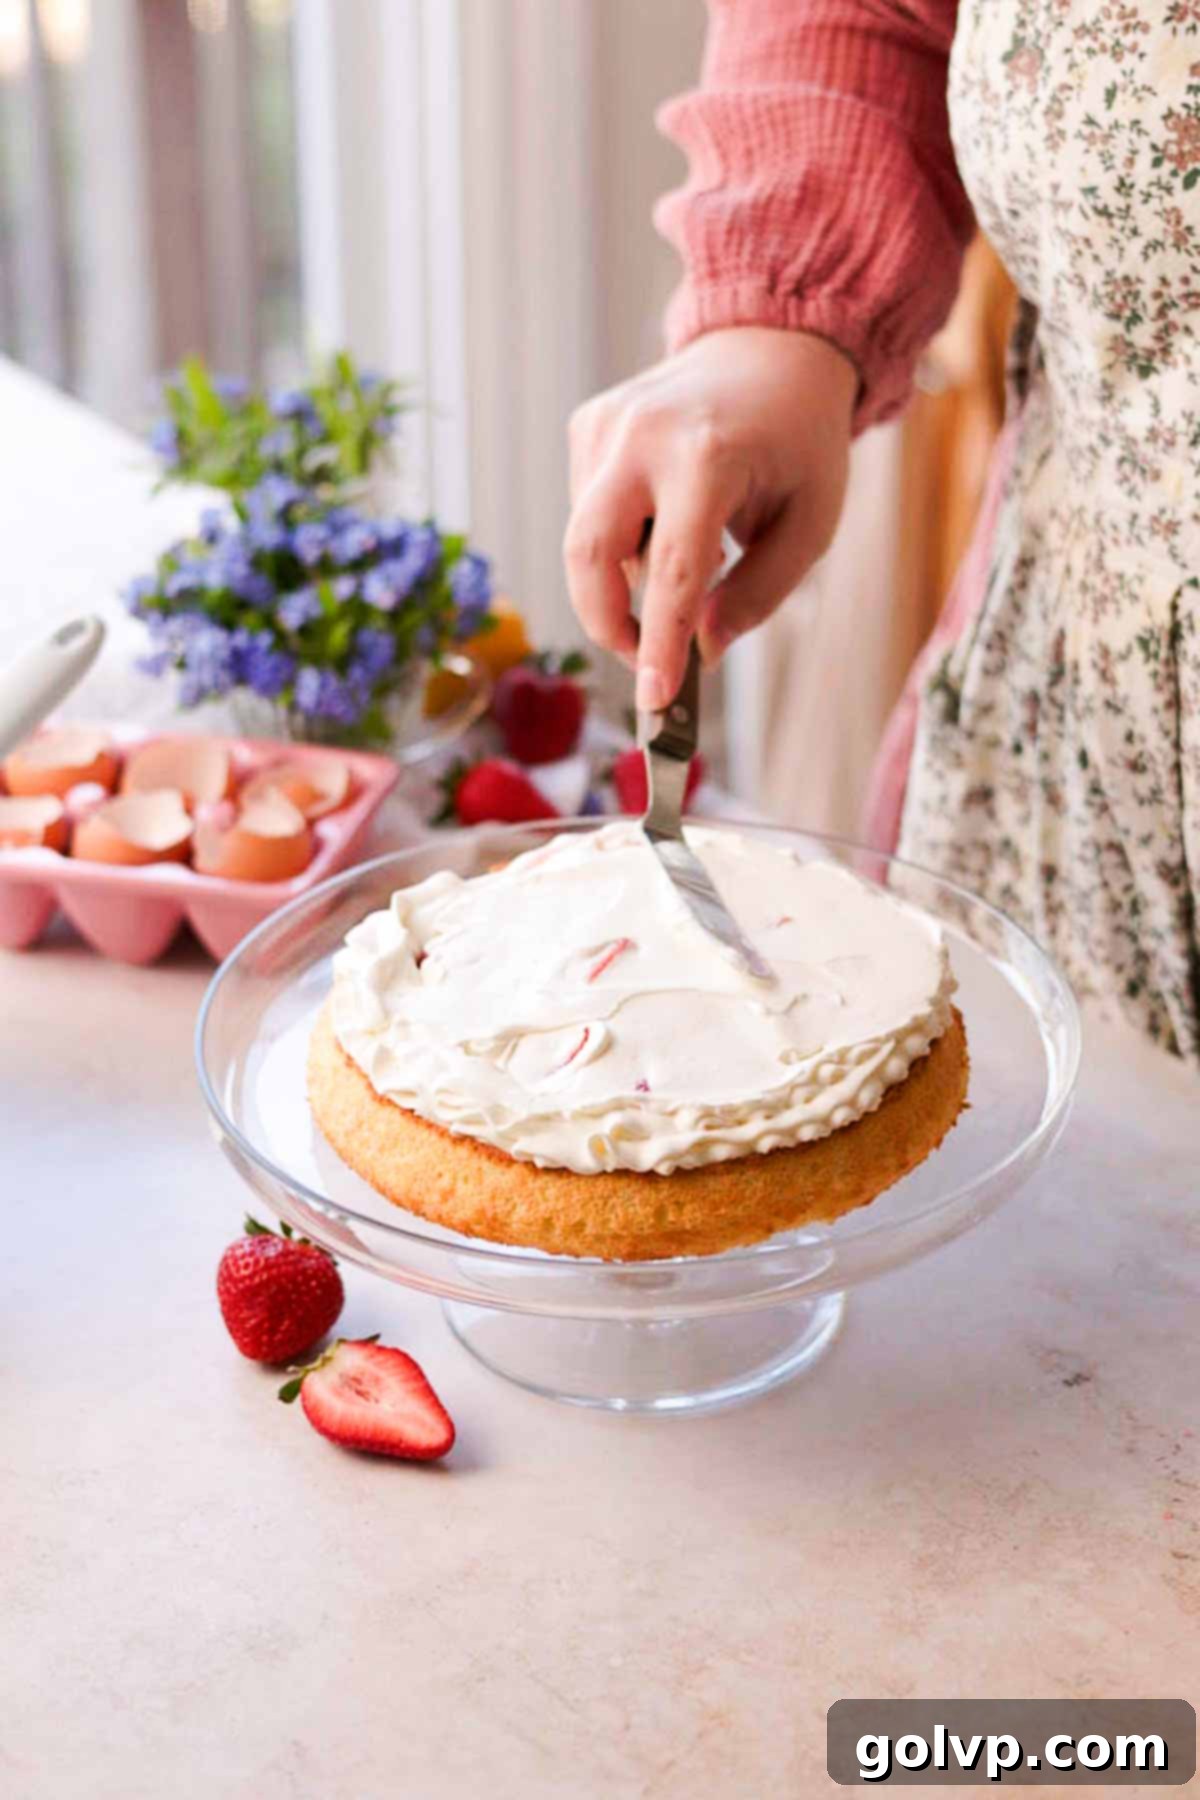
Step 3: Seal and Repeat Layers. To secure the strawberry filling, pipe or spoon another generous dollop of frosting directly over the macerated strawberries, then gently spread it out to create an even, smooth layer that completely seals in the berries. This provides a stable base for the next cake layer. Place the second chiffon cake layer on top, then repeat the process: pipe a frosting border, fill with macerated strawberries and syrup, and seal with more frosting. Finally, place the last cake layer on top, ensuring it is flipped upside down for the flattest possible surface, which makes frosting the exterior much easier.
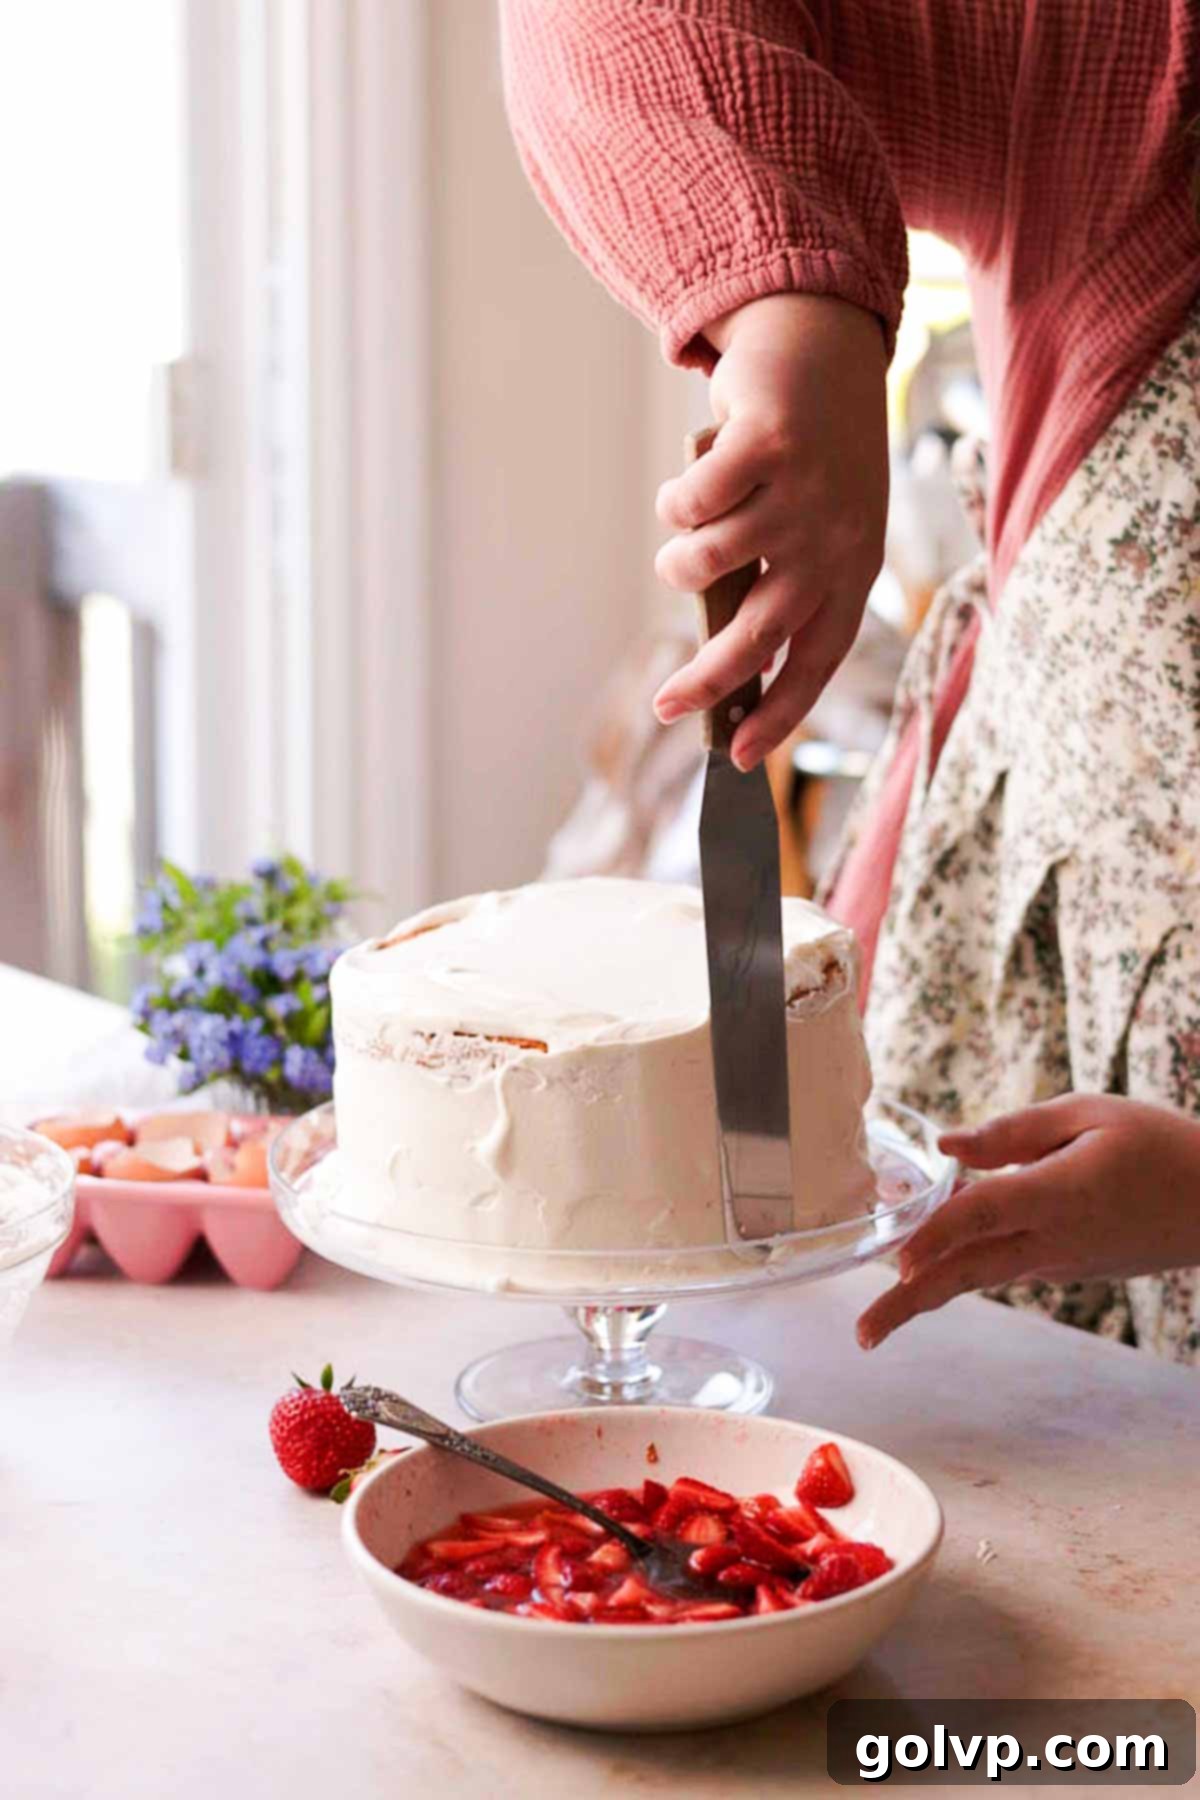
Step 4: Frost and Chill the Cake. Once all layers are stacked, use the remaining whipped yogurt frosting to cover the entire cake – top and sides – in an even, smooth layer. For best results, use a long, straight offset spatula to achieve smooth sides and a level top. To ensure a professional finish, scrape your spatula clean against the edge of the bowl after each swipe, removing excess frosting and preventing crumbs from being dragged across the cake.
Once frosted, place the cake in the freezer for about 15 minutes to allow the frosting to set quickly if you plan to serve it immediately. For longer storage or to ensure maximum stability, refrigerate the cake for up to 24 hours before serving.
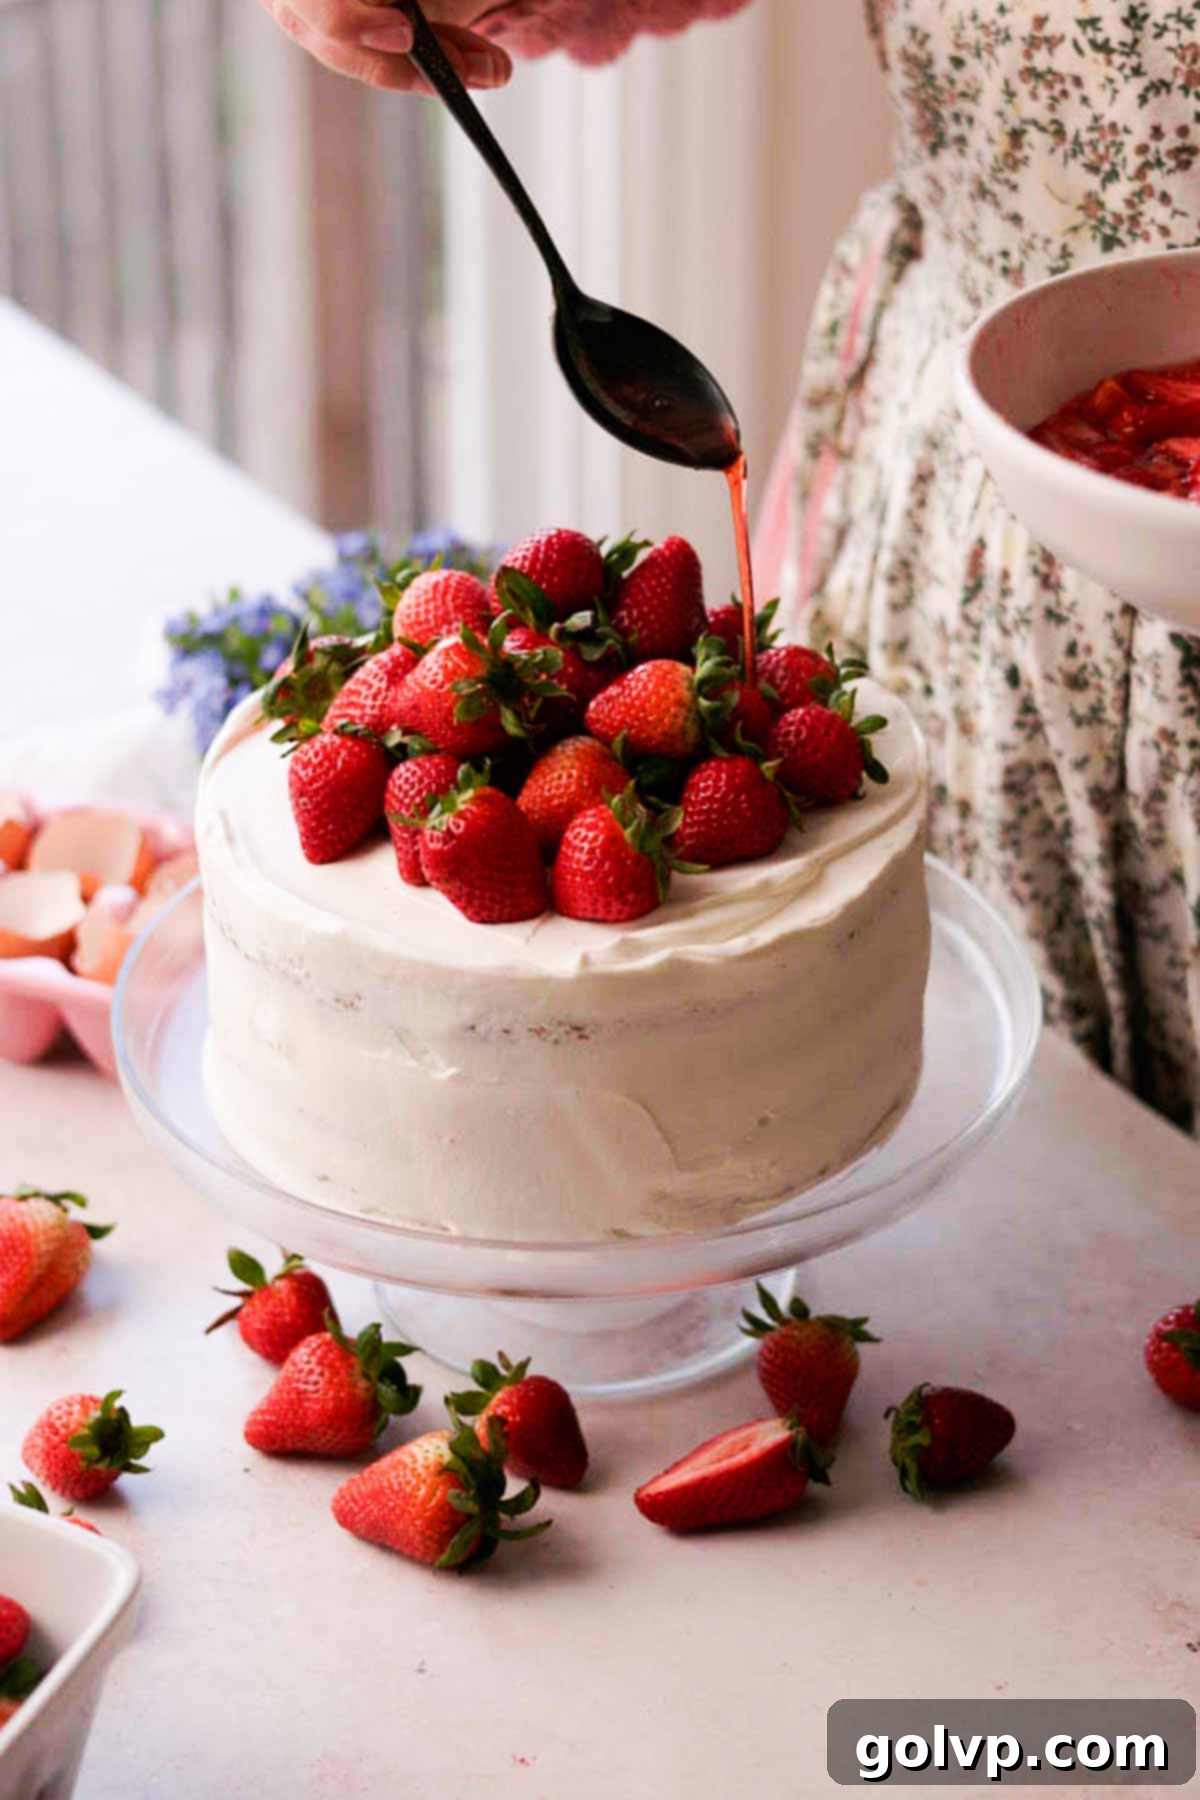
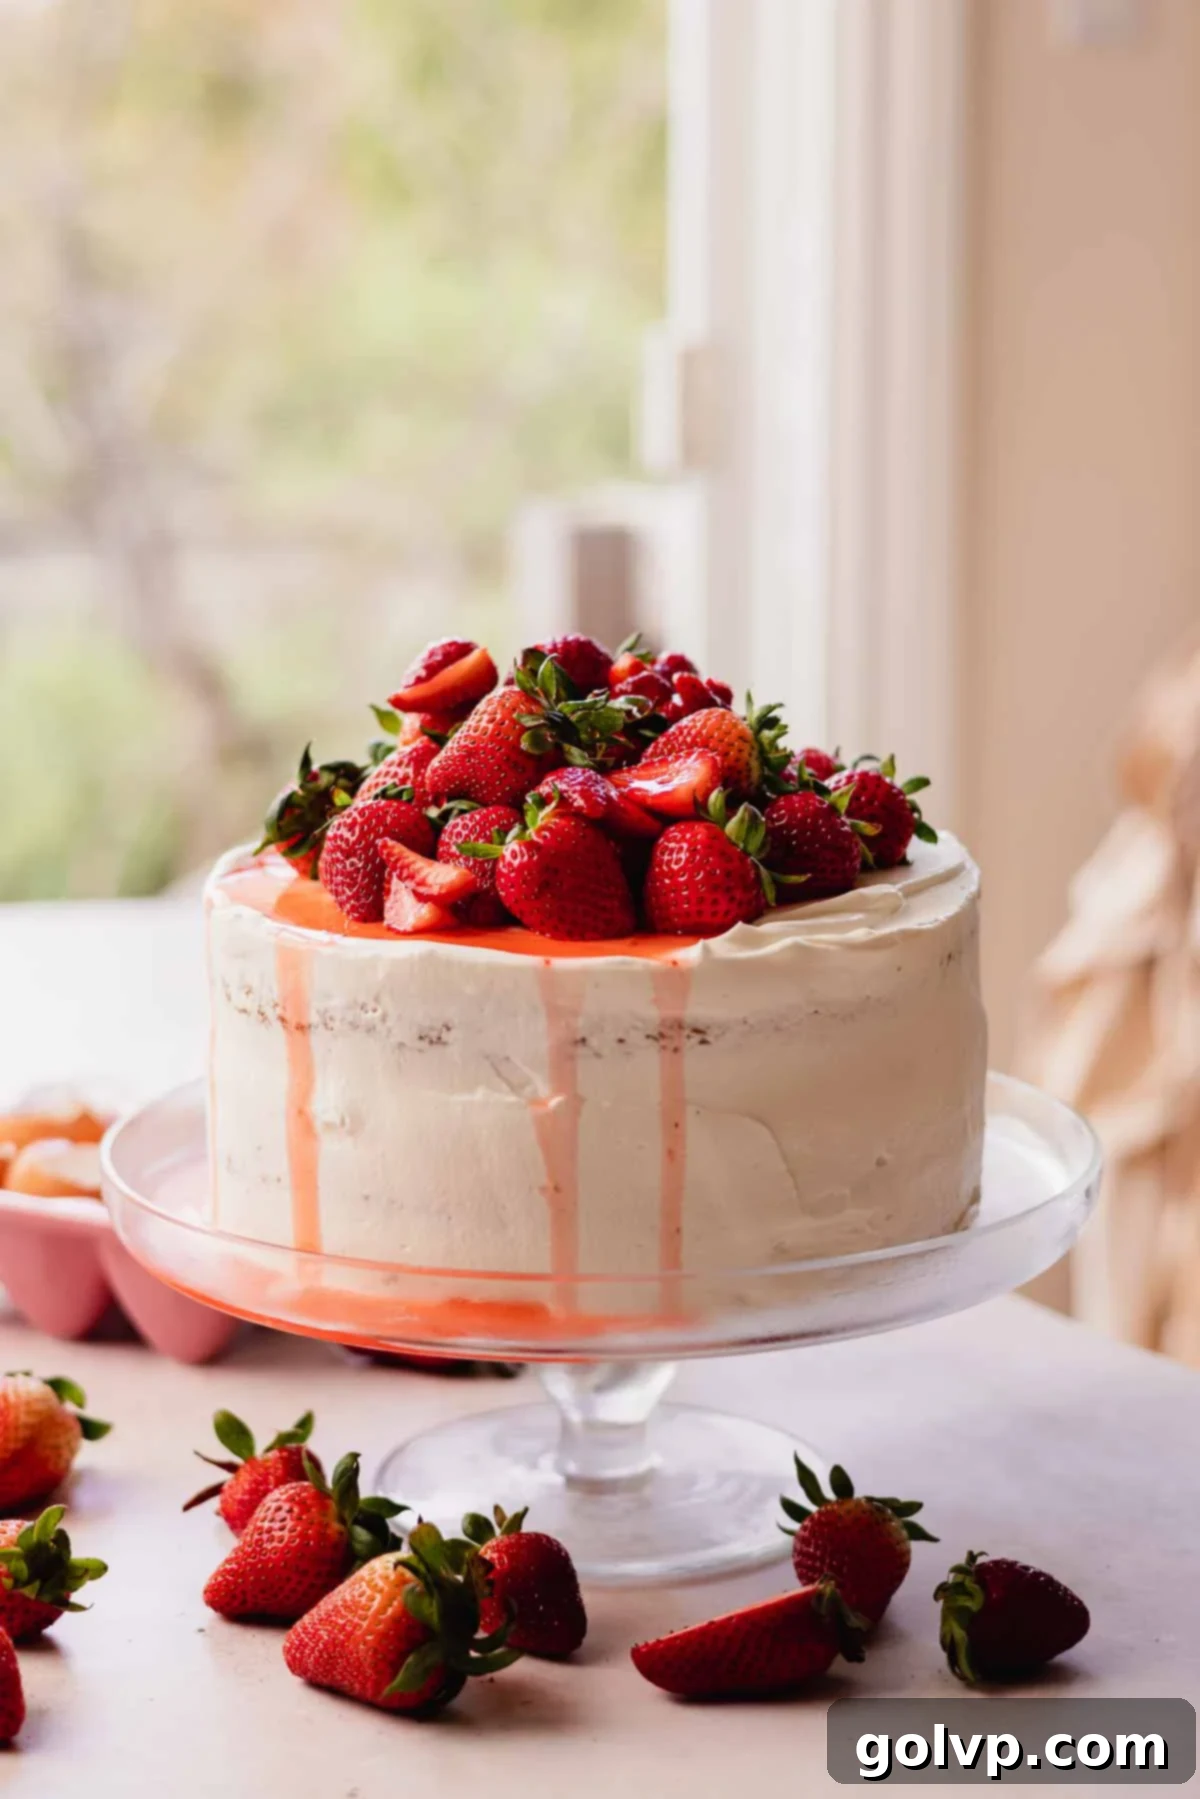
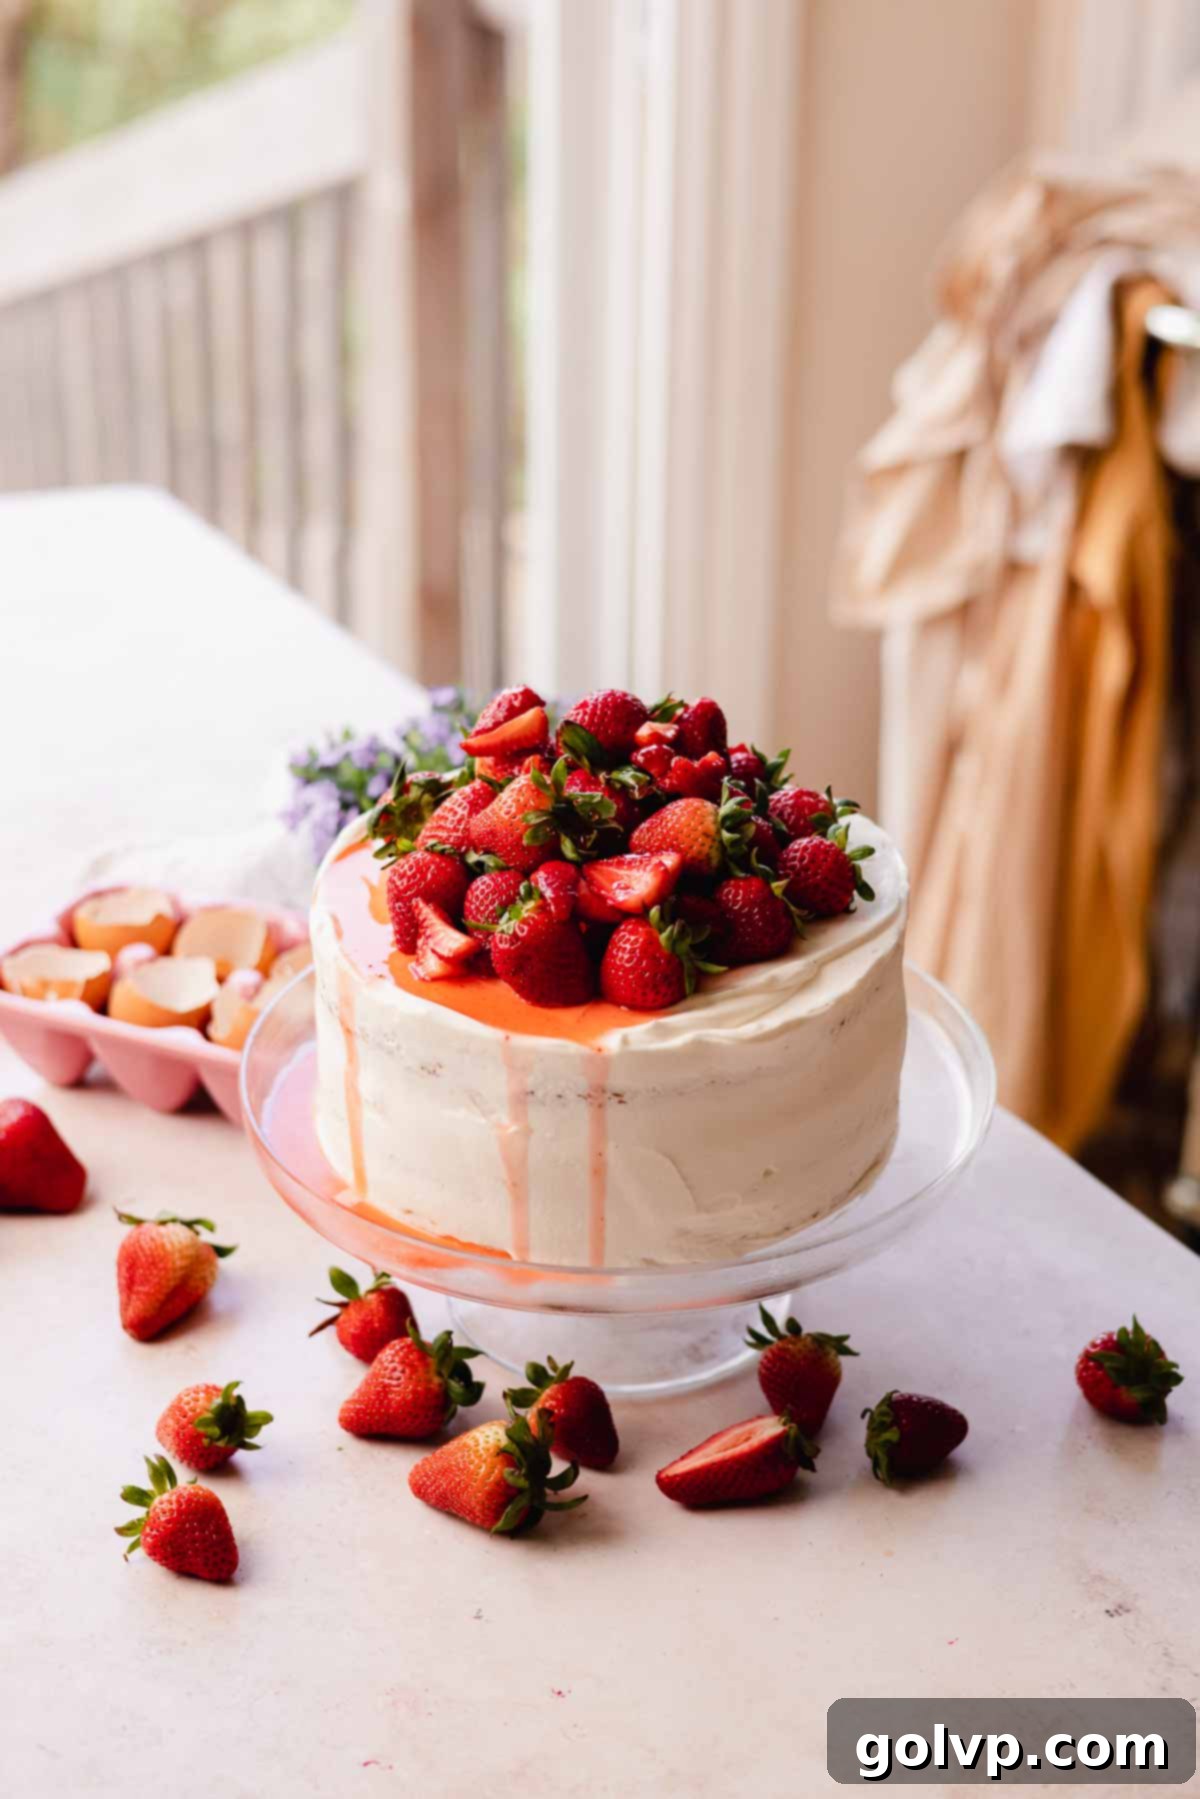
Step 5: Garnish and Serve. Just before serving your stunning strawberry vanilla cake, take it out of the fridge. Artistically pile a generous amount of fresh, whole, washed strawberries on top of the cake. For an extra touch of visual appeal and flavor, drizzle any leftover strawberry syrup from the macerated berries over the fresh strawberries and the top of the cake. Slice into generous portions, serve with any remaining macerated strawberries on the side, and savor every light, fruity, and creamy bite!
✔️ Expert Layered Chiffon Cake Tips for Success
- Gently Fold Whipped Egg Whites into the Chiffon Batter: This is arguably the most critical step for achieving that signature light and airy chiffon texture. Add the whipped egg whites to the denser egg yolk batter in two or three stages. Each time, use a large spatula and a gentle, sweeping motion (from the bottom of the bowl upwards and over) to combine. This technique prevents the delicate air bubbles in the egg whites from deflating too much, which is essential for a high, tender, and incredibly fluffy cake crumb.
- Flip the Cake Layers Upside Down Immediately After Baking: As soon as your chiffon cake layers come out of the oven, do not hesitate – invert them onto a wire rack. This seemingly simple action is vital. By cooling upside down, gravity works to prevent the warm, delicate cake structure from collapsing and shrinking as it cools. This ensures your chiffon layers remain tall, open-crumbed, and beautifully airy, rather than becoming dense and compacted.
- Whip the Frosting to Stiff Peaks, But Be Careful Not to Over-Whip: The goal for our yogurt whipped cream frosting is a stable yet airy consistency. Whip the heavy cream and sugar until you achieve firm, stiff peaks. This means that when you lift the whisk, the peaks should stand straight up. Once the Greek yogurt and vanilla are added, continue whipping until the frosting is thick and creamy enough to hold its shape when spread or piped. However, stop as soon as it reaches this point. Over-whipping can cause the cream to separate and become grainy or curdled, ruining its smooth texture and stability.
- Allow Cake Layers to Cool Completely Before Assembly: Patience is a virtue when baking, especially with layered cakes. Before you attempt to remove the chiffon cake layers from their pans, stack them, or apply any frosting and filling, they must be completely cooled to room temperature. Warm cake layers will cause your delicate whipped yogurt frosting to melt and slide, leading to a messy, unstable cake. Ensure each layer is cool to the touch throughout before proceeding with assembly.
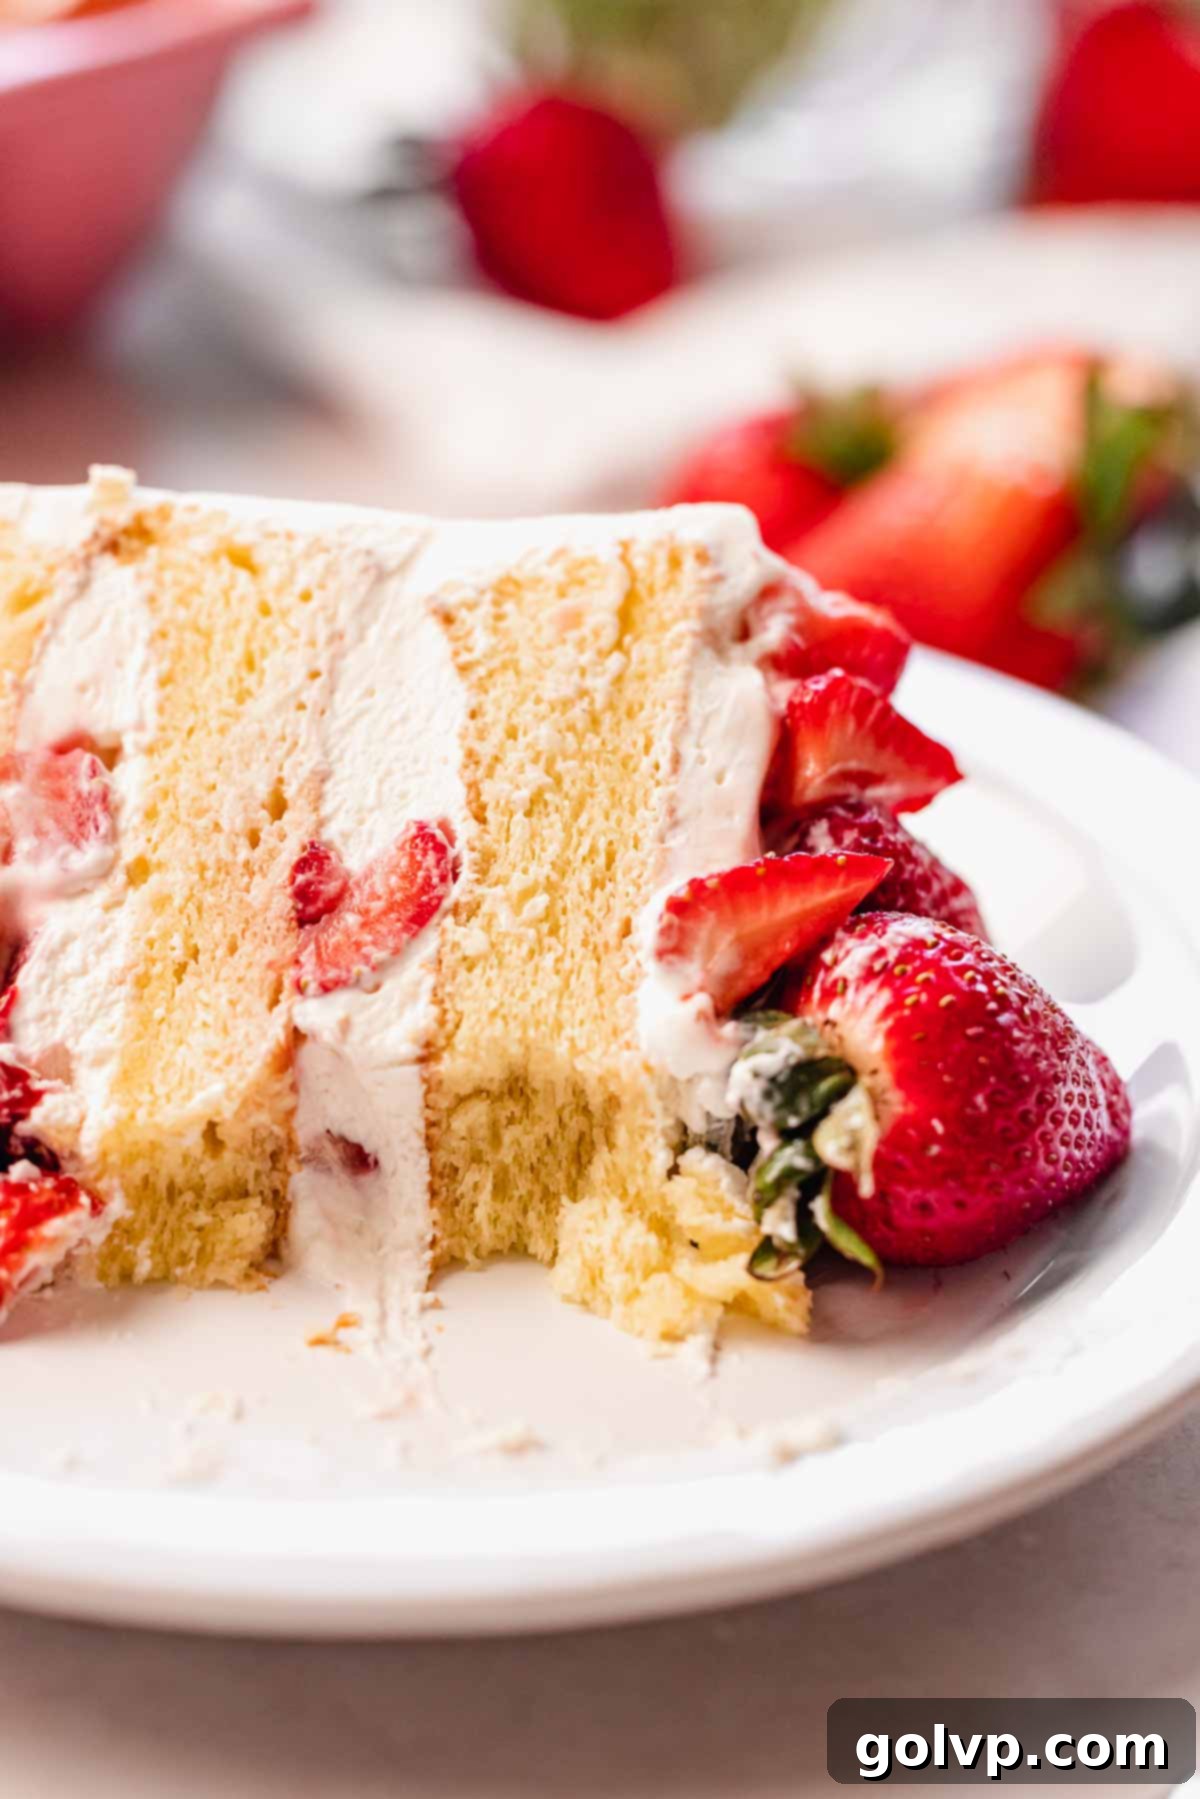
🥄 Make Ahead and Storage Tips for Your Strawberry Vanilla Cake
Proper storage is key to enjoying your strawberry vanilla chiffon cake at its best. Since this cake features fresh berries and a delicate whipped cream frosting, it requires refrigeration. Store the assembled and frosted cake in an airtight cake carrier or a container large enough to accommodate it in the refrigerator. It’s best served chilled or allowed to come to room temperature for about 15-20 minutes before slicing for optimal flavor and texture. Leftover slices can be stored in an airtight container in the fridge for 3-4 days, though the strawberries are freshest within the first 24-48 hours.
While the cake is undeniably at its peak freshness on the day it’s made or within 24 hours of assembly (due to the fresh strawberries), many components can be prepared in advance to streamline your baking process. Here’s how you can plan ahead:
Cake Layers: The vanilla chiffon cake layers are perfect for making ahead. You can bake them a day or two in advance. Once completely cooled (and removed from their pans), wrap each layer individually in plastic wrap and store them in the refrigerator. This allows you to tackle the most time-consuming part of the recipe without last-minute stress. When ready to assemble, simply unwrap them and proceed.
Macerated Strawberries: The strawberries can be macerated for a minimum of 30 minutes, which is ideal, and up to 8 hours ahead of time. Store the covered bowl of macerated strawberries in the fridge. Be cautious not to leave them macerating for too long beyond 8 hours, as they might release too much juice and start to lose their desirable texture, becoming overly soft. They are best when they still retain some bite.
Yogurt Frosting: This specific frosting, due to its whipped nature and the inclusion of Greek yogurt, is best made fresh right before you plan to assemble and frost the cake. It does not hold up well to being made ahead and stored for extended periods. If you whip it up too far in advance, it can become overly stiff or even grainy in the bowl as it sets, making it difficult to spread smoothly and compromising the light, airy texture you’re aiming for. For the silkiest, fluffiest frosting, prepare it just when you’re ready to fill and frost your chiffon cake.
☀️ Why I Love Yogurt Whipped Cream for Summer Cakes
Yogurt whipped cream frosting is truly a revelation, especially for light and airy summer cakes like this strawberry vanilla chiffon cake. It strikes a magnificent balance, offering a frosting that is neither excessively rich nor overly sweet. This makes it the ideal choice for complementing the delicate texture and vibrant flavors of a chiffon cake, preventing the dessert from feeling heavy or cloying.
The secret to its appeal lies in the subtle tang contributed by the Greek yogurt. This pleasant acidity beautifully cuts through the inherent richness of the heavy cream, creating a harmonious and refreshing flavor profile. Beyond its taste, the Greek yogurt also plays a crucial functional role: its acidity acts as a natural stabilizer, setting and thickening the whipped cream. This means you get a frosting that is not only delightfully silky smooth and thick but also robust enough to confidently support the layers of a tiered cake. Unlike traditional whipped cream, which can easily deflate and struggle to hold a substantial filling, the yogurt-stabilized version provides impressive structural integrity, perfect for holding juicy macerated strawberries.
This stability is particularly important for chiffon cakes, which are inherently lighter and fluffier than traditional butter-based cakes. The frosting needs to be supportive yet equally light in character. Another fantastic benefit is the ability to easily customize the sweetness. Since the yogurt contributes to the frosting’s thickness and stability, you aren’t reliant on a large amount of sugar for structure. You can add powdered sugar gradually, tasting as you go, to achieve your preferred level of sweetness without negatively impacting the frosting’s ability to hold up. This allows for a truly personalized strawberry vanilla cake experience, perfectly tailored to your sugar preferences.
📖 Recipe FAQs: Strawberry Vanilla Chiffon Cake
Flipping chiffon cake layers upside down immediately after baking is a critical technique to maintain their airy structure. As the cake cools, gravity helps to prevent the delicate, warm cake from collapsing and becoming dense. While a slight deflation is normal for chiffon cakes, inverting them minimizes this effect, ensuring your layers remain beautifully tall and tender.
While technically possible, I strongly advise against skipping the maceration step. Macerating the strawberries does much more than just sweeten them; it draws out their natural juices, intensifying their flavor and creating a vibrant, delicious strawberry syrup. This syrup is then drizzled over the chiffon layers, making them exceptionally moist and infusing the entire cake with incredible berry essence that truly elevates the dessert.
I haven’t personally tested a gluten-free version of this specific chiffon cake recipe. However, many bakers have success substituting regular all-purpose flour with a high-quality 1:1 gluten-free all-purpose flour blend (one that typically contains xanthan gum) in chiffon cake recipes. If you try it, ensure your blend is suitable for baking cakes to achieve a similar light texture.
Even if you’re not typically a fan of yogurt, I highly encourage you to give this frosting a try! The tanginess of the Greek yogurt is subtle and expertly balances the richness of the cream, creating a truly unique and refreshing flavor profile. If you absolutely must substitute, you could consider a cream cheese stabilized whipped cream for a similar sturdy texture. Regular whipped cream, however, is generally too soft and lacks the necessary structure to reliably support the layers and filling of a large cake like this.
Absolutely! This recipe is quite versatile. You can certainly experiment with other fresh berries such as raspberries, blueberries, or mixed berries. When macerating, you may need to adjust the amount of sugar and lemon juice slightly depending on the natural sweetness and acidity of your chosen berries. For firmer berries like blueberries, a slight mash before macerating can help them release their juices more effectively and create that delightful flavored syrup.
🍓 More Related Strawberry Desserts
- Strawberry Tiramisu
- Strawberry Cheesecake Cookies
- Strawberry Crunch Cheesecake
- Strawberry Curd
Did you make this recipe? I would love for you to rate this recipe and hear what you think in the comments below! Share your creation on Instagram and tag @flouringkitchen. Follow me on Pinterestto save and for more recipe ideas.
📖 Recipe
Strawberry Vanilla Cake
MaryEquipment
- electric mixer
- 3 eight inch round baking pans
Ingredients
Macerated Strawberry Cake Filling
- 4 cups fresh strawberries about 1 lb or 454 g
- ½ cup granulated sugar
- 1 tablespoon lemon juice
- ¼ teaspoon sea salt
Vanilla Chiffon Cake Layers
- 7 large eggs separated, room temperature
- ½ teaspoon cream of tartar
- 1 ½ cups granulated sugar
- ½ cup olive oil or vegetable oil
- ½ cup milk
- 2 teaspoons pure vanilla extract
- ¼ teaspoon sea salt
- 1 ¼ cup all purpose flour 150g
- 1 teaspoon baking powder
- 2 tablespoons cornstarch
Whipped Yogurt Frosting
- 2 cups heavy whipping cream 35%, cold
- 1 cup powdered sugar add more to taste for sweeter frosting
- 2 cups plain Greek yogurt cold
- 2 teaspoons pure vanilla extract
- ¼ teaspoon sea salt
Instructions
Macerated Strawberry Filling
- Start with macerating the strawberries: Trim the tops off the strawberries and cut them into slices or quarter them like I did for chunkier pieces. Don’t cut the slices too thin because the pieces will shrink as they sit in the sugar.4 cups fresh strawberries
- Pour sugar, lemon juice, and salt over the macerated strawberries. Use a spoon to toss the strawberries so that they’re evenly coated.½ cup granulated sugar, 1 tablespoon lemon juice, ¼ teaspoon sea salt
- Cover and place the berries in the fridge to macerate while you work on the rest of the cake. The strawberries need at least 30 minutes.
Vanilla Chiffon Cake Layers
- Preheat the oven to 355°F (180°C). Line the bottoms of three 8″ round baking pans with parchment paper. Don’t line or grease the sides of the pans!
- In a large, clean bowl or stand mixer, using the whisk attachment, whisk the egg whites and cream of tartar to soft medium peaks.7 large eggs, ½ teaspoon cream of tartar
- Then, gradually pour in a half cup (½ cup) of sugar, whisking until stiff peaks form. Set the whisked egg whites aside, or transfer them into a different bowl while you work on the egg whites.1 ½ cups granulated sugar
- In a large bowl or stand mixer, add the egg yolks and the rest of the sugar (1 cup). You can reuse the bowl and whisk from the egg whites without washing. Beat the egg yolks and sugar until lightened in color and they fall off the whisk in ribbons.
- Add the oil, milk, vanilla extract, and salt into the egg yolks. Mix to incorporate them.½ cup olive oil, ½ cup milk, 2 teaspoons pure vanilla extract, ¼ teaspoon sea salt
- Then, sift flour, baking powder, and cornstarch into the egg yolk mixture. Fold the mixture with a wire whisk, being very gentle.1 ¼ cup all purpose flour, 1 teaspoon baking powder, 2 tablespoons cornstarch
- Add a large scoop of whipped egg whites into the egg yolk mixture. Gently fold the mixture with a wire whisk (by hand) until evenly mixed. Add the rest of the egg whites and fold until evenly mixed. Stop folding as soon as the batter looks nice and even!
- Divide the batter evenly amongst the baking pans. Use a large ice cream scoop or a scale to make sure that each layer is even.
- Bake the layers in the oven for 15 to 18 minutes, until a toothpick inserted into the center comes out mostly clean with a few crumbs attached.
- Remove the baked layers from the oven and immediately flip them upside down to cool. The cake layers should stick to the sides of the pan. This helps the chiffon cake from collapsing as it cools.
- Once cooled, run a spatula along the edges of each cake pan to release the layers. Flip the pan over and the layer should fall out easily.
Whipped Yogurt Frosting
- Add the heavy whipping cream into a large bowl or stand mixer. Add the powdered sugar. Use a whisk attachment to whip the cream to medium peaks.2 cups heavy whipping cream, 1 cup powdered sugar
- Add yogurt, salt, and vanilla extract into the whipped cream and continue whipping until it gets ultra thick and creamy. Don’t over whip or else it will be grainy!2 cups plain Greek yogurt, 2 teaspoons pure vanilla extract, ¼ teaspoon sea salt
- Transfer whipped frosting to a piping bag.
Assembly
- Pipe a dollop of frosting onto a plate or cake stand. Place the first cake layer down. Pipe a thick border of frosting over the first layer.
- Fill the center with the juicy, macerated strawberries. Drizzle some of the strawberry syrup on top.
- Seal the strawberries in with a generous dollop of frosting and spread it out in an even layer.
- Place the next layer of cake on top and repeat with the frosting ring, macerated strawberries, and more frosting to seal it in. Place the last cake layer on top, flipped upside down.
- Cover the whole cake with the rest of the frosting in an even, smooth layer. Use a long, straight spatula for this. To get smooth sides and top, scrape the spatula clean against the edge of the bowl after each swipe.
- Pop the cake in the freezer for 15 minutes to set the frosting if enjoying immediately, or for up to 24 hours in the fridge.
- Before serving, pile on loads of fresh, washed, whole strawberries on top. Drizzle a bit of the strawberry syrup from the macerated strawberries over top. Slice and serve with any leftover macerated strawberries, and enjoy!
Video
Notes
- Gently add the whipped egg whites into the chiffon batter: Adding it in stages helps prevent deflating the batter too much, keeping the chiffon extra light and fluffy.
- Flip the cake layers upside down right out of the oven: Gravity helps prevent the layers from collapsing too much.
- Whip the frosting to stiff peaks but don’t over whip: This creates a stiff, stable frosting that’s perfect for frosting an airy chiffon cake.
- Wait for the cake layers to cool: Before removing the cake layers from the pan and stacking and filling the cake, it’s important to let the chiffon cake to cool to room temperature.
