The Ultimate Raspberry Coconut Cake: Fluffy Layers with Creamy Coconut Cream Cheese Frosting & Tangy Raspberry Filling
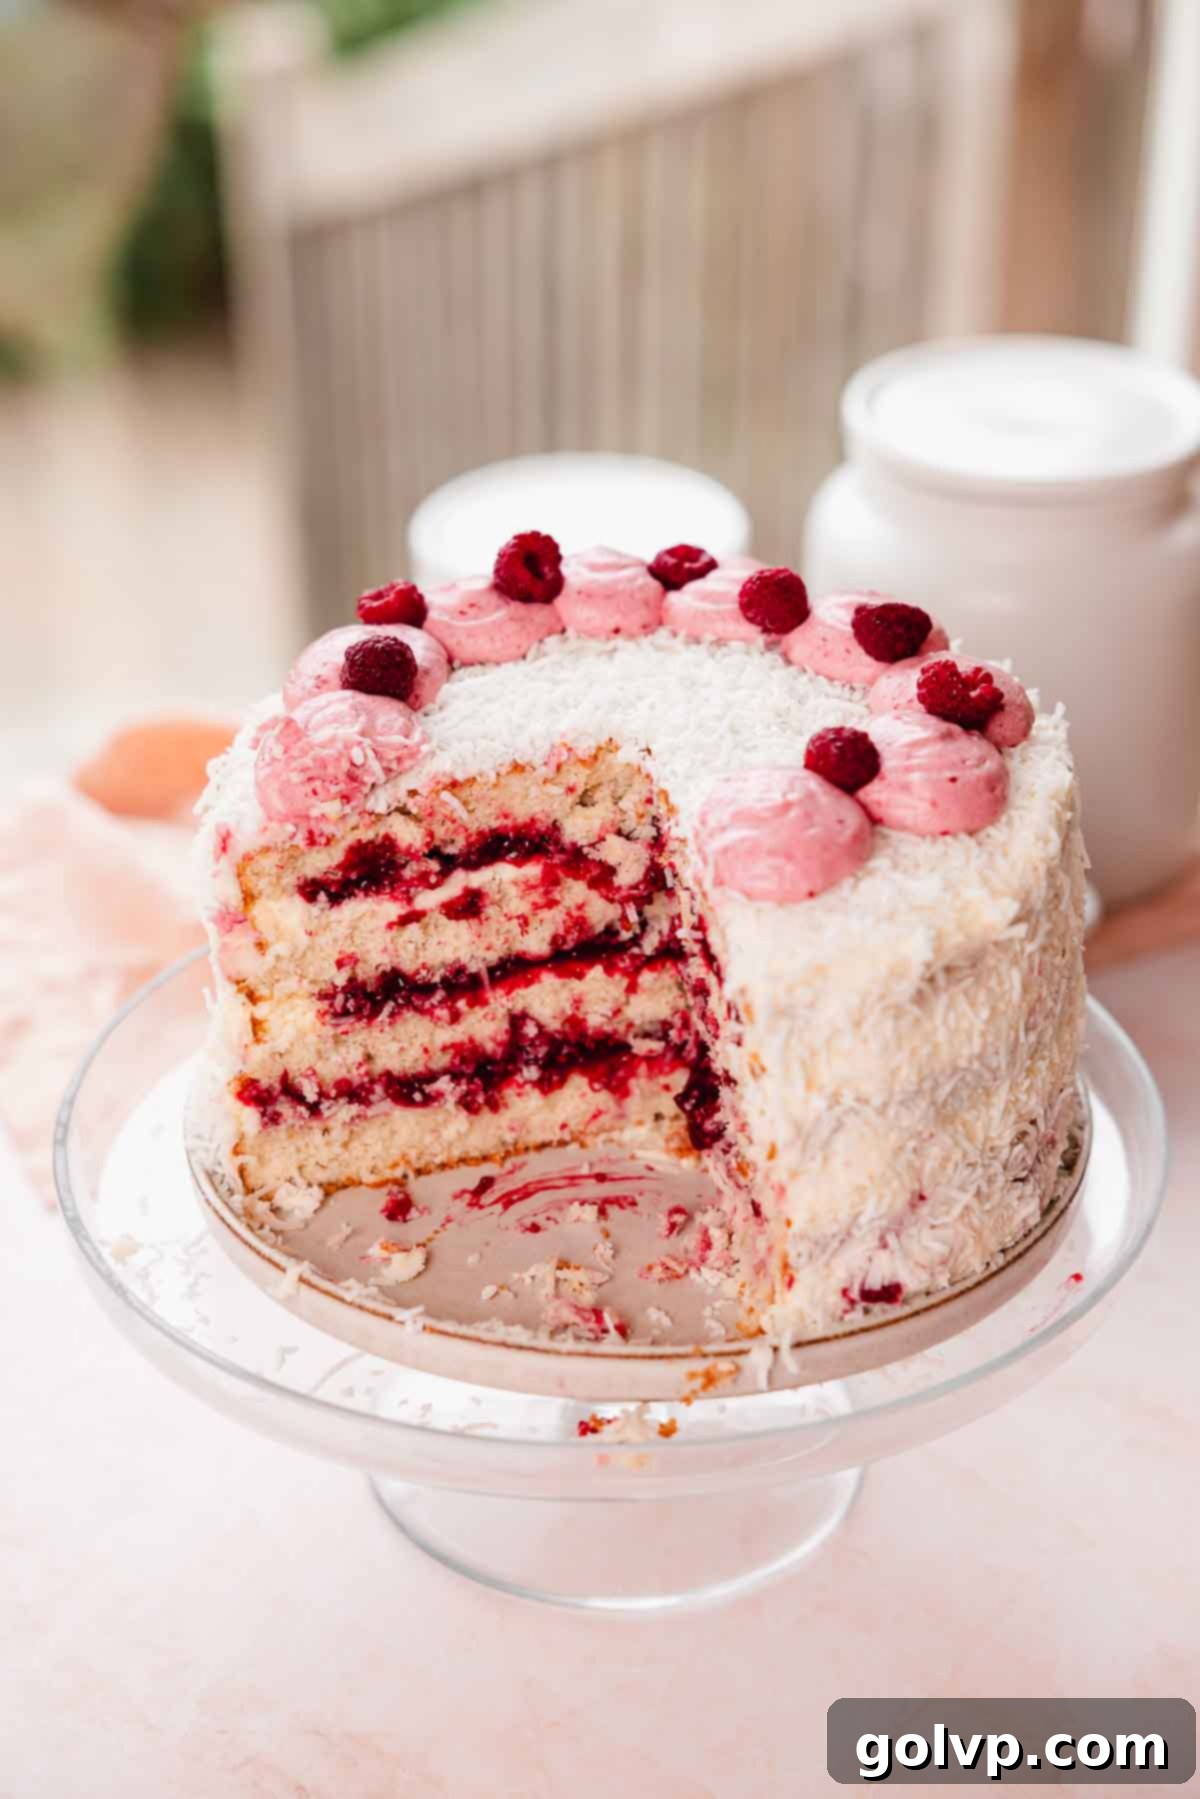
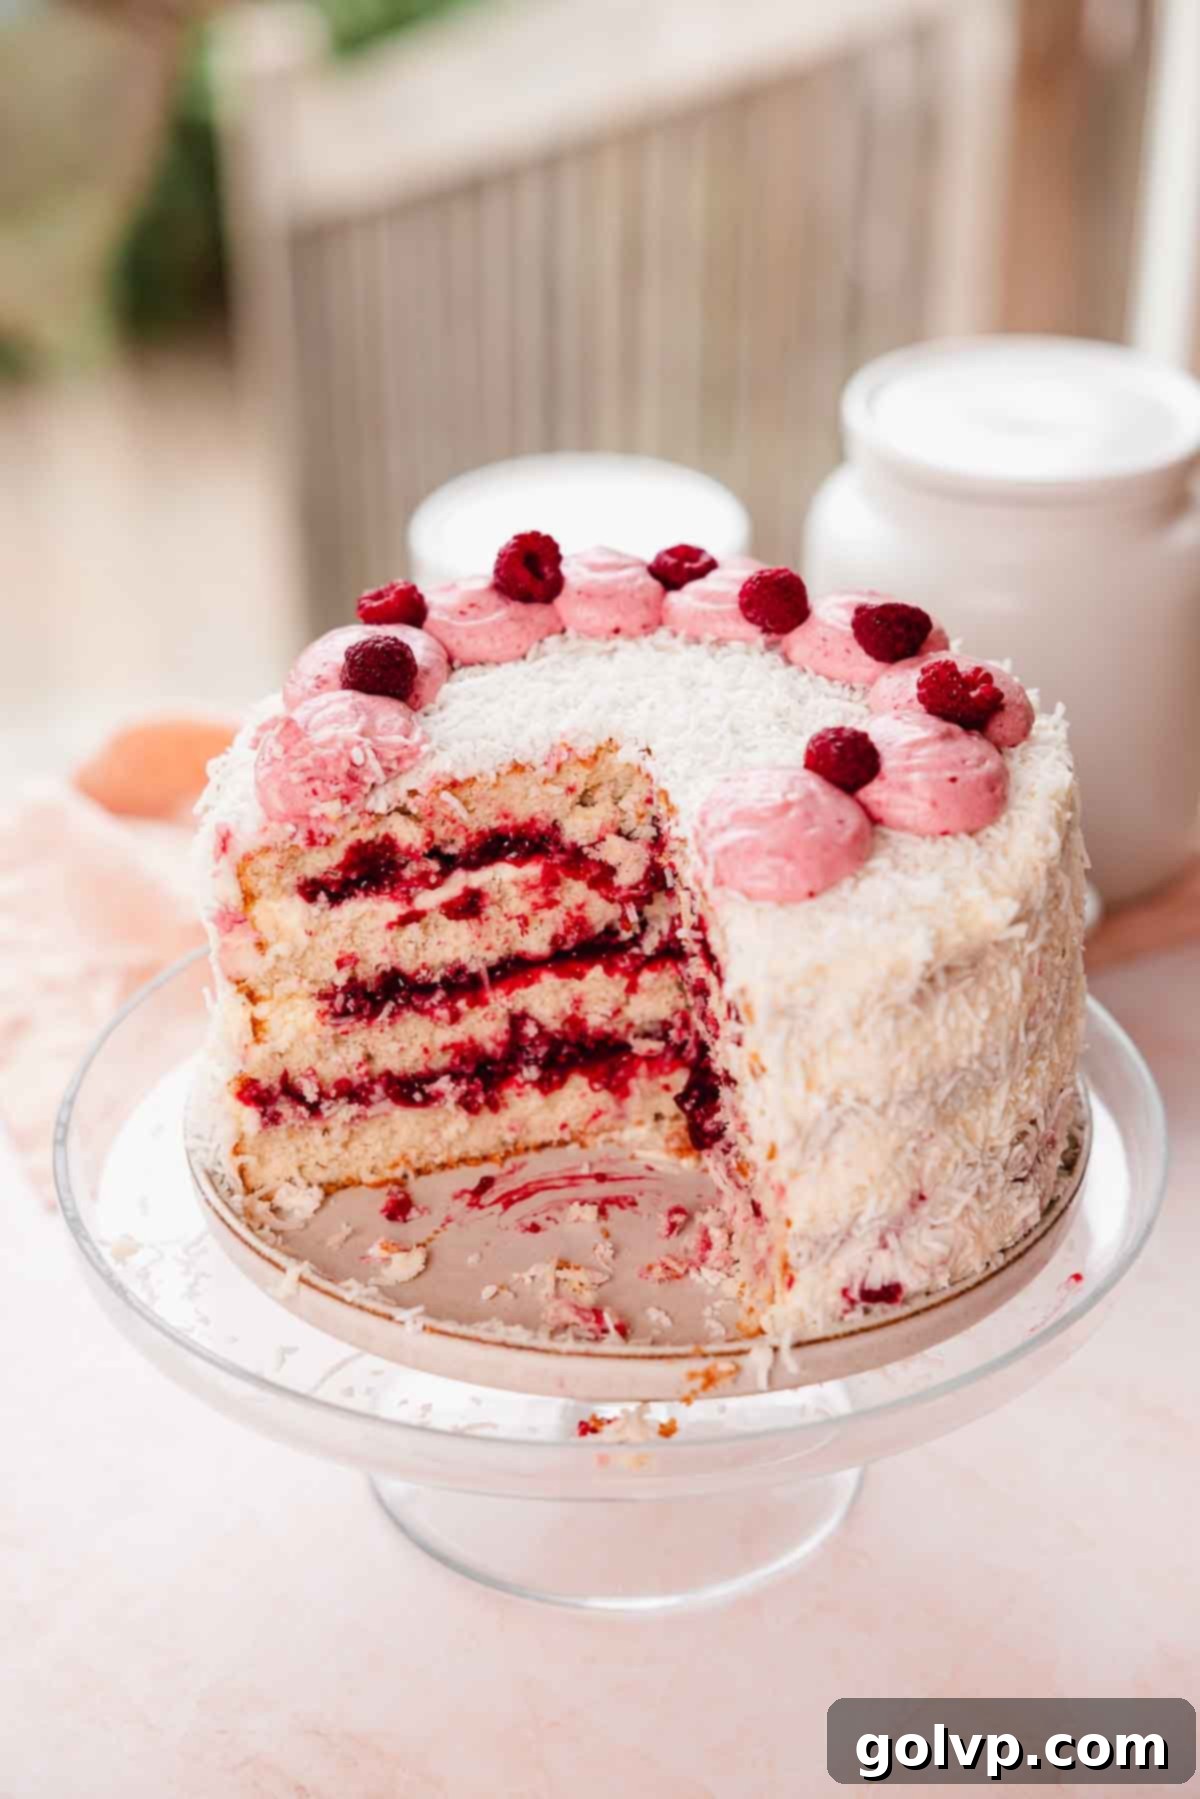
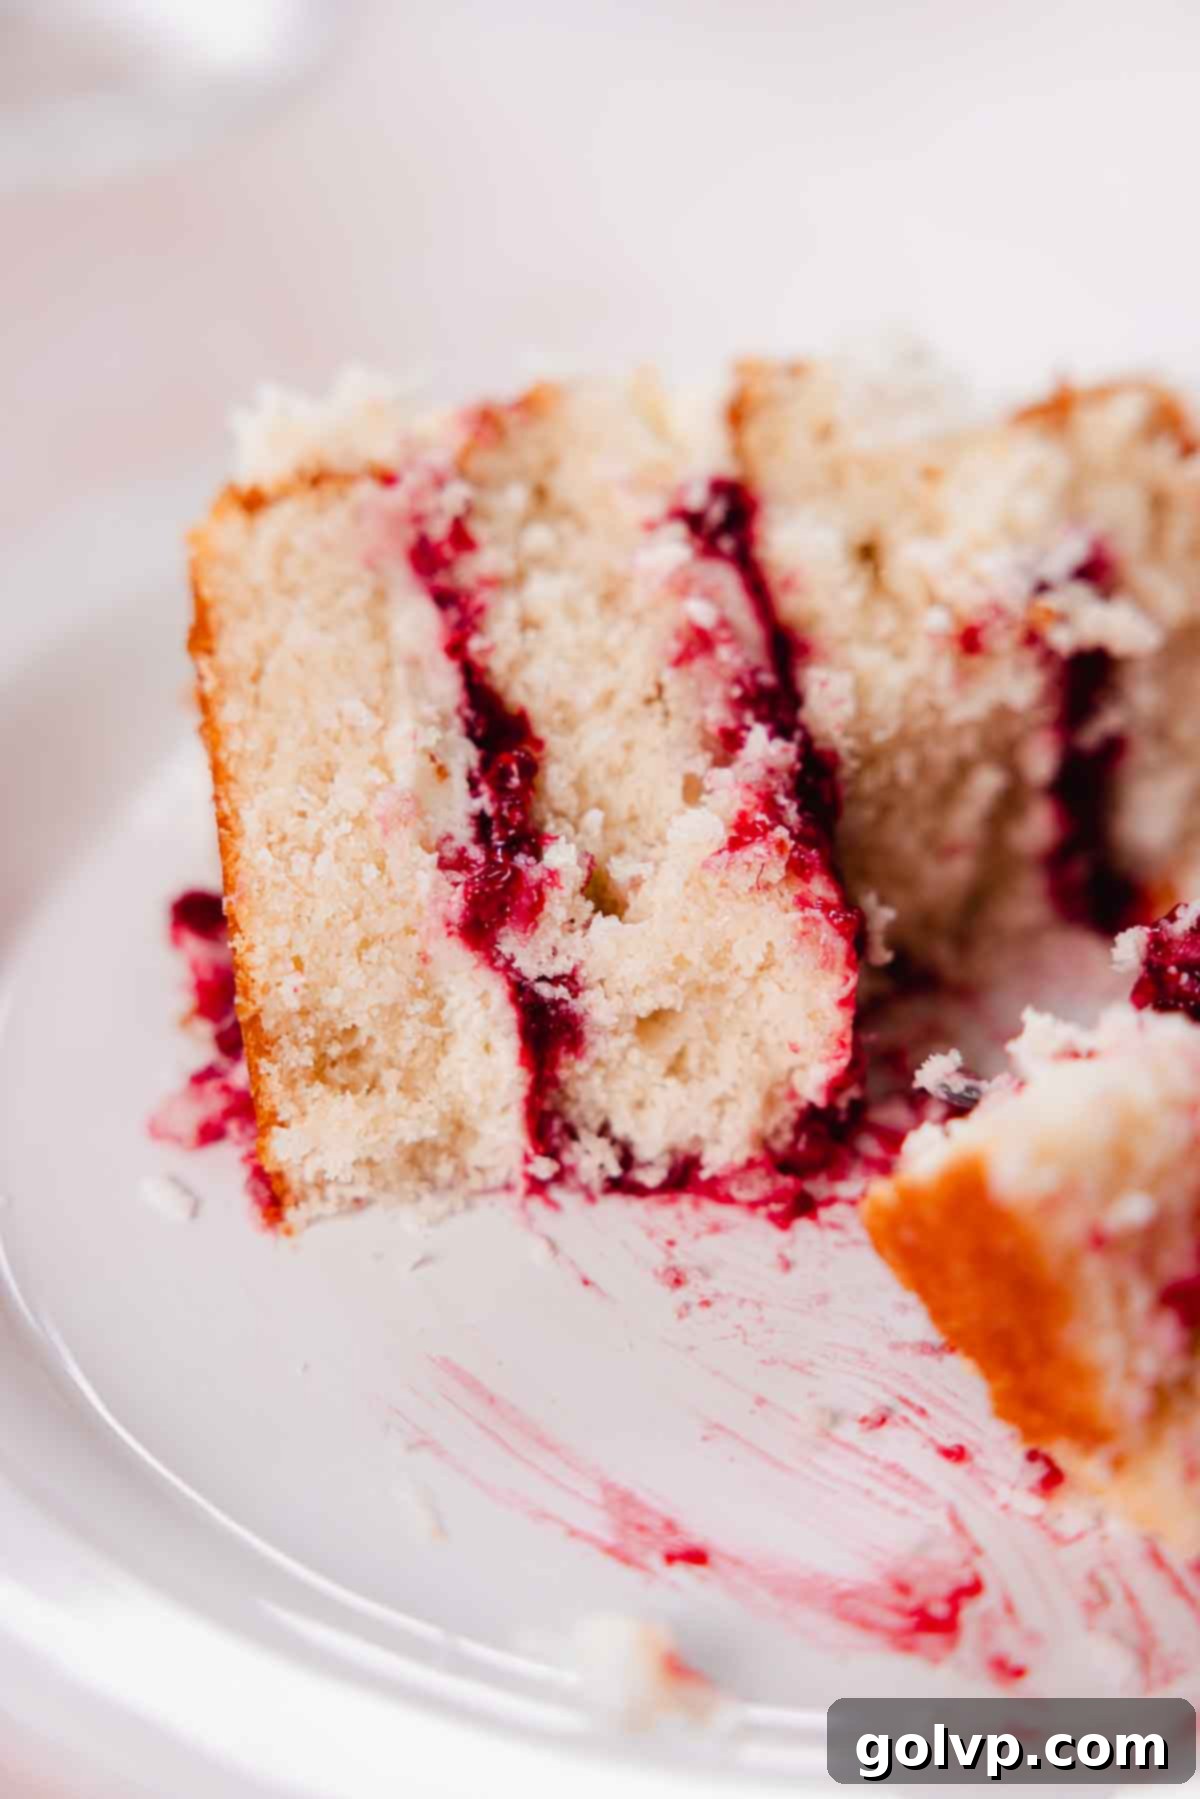
Prepare to be enchanted by a cake that’s truly a symphony of flavors and textures: our incredible Raspberry Coconut Cake. This masterpiece features ultra-soft, tender, and moist coconut cake layers, generously slathered with a luscious, creamy coconut cream cheese frosting, and adorned with a vibrant, sweet-tart raspberry filling. Every bite delivers an explosion of tropical coconut and bright berry goodness, creating an unforgettable dessert experience that will captivate any coconut enthusiast. The cake layers themselves are a marvel of baking, boasting a buttery, airy, and intensely coconutty profile that forms the perfect foundation for this delightful creation. We’ll also share our foolproof secrets to achieving a perfectly stable and smooth cream cheese frosting, ensuring your cake not only tastes divine but looks stunning too.
Having meticulously tested numerous variations, we confidently declare this the absolute best Coconut Raspberry Cake recipe you’ll ever encounter. It genuinely “took the cake” in our kitchen, and we’re thrilled to share our perfected version with you.
[feast_advanced_jump_to]
🥥 Why You’ll Love This Irresistible Coconut Raspberry Cake Recipe
This Raspberry Coconut Cake isn’t just a dessert; it’s a celebration of vibrant flavors and luxurious textures. Here’s why this recipe is destined to become your new favorite:
- Incredibly Fluffy, Tender, and Moist White Cake: Forget dry, crumbly cakes! Our white cake base is designed for supreme tenderness and a light, airy crumb that practically melts in your mouth, providing the ideal canvas for the rich coconut flavor.
- Bursting with Authentic Coconut Flavor: We double down on the coconut! This cake gets its phenomenal tropical taste from a harmonious blend of sweetened shredded coconut, rich canned coconut milk, and a hint of coconut extract, ensuring a truly immersive coconut experience in every slice.
- Decadent Cream Cheese Frosting: The tangy, creamy texture of our homemade cream cheese frosting perfectly complements the sweetness of the coconut. Plus, we equip you with all the essential tips and tricks to create a beautifully stable and spreadable frosting, free from any dreaded gloopiness.
- Homemade Sweet & Tangy Raspberry Filling: Our easy-to-make raspberry filling is a burst of fresh, vibrant flavor that cuts through the richness of the cake and frosting, adding a delightful tartness. It comes together quickly and can even be prepared a day or two in advance, making your baking day smoother.
📝 Essential Ingredients for Success
Mastering this recipe starts with understanding the role of each ingredient. Read through for all the tips you will need for success!
Full steps and ingredients in the detailed recipe card below.
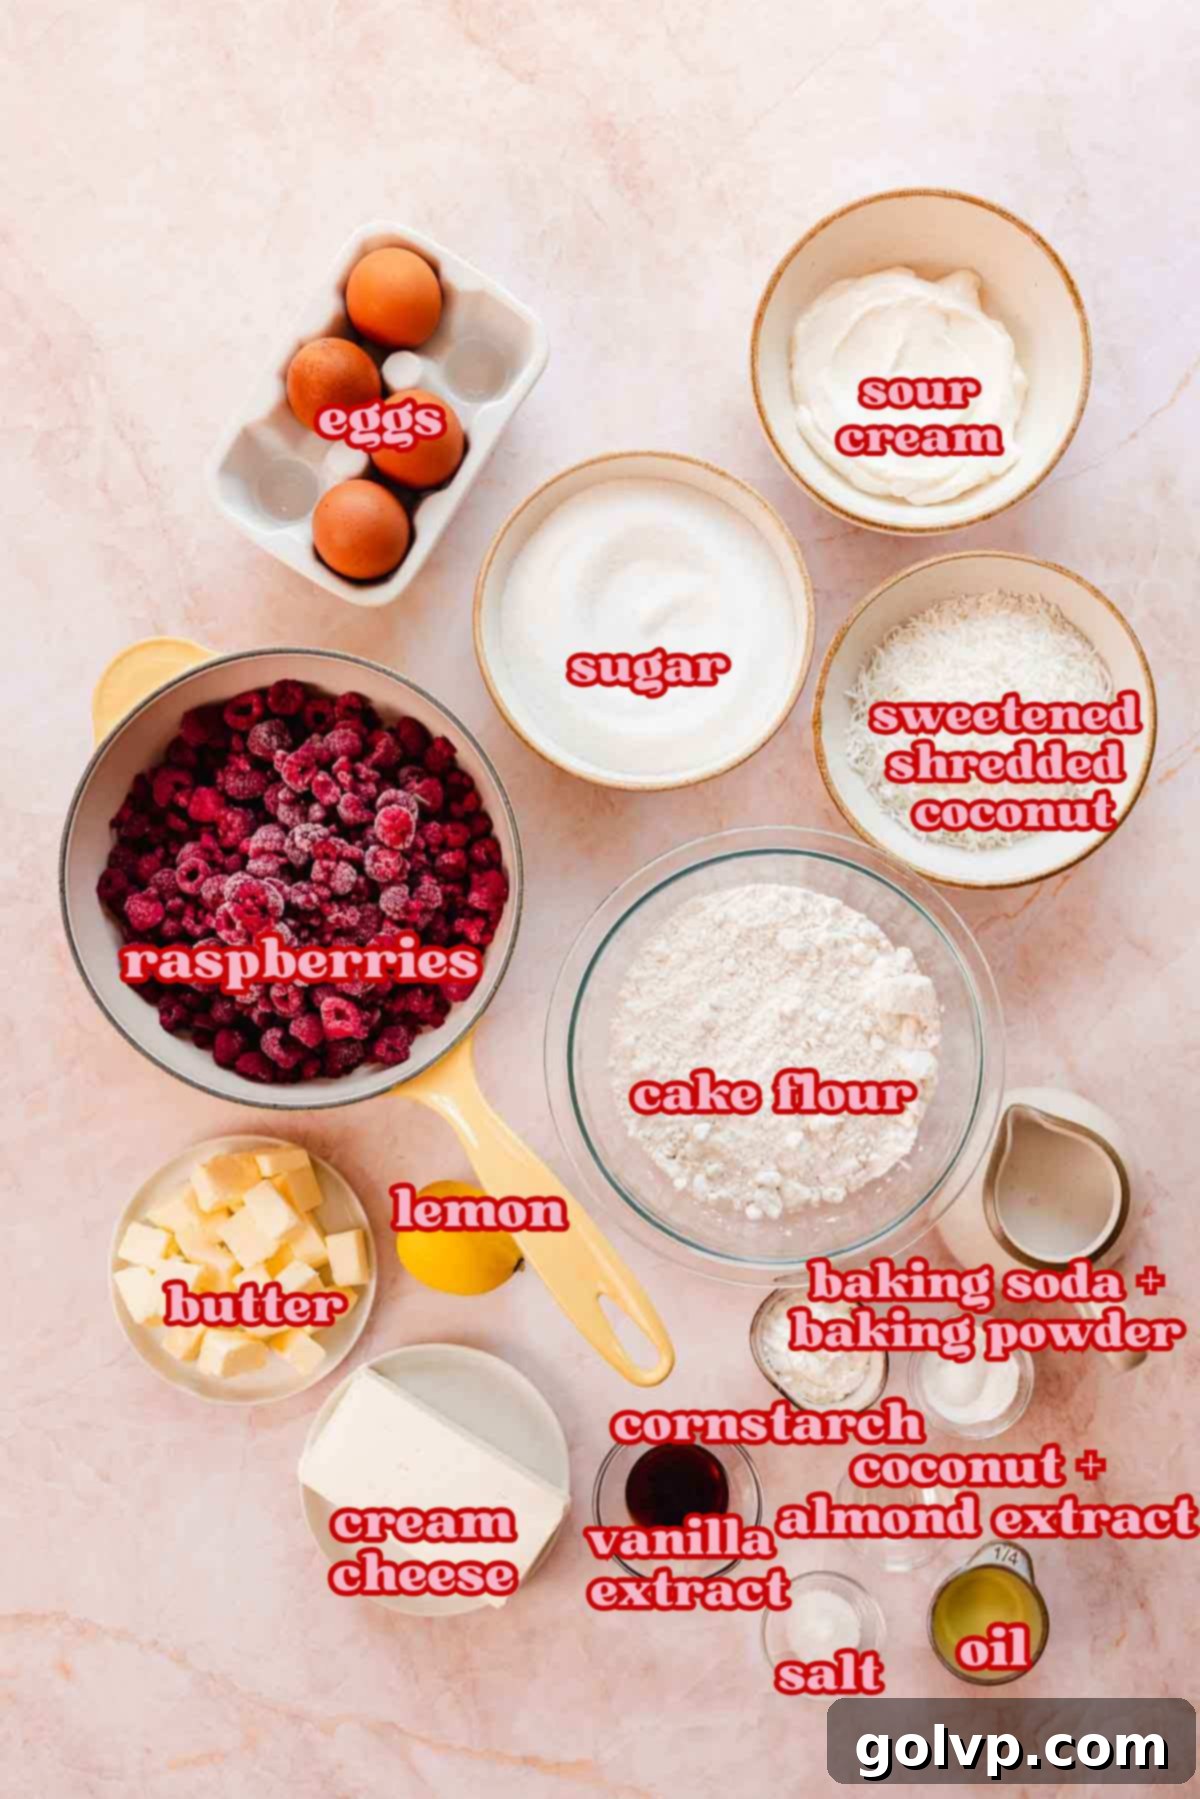
Cake Flour: This is not an ingredient to skip! Cake flour boasts a lower protein content and finer texture compared to all-purpose flour, leading to a higher starch-to-gluten ratio. This unique composition is crucial for achieving the signature soft, fluffy, and ultra-tender crumb that makes this coconut cake so exceptional. It truly elevates the texture, ensuring a delicate and melt-in-your-mouth experience.
Raspberries: Both fresh or frozen raspberries are perfectly suitable for our sweet and tangy filling. Since the berries are cooked down, the convenience and cost-effectiveness of frozen raspberries often make them the preferred choice, especially given the generous quantity required for the filling. Their bright, tart flavor provides a wonderful contrast to the rich coconut.
Sweetened Shredded Coconut: For superior texture and enhanced sweetness, we highly recommend using sweetened shredded coconut. Its softer, chewier consistency adds delightful bite to the cake layers and the frosting, making it much more appealing than its unsweetened counterpart. If you find yourself with extra shredded coconut, you might enjoy trying our Mango Coconut Swiss Roll for another tropical treat!
Coconut Milk: Ensure you’re using full-fat coconut milk from a can, not the lighter, thinner coconut beverages found in cartons. The full-fat version is essential for imparting a rich, authentic coconut flavor and contributes significantly to the moistness of the cake, as well as the creamy consistency of the frosting.
Sour Cream: Adding sour cream to the cake batter contributes to its incredible moistness and tender crumb. Its slight tang also subtly balances the sweetness. As an alternative, full-fat Greek yogurt can be used for a similar effect, ensuring your cake remains wonderfully moist and flavorful.
Cream Cheese: For a firm, stable, and perfectly pipeable cream cheese frosting, always opt for full-fat, brick-style cream cheese. Avoid spreadable cream cheese in tubs, as its higher water content will result in a runny and unstable frosting.
Egg Whites: A classic ingredient in white cakes, egg whites are key to achieving a pale, light, and airy cake crumb. They also contribute to the cake’s overall structure and ensure it remains beautifully moist without adding any unwanted yellow hue. Egg whites from a carton are perfectly acceptable for this recipe.
Coconut Extract: To truly amplify and deepen the natural coconut flavor, a touch of coconut extract is added. While optional, it boosts the tropical essence significantly. If you prefer a more subtle flavor or don’t have it on hand, you can omit it, as the shredded coconut and coconut milk already provide ample flavor.
Almond Extract: This secret ingredient adds a delicate, nutty depth that beautifully complements and enhances the coconut flavor. A mere ¼ teaspoon is used to ensure the almond notes are present but don’t overpower the star flavor of coconut, creating a harmonious and sophisticated taste profile.
Butter: High-quality unsalted butter is crucial for both the cake layers and the frosting. Using unsalted butter allows you to control the exact amount of salt in your recipe, preventing the frosting from becoming overly salty and ensuring a perfectly balanced flavor in both components. Make sure it’s softened for the cake and frosting as specified in the recipe.
👩🍳 Crafting Your Raspberry Coconut Cake: A Step-by-Step Guide
Creating this stunning Raspberry Coconut Cake is a delightful process. Follow these detailed steps to achieve perfect results every time.
Preparing the Luscious Raspberry Cake Filling
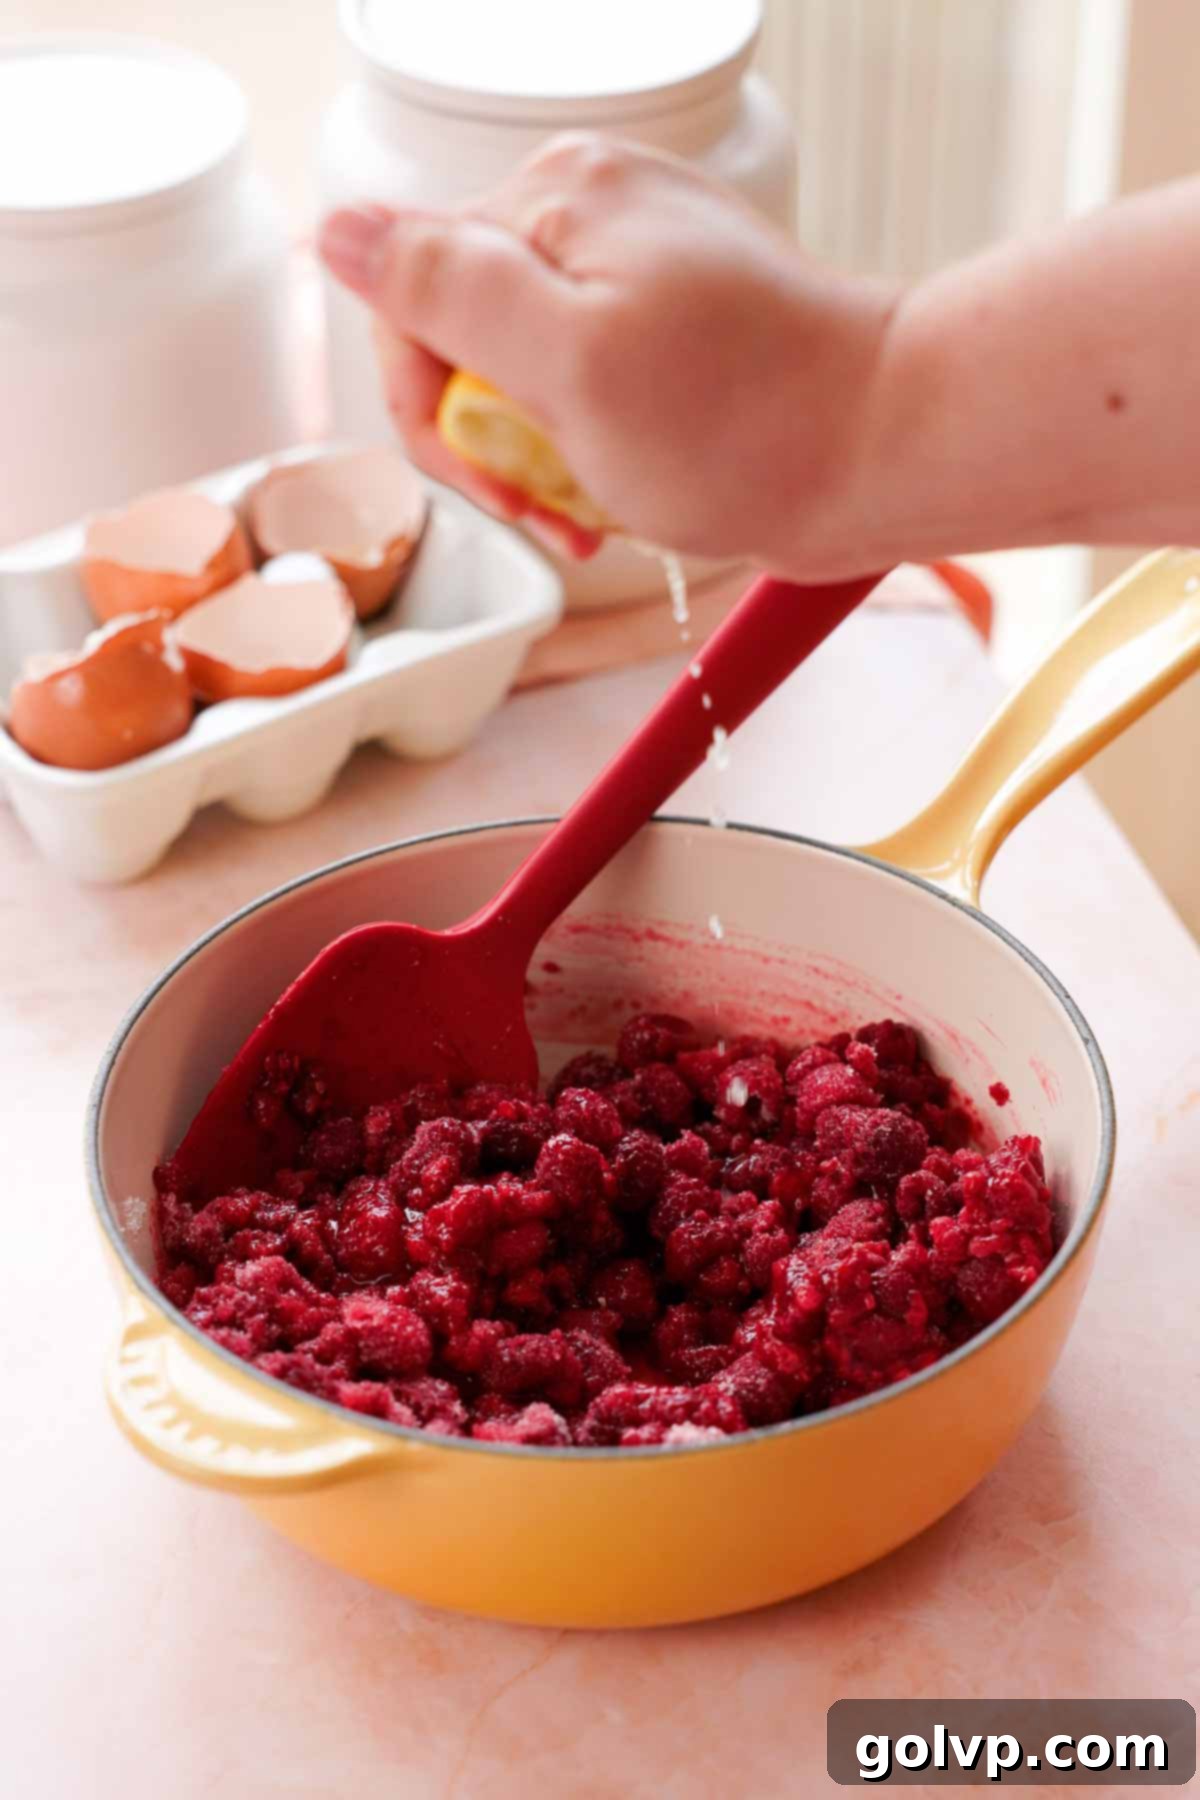
Step 1: Begin by combining your fresh or frozen raspberries, granulated sugar, and fresh lemon juice in a medium-sized saucepan. Stir these ingredients together to ensure they are well mixed. Place the saucepan over medium-low heat, stirring occasionally. As the raspberries warm, they will naturally release their juices. Continue to gently simmer the mixture for approximately 5 minutes, allowing the berries to soften and break down, forming a rich, liquid base.
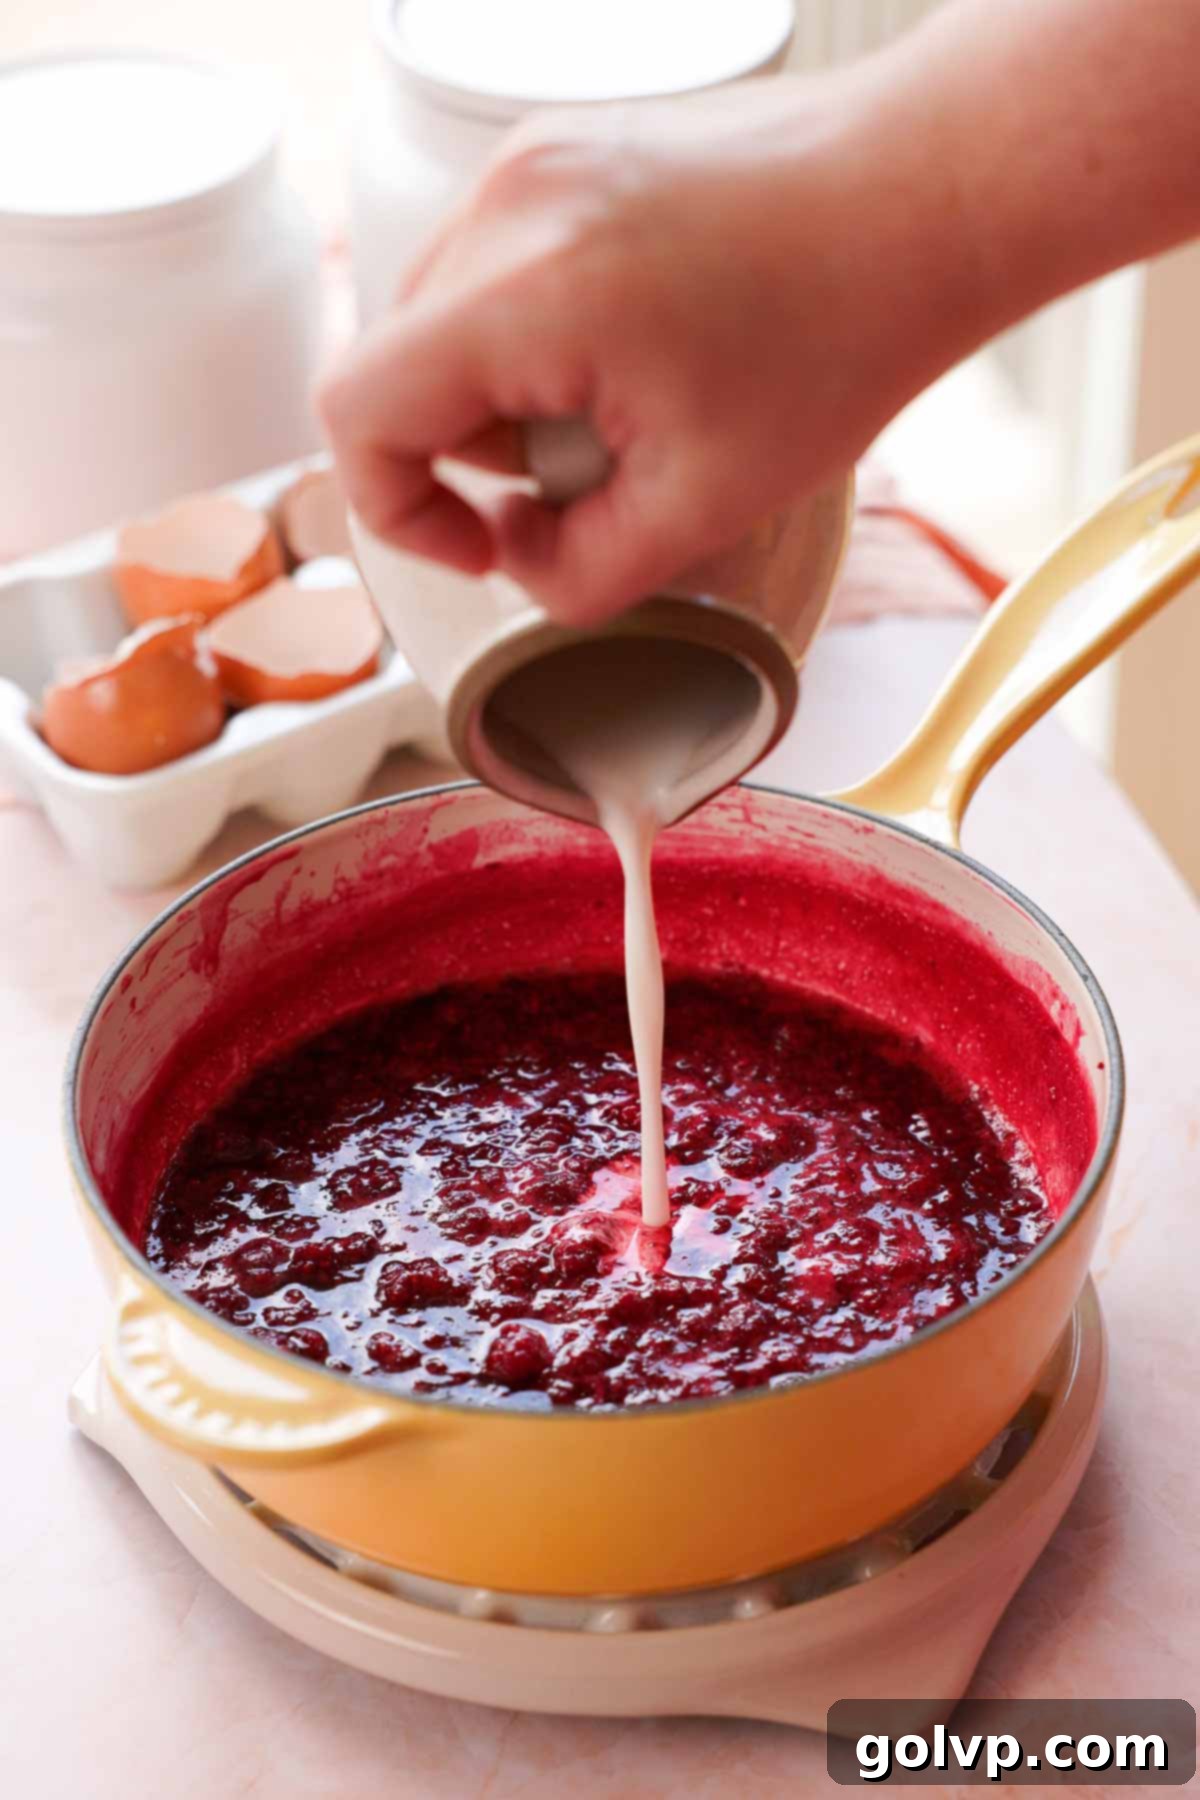
Step 2: While your raspberry mixture is simmering on the stove, prepare your cornstarch slurry. In a separate small cup or bowl, whisk together the cornstarch and cold water until a smooth, lump-free paste forms. If you prefer a completely seedless raspberry filling, now is the perfect moment to strain the cooked raspberry mixture through a fine-mesh sieve, pressing firmly to extract all the liquid and pulp while leaving the seeds behind. Return the strained liquid to the saucepan.
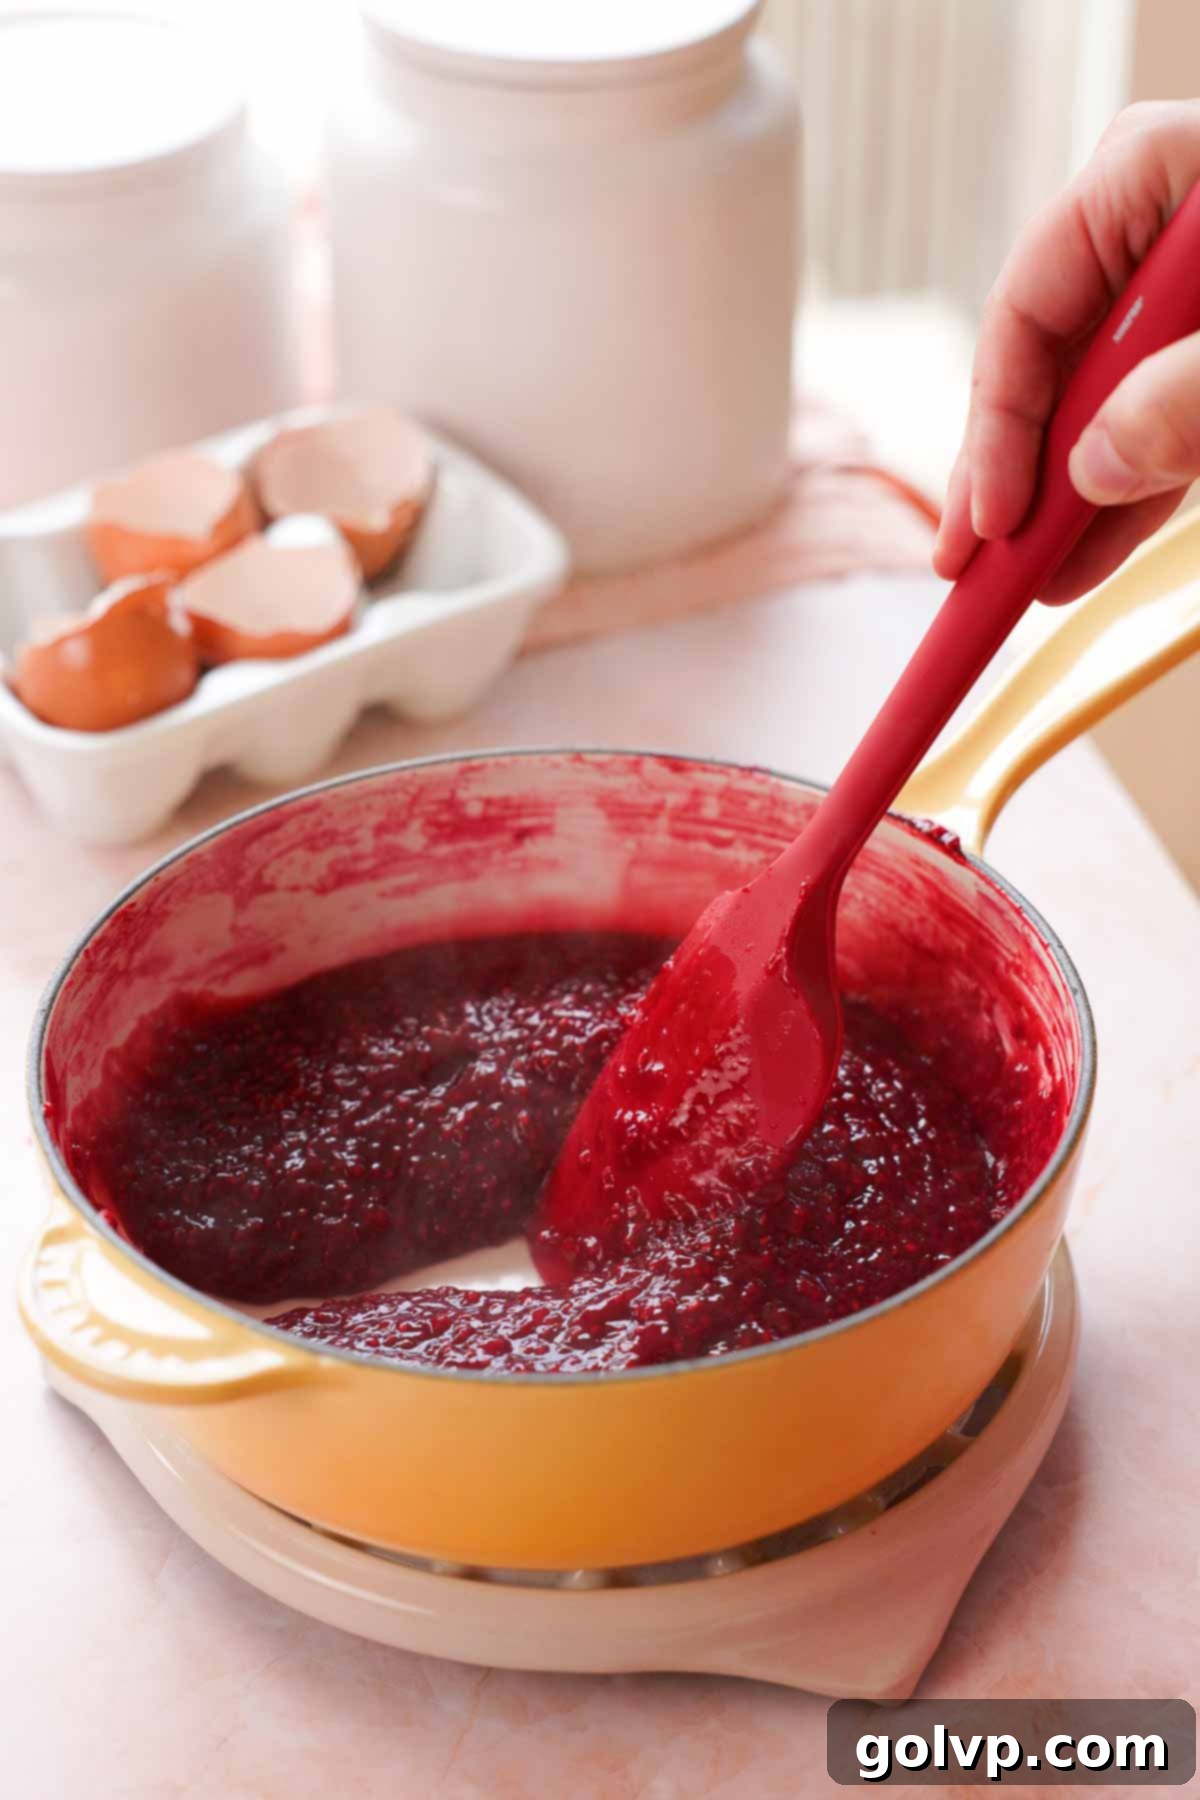
Step 3: Gradually pour the prepared cornstarch slurry into the hot raspberry sauce, stirring continuously to incorporate it thoroughly. Return the saucepan to the heat and continue to stir constantly. The mixture will begin to thicken rapidly. Continue cooking and stirring until the filling comes to a gentle boil and achieves a glossy, thick consistency. This ensures the cornstarch is fully activated, preventing any starchy taste and providing a stable filling.
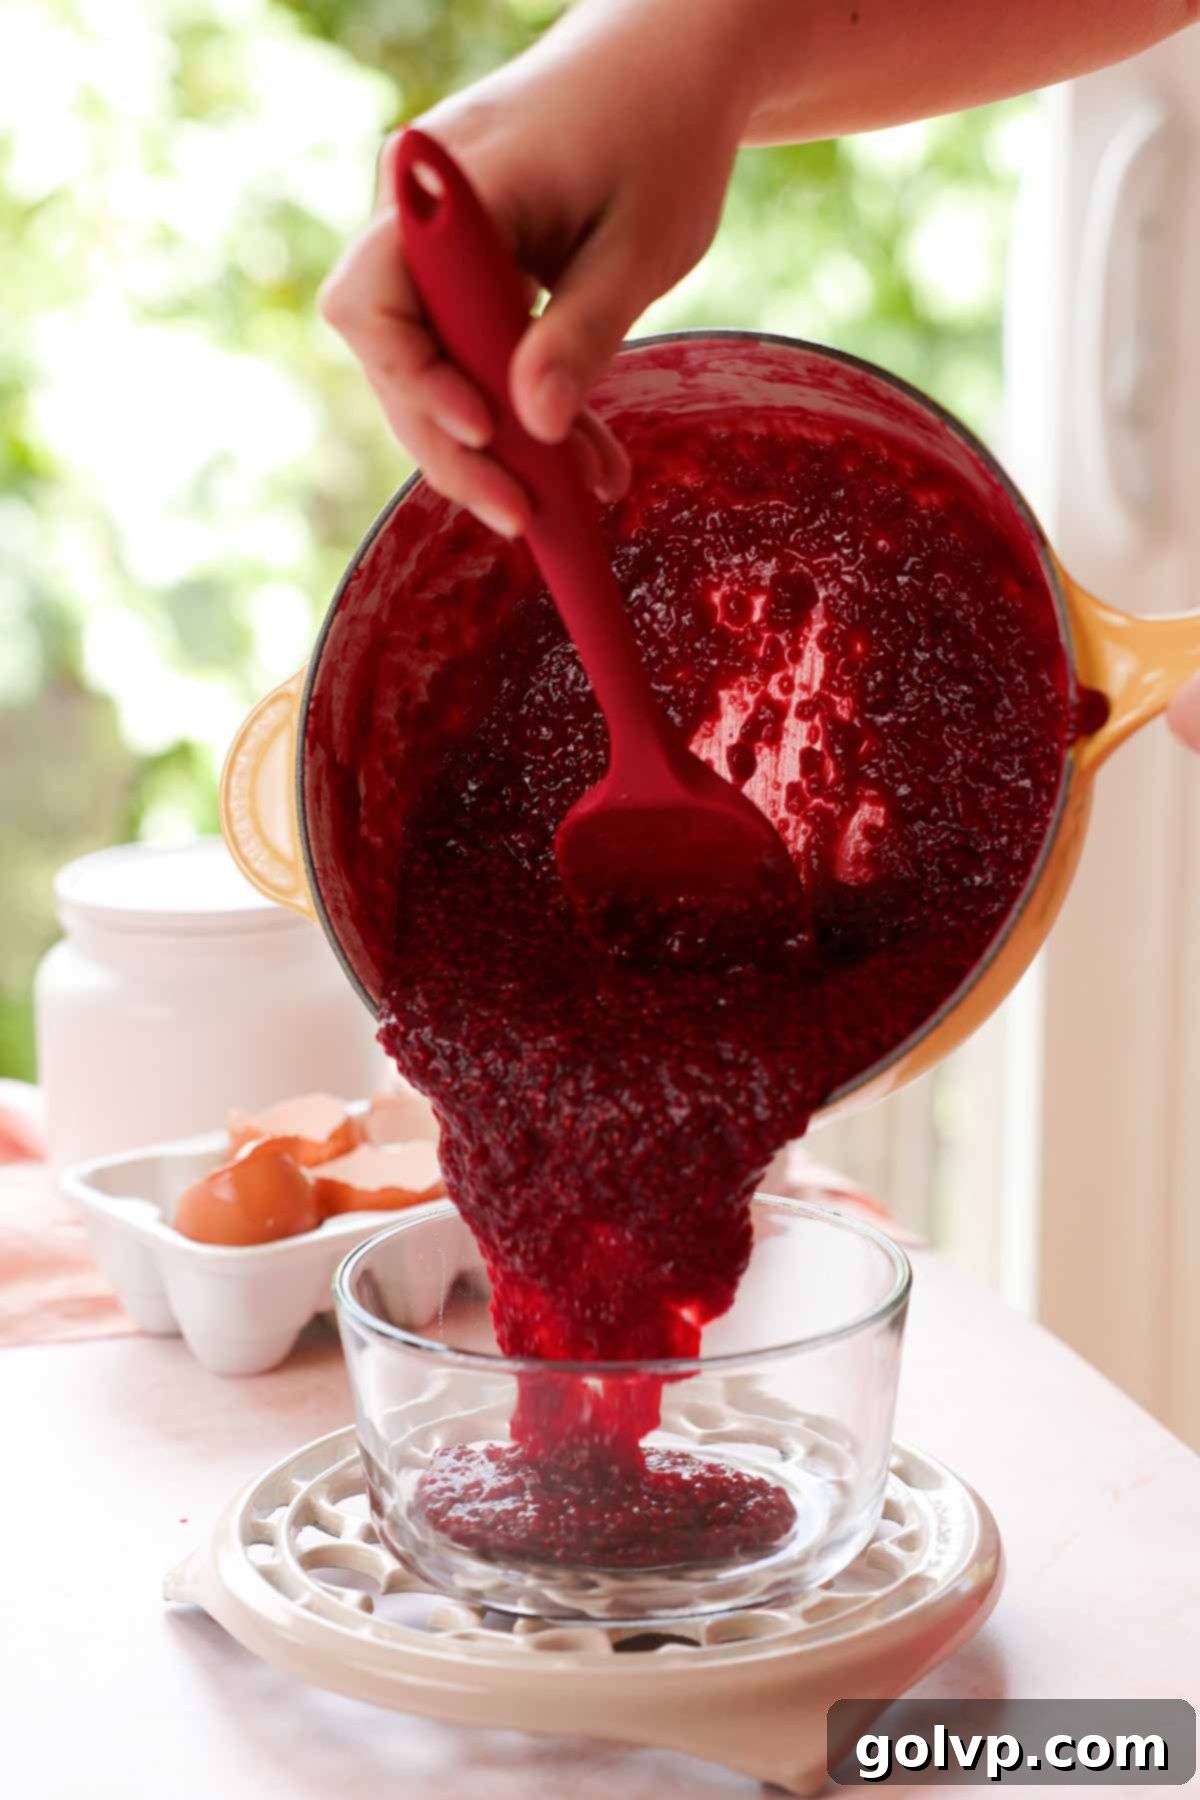
Step 4: Once the raspberry filling has reached the desired thickness, immediately transfer it from the hot saucepan into a clean, heat-safe bowl or container. To prevent a skin from forming on top, you can place a piece of plastic wrap directly onto the surface of the filling. Place the bowl into the refrigerator and allow it to cool completely. Chilling the filling thoroughly is crucial for it to set properly and maintain its structure when layered within the cake.
Baking the Fluffy Coconut Cake Layers
Preparation: Begin by preheating your oven to 355°F (180°C). Prepare two 8-inch round cake pans by lining the bottoms with parchment paper. Lightly butter the sides of the pans to ensure easy release of the baked cake layers. This careful preparation prevents sticking and helps create perfectly shaped cakes.
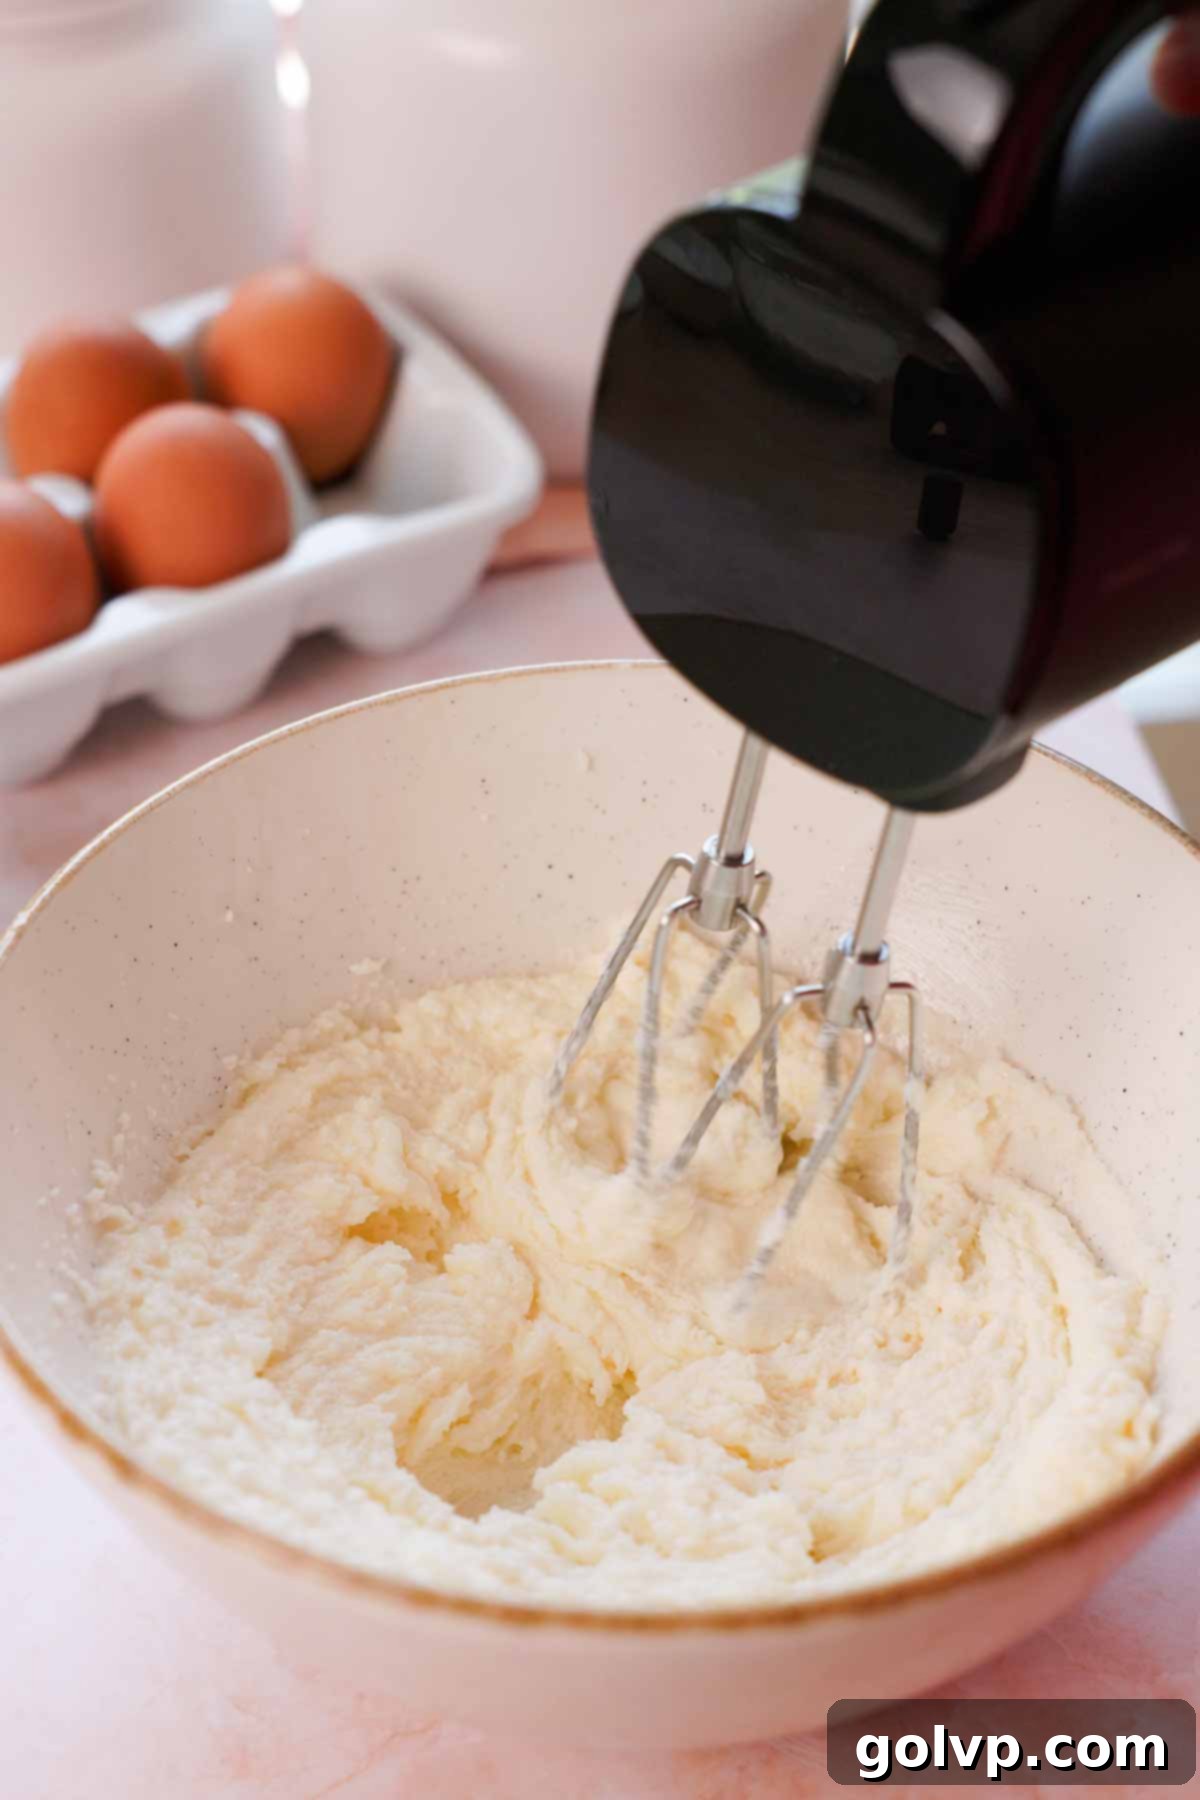
Step 1: In a large mixing bowl, or the bowl of a stand mixer fitted with the paddle attachment, combine the softened unsalted butter, neutral oil, granulated sugar, and sea salt. Beat these ingredients together on medium-high speed for about 5 minutes, until the mixture becomes visibly light, fluffy, and creamy. Periodically stop and scrape down the sides and bottom of the bowl with a spatula to ensure all ingredients are evenly incorporated and creamed.
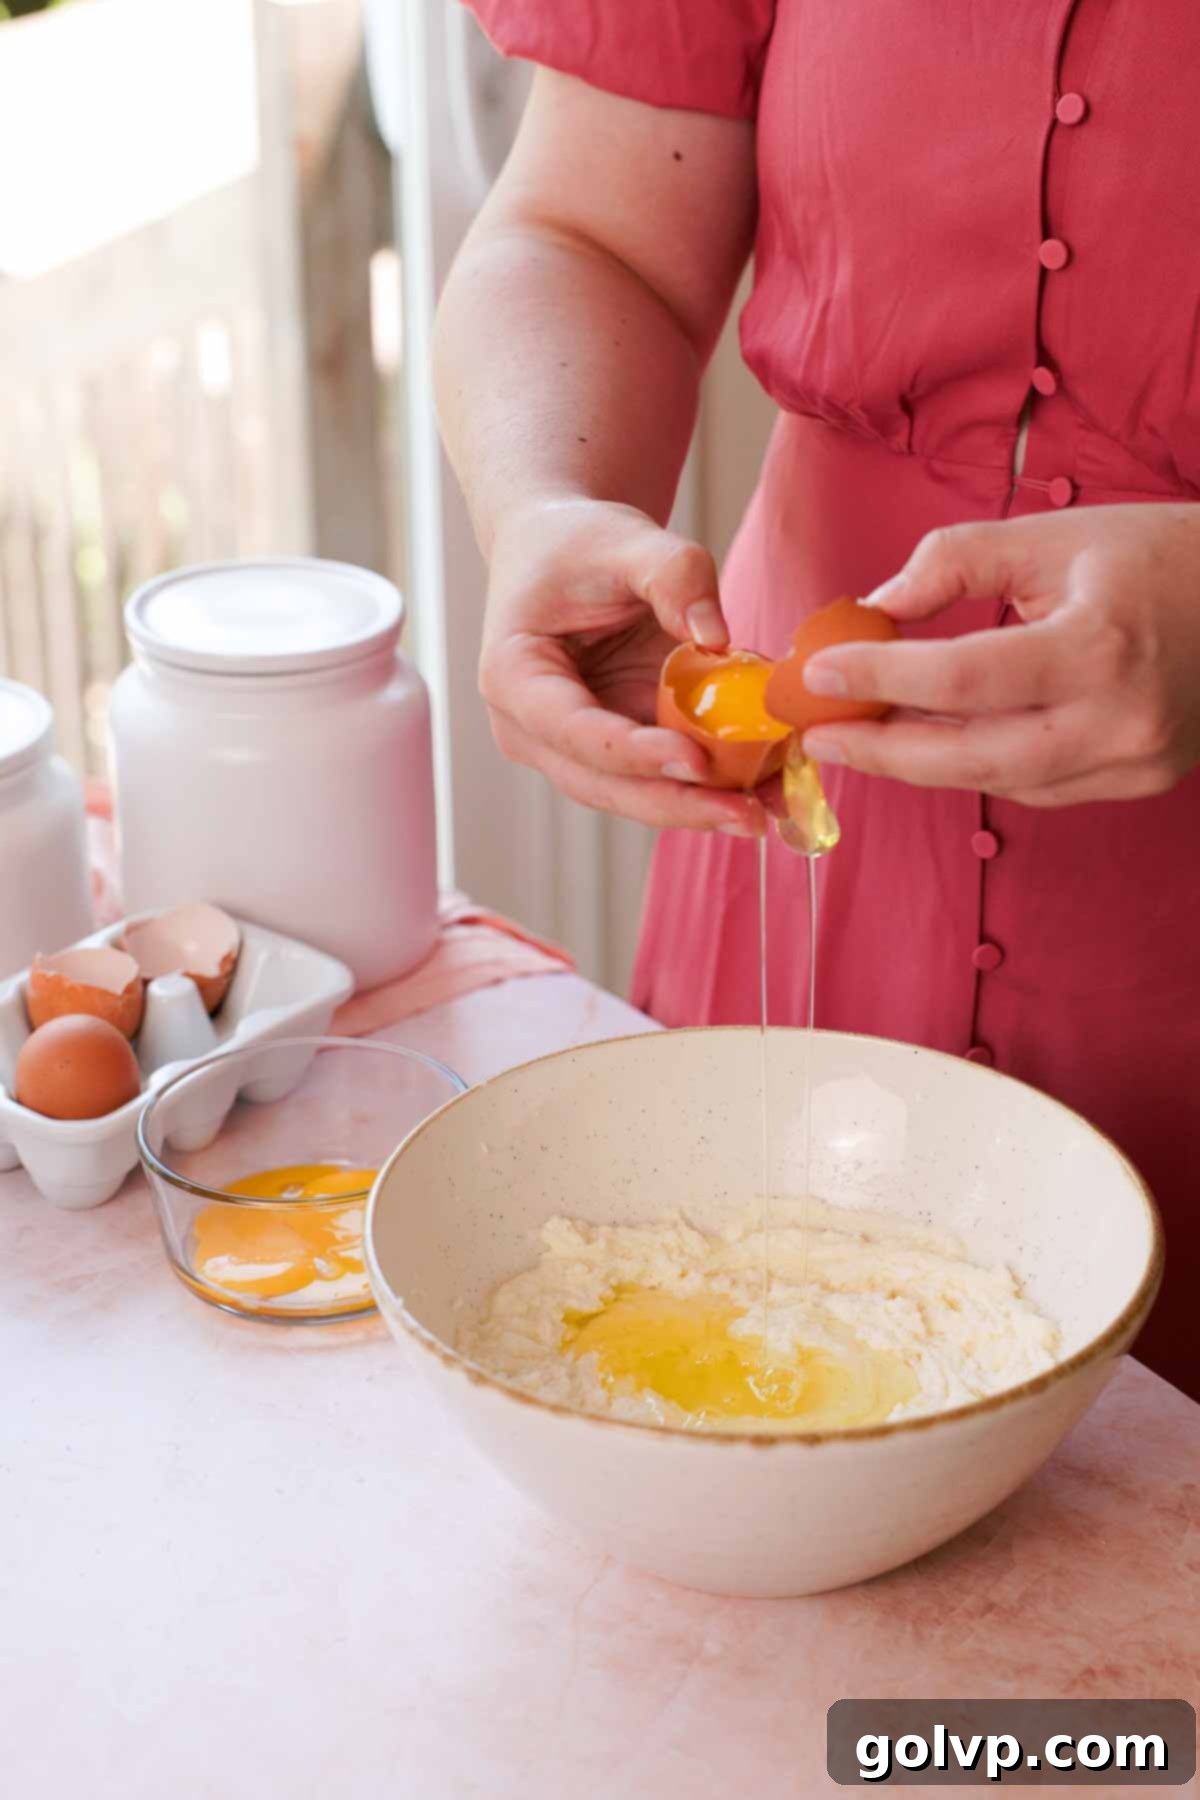
Step 2: With the mixer running on low speed, add the room-temperature egg whites one at a time to the butter and sugar mixture. Ensure each egg white is fully incorporated before adding the next. This step helps create an emulsified mixture that contributes to the cake’s moistness and structure. Take your time here for the best results.
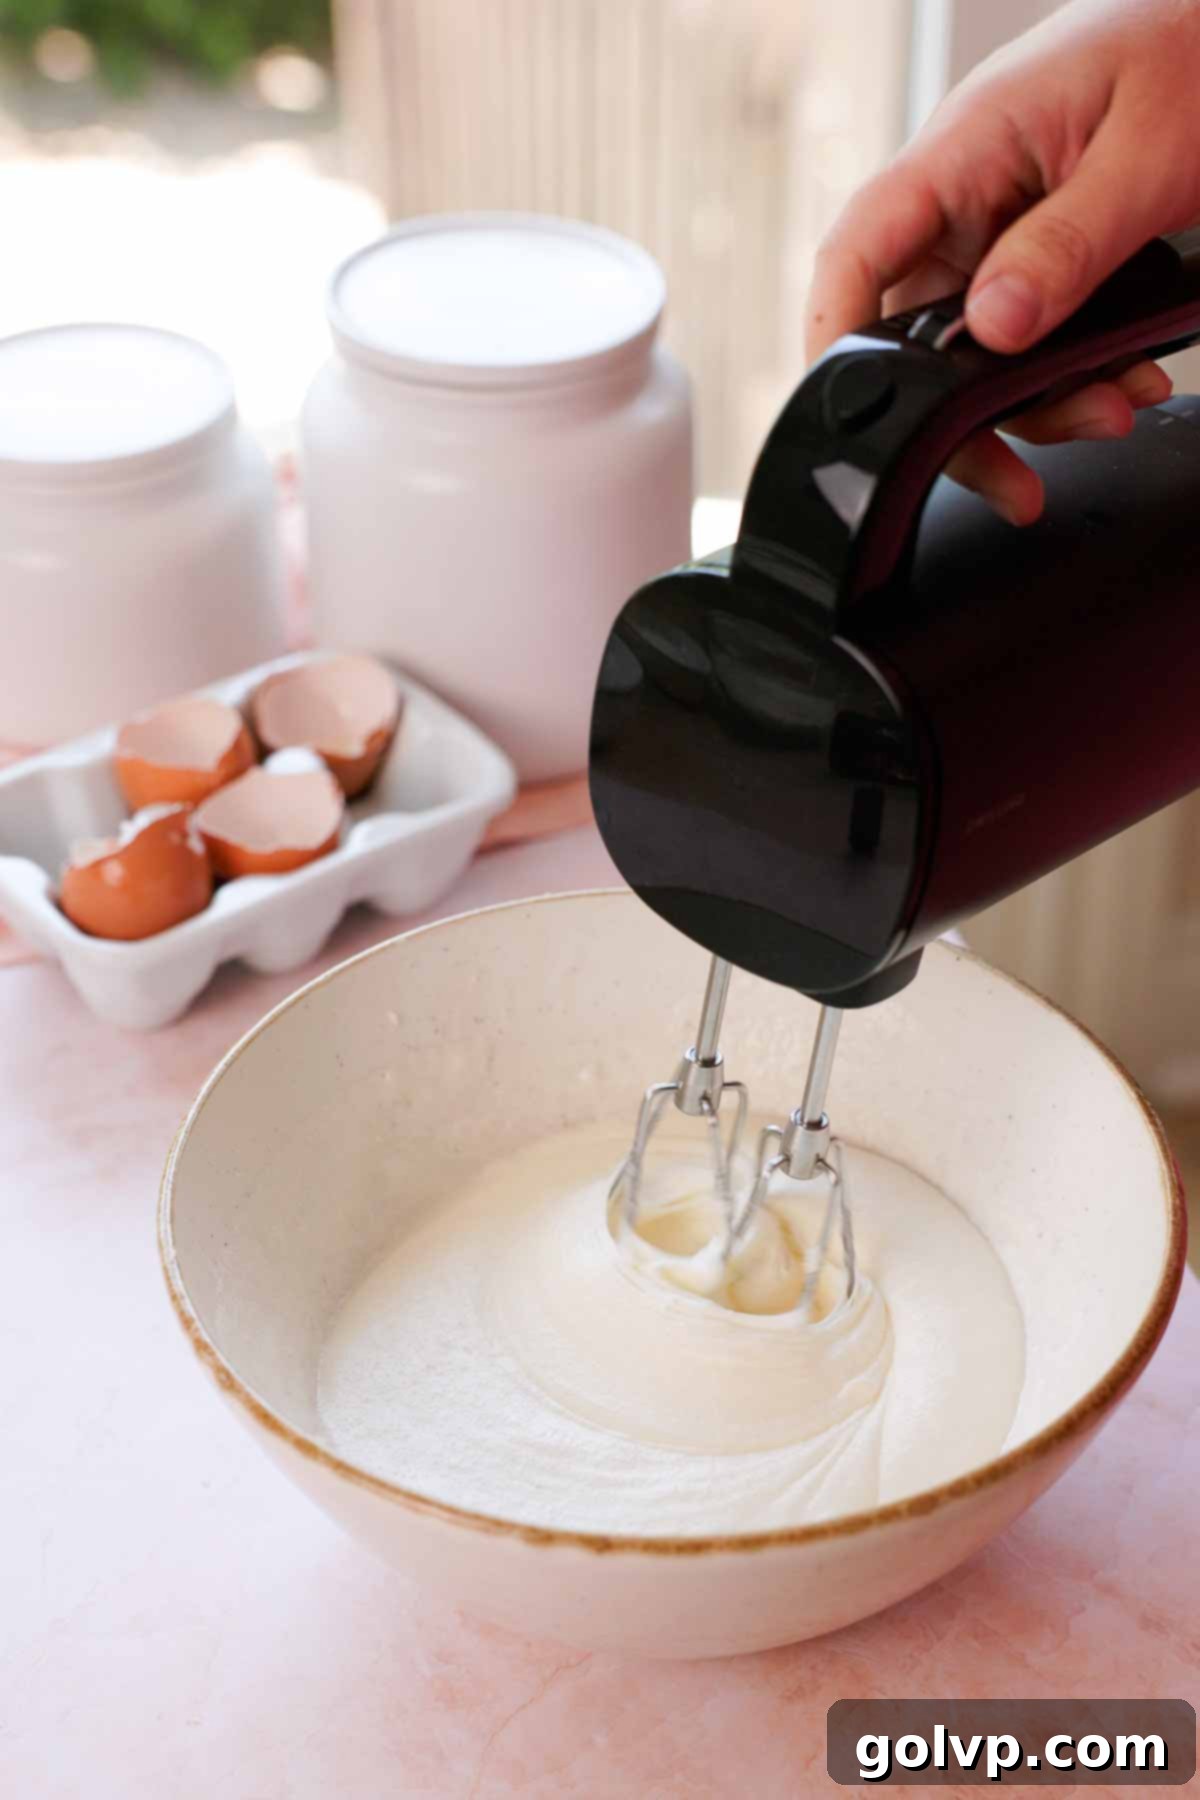
Step 3: Once all the egg whites are added, increase the mixer speed to medium and beat the mixture again for approximately 2-3 minutes. During this time, the batter will thicken slightly and become even lighter and more uniform in texture. This beating incorporates air, contributing to the cake’s fluffy texture.
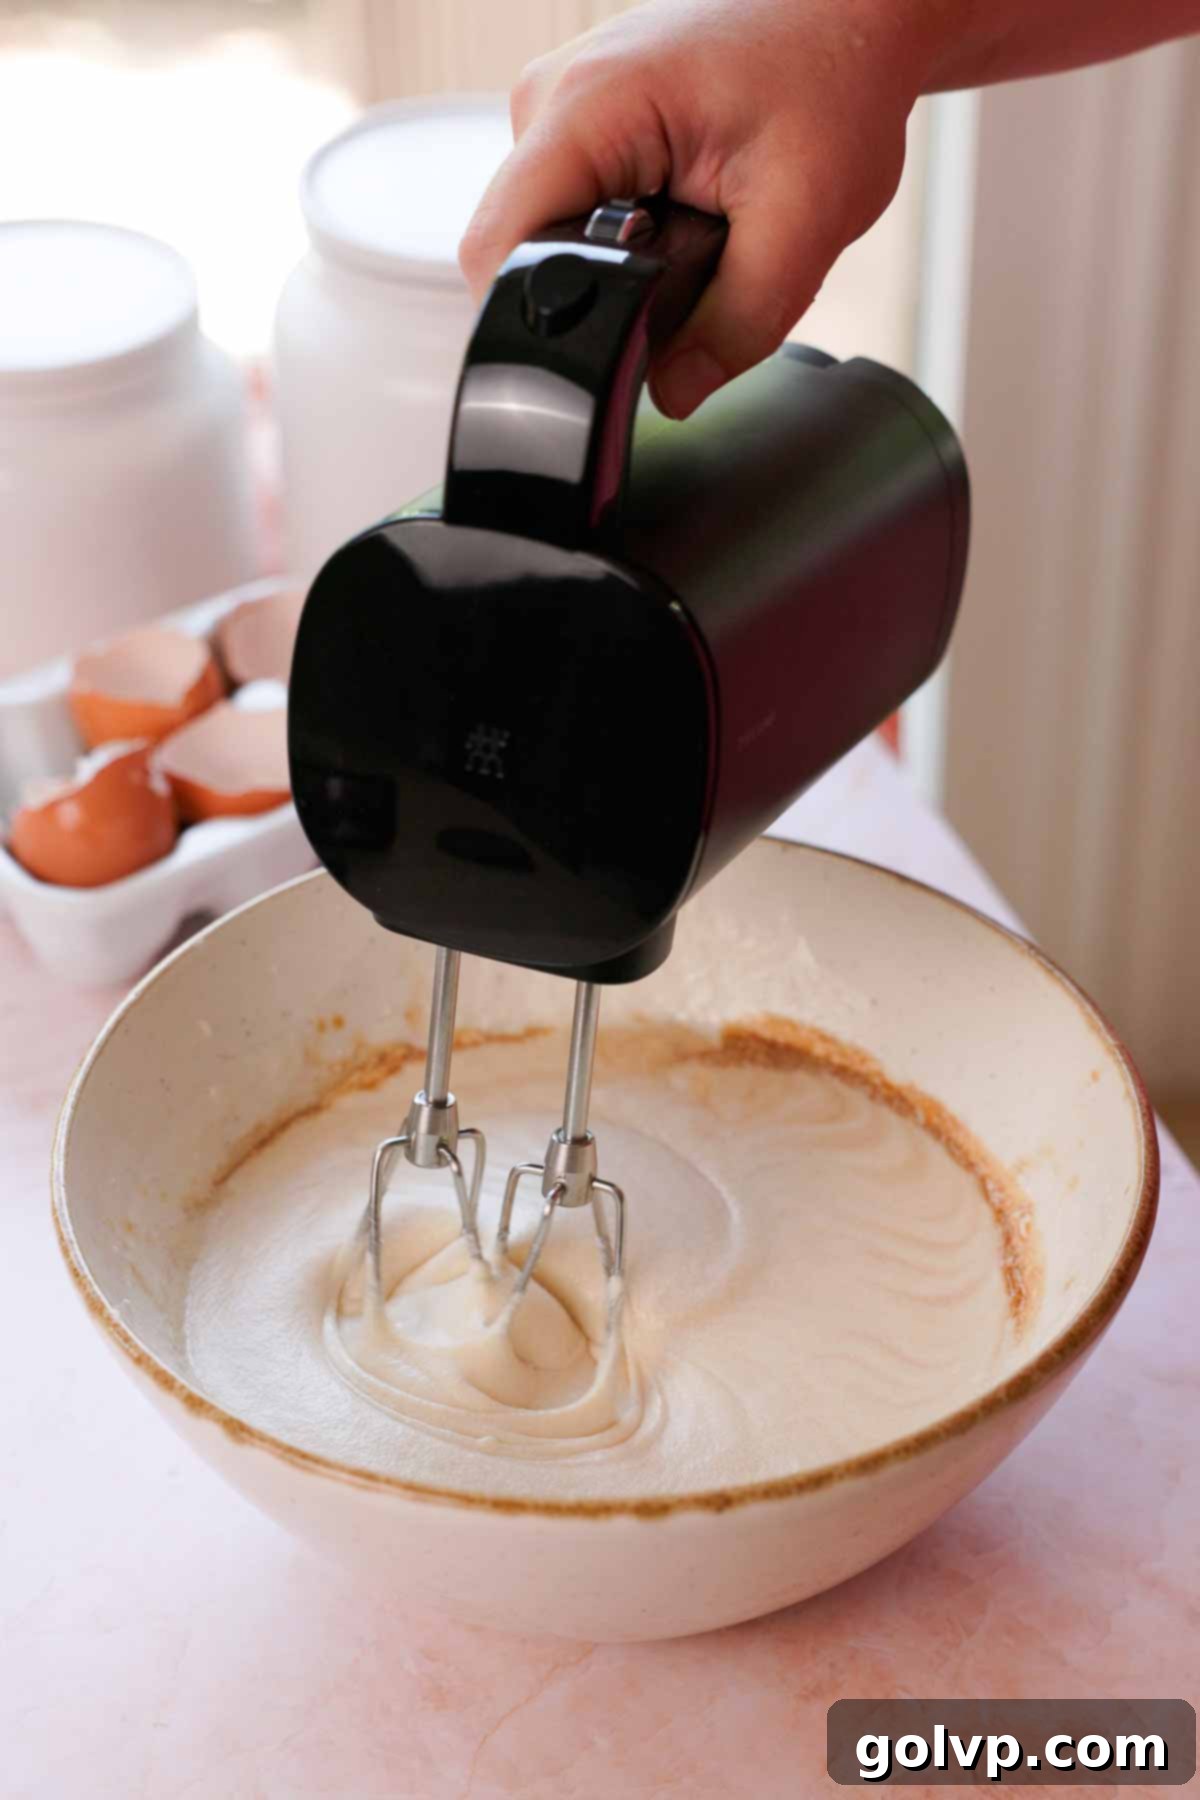
Step 4: Reduce the mixer speed to low. Add the room-temperature sour cream, pure vanilla extract, coconut extract, and almond extract to the bowl. Mix gently until all these wet ingredients are just combined. Avoid overmixing at this stage, as we want to maintain the air incorporated earlier.
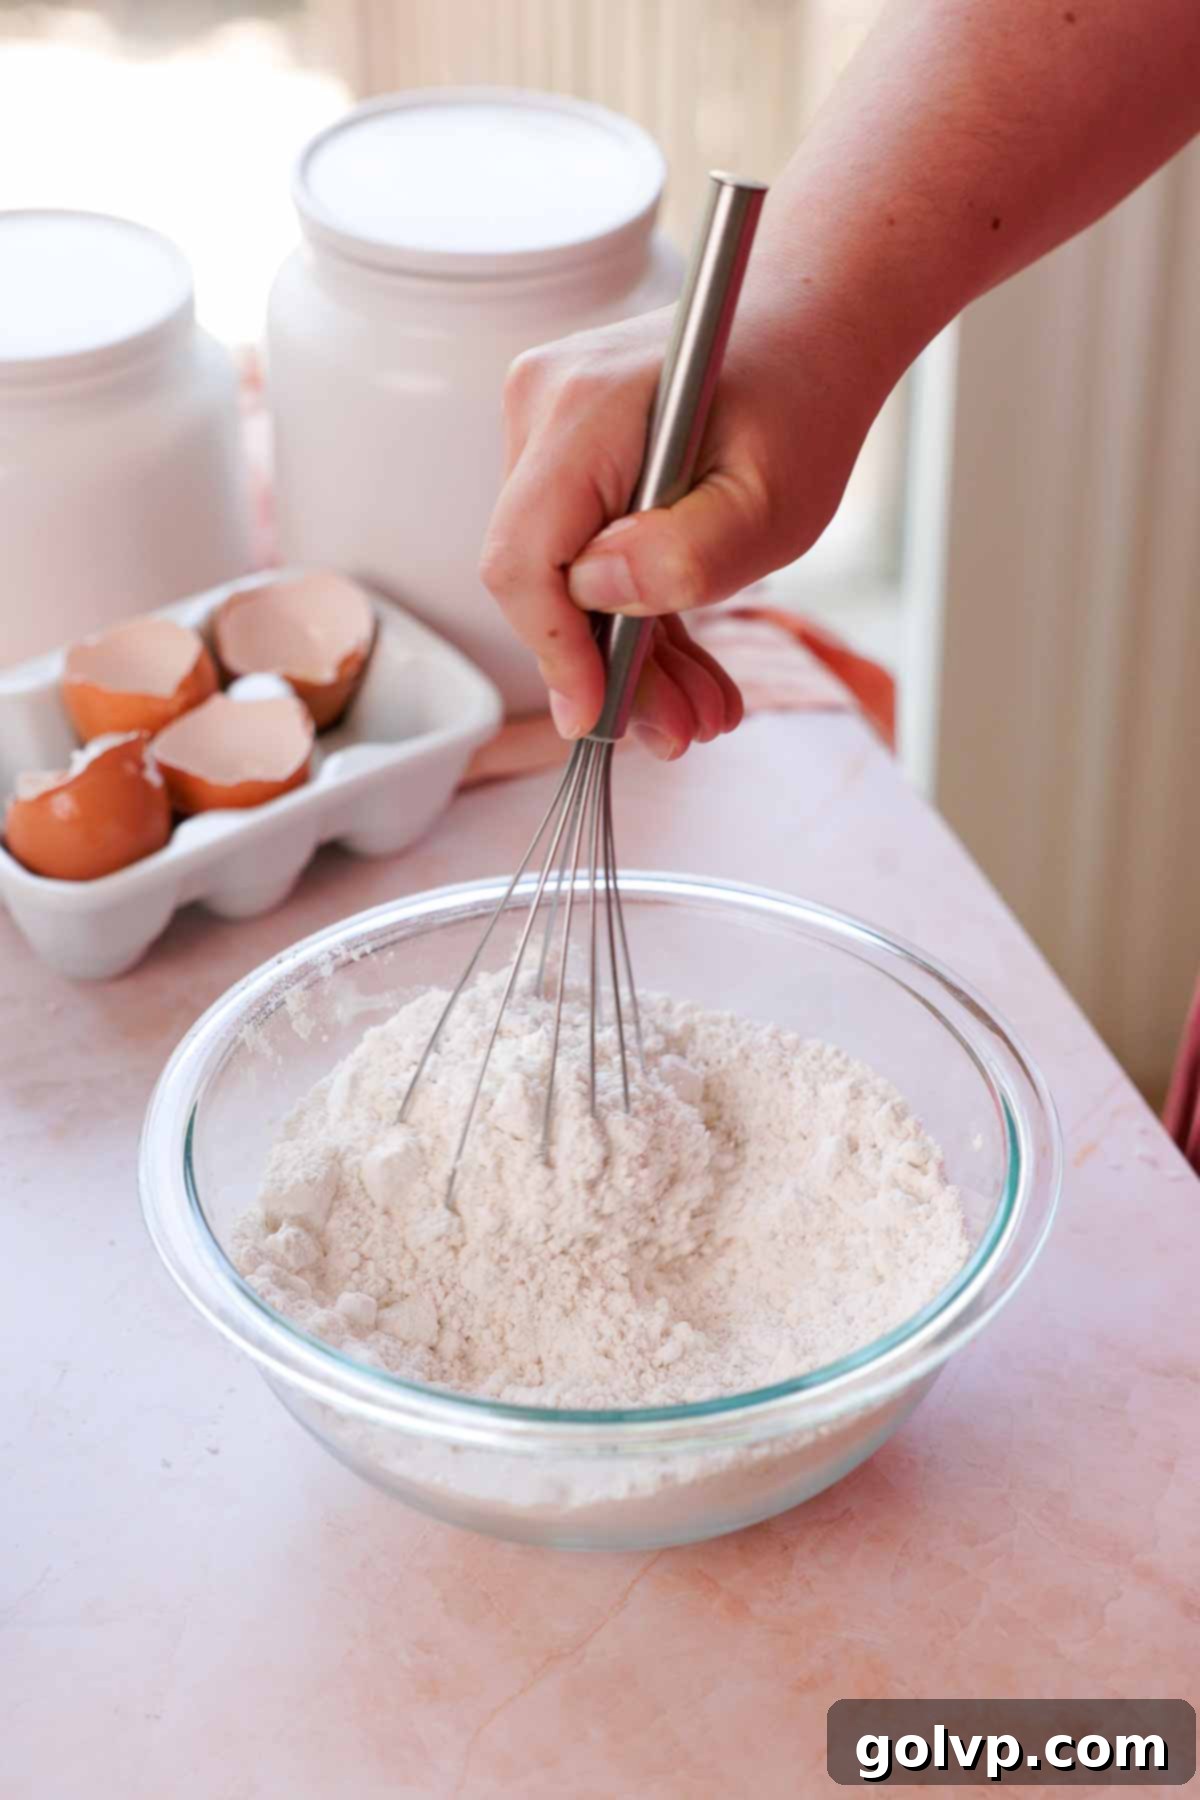
Step 5: In a separate medium-sized bowl, thoroughly whisk together the cake flour, baking powder, and baking soda. This ensures that the leavening agents and flour are evenly distributed, which is crucial for a consistent rise and texture in your cake. A well-whisked dry mix prevents pockets of unmixed ingredients.
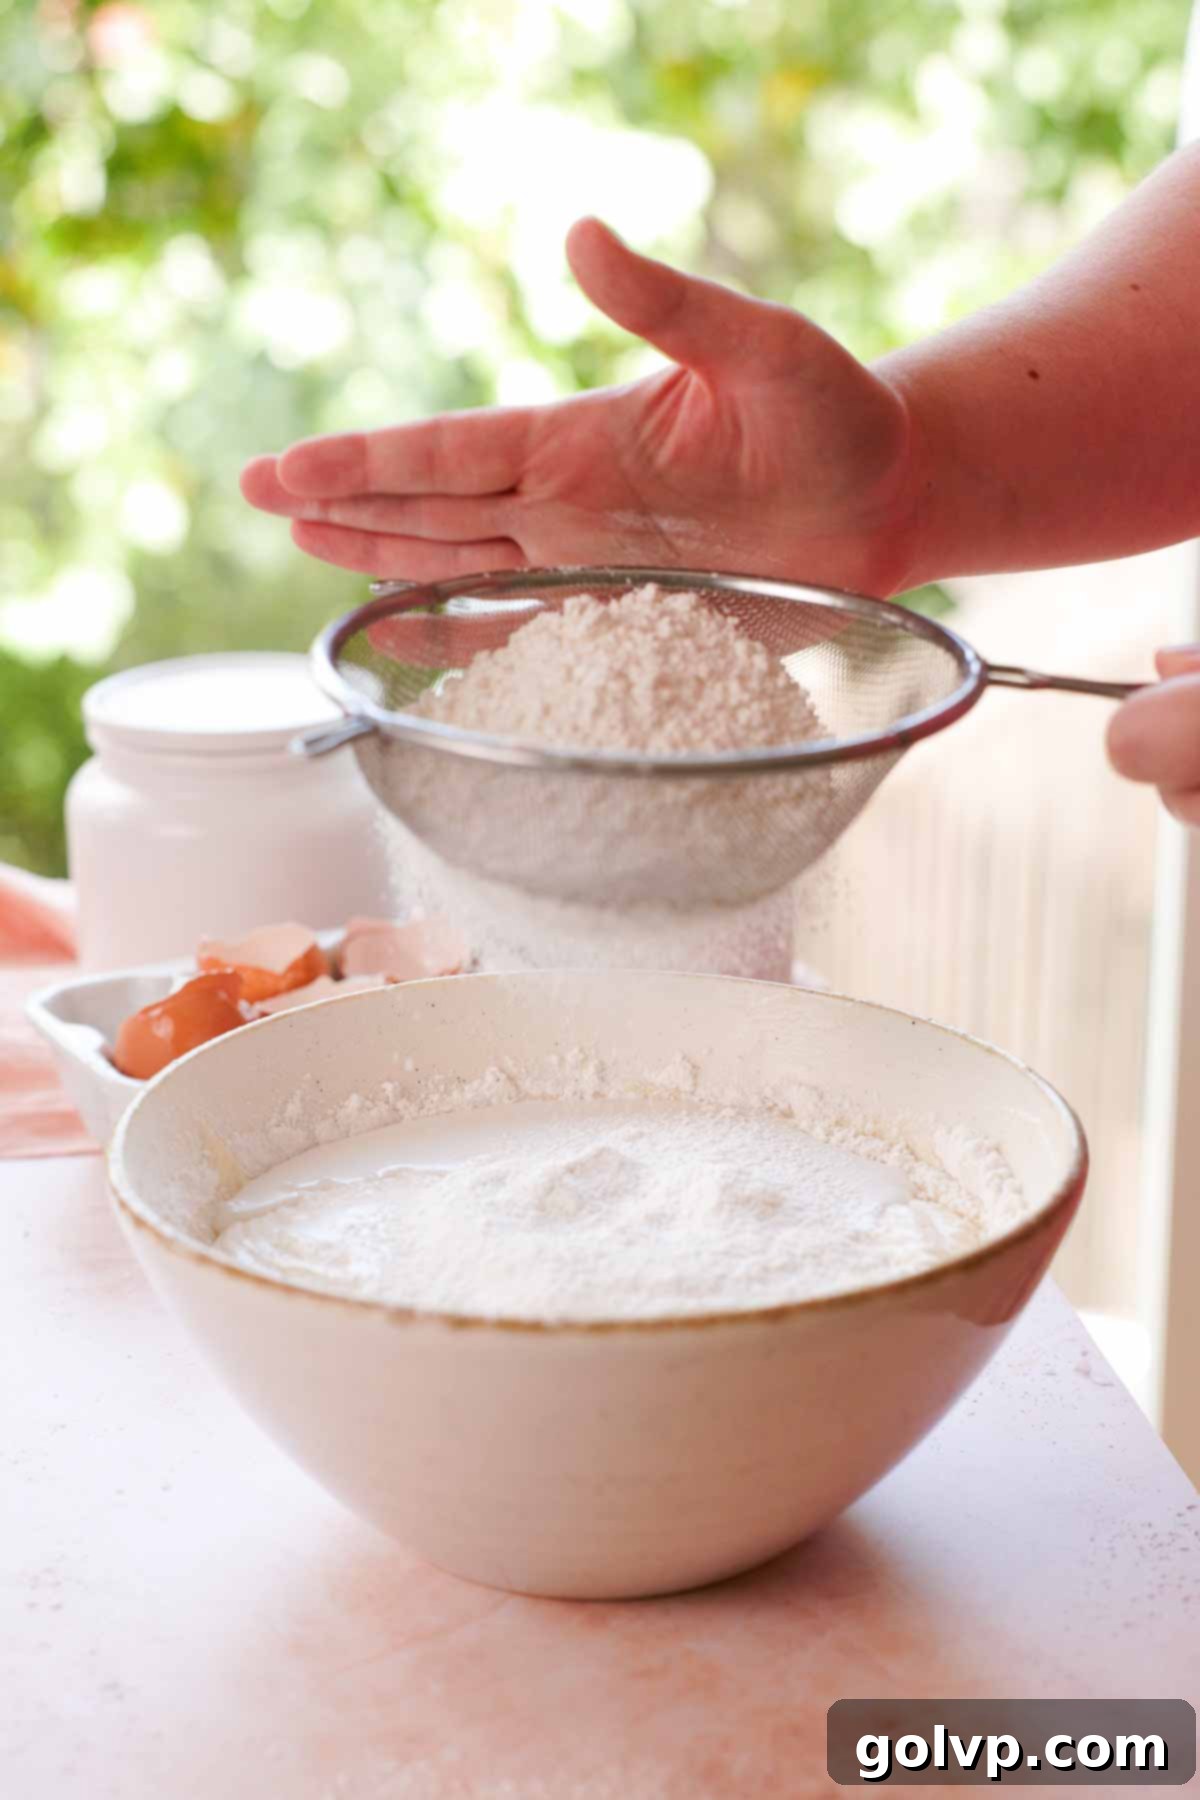
Step 6: With the mixer on its lowest speed, sift approximately half of the prepared dry ingredients into the wet mixture. Mix gently until the dry flour is just incorporated and no visible streaks remain. Overmixing at this stage can develop gluten, leading to a tough cake, so mix only until combined.
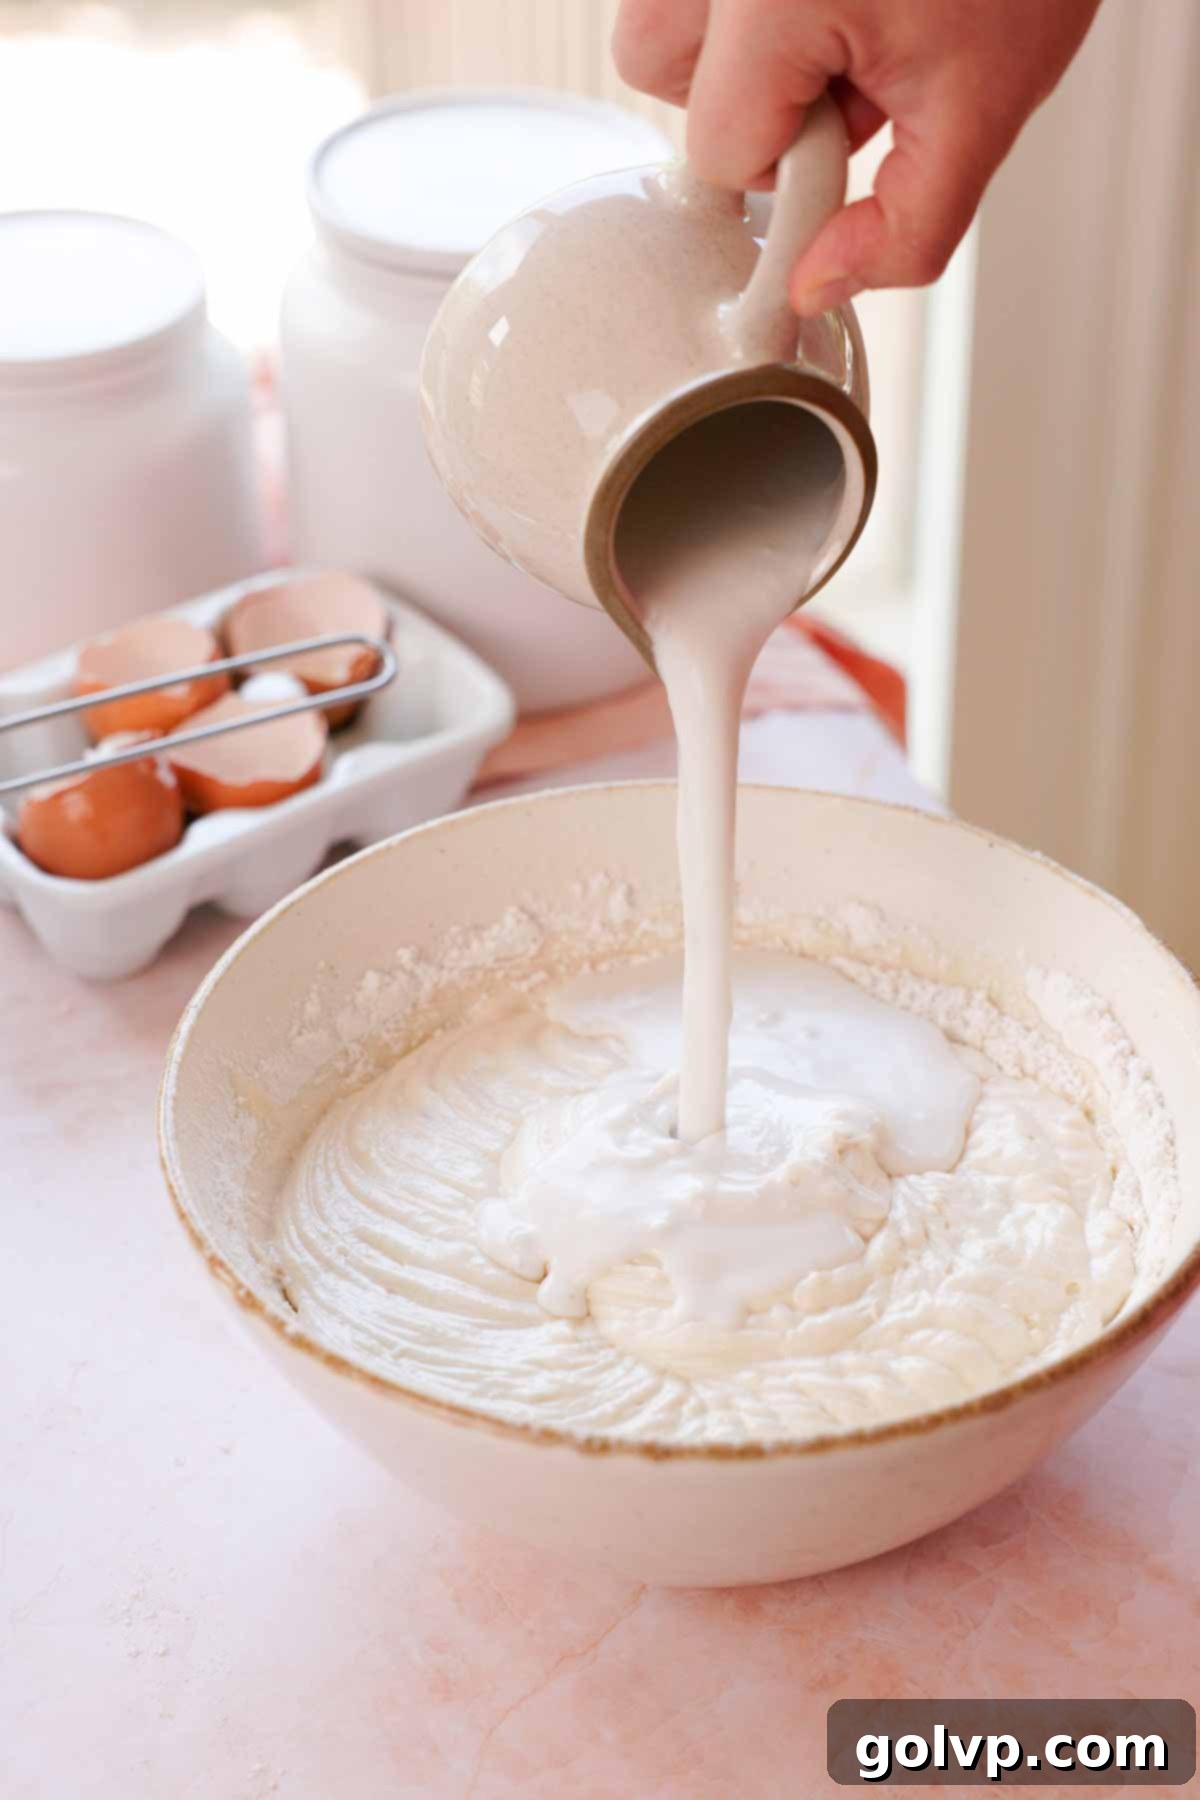
Step 7: Next, pour in the full-fat canned coconut milk, followed by sifting in the remaining half of the dry ingredients. Mix on low speed, again, only until the batter is smooth and no dry streaks of flour are visible. It is critical to stop mixing as soon as everything is just combined to prevent overdeveloping the gluten. The goal is a light, tender cake.
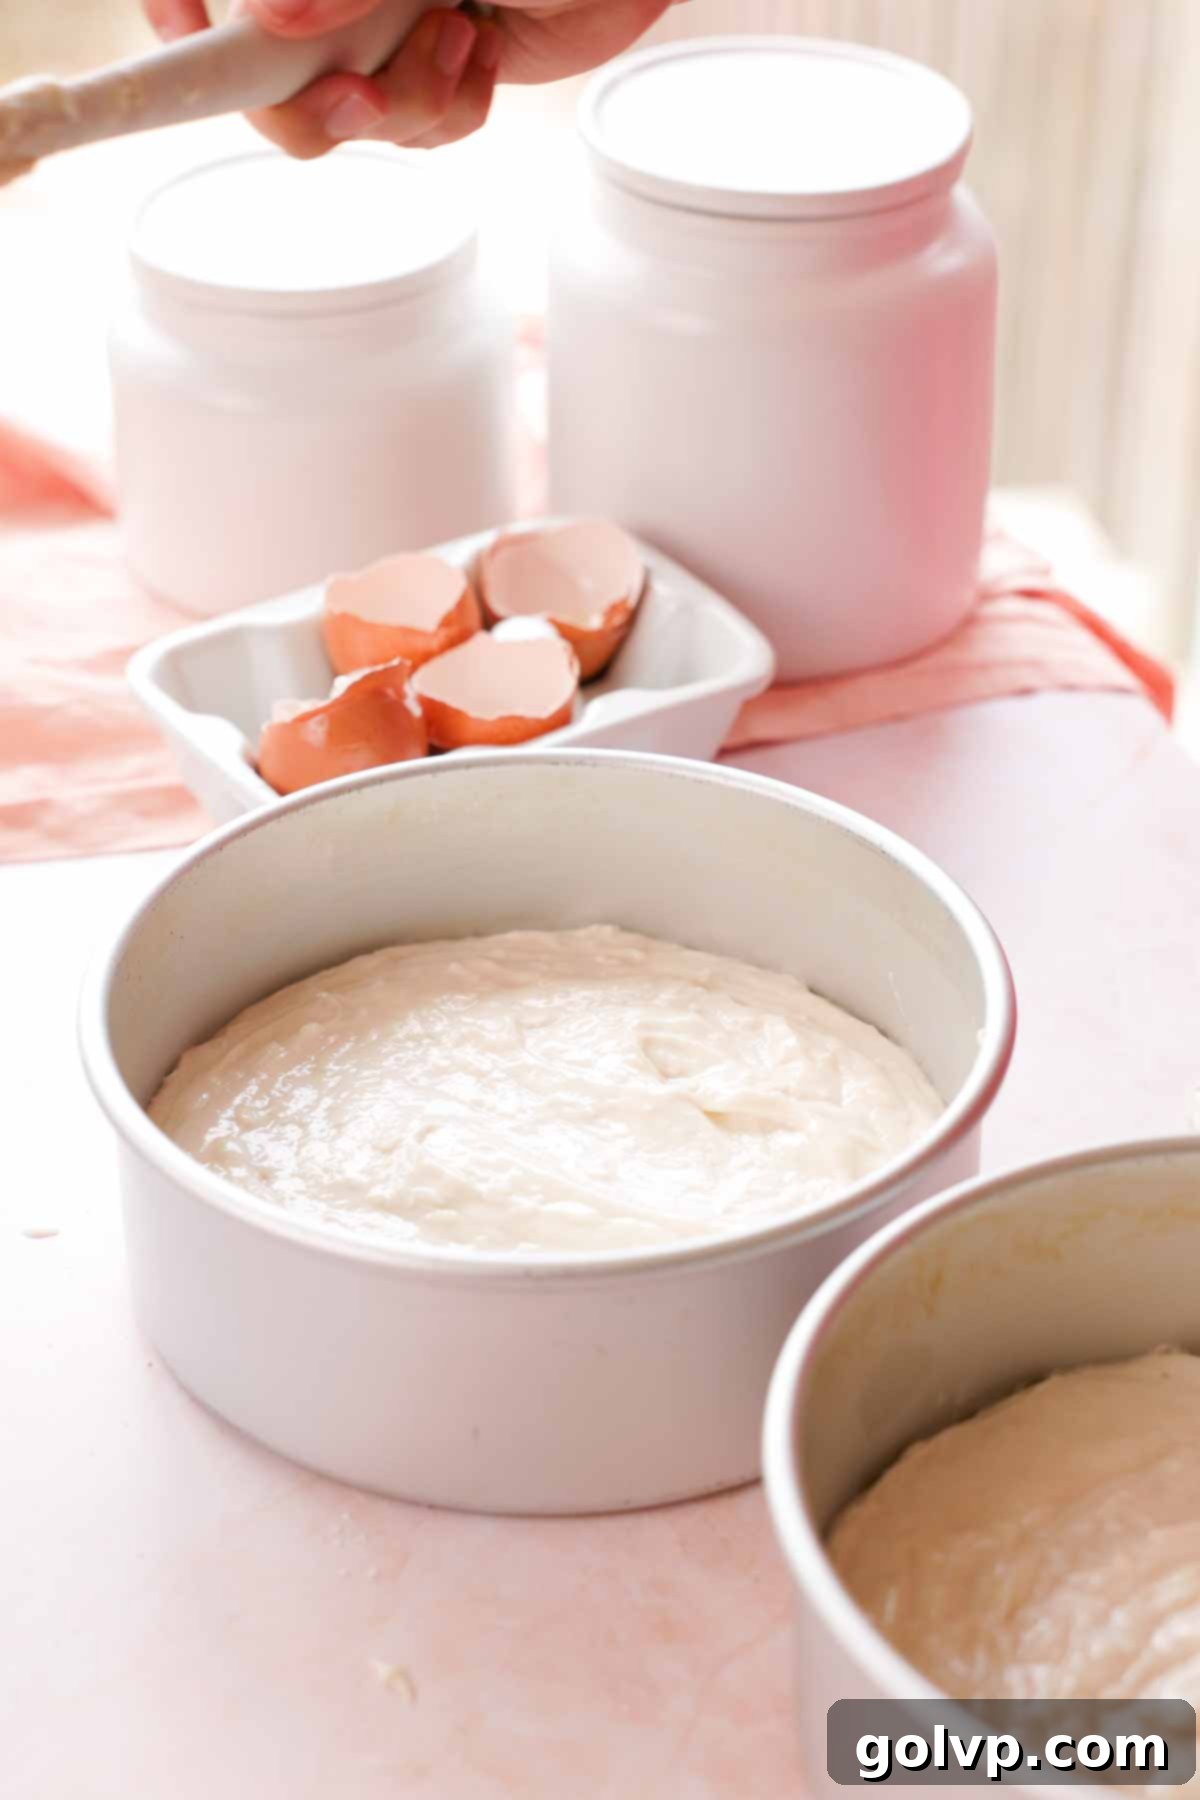
Step 8: Gently fold in the sweetened shredded coconut using a spatula until it is evenly distributed throughout the batter. Divide the batter equally between your two prepared 8-inch baking pans. Bake in the preheated oven for 25-30 minutes. Begin checking for doneness around the 25-minute mark by inserting a toothpick into the center of a cake layer; it should come out mostly clean with just a few moist crumbs attached.
Step 9: Once baked, carefully remove the cake layers from the oven. Let them cool in their pans on a wire rack for about 10 minutes. This short cooling period helps the cakes firm up, making them less fragile. After 10 minutes, invert the cake layers onto the cooling rack to cool completely. If any cake layer seems stuck, gently run a thin spatula around the edges of the pan to loosen it before flipping. Ensure the cakes are completely cool before attempting to frost them.
Crafting the Coconut Cream Cheese Frosting and Assembling Your Cake
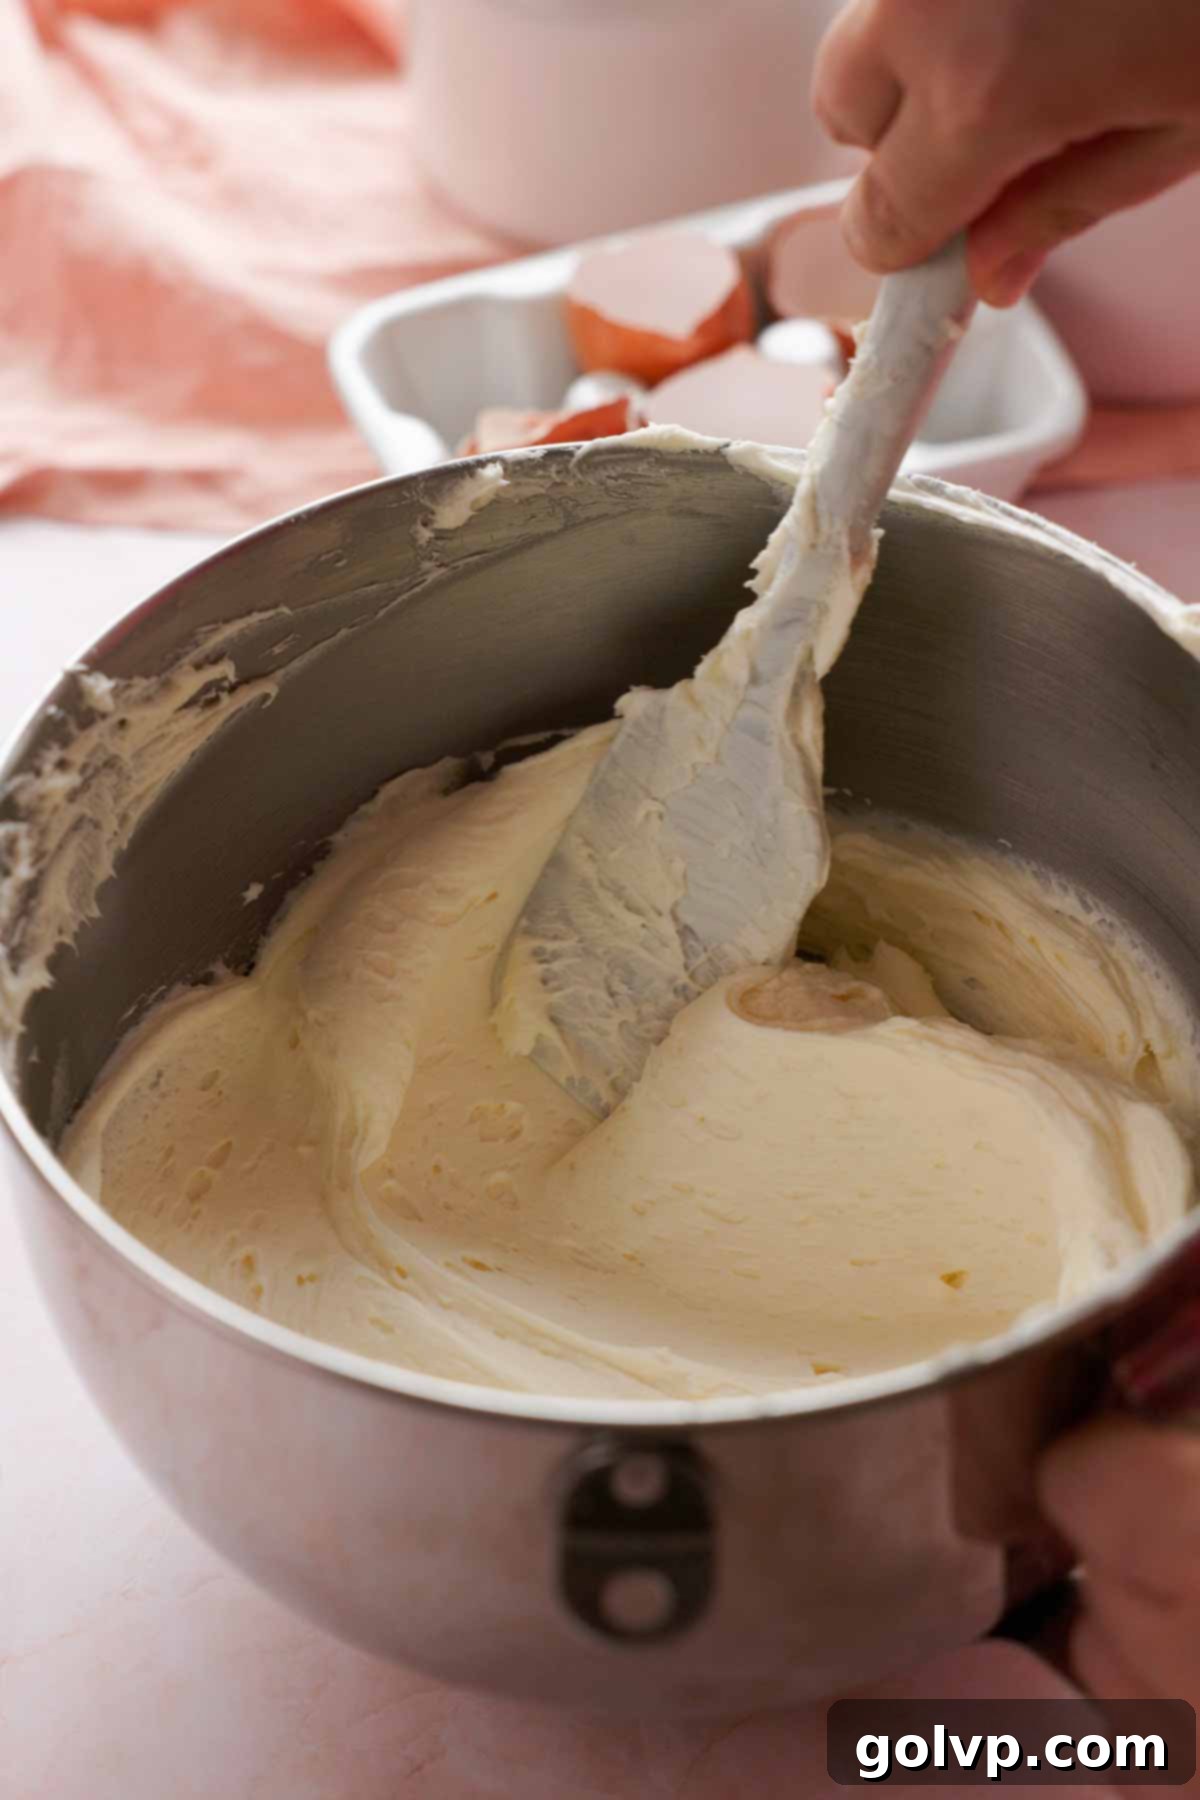
Step 1: In a clean mixing bowl, beat the softened unsalted butter until it is light and creamy. Gradually add the powdered sugar, one cup at a time, mixing well after each addition. Continue beating on medium speed for approximately 5 minutes until the frosting appears very creamy, smooth, and light. Then, incorporate the coconut extract and sea salt, mixing briefly. Finally, add the cold, brick-style cream cheese, one large piece at a time, mixing just until combined after each addition. This cold cream cheese technique helps ensure a stable, stiff frosting.
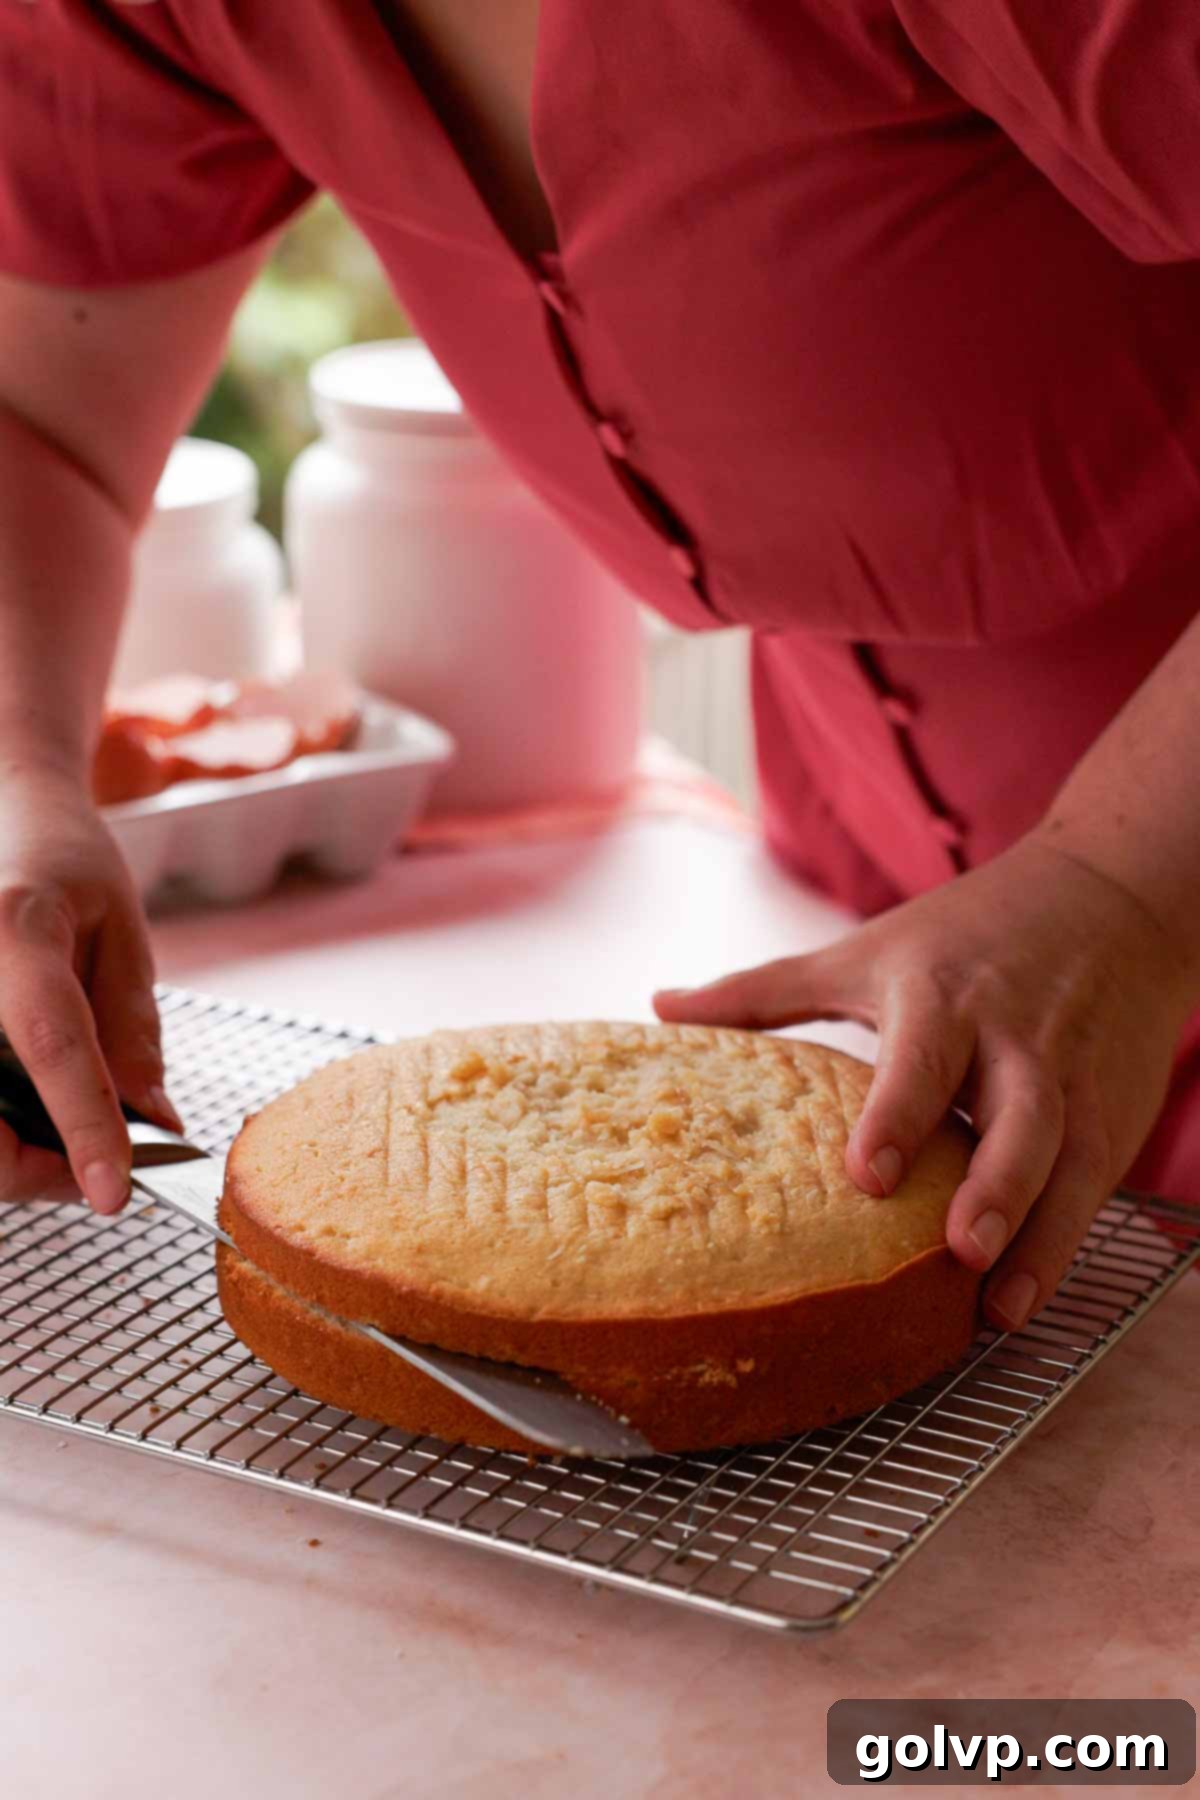
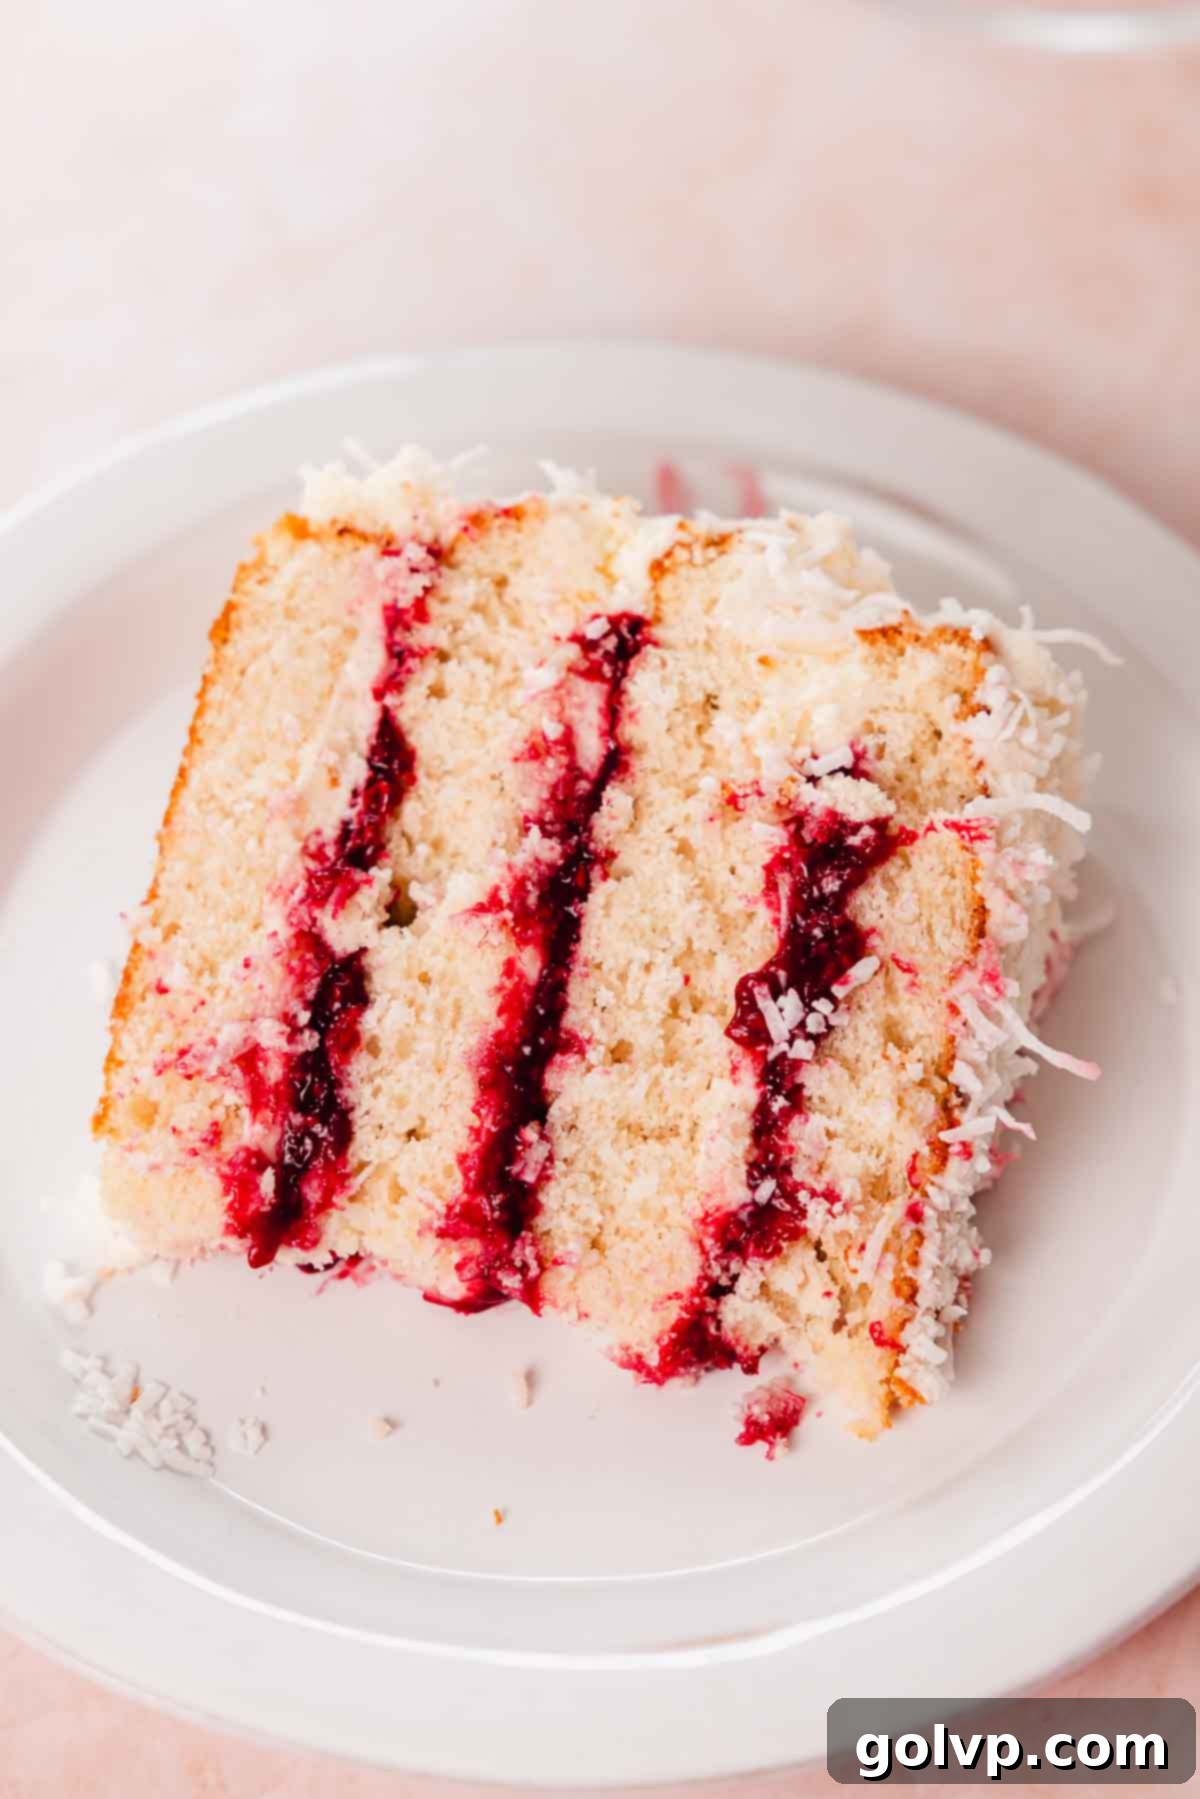
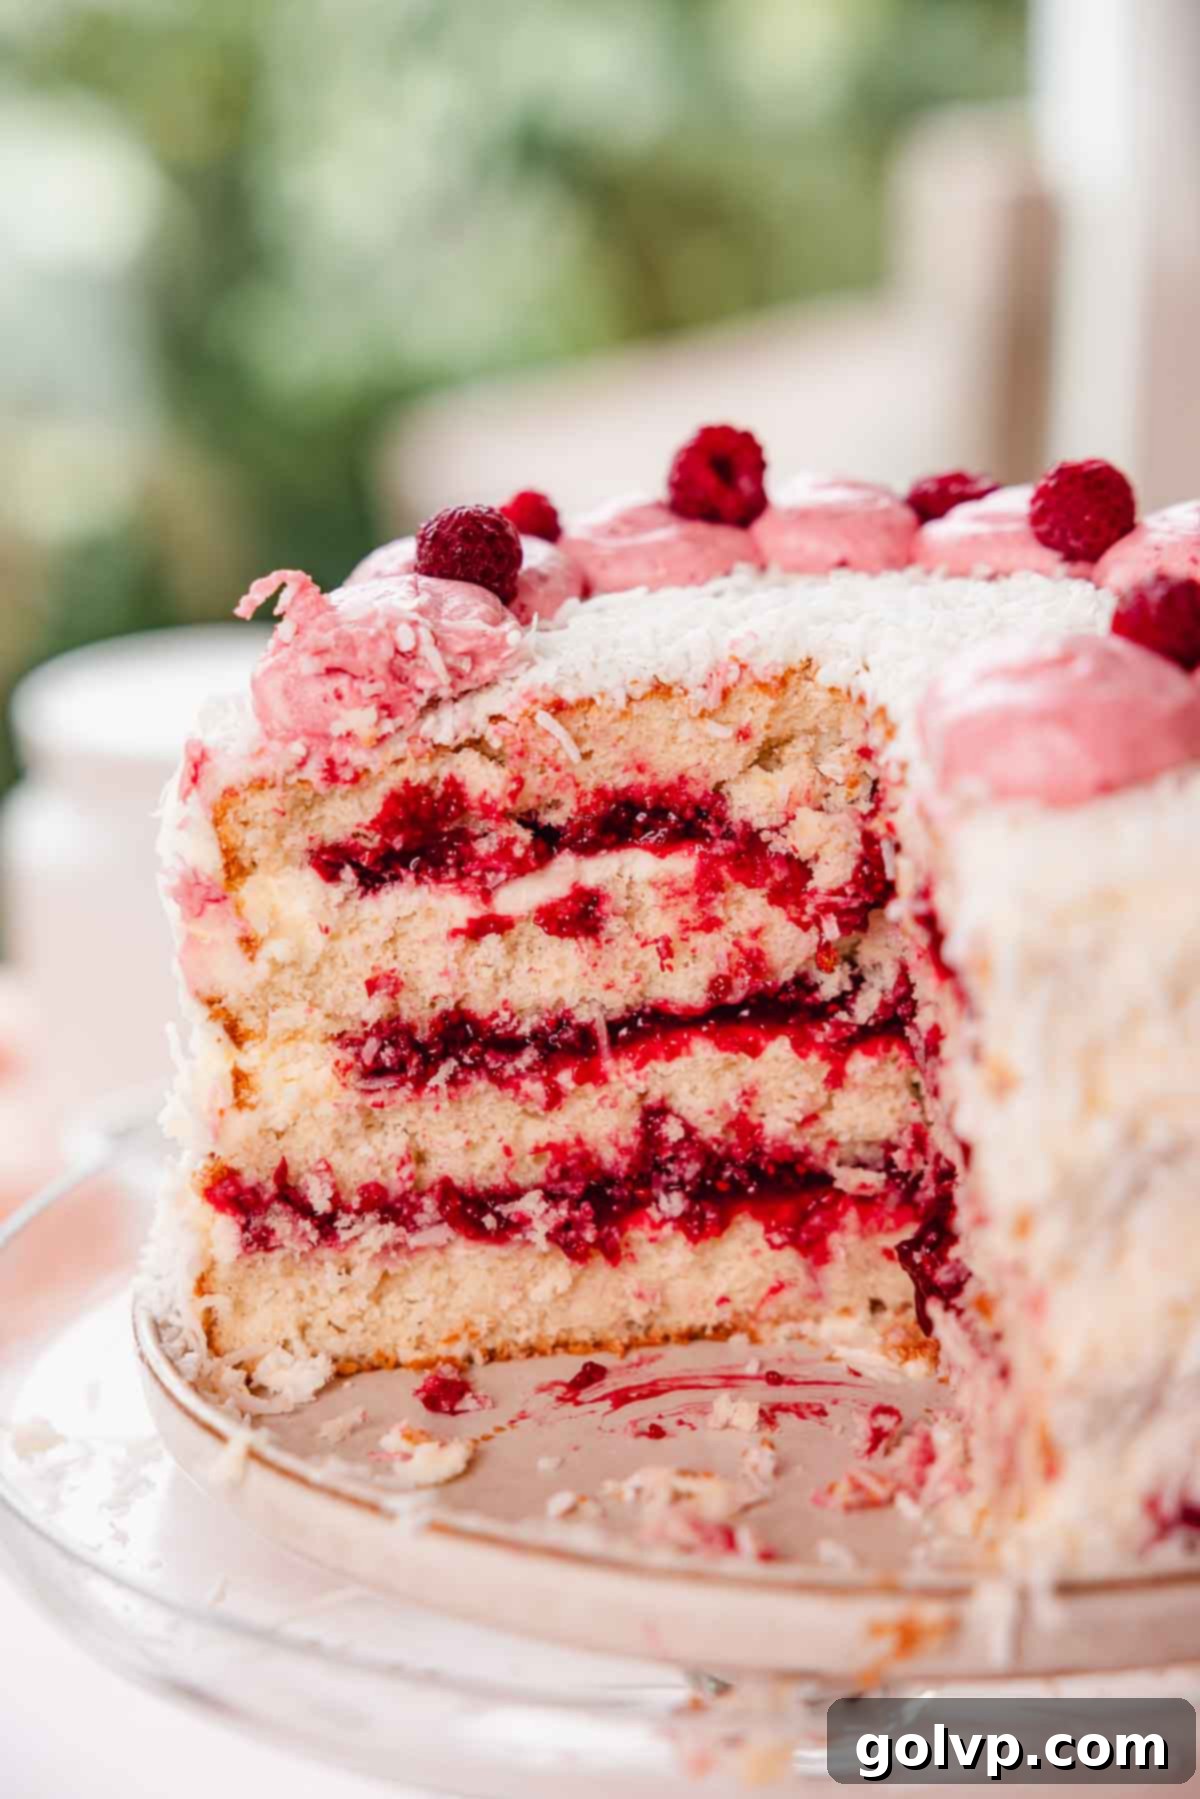
Step 2: Once your cake layers are completely cool, gently remove the parchment paper from their bottoms. Using a large, serrated knife, carefully slice each cake layer horizontally in half, creating a total of four thinner cake layers. This step requires a steady hand and helps achieve an impressive layered look and a better frosting-to-cake ratio.
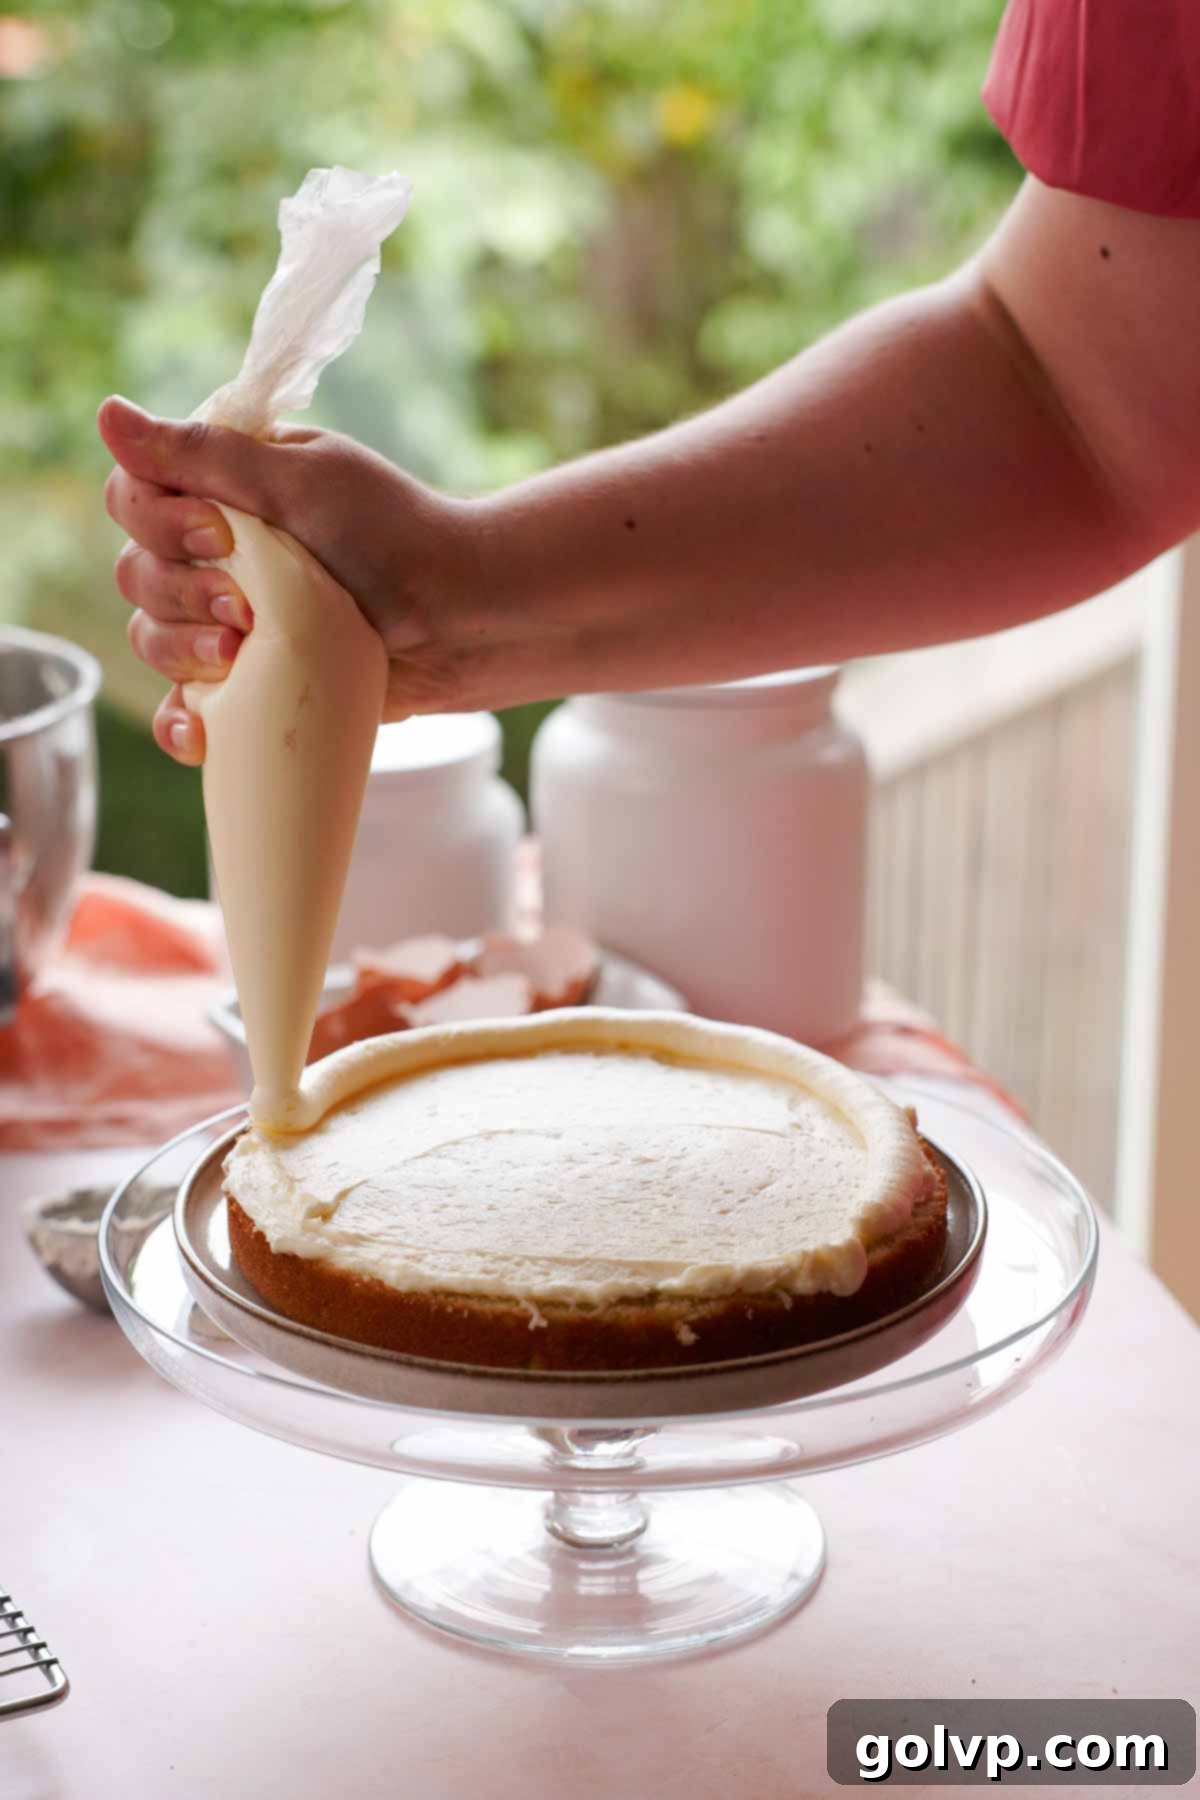
Step 3: To begin assembly, place a small dollop of frosting onto your cake stand or serving plate; this acts as an anchor for the first cake layer. Carefully place the first cake layer on top. Spread approximately ½ cup of your creamy coconut cream cheese frosting evenly over this layer. Using a piping bag, pipe a thick border of frosting along the very edge of this layer. This border acts as a dam to neatly contain the raspberry filling.
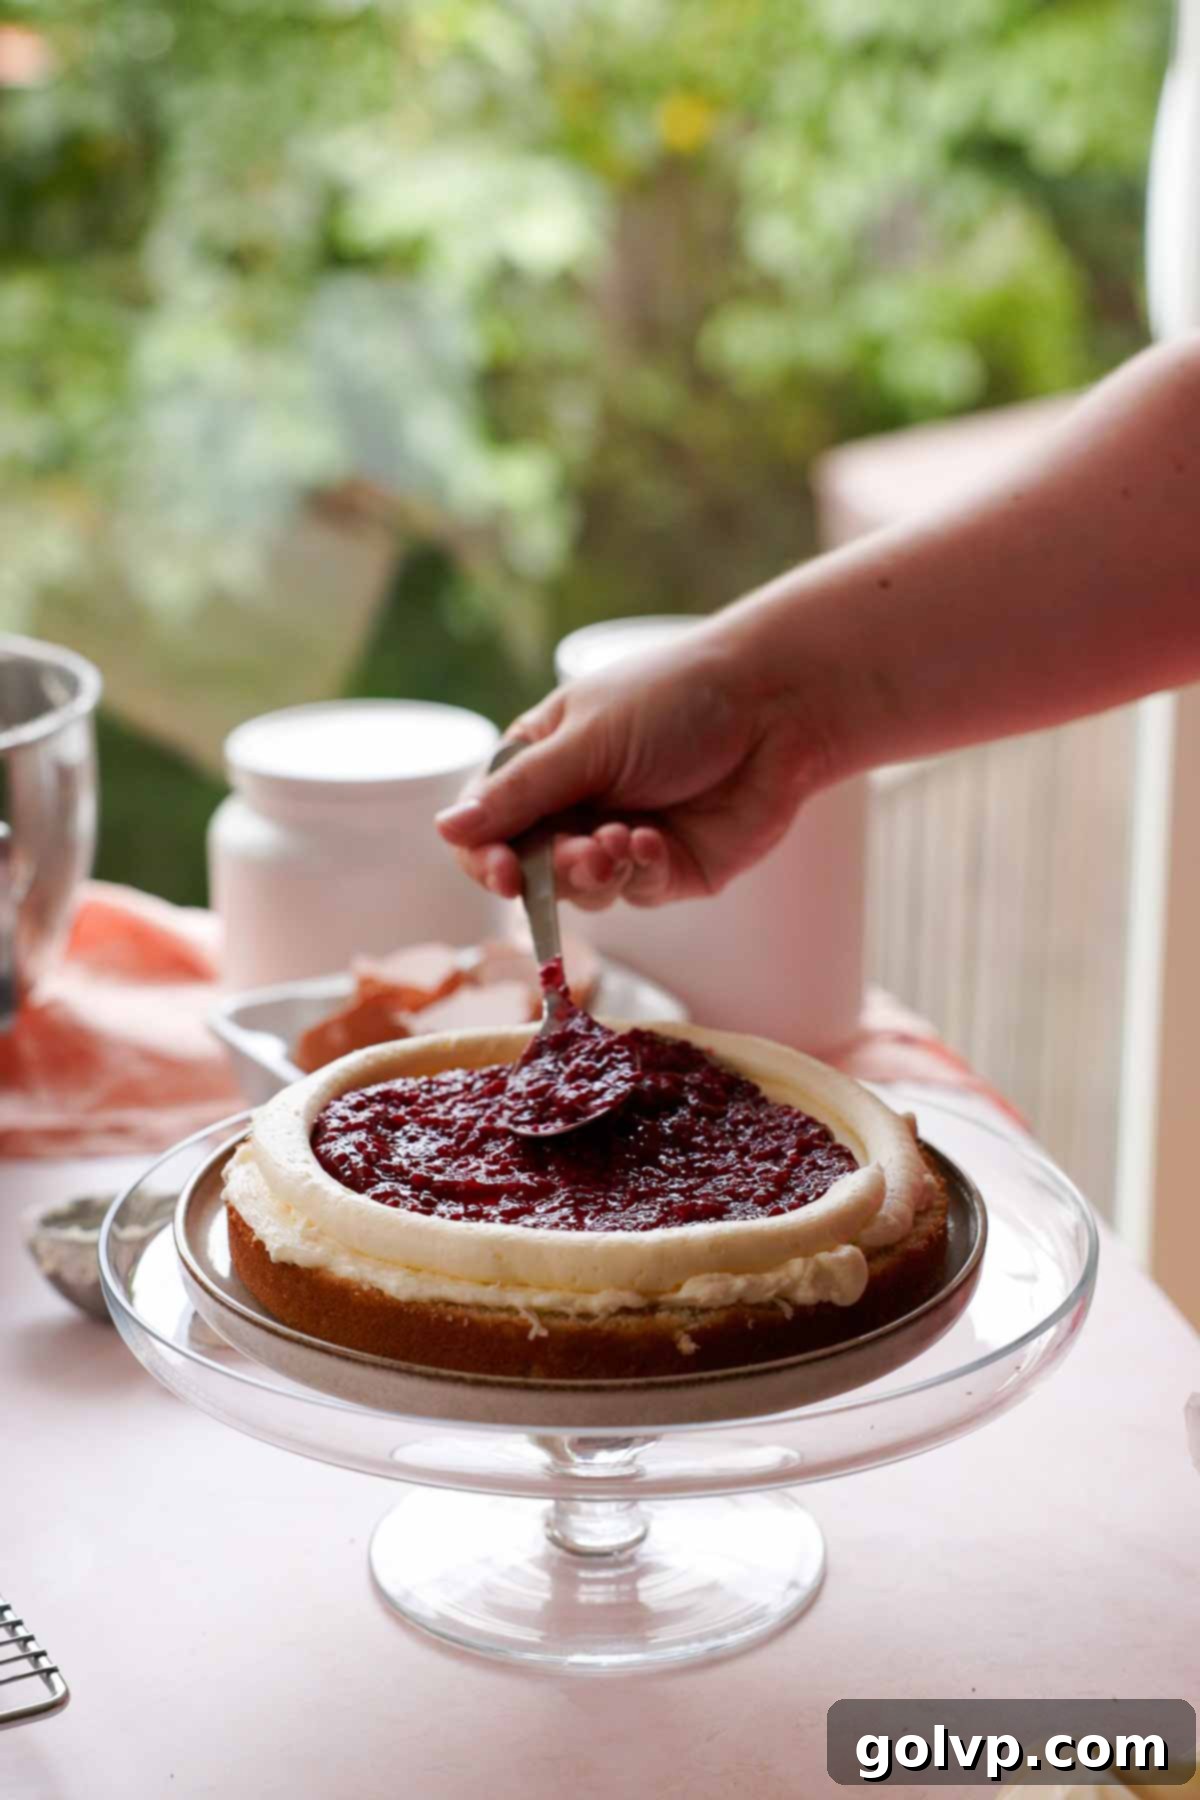
Step 4: Carefully spoon a thin, even layer of the cooled raspberry filling inside the frosting border on the first cake layer. It’s crucial not to overfill, as too much filling can cause it to leak out the sides of your cake, compromising its stability and appearance. A thin, flavorful layer is all you need to achieve that perfect balance of taste.
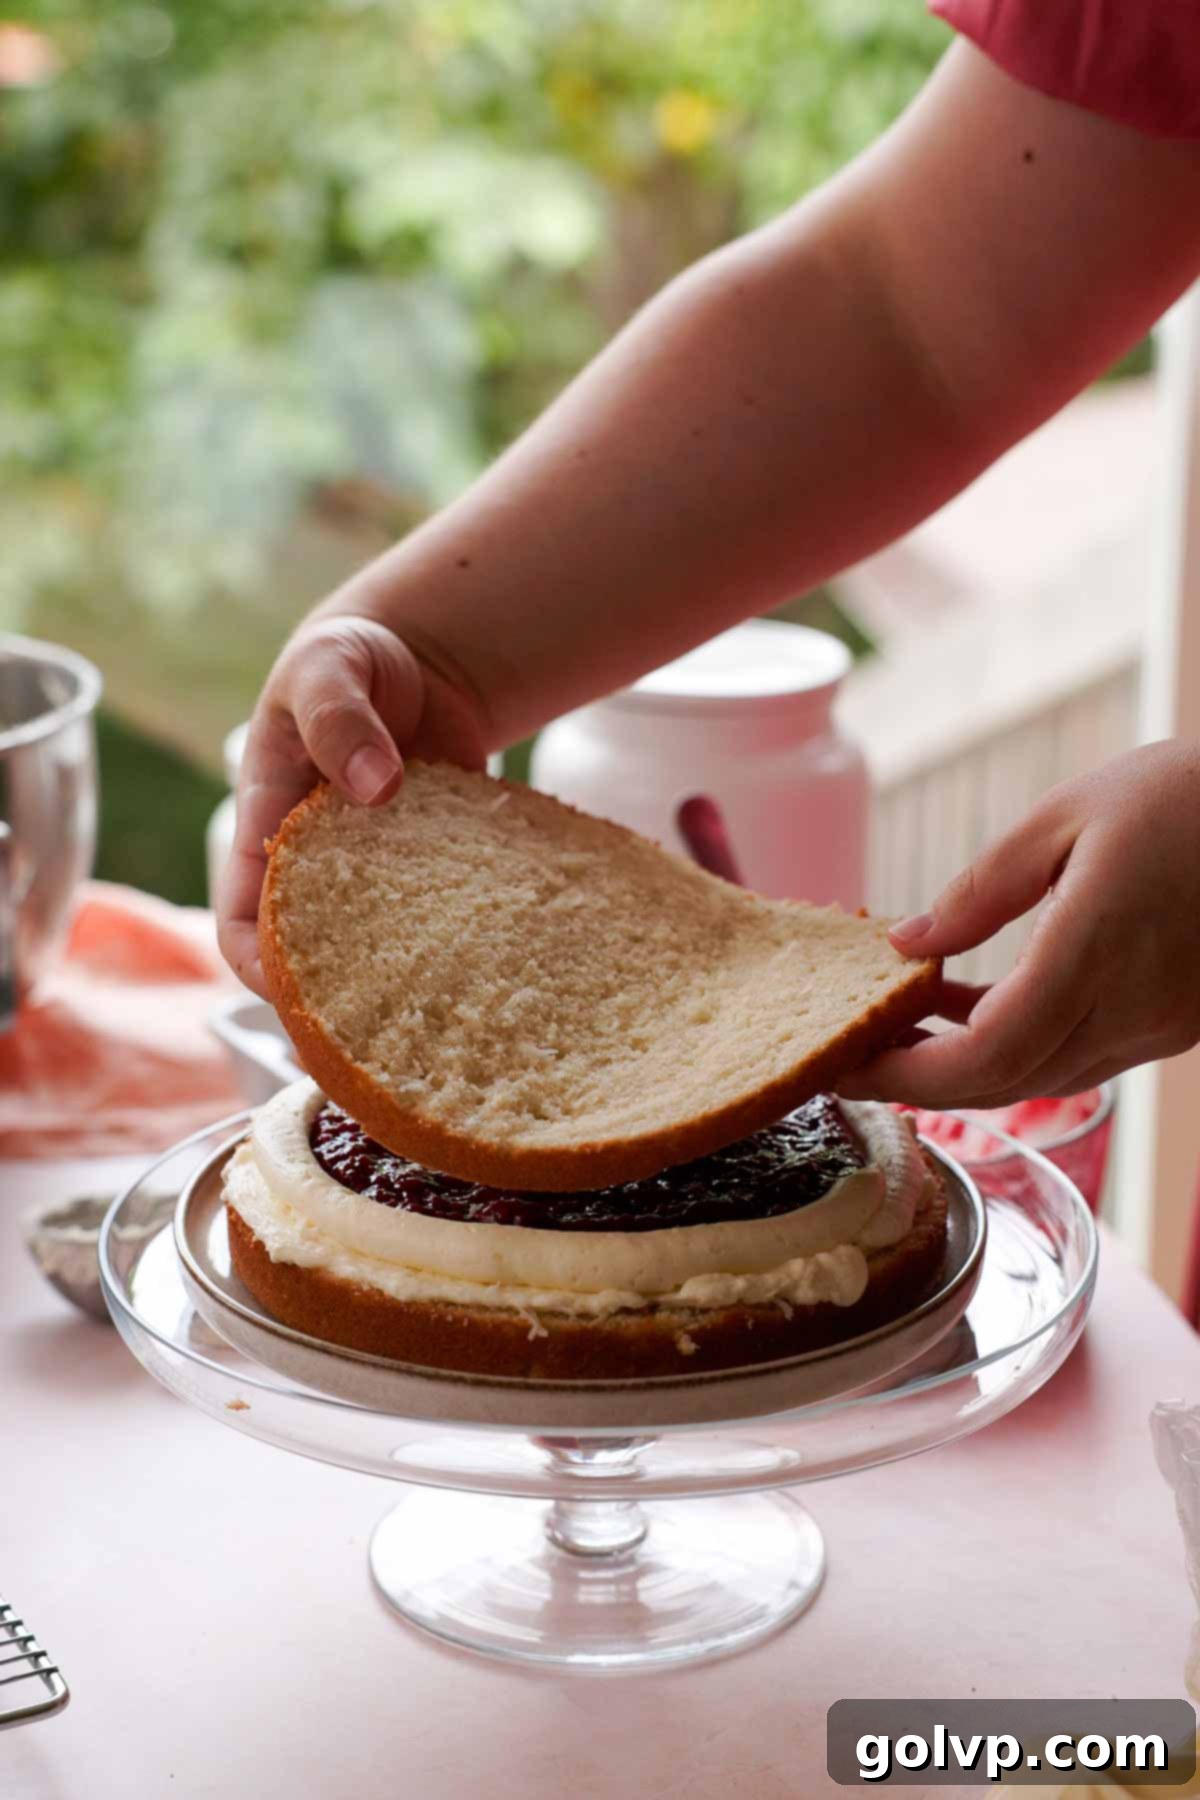
Step 5: Continue the layering process. Place the next cake layer on top of the raspberry filling. Repeat by spreading ½ cup of frosting, piping a border, and then adding a thin layer of raspberry filling. Continue this sequence until all four cake layers are stacked, ensuring each layer is carefully placed to maintain an even and stable cake structure.
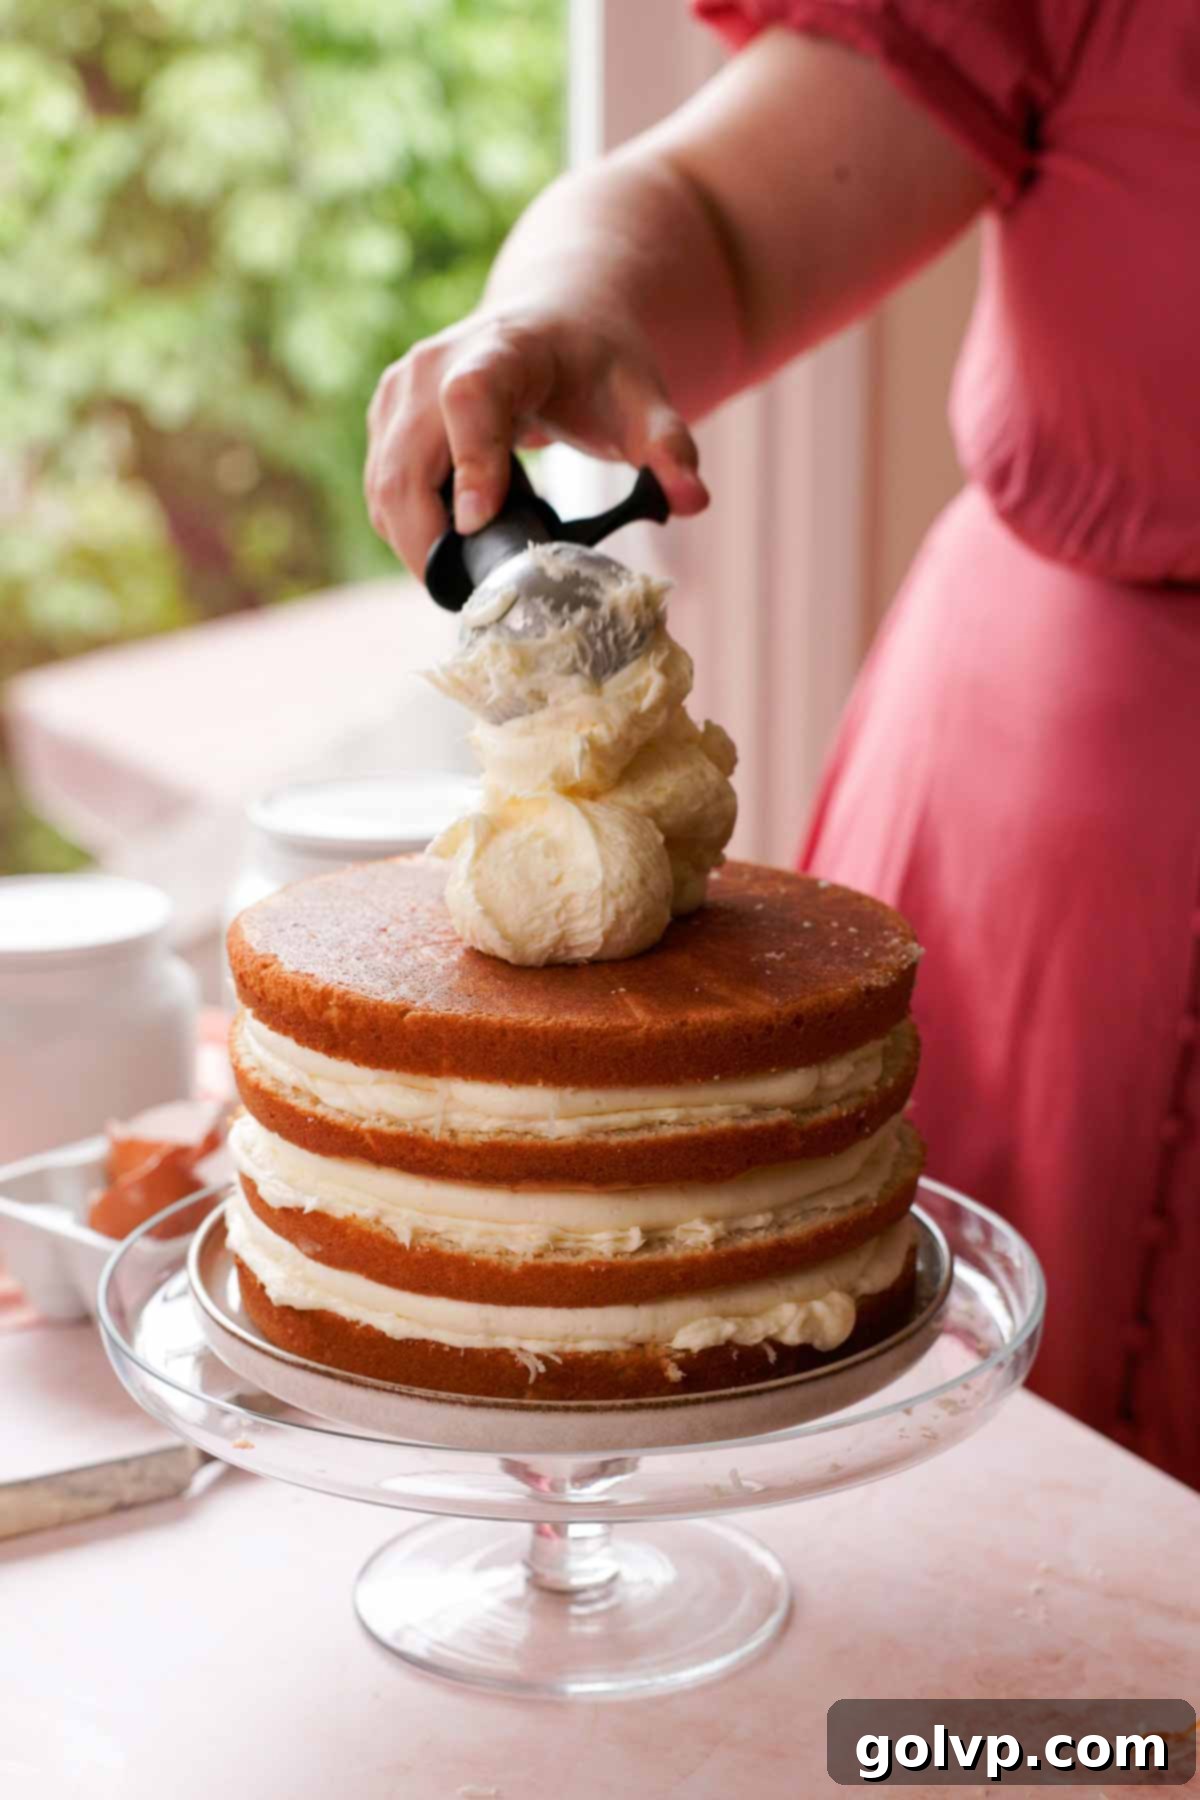
Step 6: Once the final cake layer is in place, apply a generous amount of the remaining coconut cream cheese frosting to the top and sides of the cake. Use an offset spatula or bench scraper to smooth the frosting as evenly as possible around the entire cake. Don’t worry if it’s not perfectly smooth at this stage; a rustic look is charming, and the shredded coconut will add further texture.
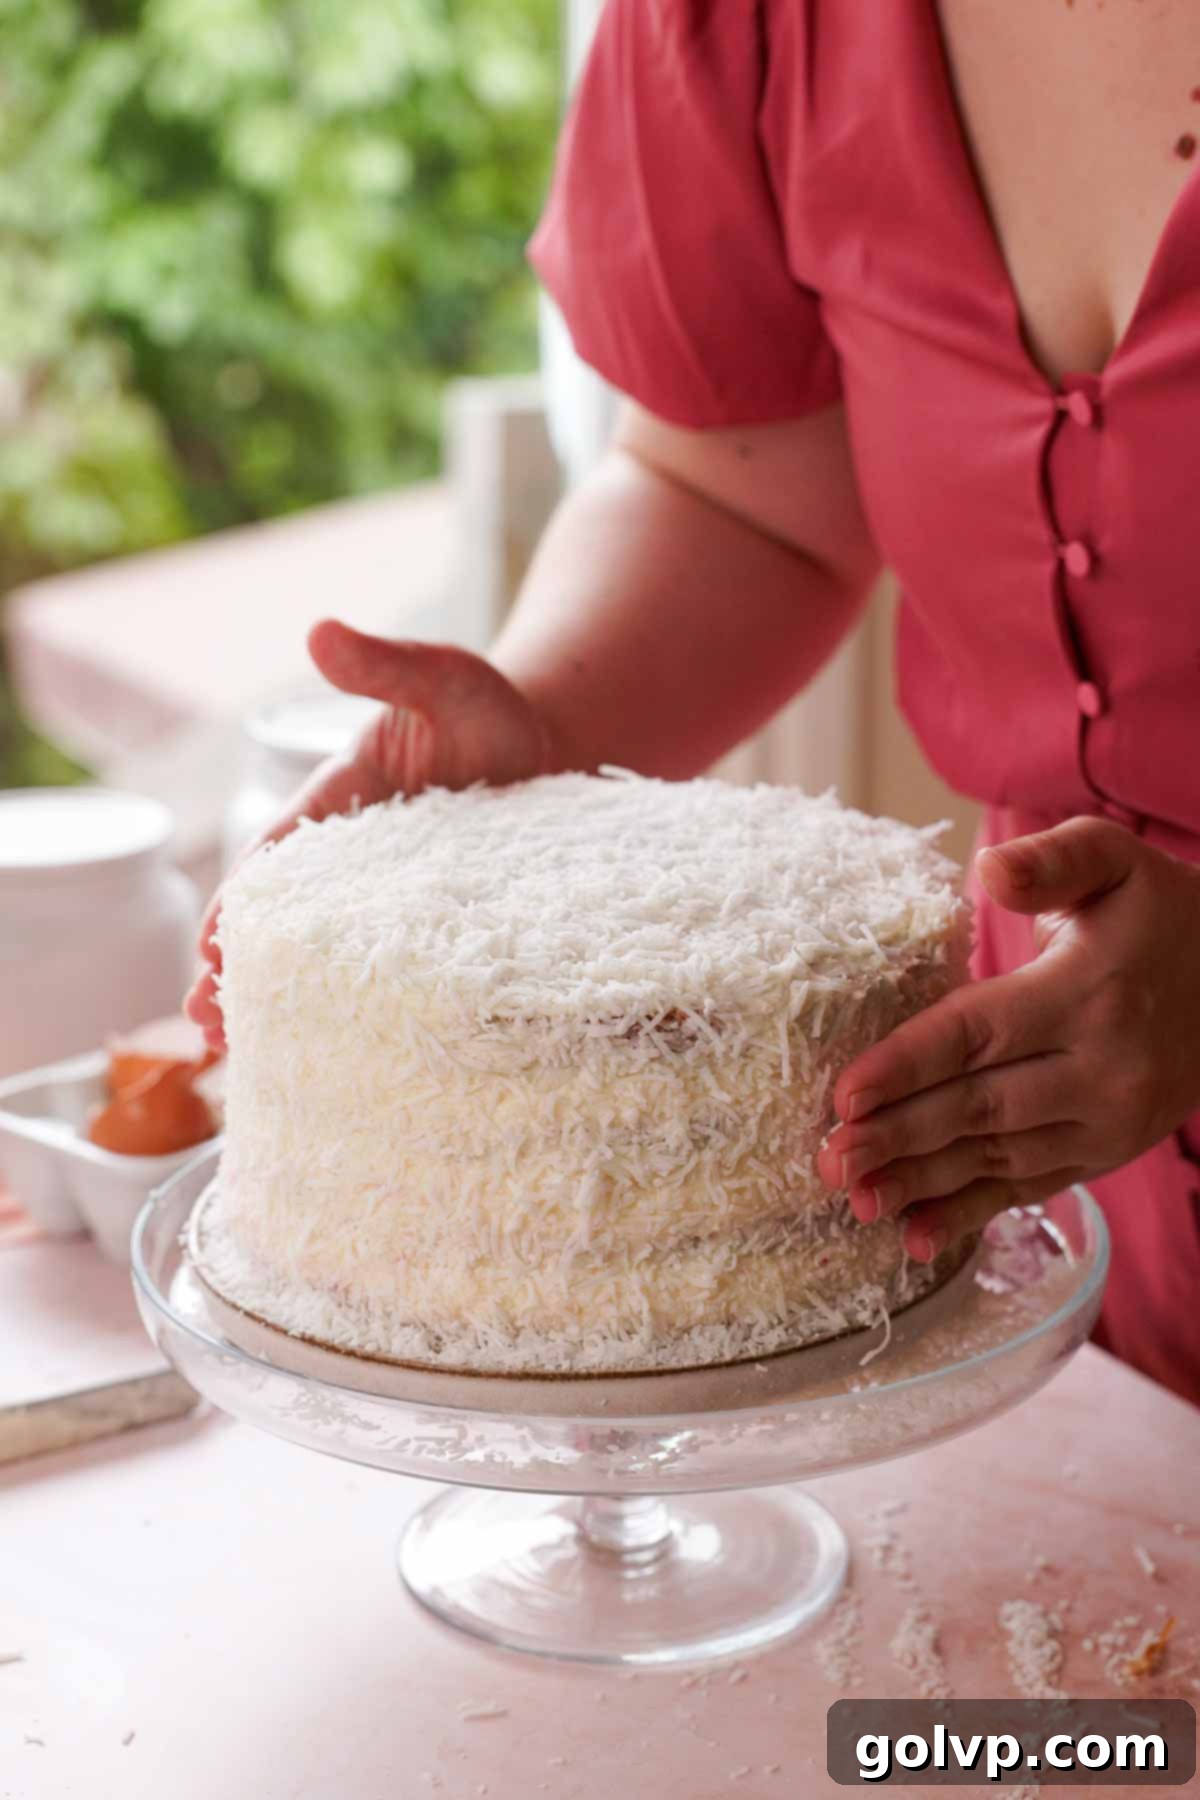
Step 7: To achieve a beautiful and characteristic finish, gently sprinkle and press the sweetened shredded coconut onto the frosted sides and top of the cake. The frosting acts as a perfect adhesive, allowing the coconut to cling effortlessly. You can use your hands to gently pat and smooth the shredded coconut, ensuring even coverage and a tidy appearance around the cake’s perimeter.
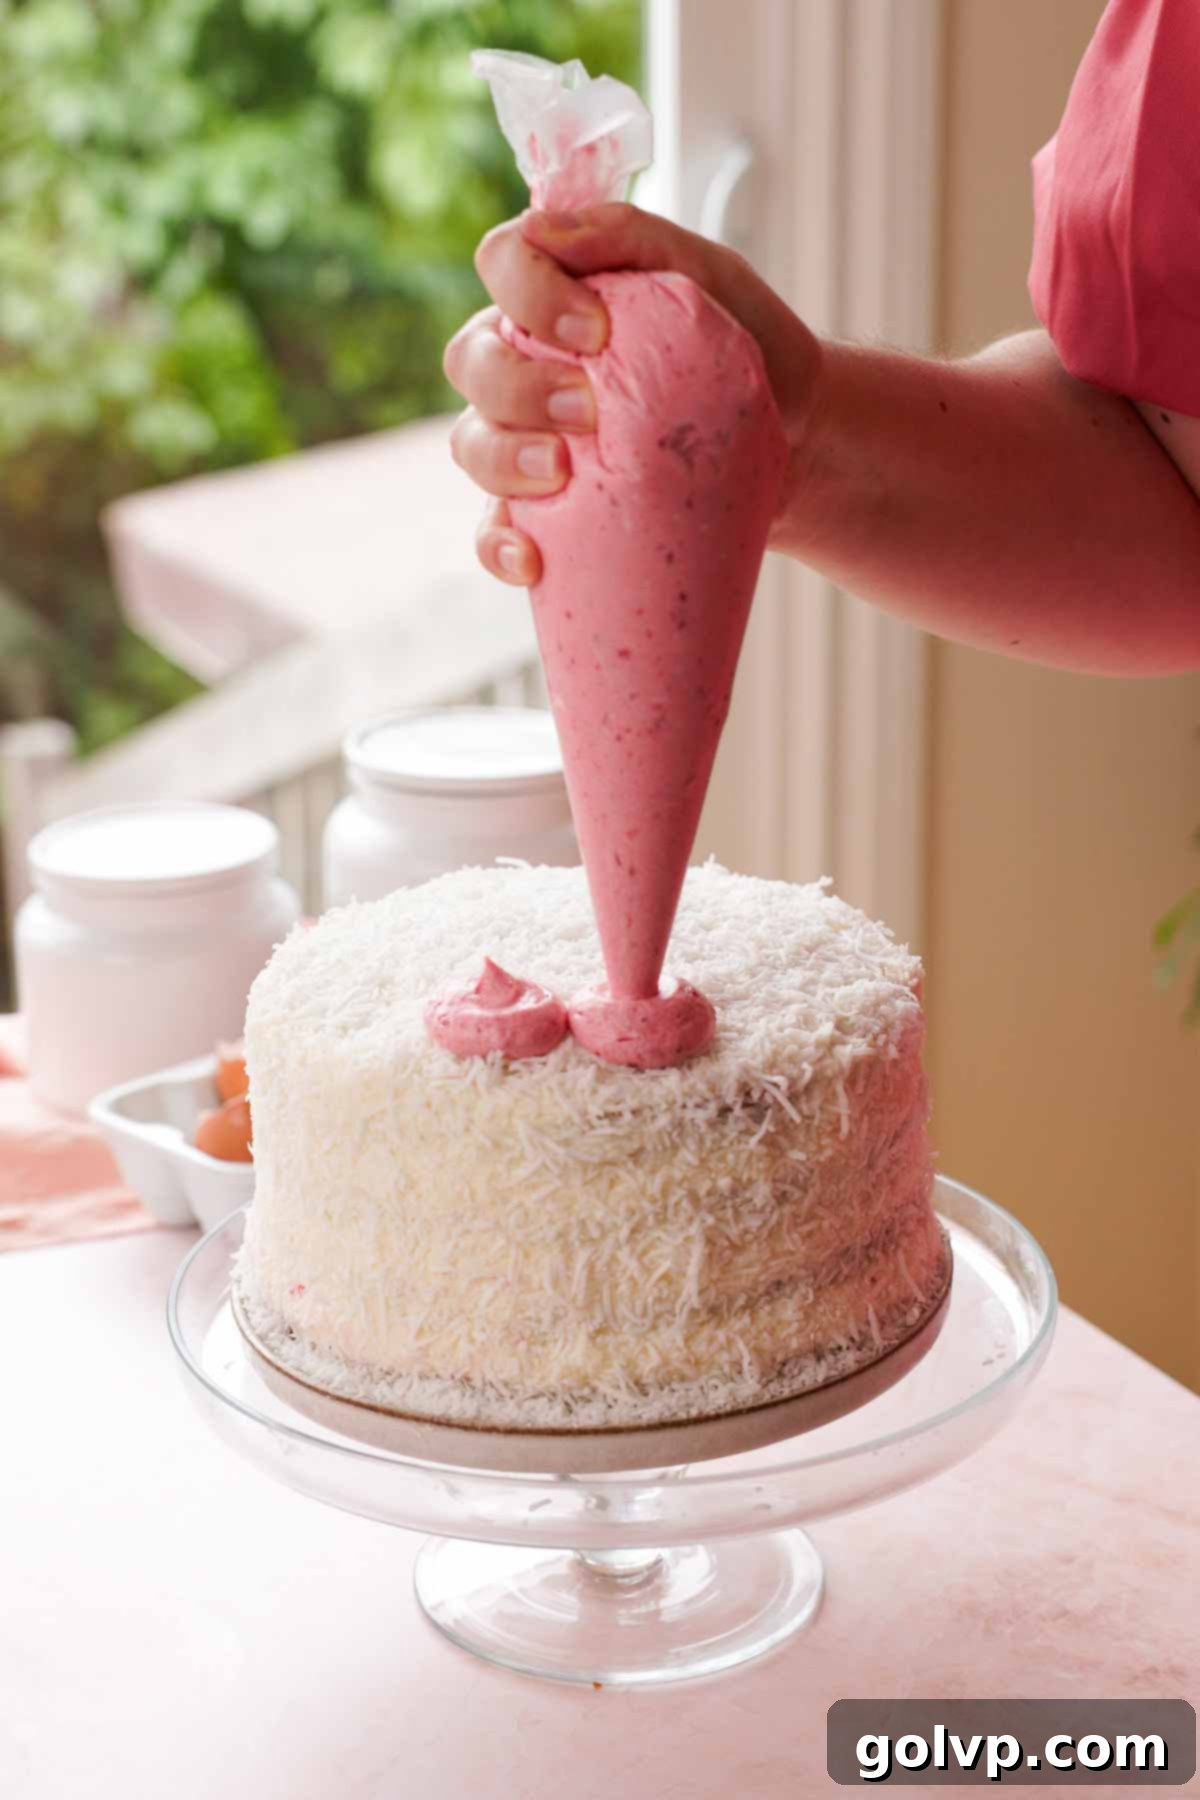
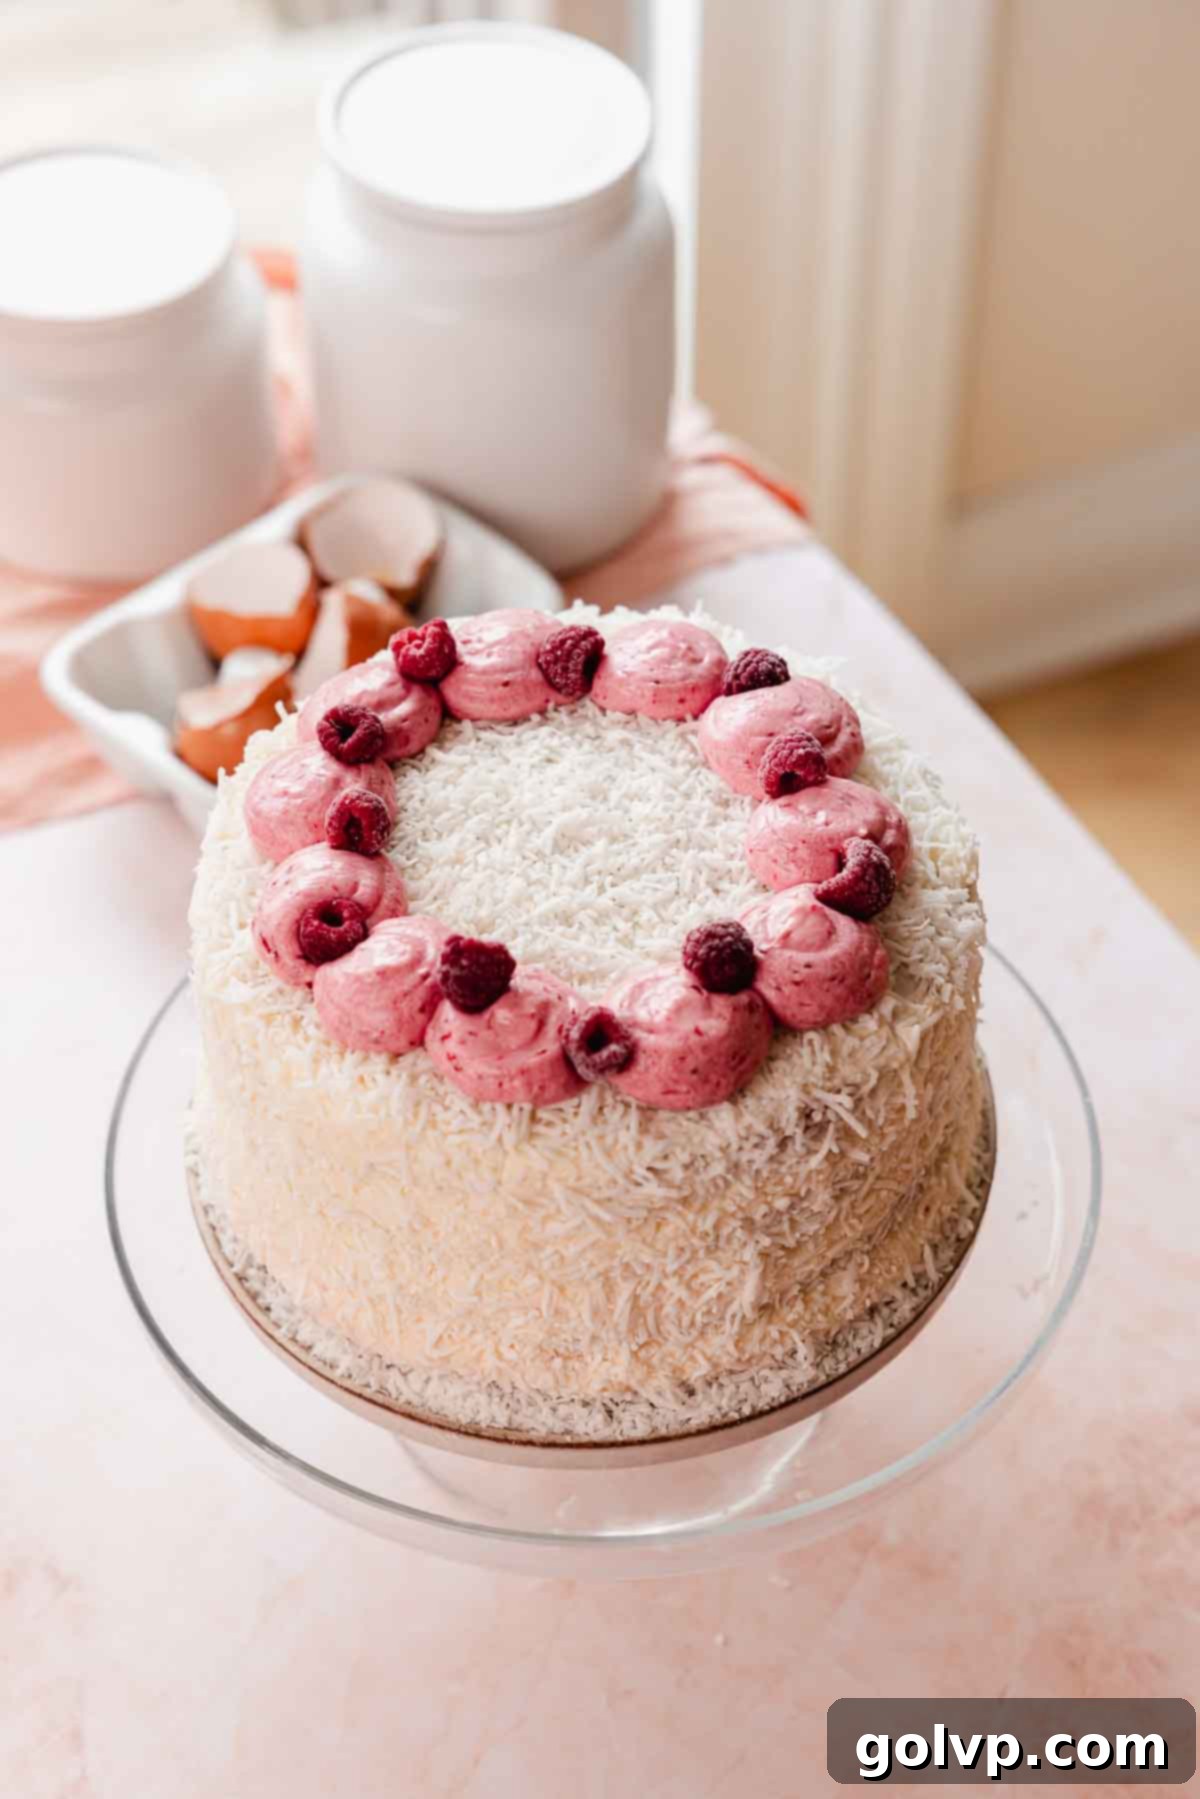
Step 8: For an elegant decorative touch and to incorporate more raspberry flavor, take a tablespoon of your leftover raspberry filling and gently mix it into the remaining coconut cream cheese frosting. The frosting will take on a lovely light pink hue. Transfer this tinted frosting into a piping bag fitted with your desired tip (a star tip works beautifully) and pipe decorative dollops in a ring shape around the top edge of your cake.
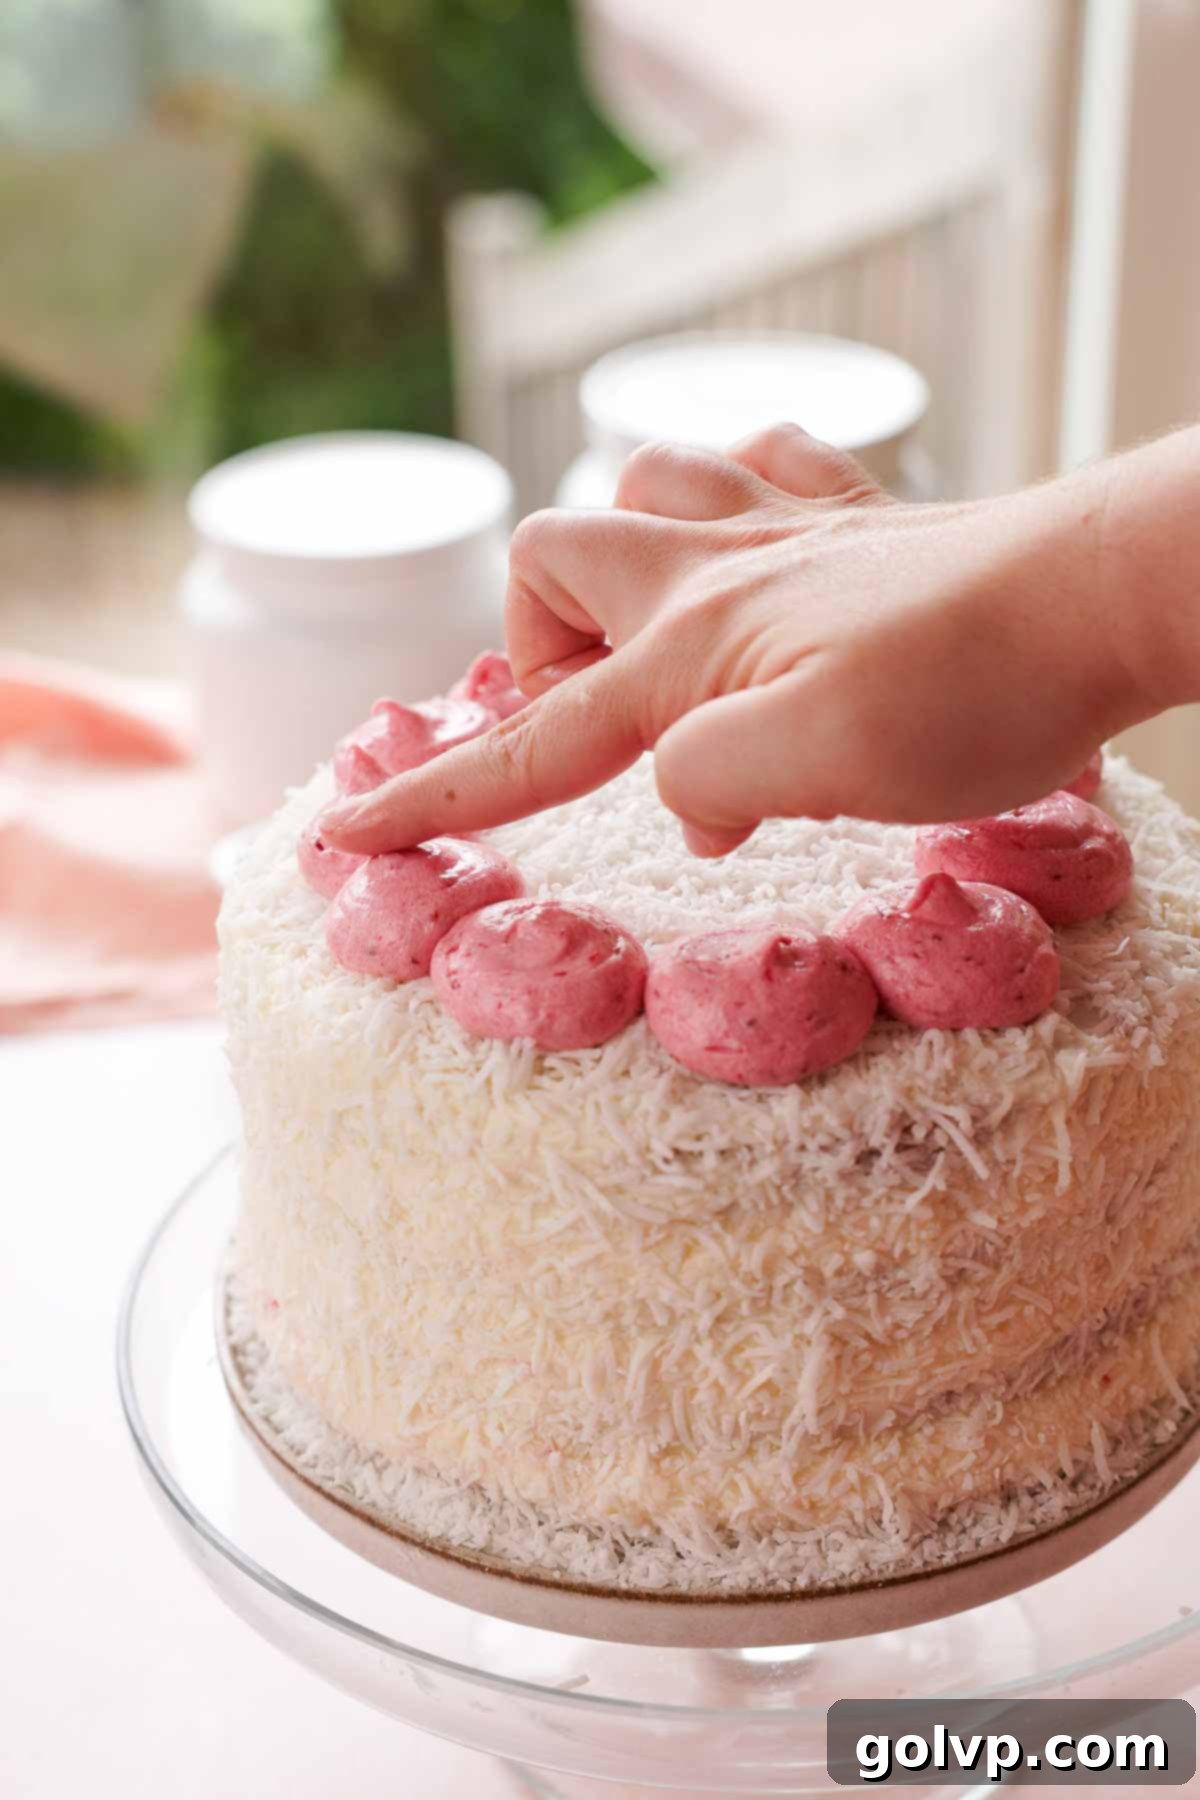
Step 9: (Optional) For a softer, more rounded look to your piped frosting dollops, lightly dampen your finger with a tiny bit of water and gently pat down the peaks of the icing. This creates a smooth, elegant finish and prevents the frosting from looking too sharp or angular.
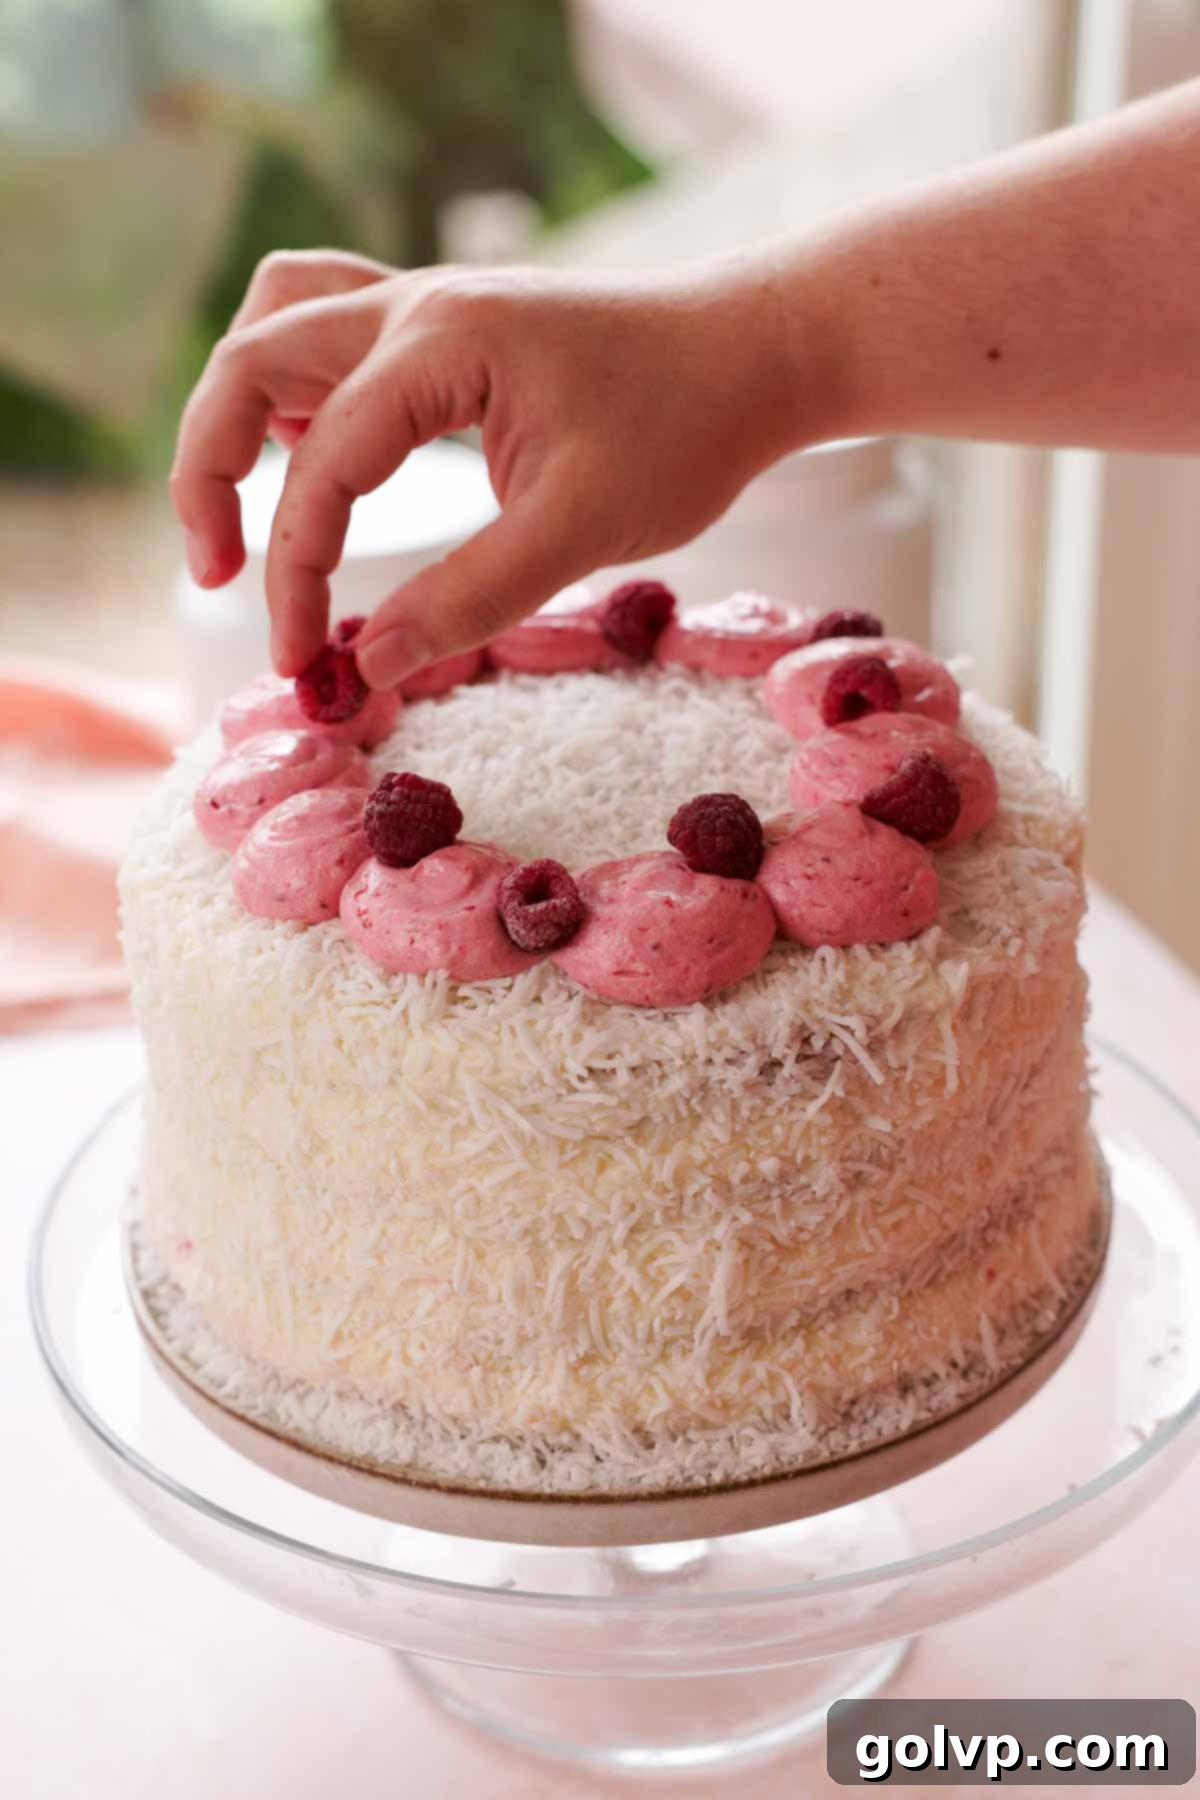
Step 10: Complete your masterpiece by decorating the top of the cake with fresh or frozen raspberries placed artfully on and around the pink frosting dollops. This adds a beautiful pop of color and freshness. Your stunning Raspberry Coconut Cake is now ready to be sliced and enjoyed immediately, or you can refrigerate it for a few hours (or overnight) to allow the flavors to meld beautifully before serving.
✔️ Expert Tips for a Flawless Raspberry Coconut Cake
Achieving bakery-quality results with this Raspberry Coconut Cake is easier than you think when you keep these expert tips in mind:
- Use Room Temperature Ingredients for Cake Batter: This is a golden rule in baking! Room temperature butter, eggs, and sour cream emulsify much more effectively, creating a smooth, homogenous batter. This leads to a more even cake crumb and a significantly more tender, moist final product. Cold ingredients would cause your batter to curdle and result in a dense cake.
- Prioritize Cake Flour: As mentioned, cake flour is a game-changer for this recipe. Its lower protein content results in less gluten development, transforming the cake’s texture into an incredibly plush, tender, and delicate crumb that cannot be replicated with all-purpose flour. Don’t substitute if you want the best possible texture!
- Thoroughly Cool Cake Layers and Raspberry Filling Before Frosting: Patience is key here. Attempting to frost a warm cake or layering warm filling will inevitably lead to a leaning, melting, and messy disaster. The heat will cause the butter in your frosting to melt and the filling to liquefy, making assembly impossible and ruining the cake’s structure. Ensure both components are completely cooled, ideally chilled, for best results.
- Incorporate Cold Cream Cheese into the Frosting: This is the secret weapon for a stable, pipeable cream cheese frosting. Cold cream cheese is much firmer and less prone to dissolving the powdered sugar, which can lead to a runny, gloopy frosting. Adding it cold and mixing briefly at the very end ensures a thick, creamy, and wonderfully stiff frosting that holds its shape beautifully.
🥄 Make Ahead & Storage Solutions for Your Cake
Planning ahead can make baking this show-stopping cake much more enjoyable and stress-free. Here’s how to manage your time and store your delicious creation:
You can certainly prepare this spectacular coconut raspberry cake a day or two in advance of your event. Once assembled and frosted, simply place it into a sturdy cake container and store it in the refrigerator. This allows the flavors to meld beautifully, often enhancing the overall taste and texture.
For any delightful leftovers, ensure they are stored in an airtight container in the fridge. This will keep the cake fresh, moist, and flavorful for up to 4 days, allowing you to savor it over time.
To further streamline your baking process, we highly recommend making the raspberry filling a day or two before you plan to bake the cakes. Prepare it according to the recipe instructions, allow it to cool completely, and then store it in an airtight container in the fridge. This way, it will be perfectly set and ready to use whenever you’re ready to assemble your cake.
Similarly, the cake layers can also be baked ahead of time. Once completely cooled, wrap each layer tightly in plastic wrap to prevent them from drying out, and store them in the refrigerator. You can then frost and assemble the cake when you are ready, saving valuable time on your baking day.
Regarding freezing, we generally do not recommend freezing the entire assembled cake. This is because the raspberry filling, which is thickened with cornstarch, tends to lose its integrity and become watery when defrosted. If freezing individual cake layers or the filling separately is a must for your plans, consider substituting the cornstarch with potato starch or arrowroot starch in the filling, as these thickeners tend to hold up better after freezing and thawing.
🧀 How to Achieve a Perfectly Stable Cream Cheese Frosting
Cream cheese frosting is notoriously tricky; it can transform from perfectly creamy to a gloopy, unstable mess in a blink. To truly master this delicious frosting, it’s crucial to understand the science behind why it can sometimes become watery and how to prevent it. The primary culprit is cream cheese’s inherently high moisture content, which is significantly greater than that of butter. When this moisture comes into contact with powdered sugar (a highly hygroscopic ingredient, meaning it readily attracts and absorbs moisture), the sugar particles begin to dissolve. As sugar dissolves, it essentially becomes a liquid, adding more moisture to the frosting, which then results in a loose, runny consistency.
But fear not! Here are the tried-and-true tricks we use to ensure you get a beautifully stiff, stable, and perfectly pipeable cream cheese frosting every single time, allowing for flawless cake decorating:
- Beat Butter and Powdered Sugar Together First: This is the foundation for a stable frosting. By thoroughly beating the butter with the powdered sugar first, you effectively coat the tiny sugar particles with fat. This protective fat layer acts as a barrier, significantly slowing down the rate at which the sugar dissolves once the high-moisture cream cheese is introduced. This step creates a robust base for your frosting.
- Utilize Cold Cream Cheese and Add it at the Very End: Temperature plays a critical role. Cold cream cheese is naturally much firmer than softened cream cheese. When it’s added cold, it takes longer for the butter in the frosting to warm it up, meaning less moisture is released prematurely. This reduces the chances of the sugar dissolving too quickly and contributing to a loose consistency. Always ensure your cream cheese is straight from the fridge when it’s time to add it.
- Once Cream Cheese is Added, Mix Only Briefly: Precision is key in this final mixing stage. After adding the cold cream cheese, mix the frosting only just enough to combine everything – usually no more than 5-10 seconds on low speed. Overmixing at this point generates heat and vigorously incorporates the cream cheese, which will rapidly release its moisture and cause the sugar to dissolve, leading directly to a gloopy outcome. Stop as soon as it’s homogenous.
- Avoid Adding Too Much Cream Cheese: This might seem obvious, but it’s a common mistake. While the tangy flavor of cream cheese is desirable, adding an excessive amount will inevitably result in a frosting with too high a moisture content to ever be truly stiff. Our recipe provides a carefully balanced ratio that gives you plenty of delicious cream cheese flavor without compromising the frosting’s stability and fluffy texture. Stick to the specified amount for the best results.
📖 Raspberry Coconut Cake Recipe FAQs
While technically possible, we strongly advise against using unsweetened shredded coconut. This recipe was specifically developed using sweetened shredded coconut, which boasts a significantly softer, chewier texture and a richer flavor profile. Using unsweetened coconut will result in a less moist cake and a coarser texture, detracting from the intended experience.
Absolutely! To make this delicious cake gluten-free, simply substitute the cake flour with a high-quality 1:1 gluten-free all-purpose flour blend. Ensure the blend you choose is suitable for baking and includes xanthan gum if not already present.
Yes, you certainly can! We’ve included instructions in the recipe on how to achieve a seedless filling. All you need to do is strain the cooked raspberry mixture through a fine-mesh sieve before incorporating the cornstarch slurry. However, we personally love the subtle crunch and textural contrast that the seeds provide, as it pairs wonderfully with the soft coconut flakes.
Yes, it can! You can bake this recipe in a 9″ x 12″ baking pan. For a layered sheet cake, you can carefully cut the baked cake in half lengthwise to create two layers, then fill and frost as usual. Alternatively, you can simply frost the top of a single-layer sheet cake. If you choose the single-layer option, we recommend halving the amount of frosting, as the original recipe yields enough for a tall, four-layer round cake.
🍰 Explore More Delicious Cake & Dessert Recipes
If you loved this Raspberry Coconut Cake, you might enjoy trying some of our other delightful creations. These recipes share similar flavor profiles or baking techniques that are sure to please your palate and impress your guests:
- Mango Coconut Swiss Roll Cake
- Lemon Raspberry Cake
- Raspberry Pistachio Cake Roll
- Raspberry Meringue Pie with Mile High Meringue
Did you make this recipe? We would absolutely love to hear your thoughts and see your creations! Please take a moment to rate this recipe and share your feedback in the comments section below. Don’t forget to share your beautiful cake on Instagram and tag @flouringkitchen. Follow us on Pinterestto save this recipe and discover more delightful baking ideas.
📖 Recipe
Raspberry Coconut Cake
Mary
This is the best coconut raspberry cake ever! I’ve tested many versions and this quite literally, took the cake.
Pin Recipe
Shop Ingredients
Equipment
-
2 eight inch round baking pans
-
electric mixer
Ingredients
Raspberry Cake Filling
- 4 cups raspberries 430g
- ½ cup granulated sugar
- 1 tablespoon lemon juice
- 3 tablespoons cornstarch
- 2 tablespoons water
Coconut Cake Layers
- ½ cup unsalted butter softened
- ¼ cup neutral oil
- 1 ½ cups granulated sugar
- ½ teaspoon sea salt
- 4 large egg whites room temperature
- ⅔ cups sour cream room temperature
- 1 tablespoon pure vanilla extract
- 1 teaspoon coconut extract
- ¼ teaspoon almond extract
- 2 ½ cups cake flour 300g
- 2 teaspoons baking powder
- ¼ teaspoon baking soda
- 1 cup canned coconut milk full fat
- 1 cup sweetened shredded coconut
Coconut Cream Cheese Frosting
- 2 cups unsalted butter softened
- 7 cups powdered sugar
- ½ teaspoon sea salt
- ½ teaspoon coconut extract
- 6 oz cream cheese cold
- 2 cups sweetened shredded coconut
Shop Ingredients on Jupiter
Instructions
Raspberry Cake Filling
-
Add the raspberries into a medium saucepan. Add the sugar and lemon juice and stir. Heat on medium-low heat, stirring occasionally, until the juice gets released. Then let it simmer gently for about 5 minutes to break down the berries.4 cups raspberries, ½ cup granulated sugar, 1 tablespoon lemon juice
-
While the raspberries simmer, combine cornstarch and water in a separate cup or a bowl. If you want a seedless raspberry filling, you could strain the raspberry mixture through a sieve at this point.3 tablespoons cornstarch, 2 tablespoons water
-
Pour the cornstarch slurry into the hot raspberry sauce and stir to combine. Then, put it back onto the heat and stir until it thickens and comes to a boil.
-
Transfer the raspberry filling into a heat safe bowl, and pop it into the fridge to cool completely.
Coconut Cake Layers
-
Preheat the oven to 355°F (180°C). Line the bottoms of two 8″ round cake pans with parchment paper and butter the sides of the pans.
-
In a large bowl or stand mixer, combine softened butter, oil, sugar, and salt. Beat together until light and creamy, for about 5 minutes. Scrape down the bowl to make sure that it’s evenly creamed.½ cup unsalted butter, ¼ cup neutral oil, 1 ½ cups granulated sugar, ½ teaspoon sea salt
-
Add the egg whites into the butter and sugar mixture. Beat again until combined and it thickens slightly, for about 2-3 minutes.4 large egg whites
-
Add the sour cream, vanilla, coconut extract, and almond extract into the bowl. Mix to combine.⅔ cups sour cream, 1 tablespoon pure vanilla extract, 1 teaspoon coconut extract, ¼ teaspoon almond extract
-
Whisk the flour, baking powder, and baking soda together in a separate bowl.2 ½ cups cake flour, 2 teaspoons baking powder, ¼ teaspoon baking soda
-
Sift half of the dry ingredients into the wet ingredients. Mix gently to incorporate until you don’t see any more dry flour. Then, add the coconut milk and sift the rest of the flour inside. Mix on low to incorporate. Stop mixing as soon as it’s smooth and you don’t see any dry streaks of flour. Don’t overmix!1 cup canned coconut milk
-
Add the shredded coconut and fold to combine. Divide the batter in half and transfer them into two baking pans. Bake in the preheated oven for 25-30 minutes (check at 25 minutes), until a toothpick inserted into the center comes out mostly clean with a few crumbs attached.1 cup sweetened shredded coconut
-
Remove the cake layers from the oven and let them cool inside the pans for 10 minutes. Then, flip the layers onto a cooling rack to cool completely. If the cake is stuck, you can run a spatula along the outside.
Coconut Cream Cheese Frosting
-
Add the butter into a clean mixing bowl. Beat with a paddle attachment until light and creamy. This will take about 7-10 minutes, and the butter should be very creamy and pale.2 cups unsalted butter
-
Add the powdered sugar, 1 cup at a time, mixing in between each addition. Then, mix on medium speed until the frosting looks very creamy and light, about 5 minutes.7 cups powdered sugar
-
Add the coconut extract and salt into the bowl. Mix briefly to combine. Then, add the cold cream cheese, one large piece at a time, mixing to combine in between each addition.½ teaspoon sea salt, ½ teaspoon coconut extract, 6 oz cream cheese
-
Once all of the cream cheese is added, beat the frosting until it’s light and creamy for about 5 seconds. No longer or else it will become gloopy! At this point it should be fluffy and very stiff.
Assembly
-
Once the cake layers cool down completely, you are ready to assemble. Take the parchment paper off the layers. Use a large knife to cut each layer in half lengthwise to make four cake layers.
-
Add a small dollop of frosting onto the cake stand. Add the first cake layer on top. Spread about ½ cup of frosting evenly onto the first cake layer. Then, pipe a thick border of frosting along the edge to hold the filling. Spread a thin layer of raspberry filling inside the middle. Don’t add too much or else it will leak out the sides.
-
Continue with layering the rest of the cake layers. Once you place the last layer on top, add a generous amount of frosting on top and to the sides, and smooth it down. Don’t worry if it looks messy.2 cups sweetened shredded coconut
-
Sprinkle and press the shredded coconut onto the sides and top of the cake. It will stick to the frosting. You can use your hands to help you smooth the sides.
-
Add a tablespoon of leftover raspberry filling to the remaining frosting. Mix together well. Use a piping bag to pipe dollops of pink frosting in a ring shape on top of the cake.
-
Decorate with fresh or frozen raspberries. Slice and enjoy, or refrigerate and enjoy later!
Notes
- Raspberry filling: make it a day or two ahead of time and storing it in the fridge in an airtight container. That way it’s ready to go whenever you’re ready.
- Cake layers: wrap them up tightly to prevent them from drying out, and store them in the fridge until you’re ready to assemble the cake.
Storage: Leftovers store well in an airtight container in the fridge for up to 4 days.
Freezing: I don’t recommend freezing the cake because the raspberry filling uses cornstarch to thicken and cornstarch tends to lose its integrity when it defrosts. If you plan on making and freezing the cake or filling, I recommend substituting the cornstarch with potato starch or arrowroot starch.
Tips for success
- Use room temperature ingredients for the cake batter: this ensures that all of your ingredients blend smoothly and evenly, creating an even cake crumb.
- Use cake flour: In this recipe, cake flour makes a huge difference! It transforms the texture into a plush, tender crumb.
- Cool the cake layers and raspberry filling before frosting: If you frost a hot cake you’re bound to have a leaning, melting mess on your hands.
- Add cold cream cheese into the frosting: This creates a stable cream cheese frosting that won’t melt on you.
