The Ultimate Pink Velvet Cake: Fluffy, Moist & Dreamily Frosted
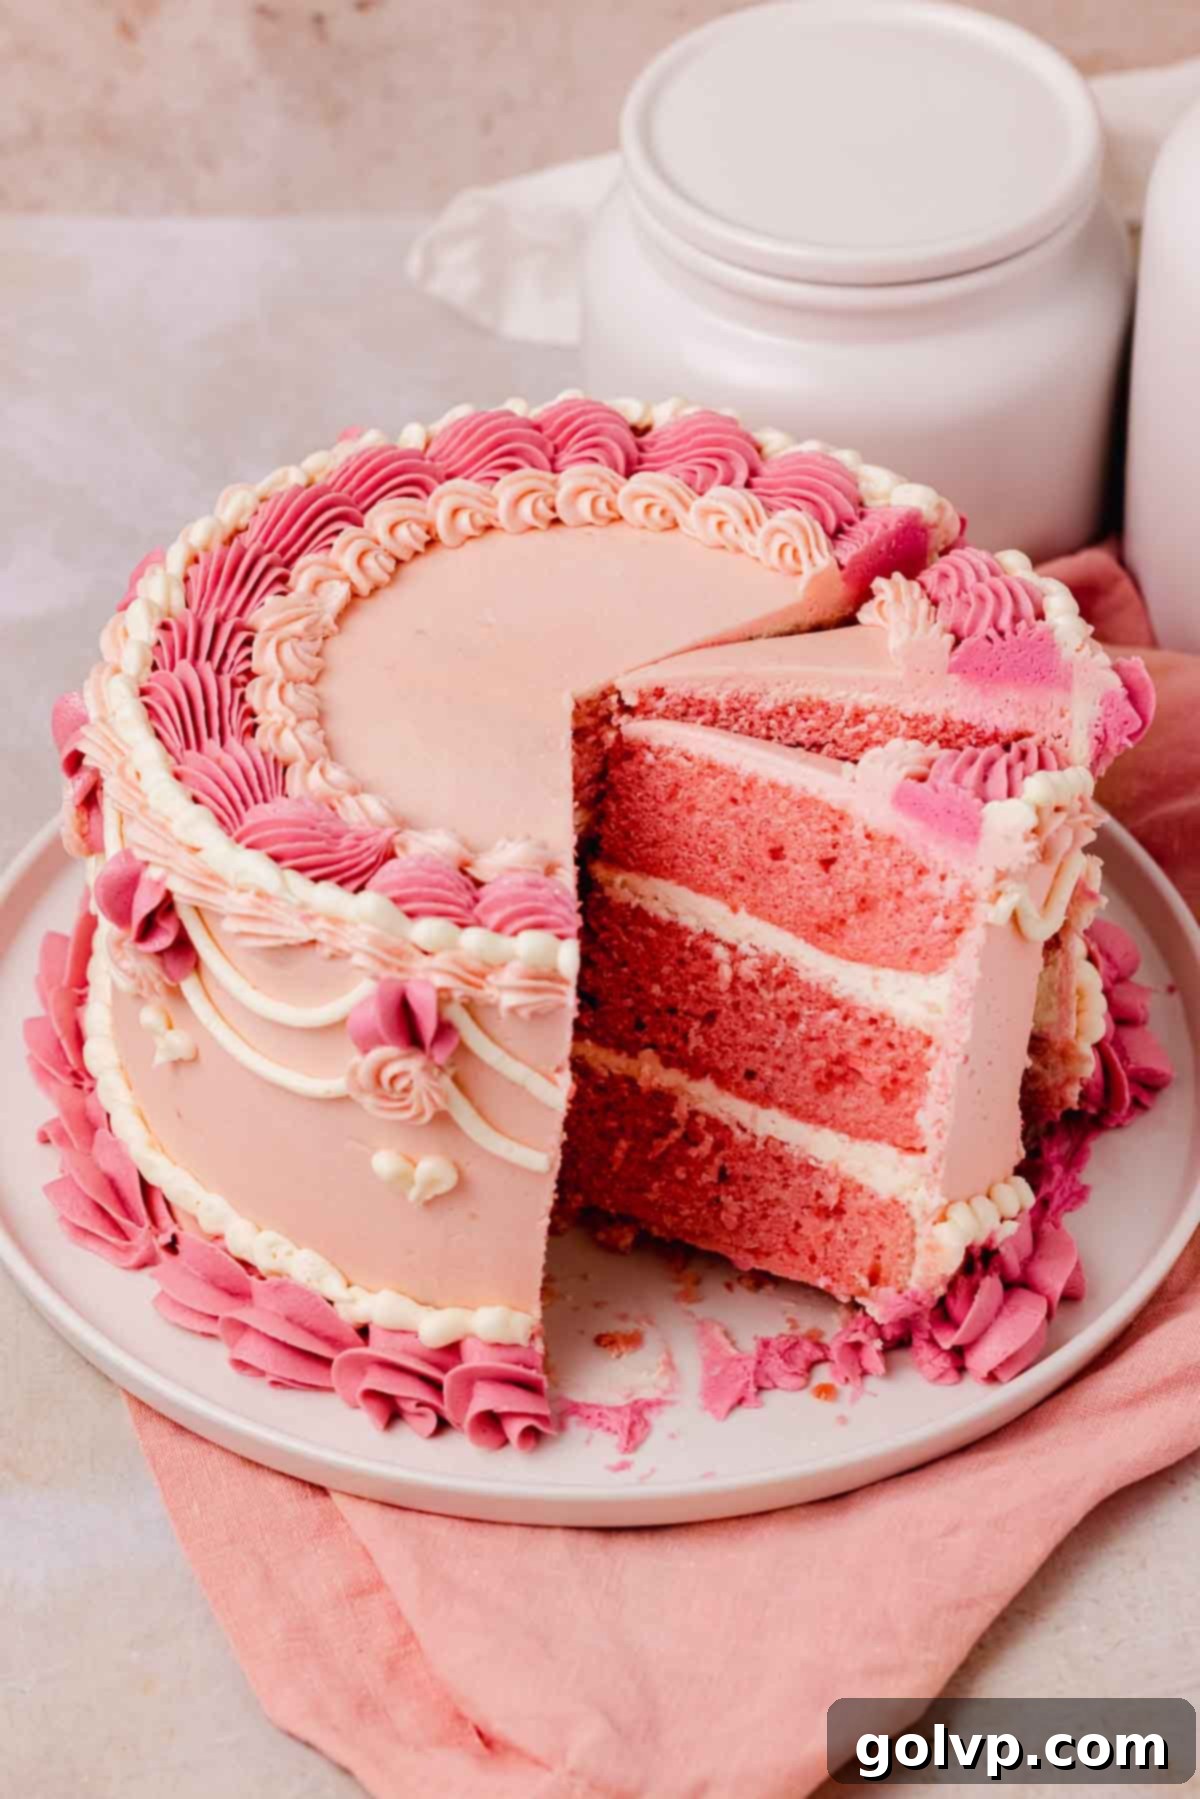
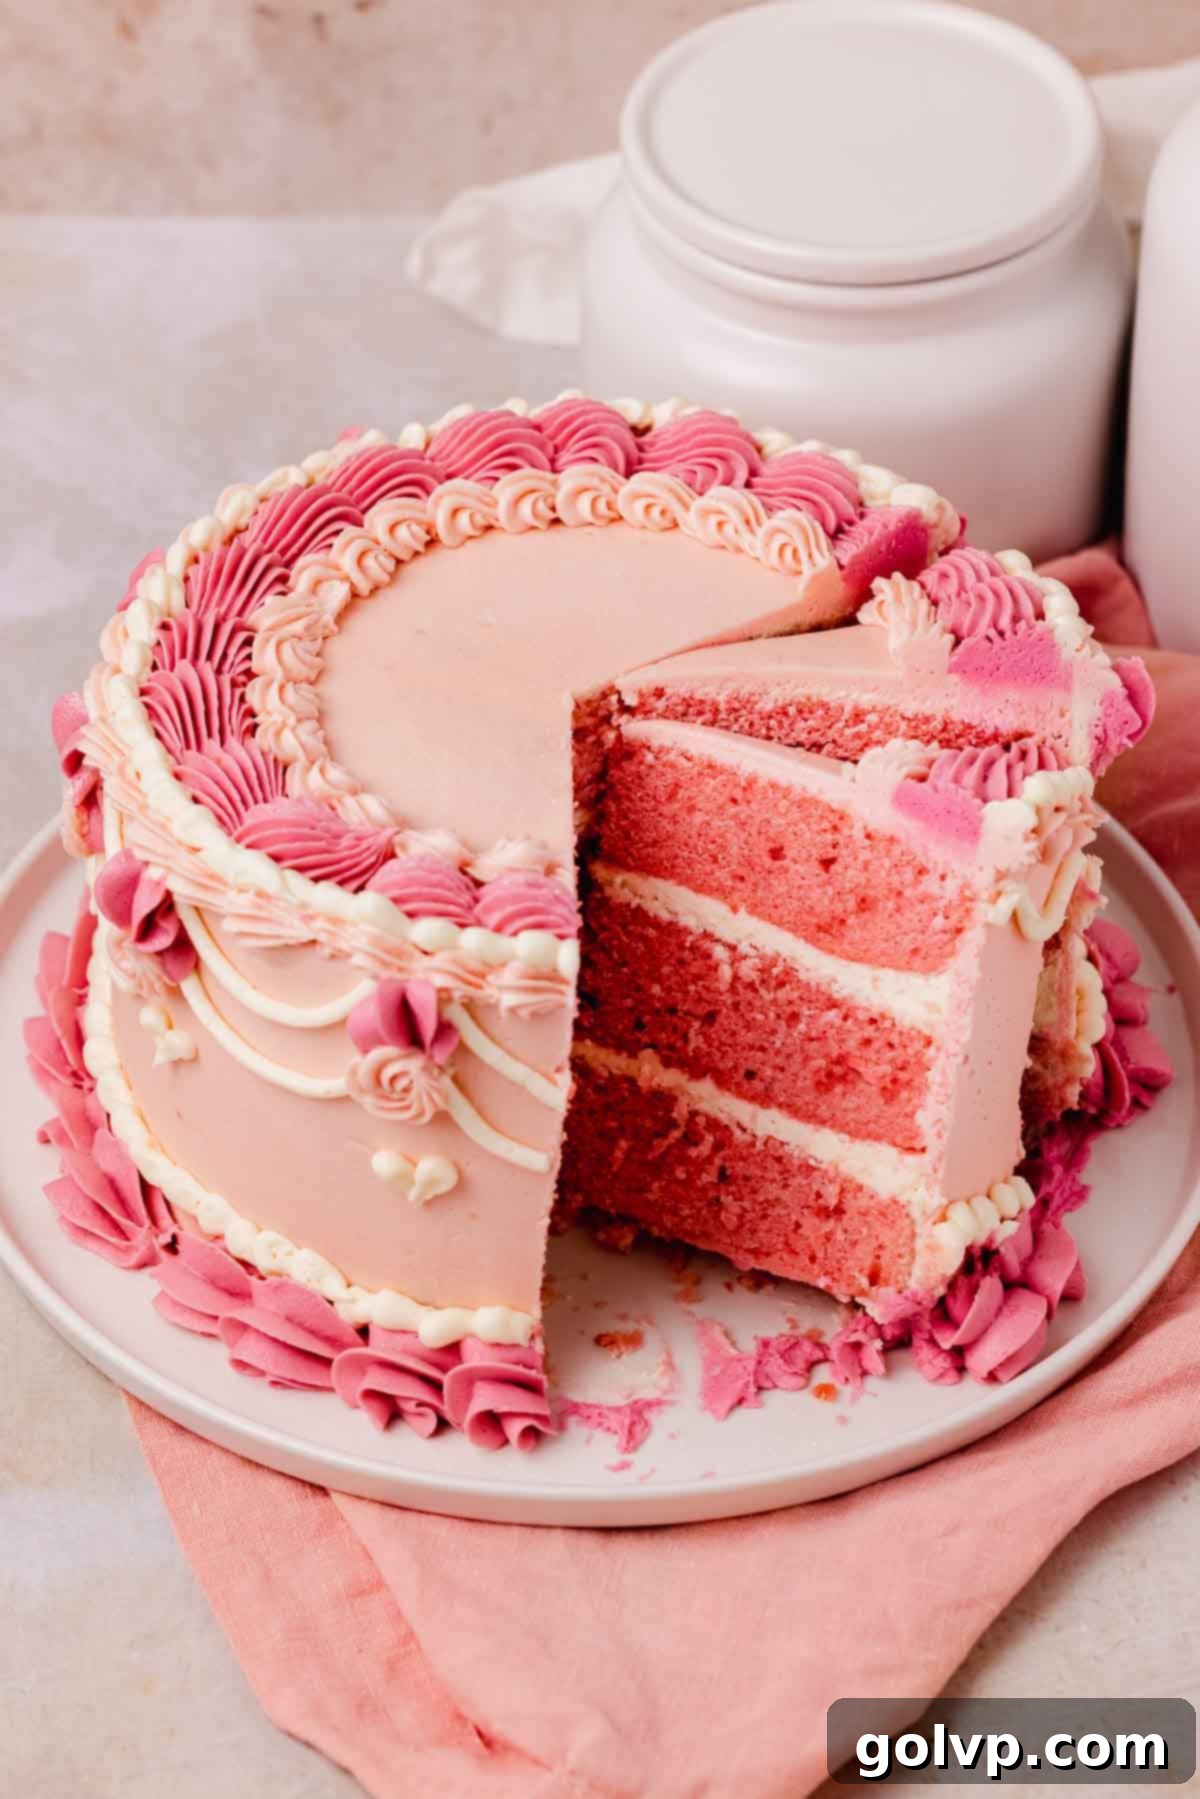
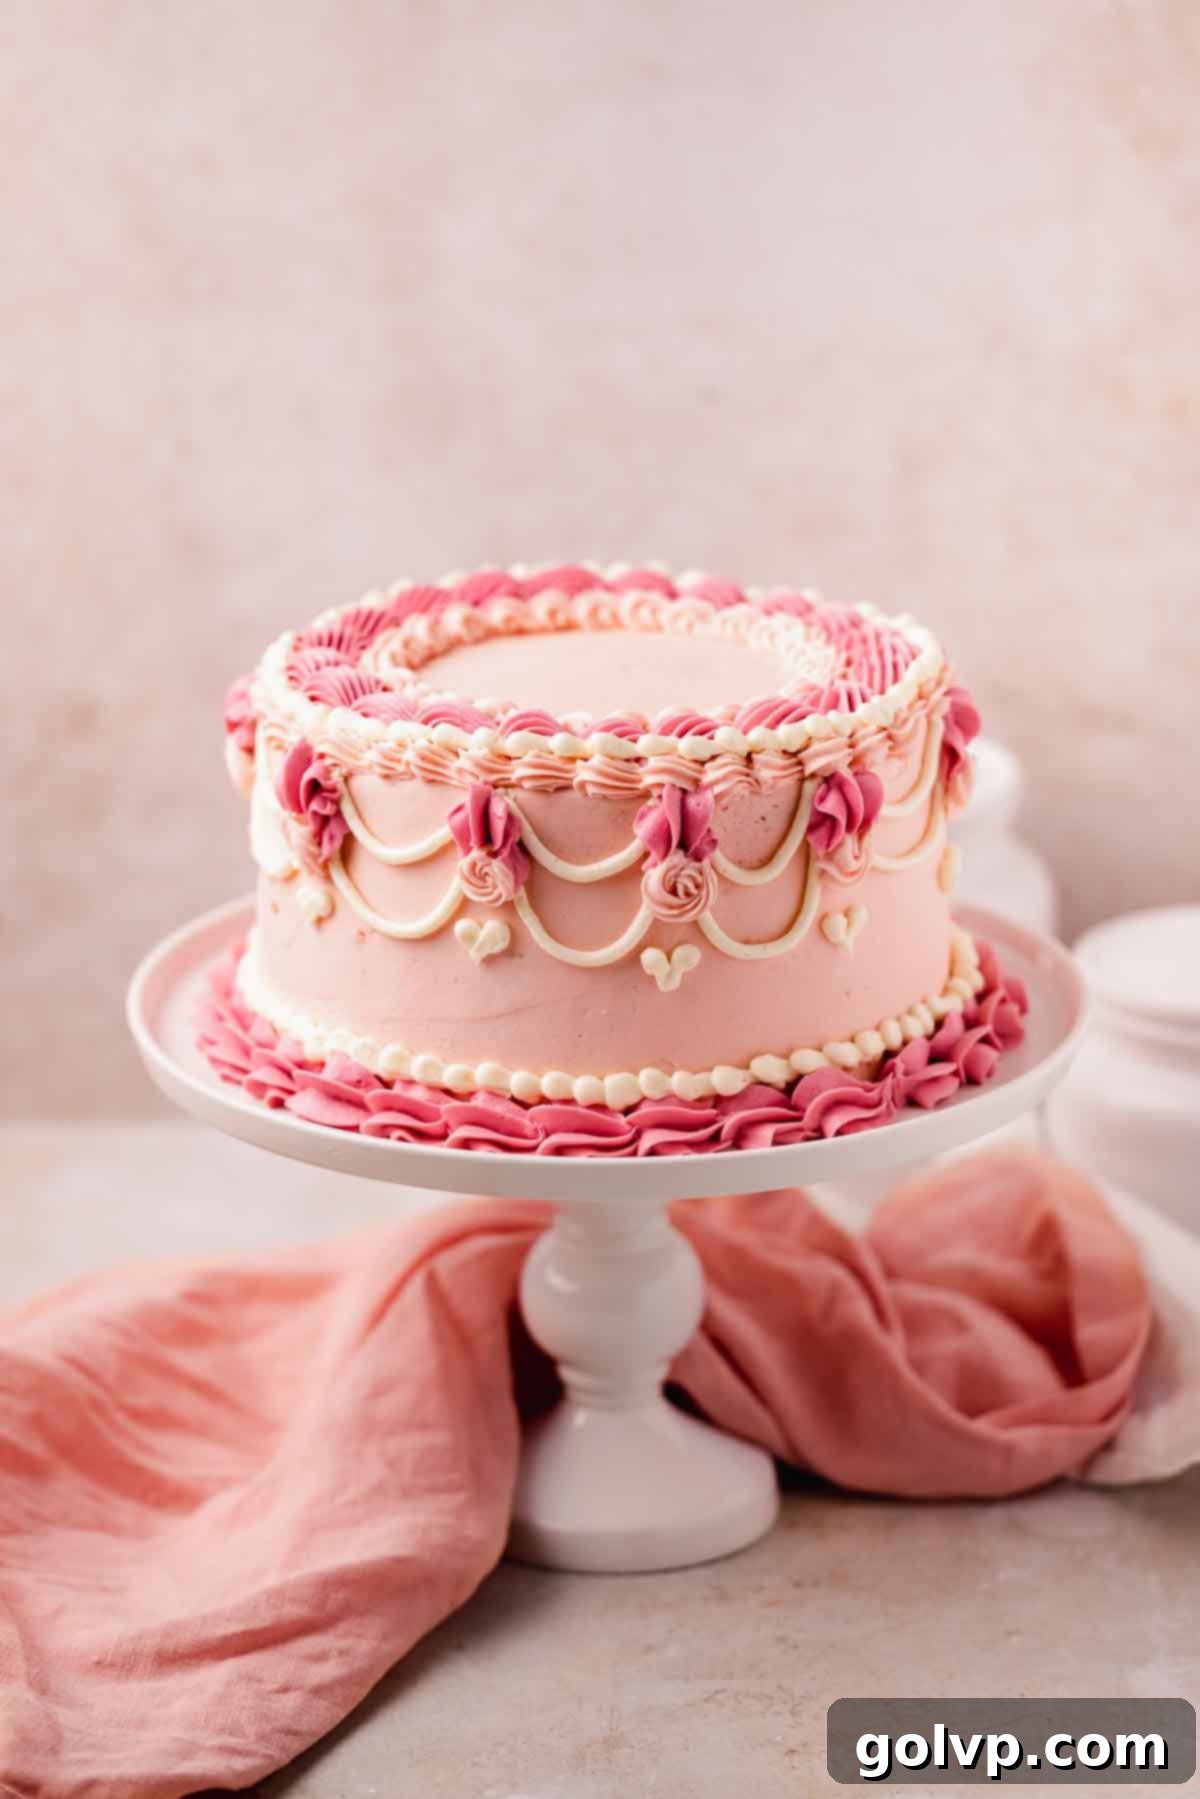
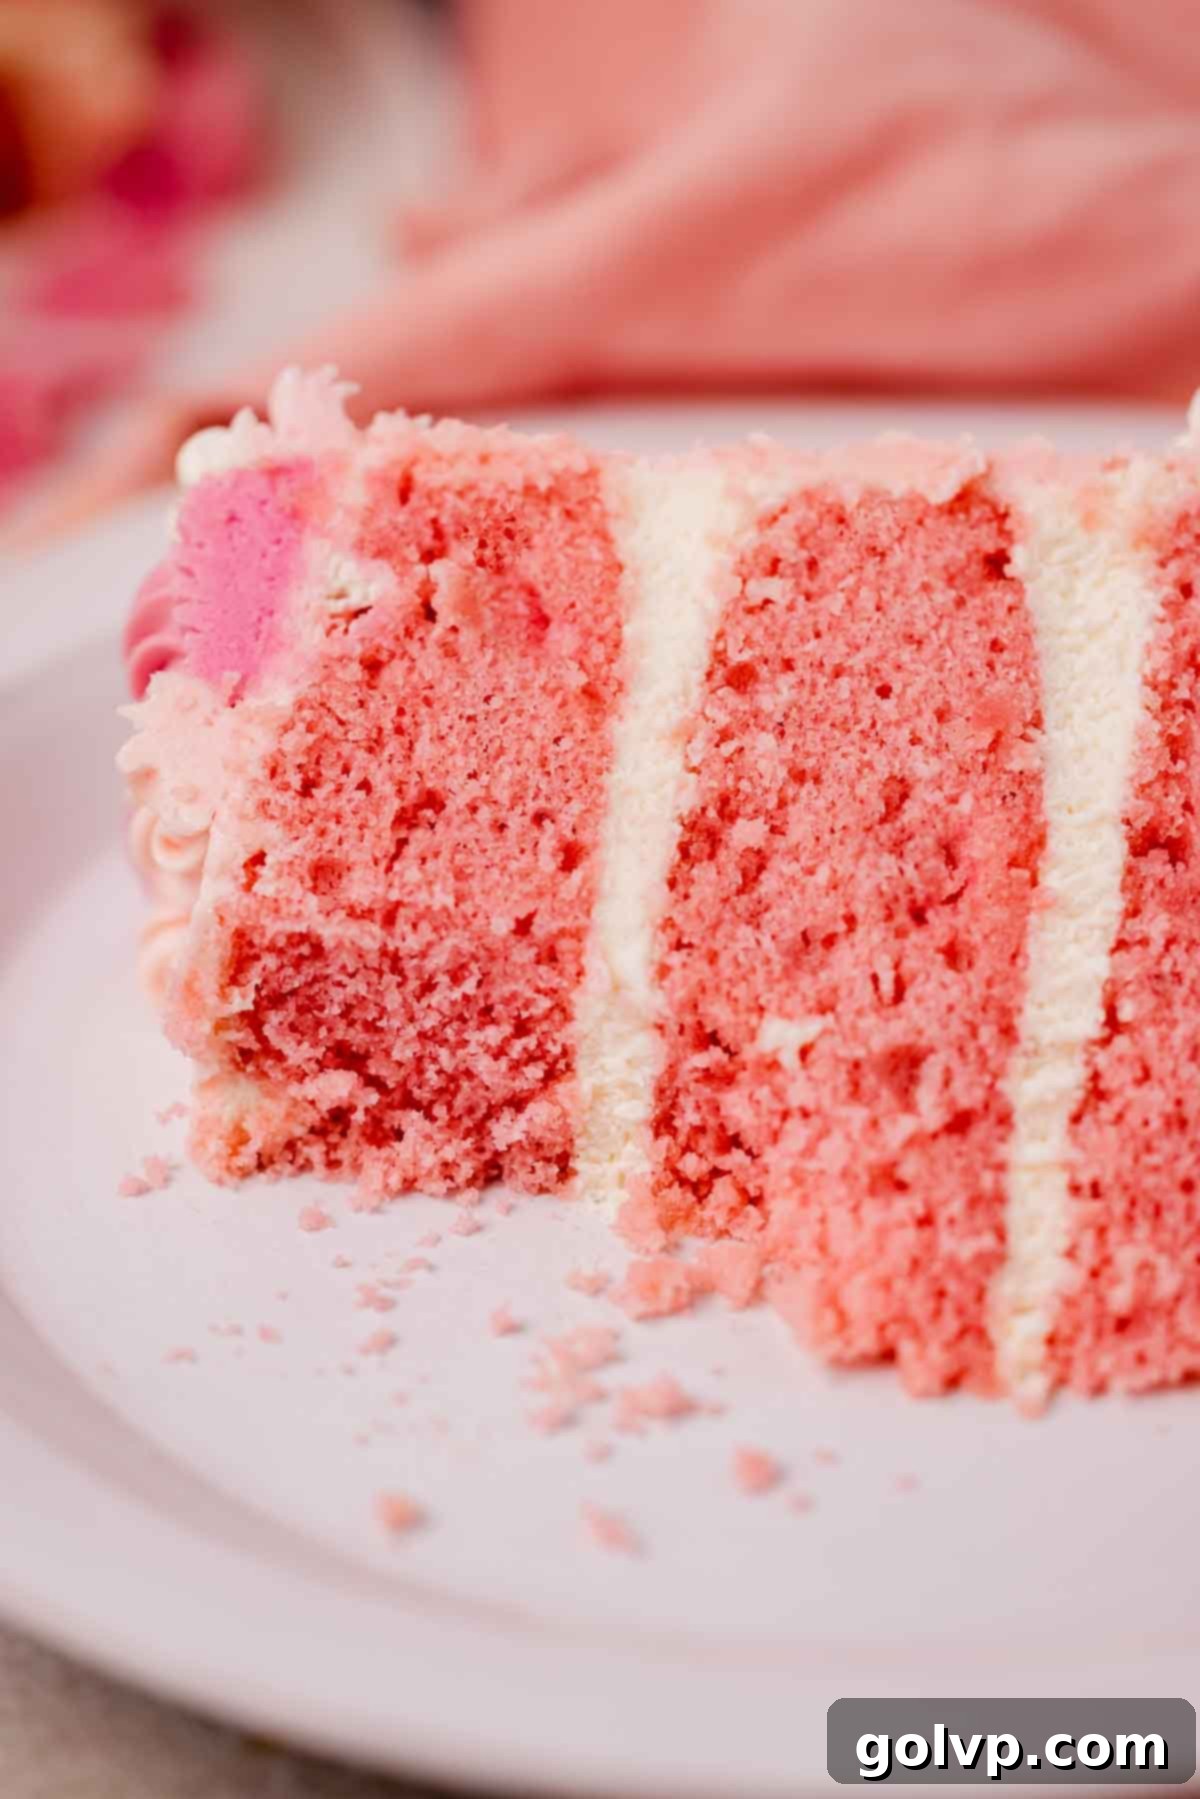
Prepare to be enchanted by this show-stopping pink velvet cake! It boasts an ultra-fluffy, incredibly tender, and wonderfully moist crumb, perfectly complemented by a luscious, tangy cream cheese frosting. Each slice reveals stunning pale pink layers, beautifully adorned with vintage-style piping decorations cascading over the sides and top. While reminiscent of classic red velvet cake, this delightful creation stands out by omitting cocoa powder, allowing its vibrant pink hue to truly shine. Yet, it retains that gorgeous, dense, velvety texture and subtle tang that makes velvet cakes so irresistible. It’s the quintessential centerpiece for any celebration – be it a pink birthday cake, a charming vintage birthday cake, or the crown jewel of a princess party. The beauty of this recipe lies in its versatility; you can decorate it as elaborately or as simply as your heart desires!
Why You’ll Fall in Love with This Pink Velvet Cake Recipe
This isn’t just any cake; it’s a culinary experience designed to impress and delight. Here’s why this pink velvet cake will become your new favorite:
- Unmatched Velvety Texture: The name “velvet” truly comes to life in this cake. Imagine a texture so incredibly soft, delicate, and fine-crumbed that it practically melts in your mouth. It’s an indulgence that sets it apart from ordinary cakes, delivering a luxurious mouthfeel with every forkful.
- Incredibly Soft and Tender Cake Layers: Achieving the perfect cake texture is an art, and this recipe masters it. The secret lies in a harmonious blend of buttermilk, vinegar, and cake flour. Buttermilk and vinegar react with the leavening agents to create an incredibly tender crumb, while cake flour, with its lower protein content, ensures a lighter, fluffier result that’s simply divine.
- Visually Stunning Pink Hue: From the moment you slice into it, this cake is a feast for the eyes. The pale pink cake layers are a delightful and elegant surprise, creating a beautiful contrast against the rich cream cheese frosting. The exterior, adorned with complementary pink piping and swirls, elevates its aesthetic appeal, making it perfect for any special occasion that calls for a touch of feminine charm.
- Perfectly Pipeable Cream Cheese Frosting: A great velvet cake demands an exceptional cream cheese frosting, and this recipe delivers. Our frosting is thick, wonderfully creamy, and boasts that signature tangy flavor that beautifully balances the sweetness of the cake. Crucially, it’s formulated to have the ideal consistency for both filling your cake layers and executing intricate piping decorations, eliminating the need for multiple frosting batches.
- Easy to Follow for Home Bakers: Despite its elaborate appearance, this recipe is designed with clarity and success in mind. Detailed instructions and helpful tips ensure that even bakers with moderate experience can achieve stunning, professional-looking results right in their home kitchen.
- An Impressive Showstopper: Whether it’s for a birthday, anniversary, or a simple get-together, this pink velvet cake is guaranteed to be the star of the dessert table. Its vibrant color, elegant decorations, and irresistible flavor profile make it an unforgettable treat that will have everyone asking for the recipe.
If you’re a connoisseur of velvet cakes, don’t miss trying my black velvet cake for a dramatic twist or my red velvet cream cheese swirled bundt cake for a delightful surprise!
Key Ingredients for an Exceptional Pink Velvet Cake
Mastering this recipe starts with understanding your ingredients. Below are the key components and essential tips for ensuring your cake is a resounding success!
Full steps and ingredients can be found in the comprehensive recipe card below.
Pink Cake Layer Ingredients: Crafting the Perfect Crumb
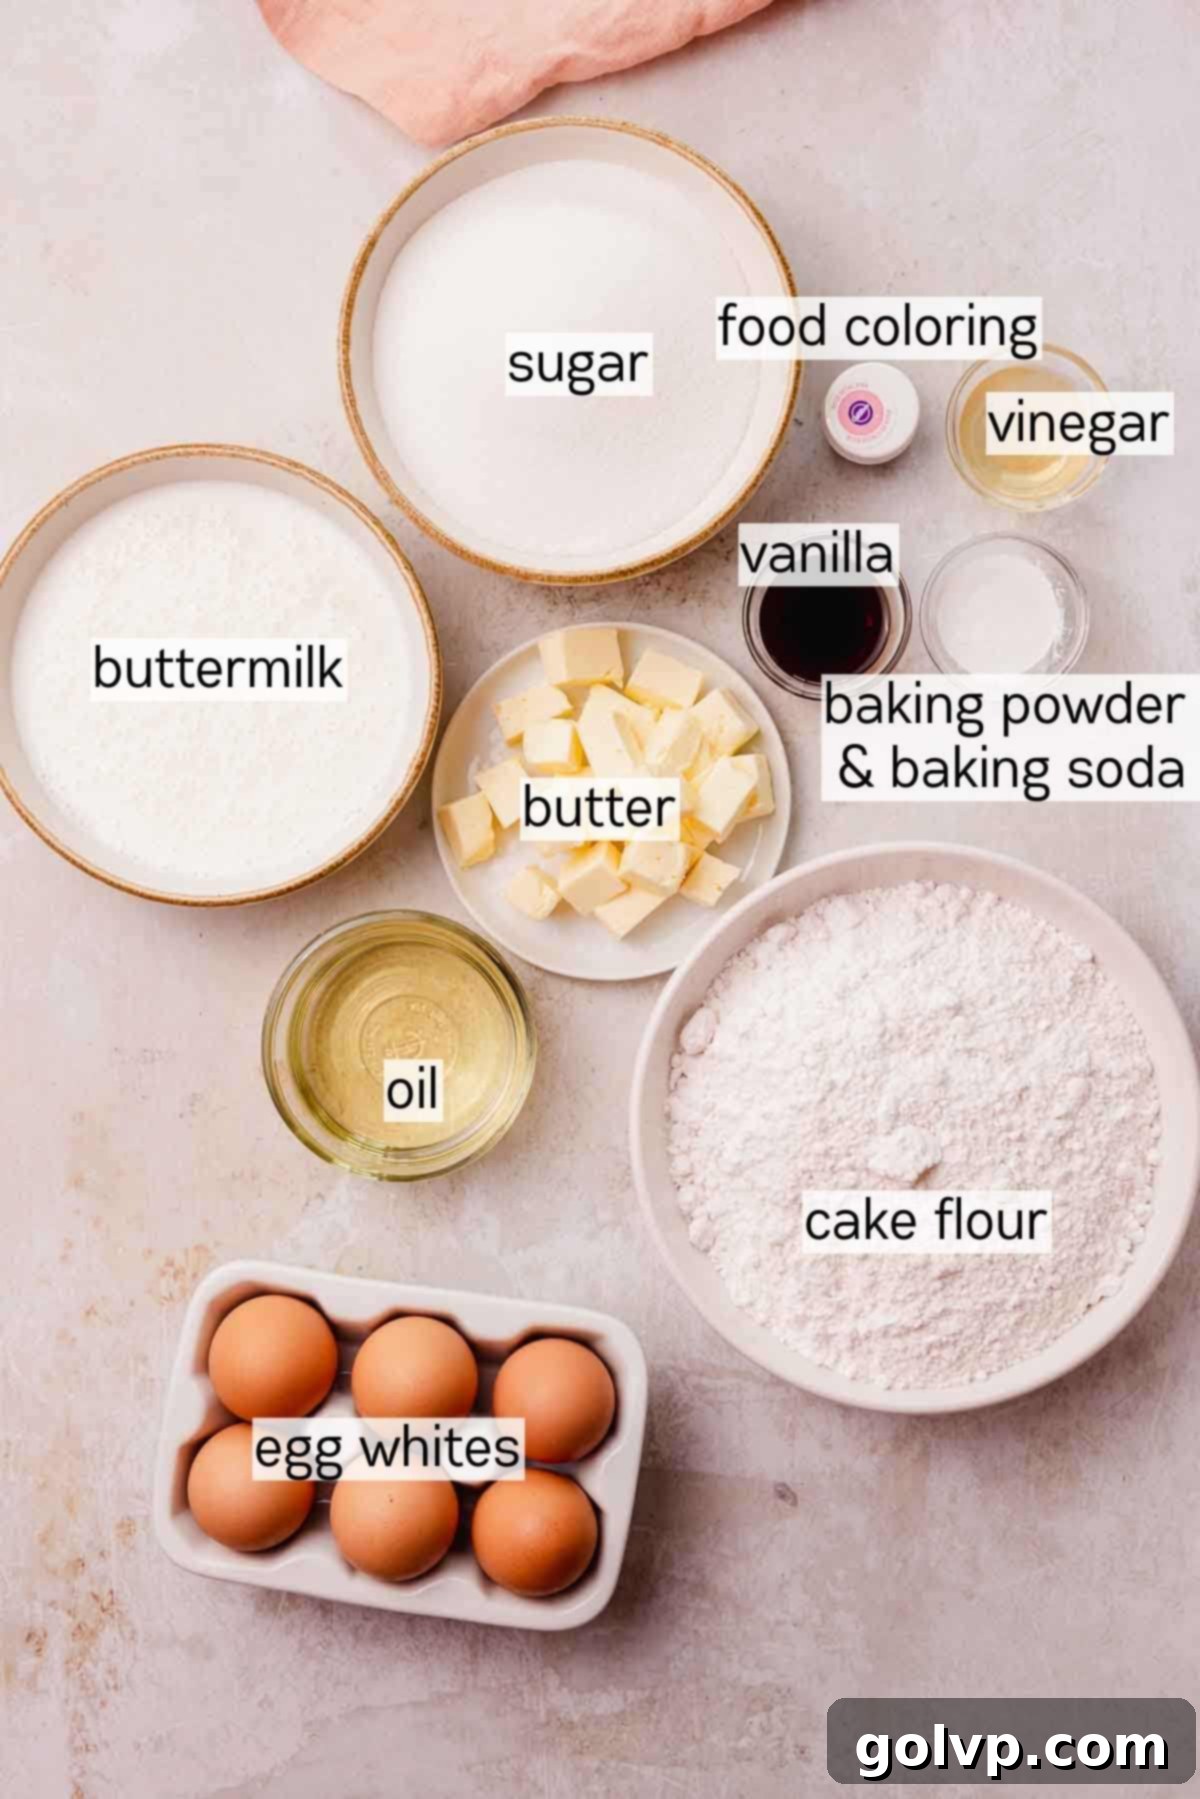
- Butter & Oil: This dynamic duo is crucial for achieving the ideal cake texture and flavor. Butter infuses the cake with a rich, classic buttery taste, while vegetable oil contributes to an incredibly moist and tender crumb that stays soft for days. The oil prevents the cake from drying out, even after refrigeration.
- Buttermilk: Don’t underestimate the power of buttermilk in velvet cakes! Its acidity reacts with the baking soda, creating tiny air pockets that contribute to an ultra-tender and fluffy texture. Buttermilk also imparts a subtle tangy flavor that is characteristic of a true velvet cake. For the best consistency and taste, we highly recommend using store-bought buttermilk. If it’s not available, you can easily make a homemade version by stirring 1 tablespoon of apple cider vinegar or white vinegar into 1 ¼ cups of room temperature milk. Let it sit for 5-10 minutes until it visibly thickens and curdles slightly.
- Pink Gel Food Coloring: To achieve that gorgeous, vibrant pink color without altering the cake’s consistency, gel food coloring is your best friend. Unlike liquid food coloring, a small amount of gel provides intense color saturation. Start with a pea-sized amount and gradually add more until you reach your desired shade, keeping in mind that the color may lighten slightly during baking.
- Cake Flour: This ingredient is non-negotiable for the lightest, fluffiest cake layers. Cake flour has a lower protein (gluten) content than all-purpose flour, which means less gluten development and a more delicate, tender crumb. For the most accurate and consistent results, always weigh your cake flour using a kitchen scale. If you don’t have cake flour, you can create a decent substitute by combining ¾ cup + 2 tablespoons (105g) all-purpose flour with 2 tablespoons (14g) cornstarch. While not identical, this substitute will yield a much lighter cake than using all-purpose flour alone.
- Egg Whites: Using only egg whites instead of whole eggs with yolks is key to achieving a clean, pale white base for your cake batter. This allows the pink food coloring to create a pure, vibrant pink hue. If you were to use whole eggs, the natural yellow from the yolks would interfere with the pink, resulting in more of an orange-pink or muted tone.
Cream Cheese Frosting Ingredients: The Perfect Tangy Finish
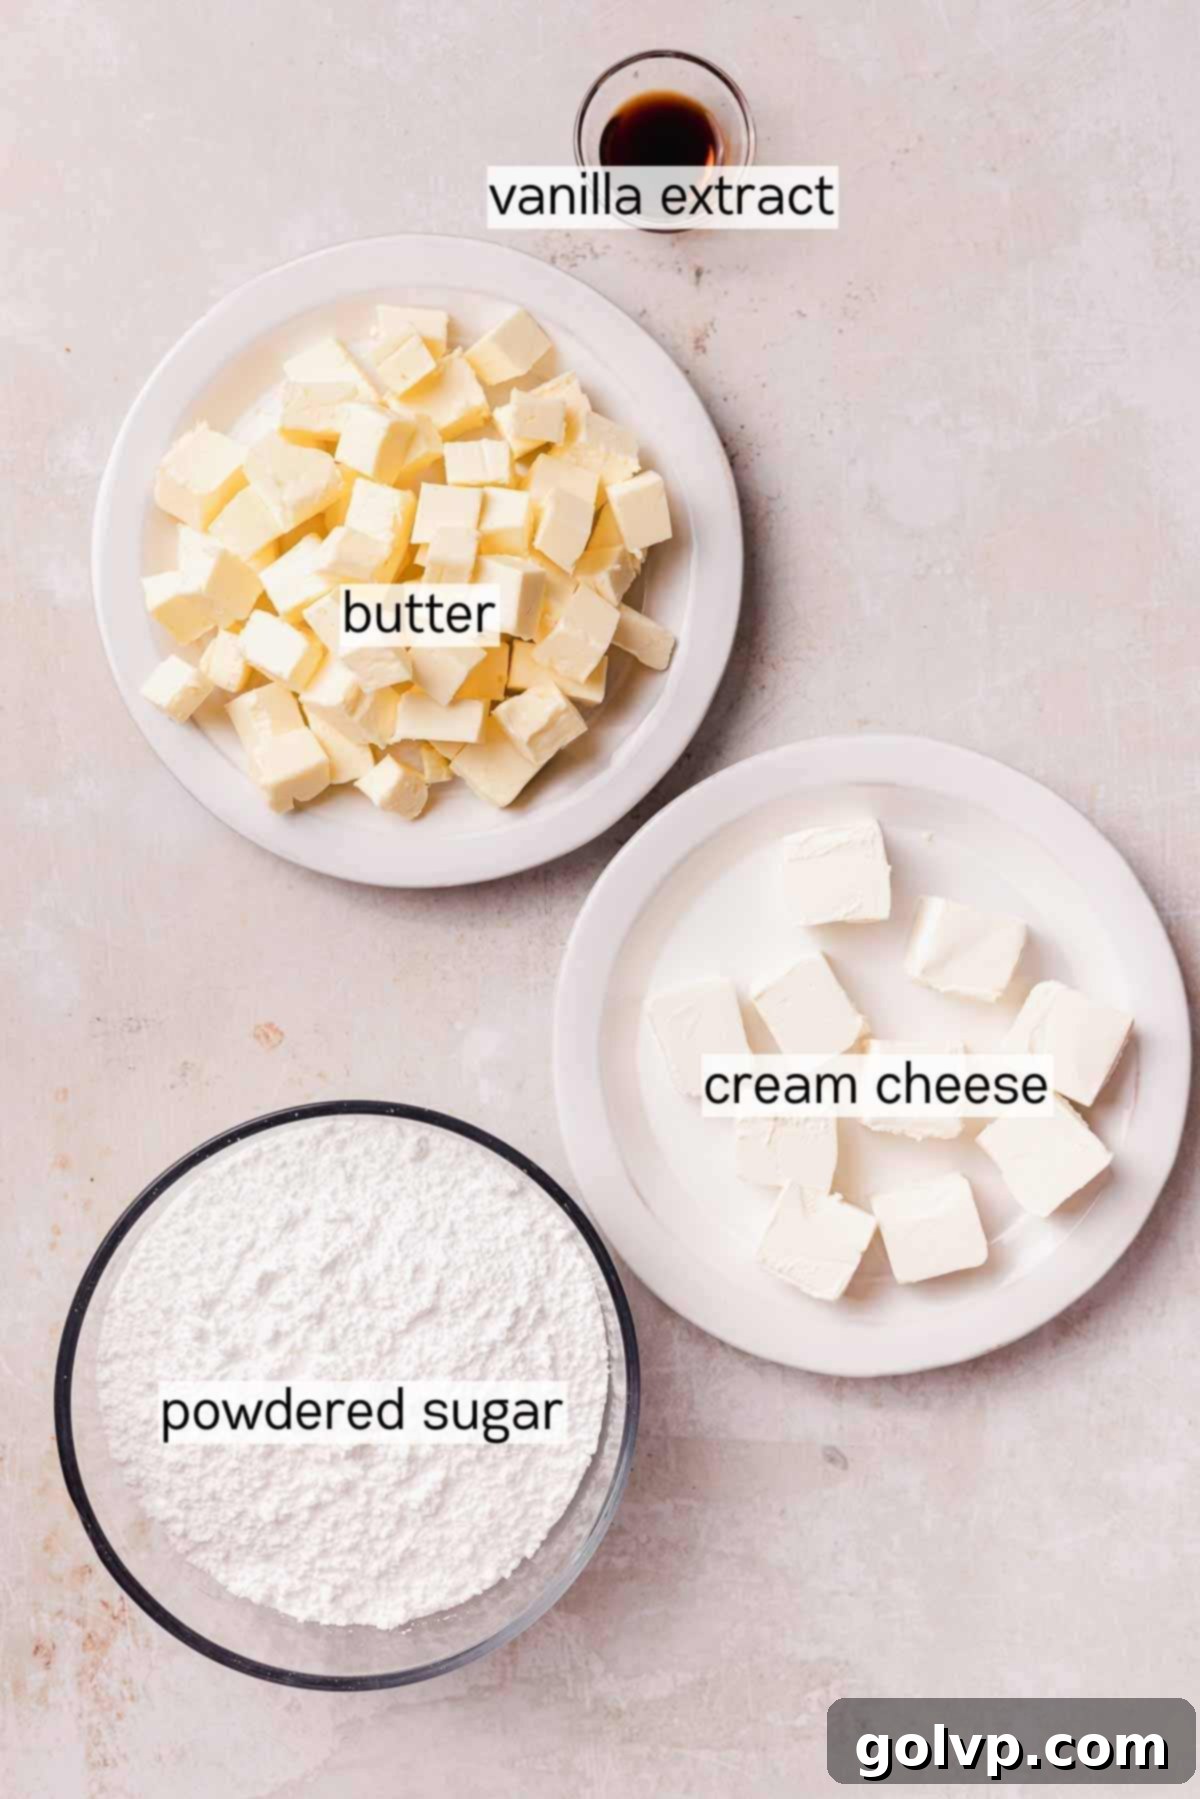
- Full-Fat Brick Style Cream Cheese: The foundation of a stable, pipeable cream cheese frosting is full-fat, brick-style cream cheese. Its firm consistency ensures your frosting holds its shape beautifully for both filling and intricate decorations. Avoid low-fat or spreadable cream cheese varieties, as their higher water content will result in a runny, “gloopy” frosting that simply won’t perform as needed.
- Pink and Red Gel Food Coloring: To replicate the stunning multi-toned pink decorations seen in our photos, you’ll need both pink and a touch of red gel food coloring. Pink will create the delicate pale base color, while a combination of pink and red will allow you to achieve a deeper, darker pink for accent piping. Of course, you can always opt for a classic uncolored, white frosting for a more subtle look.
For more delightful pink treats that don’t rely on food coloring, try my strawberry cinnamon rolls and raspberry tiramisu recipes – they’re naturally gorgeous!
How to Create Your Beautiful Pink Velvet Cake: A Step-by-Step Guide
Creating this stunning pink velvet cake is a rewarding process. Follow these detailed steps to ensure a flawless result, from perfectly baked layers to exquisite decorations.
Cake Layers: Achieving Fluffy, Tender Perfection
Preparation is Key: Begin by preheating your oven to 355°F (180°C). Prepare three 8-inch round baking pans by greasing them thoroughly with a small amount of cold butter, then lining the bottoms with parchment paper rounds. This ensures your cake layers release effortlessly.
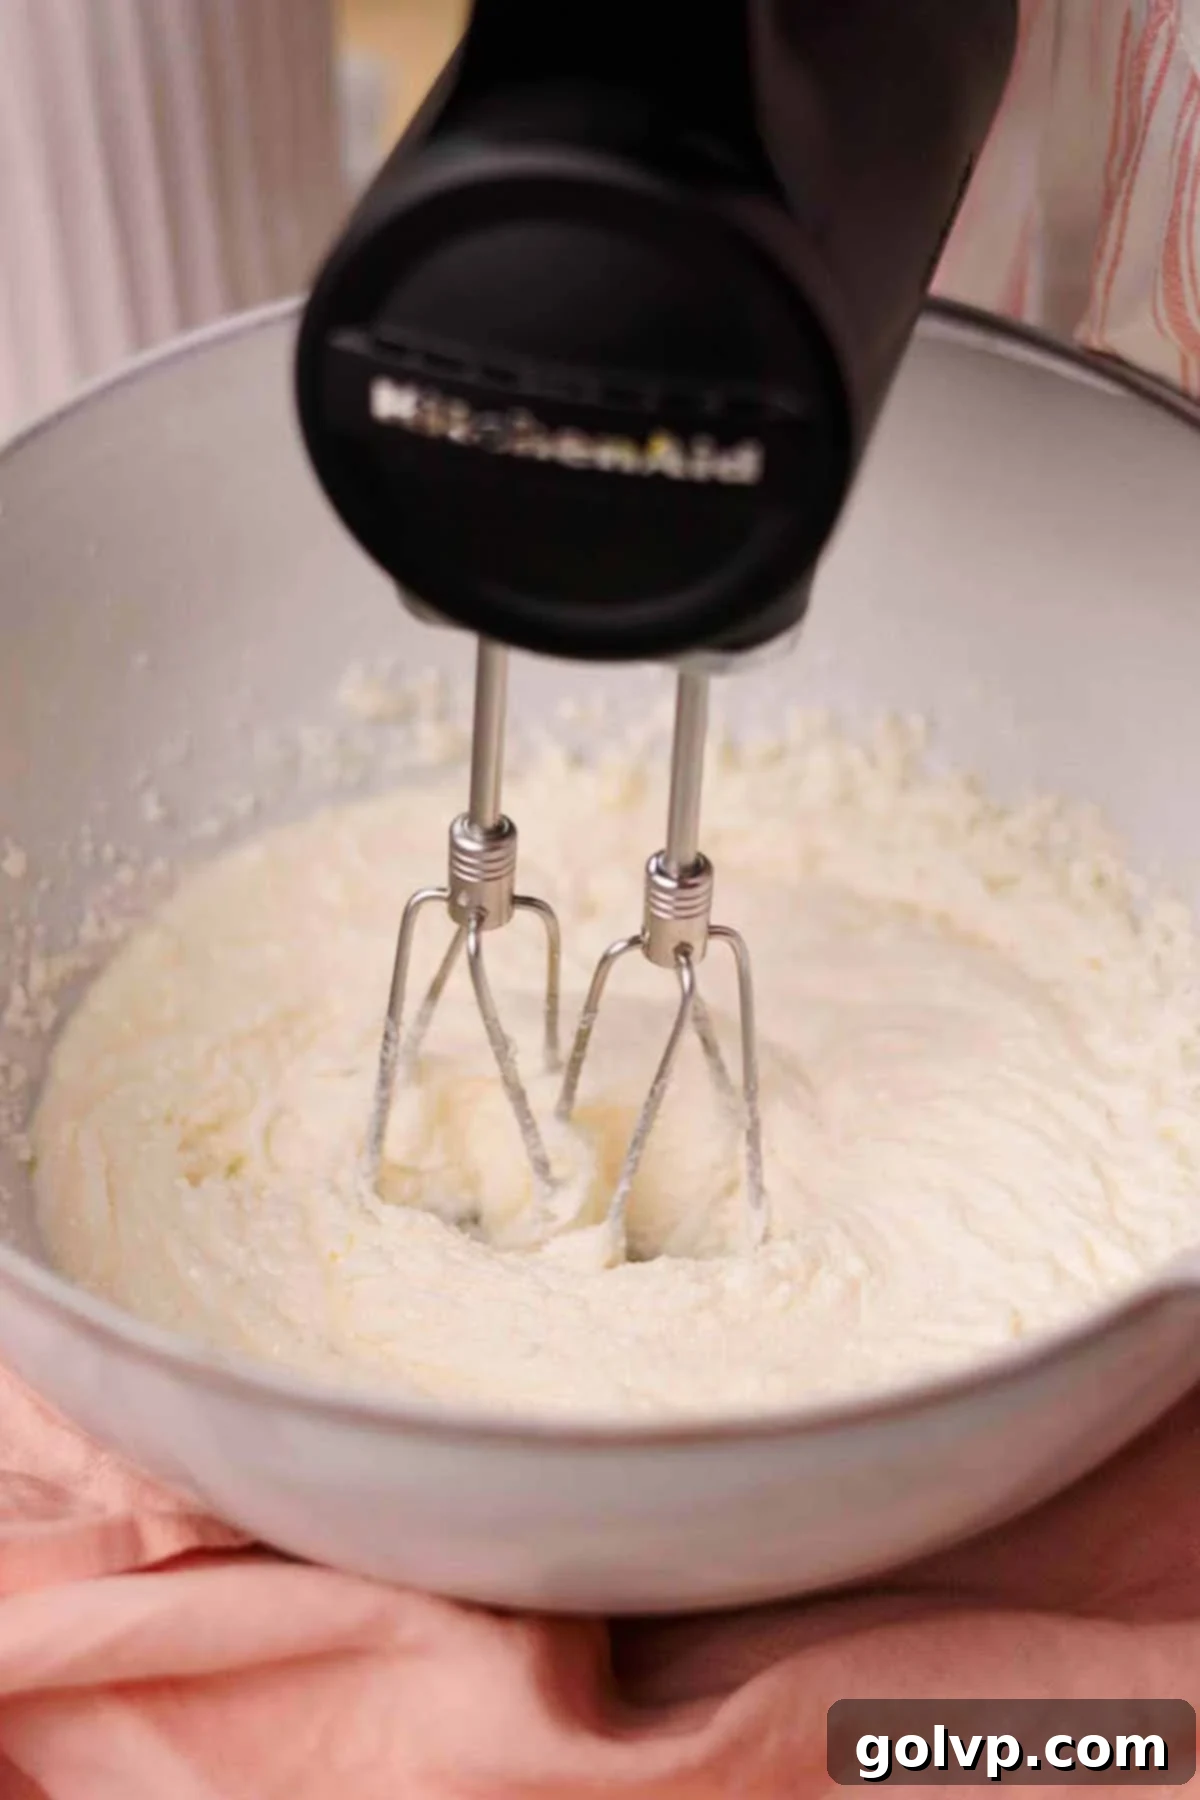
Step 1: Creaming the Fats and Sugar. In a large mixing bowl or the bowl of a stand mixer fitted with the paddle attachment, combine the softened unsalted butter, vegetable oil, granulated sugar, and sea salt. Beat with an electric mixer on medium-high speed until the mixture becomes visibly lightened in color and significantly increased in volume. This creaming process incorporates air, essential for a fluffy cake. Don’t forget to pause and scrape down the sides of the bowl to ensure everything is evenly combined.
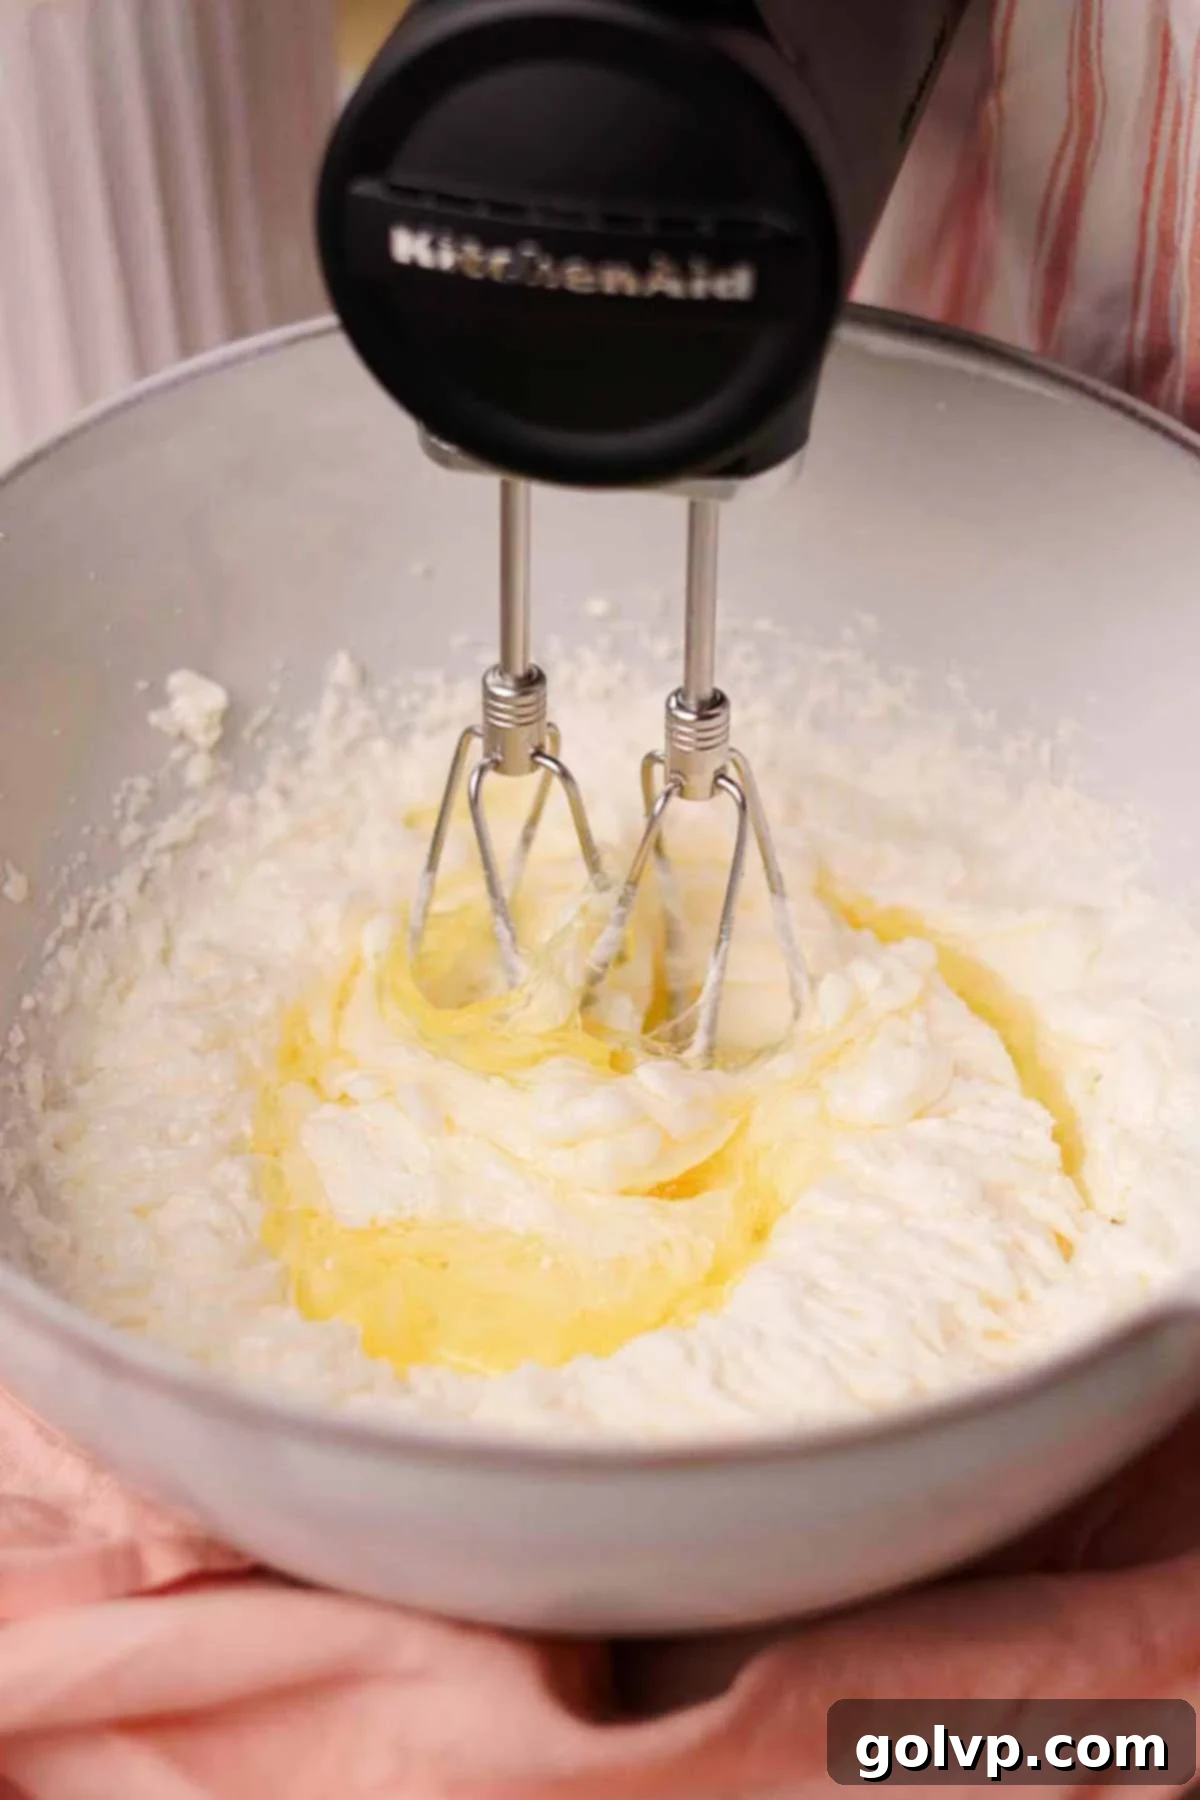
Step 2: Incorporating Egg Whites and Flavor. Add half of the room-temperature egg whites to the creamed mixture and blend until just combined. Then, add the remaining egg whites and beat again until the mixture is thick and further increased in volume, resembling a light, airy meringue. Next, incorporate the pure vanilla extract and vinegar, blending until fully combined. The vinegar plays a vital role in reacting with the baking soda later, enhancing the cake’s tender texture.
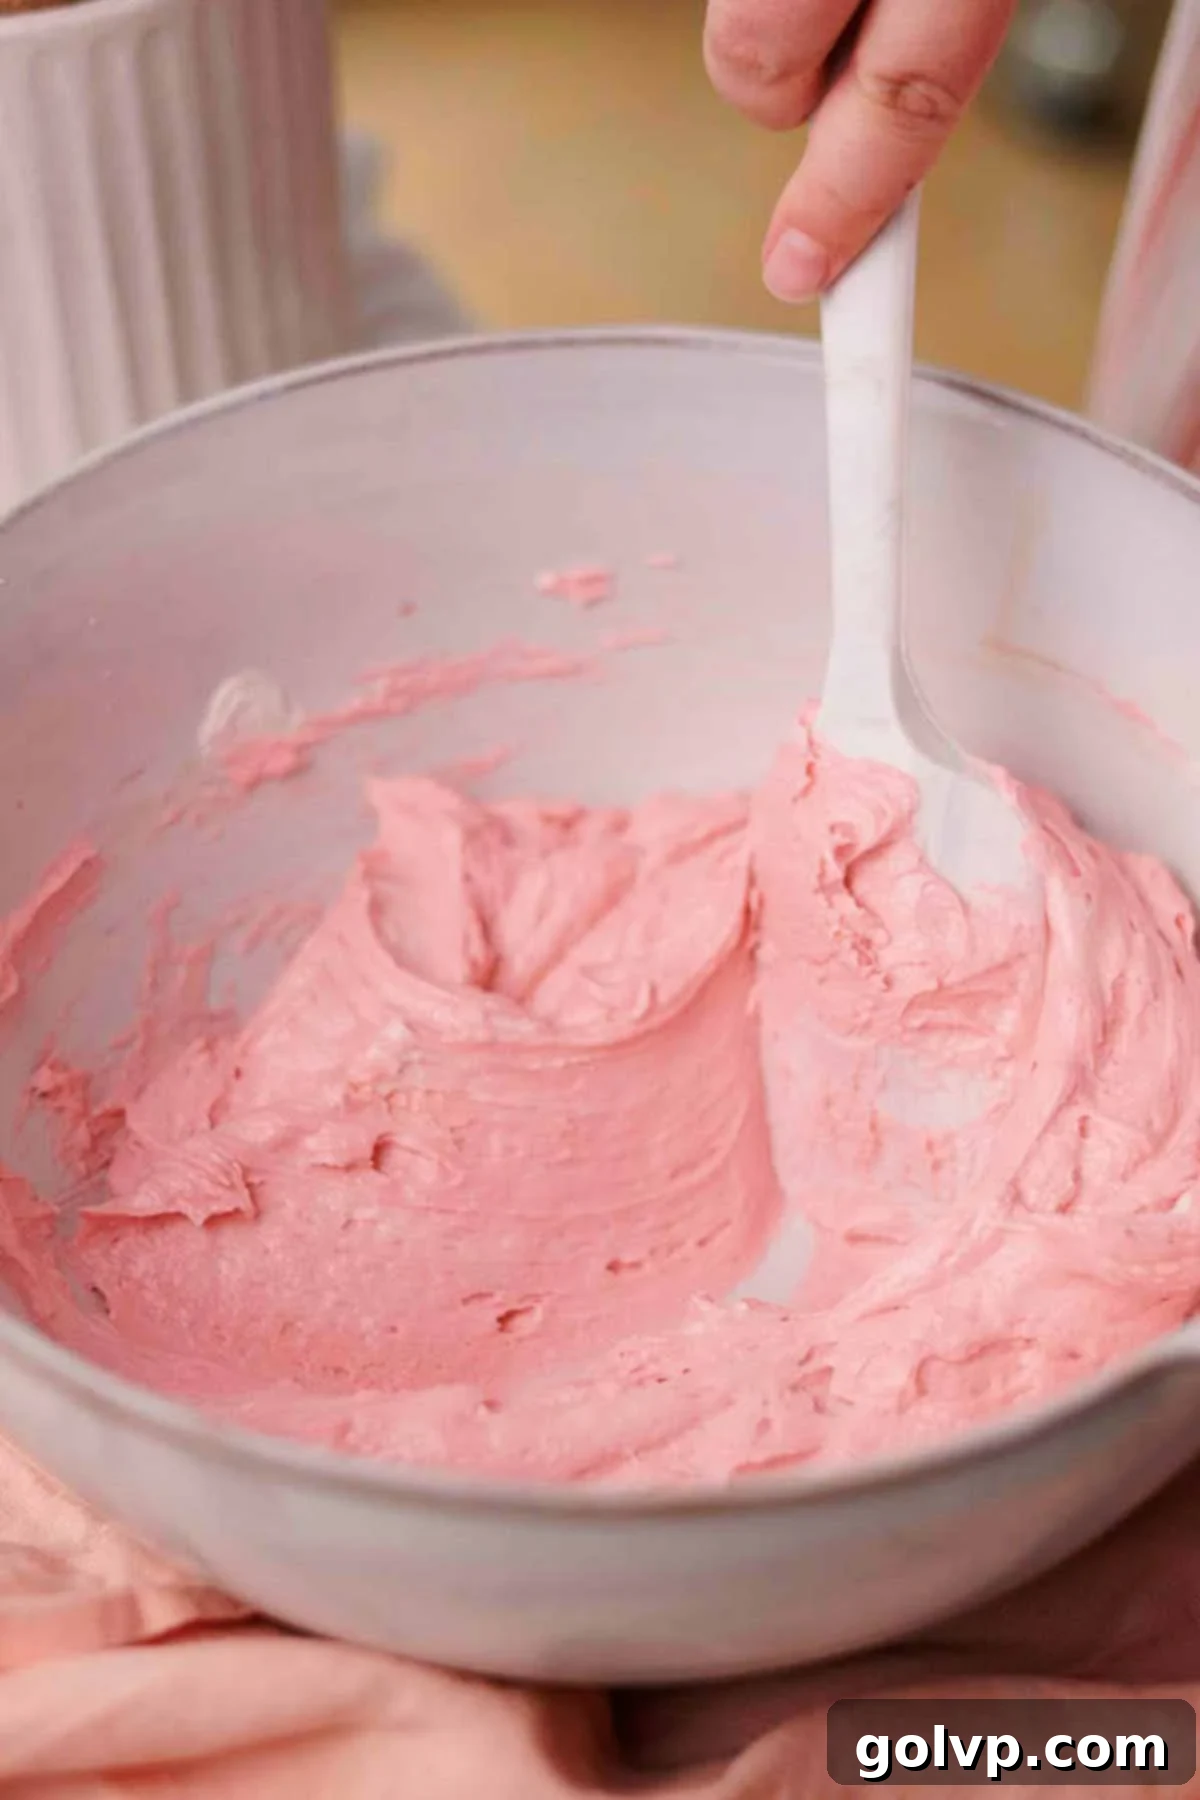
Step 3: Adding the Signature Pink Color. Now for the fun part – coloring your cake! Add pink gel food coloring, starting with a very small, pea-sized amount. Blend it in and assess the color. Continue adding tiny amounts until you achieve a beautiful pink shade. Remember, the color will lighten slightly once the flour is added, so aim for a slightly darker pink than your desired final result.
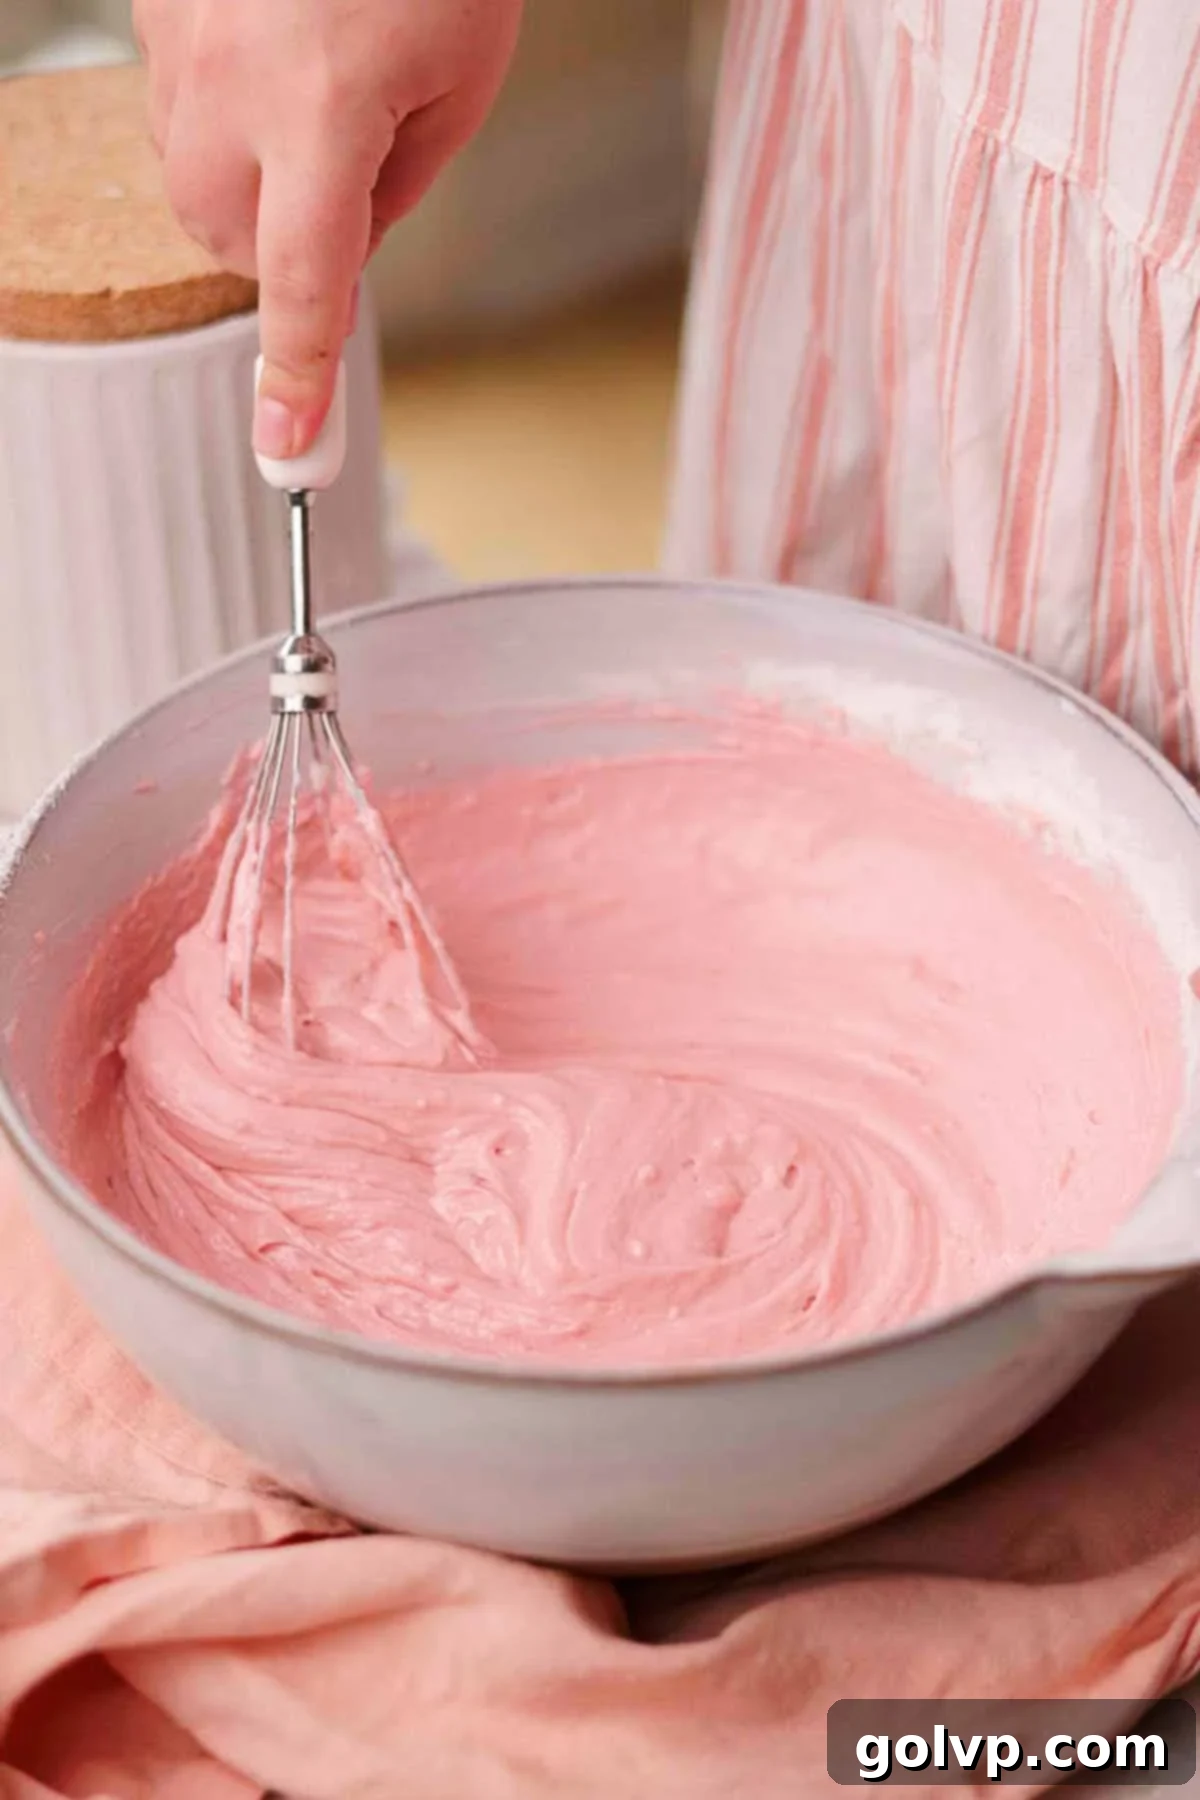
Step 4: Alternating Dry and Wet Ingredients. Sift half of the measured cake flour, all of the baking powder, and all of the baking soda directly into the bowl with your wet batter. Gently fold these dry ingredients into the batter using a whisk until just incorporated. Next, add the buttermilk and fold again. Finally, sift in the remaining cake flour and continue folding with the whisk until most of the lumps are broken up and the batter is mostly smooth. Be careful not to overmix at this stage, as excessive mixing can develop gluten, leading to a tough cake.
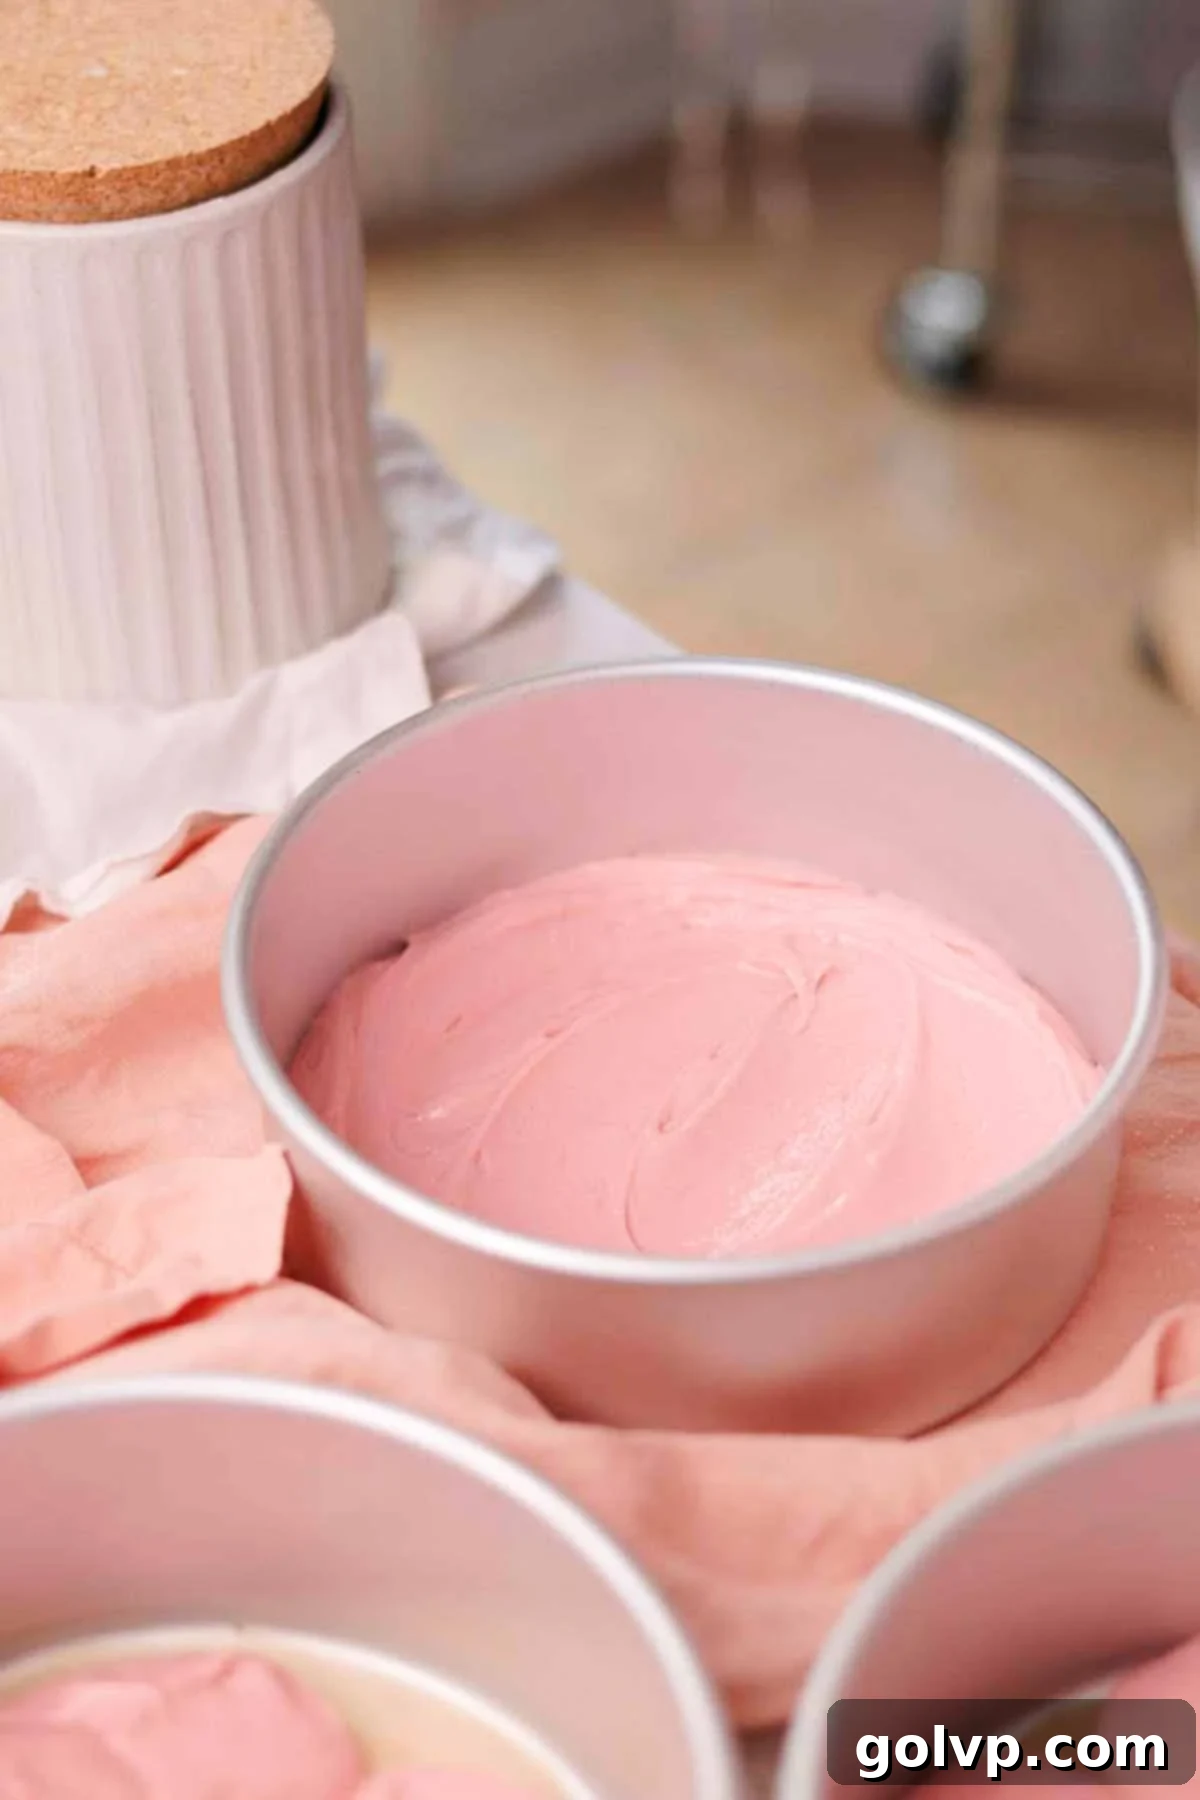
Step 5: Baking the Cake Layers. Divide the prepared batter evenly among the three greased and lined baking pans. Use an offset spatula to smooth the tops of the batter in each pan. Gently tap the pans on your counter a few times to release any large air pockets, which helps prevent tunnels in the cake. Bake for approximately 15-18 minutes, or until a wooden toothpick inserted into the center of a cake layer comes out mostly clean, with only a few moist crumbs attached.
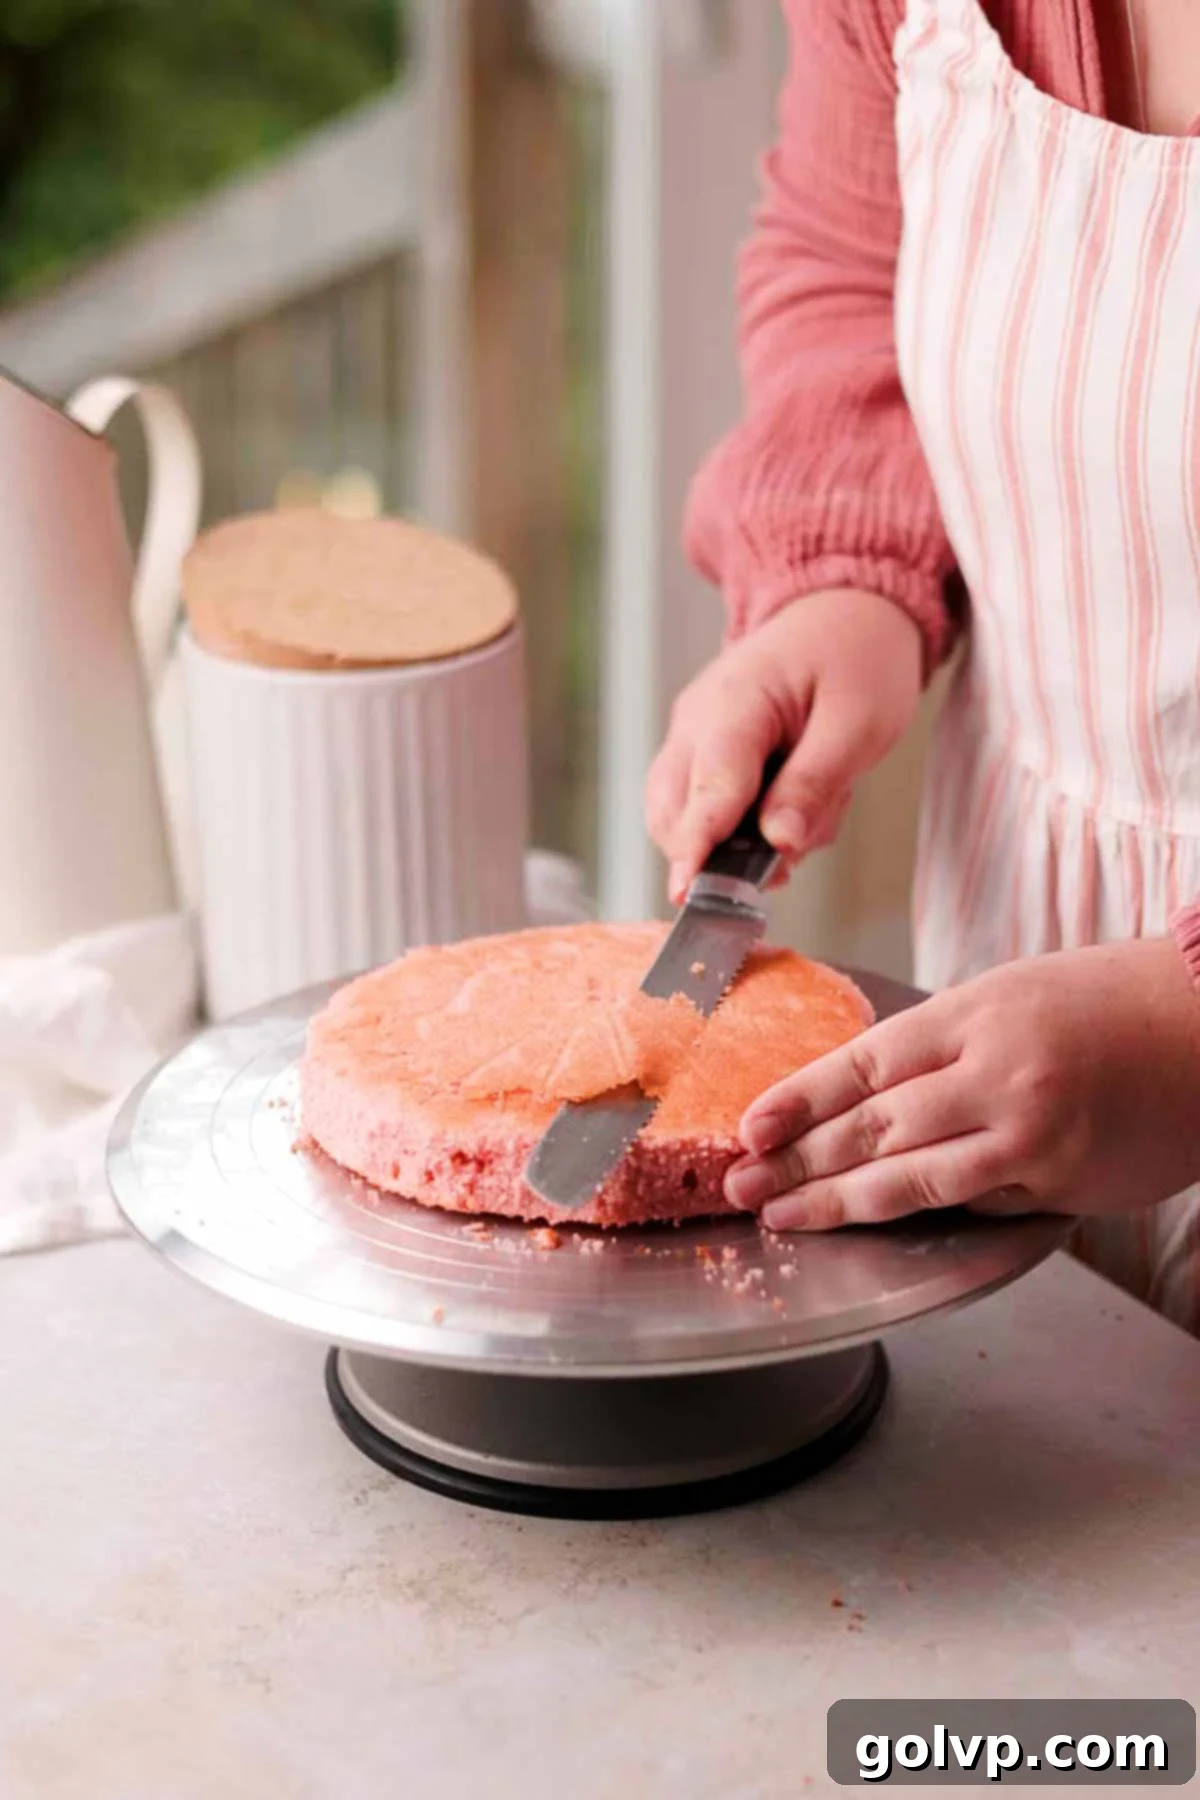
Step 6: Cooling and Trimming for Perfection. Once baked, remove the cake layers from the oven and allow them to cool in their pans for about 8 minutes. This brief cooling period helps the cakes firm up. Then, carefully loosen the edges with a spatula and invert them onto wire cooling racks to cool completely. Once fully cooled, use a serrated knife and a gentle sawing motion to meticulously trim any golden-brown edges, tops, and bottoms from the layers. This step is crucial for achieving clean, perfectly uniform pink layers that will look stunning when frosted.
Cream Cheese Frosting: Rich, Tangy & Pipeable
This generous recipe provides ample cream cheese frosting, ensuring you have enough for a beautiful filling, a smooth exterior, and all your desired decorating flourishes.
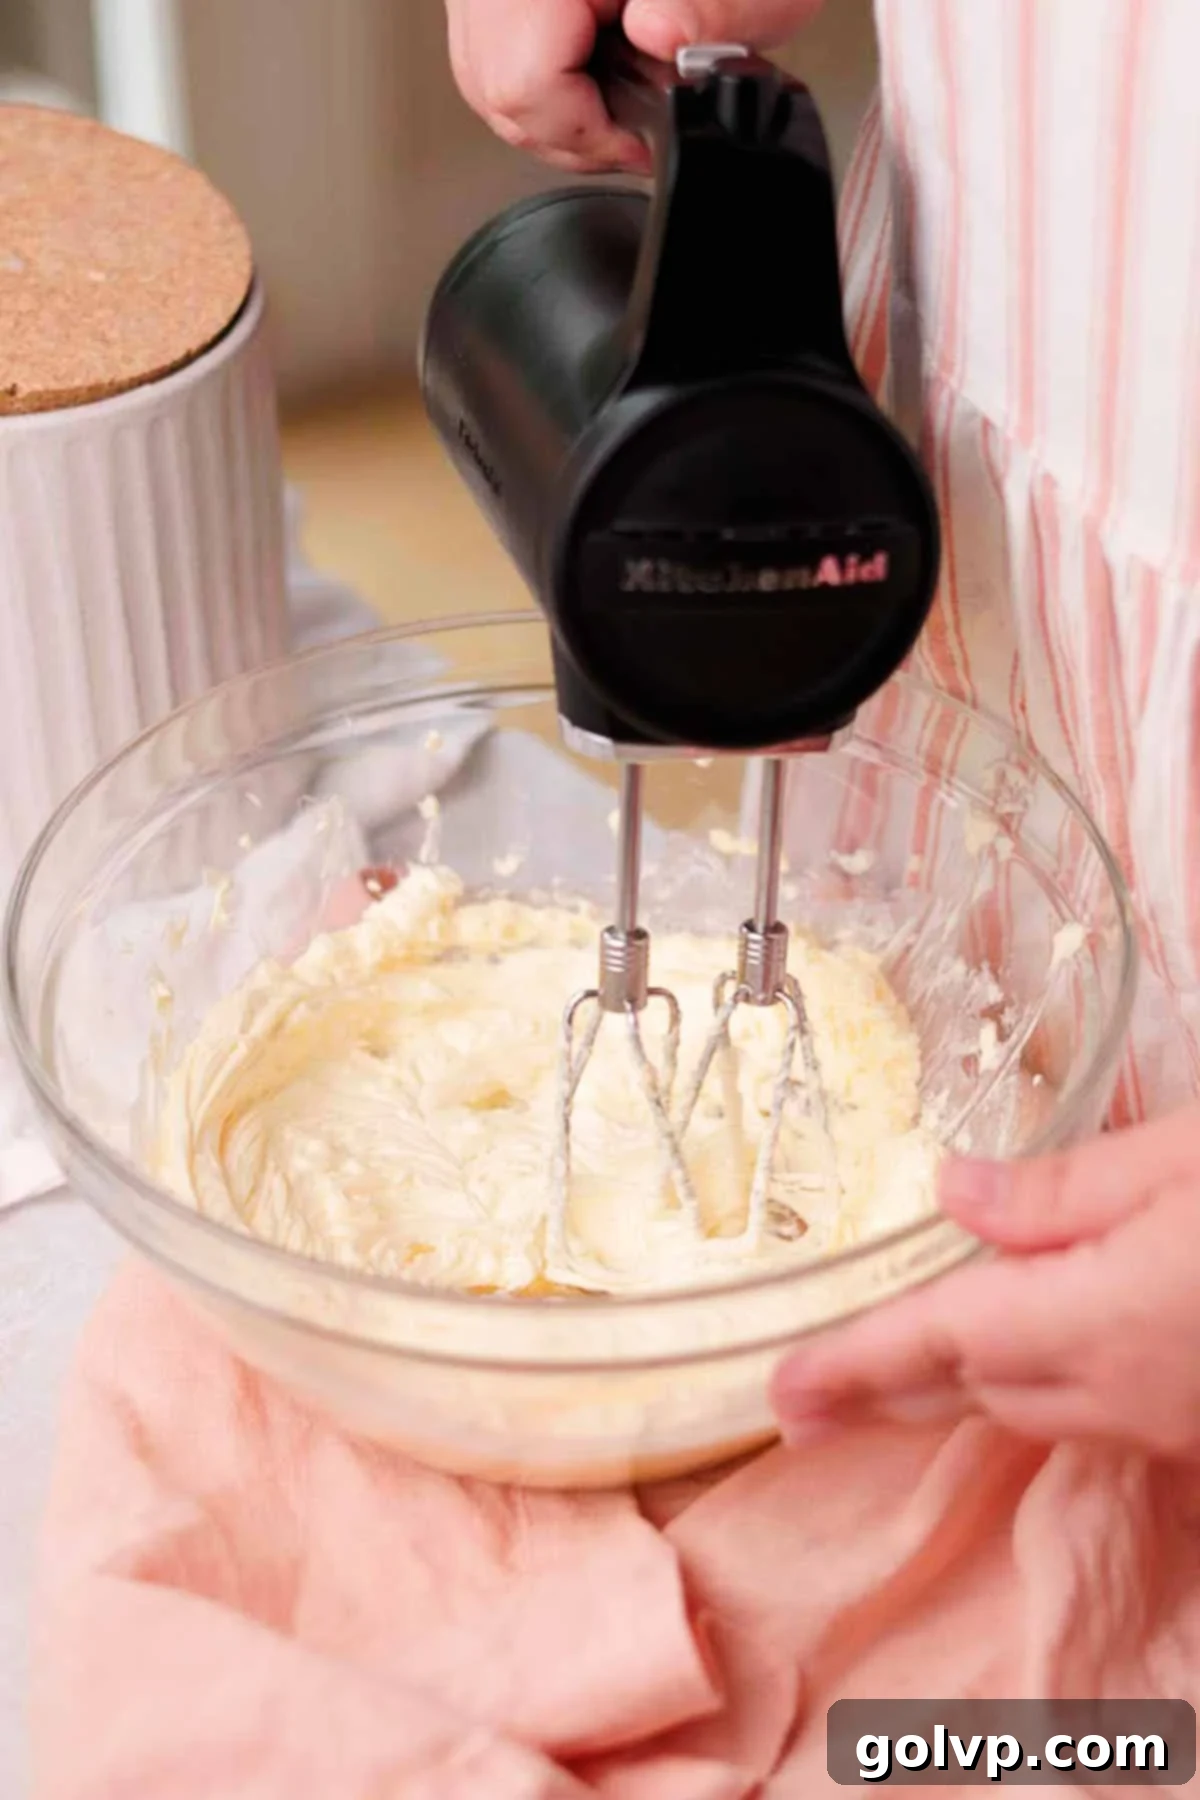
Step 1: Whipping the Butter. In a large mixing bowl or the bowl of a stand mixer fitted with the paddle attachment, beat the softened butter on medium-high speed until it becomes incredibly creamy, pale in color, and visibly lightened. This step is essential for incorporating air, resulting in a light and airy frosting.
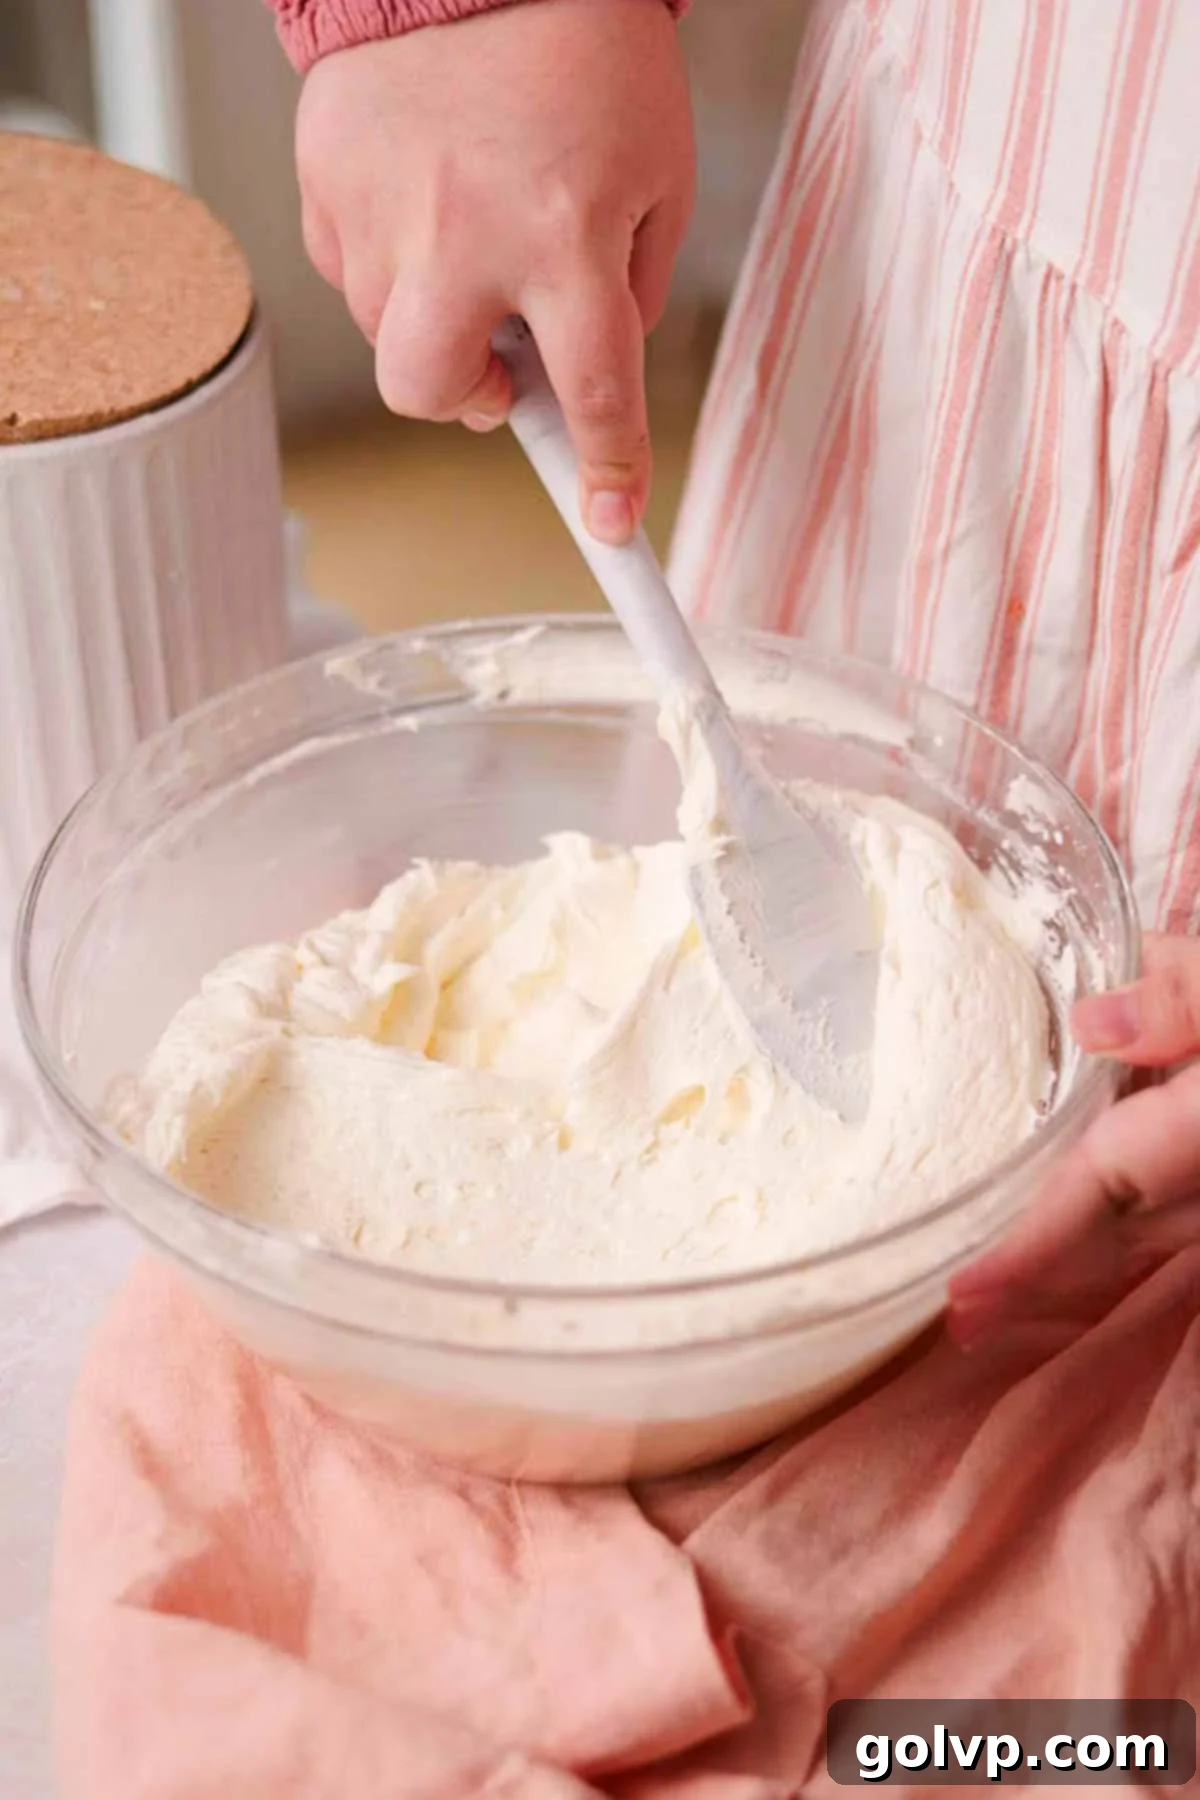
Step 2: Building the Frosting. Add the sea salt and powdered sugar to the whipped butter, one cup at a time. Beat thoroughly after each addition, scraping down the sides of the bowl frequently to ensure a smooth, lump-free frosting. Continue whipping until the mixture is very creamy and light. The longer you whip the butter and sugar, the lighter and fluffier your frosting will be. Next, add the softened cream cheese in several pieces, blending each addition completely before adding the next. This helps prevent lumps and ensures a smooth consistency. The frosting will transform into a very light and fluffy texture. Finally, add the pure vanilla extract and beat once more until fully incorporated and fragrant.
Assembling the Cake: From Layers to a Masterpiece
The assembly process brings your cake to life. Follow these steps for a beautifully structured and decorated pink velvet cake.
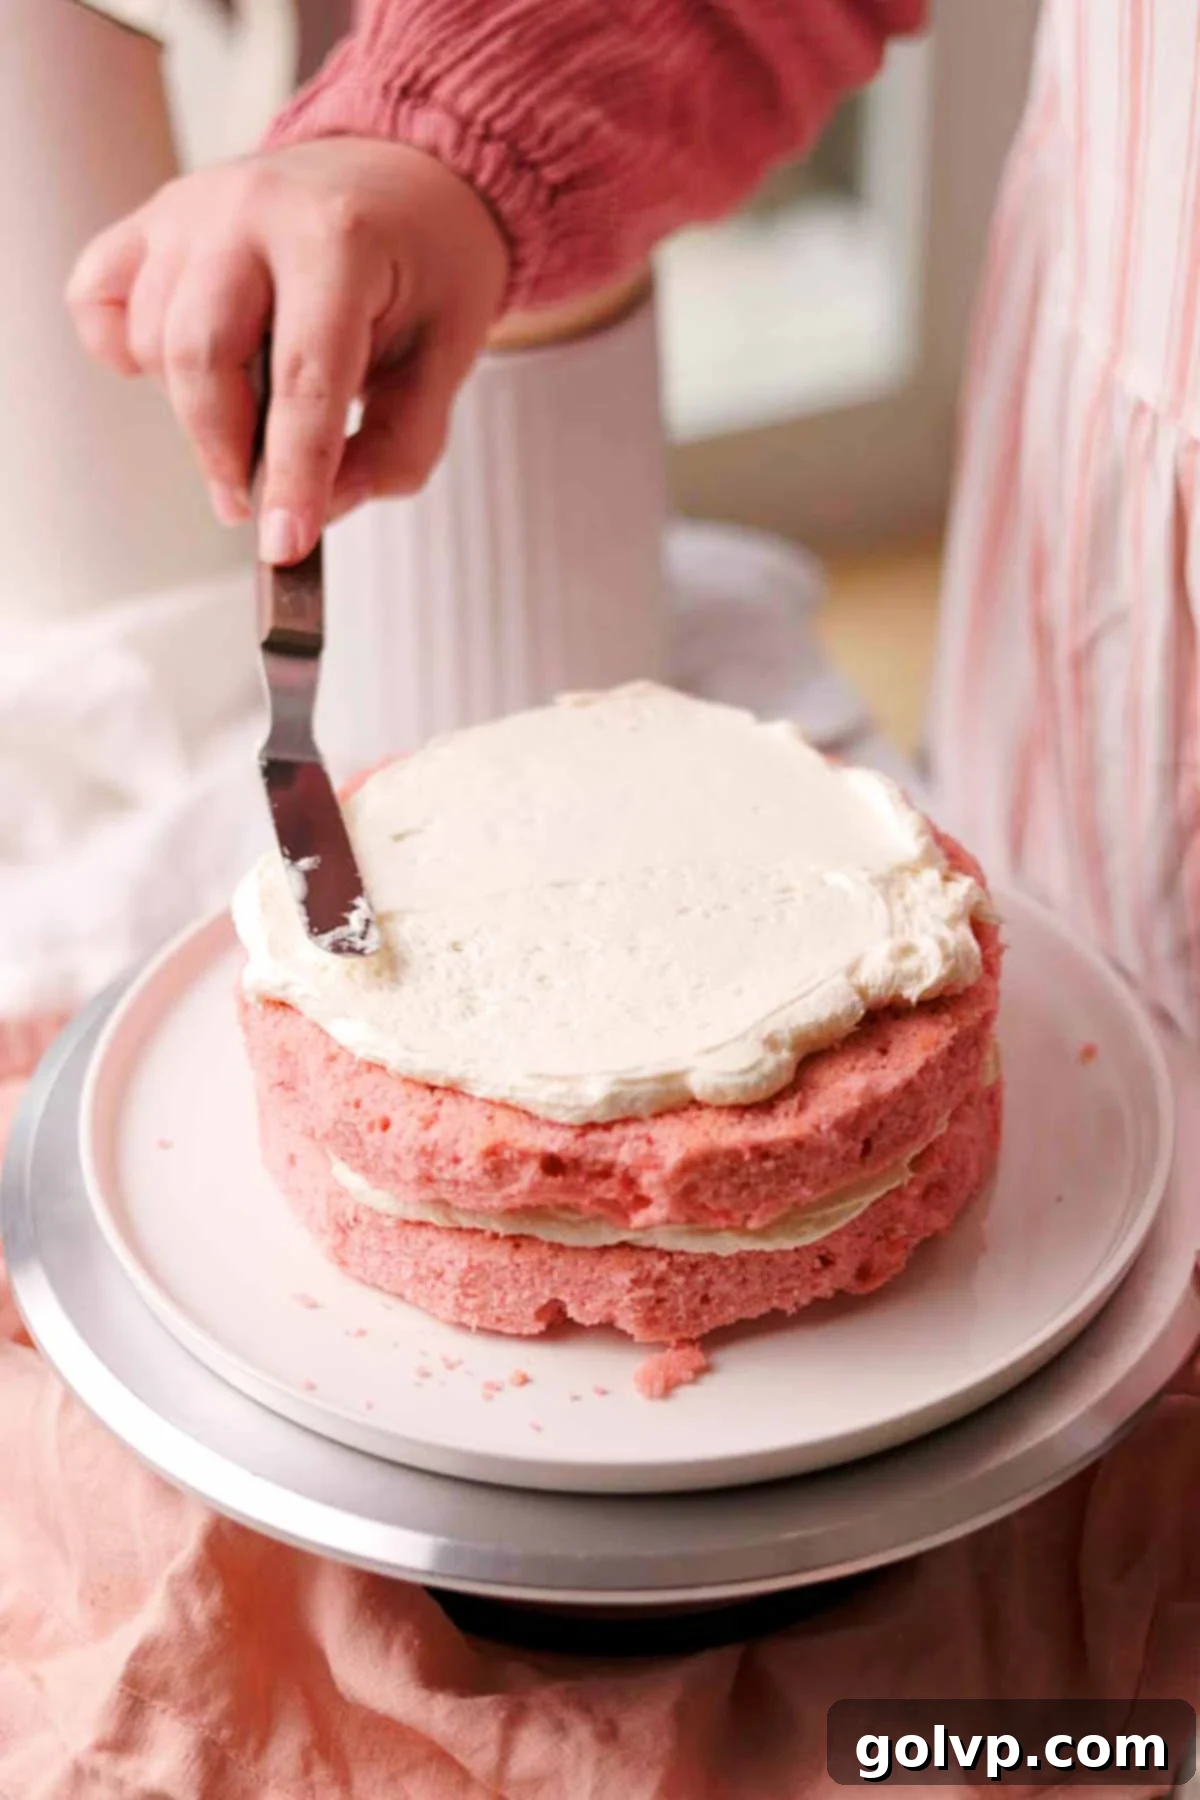
Step 1: Layering the Cake. Begin by spreading a small dollop of frosting onto your chosen serving plate or cake stand; this acts as an anchor to prevent the cake from shifting. Carefully place the first trimmed cake layer on top. Spread an even layer of approximately ⅓ cup of frosting over the first cake layer using an offset spatula. Repeat this process with the remaining cake layers, stacking them neatly. Ensure each layer is level for a professional finish.
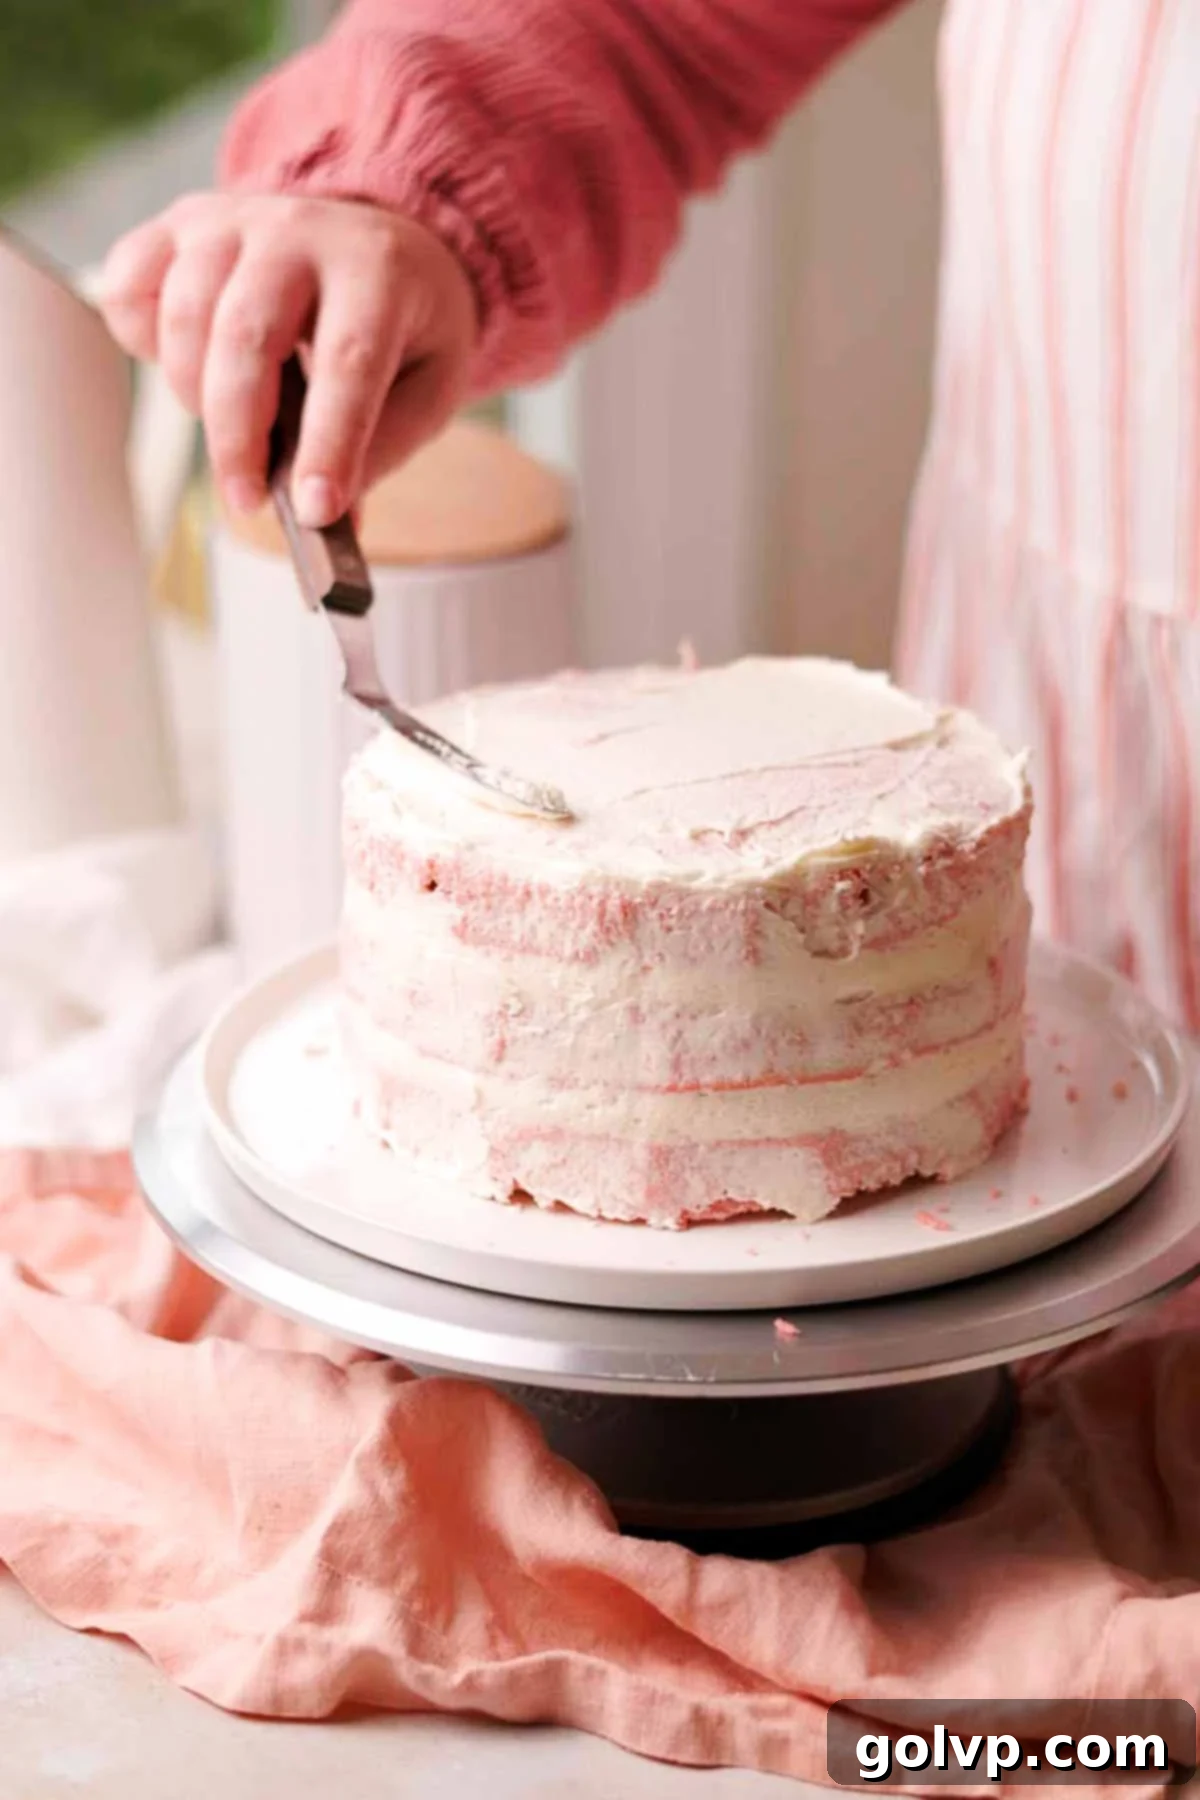
Step 2: Applying the Crumb Coat. Once stacked, cover the entire cake – top and sides – with a very thin layer of the cream cheese frosting. This is known as a “crumb coat,” and it’s essential for trapping any loose crumbs, creating a smooth, clean surface for your final layer of frosting. Use a long metal spatula or a cake scraper to achieve an even, thin spread. Transfer the cake to the freezer for about 10 minutes to allow the crumb coat to set firm, locking in all those pesky crumbs.
Step 3: Preparing Colored Frosting. While your crumb-coated cake chills in the freezer, it’s time to prepare your colored frostings. Transfer approximately 1 cup of the remaining frosting into a medium bowl; this portion will remain white for specific piping details. Divide the rest of the frosting into two bowls. Color one portion a pale pink by adding pink gel food coloring, ensuring a consistent hue. For the second portion, create a darker pink by adding both pink and a touch of red gel food coloring until you achieve a rich, vibrant shade.
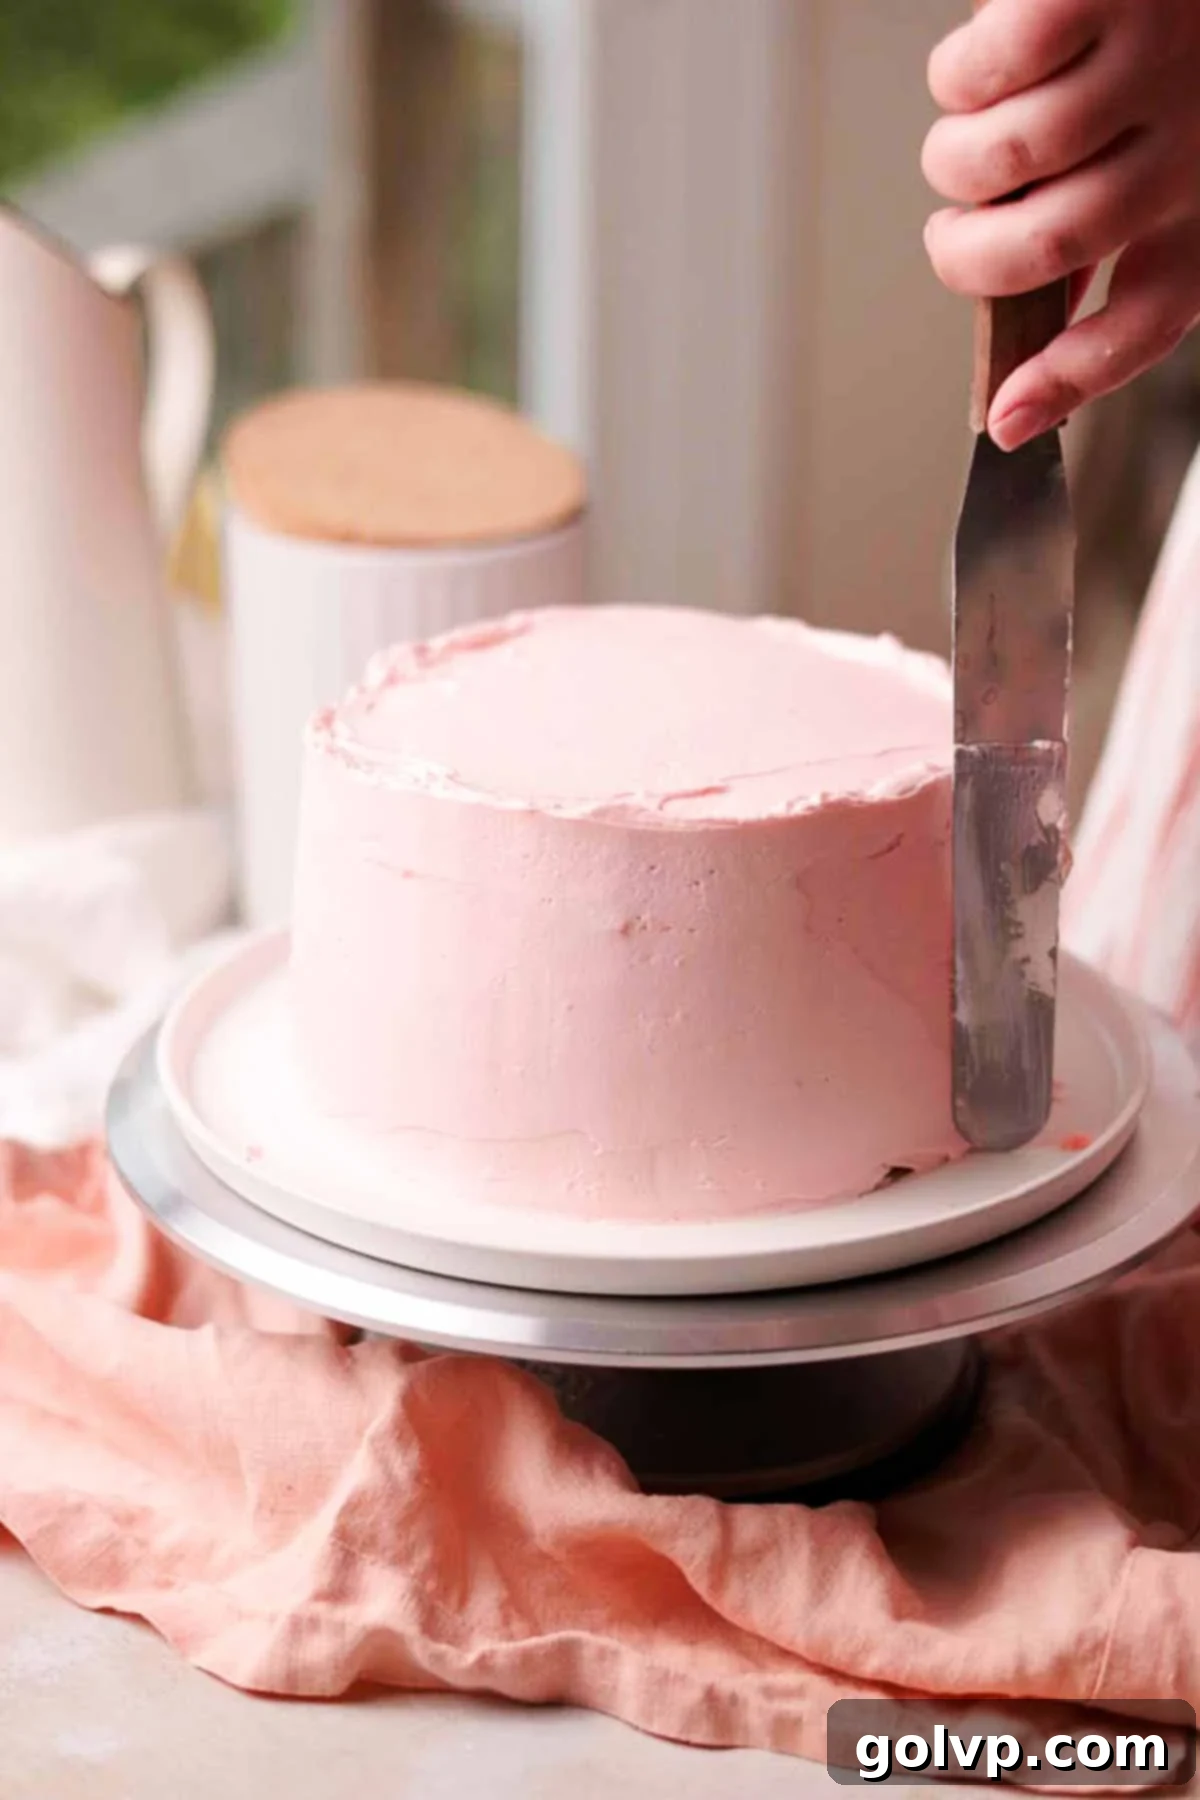
Step 4: Applying the Final Frosting Layer. Retrieve your chilled cake. Evenly cover the entire cake with the pale pink colored frosting, smoothing the top and sides with an offset spatula or cake scraper for a polished look. You should now have three distinct colors of frosting prepared for piping: white, pale pink (for the cake’s main coating and some piping), and a darker pink for accent decorations.
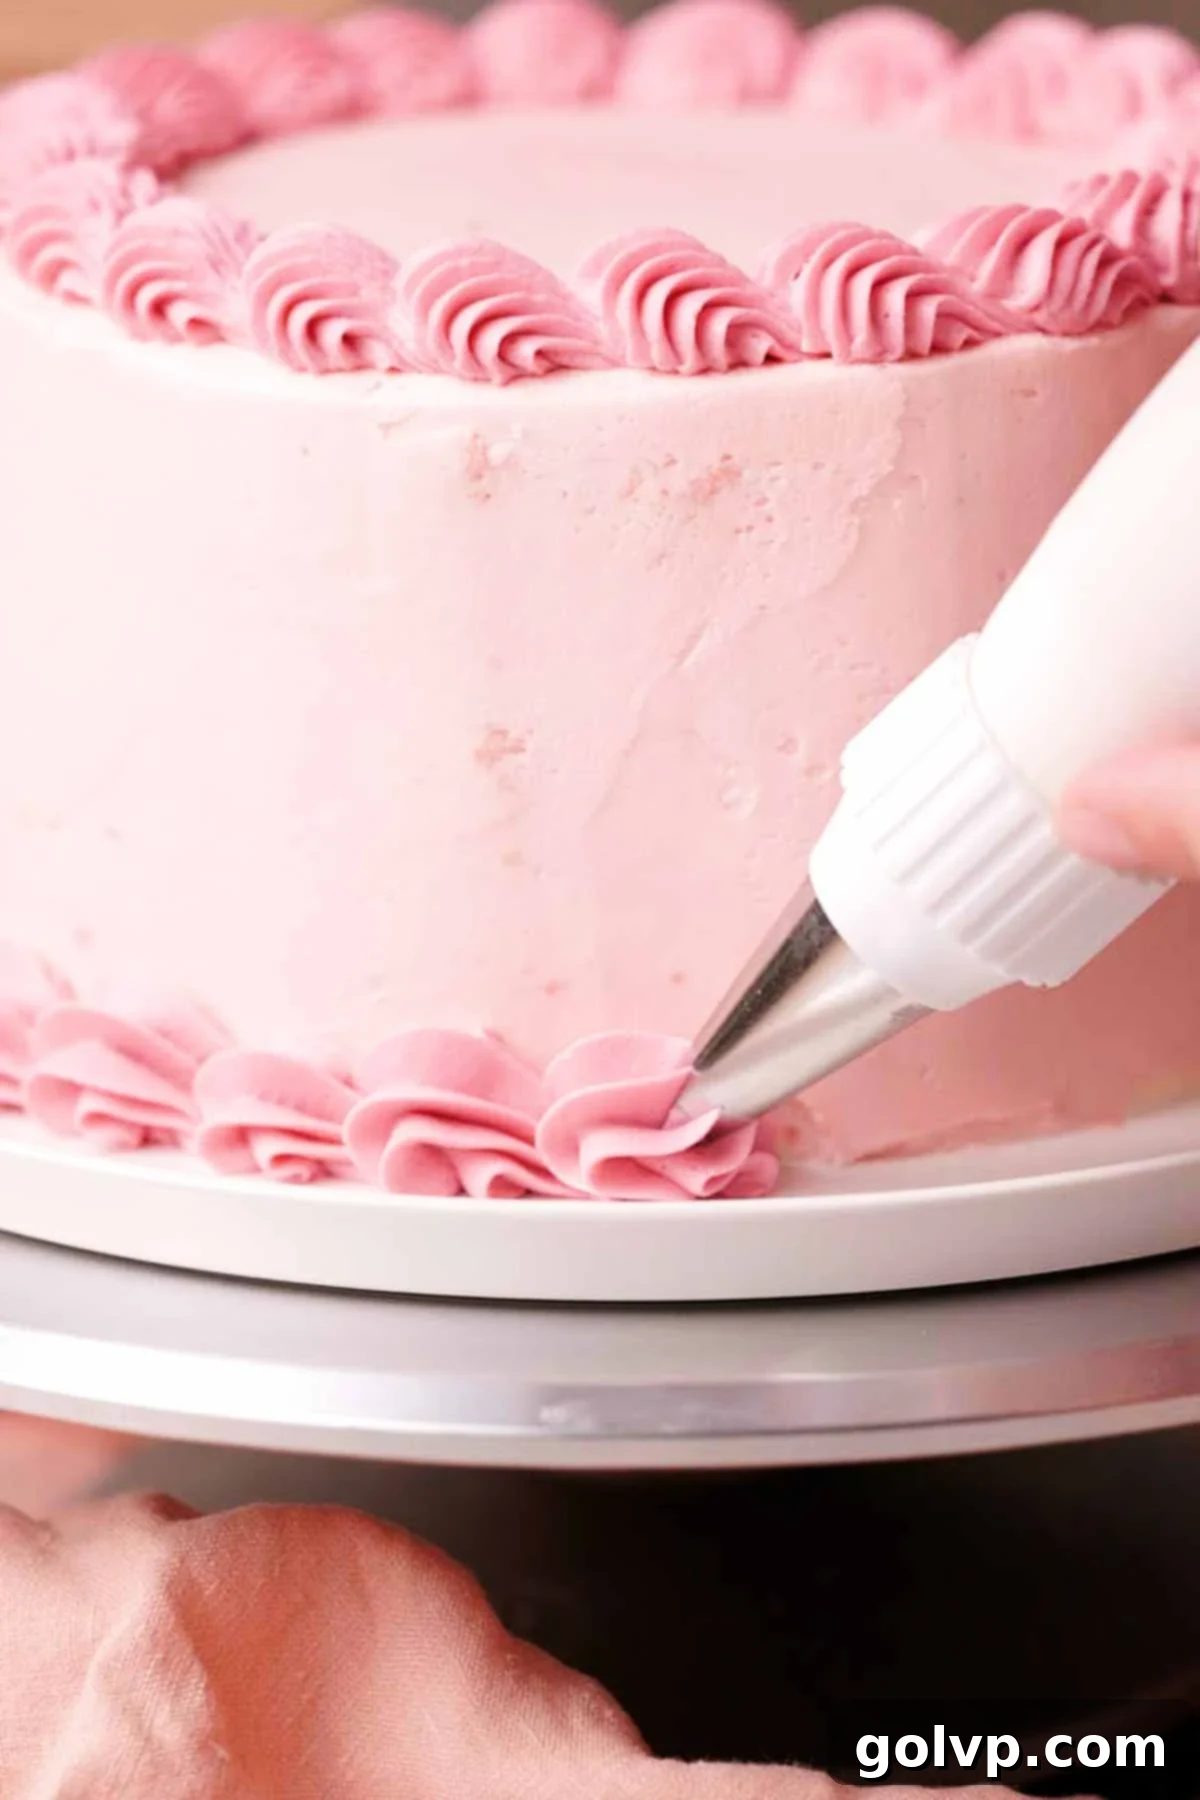
Step 5: Preparing for Piping. Transfer each of your three frosting colors (white, pale pink, and darker pink) into separate piping bags. For the darker pink frosting, use a large open star piping tip. I achieved the elegant bottom border and embellishments using a Wilton 1M tip, and a large drop flower tip for a stunning top border. Consider using a coupler for your dark pink bag if you plan to switch between various large tips easily.
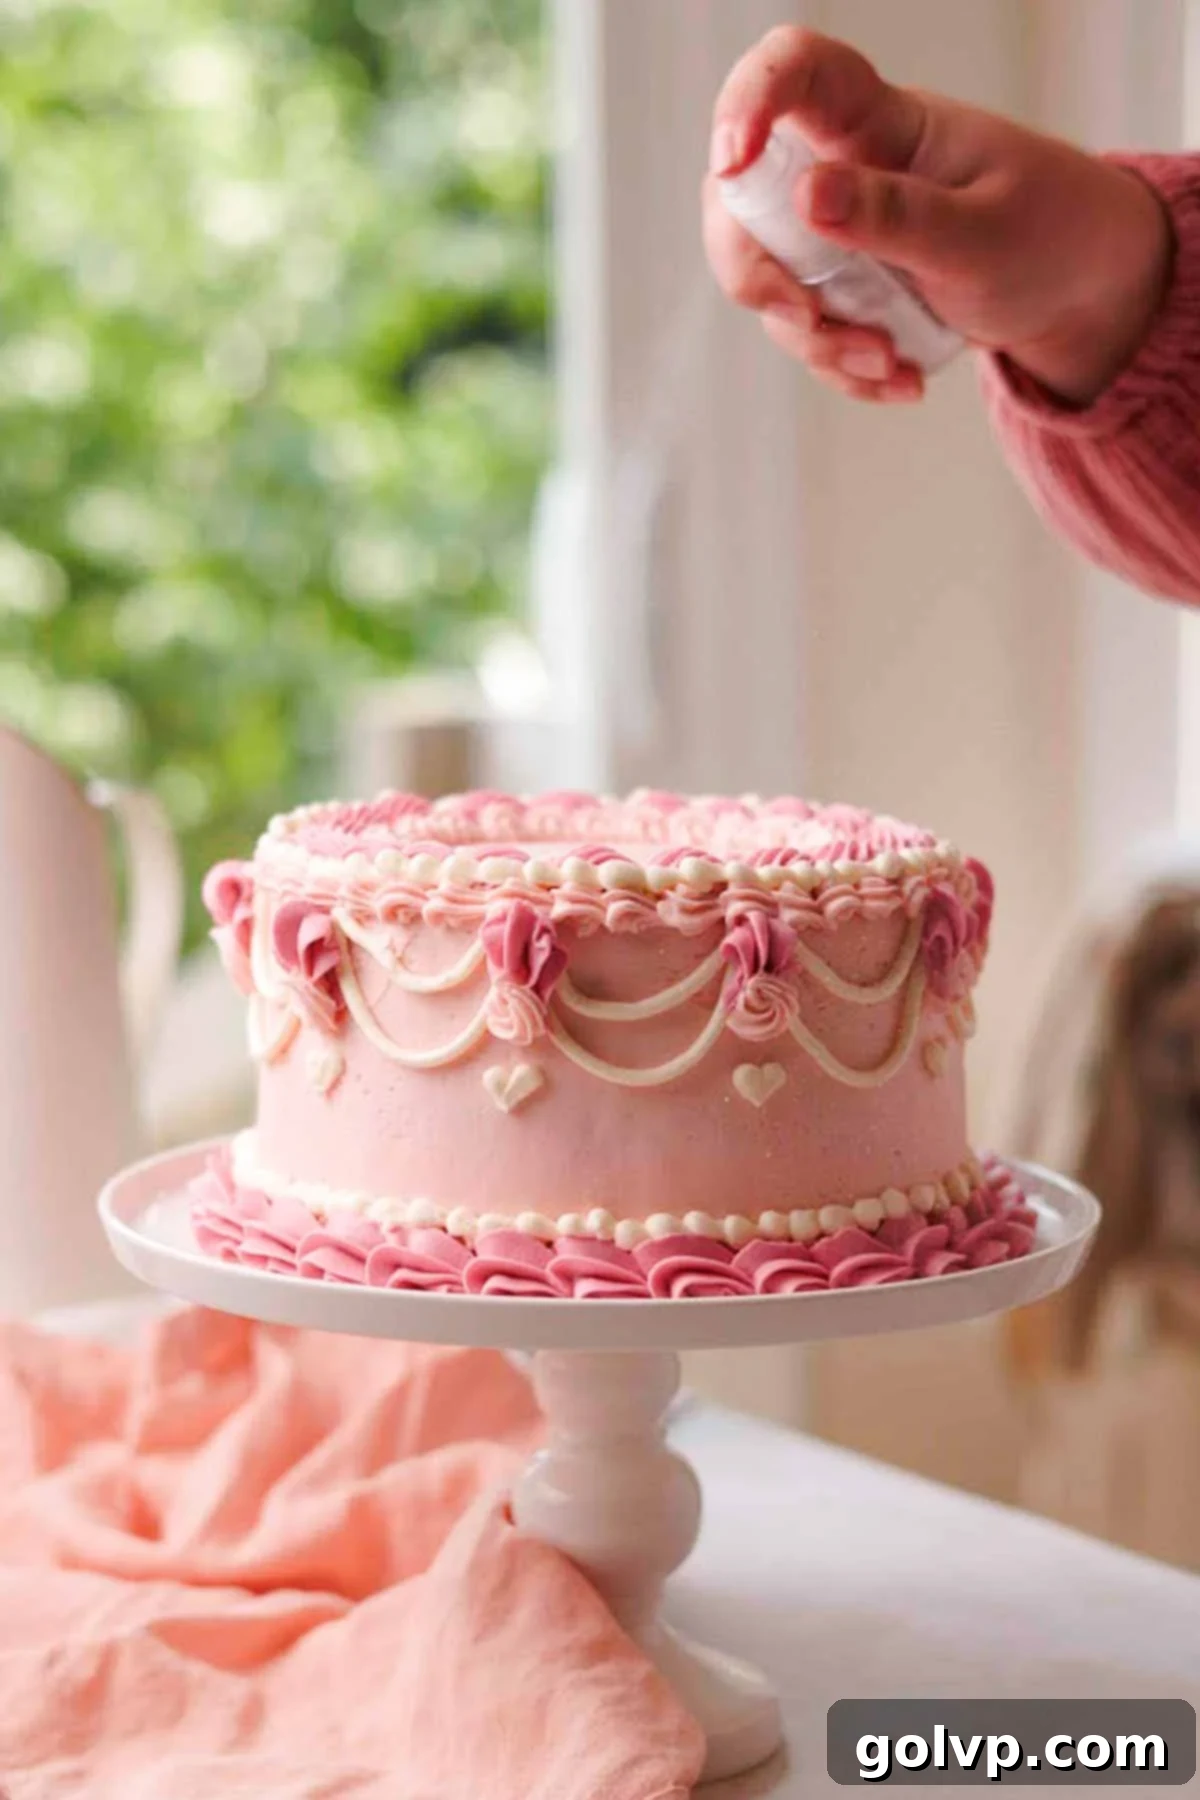
Step 6: Decorative Piping & Finishing Touches. For the pale pink frosting, use a small open star piping tip to create delicate details. For the white “beaded” frosting, simply snip off the very end of the piping bag to create a small round opening. Now, unleash your creativity! Pipe intricate borders, elegant swoops, and charming embellishments along all the edges and sides of the cake, following a vintage style or your own design. As an optional but highly recommended finishing touch, gently spray or sprinkle a small amount of edible glitter spray over the cake for a magical, sparkling effect.
Expert Tips for a Flawless Pink Velvet Cake
Achieving a truly remarkable pink velvet cake is easier with these insider tips:
- Opt for Store-Bought Buttermilk: While homemade buttermilk can work in a pinch, store-bought buttermilk is generally thicker and has a more consistent acidity. This translates to a cake with superior flavor depth and a more consistently moist and tender texture that’s hard to beat.
- Prioritize Cake Flour: This is a non-negotiable for the signature velvet texture. Cake flour, with its lower protein content, creates less gluten when mixed, resulting in incredibly soft, fluffy, and delicate cake layers that literally melt in your mouth. Do not substitute with all-purpose flour unless absolutely necessary and with the cornstarch modification mentioned in the ingredients section.
- Accurate Flour Measurement is Crucial: Baking is a science, and precision matters. The most accurate way to measure flour is by weight using a digital kitchen scale. If you don’t have a scale, use the “spoon and level” method: gently fluff the flour with a spoon, then lightly spoon it into a dry measuring cup. Level off the excess with the flat edge of a knife without packing the flour down. Too much flour will lead to a dense, dry cake.
- Avoid Overmixing the Cake Batter: Once you add the flour to the wet ingredients, mix only until just combined. Overmixing develops gluten, which can turn your tender cake layers tough and chewy. It’s perfectly fine if a few small lumps remain in the batter; they will typically bake out. Using a whisk to gently fold the dry ingredients in can help achieve a mostly smooth batter without overworking it.
- Trim Cake Layers for a Professional Finish: After cooling, take the time to carefully trim any golden-brown edges, tops, and bottoms from your cake layers using a serrated knife. This step might seem minor, but it ensures you have perfectly flat, uniform, and vibrant pink layers. This makes stacking and frosting much easier and results in a much more aesthetically pleasing cake once decorated.
- Use Full-Fat, Brick-Style Cream Cheese: For a stable, luscious, and pipeable cream cheese frosting that holds its intricate decorations, full-fat, brick-style cream cheese is essential. Low-fat cream cheese or cream cheese from a tub contains too much water, which will result in a runny, unstable, and often “gloopy” frosting that is difficult to work with and prone to melting.
Make Ahead & Storage Recommendations
Due to the rich cream cheese in the frosting, this pink velvet cake requires refrigeration. To enjoy it at its best, allow it to sit at room temperature for approximately 30 minutes before serving. On a particularly hot day, 10-15 minutes might suffice to soften the butter in the frosting, ensuring a smooth, melt-in-your-mouth experience.
You can prepare and frost this stunning pink velvet cake one to two days in advance of your event, making party planning a breeze! Store the cake in a specialized cake carrier in the refrigerator. This not only protects the delicate decorations but also keeps the cake fresh and prevents it from absorbing any unwanted fridge odors.
The individual cake layers can also be made ahead of time. Once completely cooled, wrap each untrimmed layer tightly in plastic wrap (and then aluminum foil, if you wish to freeze them for longer storage). Store them at room temperature for a few days, or in the freezer for up to a month. It’s always best to trim the cake layers just before you are ready to stack and decorate, as this ensures the freshest, cleanest pink edges for assembly.
Can You Use Natural Pink Food Coloring?
Yes, you can certainly experiment with natural pink food coloring, but be aware that the color might behave differently during the baking process! The heat of the oven and the natural acidity found in cake batter (from ingredients like buttermilk and vinegar) can cause natural pigments, especially those containing anthocyanins (found in ingredients like beet or red cabbage), to change color or fade. For instance, food coloring derived from beets is known to shift towards a brownish or purplish hue when exposed to heat and acid.
For more reliable results and to maintain a vibrant pink, natural food coloring might work better when incorporated into the cream cheese frosting, as it doesn’t undergo the baking process. Options like freeze-dried strawberry powder, dragon fruit powder, or a small amount of beet juice (used carefully to avoid adding too much moisture) can provide beautiful natural pink shades for your frosting.
How to Achieve That Perfect Pink Colored Cake
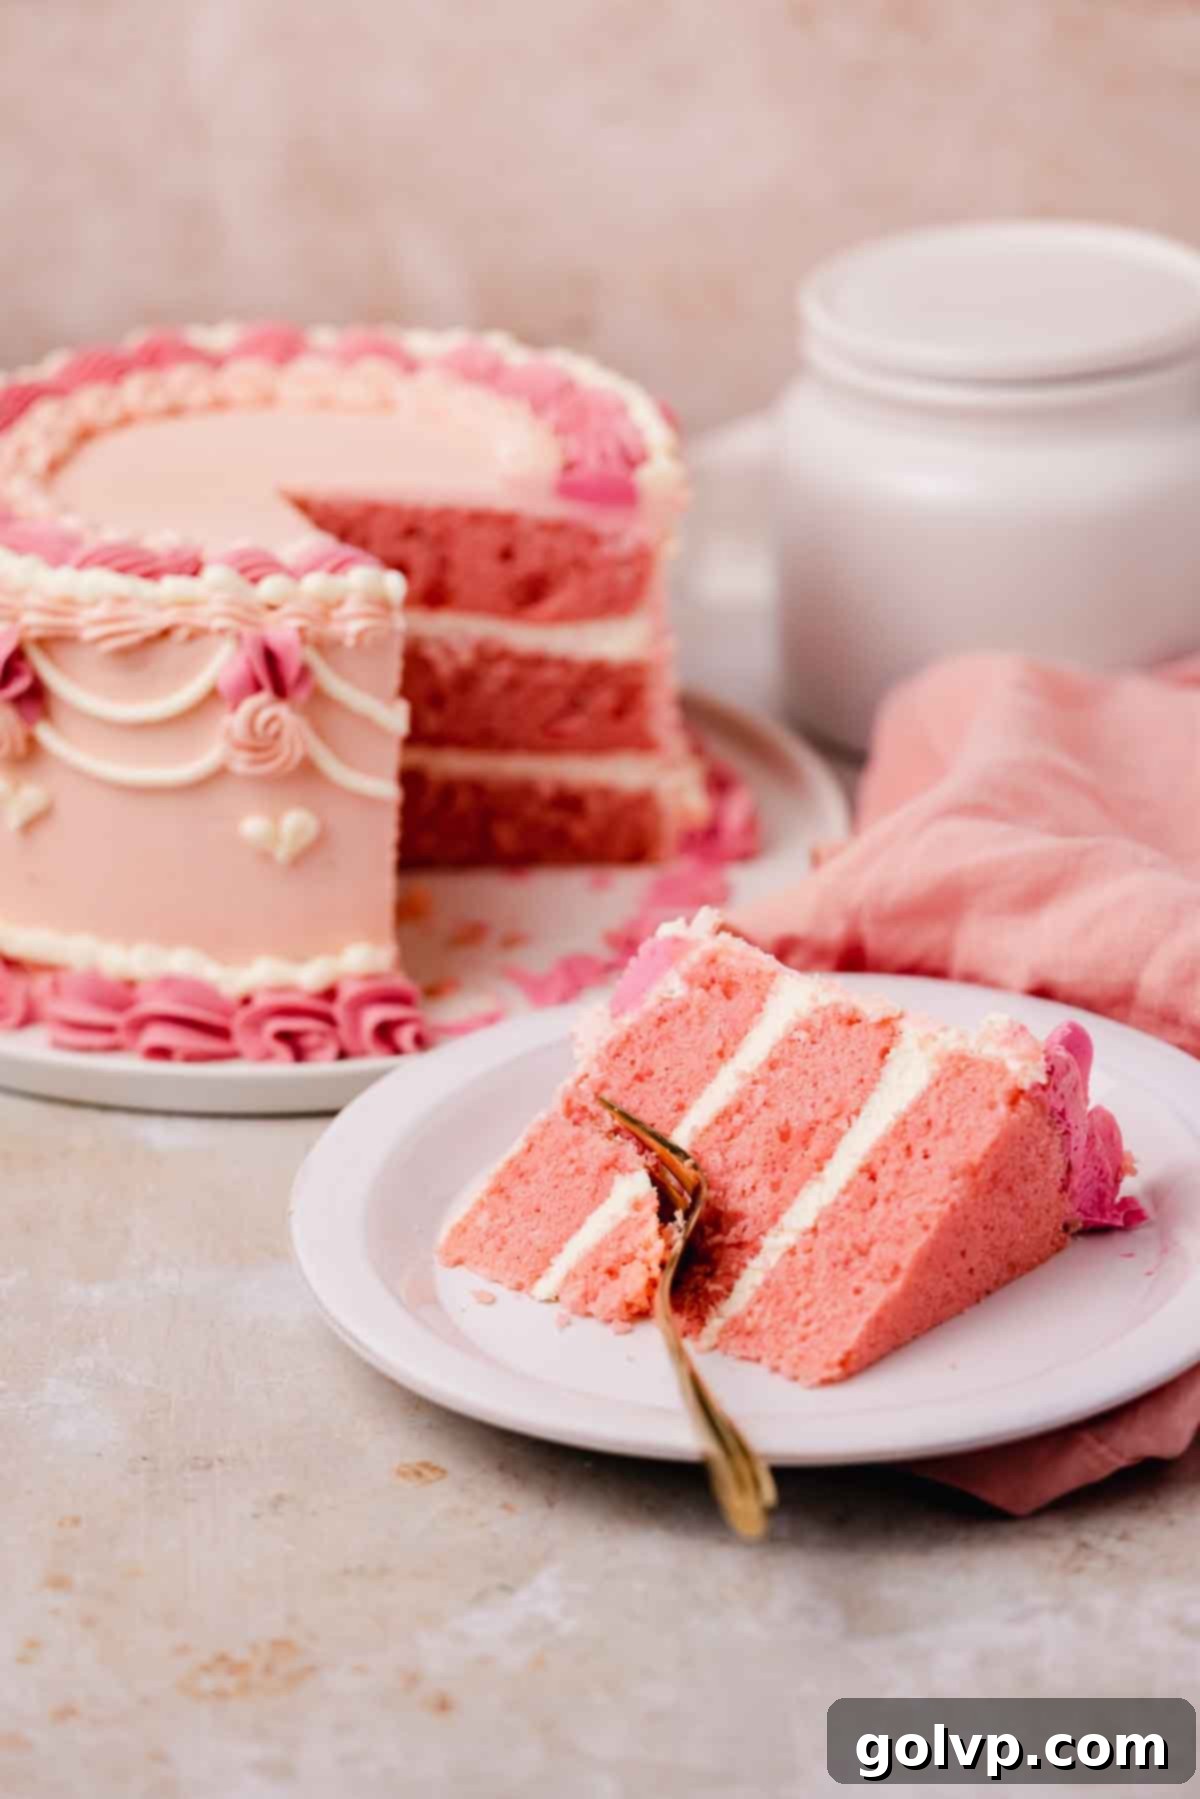
The secret to our gorgeous, clean pink velvet cake lies in its foundation: a white velvet cake base. By starting with a batter made predominantly with egg whites (as opposed to a traditional yellow cake using whole eggs), we ensure there’s no yellow tint to interfere with the pink dye. This allows the pink gel food coloring to truly pop, creating a pure, vibrant hue that’s truly stunning.
To add depth and visual interest, we use a touch of red gel food coloring alongside the pink to create the darker, more intense pink used for some of the decorative piping. Keeping the creamy frosting between the cake layers white further emphasizes the beautiful pink color of the cake itself. The entire cake is then elegantly coated in a pale pink frosting, providing a soft backdrop for the multi-toned piping decorations in white, pale pink, and a bolder, darker pink.
Mastering Vintage Cake Decorating
There’s an undeniable charm and elegance to vintage cake decorating, and this pink velvet cake is the perfect canvas to explore this beautiful style. Vintage cakes are known for their intricate, often elaborate swoops, borders, shells, and rosettes that adorn the edges and sides. I’ve used this same enchanting style for my black velvet cake too, and it’s always a fun and satisfying creative endeavor!
All you need are a few basic tools: piping bags and a selection of piping tips. For this particular cake, I used three separate piping bags to accommodate the three frosting colors. A large piping bag fitted with a large piping tip (like a Wilton 1M open star tip for classic borders or a large drop flower tip for top embellishments) works wonderfully for the darker pink frosting. I highly recommend using a coupler with this bag, as it allows you to easily switch between different large piping tips without changing the entire bag of frosting. For the pale pink frosting, a smaller piping bag with a small open star tip is ideal for delicate details. And for the white beaded frosting, a simple snip off the end of a piping bag creates a perfect small round tip. Having a few different tips will allow you to create a variety of textures and designs.
Here are the steps and corresponding visual cues I followed to achieve this delightful vintage cake design, which you can easily recreate:
- Establish Your Borders: Begin by piping the largest, most prominent borders. Create one along the top edge of the cake and another where the bottom edge meets the plate or cake stand. These provide a strong framework for your design.
- Add Elegant Swoops: Using a different color or tip (like our white frosting), carefully pipe graceful swoops along the sides of the cake. The trick is to gently squeeze out the frosting, let it hang down in a beautiful curve, and then reconnect it smoothly to the cake, creating a draped effect.
- Introduce Details and Embellishments: Now, add the finer details. Use a small open star piping tip to create small rosettes, stars, or delicate ruffles. With your white frosting (using the round tip), pipe a classic beaded border along the top or bottom edges, or create tiny dots and swirls for extra texture. Feel free to add little hearts or other small embellishments to truly make it your own.
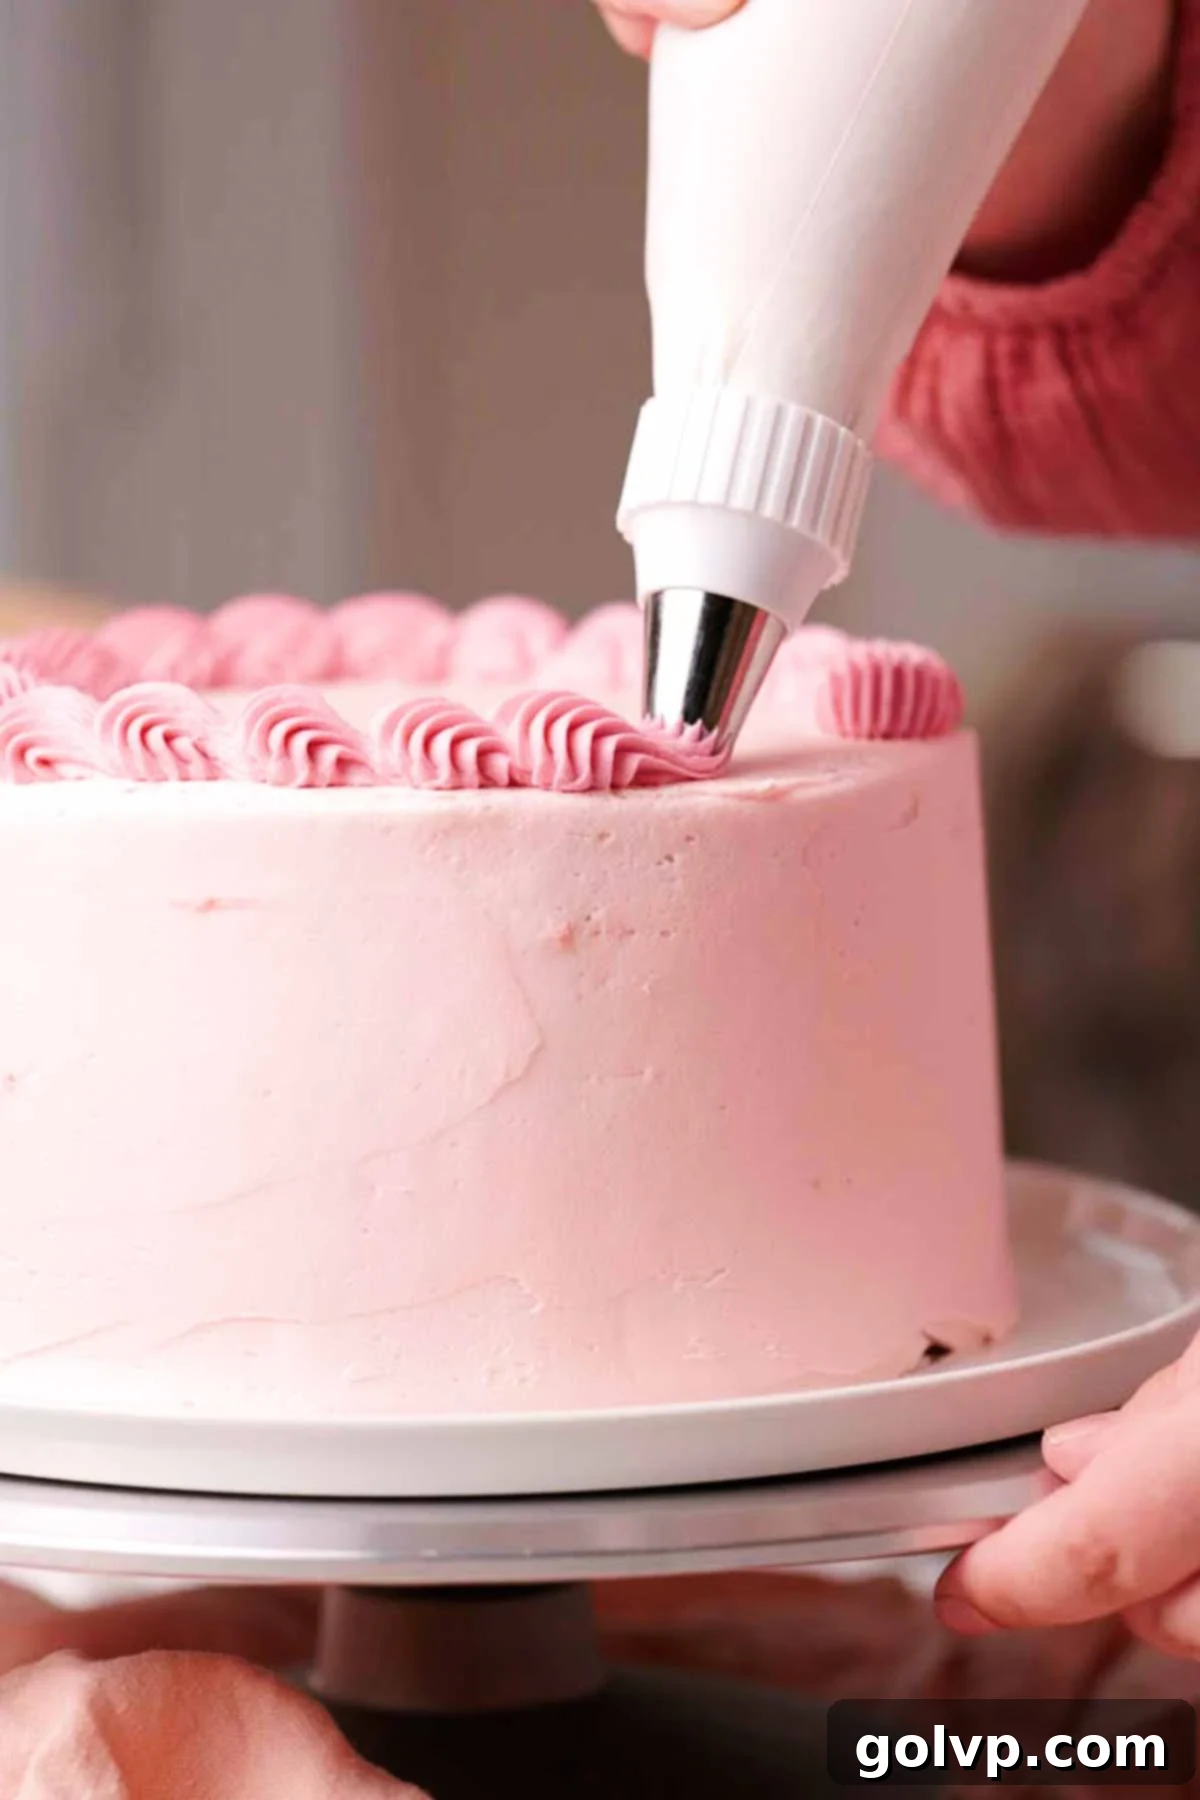
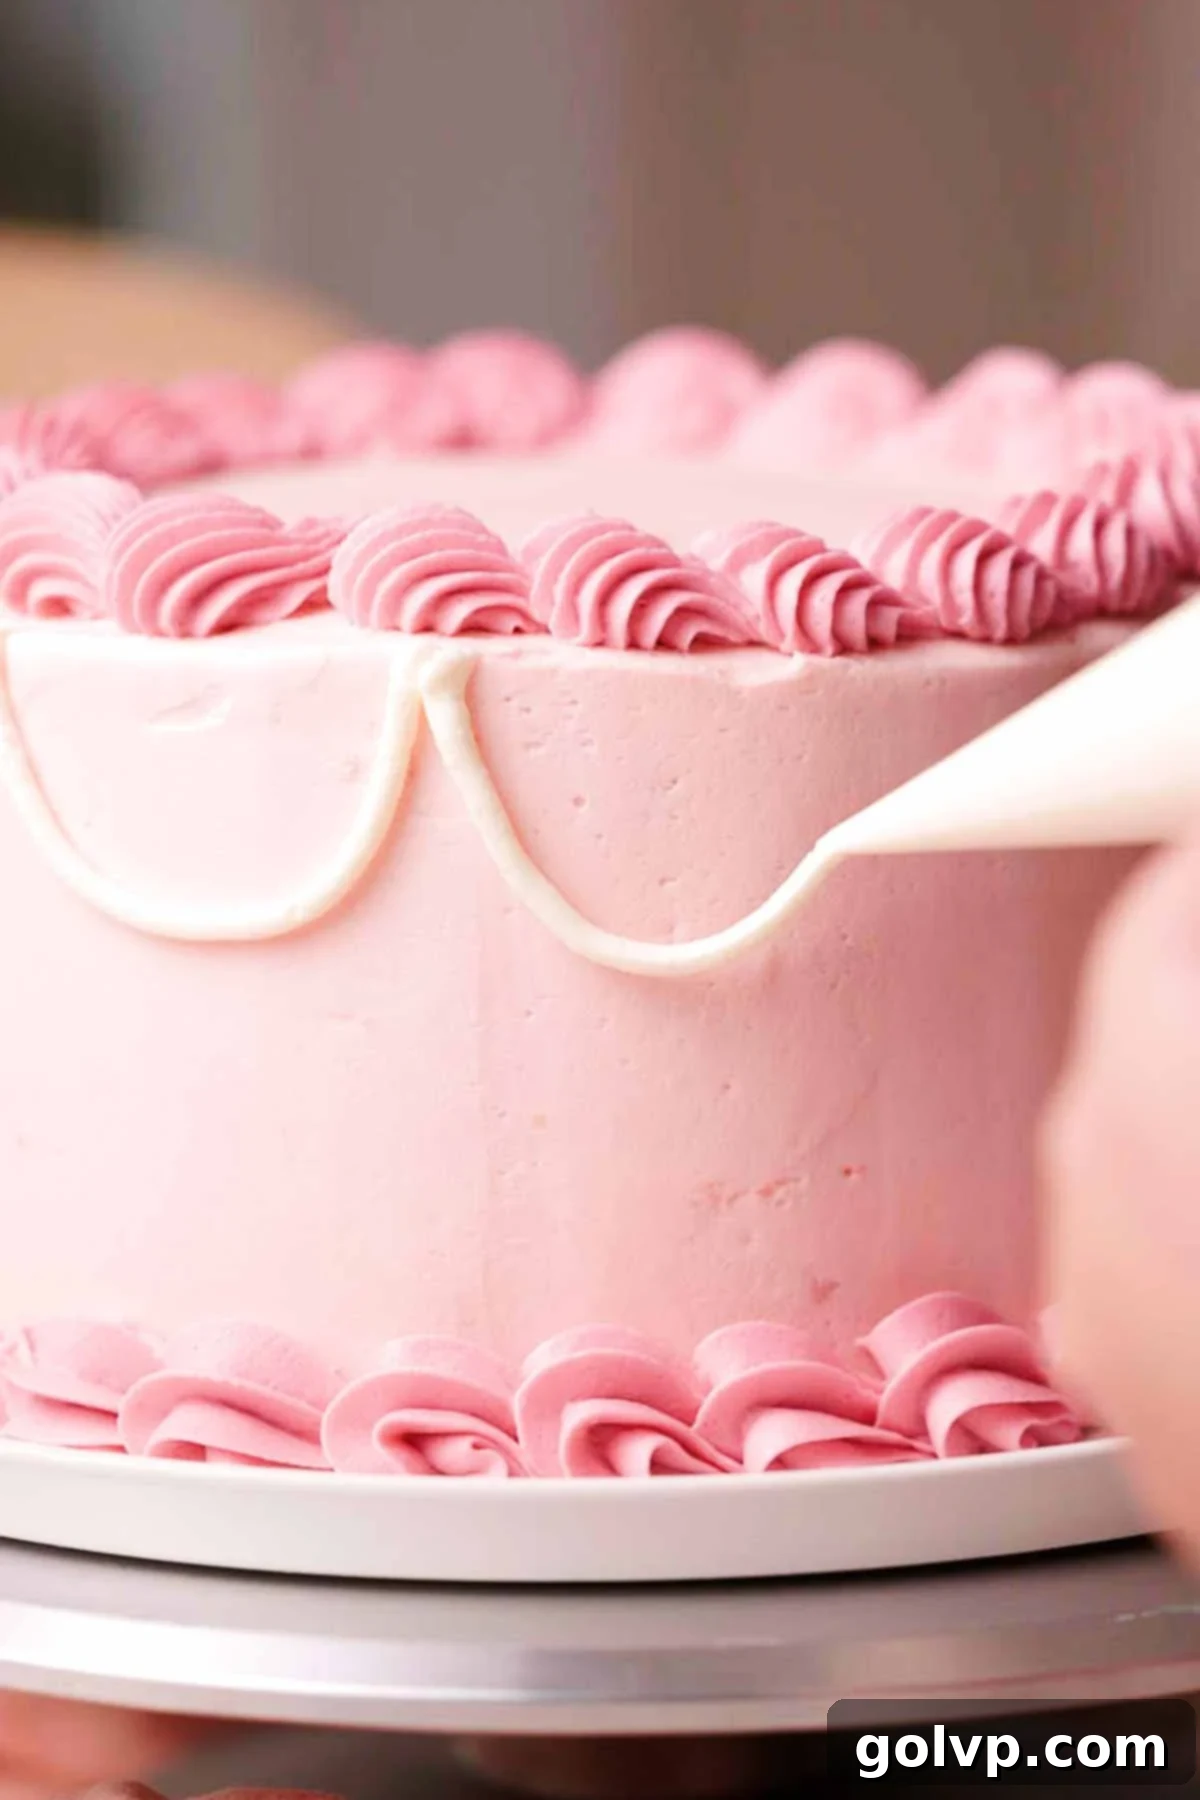
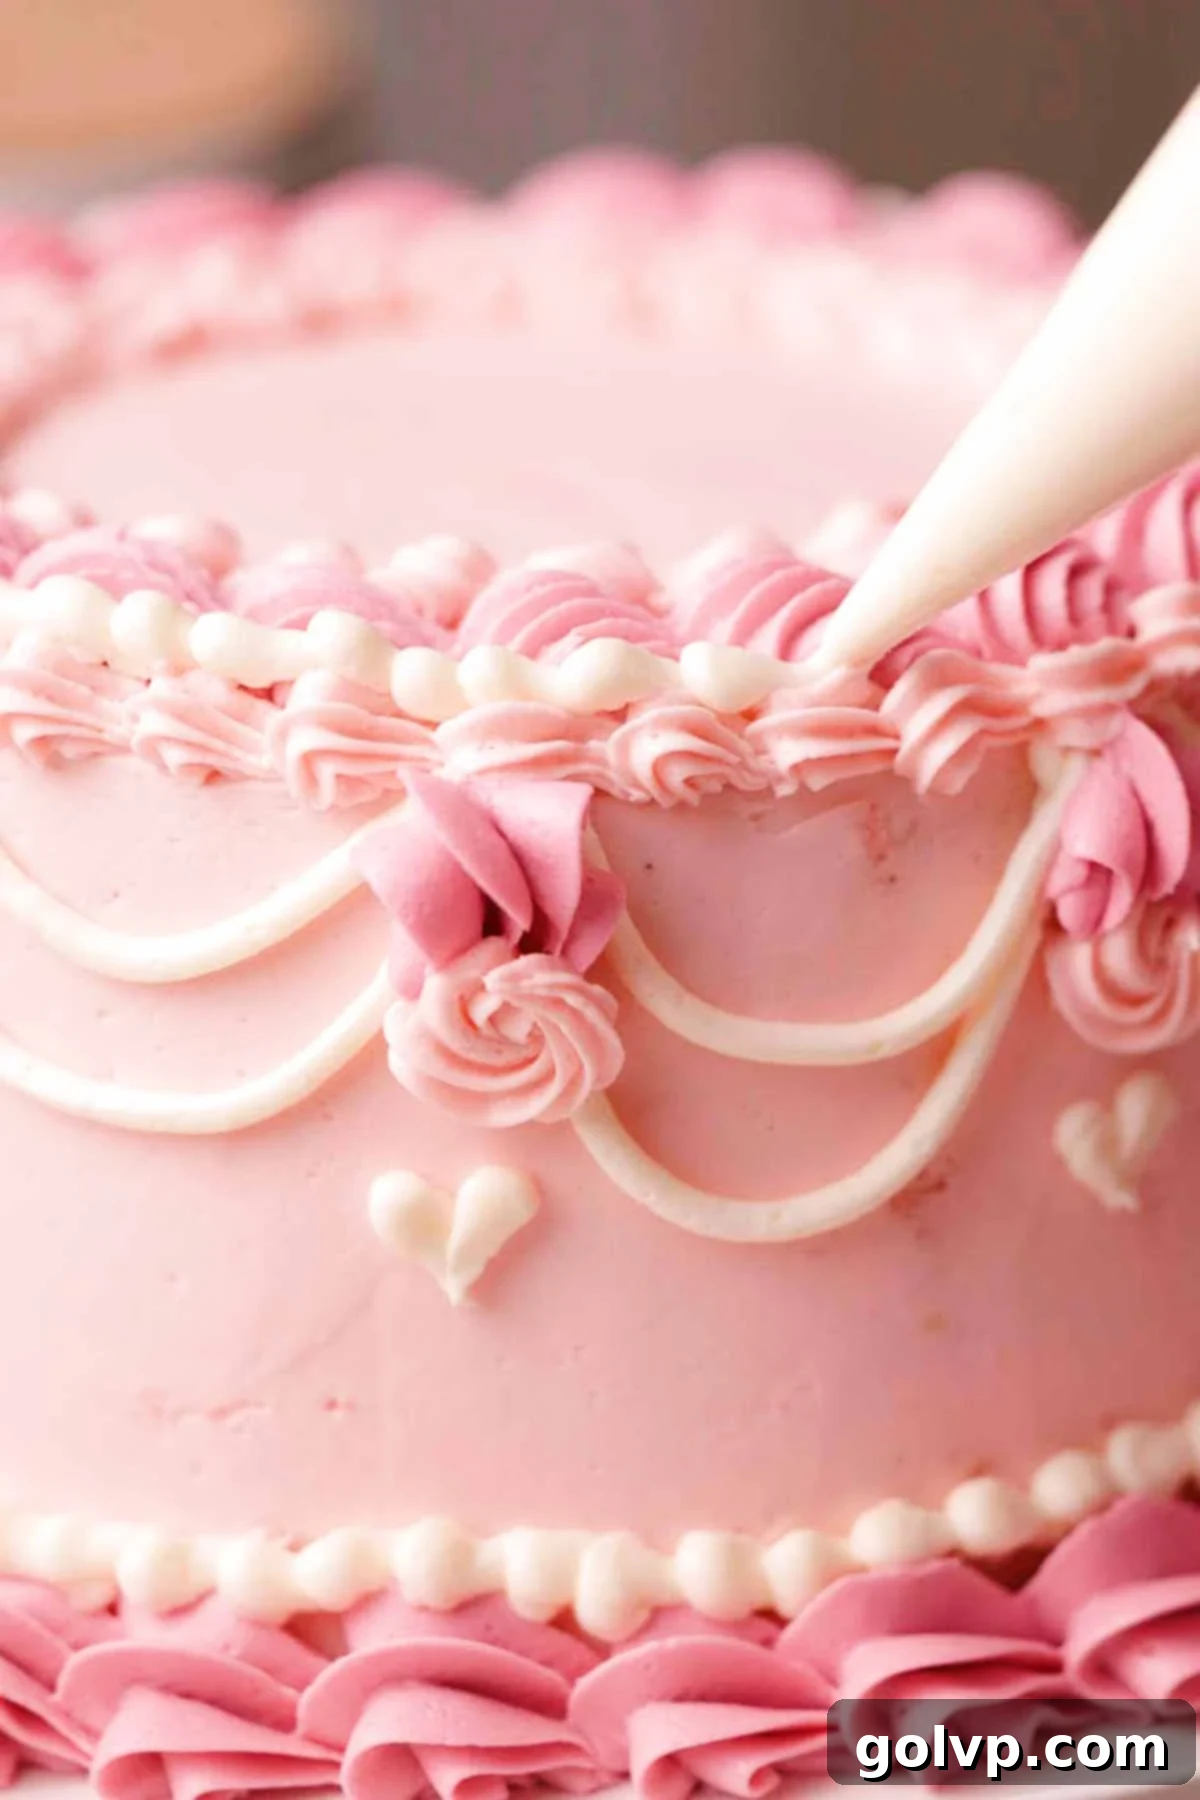
Remember, decorating is an art form, and there are no strict rules. You can easily switch up the frosting colors – perhaps a monochromatic look with various shades of pink, or an all-white elegant design. Likewise, feel free to add or subtract elements from the suggested design. The key is to be creative, have fun, and let your personality shine through in your edible masterpiece!
The Sweet Difference Between Pink and Red Velvet Cake
While both pink velvet and red velvet cakes share a luxurious, tender crumb and a distinctive tang, they diverge beautifully in their flavor profile and iconic color. The primary distinction lies in the presence of cocoa powder.
- Red Velvet Cake: Traditionally includes a small amount of cocoa powder, along with red food coloring. This combination gives red velvet its characteristic deep, rich reddish-brown hue and a subtle, complex chocolate flavor that underlies its tang.
- Pink Velvet Cake: Our pink velvet cake, in contrast, contains no cocoa powder. It focuses purely on achieving a vibrant pink color through the use of pink food coloring. This results in a cleaner, less complex flavor profile that allows the buttery vanilla notes and the tang of buttermilk to truly shine, without any chocolate undertones.
Both cakes, however, share core characteristics that define the “velvet” experience: the use of buttermilk and vinegar, which contribute to their ultra-soft, fluffy texture and that signature tangy note. And, of course, both are almost universally frosted with a rich, creamy, and wonderfully tangy cream cheese frosting. It’s this luscious cream cheese frosting that truly elevates layered cakes, providing a perfect counterpoint to the cake’s sweetness and an irresistible texture. Plus, it’s surprisingly straightforward to prepare!
Pink Velvet Cake Recipe FAQs
No, absolutely not. Any cake frosted with cream cheese frosting, including this pink velvet cake, should never be left out in warm temperatures or direct heat. Cream cheese frosting is highly perishable and will quickly melt and become unstable in heat. Always store the frosted cake in the refrigerator. For the best serving experience, take it out about 30 minutes before you plan to serve it to allow the frosting butter to soften slightly. If it’s a particularly hot day, 10-15 minutes at room temperature should be sufficient.
Yes, you can use natural pink food coloring, but with some considerations. We generally recommend a natural powder or gel food coloring over liquid for better color concentration. It’s crucial to understand that if you incorporate natural food coloring into the cake layers, the color may change or fade during the baking process due to the heat and the acidity in the cake batter. Natural pigments, especially those from ingredients like beets or red cabbage, can be sensitive to these factors. For a more stable and vibrant natural pink, you might find better success using it in the frosting, which doesn’t undergo baking.
While cake flour is highly recommended for its low gluten content, which yields the ultimate soft, fluffy, and tender texture characteristic of this pink velvet cake, you can substitute it if absolutely necessary. If you can’t find cake flour, you can make a substitute by combining ¾ cup + 2 tablespoons (105g) of all-purpose flour with 2 tablespoons (14g) of cornstarch. While this won’t achieve the exact same delicate lightness as pure cake flour, it will still result in a much better texture than using all-purpose flour alone.
Absolutely! Adding a delicious filling can elevate your pink velvet cake even further. My luscious raspberry curd makes for a perfect complement, offering a burst of fruity tang. To learn how to expertly fill and frost a cake with a separate filling, refer to the detailed instructions in my lemon raspberry cake recipe.
If your cream cheese frosting split, it’s usually an indication that either your butter or your cream cheese was too cold when you started mixing, causing the fat and liquid to separate. Don’t worry, it’s often fixable! Gently warm a small portion of the split frosting in the microwave for a few seconds (or over a double boiler). Stir it well until it’s slightly melted and smooth, then gradually add it back into the main bowl of frosting while whipping on low speed. Continue to whip until the frosting comes back together smoothly. You may need to repeat this process a couple of times. If the frosting becomes too liquidy, pop it in the fridge for a few minutes to firm up before whipping again.
A “gloopy” or runny cream cheese frosting can result from several factors. Common culprits include cream cheese that was too soft or warm, using low-fat cream cheese (which has higher water content), or butter that had started to melt. A key tip for preventing gloopy frosting is to ensure you beat the butter and powdered sugar thoroughly until very light and creamy *before* adding the cream cheese. This allows the butter to coat the sugar crystals, preventing them from dissolving too quickly into the cream cheese and turning the frosting thin and liquidy. Always use full-fat, brick-style cream cheese and ensure both butter and cream cheese are at the correct softened, but not melted, temperature.
More Delicious Related Recipes
- The Best Black Velvet Cake
- Red Velvet Bundt Cake with Cream Cheese Swirl
- Strawberry Cinnamon Rolls
- Red Velvet Oreo Cheesecake
Did you make this delightful recipe? We would love to hear your thoughts and see your creations! Please rate this recipe and share your experience in the comments below. Share your beautiful pink velvet cake on Instagram and tag @flouringkitchen. Follow me on Pinterest for more inspiring recipes and baking ideas!
Recipe Card
The Best Pink Velvet Cake
Mary
Pin Recipe
Shop Ingredients
45
minutes
20
minutes
1
hour
5
minutes
Baking, Cake
American
14
people
782
kcal
Equipment
-
electric mixer -
3
eight inch round baking pans -
parchment paper -
piping bag and tips
Ingredients
Cake Layers
-
¾
cup
unsalted butter
softened -
½
cup
vegetable oil -
1 ½
cups
granulated sugar -
¼
teaspoon
sea salt -
6
large egg whites
room temperature -
1
tablespoon
pure vanilla extract -
1
tablespoon
vinegar
white or apple cider vinegar -
¼
teaspoon
pink gel food coloring
-
3
cups
cake flour
345g -
2
teaspoons
baking powder -
½
teaspoon
baking soda -
1 ¼
cup
buttermilk
room temperature
Cream Cheese Frosting
-
2
cups
butter
softened -
¼
teaspoon
sea salt -
6-7
cups
powdered sugar -
8
oz
cream cheese
softened for 10 minutes at room temperature -
1
tablespoon
pure vanilla extract -
Pink gel food coloring
-
Red gel food coloring
-
edible glitter spray
optional
Shop Ingredients on Jupiter
Instructions
Cake Layers
-
Preheat oven to 355°F (180°C). Grease three 8” round baking pans with a bit of cold butter and line the bottoms with rounds of parchment paper.
-
In a large bowl or stand mixer, combine softened butter, oil, sugar, and salt. Beat with an electric mixer until lightened in color and increased in volume. Scrape down the bowl.¾ cup unsalted butter,
½ cup vegetable oil,
1 ½ cups granulated sugar,
¼ teaspoon sea salt -
Add half of the egg whites, blend, then the rest of the egg whites and blend. Beat until increased in volume and thick. Add vanilla extract and vinegar, blend.6 large egg whites,
1 tablespoon pure vanilla extract,
1 tablespoon vinegar -
Add pink food coloring, one pea sized amount at a time until you get a pink color. It will lighten a bit after adding the flour so make it slightly darker than you’d like.¼ teaspoon pink gel food coloring
-
Sift half of the cake flour, all of the baking powder, and all of the baking soda into the bowl with the batter. Add the buttermilk and fold with a whisk to incorporate. Sift the rest of the flour in and fold well with a whisk to break up most of the lumps to make a mostly smooth batter. Don’t overmix.3 cups cake flour,
2 teaspoons baking powder,
½ teaspoon baking soda,
1 ¼ cup buttermilk -
Evenly divide the batter between the greased and lined baking pans. Smooth the batter tops and gently tap them on a counter to release any large air pockets. Bake for 15-18 minutes or until a toothpick inserted into the center comes out mostly clean with a few crumbs attached.
-
Remove from the oven and let the layers cool for 8 minutes inside the pans. Loosen the edges with a spatula and turn them out onto cooling racks to cool completely.
-
When cooled, use a serrated knife and a sawing motion to gently trim the edges, top, and bottom of the layers. Only trim the golden brown bits to give you clean, pink layers.
Cream Cheese Frosting
-
In a large bowl or stand mixer, beat the butter with a paddle attachment until creamy and lightened in color.2 cups butter
-
Add the salt and powdered sugar, one cup at a time. Beat well in between each addition and scrape down the sides of the bowl frequently. Whip until very creamy and light. The longer you whip, the creamier the frosting will be.¼ teaspoon sea salt,
6-7 cups powdered sugar -
Add pieces of cream cheese, blending well before adding the next. The frosting will become very light and fluffy. Add vanilla and beat again.8 oz cream cheese,
1 tablespoon pure vanilla extract
Assembly
-
Smear a small dollop of frosting onto a serving plate or cake stand. Place the first layer of cake down. Spread about ⅓ cup of frosting in an even layer on top. Continue until the last layer.
-
Cover the stacked cake with a very thin layer of frosting all over the top and sides. Use a long metal spatula or cake scraper to help spread. Pop it in the freezer for 10 minutes to set and lock in the crumbs.
-
While the crumb coat chills, work on dividing and coloring the remaining frosting. Transfer about 1 cup of frosting into a medium bowl (this is for the white piping) and color the remaining frosting a pale pink color.Pink gel food coloring
-
Cover the cake with the pale pink colored frosting and smooth the sides and top. Set aside a third of the remaining frosting and add more red and pink food coloring into the rest of the frosting. This will be the darker pink piping color. You should have 3 colors in piping bags: white, pale pink, and dark pink.Red gel food coloring,
Pink gel food coloring -
Transfer the white, pink, and darker pink frosting colors into three different piping bags. Use a large open star piping tip for the dark pink color. I used a Wilton 1M for the bottom border and embellishments, and a large drop flower tip for the top border. Use a small open star piping tip for the pale pink color, and for the white – I just cut the end off the piping bag to make a round tip. Pipe borders and swoops all along the edges and sides of the cake.edible glitter spray
Video
Notes
Storage: This cake needs to be stored in the fridge because of the cream cheese in the frosting. Let it sit at room temperature for about 30 minutes to soften up the butter in the frosting before serving. Or 10 minutes if it’s a hot day.
Make ahead: You can make and frost this pink velvet cake one or two days ahead of serving! It’ll store well in the fridge – store the cake in a cake carrier to protect and keep it fresh when in the fridge.
The cake layers can be made ahead of time as well. Store them wrapped tightly at room temperature for a few days, until you’re ready to stack and decorate the cake. It’s best to trim them right before stacking and decorating the cake; store the cake layers untrimmed.
Tips for success:
- Use store-bought buttermilk for the best flavor and texture
- Use cake flour for the fluffiest cake layers
- Measure the flour properly with a scale
- Don’t overmix the cake batter after adding flour
- Trim the cake layers from any brown bits before stacking and decorating
- Use full fat, brick style cream cheese for the frosting
Nutrition
Calories:
782
kcal
Carbohydrates:
95
g
Protein:
8
g
Fat:
42
g
Saturated Fat:
23
g
Polyunsaturated Fat:
6
g
Monounsaturated Fat:
11
g
Trans Fat:
1
g
Cholesterol:
91
mg
Sodium:
552
mg
Potassium:
136
mg
Fiber:
1
g
Sugar:
74
g
Vitamin A:
1057
IU
Calcium:
131
mg
Iron:
0.4
mg
Tried this recipe?
Let us know how it was!
