Easy Homemade Oreo Pop Tarts: Flaky Pastry, Creamy Cookies & Cream Filling & Chocolate Glaze
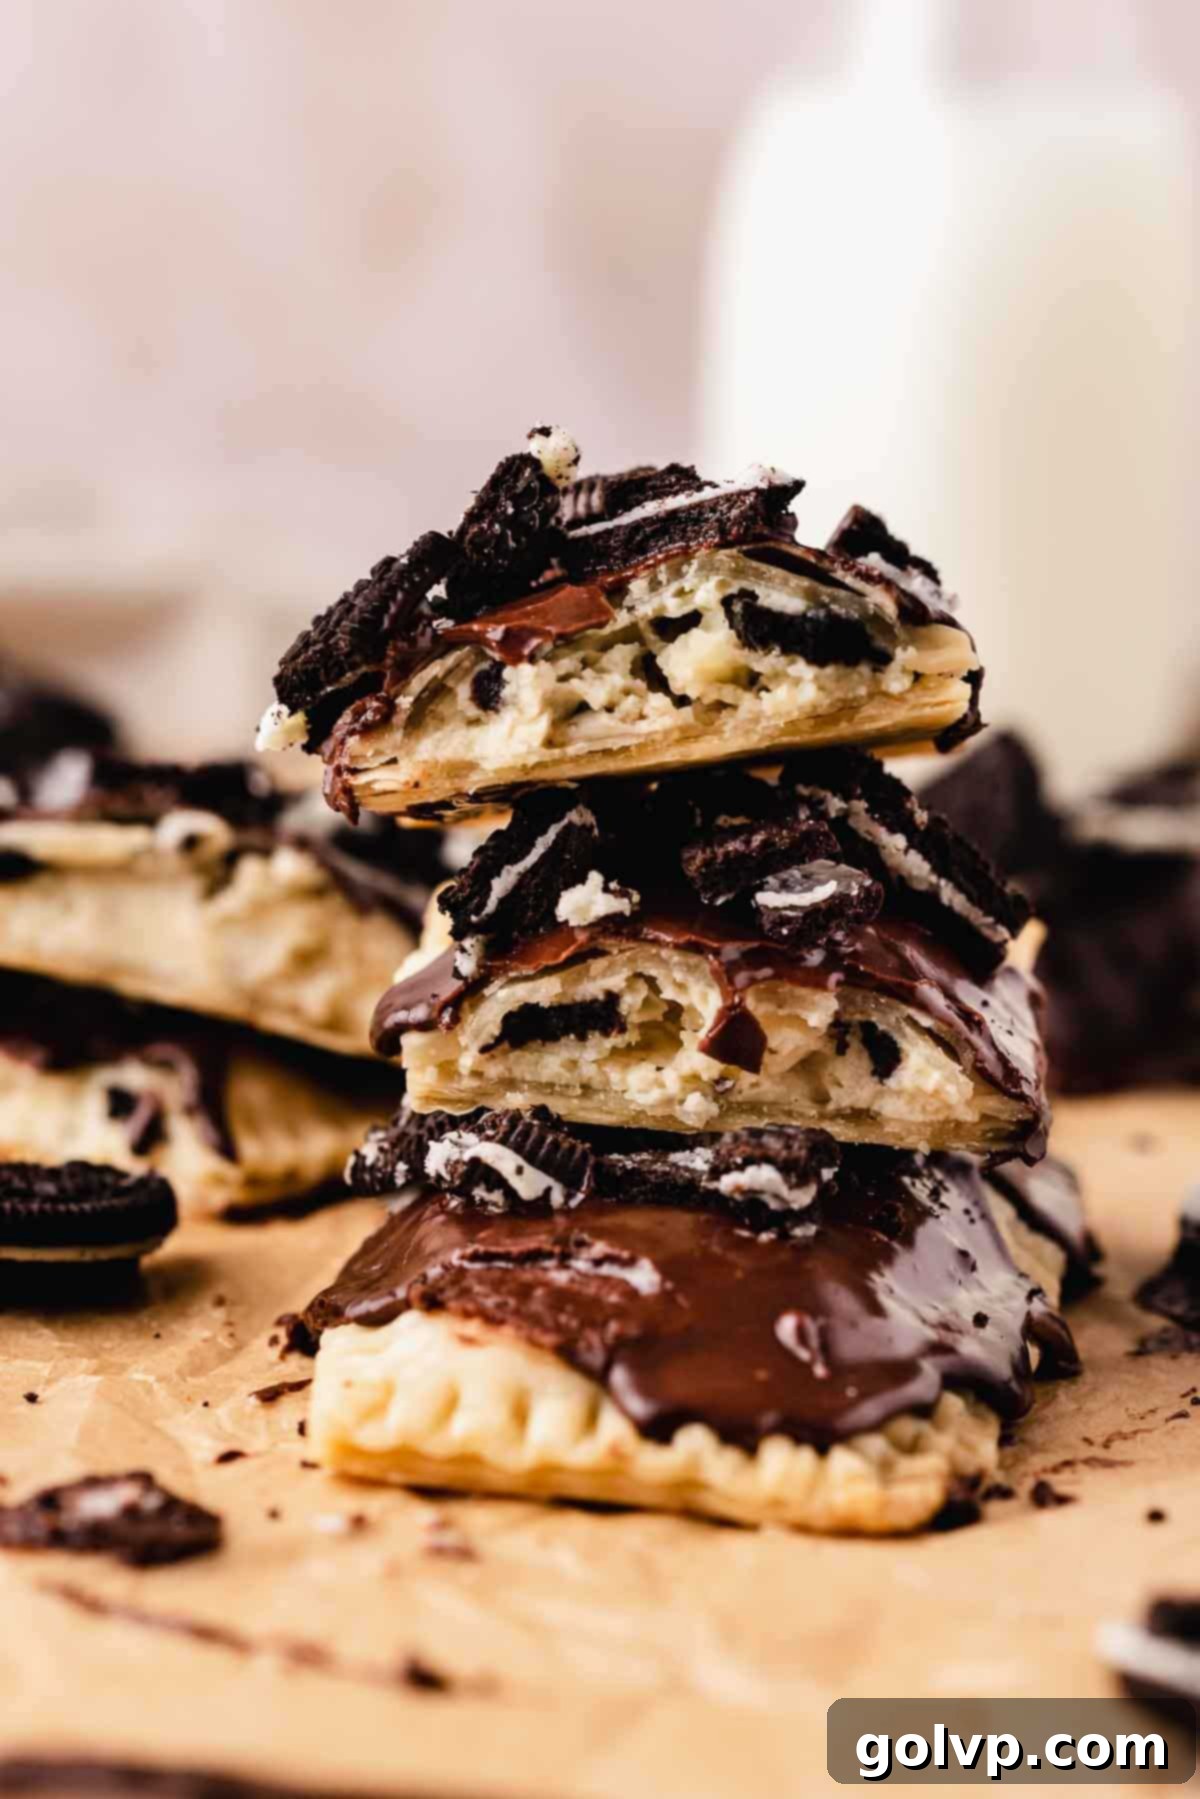
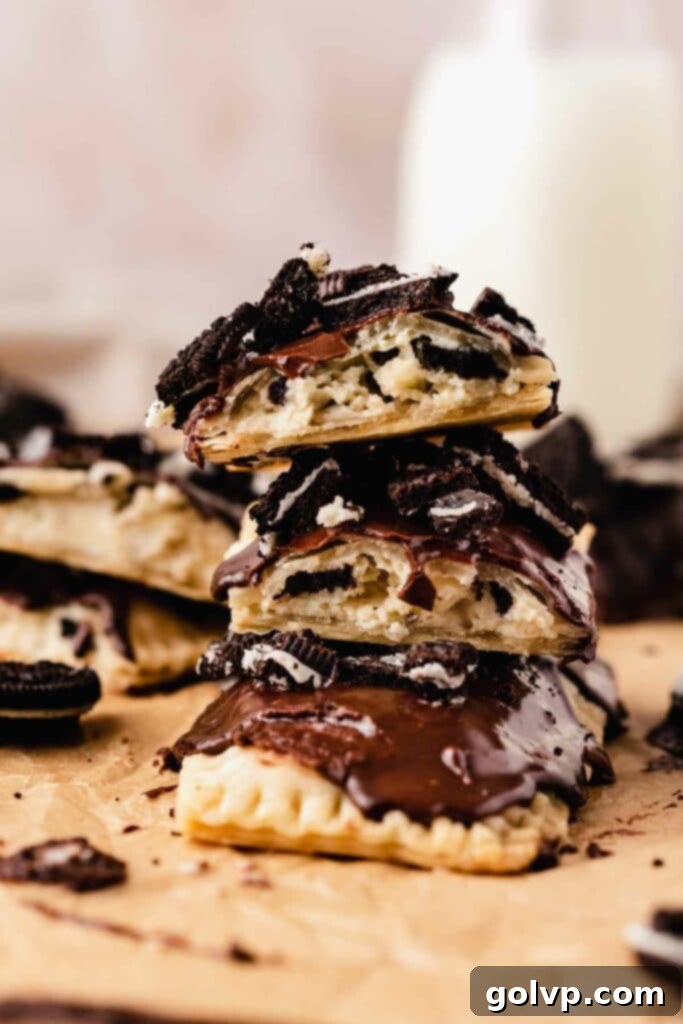
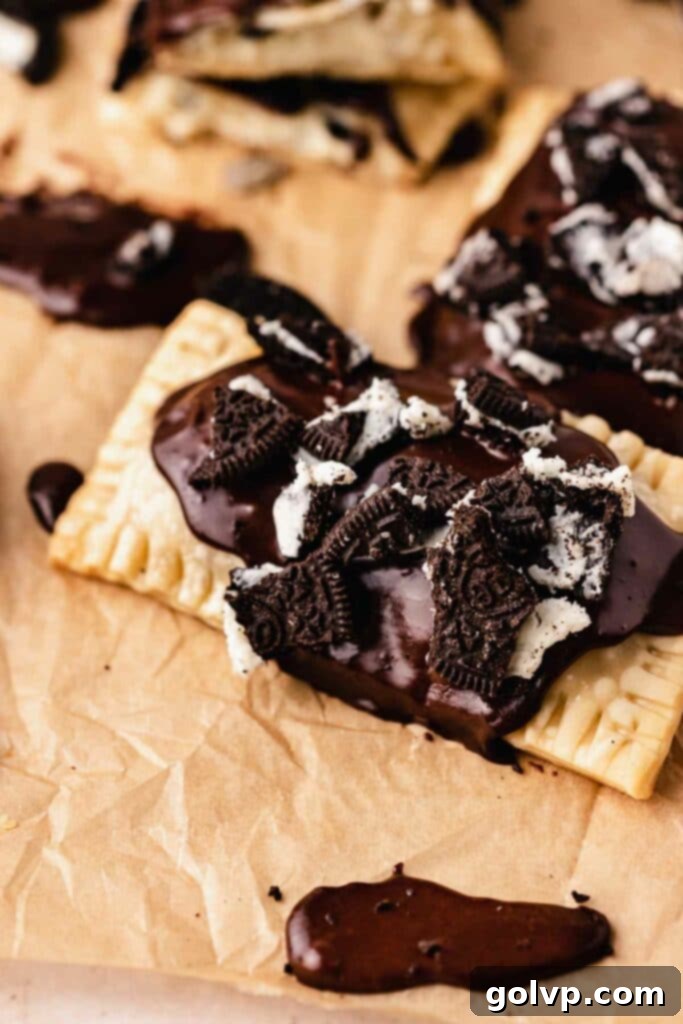
Forget everything you thought you knew about store-bought breakfast pastries, because these **Homemade Oreo Pop Tarts** are an absolute revelation! Imagine a perfectly crisp, golden-brown buttery pastry, generously filled with an unbelievably creamy, rich cream cheese and crushed Oreo cookies filling. Then, to top it all off, a luscious chocolate glaze is drizzled over the top, adorned with even more crunchy Oreo pieces. This isn’t just a snack; it’s an experience. They’re surprisingly simple to make from scratch in your own kitchen and taste exponentially better than any packaged version. The delectable cookies and cream filling alone is a dream, crafted from just a handful of straightforward ingredients, delivering that iconic flavor you adore. Get ready to elevate your breakfast, brunch, or dessert routine with these irresistible treats that are sure to become a cherished family favorite for any occasion.
Purchasing the items in this post supports this blog, at no additional cost to you. As an Affiliate Product marketer and Amazon Associate, I earn from qualifying purchases.
Why You Will Absolutely LOVE This Homemade Oreo Pop Tart Recipe
Get ready to fall head over heels for these delightful homemade pop tarts. Here’s why this recipe stands out and why it’s destined to become a staple in your kitchen, perfect for satisfying those sweet cravings any time of day:
- Effortlessly Easy & Quick: Don’t let the impressive appearance fool you; these Oreo Pop Tarts are incredibly simple to prepare, making them accessible for bakers of all skill levels. The creamy, rich filling comes together with just a few basic ingredients, and assembling the pastries is a straightforward process. You’ll be amazed at how quickly you can create such a gourmet-tasting treat, ideal for busy mornings or spontaneous baking sessions.
- Irresistible Chocolate Glaze Perfection: What could be better than a flaky, buttery pastry? One topped with a rich, glossy, and utterly decadent chocolate glaze, of course! This sweet topping not only adds another layer of deep chocolatey goodness but also seals in the freshness and provides that perfect final touch that makes these pop tarts truly special. The delightful contrast between the smooth glaze and the crisp pastry is pure culinary perfection.
- Luxurious Cream Cheese Cookies & Cream Filling: The heart and soul of these pop tarts lie in their signature cream cheese filling, generously packed with real crushed Oreo cookies. This unique combination creates an incredibly creamy, tangy-sweet center that perfectly balances the iconic sweetness of the Oreos with a subtle tang from the cream cheese. It’s like a dreamy cookies and cream dessert, offering a delightful texture and an explosion of flavor in every single bite.
- Naturally Egg-Free & Adaptable for Gluten-Free: For those with dietary considerations, this recipe is a fantastic choice as it’s naturally egg-free, making it suitable for many without any modifications. Furthermore, it’s easily adaptable to be gluten-free! Simply swap out the regular pie crust for your favorite store-bought or homemade gluten-free pie crust, and you’ll have equally delicious, safe-to-eat treats for everyone to enjoy. It’s a versatile recipe designed for maximum enjoyment and inclusivity.
Why Homemade Oreo Pop Tarts are Exponentially Better Than Store-Bought
Once you try these homemade Oreo Pop Tarts, there’s truly no going back to the store-bought variety. Baking these from scratch is an absolute game-changer, transforming a simple breakfast pastry into a gourmet experience. Here’s why our homemade version consistently outshines its packaged counterparts, offering a superior taste, texture, and overall enjoyment:
- Unmatched Freshness and Flaky Texture: The most immediate and striking difference you’ll notice is the unparalleled freshness. Straight from your oven, these homemade pop tarts boast a delicate, buttery, and incredibly flaky crust that simply cannot be replicated by mass-produced versions. The irresistible aroma alone is enough to convince you of their superiority.
- Perfectly Balanced Sweetness: Store-bought pop tarts often err on the side of being excessively sweet, leaving an artificial aftertaste. Our homemade recipe allows you to control the sugar content precisely, ensuring a perfectly balanced sweetness that highlights the rich, natural flavors of the cream cheese and authentic Oreo filling without overwhelming your palate.
- Thicker, More Substantial and Flavorful Filling: The absolute best part about making your own is the freedom to customize and load them up! You can make your homemade pop tarts much thicker, generously stuffing them with an abundance of that luscious, creamy cookies and cream filling. This means more intense flavor and a much more satisfying, substantial bite in every single pastry.
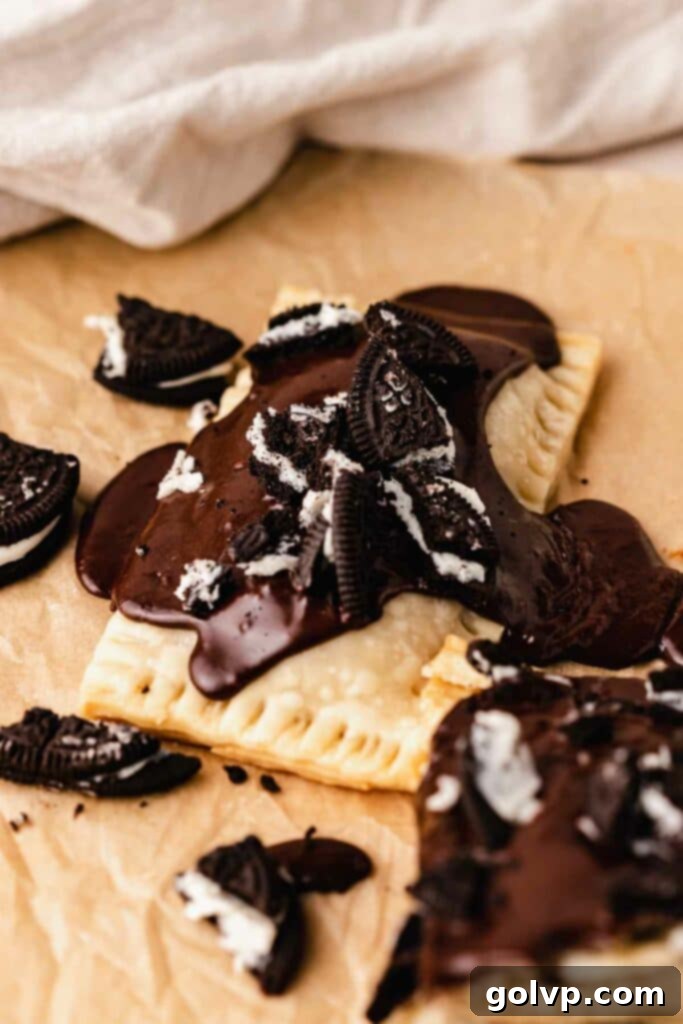
- Customizable, Decadent Chocolate Icing: Forget the thin, often sparse, and artificial-tasting icing on commercial pop tarts. With this recipe, you have complete control to create a thick, rich, and deeply chocolatey glaze, perfectly tailored to your preference. Drizzle it lavishly and top with an abundance of coarsely crushed Oreos for an extra crunch, irresistible texture, and visually appealing finish that’s impossible to achieve with pre-made options.
Even if you opt for the convenience of a high-quality store-bought pie crust, these homemade Oreo Pop Tarts will still deliver a superior taste and texture that far surpasses anything you’ll find in a box. It’s a simple upgrade that yields absolutely incredible, memorable results every time.
The Irresistible Cookies & Cream Cheese Filling: A Delectable Core
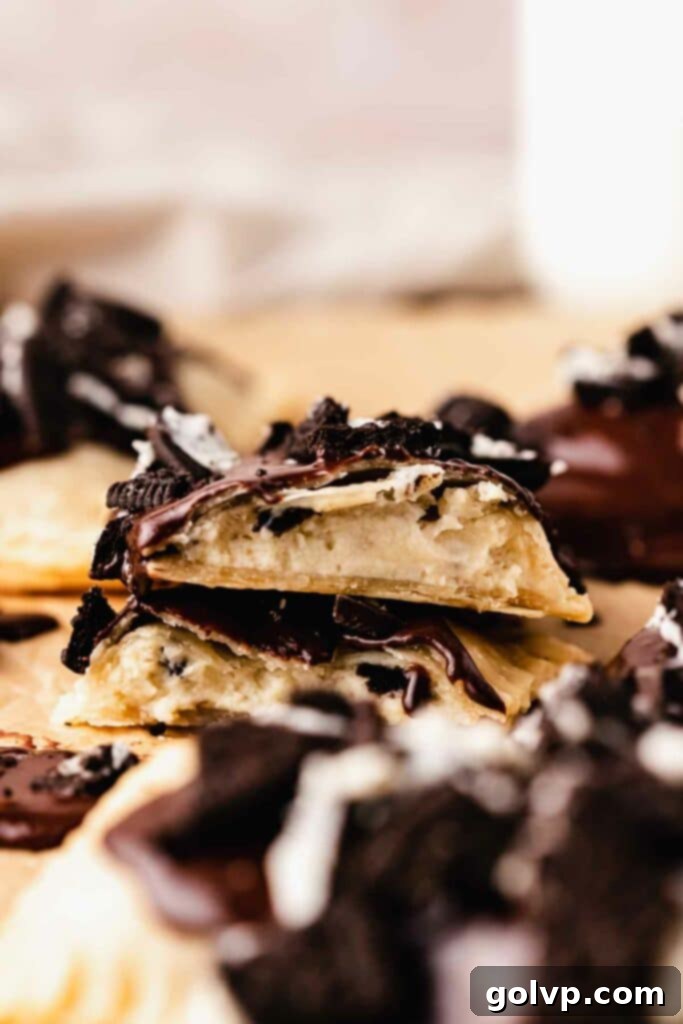
When it comes to crafting the ultimate Oreo experience, nothing quite compares to our signature cream cheese Oreo filling. This velvety smooth, incredibly flavorful center is what truly sets these homemade pop tarts apart, transforming them into a decadent treat. Crafted with just four simple ingredients, it’s astonishingly easy to whip up and delivers a taste that perfectly screams “Oreo” with every bite. The subtle tanginess of the cream cheese beautifully complements the rich, familiar sweetness and crunch of the crushed cookies, creating a harmonious and utterly addictive flavor profile. This filling ensures each pop tart is bursting with that beloved cookies and cream goodness, making it the star component of this delightful recipe.
Make Ahead & Storage Tips for Your Homemade Oreo Pop Tarts
One of the best features of these homemade Oreo Pop Tarts is their make-ahead convenience, making them perfect for meal prepping breakfasts, ensuring a quick and easy snack, or having a delightful dessert on hand. You can prepare one or even two batches at once and store them for later enjoyment without compromising on flavor or texture. For the best results and to preserve their freshness, allow them to cool completely to room temperature before wrapping each individual pop tart securely in parchment paper. Then, transfer them to an airtight freezer-safe bag or container. They will keep beautifully in the freezer for up to two months, ready for whenever a craving strikes.
When you’re ready to indulge in your delicious homemade treat, simply remove a frozen pop tart and reheat it gently. For a quick warm-up, you can pop them in the microwave for approximately 30-60 seconds, depending on your microwave’s power. Alternatively, for a crispier, freshly baked pastry texture, heat them in a preheated oven at 350°F (175°C) for about 5-10 minutes. This method helps to revive that wonderful flaky crust you love, making them taste as if they just came out of the oven.
These delightful pastries are truly best when served warm or at room temperature. At these temperatures, the pastry maintains its soft, flaky texture, and the creamy filling remains perfectly smooth and luscious. Serving them chilled might cause the pastry to become a bit too firm and the filling less yielding, so a gentle warming is highly recommended to bring out all their wonderful flavors and textures for an optimal eating experience.
Key Ingredients for Crafting Perfect Oreo Pop Tarts
Crafting these delectable homemade Oreo Pop Tarts requires just a few key ingredients, each playing a vital role in achieving that perfect balance of flaky crust, creamy filling, and delightful chocolate glaze. While the full steps and precise measurements are in the recipe card below, take a moment to read through these essential tips for ingredient selection and preparation to ensure your baking success:
- Pie Crust: The Foundation of Flakiness and Flavor
You have excellent options here, depending on your preference and time! For ultimate convenience and a quick assembly, a good quality store-bought pie crust works wonderfully and saves a significant amount of time. When choosing, look for a brand that prominently features real butter in its ingredient list for the best flavor and a superior flaky texture. Alternatively, for a truly exceptional, melt-in-your-mouth experience, we highly recommend trying this recipe for the flakiest all-butter pie crust – it elevates these pop tarts to another level. Whichever route you choose, you’ll need enough for a double-crust pie (which typically means two rounds of crust). Most pre-packaged crusts come in pairs, and our recommended homemade recipe also yields two rounds, perfectly suited for this recipe. Always ensure your crust is cold but pliable before you begin working with it to maintain its structure and flakiness. - Powdered Sugar: For Unmatched Smoothness and Balanced Sweetness
Also widely known as confectioners’ sugar or icing sugar, powdered sugar is an absolutely essential ingredient for both the creamy, lump-free filling and the silky-smooth chocolate glaze. Its incredibly fine texture allows it to dissolve quickly and completely into liquid and fat, ensuring a perfectly smooth, velvety consistency in both components. Using granulated sugar would result in an undesirable gritty texture in your filling and glaze, so it’s crucial not to substitute here. This sugar also helps to create a delicate sweetness that enhances rather than overpowers the other flavors. - Oreos: The Unmistakable Star of the Show
No Oreo Pop Tart is truly complete without the iconic chocolate sandwich cookies! Oreos are generously incorporated into two distinct parts of this recipe: they’re finely crushed and blended into the rich, creamy filling, and then coarsely crumbled as a delightful crunchy topping for the decadent chocolate glaze. Feel free to get creative and experiment with your favorite Oreo flavor – whether it’s the classic original, extra-creamy double-stuffed, or a fun seasonal variety, they will all work beautifully and add their unique twist. If you don’t have Oreos on hand, any similar chocolate sandwich cookie will make a delicious and acceptable substitute. Just remember to crush them finely for the filling to ensure a smooth texture and crumble them more coarsely for the topping to provide that satisfying crunch. - Cream Cheese: The Secret to a Velvety, Stable Filling
For the absolute best and most luscious results in your cookies and cream filling, it is imperative to always opt for a full-fat, brick-style cream cheese. This specific type of cream cheese has a significantly lower water content and a much richer, denser texture compared to other varieties. This characteristic is crucial for achieving a firm, exquisitely creamy, and perfectly spreadable filling that will hold its shape beautifully during baking and won’t make your delicate pastry soggy. Low-fat or whipped cream cheese varieties tend to be too watery, or too airy, and simply won’t hold up as well during the baking process nor provide the desired decadent, robust texture that makes this filling so special. Always make sure your cream cheese is softened to room temperature before you begin mixing to ensure a perfectly smooth, lump-free blend with the powdered sugar.
Step-by-Step Guide to Making Homemade Oreo Pop Tarts
Follow these detailed instructions carefully to create perfect, irresistible Oreo Pop Tarts right in your own kitchen. Each step is designed to guide you to baking success, ensuring a delicious outcome every time!
Step 1 – Prepare Your Pie Crust: Begin by preparing your pie crust. If you’re using a convenient store-bought crust, follow the package instructions precisely to defrost it to a workable, pliable consistency. For a truly superior taste and texture, we highly recommend making your own flaky all-butter pie crust (refer to our linked recipe for detailed guidance). While homemade is always a winner in terms of flavor, store-bought crusts provide a fantastic shortcut, and your pop tarts will still be incredibly delicious and satisfying!
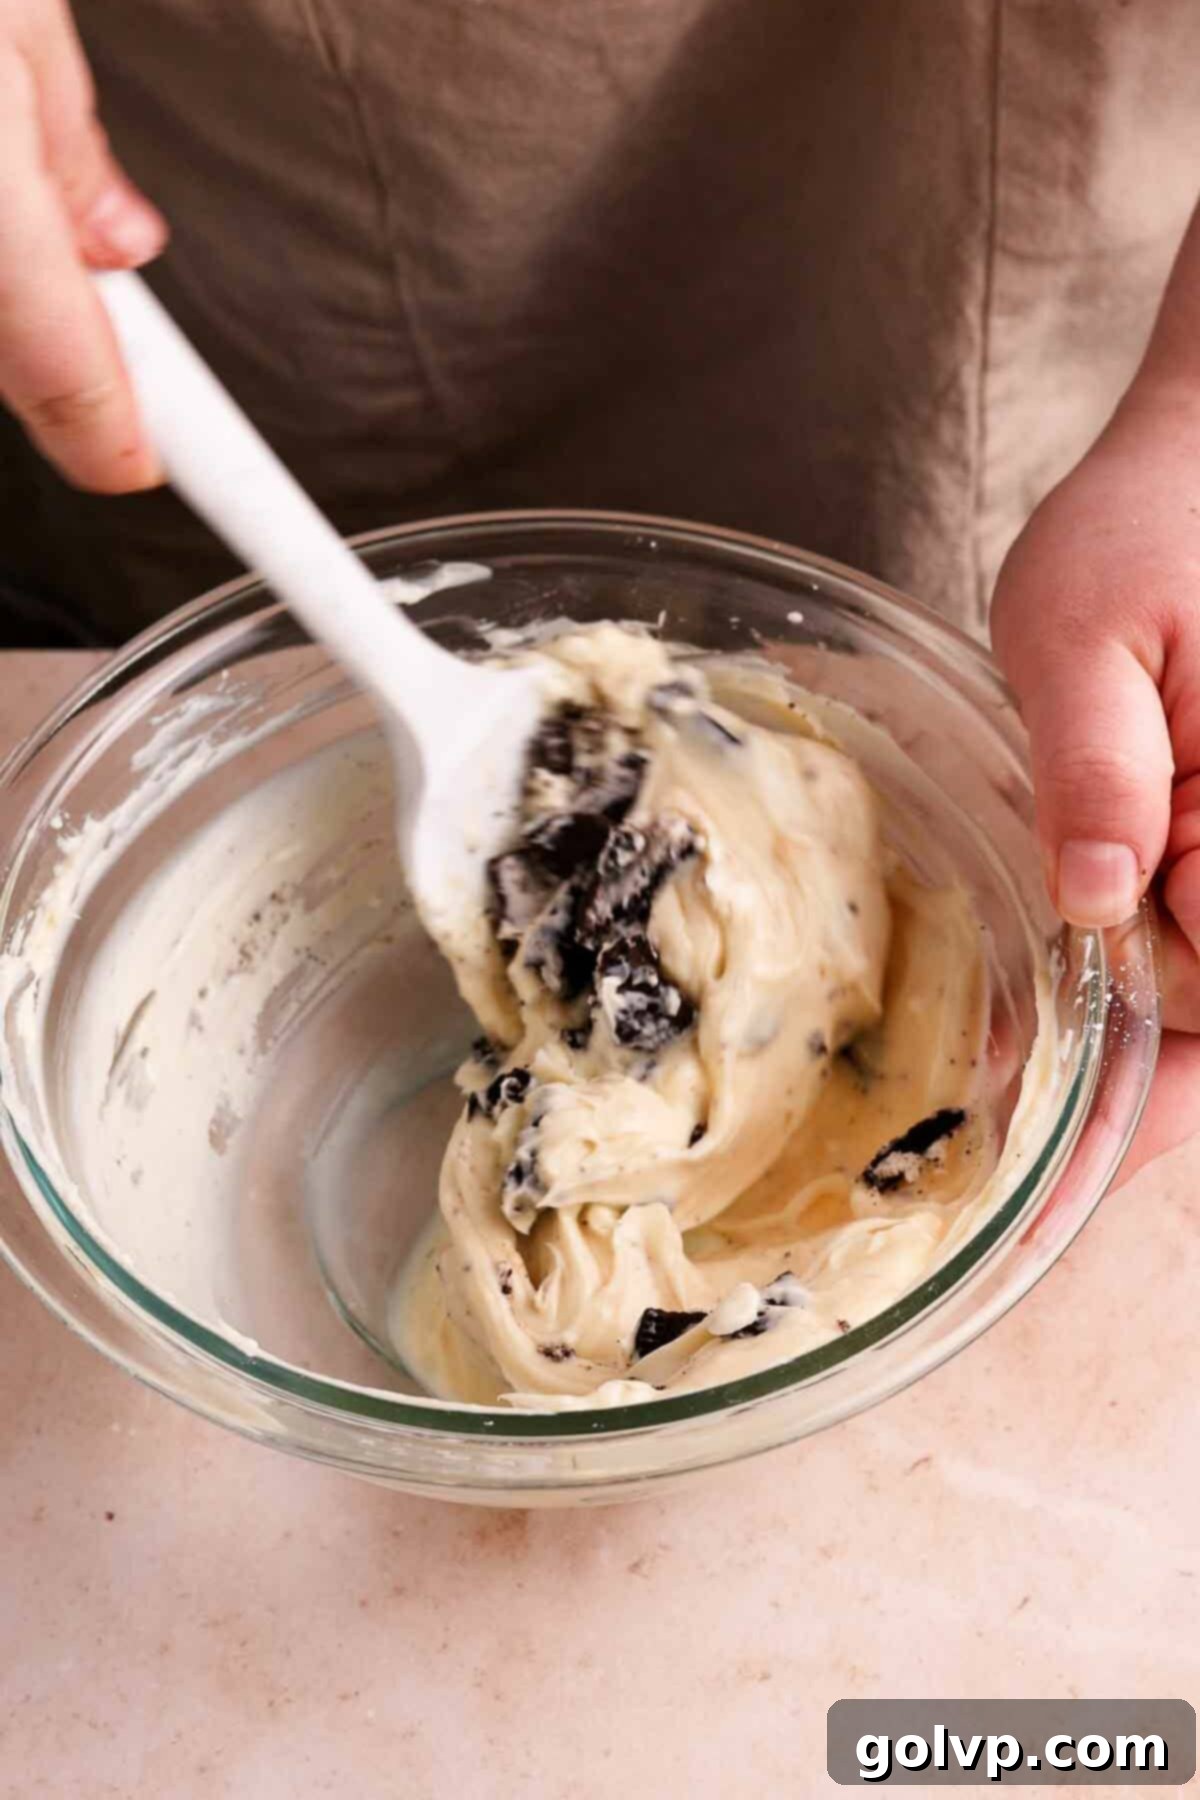
Step 2 – Craft the Creamy Oreo Filling: In a spacious mixing bowl, combine the softened full-fat cream cheese with the powdered sugar. Mix thoroughly using an electric mixer or a sturdy whisk until the mixture is completely smooth, light, and free of any lumps. Next, stir in the pure vanilla extract until it’s just well combined. Finally, gently fold in the crushed or finely chopped Oreo cookies. Be careful not to overmix once the Oreos are added, as you want to maintain some delightful texture and avoid overworking the mixture.
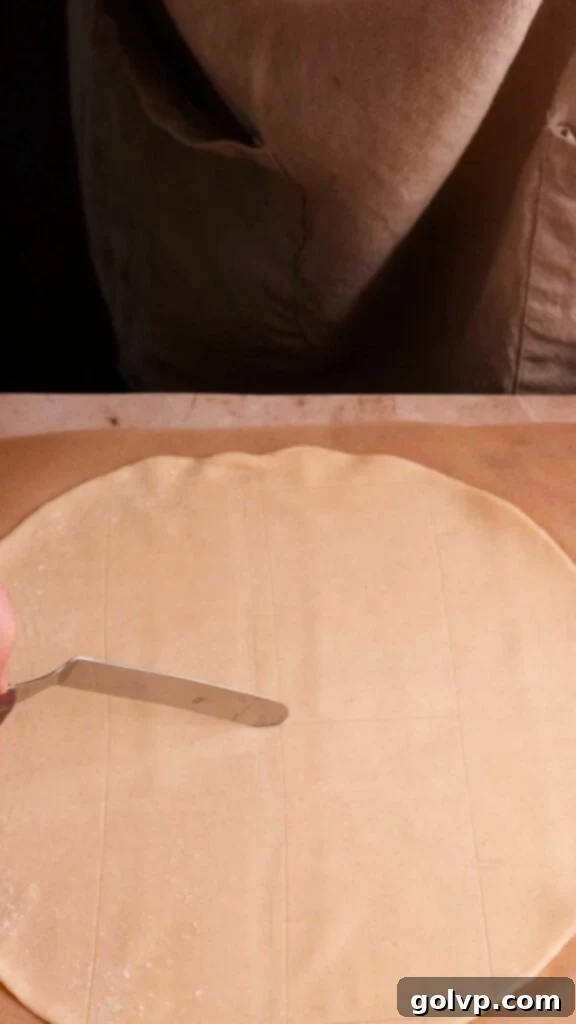
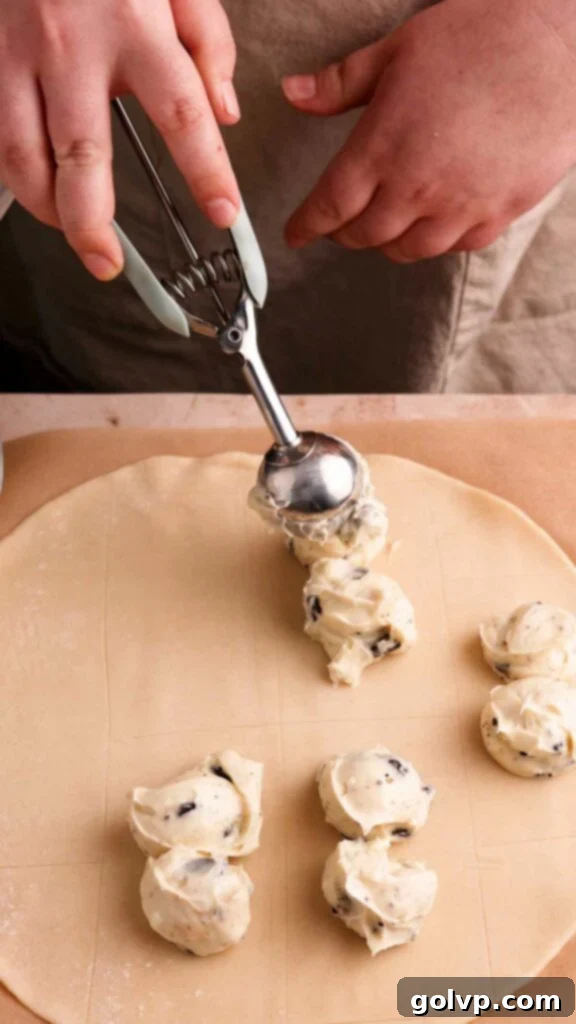
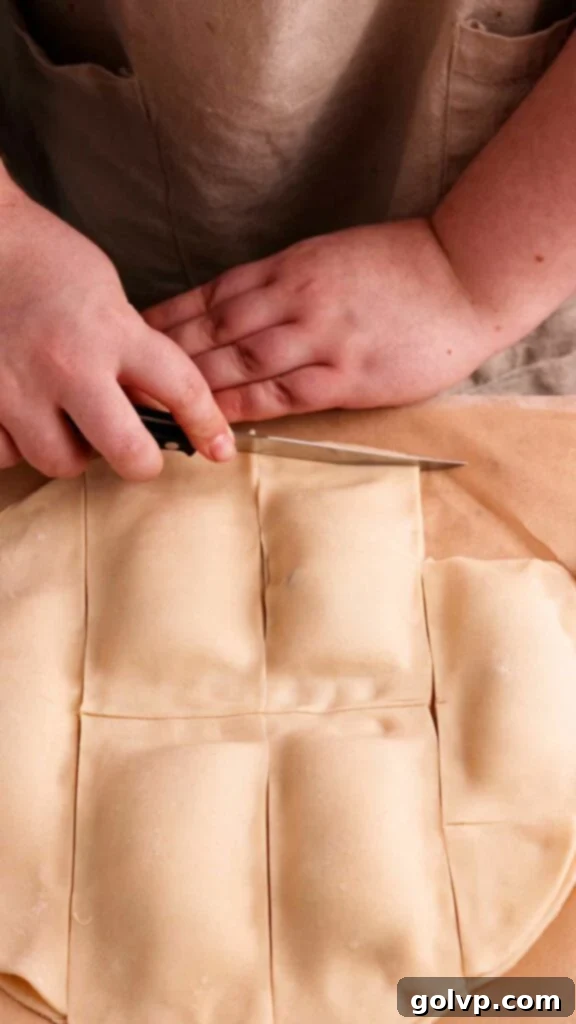
Step 3 – Lay Out the First Crust and Add Filling: Carefully unroll or lay out your first pie crust onto a lightly floured surface or a piece of parchment paper. Using a ruler or a visual guide, lightly mark out approximately six rectangles on the crust, each measuring about 1.5 inches by 3 inches (refer to the accompanying photos for a clear visual example of this layout and spacing). Spoon 2-3 generous tablespoons of the prepared Oreo cream cheese filling into the precise center of each marked rectangle, ensuring you leave a clear ½-inch border all the way around the edges. This border is absolutely crucial for proper sealing and preventing leaks.
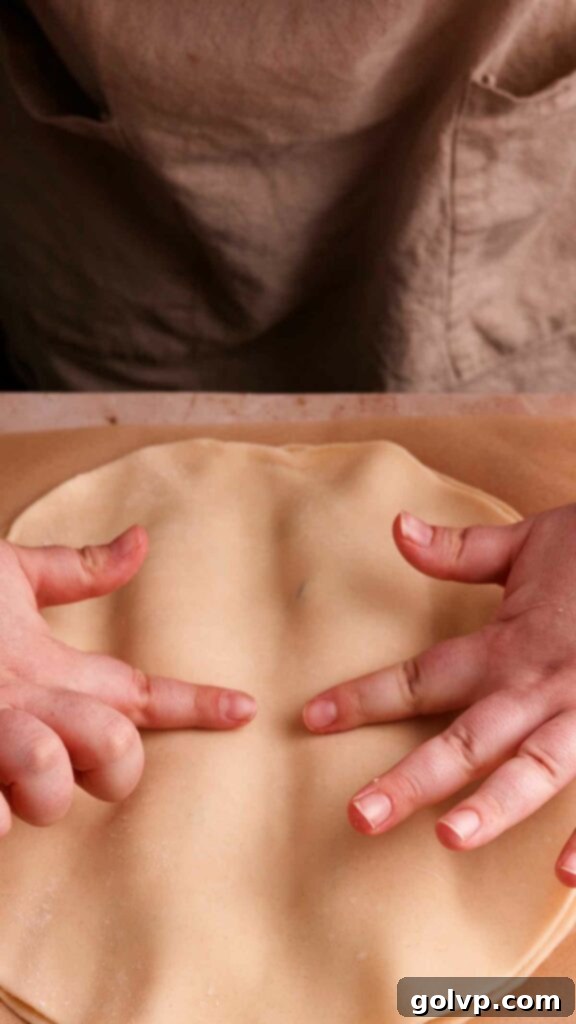
Step 4 – Seal and Cut the Pop Tarts: Lightly brush a small amount of milk onto the exposed pie crust in the spaces *between* the mounds of filling. This acts as an edible glue, helping the two crusts adhere firmly together. Carefully place the second rolled-out pie crust directly on top of the first, ensuring the edges are aligned as best as possible. Gently but firmly press down on the top crust in between each mound of filling, working your way around to seal all the edges completely. Use a sharp knife or a pastry wheel to cut out the individual rectangular pop tarts, then neatly trim any rounded edges to achieve a uniform and appealing shape.
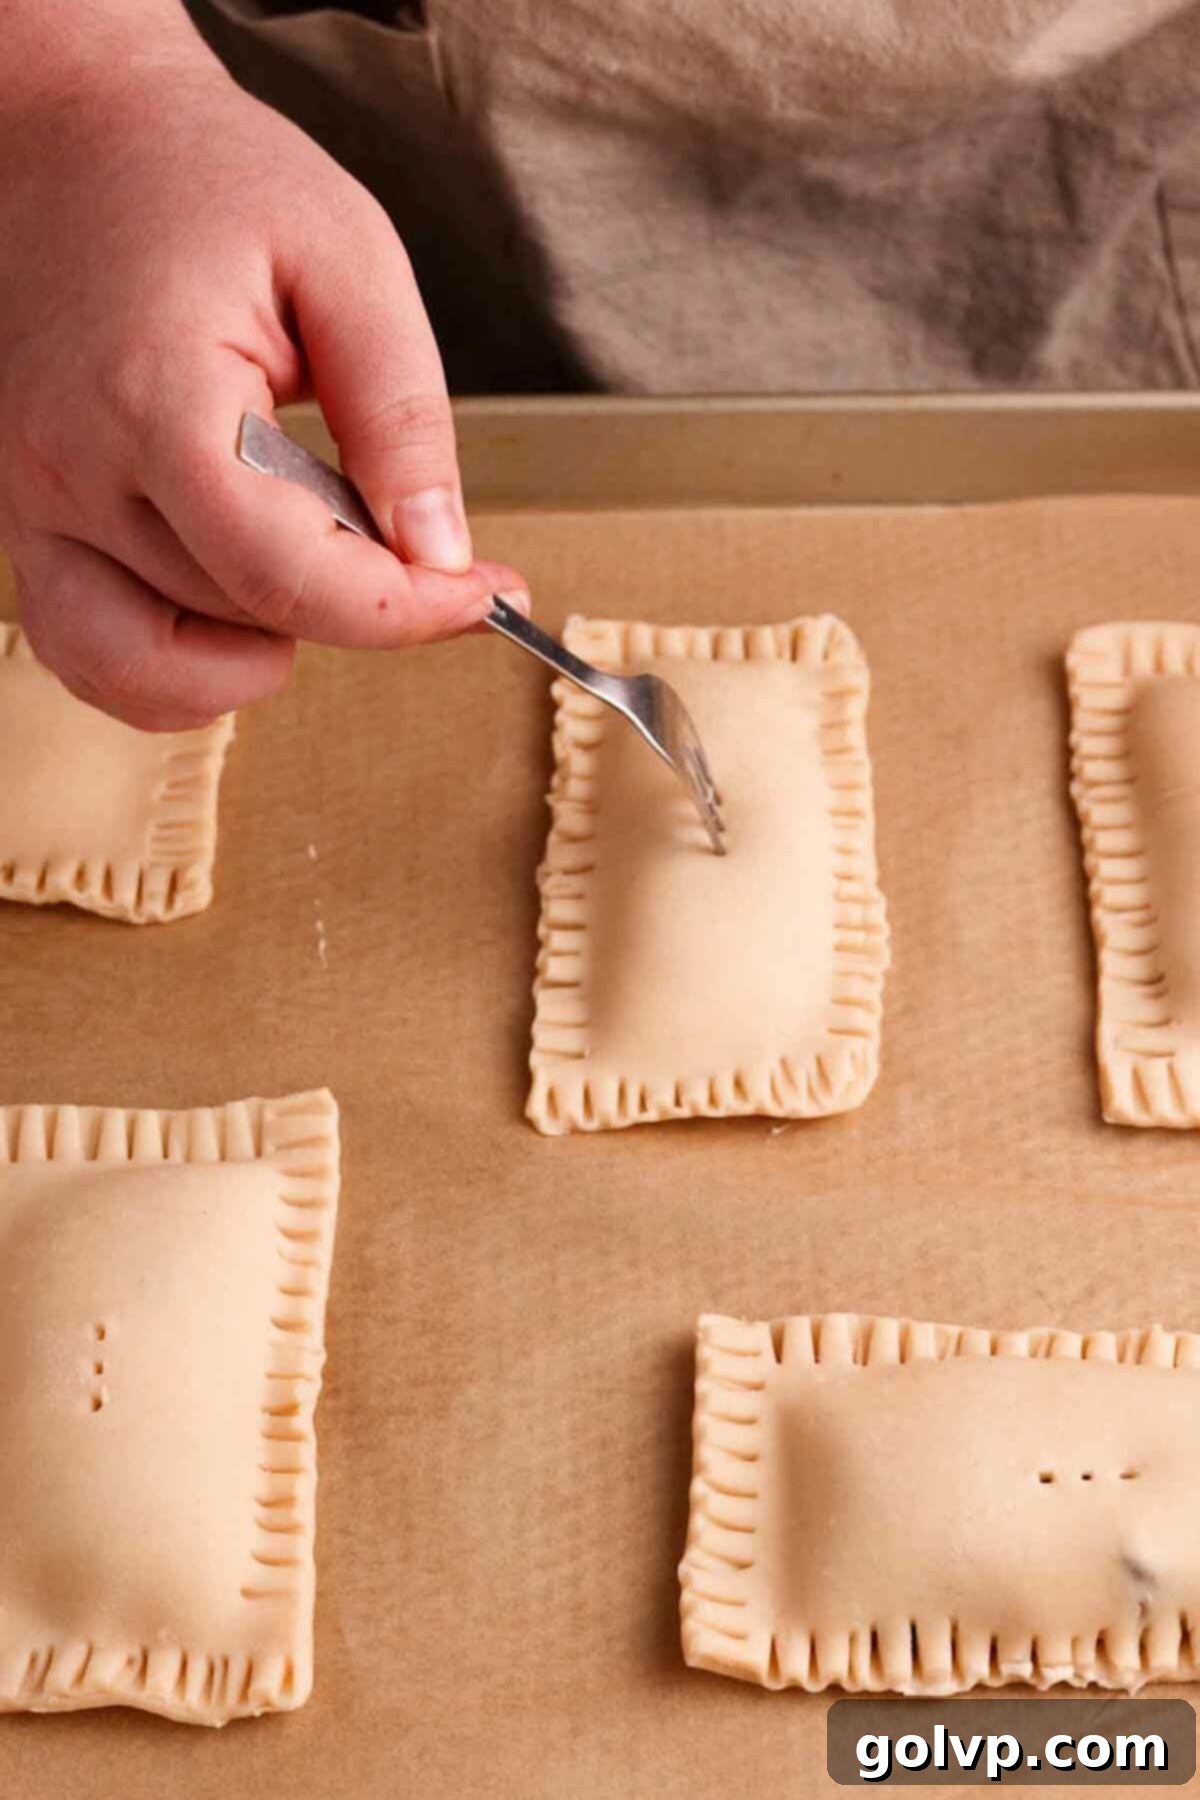
Step 5 – Finalize Sealing and Venting: To further secure the edges and create that classic, appealing pop tart look, use the tines of a fork to press down firmly all the way around the perimeter of each individual pop tart. This crimping action not only helps prevent the delicious filling from leaking out during baking but also adds a charming, rustic decorative touch. Next, lightly pierce the top of each pop tart several times with the fork. These small, strategically placed holes are essential as they allow steam to escape during baking, preventing the pastries from puffing up excessively and ensuring a perfectly flat, uniform top. Finally, arrange your prepared pop tarts onto a baking sheet lined with parchment paper, making sure to leave an inch or two of space between each one to allow for even heat circulation and baking.
Step 6 – Bake to Golden Perfection: Preheat your oven to 355°F (180°C). Carefully place the baking sheet with the pop tarts into the preheated oven and bake for approximately 15-18 minutes. Keep a close eye on them; they are ready when their edges and bottoms turn a beautiful, light golden brown, indicating a perfectly cooked, flaky crust. Once baked, remove the baking sheet from the oven and let the pop tarts cool on the sheet for a few minutes before carefully transferring them to a wire cooling rack. Allow them to cool until they are just warm to the touch, as this is the ideal temperature for applying the glaze for optimal adherence and appearance.
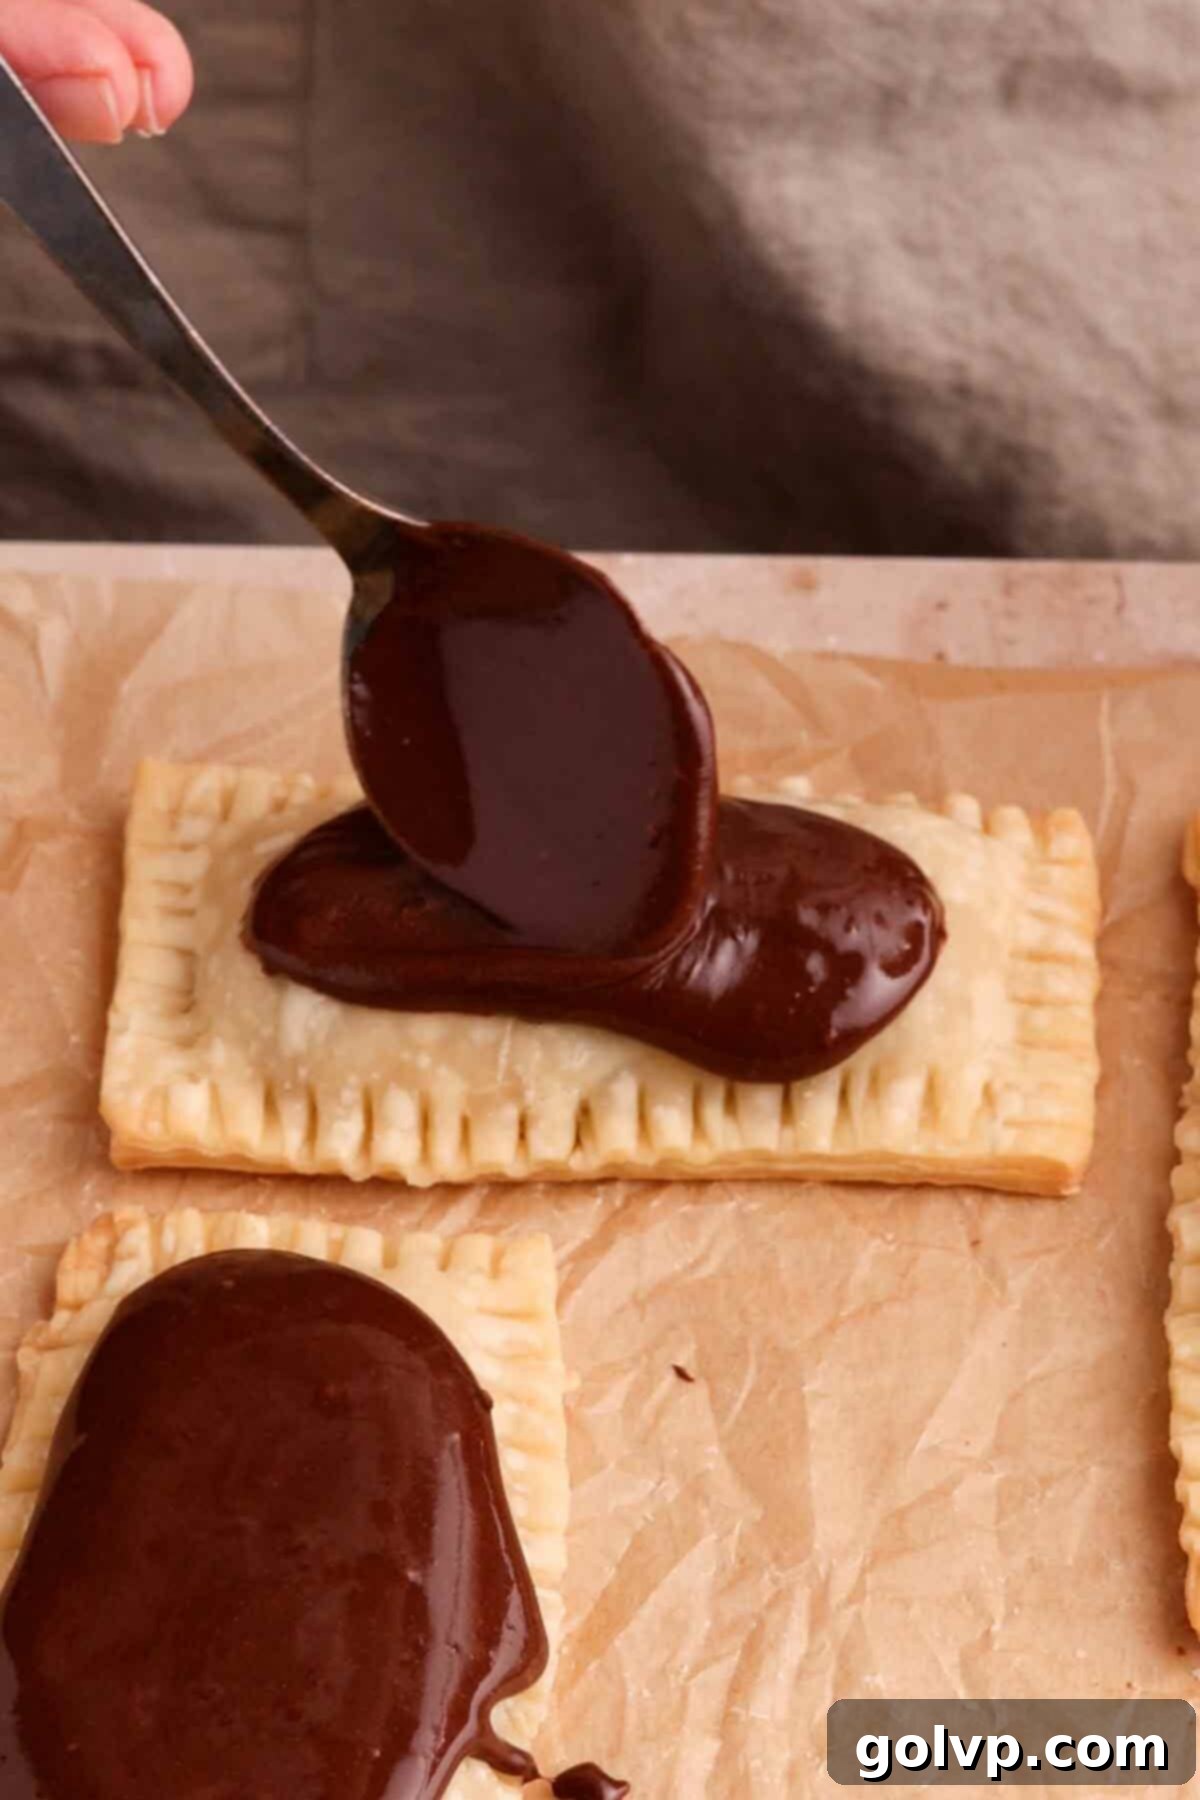
Step 7 – Prepare the Decadent Chocolate Glaze: In a medium bowl, whisk together the sifted powdered sugar and the sifted unsweetened cocoa powder until they are thoroughly combined and no lumps remain. Sifting these dry ingredients is important here to ensure a perfectly smooth, lump-free glaze. Gradually add milk, starting with two tablespoons and adding more one tablespoon at a time, mixing continuously after each addition. Continue mixing until you achieve a consistency that is very thick but still pourable – it should slowly drip from your whisk, not run like water. This thick consistency is key for a luscious glaze that sets beautifully without being too thin or transparent.
Step 8 – Glaze and Garnish for the Finishing Touch: Once your pop tarts have cooled to a warm temperature, use a tablespoon to generously spoon the prepared thick chocolate glaze over the top of each one, spreading it evenly across the entire surface. While the glaze is still wet and pliable, immediately sprinkle a generous amount of the remaining coarsely crushed Oreo cookies on top of each pop tart. This creates an appealing visual contrast and adds an extra layer of delightful texture and flavor. Allow the pop tarts to sit for a few minutes (about 10-15) to allow the chocolate glaze to set slightly. Then, grab one, and enjoy your sensational homemade Oreo Pop Tarts!
Frequently Asked Questions (FAQ) About Homemade Oreo Pop Tarts
Absolutely! This recipe is incredibly versatile and works wonderfully with gluten-free pie crusts. Just ensure you follow the specific handling and baking instructions for your chosen gluten-free crust, as some may be more delicate or require slightly different baking times. The creamy Oreo filling and delicious chocolate glaze will taste just as fantastic and delightful with a gluten-free base, making them accessible for everyone.
Yes, you absolutely can and are encouraged to get creative! While Oreos are the iconic star of this particular recipe, feel free to substitute them with any other sandwich cookie or even a different type of biscuit you prefer to customize your pop tarts. Fantastic alternatives that work well include Biscoff cookies for a spiced, caramel-like flavor, classic graham crackers for a unique s’mores-like twist, or even chocolate chip cookies for a double-chocolate delight. Experiment with your favorite cookies to create unique and personalized pop tart variations!
Preventing leaks is key to achieving perfectly shaped and delicious pop tarts! Ensure you leave at least a generous ½-inch border around the filling when placing it on the first crust. Brushing milk on these edges before placing the top crust helps create a stronger, more secure seal between the two layers of pastry. Most importantly, firmly crimp all around the edges with the tines of a fork to really seal the two crusts together. Also, don’t forget to pierce the tops with a fork to allow steam to escape; this reduces internal pressure build-up that could cause the filling to burst through the crust.
You absolutely can and should make the pie dough from scratch if you have the time! While store-bought pie crust offers incredible convenience and still yields a delicious result, making your own pie dough from scratch will undeniably yield an even flakier, more tender, and richer pastry that truly elevates these pop tarts. Our recipe references this all-butter pie crust recipe, which would be an excellent, tried-and-true choice for these pop tarts. Just be sure to chill your homemade dough thoroughly before rolling and assembling to ensure the best possible texture.
Discover More Delicious Recipes from Our Kitchen
If you loved baking and enjoying these Homemade Oreo Pop Tarts, be sure to explore more delightful baking adventures and comforting bakes from our kitchen! We offer a wide variety of sweet treats and savory dishes that are perfect for any occasion, from simple weeknight desserts to impressive holiday spreads. Here are a few highly recommended recipes that you might enjoy next:
- Mini Blueberry Pies with Flaky Crust
- Raspberry Meringue Pie with Mile High Meringue
- Red Velvet Oreo Cheesecake
- Oreo Tiramisu
Happy baking!
Did you make this recipe? I would love for you to rate this recipe and hear what you think in the comments below! Share your creation on Instagram and tag @flouringkitchen. Follow me on Pinterestto save and for more delicious recipe ideas.
📖 Recipe Card

Oreo Pop Tarts
Mary
Pin Recipe
Shop Ingredients
Equipment
-
Baking sheet
-
Large mixing bowl
-
Whisk or electric mixer
-
Rolling pin
-
Pastry wheel or sharp knife
-
Fork
Ingredients
Pop Tarts
- pie crust enough for a double crust pie (2 rounds)
- 8 oz cream cheese full-fat, brick-style, very soft
- ⅓ cup powdered sugar
- ½ teaspoon pure vanilla extract
- 4 Oreos crushed or finely chopped
- 1-2 tablespoons milk for sealing edges
Chocolate glaze
- 1 ½ cups powdered sugar sifted
- 1 ½ tablespoons cocoa powder unsweetened, sifted
- 2-5 tablespoons milk for desired consistency
- 6 crushed Oreos for topping
Shop Ingredients on Jupiter
Instructions
Pop Tarts Assembly & Baking
-
Prepare Pie Crust: Begin by preparing your pie crust. If you’re using a store-bought crust, follow the package instructions to defrost it to a workable consistency. For the best flaky results, a homemade all-butter crust is recommended (see our linked recipe), but a good quality store-bought crust will still yield delicious results. Ensure you have two rounds of crust ready.pie crust
-
Make Oreo Cream Cheese Filling: In a large bowl, combine the softened full-fat cream cheese and powdered sugar. Mix with a whisk or electric mixer until the mixture is smooth and creamy. Add the pure vanilla extract and mix until just combined. Gently fold in the crushed Oreo cookies, ensuring they are evenly distributed without overmixing.8 oz cream cheese, ⅓ cup powdered sugar, ½ teaspoon pure vanilla extract, 4 Oreos
-
Assemble First Layer: On a lightly floured surface or parchment paper, roll out or lay your first pie crust. Lightly mark or cut out approximately six rectangles, each about 1.5” x 3” in size. Spoon 2-3 tablespoons of the Oreo filling into the center of each marked rectangle, leaving a clear ½-inch border on all sides for sealing.
-
Seal the Pop Tarts: Lightly brush milk onto the pie crust in the areas between the filling mounds to aid in sealing. Carefully place the second rolled-out crust directly on top, aligning the edges. Press down firmly around each filling mound to seal the edges completely. Use a sharp knife or pastry wheel to cut out the individual rectangular pop tarts, and trim any excess dough or rounded edges for a neat finish.1-2 tablespoons milk
-
Crimping & Venting: Use the tines of a fork to firmly press down and crimp all the way around the edges of each pop tart. This ensures a secure seal and adds a classic look. Pierce the top of each pop tart several times with a fork to create vents for steam to escape during baking. Arrange the pop tarts on a baking sheet, leaving about 1-2 inches of space between them for even cooking.
-
Bake: Bake the pop tarts in a preheated oven at 355°F (180°C) for 15-18 minutes, or until the pastry edges and bottom are a light golden brown. Once baked, remove them from the oven and let them cool on the baking sheet for a few minutes before transferring them to a wire rack. Cool until warm before glazing.
Chocolate Glaze & Finishing
-
Prepare Glaze: In a medium bowl, whisk together the sifted powdered sugar and sifted unsweetened cocoa powder until fully combined and lump-free. Add milk, one tablespoon at a time, mixing continuously until you achieve a very thick but pourable, smooth consistency. Adjust milk quantity as needed to reach desired thickness.1 ½ cups powdered sugar, 1 ½ tablespoons cocoa powder, 2-5 tablespoons milk
-
Glaze & Serve: Using a tablespoon, generously spoon the thick chocolate glaze over the warm pop tarts, spreading it evenly across the top. Immediately sprinkle the remaining crushed Oreo cookies over the wet glaze for added crunch and visual appeal. Allow the glaze to set for about 10-15 minutes before serving. Enjoy your irresistible homemade Oreo Pop Tarts warm!6 crushed Oreos
Video
Notes
Storage Instructions: Leftover pop tarts should be stored in an airtight container in the refrigerator for up to 3 days. To store for longer periods, wrap individual pop tarts securely in parchment paper, then place them in a freezer-safe bag or container. They will keep well in the freezer for up to 2 months. You can thaw them at room temperature or reheat directly from frozen using the methods described above.
