Decadent Nutella Cheesecake: The Ultimate Chocolate Hazelnut Dessert with Oreo Crust
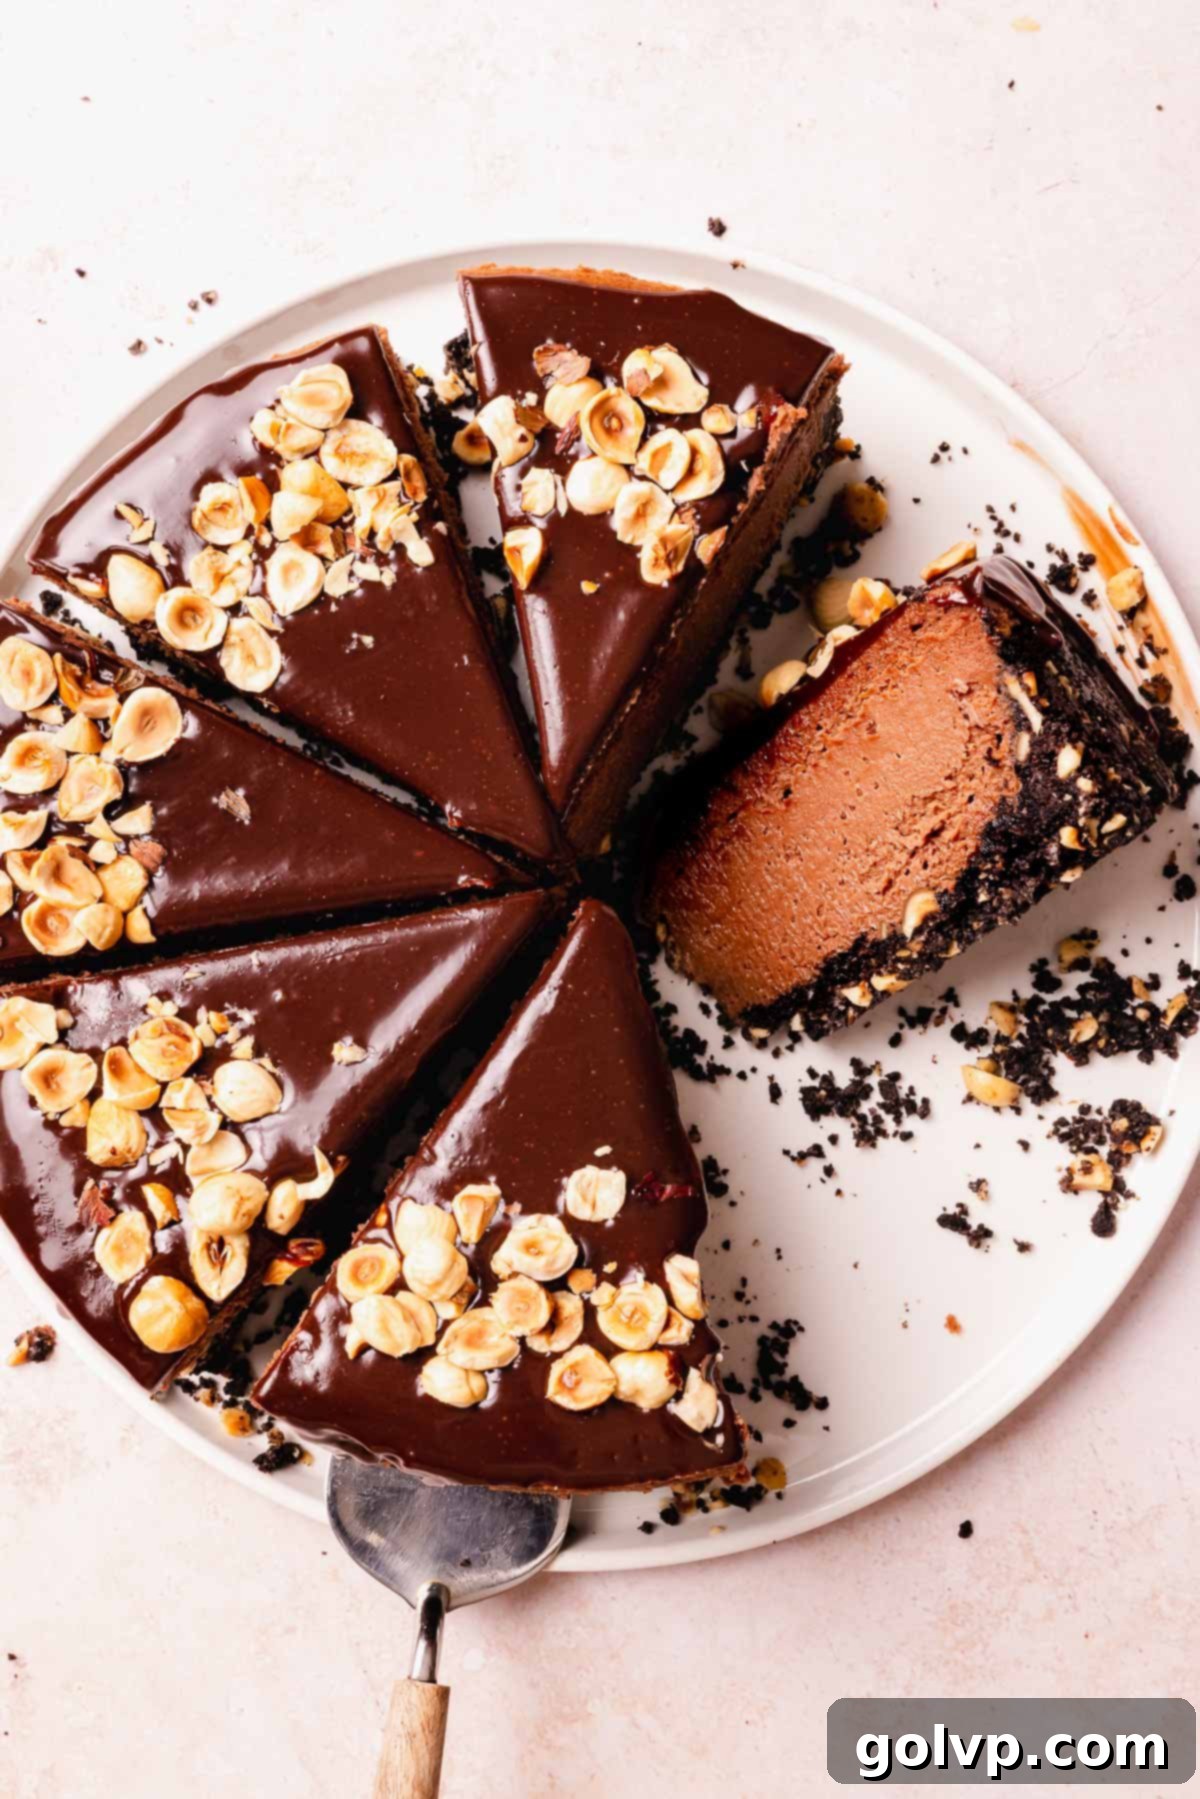
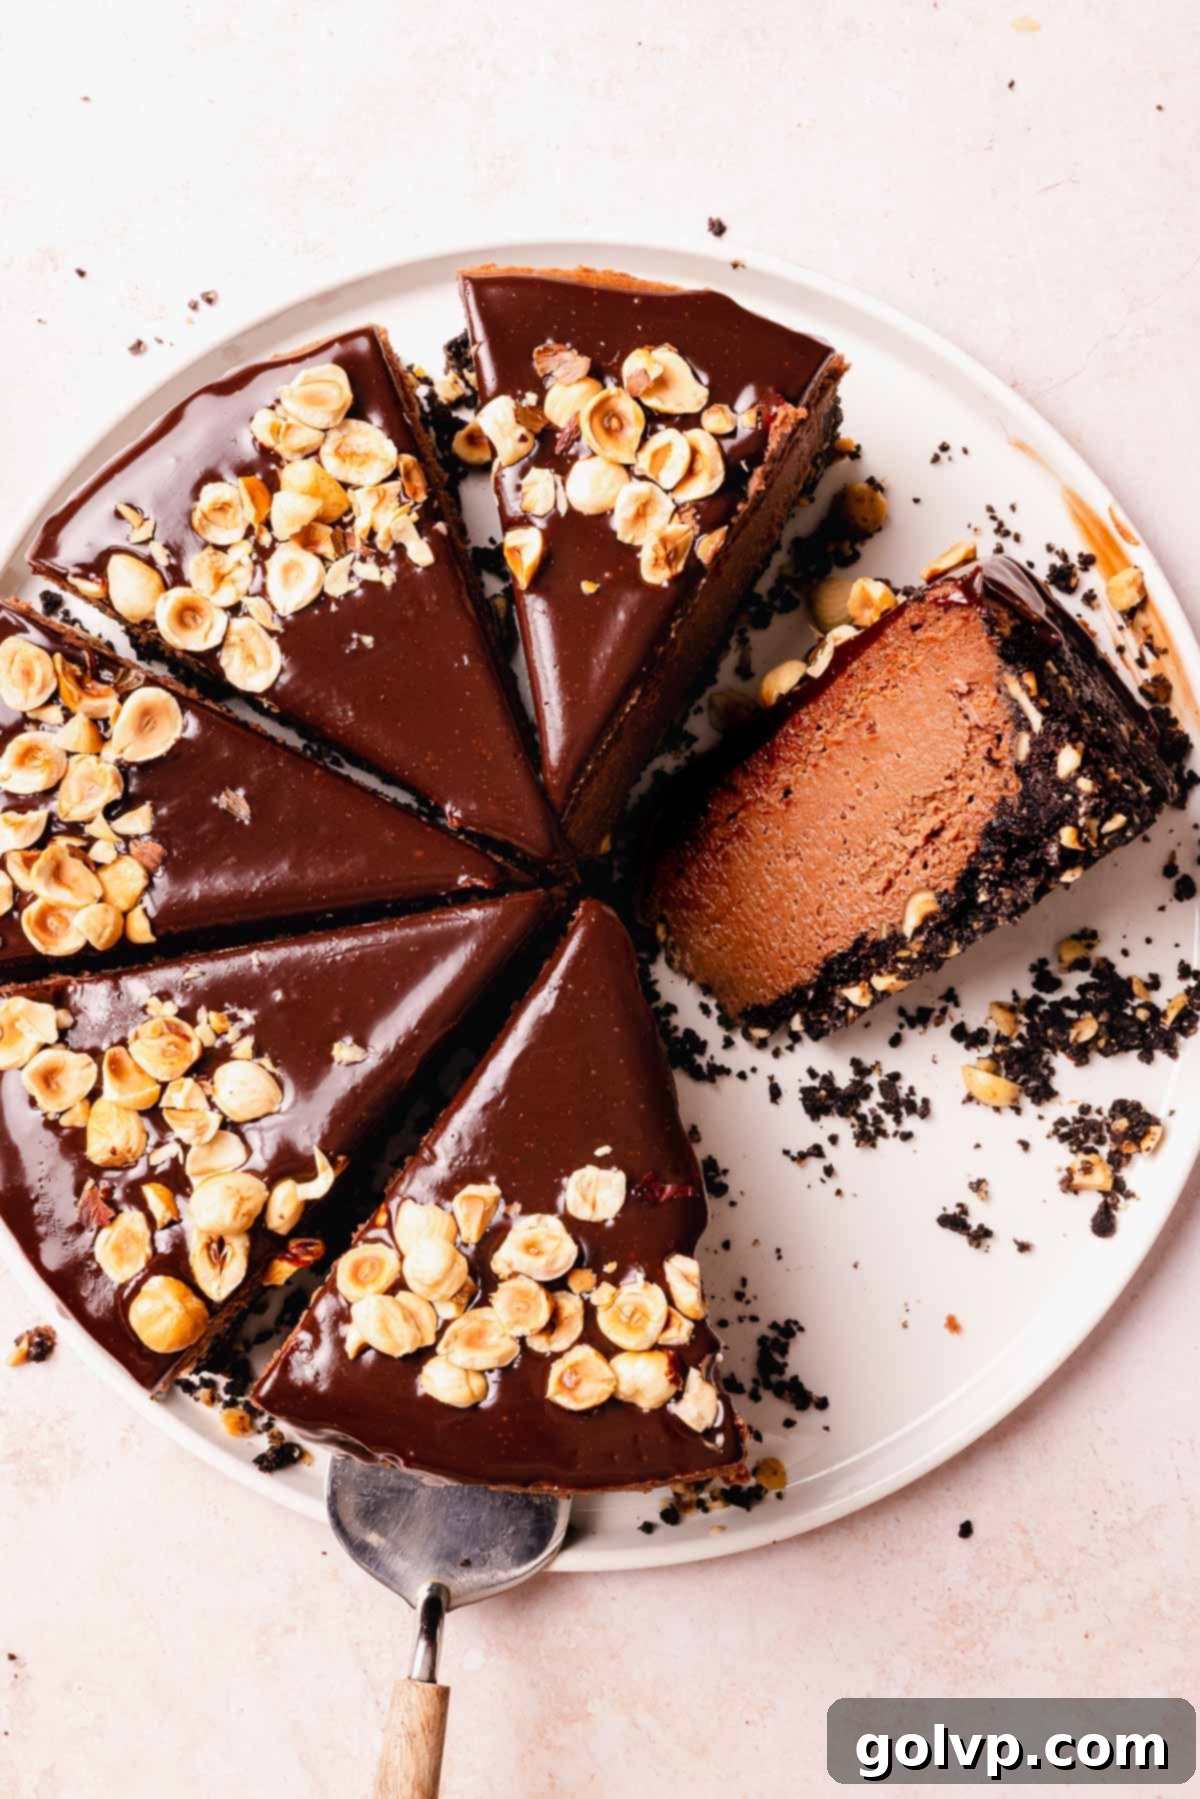
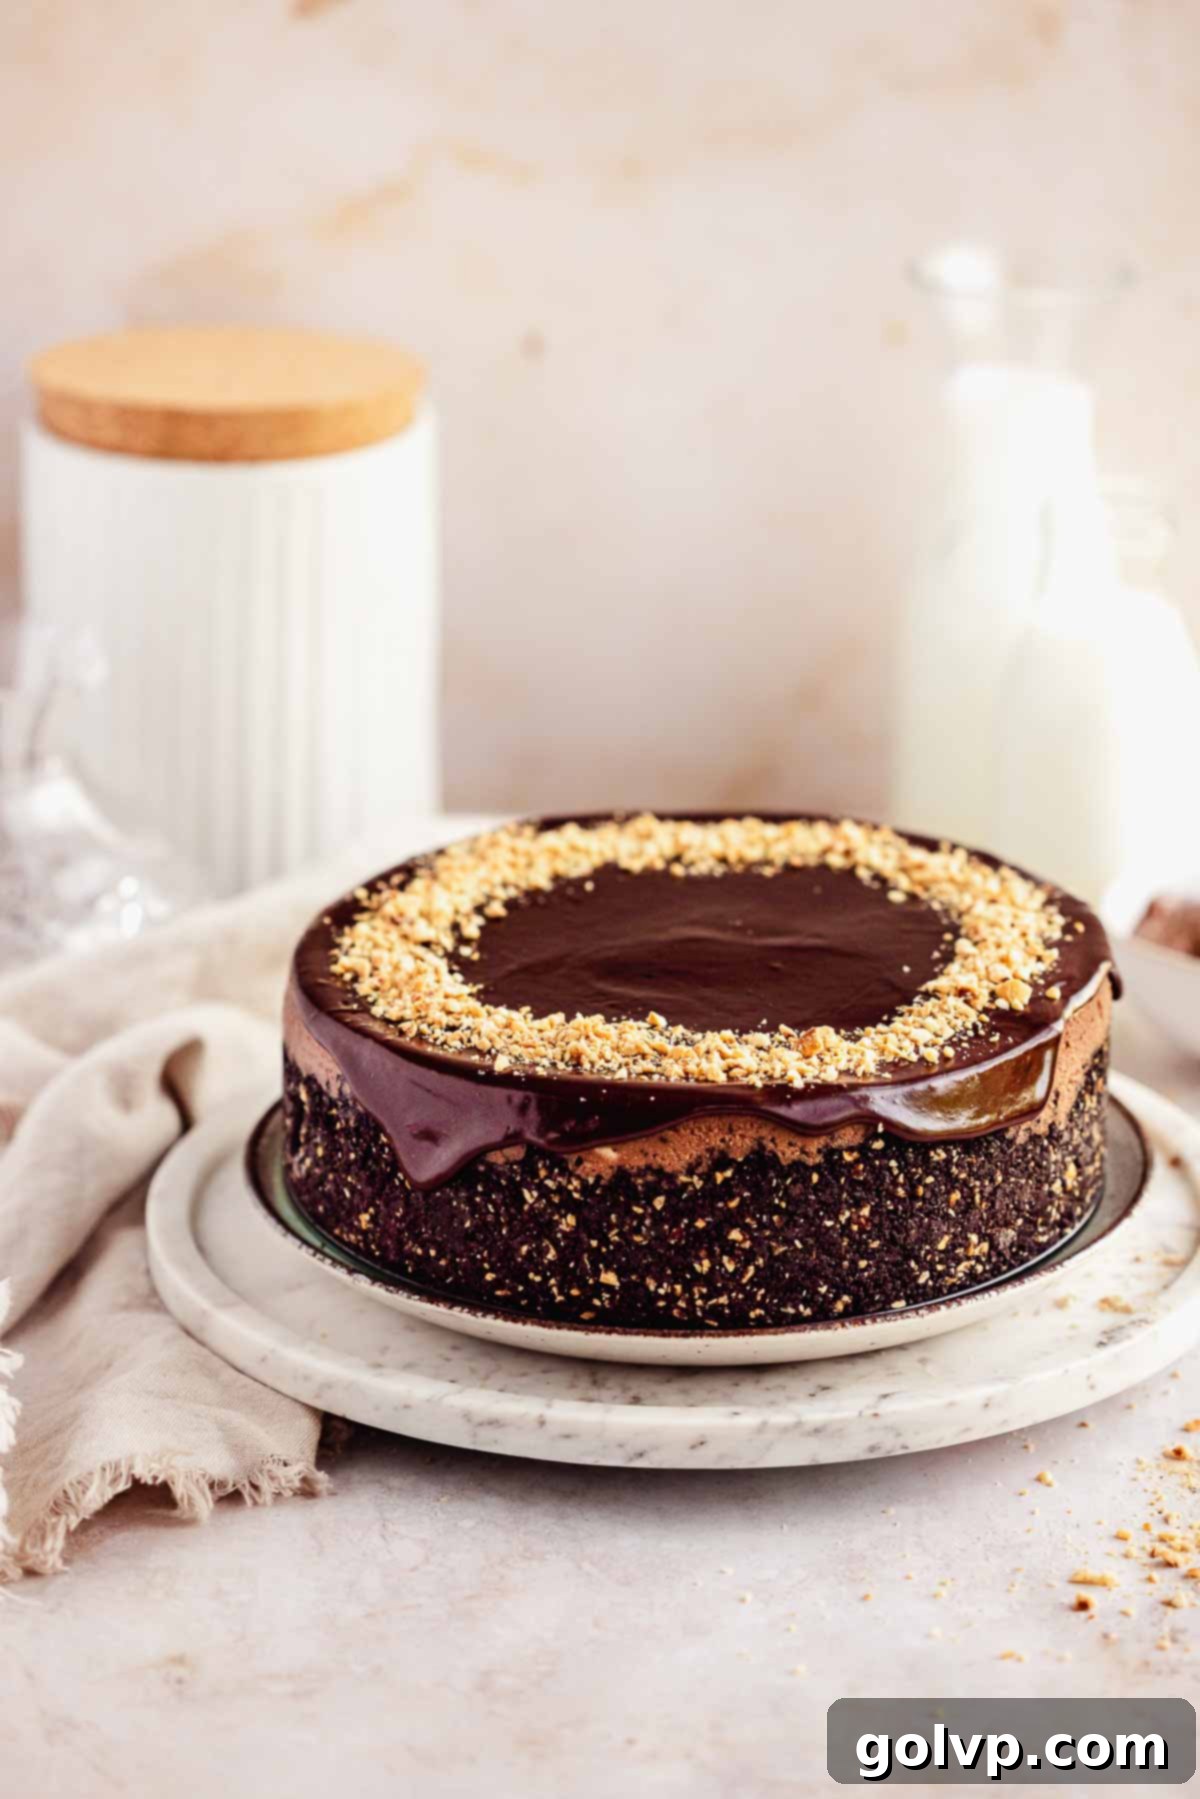
Prepare to indulge in the most exquisite Nutella cheesecake you’ve ever tasted! This dessert is a masterpiece of smooth, rich, and intensely creamy chocolate hazelnut flavor. Imagine sinking your fork into a luscious filling generously infused with two full cups of Nutella, perfectly complemented by a delightful Oreo crust. But we don’t stop there – this isn’t just any Oreo crust; it’s elevated with the addition of finely chopped toasted hazelnuts, creating an irresistible nutty crunch that amplifies the deep chocolate-hazelnut notes. To crown this masterpiece, a silky smooth Nutella ganache is poured over the top, garnished with even more chopped hazelnuts for an extra layer of texture and visual appeal. This cheesecake isn’t just a dessert; it’s an experience, a true celebration of all things rich, decadent, and utterly chocolatey.
If you’re a fan of the irresistible chocolate hazelnut combination, you might also adore these Nutella cupcakes, which are another dream come true for any dessert lover.
🎂 Why You’ll LOVE This Decadent Nutella Cheesecake Recipe
- Unbeatable Nutella Flavor: This recipe calls for a generous two full cups of Nutella in the creamy cheesecake filling itself, plus an additional amount in the ganache and the crust. This ensures that every single bite is packed with an authentic, rich chocolate hazelnut flavor that true Nutella enthusiasts will adore. It’s not just a hint; it’s a full-bodied embrace of your favorite spread, making this cheesecake intensely satisfying and flavorful.
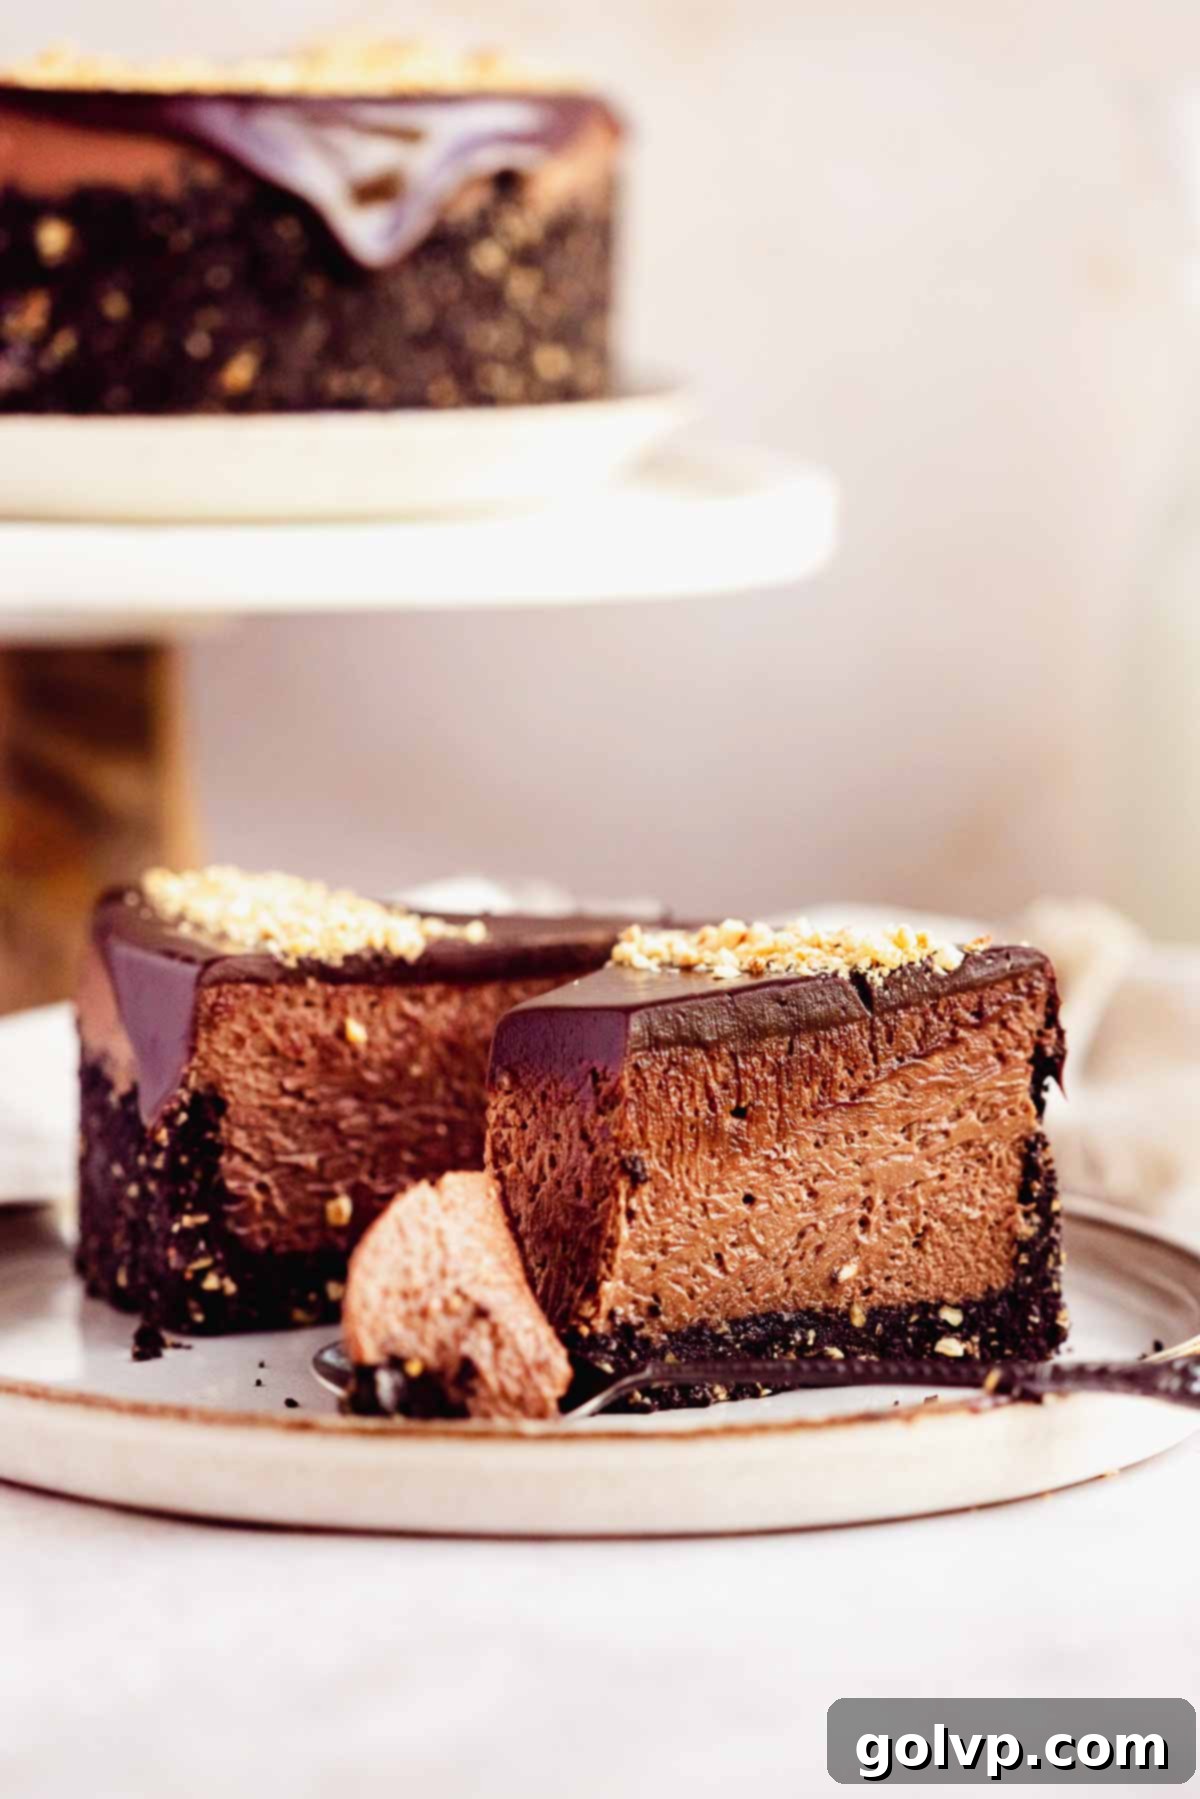
- Luxuriously Ultra Creamy Texture: Achieving the perfect cheesecake texture is an art, and this recipe delivers. By combining a substantial amount of Nutella with high-quality sour cream and heavy cream, we create an incredibly smooth, melt-in-your-mouth filling. These ingredients work in harmony to produce a cheesecake that is perfectly set, yet remarkably luscious and never dry or crumbly. Each forkful is a testament to its velvety consistency.
- Straightforward and Foolproof Baking: Don’t be intimidated by baking a cheesecake! This recipe is designed with success in mind, providing clear, step-by-step instructions and all the essential tips and tricks you’ll need. From preparing the crust to achieving that signature “jiggle” when it comes out of the oven, we guide you through each stage, ensuring a beautifully baked, crack-free cheesecake every time. You’ll gain confidence and pride in creating this show-stopping dessert.
📝 Key Ingredients for Your Perfect Nutella Cheesecake
To ensure your Nutella cheesecake is nothing short of perfection, pay close attention to the quality and preparation of these key ingredients. Detailed steps and a full ingredient list can be found in the recipe card below.
Filling Ingredients: Crafting the Creamy Core
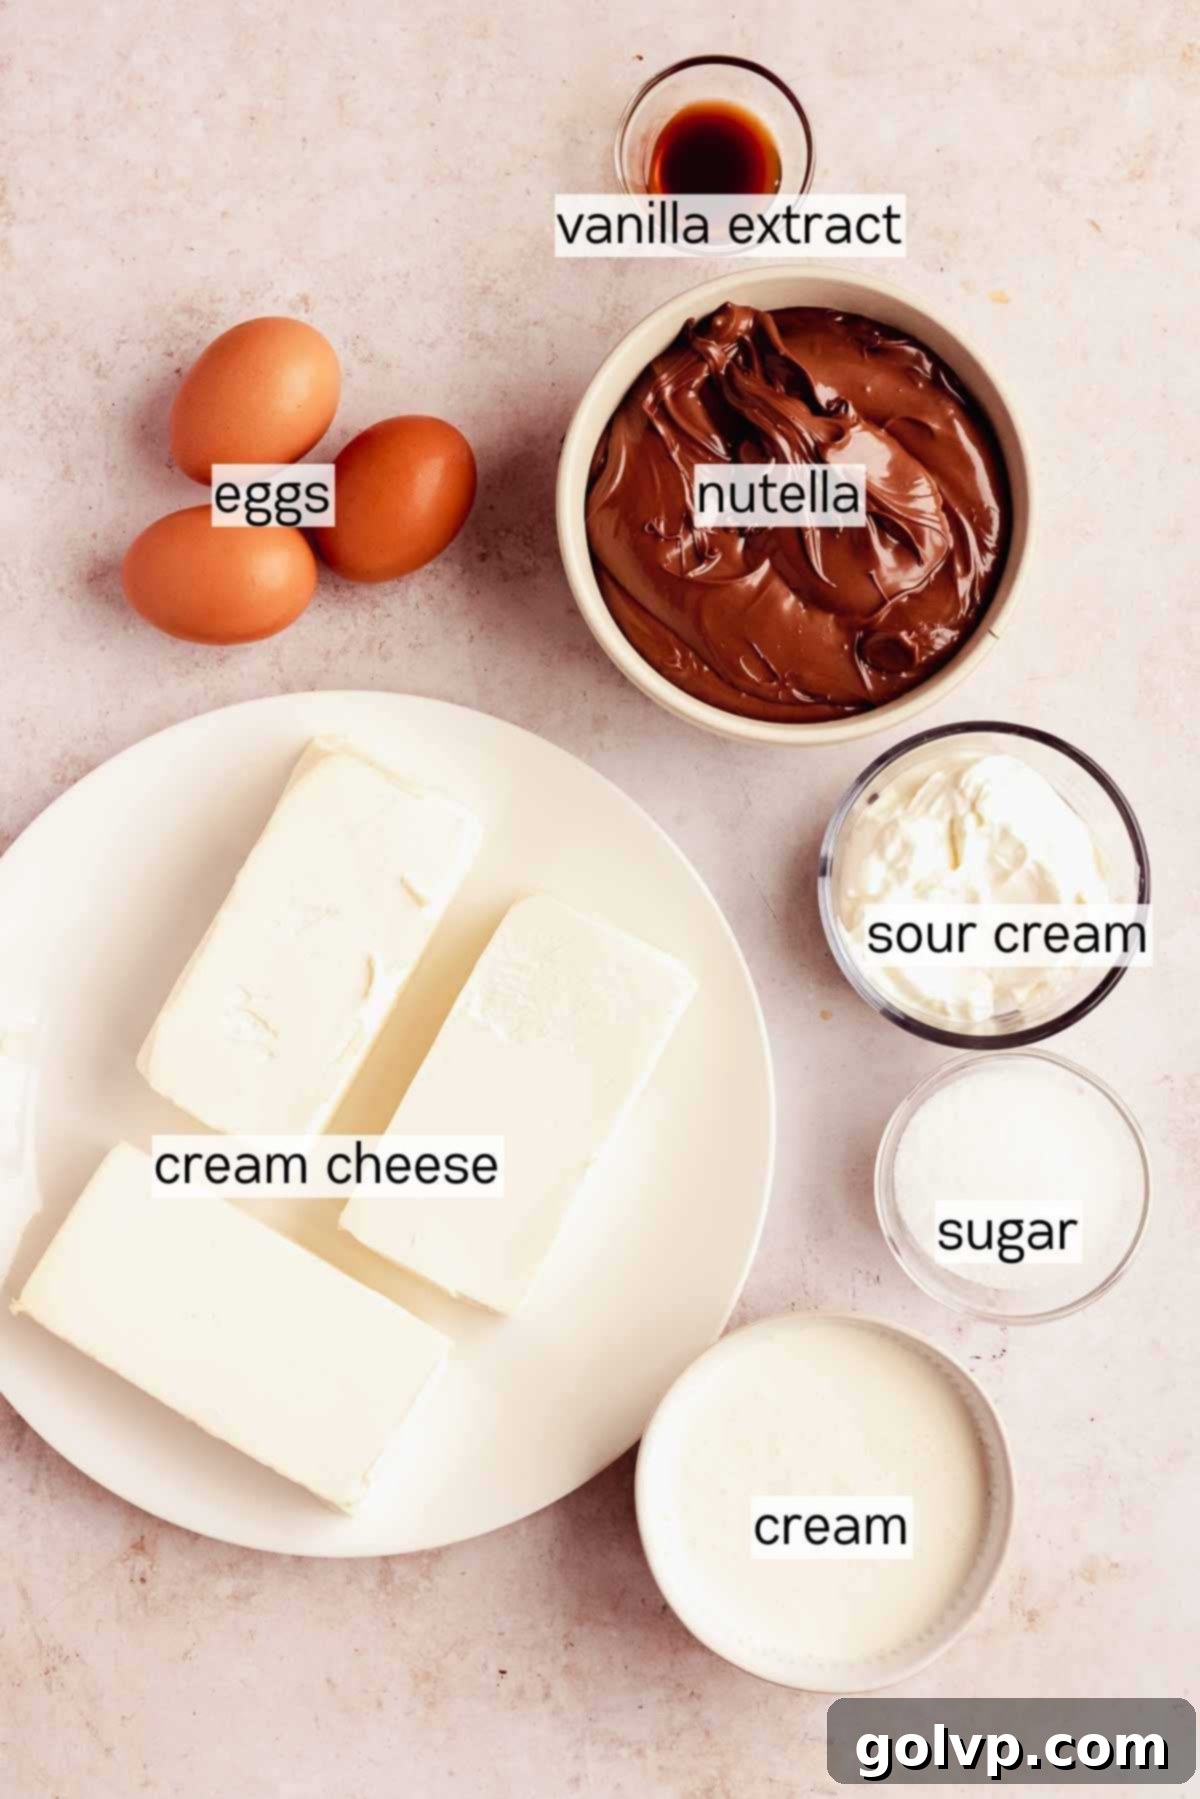
- Cream Cheese: The foundation of any great cheesecake! Opt for a high-quality, full-fat, brick-style cream cheese. Low-fat varieties contain too much water, which can lead to a watery consistency and prevent your cheesecake from setting properly. Always ensure your cream cheese is at room temperature for at least 30 minutes before you start mixing; this prevents lumps and ensures a silky smooth batter.
- Nutella: The star of the show! You’ll need a generous two cups for the cheesecake filling alone. This substantial amount ensures the chocolate hazelnut flavor truly shines without making the dessert overly sweet. While Nutella is preferred, any other similar chocolate hazelnut spread of good quality can be used.
- Heavy Cream: This ingredient is crucial for achieving an exceptionally light and ultra-creamy texture in your cheesecake. It also plays a vital role in creating the smooth Nutella ganache topping. Use whipping cream (35% fat content) and avoid substituting with half-and-half or milk, as these lack the necessary fat content for the desired richness and consistency.
- Sour Cream: Beyond adding a tangy depth of flavor, sour cream contributes significantly to the cheesecake’s characteristic creamy texture. Like the cream cheese, use a full-fat sour cream. Room temperature sour cream blends seamlessly into the batter, preventing curdling and ensuring a smooth finish.
- Eggs: Eggs act as a binder, providing structure and richness to the cheesecake. It is essential that your eggs are at room temperature. This helps them incorporate perfectly into the batter, preventing over-mixing and ensuring a silky, uniform consistency without any scrambled egg bits.
For those who love cheesecakes but might want to explore a slightly less chocolate-intensive option, consider trying this delightful red velvet Oreo cheesecake.
Crust and Topping Ingredients: The Perfect Complement
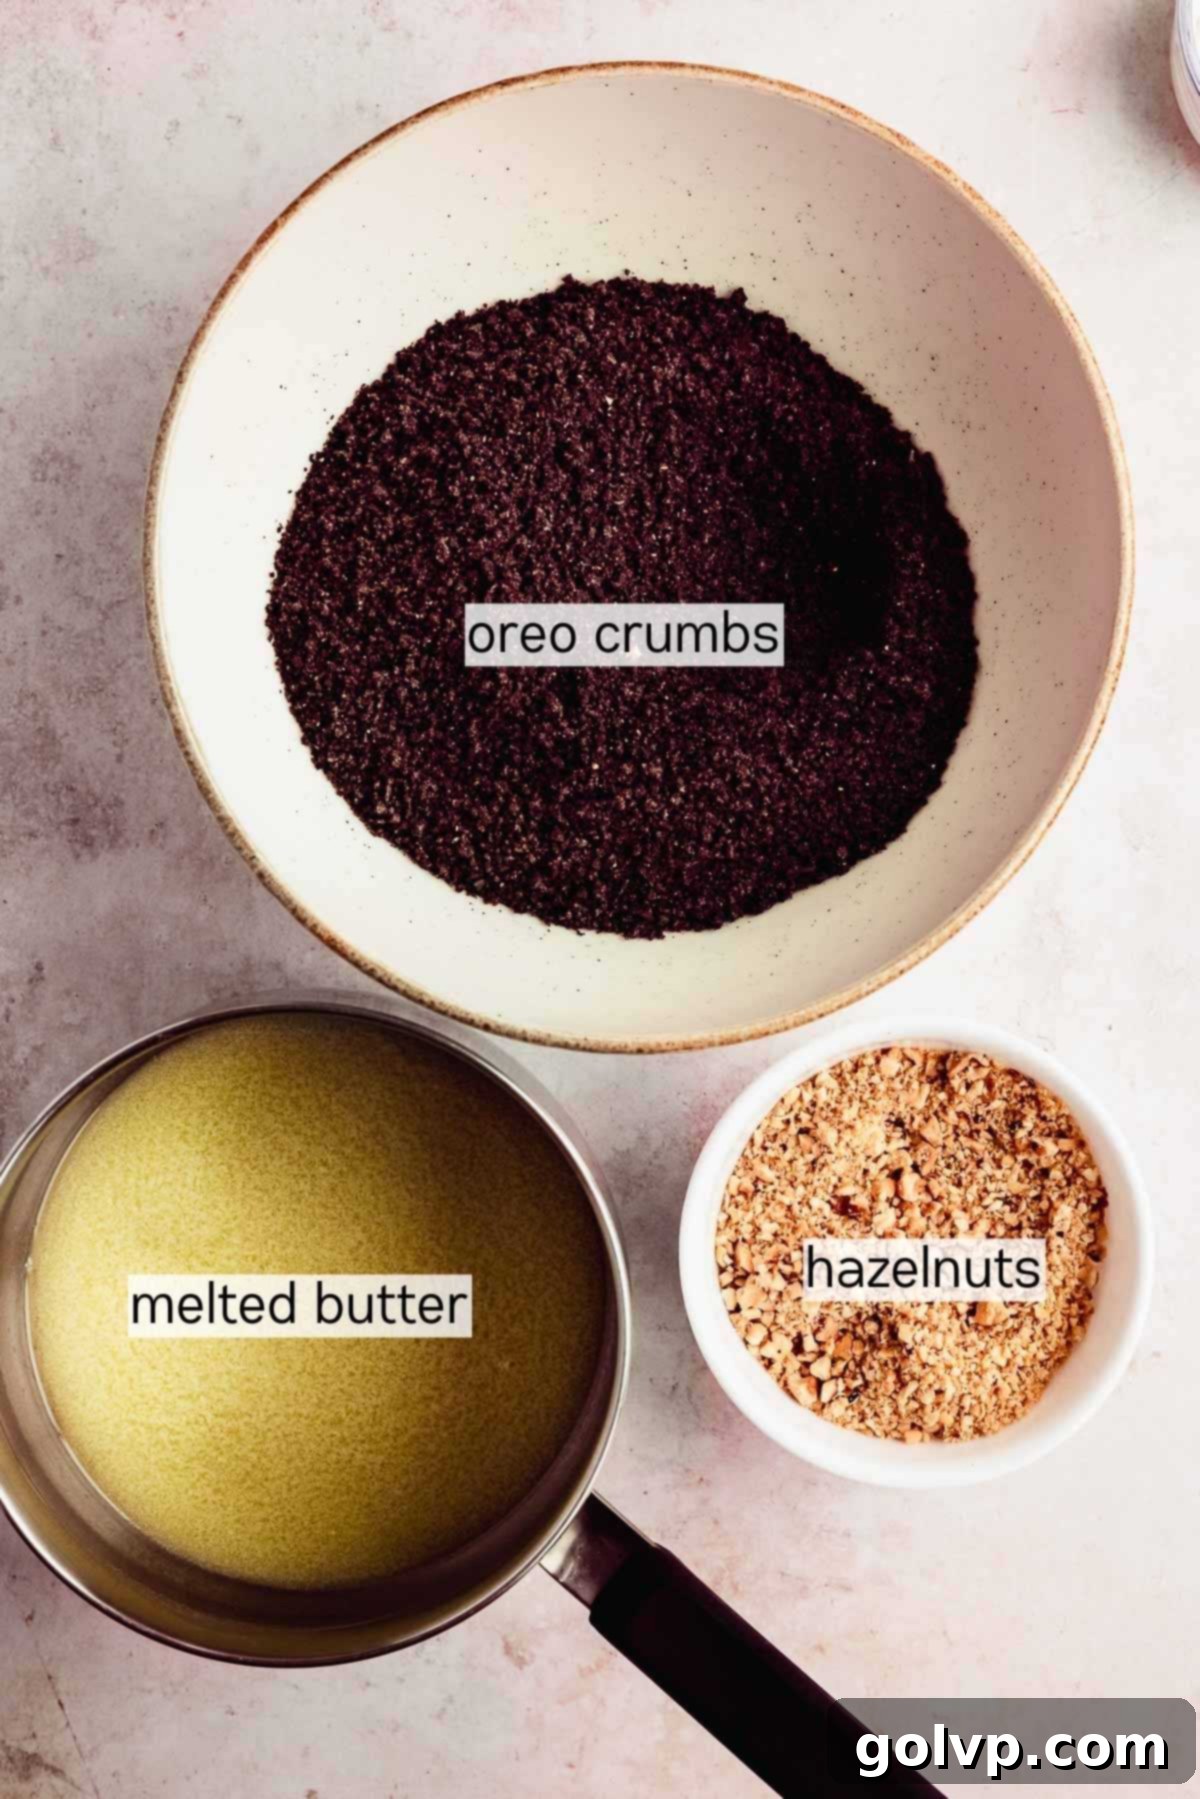
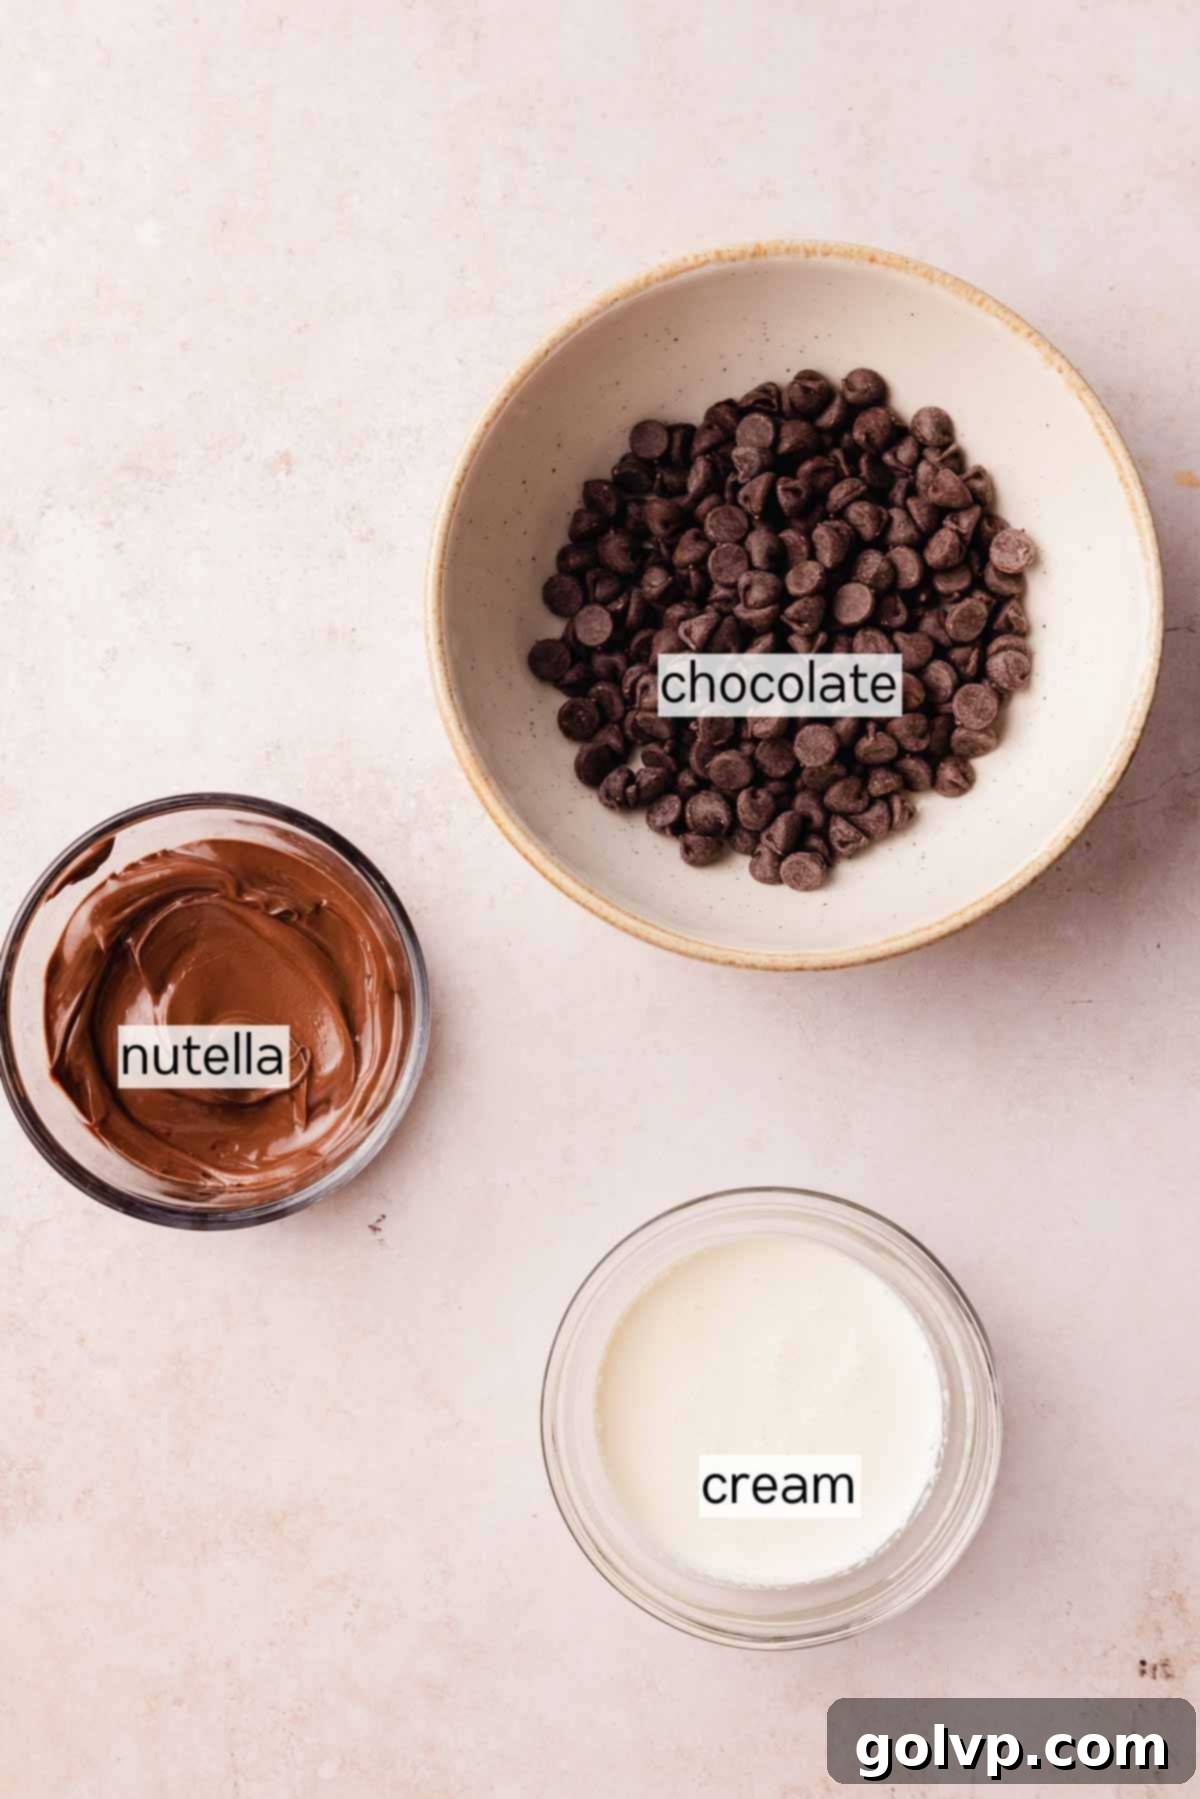
- Oreo Crumbs: The classic choice for a delectable crust! You’ll need approximately 36 whole Oreo cookies (about 407g) to create fine crumbs. The black cocoa of the Oreos provides a beautiful contrast and deep chocolate flavor that perfectly complements the Nutella. If you prefer a milder chocolate or even a vanilla base, golden Oreos can be used as an alternative. Ensure the cookies are finely crushed for a uniform crust.
- Hazelnuts: These add a wonderful textural contrast and an even deeper hazelnut essence to the cheesecake. Toasted hazelnuts are incorporated into the Oreo crust for a delightful crunch and to reinforce the chocolate-hazelnut theme. They also serve as a beautiful and flavorful garnish for the finished cake. You can easily chop them by hand on a cutting board or use a food processor for speed and consistency.
- Melted Butter: This acts as the binder for your cookie crust, holding everything together perfectly. Using a good quality melted butter will enhance the overall flavor profile. Both unsalted and salted butter work well; if using salted, you might slightly reduce any additional salt in the crust mixture. Ensure it’s fully melted but not boiling hot.
- Semisweet Chocolate Chips: Essential for the luscious Nutella ganache. Semisweet chocolate provides a balanced sweetness that pairs beautifully with the Nutella. For an even richer, darker ganache, you can opt for chopped dark chocolate with a higher cocoa percentage. Quality chocolate will make a noticeable difference in the ganache’s flavor and sheen.
✔️ Smart Ingredient Substitutions for Your Nutella Cheesecake
While this recipe is designed for optimal flavor and texture, a few substitutions can be made if needed:
- Nutella: Any widely available chocolate hazelnut spread can be used in place of Nutella. While I haven’t personally tested every off-brand variation, most similar products should perform well in both the filling and the ganache, maintaining the core flavor profile.
- Oreos: Feel free to substitute Oreos with any similar chocolate sandwich cookie. The key is to use the entire cookie, including the cream filling, as this contributes to the crust’s texture and richness. Graham cracker crumbs can also be used, though the flavor will be different.
- Hazelnuts: If hazelnuts are unavailable or if you prefer a different nut, you can substitute them with an equal amount of any other toasted, finely chopped nuts you enjoy, such as almonds or pecans. Keep in mind this will alter the traditional “chocolate hazelnut” profile but still yield a delicious cheesecake.
👩🍳 How to Make the Perfect Nutella Cheesecake Step-by-Step
Crafting this incredible Nutella cheesecake is a straightforward process, divided into three main stages: preparing the crisp, nutty crust; blending the velvety smooth filling; and finally, assembling with the decadent ganache.
Cheesecake Crust Step by Step: Building the Foundation
Preparation: Begin by preheating your oven to 355°F (180°C). Take an 8-inch or 9-inch round springform pan and lightly grease it with a piece of cold butter. This helps with release. Then, line the bottom of the pan with parchment paper – a crucial step for easy removal of the finished cheesecake. This preparation ensures a clean lift-off and a pristine presentation.
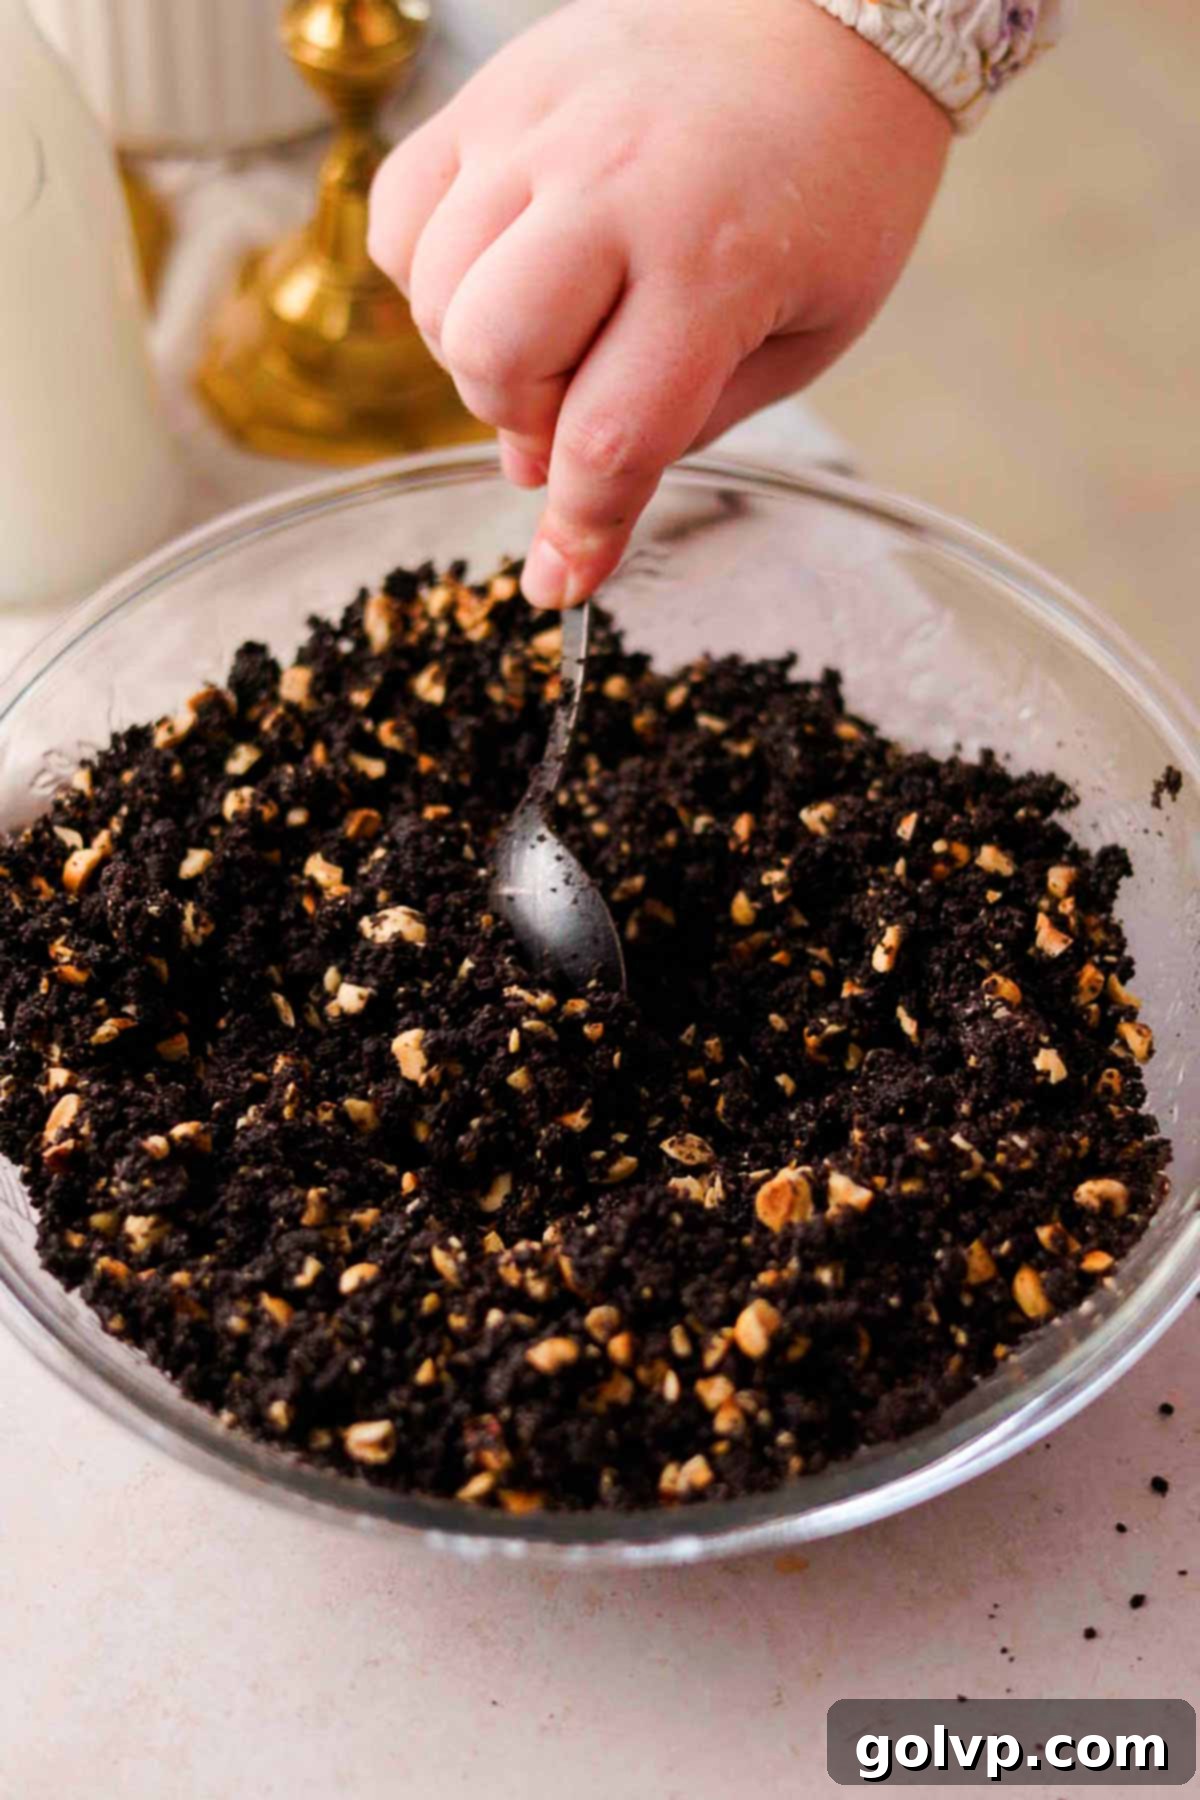
Step 1: In a medium-sized mixing bowl, combine the finely crushed Oreo crumbs, the toasted and chopped hazelnuts, and the melted butter. Use a spoon or your hands to mix these ingredients thoroughly until the crumbs are evenly moistened and incorporated. The butter acts as the binder, ensuring the crust holds its shape.
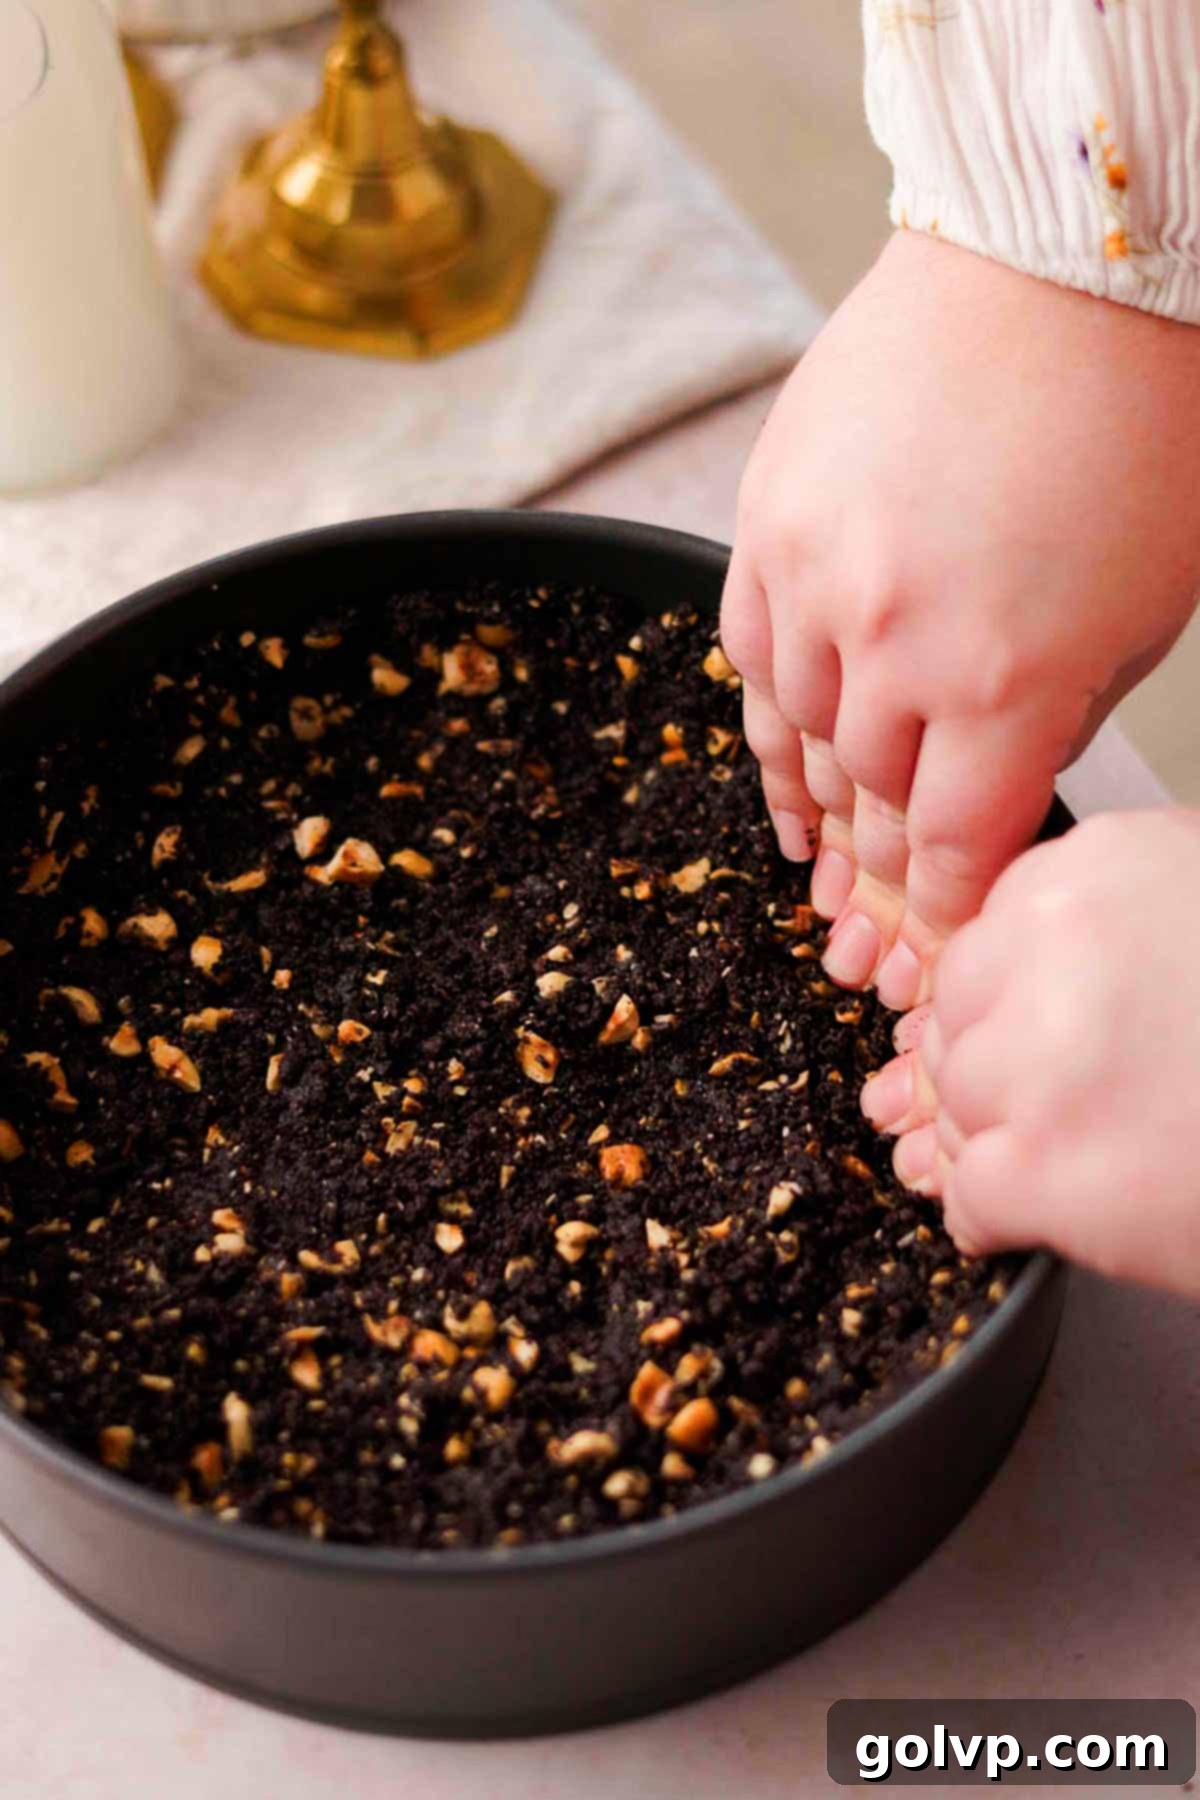
Step 2: Pour the crumb mixture into your prepared springform pan. Spread it out evenly across the bottom and then use the bottom of a flat-bottomed glass or a measuring cup to pack the crumbs down very tightly. This compacting is essential for a firm crust that won’t crumble when sliced. Gently push some of the crumbs halfway up the sides of the pan to form a slight edge.
Bake this crust in the preheated oven for 12 minutes. This pre-baking step helps to set the crust and makes it nice and crisp. While the crust is baking, immediately begin preparing your cheesecake filling. Do not turn off your oven after the crust finishes baking, as it will be needed for the cheesecake itself.
Cheesecake Filling Step by Step: Creating the Creamy Center
Preparation: Fill a kettle with water and place it on the stove to boil. This hot water will be used for the crucial water bath, which helps the cheesecake bake evenly and prevents cracks.
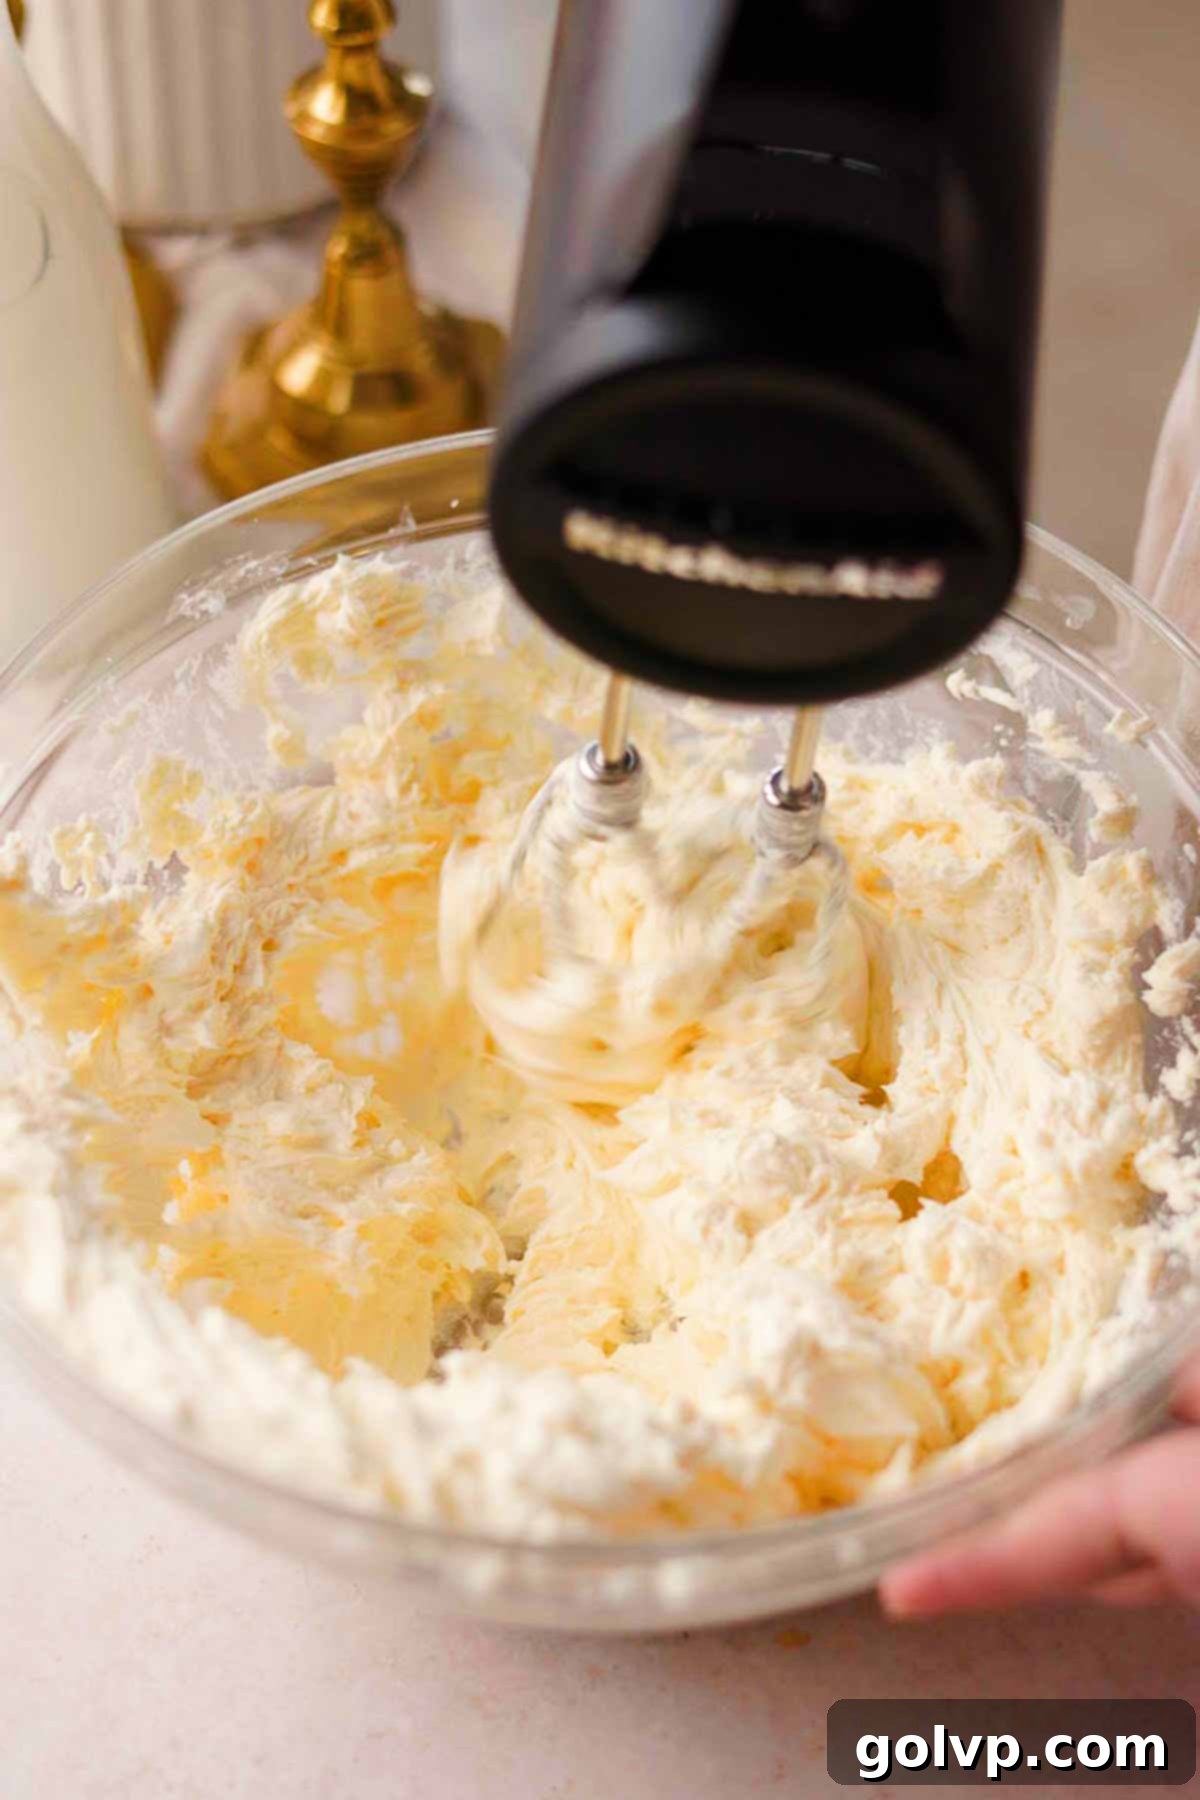
Step 1: In a large mixing bowl or the bowl of a stand mixer fitted with the paddle attachment, combine the softened cream cheese, granulated sugar, pure vanilla extract, and a pinch of sea salt. Beat these ingredients together on medium speed for about 2 minutes. Continue mixing until the mixture is completely smooth, lump-free, and creamy. Ensure to scrape down the sides of the bowl frequently to incorporate all ingredients evenly.
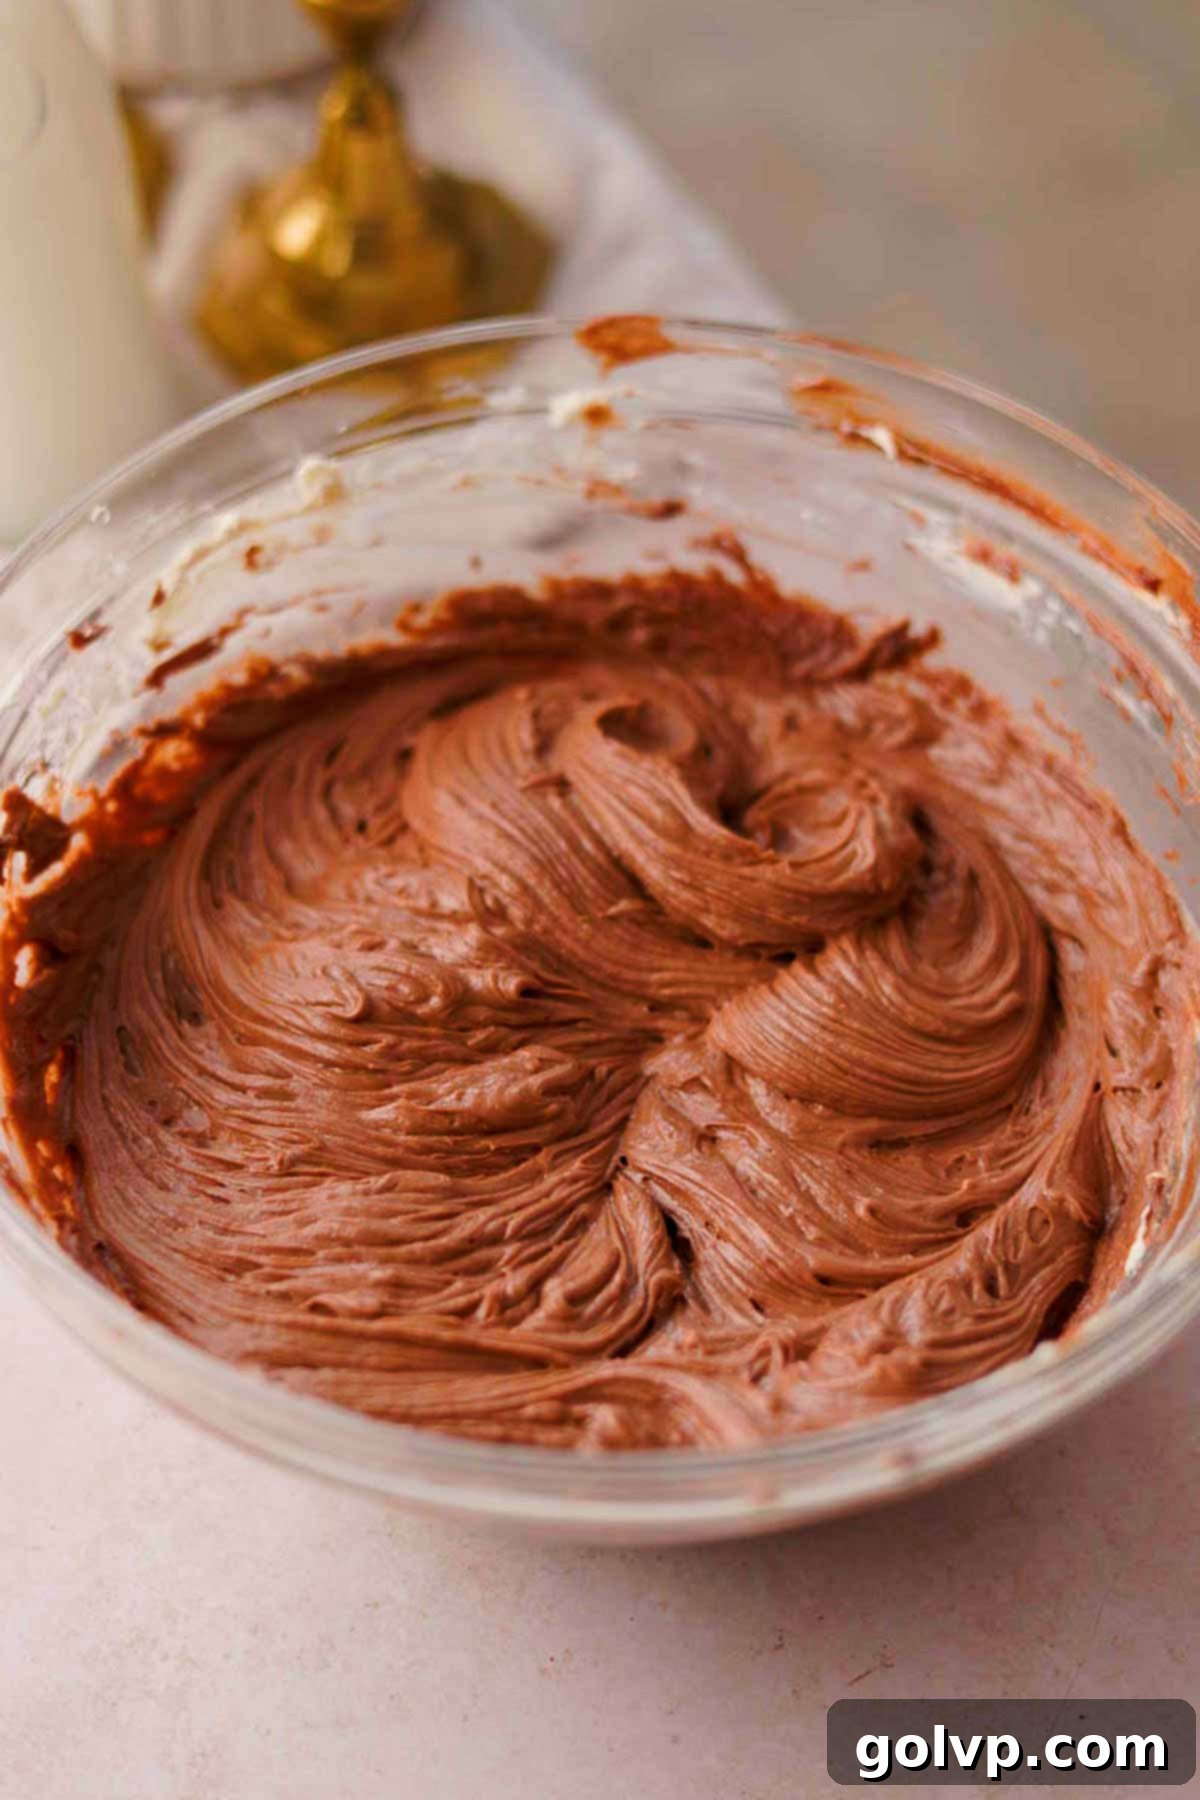
Step 2: Gradually add the Nutella, heavy cream, and sour cream to the cream cheese mixture. Blend thoroughly after each addition, ensuring everything is well combined before adding the next ingredient. This staged approach helps to maintain a smooth and consistent batter, preventing over-mixing that can introduce too much air, which can cause cracks.
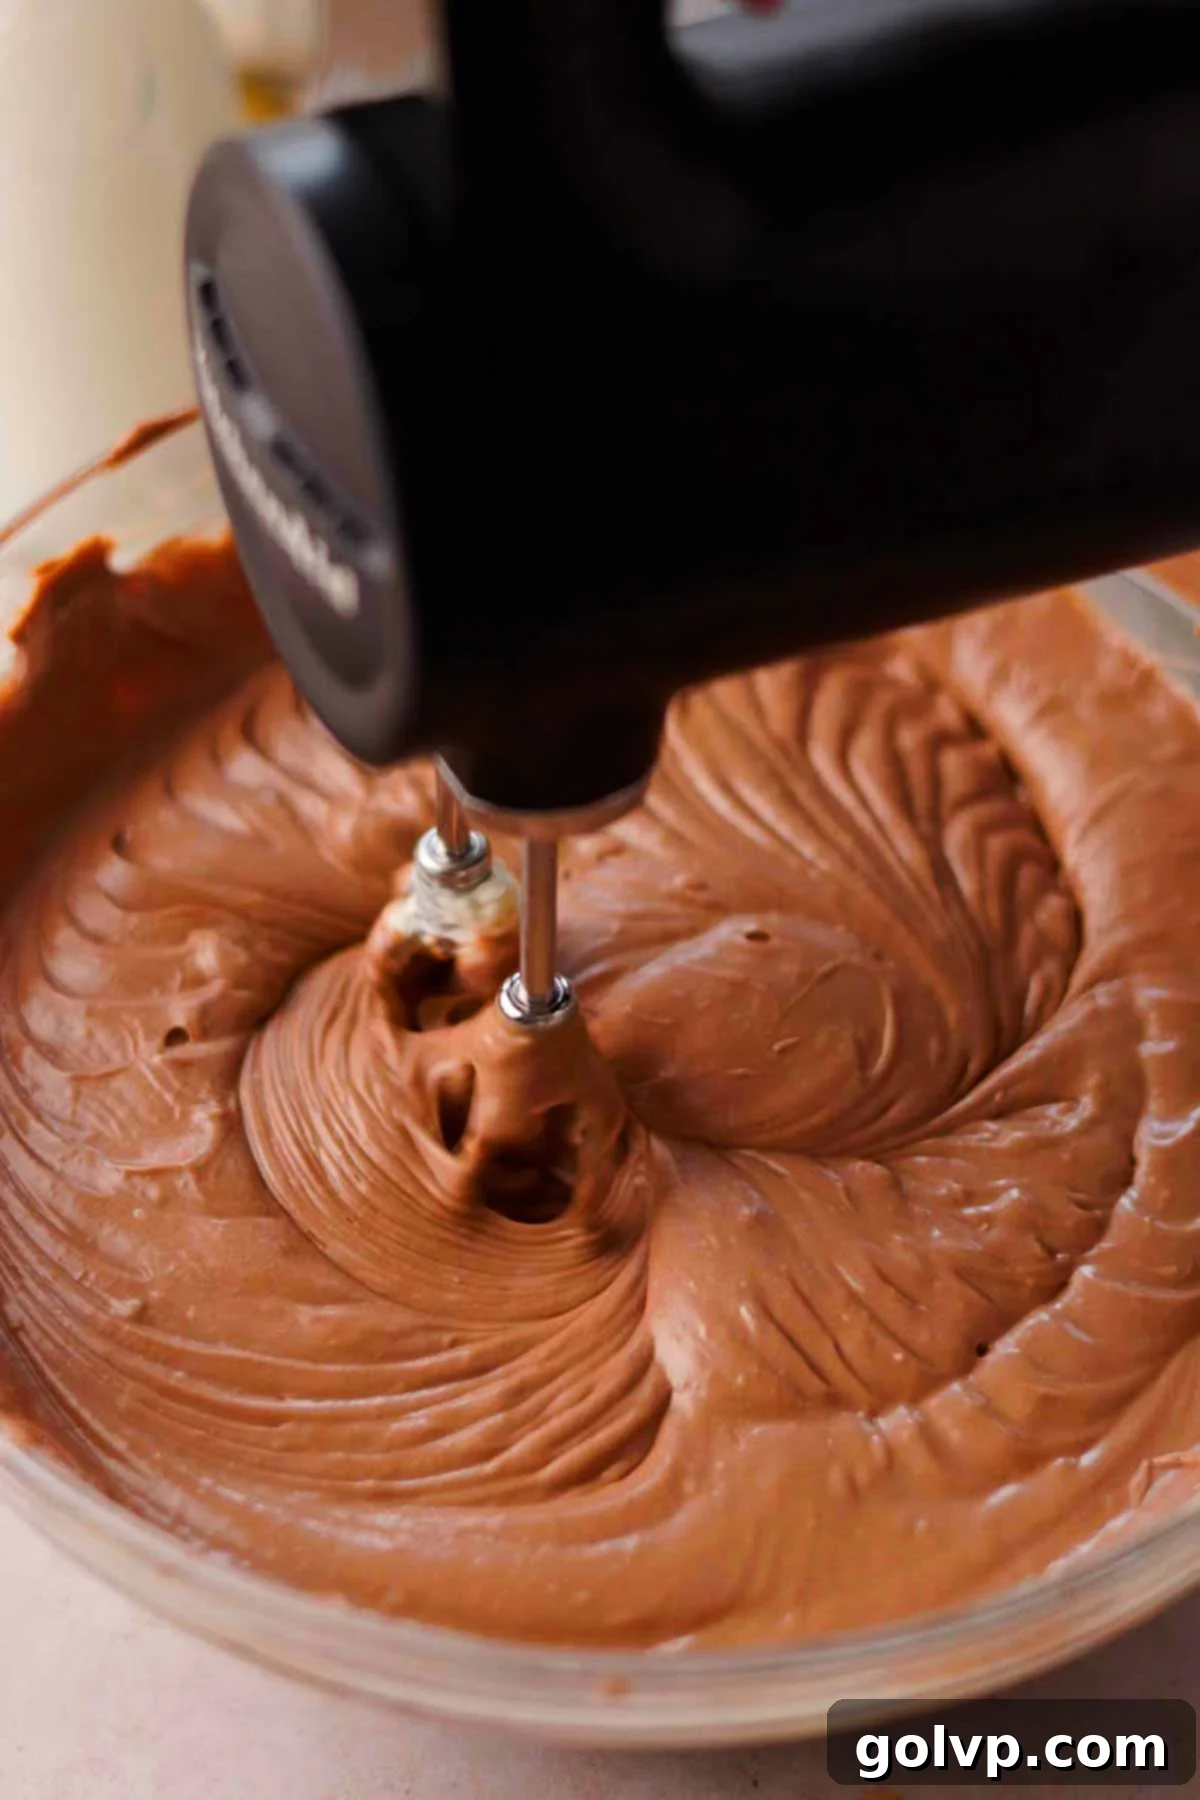
Step 3: With the mixer on low speed, add the room temperature eggs one at a time. Beat just until each egg is fully incorporated into the batter and disappears. It’s crucial to stop beating as soon as the last egg is mixed in. Over-mixing eggs can introduce too much air, leading to a cracked cheesecake surface.
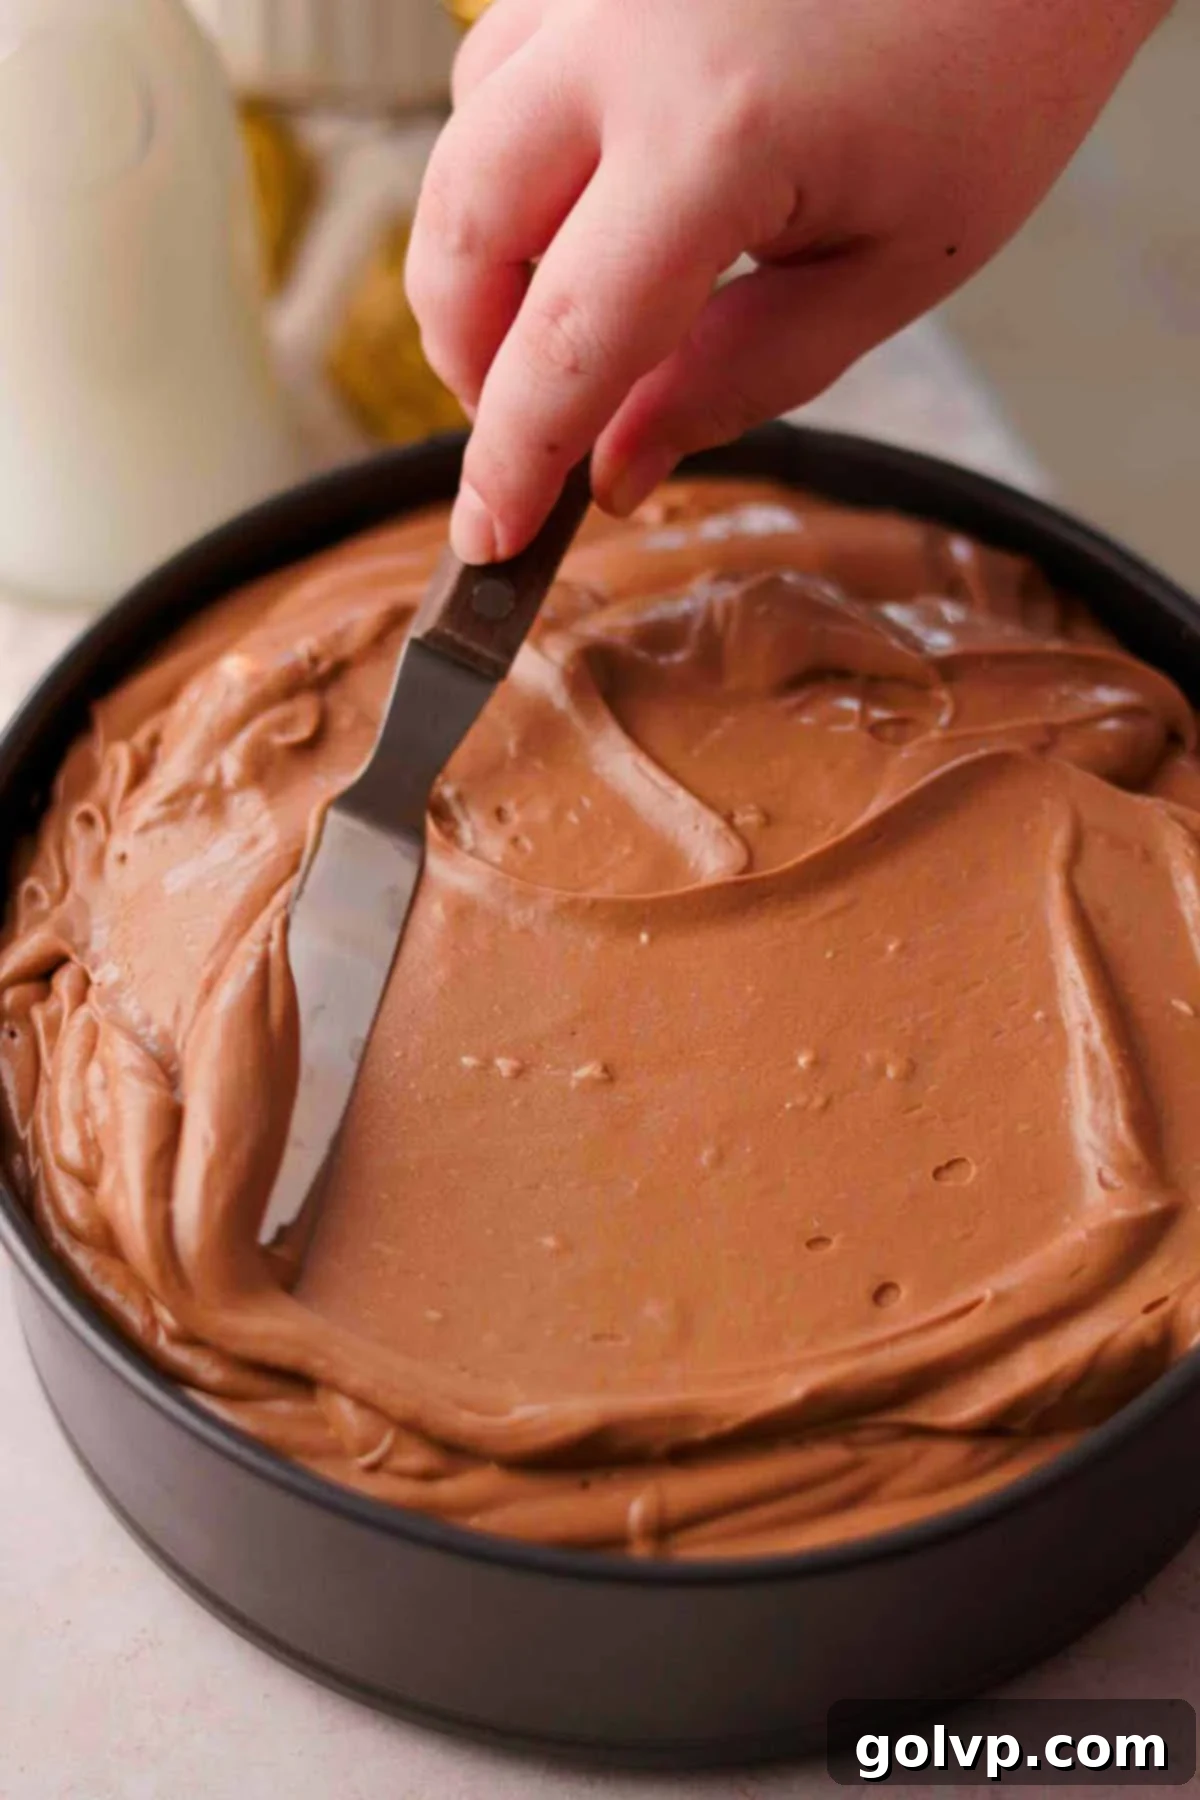
Step 4: Pour the smooth cheesecake filling into the pre-baked Oreo crust. Gently smooth the top of the filling with an offset spatula or the back of a spoon to create an even surface. To prepare for the water bath, place your springform pan (with the cheesecake) into a slightly larger round baking pan (1 to 2 inches wider). Then, place this round pan into an even larger rectangular baking dish, ensuring it fits comfortably. Refer to the “Water Bath Options” section for detailed alternatives if you don’t have the exact pans.
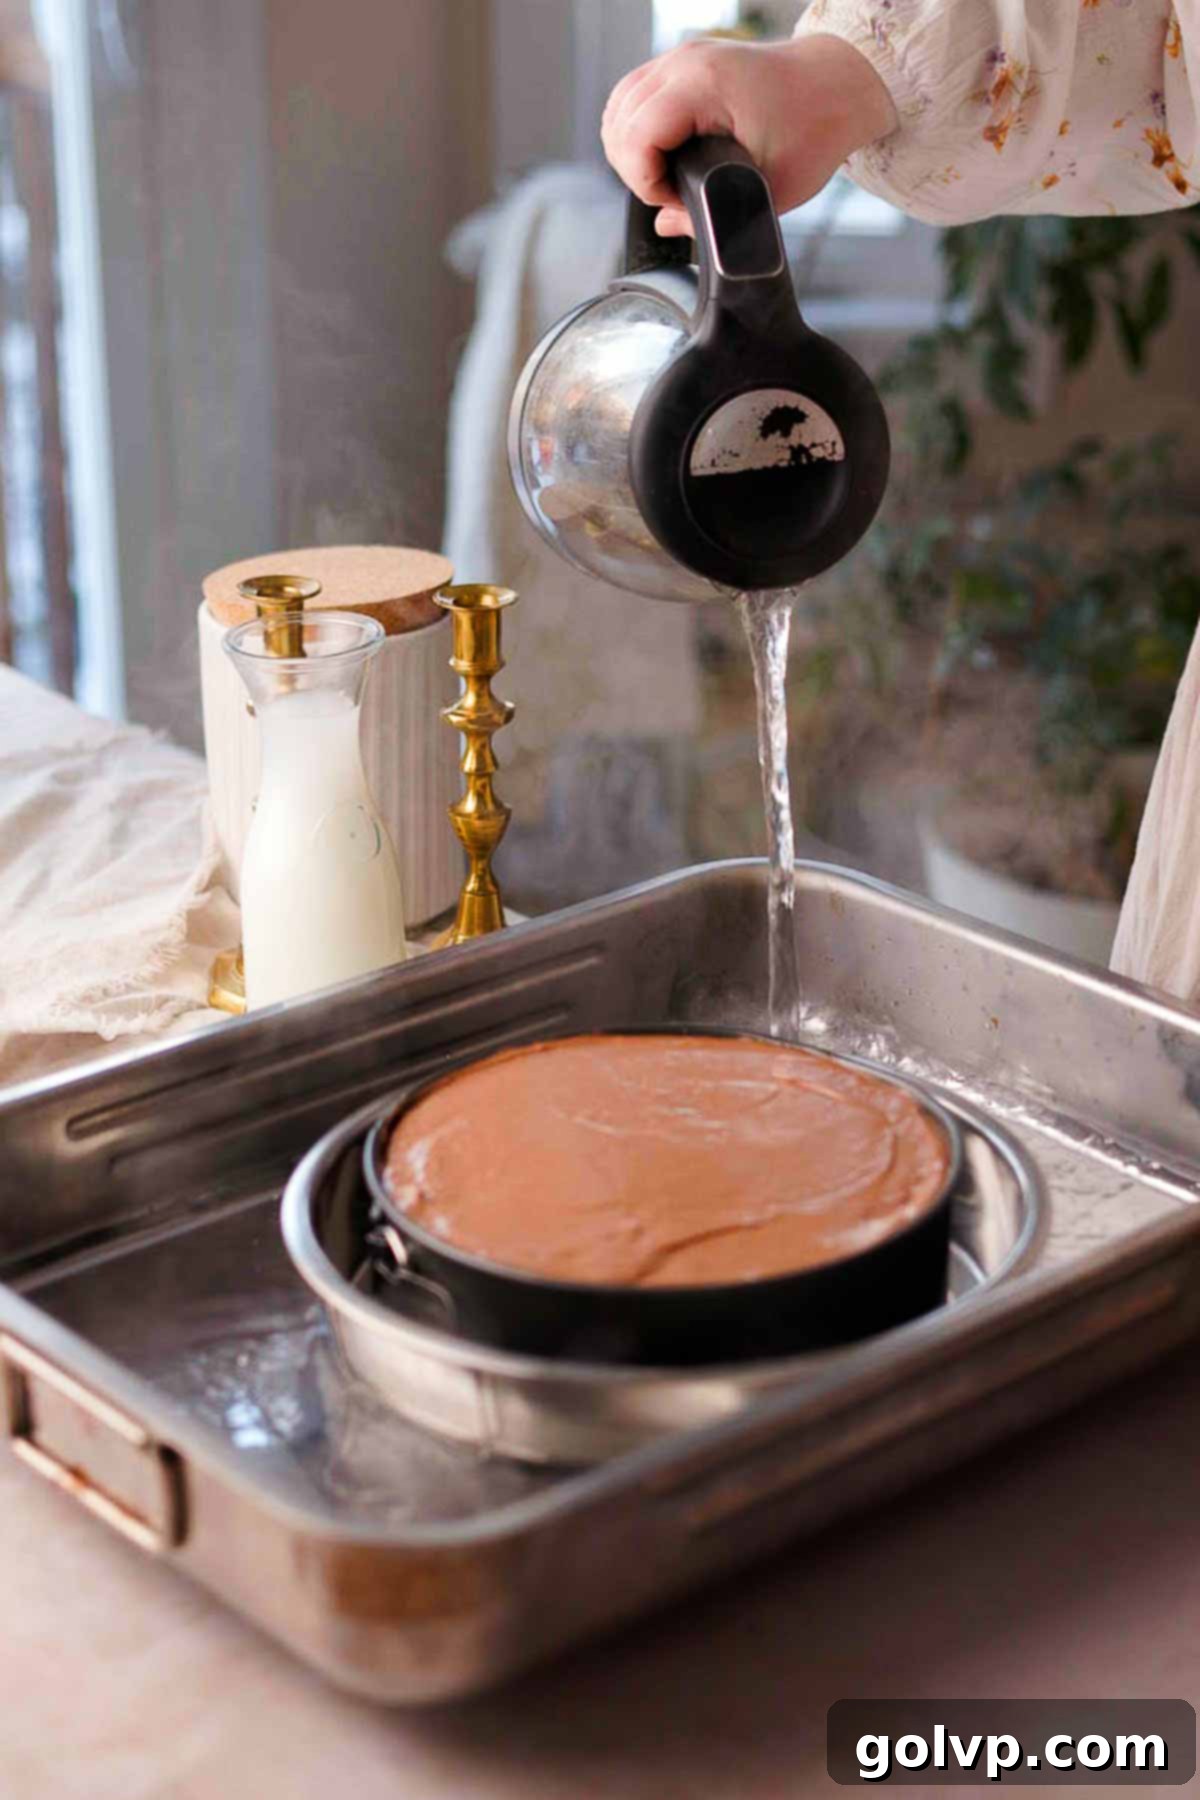
Step 5: Carefully pour the boiling hot water into the large rectangular pan, ensuring the water level comes about halfway up the sides of the cheesecake pan, but without splashing any water into the cheesecake itself. Using oven mitts for safety, carefully transfer the large baking tray (containing the cheesecake and water bath setup) into your preheated oven.
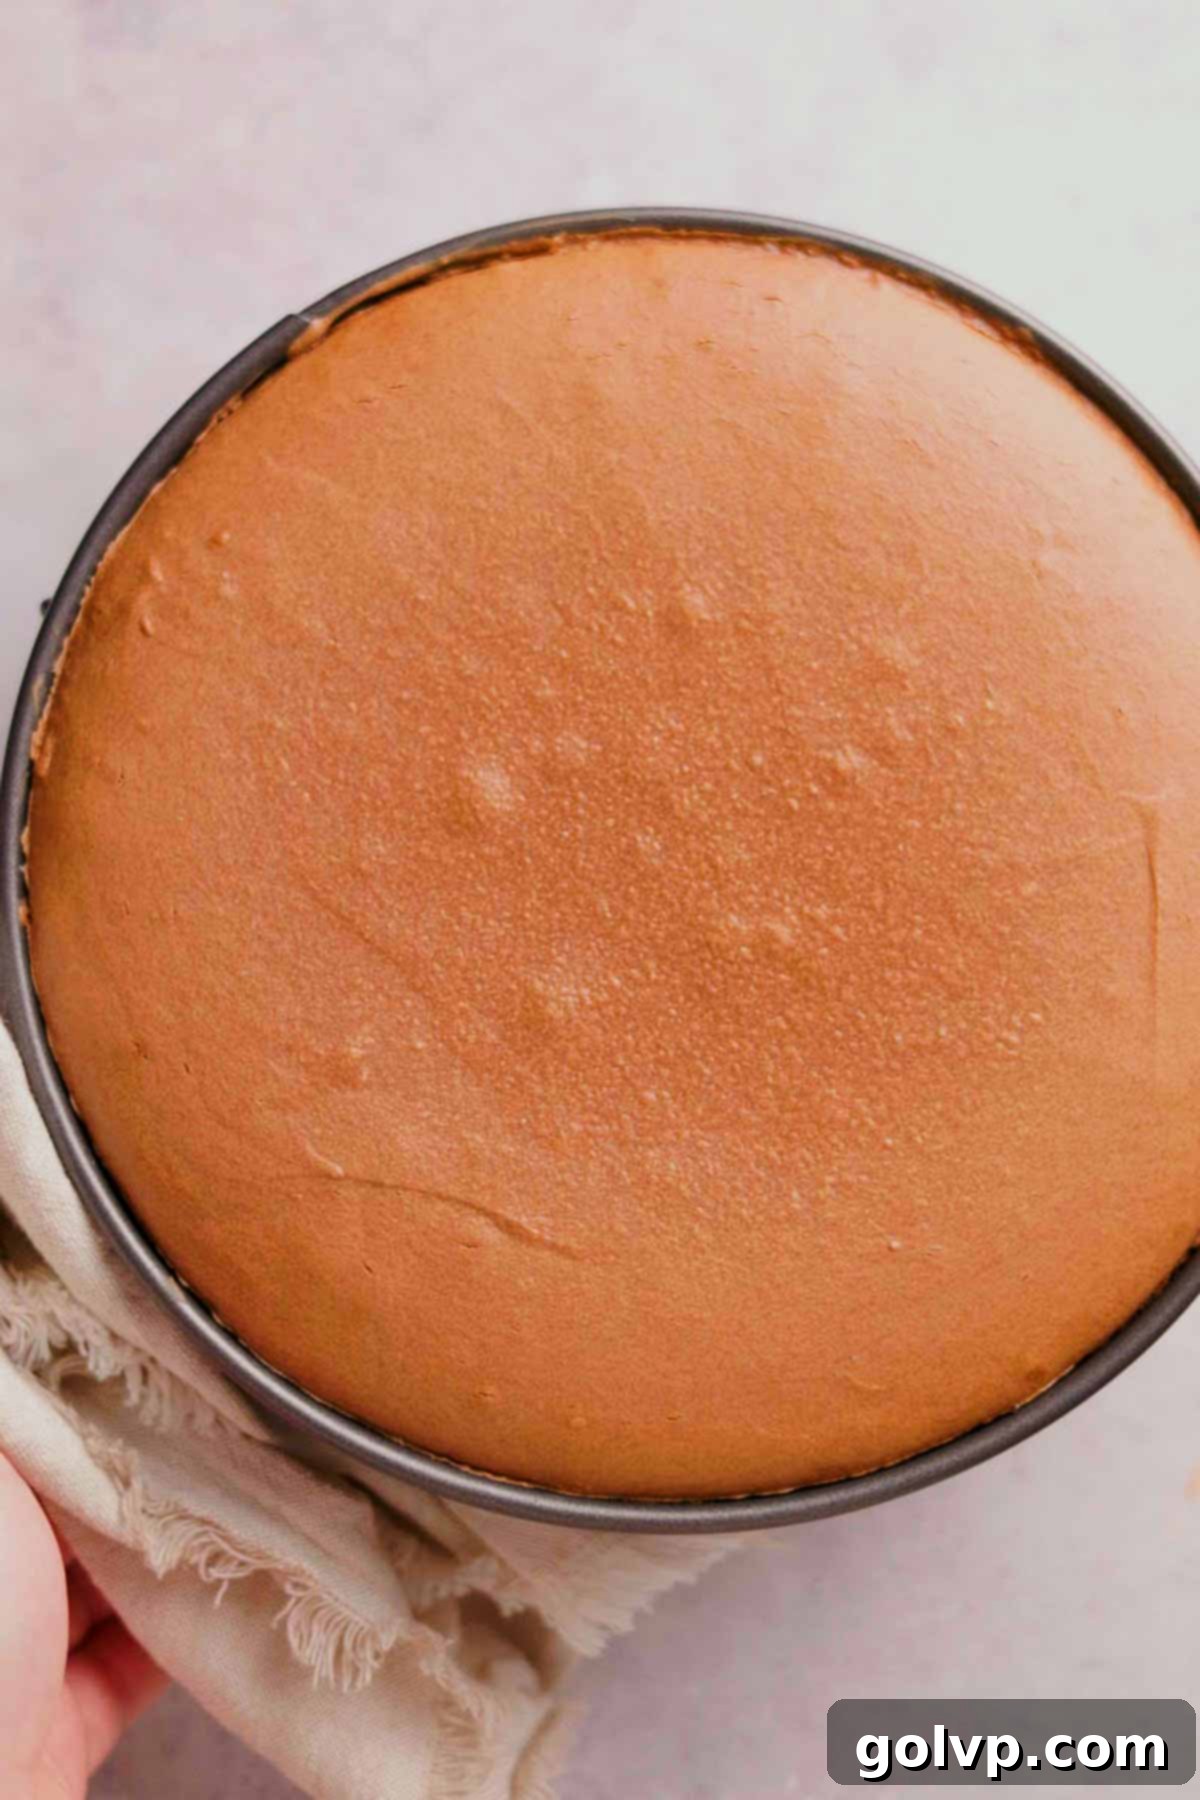
Step 6: Bake the Nutella cheesecake in the preheated oven (still at 355°F or 180°C) for 70-90 minutes. The cheesecake is ready when the edges appear set and slightly puffed, but the very center still has a slight jiggle when you gently shake the pan. This jiggle is key – it will continue to set as it cools, preventing over-baking and cracks.
Step 7: Once baked, turn off the oven but leave the cheesecake inside with the oven door propped open for about 20 minutes. This gradual cooling prevents sudden temperature changes that can cause cracks. After this period, carefully remove the cheesecake from the water bath and let it cool completely on a wire rack at room temperature. Once entirely cool, cover the cheesecake tightly with plastic wrap and refrigerate for at least 8 hours, or ideally, overnight. This chilling process is essential for the cheesecake to fully set, firm up, and for its flavors to truly develop.
Assembly Step by Step: The Decadent Finishing Touch
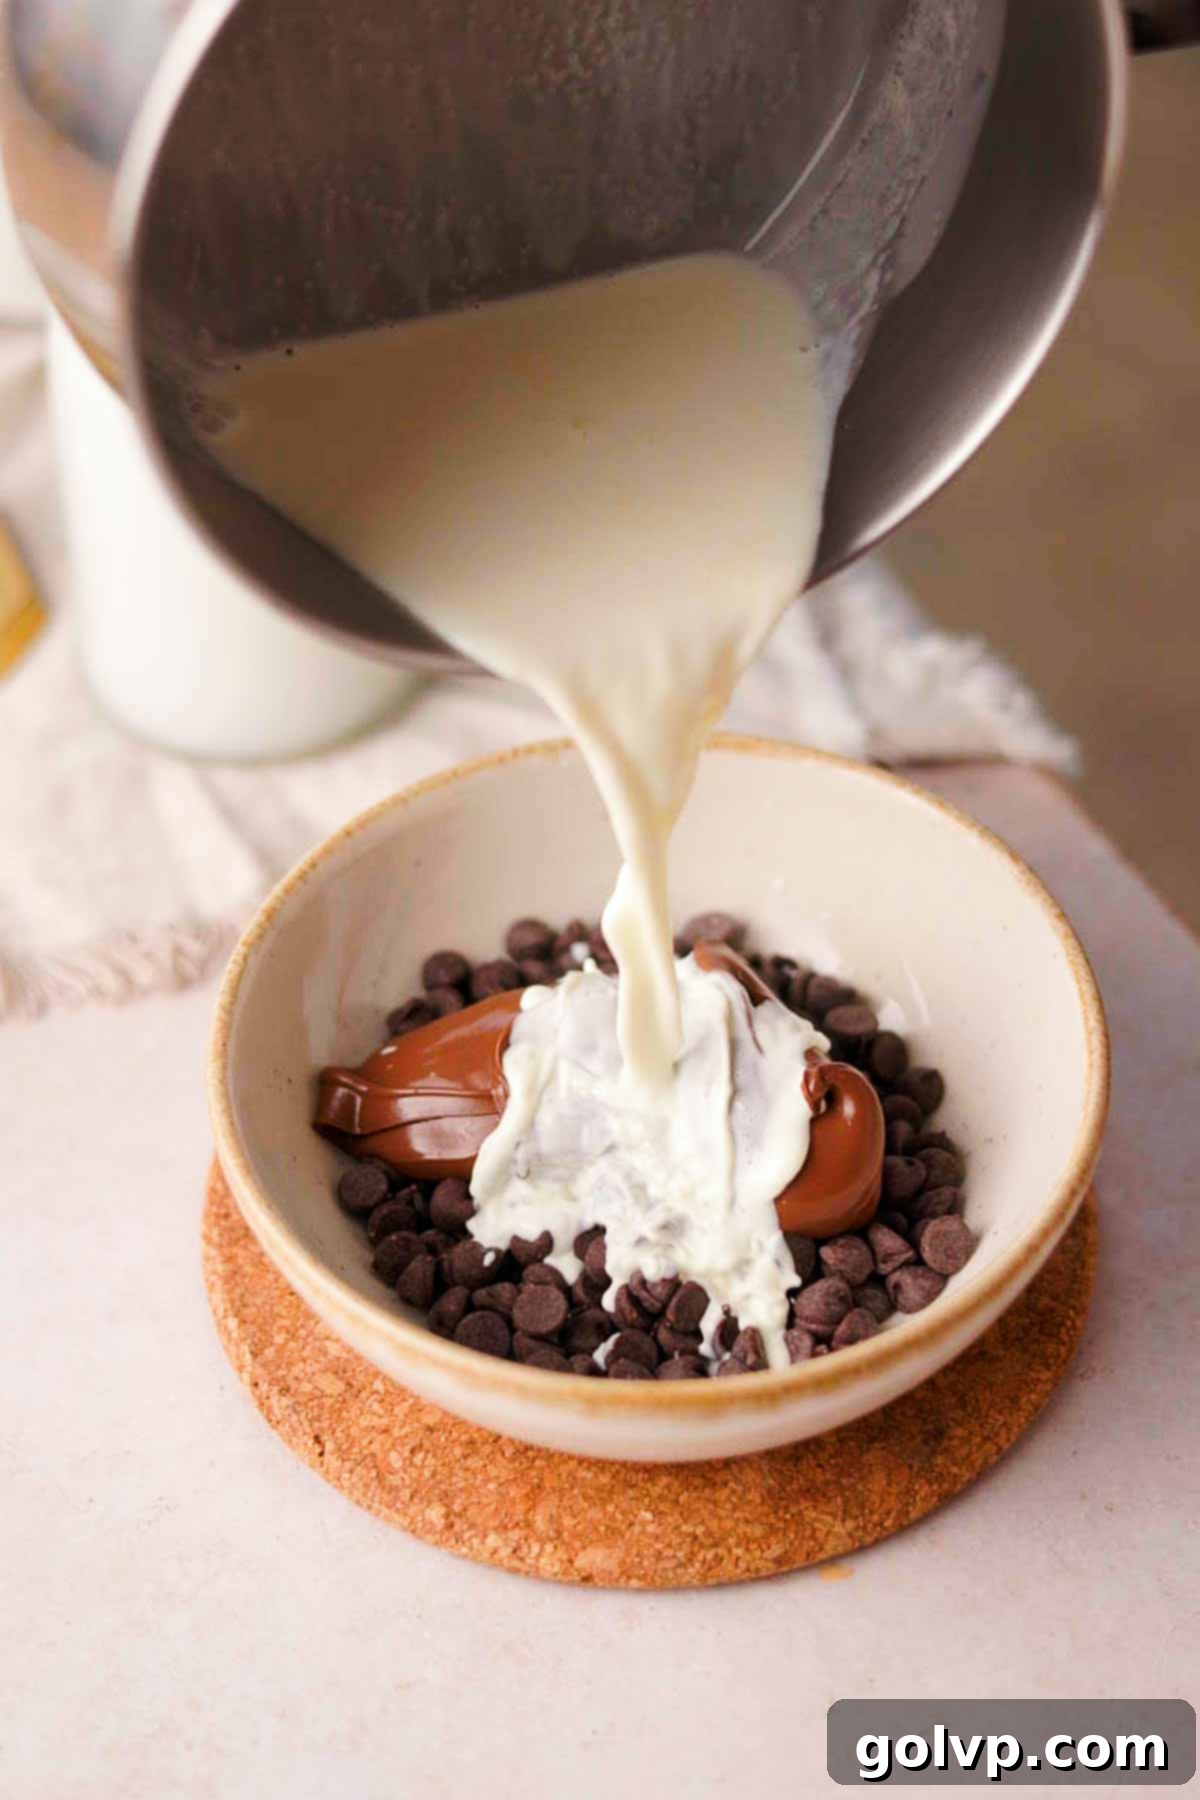
Step 1: In a large, heat-safe bowl, combine the semisweet chocolate chips, the remaining Nutella, and a tiny pinch of salt. In a small saucepan, gently heat the heavy cream over medium-low heat until it just begins to simmer around the edges – do not let it boil vigorously. Once simmering, immediately pour the hot cream over the chocolate chips, Nutella, and salt mixture in the bowl.
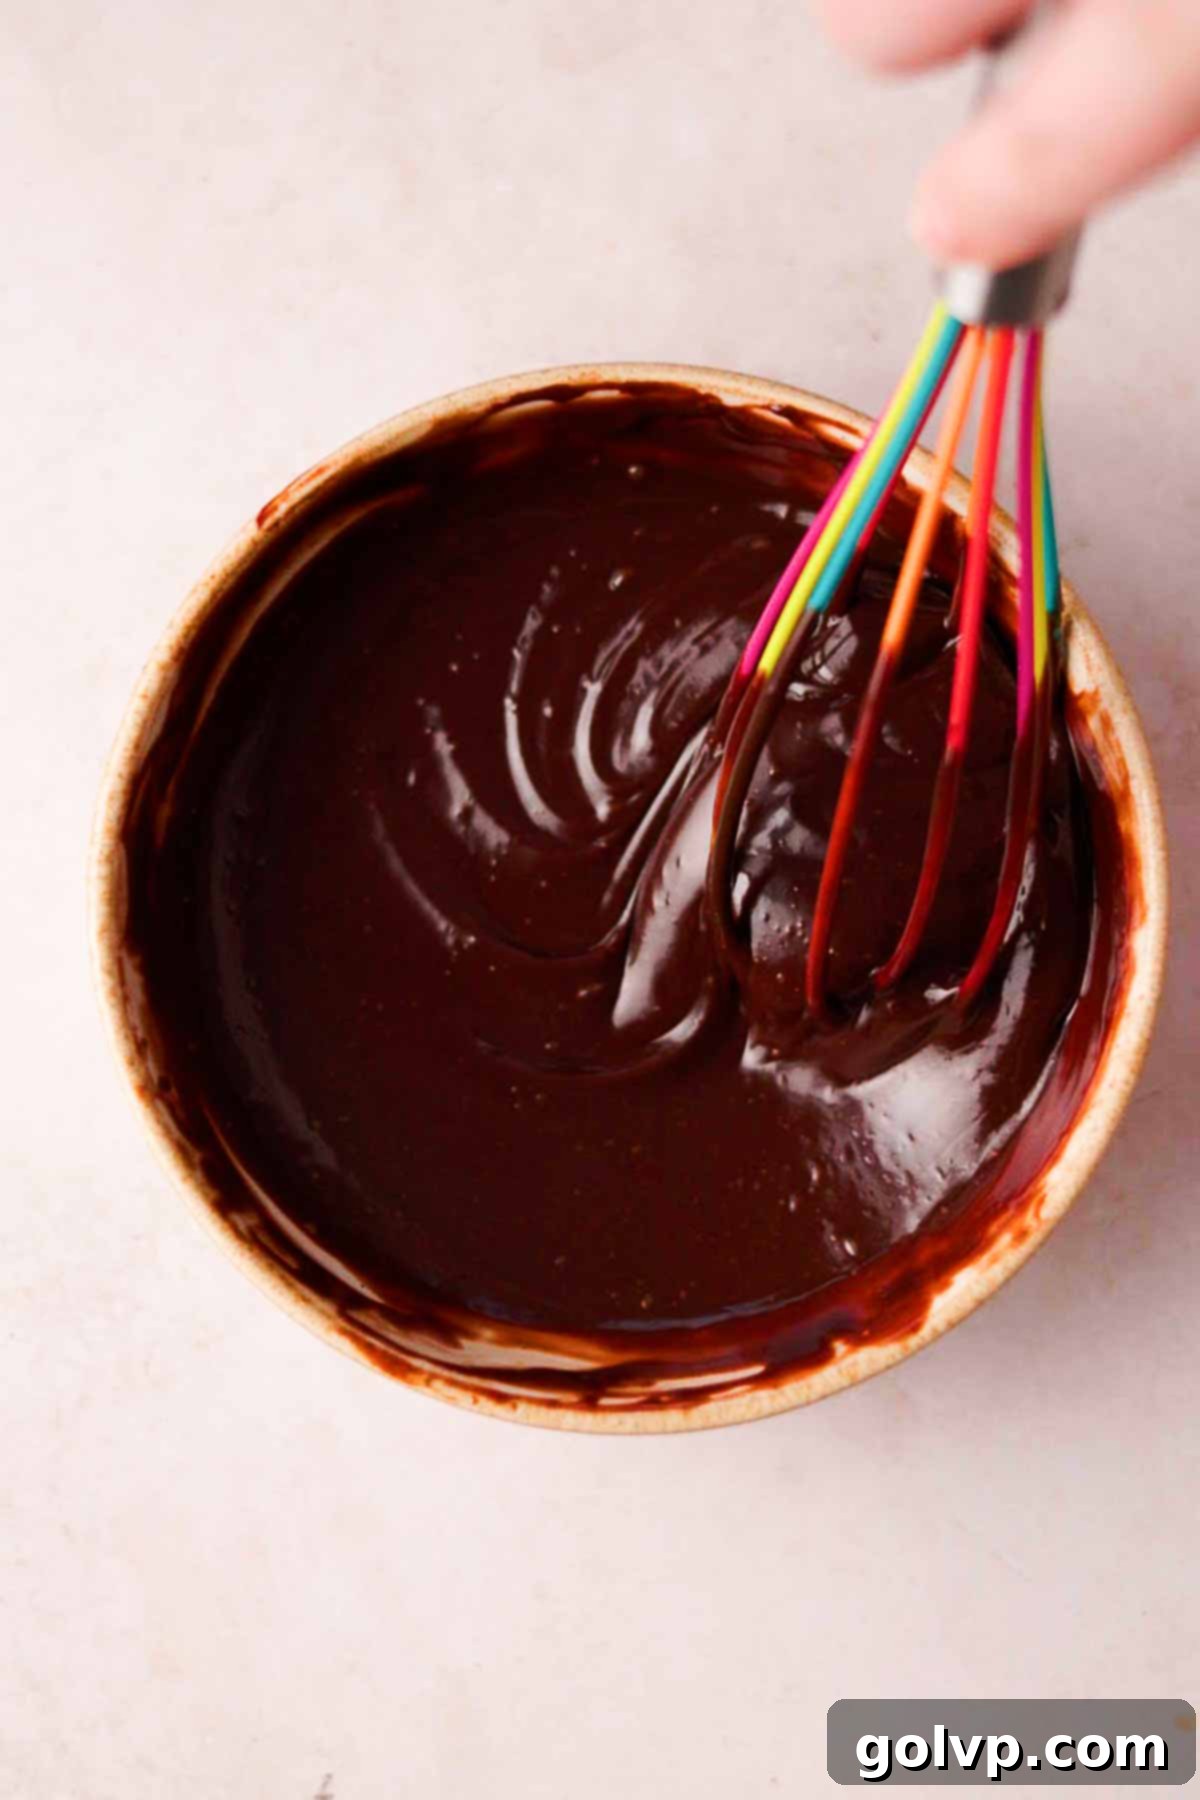
Step 2: Allow the mixture to sit undisturbed for about 7 minutes. This gives the hot cream time to melt the chocolate and warm the Nutella. After 7 minutes, use a whisk to gently stir the mixture from the center outwards until it becomes completely smooth, glossy, and emulsified into a beautiful ganache. If there are still a few stubborn chocolate lumps, you can briefly warm the bowl over a pot of hot water (creating a double boiler) or microwave it in 10-second intervals, stirring after each, until perfectly smooth.
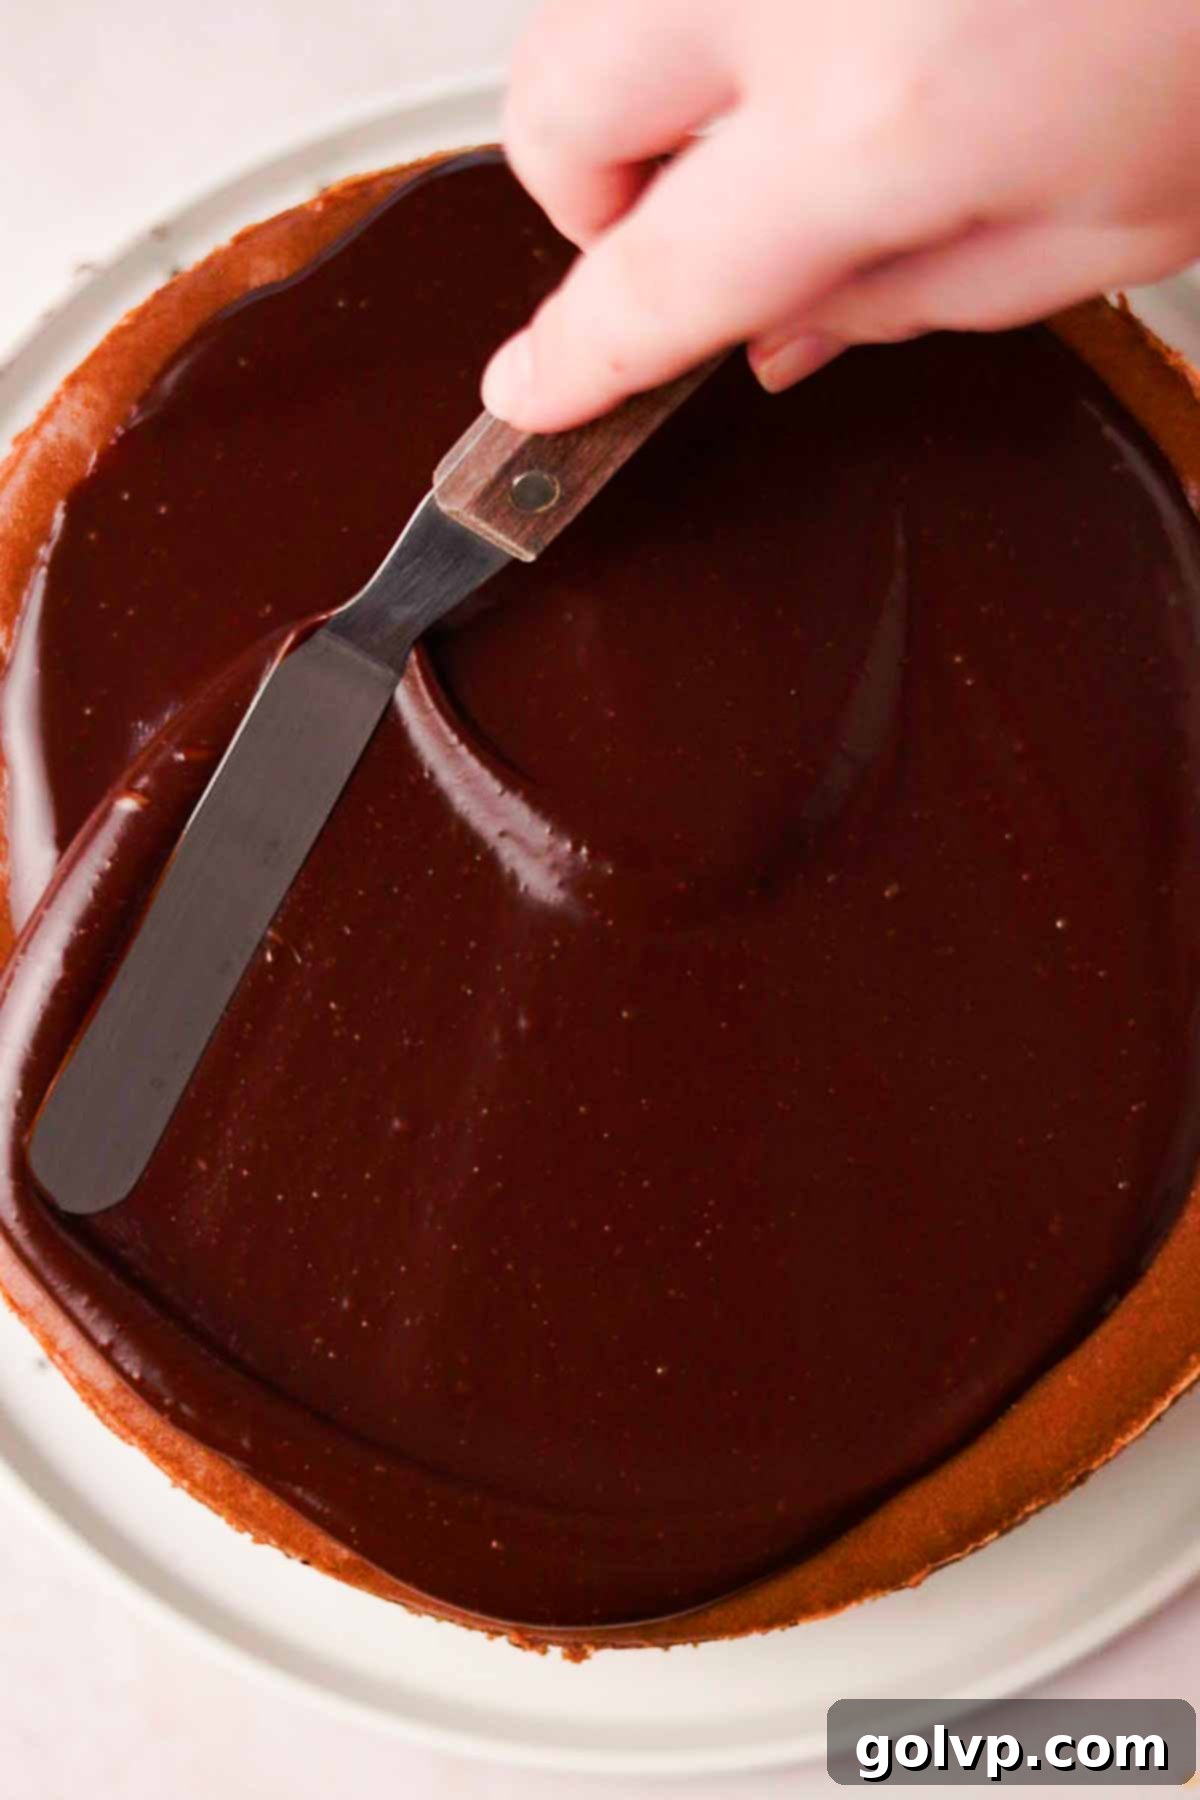
Step 3: Once your cheesecake has fully chilled and set, carefully remove it from its springform pan. This is often easiest by warming the sides of the pan slightly with a warm towel or quick blast from a hairdryer. Pour the freshly made, slightly warm Nutella ganache evenly over the top of the chilled cheesecake. Use an offset spatula or the back of a spoon to spread the ganache gracefully to the edges, allowing a little to drip down the sides for an appealing aesthetic.
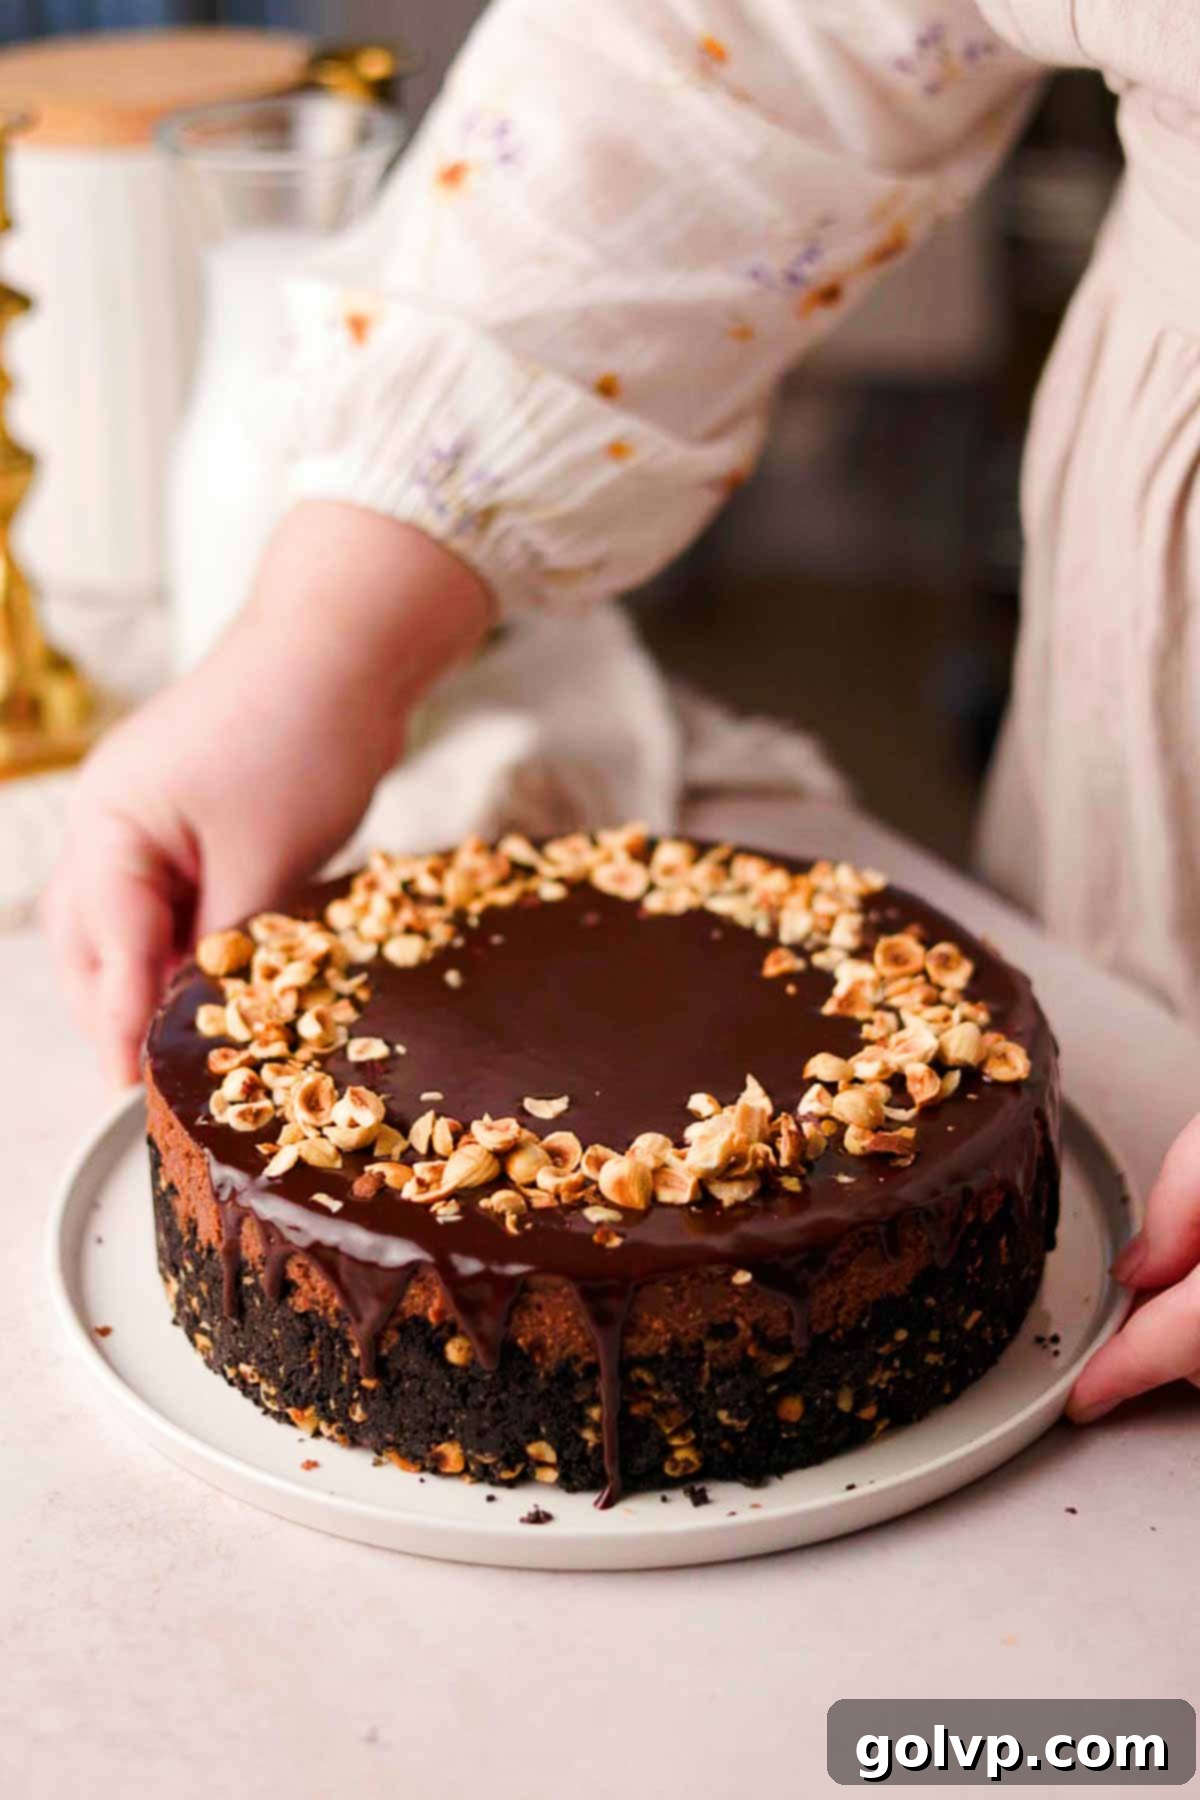
Step 4: Finish your beautiful Nutella cheesecake by generously sprinkling roasted and roughly chopped hazelnuts over the ganache. These provide an elegant garnish and an extra layer of hazelnut flavor and crunch. Before slicing and serving, place the decorated cheesecake back into the fridge for about 10 minutes to allow the ganache to set slightly, ensuring clean cuts.
✔️ Expert Tips for a Flawless Nutella Cheesecake
Achieving a perfect cheesecake every time involves a few key techniques. Follow these expert tips for an incredibly smooth, creamy, and crack-free Nutella cheesecake:
- Always Use Good Quality, Full-Fat Cream Cheese: This is paramount. Low-fat cream cheese contains more water, which can result in a grainy texture and a cheesecake that struggles to set properly. Stick to full-fat, brick-style cream cheese, such as Philadelphia original, for the best, creamiest results.
- Bring All Batter Ingredients to Room Temperature: This step is critical for a silky-smooth batter. Allow your cream cheese, eggs, heavy cream, and sour cream to sit out at room temperature for at least 30 minutes (or longer for cream cheese) before you begin mixing. Room temperature ingredients emulsify much better, preventing lumps and ensuring a uniform, smooth consistency.
- Scrape Down the Bowl Frequently: As you mix the batter, ingredients tend to cling to the sides of the bowl. Stop your mixer periodically and use a rubber spatula to scrape down the sides and bottom thoroughly. This ensures all ingredients are fully incorporated, leading to a perfectly smooth and homogenous cheesecake batter.
- Bake in a Water Bath (Bain-Marie): This technique is a game-changer for baked cheesecakes. A water bath creates a moist, even heat environment in the oven, which prevents the cheesecake from over-baking around the edges before the center is done. This even cooking results in an ultra-creamy texture from edge to center and significantly reduces the risk of cracks on the surface.
- Know When Your Cheesecake is Perfectly Baked: Resist the urge to over-bake! A cheesecake is ready when its edges are set and slightly firm, but the very middle (about 2-3 inches in diameter) still shows a slight jiggle when you gently shake the pan. It will continue to cook and set as it cools. Over-baking is the primary cause of cracks, while under-baking will lead to a cheesecake that doesn’t fully set.
- Chill Your Nutella Cheesecake for at Least 8 Hours (or Overnight): Patience is a virtue when it comes to cheesecake. This extended chilling period allows the cheesecake to firm up completely and gives the flavors time to meld and deepen. A properly chilled cheesecake will have the best texture – dense, creamy, and luxurious – and a much richer, more developed flavor profile. It also makes for much cleaner slicing!
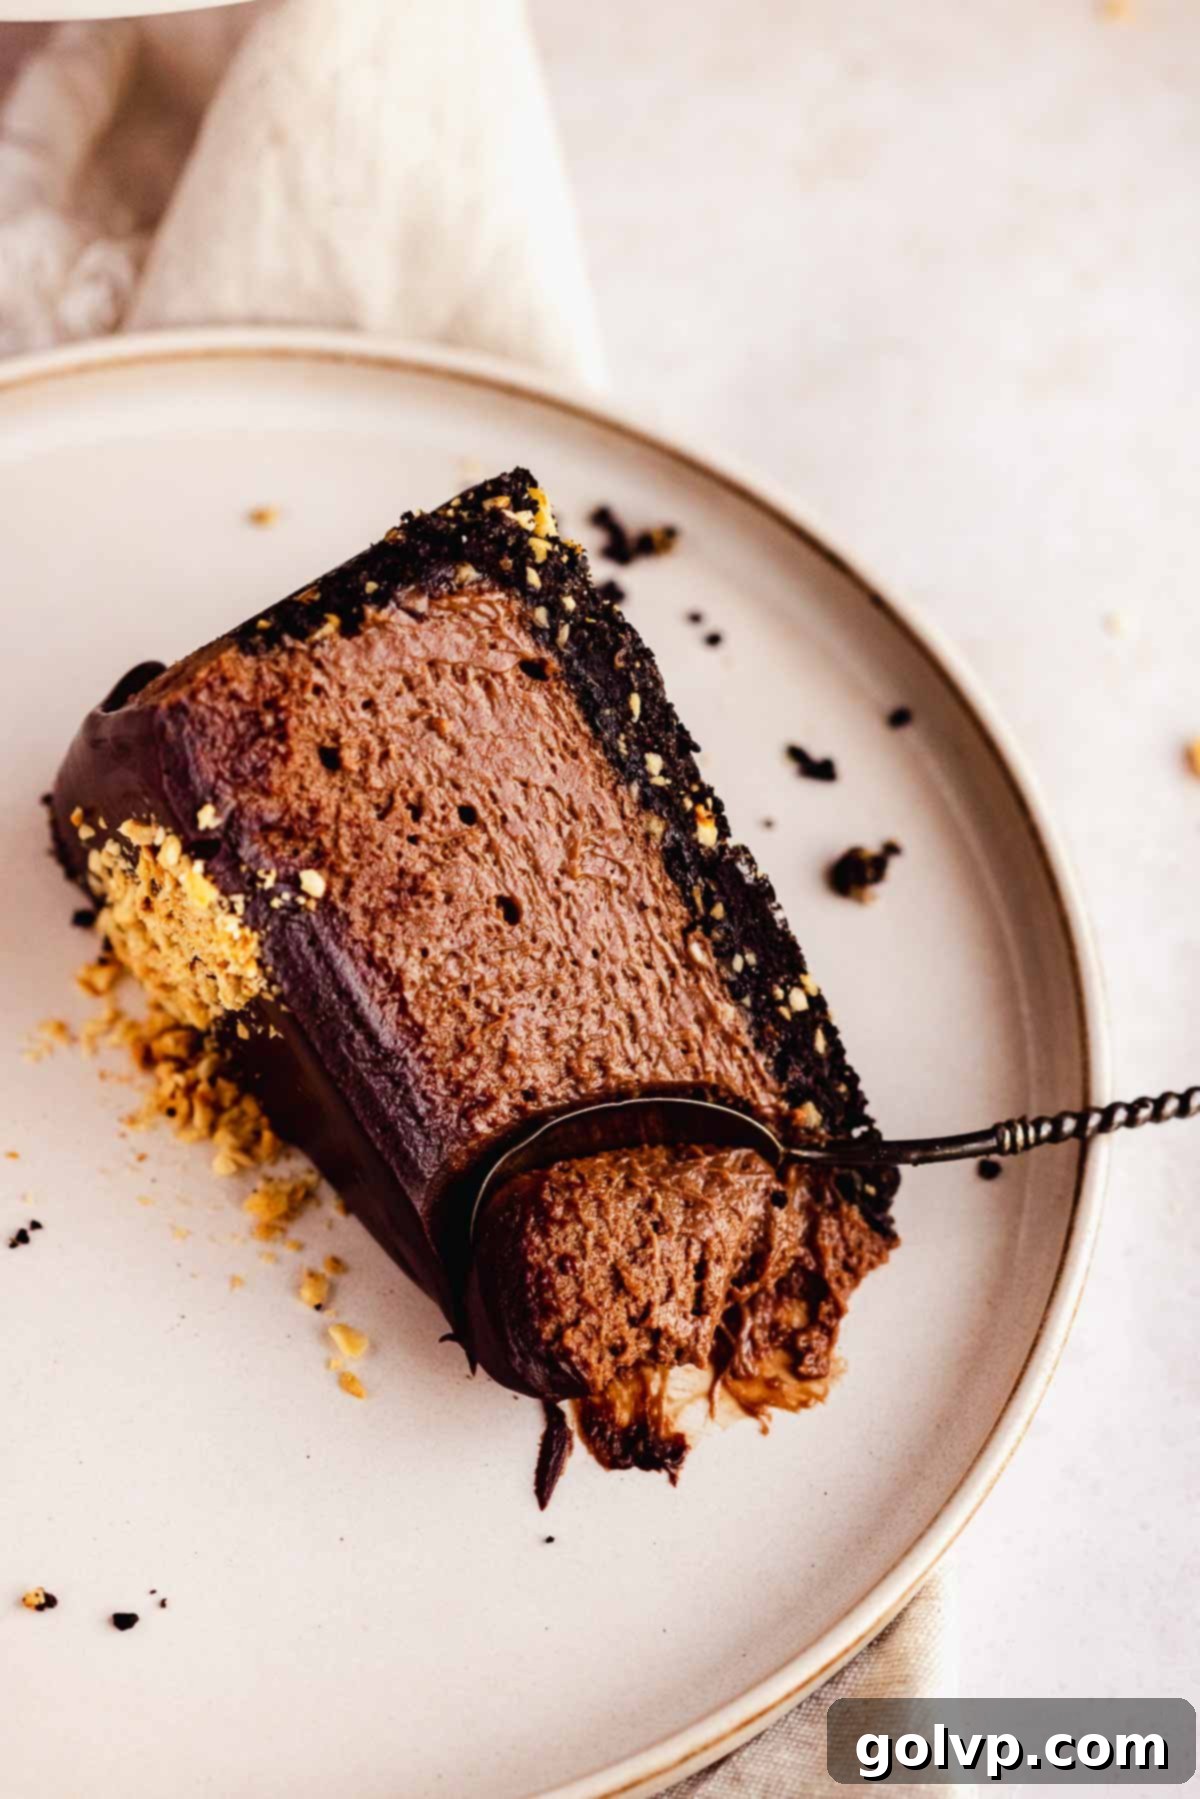
🛁 Water Bath Options for a Crack-Free Cheesecake
A water bath is absolutely essential for creating an evenly baked, impossibly creamy cheesecake with a pristine, crack-free surface. It works by providing a gentle, moist heat that prevents the cheesecake from cooking too quickly or drying out. Here are several effective ways to set up a water bath, depending on the equipment you have available:
The Best Option (Recommended for Springform Pans): This method provides the most protection against water seeping into your cheesecake. Find a round baking pan that is 1 to 2 inches larger in diameter than your springform pan (the one holding the cheesecake). Place your springform pan directly into this larger round pan. Then, place this nested setup into an even larger rectangular roasting pan. This creates a double barrier, ensuring no water can penetrate the springform pan’s seal. This is the method I have used and highly recommend for this Nutella cheesecake recipe.
Option for Regular Round Pans (Non-Springform): If you are using a standard, non-springform round cake pan, you can place the pan directly into the larger rectangular water bath. Since regular pans don’t have a removable bottom, water cannot seep in. For easier removal of the chilled cheesecake, create a “sling” out of two long strips of parchment paper, crossing them at the bottom of the pan before adding the crust and filling. These parchment strips will allow you to lift the cooled cheesecake right out of the pan.
Option for Springform Pans (Direct Foil Wrap): If you don’t have a larger round pan to nest your springform pan in, you can directly wrap the outside of your springform pan with heavy-duty aluminum foil. Use at least two layers of foil, ensuring they extend well up the sides of the pan. Try to use wide foil to minimize seams. This creates a waterproof barrier. Alternatively, you can place the wrapped springform pan into a heat-safe sous vide bag, then into the water bath, for an extra layer of protection.
A water bath is also used for this indulgent chocolate orange cheesecake. For a simpler, baked alternative that doesn’t require a water bath, try these adorable mini Oreo cheesecakes!
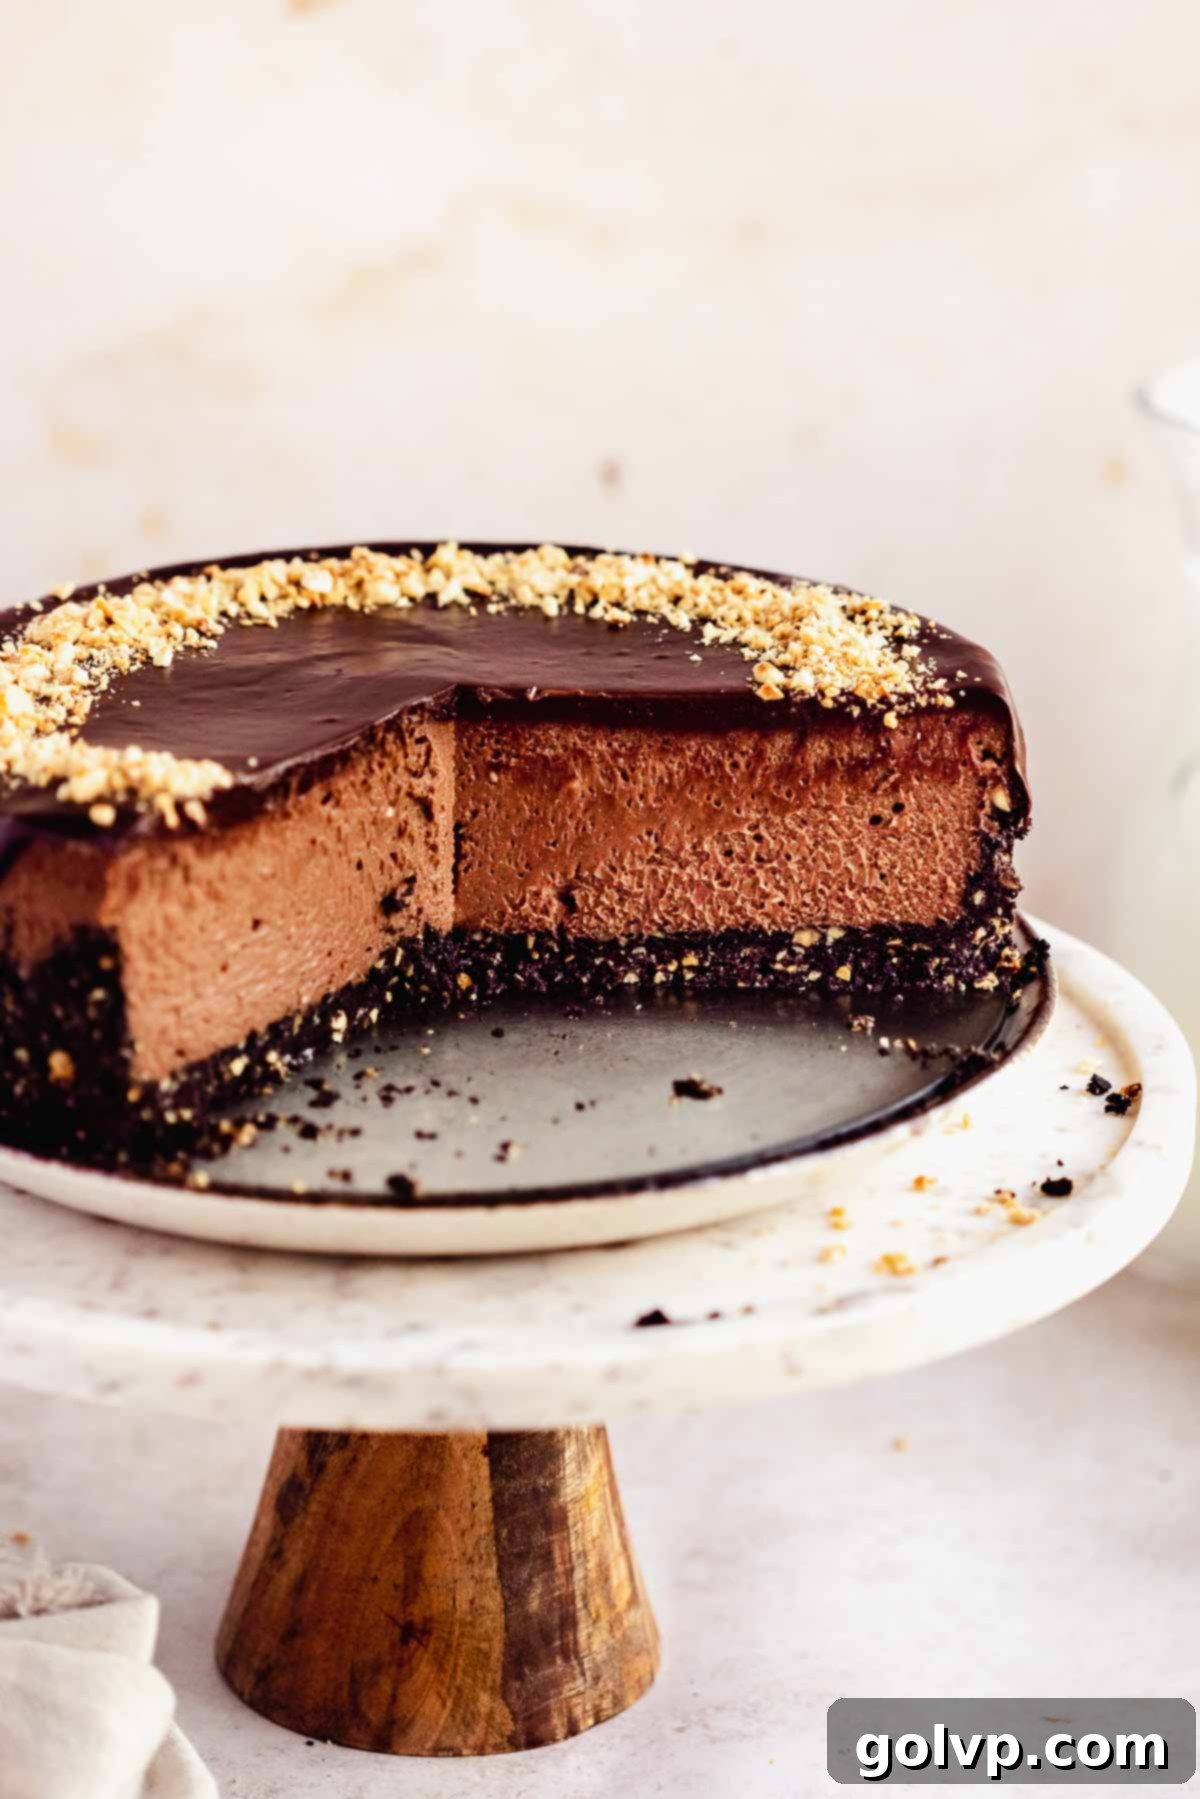
🥄 Make Ahead and Storage Tips for Your Nutella Cheesecake
Cheesecakes are truly ideal make-ahead desserts, a perfect choice for entertaining or simply enjoying throughout the week. Their structure and flavor actually benefit from an extended chill time. This Nutella cheesecake can be baked up to three days in advance, allowing you to focus on other preparations closer to serving time. It’s an excellent candidate for making the day before and letting it chill in the refrigerator overnight, ensuring optimal flavor development and a perfectly set texture.
For the best presentation and to maintain the silky texture of the ganache, it’s generally recommended to decorate the cake just before serving. This prevents the ganache from getting smushed or marred during storage. However, if you need to decorate it the day before, store the cheesecake in a cake carrier or a large airtight container that protects it on all sides to keep the ganache pristine.
Your Nutella cheesecake will maintain its incredible freshness and flavor when stored properly in the refrigerator. Ensure it’s tightly wrapped in plastic wrap or kept in an airtight container, and it will last for up to four days. For longer storage, this cheesecake freezes beautifully. Wrap it tightly in several layers of plastic wrap, then an additional layer of aluminum foil, or place it in a freezer-safe airtight container. It can be stored in the freezer for up to two months. Thaw frozen cheesecake overnight in the refrigerator before serving.
If you’re looking for delightful no-bake cheesecake recipes, check out these vibrant funfetti cheesecake bars or this elegant Baileys cheesecake.
📖 Nutella Cheesecake Recipe FAQs
Bringing your ingredients like cream cheese, eggs, heavy cream, and sour cream to room temperature is the ultimate secret to achieving a silky-smooth, lump-free cheesecake batter. When ingredients are at the same temperature, their fats are soft and emulsify much more easily. This allows them to blend perfectly without over-mixing, preventing a lumpy or curdled texture and ensuring a uniform, creamy consistency in your finished Nutella cheesecake.
Cheesecake cracks typically occur due to one of three main reasons: over-baking, an oven temperature that is too high, or not using a water bath. Over-baking causes the cheesecake to expand too quickly and then contract unevenly as it cools. An oven that’s too hot can have a similar effect. Always check your oven’s accuracy with an oven thermometer. Most importantly, ensure you pull the cheesecake from the oven when the center still has a slight jiggle, indicating it’s perfectly cooked but not overdone. Using a water bath, as instructed, is your best defense against cracking.
While placing a pan of water below might add some humidity to the oven, it doesn’t offer the same benefits as a true water bath. For the optimal even heat distribution and prevention of cracks, the cheesecake pan needs to be immersed directly in the hot water. This direct contact provides a consistent, gentle temperature around the cheesecake, allowing it to cook slowly and evenly, which is critical for that signature creamy texture and crack-free surface. Indirect steam just won’t cut it for a perfect cheesecake.
The long chilling period, at least 8 hours or overnight, is absolutely vital for several reasons. Firstly, it allows the cheesecake to fully firm up and set, making it dense, sliceable, and structurally sound. Secondly, chilling gives the complex flavors, especially the rich Nutella and tangy cream cheese, ample time to meld and deepen, resulting in a much richer, creamier, and more delicious tasting experience. Patience truly pays off for a superior cheesecake.
Absolutely not! The entire Oreo cookie, filling and all, goes into the crust. The creamy filling contributes to the richness and binds the crumbs together beautifully when mixed with melted butter. Simply crush the whole Oreo cookies into fine crumbs using a food processor or by placing them in a sealed bag and crushing with a rolling pin.
🍫 More Indulgent Chocolate & Dessert Recipes
If you’ve fallen in love with this Nutella cheesecake, you’ll surely enjoy exploring these other delightful and decadent recipes from our kitchen. Each one promises a unique and satisfying treat!
- Chocolate Praline Cake
- Chocolate Gooey Cake
- Nutella Cupcakes with Nutella Buttercream Frosting
- Chocolate Orange Cheesecake
Did you make this recipe? We would absolutely love for you to rate this recipe and share your thoughts in the comments below! Don’t forget to share your amazing creation on Instagram and tag @flouringkitchen. Follow us on Pinterest for more inspiring recipe ideas and to save your favorites.
📖 Recipe
Nutella Cheesecake
Mary
Pin Recipe
Shop Ingredients
Equipment
-
1 9″ springform cake pan
Ingredients
Crust
- 3 cups oreo crumbs 36 oreo cookies (407g), crushed
- 1 cup hazelnuts toasted and finely chopped
- 4 tablespoon melted butter
Cheesecake Filling
- 24 oz cream cheese softened (680g)
- 4 tablespoon granulated sugar
- 1 tablespoon pure vanilla extract
- ⅛ teaspoon sea salt
- 2 cups nutella or similar chocolate hazelnut spread
- ½ cup heavy cream whipping cream, room temperature
- ½ cup sour cream room temperature
- 3 large eggs room temperature
Nutella Ganache
- ½ cup semisweet chocolate chips
- ¼ cup nutella or similar chocolate hazelnut spread
- ⅓ cup heavy cream whipping cream
- ⅛ teaspoon sea salt
Assembly
- ¼ cup hazelnuts toasted and roughly chopped
Shop Ingredients on Jupiter
Instructions
Crust
-
Preheat oven to 355°F (180°C). Grease an 8” or 9” round pan non-stick baking pan with vegetable oil or butter and line the bottom with parchment paper.
-
Combine oreo crumbs, hazelnuts, and melted butter in a medium bowl. Mix until evenly incorporated.3 cups oreo crumbs, 1 cup hazelnuts, 4 tablespoon melted butter
-
Pour into prepared pan and spread it out to the edges. Use the bottom of a glass to pack tightly, pushing the crumbs halfway up the edges.
-
Bake in preheated oven for 12 minutes. Work on the filling while it bakes. Don’t turn the oven off.
Cheesecake Filling
-
Fill up a kettle with water and set it to boil.
-
In a large bowl or stand mixer, combine cream cheese, sugar, vanilla, and salt. Beat for about 2 minutes, until no lumps remain and it is smooth.24 oz cream cheese, 4 tablespoon granulated sugar, 1 tablespoon pure vanilla extract, ⅛ teaspoon sea salt
-
Add nutella, heavy cream, and sour cream. Blend well in between each addition.2 cups nutella, ½ cup heavy cream, ½ cup sour cream
-
Add eggs one at a time, beating after each egg until it disappears. Stop beating as soon as the last egg disappears.3 large eggs
-
Place the prebaked crust in a round baking pan that is 1-2” wider than the cheesecake pan. Place that pan into a large rectangular baking dish where it fits comfortably. See notes for water bath alternatives.
-
Pour the filling into the crust and smooth the top. Carefully pour the boiling hot water into the large rectangular pan. Carefully transfer the large baking tray with everything inside into the oven using oven mitts.
-
Bake the cheesecake in the preheated oven (355°F or 180°C) for 70-90 minutes. It is ready when the edges are set and the middle is still jiggly. It will continue baking as it cools.
-
Leave the oven door open for 20 minutes and let the cheesecake cool inside the oven. Afterwards, remove the cheesecake from the waterbath and let cool completely to room temperature. Cover and refrigerate for at least 8 hours or overnight.
Nutella Ganache
-
Place chocolate chips, salt, and nutella in a large heat safe bowl.½ cup semisweet chocolate chips, ¼ cup nutella, ⅛ teaspoon sea salt
-
In a small saucepan, heat the cream until simmering. Pour over the chocolate chips and nutella. Let sit for 7 minutes before whisking until smooth.⅓ cup heavy cream
-
Remove the chilled cheesecake from its pan. Pour the ganache over the cheesecake, spreading it out until the edges. Top with roasted and chopped hazelnuts. Let the ganache on the cake set in the fridge for 10 minutes before slicing and serving.¼ cup hazelnuts
Notes
Water Bath Options:
- (The best option) Find a round baking pan that is 1”-2” larger than the pan that the cheesecake is in. This will keep the water out of the cheesecake preventing it from getting soggy. Nest the cheesecake into the larger pan and then into the large roasting tray where the hot water will be. *This is for if the cheesecake is in a springform pan*
- If the cheesecake is in a regular round pan (not springform), you can place the pan directly into the water bath because water can’t get in through the bottom edge. Make sure you create a sling out of parchment paper so that you can lift to remove the cheesecake out of the pan after chilling.
- If the cheesecake is in a springform pan, wrap the outside of the pan tightly with a double layer of aluminum foil. Try to use a wide enough foil to cover the whole bottom and edges. You can also nestle the springform pan into a heat safe sous vide bag instead of the aluminum foil.
Make Ahead: You can make the cheesecake 1-2 days in advance. Top with ganache before serving so that it stays silky smooth and won’t get ruined during storage. The cheesecake will keep well refrigerated (wrapped tightly or in an airtight container) for 3-4 days or in the freezer for up to 2 months.
The Crust: If you can’t find Oreos you can use any other chocolate sandwich cookies or 407g graham cracker crumbs.
Chilling: It’s essential that the cheesecake chills in the fridge for at least 8 hours (or overnight) for it to set and for the flavors to develop.
Nutrition
