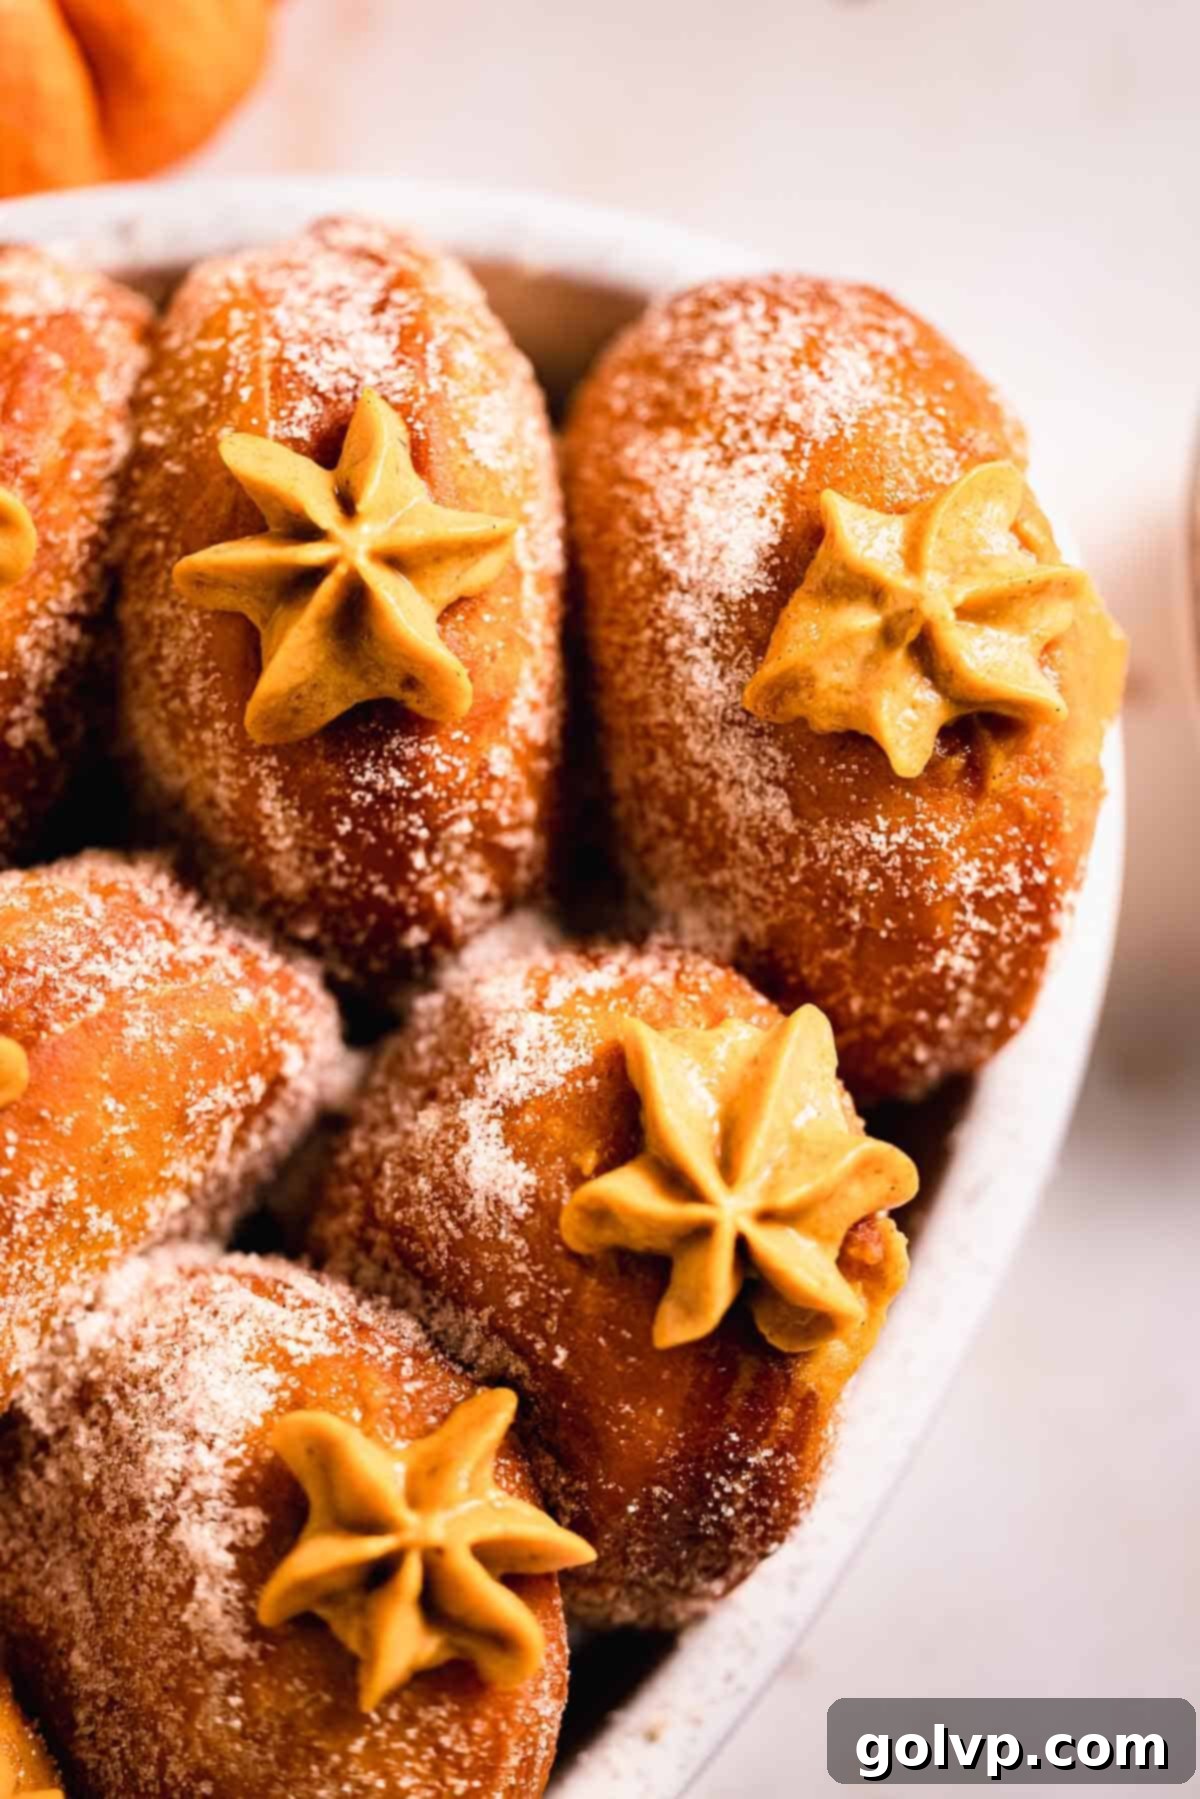
Irresistible Pumpkin Spice Donuts with Creamy Pumpkin Custard (No-Knead Recipe!)
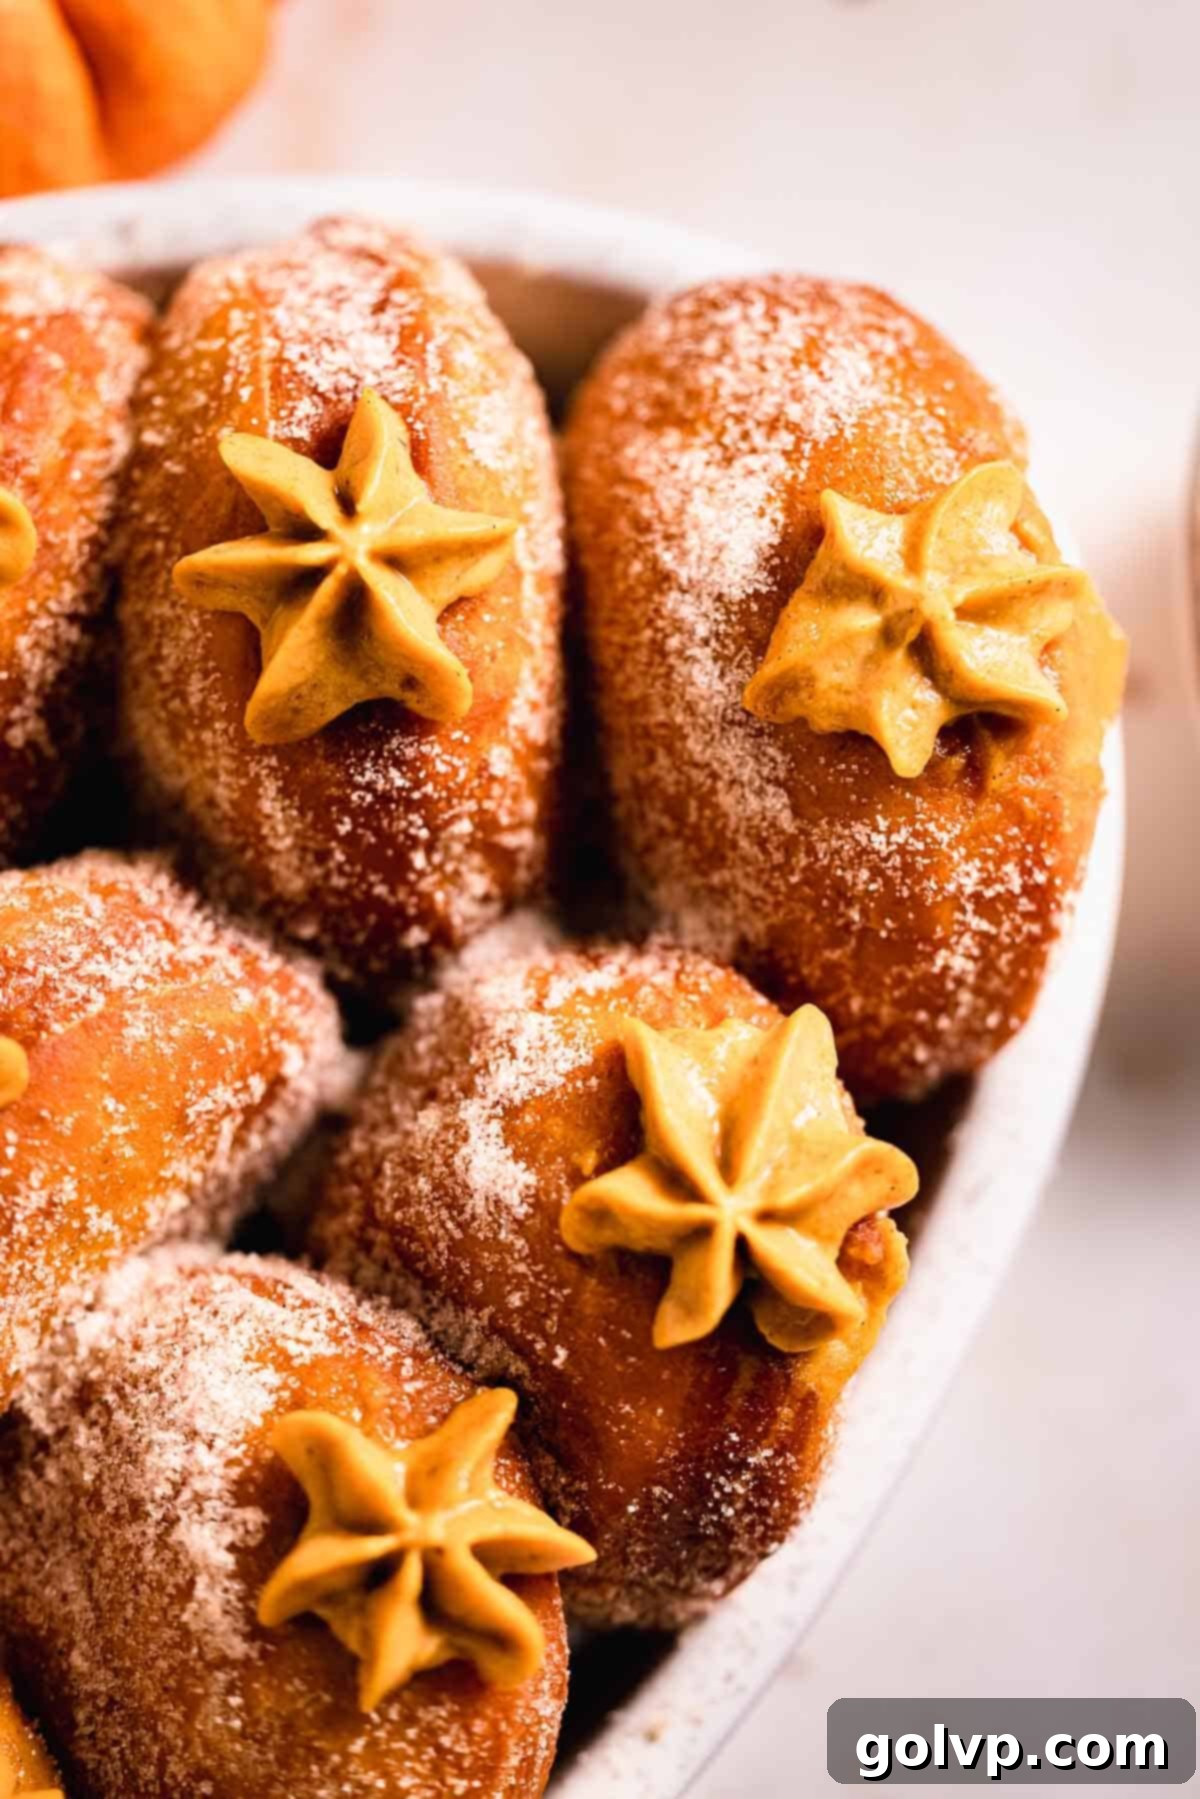
Prepare to fall in love with these extraordinary pumpkin spice donuts! Each bite offers a delightful contrast: a perfectly crispy exterior giving way to an incredibly soft, fluffy interior. But the magic doesn’t stop there – these donuts are generously filled with a luscious, creamy pumpkin custard that captures the essence of pumpkin pie, elevated to a whole new level of deliciousness. To complete the experience, they’re coated in a warm, fragrant mixture of sugar and pumpkin spice. The donut dough itself is infused with real pumpkin puree and a hint of pumpkin spice, ensuring that rich, autumnal flavor shines through in every single component. The secret to their incredible texture is a simple, no-knead dough, which naturally creates beautiful, airy pockets inside, making them ideal for holding that decadent filling. You’ll be amazed at how effortlessly these donuts turn out, consistently soft, pillowy, and utterly irresistible!
[feast_advanced_jump_to]
🍩 Why You’ll Absolutely Love This Pumpkin Donut Recipe:
- Effortless Preparation: Forget the endless kneading! Our no-knead dough is incredibly simple to prepare. Just a quick mix until a shaggy dough forms, then let it rest and rise. It’s perfect for bakers of all skill levels, delivering professional-quality results without the hassle.
- Remarkably Soft Texture: These donuts are a masterclass in texture. They boast an incredibly soft, airy, and fluffy interior that melts in your mouth, perfectly complemented by a delicate, crisp golden-brown exterior from frying.
- Decadent Pumpkin Pie Custard Filling: The star of the show! Our thick, luxurious custard is a dream come true for pumpkin pie lovers. It’s rich, smooth, and bursting with all the warm, comforting flavors of your favorite fall dessert, but with an even more indulgent, creamy consistency that’s ideal for filling.
- Layers of Authentic Pumpkin Flavor: We’ve taken pumpkin perfection seriously! Pumpkin spice is integrated into both the donut dough and the velvety custard filling. Furthermore, a delightful pumpkin spice sugar coating ensures that every single bite delivers an explosion of classic autumnal flavor. It’s a true celebration of pumpkin.
📝 Essential Ingredients for Your Pumpkin Spice Donuts
Read through for all the tips you will need for success!
Full steps and ingredients in recipe card below.
For the Luxurious Pumpkin Custard Filling
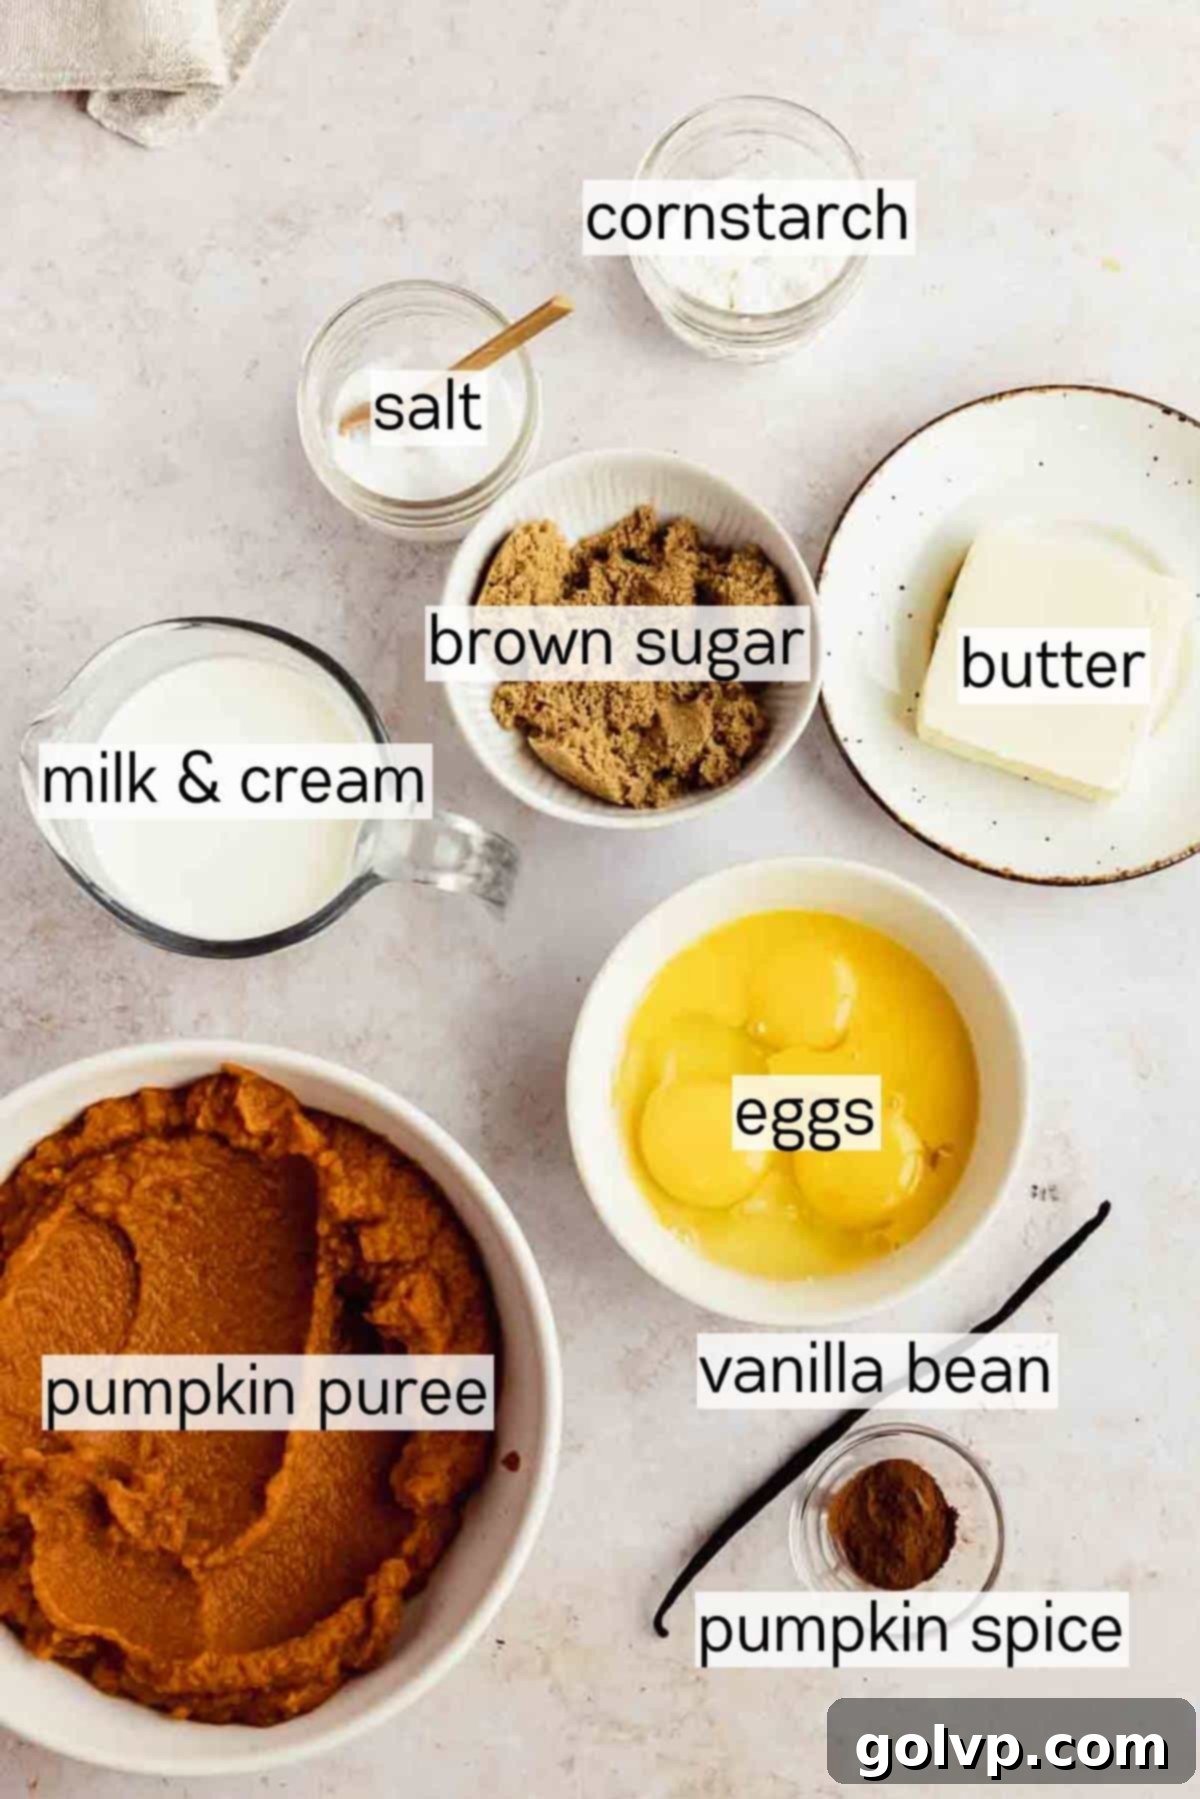
This filling is truly what sets these pumpkin spice donuts apart. It’s a rich, decadent custard, essentially a pumpkin pie filling taken up a notch, crafted with a generous amount of pumpkin puree. The result is a velvety smooth, intensely flavored cream that tastes like the very best pumpkin pie you’ve ever had, but with an even more luscious texture perfect for piping into donuts.
If you prefer a lighter, airier filling, or simply aren’t a fan of custard, consider using this easy pumpkin whipped cream. It makes a fantastic and equally delicious alternative for these delightful donuts!
- Cornstarch: This crucial ingredient acts as our thickening agent, ensuring the custard achieves that desirable, pipeable consistency. Without it, your filling might be too runny. For substitutions, you can use arrowroot starch or an equal amount of all-purpose flour, though cornstarch yields the smoothest result.
- Vanilla Bean: The addition of a whole vanilla bean elevates the flavor profile and leaves those exquisite, tiny flecks of vanilla throughout the custard, signaling a truly gourmet treat. If a vanilla bean isn’t available, you can substitute with 1 tablespoon of high-quality vanilla bean paste for a similar visual and flavor effect, or 1-2 teaspoons of pure vanilla extract if flecks aren’t a priority.
- Pumpkin Spice: A pre-made pumpkin pie spice mix is key to achieving that signature, comforting pumpkin pie flavor in your custard. It’s a blend of cinnamon, nutmeg, ginger, and cloves, all working in harmony. Should you prefer a simpler flavor or wish to avoid the full spice blend, pure cinnamon makes an excellent substitute, offering a warm, sweet note without the complexity.
For the Soft & Fluffy Donut Dough
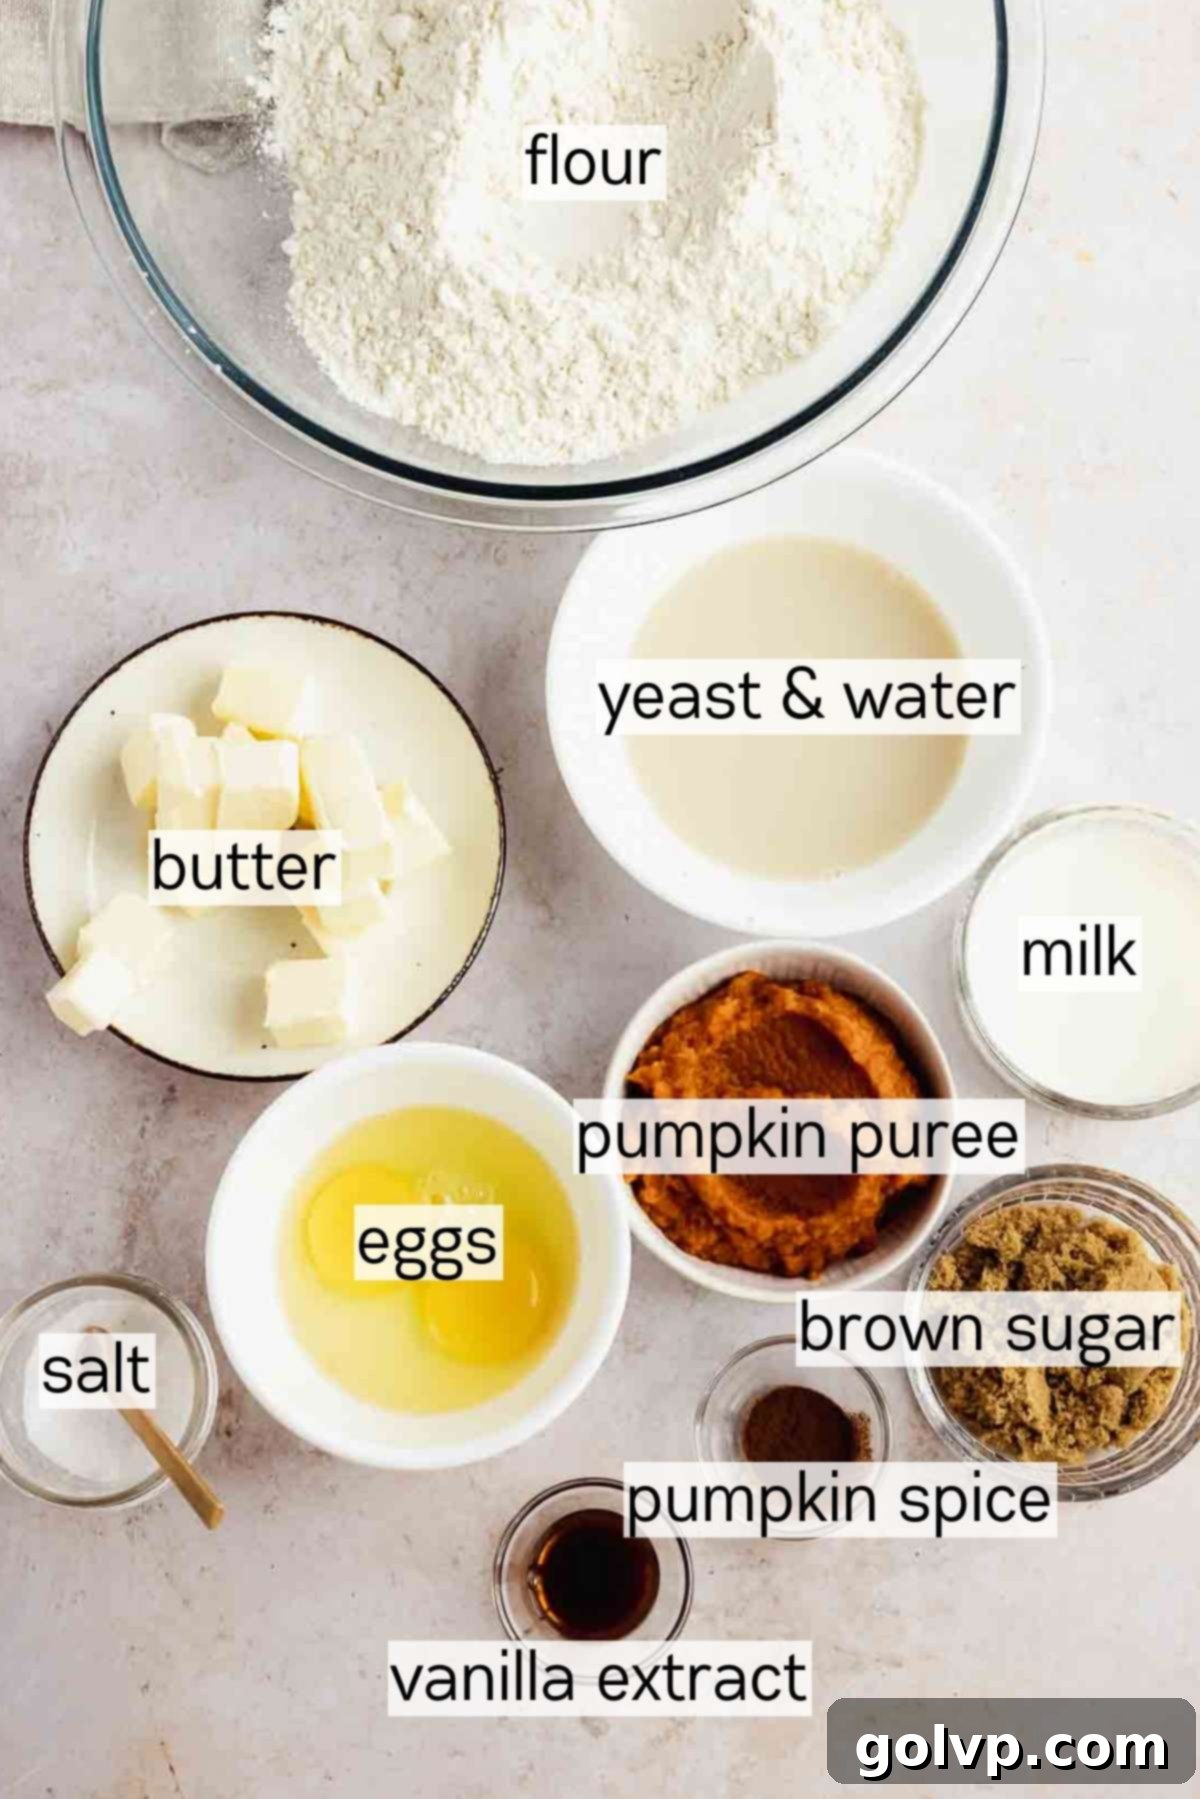
Our donut dough uses an enriched no-knead dough base. This innovative approach simplifies the process dramatically, requiring minimal effort while still yielding extraordinarily soft, pillowy pastries that are a joy to eat. The beauty of no-knead dough is that the long fermentation time does all the hard work for you, developing gluten and flavor without intense manual labor. You simply mix all the ingredients by hand until just combined, and then let time work its magic as the dough rises.
I’ve successfully adapted this versatile no-knead dough recipe for various other beloved treats, showcasing its reliability and fantastic results. You can find variations in my popular gingerbread cinnamon rolls, the rich and delightful chocolate tahini babka, and the traditional Ukrainian poppyseed roll. These recipes are testament to the consistent quality and ease this dough offers.
A crucial tip for optimal mixing and a perfectly smooth dough is to ensure all your ingredients, especially the wet ones like butter, eggs, and milk, are at room temperature. This allows them to emulsify and combine much more easily and evenly, leading to a superior final product.
- Active Dry Yeast: I typically use active dry yeast for its reliability and consistent activation. However, you can absolutely substitute instant yeast if that’s what you have on hand. When using instant yeast, simply incorporate it directly into your dry ingredients without needing to proof it in water first, though it behaves similarly once combined.
- All-Purpose Flour: For the most precise and consistent baking results, I always recommend weighing your flour using a kitchen scale. If you don’t have a scale, proper measuring technique is vital: gently stir the flour in its bag, then spoon it lightly into a measuring cup. Avoid packing it down, and simply level off the excess with the flat edge of a knife. This prevents adding too much flour, which can lead to dense donuts.
- Pumpkin Spice (in dough): Interestingly, while pumpkin spice seems like a natural addition to pumpkin donut dough, I discovered through experimentation and research that cinnamon—a primary component of pumpkin spice—can actually hinder yeast activity. In my tests, omitting cinnamon from the dough resulted in a noticeably higher and more consistent rise, leading to even fluffier donuts. Therefore, we primarily rely on pumpkin puree and the pumpkin spice in the custard and coating for flavor.
- Butter: For seamless integration into the dough, your butter should be exceptionally soft, almost to the point of being partially melted. This allows it to mix in smoothly without creating lumps and ensures a tender, rich dough.
- Vegetable Oil for Frying: When it comes to deep-frying, selecting the right oil is paramount. You need a neutral-tasting oil with a high smoke point to prevent burnt flavors and ensure your donuts cook beautifully without absorbing too much grease. Excellent choices include vegetable oil, peanut oil, sunflower oil, and canola oil. For this recipe, I personally used canola oil due to its balance of affordability, neutrality, and high smoke point.
📖 Exciting Variations for Your Pumpkin Donuts
While this recipe delivers a classic, unbeatable pumpkin spice donut, feel free to get creative with these delicious variations:
- Light & Airy Whipped Cream Filling: If the rich custard isn’t quite what you’re craving, opt for a light and creamy alternative. Fill your freshly fried donuts with this smooth and luscious pumpkin whipped cream for a delightful contrast in texture and a slightly less indulgent treat.
- Classic Pumpkin Donuts Without Filling: For a more traditional donut experience, you can simply omit the filling altogether. If you prefer the classic donut shape, use a small round cookie cutter to cut a hole in the middle of each donut round before frying. These un-filled donuts are fantastic on their own or with a simple dusting of powdered sugar.
- Explore Other Delicious Fillings: Don’t limit yourself to pumpkin! These versatile donuts can be filled with nearly anything your heart desires. Experiment with your favorite fillings such as classic whipped cream, a vibrant fruit jam, rich maple cream, homemade pumpkin butter, or even a decadent chocolate hazelnut spread like Nutella. The possibilities are endless!
- Tangy Cream Cheese Glaze: For a delightful tangy twist that perfectly complements the sweetness of the pumpkin, consider topping your donuts with a rich cream cheese glaze. You can easily adapt the glaze from my cream cheese red velvet glazed donut recipe for a truly unique and irresistible finish.
👩🍳 Step-by-Step Guide: How to Make These Amazing Pumpkin Donuts
Crafting these delectable pumpkin spice donuts involves three main components: the creamy pumpkin custard filling, the incredibly easy no-knead donut dough, and the irresistible pumpkin spice sugar mixture for coating. To ensure a smooth process and perfectly chilled filling, we’ll start by preparing the custard first, allowing it ample time to cool and thicken while you work on the dough.
Pro Tip: For ultimate convenience and to save time on baking day, consider preparing the pumpkin custard filling 1-2 days in advance. Store it securely in an airtight container in the refrigerator until you’re ready to fill your freshly fried donuts.
Making the Creamy Pumpkin Custard Filling
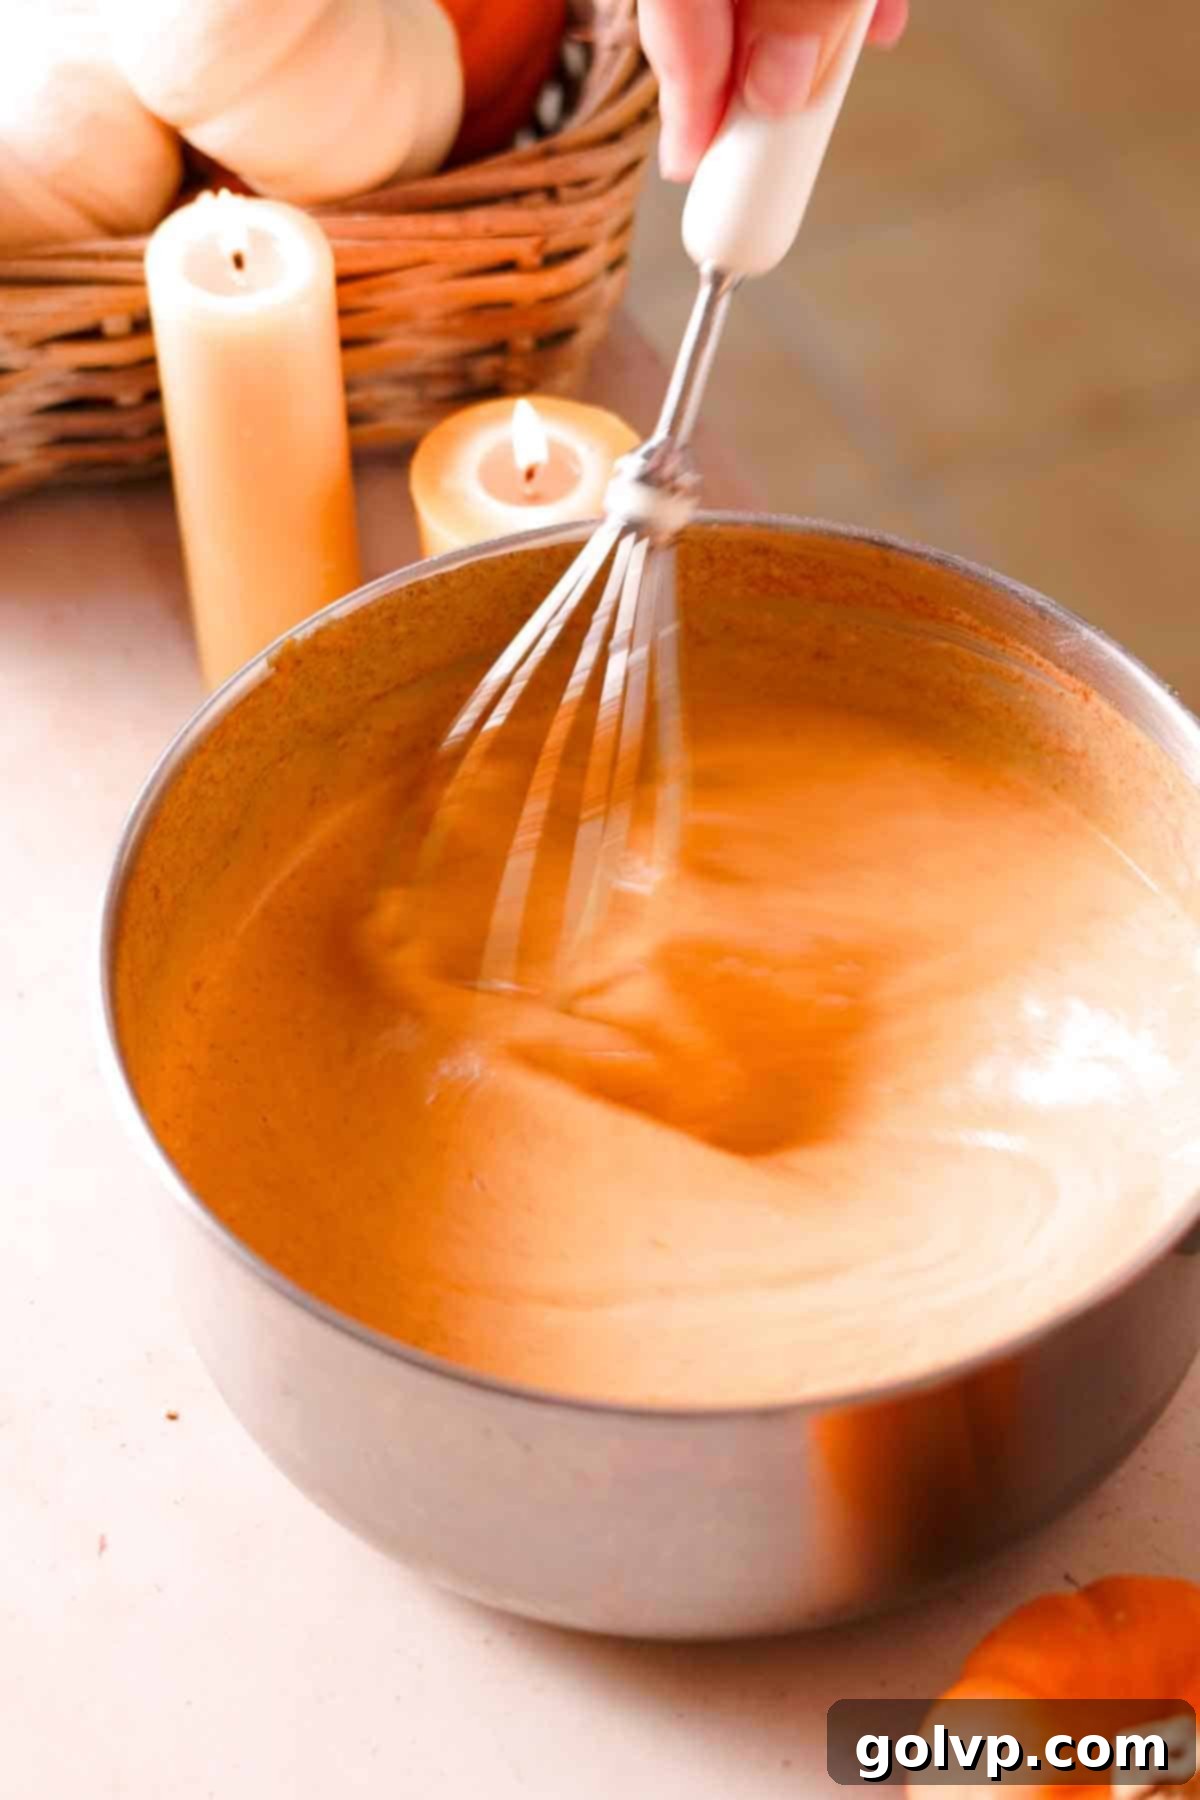
Step 1: In a medium-sized, heavy-bottomed saucepan, thoroughly combine the granulated sugar and cornstarch. Use a whisk to break up any lumps, ensuring a smooth powder mixture. Next, crack in the large eggs and whisk vigorously until they are fully incorporated and no distinct egg whites remain. Finally, add the pumpkin puree, heavy cream, milk, pumpkin spice, the scraped vanilla bean seeds (and the pod for extra flavor!), and a pinch of salt. Whisk everything together until the mixture is uniform.
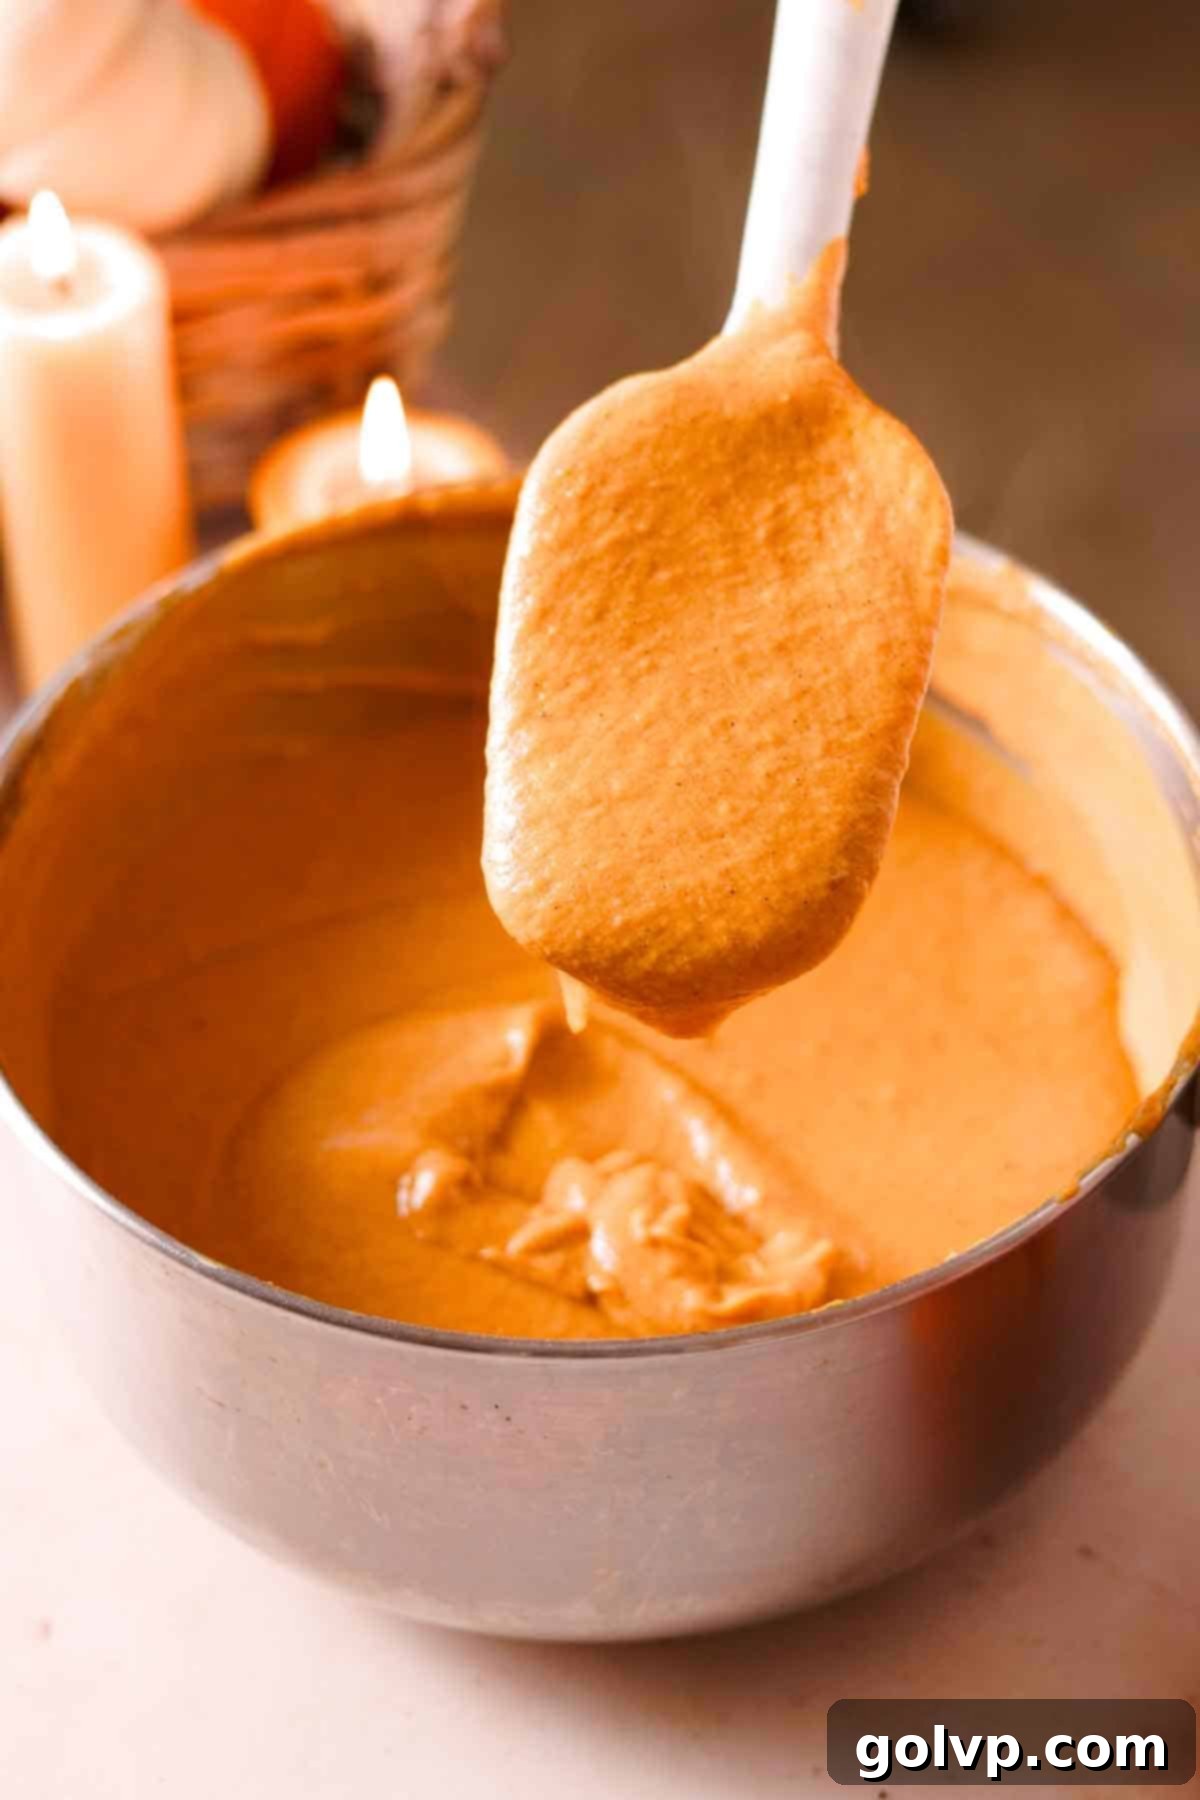
Step 2: Place the saucepan over low to medium-low heat. Cook the mixture, stirring constantly with a whisk or rubber spatula, ensuring it doesn’t stick to the bottom. Continue stirring until it just begins to simmer and thickens considerably, reaching a pudding-like consistency that coats the back of a spoon. This constant stirring is crucial to prevent lumps and ensure even cooking.
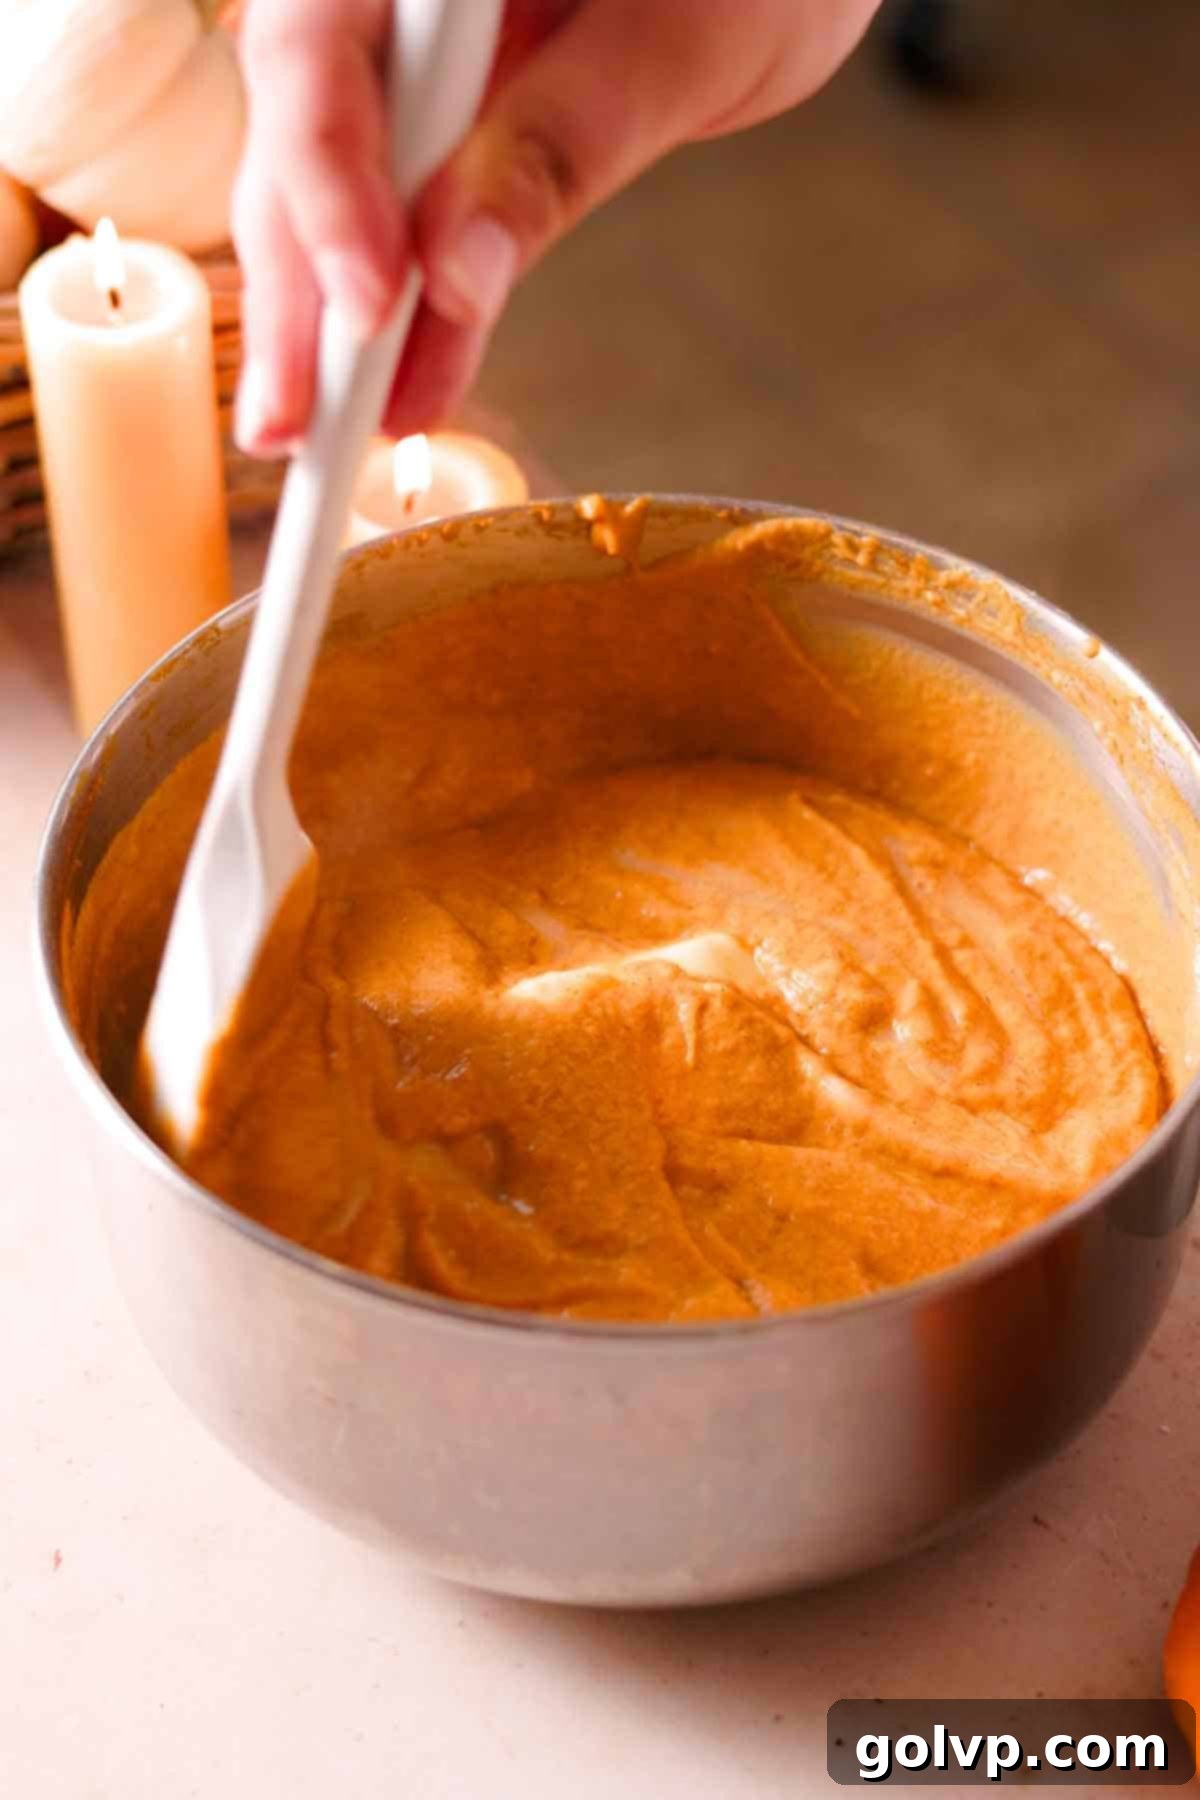
Step 3: Once the custard is thick, remove it from the heat. Add the cold, cubed unsalted butter and stir until it completely melts into the warm custard, making it incredibly smooth and glossy. If you notice any small lumps, you can optionally strain the custard through a fine-mesh sieve into a clean container, though with consistent stirring, this step often isn’t necessary.
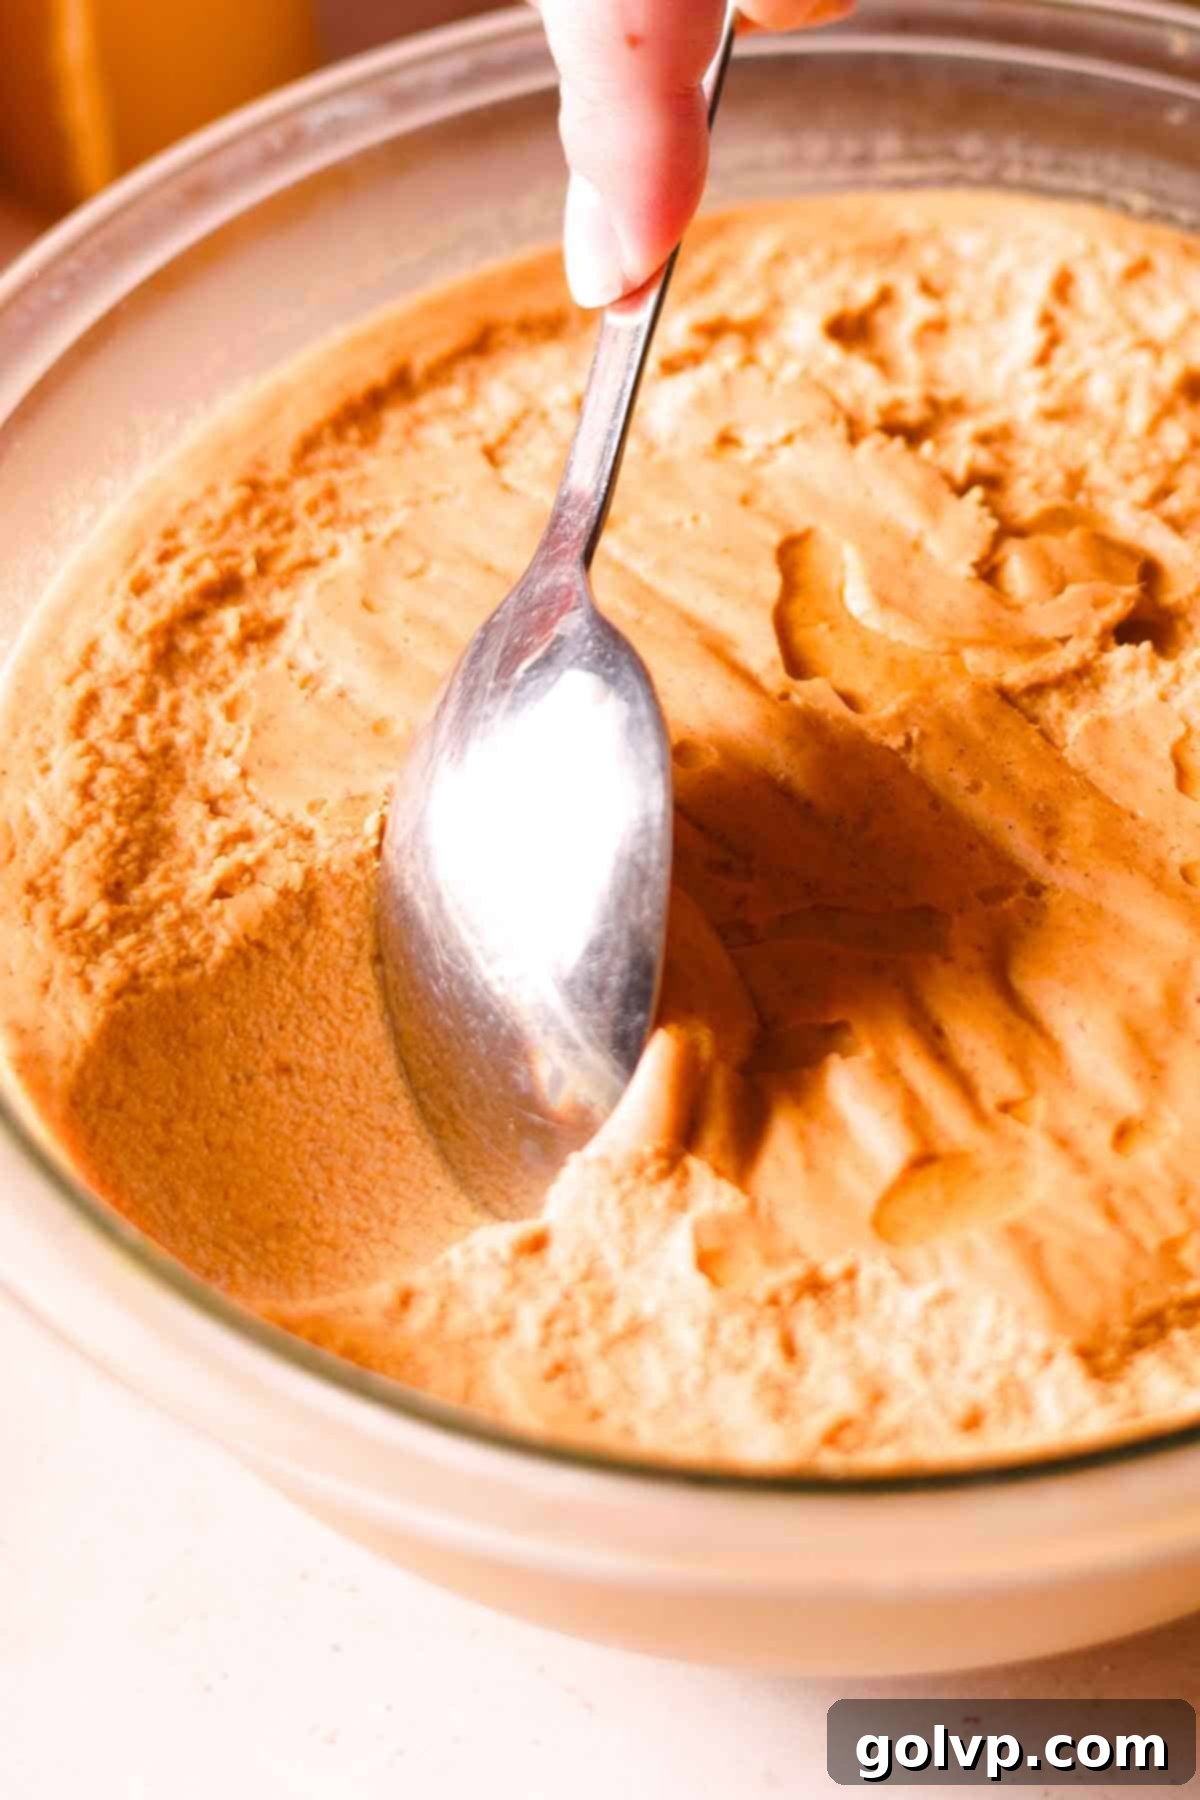
Step 4: Immediately after transferring, place a sheet of plastic wrap or parchment paper directly onto the surface of the hot custard. This crucial step prevents a “skin” from forming as it cools. Chill the custard in the refrigerator for at least 4 hours, or until it is thoroughly cold and has fully set into a thick, luxurious filling. For faster cooling, you can place it in the freezer for about an hour before transferring to the fridge.
Making & Frying the Perfect Pumpkin Donut Dough
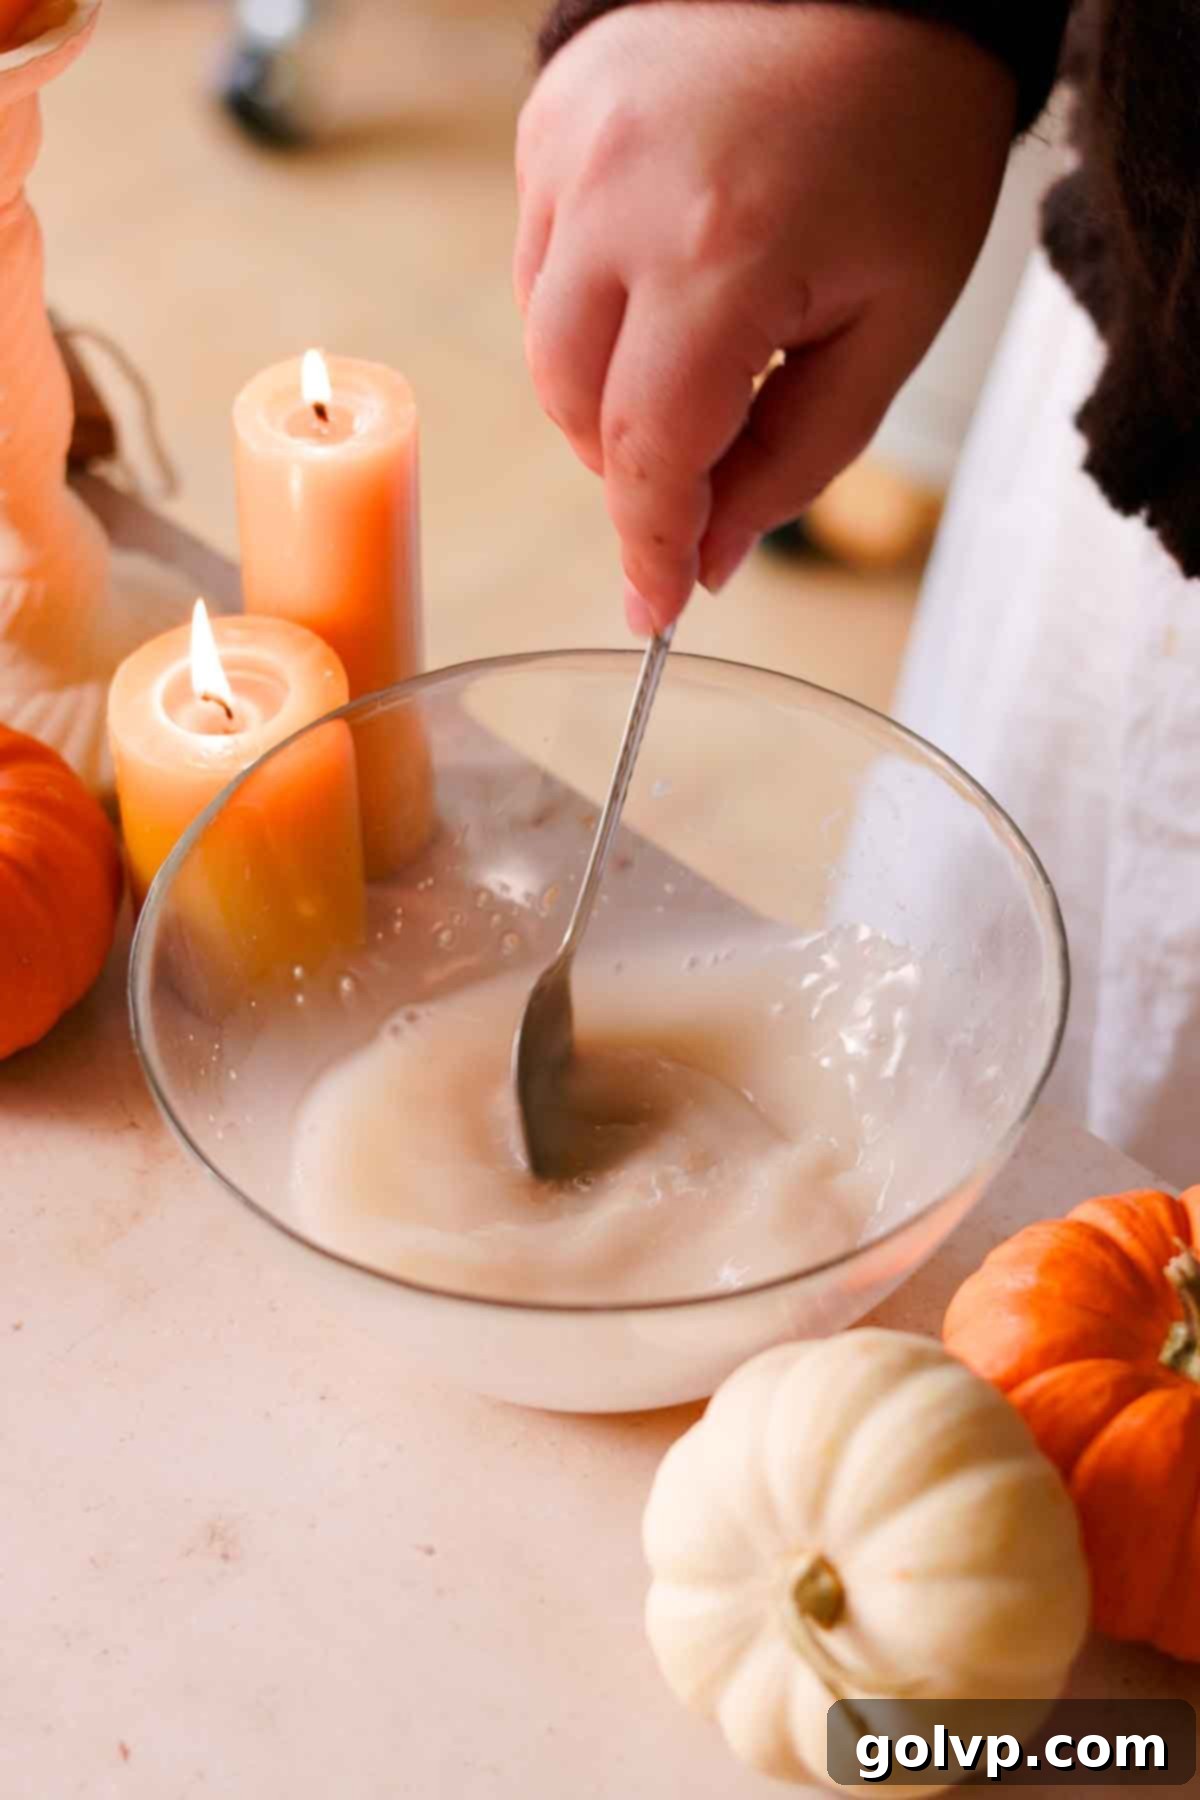
Step 1: Begin by activating your yeast. In a small bowl, combine the warm water (ensure it’s between 105-110°F or 40-43°C – too hot will kill the yeast, too cold won’t activate it), and 1 teaspoon of granulated sugar. Sprinkle the active dry yeast over the water and stir gently until it’s completely dissolved. Let this mixture sit undisturbed for 5-10 minutes. You’re looking for a foamy layer to form on the surface, which indicates that your yeast is alive and active, ready to make your donuts light and airy. If no foam appears, your yeast may be old or the water temperature was incorrect, and you’ll need to start again with fresh yeast.
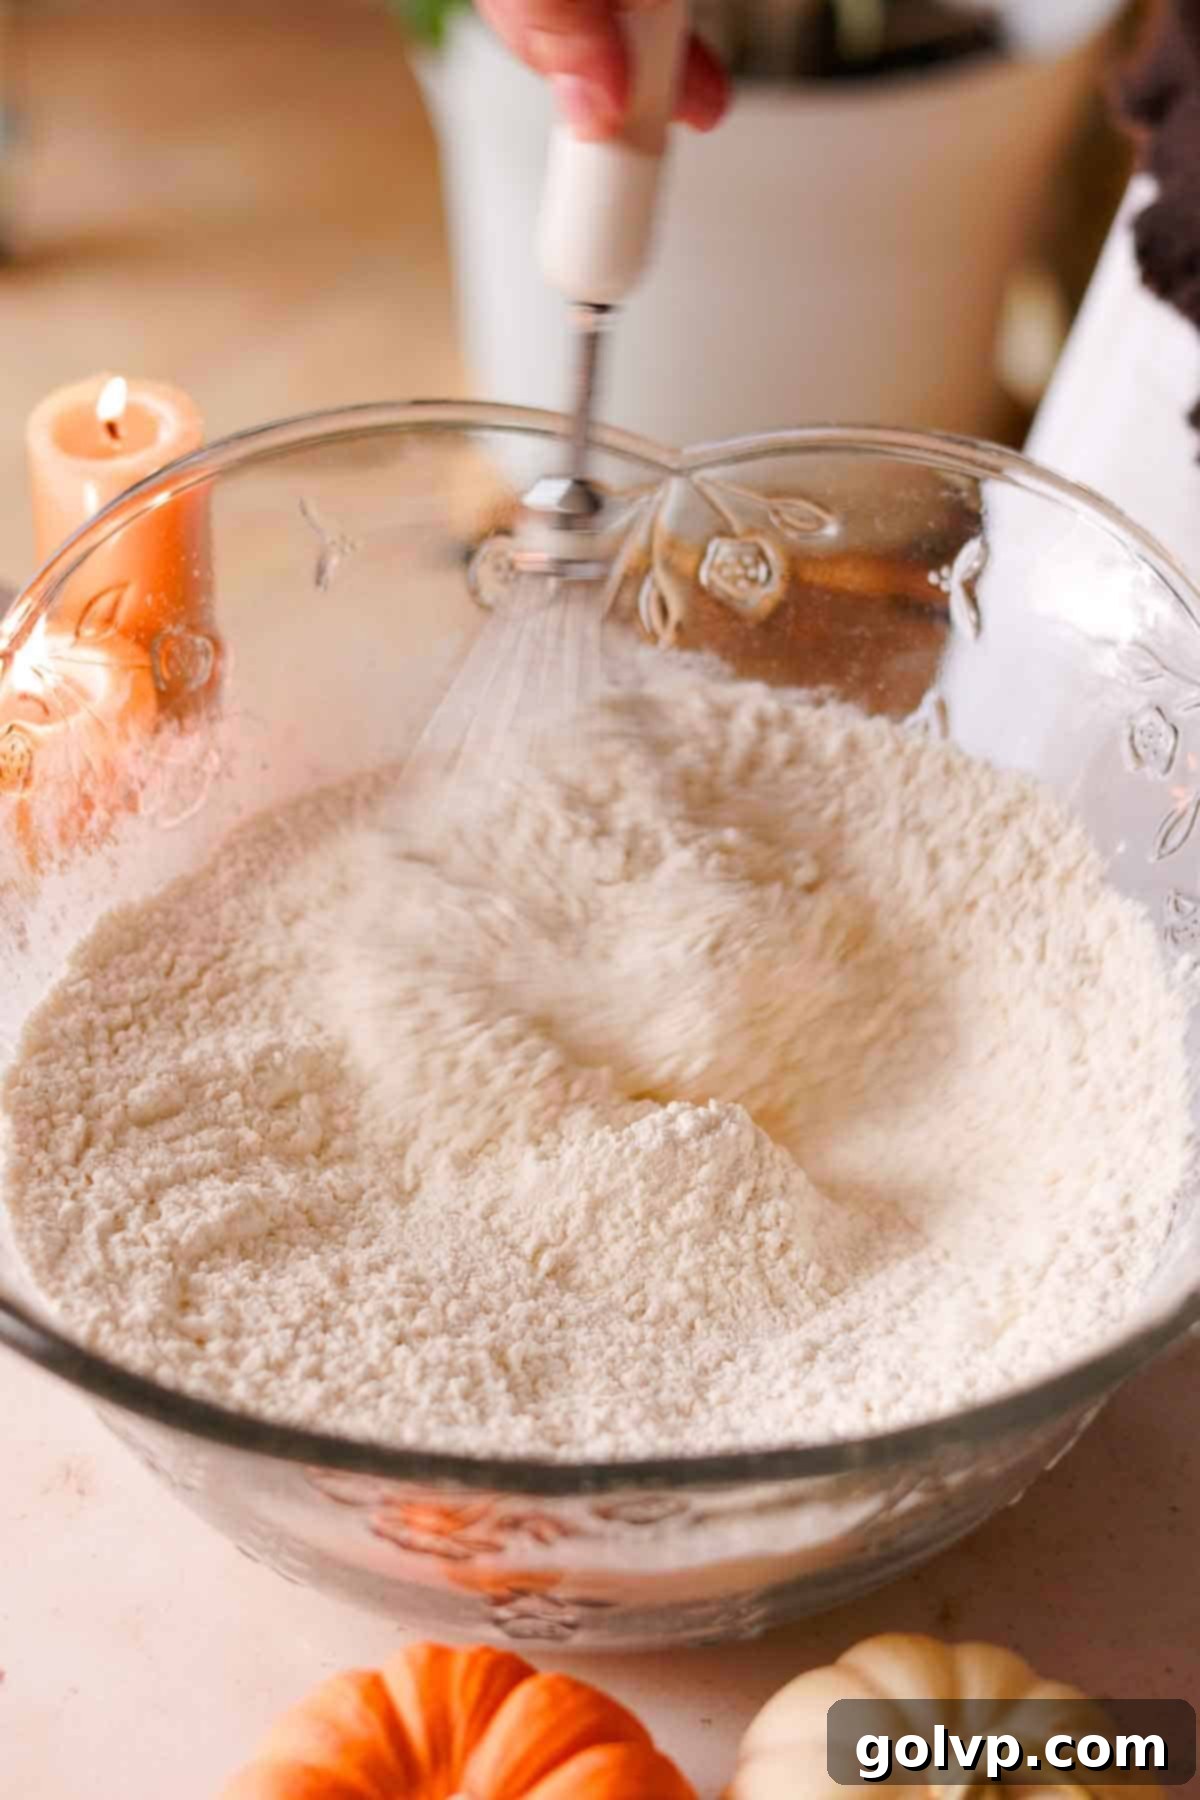
Step 2: In a generously large mixing bowl, combine the sifted all-purpose flour, the remaining brown sugar (which adds a lovely molasses note and moisture), and a pinch of salt. Whisk these dry ingredients together thoroughly to ensure they are well distributed. This prevents pockets of unmixed ingredients and contributes to a uniform dough.
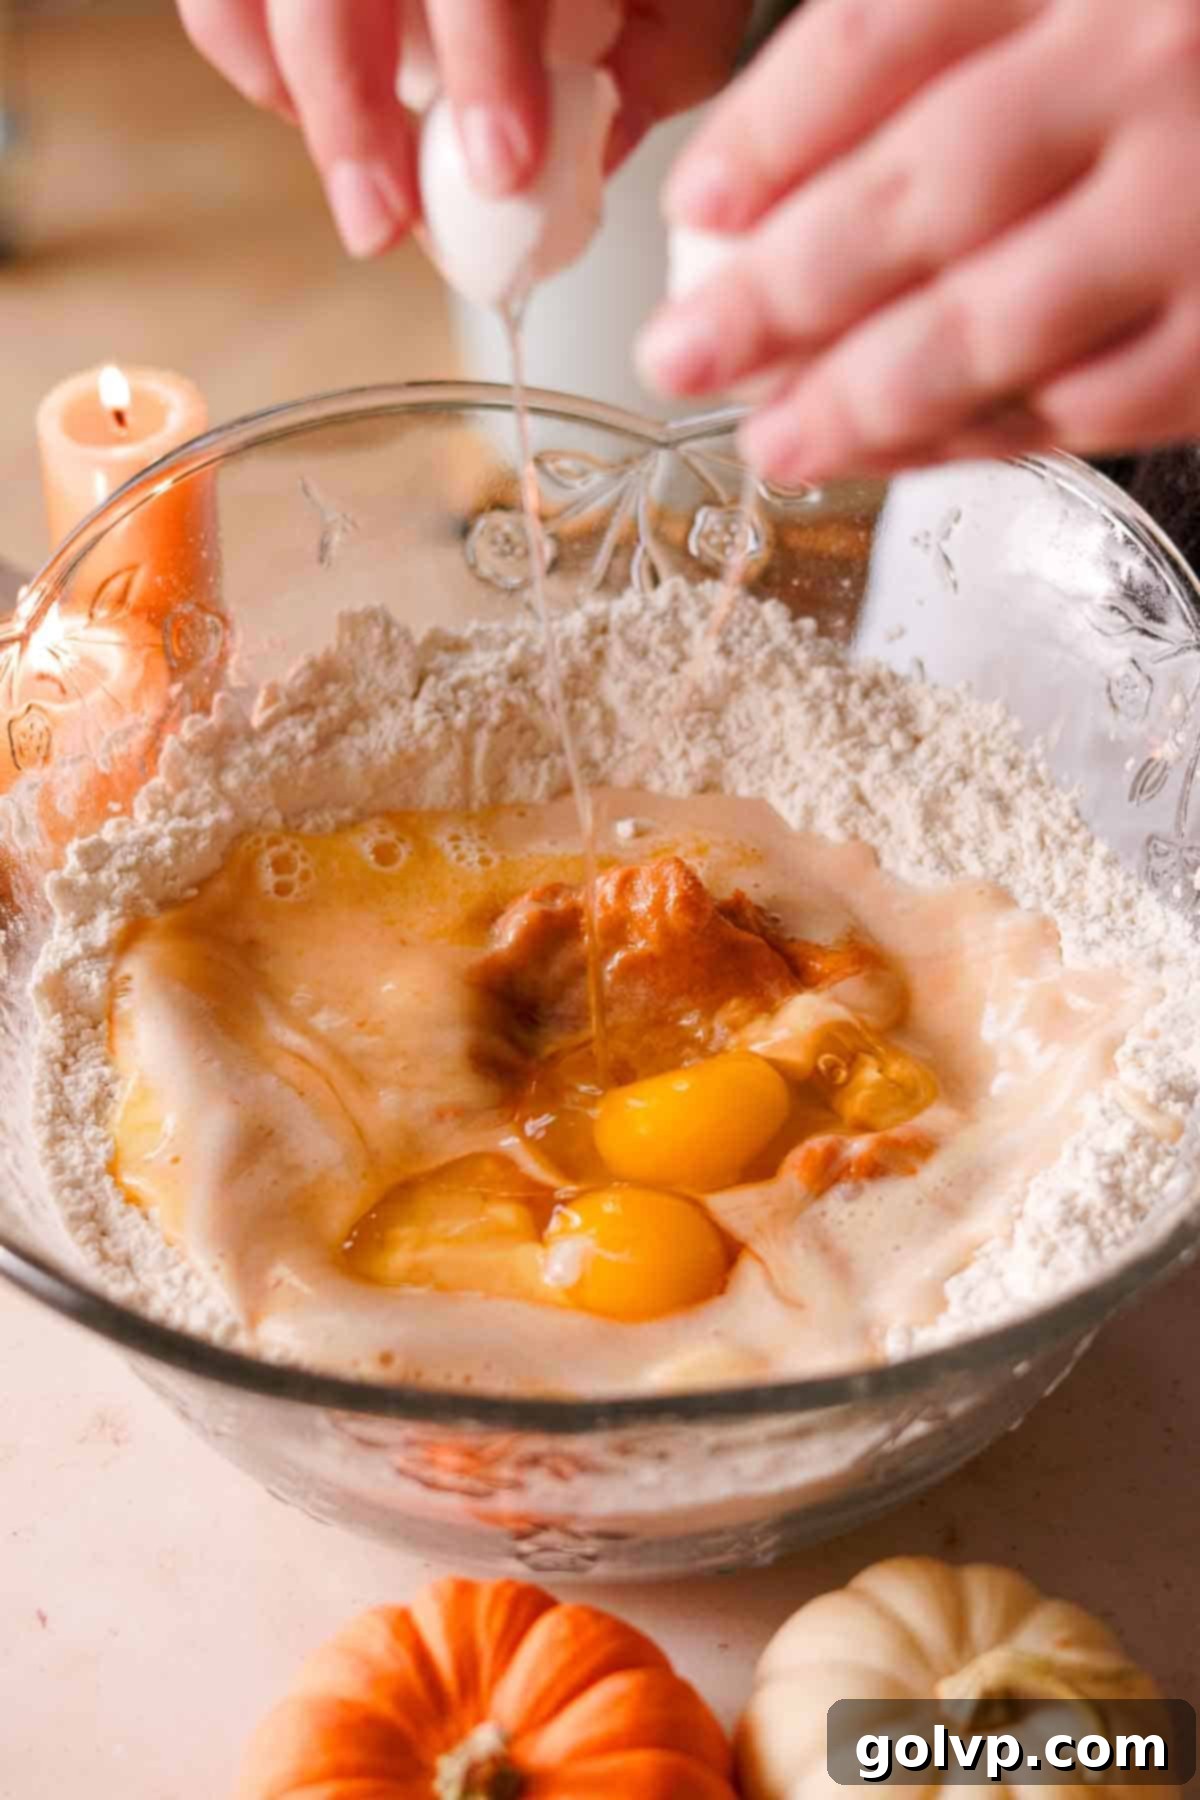
Step 3: Create a deep well or indentation in the center of your dry ingredients in the large bowl. Into this well, add the very soft (almost melted) butter, the room-temperature whisked eggs, pure vanilla extract, canned pumpkin puree, warm milk, and finally, the activated yeast mixture. Ensuring all wet ingredients are at room temperature helps them blend seamlessly.
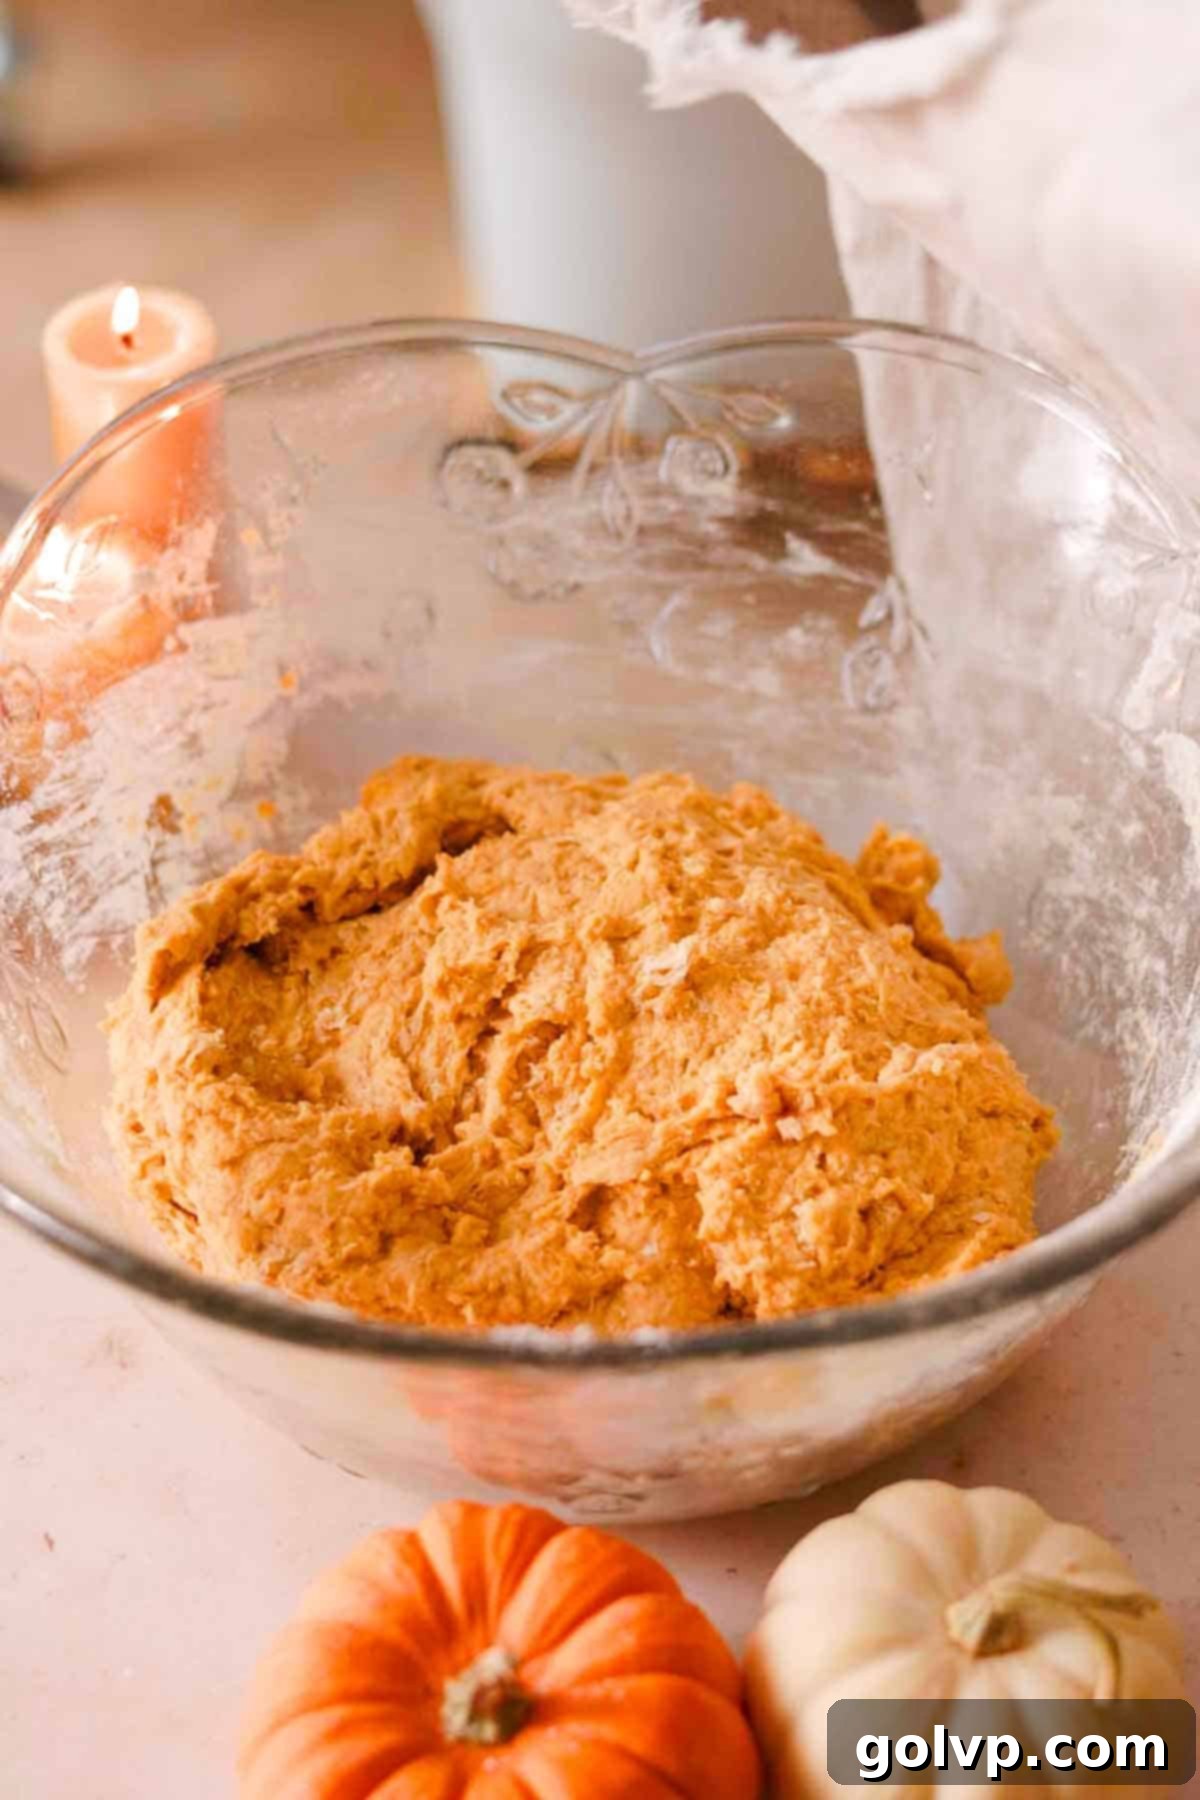
Step 4: Begin mixing the ingredients with a sturdy wooden spoon or a spatula, gradually incorporating the dry ingredients into the wet. Once it becomes too thick for the spoon, switch to using your hands. Mix until a sticky, shaggy dough forms, where all the flour is hydrated. It won’t be smooth at this stage, and that’s perfectly normal for a no-knead dough. Cover the bowl loosely with a clean kitchen cloth or plastic wrap and place it in a warm, draft-free place to rise until it has visibly doubled in size, which typically takes about 30-45 minutes depending on the warmth of your environment.
Important Note: Don’t be concerned if the dough appears a bit shaggy and sticky after initial mixing. It will smooth out and come together beautifully during the rising process as the gluten develops naturally.
Expert Tip for Rising: To create an ideal warm environment for your dough, you can place the covered bowl inside a cold oven with just the oven light turned on. Alternatively, find a warm, sunny spot in your kitchen. Avoid overly hot temperatures (above 55°C or 130°F), as extreme heat can actually bake the yeast, rendering it inactive. Enriched doughs, like this one with its fat and egg content, tend to rise a bit slower, so patience is key.
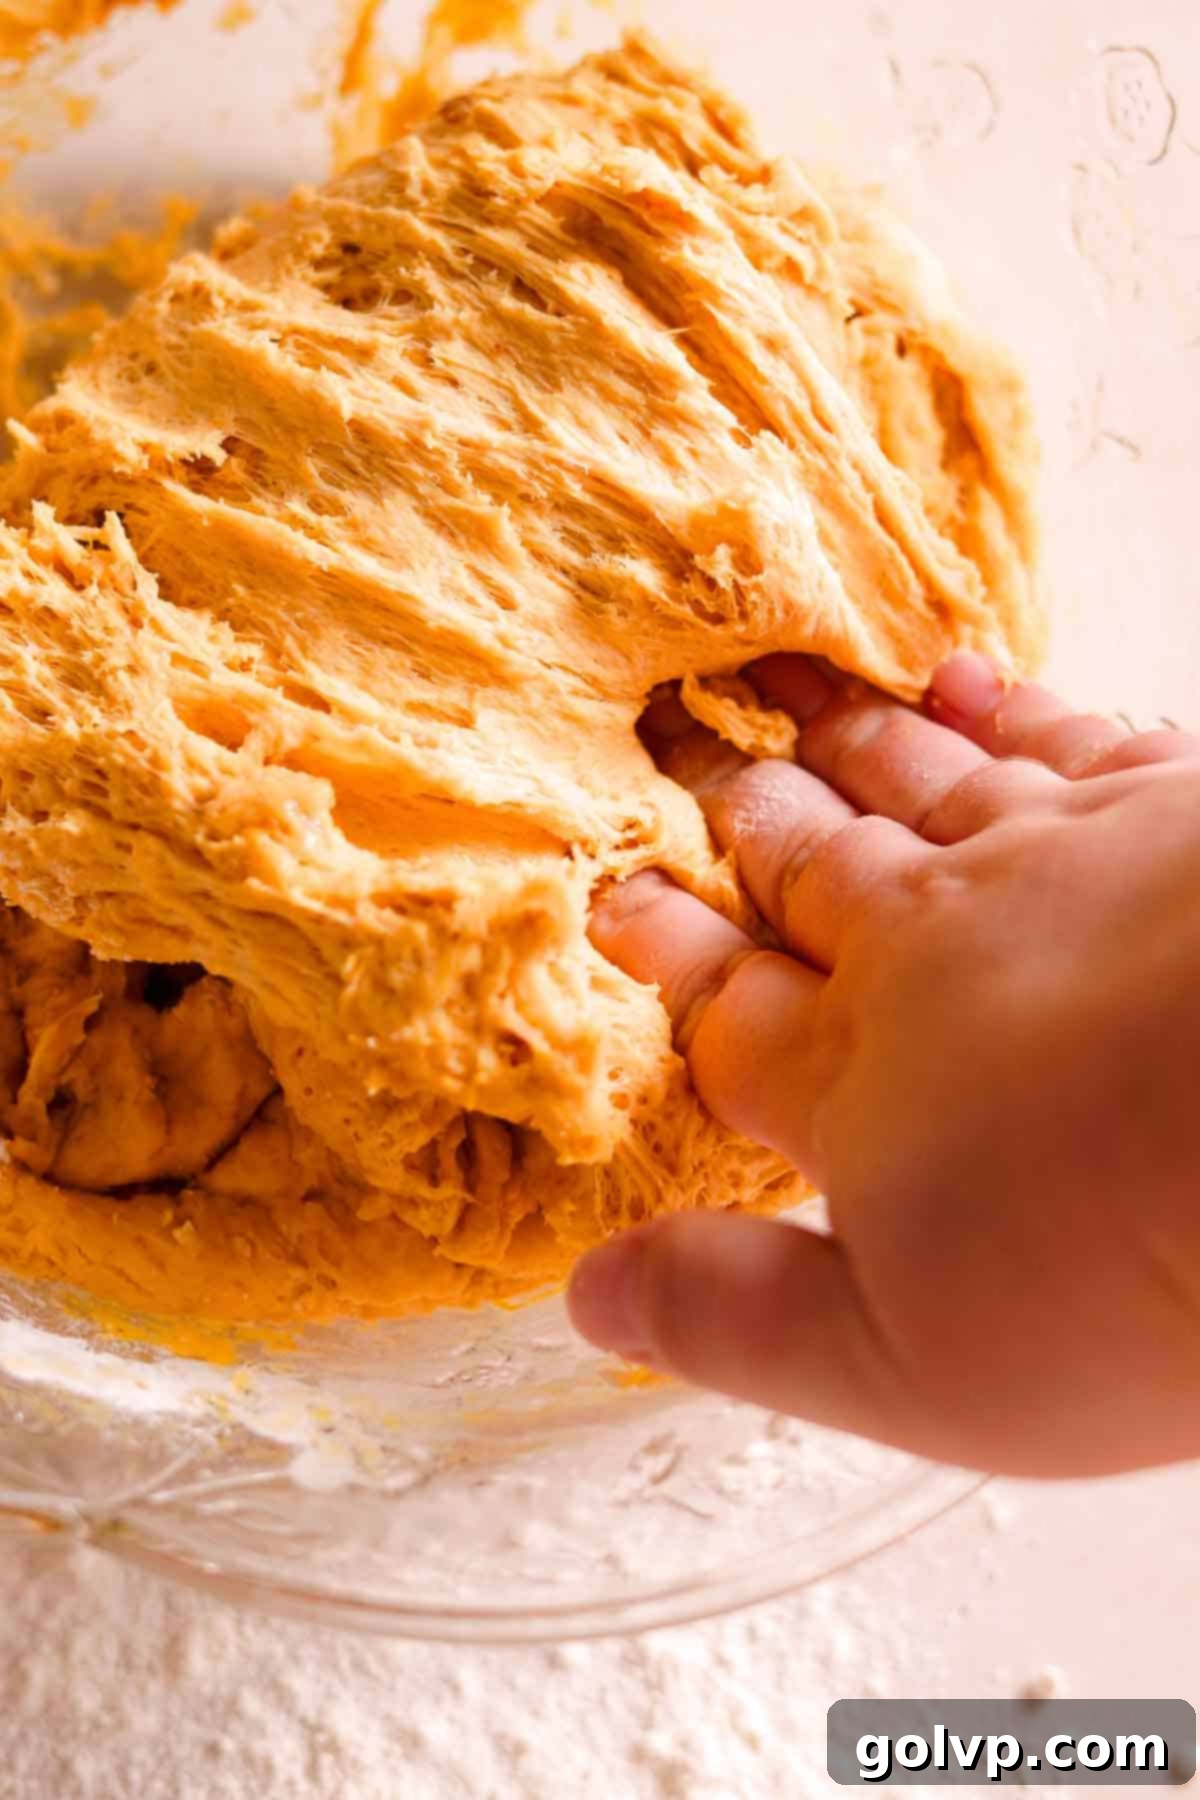
Step 5: Once the dough has doubled in size, gently “punch it down” to release the accumulated gases. Then, perform a few light folds right in the bowl to further develop the gluten and create a smoother texture. Turn the dough out onto a lightly floured surface. Using your hands, gently flatten and fold the dough a few more times. This helps to further smooth it out and distribute the air pockets evenly without overworking it.
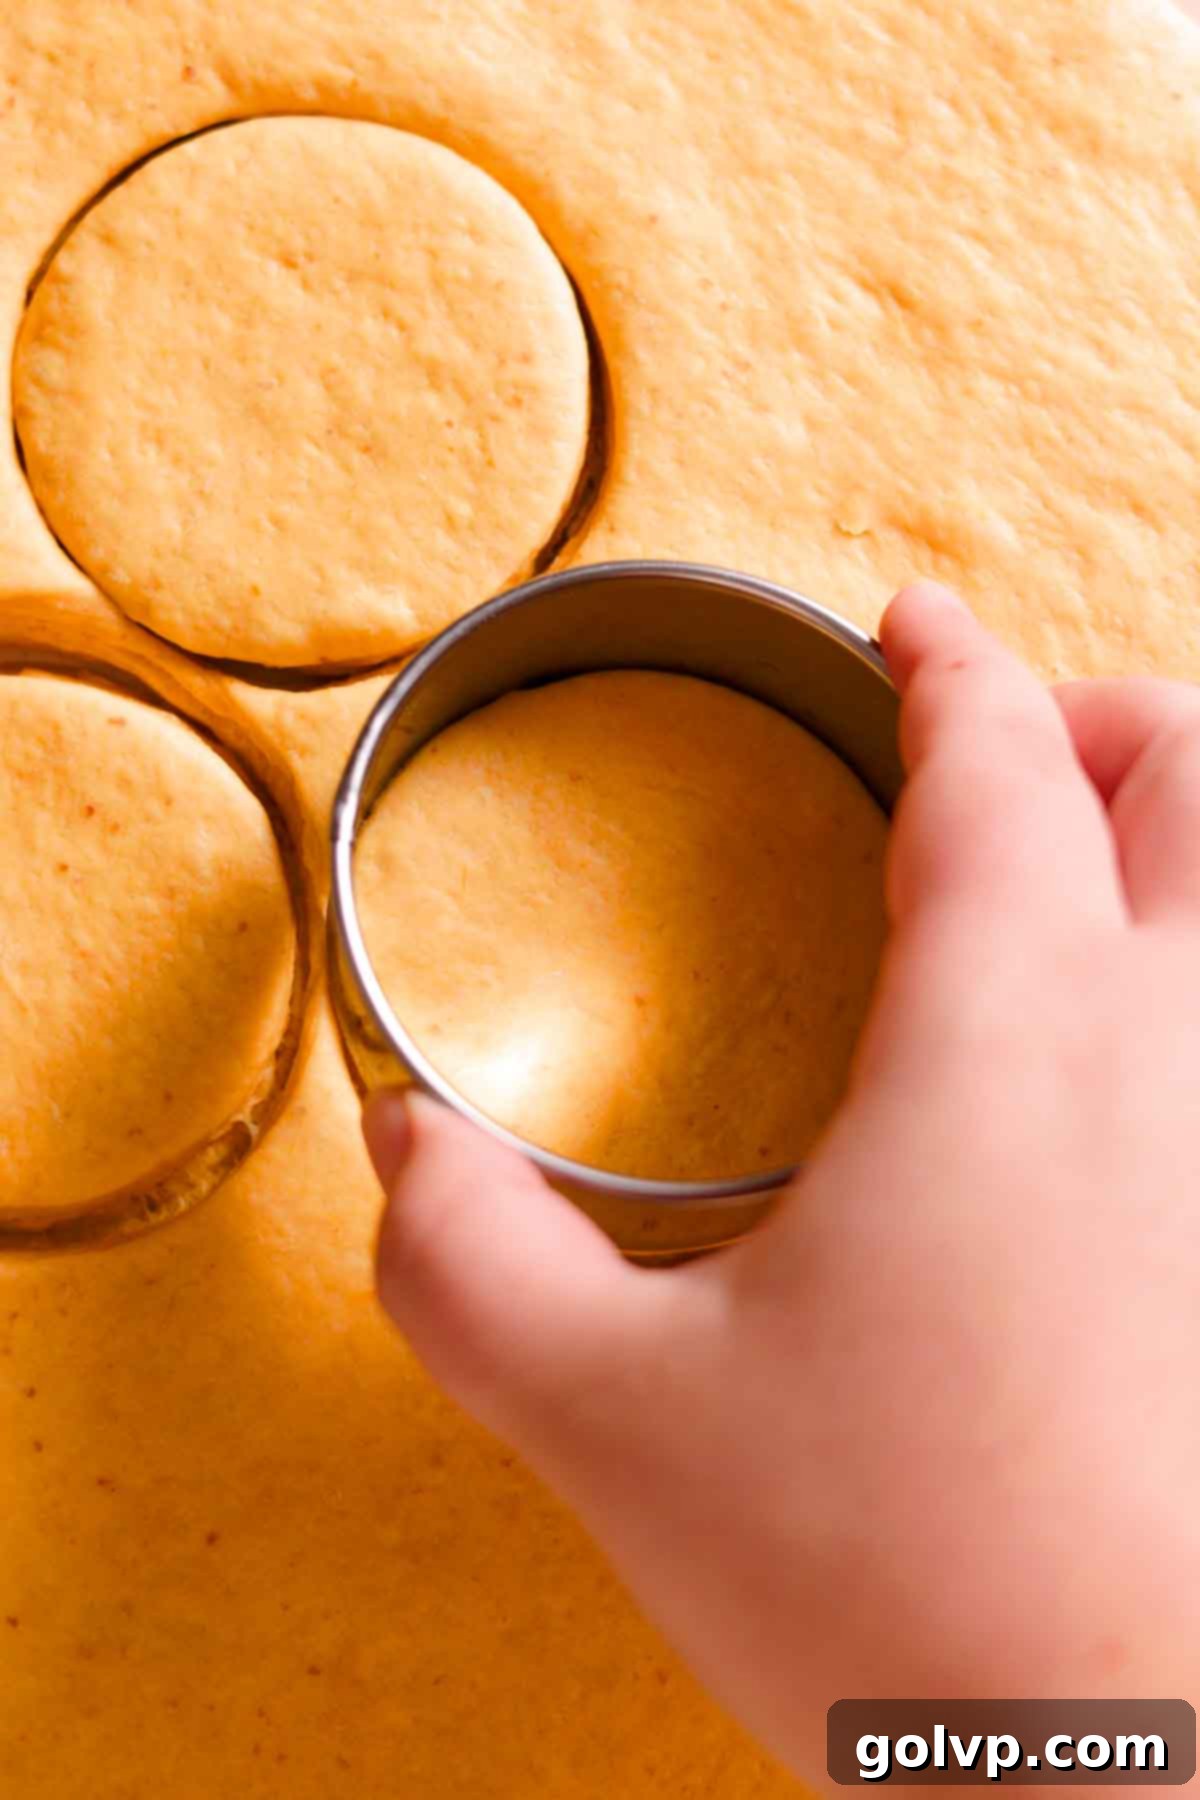
Step 6: With a lightly floured rolling pin, carefully roll out the dough to an even thickness of approximately ¾ inch. Using a 3.5-inch round cookie cutter (or a drinking glass), cut out about eighteen circles of dough. As you cut, gently transfer each dough round onto a baking sheet lined with parchment paper. Gather any dough scraps, gently press them together (avoiding excessive handling), re-roll, and cut out additional donuts until most of the dough is used. Reserve these dough scraps for testing the oil temperature.
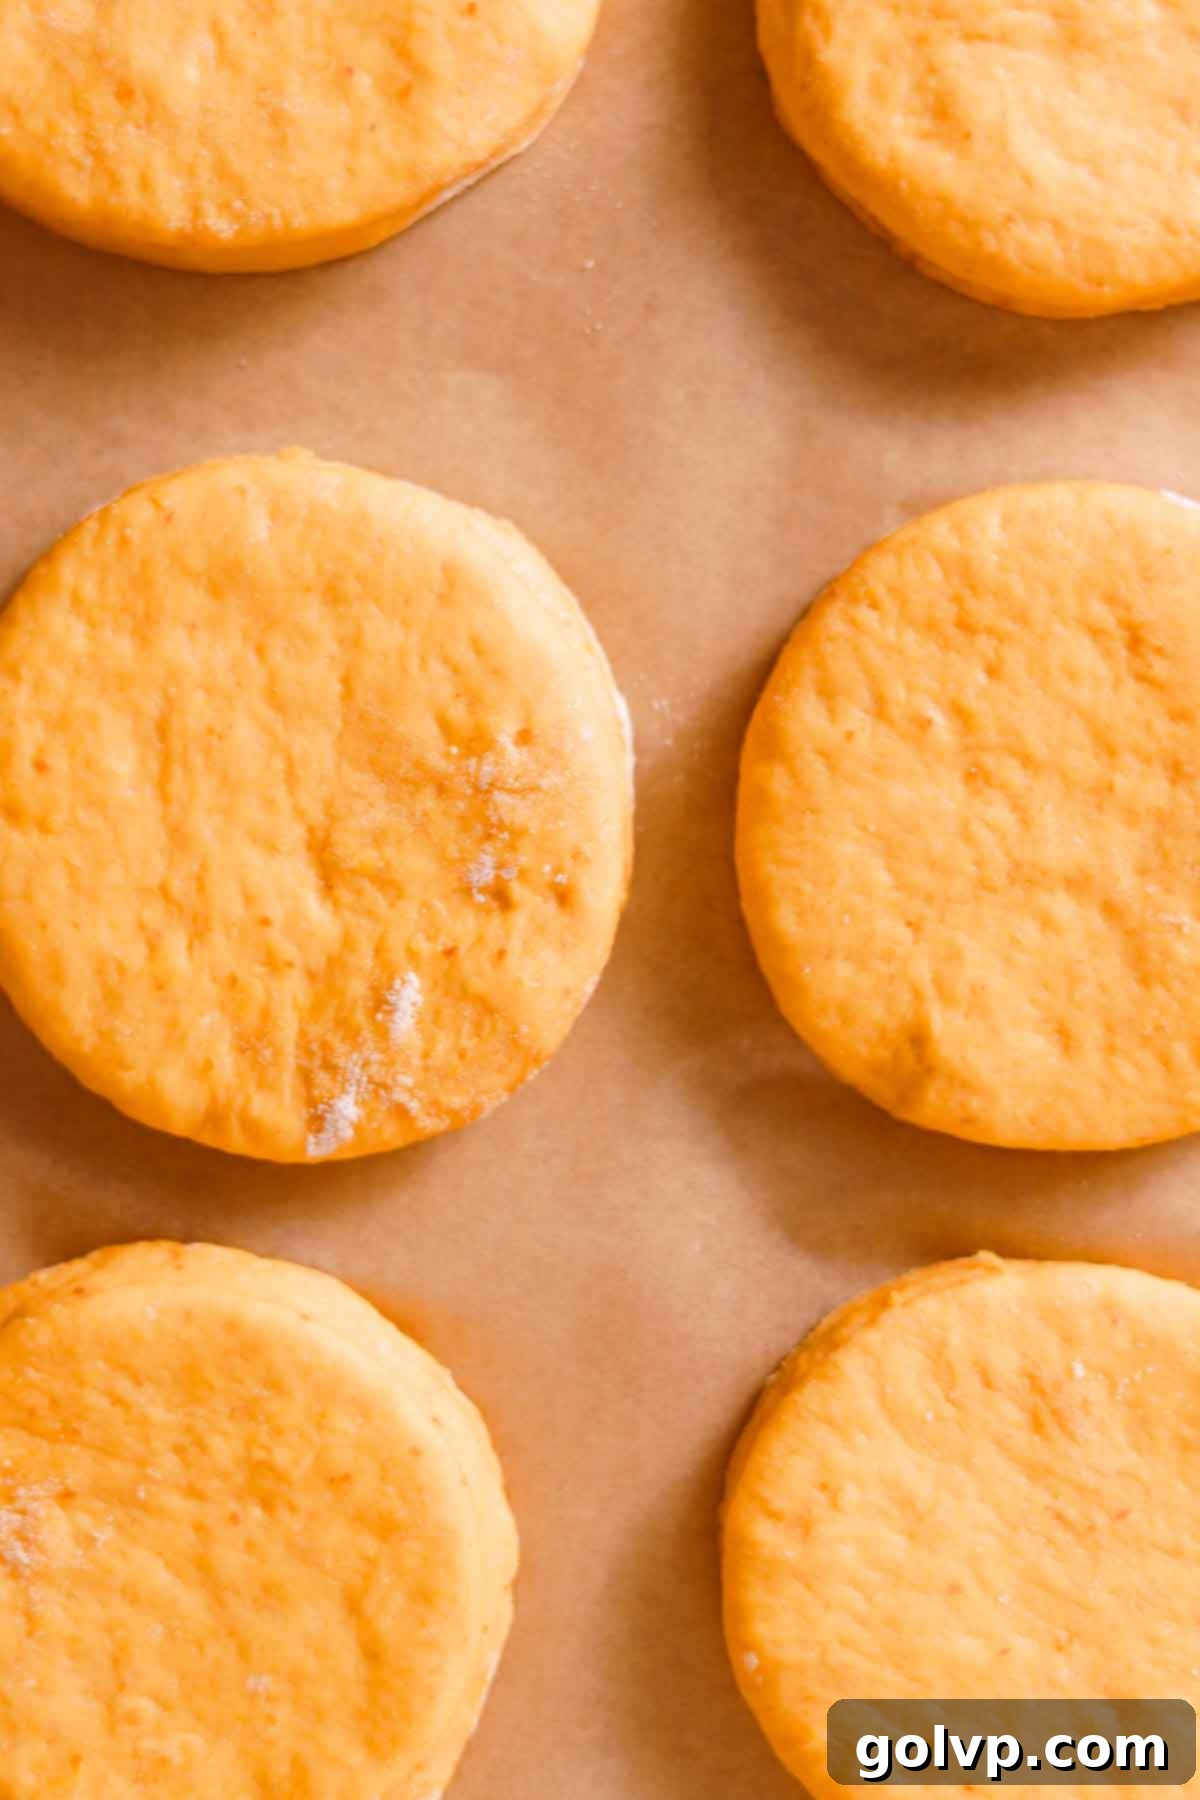
Step 7: Once all your donut rounds are cut, cover the baking sheet loosely with a clean kitchen cloth or plastic wrap. Allow the cut donuts to rise in a warm, draft-free place for a second time, until they have visibly doubled in size and appear puffy, which should take approximately 15 minutes. For easier handling and to prevent deflation when transferring to hot oil, carefully cut the parchment paper around each donut into individual squares. This way, you can gently drop the donut and its parchment square into the oil, then remove the paper with tongs.
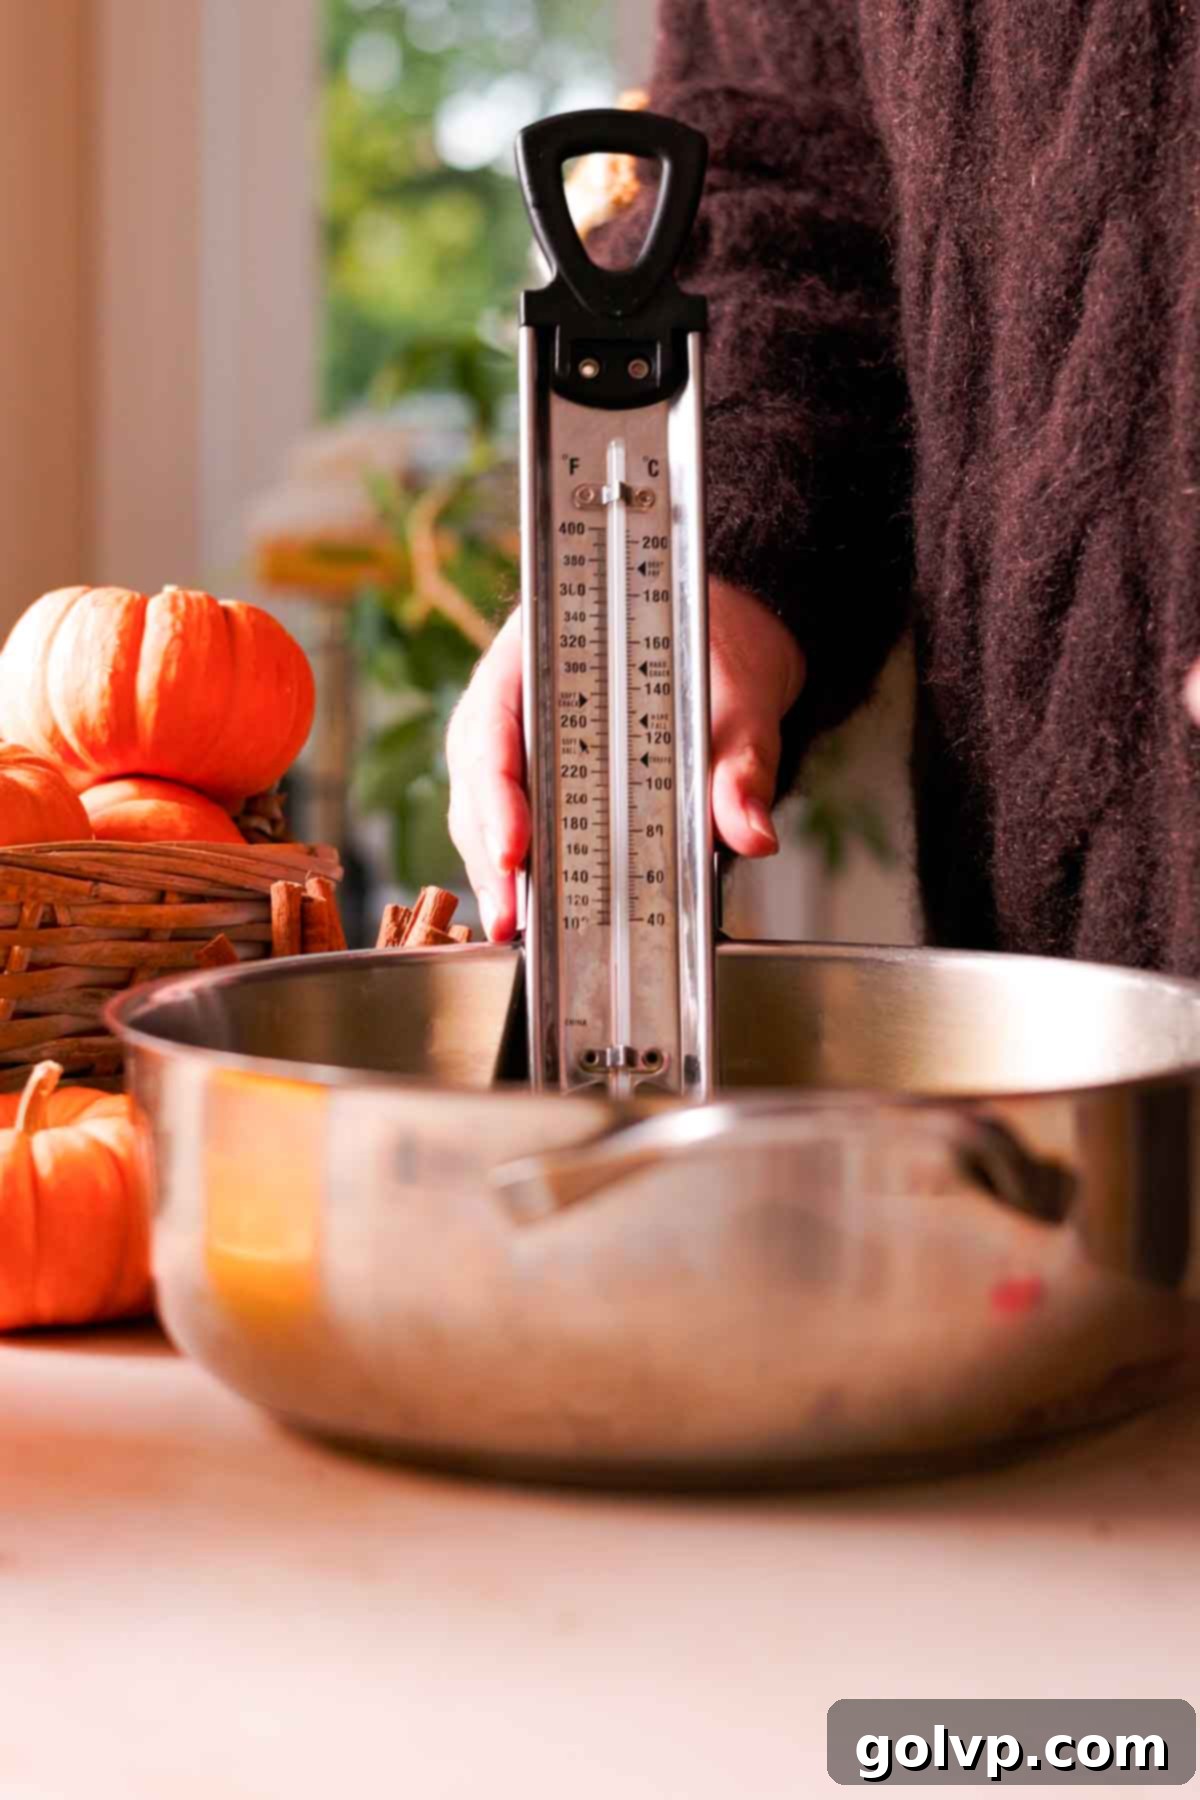
Step 8: While your donut rounds are completing their second rise, prepare your frying station. Pour the vegetable oil into a large, heavy-bottomed pot. A wide but not too shallow pot works best for safe frying and even heat distribution. Securely clip a reliable cooking thermometer (a candy or deep-fry thermometer works perfectly) onto the side of the pot, ensuring the tip is submerged in the oil but not touching the bottom. Begin heating the oil over medium heat until it reaches a consistent temperature of 190°C (370°F). Maintaining this precise temperature is key to perfectly fried, non-greasy donuts.
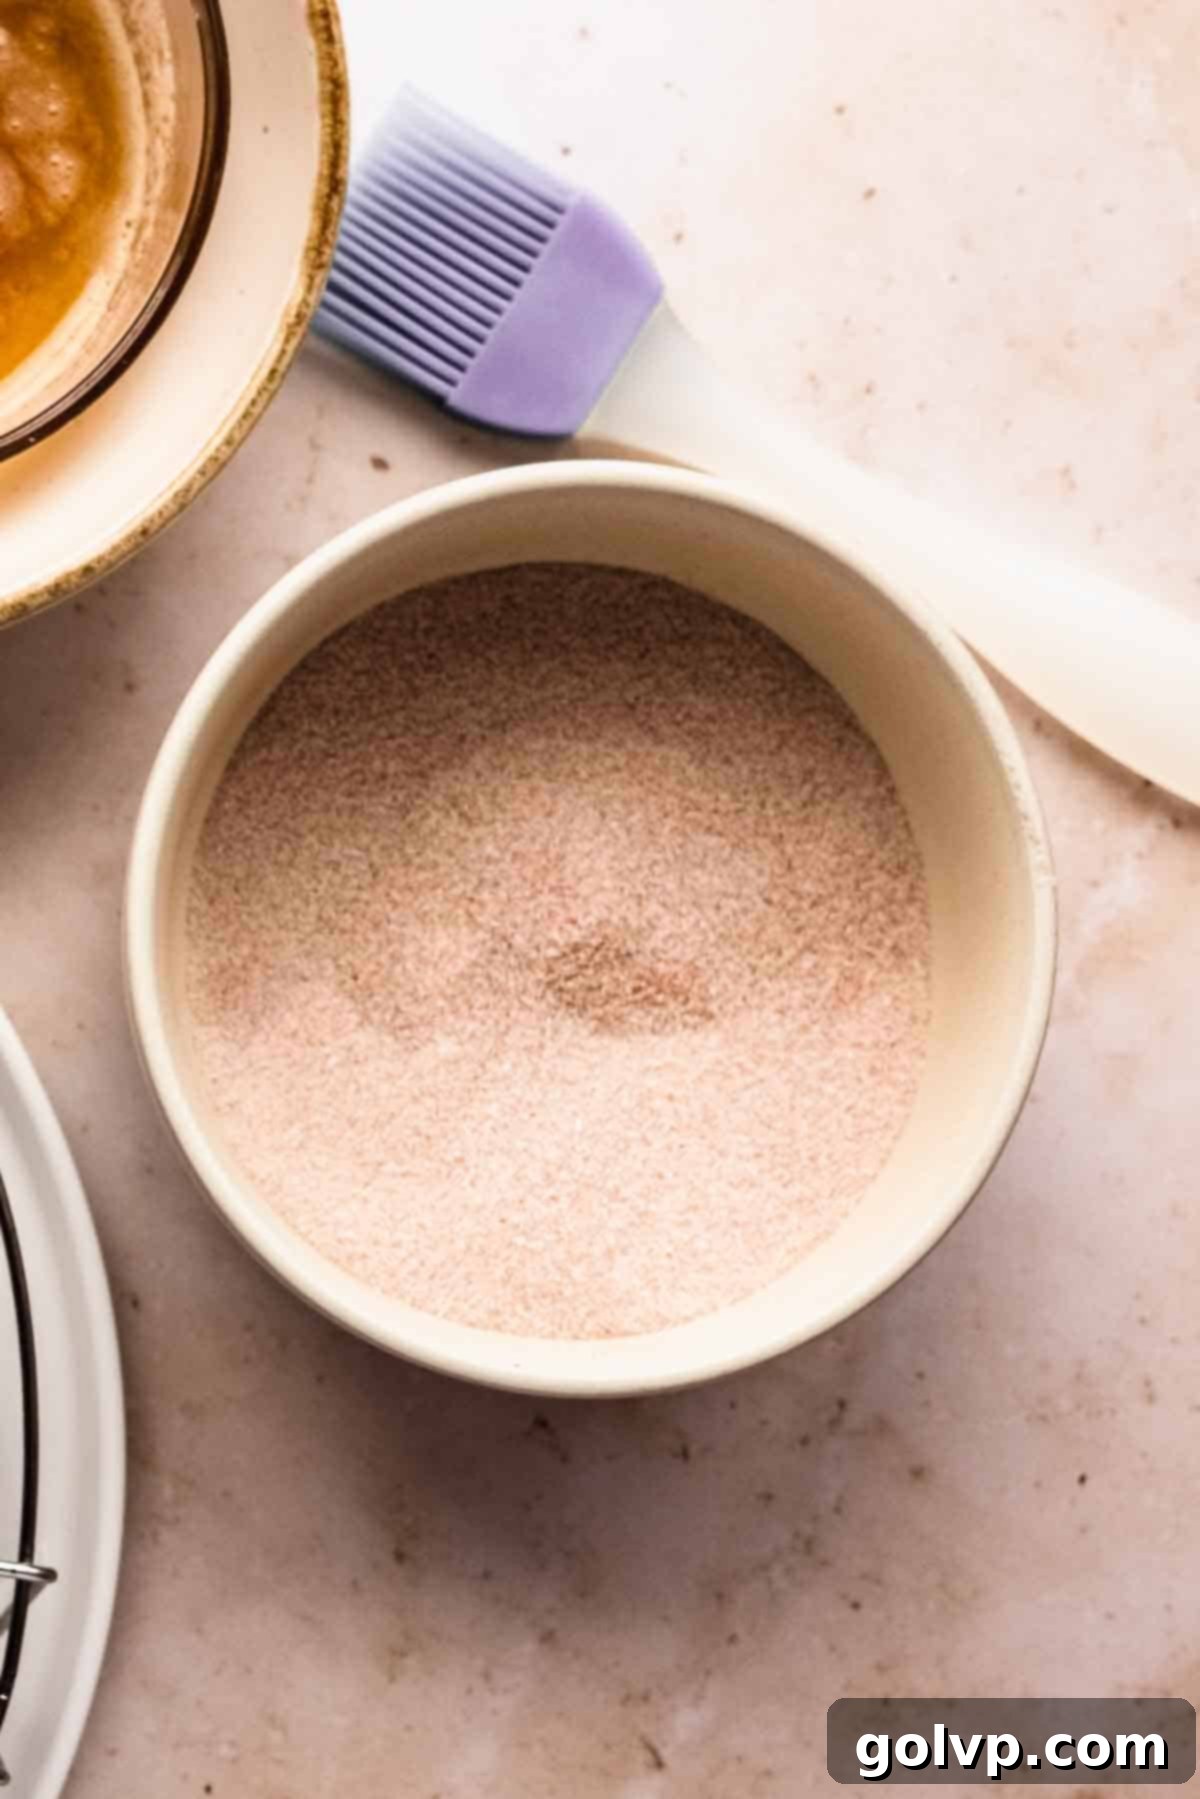
Step 9: Get your post-frying setup ready. Line a separate baking tray with at least 4 layers of paper towels to absorb excess oil from the freshly fried donuts. Next to it, set up a cooling rack with another layer of paper towels underneath to catch any remaining drips. In a medium-sized bowl, mix together the granulated sugar and 1 teaspoon of pumpkin spice until well combined. This will be your delicious, aromatic coating for the warm donuts.
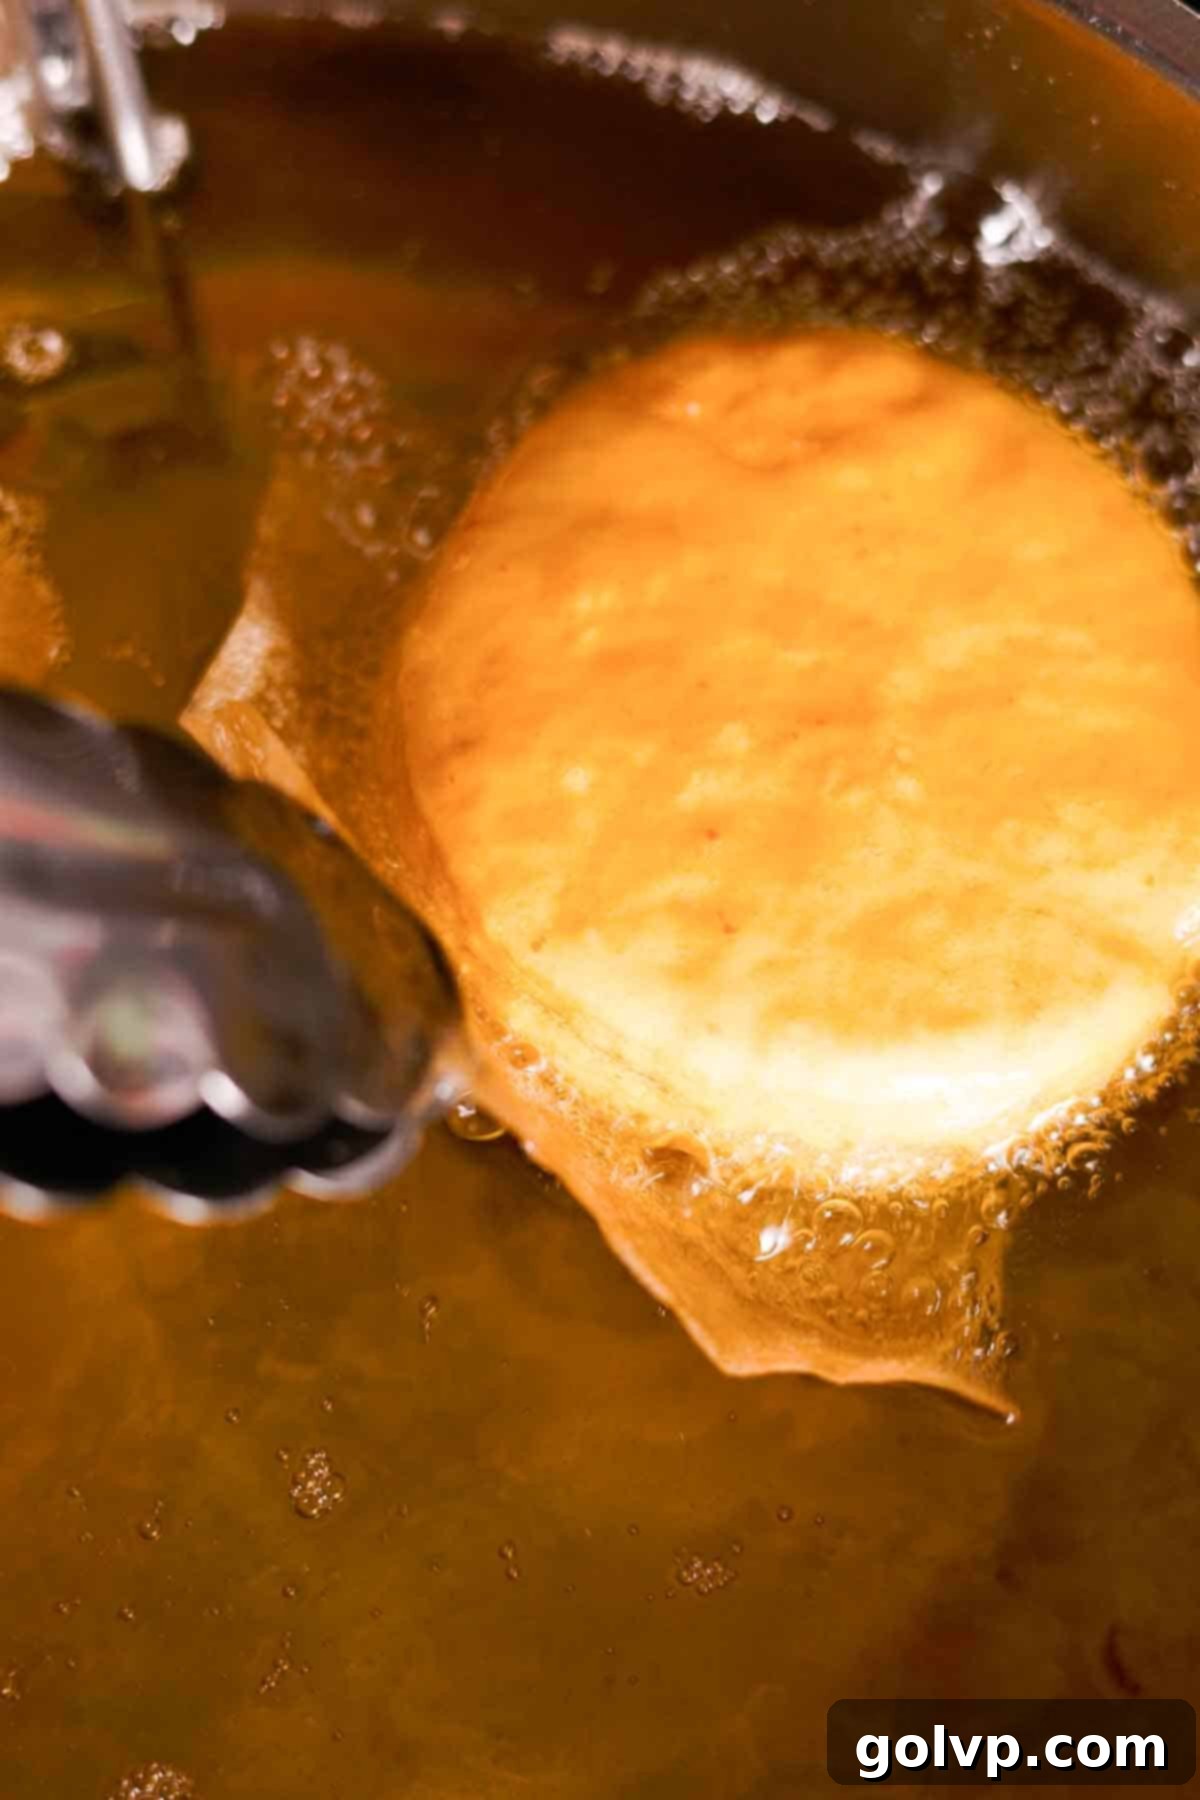
Step 10: Once the oil consistently reaches 190°C (370°F), it’s time to test. Carefully drop a few of the reserved dough scraps into the hot oil. Fry them for 2-3 minutes per side, or until they turn a beautiful golden brown. Remove with tongs or a spider strainer, gently shake off excess oil, and place on the prepared paper towels. Blot thoroughly. Once confident in your oil temperature and cooking time, proceed with the main donut rounds. Gently transfer the risen donuts into the hot oil, using the parchment squares for assistance to prevent splashing and keep their shape. Fry 2-3 donuts at a time to avoid overcrowding and dropping the oil temperature. Fry each side for 2-3 minutes until golden brown. Repeat the removal, draining, blotting, and cooling rack transfer process.
Crucial Frying Tip: Always fry your donut scraps first! This serves multiple purposes: it helps season the oil, allows you to practice your frying technique, and most importantly, lets you test and adjust the oil temperature and cooking time. Fry a scrap, then cut it open to ensure it’s cooked all the way through before frying your perfectly cut donuts. This guarantees consistently cooked, golden-brown donuts every time.
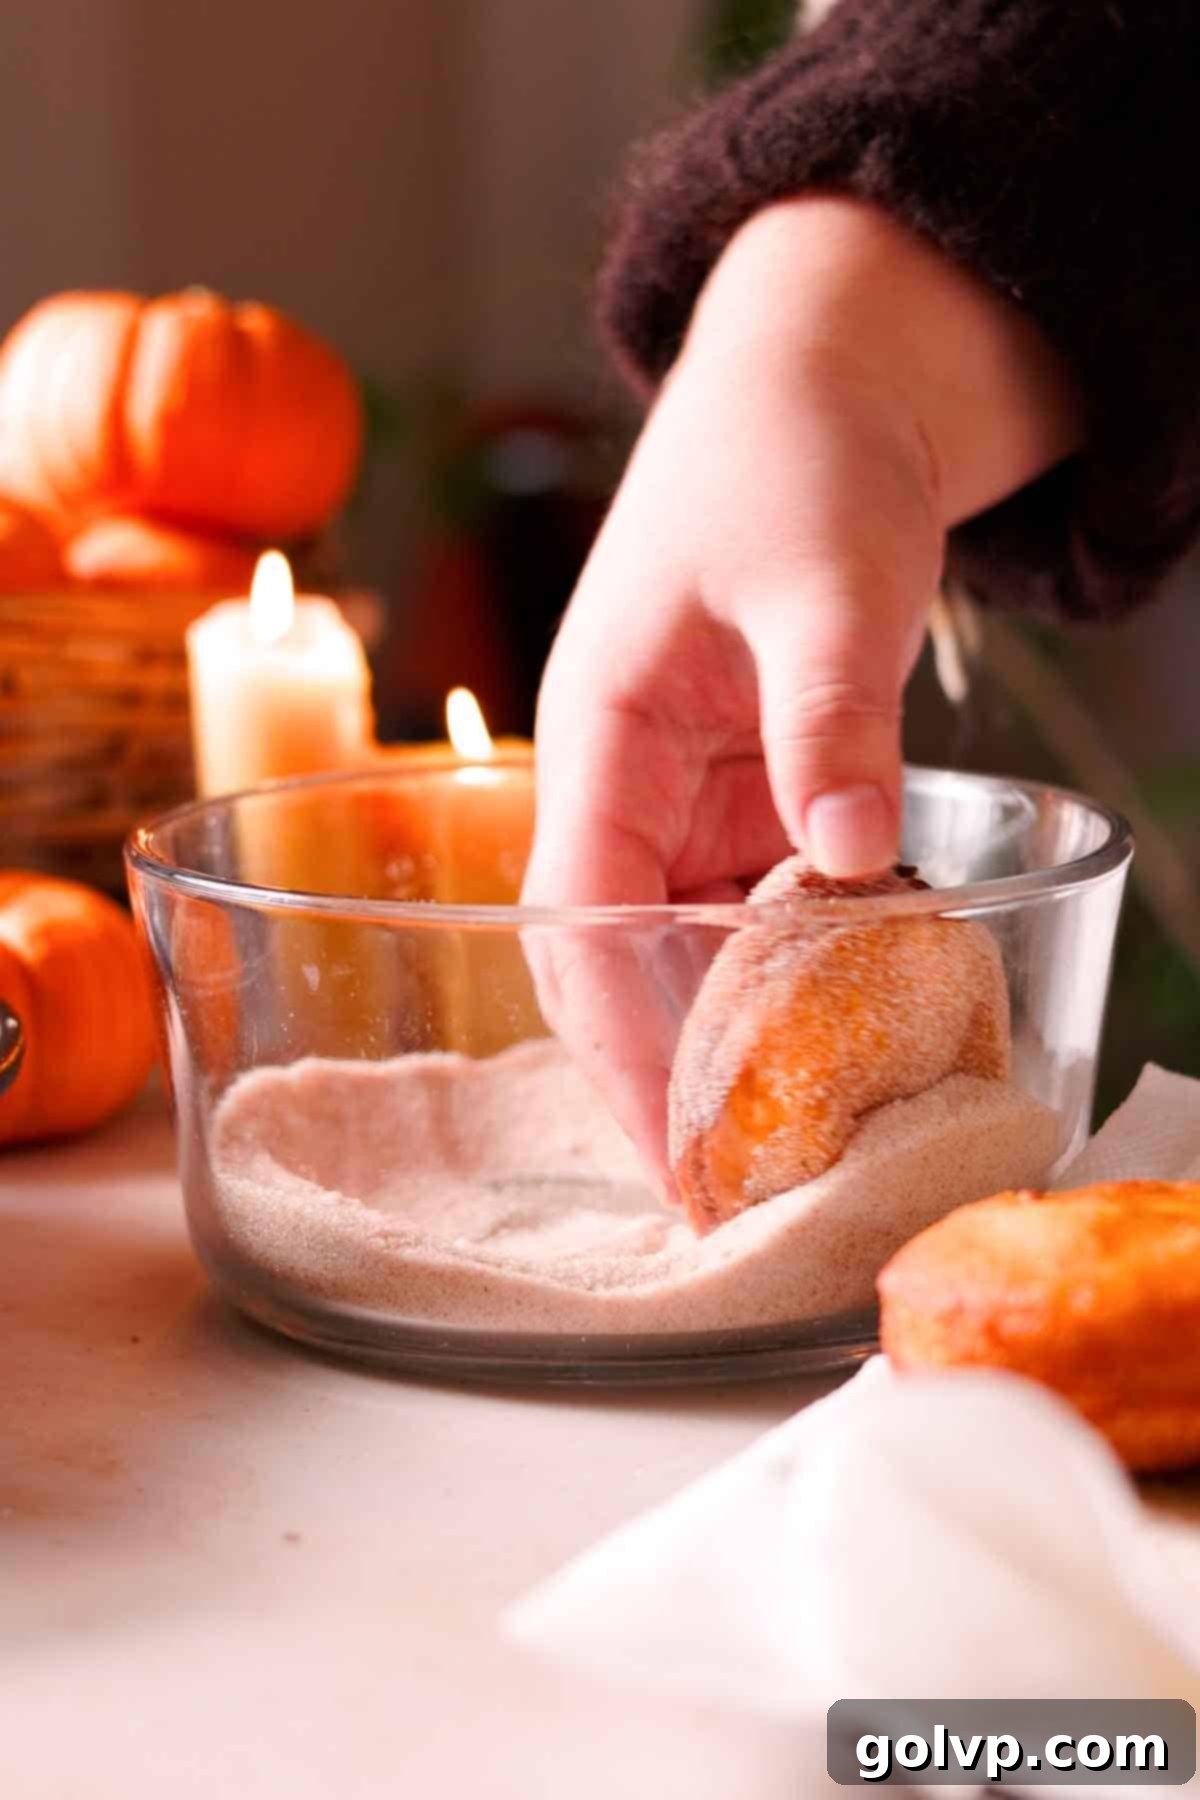
Step 11: Once the fried donuts are cool enough to handle comfortably (but still warm), carefully toss them in the prepared pumpkin spice sugar mixture. Ensure they are coated evenly and generously on all sides. The slight warmth of the donuts helps the sugar adhere beautifully. Place the coated donuts back on the cooling rack and allow them to cool completely before proceeding to the filling stage.
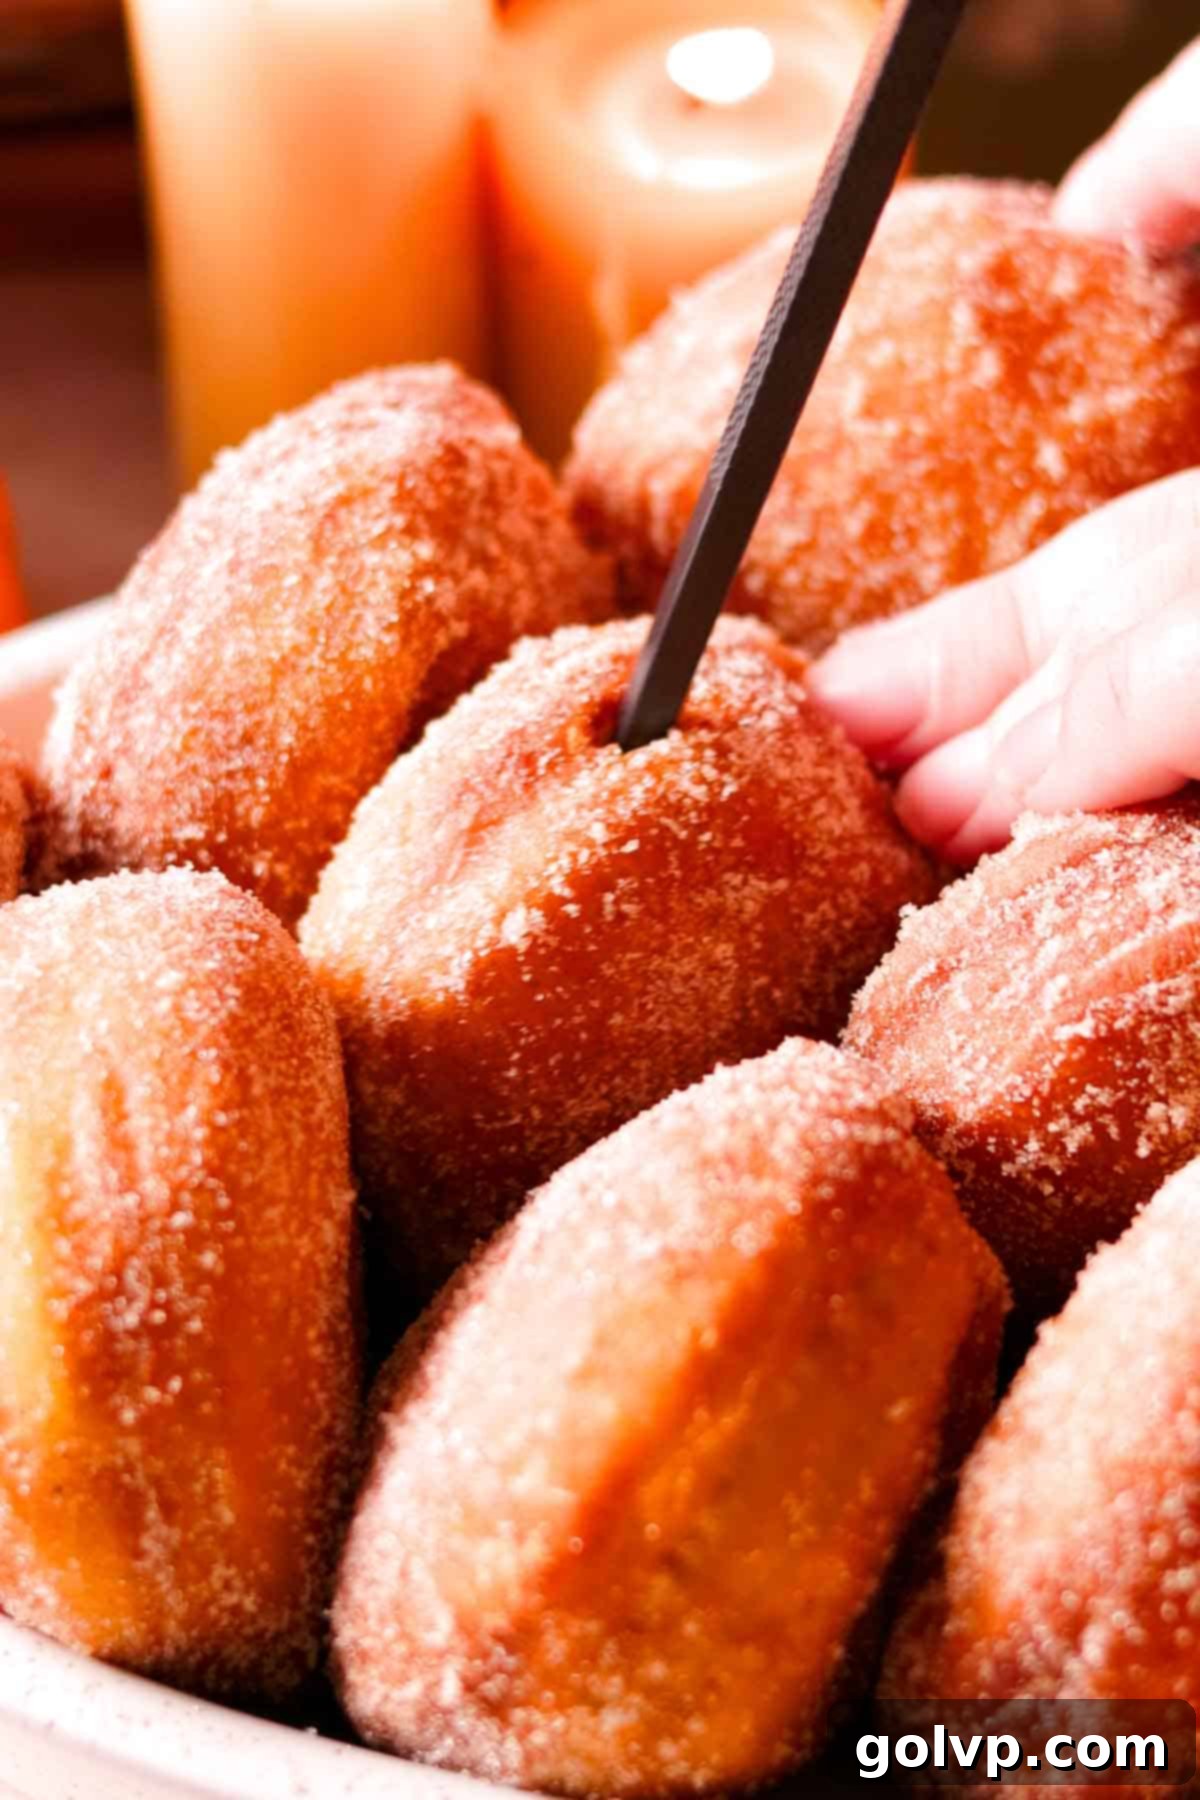
Step 12: Once the donuts are entirely cool to the touch, it’s time to prepare them for filling. Using a chopstick, the tip of a small paring knife, or a piping tip, carefully poke a hole through one side of each donut. Gently wiggle it to create a small cavity inside without tearing the donut apart. This hole will be the entry point for our delicious pumpkin custard.
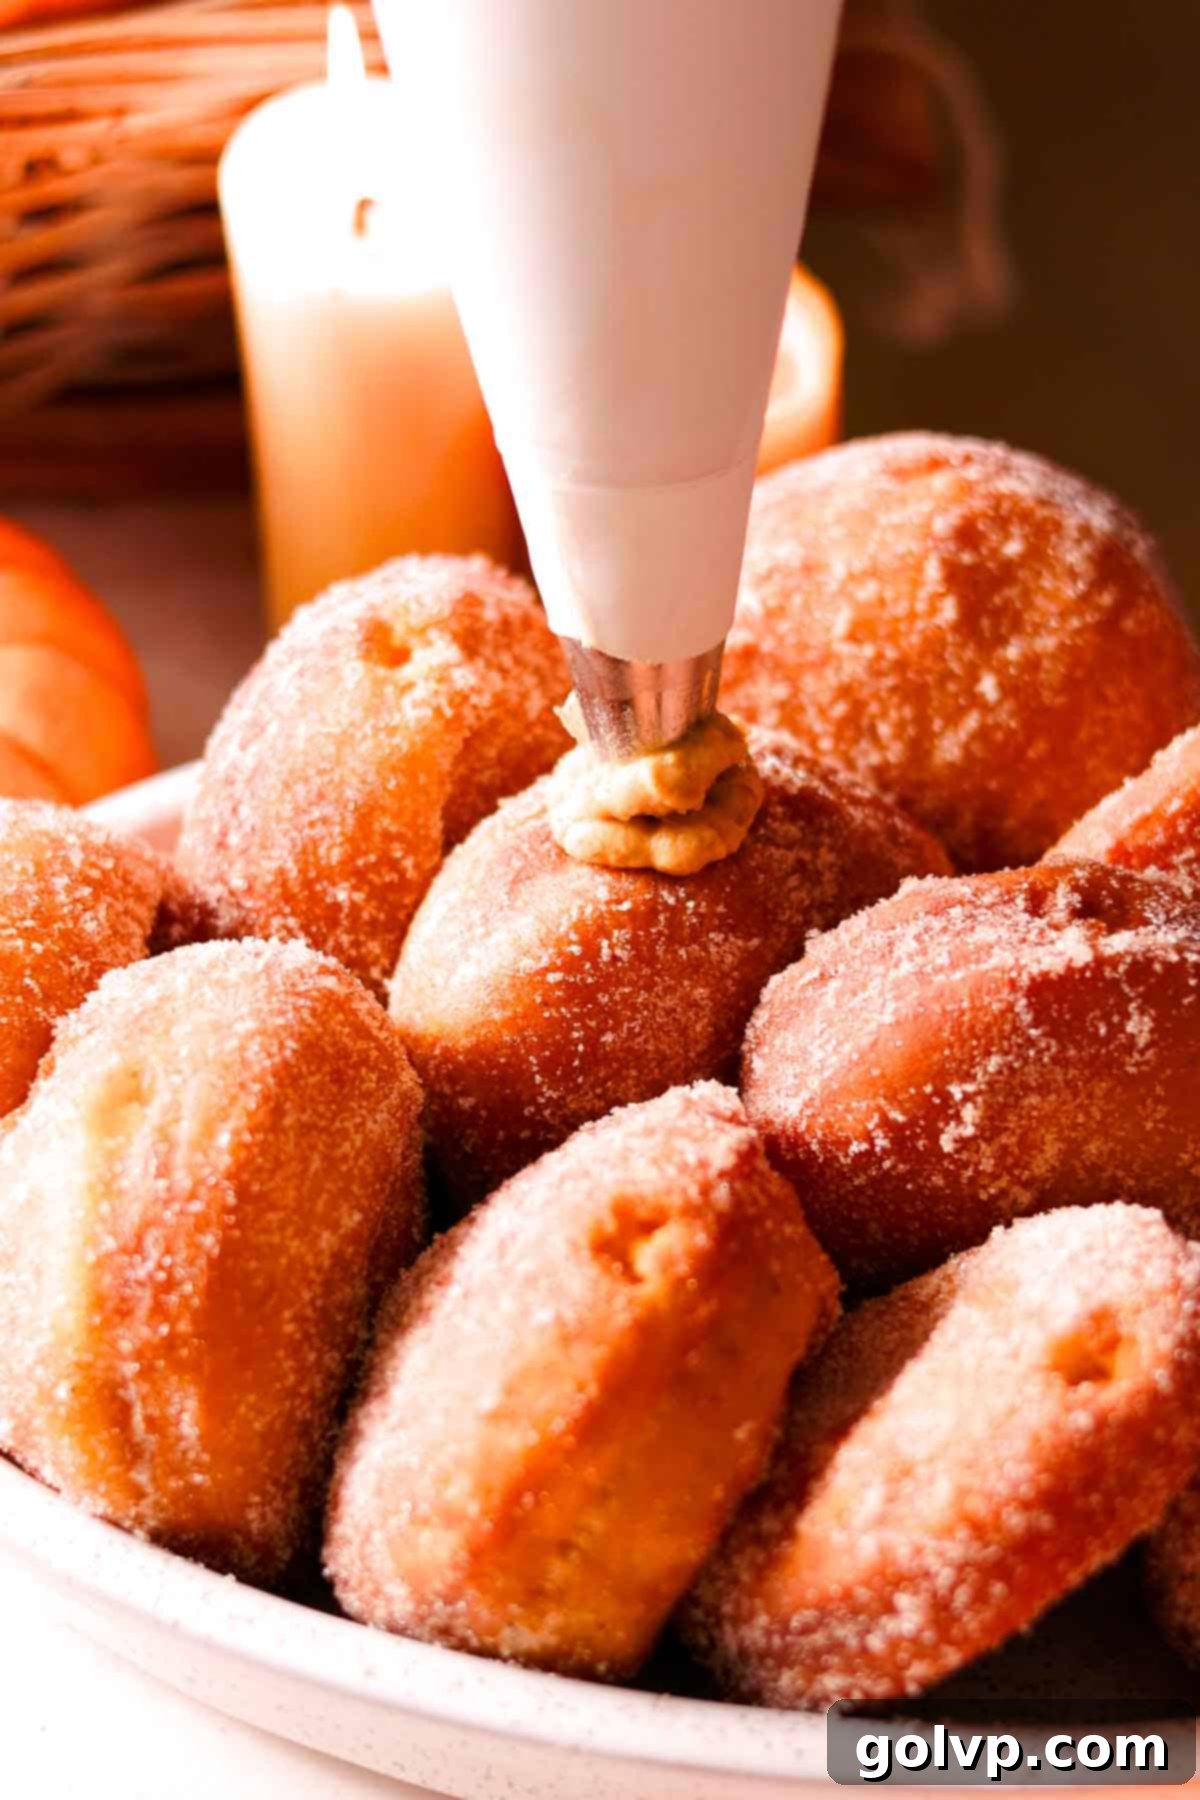
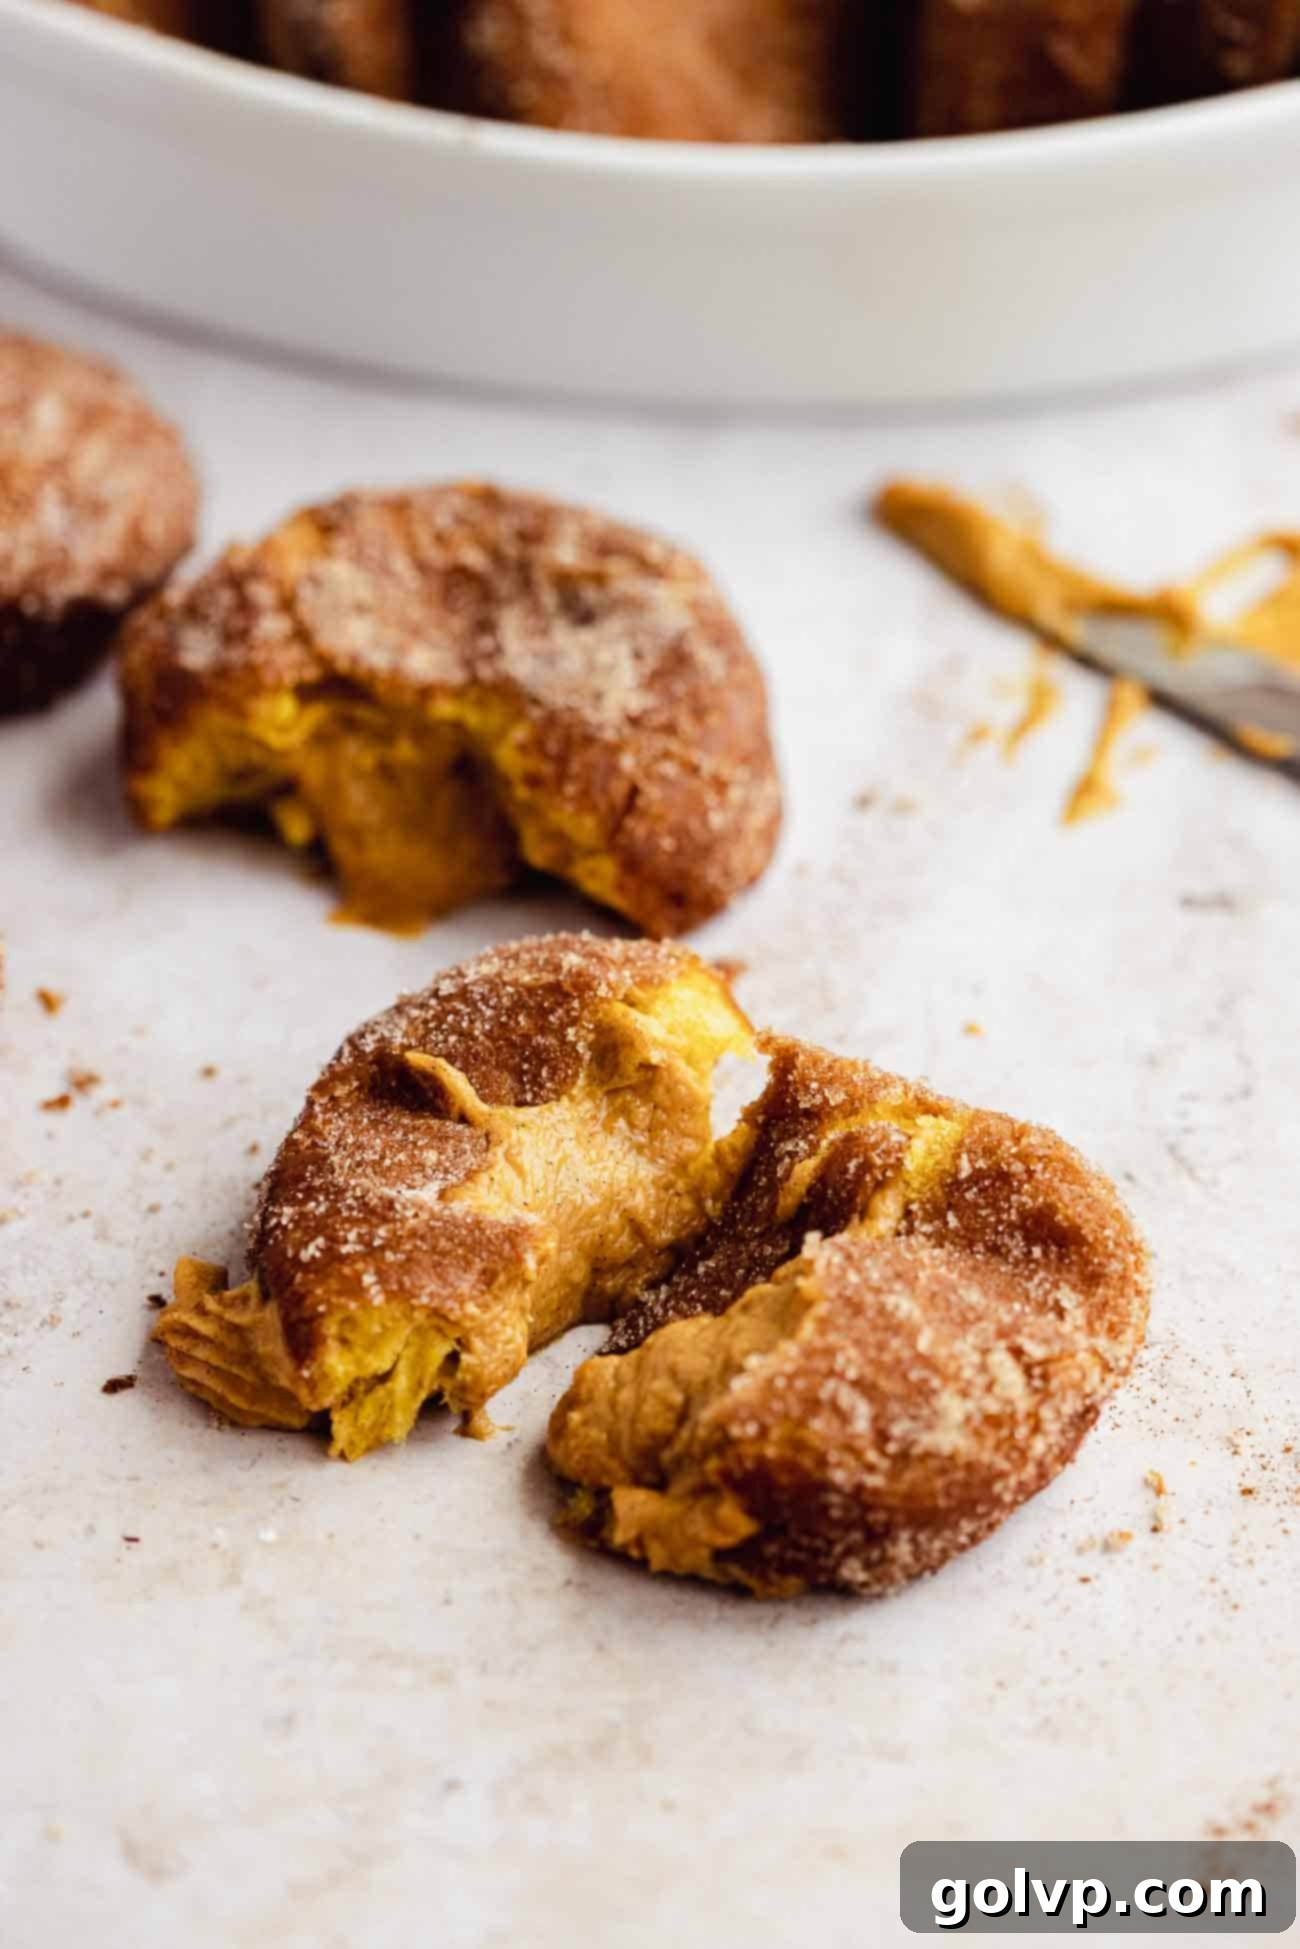
Step 13: Retrieve your chilled pumpkin custard filling from the refrigerator. Spoon the thick, creamy custard into a piping bag fitted with your preferred piping tip (a round or star tip works well). Insert the tip into the hole you created in each donut. Gently squeeze the piping bag, filling the donut until it feels noticeably heavy and the filling just begins to peek out from the hole. This ensures a generous, satisfying amount of custard in every donut. These freshly filled pumpkin spice donuts are truly best enjoyed the very same day they are made, while their exterior is still perfectly crisp and the filling is at its peak. Any leftovers should be stored in an airtight container in the refrigerator for up to 3 days to maintain freshness.
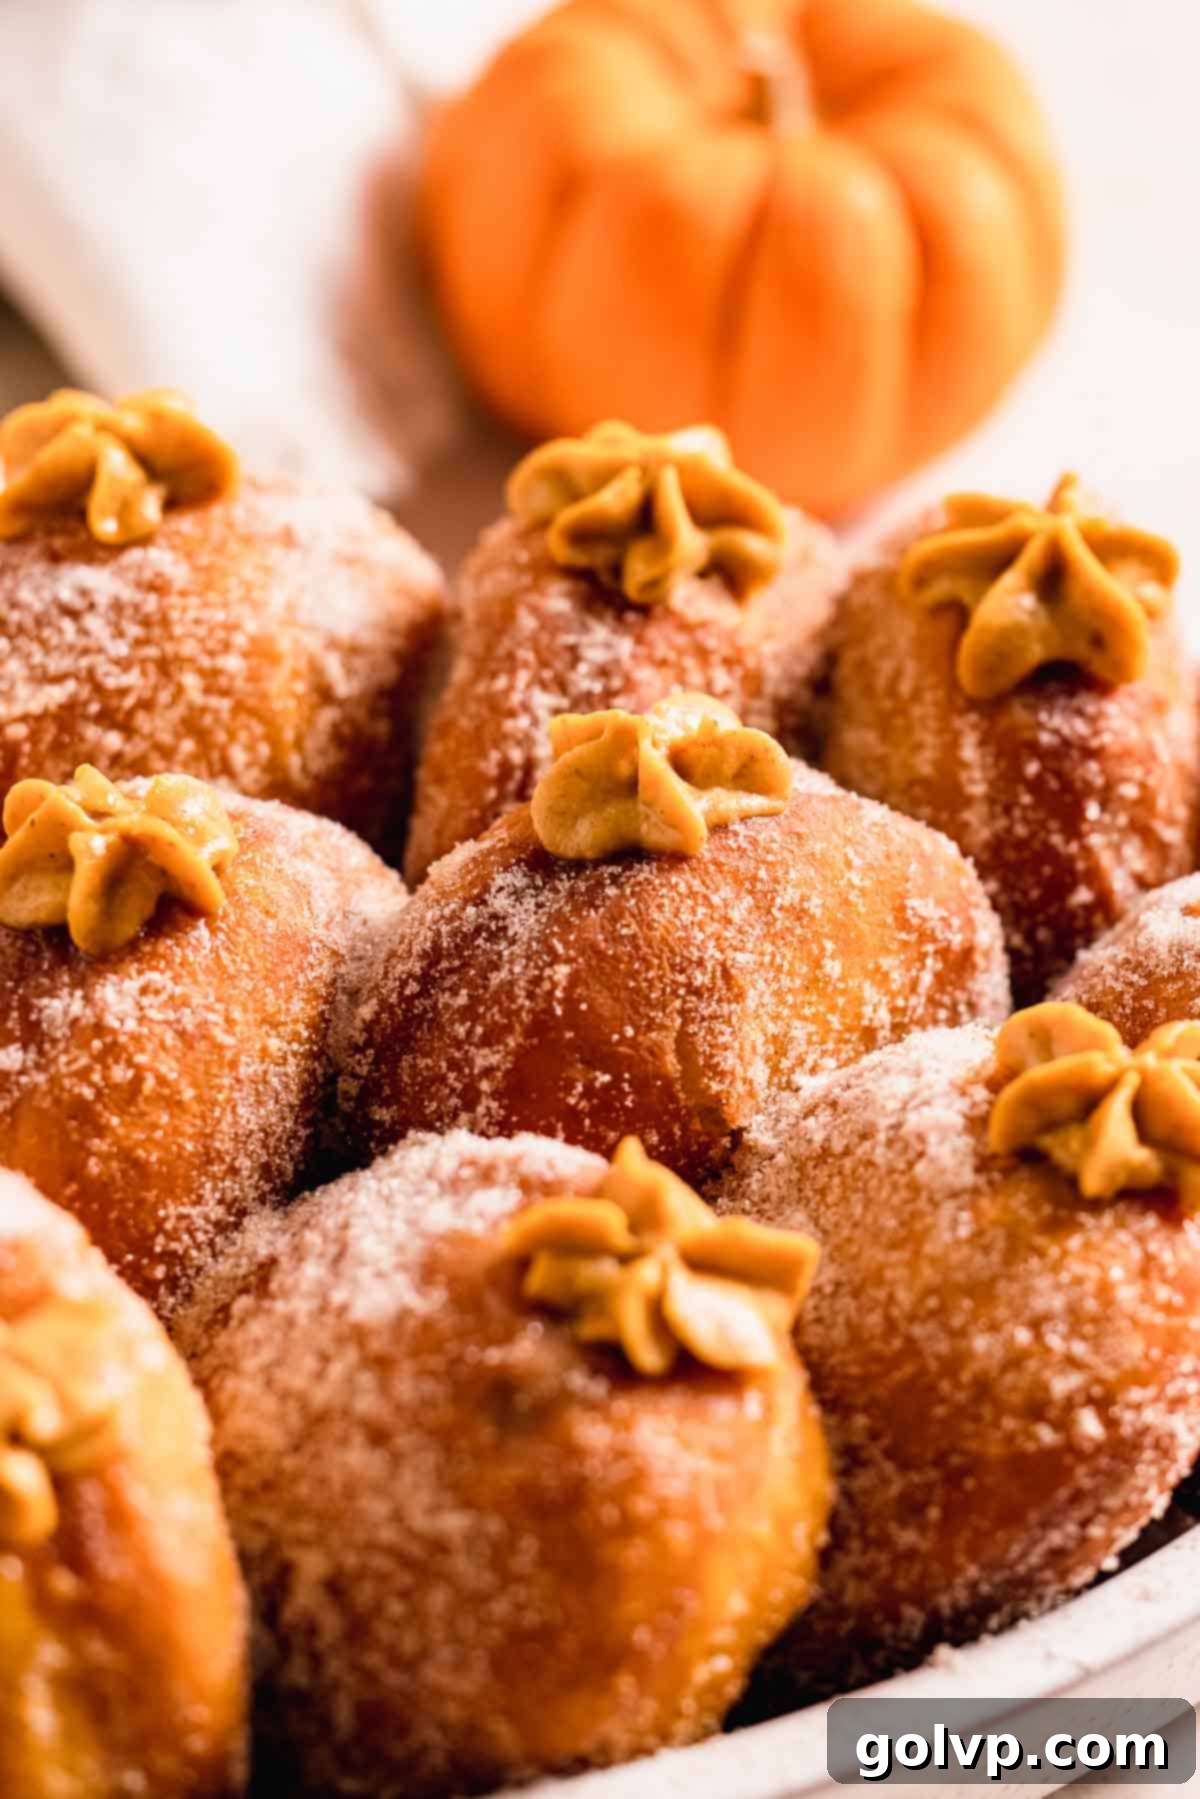
The donuts are best enjoyed the same day they are made. Store any leftovers in an airtight container, refrigerated for up to 3 days.
🥡 Make Ahead & Storage Tips for Perfect Pumpkin Donuts
These pumpkin spice donuts are a labor of love, but with a few make-ahead strategies, you can spread out the work and enjoy them at their freshest. The rich pumpkin custard filling is an ideal component to prepare in advance; it can be made up to two days before you plan to assemble and fill your donuts. Storing it in an airtight container in the refrigerator allows it to fully chill and thicken, ensuring it’s perfectly pipeable when you need it.
While the filling is forgiving, the fried donuts themselves are truly at their best when enjoyed on the same day they are made. This is because their delightful crispy exterior, a hallmark of a perfectly fried donut, will soften over time. For the ultimate fresh experience, we highly recommend frying and filling just before serving.
Should you find yourself with any delicious leftovers, don’t fret! Store them in an airtight container and refrigerate for up to three days. When you’re ready to enjoy them again, gently reheat them to bring back some of their magic. A few minutes in a warm oven (around 250°F/120°C) can help crisp up the edges slightly, or a quick zap in the microwave will warm them through. Be cautious not to overheat, however, as too much heat can cause the creamy pumpkin custard filling to liquefy and become runny, diminishing its luxurious texture.
❔ What Kind of Pumpkin is Best for This Recipe?
For these delectable pumpkin donuts, I exclusively use canned pumpkin puree. It’s widely accessible, incredibly convenient, and consistently delivers reliable results in terms of flavor and moisture. However, it’s important to note that not all canned pumpkin purees are created equal. The ideal puree for this recipe should be very thick and dense, almost resembling a thick hummus in consistency. It should hold its shape well and not appear watery or soupy. If you open a can and find your pumpkin puree looks a bit wet, a simple trick is to strain out the excess water. You can do this by placing the puree in a fine-mesh sieve lined with a few layers of cheesecloth and letting it drain for about 30 minutes. This extra step ensures your dough isn’t too moist and your custard isn’t too loose.
You will need just over a 16 oz can of pumpkin puree for both the dough and the generous custard filling, so it’s a good idea to grab two cans to ensure you have plenty. Don’t worry about any leftovers! Canned pumpkin is versatile, and you can put any remaining puree to excellent use. Consider making my hugely popular no-bake pumpkin cheesecake bars, which are incredibly easy and delicious, or whip up these charming pumpkin hand pies for another fantastic fall treat.
✔️ Insider Tips to Make Deep Frying Less Intimidating
Deep-frying can seem daunting, but it’s much less intimidating than it looks, especially with the right tools and techniques. The absolute key to successful frying is consistently monitoring the oil temperature. A reliable thermometer removes all guesswork and ensures your donuts cook perfectly without becoming greasy or burnt. I highly recommend using a candy thermometer that doubles as a frying thermometer; it conveniently clips onto the edge of your pot, keeping the temperature constantly visible.
If you don’t have access to a thermometer, don’t despair! There are traditional methods to gauge oil temperature. You can explore how to fry donuts without a thermometer using simple tricks like the wooden spoon test or a pinch of flour. However, for precision and best results, a thermometer is truly invaluable.
One critical step often overlooked is calibrating your thermometer! My own thermometer was initially off by 10 degrees, which could significantly impact frying results. To calibrate, place the thermometer in rapidly boiling water. At sea level, water boils at 100°C (212°F). Note how much your thermometer reads differently from this standard boiling point. If it reads higher or lower, remember to add or subtract that difference from your target temperature (190°C/370°F) whenever you check the oil. This simple calibration ensures you’re always frying at the exact desired temperature.
❔ How Do I Ensure My Donuts Aren’t Greasy?
Nobody wants a greasy donut! Achieving perfectly fried, non-greasy donuts is entirely possible with a few key considerations and techniques. It mostly comes down to controlling your oil and handling your dough correctly. Here’s how to prevent those undesirable oily results:
- Maintain Optimal Oil Temperature: This is arguably the most critical factor. The best oil temperature for frying these pumpkin donuts is precisely 190°C (370°F). Why this specific temperature? If the oil is too hot, the donuts will brown too quickly on the outside, leaving the inside raw. If the oil is too low, the dough will absorb too much oil, resulting in a heavy, greasy donut. You need it hot enough to create an immediate crust, sealing out the oil, and low enough to allow the interior to cook through. While many recipes recommend 350°F, I found that to be consistently too low for this enriched pumpkin dough, leading to noticeably greasier donuts. Stick to 370°F for ideal results!
- Utilize Dough Scraps as Testers: Think of the first pancake—it rarely turns out perfect! The same concept applies to donuts. That’s why it’s incredibly helpful to fry your dough scraps first. This not only “seasons” the oil slightly but, more importantly, gives you a chance to test and adjust. Fry a scrap, then cut it open to visually check if it’s fully cooked through. This confirms your oil temperature and cooking time are perfect before you introduce your beautifully shaped donuts, ensuring they turn out flawless every time.
- Choose the Right Oil: The type of oil you use plays a significant role. For deep frying, always opt for a neutral-tasting oil with a high smoke point. A neutral oil won’t impart unwanted flavors to your delicate donuts, and a high smoke point means it can reach the necessary high temperatures without breaking down or burning. My preferred choice for these donuts is canola oil, which ticks both boxes. Other excellent and popular options for deep frying include peanut oil and vegetable oil.
- Thorough Blotting & Draining: Once your pumpkin donuts emerge golden brown and puffed from the hot oil, don’t rush them! Lift them carefully with a spider strainer or tongs directly over the pot, allowing any immediate excess oil to drip back into the pan. Immediately transfer them to a baking tray lined with several layers of paper towels. The paper towels will absorb a significant amount of surface oil. Gently blot the donuts with additional paper towels, pressing lightly, to remove even more excess. Finally, transfer them onto a cooling rack placed over fresh paper towels. This multi-step draining and blotting process is crucial for preventing a greasy finish and ensures a light, crisp texture.
❔ Recipe Frequently Asked Questions
Frying donut scraps initially serves a dual purpose: it helps to “season” the oil before you introduce your main batch of donuts, and it provides a valuable opportunity to test your oil temperature and adjust your frying time without risking your perfectly cut donuts. Fry a scrap until golden brown, then slice it open to confirm the interior is fully cooked. This practice run ensures your final donuts are cooked to perfection.
Absolutely! While pumpkin spice provides a complex blend of autumnal flavors, pure cinnamon makes a wonderful substitute if you prefer a simpler flavor profile or don’t have pumpkin spice on hand. It will still lend a warm, comforting note to the creamy custard.
I do not have personal experience with making gluten-free donuts using this specific recipe, as it relies on all-purpose flour for its texture and structure. Gluten-free baking can be quite nuanced, especially with yeast doughs. If you do attempt a gluten-free version, please share your results and any tips in the comments below – your experience could be invaluable to other bakers!
🍂 More Irresistible Fall Recipes
If you’re as enchanted by pumpkin and cozy fall flavors as we are, you’ll love exploring more of our seasonal delights! Dive into my curated collection of the best pumpkin desserts for even more easy and delicious pumpkin recipe ideas that are perfect for autumn gatherings or a comforting treat at home.
- No-Knead Cinnamon Roll Muffins
- Moist Pumpkin Spice Cake with Cream Cheese Frosting
- Easy No-Bake Pumpkin Cheesecake Bars
- Soft & Chewy Pumpkin Cheesecake Cookies
Did you try this irresistible recipe? I’d be absolutely delighted to hear your thoughts! Please take a moment to rate this recipe and share your feedback in the comments section below. I love seeing your culinary creations! Share your beautiful pumpkin donuts on Instagram and remember to tag @flouringkitchen. For more delicious recipe ideas and inspiration, be sure to follow me on Pinterest and save your favorite finds!
📖 Recipe

Pumpkin Spice Donuts with Pumpkin Custard (No-Knead)
Mary
Pin Recipe
Shop Ingredients
Equipment
-
large heavy bottomed pot
-
thermometer
Ingredients
Pumpkin Custard Filling
- 4 tablespoon cornstarch
- ½ cup brown sugar packed
- 4 large eggs
- 16 oz canned pumpkin puree 2 cups
- 1 cup heavy cream
- ½ cup milk
- 2 teaspoon pumpkin spice
- 1 whole vanilla bean cut in half lengthwise and seeds scraped out
- ⅛ teaspoon salt
- ½ cup unsalted butter cubed and cold
Donuts
- ½ cup water warm (105-110°F)
- 1 teaspoon granulated sugar
- 1 packet active dry yeast 7g or 2 ¼ teaspoon
- 5 cups all purpose flour 600 g
- ¼ cup brown sugar packed
- ⅛ teaspoon salt
- ¼ cup butter very soft, partially melted
- 2 large eggs room temperature and whisked
- 1 teaspoon pure vanilla extract
- ¾ cup canned pumpkin puree
- ¼ cup milk warm
- 48 oz vegetable oil I used canola (or more as needed)
Pumpkin spice sugar
- 1 cup granulated sugar
- 1 teaspoon pumpkin spice
Shop Ingredients on Jupiter
Instructions
Pumpkin Custard Filling
-
In a heavy-bottomed saucepan, thoroughly combine the brown sugar and cornstarch, whisking to break up any lumps. Add the eggs and whisk until completely blended. Incorporate the pumpkin puree, heavy cream, milk, pumpkin spice, the scraped vanilla bean seeds (along with the pod), and salt. Whisk everything together until smooth.4 tablespoon cornstarch, ½ cup brown sugar, 4 large eggs, 16 oz canned pumpkin puree, 1 cup heavy cream, ½ cup milk, 2 teaspoon pumpkin spice, 1 whole vanilla bean, ⅛ teaspoon salt
-
Heat the mixture over low heat, stirring continuously, until it reaches a gentle simmer and becomes very thick, coating the back of a spoon.
-
Remove from heat and stir in the cold, cubed unsalted butter until it’s completely melted and incorporated. Transfer the custard into a clean container. If desired, you can strain it through a fine-mesh sieve for an even smoother consistency, though it’s often not needed. Immediately place plastic wrap directly onto the surface of the custard to prevent a skin from forming.½ cup unsalted butter
-
Refrigerate the custard until it is completely cold and thick, which will take at least 4 hours. For a quicker chill, you can place it in the freezer for about one hour before transferring it to the fridge.
Donuts
-
In a small bowl, dissolve the active dry yeast in warm water (105-110°F or 40-43°C) with 1 teaspoon of granulated sugar. Stir until completely dissolved. Set it aside for 5-10 minutes to ensure it foams, indicating active yeast, while you prepare the remaining ingredients.½ cup water, 1 teaspoon granulated sugar, 1 packet active dry yeast
-
In a large bowl, whisk together the all-purpose flour, ¼ cup brown sugar, and ⅛ teaspoon salt. Create a well in the center of the dry ingredients. Add the very soft butter, whisked eggs, vanilla extract, pumpkin puree, warm milk, and the activated yeast mixture into the well.5 cups all purpose flour, ¼ cup brown sugar, ⅛ teaspoon salt, ¼ cup butter, 2 large eggs, 1 teaspoon pure vanilla extract, ¾ cup canned pumpkin puree, ¼ cup milk
-
Use a spoon to mix until the ingredients are mostly combined, then switch to using your hands to mix until a sticky, shaggy dough forms. Don’t worry if all the butter isn’t perfectly incorporated at this stage.
-
Cover the bowl with a clean cloth or plastic wrap and let the dough rise in a warm, draft-free place (see notes for tips on creating a warm environment) until it has doubled in size, approximately 30-45 minutes.
-
Gently punch down the risen dough to release the air. Turn the dough out onto a lightly floured surface and gently flatten and fold it a few times with your hands to smooth it out. Roll the dough to a thickness of ¾ inch. Using a 3.5-inch round cookie cutter, cut out approximately eighteen donut circles. Transfer these onto a parchment-lined baking sheet, re-rolling scraps as needed to cut more donuts. Let these cut donuts rise in a warm place until doubled, about 15 minutes. Save any remaining dough scraps for testing.
-
While the donuts are rising, heat the vegetable oil in a large, heavy-bottomed pot (a wide and narrow pot works well). Clip a cooking thermometer to the side of the pot, ensuring it’s submerged in the oil but not touching the bottom. Heat the oil to 190°C (370°F).48 oz vegetable oil
-
Prepare your draining station: line a baking tray with 4 layers of paper towels, and set up a cooling rack with paper towels underneath. In a medium bowl, mix together 1 cup of granulated sugar and 1 teaspoon of pumpkin spice for the coating.1 cup granulated sugar, 1 teaspoon pumpkin spice
-
Once the oil reaches 190°C (370°F), carefully drop the dough scraps into the hot oil. Fry them for 2-3 minutes per side, or until golden brown. Remove with tongs or a spider strainer, gently shake off excess oil, and transfer onto the paper towels. Blot, then move to the cooling rack. This is your test run!
-
Now, carefully add the risen donut rounds to the hot oil, using the parchment paper squares to help transfer them gently. Fry 2-3 donuts at a time, ensuring you don’t overcrowd the pot, and constantly monitor the oil temperature to keep it at 190°C (370°F). Fry each side for 2-3 minutes until golden brown. Repeat the process of removing, draining, blotting, and placing on the cooling rack for all donuts.
-
Once the donuts are cool enough to handle (but still warm), carefully toss and coat each one thoroughly in the pumpkin spice sugar mixture. Set them aside on the cooling rack to cool completely.
-
After the donuts are completely cool, use a chopstick or the tip of a small knife to poke a hole through one side of each donut, creating a cavity for the filling.
-
Fill a piping bag fitted with a piping tip with the chilled pumpkin custard filling. Insert the tip into the hole of each donut and gently squeeze to fill until the donut feels heavy and the custard just begins to emerge from the opening. Serve immediately and enjoy these delightful pumpkin spice donuts!
Video
Notes
- Do not be alarmed if the donut dough appears a bit shaggy and sticky after initial mixing; this is normal for a no-knead dough, and it will come together and smooth out as it rises.
- To create an ideal warm environment for your dough to rise, place the covered bowl inside a cold oven with just the oven light turned on, or find a warm, sunny spot in your kitchen. Avoid temperatures over 55°C (130°F), as excessive heat can inactivate the yeast. Enriched doughs, with their higher fat and egg content, typically require a slightly longer rising time, so be patient.
- Always fry a few donut scraps first! This crucial step helps to season your oil and allows you to practice your frying technique. More importantly, it lets you test the oil temperature and cooking time. Fry a scrap until golden brown, then cut it open to ensure it’s fully cooked through before frying your main batch of donuts. Adjust cooking time as needed.
Make ahead: The delicious pumpkin custard filling is perfect for making in advance! You can prepare it up to two days before you plan to fill your donuts. Store it in an airtight container in the refrigerator until ready to use.
These freshly fried and filled donuts are at their absolute peak on the day they are made. The crispy exterior will soften over time, so for the best experience, enjoy them immediately after preparation.
Storage: If you have any leftovers, store them in an airtight container in the refrigerator for up to three days. To enjoy them warm, gently reheat them in the oven or microwave. Be careful not to overheat, as this can cause the creamy custard filling to liquefy.
