The Ultimate Creamy No-Bake Matcha Tiramisu (Egg-Free & Coffee-Free Delight)
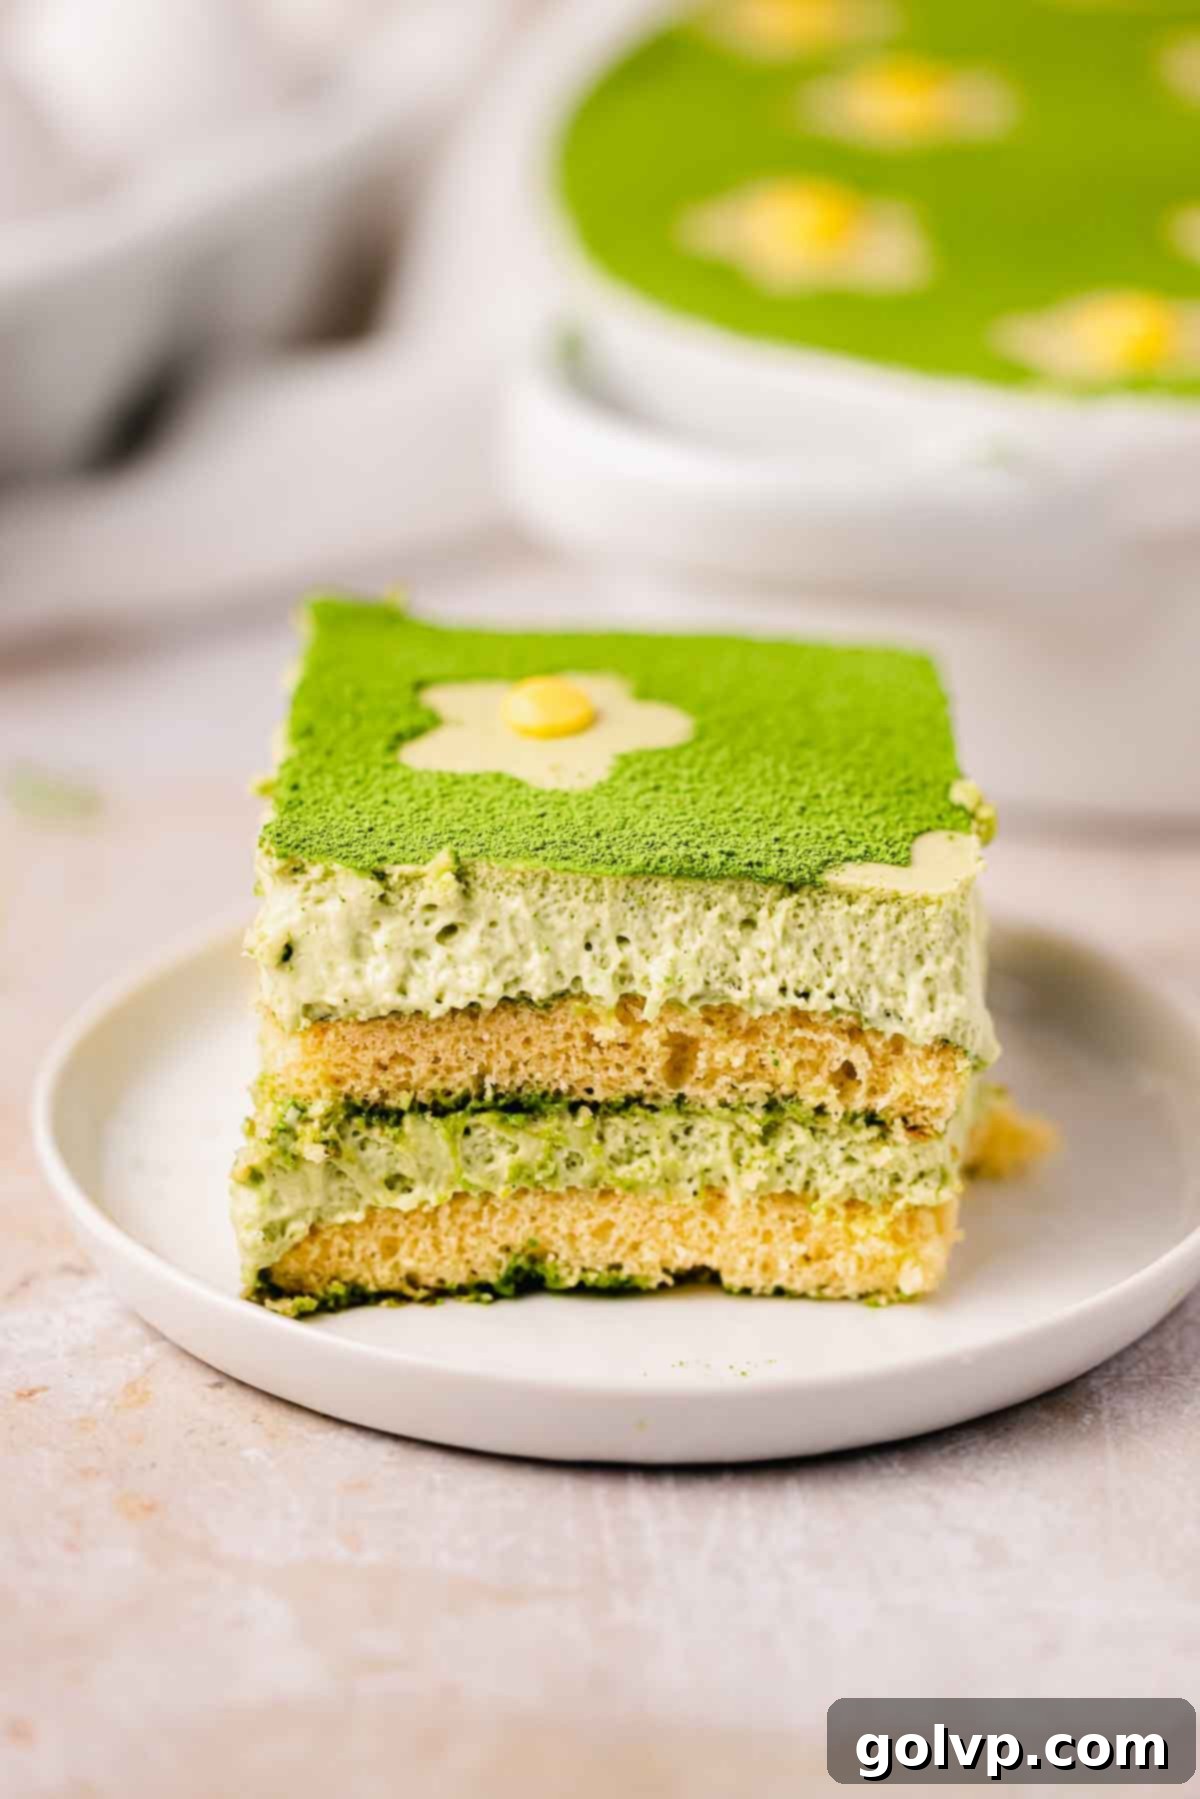
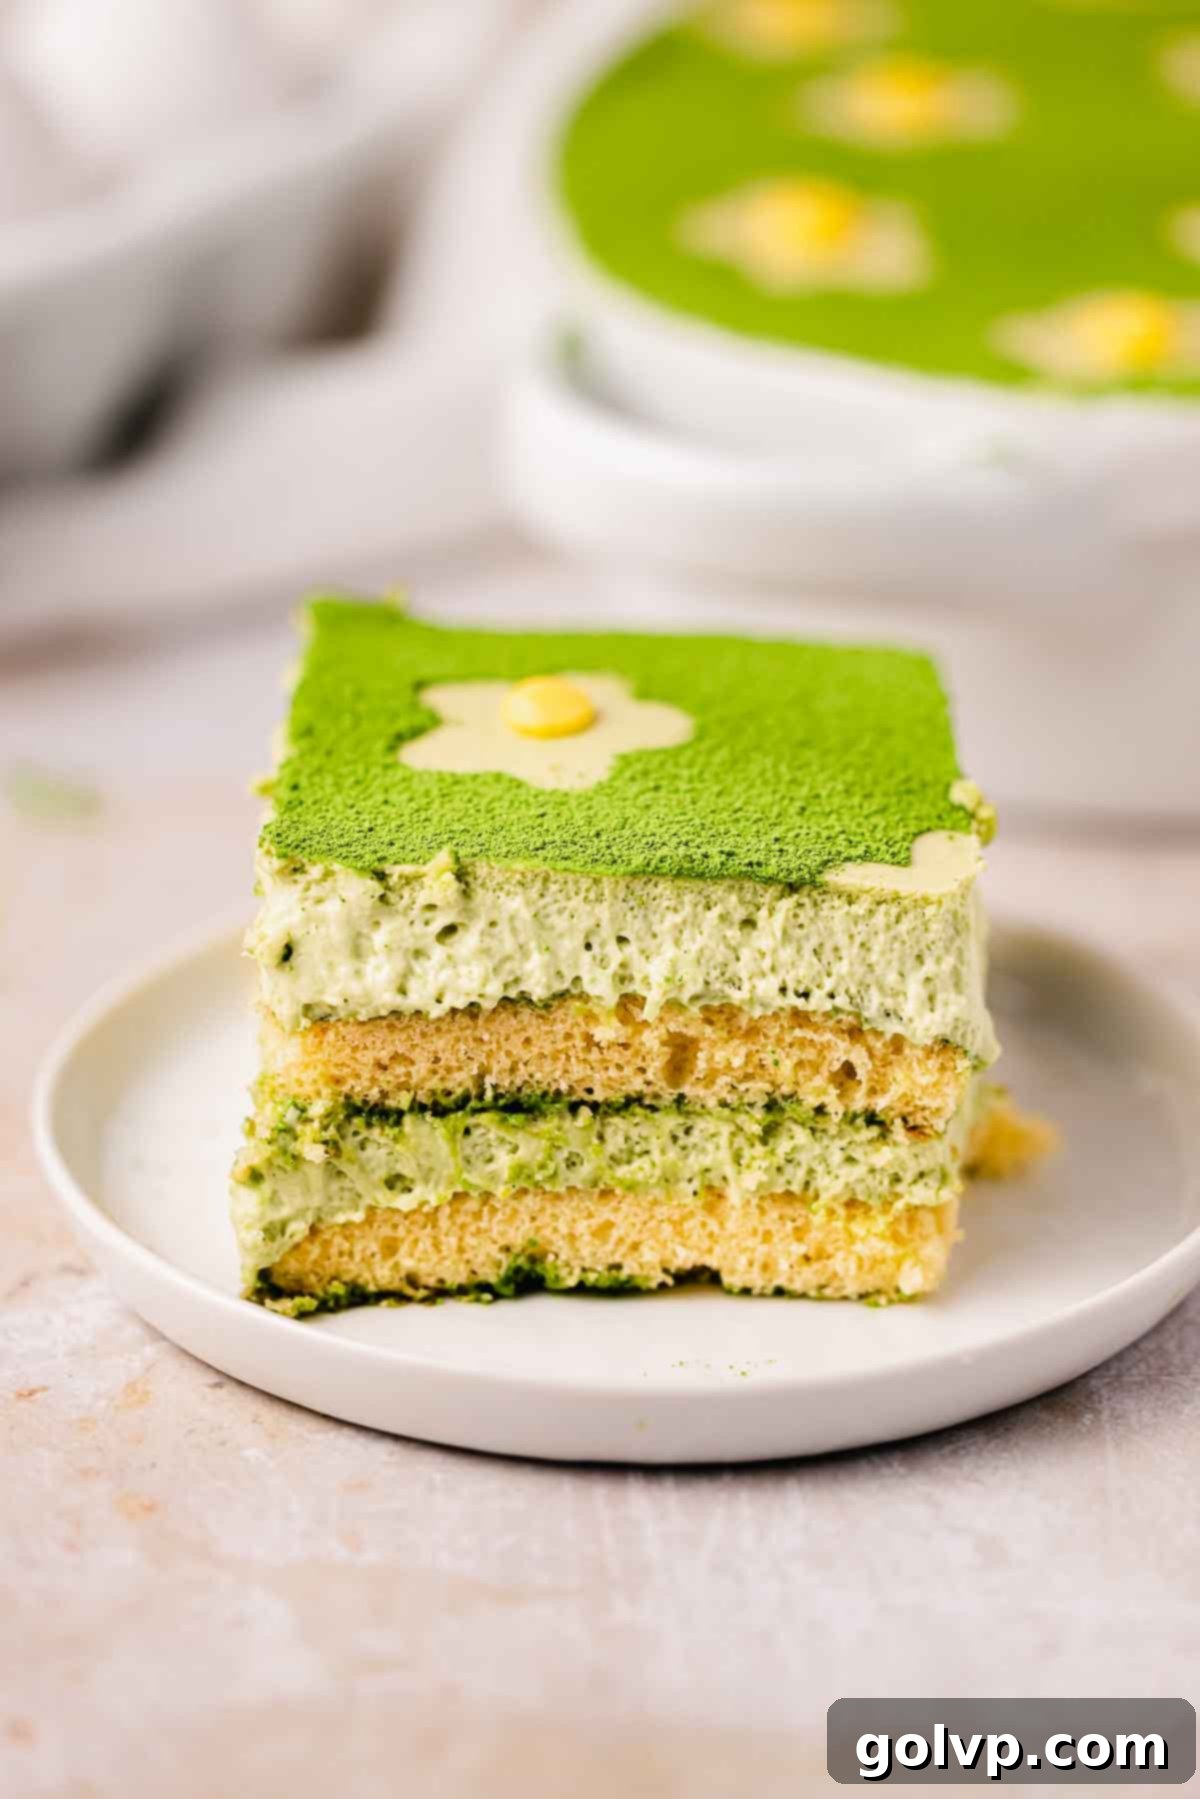
Embark on a culinary journey where classic Italian indulgence meets the vibrant, earthy notes of Japanese matcha. This extraordinary Matcha Tiramisu offers a delightful twist on the beloved traditional dessert, featuring layers of exquisitely creamy matcha filling and tender ladyfingers thoroughly infused with a delicate matcha soak. Every bite is a harmonious blend of rich, nuanced matcha flavor and the signature melt-in-your-mouth texture that defines an authentic tiramisu. What makes this recipe truly special is its accessibility: it’s crafted entirely without coffee and, importantly, without any raw eggs, making it a safe and delicious treat for everyone. As a fantastic make-ahead dessert, it’s ideal for entertaining or simply enjoying a luxurious treat after a long day. If you’re a devoted matcha enthusiast or simply seeking a fresh, exciting variation of tiramisu, this recipe promises to become your new favorite, delivering an unforgettable, vibrant green dessert experience.
[feast_advanced_jump_to]
🍵 Why You’ll Adore This Matcha Tiramisu Recipe
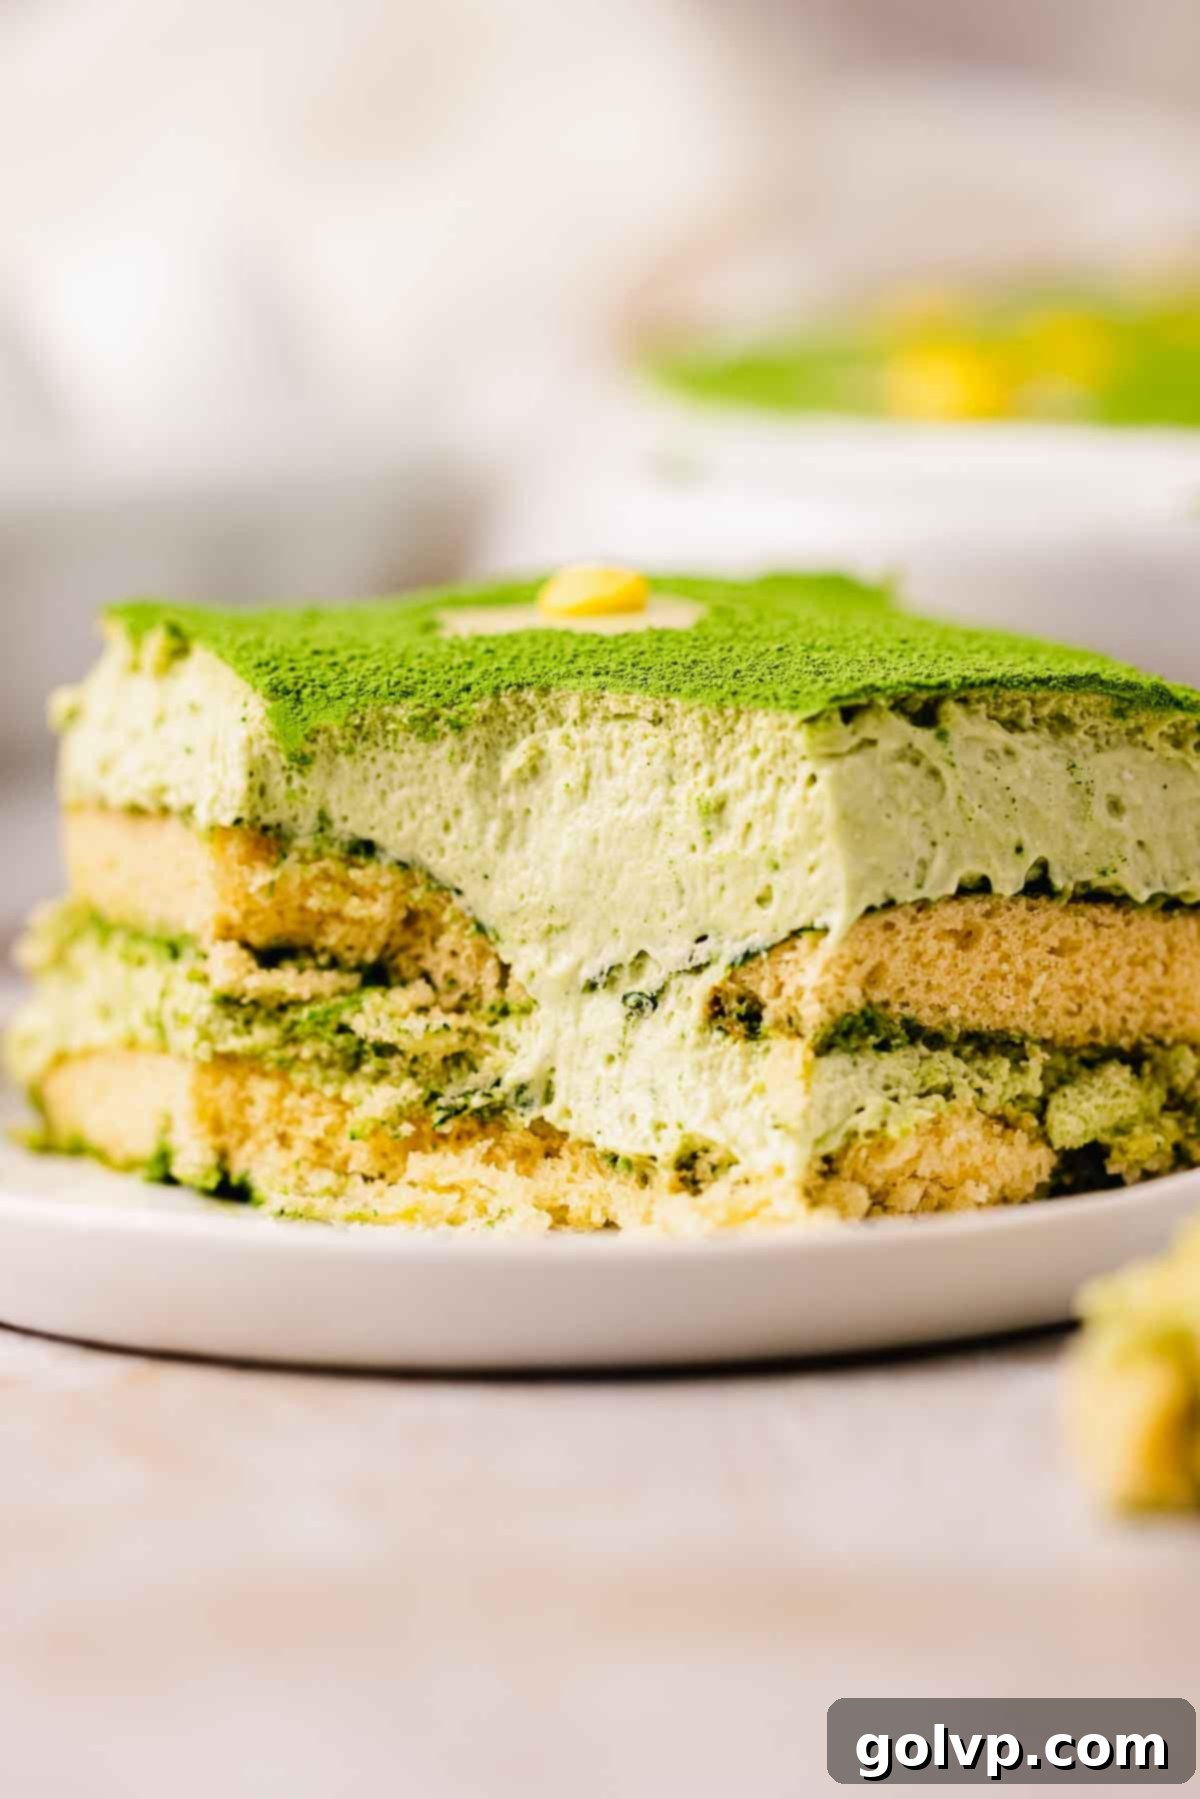
- Unbelievably Creamy Texture: This tiramisu achieves a luxuriously light and creamy consistency, reminiscent of the finest traditional tiramisu. The mascarpone-based filling is whipped to perfection, creating a mousse-like experience that melts in your mouth with every spoonful. It’s an authentic tiramisu experience, reinvented.
- Completely Egg-Free (Cooked Filling): Forget worries about raw eggs! Our innovative filling is gently cooked over a double boiler, imparting that characteristic eggy richness and depth of flavor without any raw ingredients. Instead of raw whipped egg whites, we incorporate perfectly whipped cream, ensuring a safe, stable, and delightfully airy mousse-like texture that sets beautifully.
- Bursting with Matcha Flavor: This isn’t just a hint of matcha; it’s a celebration! We infuse the vibrant green tea into multiple elements: the lusciously creamy filling, the soaking liquid for the delicate ladyfingers, and a generous dusting on top for a beautiful finish and an extra aromatic kick. It’s a matcha lover’s dream, delivering a bold, authentic, and satisfying matcha experience.
- Effortless Make-Ahead Dessert: Tiramisu is known for being a fantastic make-ahead treat, and this matcha version is no exception. It requires a minimum of 8 hours chilling, allowing all the exquisite flavors to meld and the layers to set perfectly. This makes it an ideal dessert for dinner parties, holidays, or any occasion where you want to prepare something impressive in advance.
Craving other exciting tiramisu variations? Don’t miss out on my strawberry tiramisu, a refreshing lemon tiramisu for a tangy zest, or the decadent oreo tiramisu recipes. Each offers a unique twist on this beloved Italian classic!
📝 Essential Ingredients for Your Matcha Tiramisu
Read through for all the tips you will need for success!
Full steps and ingredients in recipe card below.
- Matcha: The star of the show! Both ceremonial and culinary grade matcha can be used, but for the most vibrant color and least bitter, brightest flavor, ceremonial grade matcha is highly recommended (and what was used in this recipe). Culinary grade will still provide a good flavor, but might be slightly duller in color and have a more robust, slightly bitter edge, which some prefer. Ensure you’re using pure matcha powder, not a sweetened drink mix.
- Milk: The type of milk you choose impacts the richness. While any milk works, whole milk is preferred for its higher fat content, which contributes to an extra luxurious and rich filling, enhancing the overall indulgence of this tiramisu.
- Heavy Whipping Cream (at least 35% fat): This ingredient is absolutely crucial for achieving the light, airy, and mousse-like texture of the filling. Its high fat content allows it to whip to stiff peaks, providing the necessary body and lift. Do not substitute with lighter creams, as they won’t whip properly.
- Mascarpone Cheese: This Italian cream cheese is the foundation of traditional tiramisu’s iconic flavor and texture. Its incredibly rich, buttery, and mildly sweet profile is irreplaceable for an authentic taste. If mascarpone is unavailable, full-fat cream cheese can be used as a substitute; it will result in a slightly tangier flavor but maintain a similar creamy texture. Avoid ricotta, as its grainy consistency will compromise the smooth filling.
- Ladyfingers: These delicate, porous biscuits are essential for soaking up the matcha tea and forming the distinct layers. The quantity needed may vary slightly based on the size and shape of your baking dish. I specifically used two 5 oz packages of Milano giant ladyfingers, but feel free to use your preferred brand. For a different twist, vanilla cookies or even sandwich cookies can be used as alternatives.
- Eggs and Yolks: While this recipe is egg-free in the sense that no raw eggs are used in the final mousse, we do use both egg yolks and whole eggs in the cooked custard base. This is what provides that classic, rich, and velvety custard texture to the filling, cooked safely over a double boiler.
✔️ Creative Ingredient Substitutions & Variations
Get creative with your Matcha Tiramisu using these simple substitutions:
Ladyfingers: While classic ladyfingers are recommended, feel free to use any of your favorite vanilla cookies, shortbread biscuits, or even plain sponge cake slices for layering. For a delightful gluten-free version, simply opt for gluten-free ladyfingers or your preferred gluten-free cookies – the filling itself is naturally gluten-free!
Tea Soak: The matcha milk tea provides a unique flavor, but you can experiment with other soaking liquids. A strong brew of black tea (like Earl Grey for a floral note) or simply plain milk can work. For an adult-friendly version, consider adding about ¼ cup of a mild-flavored alcohol such as sake, white rum, or even a splash of orange liqueur (like Grand Marnier) to the matcha soak. Limoncello would introduce a bright, zesty lemon twist, complementing the matcha beautifully.
Strawberry Matcha Tiramisu: Elevate your tiramisu by adding a layer of thinly sliced fresh strawberries on top of the ladyfingers during assembly. The sweet and tart berries pair wonderfully with the earthy matcha. Alternatively, you can always make my dedicated strawberry tiramisu recipe for a full berry experience.
For those who enjoy a more traditional coffee-flavored tiramisu, but with a fun twist, try my Oreo tiramisu! And if you’re seeking a bright, zesty, and refreshing dessert, my popular lemon tiramisu offers a delightful tangy version that’s perfect for warmer weather.
👩🍳 Step-by-Step Guide: Crafting Your Matcha Tiramisu
This recipe is broken down into two main phases: preparing the rich, creamy filling and then assembling the layers into a magnificent dessert. Each step is designed for clarity and ease to ensure a perfect result.
Filling Step by Step
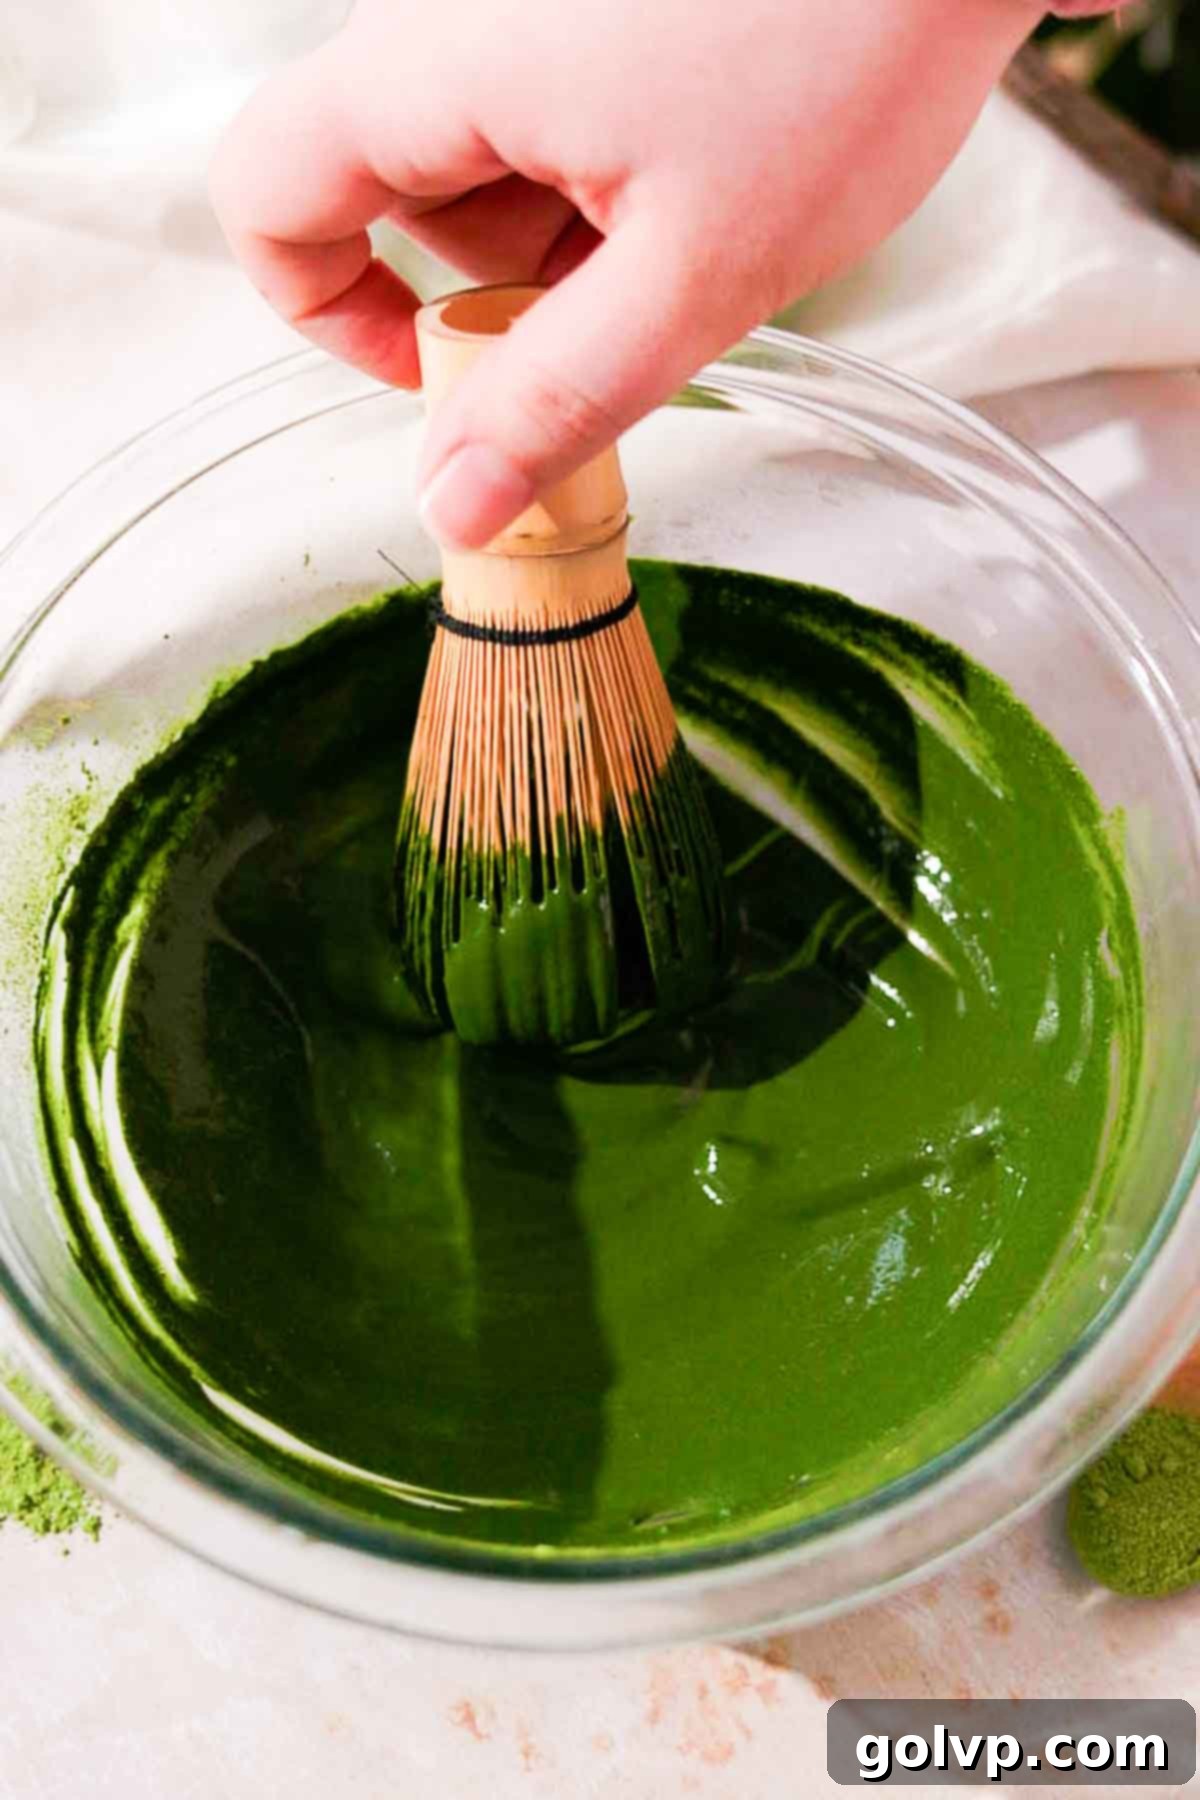
Step 1: Prepare the Matcha Paste. Begin by sifting your matcha powder into a medium-sized, non-metal bowl. Sifting is crucial to break up any stubborn lumps, ensuring a smooth, consistent matcha flavor without gritty bits. Add the hot water to the sifted matcha. Using a bamboo matcha whisk (chasen) or a small wire whisk, vigorously whisk the mixture until the matcha is fully dissolved and smooth, forming a concentrated paste. This ensures the matcha’s flavor is evenly distributed.
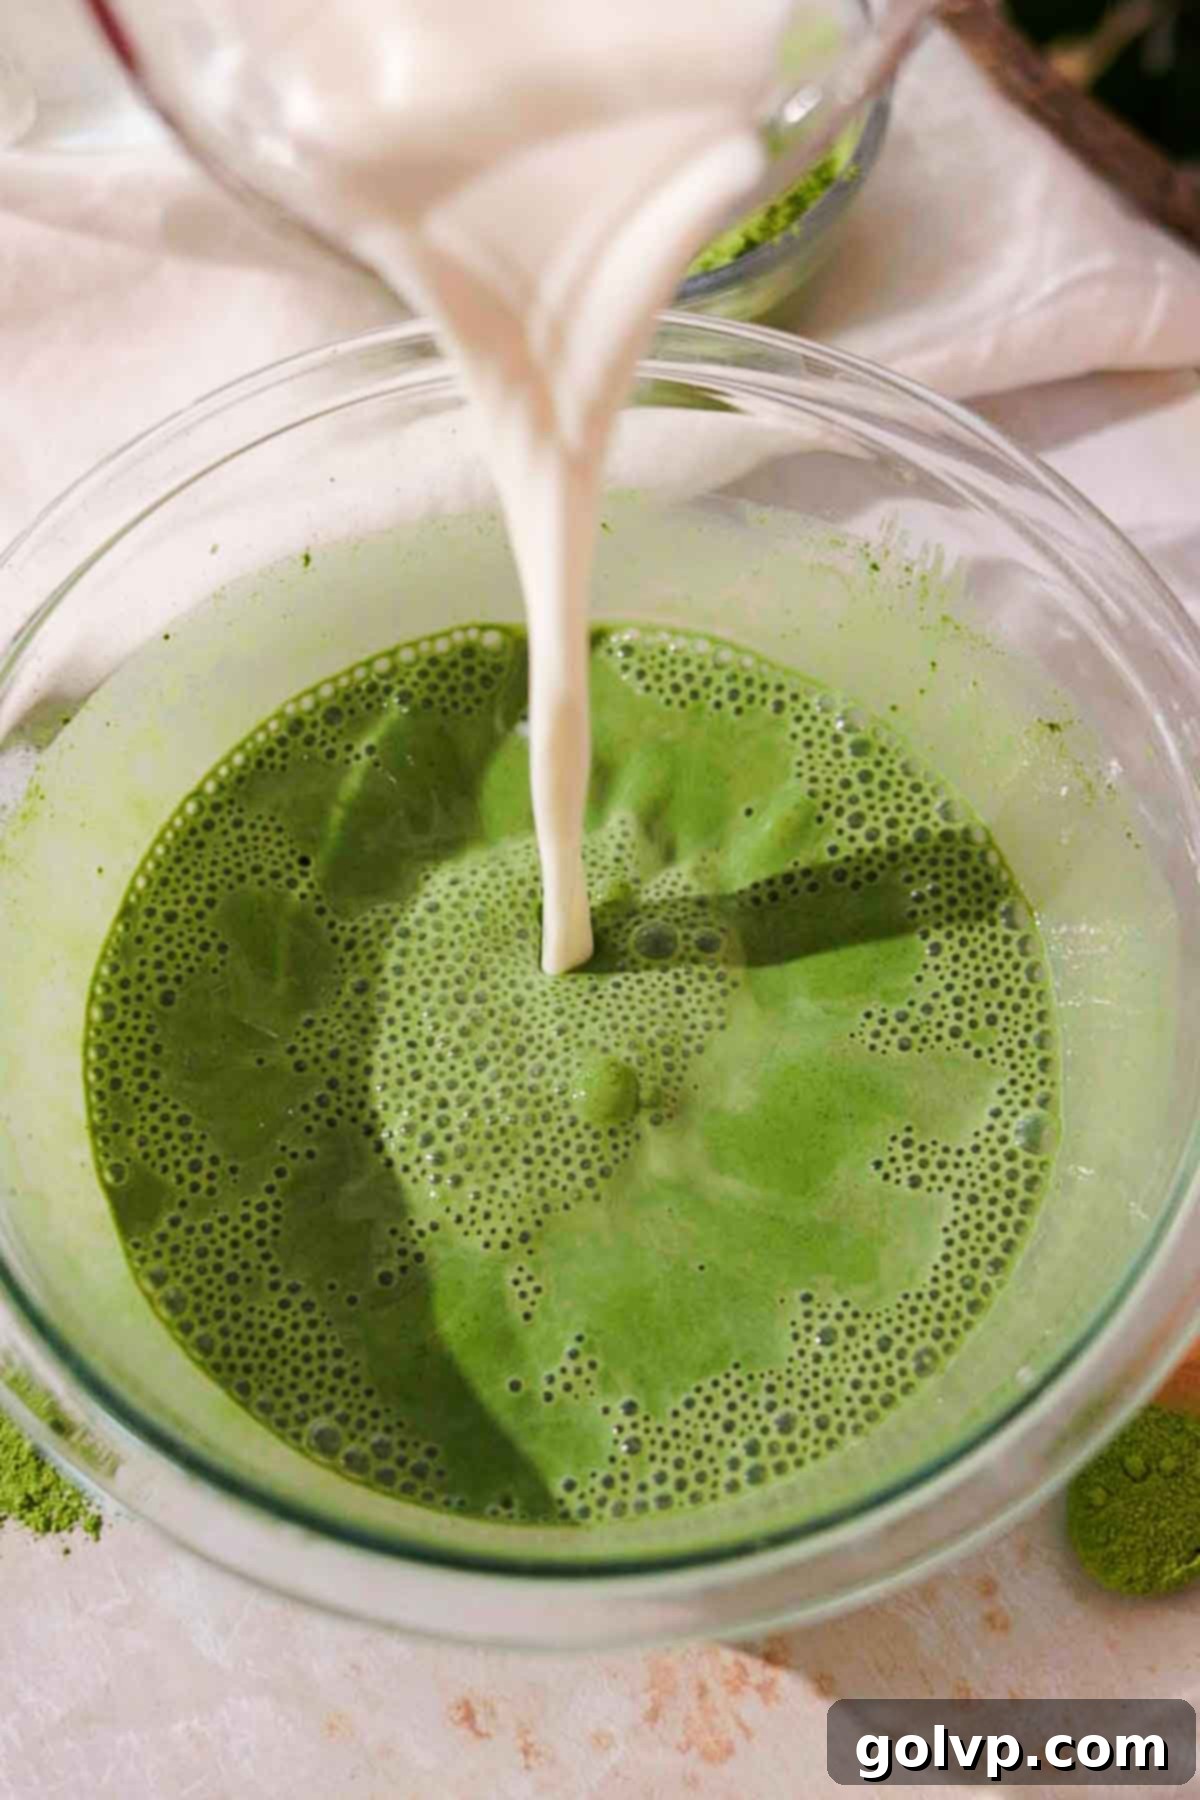
Step 2: Create the Matcha Milk. Pour the milk into the bowl with the dissolved matcha. Stir gently until completely combined and the mixture is uniformly green. This will be your flavorful base for both the filling and the ladyfinger soak. Place the matcha milk aside in the fridge to keep it chilled while you prepare the custard base.
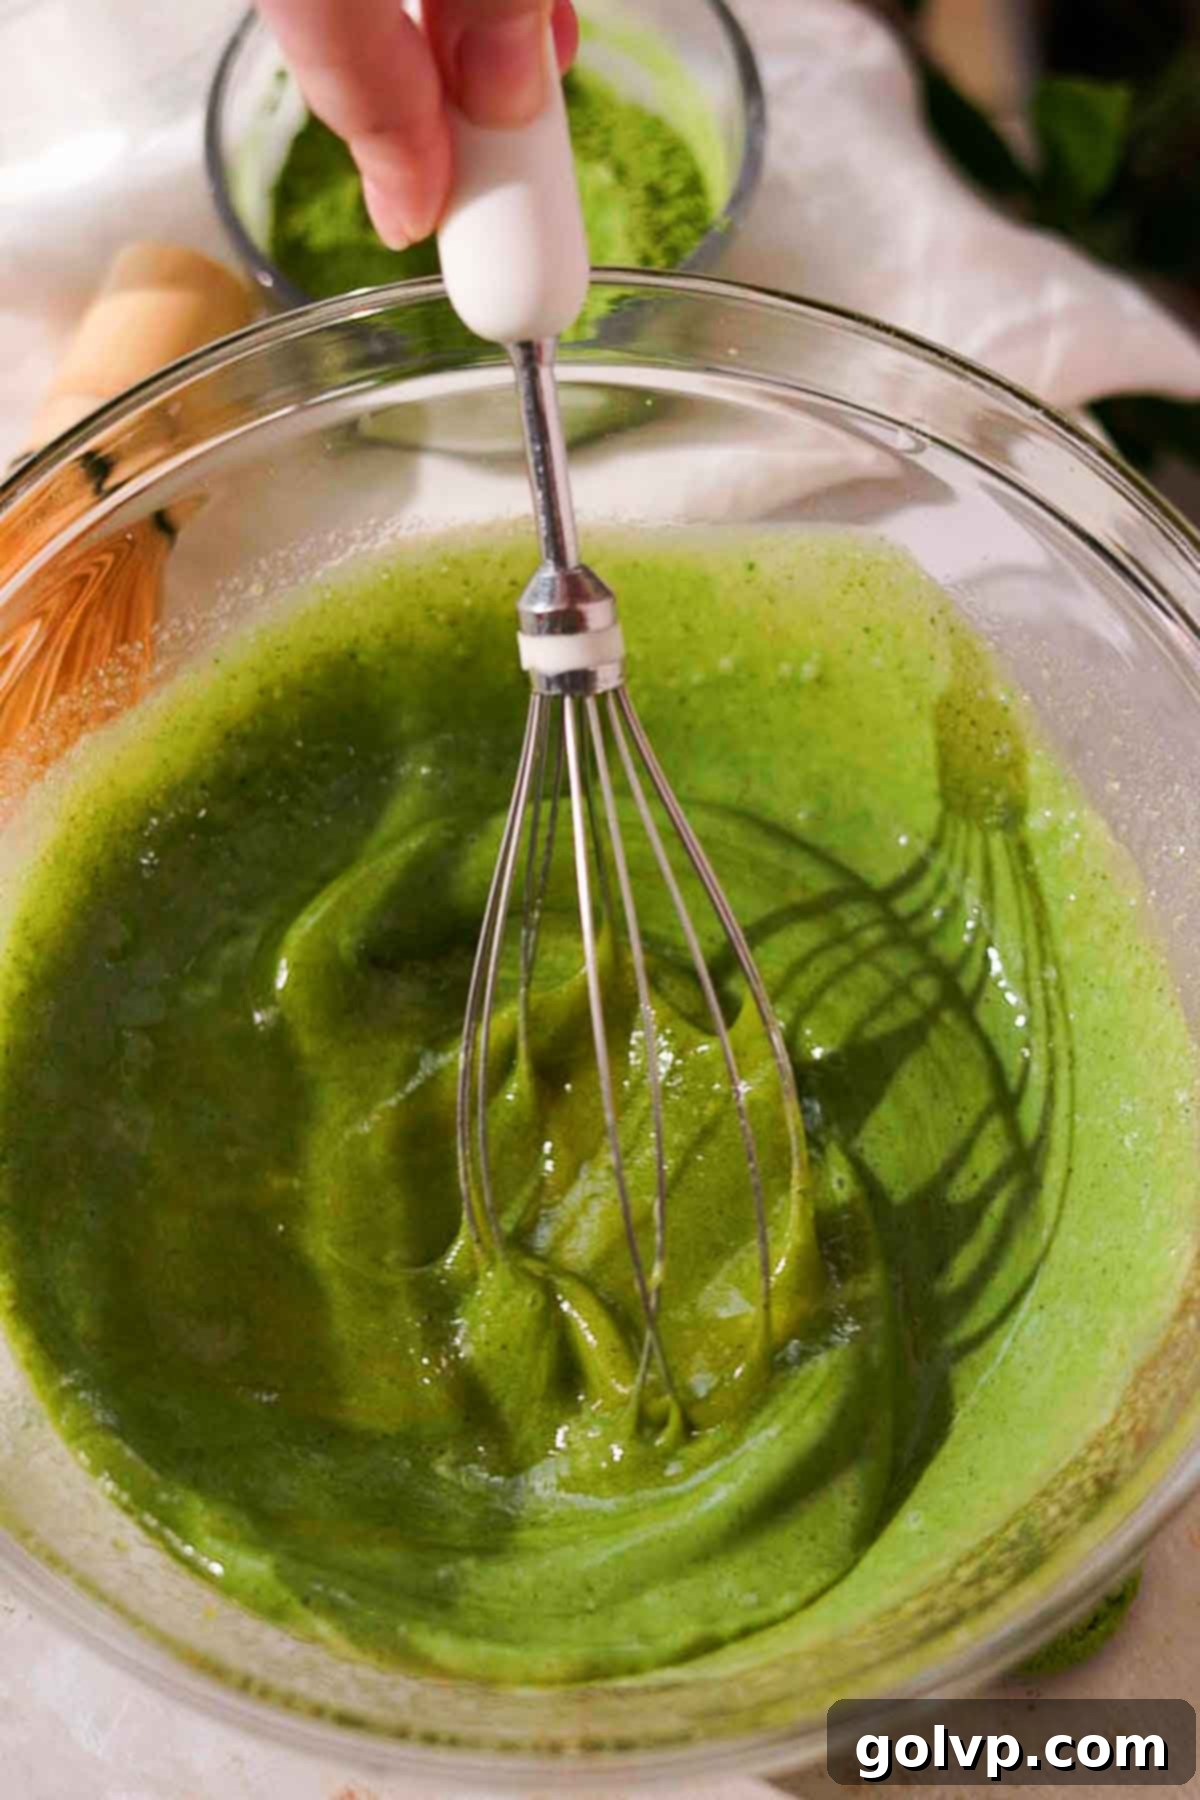
Step 3: Prepare the Custard Base. In a separate heat-safe bowl, combine the egg yolks, whole eggs, granulated sugar, pure vanilla extract, and ½ cup of the prepared matcha milk mixture from Step 2. Whisk these ingredients together thoroughly until they are well combined and the sugar has largely dissolved. This forms the base of your rich, cooked custard.
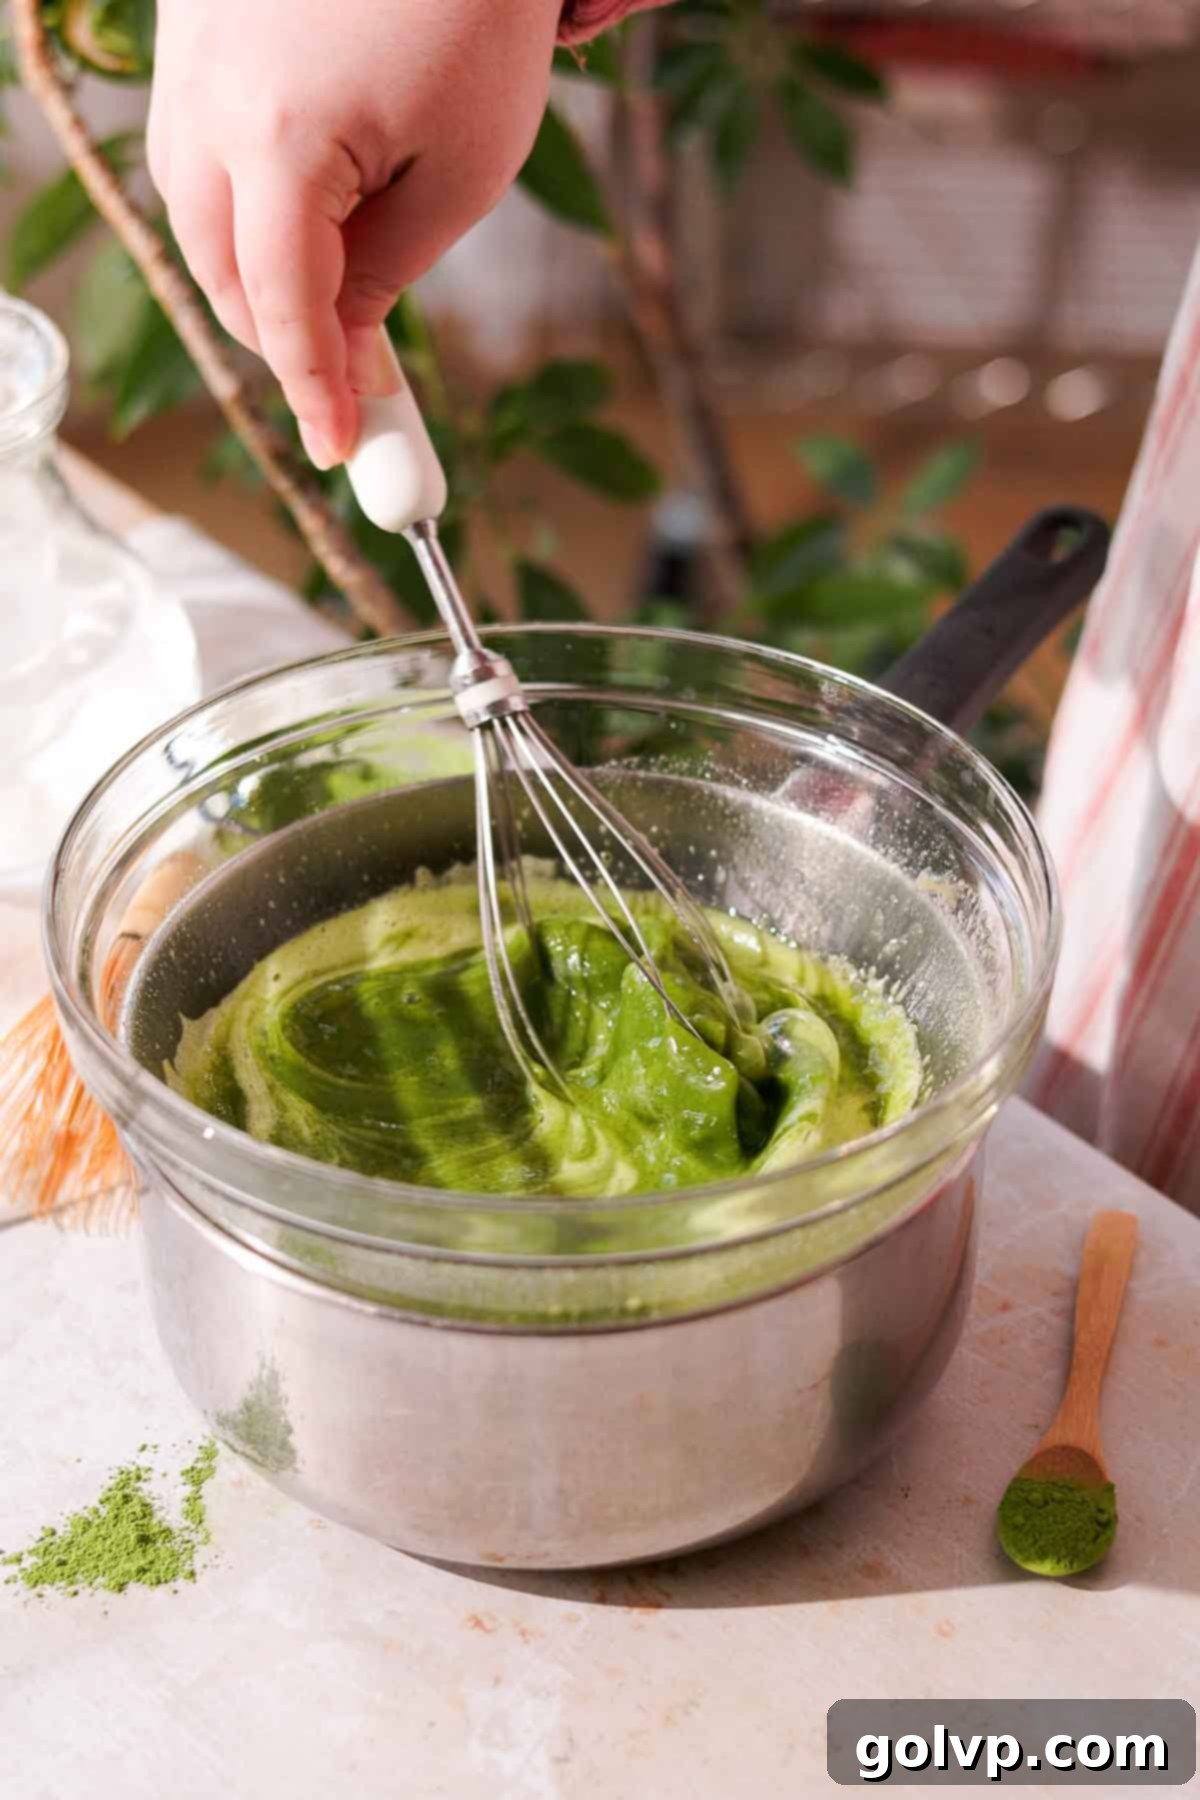
Step 4: Cook the Custard over a Double Boiler. Pour a few inches of water into a medium saucepan and bring it to a gentle simmer over medium heat. Place your heat-safe bowl (with the egg mixture from Step 3) on top of the saucepan, ensuring the bottom of the bowl does not touch the simmering water. This creates a double boiler, allowing the mixture to cook gently without scrambling. Begin whisking continuously.
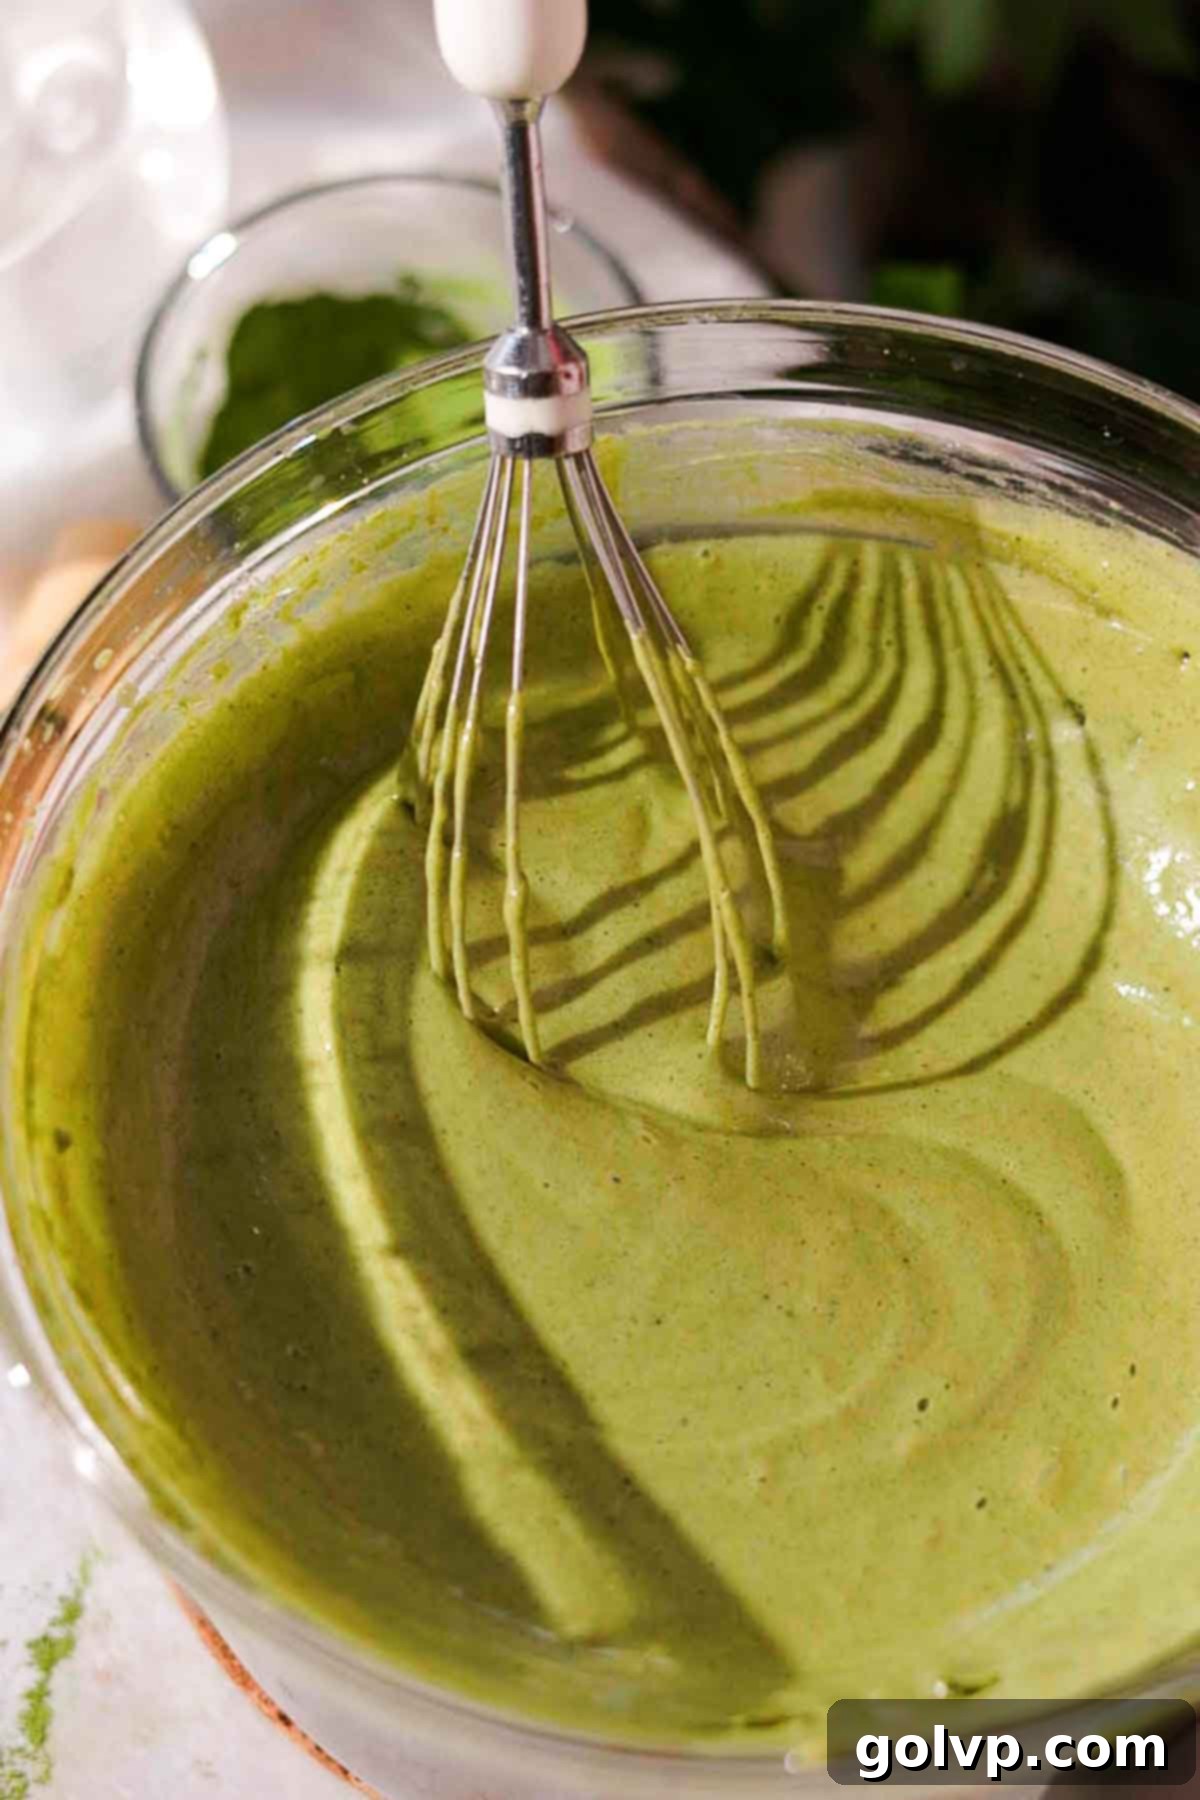
Step 5: Thicken the Custard. Continue whisking the mixture over the simmering water. This process can take about 10-15 minutes. You’ll notice the mixture gradually foam up, become lighter in color, and thicken considerably to a ribbon stage (when the whisk leaves a trail). Once thick, remove the bowl from the heat and let it cool completely to room temperature. This cooling step is essential to prevent the mascarpone from melting when combined.
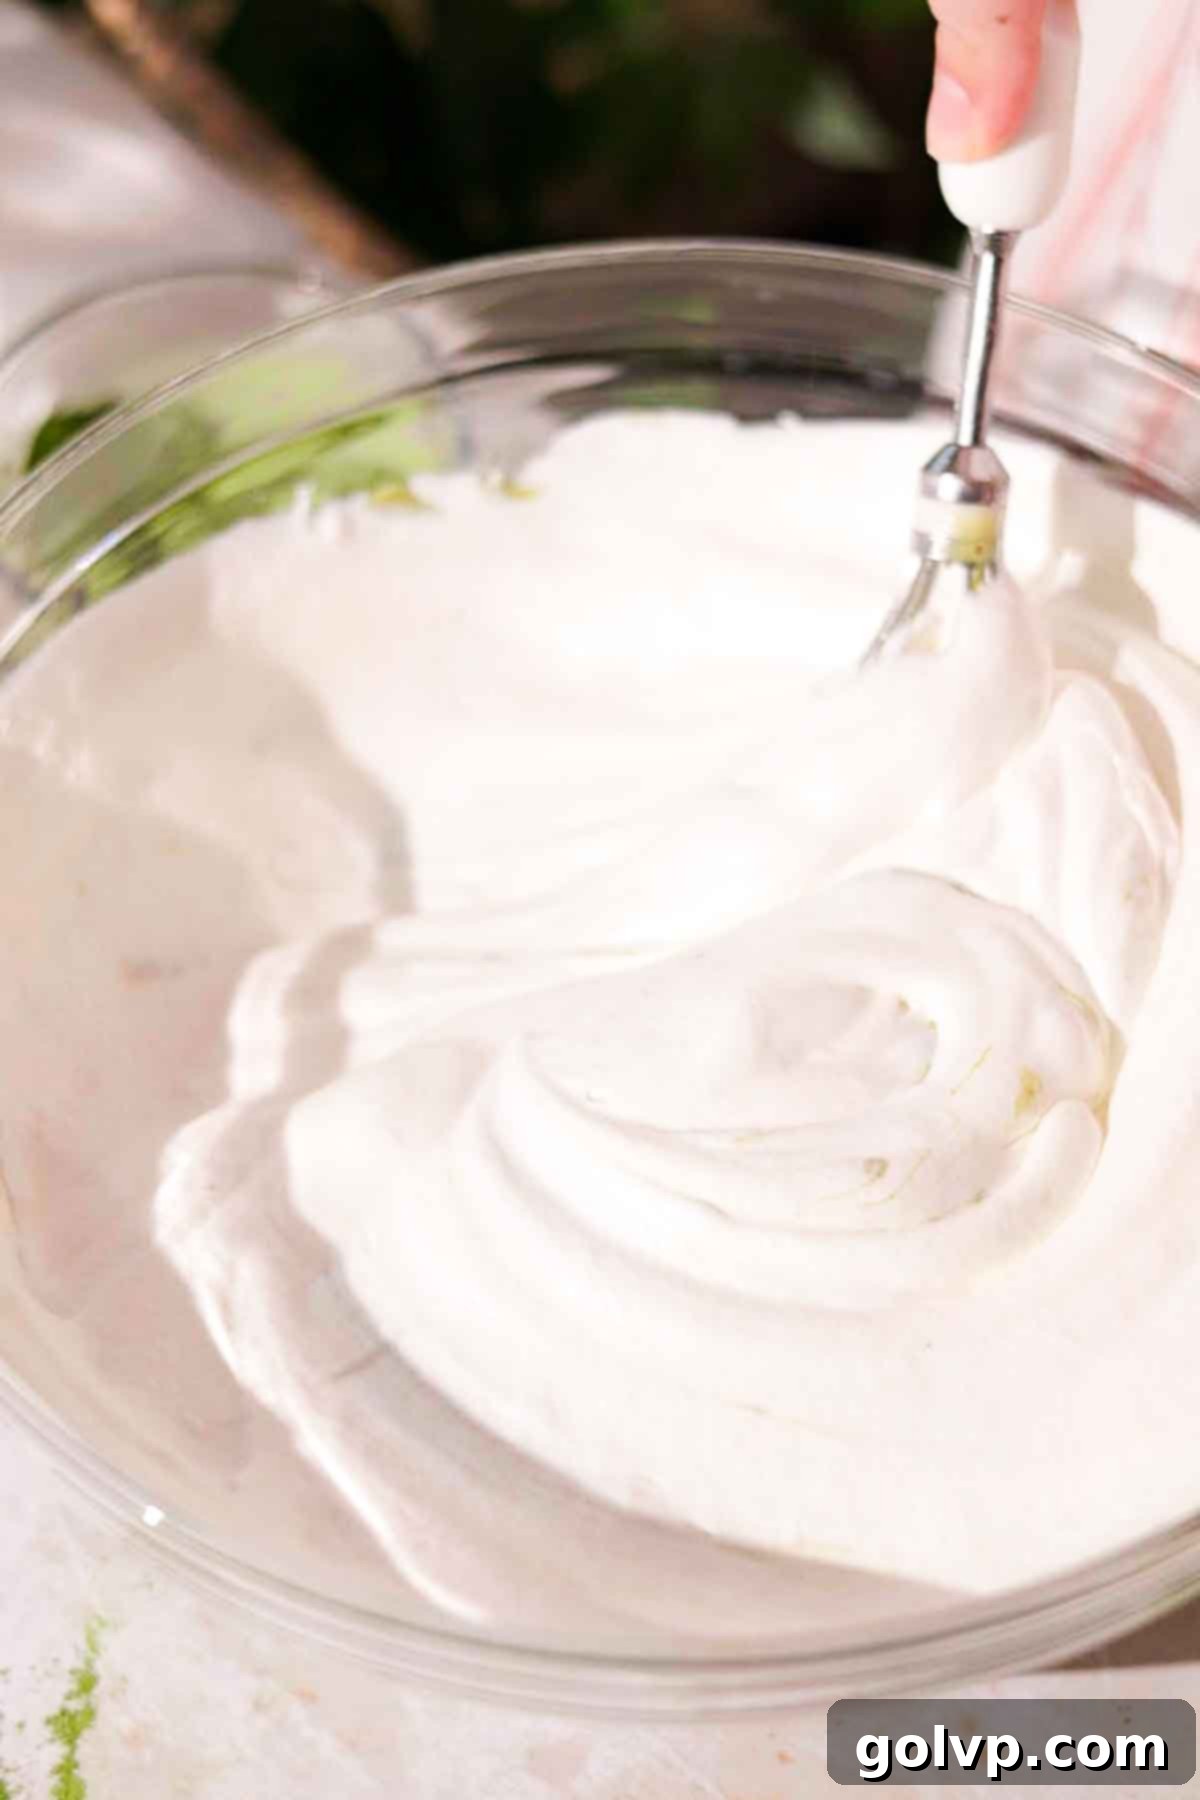
Step 6: Whip the Heavy Cream. While the matcha egg custard cools, pour the heavy whipping cream into a separate chilled large bowl. Using an electric mixer or a stand mixer with the whisk attachment, whip the cream until it forms medium-stiff peaks. Be vigilant not to overwhip the cream, as it can quickly turn grainy or curdle. Once whipped, place the bowl in the fridge to keep it cold until needed.
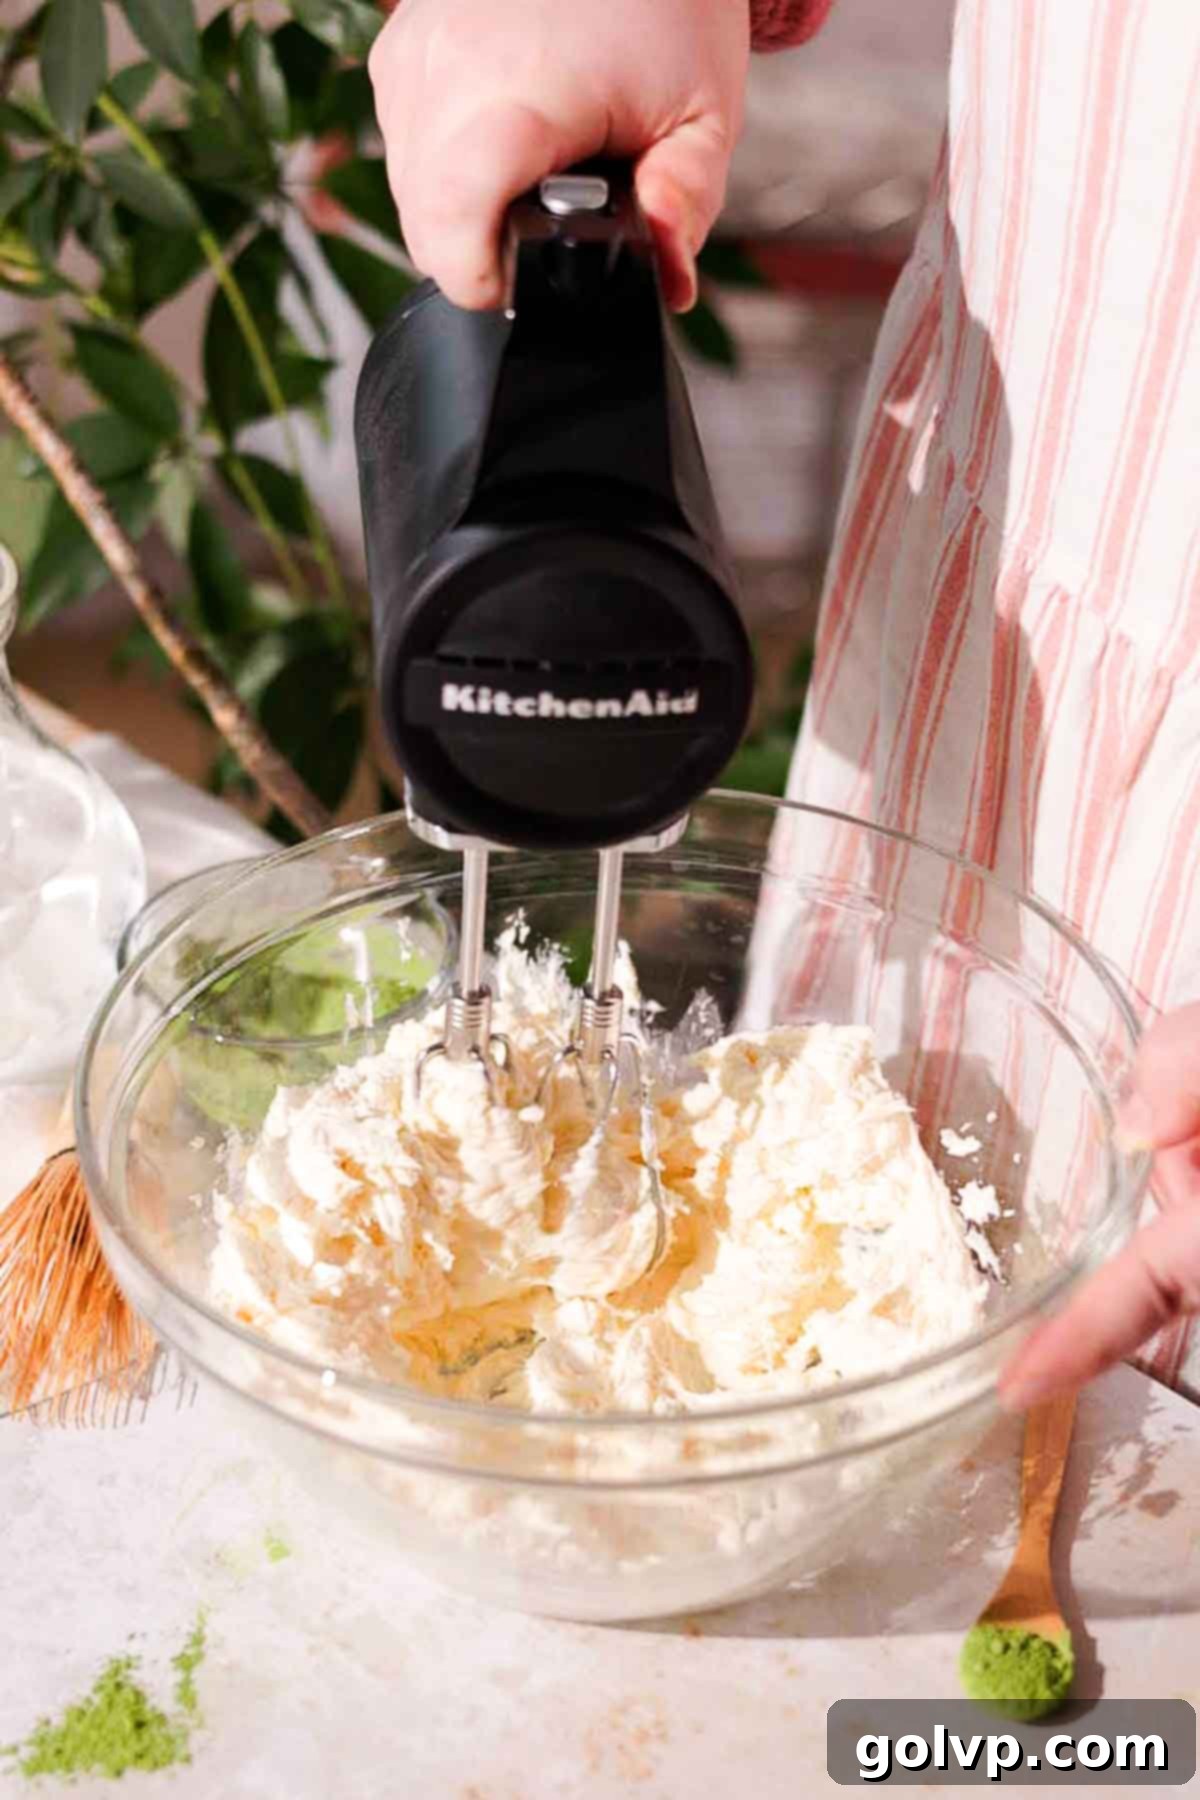
Step 7: Prepare the Mascarpone. In another large mixing bowl, add the mascarpone cheese. Whisk or beat it briefly with a spatula or electric mixer on low speed, just until it becomes smooth and any lumps are removed. It’s critical not to overmix the mascarpone, as it can quickly separate and become liquidy, preventing the tiramisu from setting properly. A few quick stirs are usually sufficient.
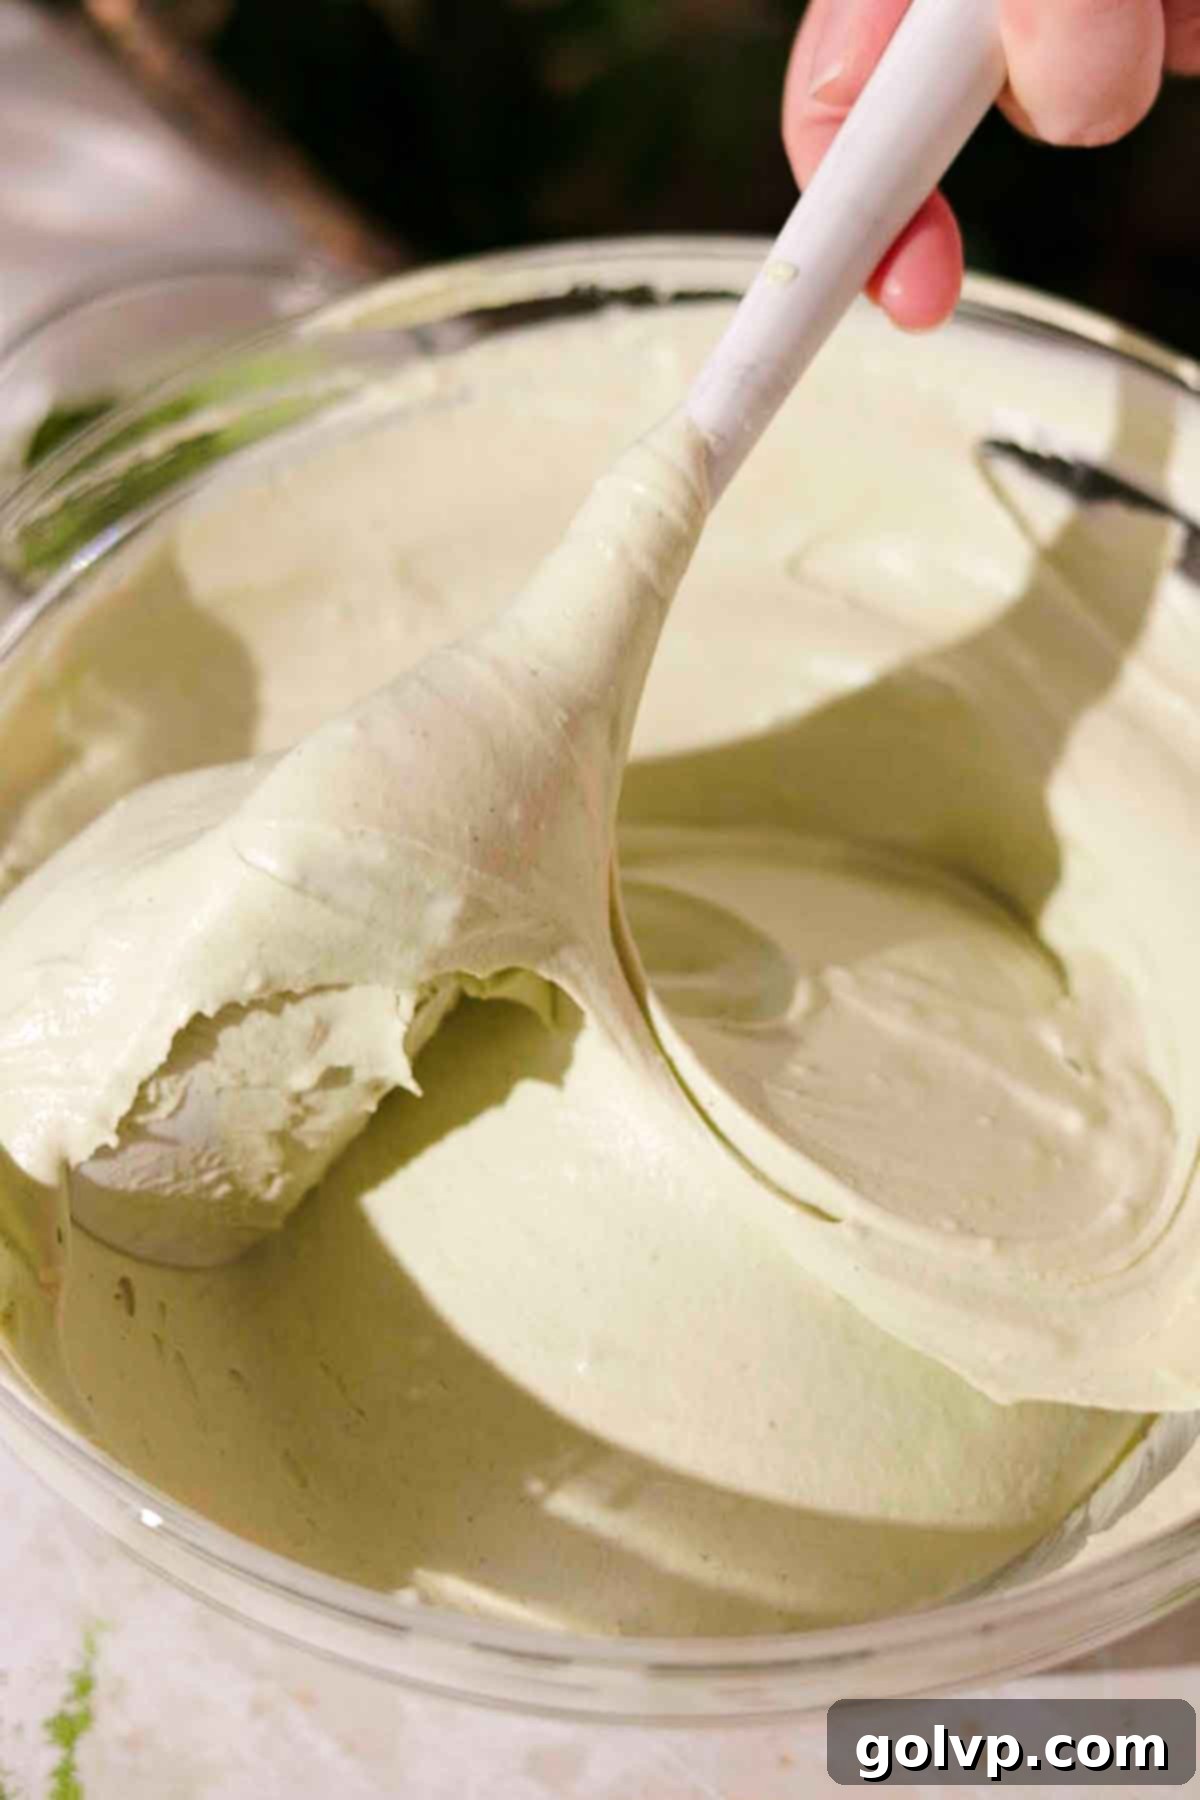
Step 8: Combine the Filling Components. Pour the completely cooled, thickened matcha custard into the prepared mascarpone cheese. Whisk or beat them together very briefly, just until combined. Again, be extremely careful not to overmix. Finally, gently fold the whipped cream into the mascarpone-custard mixture using a whisk or a rubber spatula. Use light, upward motions until the filling is uniformly even, smooth, and beautifully airy. This careful folding ensures the light, mousse-like texture of your tiramisu.
Assembling Step by Step
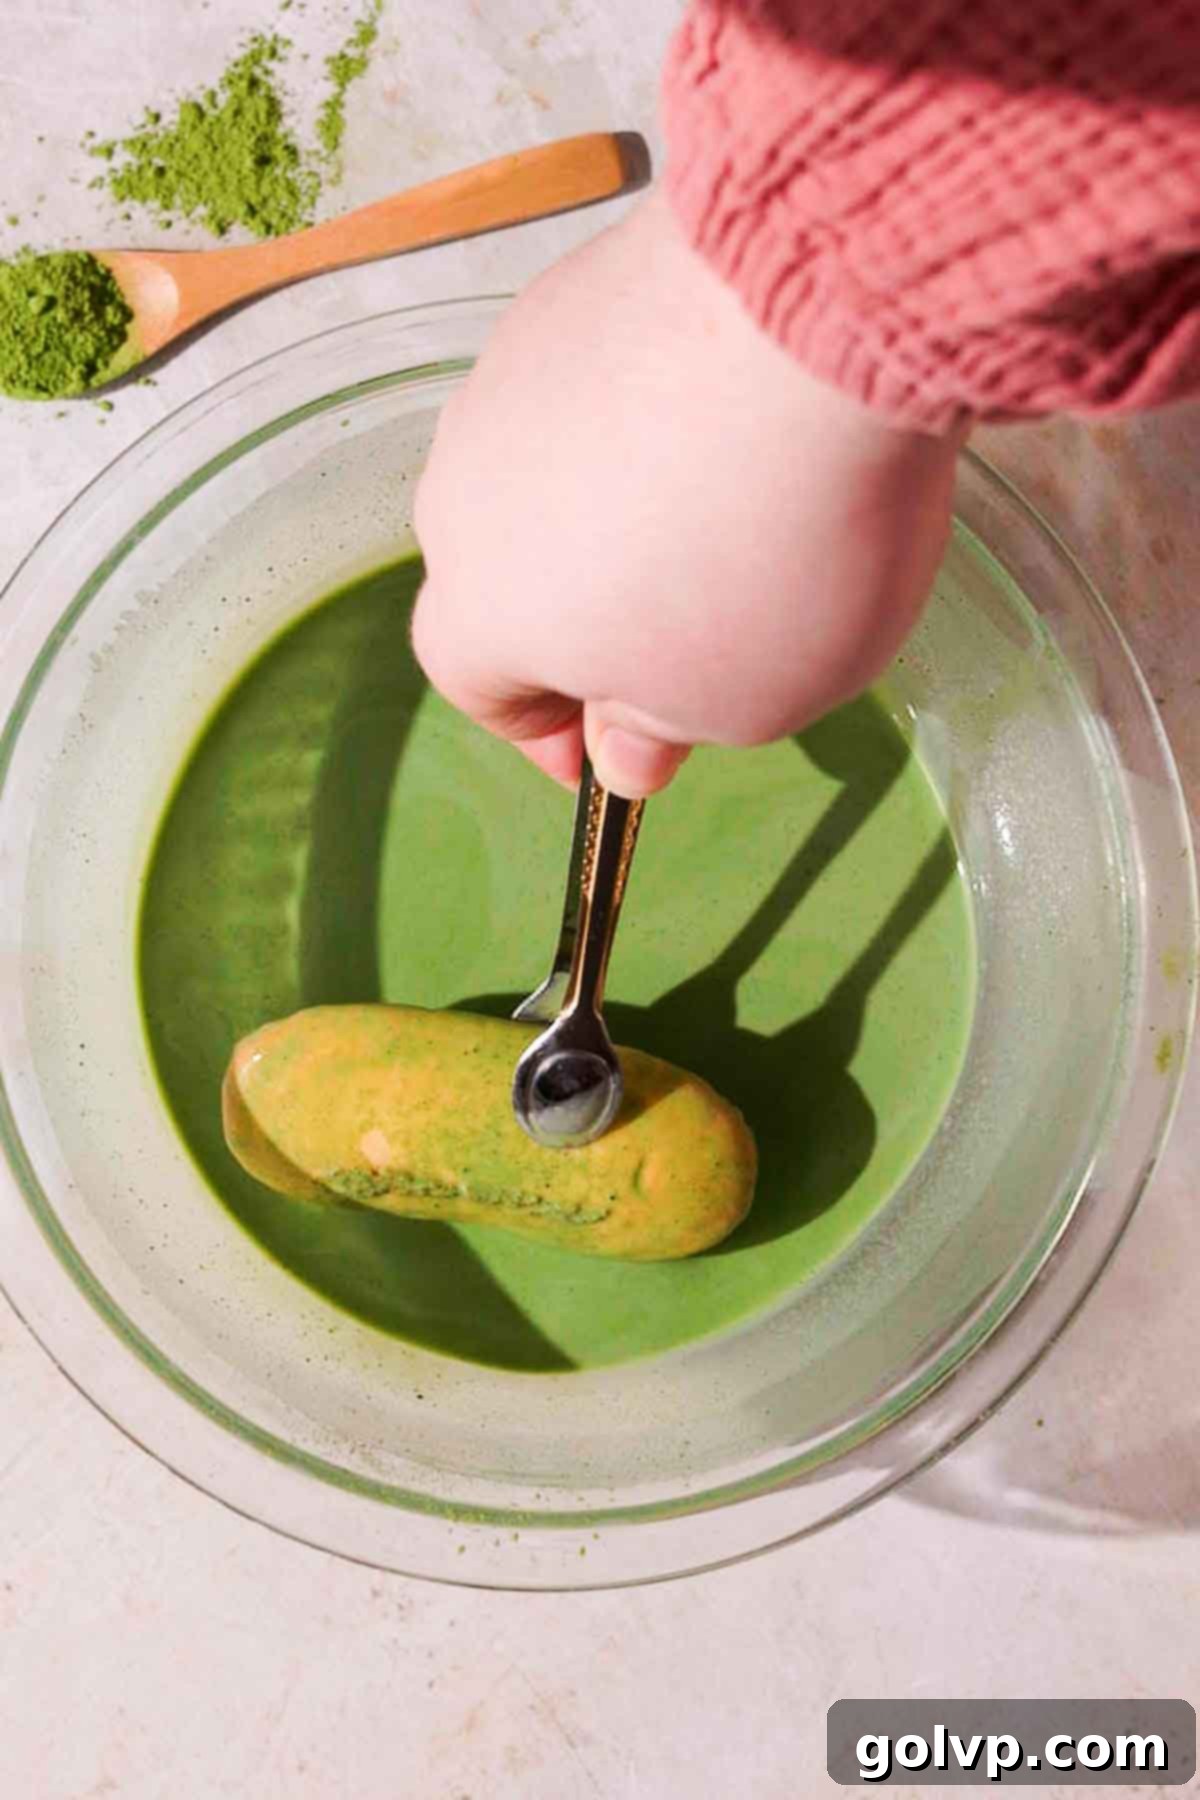
Step 1: Soak the Ladyfingers. Retrieve the chilled matcha milk mixture. One by one, take a ladyfinger and briefly dip it into the matcha milk. It’s important to dip quickly (just a second or two per side) to prevent them from becoming soggy. Arrange a single, even layer of soaked ladyfingers at the bottom of your chosen casserole dish or serving container.
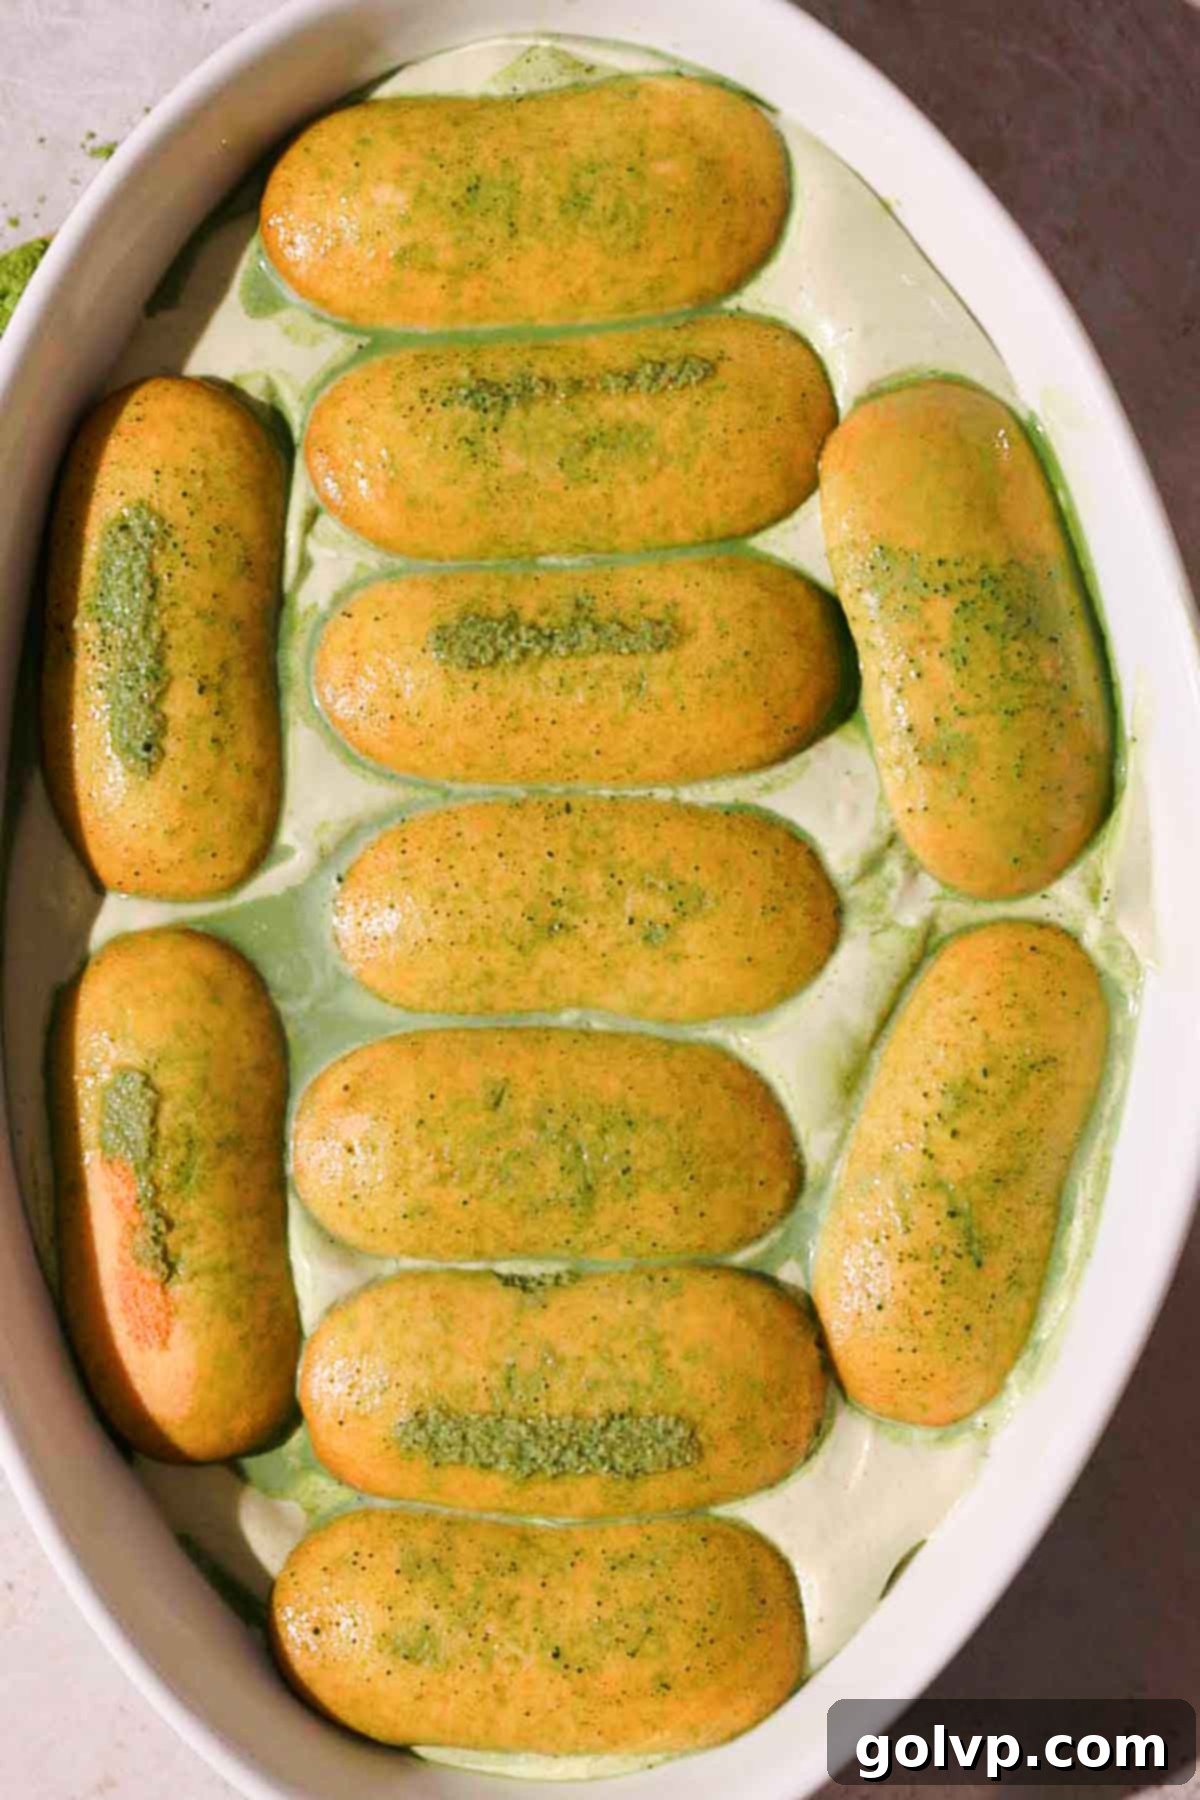
Step 2: Layer the Filling and Ladyfingers. Spread half of the creamy matcha filling evenly over the first layer of ladyfingers, making sure it reaches all the way to the edges of the dish. Repeat the process: dip more ladyfingers in the reserved matcha milk, and arrange them in a single, neat layer on top of the filling.
Pro Tip: If your matcha milk tea for soaking starts to run low, simply add a little extra plain milk to extend it. Don’t waste any leftover! Pour it into a glass, add some ice and extra milk, and enjoy a refreshing homemade iced matcha latte.
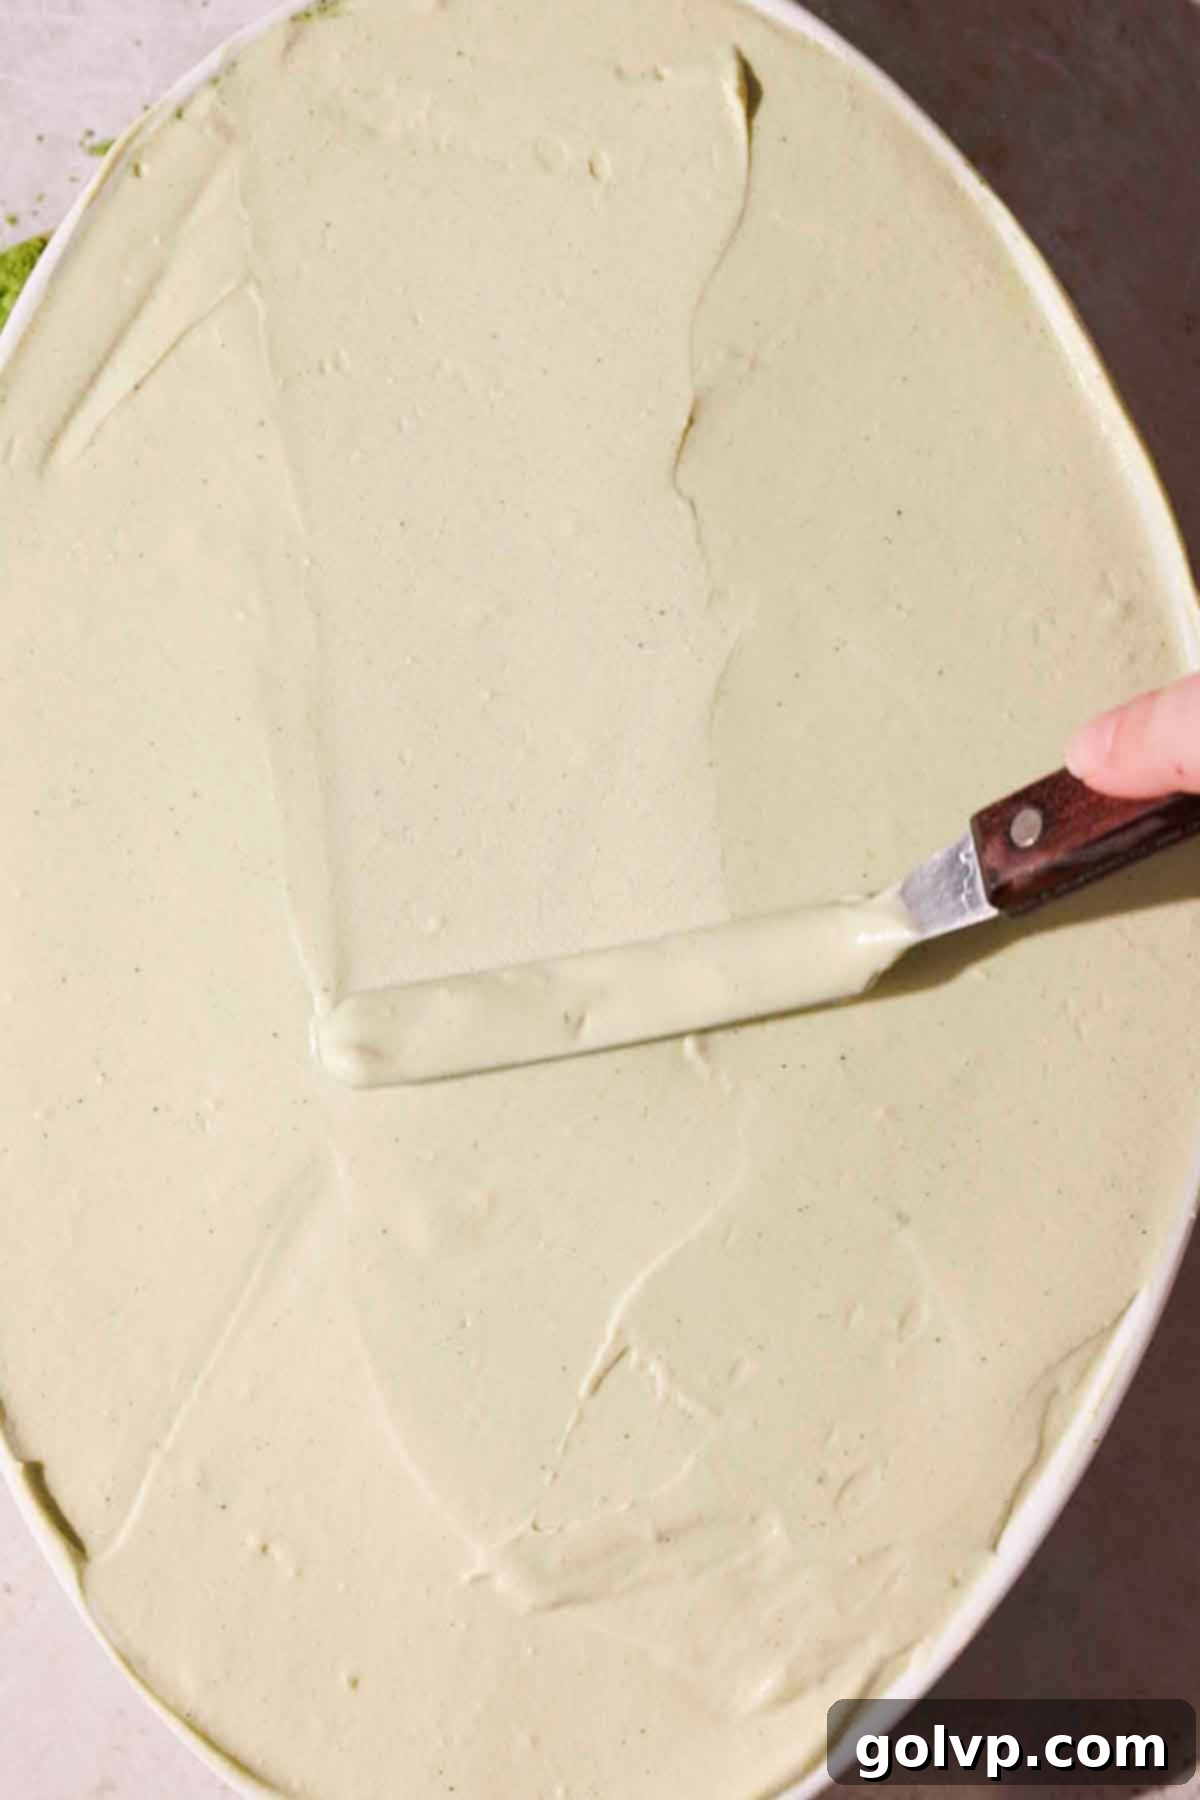
Step 3: Final Layer and Chill. Add the remaining matcha filling on top of the second layer of ladyfingers, spreading it smoothly and evenly across the entire surface. Cover the dish tightly with plastic wrap to prevent any odors from the fridge from permeating the dessert. Refrigerate for at least 8 hours, or ideally, overnight. This crucial chilling time allows the ladyfingers to fully soften and absorb the matcha liquid, and for the entire tiramisu to set into its perfect, creamy consistency.
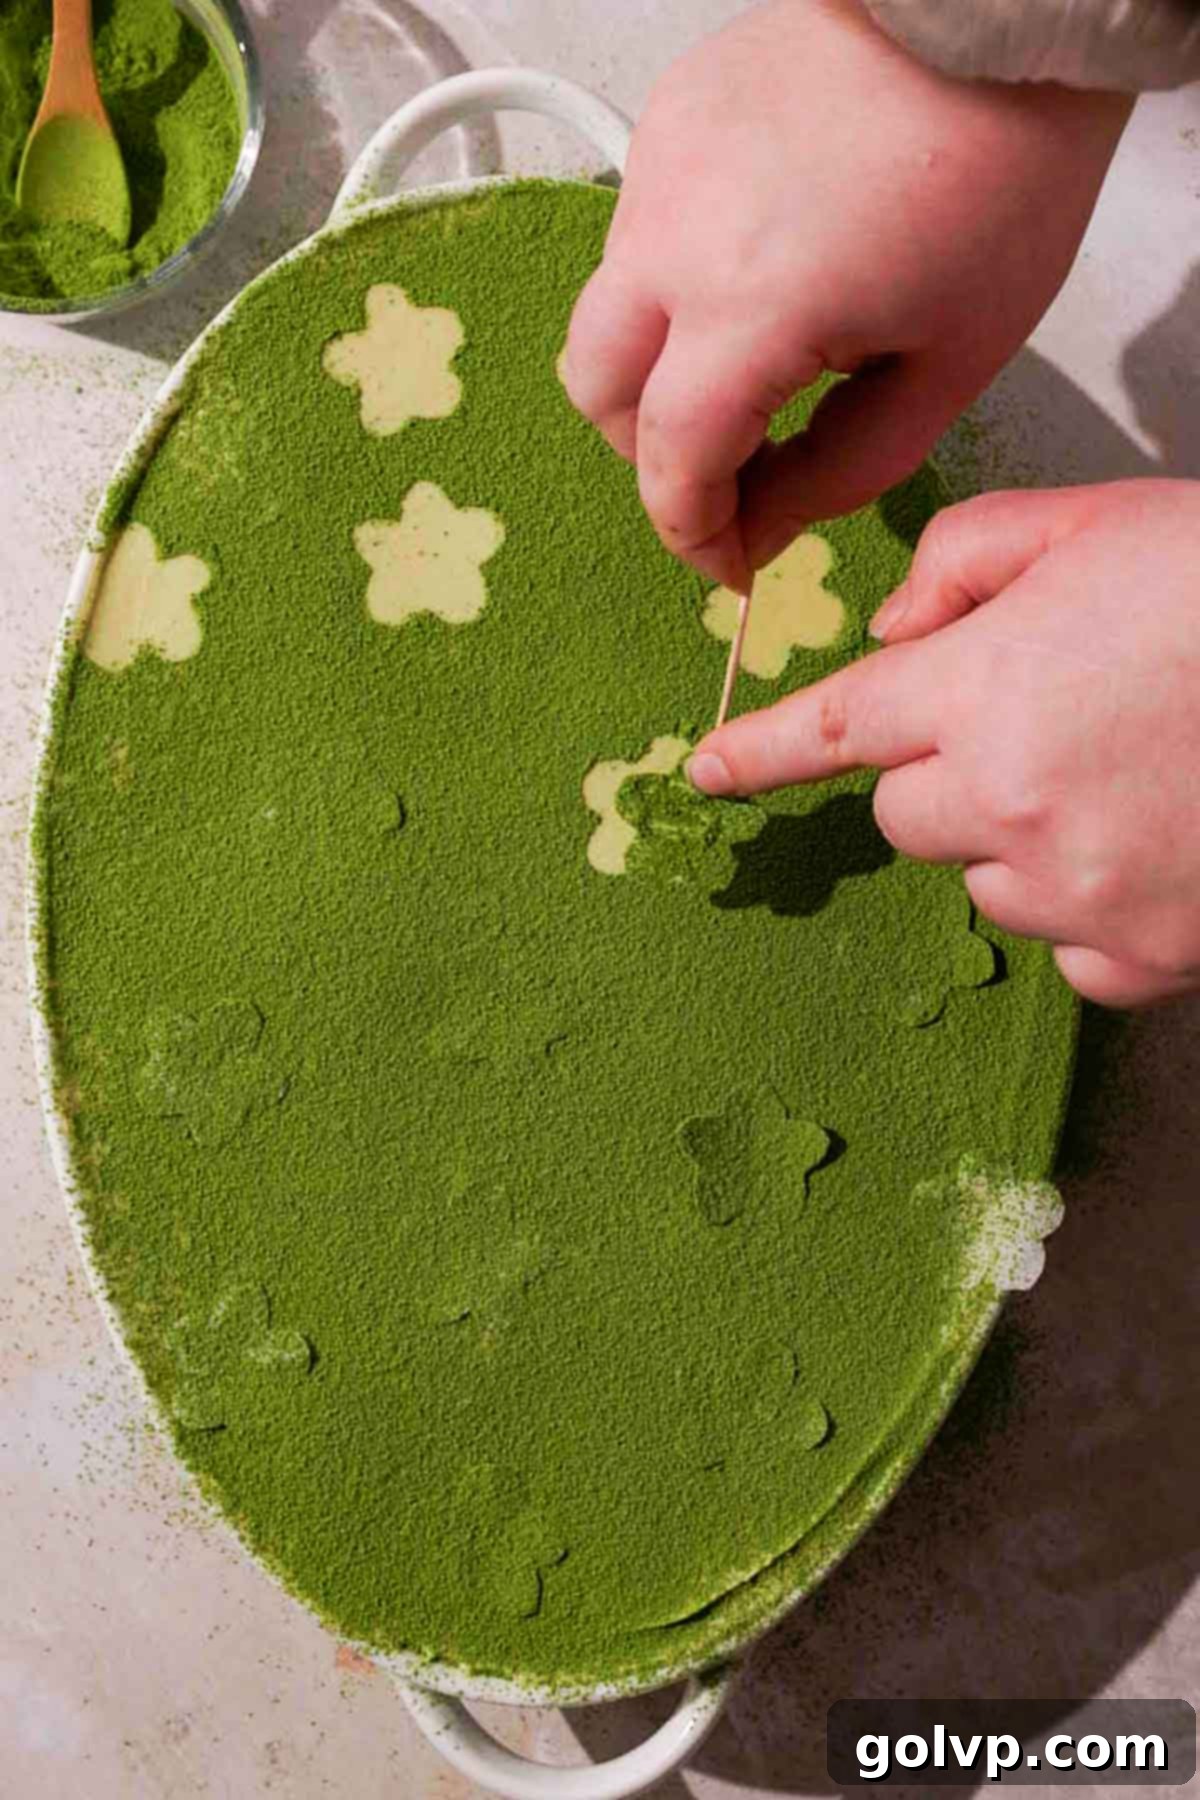
Step 4: Decorate and Serve. On the day you plan to serve, remove the tiramisu from the fridge. For a beautiful finish, sift a generous amount of additional matcha powder over the top.
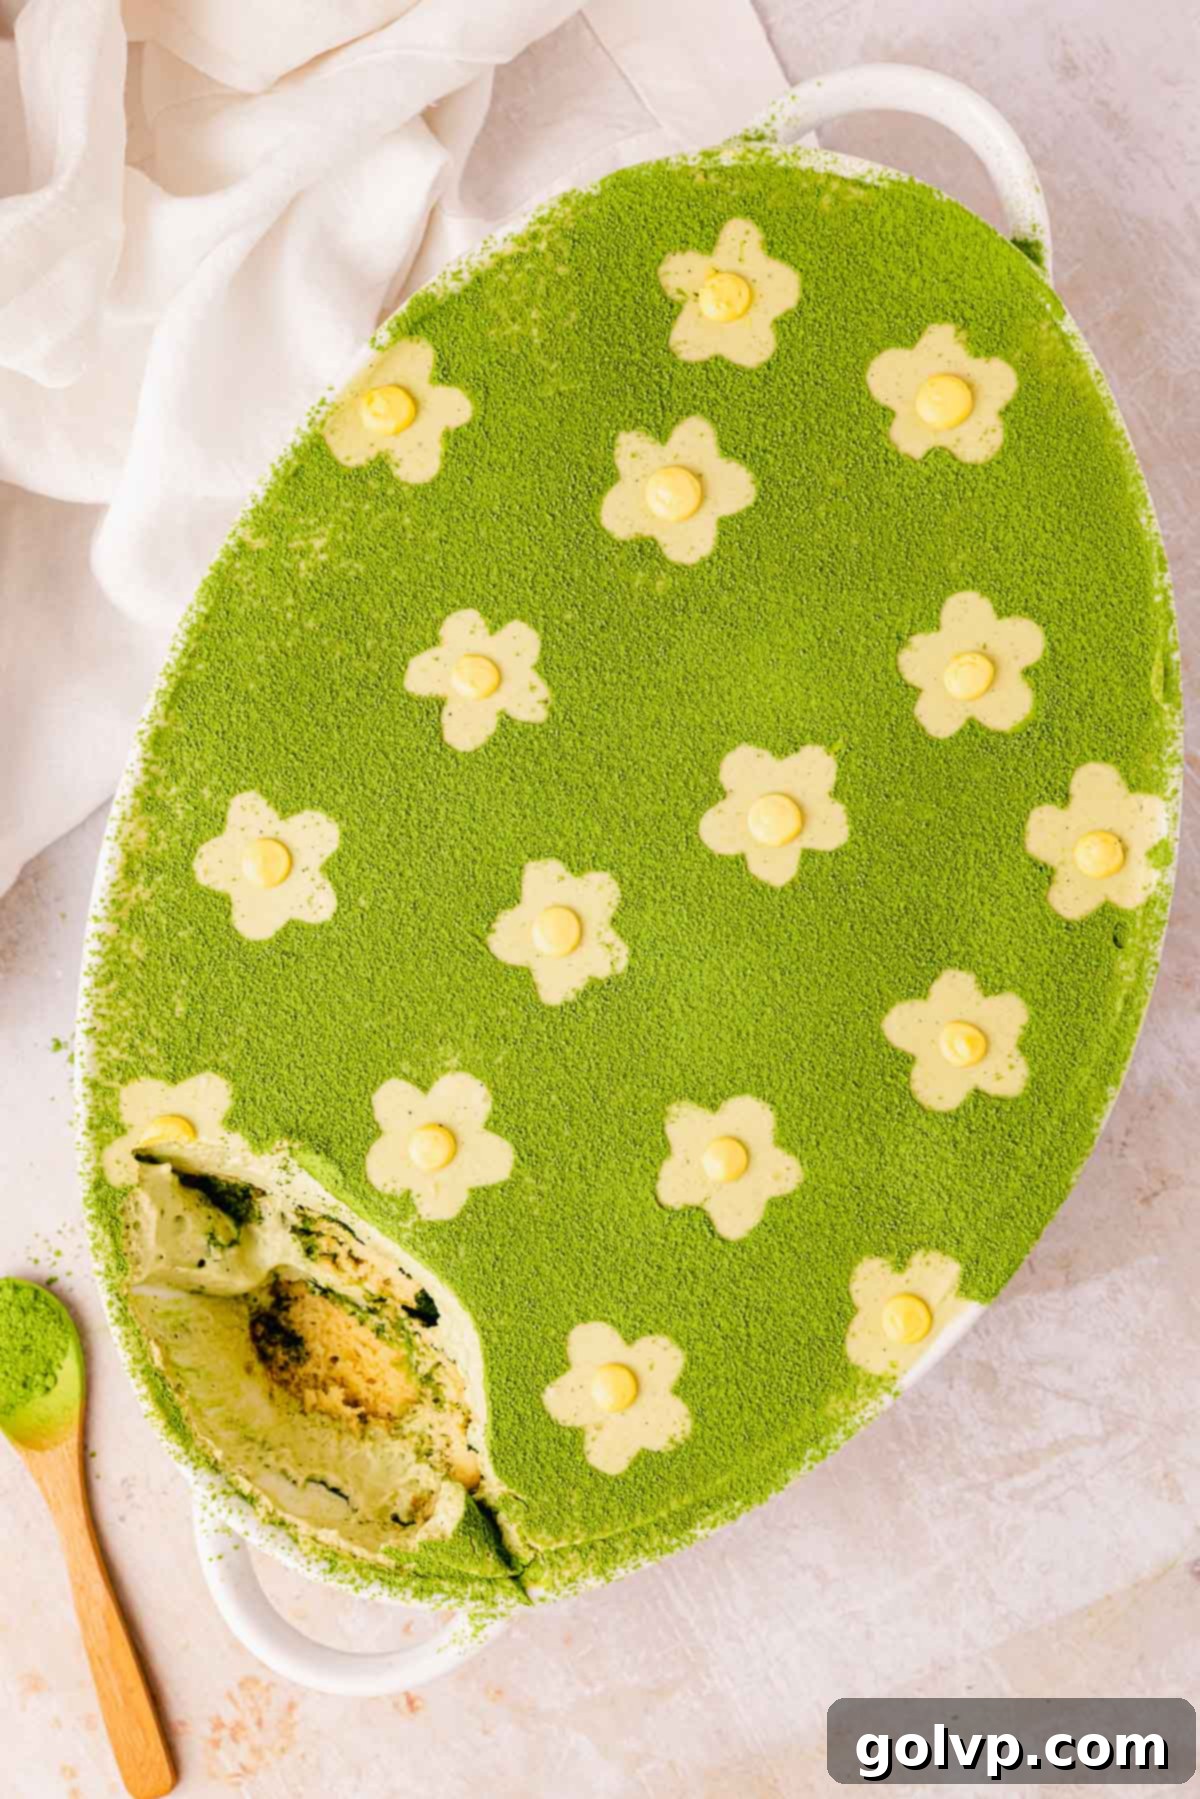
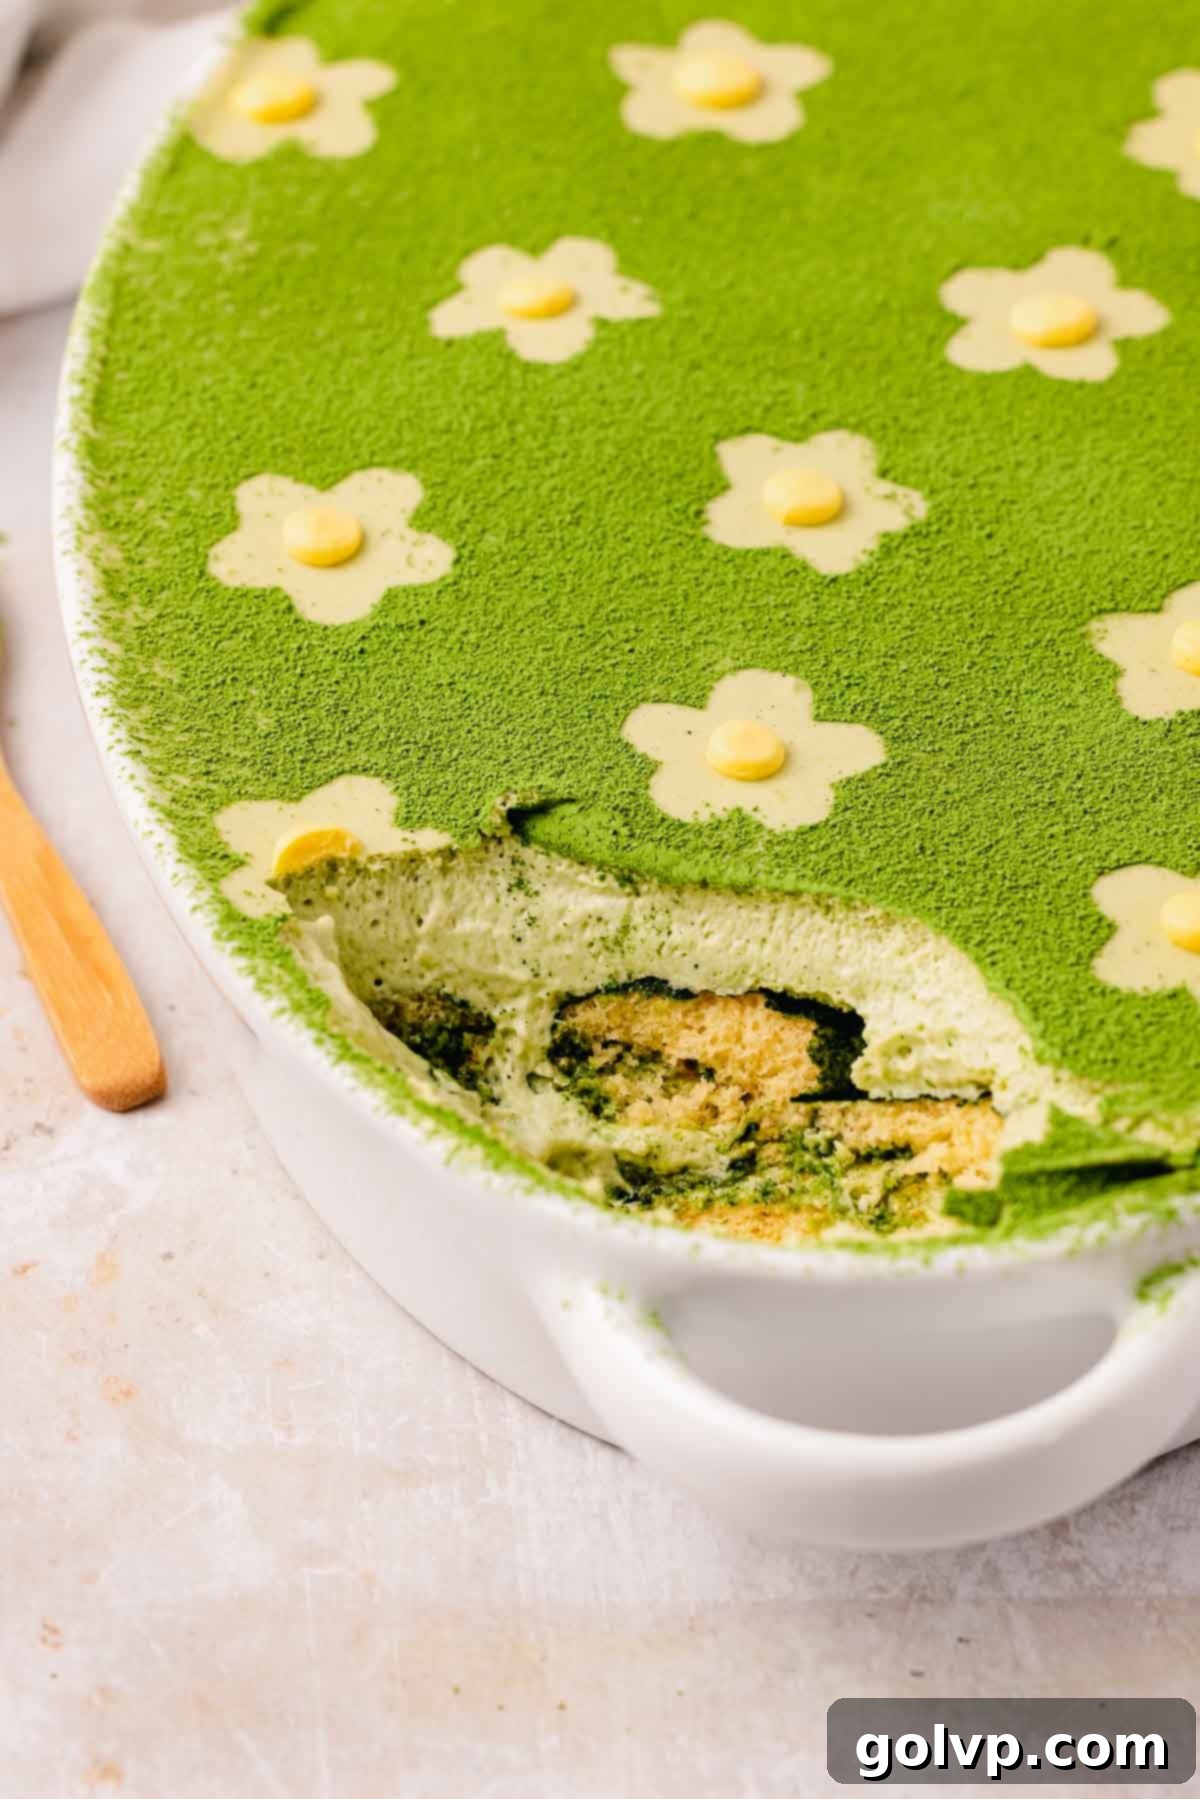
Optionally for a Floral Design: To create an elegant flower pattern, cut out simple flower shapes from parchment paper. Carefully place these paper cutouts on the surface of the tiramisu before dusting with matcha powder. Once dusted, gently lift and remove the parchment paper flowers to reveal clean, undusted shapes. For an extra touch, pipe small dollops of yellow whipped cream or frosting into the center of each flower to mimic flower centers. Slice and serve your exquisite Matcha Tiramisu!
Expert Tips for a Flawless Matcha Tiramisu
- Choose Non-Metal Dishes for Matcha: Always opt for ceramic, glass, or plastic bowls when preparing any matcha dessert. Metal can impart an undesirable metallic aftertaste to matcha, dulling its delicate flavor and vibrancy.
- Avoid Overwhipping Mascarpone: Mascarpone cheese has a delicate structure. While it needs a brief whisking to smooth out any lumps, overmixing can cause it to break down and become liquidy, preventing the filling from setting properly. Mix just until smooth and combined.
- Whip Heavy Cream to Stiff Peaks: The perfectly whipped heavy cream is key to the tiramisu’s light, airy, and mousse-like texture. It acts as a leavening agent, adding volume and helping the filling to set firmly. Gently fold it into the mascarpone mixture to maintain its airiness. This method effectively replaces the traditional use of raw whipped egg whites, ensuring a safe and equally delicious result.
- Crucial Chilling Time: Patience is a virtue when making tiramisu! Allow your Matcha Tiramisu to chill in the refrigerator for at least 8 hours, or preferably overnight. This extended chilling period is vital for the ladyfingers to fully absorb the matcha soak and soften to the perfect texture, and for the mascarpone filling to firm up and achieve its optimal consistency. It also allows all the delightful flavors to fully meld together.
- Quality Matcha Makes a Difference: Invest in good quality matcha powder. Ceremonial grade matcha will offer the best color and a less bitter, more refined flavor, making a noticeable difference in the final taste of your tiramisu.
🥄 Make Ahead & Storage Instructions
This Matcha Tiramisu is the epitome of a perfect make-ahead dessert, as it absolutely thrives with ample time to chill and set in the refrigerator. I highly recommend preparing it the day before you plan to serve, allowing all the incredible flavors to fully develop and meld together overnight. It requires a minimum of 8 hours of chilling time, but often tastes even better after 24 hours.
Once assembled and covered tightly with plastic wrap, your delicious matcha tiramisu will keep beautifully in the refrigerator for up to four days. If you’re looking to extend its life, this tiramisu freezes exceptionally well. Wrap it tightly in multiple layers of plastic wrap and then aluminum foil to prevent freezer burn, and it can be stored in the freezer for up to two months. When frozen, it transforms into a delightful, scoopable dessert with a texture remarkably similar to matcha ice cream – a truly wonderful treat on a hot day!
✔️ What Makes This the Best Matcha Tiramisu?
Our recipe strives to capture the essence and luxurious texture of a traditional Italian tiramisu, while consciously adapting it to be both coffee-free and entirely free of raw eggs. This makes it a fantastic option for those with dietary preferences or concerns, without compromising on flavor or authenticity.
The secret lies in our carefully crafted filling. A rich base of egg yolks, whole eggs, sugar, and our unique matcha milk tea is cooked gently over a double boiler. This process is crucial and takes approximately 10-15 minutes of continuous whisking. As the mixture heats and thickens, it transforms into a light, foamy, and considerably thickened custard. This cooking step ensures a safe, stable, and incredibly flavorful foundation for our tiramisu.
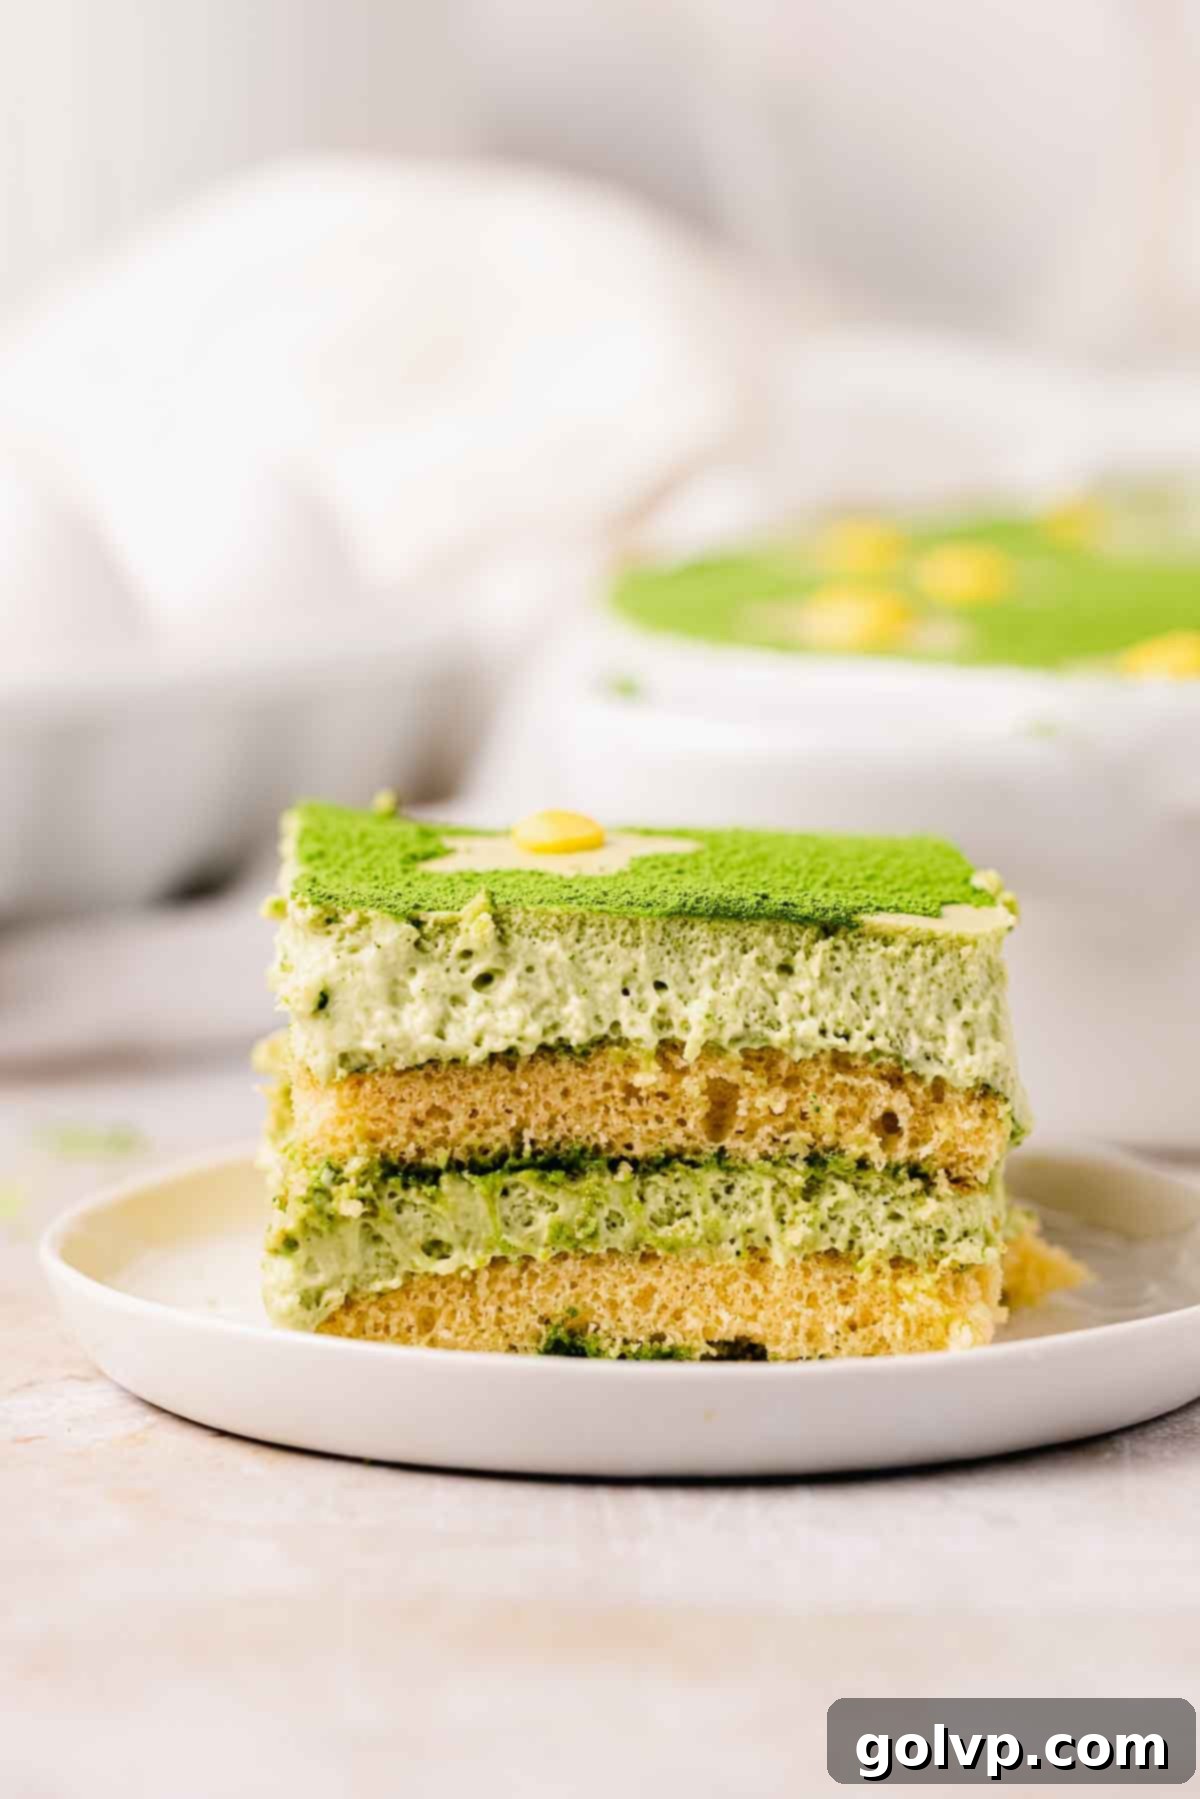
After the cooked matcha custard has cooled to room temperature, it’s combined with smooth mascarpone cheese. To achieve that signature light and airy, mousse-like consistency, perfectly whipped heavy cream is then gently folded into the mixture. The result is an ultra-creamy, velvety filling that perfectly balances the rich flavor of mascarpone with the vibrant notes of matcha, creating a dessert that is both familiar in its comforting texture and exciting in its unique flavor profile.
❔ What Kind of Matcha Should I Use for Tiramisu?
Choosing the right matcha can significantly impact the flavor and appearance of your tiramisu.
For the absolute best results in this recipe, I highly recommend using ceremonial grade matcha. Ceremonial grade matcha is harvested from the youngest tea leaves, known for its vibrant green color, less bitter taste, and smoother, more delicate grassy flavor profile. It will yield a tiramisu with a brighter, more appealing green hue and a superior, more refined taste.
However, if ceremonial grade isn’t readily available or is outside your budget, culinary grade matcha is a perfectly acceptable alternative. Culinary grade matcha is made from slightly older leaves and has a more robust, sometimes slightly more bitter flavor, and a less vivid green color. It will still provide a delicious matcha taste, but the overall intensity and visual appeal might be subtly different.
Important Note: Steer clear of “matcha drink mixes” or sweetened matcha powders. These typically contain added sugars, milk solids, and other ingredients that will throw off the balance of this recipe’s sweetness and consistency. Always opt for pure matcha powder for authentic flavor and control over your ingredients.
📖 Recipe FAQs
No, this particular version of matcha tiramisu is specifically designed without raw eggs, making it a safe and accessible dessert for everyone, including pregnant women and those with raw egg concerns. The eggs and yolks used in the filling are cooked thoroughly with sugar, vanilla, and matcha milk over a double boiler until they form a thick, rich custard. Additionally, whipped cream is utilized instead of raw whipped egg whites to achieve its light and fluffy, mousse-like texture. This method successfully delivers a taste and texture remarkably similar to traditional tiramisu, but with the added peace of mind that comes from a fully cooked filling.
If ladyfingers aren’t available or you’re looking for a different texture, you have several delicious alternatives. You can use your favorite vanilla cookies, such as shortbread, or even a plain, dense sponge cake. For a fun, modern twist, consider using Golden Oreos or classic chocolate Oreos, similar to our Oreo tiramisu recipe. Just be mindful of how quickly alternative cookies absorb the liquid; a brief dip is usually sufficient.
Making this matcha tiramisu gluten-free is very straightforward! The creamy filling is naturally gluten-free. The only component you need to substitute is the ladyfingers. Simply use your preferred brand of gluten-free ladyfingers or any other gluten-free cookies that can be dipped and layered. Ensure they are sturdy enough to hold their shape after a brief soak.
While mascarpone cheese provides the quintessential mild, creamy, and slightly sweet flavor that defines tiramisu, you can substitute it with full-fat cream cheese in a pinch. Using cream cheese will result in a similar luxurious texture, but the flavor will be noticeably tangier. It won’t have the subtle sweetness of mascarpone, but it will still make a delicious dessert. However, I strongly advise against using ricotta cheese, as its naturally grainy texture will not yield the smooth and velvety filling that tiramisu is known for.
I generally do not recommend attempting to make this tiramisu into a free-standing cake. Tiramisu, particularly the creamiest and most authentic versions, relies on its soft, rich, and often delicate texture which is best maintained when prepared and served directly from a casserole dish or an individual serving glass. The filling is designed to be lusciously soft, not firm enough to hold its shape for an extended period outside of a supportive container. The beauty of tiramisu lies in its scoopable, layered presentation.
🍰 More Delightful Dessert Recipes
- Strawberry Tiramisu
- Lemon Tiramisu with Lemon Curd
- Oreo Tiramisu
- Matcha White Chocolate Ganache Truffles
Did you make this recipe? I would love for you to rate this recipe and hear what you think in the comments below! Share your creation on Instagram and tag @flouringkitchen. Follow me on Pinterestto save and for more recipe ideas.
📖 Recipe
Matcha Tiramisu
Mary
Pin Recipe
Shop Ingredients
Equipment
-
8” by 11” oval dish or any non-metal dish of similar size
-
electric mixer
Ingredients
Filling
- 2 tablespoons matcha powder see notes, plus extra for dusting
- ¼ cup water boiling hot
- 1 cup milk
- 4 large egg yolks
- 2 large eggs
- ⅔ cup granulated sugar
- 1 teaspoon pure vanilla extract
- 1 lb mascarpone cheese
- 1 ½ cup heavy whipping cream
Assembly
- 2 packages ladyfingers about 22 large ladyfingers, see notes
- 2 teaspoons matcha powder for dusting on top
Shop Ingredients on Jupiter
Instructions
Filling
-
Sift the matcha powder into a medium-sized bowl to ensure there are no lumps. Add the boiling hot water and whisk thoroughly using a matcha whisk or a regular wire whisk until the matcha is fully dissolved and smooth, forming a paste.2 tablespoons matcha powder, ¼ cup water
-
Pour the milk into the bowl with the dissolved matcha and stir until completely combined. This vibrant matcha milk will be used for both the filling and soaking the ladyfingers. Place it aside in the fridge to keep it chilled.1 cup milk
-
Prepare a double boiler: Pour a few inches of water into a medium saucepan and bring it to a gentle simmer. Find a heat-safe bowl that fits snugly on top of the pan without touching the simmering water.
-
In the heat-safe bowl, combine the egg yolks, whole eggs, granulated sugar, pure vanilla extract, and ½ cup of the prepared matcha milk mixture. Whisk these ingredients together until well combined and homogenous.4 large egg yolks, 2 large eggs, ⅔ cup granulated sugar, 1 teaspoon pure vanilla extract
-
Place the bowl with the egg mixture on top of the saucepan. Whisk continuously over the simmering water for 10-15 minutes, until the mixture foams up significantly, becomes lighter in color, and thickens considerably (it should coat the back of a spoon). Immediately remove from heat and let it cool completely to room temperature.
-
While the cooked matcha egg custard is cooling, pour the heavy whipping cream into a large, chilled bowl. Using an electric mixer or stand mixer, whip the cream until it reaches medium-stiff peaks. Be very careful not to overwhip, as it can quickly become grainy. Once whipped, place the bowl back into the fridge.1 ½ cup heavy whipping cream
-
In a separate large bowl, add the mascarpone cheese. Briefly whisk or beat it until it’s smooth and any lumps are gone. This step should be quick; do not overmix, as mascarpone can easily become liquidy and prevent your tiramisu from setting.1 lb mascarpone cheese
-
Pour the thickened and fully cooled matcha custard into the mascarpone cheese bowl. Whisk or beat them together very briefly, just until they are combined. Again, avoid overmixing to maintain the mascarpone’s consistency.
-
Finally, gently fold the whipped cream into the mascarpone-custard mixture. Use a whisk or spatula and light, upward motions until the entire filling is evenly combined, smooth, and beautifully airy.
Assembly
-
Take one ladyfinger at a time and briefly dip it into the reserved matcha milk mixture. Ensure it’s just a quick dip (about 1-2 seconds per side) to prevent sogginess. Arrange a single, even layer of soaked ladyfingers at the bottom of an 8×11 inch oval dish or any similarly sized non-metal casserole dish.2 packages ladyfingers
-
Spread half of the prepared matcha filling evenly over the first layer of ladyfingers, ensuring it covers all the way to the edges. Dip more ladyfingers in the matcha tea and arrange them in a second single layer on top of the filling. Then, add the rest of the filling and smooth the top surface carefully.
Tip: If you find yourself running low on the matcha milk tea for soaking, you can simply add a little extra plain milk to stretch it further. If you have any matcha milk mixture leftover after assembly, don’t let it go to waste! Pour it into a glass, add some ice and extra milk, and enjoy your delicious homemade iced matcha tea latte.
-
Cover the dish tightly with plastic wrap to prevent it from absorbing any refrigerator odors. Refrigerate the tiramisu for at least 8 hours, or ideally, overnight, to allow it to fully set and the flavors to meld.
-
On the day you plan to serve, remove the tiramisu from the fridge. Decorate it by sifting a generous amount of additional matcha powder over the top for a beautiful finish.
Optionally: To create an elegant flower design, cut out desired flower shapes from parchment paper. Place these paper stencils gently on top of the tiramisu before dusting with matcha powder. Carefully remove the parchment paper flowers to reveal the undusted shapes beneath. For an extra decorative touch, pipe small dollops of yellow whipped cream or frosting into the middle of each flower to create vibrant flower centers.
2 teaspoons matcha powder -
Once decorated and fully chilled, scoop or slice generous portions and serve immediately. Enjoy your delightful homemade Matcha Tiramisu!
Notes
Ladyfingers: The quantity of ladyfingers required can vary depending on the dimensions of your specific baking dish. This recipe used approximately 22 large ladyfingers from two 5 oz packages of Milano giant ladyfingers. Feel free to substitute with your preferred vanilla cookies or even sandwich cookies for a creative twist.
Matcha Quality: For the most vibrant color and a less bitter, more refined flavor, ceremonial grade matcha is highly recommended. While culinary grade matcha will also work and provide a delicious taste, expect a slightly duller green hue and a more robust, sometimes subtly bitter flavor.
Tiramisu Pro Tips:
- Use Non-Metal Bowls: Always use non-metal dishes (glass, ceramic, or plastic) when working with matcha to prevent any metallic aftertaste.
- Do Not Overmix Mascarpone: Whisk mascarpone cheese briefly, just enough to remove lumps. Overmixing will cause it to separate and become liquidy, hindering the tiramisu from setting correctly.
- Achieve Stiff Peaks for Cream: Whip your heavy cream to firm, stiff peaks. This is crucial for adding air to the filling, ensuring a light, mousse-like texture, and helping the tiramisu set perfectly. Fold it gently into the mascarpone mixture.
- Allow Ample Chill Time: For the best texture and flavor development, chill your tiramisu for a minimum of 8 hours, or preferably overnight. This allows the ladyfingers to fully soften and absorb the flavors, and the filling to firm up properly.
