Ultimate Lemon Raspberry Cheesecake: Creamy, Tangy & Irresistibly Delicious
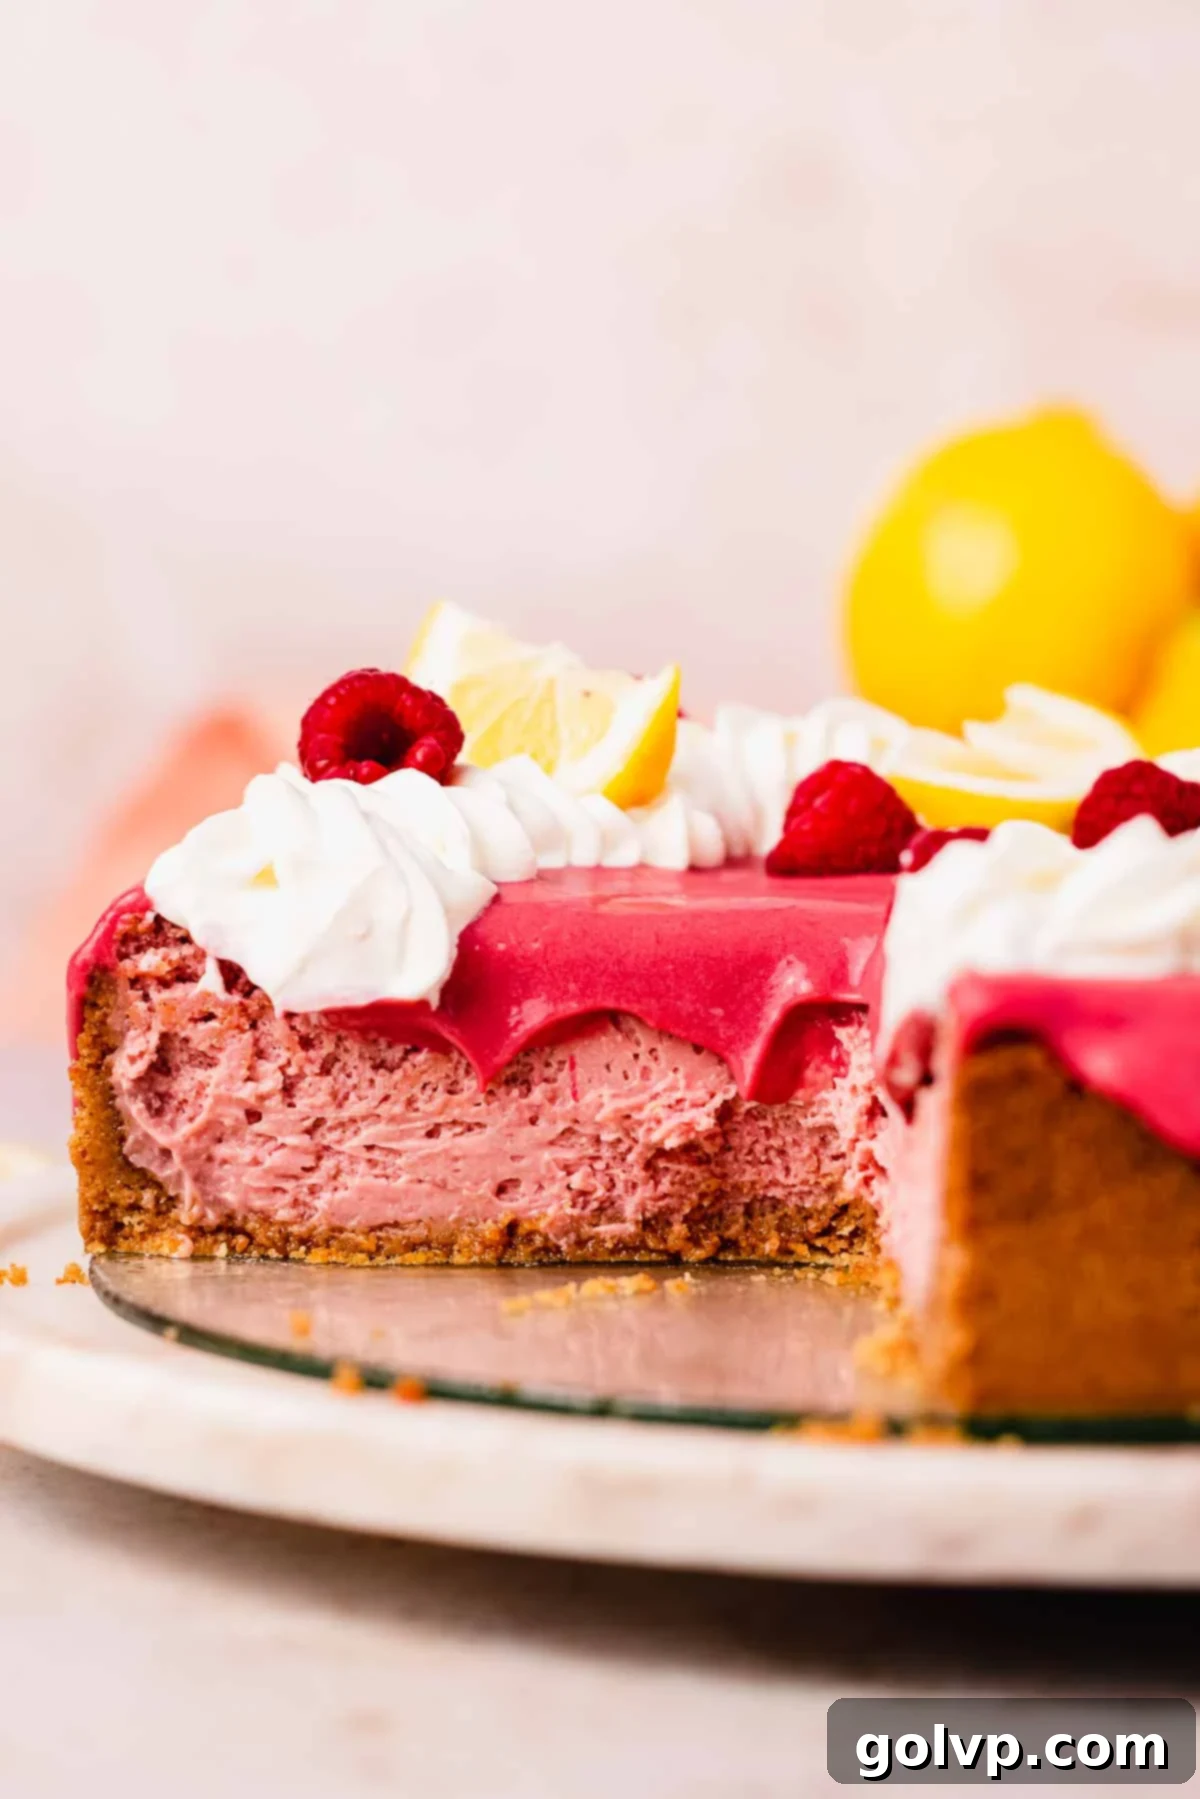
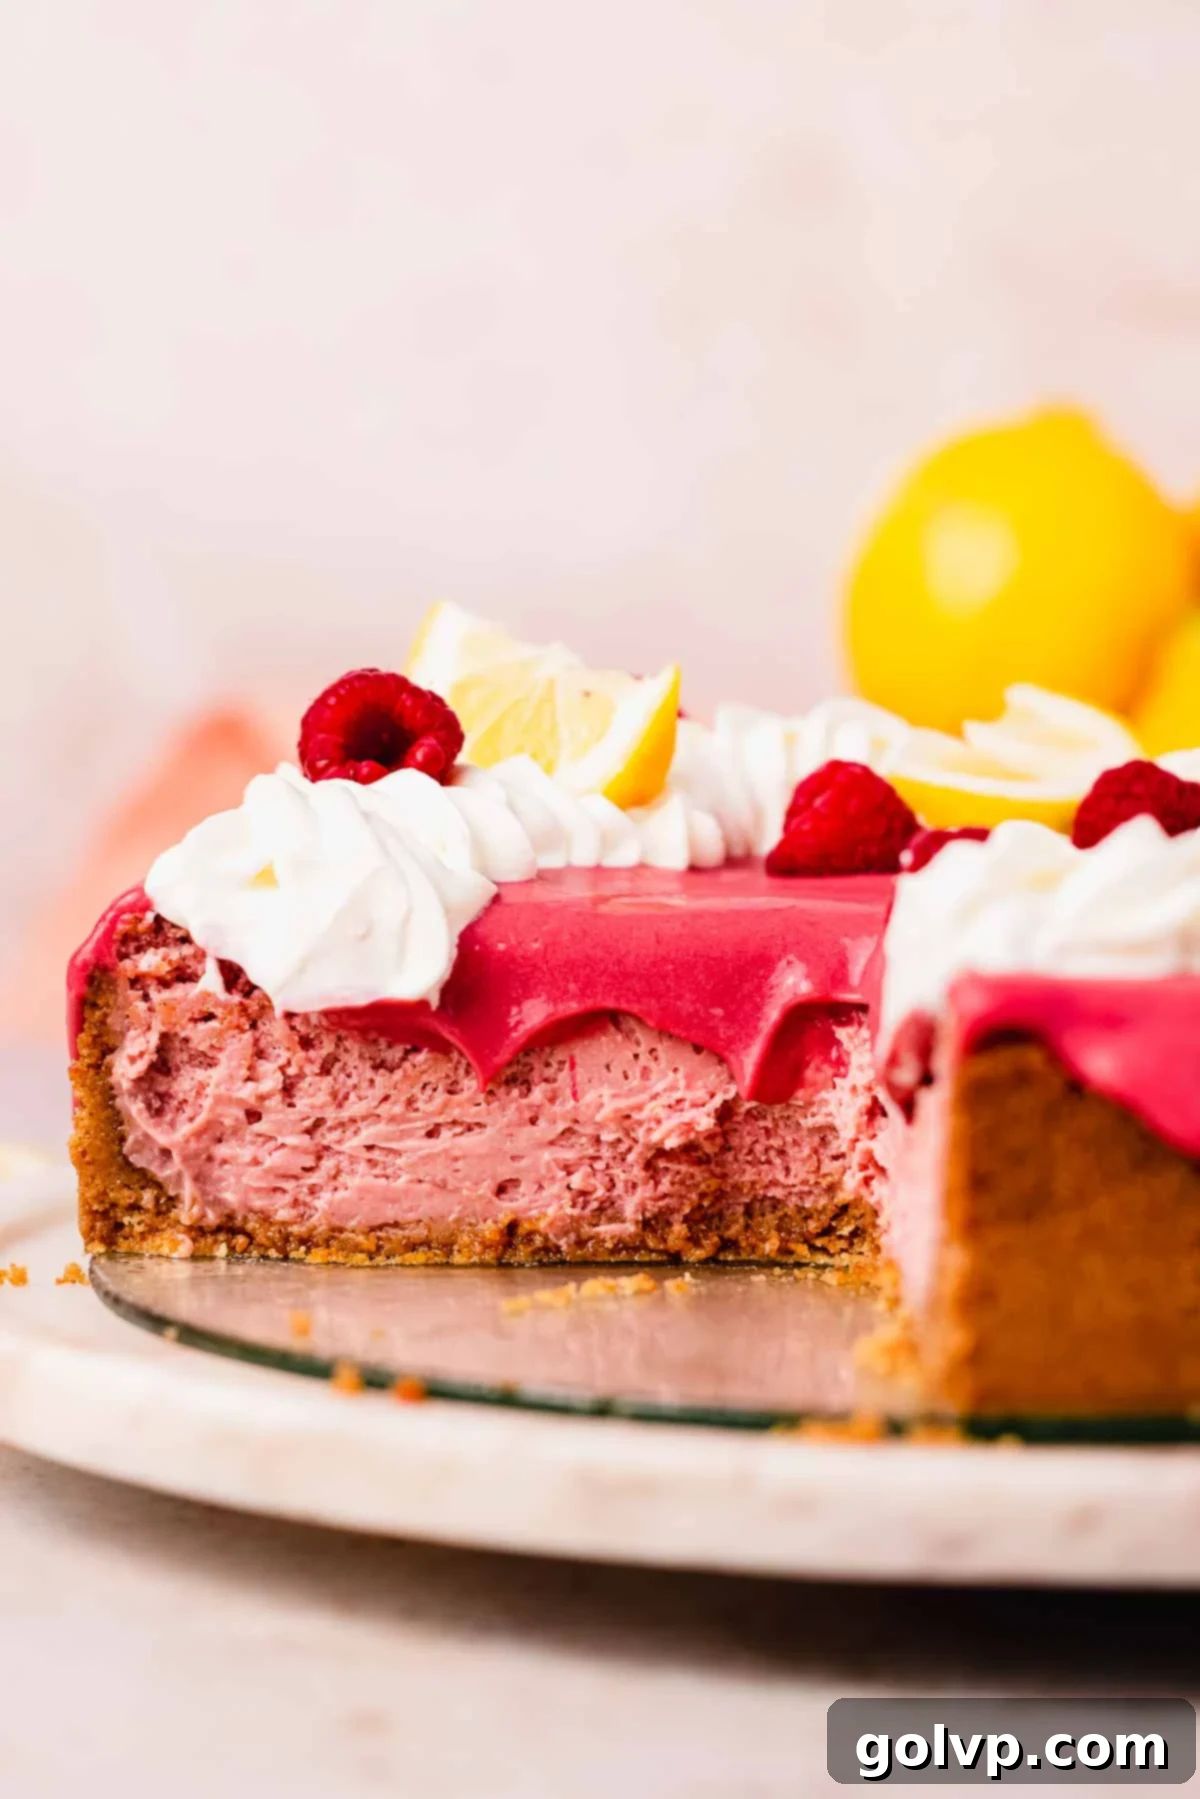
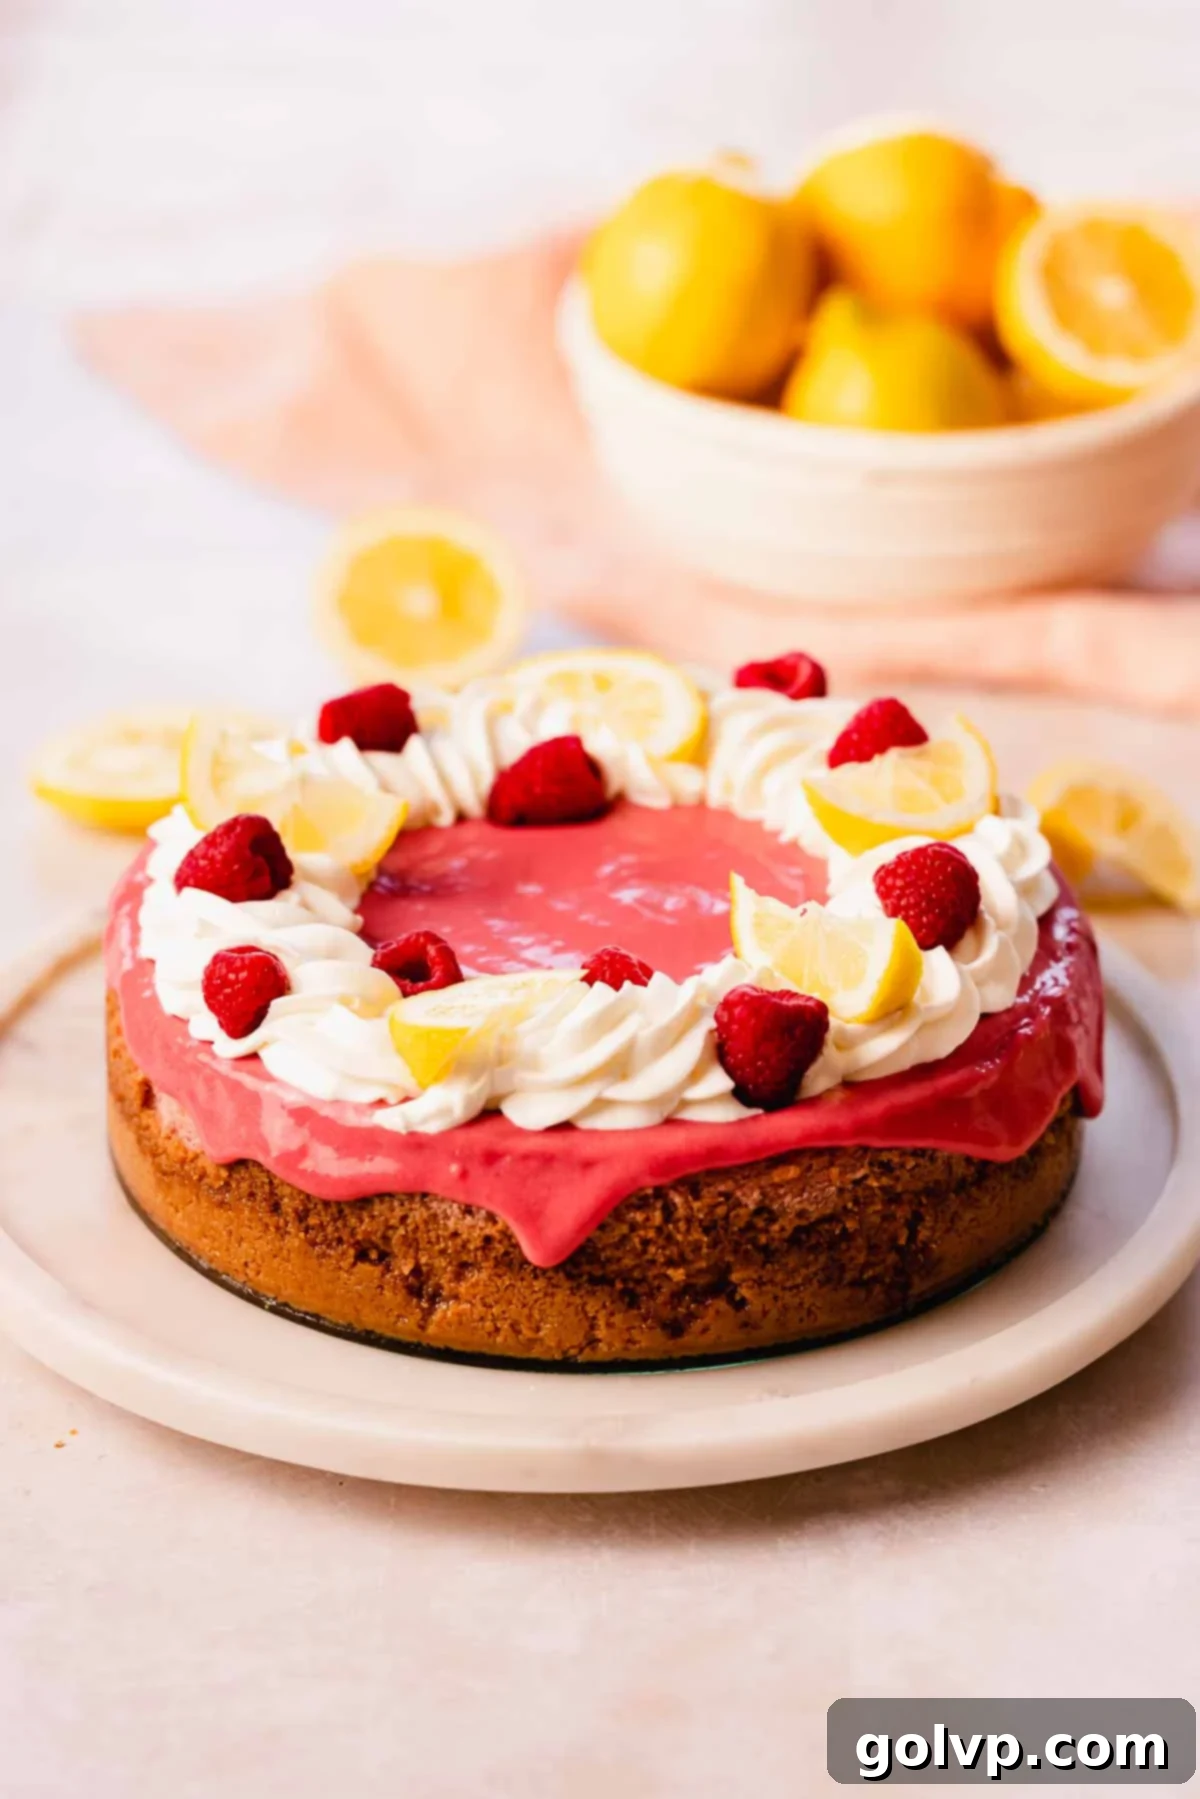
Prepare to fall in love with this ultimate Lemon Raspberry Cheesecake, a dessert that masterfully balances a rich, creamy texture with an explosion of tangy lemon and sweet-tart raspberry flavors. It’s truly a showstopper, featuring a crisp, buttery graham cracker crust, a luxuriously smooth baked cheesecake filling naturally tinted pink with fresh raspberries, a vibrant homemade raspberry curd topping, and a delicate crown of fluffy whipped cream. This isn’t just any cheesecake; it’s a perfectly crafted treat that offers a delightful tang without being overly sweet, making it an ideal choice for any occasion, especially during the bright and sunny spring and summer months.
If you adore the combination of lemon and raspberry, you might also enjoy these lemon raspberry bars! They are incredibly easy to prepare and boast a thick, tender shortbread crust generously filled with a gooey, tangy lemon-raspberry mixture.
🍋 Why This Lemon Raspberry Cheesecake Will Be Your New Favorite
This Lemon Raspberry Cheesecake isn’t just another dessert; it’s an experience designed to delight your taste buds. Here’s why this particular recipe stands out and why you’ll absolutely adore making and sharing it:
- Perfect Balance of Tangy Lemon & Sweet Raspberry: Every bite delivers a harmonious blend of bright, zesty lemon and sweet-tart raspberry. The fruit flavors are prominent and invigorating, preventing the cheesecake from being overly rich or cloying. It’s a truly refreshing taste that brightens any palate.
- Incredibly Creamy Texture: The filling is engineered for perfection, achieving an ultra-rich, smooth, and velvety texture that melts in your mouth. This isn’t a dense, heavy cheesecake; it’s light and luscious, making it wonderfully decadent yet satisfying.
- Luscious Raspberry Curd Topping: Elevating this cheesecake is an easy-to-make, incredibly smooth, and intensely flavorful raspberry curd. This vibrant topping adds an extra layer of tangy fruitiness and a beautiful, glossy finish, perfectly complementing the creamy cheesecake base. Its rich flavor and silky texture are simply irresistible.
- Naturally Vibrant Color: Forget artificial dyes! The stunning pink hue of this cheesecake comes entirely from fresh raspberry puree, which is surprisingly simple to prepare. This natural coloring not only looks beautiful but also ensures an authentic, wholesome raspberry flavor throughout the dessert.
- Ideal for Any Season: While perfect for spring and summer gatherings, its bright and comforting flavors make it a wonderful dessert for any time of year, whether it’s a holiday, a special celebration, or just a treat for yourself.
For more delightful lemon and raspberry combinations, be sure to try this elegant lemon raspberry cake or these wonderfully easy lemon raspberry cookies.
📝 Essential Ingredients for Success
To ensure your lemon raspberry cheesecake turns out absolutely perfect, pay close attention to the quality and preparation of your ingredients. Below are some crucial tips for success!
Full steps and ingredients list can be found in the comprehensive recipe card below.
Cheesecake Filling Ingredients: Your Path to Creaminess
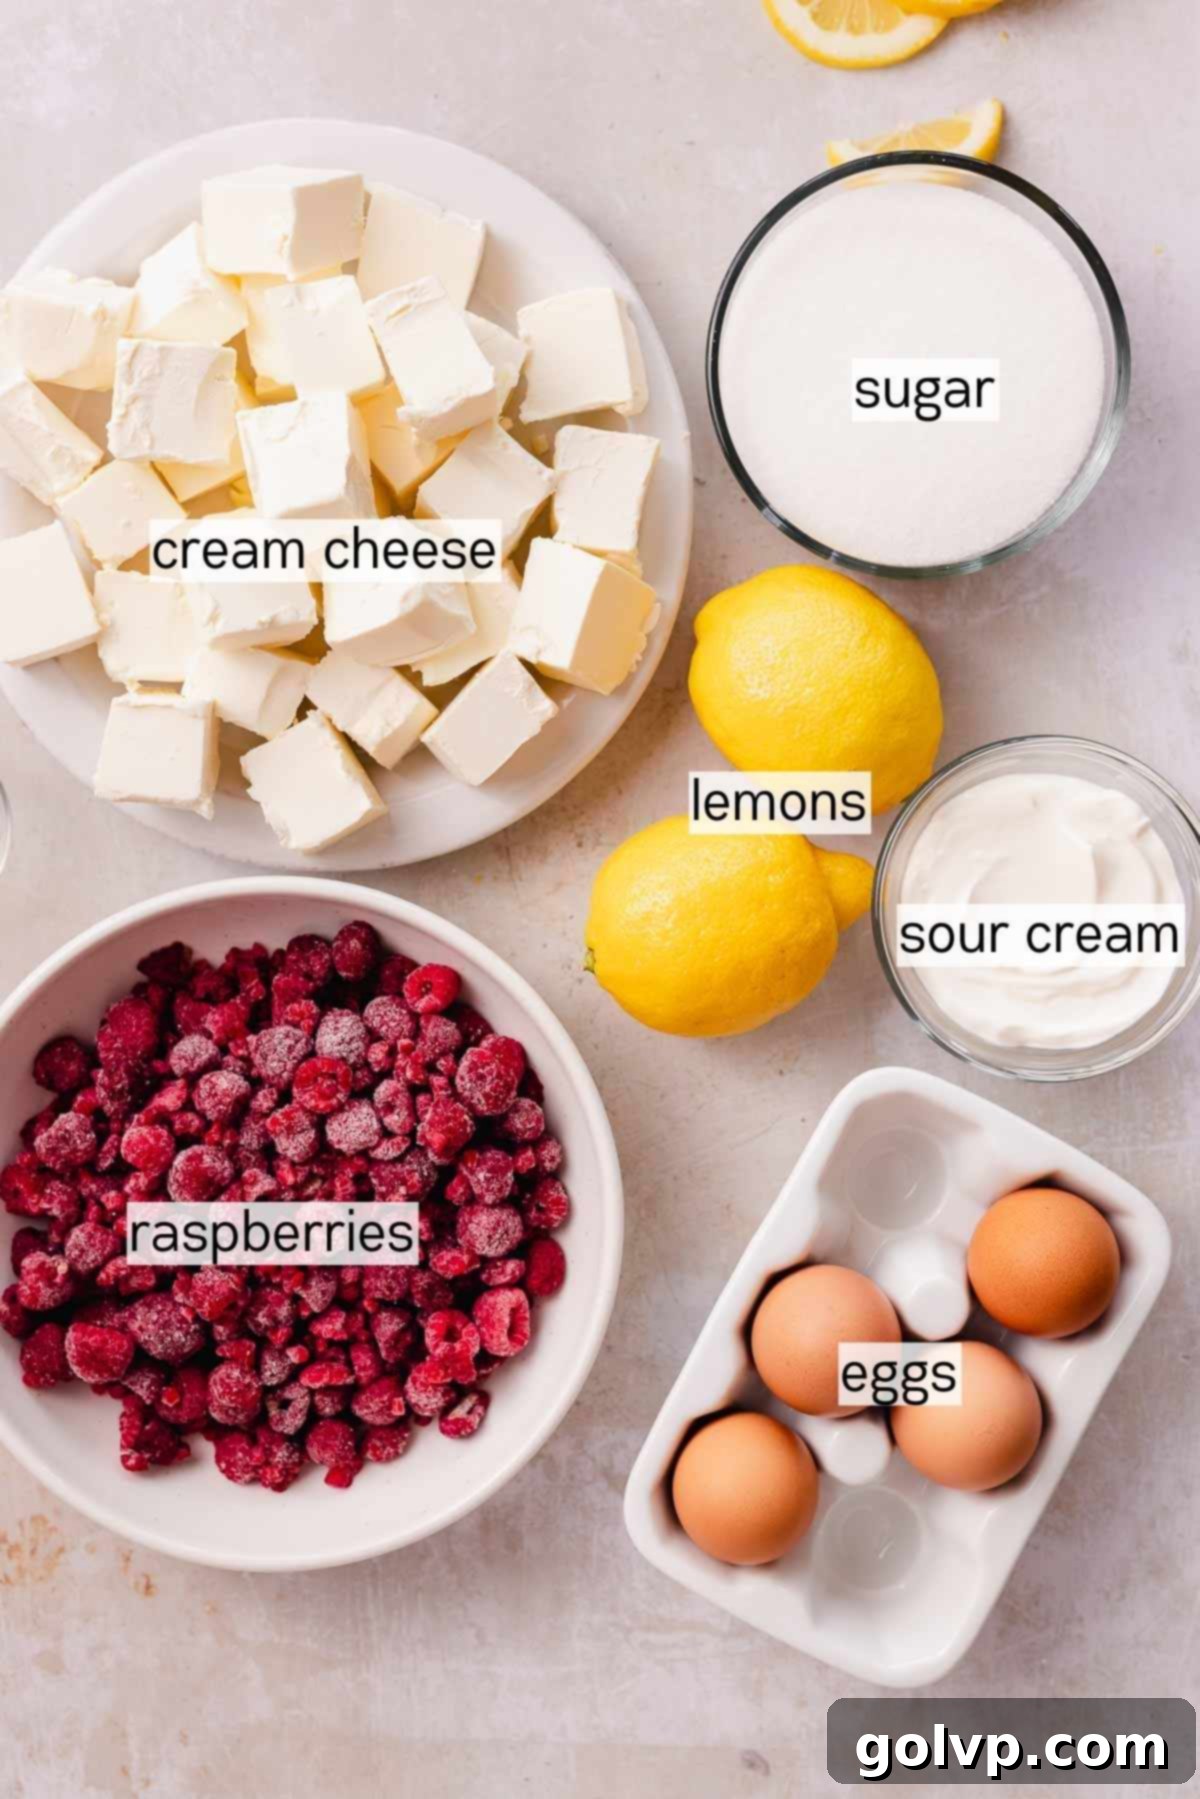
- Cream Cheese: This is the star of your cheesecake! Always opt for a high-quality, full-fat, brick-style cream cheese. Low-fat varieties contain too much water, which can lead to a watery consistency and an inferior texture. For best results, ensure your cream cheese is at room temperature (ideally, let it sit out for at least 2 hours) so it blends smoothly without lumps.
- Heavy Whipping Cream: Incorporating heavy cream is key to achieving that signature light and ultra-creamy cheesecake texture. It helps to aerate the batter slightly and adds a wonderful richness. Do not substitute with half-and-half or milk, as they lack the fat content necessary for the desired consistency.
- Sour Cream: A secret weapon for depth of flavor and an even creamier, more luxurious mouthfeel. Sour cream also contributes to the cheesecake’s characteristic tang, balancing the sweetness. Like the cream cheese, use full-fat sour cream for optimal results.
- Eggs: Crucial for structure and emulsification. Ensure your eggs are at room temperature. This allows them to incorporate seamlessly into the batter, preventing curdling and resulting in a silky-smooth, uniform mixture.
- Lemons (Zest & Juice): Fresh lemons are non-negotiable for that bright, zesty flavor. The zest holds aromatic oils that infuse the cheesecake with intense lemon notes, while the juice provides essential tang.
- Raspberries: Use fresh or frozen (thawed) raspberries for the puree. They provide the natural pink color and signature sweet-tart flavor.
If you’re a fan of unique and refreshing cheesecakes, you’ll also love this vibrant passionfruit cheesecake, known for its exquisite tanginess.
Crust Ingredients: The Foundation of Flavor
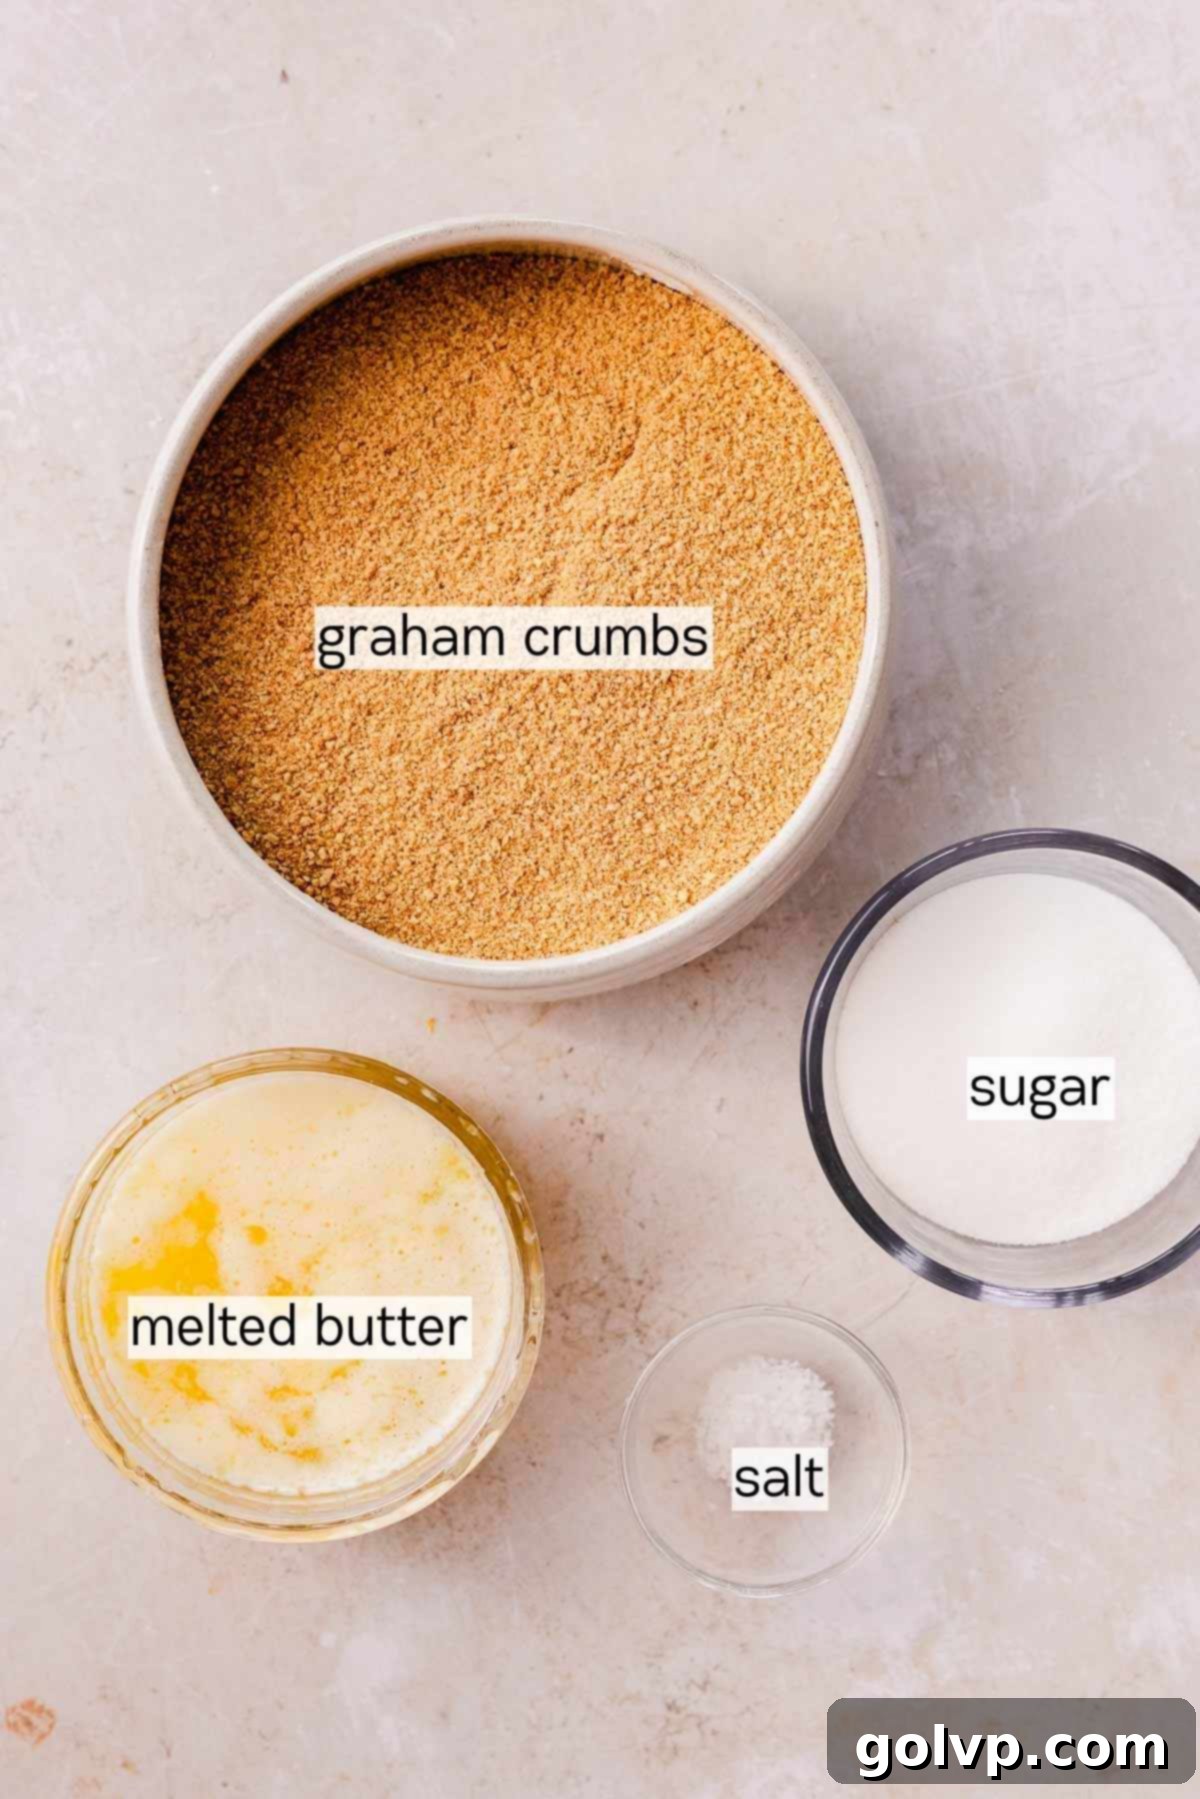
- Graham Cracker Crumbs: The classic choice for a cheesecake crust, offering a subtly sweet and crunchy base. You can purchase pre-made crumbs for convenience or easily make your own by blending whole graham crackers in a food processor or crushing them in a bag with a rolling pin.
- Melted Unsalted Butter: Essential for binding the graham cracker crumbs together and creating a firm, flavorful crust. Ensure the butter is melted but cooled to room temperature before mixing, so it doesn’t cook the crumbs.
- Sugar and Sea Salt: A touch of sugar enhances the sweetness of the crust, while a pinch of sea salt balances the flavors and adds a slight depth.
✔️ Smart Ingredient Substitutions & Dietary Adjustments
While this recipe is designed for optimal flavor and texture, here are a few tested substitutions and adjustments you can make:
Crust Alternatives: The graham cracker crust is a classic, but you can easily swap it for other complementary cookies. Biscoff cookies offer a warm, spiced note, while golden Oreos (crushed whole with their cream filling) provide a richer, sweeter base. When using cookies with a filling, you might need slightly less melted butter as the filling contributes to the binding. The mixture should hold together when squeezed. Experiment to find your favorite!
Gluten-Free Option: To make this cheesecake entirely gluten-free, simply use gluten-free graham crackers or any other suitable gluten-free cookie alternative for the crust. The rest of the recipe is naturally gluten-free.
Raspberry Curd (Optional, but highly recommended): While the recipe includes instructions for a homemade raspberry curd, you can use a high-quality store-bought raspberry curd for a quicker assembly, or even a different berry curd like strawberry or mixed berry. However, homemade curd offers unparalleled freshness and flavor.
👩🍳 Step-by-Step Guide: Crafting Your Lemon Raspberry Cheesecake
Crust Preparation: Building a Solid Foundation
Prep: Begin by preheating your oven to 355°F (180°C). Lightly grease a 9-inch round springform baking pan with a small amount of cold butter or a neutral oil. This step is crucial for easy removal of the cheesecake later.
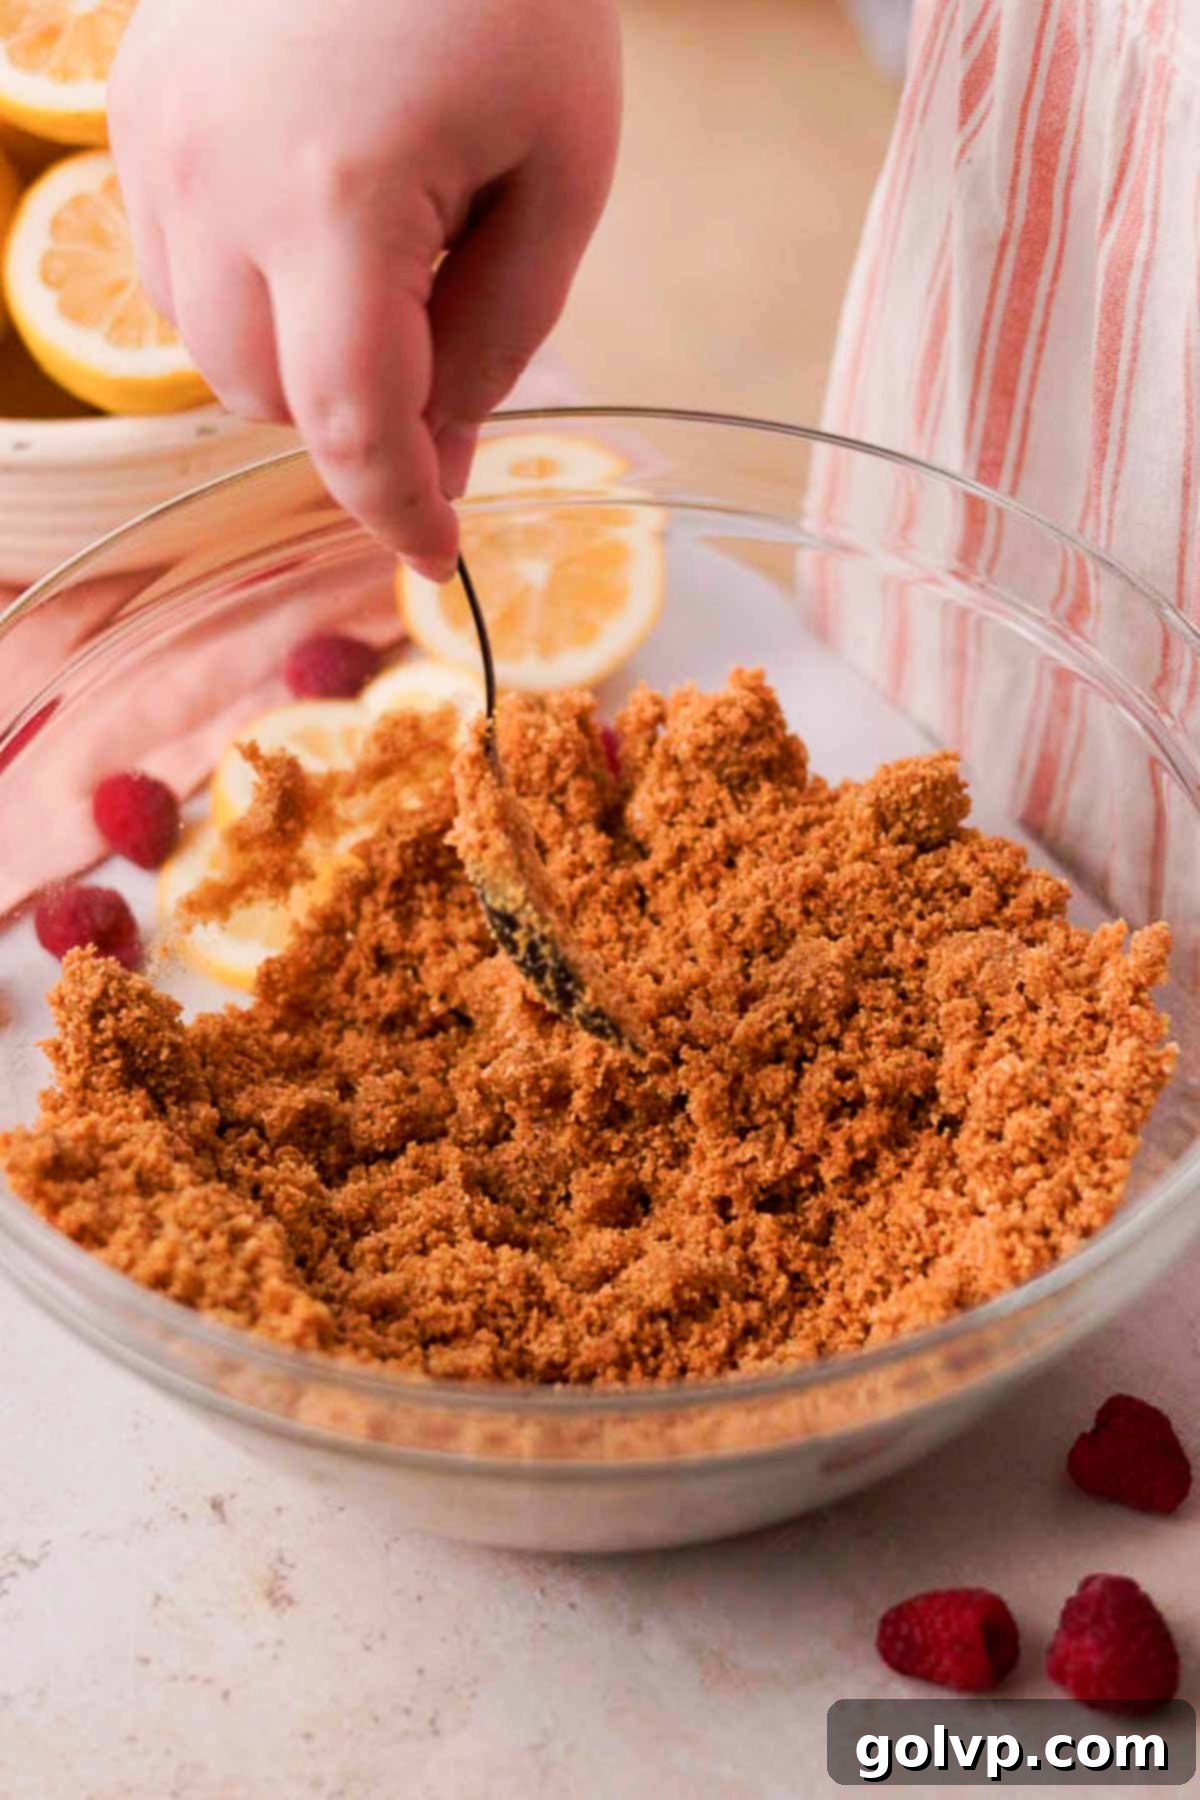
Step 1: Combine Crust Ingredients. In a large mixing bowl, add the graham cracker crumbs, melted butter (cooled to room temperature), sugar, and sea salt. Stir thoroughly with a spoon or your hands until all ingredients are uniformly combined and the mixture resembles wet sand.
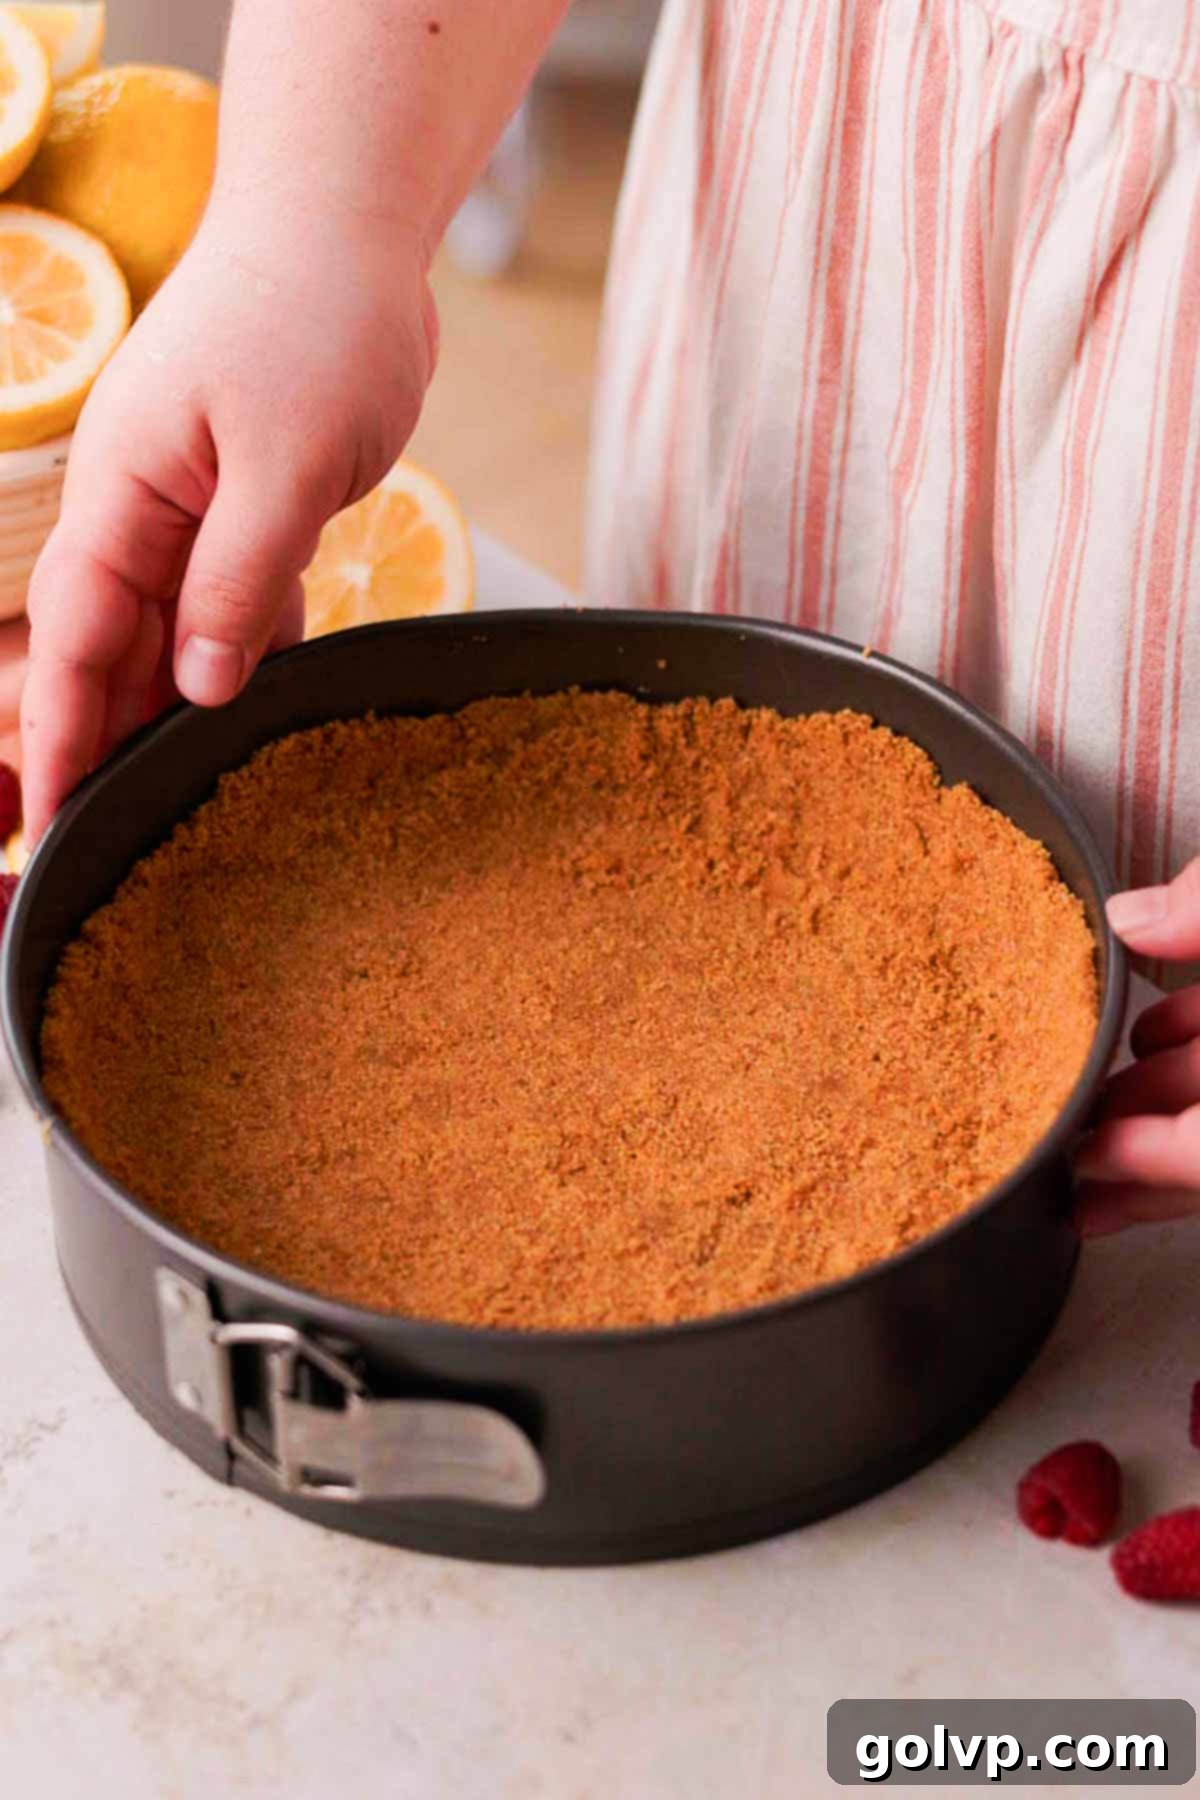
Step 2: Press and Bake the Crust. Pour the prepared crust mixture into the greased springform pan. Using the bottom of a glass or your fingers, firmly press the mixture down to form an even layer on the bottom and extend it slightly up the sides of the baking pan. Place the pan onto a baking sheet (this helps catch any potential butter leakage and makes it easier to transfer). Bake for 8 minutes to set the crust and give it a slight crispness. While the crust bakes, you can start preparing the filling. Once baked, remove the crust from the oven and let it cool slightly.
Cheesecake Filling: Creating the Creamy Heart
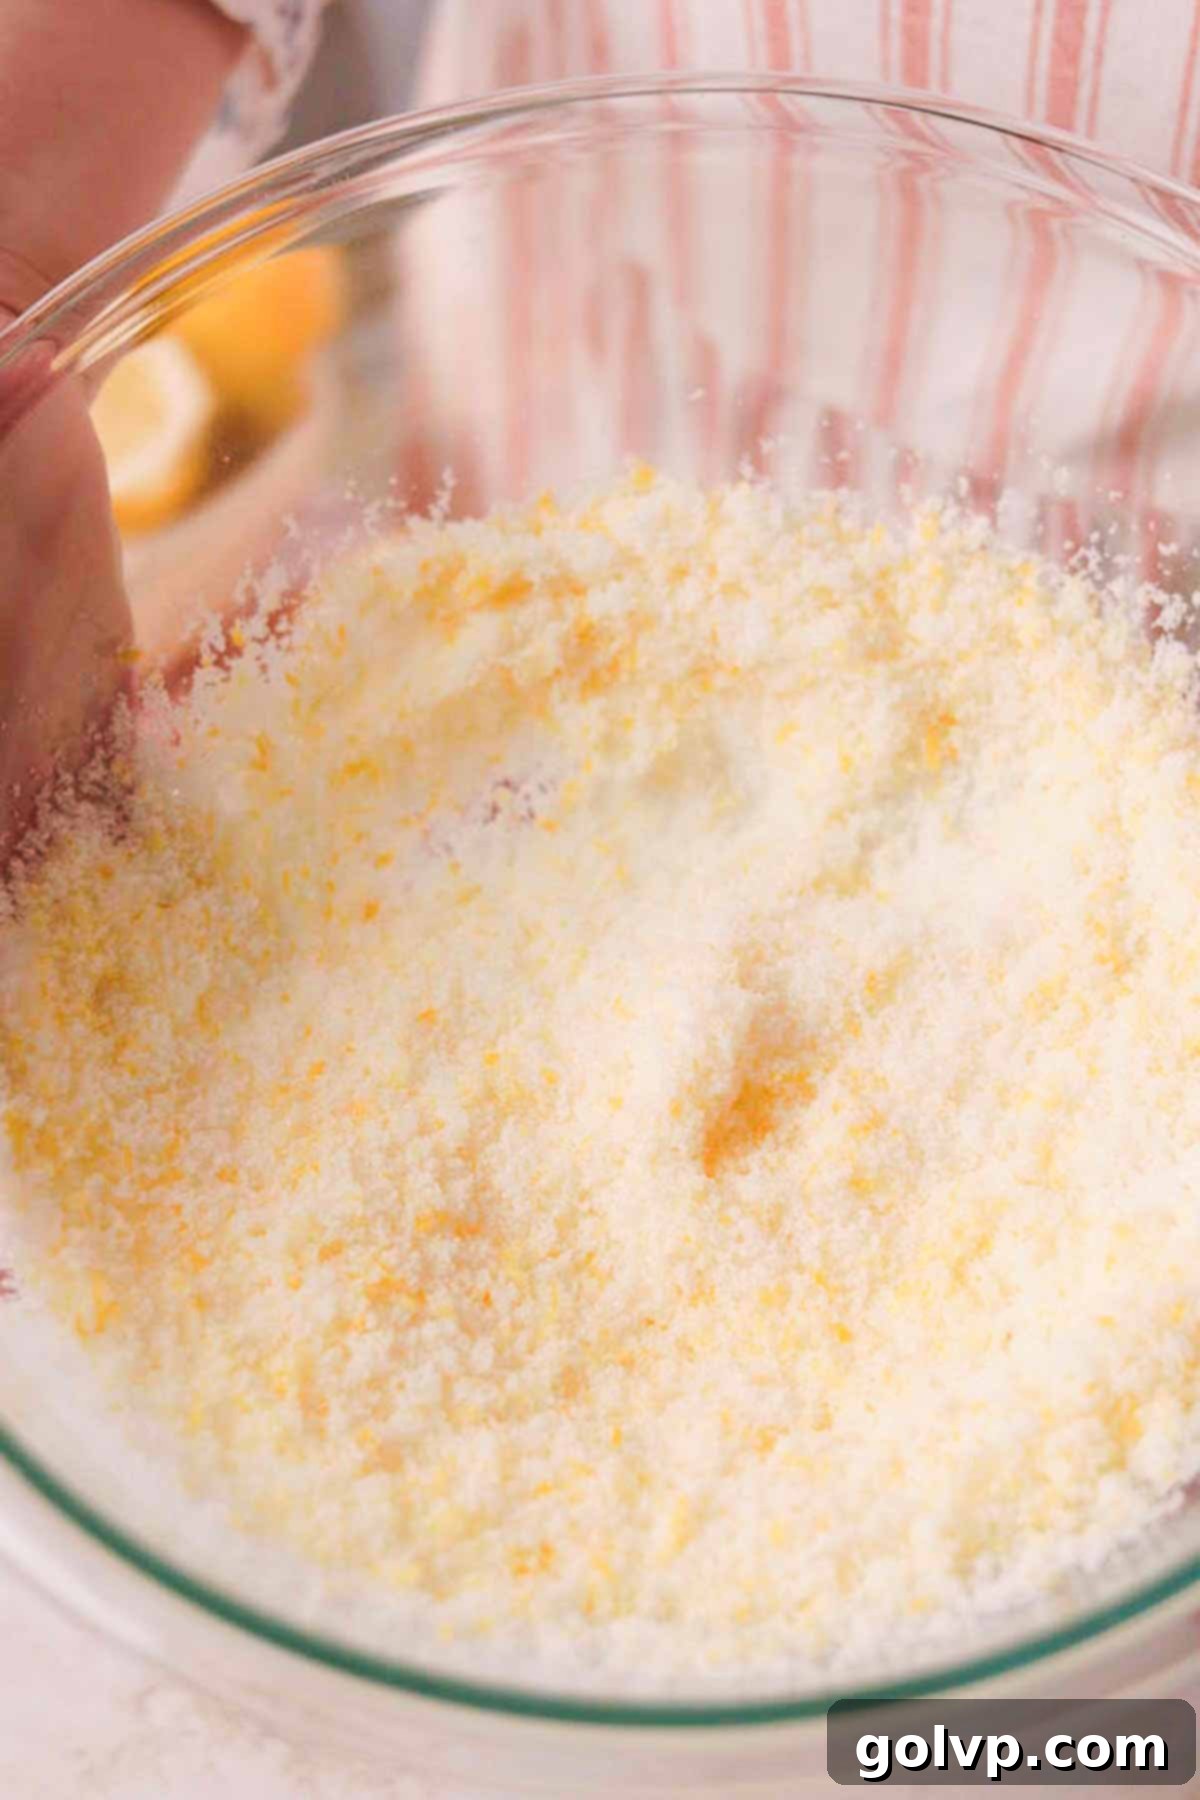
Step 1: Infuse Lemon Flavor. In a large mixing bowl or the bowl of a stand mixer fitted with the paddle attachment, combine the grated lemon zest, granulated sugar, and sea salt. Use your fingers to rub the lemon zest into the sugar for a few minutes. This process releases the essential oils from the zest, deeply infusing the sugar with fragrant lemon flavor, making the sugar wonderfully aromatic and slightly yellow.
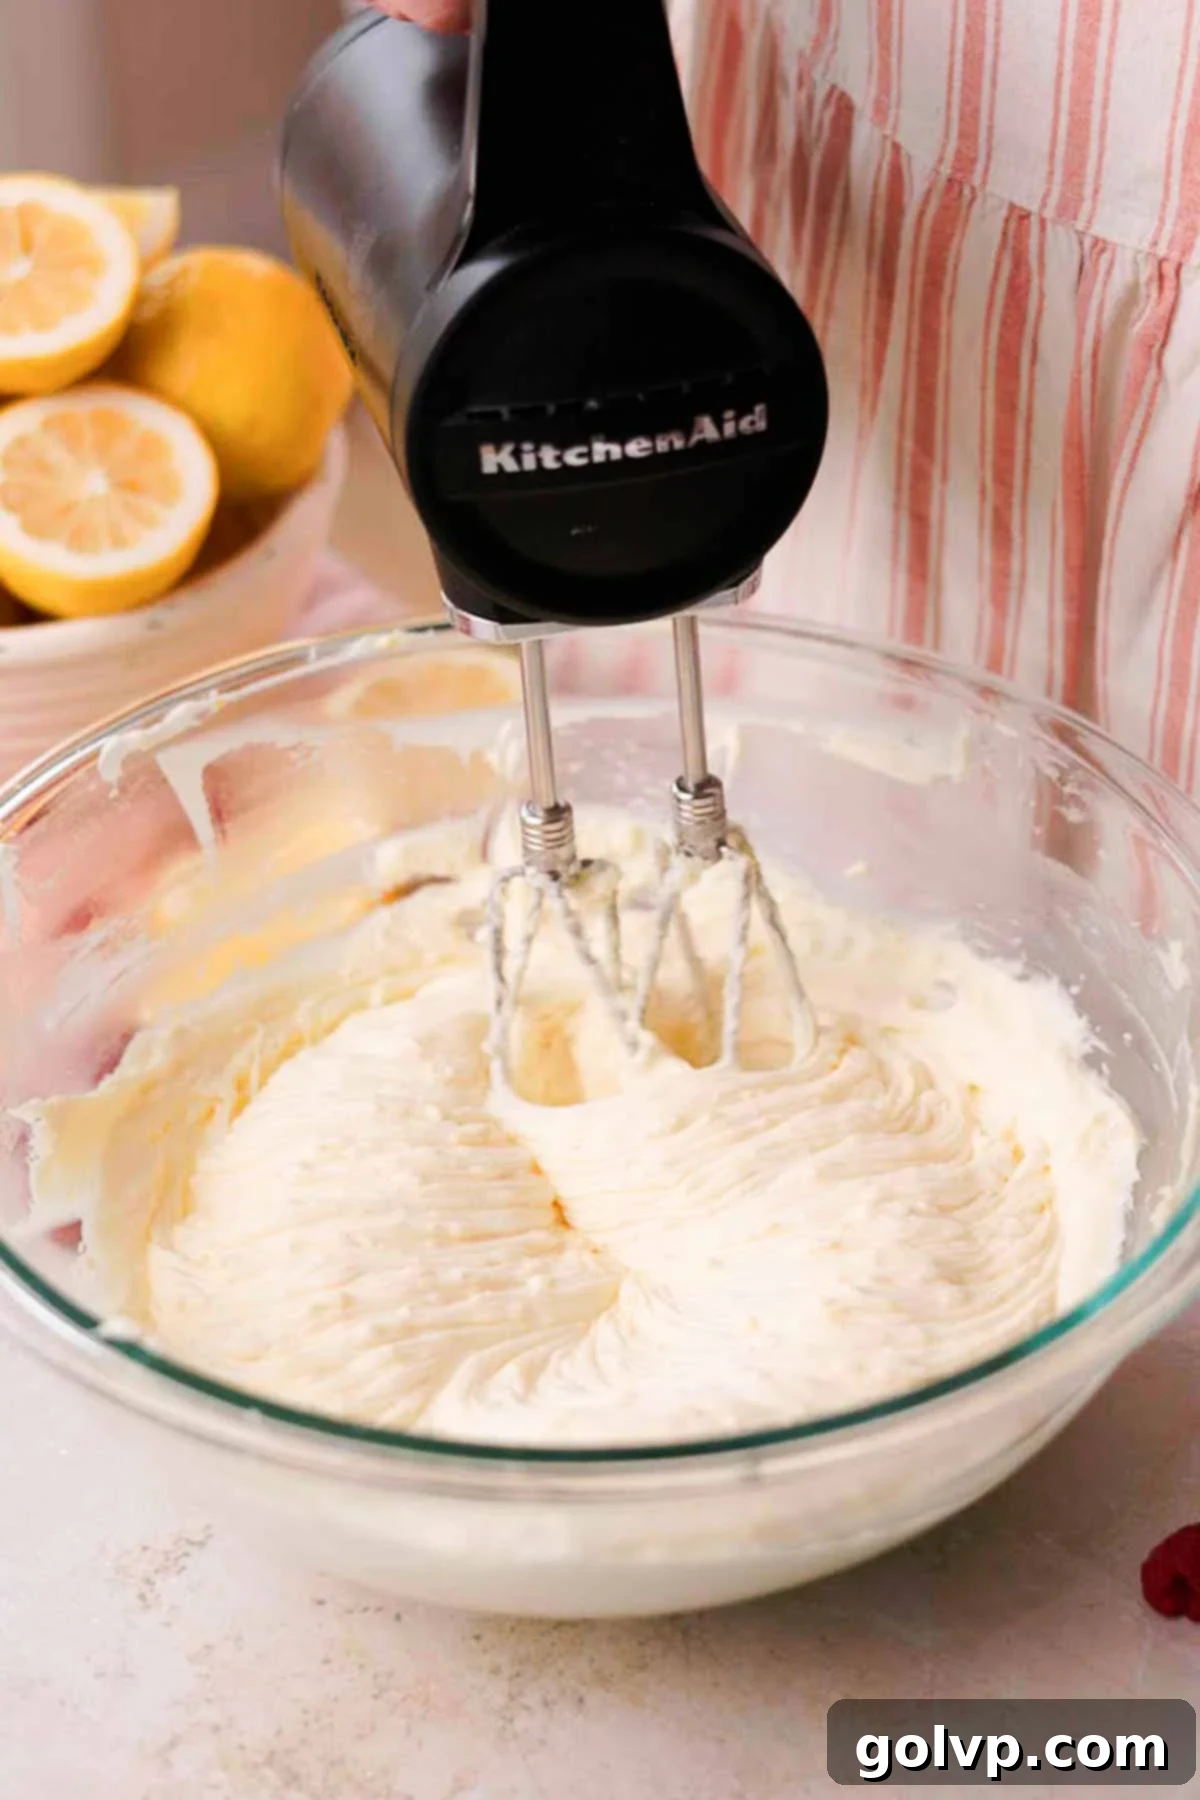
Step 2: Cream the Cheese. Add the softened, room-temperature cream cheese to the lemon sugar mixture. Blend with the paddle attachment on medium-low speed until the mixture is perfectly smooth and creamy, with no lumps. It’s vital to frequently scrape down the sides and bottom of the bowl to ensure everything is thoroughly incorporated and to achieve that velvety consistency.
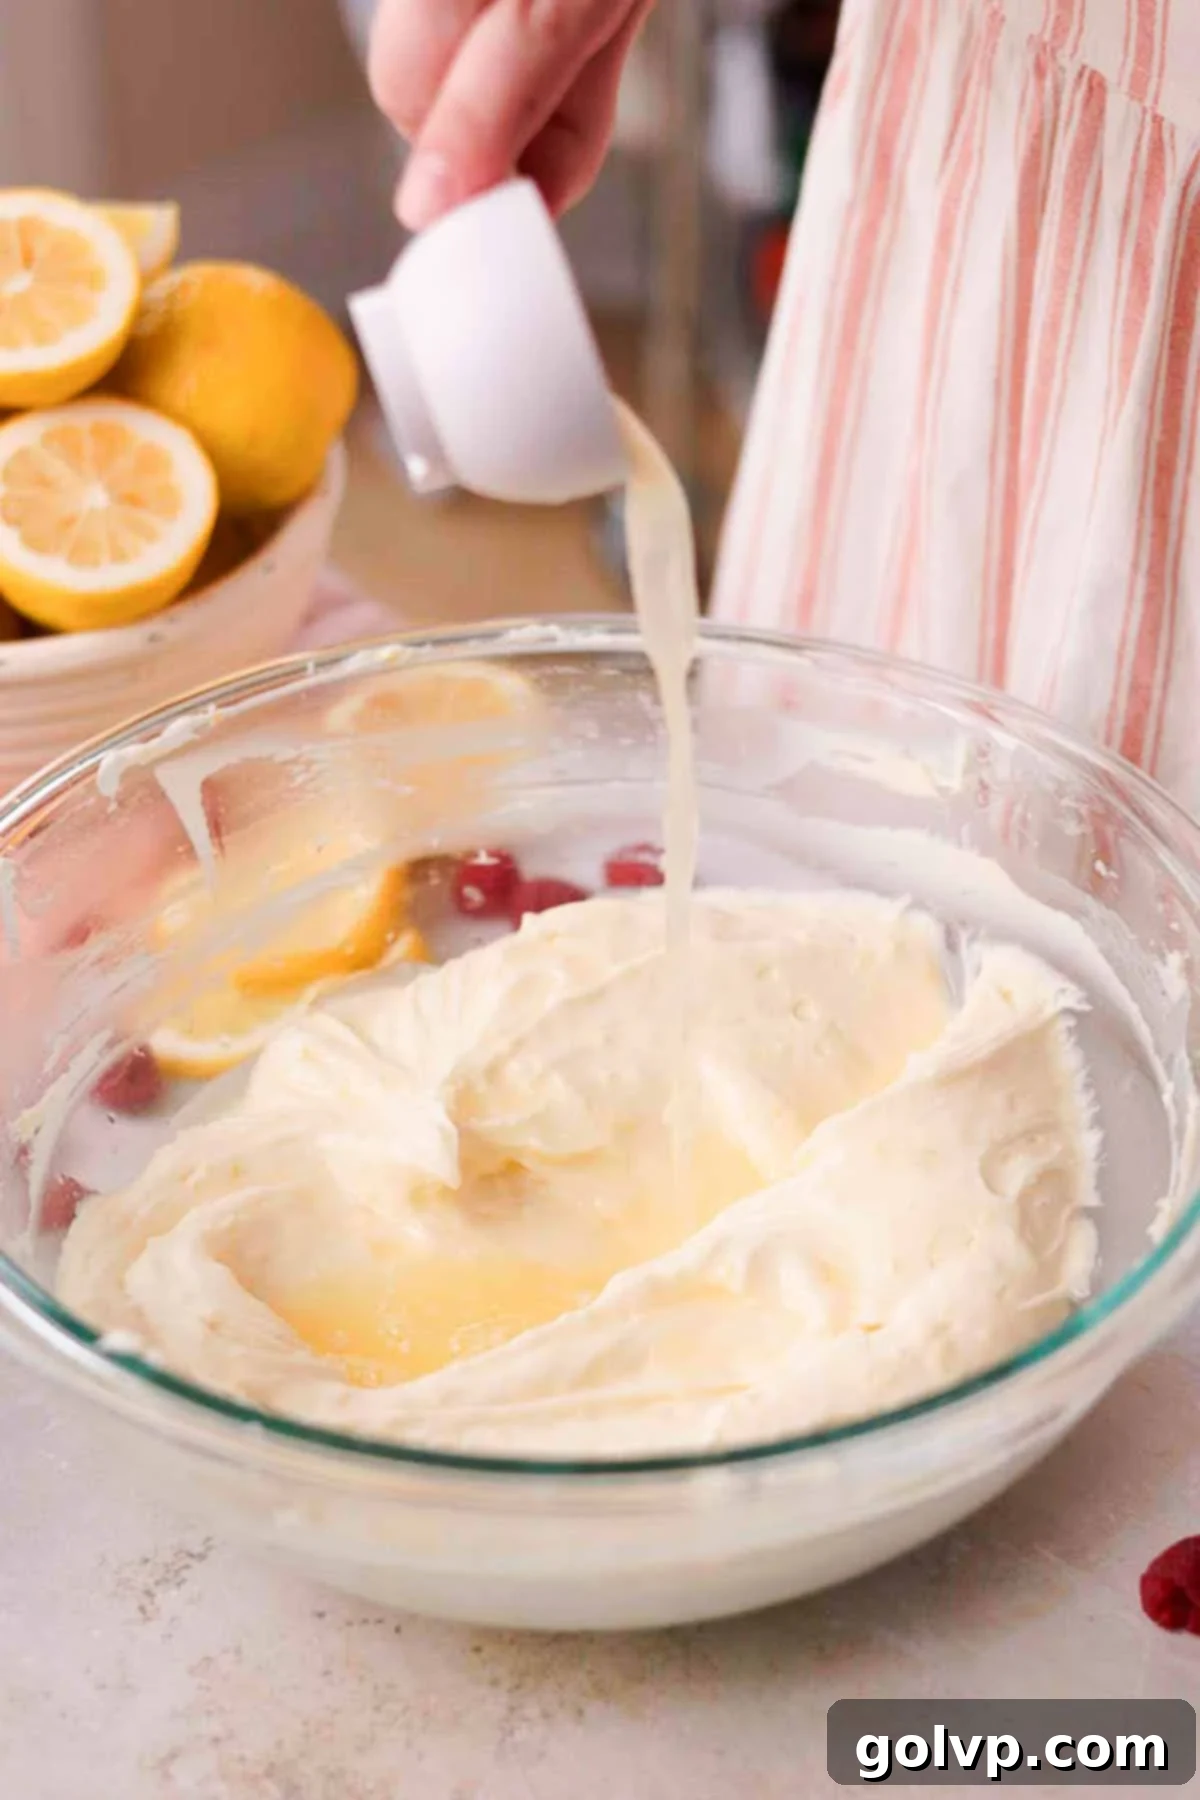
Step 3: Add Liquids and Eggs. Pour in the fresh lemon juice and sour cream. Beat them into the cream cheese mixture until fully combined, again scraping the bowl frequently to prevent any lumps. Next, add the room-temperature eggs, one at a time. Beat just until each egg is incorporated before adding the next. Overmixing at this stage can incorporate too much air, which can cause the cheesecake to puff up too much and then crack when cooling. Scrape down the bowl after each egg addition to maintain a homogenous mixture.
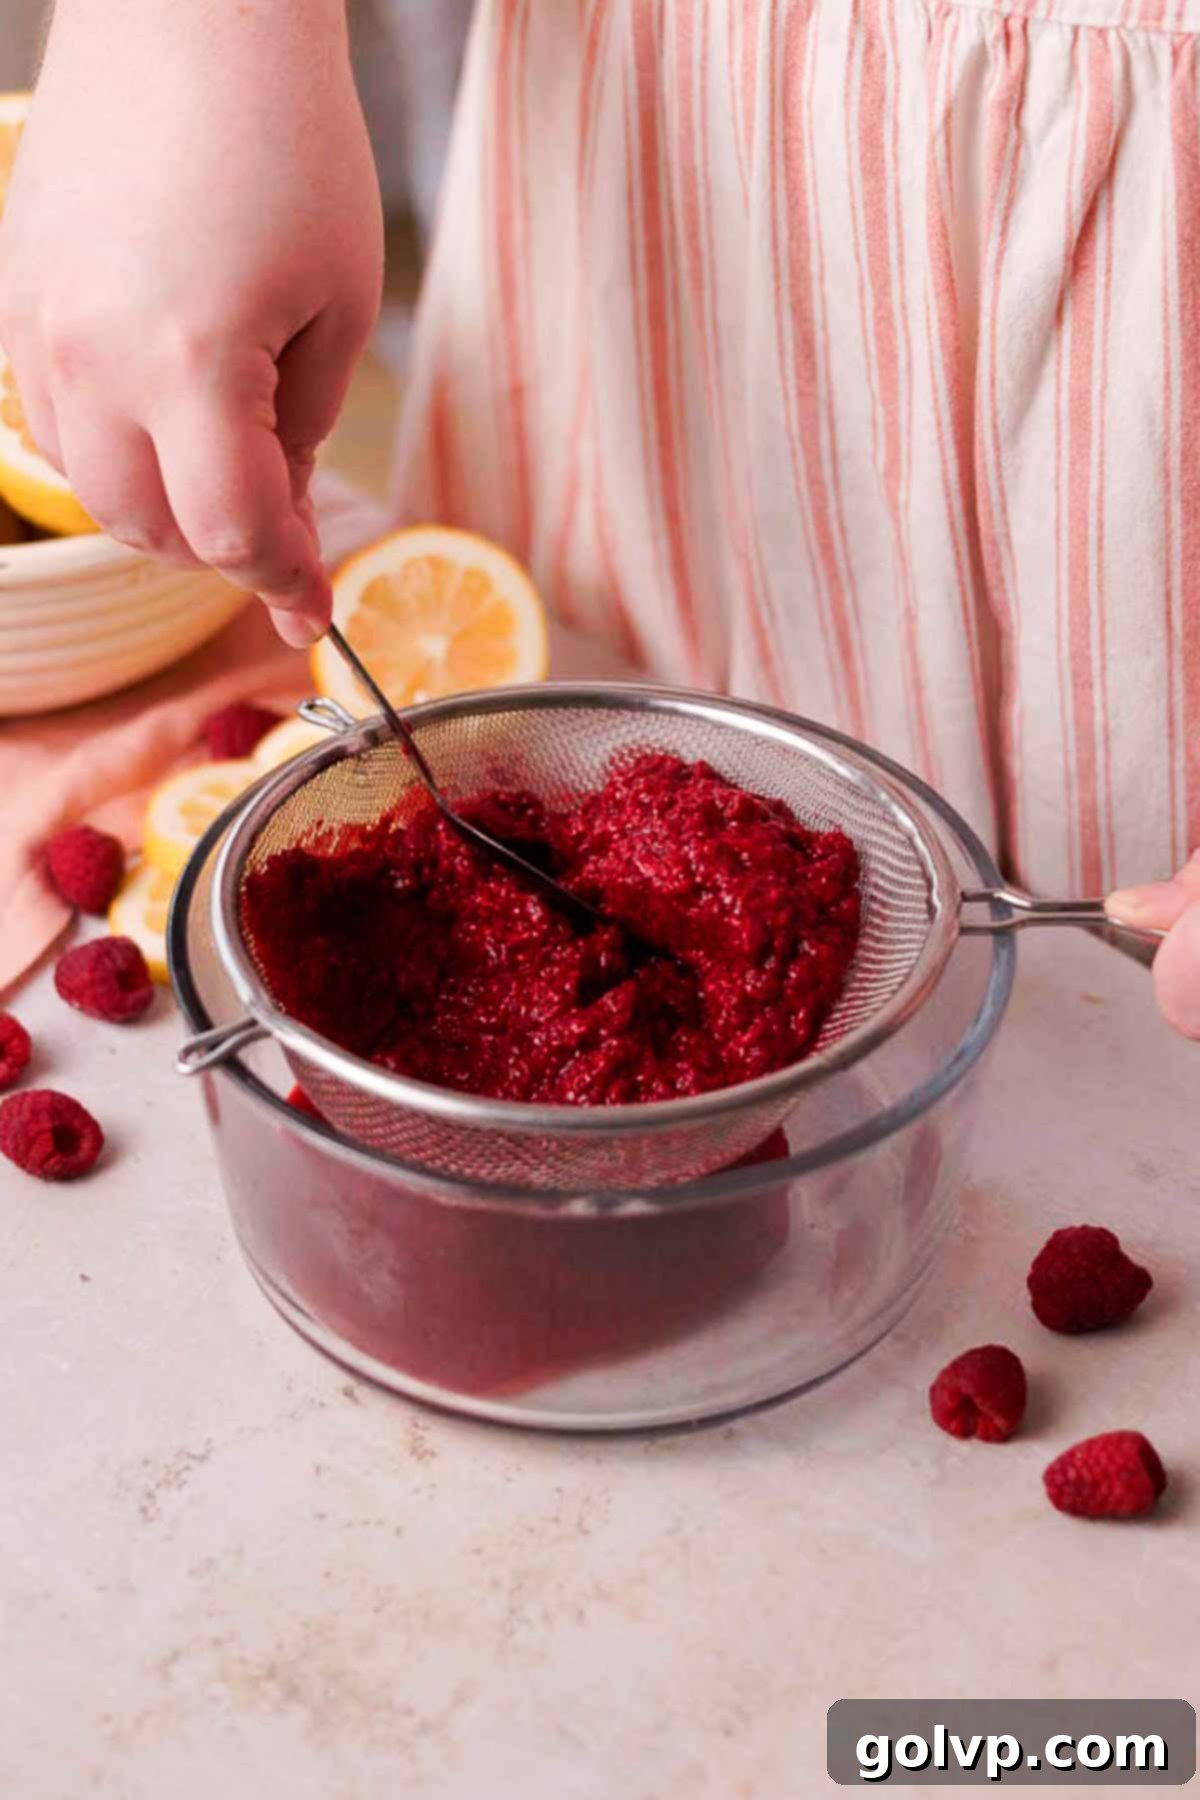
Step 4: Prepare Raspberry Puree. Place the fresh or thawed raspberries into a fine-mesh sieve set over a clean bowl or container. Mash the raspberries thoroughly and use the back of a spoon to press them through the sieve, straining out all the seeds. Continue pushing until you’ve extracted as much vibrant, seedless raspberry puree as possible. This step ensures a silky-smooth cheesecake filling without gritty seeds.
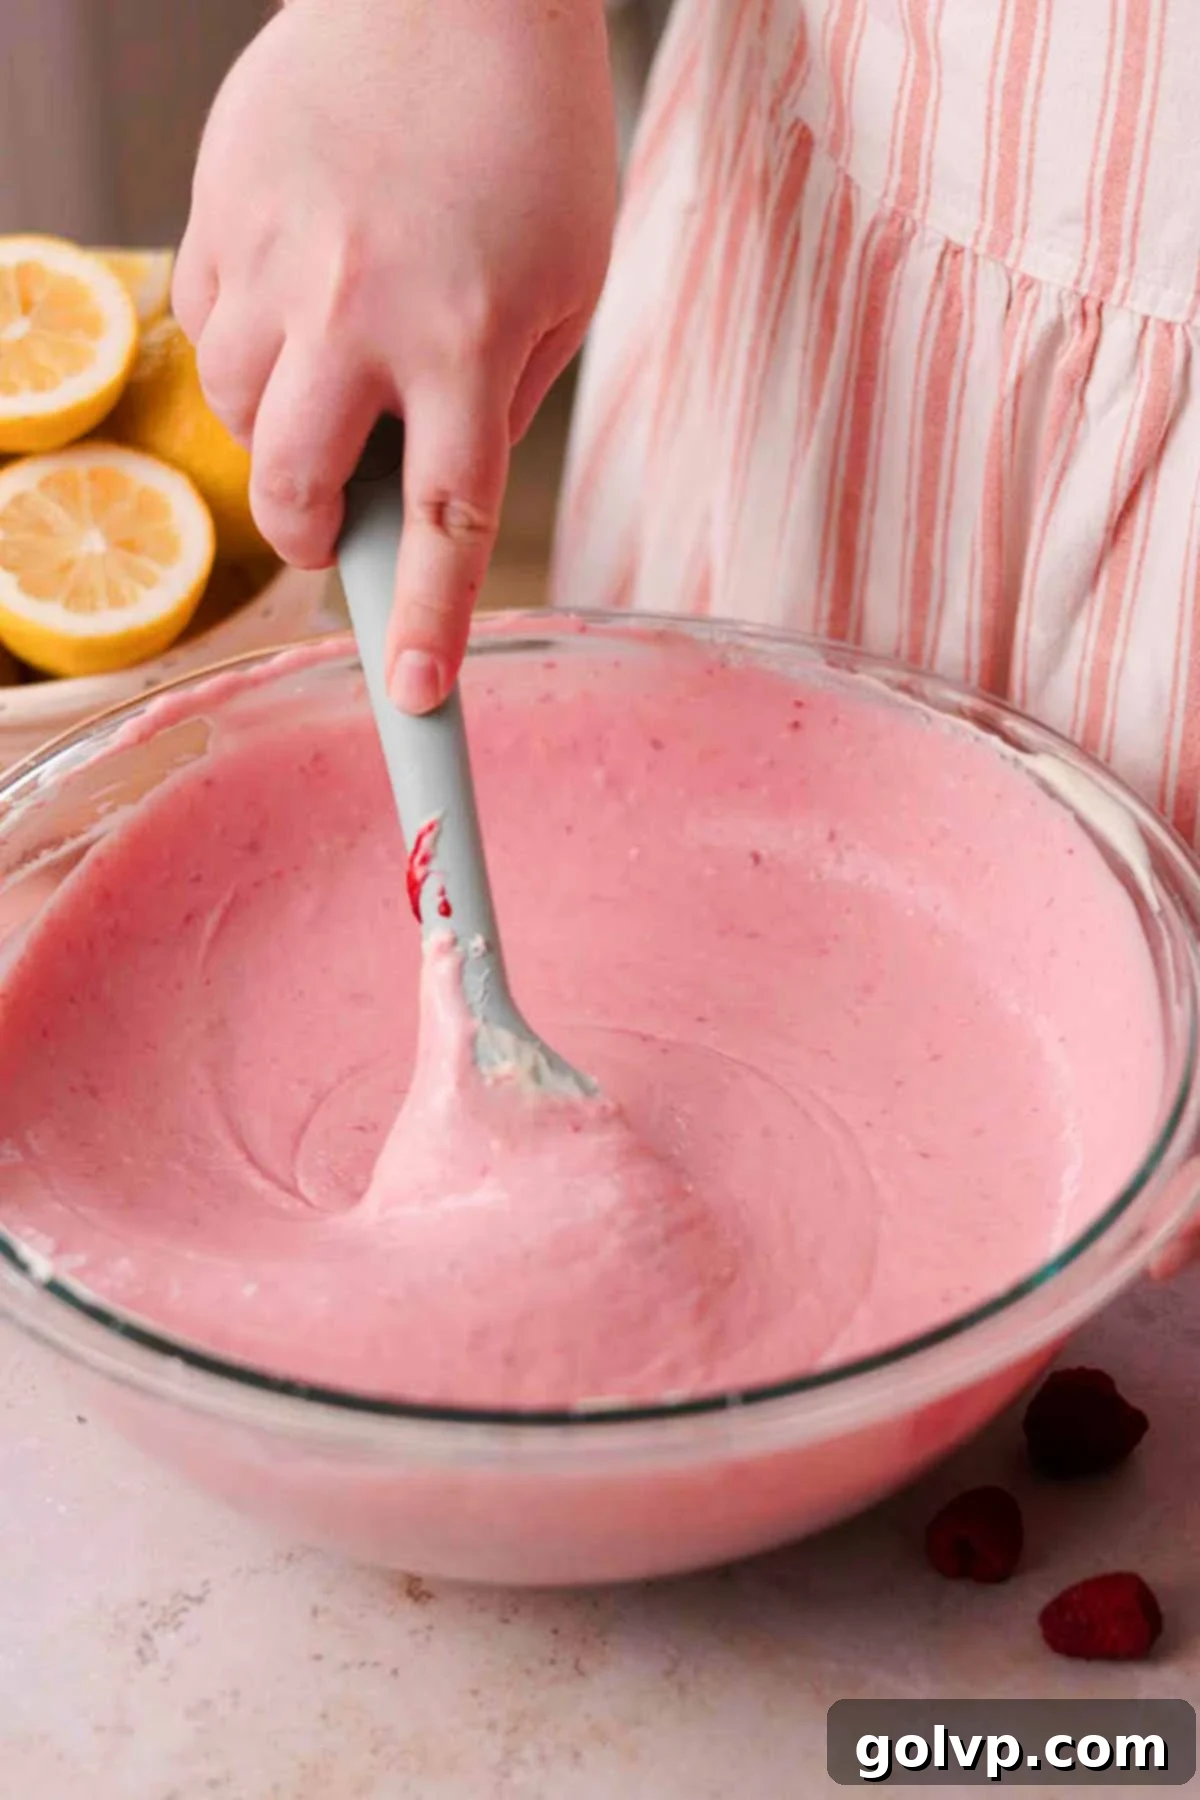
Step 5: Incorporate Raspberry Puree. Gently pour the seedless raspberry puree into your prepared cheesecake batter. Using a rubber spatula, carefully fold the puree into the batter until it’s just combined and uniformly distributed, creating a beautiful, natural pink hue. Be careful not to overmix.
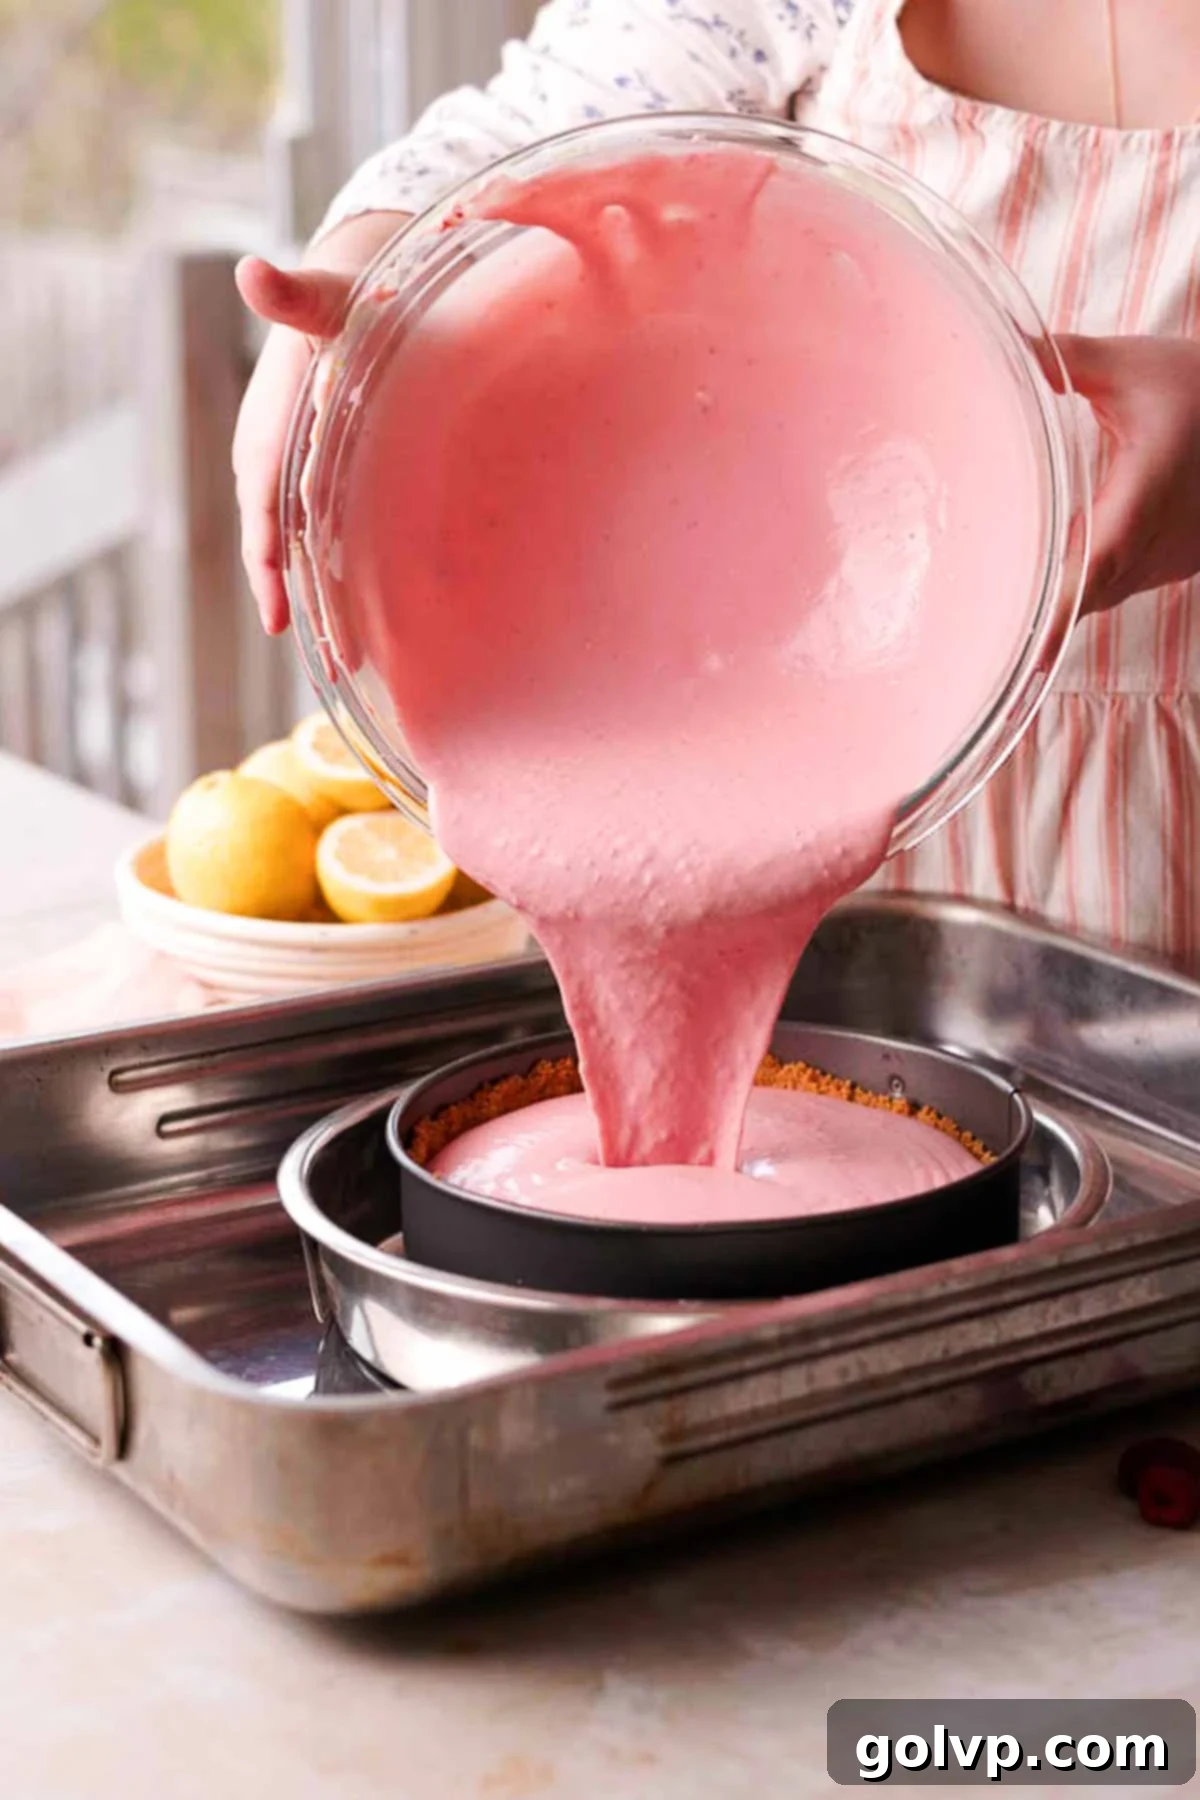
Step 6: Prepare for Water Bath. Place your pre-baked crust in its springform pan into a slightly larger round baking pan (1-2 inches wider than the cheesecake pan). This extra pan acts as a protective layer, preventing water from seeping into the springform pan during the water bath. Then, carefully place this nested setup into a large rectangular roasting dish or baking tray, ensuring it fits comfortably. Refer to the water bath options below and the photos for visual guidance.
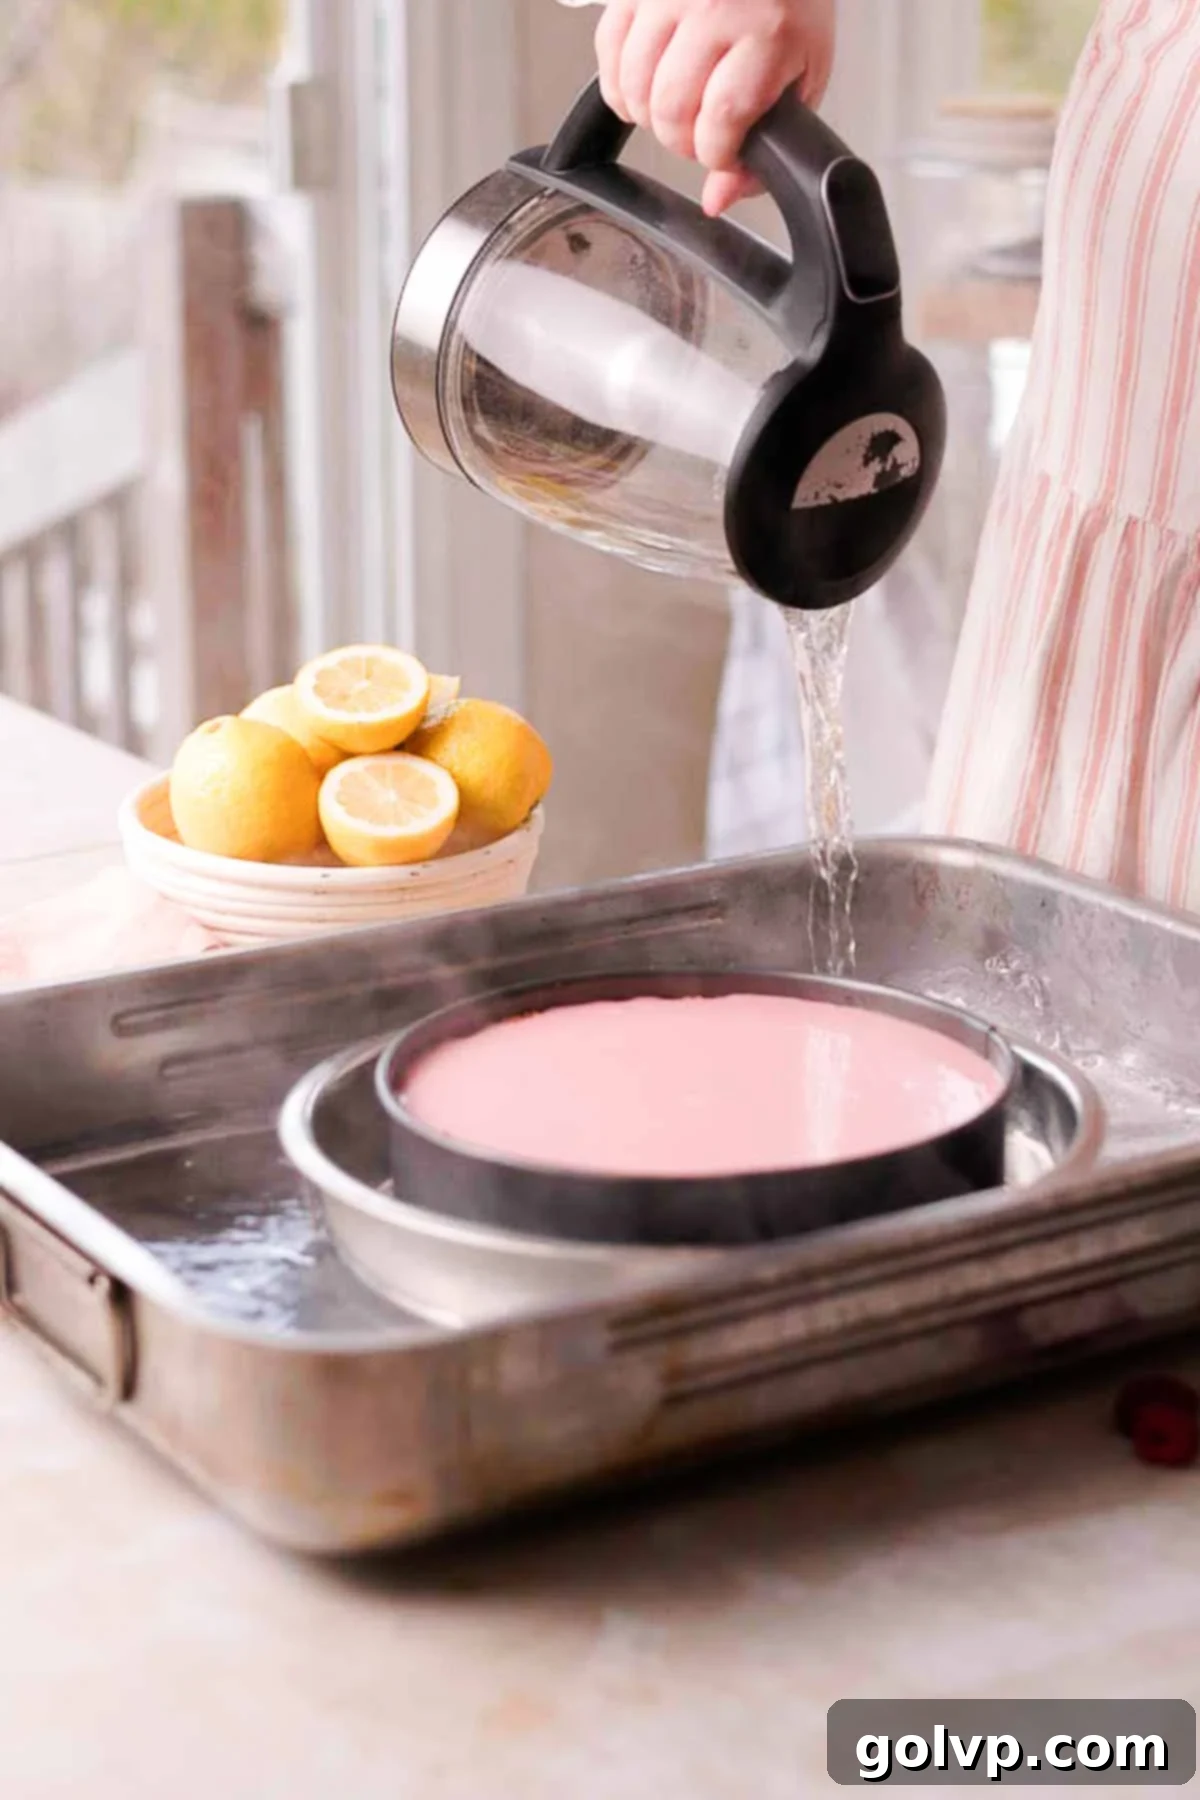
Step 7: Pour Filling and Create Water Bath. Gently pour the beautiful pink cheesecake filling into the pre-baked crust. Once the filling is in, carefully pour boiling hot water into the large rectangular pan, ensuring the water level comes about halfway up the sides of the outer pan (or about 1 inch for the foil-wrapped springform option). With extreme caution (using oven mitts), carefully transfer the entire baking tray with the cheesecake and water bath into the preheated oven. Be very mindful of the hot water.
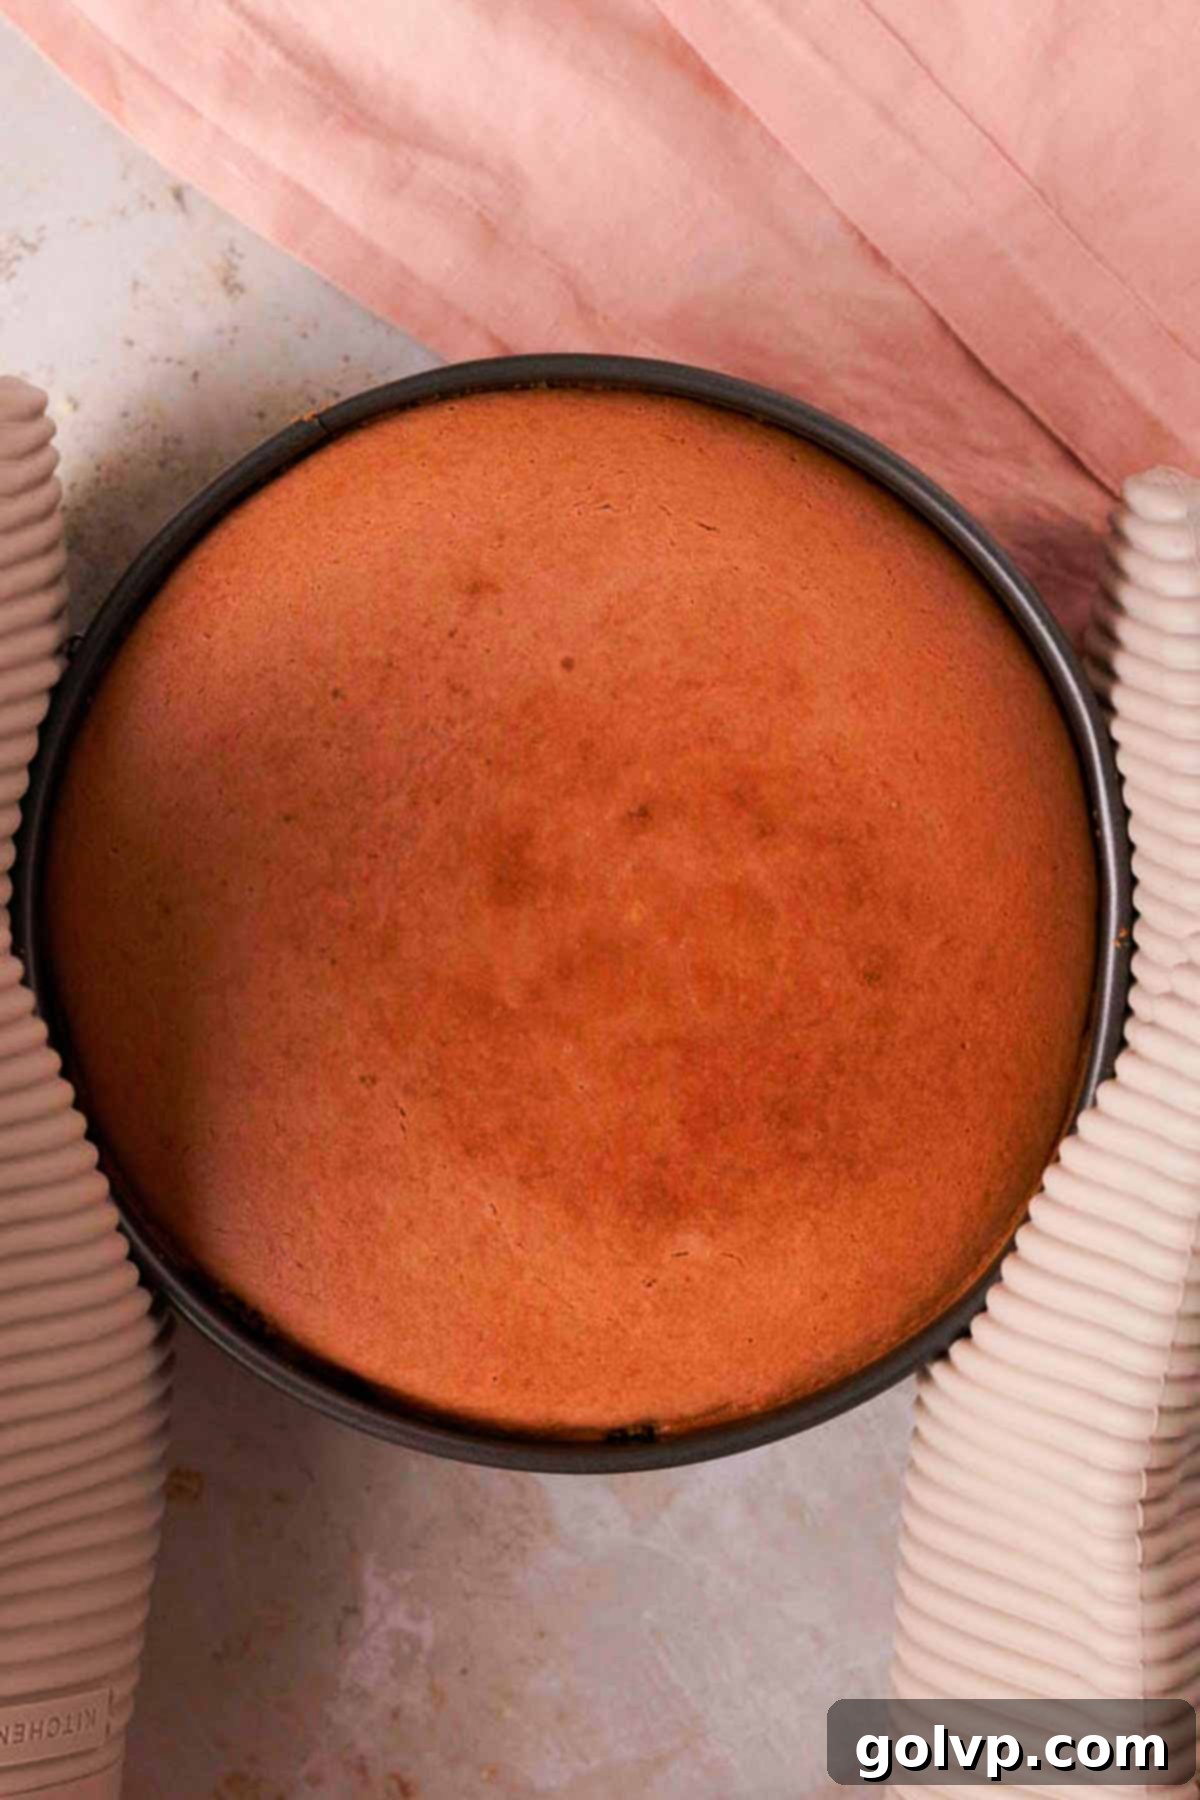
Step 8: Bake and Cool. Bake the cheesecake in the preheated oven (355°F or 180°C) for 80-90 minutes. The cheesecake is ready when the edges appear set and slightly puffed, but the very center still has a slight jiggle when gently shaken. It will continue to set as it cools. Once baked, turn off the oven, prop the oven door open slightly (about 4-6 inches), and allow the cheesecake to cool gradually inside the oven for 20 minutes. This slow cooling prevents cracks. Remove the cheesecake from the water bath and let it cool completely to room temperature on a wire rack. Finally, cover the cheesecake tightly with plastic wrap and refrigerate it overnight, or for at least 8 hours, to allow it to fully set and for the flavors to deepen and meld.
Raspberry Curd: The Tangy Topping (Optional, but Recommended)
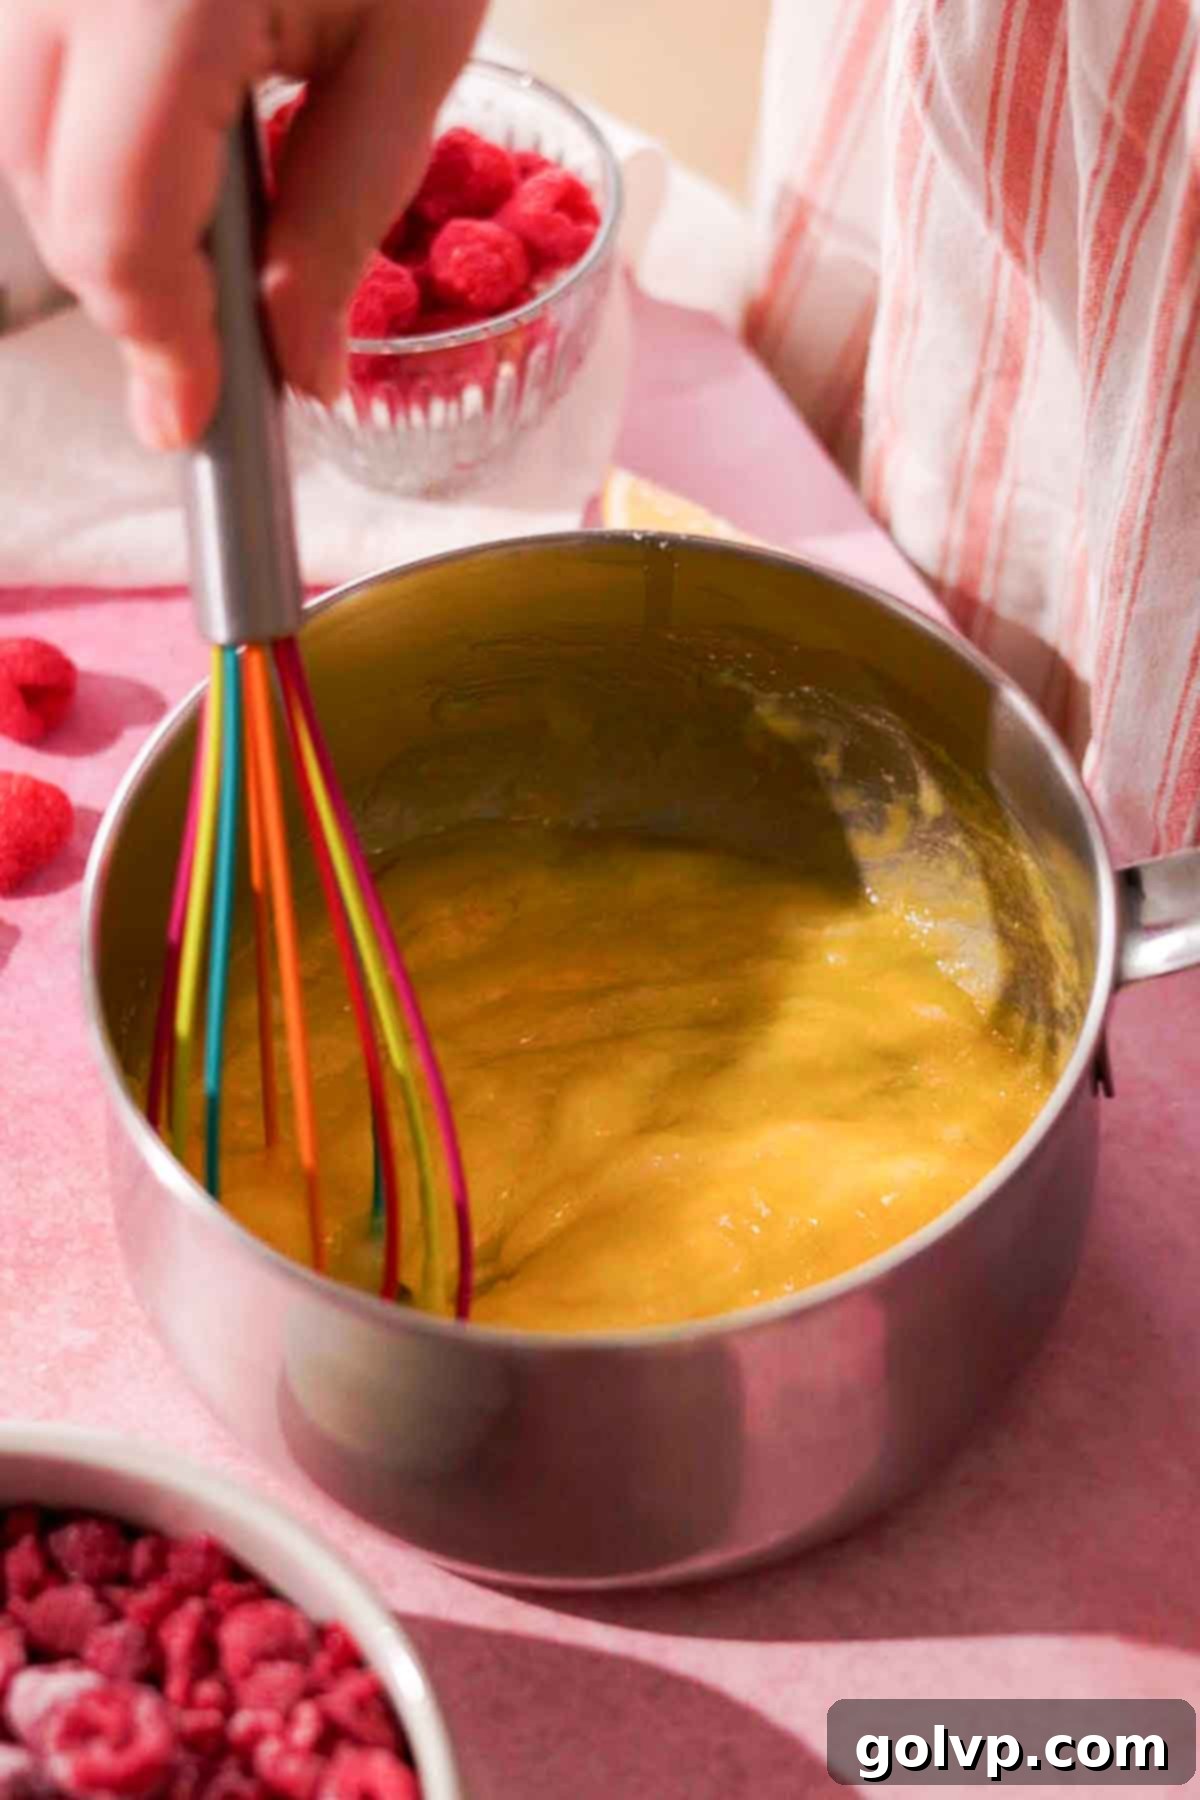
Step 1: Whisk Ingredients. In a medium, heavy-bottomed saucepan, combine the whole egg, egg yolk, granulated sugar, and a pinch of salt. Whisk vigorously to combine them thoroughly. Add the raspberries (fresh or frozen) and fresh lemon juice. For an extra punch of lemon, you can add a bit of grated lemon zest here as well.
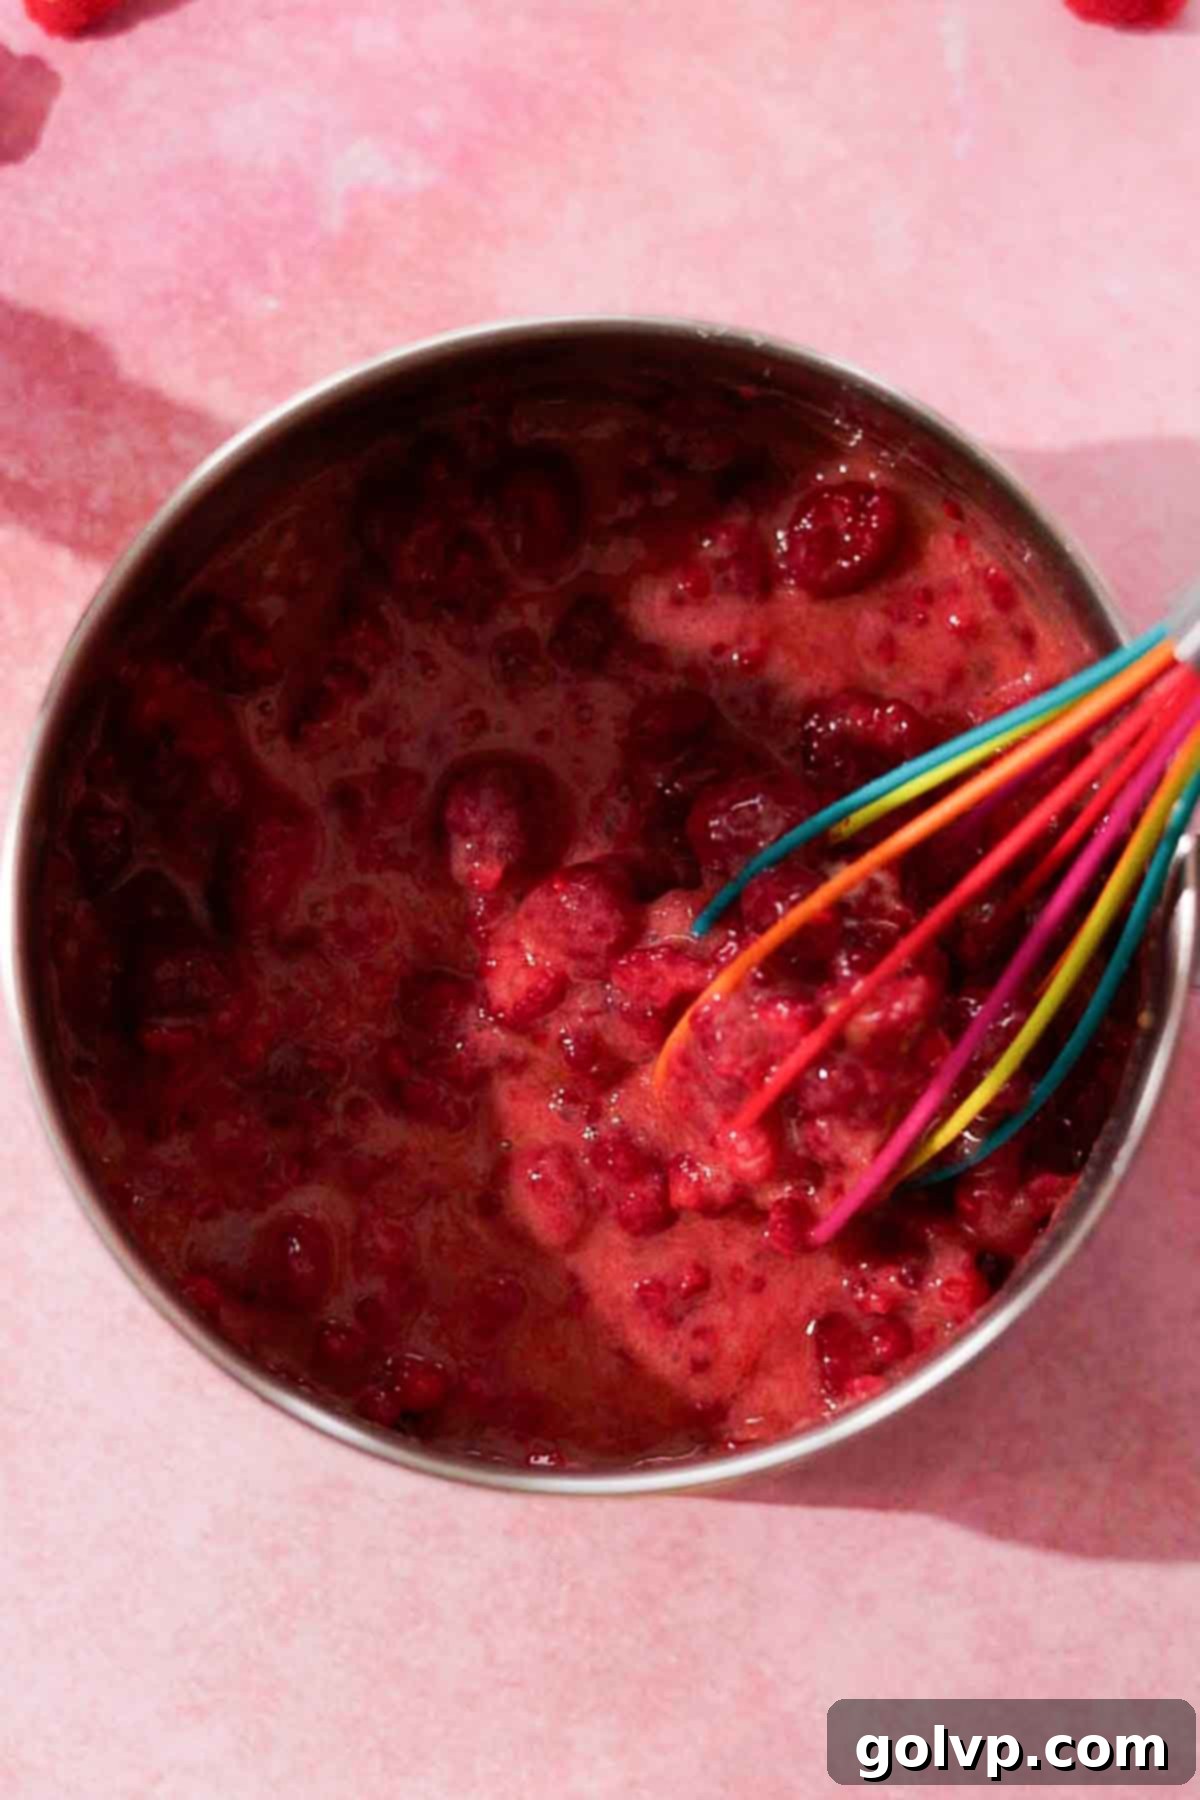
Step 2: Cook and Thicken. Place the saucepan over medium-low heat. Stir constantly with a whisk or heat-resistant spatula to prevent the bottom from burning. The mixture will gradually heat up, begin to simmer, and noticeably thicken. Continue stirring frequently until it reaches a consistency thick enough to coat the back of a spoon.
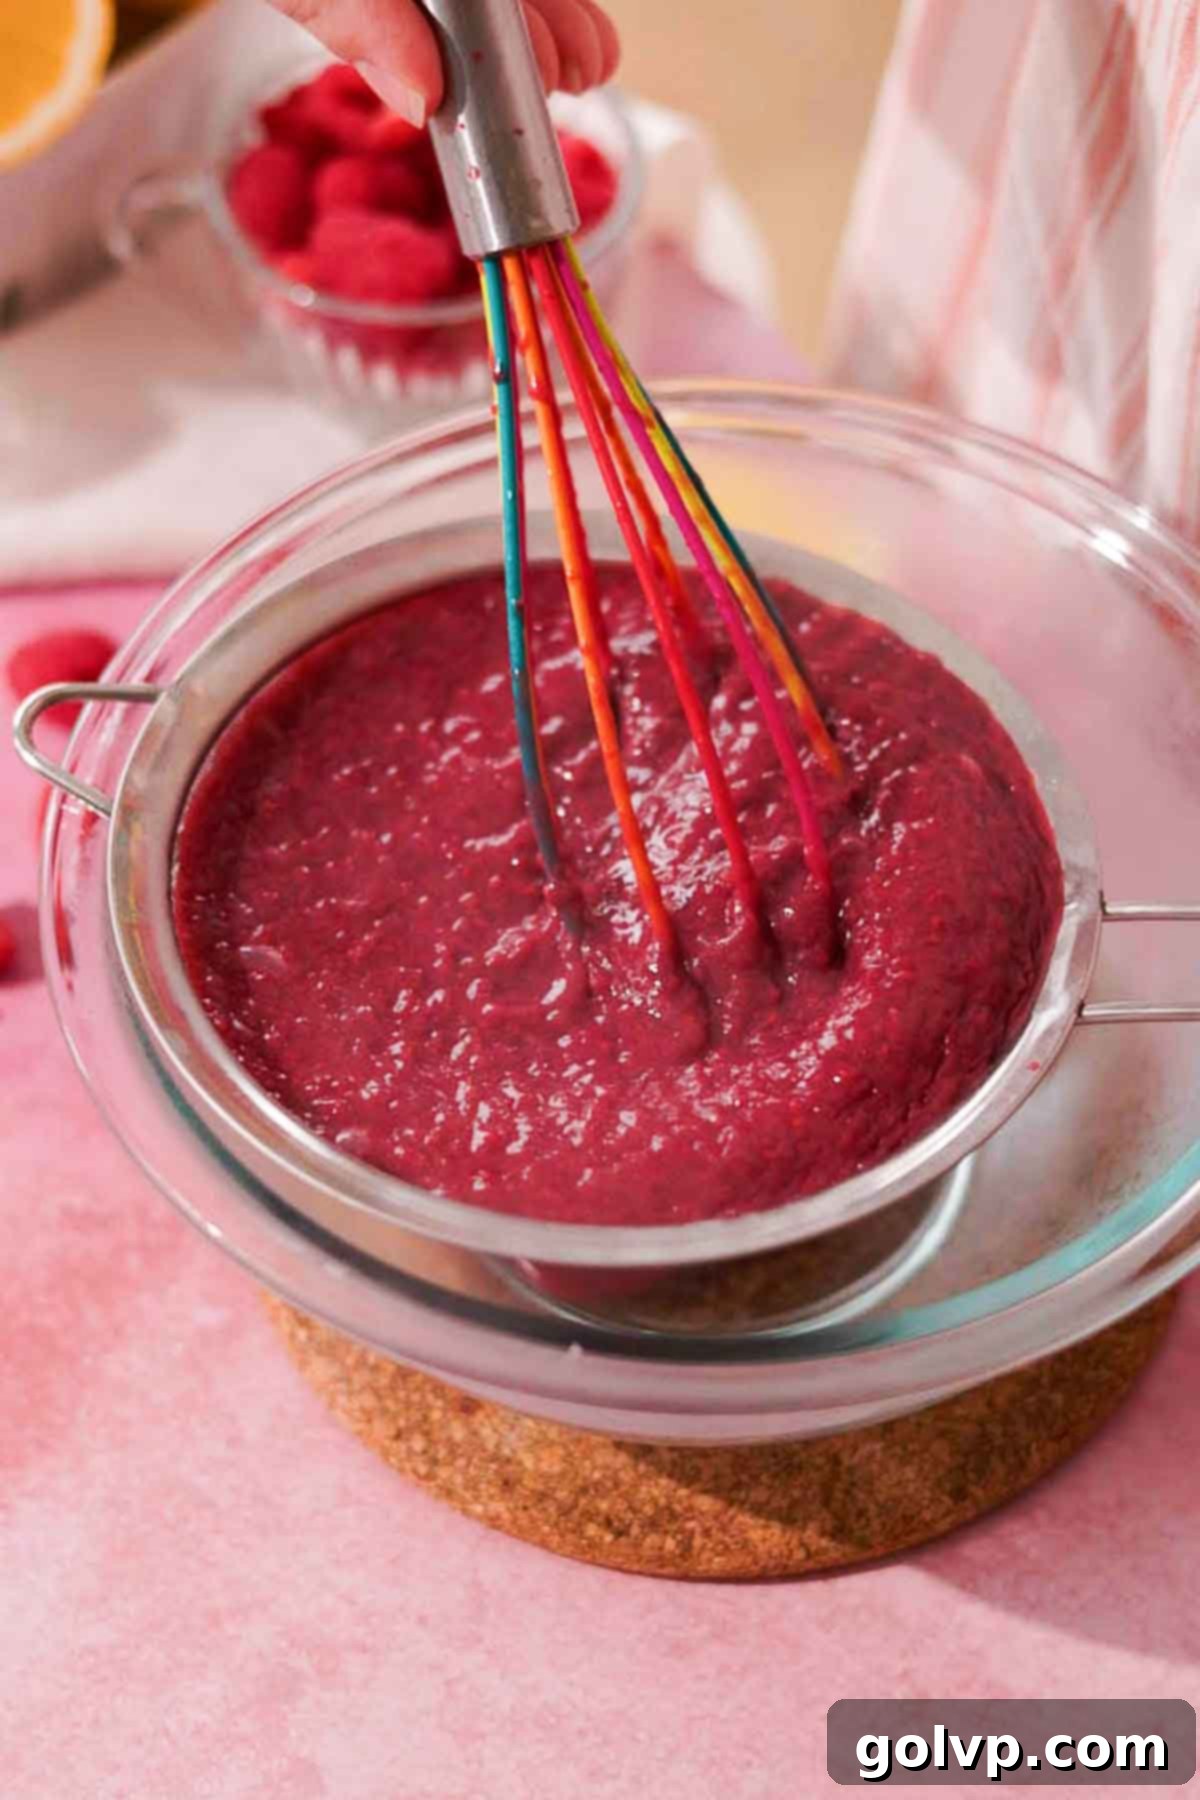
Step 3: Strain for Smoothness. Once the curd has thickened, remove it from the heat. Immediately strain the hot curd through a fine-mesh metal sieve into a clean, non-metal bowl or container. Use a spoon or whisk to help push the curd through, ensuring all the seeds are removed and you’re left with a perfectly smooth, luscious curd. This step is essential for the best texture.
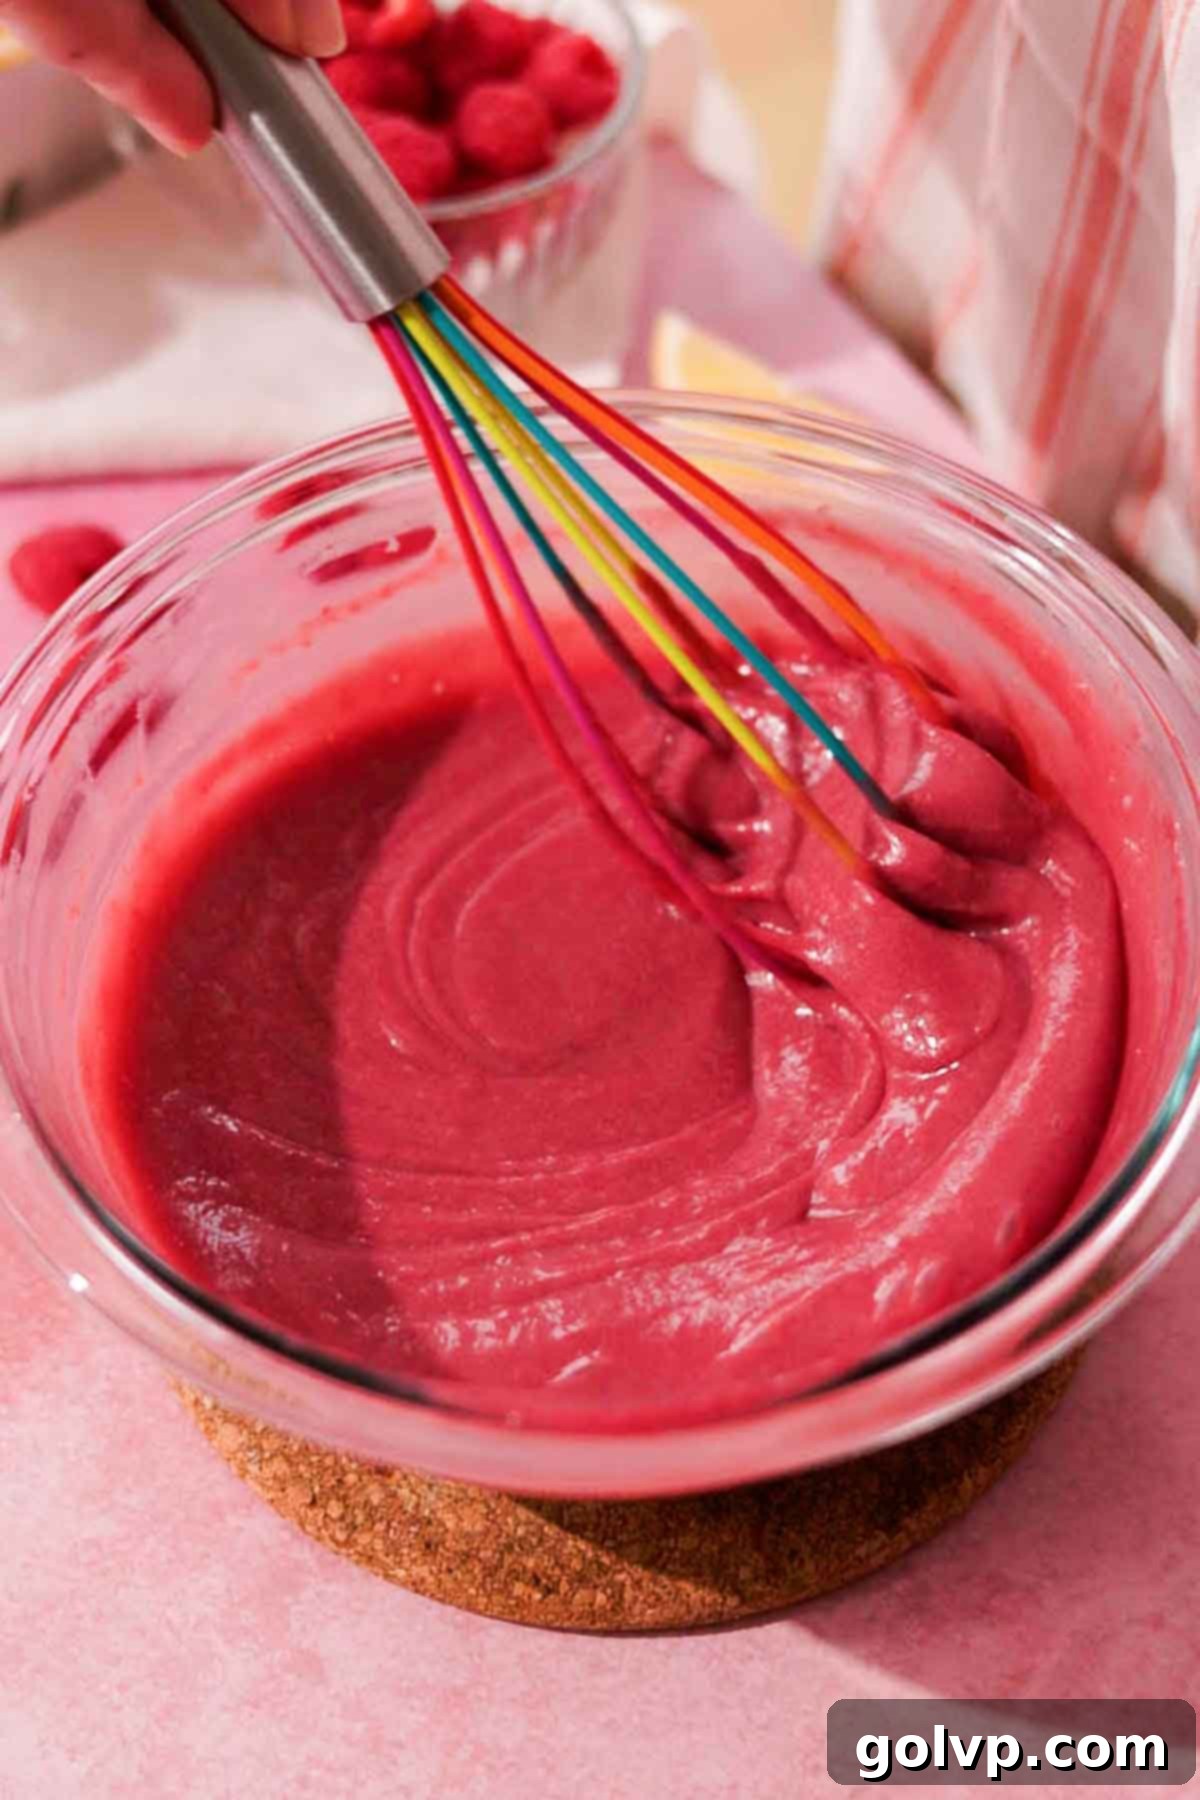
Step 4: Add Butter and Chill. Add the cold, cubed unsalted butter to the warm, strained raspberry curd. Stir until the butter is completely melted and the curd is smooth and glossy. This also helps to cool the curd slightly. Press a piece of plastic wrap directly onto the surface of the curd to prevent a skin from forming, and refrigerate until thoroughly chilled and thickened, typically at least 2 hours or overnight.
Assembly: The Grand Finale
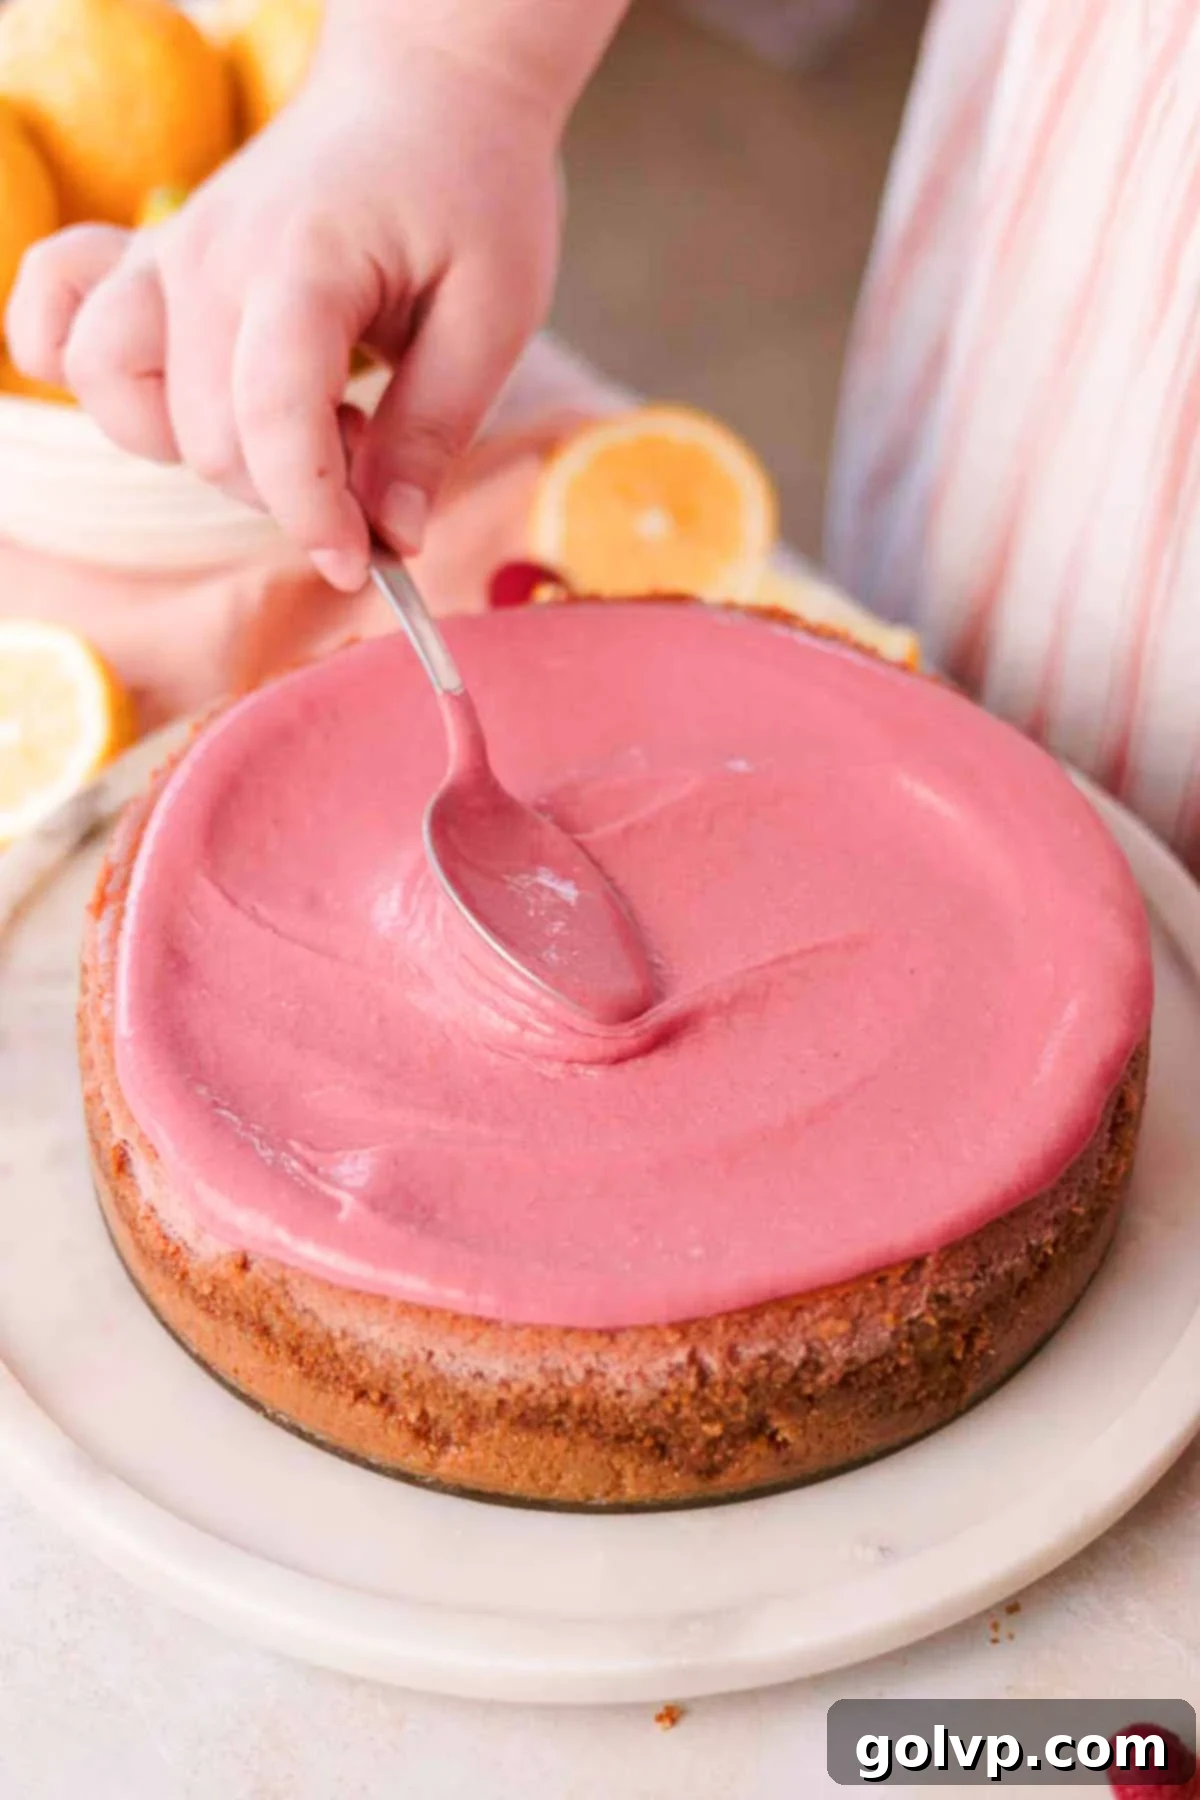
Step 1: Top with Raspberry Curd and Prepare Whipped Cream. Once your cheesecake is thoroughly chilled and set, remove it from the springform pan. Liberally spread the chilled raspberry curd over the entire top surface of the cheesecake using the back of a spoon or an offset spatula. In a separate, chilled large bowl (or stand mixer bowl), combine cold heavy whipping cream (35%), granulated sugar, and pure vanilla extract. Whip the mixture with an electric mixer until stiff peaks form, indicating a firm, pipeable whipped cream. Transfer the whipped cream into a piping bag fitted with a large star tip (or simply use a disposable zippered bag with the corner snipped off).
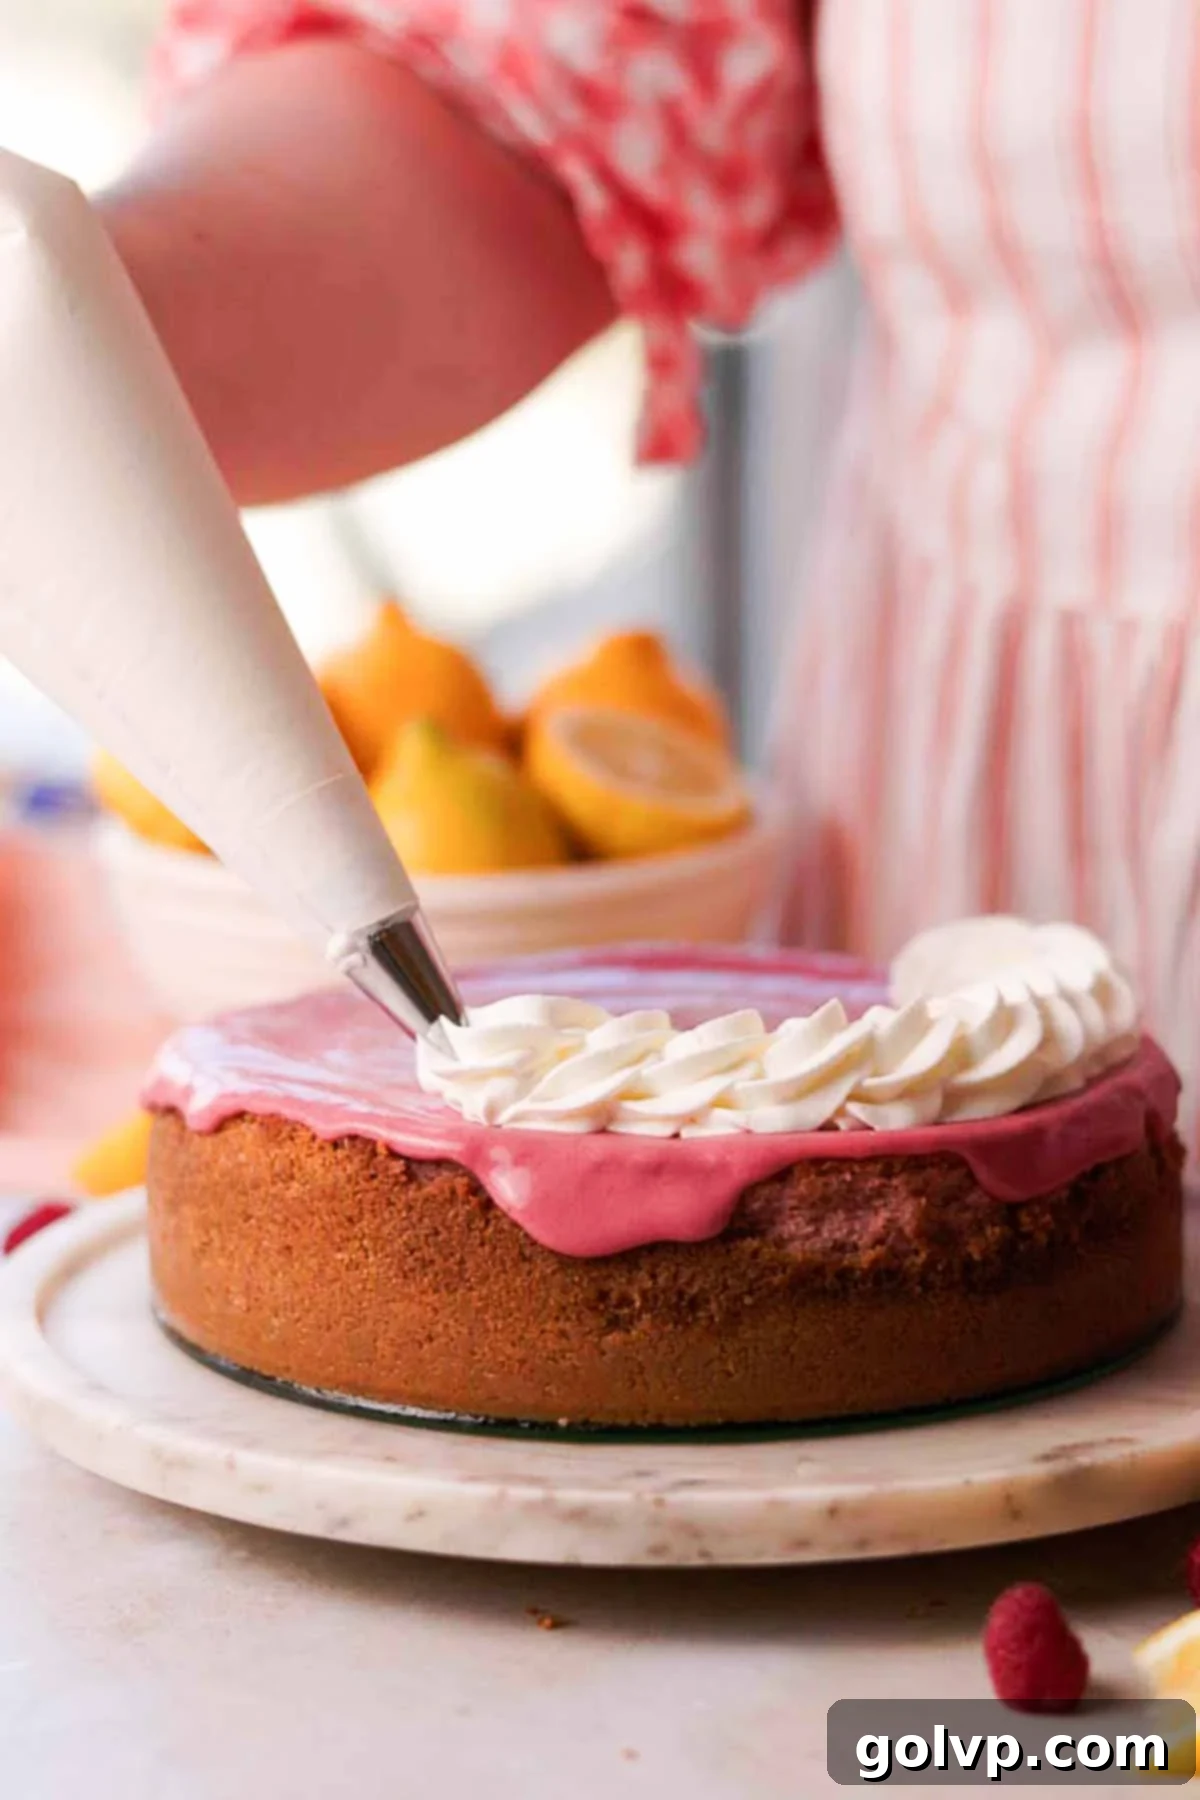
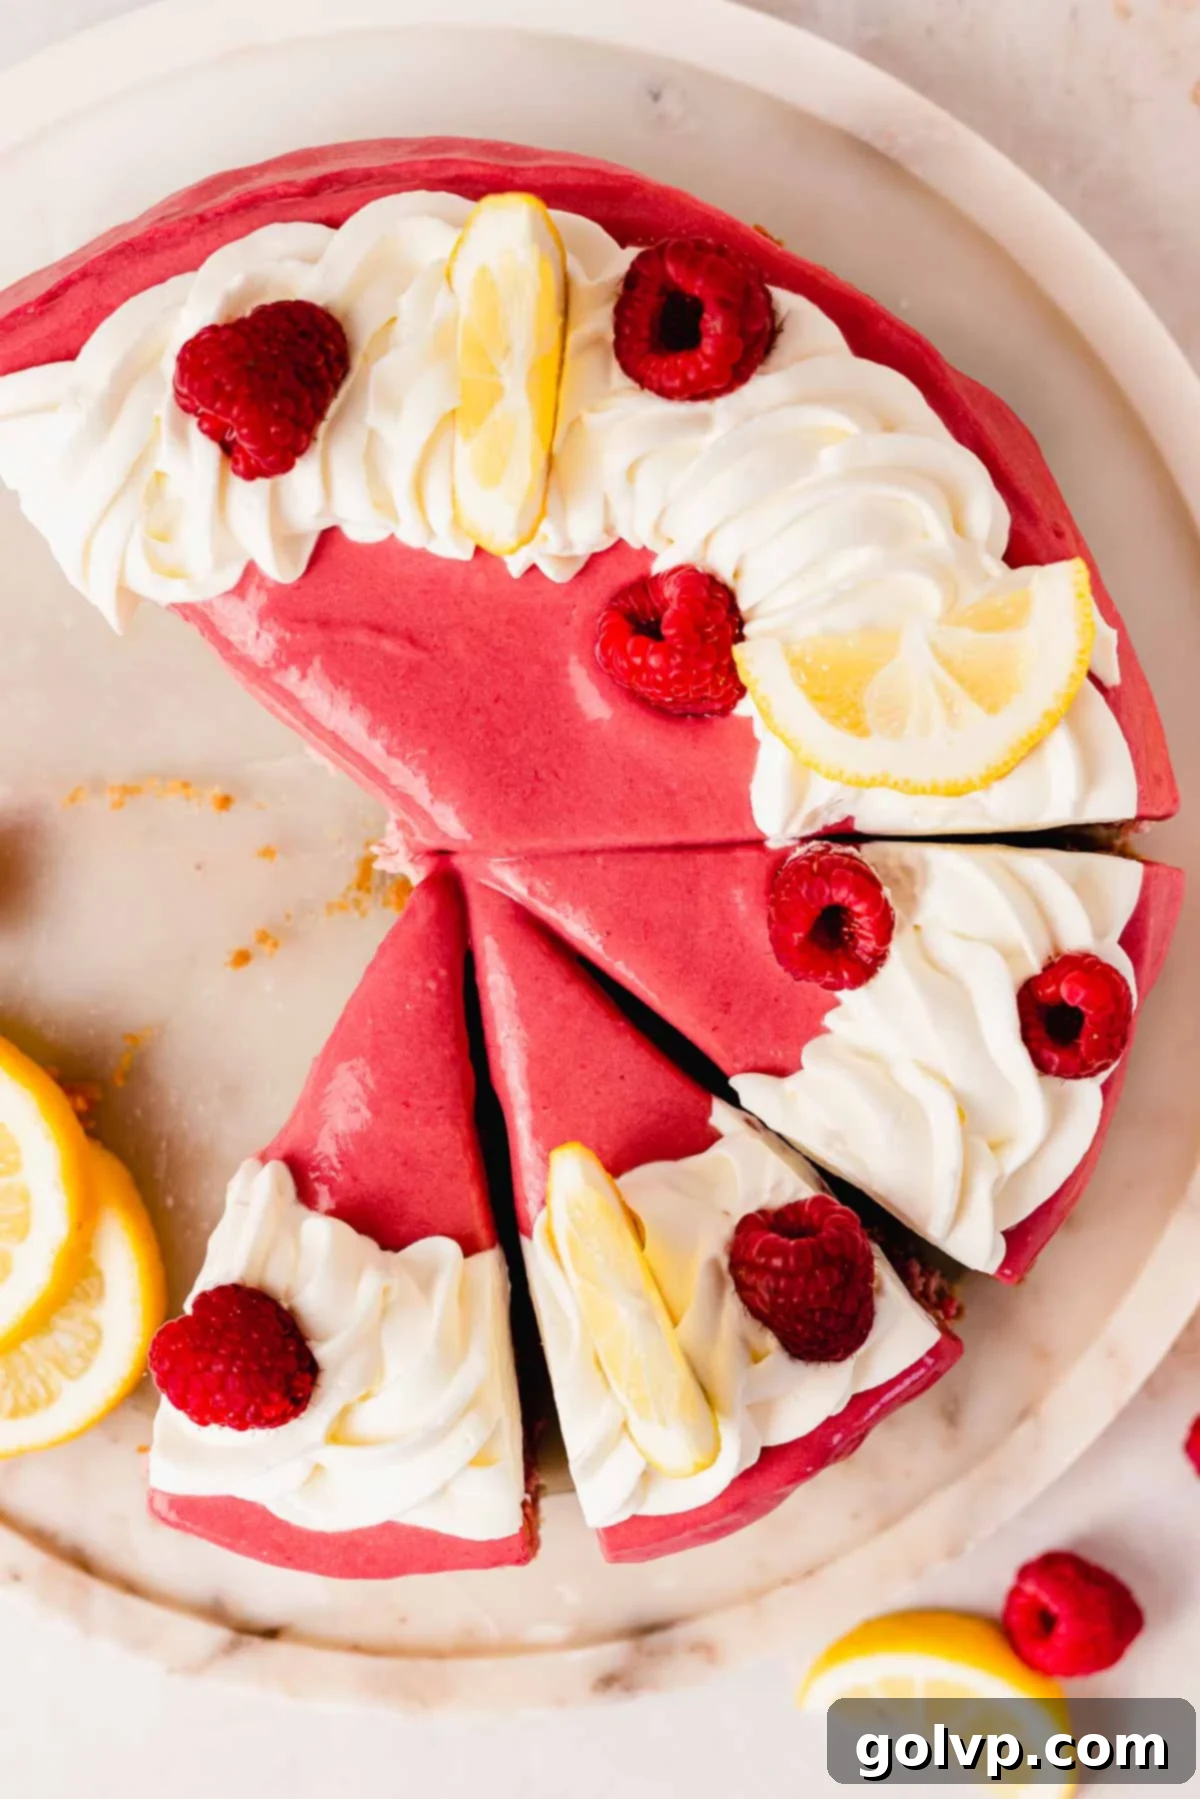
Step 2: Decorate and Serve. Pipe a beautiful border of whipped cream along the edge of the cheesecake, creating a stunning frame for the raspberry curd. Garnish the top with fresh lemon wedges or candied lemon slices and plenty of fresh, plump raspberries for a final pop of color and freshness. Slice and serve this exquisite Lemon Raspberry Cheesecake chilled for the best possible experience!
✔️ Expert Cheesecake Tips for a Flawless Result
Creating a perfect cheesecake requires attention to detail. Follow these expert tips for an incredibly smooth, creamy, and crack-free lemon raspberry cheesecake every time:
- Choose Quality Cream Cheese: Always use good quality, full-fat, brick-style cream cheese. Low-fat varieties have a higher water content and will negatively impact the texture, making your cheesecake watery and less rich. Philadelphia original cream cheese is a widely trusted brand for its consistency and flavor.
- Room Temperature Ingredients are Key: Ensure all your cold batter ingredients (cream cheese, sour cream, eggs) are at room temperature for at least 20 minutes before you start mixing. This allows them to blend together smoothly and evenly, preventing lumps and ensuring a uniform, silky batter.
- Scrape Down the Bowl Religiously: During the mixing process, frequently stop and scrape down the sides and bottom of your mixing bowl with a rubber spatula. This ensures that all ingredients are fully incorporated and prevents any unmixed pockets from forming, which can lead to a lumpy or uneven cheesecake.
- Avoid Overmixing the Batter: After adding the eggs, mix just until they are incorporated – no longer. Overmixing at this stage can incorporate too much air into the batter, which causes the cheesecake to puff up excessively in the oven and then collapse and crack as it cools. Gentle mixing is crucial for a dense, creamy texture.
- Embrace the Water Bath: Baking your cheesecake in a water bath is a non-negotiable step for achieving an evenly baked, ultra-creamy, and crack-free cheesecake. The steam from the water bath creates a moist environment in the oven, which helps the cheesecake cook gently and prevents it from drying out and cracking.
- Recognize When It’s Done: Bake your cheesecake until the edges are set and appear slightly puffed, but the very center (about 2-3 inches in diameter) still has a slight, gentle jiggle when the pan is carefully nudged. It will continue to cook and set as it cools. Underbaking will result in a runny center, while overbaking is the primary cause of cracks.
- Chill, Chill, Chill: Patience is a virtue when it comes to cheesecake. Allow your cheesecake to chill in the refrigerator for at least eight hours, or ideally overnight. This extended chilling period is essential for the flavors to fully develop, deepen, and for the cheesecake to achieve its perfectly firm, rich, and creamy texture.
🛁 Mastering the Water Bath for a Perfect Cheesecake
A water bath, also known as a bain-marie, is an indispensable technique for baking cheesecakes. It ensures uniform, gentle cooking, resulting in an ultra-creamy filling that sets beautifully without any unsightly cracks on the surface. Here are a couple of practical options for setting up your water bath, depending on the bakeware you have at hand.
The Preferred Water Bath Method (for Springform Pans): If you are using a springform pan, the most effective way to prevent water from seeping into your crust is to use a slightly larger round baking pan as a barrier. Find a round baking pan that is about 1 to 2 inches wider in diameter than your springform pan. Place your springform pan (with the cheesecake crust and filling) inside this larger round pan. This creates a protective seal. Then, place this entire nested setup into an even larger rectangular roasting tray. This is the method demonstrated and recommended in this recipe, as it reliably keeps the water out while still providing the essential moist heat for perfect baking.
Direct Water Bath (for Regular Round Pans): If your cheesecake is baked in a regular, solid-bottomed round baking pan (not a springform pan), you can place this pan directly into the larger water bath. Since there are no gaps for water to seep through, this method is straightforward. However, to easily remove the chilled cheesecake from the pan later, it’s highly recommended to create a “sling” out of two strips of parchment paper. Lay the strips perpendicular to each other in the pan before adding the crust and filling, leaving enough overhang on the sides to use as handles to lift the cheesecake out once it has chilled and set.
Aluminum Foil Barrier (for Springform Pans without a Larger Pan): If you’re using a springform pan and don’t have a secondary baking pan that’s 1-2 inches wider, you’ll need to create a robust aluminum foil barrier. Tightly wrap the outside of your springform pan with a double layer of heavy-duty aluminum foil. Ensure the foil extends well up the sides of the pan, covering the bottom and all edges securely to prevent any water from leaking through the springform’s seams. Alternatively, for a more reliable seal, you can carefully place the foil-wrapped springform pan into a heat-safe sous vide bag before placing it in the water bath.
For more decadent baked cheesecake recipes, explore this rich chocolate orange cheesecake and this indulgent Nutella cheesecake recipe with an Oreo crust!
🥄 Make Ahead & Storage Tips for Your Cheesecake
This lemon raspberry cheesecake is a fantastic dessert to prepare in advance, making it perfect for entertaining or enjoying over several days. Here’s how to manage your time and ensure optimal freshness:
Make Ahead: The cheesecake absolutely requires time to set properly in the refrigerator, needing at least 8 hours, or ideally overnight. This allows the flavors to meld and the texture to firm up, resulting in the best possible eating experience. Starting it the night before (or even two nights before) any event is highly recommended.
The raspberry curd is also an excellent component to make ahead. It can be prepared up to 4 days in advance and stored in an airtight container in the refrigerator. For longer storage, the curd can be frozen in an airtight container or freezer bag for up to 2 months. Thaw in the refrigerator before using.
Decoration: For the freshest appearance, it’s best to decorate the lemon raspberry cheesecake with whipped cream, fresh berries, and lemon wedges just before serving. This prevents the whipped cream from losing its peak and ensures the garnishes look their best. When storing, use a cake carrier to protect the delicate toppings and prevent them from getting smushed.
Storage: Leftover cheesecake will keep beautifully when stored in an airtight container in the refrigerator for up to four days. For longer-term storage, the cheesecake can be frozen. Wrap it tightly in several layers of plastic wrap, then an additional layer of aluminum foil, and store in the freezer for up to two months. Thaw in the refrigerator overnight before serving.
✔️ Tips for a Beautifully Vibrant Natural Pink Color
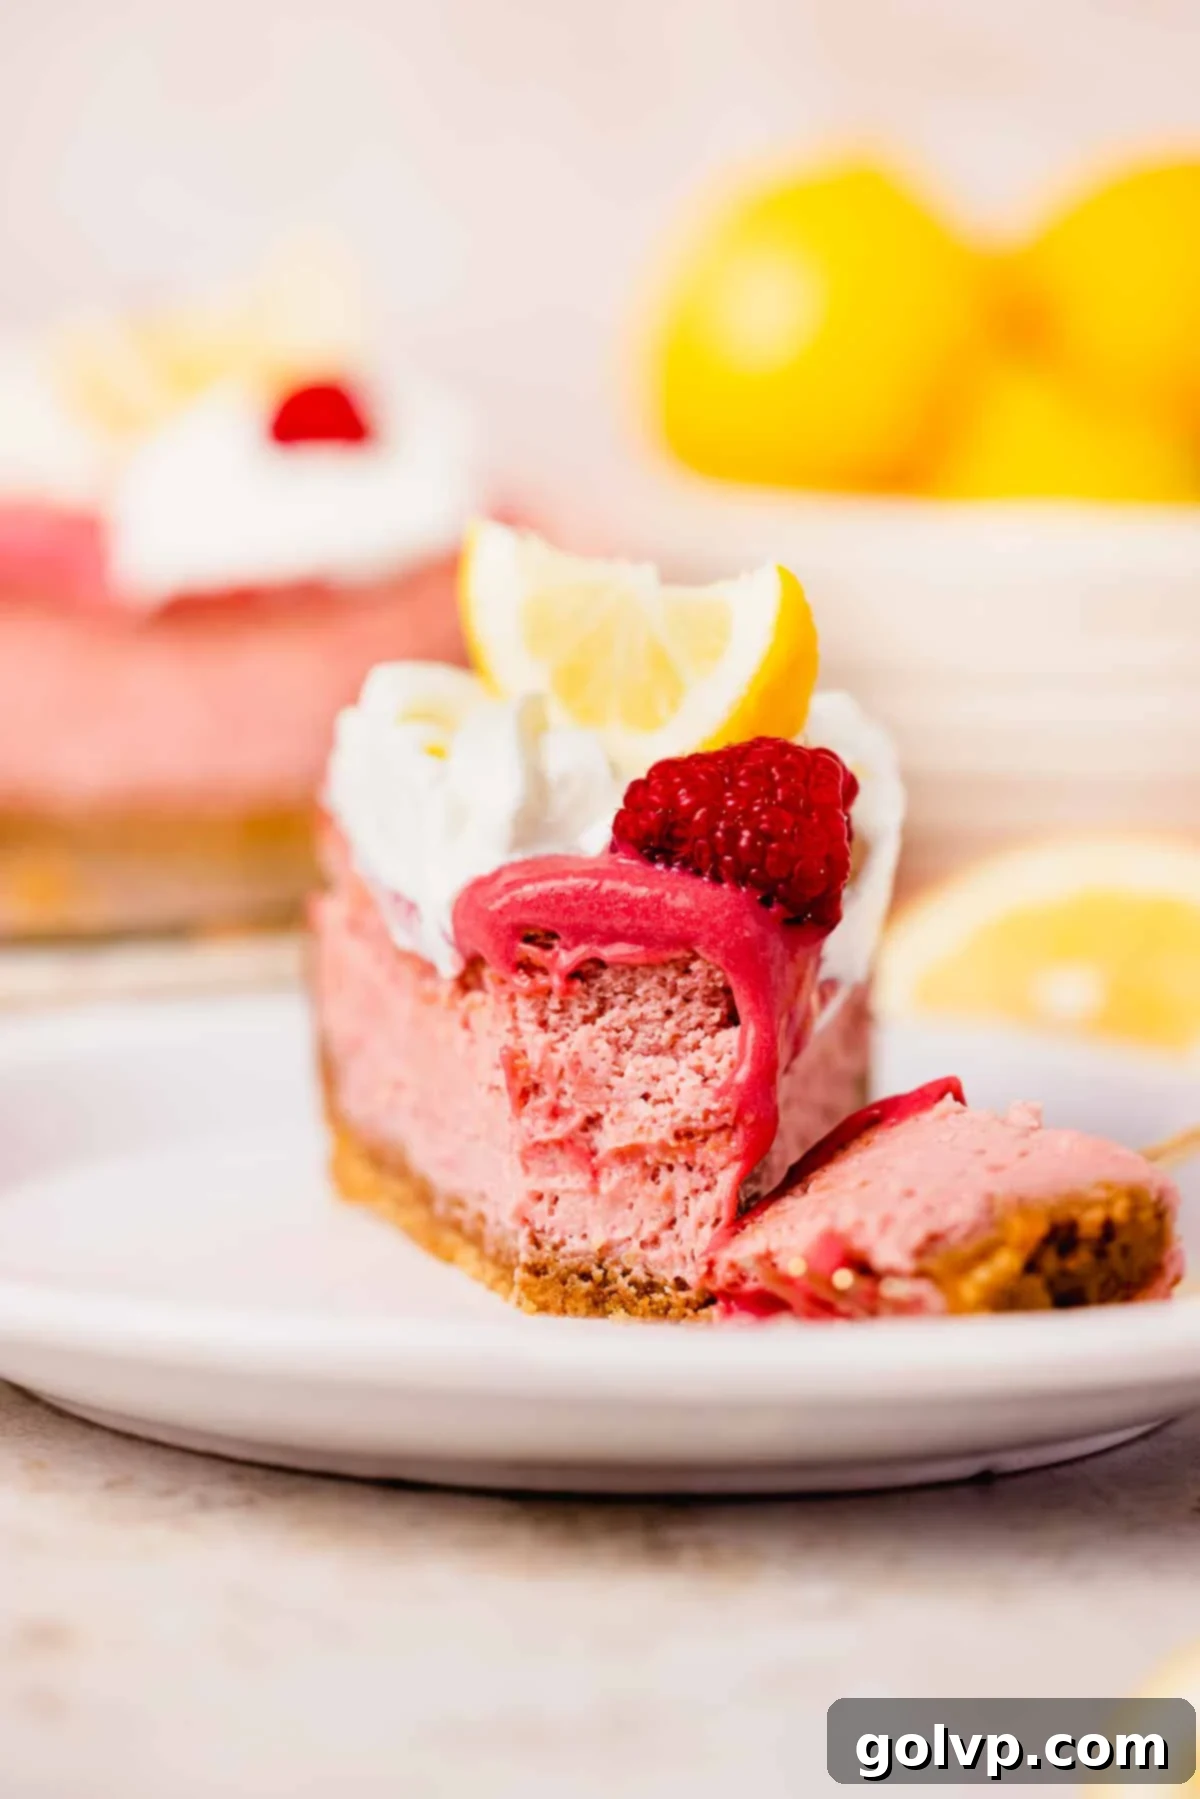
Achieving that gorgeous, natural pink hue in your lemon raspberry cheesecake is simpler than you might think, and it doesn’t require any artificial food coloring. Here’s how to maximize the vibrant color from your raspberries:
- Choose Frozen Raspberries: Often, frozen raspberries are harvested at their peak ripeness and flash-frozen, locking in their most intense color and flavor. They can sometimes yield a more vibrant pigment than fresh, out-of-season raspberries, which might be paler. If using fresh, select the darkest, ripest berries you can find.
- Consider Egg Yolk Color: The natural yellow pigment in egg yolks can slightly dull the pink tone of the raspberry puree. If you are very particular about achieving a bright, vivid pink, you might try to source eggs with paler yolks. Some specialty eggs or organic varieties can have less intensely colored yolks. However, for most home bakers, standard large eggs will work just fine, and the pink will still be lovely.
- Straining is Essential: Make sure to thoroughly mash and strain your raspberries through a fine-mesh sieve. This not only removes the seeds for a smooth texture but also extracts the maximum amount of color-rich juice from the fruit.
If, after mixing your cheesecake batter, you find the color isn’t quite as vibrant as you’d like, and you prioritize a brighter pink, you are certainly welcome to add a few drops of red or pink food coloring. However, with the tips above, you should be able to achieve a beautiful, natural hue. Keep in mind that natural ingredients can vary, so results might differ slightly from batch to batch.
📖 Recipe FAQs
Lumpy or split cheesecake batter usually indicates that your ingredients weren’t at room temperature when you started. Room temperature ingredients blend together much more easily and create a smooth emulsion. Also, adding eggs too quickly or overmixing after adding them can cause the batter to seize or split. To fix this, ensure all ingredients are at room temperature and add eggs one by one, beating just until incorporated, scraping the sides of the bowl with every addition. If your batter is still lumpy, try placing the bowl in a warm area (like near a turned-on oven, not in it) for 10-20 minutes, then re-blend gently until smooth. A food processor can also sometimes help emulsify a stubborn, slightly separated batter.
Cheesecake cracks are typically caused by one of three issues: overbaking, an oven temperature that’s too high, or not using a water bath. Overbaking dries out the cheesecake, causing its surface to expand and then crack as it cools and contracts. Ensure your oven temperature is accurate by using an oven thermometer. Always remove the cheesecake from the oven while the center still has a slight jiggle. The gradual cooling process is also critical; leaving the cheesecake in the oven with the door ajar for 20 minutes allows it to cool slowly and prevents sudden temperature changes that can lead to cracks. A water bath helps maintain a moist, even cooking environment, significantly reducing the risk of cracking.
Unfortunately, no. For a water bath to be effective, the cheesecake pan needs to be directly immersed in the water. This ensures that the heat from the water evenly surrounds the sides and bottom of the cheesecake, promoting gentle, even cooking and preventing the edges from baking faster than the center. Placing the water bath on a separate rack below the cheesecake will only provide ambient steam, which is not sufficient to achieve the unique benefits of a direct water bath.
Chilling is arguably one of the most important steps for a perfect cheesecake! It needs to chill for a minimum of 8 hours, and ideally overnight, for several critical reasons. First, chilling allows the flavors to fully develop and meld, creating a richer and more complex taste. Second, and perhaps most importantly, it gives the cheesecake time to properly set. As it chills, the fats and proteins in the cream cheese solidify, transforming the filling into that signature firm, dense, and ultra-creamy texture that cheesecake is known for. Serving it too soon will result in a soft, unset, and less flavorful dessert.
🍰 Explore More Delicious Dessert Recipes
- Lemon Raspberry Cake
- Strawberry Cheesecake Cookies
- Lemon Raspberry Bars
- Passion Fruit No Bake Cheesecake [No Gelatin]
Did you make this incredible Lemon Raspberry Cheesecake? We would absolutely love to hear about your experience! Please take a moment to rate this recipe and share your thoughts in the comments section below. Don’t forget to share your beautiful creation on Instagram and tag @flouringkitchen so we can see your masterpieces! For more mouth-watering recipes and baking inspiration, be sure to follow us on Pinterest and save your favorite ideas.
📖 Recipe
Lemon Raspberry Cheesecake
MaryEquipment
- electric mixer
- nine inch springform round baking pan
Ingredients
Crust
- 2 cups graham cracker crumbs
- ½ cup unsalted butter melted and cooled to room temperature
- ⅛ teaspoon sea salt
- ¼ cup sugar
Filling
- 2 lemons zested
- 1 ½ cup granulated sugar
- ⅛ teaspoon sea salt
- 24 oz cream cheese room temperature, full fat brick style
- ¼ cup lemon juice freshly squeezed
- ½ cup sour cream
- 4 large eggs
- 2 cups raspberries fresh or frozen and thawed
Raspberry Curd (optional)
- 1 large egg see notes
- 1 large egg yolk see notes
- ¼ cup granulated sugar
- 1 ¼ cup raspberries fresh or frozen, about 6 oz
- ½ lemon juiced grated zest optional
- ¼ cup unsalted butter cold cut in small cubes
Assembly
- ½ cup heavy whipping cream 35% cold
- 2 tablespoons granulated sugar
- ½ teaspoon pure vanilla extract
- Lemon wedges or candied lemon slices for garnish
- Fresh raspberries for garnish
Instructions
Crust
- Preheat the oven to 355°F (180°C). Grease a 9” round springform baking pan with a bit of cold butter or oil.
- Add all of the crust ingredients into a large bowl and stir well to combine.2 cups graham cracker crumbs, ½ cup unsalted butter, ⅛ teaspoon sea salt, ¼ cup sugar
- Pour crust mixture into the greased springform pan and press it down and up the walls of the baking pan.
- Place the pan onto a baking sheet (to prevent any leakage) and bake for 8 minutes to help set the crust. Work on the filling as it bakes. Once baked, remove from the oven.
Filling
- In a large bowl or stand mixer, combine grated lemon zest, sugar, and salt. Blend with a mixer or use your fingers to rub the mixture together until the sugar is fragrant and yellow.2 lemons, 1 ½ cup granulated sugar, ⅛ teaspoon sea salt
- Add cream cheese and blend with a paddle attachment until smooth and creamy. Scrape down the bowl frequently and blend to prevent any lumps.24 oz cream cheese
- Add lemon juice and sour cream, beating well and scraping down the bowl to prevent lumps.¼ cup lemon juice, ½ cup sour cream
- Add eggs one at a time to the mixture, beating in between each egg just until the egg is incorporated. Scrape down the edges of the bowl every time to ensure a smooth mixture. Don’t overmix to prevent incorporating too much air.4 large eggs
- Mash the raspberries together and push them through a sieve to strain out the seeds. Keep pushing them around to strain as much juice as possible.2 cups raspberries
- Pour the seedless raspberry puree into the cheesecake batter and fold to combine.
- Place the prebaked crust in a round baking pan that is 1-2” wider than the cheesecake pan. Place the cheesecake pan into a large rectangular baking dish where it fits comfortably – see notes for water bath options and refer to photos.
- Pour the filling into the crust. Carefully pour the boiling hot water into the large rectangular pan. Transfer the large baking tray with everything inside into the oven using oven mitts, being very careful because it’s hot.
- Bake the cheesecake in the preheated oven (355°F or 180°C) for 80-90 minutes. It’s ready when the edges are set and the middle is still jiggly. It will continue baking as it cools.
- Leave the oven door open for 20 minutes and let the cheesecake cool inside the oven. Remove the cheesecake from the waterbath and let cool to room temperature. Cover the cheesecake and refrigerate overnight or for at least 8 hours.
Raspberry curd (optional)
- In a heavy bottomed saucepan, whisk the egg yolk, whole egg, sugar, frozen raspberries, lemon juice, and grated lemon zest (optional) into the saucepan. Heat on medium-low heat, stirring constantly until simmering and thickened.1 large egg, 1 large egg yolk, ¼ cup granulated sugar, 1 ¼ cup raspberries, ½ lemon juiced
- Strain the raspberry curd through a mesh sieve or cheesecloth into a non-metal bowl or jar to remove the seeds. Add the butter and stir to melt. This will help cool the curd. Place a piece of plastic film or parchment paper right onto the surface. Refrigerate for at least 2 hours or until cold and thick.¼ cup unsalted butter cold
Assembly
- In a chilled large bowl or stand mixer, combine cold cream, sugar, and vanilla extract. Whip until stiff peaks form. Transfer into a piping bag with a large star tip or into a disposable zippered bag with the end cut off.½ cup heavy whipping cream, 2 tablespoons granulated sugar, ½ teaspoon pure vanilla extract
- Spread the top of the chilled cheesecake liberally with chilled raspberry curd. Pipe a border of whipping cream along the edge of the cheesecake. Decorate with lemon wedges and fresh raspberries. Slice and enjoy chilled!Lemon wedges, Fresh raspberries
Video
Notes
- Use good quality, full fat, brick style cream cheese.
- Have all of the batter ingredients at room temperature.
- Scrape down the sides of the bowl frequently.
- Don’t overmix the batter after adding in the eggs.
- Bake in a water bath.
- Bake until the edges are set and the middle is puffed up and still a little jiggly.
- Chill the cheesecake for at least eight hours or overnight.
- (The best option) Find a round baking pan that is 1”-2” larger than the pan that the cheesecake is in. This will keep the water out of the cheesecake preventing it from getting soggy. Nest the cheesecake into the larger pan and then into the large roasting tray where the hot water will be. *This is for if the cheesecake is in a springform pan*
- If the cheesecake is in a regular round pan (not springform), you can place the pan directly into the water bath because water can’t get in through the bottom edge. Make sure you create a sling out of parchment paper so that you can lift to remove the cheesecake out of the pan after chilling.
- If the cheesecake is in a springform pan – and you don’t have a baking pan that’s 1”-2” larger – wrap the outside of the pan tightly with a double layer of aluminum foil. Try to use a wide enough foil to cover the whole bottom and edges. You can also nestle the springform pan into a heat safe sous vide bag instead of the aluminum foil.
