Irresistible Lemon Poppy Seed Cheesecake: A Zesty, Creamy, and Easy-to-Bake Delight
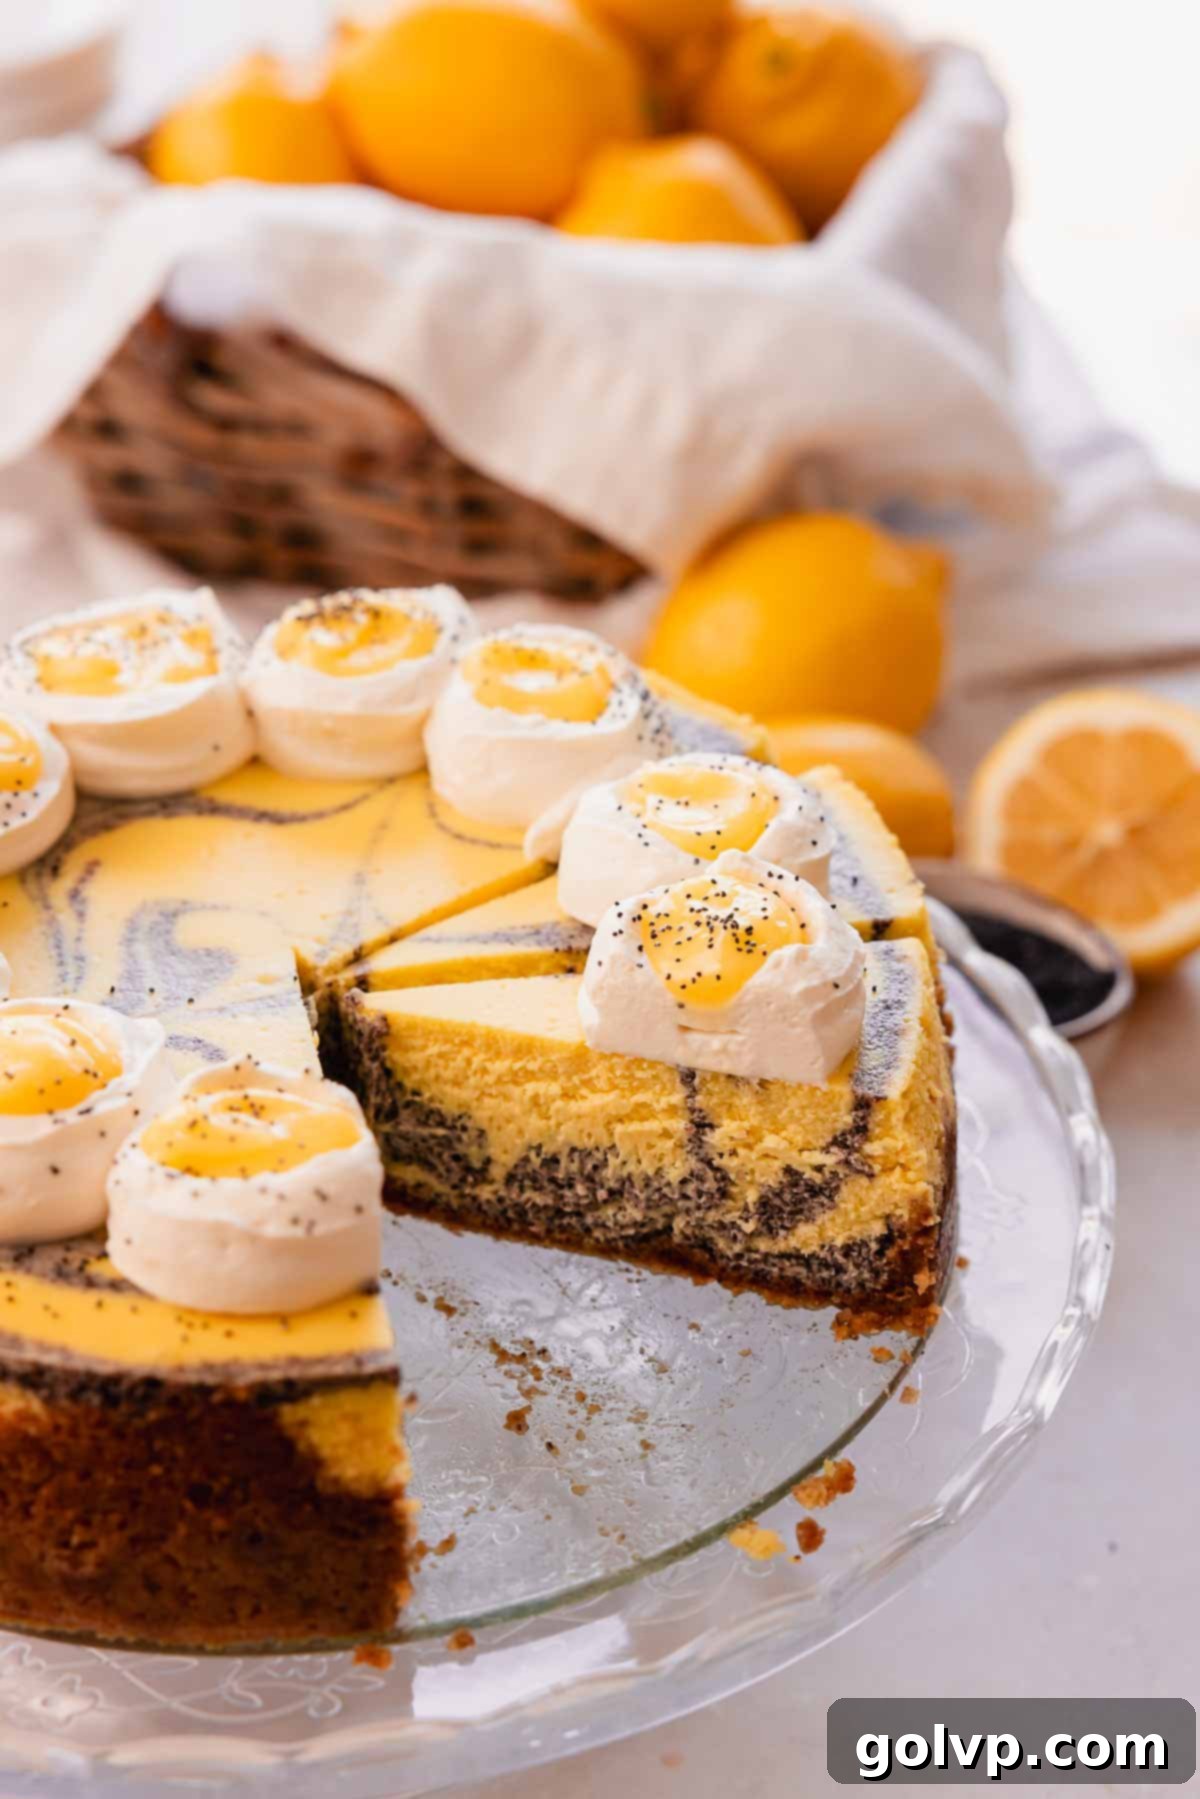
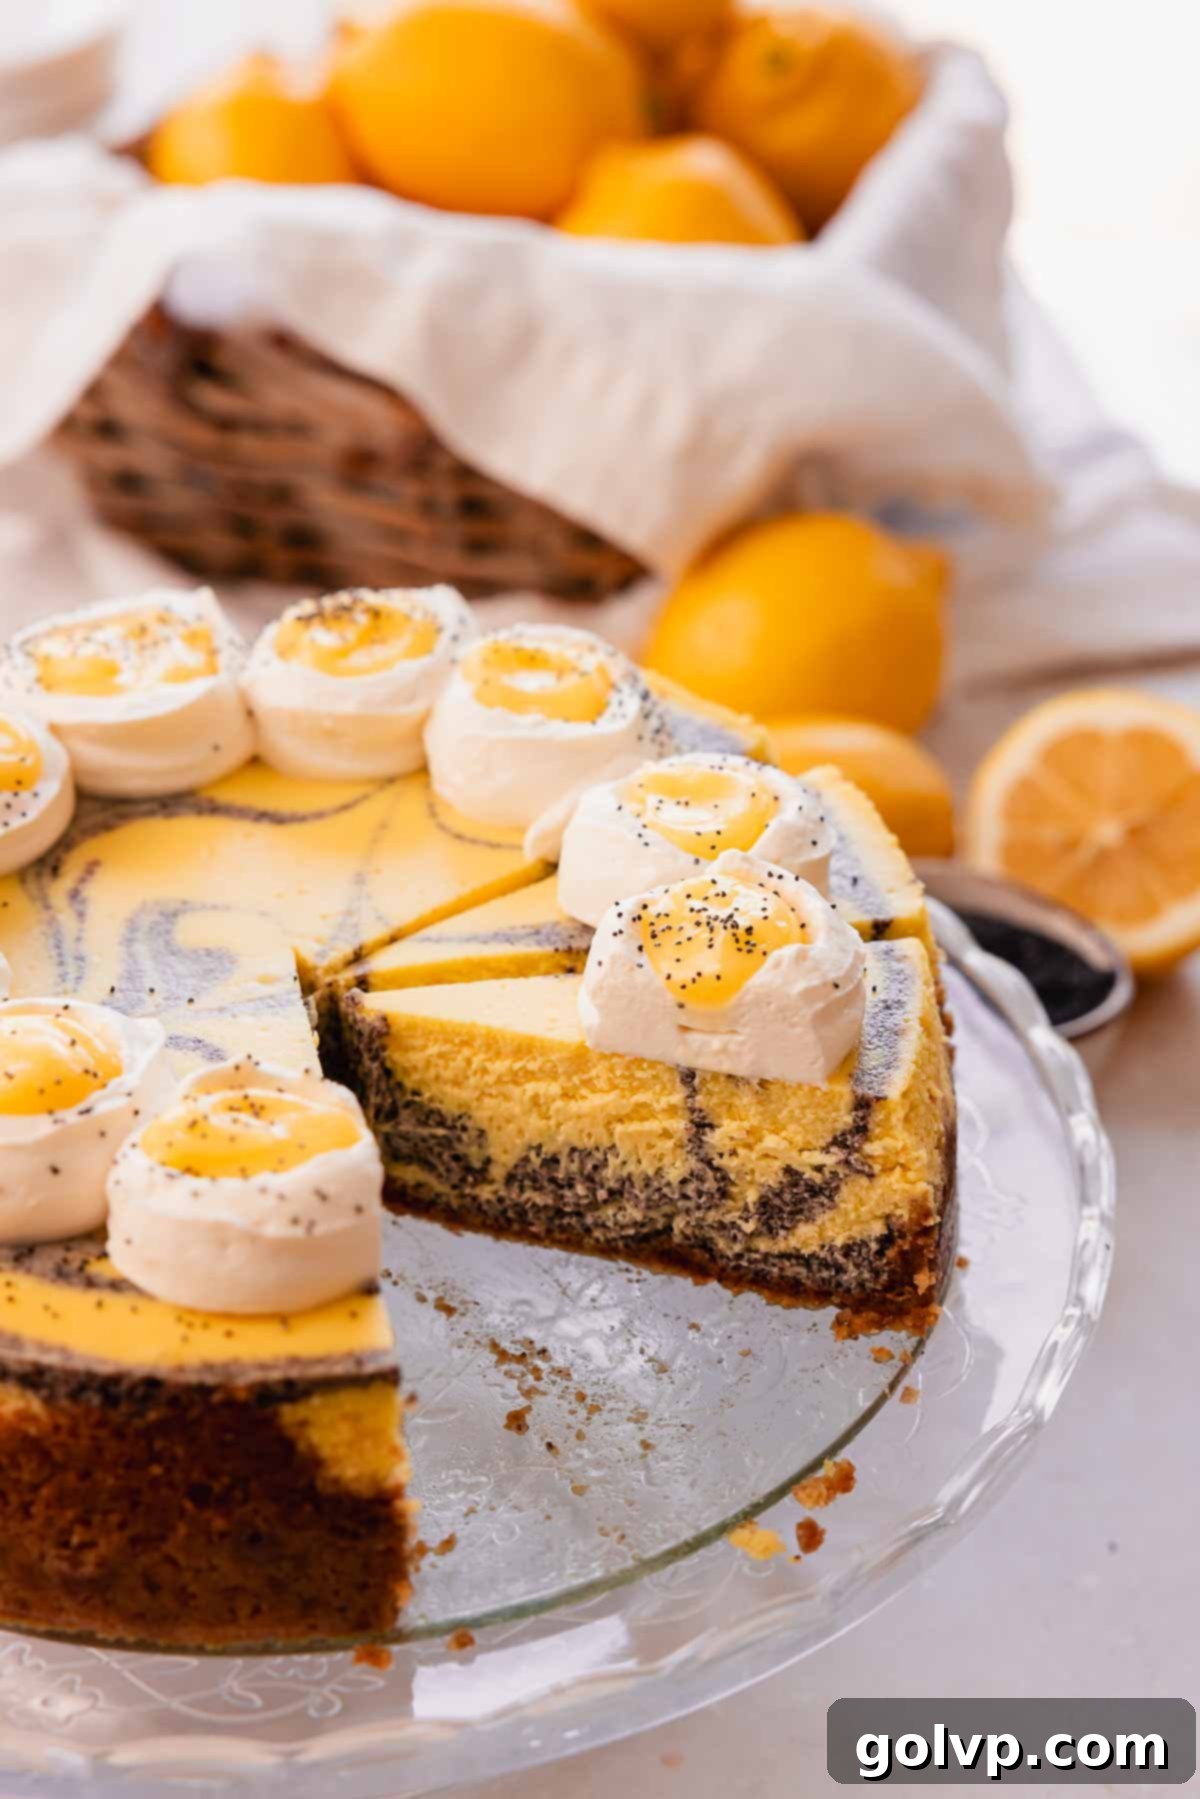
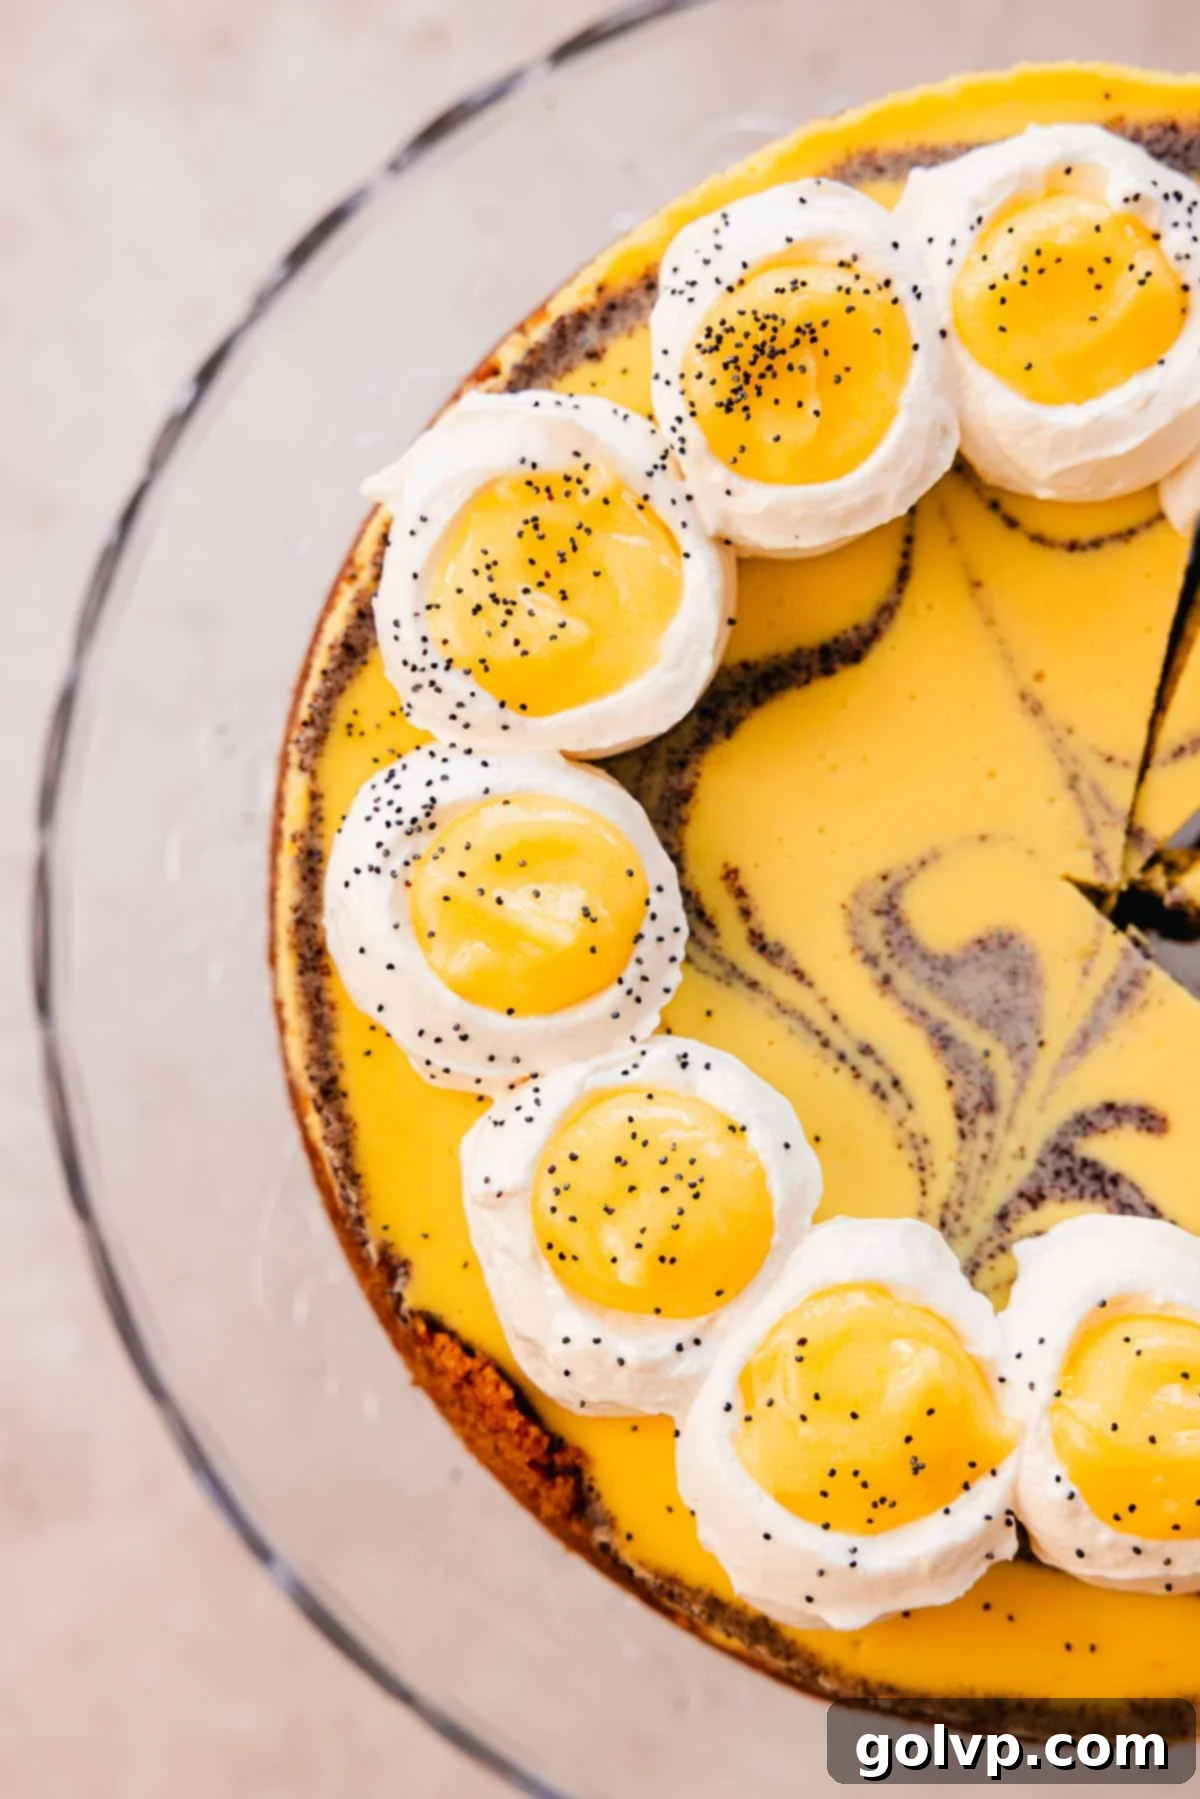
Prepare to be enchanted by this truly irresistible Lemon Poppy Seed Cheesecake! This dessert masterpiece is a vibrant symphony of flavors, combining the bright, tangy zest of fresh lemons with the subtle, nutty crunch of poppy seeds in a velvety, baked cheesecake. It’s perched on a perfectly crisp graham cracker crust and crowned with generous dollops of fluffy whipped cream, each cradling a pool of gooey, tangy lemon curd. If you’re a connoisseur of lemon poppy seed desserts, this cheesecake is destined to become your new obsession, a show-stopping treat that will undoubtedly be the highlight of any gathering. The unique twist of grinding the poppy seeds allows for a more intense, comforting flavor throughout the cheesecake without the often-overpowering gritty texture, ensuring every bite is smooth and satisfying. Our family adores poppy seed desserts, and this particular cheesecake was an absolute triumph, leaving everyone craving more!
Why You’ll Love This Lemon Poppy Seed Cheesecake Recipe
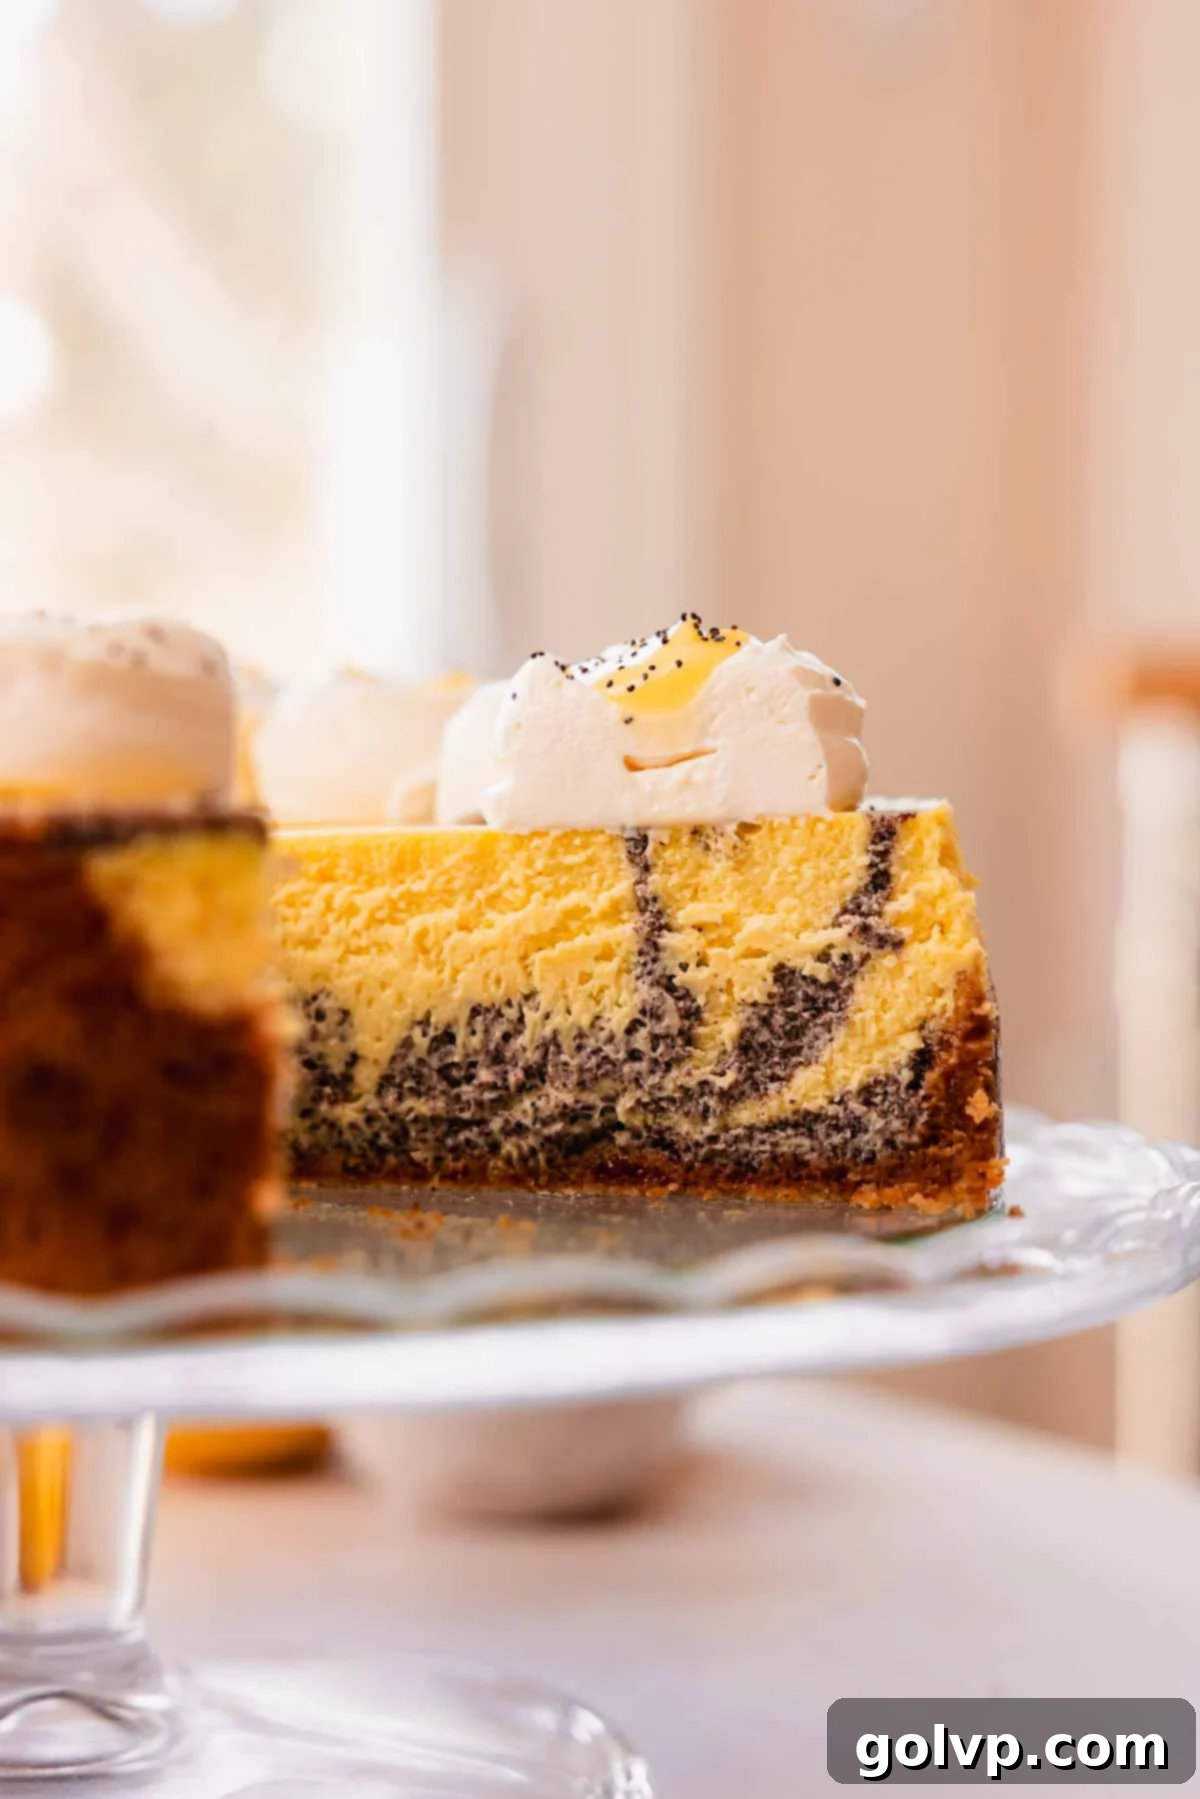
- Delightful Poppy Seed Swirls: This cheesecake boasts beautiful, flavorful swirls of poppy seeds that infuse every slice with a unique, nutty sweetness. The secret lies in grinding the poppy seeds, a technique that allows you to incorporate a larger quantity for maximum flavor without creating an overly gritty texture. This method guarantees a smooth, rich experience, delivering an abundance of comforting poppy seed essence that perfectly complements the lemon.
- Vibrant Lemon Zest: The star of this cheesecake is its incredible lemon flavor. It’s wonderfully tangy and zesty, thanks to a generous amount of fresh lemon zest and juice folded into the creamy batter. To further amplify that bright citrus punch, we top each slice with scoops of homemade lemon curd, creating a harmonious balance of sweet and tart that refreshes the palate. This dual application ensures a profound lemon experience from the first bite to the last.
- Effortless Baking Instructions: Don’t let the thought of baking a cheesecake intimidate you. We’ve meticulously crafted these instructions to be straightforward and simple, guiding you through each step to achieve a perfectly baked cheesecake every time. Our detailed tips include a foolproof method to prevent cracking, ensuring a smooth, impressive finish that will make you feel like a seasoned pastry chef. You’ll be amazed at how easy it is to create such an elegant dessert.
Key Ingredients for the Perfect Lemon Poppy Seed Cheesecake
Read through for all the tips you will need for success!
Full steps and ingredients in recipe card below.
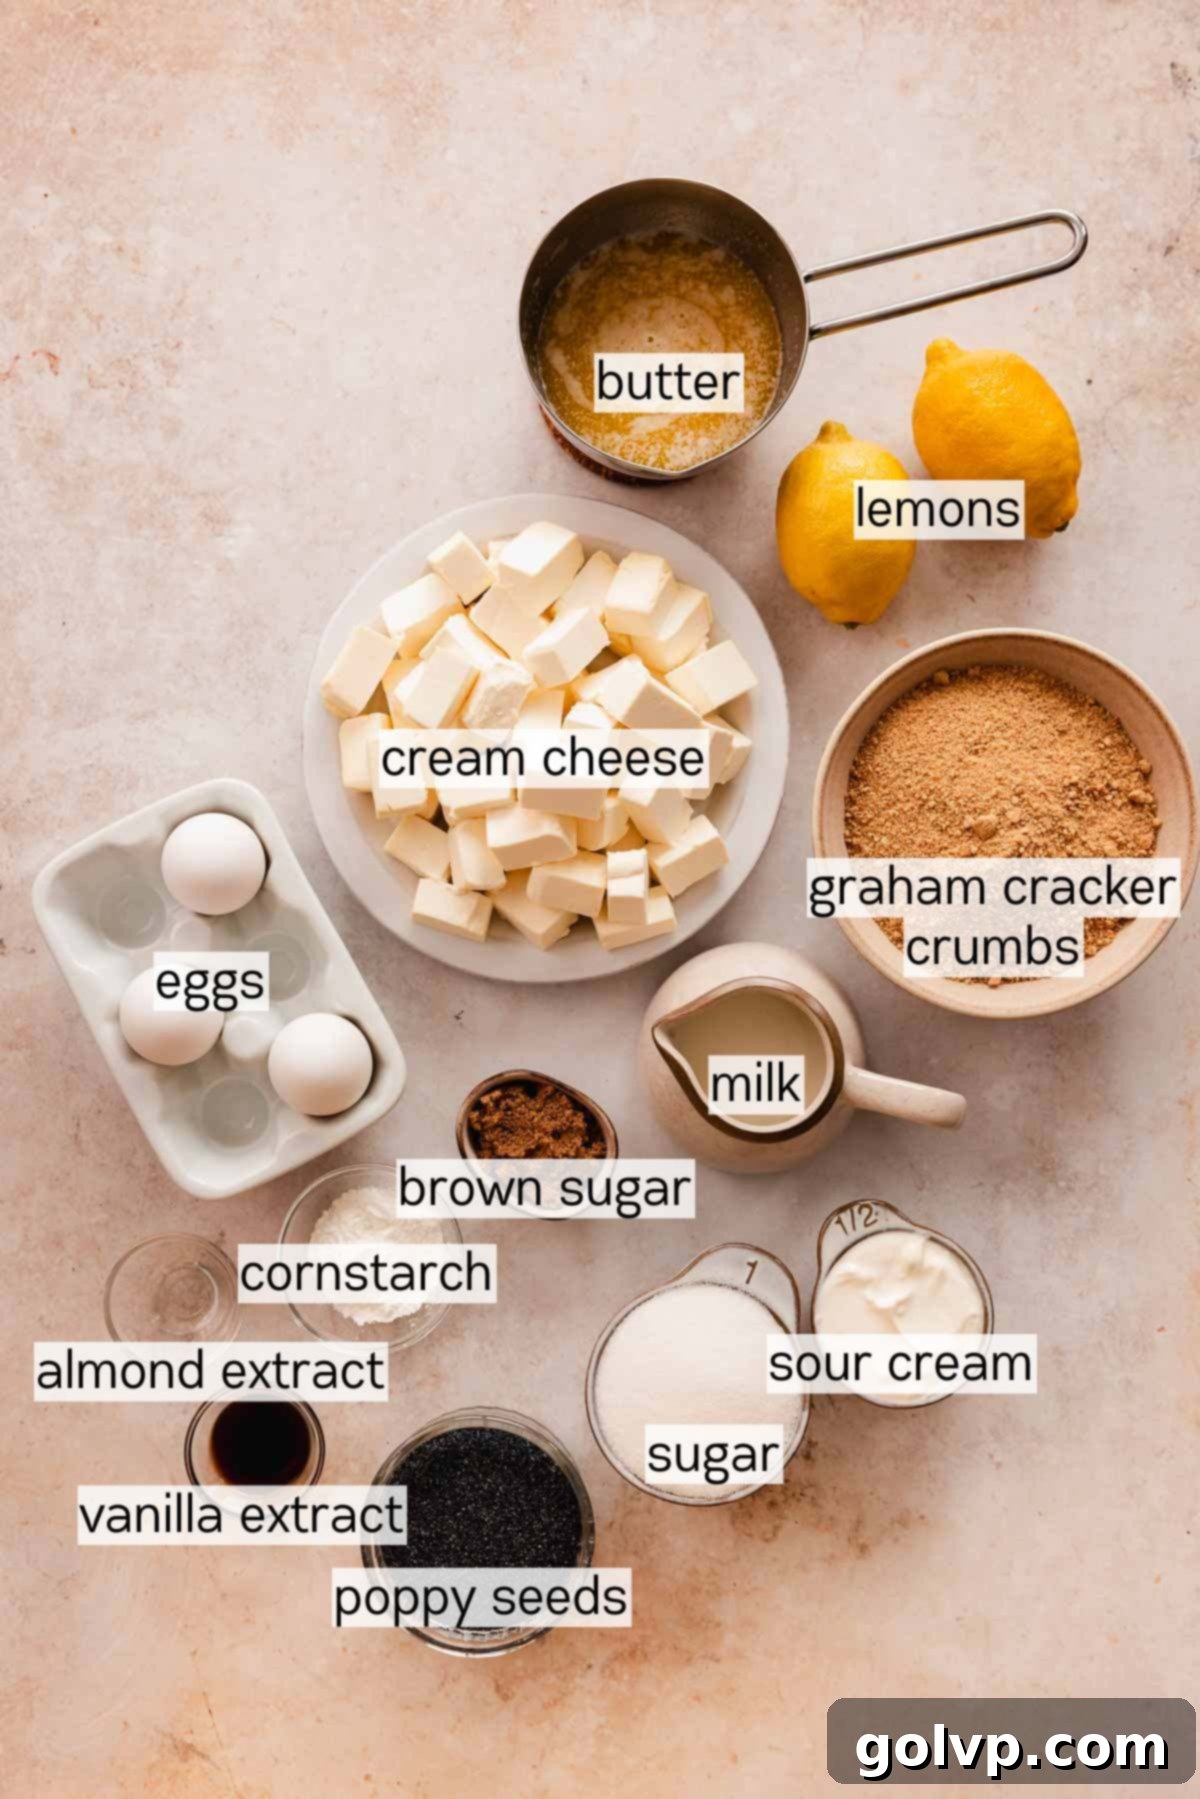
Graham Cracker Crumbs: These buttery, slightly sweet crumbs form the ideal foundation for our cheesecake. They provide a delightful texture contrast to the creamy filling. While pre-crushed graham cracker crumbs are a convenient choice, you can easily make your own by pulsing whole graham crackers in a food processor or crushing them in a sealed bag with a rolling pin. For a unique twist, consider using crushed shortbread cookies or even Biscoff cookies for a different flavor profile.
Poppy Seeds: This recipe calls for a substantial amount of poppy seeds to ensure a rich and pronounced flavor. The key to unlocking their full potential and achieving a smooth texture is to grind them. I highly recommend purchasing fresh poppy seeds from a bulk food store and always check the expiry date, as they can go rancid quickly. A quick sniff test will tell you if they are fresh. If you’re a big fan of poppy seeds like me, don’t miss my Ukrainian poppy seed roll recipe!
Milk: When preparing the poppy seed mixture, milk is crucial for creating a thick, flavorful paste. I recommend using whole or 2% cow’s milk for the best results in terms of creaminess and consistency, but you can certainly use your preferred milk of choice. The fat content in dairy milk helps to carry the nutty flavors of the poppy seeds beautifully.
Almond Extract: A small touch of almond extract is a game-changer in the poppy seed mixture. It beautifully enhances and draws out the inherent sweet and nutty flavors of the poppy seeds, creating a more complex and satisfying taste. While optional, I highly recommend including it for that extra layer of depth and aroma that truly elevates the poppy seed element.
Lemons: Fresh lemons are non-negotiable for this recipe. You’ll need the vibrant zest from two large lemons to infuse the cheesecake batter with its signature bright and tangy flavor, along with two tablespoons of fresh juice. Don’t let the remaining lemon juice go to waste; it’s perfect for whipping up a batch of homemade lemon curd to top your finished cheesecake, ensuring maximum lemon impact.
Cream Cheese: For a truly decadent and crack-free cheesecake, full-fat, brick-style cream cheese is essential. Brands like Philadelphia original cream cheese, sold in 8oz bricks, are perfect. You’ll need three of these. Avoid using low-fat or whipped cream cheese varieties, as their higher water content can lead to a watery cheesecake that struggles to set properly and may result in an undesirable texture.
Cornstarch: This humble ingredient plays a vital role in ensuring your cheesecake sets beautifully and prevents those dreaded cracks from forming during baking. It acts as a stabilizer, providing structure to the creamy batter. If you plan to freeze your cheesecake, I recommend substituting cornstarch with arrowroot starch or potato starch, as cornstarch can sometimes break down and release water after freezing and thawing, affecting the texture.
Sour Cream: Incorporating sour cream into the cheesecake batter adds a wonderful tang and contributes to its luxurious, smooth consistency. I use 14% sour cream for optimal richness. Similar to cream cheese, it’s best to avoid low-fat sour cream varieties, as their increased water content can thin out the batter and compromise the final texture of the cheesecake.
Lemon Curd: This bright, velvety topping is the perfect complement to the rich cheesecake, offering an extra layer of tangy lemon flavor. While store-bought lemon curd can be used, I highly encourage you to try my favorite homemade lemon curd recipe – it’s incredibly easy to make and tastes infinitely superior, providing that irresistible homemade touch.
Whipped Cream: Optional but highly recommended, delicate scoops of freshly whipped cream not only add a beautiful aesthetic but also provide a light, airy contrast to the dense cheesecake. These soft clouds are specifically designed to hold generous spoonfuls of that tangy lemon curd, making each bite a harmonious blend of textures and flavors.
How to Make Lemon Poppy Seed Cheesecake
Graham Cracker Crust Step-by-Step Perfection
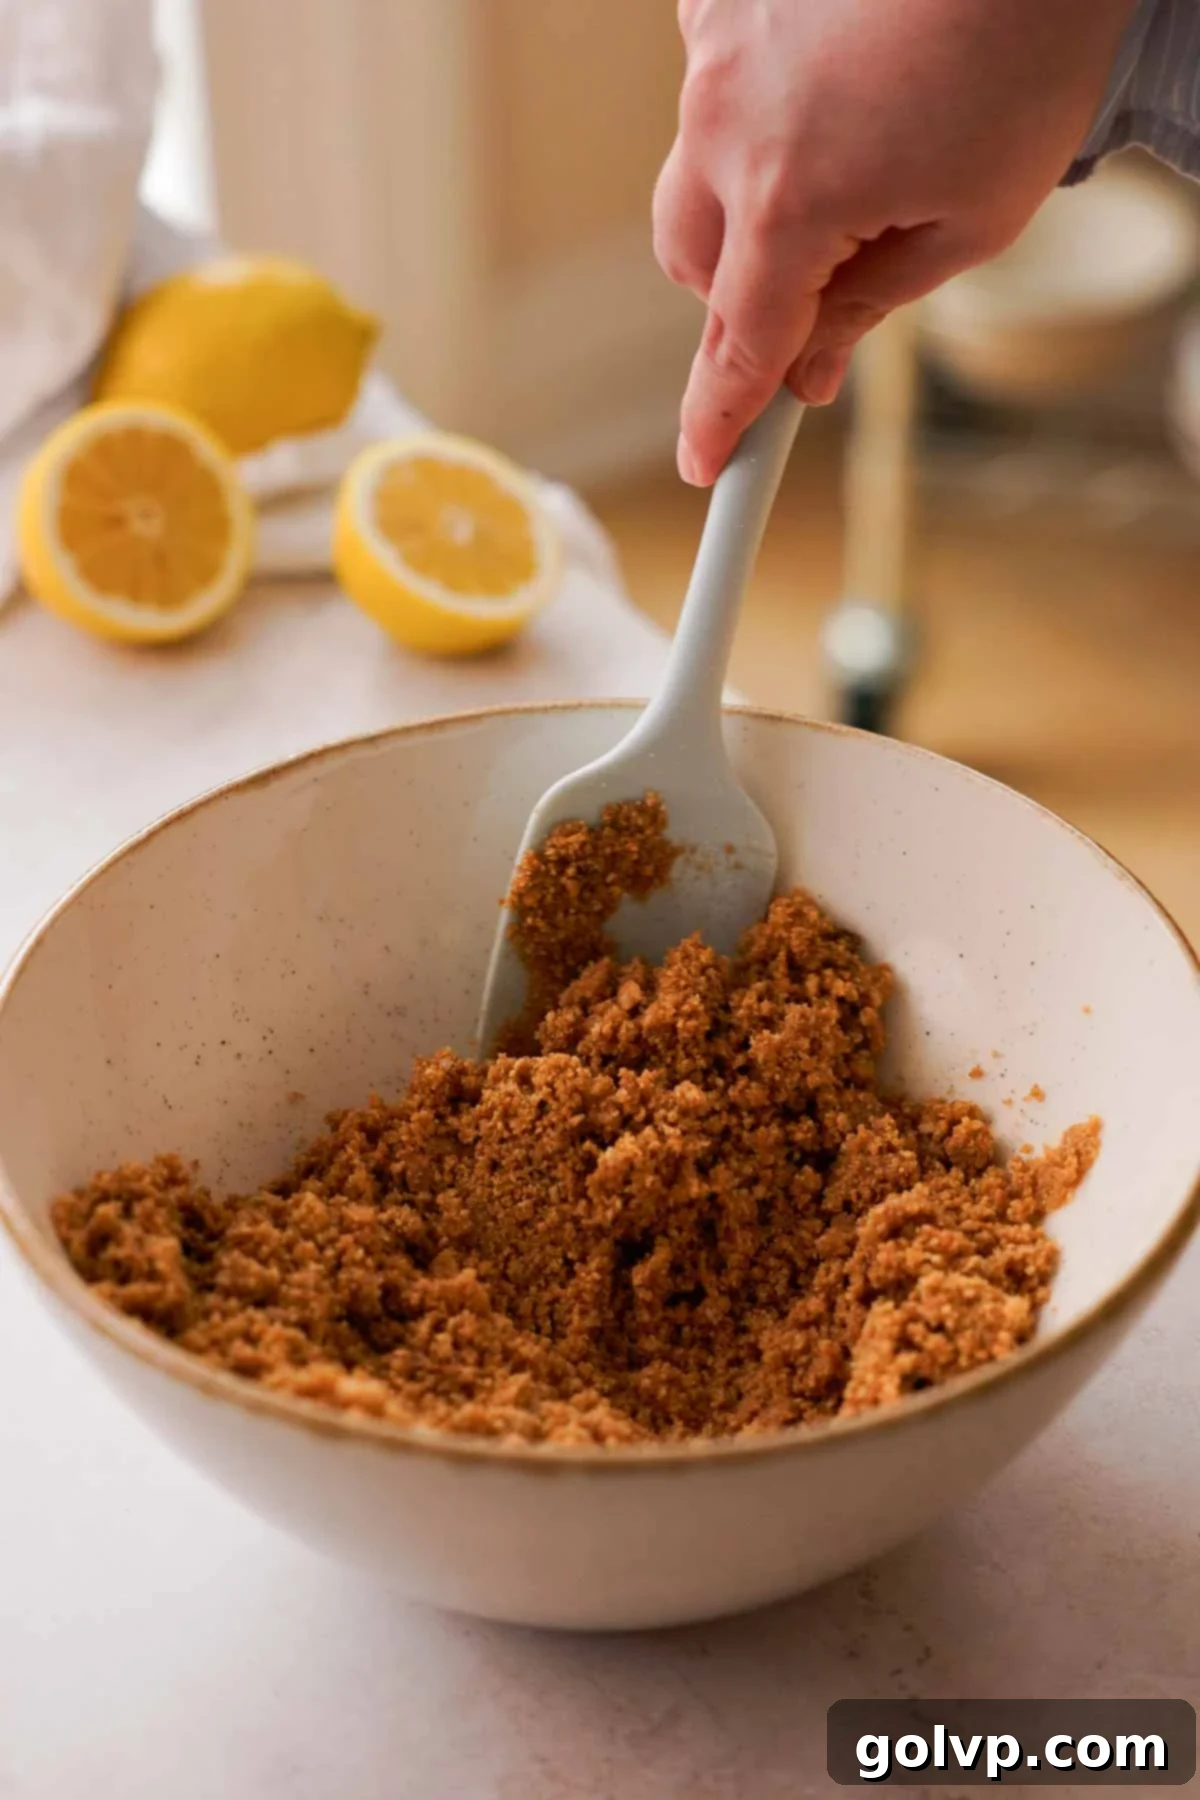
Step 1: Begin by preheating your oven to 350°F (180°C). In a large bowl, combine the crushed graham crackers with brown sugar and a pinch of sea salt. Stir these dry ingredients thoroughly to ensure even distribution. Then, pour in the melted butter and mix again until the crumbs are uniformly moistened and resemble wet sand. This ensures your crust will be firm and flavorful.
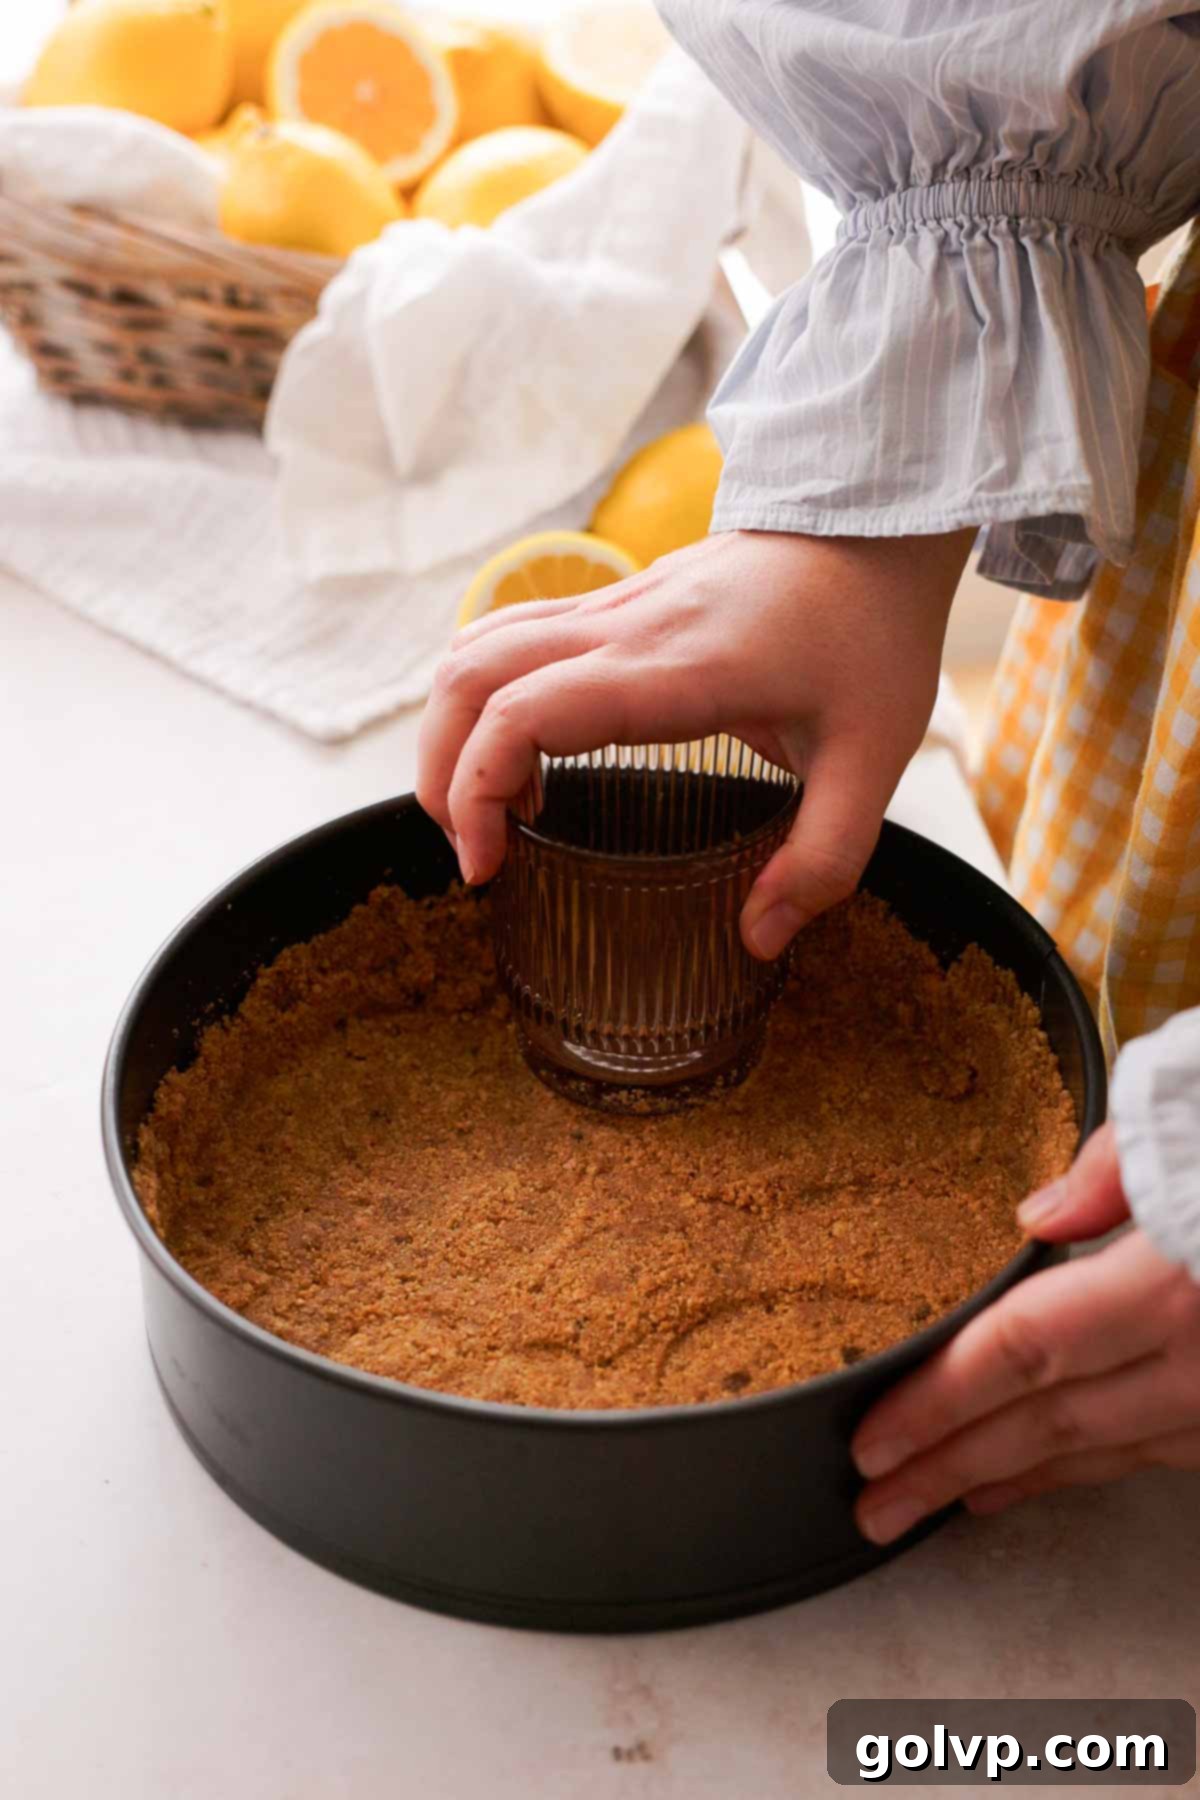
Step 2: Transfer the buttery graham cracker mixture into an 8-inch or 9-inch springform pan. Using the bottom of a flat glass or a measuring cup, firmly press the crumbs into an even layer across the bottom of the pan and halfway up the sides. This firm compression is crucial for a sturdy crust that won’t crumble. Place the springform pan onto a larger baking sheet to catch any drips and bake for 8 minutes. This pre-baking step helps to set the crust and prevents it from becoming soggy. After baking, remove it from the oven and let it cool completely while you prepare the filling. Don’t forget to lower your oven temperature to 300°F (150°C) for the cheesecake itself.
Lemon Poppy Seed Cheesecake Batter Step-by-Step Preparation
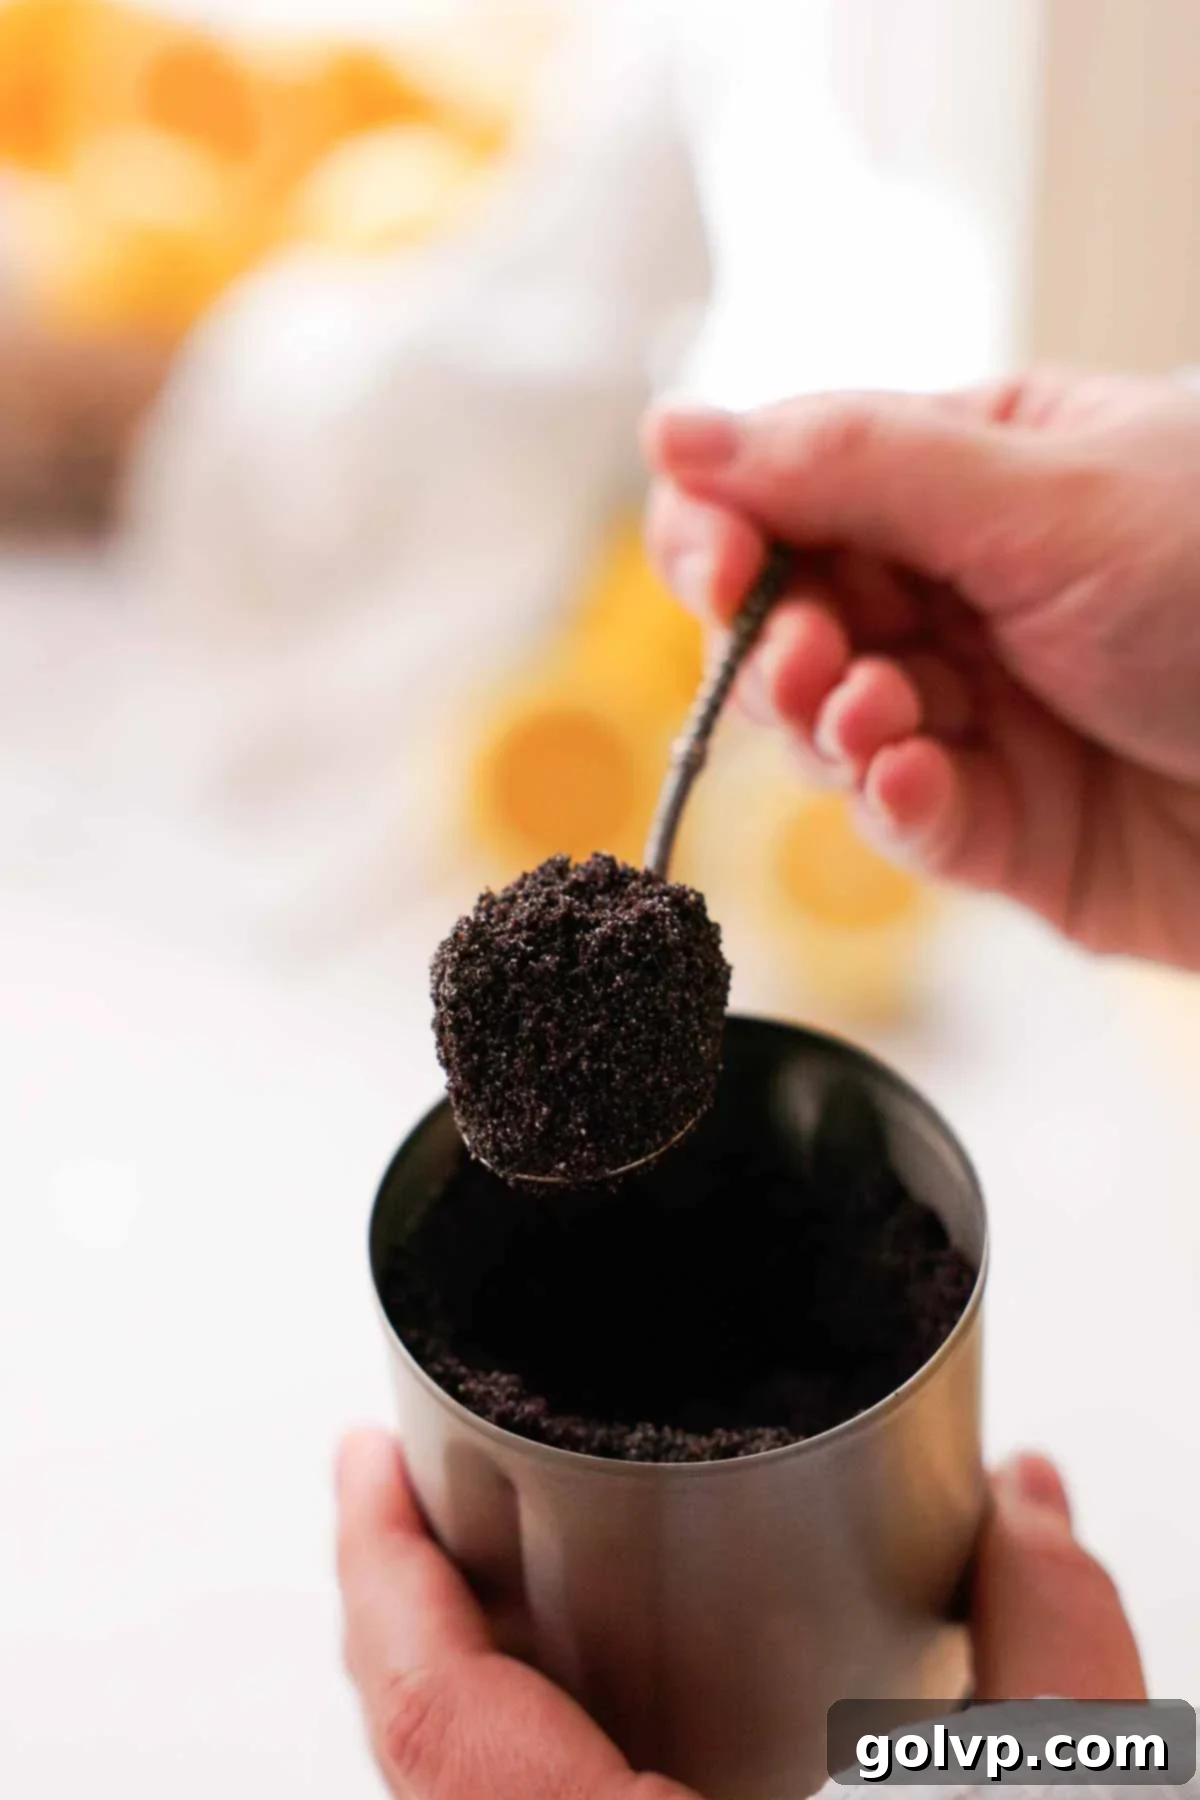
Step 1: To prepare the poppy seeds for maximum flavor and smooth texture, they need to be ground. Use a clean coffee grinder for the best results, grinding them roughly until they resemble a coarse meal. Alternatively, a food processor or a mortar and pestle can also be used, ensuring they are finely enough processed to release their oils and nutty essence without being too gritty.
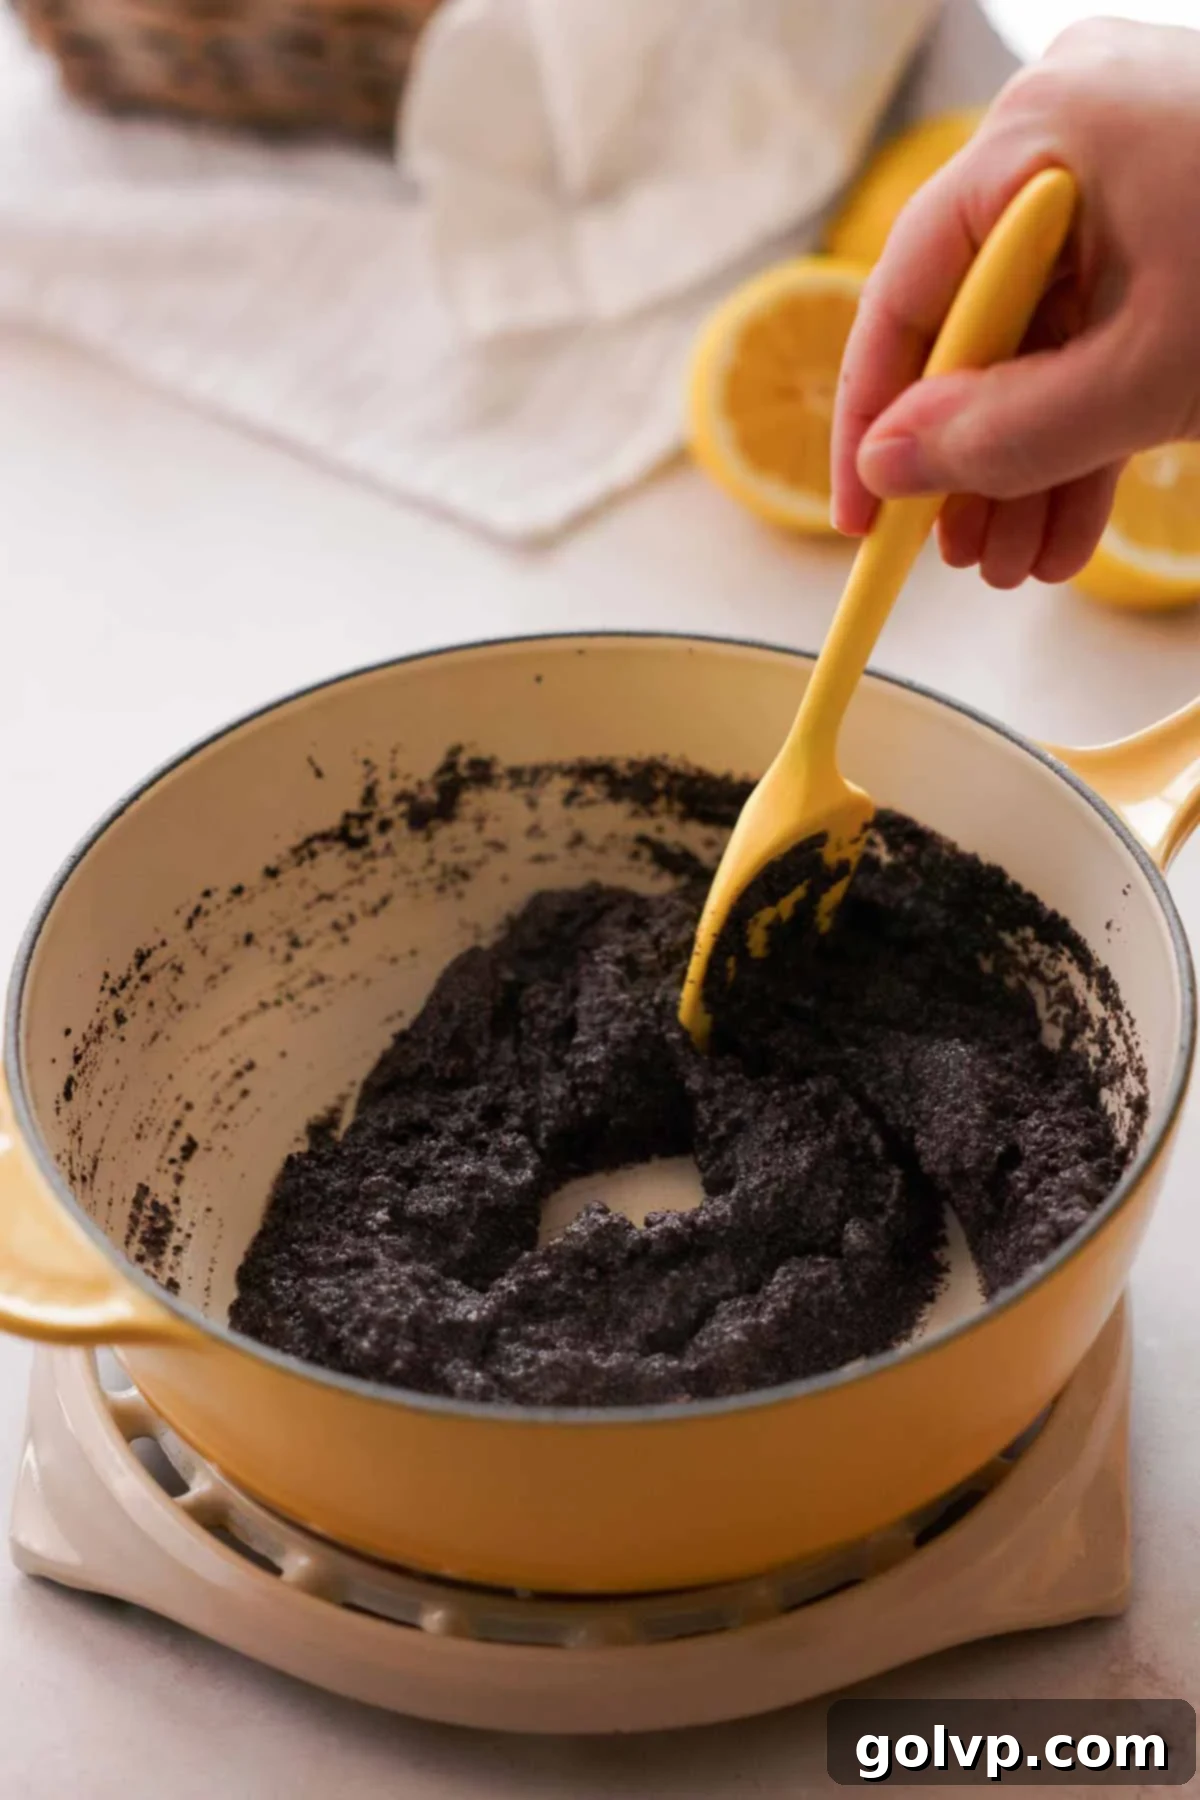
Step 2: In a small saucepan, combine the freshly ground poppy seeds with milk, 2 tablespoons of granulated sugar, and a dash of almond extract. Cook this mixture over low heat, stirring continuously to prevent sticking. Continue cooking until the milk is completely absorbed and the mixture thickens into a rich, fragrant paste. This cooking process helps to soften the poppy seeds further and deepen their flavor. Remove from heat and set aside to cool.
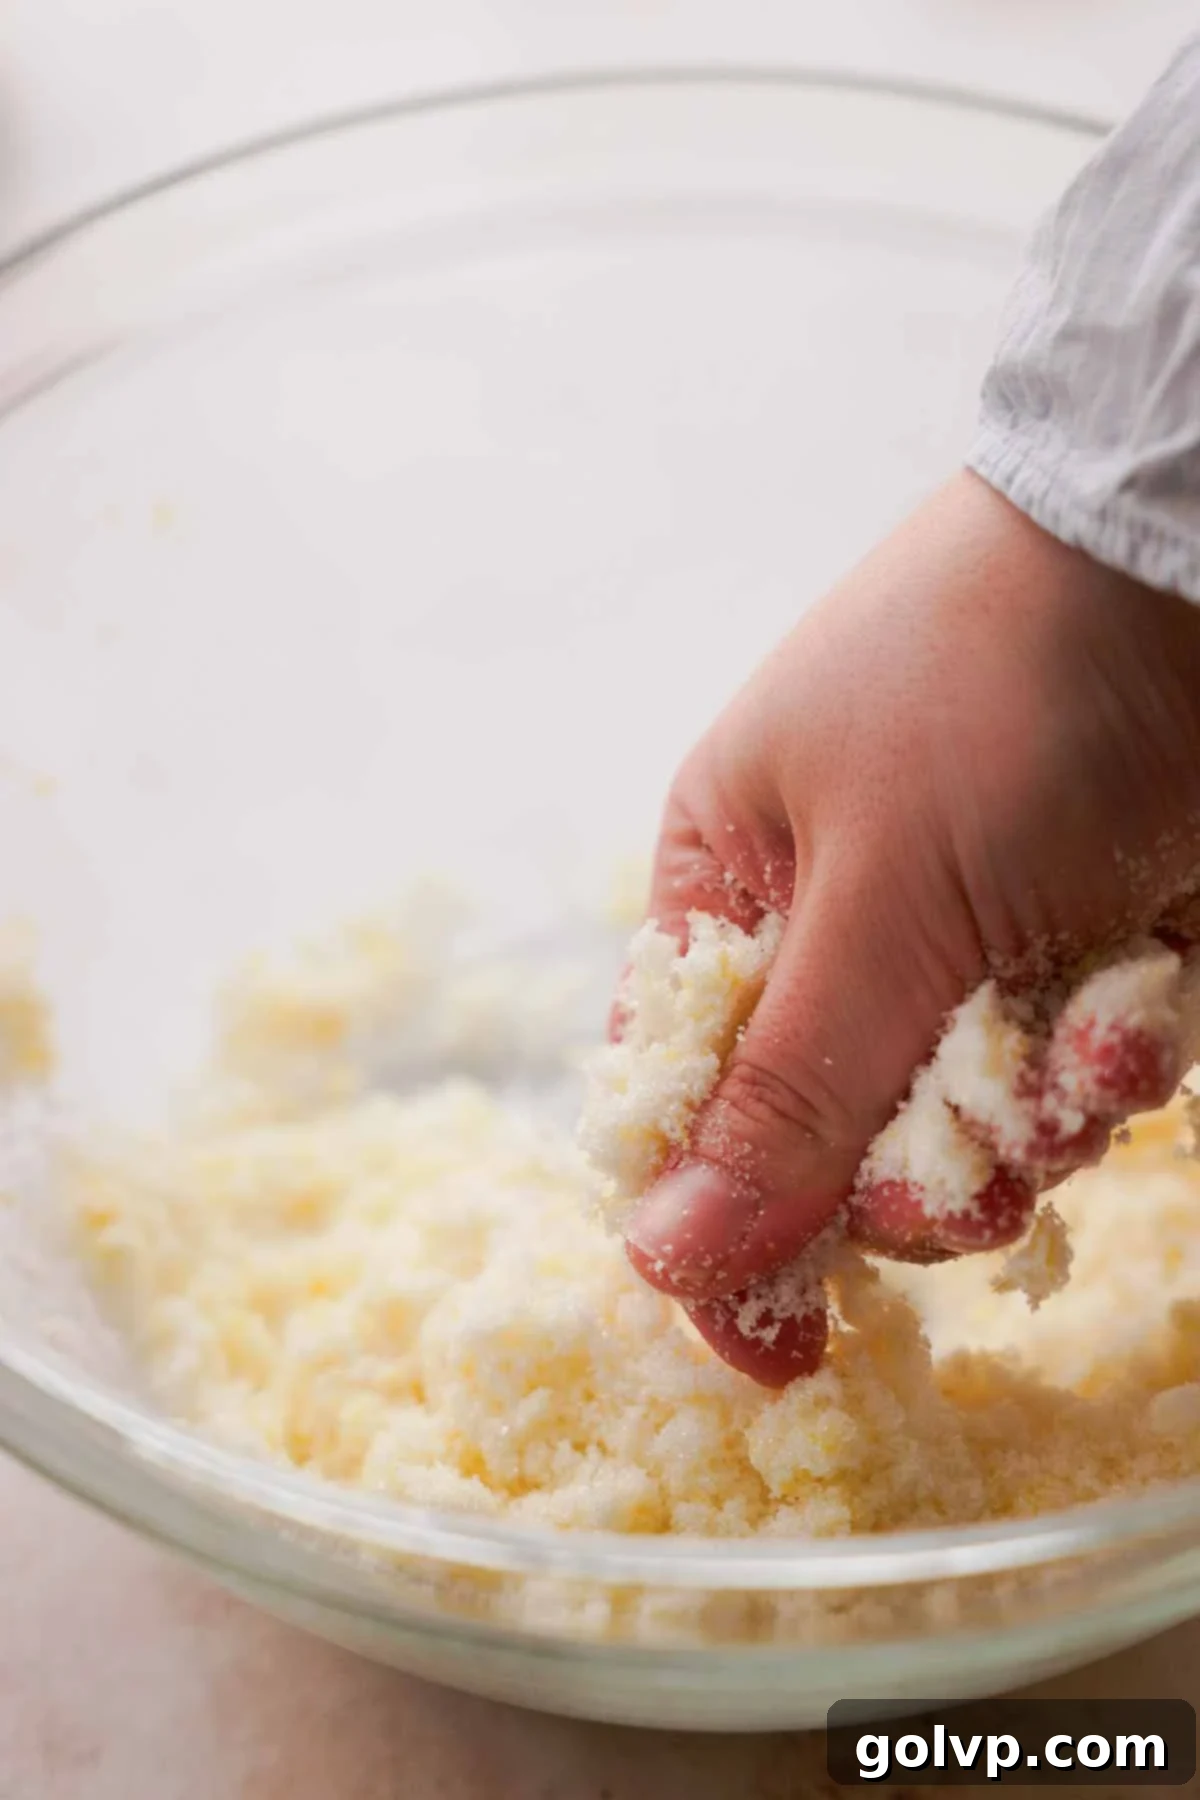
Step 3: In a large mixing bowl or the bowl of a stand mixer, combine 1 cup of granulated sugar with the finely grated zest from two large lemons. Using your fingertips, vigorously rub the lemon zest into the sugar. This crucial step releases the essential oils from the zest, infusing the sugar with an intense, aromatic lemon fragrance and making it visibly moist. Stir in the cornstarch until well combined. This zest-infused sugar will be the foundation of our vibrant lemon flavor.
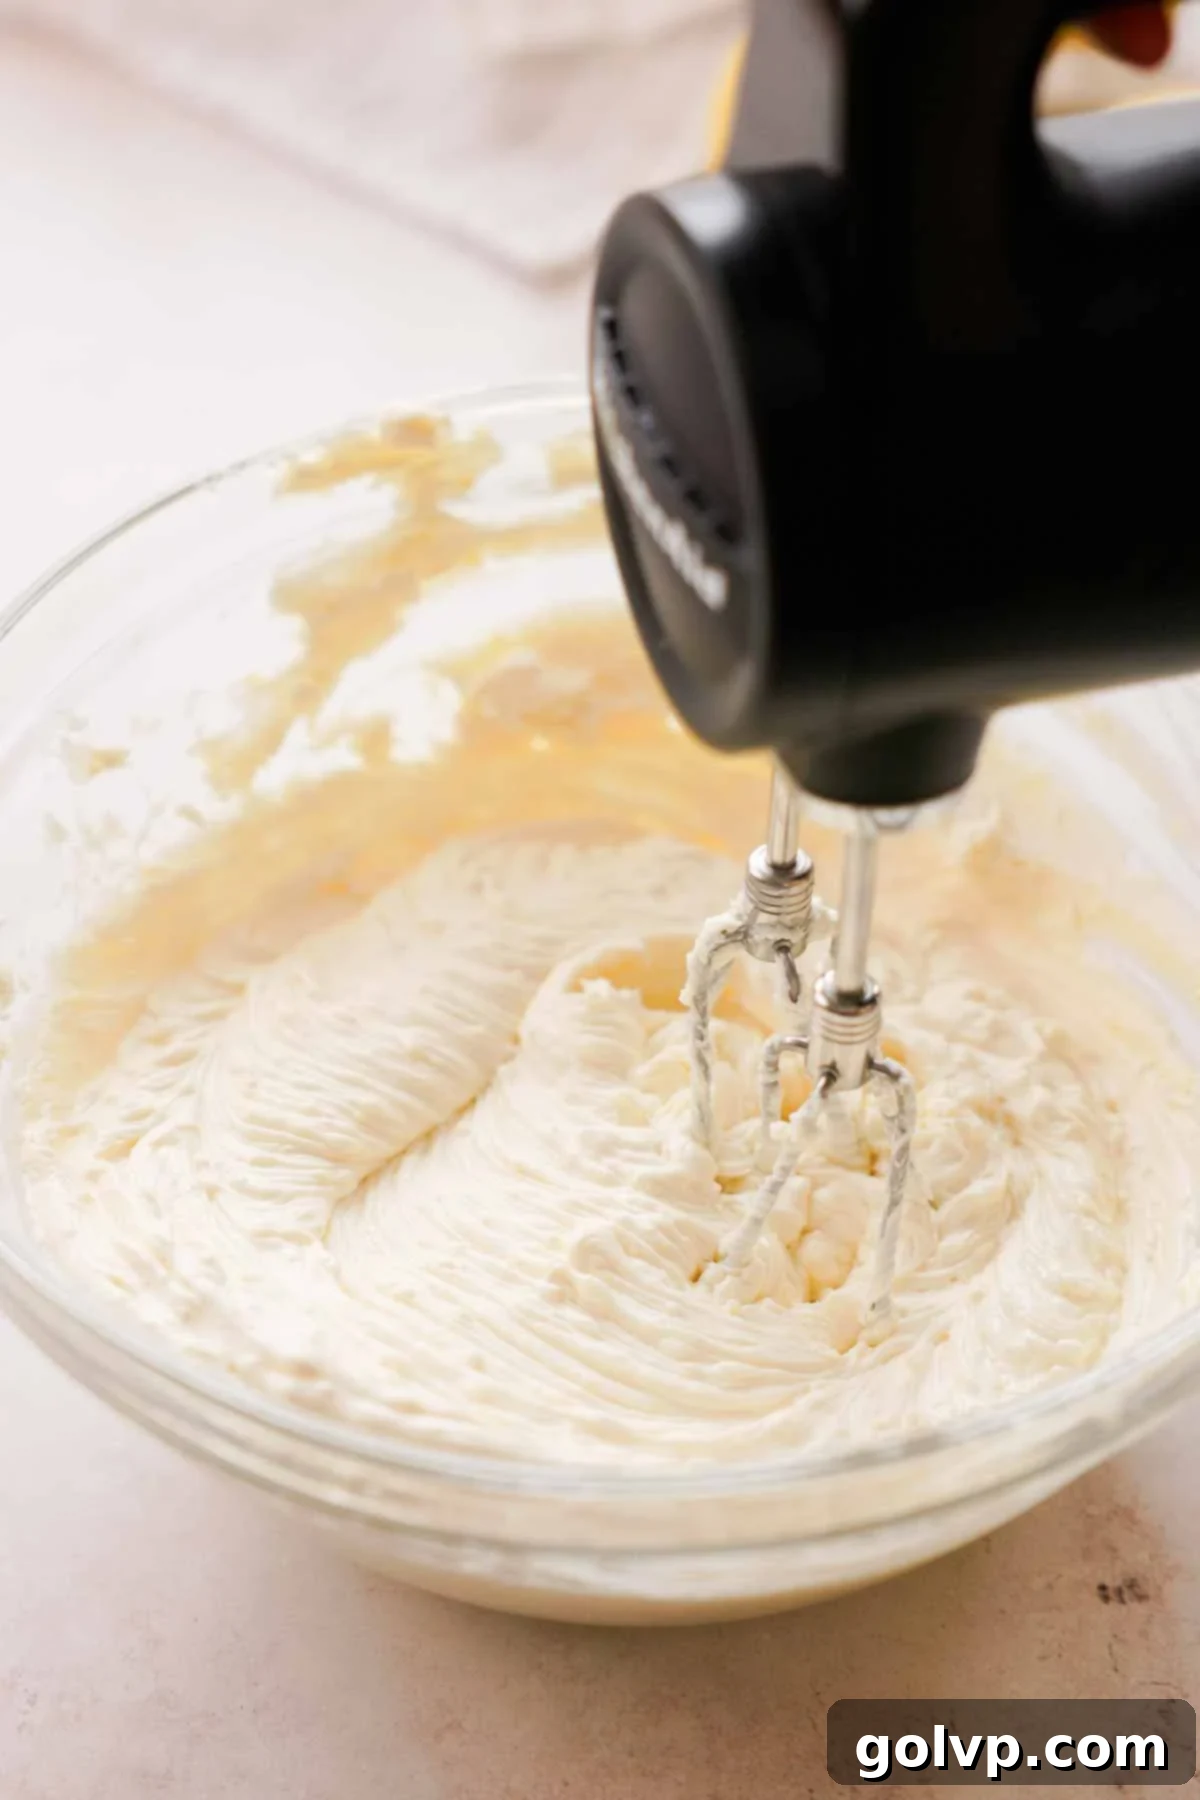
Step 4: Add the softened, room-temperature full-fat cream cheese to the stand mixer with the lemon-infused sugar mixture. Using the paddle attachment, beat on medium-low speed until the mixture is perfectly creamy and smooth. Make sure to stop and scrape down the sides and bottom of the bowl frequently to ensure all ingredients are thoroughly incorporated and there are no lumps. Achieving a smooth cream cheese base at this stage is key to a velvety cheesecake.
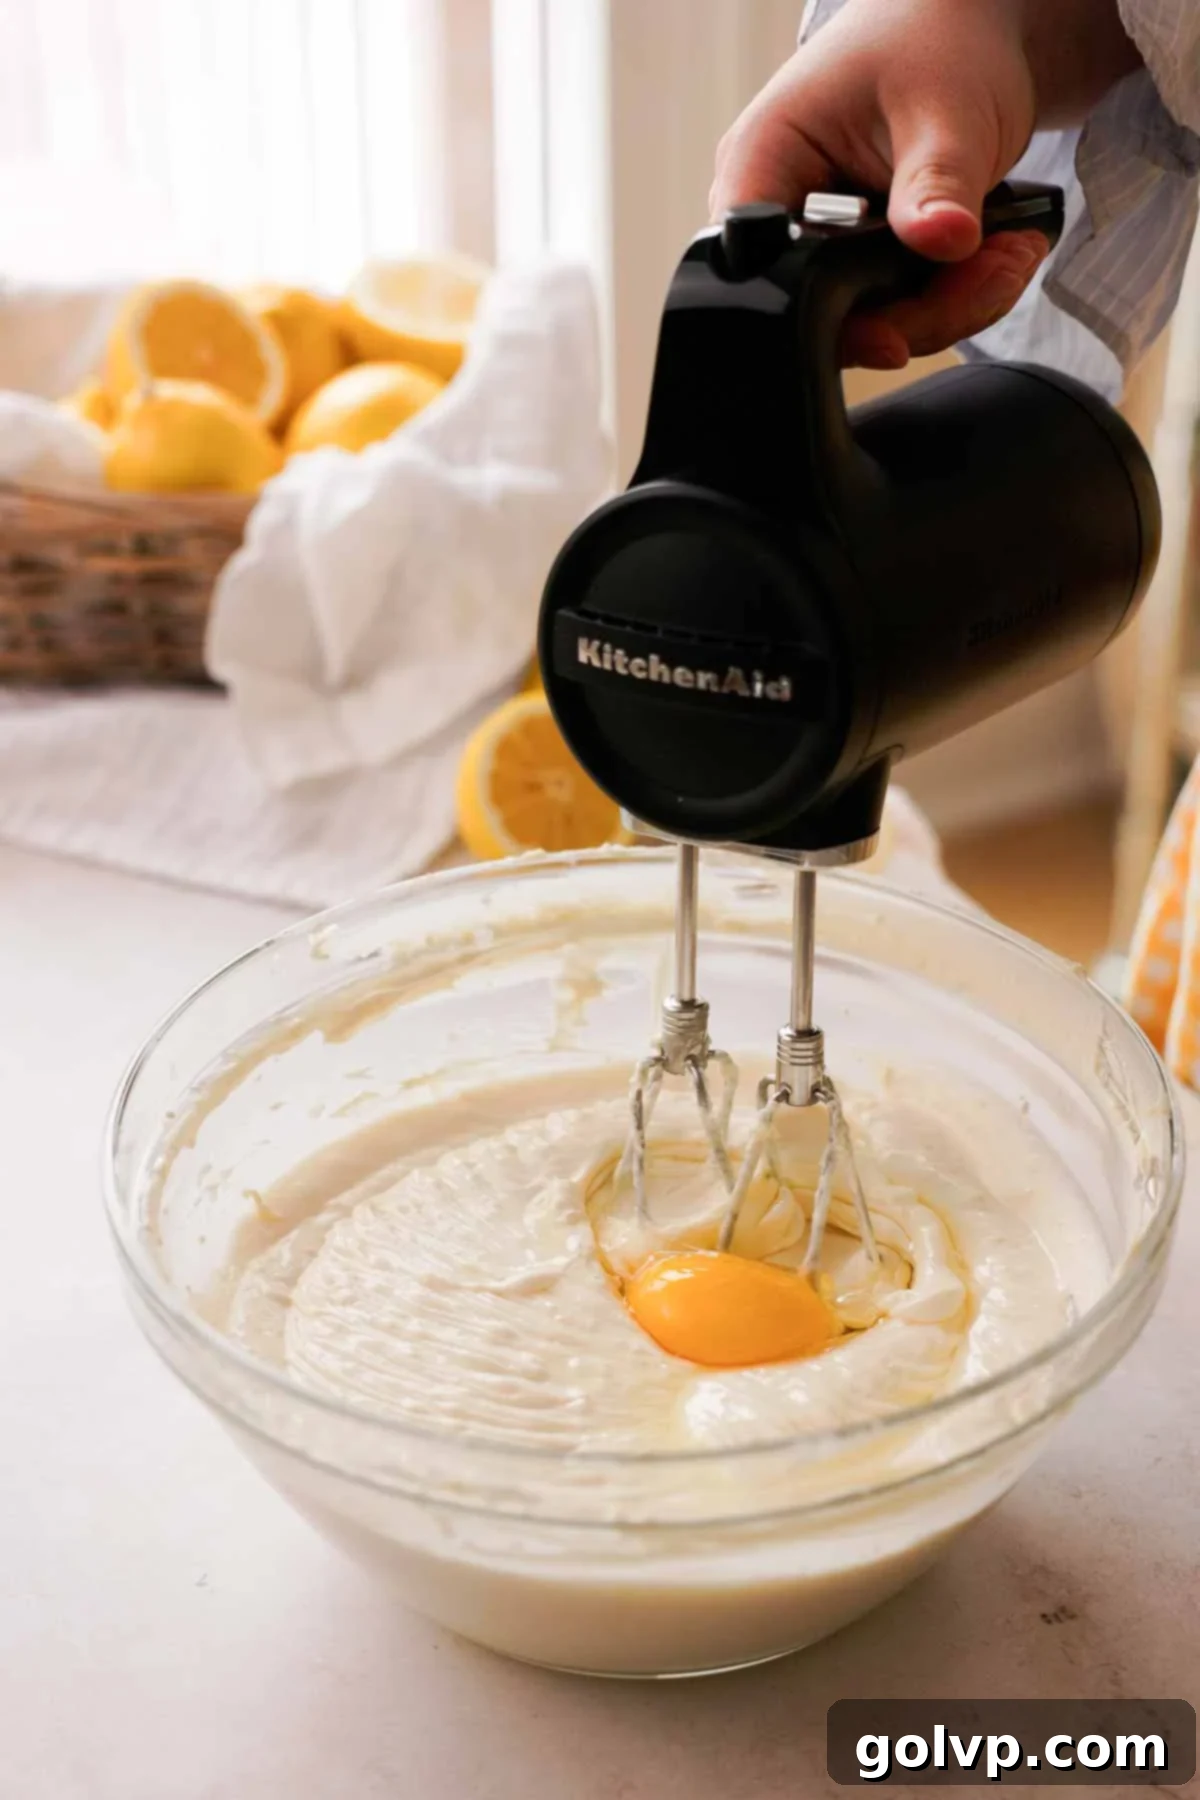
Step 5: Introduce the sour cream, vanilla extract, and salt to the cream cheese mixture. Measure out 3 tablespoons of freshly squeezed lemon juice and add it in. Mix on low speed just until everything is well combined, again taking care to scrape down the sides of the bowl to ensure a uniform batter. Next, add the eggs, one at a time, mixing only until each egg is just incorporated. Overmixing after adding the eggs can incorporate too much air, which can lead to cracks in your baked cheesecake.
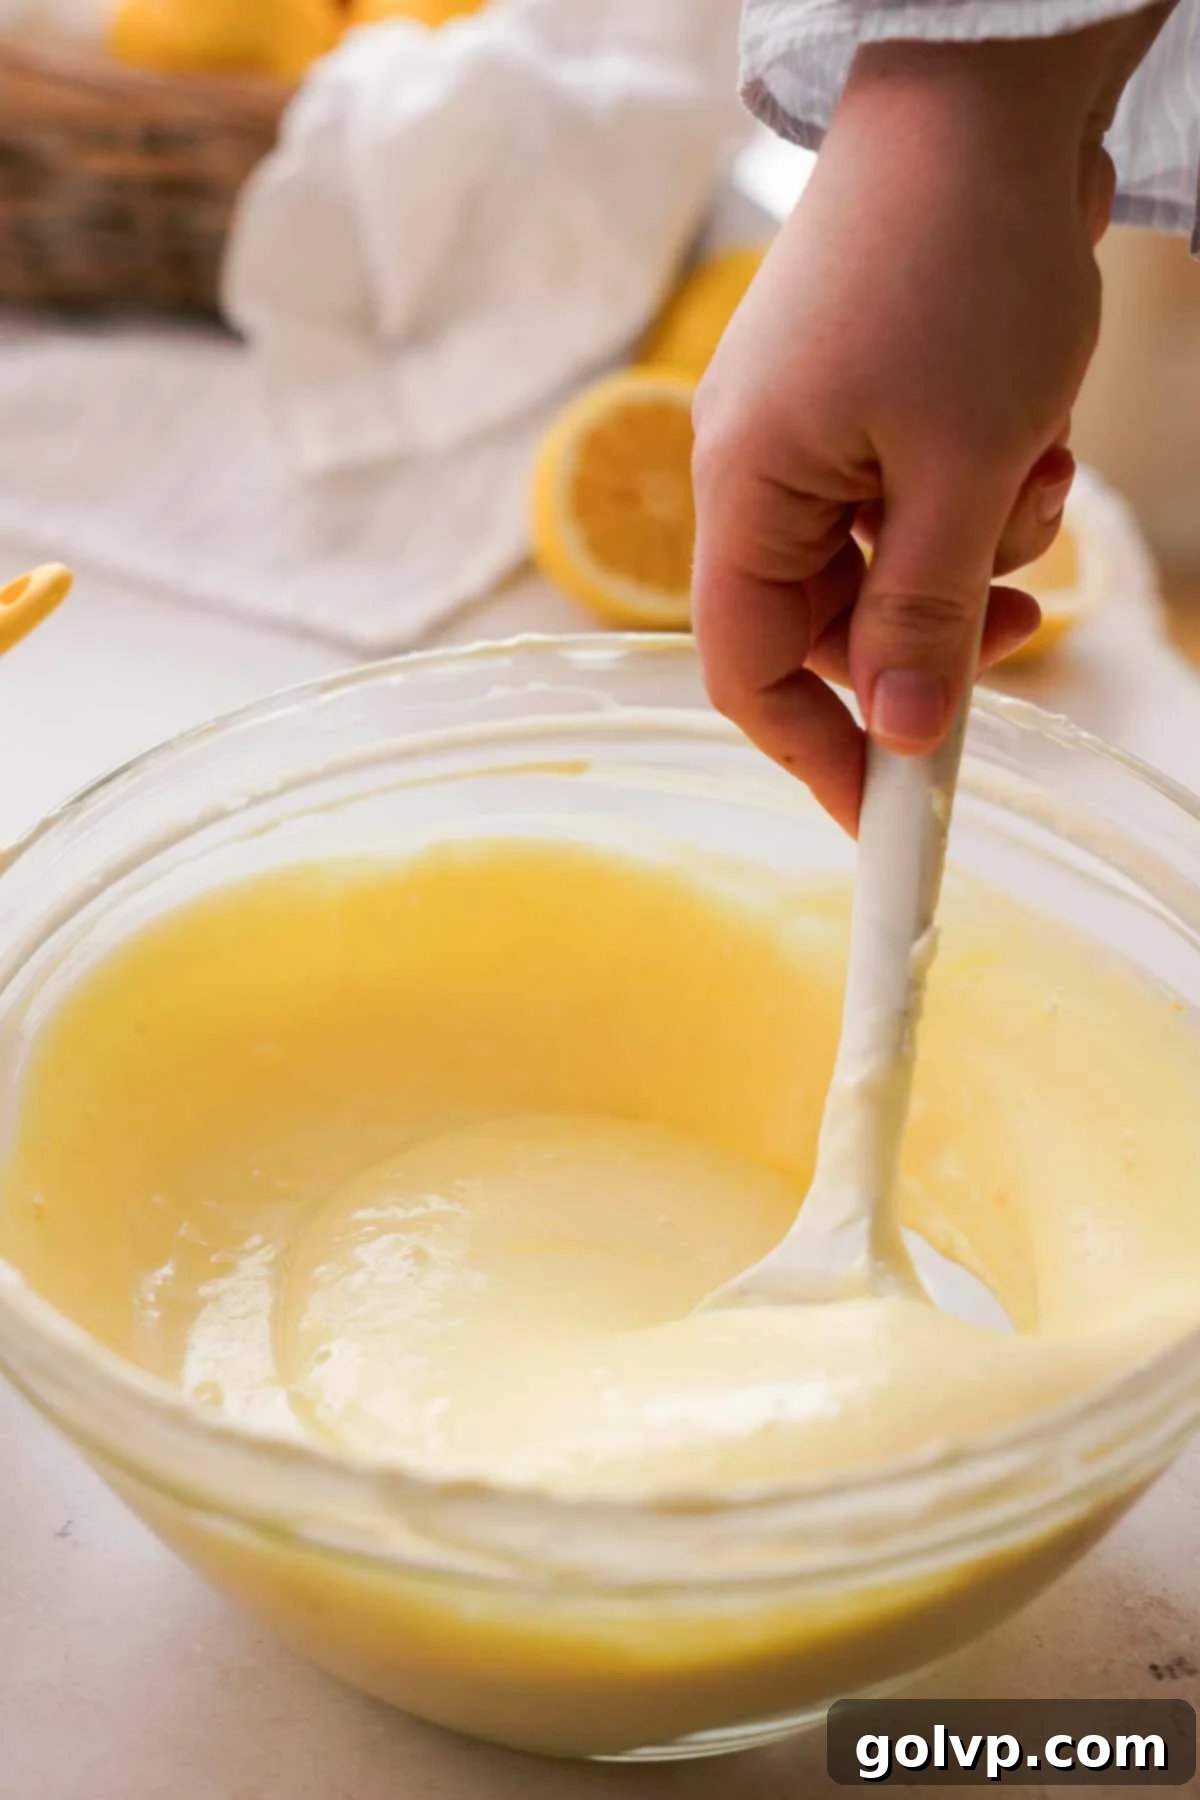
Step 6: Carefully divide the smooth cheesecake batter into two equal halves. If you desire a more pronounced lemon color, add a few drops of yellow food coloring to one half of the batter and gently stir until the color is even. This will create a beautiful visual contrast with the poppy seed portion. Leave the other half uncolored, or prepare it for the poppy seeds.
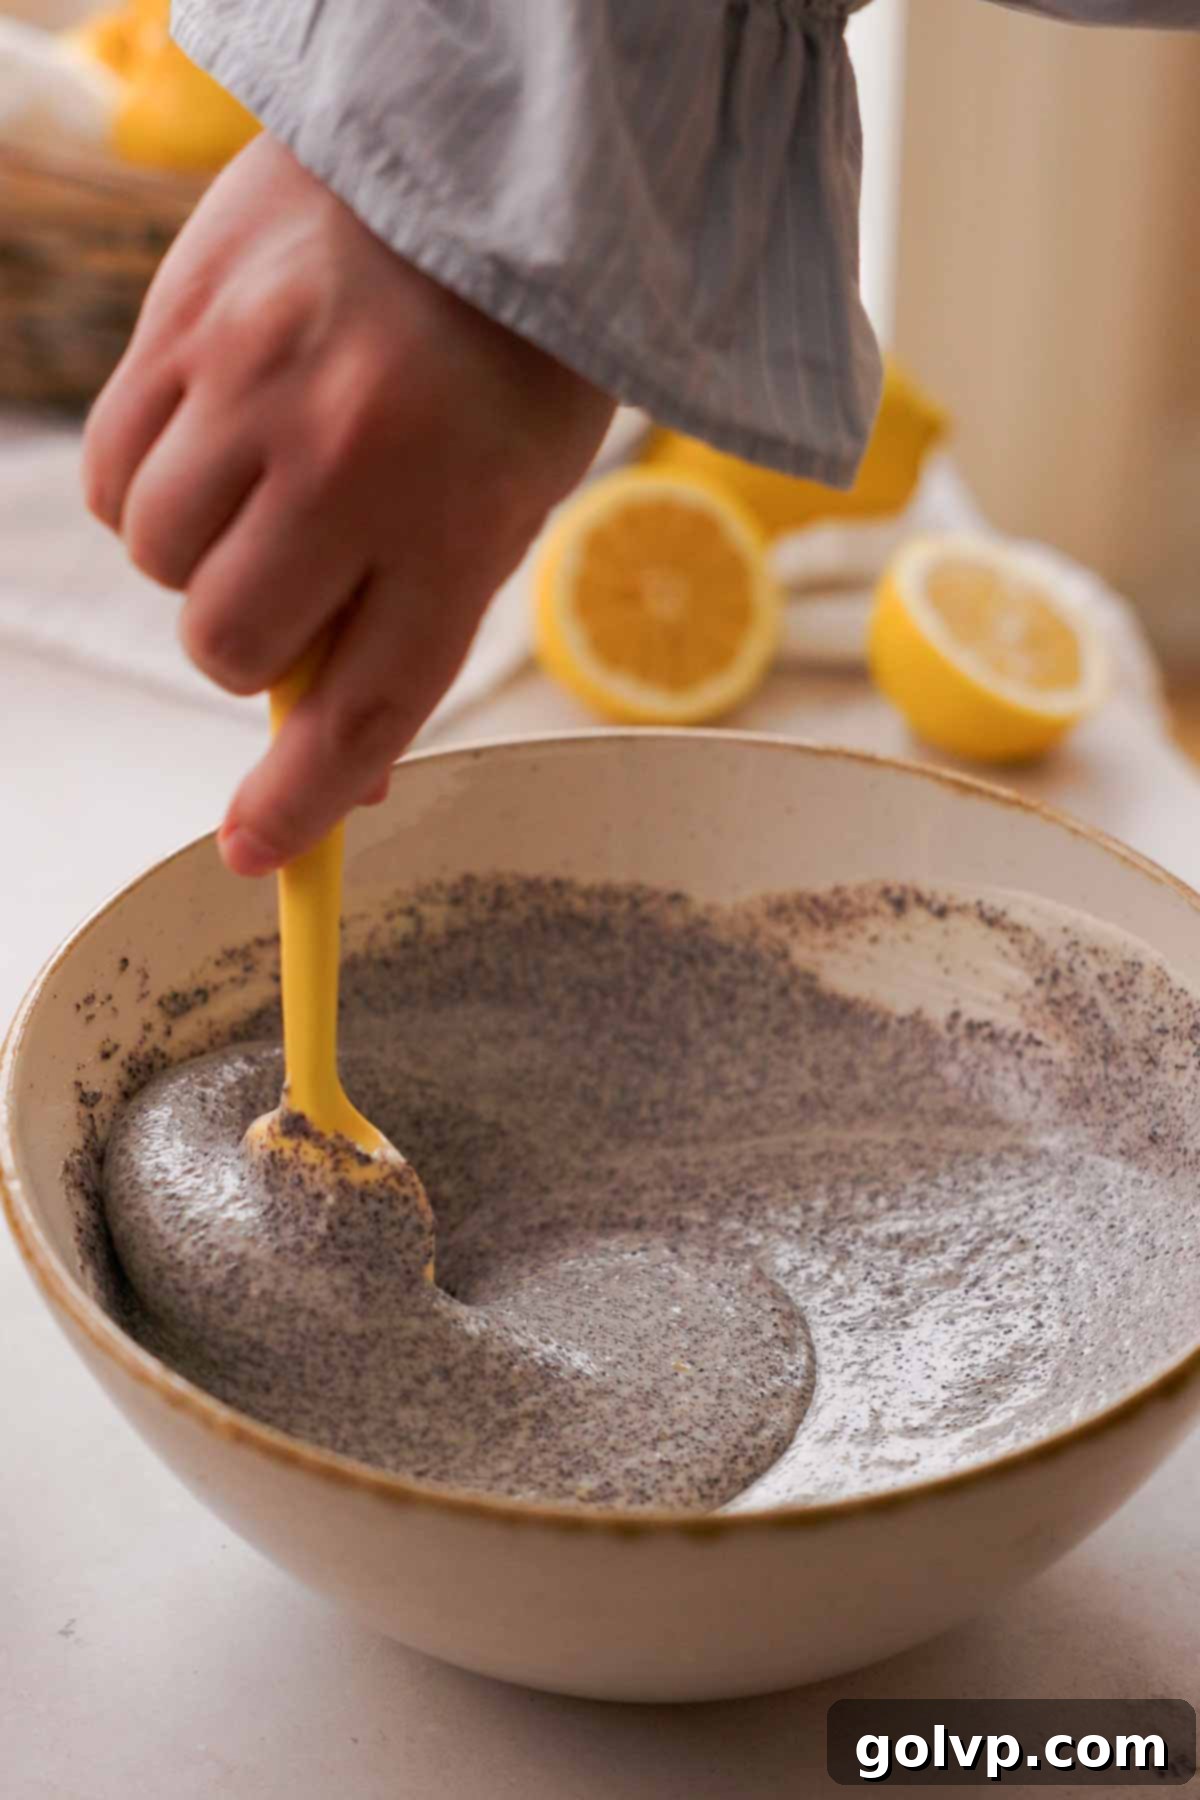
Step 7: Now, take the cooled poppy seed paste you prepared earlier and gently fold it into the remaining half of the cheesecake batter. Stir just until the poppy seeds are evenly distributed, creating a speckled, darker batter. Be careful not to overmix, as this can develop gluten in the cream cheese and alter the cheesecake’s delicate texture. You should now have two distinct batters: one lemon-flavored and potentially yellow, and one with poppy seeds.
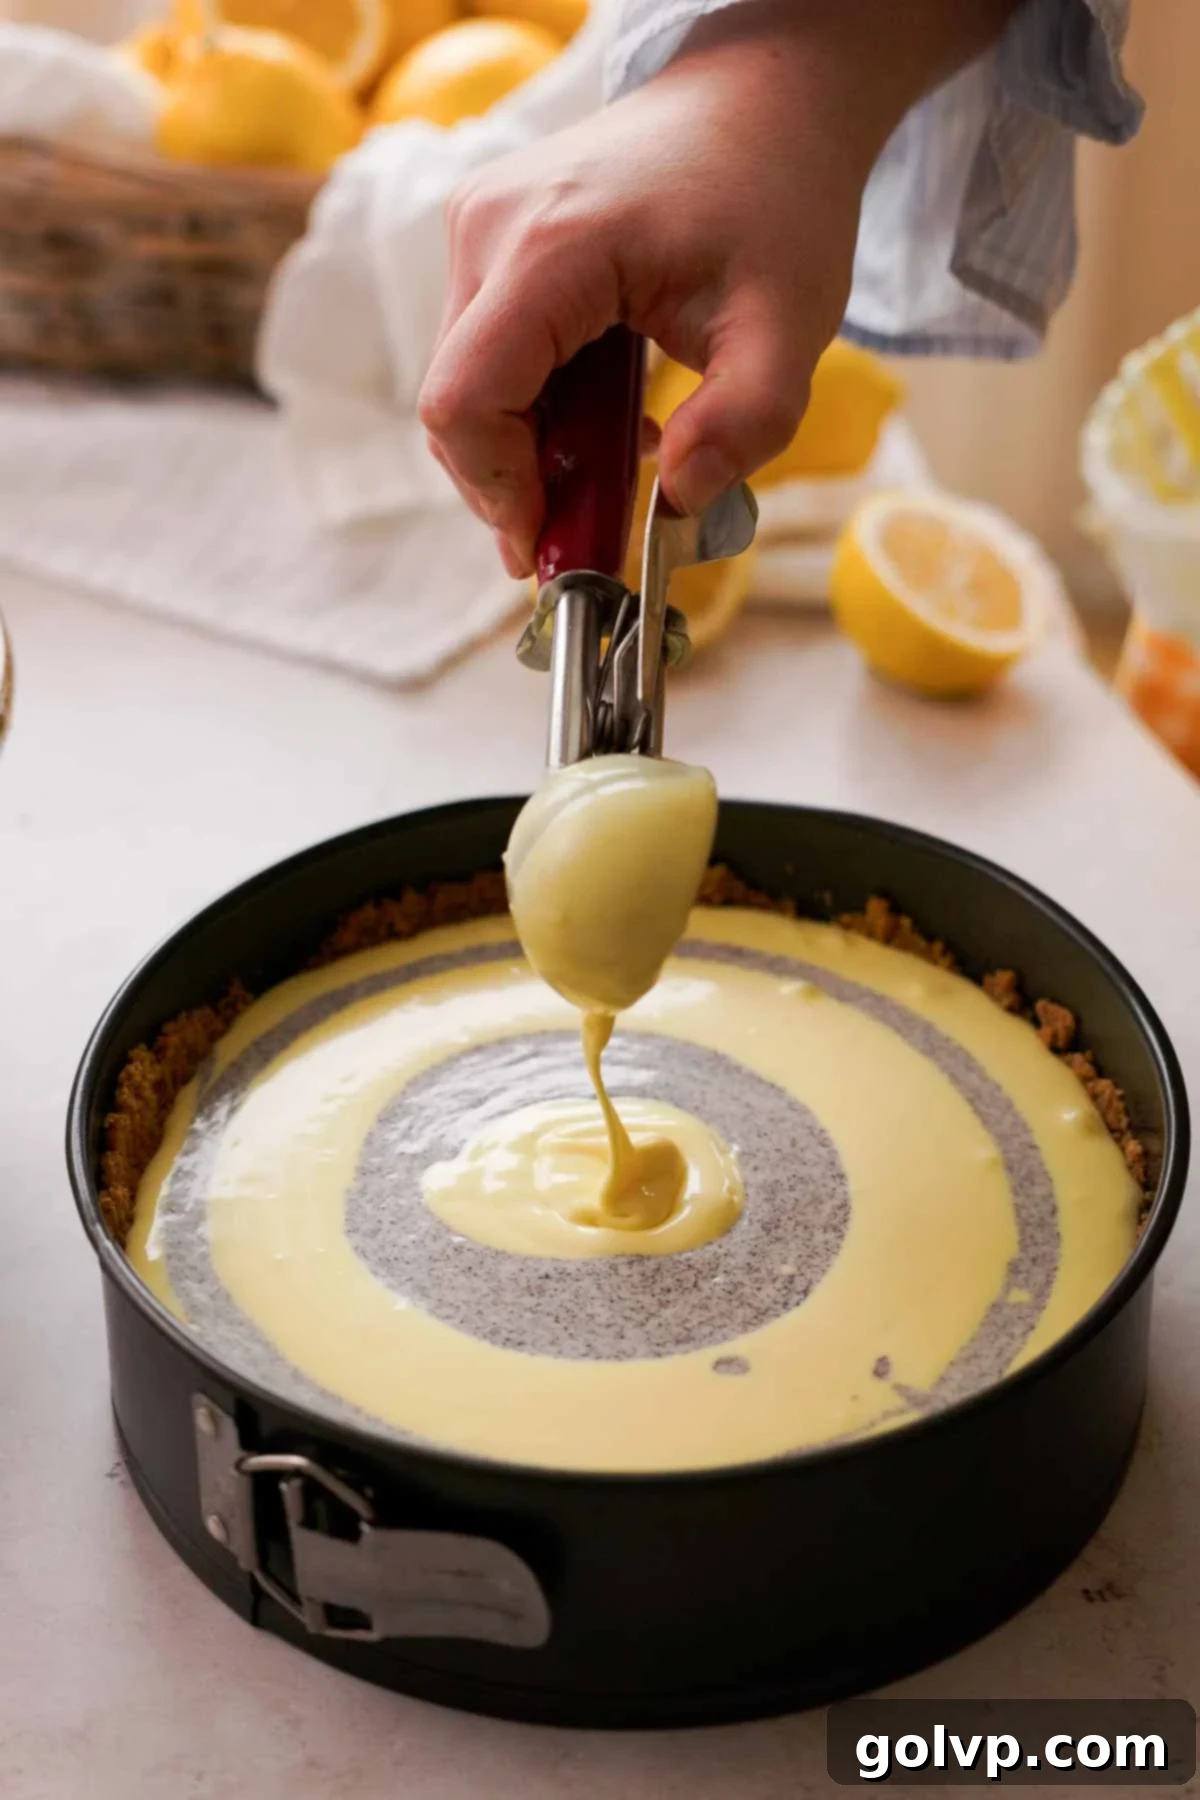
Step 8: Begin assembling your cheesecake. Spoon alternating dollops of the lemon batter and the poppy seed batter into the pre-baked graham cracker crust. Aim for an even distribution, creating a beautiful marbled effect. Continue layering until all the batter has been added to the springform pan. Don’t worry too much about perfection at this stage; the next step will help create the elegant swirls.
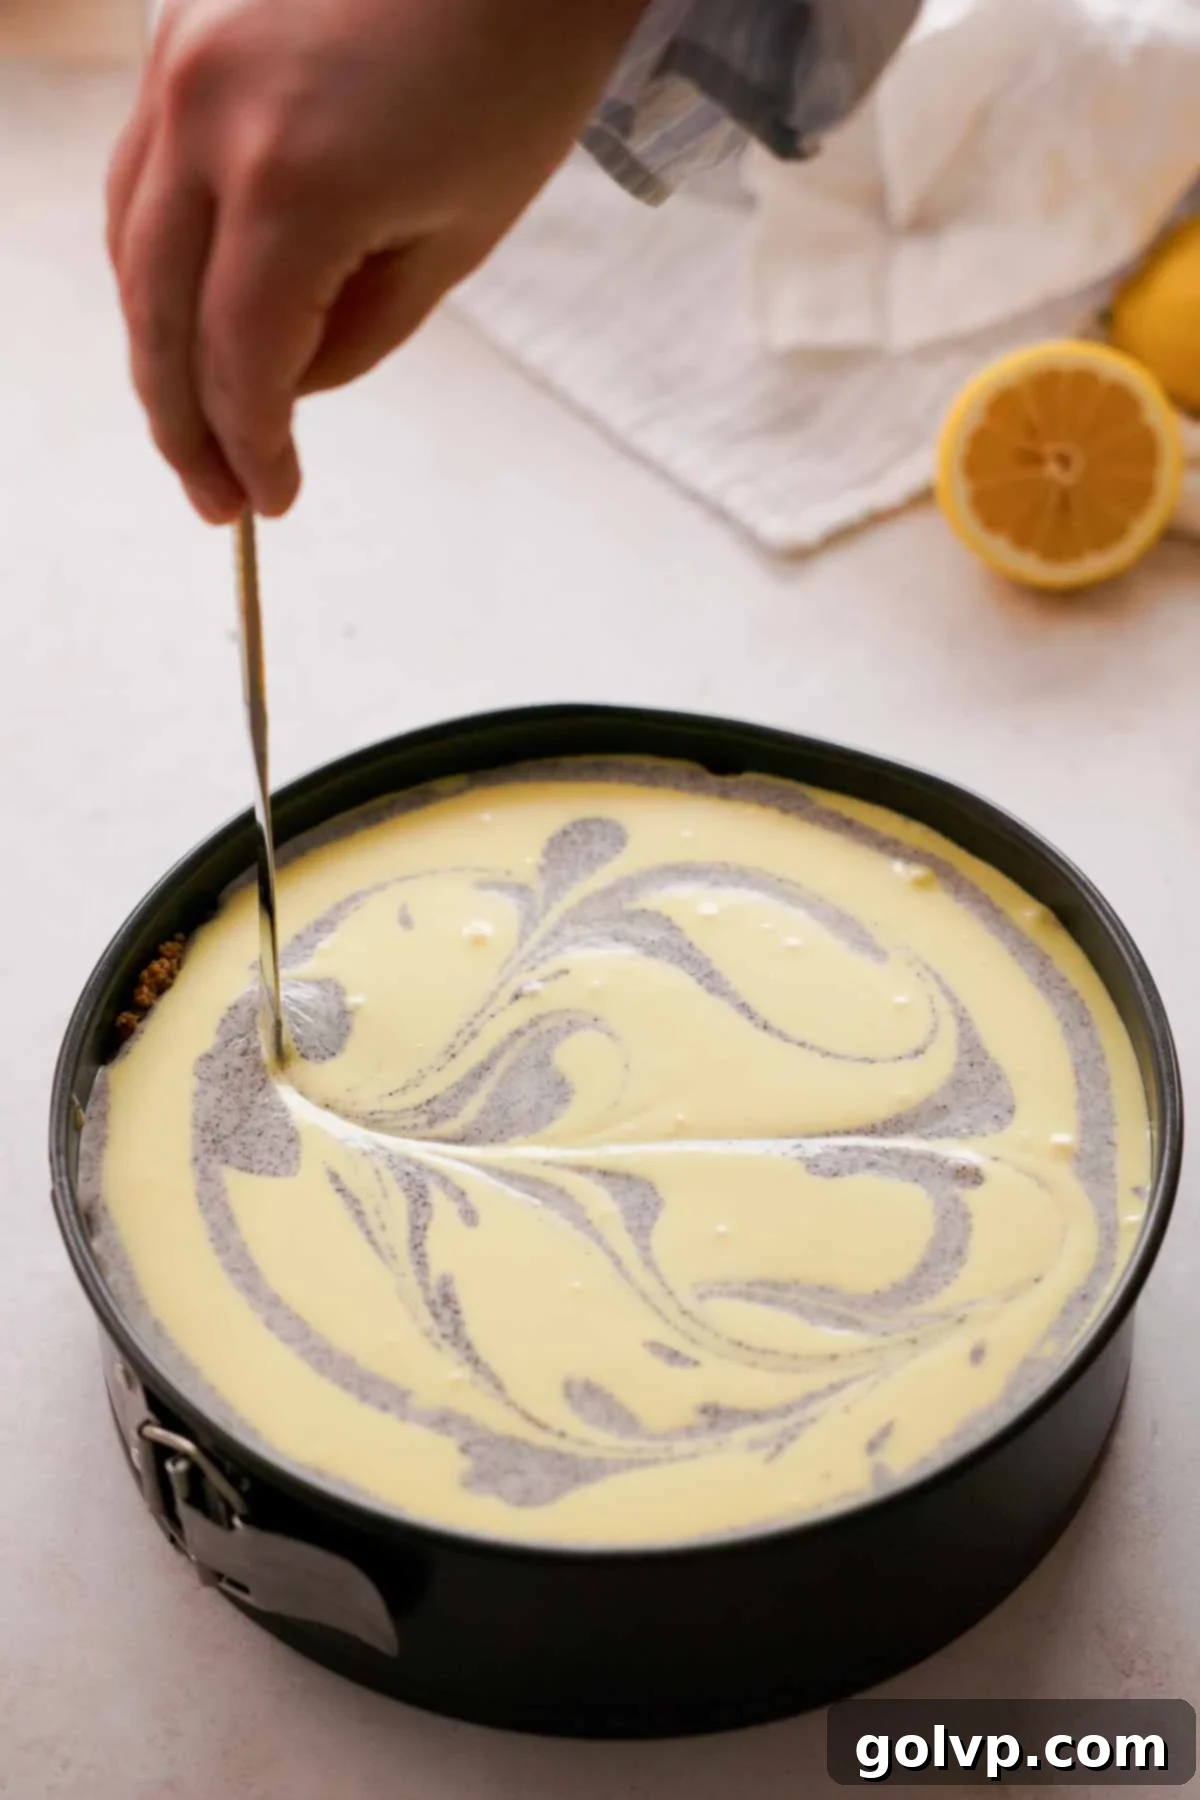
Step 9: For an extra visual flourish, reserve a small amount (about 2-3 tablespoons) of the poppy seed batter. Once the main batters are in the crust, spoon these reserved dollops on top of the cheesecake. Then, using a thin knife, skewer, or toothpick, gently swirl the top layer of batter to create intricate patterns. This not only looks stunning but ensures a delightful mix of flavors and textures in every bite. Tap the pan gently on the counter a few times to release any large air bubbles.

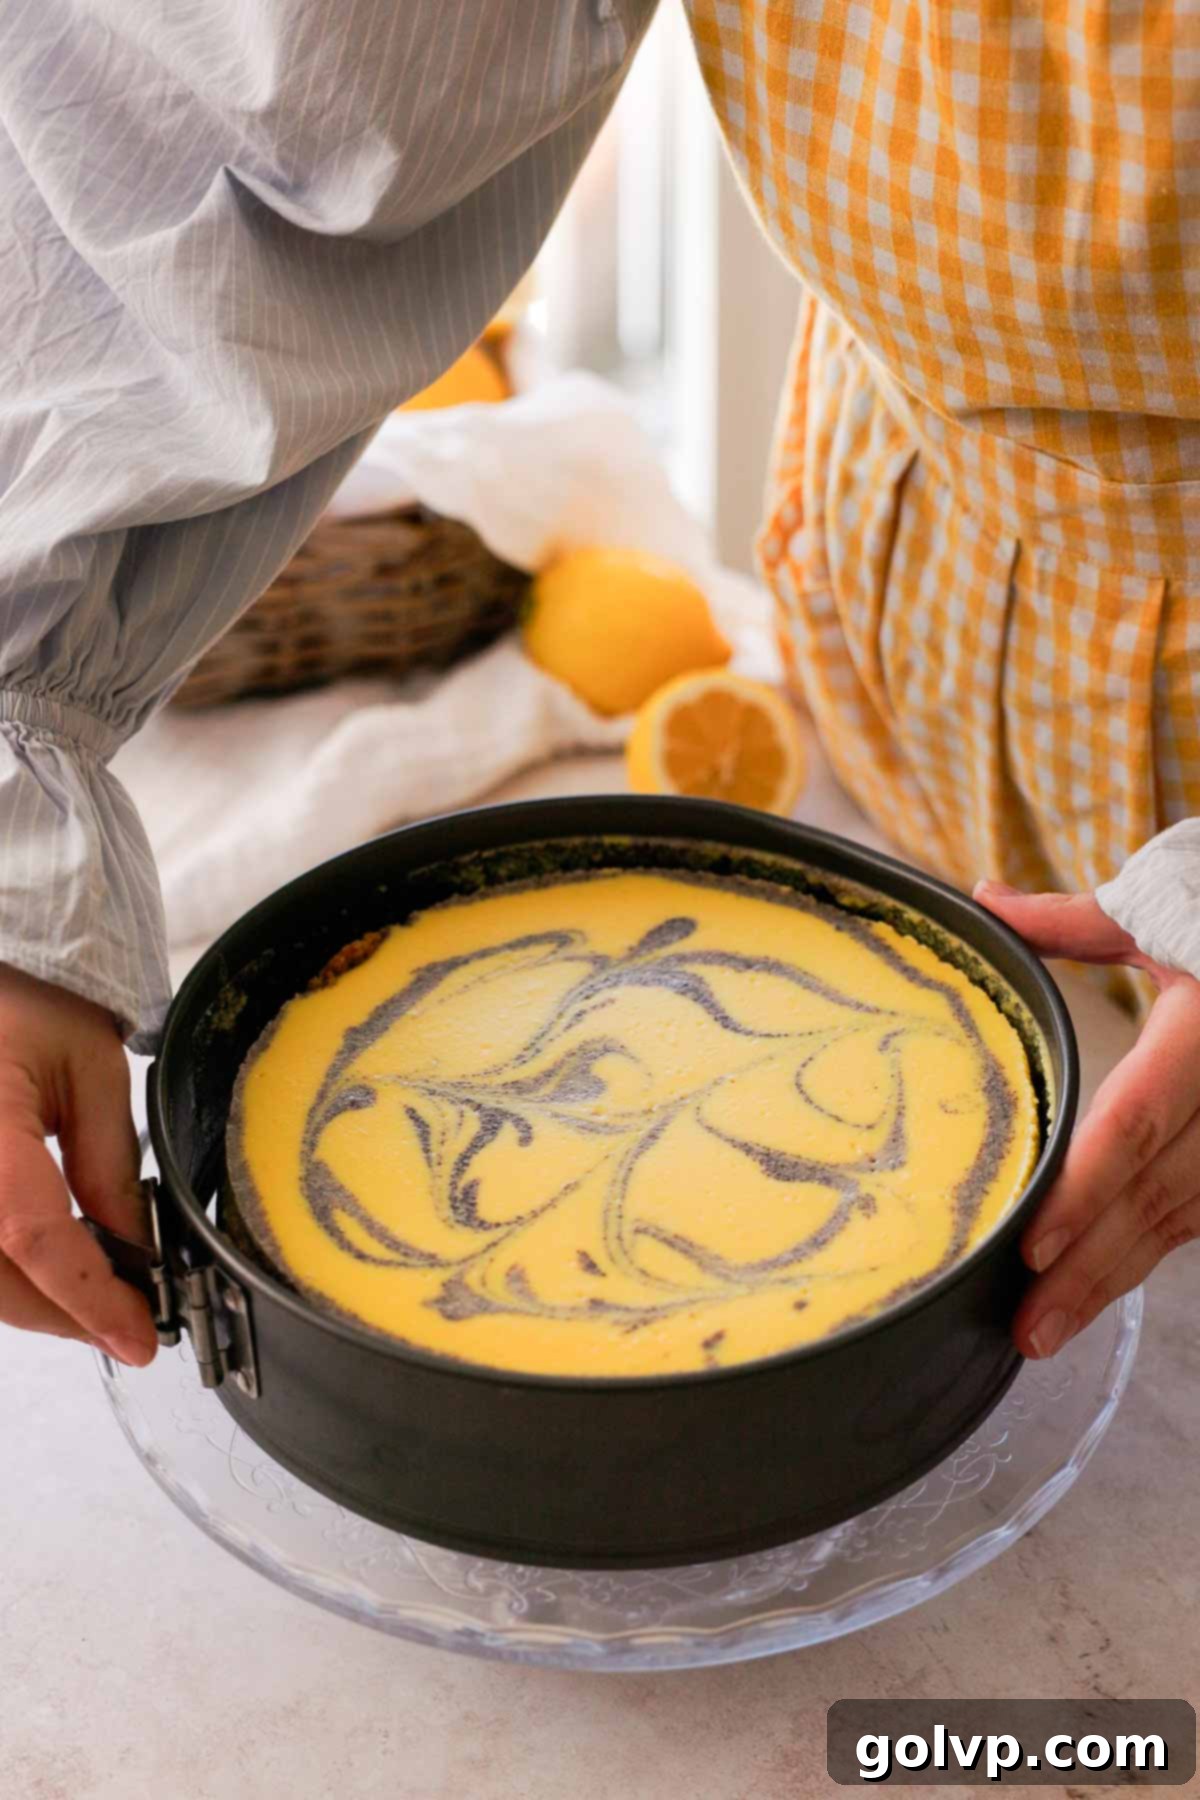
Step 10: Prepare a water bath, which is crucial for a crack-free, creamy cheesecake. Place the springform pan (wrapped if necessary, see water bath options below) into a larger roasting pan. Carefully pour boiling water into the outer roasting pan, ensuring the water level comes about halfway up the sides of the springform pan, but without touching the cheesecake itself. Transfer the entire assembly into the preheated 300°F (150°C) oven and bake for approximately 1 hour and 30 minutes. The cheesecake is ready when the edges are set but the center still has a slight jiggle when gently nudged. Turn off the oven, leave the oven door ajar, and let the cheesecake cool gradually in the oven for another 30 minutes. This slow cooling prevents sudden temperature changes that can cause cracks.
Once cooled in the oven, remove the cheesecake and let it come to room temperature on a wire rack. Finally, transfer it to the refrigerator to chill and set completely for at least 6 hours, or preferably overnight. This extended chilling time is vital for developing its firm, creamy texture and allowing the flavors to fully meld.
Decorating Your Lemon Poppy Seed Cheesecake Step-by-Step
Step 1: To prepare the elegant topping, combine chilled heavy whipping cream, powdered sugar, and pure vanilla extract in a medium bowl or the bowl of a stand mixer fitted with a whisk attachment. Whisk on high speed until soft to medium peaks form. Then, add the chilled sour cream (or Greek yogurt) and continue whisking until stiff peaks are achieved. The sour cream adds a slight tang and stabilizes the whipped cream. Once the cheesecake is fully chilled, carefully remove it from the fridge and gently release the springform pan sides.
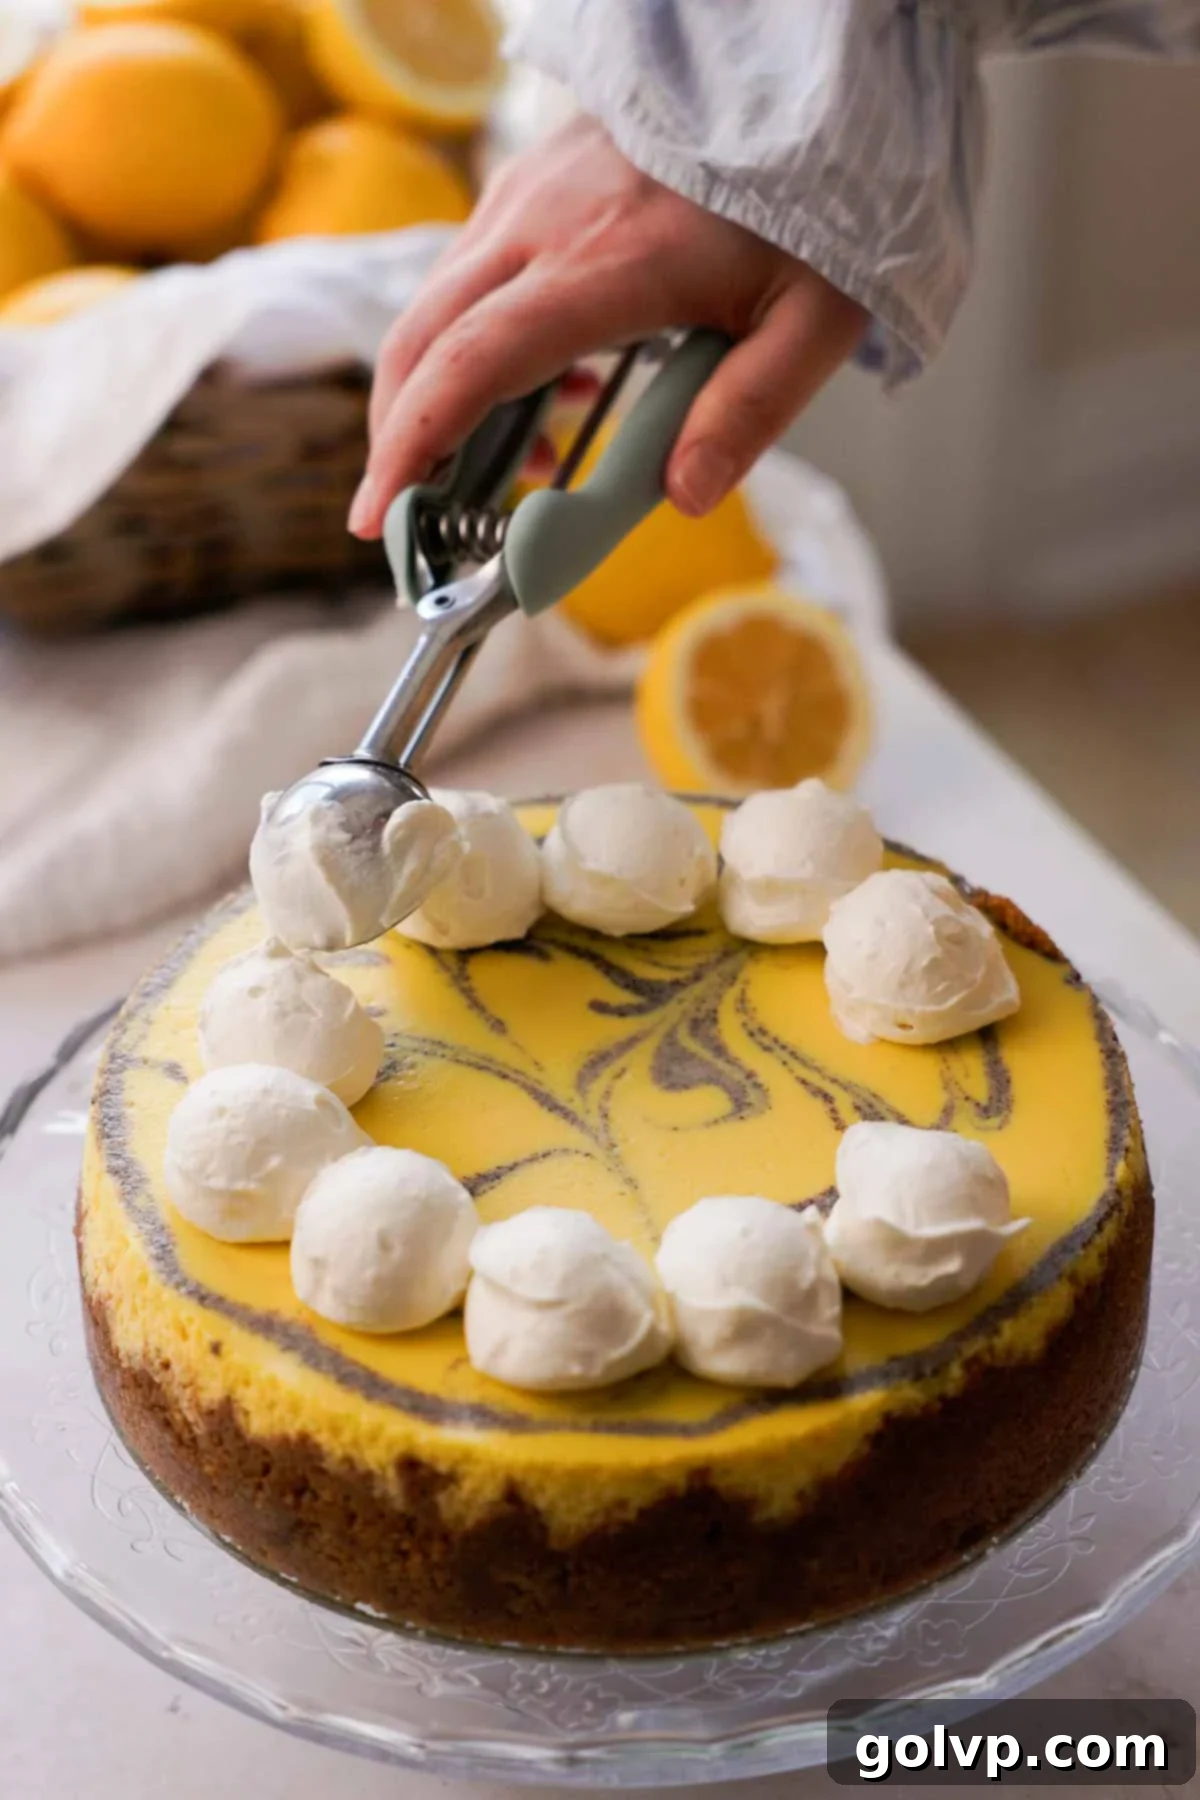
Step 2: With a large spoon, artfully scoop generous dollops of the stiff whipped cream around the entire edge of the cheesecake, creating a decorative border. For each dollop, use the back of a smaller spoon to gently create a small indent or well in its center. These indents will serve as perfect little nests for the luscious lemon curd, ensuring each serving gets a delightful burst of tangy flavor.
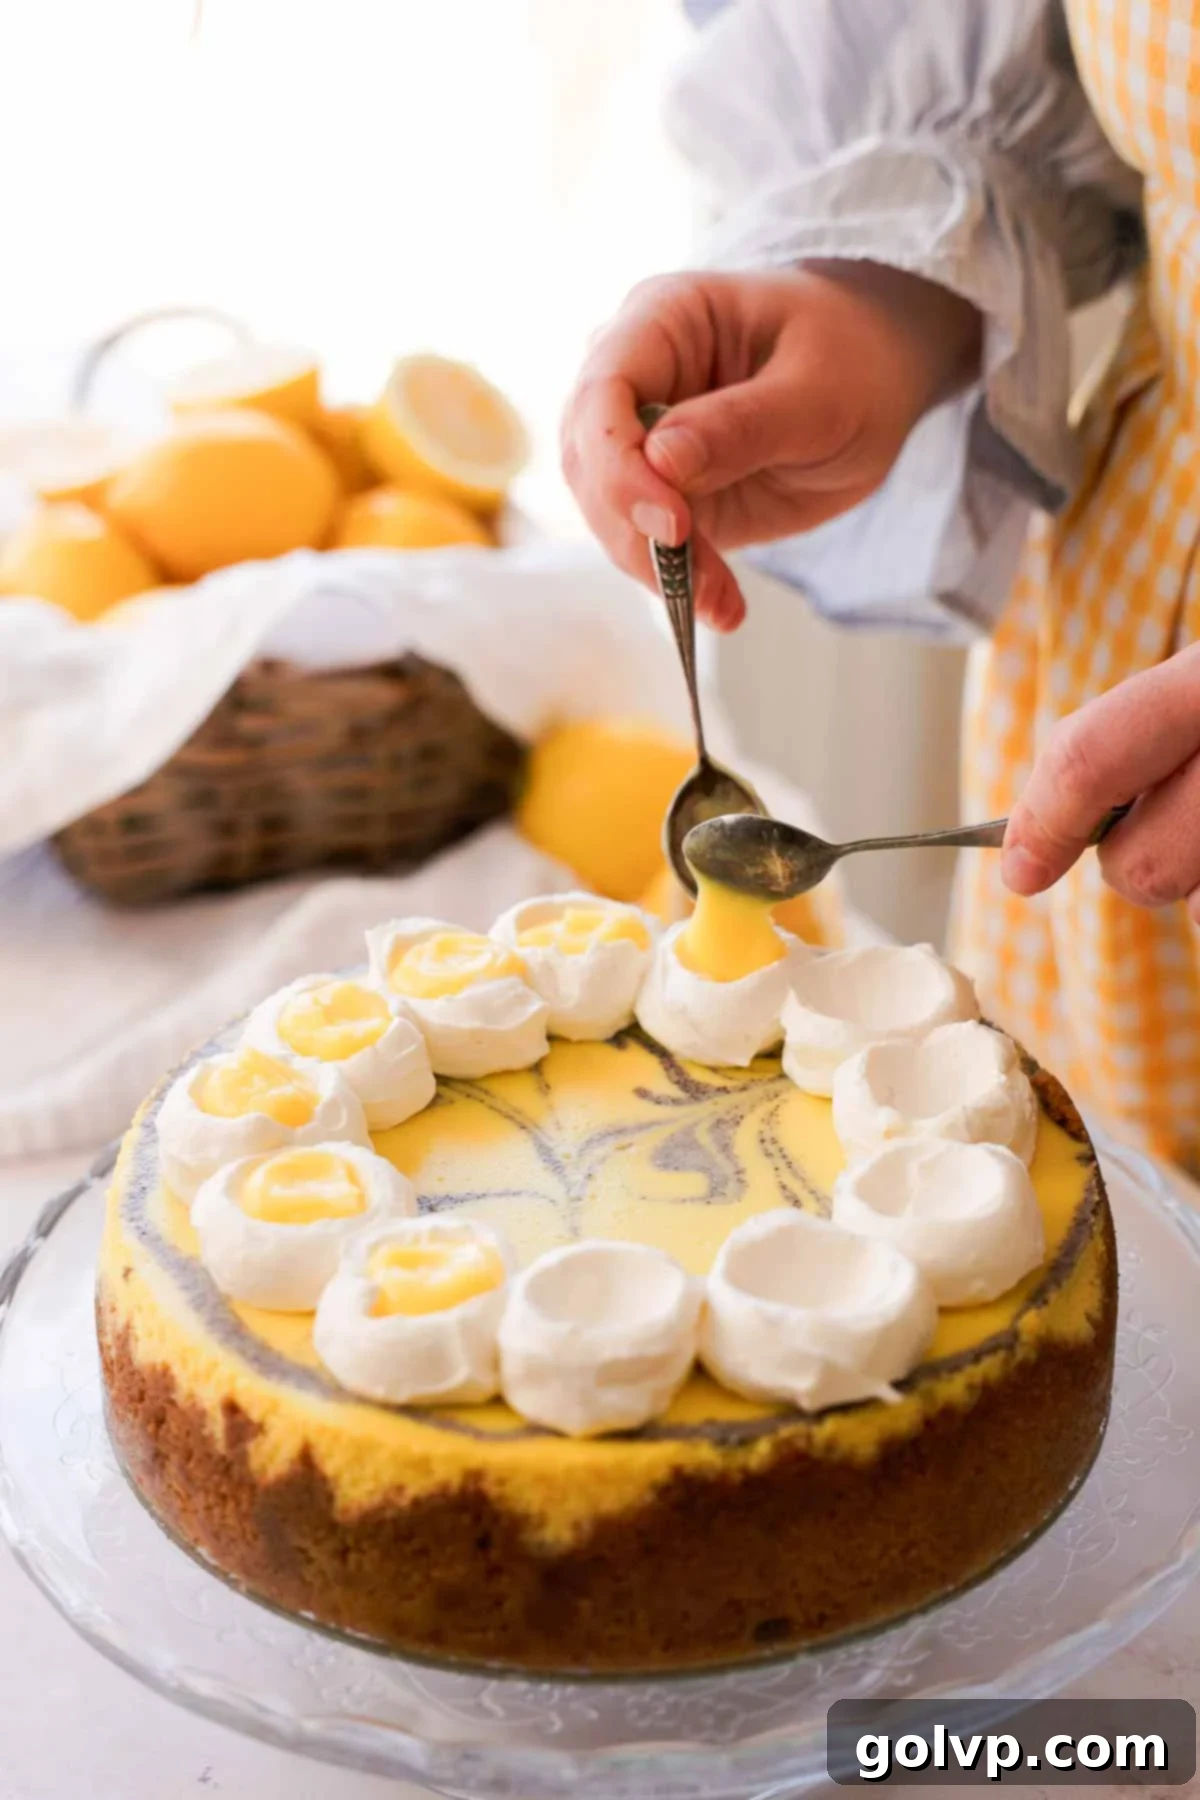
Step 3: Carefully spoon your vibrant homemade lemon curd into each of the created indents in the whipped cream dollops. The bright yellow of the curd will contrast beautifully with the white cream, adding a pop of color and an irresistible tangy aroma. Ensure each well is adequately filled to deliver that perfect burst of citrus with every bite.
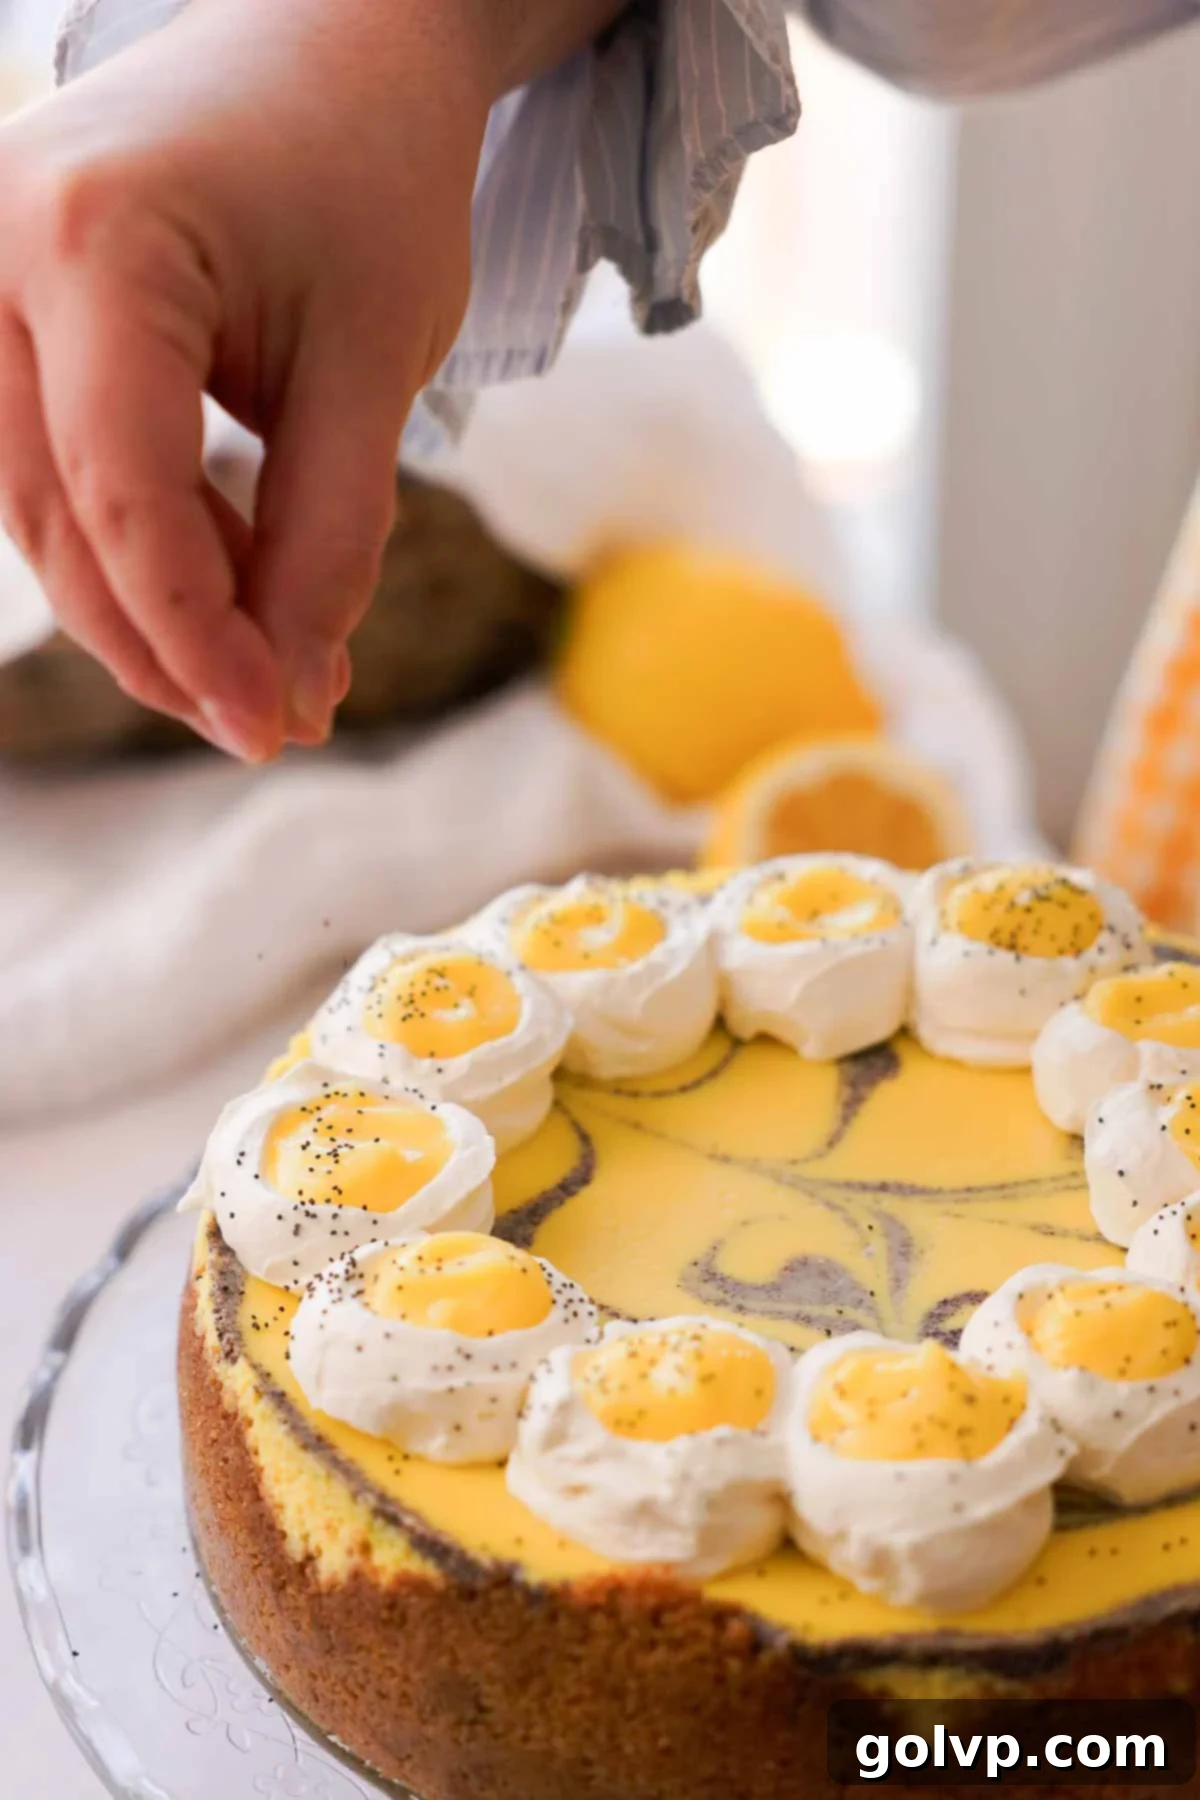
Step 4: For the final touch, lightly sprinkle a small amount of whole poppy seeds over the top of the cheesecake. This adds a delicate visual appeal and a subtle textural element that hints at the delightful poppy seed swirls within. Your masterpiece is now complete and ready to be sliced and served! Ensure it is well chilled before serving for the best texture and flavor experience.
Expert Baked Cheesecake Tips for Success
- Always Use Good Quality, Full-Fat, Brick-Style Cream Cheese: This is the golden rule for a superior cheesecake. Low-fat cream cheese contains too much water, which can lead to a runny filling that won’t set properly, resulting in a less dense and creamy texture. Philadelphia original cream cheese, in its brick form, is highly recommended for its consistent quality and fat content.
- Do Not Overmix the Cheesecake Batter, Especially After Adding Eggs: Overmixing is a common culprit for cracked cheesecakes. When air is incorporated into the batter, it expands during baking and then collapses as it cools, causing unsightly cracks. After adding the eggs, mix only until they are just combined, and always scrape down the sides of the bowl to ensure even mixing without over-aeration.
- Bake in a Water Bath (Bain-Marie) for Even Creaminess: A water bath creates a moist, consistent heat environment, allowing the cheesecake to bake gently and evenly from edge to center. This slow, moist baking is key to achieving that perfectly smooth, creamy texture and helps prevent the cheesecake from cracking on top. It’s a simple step that makes a huge difference.
- Avoid Baking at Too High an Oven Temperature: High heat will cause the outside edges of your cheesecake to bake and set much faster than the delicate center. This uneven baking leads to a tough outer ring and can dramatically increase the likelihood of cracks forming across the surface as the cheesecake cools and contracts. Always adhere to the recommended lower baking temperatures.
- Rely on Visual Cues to Determine Doneness: The best way to know if your cheesecake is perfectly baked is by observing it. The edges should appear set and slightly puffed, while the very center should still have a slight “jiggle” when you gently nudge the pan. It shouldn’t be liquid but should move like a firm custard. It will continue to set as it cools.
- Allow for Ample Chilling Time in the Refrigerator: Patience is key! A minimum of six hours, or preferably overnight, in the refrigerator is essential. This extended chilling time allows the cheesecake to fully firm up, transforming its texture into that ideal balance of creamy yet perfectly set. It also allows the flavors to deepen and meld, making for an incredibly satisfying dessert that slices beautifully.
Make Ahead and Storage
Cheesecakes are ideal make-ahead desserts, as they require significant chilling time to fully set and for their flavors to develop. This lemon poppy seed cheesecake can be baked a day or two in advance, allowing you to focus on other preparations closer to serving time.
Store any leftover cheesecake, covered tightly with plastic wrap or in an airtight container, in the refrigerator for up to 5 days. For longer storage, this cheesecake freezes exceptionally well. Wrap individual slices or the whole cheesecake tightly in several layers of plastic wrap, followed by aluminum foil, to prevent freezer burn. It can be frozen for up to 2 months. When ready to enjoy, thaw it overnight in the refrigerator.
If you anticipate freezing the cheesecake, it’s best to use arrowroot starch or potato starch instead of cornstarch in the batter. Cornstarch tends to break down after freezing and thawing, potentially releasing water and altering the cheesecake’s texture. Arrowroot starch maintains a better texture and consistency post-freezing.
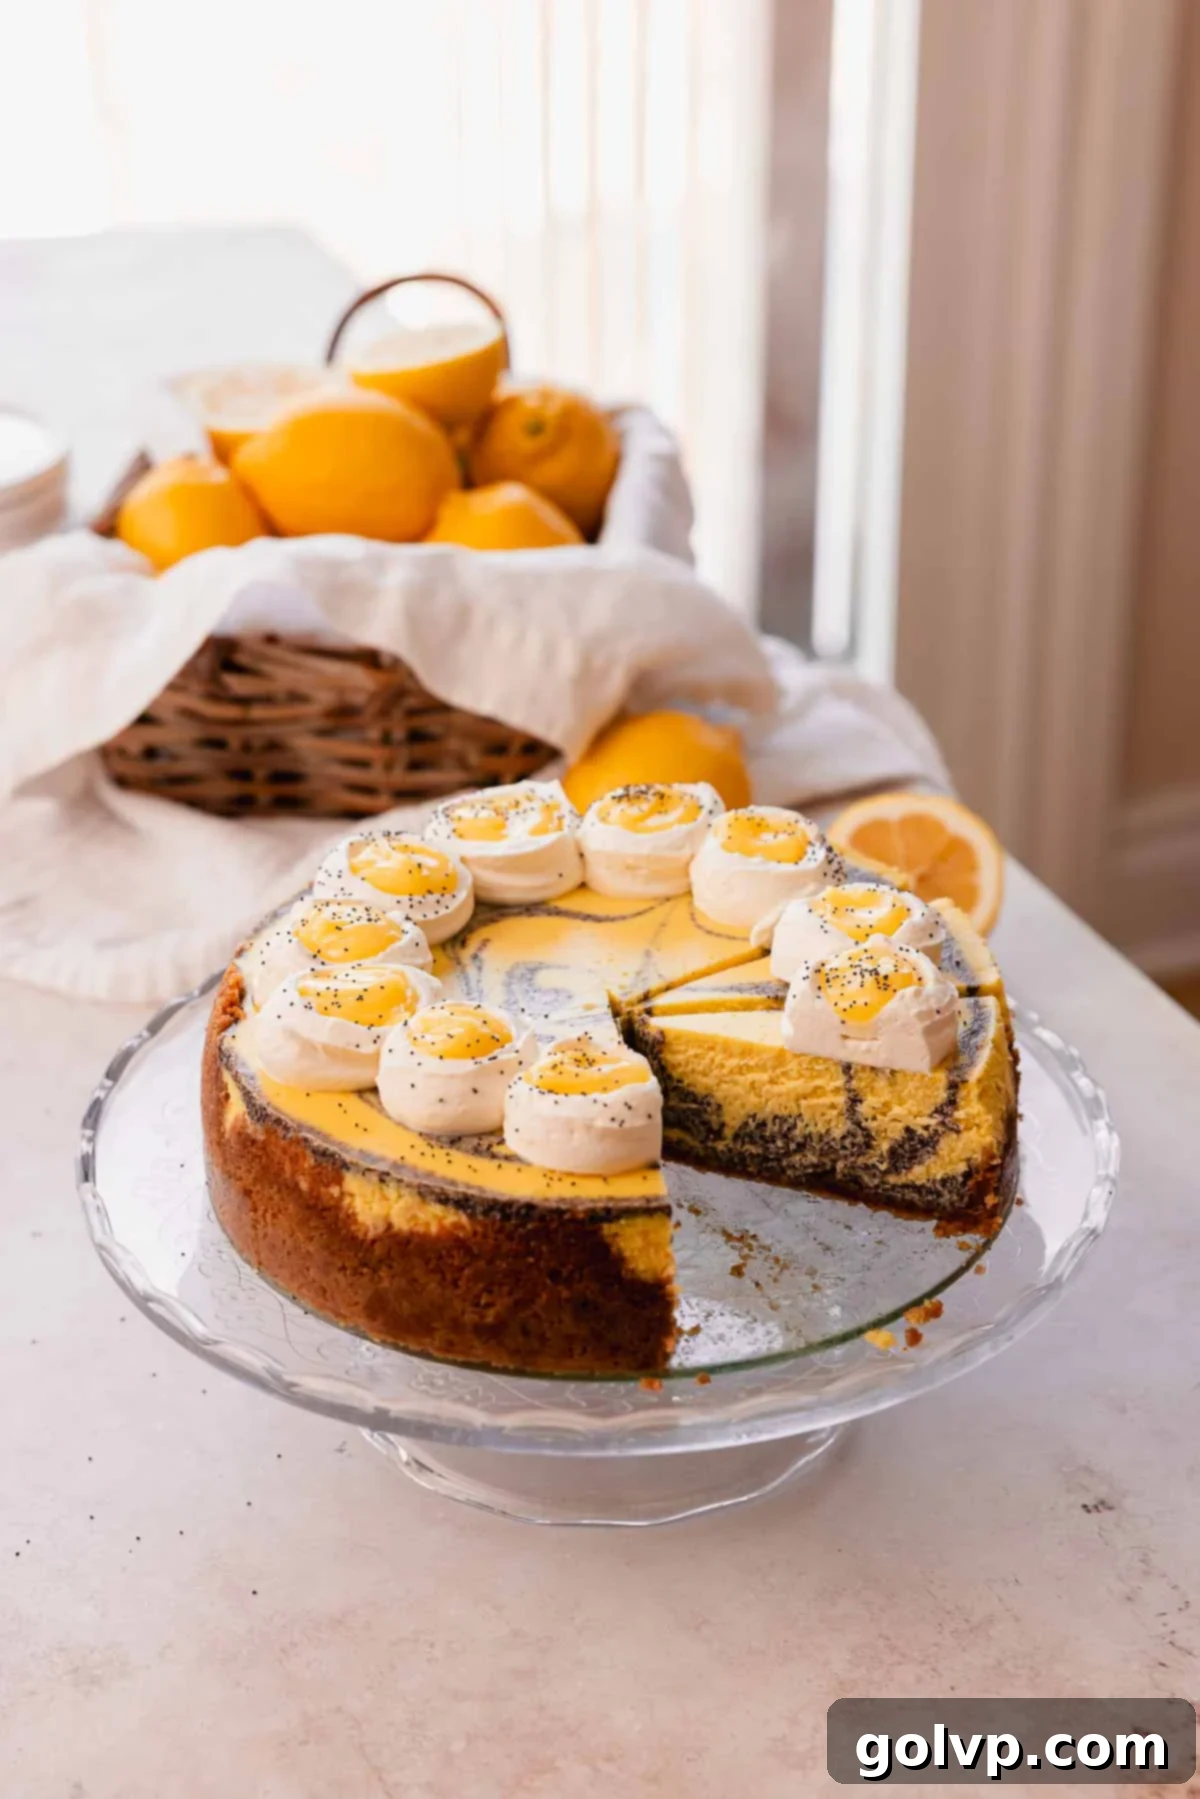
Essential Water Bath Options for Cheesecake Baking
A water bath (or bain-marie) is not just a suggestion; it’s an essential technique for achieving an evenly baked, ultra-creamy, and perfectly smooth baked cheesecake without any unsightly cracks. The moist heat environment created by the water bath prevents the cheesecake from over-baking around the edges, resulting in a custardy texture throughout. Below are a few options for setting up a water bath, depending on the equipment you have on hand and the type of pan you’re using.
The Most Recommended Water Bath Option: If you are using a springform pan for your cheesecake, the most effective method involves nesting it. Find a round baking pan that is about 1 to 2 inches larger in diameter than your springform pan. Place your cheesecake-filled springform pan inside this larger pan. Then, place both nested pans into an even larger roasting tray. This setup creates a secure barrier, preventing any water from seeping into the springform pan and making the crust soggy. This is the method I personally used and highly recommend for this lemon poppy seed cheesecake recipe.
For Regular Round Baking Pans (Non-Springform): If your cheesecake is baked in a standard round baking pan (one without removable sides), you can place this pan directly into the larger roasting pan for the water bath. Since regular pans don’t have seams, there’s no risk of water leaking into the cheesecake. For easy removal after chilling, remember to create a “sling” out of two strips of parchment paper placed crosswise in the pan before adding the crust and batter. These strips can then be used to lift the cooled cheesecake out of the pan.
For Springform Pans (Direct Water Bath Method): If you don’t have a suitable nesting pan, you can prepare your springform pan for a direct water bath. Tightly wrap the entire exterior of the springform pan with a double layer of heavy-duty aluminum foil. Ensure the foil extends well up the sides, covering all seams to create a watertight seal. Alternatively, you can place the springform pan inside a heat-safe sous vide bag, which offers excellent protection against water leakage. Then, place the wrapped springform directly into a large roasting pan before filling it with boiling water.
While a water bath is crucial for the best results, it’s worth noting that some cheesecakes can be baked without one. For instance, my chocolate orange cheesecake also benefits greatly from a water bath, but my lemon blueberry cheesecake recipe does not strictly require it. Although you technically *can* omit the water bath for this lemon poppy seed cheesecake, I strongly advocate for its use as it consistently yields the most even, creamy texture and a pristine, crack-free surface. It’s a small effort for a significant improvement in quality.
Recipe FAQs
Bringing all cold ingredients, especially cream cheese and eggs, to room temperature is paramount for a silky-smooth cheesecake batter. When ingredients are cold, fats are firm, making them difficult to emulsify evenly. Room temperature ingredients blend together effortlessly, creating a homogenous, lump-free batter that bakes into a beautifully smooth and uniform cheesecake.
Cheesecake cracks typically occur due to sudden temperature changes or overbaking. Common reasons include baking at too high a temperature, opening the oven door too frequently, or removing the cheesecake from the oven too quickly. Using a water bath and ensuring the cheesecake is slightly jiggly in the center when removed from the oven are key preventative measures.
Extended chilling (at least 6 hours, ideally overnight) is crucial for a cheesecake to fully set and achieve its characteristic dense, yet creamy texture. During this time, the fats and proteins in the cream cheese firm up, and the flavors have a chance to meld and deepen. Attempting to slice a warm or insufficiently chilled cheesecake will result in a messy, unset dessert.
While not always strictly necessary for every recipe, I highly recommend grinding poppy seeds for this cheesecake and many other desserts. Grinding them releases their aromatic oils, intensifying their nutty flavor. More importantly, it transforms their texture, allowing you to incorporate a larger quantity of poppy seeds into a dessert without it feeling overwhelmingly gritty, resulting in a smoother, more enjoyable experience.
More Lemon & Poppy Seed Recipes to Enjoy
- Lemon Blueberry Cheesecake
- Mini Lemon Cheesecakes
- Lemon Poppy Seed Scones
- Ukrainian Poppy Seed Roll
Did you make this recipe? I would love for you to rate this recipe and hear what you think in the comments below! Share your creation on Instagram and tag @flouringkitchen. Follow me on Pinterestto save and for more recipe ideas.
📖 Recipe
Lemon Poppy Seed Cheesecake
Mary
Pin Recipe
Shop Ingredients
Equipment
-
electric mixer
-
eight or nine inch springform baking pan
-
coffee or spice grinder
Ingredients
Crust
- 2 cups graham cracker crumbs crushed graham crackers
- 2 tablespoons brown sugar packed
- ¼ teaspoon sea salt
- ⅓ cup butter melted
Cheesecake Filling
- ¾ cup poppy seeds
- ¾ cup milk preferably dairy milk
- 2 tablespoons granulated sugar
- ⅛ teaspoon almond extract
- 1 cup granulated sugar
- 2 large lemons zested and juiced
- 3 tablespoons cornstarch
- 24 oz full fat brick style cream cheese three 8oz packs, softened at room temperature
- ½ cup sour cream
- 1 tablespoon vanilla extract
- ¼ teaspoon sea salt
- 3 large eggs
- yellow food coloring as needed (optional)
To Decorate
- ½ cup heavy whipping cream chilled 35%
- ¼ cup powdered sugar or icing sugar
- ½ teaspoon pure vanilla extract
- ¼ cup sour cream or greek yogurt, chilled
- ½ cup lemon curd
- ½ teaspoon poppy seeds
Shop Ingredients on Jupiter
Instructions
Graham Cracker Crust
-
Preheat the oven to 350°F (180°C). Lightly grease the inside of an 8″ or 9″ round springform cheesecake pan with a bit of cold butter.
-
In a large bowl, combine crushed graham crackers, brown sugar, and salt. Stir well, then add melted butter and stir again until crumbs are moist.2 cups graham cracker crumbs, 2 tablespoons brown sugar, ¼ teaspoon sea salt, ⅓ cup butter
-
Transfer crumbs to the springform pan. Press firmly into the bottom and halfway up the sides of the pan with the bottom of a glass.
-
Place the springform pan on a larger baking sheet and bake for 8 minutes. Remove and cool. Lower oven temperature to 300°F (150°C).
Cheesecake Batter
-
Grind poppy seeds roughly using a clean coffee grinder, food processor, or mortar and pestle.¾ cup poppy seeds
-
In a small saucepan, combine ground poppy seeds, milk, 2 tablespoons sugar, and almond extract. Cook on low heat, stirring frequently, until thickened into a paste. Let cool.¾ cup milk, 2 tablespoons granulated sugar, ⅛ teaspoon almond extract
-
In a large bowl, combine 1 cup sugar and lemon zest. Rub with fingers until fragrant and moist. Stir in cornstarch.1 cup granulated sugar, 2 large lemons, 3 tablespoons cornstarch
-
Add softened cream cheese to the sugar mixture. Beat with a paddle attachment until creamy, scraping down the bowl as needed.24 oz full fat brick style cream cheese
-
Add sour cream, vanilla extract, salt, and 3 tablespoons lemon juice. Mix well, scraping down the bowl.½ cup sour cream, 1 tablespoon vanilla extract, ¼ teaspoon sea salt, 2 large lemons
-
Add eggs one by one, mixing only until just incorporated after each addition. Scrape bowl edges after each egg.3 large eggs
-
Divide batter in half. Add yellow food coloring to one half (optional). Stir cooled poppy seeds into the other half.yellow food coloring
-
Pour alternating colors of batter into the crust. Reserve a few tablespoons of poppy seed batter for swirling.
-
Spoon reserved poppy seed batter on top, then use a knife or toothpick to gently swirl the top layer for a marbled effect.
-
Prepare a water bath: Place springform pan (wrapped in foil or nested in a larger pan) into a roasting pan. Pour boiling water into the roasting pan, ensuring water level comes halfway up the sides of the springform pan.
-
Bake at 300°F (150°C) for 1 hour 30 minutes. Cheesecake is done when edges are set and center is still jiggly. Turn off oven, leave door ajar, and let cheesecake cool in oven for 30 minutes.
-
Remove cheesecake, cool to room temperature, then refrigerate for at least 6 hours or overnight to set completely.
To Decorate
-
In a medium bowl, whisk chilled whipping cream, powdered sugar, and vanilla extract until medium peaks form.½ cup heavy whipping cream, ¼ cup powdered sugar, ½ teaspoon pure vanilla extract
-
Add chilled sour cream (or yogurt) and whisk until stiff peaks form.¼ cup sour cream
-
Remove cheesecake from fridge and sides from springform pan. Scoop whipped cream dollops along the edge, create indents, and fill with lemon curd. Sprinkle with poppy seeds. Slice and serve when chilled.½ cup lemon curd, ½ teaspoon poppy seeds
Notes
Storage: Store the cheesecake covered tightly in the fridge for up to 5 days. For longer preservation, wrap individual slices or the entire cheesecake securely and freeze for up to 2 months. If you know you’ll be freezing the cheesecake, using arrowroot starch instead of cornstarch is recommended, as it holds up better and prevents water release upon thawing.
Make Ahead: This cheesecake is an excellent make-ahead dessert. You can prepare and bake it a day or two before serving, allowing it ample time to chill and firm up. For the freshest appearance, I suggest decorating the cheesecake with whipped cream and lemon curd within 24 hours of serving to maintain the whipped cream’s structure and aesthetic appeal.
Top tips for success:
- Always use good quality, full-fat, brick-style cream cheese for best results.
- Avoid overmixing the cheesecake batter, especially after adding the eggs, to prevent cracks.
- Bake in a water bath to ensure an even, creamy, and crack-free cheesecake.
- Do not bake at too high of an oven temperature; lower heat prevents uneven baking.
- Look for visual cues of doneness: set edges and a slight jiggly center.
- Allow the cheesecake to set in the fridge for at least six hours or overnight for perfect texture.
