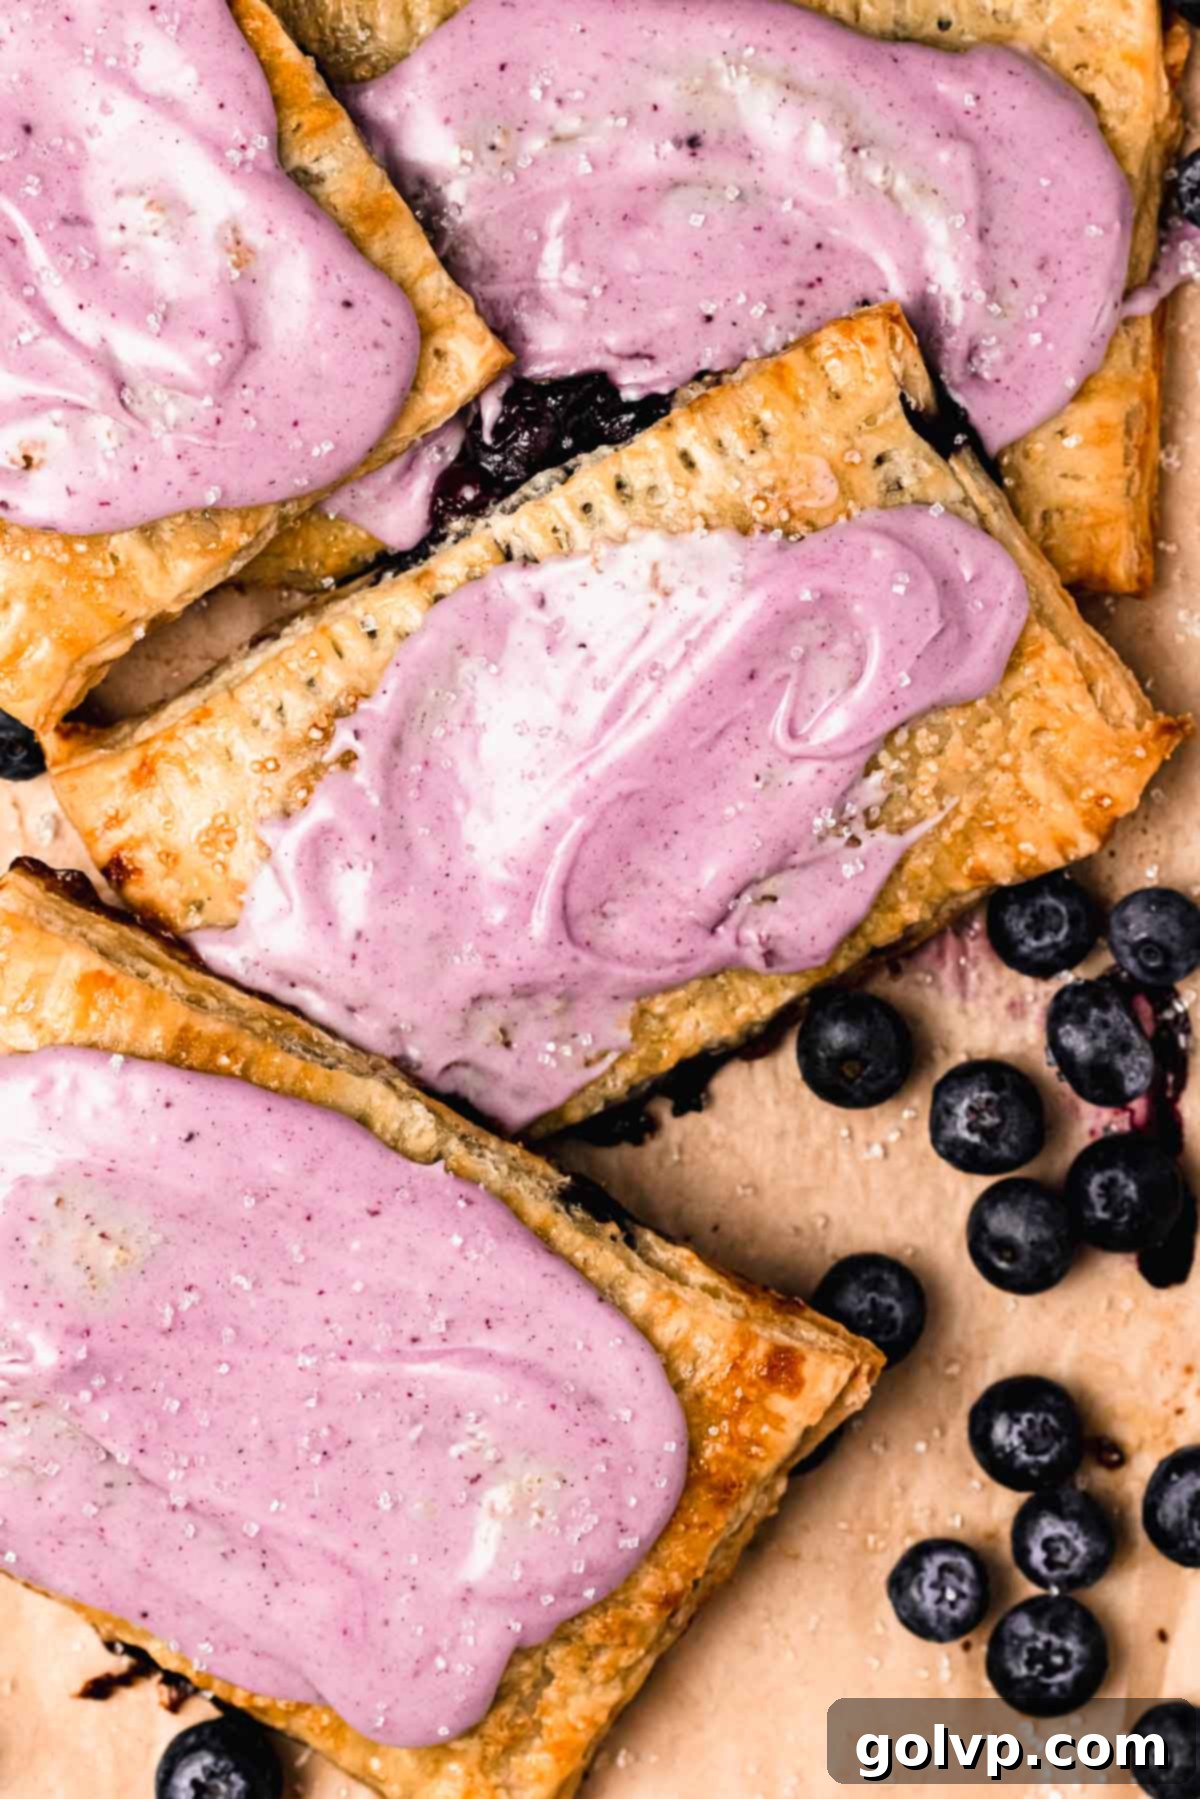
Delicious Homemade Blueberry Pop Tarts: Flaky Crust, Gooey Filling & Creamy Glaze
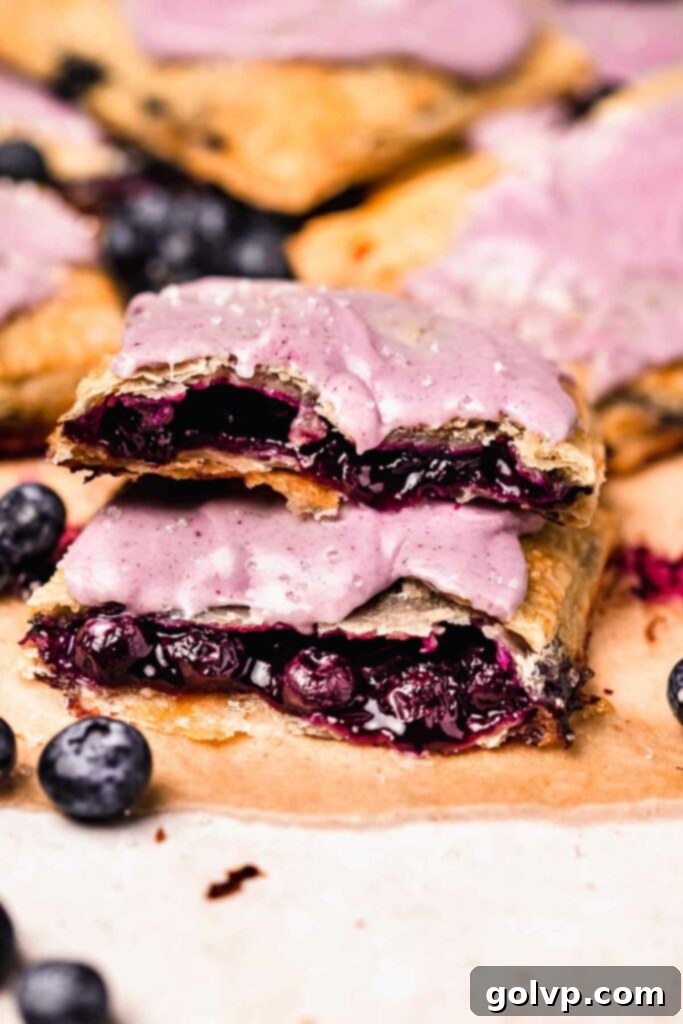
There’s nothing quite like the nostalgic taste of a homemade pop tart, and these Blueberry Pop Tarts are an absolute game-changer. Forget the dry, overly sweet store-bought versions; this recipe delivers a truly exceptional breakfast pastry or sweet treat. Imagine a warm, golden-brown pastry, perfectly flaky and tender, giving way to a rich, gooey blueberry filling that bursts with natural fruit flavor. Topped with a luscious, creamy blueberry glaze, these pop tarts are like miniature frosted blueberry pies, but even more fun to eat! They are surprisingly easy to make from scratch, offering a taste experience far superior to anything you’d find on a supermarket shelf. Whether you choose to make them in classic rectangular shapes or get creative with fun cutters, these delightful pastries are sure to impress and become a family favorite.
Purchasing the items in this post supports this blog, at no additional cost to you. As an Affiliate Product marketer and Amazon Associate, I earn from qualifying purchases.
Why You’ll Adore This Homemade Blueberry Pop Tart Recipe:
- Effortless Preparation: You might think homemade pop tarts are complicated, but this recipe is designed for simplicity. While we provide instructions for a magnificent homemade crust, you can easily opt for store-bought pie crusts to save time without compromising too much on flavor. The assembly process is straightforward and enjoyable, making it accessible even for beginner bakers. You’ll be surprised at how quickly these come together for such an impressive result.
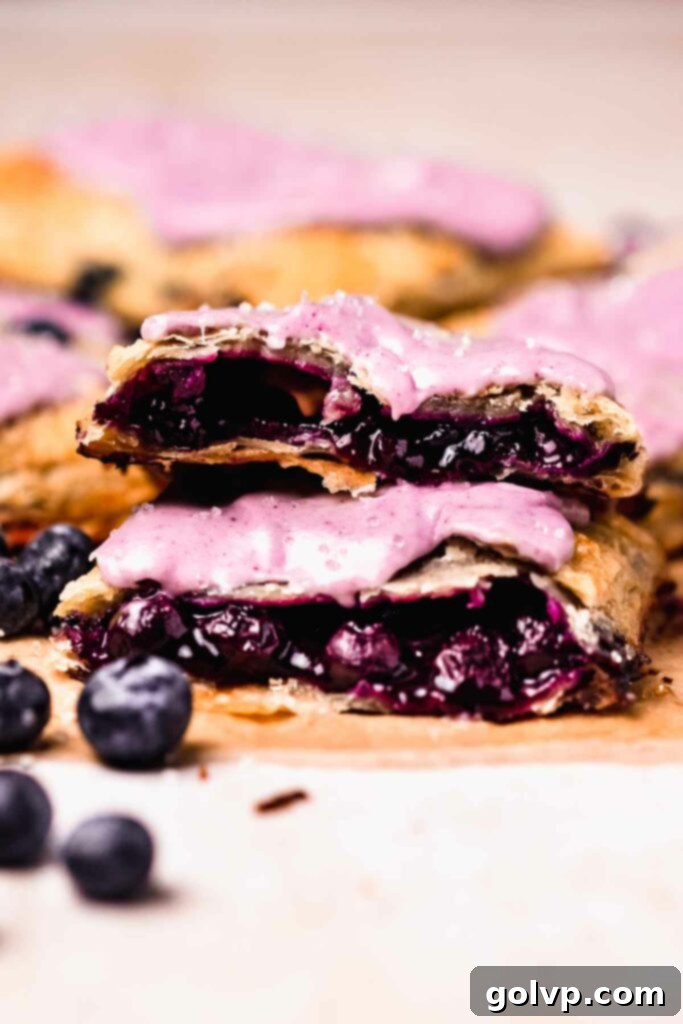
- Irresistible Blueberry Filling: The heart of these pop tarts is their vibrant, homemade blueberry filling. Crafted with fresh or frozen berries, a touch of sugar, and a hint of lemon, it cooks down into a thick, jammy, and intensely flavorful concoction. It’s remarkably similar to a gourmet blueberry pie filling, ensuring every bite is packed with juicy, sweet, and slightly tart goodness. The natural sweetness of the blueberries truly shines through, offering a much more authentic fruit flavor than artificial versions. Plus, you can prepare this filling a few days in advance, simplifying your baking schedule and spreading out the fun!
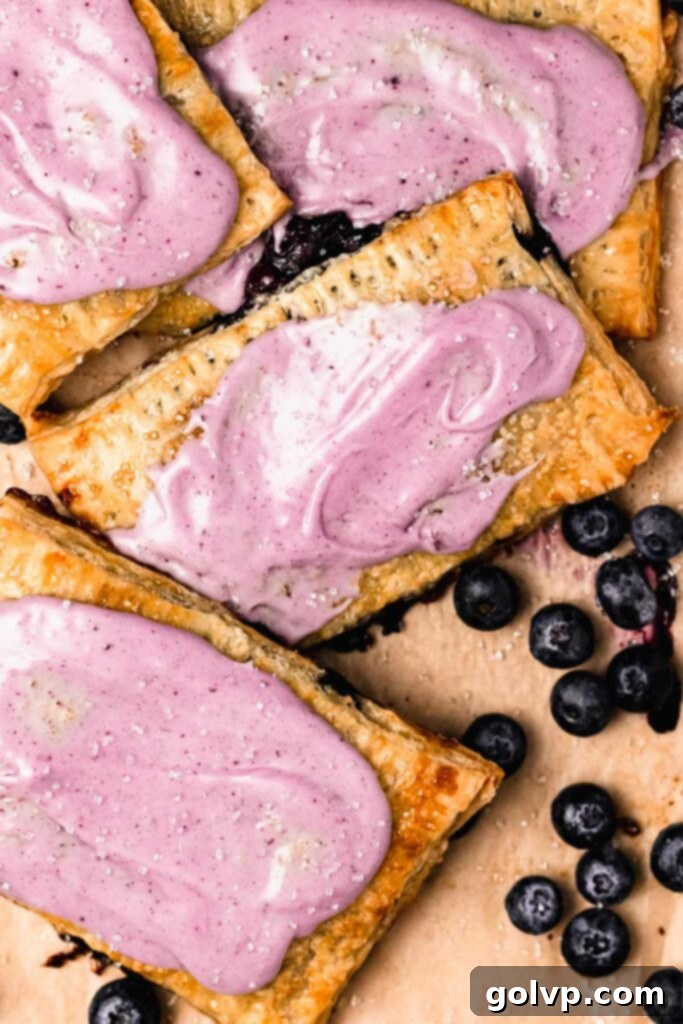
- Decadent Blueberry Glaze: What truly sets these pop tarts apart is the rich, creamy glaze. Made with just three simple ingredients – powdered sugar, heavy cream, and a touch of the leftover blueberry filling liquid – it’s akin to a luxurious blueberry frosting. This small addition of berry liquid naturally imparts a beautiful purple hue and an extra layer of authentic blueberry flavor, making the glaze much more than just a sweet topping. Its thick, smooth consistency adds an amazing textural contrast and a sweet finish that perfectly complements the tartness of the berry filling. Best of all, no electric mixer is needed for this simple yet exquisite topping!
- Authentic All-Butter Homemade Crust: For those who appreciate the finer details and superior texture, our all-butter pie crust recipe is a revelation. It bakes up incredibly flaky, wonderfully tender, richly buttery, and delightfully crisp. The use of cold butter and a gentle hand ensures those coveted layers that make for an unforgettable pastry. There’s truly nothing that compares to the depth of flavor and texture of a freshly made, all-butter pastry. It’s the perfect vehicle for our delicious blueberry filling, elevating these pop tarts from good to utterly unforgettable.
- Versatility and Fun: This recipe isn’t just about deliciousness; it’s also about versatility and fun! You can easily adjust the size of your pop tarts, making them mini for bite-sized treats perfect for parties or lunchboxes. Feeling creative? Use cookie cutters to create various playful shapes for themed events or just to make breakfast more exciting. It’s a fantastic activity for baking with kids or for customizing for different occasions, adding a personal touch to your sweet creations.
- Better Than Store-Bought: The most compelling reason to try this recipe is the undeniable fact that homemade always tastes better. The fresh ingredients, the control over sweetness, and the absence of artificial flavors and preservatives mean these pop tarts are a healthier, more flavorful, and truly satisfying alternative to anything you’d buy pre-packaged. Once you try these, you’ll never go back!
The Secret to Our Creamy, Frosting-Like Glaze
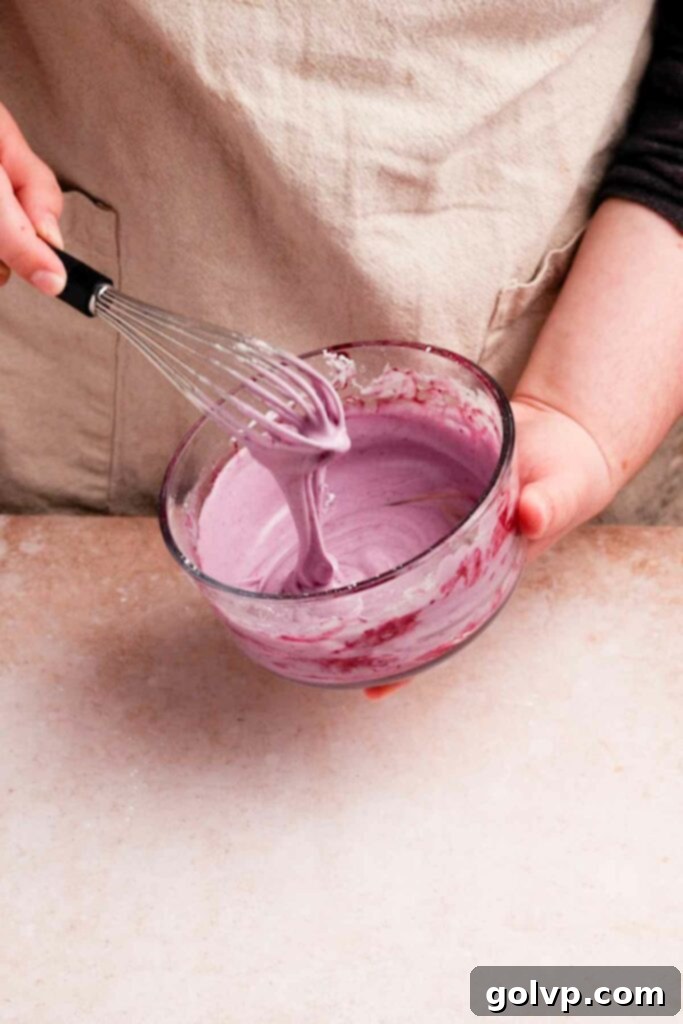
Our unique blueberry glaze is designed to be much more than a simple sugar drizzle; it’s a luscious, frosting-like topping that adds a layer of richness and deep berry flavor. A clever trick to achieve its beautiful natural purple tint and infuse it with extra blueberry essence is to prepare it in the same container used for the blueberry filling. This allows any residual berry liquid to naturally color and flavor the glaze, giving it an authentic touch and ensuring no delicious blueberry goodness goes to waste.
Typically, glazes are made using milk, but we make a key substitution in this recipe: heavy cream. This simple change makes all the difference, transforming the glaze into a thick, velvety coating that truly feels like a frosting. The higher fat content of heavy cream provides a rich, luxurious mouthfeel that perfectly complements the flaky pastry and vibrant filling. It’s a straightforward combination of powdered sugar and heavy cream, requiring no fancy equipment – just a whisk and a bowl. The result is a smooth, decadent glaze that perfectly crowns your homemade blueberry pop tarts, making them look as irresistible as they taste.
Crafting the Perfect Blueberry Pie-Like Filling
The delicious blueberry filling for these pop tarts comes together effortlessly in a single saucepan, making cleanup a breeze. This easy-to-make filling is truly the star of the show, delivering a burst of fresh fruit flavor in every bite. Simply combine all the filling ingredients – fresh or frozen blueberries, granulated sugar, a squeeze of lemon juice, cornstarch (or flour) for thickening, a touch of warm ground cinnamon, and a splash of water – and gently simmer them over medium-low heat. This slow cooking process allows the blueberries to break down beautifully, releasing their natural juices and mingling with the sugar and lemon to create a thick, luscious, and wonderfully gooey consistency.
The goal is a filling that closely resembles a homemade blueberry pie filling: thick enough to stay perfectly contained within the pastry, but still wonderfully soft, jammy, and bursting with vibrant fruit. The lemon juice brightens the flavors and prevents the filling from becoming overly sweet, while the cornstarch ensures a perfectly set, yet still gooey, texture. A personal touch I absolutely adore adding to all my blueberry desserts, and especially this filling, is a hint of cinnamon. This warm spice beautifully complements the sweet and tart notes of the blueberries, adding a depth of flavor that evokes classic homemade pies and creates a truly comforting aroma. It’s a subtle addition that truly elevates the overall taste profile and adds a layer of sophisticated warmth. If you’re a fan of this delightful combination, you should definitely check out these no-knead blueberry cinnamon rolls – they feature a similar flavor profile and are equally delicious!
Make-Ahead Tips for Convenient Baking
One of the many appealing aspects of this blueberry pop tart recipe is its incredible flexibility for make-ahead preparation, perfect for busy schedules, weekend brunch prep, or when you want fresh pastries without the morning rush. All the individual components can be prepped up to two full days in advance, allowing you to break down the baking process into manageable steps.
You can prepare the pie crust dough according to the instructions, wrap it tightly in plastic wrap, and store it in the refrigerator. The longer it chills, the easier it will be to roll out, and the flakier your crust will be. Similarly, the luscious blueberry filling can be cooked, cooled completely to room temperature, and then transferred to an airtight container before being stored in the fridge. Having these components ready means that on baking day, all you need to do is roll out the dough, assemble the pop tarts, pop them in the oven, and then glaze. This significantly cuts down on active preparation time, making it easier to enjoy these delicious treats whenever a craving strikes without feeling overwhelmed.
Should you find yourself with any glorious leftovers – though I highly doubt you will, as these tend to disappear quickly – these homemade blueberry pop tarts freeze beautifully! To freeze, place the cooled, unglazed pop tarts in a single layer on a baking sheet and freeze until solid. Then, transfer them to an airtight freezer-safe container or a heavy-duty freezer bag, separating layers with parchment paper, for up to two months. When ready to enjoy, simply thaw them at room temperature or gently reheat them in a toaster oven for that freshly baked warmth. You can then apply the glaze just before serving.
Essential Ingredients for Perfect Blueberry Pop Tarts
While the full steps and precise ingredient measurements are detailed in the recipe card below, taking a moment to read through these tips on key ingredients will significantly contribute to your baking success and help you understand the role each component plays!
- Blueberries: The undisputed star of our pop tarts! You have the flexibility to use either fresh or frozen blueberries, both yield excellent results. If using frozen, there’s no need to thaw them beforehand; simply add them directly to the saucepan with the other filling ingredients. This allows them to slowly break down and release their juices, creating a perfectly jammy texture.
- Heavy Whipping Cream: This is the secret behind our signature creamy, frosting-like glaze. Its high-fat content (typically 36% or more) results in a richer, more luxurious texture and a wonderfully smooth consistency compared to thinner dairy products. While you can substitute with whole milk in a pinch, heavy cream is highly recommended for achieving that decadent, truly frosting-like experience.
- Butter: For the flakiest, most tender, and supremely flavorful crust, always use high-quality, unsalted real butter. The butter needs to be kept very cold and cut into small, uniform cubes. This is crucial for achieving that desirable flaky texture in the pastry, as the cold butter creates pockets of steam during baking, separating the layers of dough.
- Cinnamon: A humble yet powerful spice, a touch of ground cinnamon in the blueberry filling provides a warm, comforting, and distinctly pie-like flavor that beautifully complements the sweet and tart fruit. It adds a subtle depth and a hint of coziness to every bite, making these pop tarts even more irresistible.
- All-Purpose Flour: Accurate flour measurement is absolutely key for pastry success. The most reliable method is to weigh your flour using a kitchen scale, which provides the most consistent results (300g for 2.5 cups). If you don’t have a scale, properly measure by first stirring the flour in its bag or container to aerate it. Then, gently spoon it into your measuring cup until overflowing. Level off the excess with the flat edge of a knife without packing the flour down into the cup, as this can add too much flour and result in a tough crust.
- Apple Cider Vinegar: This seemingly unusual ingredient in the crust recipe plays a surprisingly vital role. The acidity in the vinegar helps to tenderize the dough by inhibiting gluten development without imparting a strong flavor to the finished product. This results in a more pliable crust that’s easier to roll and contributes significantly to a wonderfully tender and flaky texture.
- Granulated Sugar & Powdered Sugar: Granulated sugar sweetens the filling, balancing the tartness of the blueberries, while powdered sugar forms the base of our smooth and creamy glaze. The fine texture of powdered sugar is essential for a lump-free glaze.
Mastering the Perfect Flaky Pop Tart Crust from Scratch
Crafting the ideal pastry for your pop tarts is easier than you might think and is fundamental to their superior taste and texture. This all-butter crust provides an unbeatable foundation for your homemade treats. Follow these steps meticulously for a wonderfully flaky and tender crust that truly melts in your mouth:
- Step 1: Prepare the Liquid Mixture. Begin by combining ice-cold water with apple cider vinegar in a small bowl or measuring cup. This mixture will be added to the dry ingredients later. The cold temperature is absolutely crucial for keeping the butter from melting prematurely within the dough, and the vinegar helps tenderize the dough by inhibiting excessive gluten development, resulting in a more pliable and flaky crust. Set this aside to keep it as chilled as possible until needed.
- Step 2: Combine Dry Ingredients and Butter. In a large mixing bowl, sift together the all-purpose flour and salt. Sifting ensures there are no lumps and helps aerate the flour, contributing to a lighter crust. Next, add your very cold butter, which should be cut into small, even cubes (about ½-inch pieces). The key here is to make sure each butter cube is thoroughly coated in flour. This coating prevents the butter from fully integrating into the dough, which is essential for creating those desired flaky layers as the butter melts and creates steam during baking.
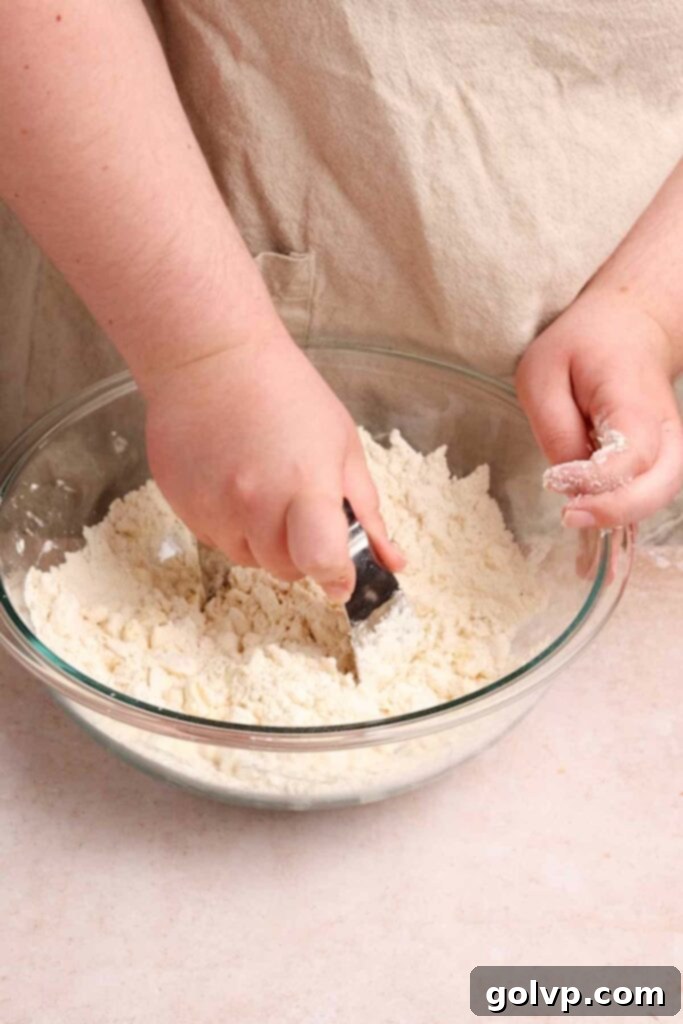
- Step 3: Cut in the Butter. Using a pastry cutter, two knives, or a food processor with pulse function, work the cold butter into the flour mixture. Your goal is to achieve a texture that resembles coarse breadcrumbs, but with some larger, pea-sized pieces of butter still visible throughout the mixture. These larger butter pieces are vital for maximum flakiness. It’s important to work quickly during this stage to prevent the butter from warming up and melting, which would compromise the beautiful flaky texture of the crust.
- Step 4: Gradually Add Liquid. Pour a few tablespoons of your chilled ice water and vinegar mixture into the flour and butter. Mix gently with a fork or your fingertips until just distributed. Continue adding the vinegar water one tablespoon at a time, mixing only until the dough *just* comes together when pressed firmly. Be careful not to add too much liquid, as this can make the dough tough and less flaky. The exact amount of liquid needed can vary based on factors like flour type and ambient humidity, so go by feel rather than strictly by measurement.
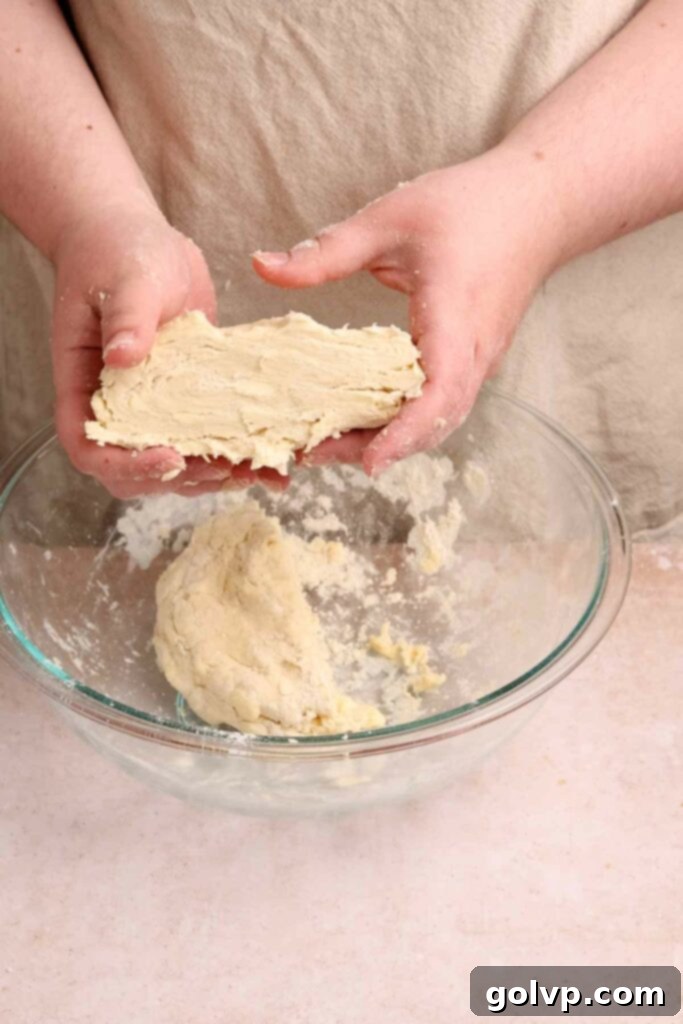
- Step 5: Form and Chill the Dough. Quickly bring the mixture together using your hands, gently packing it tightly into a ball. Avoid overworking the dough, as this can develop too much gluten and result in a tough crust. To help develop gluten structure without overworking and to create layers, lightly squish the ball to flatten it slightly, then fold it in half. Repeat this flattening and folding process a couple of times. Divide the dough into two equal halves and roughly form each half into a square or disc. Wrap each portion tightly with wax paper or cling wrap and refrigerate for a minimum of 45 minutes, or ideally, overnight (for up to 2 days). Chilling allows the gluten to relax, making the dough easier to roll without snapping back, and more importantly, allows the butter to firm up completely, ensuring maximum flakiness during baking.
Preparing the Luscious Blueberry Filling
The delicious blueberry filling is what truly makes these pop tarts sing. Here’s how to create that perfect gooey consistency and rich, vibrant flavor with ease:
- Step 1: Combine and Simmer. In a medium saucepan, combine all the blueberry filling ingredients: fresh or frozen blueberries, granulated sugar, fresh lemon juice (which brightens the flavor), cornstarch (or flour for thickening), a hint of ground cinnamon, and the specified amount of water. Stir everything together thoroughly to ensure the cornstarch is dissolved and the sugar is evenly distributed among the berries. Place the saucepan over medium-low heat and bring the mixture to a gentle simmer.
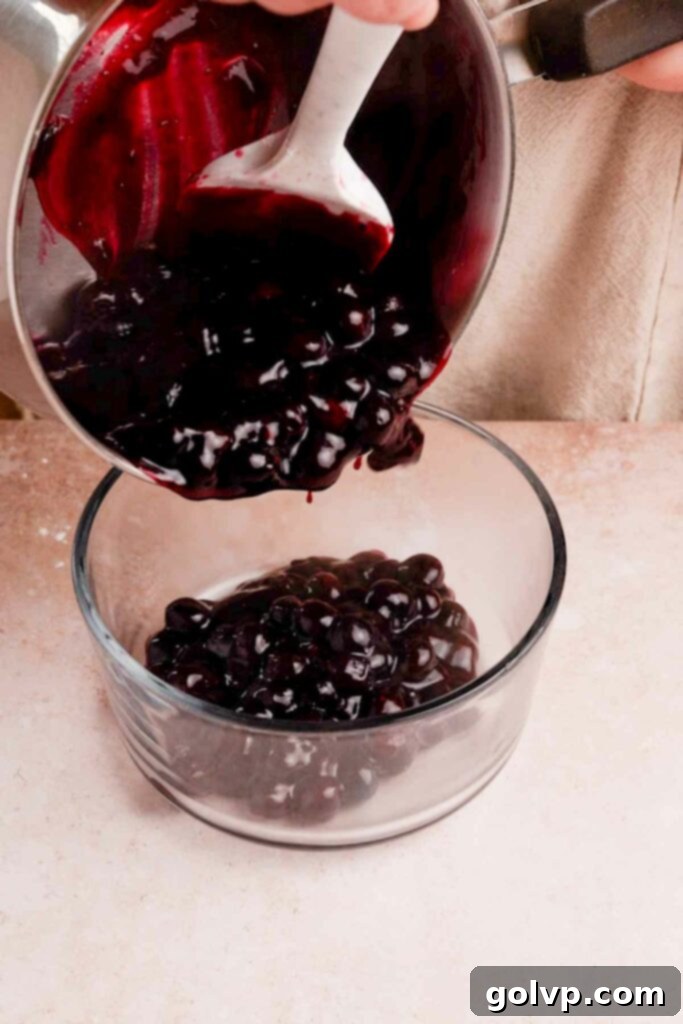
- Step 2: Thicken and Cool. Allow the filling to simmer and thicken, stirring frequently to prevent it from sticking to the bottom of the pan and burning. As it cooks, the blueberries will naturally break down, and the mixture will become jammy and wonderfully gooey, much like a classic pie filling. The cornstarch will help achieve this perfect, thick consistency. Once it reaches your desired thickness (keep in mind it will thicken even further as it cools), remove it from the heat. Immediately transfer the hot filling to a non-metal, heat-safe bowl or container to cool. It is absolutely crucial for the filling to cool completely to room temperature, or even be refrigerated, before you use it in the pop tarts. Using hot or warm filling would melt the cold butter in the crust, leading to a soggy, un-flaky pastry.
Assembling Your Homemade Blueberry Pop Tarts with Precision
Now comes the most exciting part: bringing all the components together to create your beautiful, homemade blueberry pop tarts! Careful and precise assembly ensures a well-sealed pastry with a perfect filling-to-crust ratio, preventing any delicious leaks during baking.
- Step 1: Prepare the Egg Wash. In a small bowl, whisk together one large egg with a tablespoon of milk (or water) until smooth and well combined. This simple egg wash will serve a dual purpose: it acts as a “glue” to seal the edges of the pastry, and when brushed on top, it will give the pop tarts a beautiful golden-brown, glossy finish during baking. Set it aside for later use.
- Step 2: Roll and Trim the Crust. Lightly flour a clean work surface to prevent sticking. Take one chilled dough portion from the refrigerator and roll it out evenly into a square or rectangle, aiming for a consistent thickness of about ¼ inch. Repeat this process with the second dough portion. Once rolled, use a sharp knife or pizza cutter to carefully trim the edges of both rolled-out pieces so they are even and straight. This step ensures neat, uniformly shaped pop tarts.
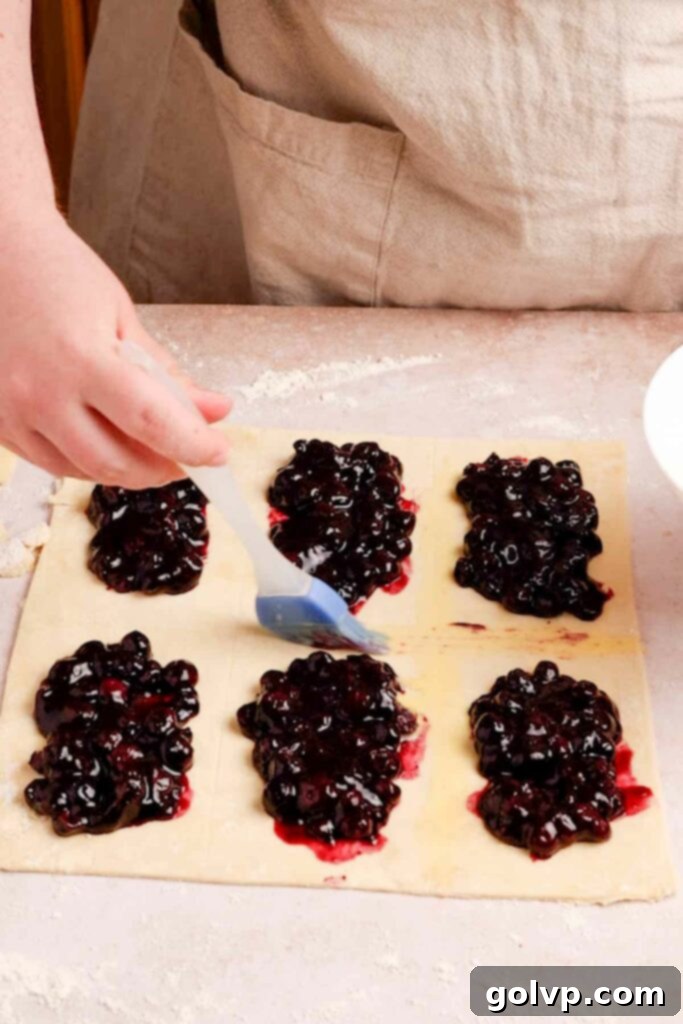
- Step 3: Fill the Bottom Layer. On one of the rolled-out crusts, use a knife to gently score it into 6 (or more, if you prefer smaller pop tarts) evenly sized rectangles. These scored lines will serve as helpful guides for both filling and cutting. Spoon a generous dollop of the completely cooled blueberry filling into the center of each scored rectangle, making sure to leave a ½-inch border around the edges. This border is essential for sealing the pop tarts. Remember to reserve the bowl used for the blueberry filling; it will be perfectly tinted and ready for making the glaze later! Using a pastry brush, apply the prepared egg wash along the edges and in between the filling mounds. This acts as a powerful “glue” to help the top and bottom crusts adhere securely, preventing the filling from escaping.
- Step 4: Top and Seal. Carefully place the second rolled-out crust square directly on top of the first, aligning the edges as best as possible. Gently press down with your fingers in between each mound of filling to create a firm seal and remove any trapped air pockets. Once sealed, use a pizza cutter or a sharp knife to cut along the scored lines, separating them into individual pop tarts. Take your time to ensure clean cuts.
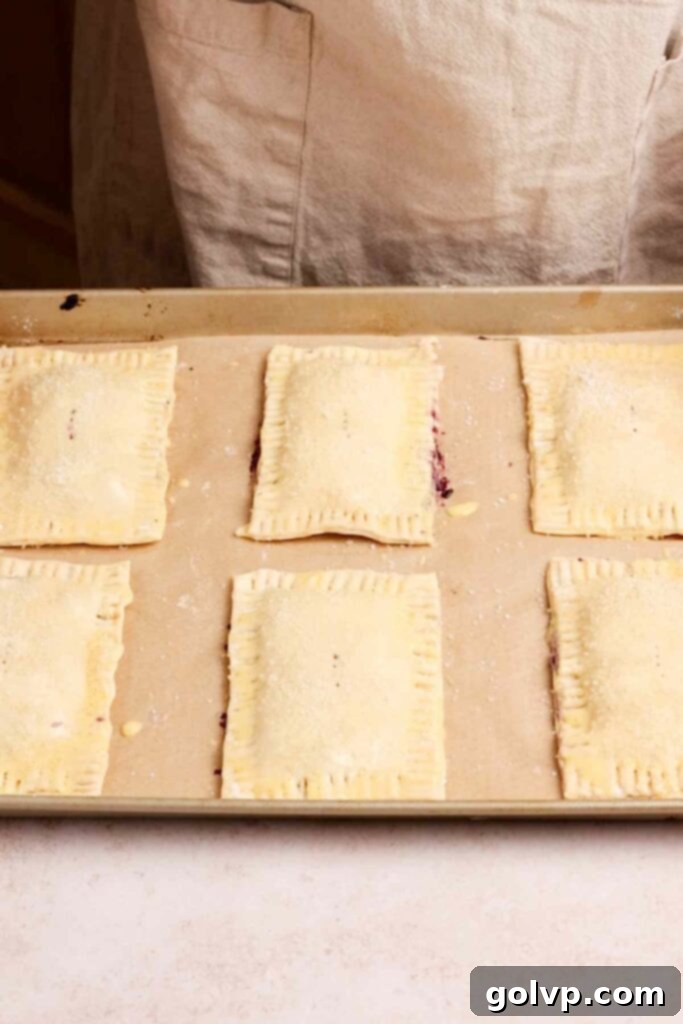
- Step 5: Final Sealing and Venting. To ensure the edges are completely sealed and the delicious filling doesn’t leak out during the baking process, use the tines of a fork to firmly press down along all four edges of each individual pop tart. This creates that classic, decorative pop tart crimp. Before baking, use a fork or a small knife to poke several holes in the top of each pop tart. These vent holes are crucial for allowing steam to escape during baking, preventing the pastries from puffing up excessively and ensuring a crisp, evenly baked crust. Carefully transfer the assembled pop tarts to a parchment-lined baking sheet, leaving 1-2 inches of space between each to allow for even baking.
- Step 6: Chill and Preheat. Place the baking sheet with the pop tarts into the freezer for 10 minutes. This quick chill serves a vital purpose: it helps firm up the butter in the crust one last time, which is essential for maximizing flakiness and preventing the pastry from shrinking too much during baking. While the pop tarts are chilling, preheat your oven to 375°F (190°C) so it’s ready when the pastries are.
- Step 7: Bake to Golden Perfection. Remove the chilled pop tarts from the freezer. Brush the tops generously with the remaining egg wash, and then sprinkle them liberally with coarse sugar. The coarse sugar not only adds a lovely sparkle and a delightful crunch to the finished product but also helps create a beautiful golden crust. Bake for approximately 20 minutes, or until the pop tarts are beautifully golden brown all over and the filling is bubbling slightly around the edges. Once baked, let them cool on the baking sheet for about 10 minutes before carefully transferring them to a wire rack. This initial cooling period allows them to firm up slightly, making them easier to handle without breaking.
- Step 8: Glaze and Enjoy! Once the pop tarts have cooled completely or are just slightly warm to the touch, it’s time for the delicious final touch: the glaze! Add the powdered sugar into the reserved bowl from the blueberry filling (this clever trick will give your glaze a faint purple hue and a delicate hint of berry flavor from any residual juices). Gradually add heavy whipping cream, one tablespoon at a time, whisking continuously until a thick, smooth, and spreadable glaze forms. Be cautious not to add too much cream too quickly, as you want a thick consistency. Generously spread this creamy glaze evenly over the tops of your cooled blueberry pop tarts. Allow the glaze to set slightly for a few minutes, then enjoy your truly homemade masterpiece! These are best enjoyed fresh, but they also store well.
Frequently Asked Questions About Homemade Blueberry Pop Tarts
Absolutely! While our homemade pie crust offers unparalleled flakiness and a rich, buttery flavor, puff pastry is an excellent shortcut if you’re looking to save time and effort. You can use it in exactly the same way as you would the pie crust in this recipe. Just be aware that puff pastry typically has a slightly different texture and flavor profile, usually being lighter, more airy, and less robustly buttery than a traditional shortcrust. However, it will still yield delicious results and is a great option for a quick bake.
Yes, most definitely! If you’re short on time, intimidated by making pastry from scratch, or simply prefer a quicker assembly process, store-bought or premade pie crusts are a fantastic alternative. Look for good quality all-butter pie crusts if possible, as they will provide the best flavor and flakiness. Simply roll them out as directed in the recipe to achieve your desired thickness and shape, and then proceed with the filling and assembly steps. This is a brilliant way to enjoy homemade flavor with significantly less effort in the kitchen.
You can certainly use blueberry jam as a substitute for the homemade filling to save a substantial amount of time. However, there are a few important considerations: store-bought jams are often very sweet, which might make your pop tarts considerably sweeter than intended, especially once glazed. If you opt for jam, consider reducing the amount of sugar in the glaze or choosing a less sweet, perhaps “reduced sugar” or “fruit-only” jam. For the best flavor, texture control, and a less cloyingly sweet result, I personally prefer a homemade blueberry pie filling – it has a richer, more authentic fruit taste and a more substantial consistency. If making from scratch isn’t an option, a quality store-bought blueberry pie filling would also work well in a pinch.
Yes! This recipe can absolutely be adapted to be vegan-friendly. The key is to use a high-quality plant-based butter that is specifically designed for baking and is firm when cold. Avoid softer margarine spreads, as they tend to have a higher water content and won’t create the same flaky texture in the crust. Look for vegan butter sticks or blocks in your local grocery store. Ensure the vegan butter is kept very cold throughout the crust-making process, just like regular butter, for the best flaky results.
This recipe is incredibly versatile and works beautifully with a wide variety of berries! Feel free to experiment with raspberries, blackberries, tart cherries, or even a delightful mixed berry combination. Each berry will lend its unique flavor profile. If you choose to use strawberries, which typically have a higher water content than other berries, I recommend adding an extra tablespoon of cornstarch (for a total of 2 tablespoons) to the filling mixture. This will help ensure it thickens properly and doesn’t make your pop tarts soggy or overly runny.
Certainly! If you prefer to avoid eggs or have dietary restrictions, you can easily create an effective egg-free wash for brushing the tops of your pop tarts. Simply brush them generously with either milk (any kind, dairy or non-dairy) or heavy cream. Heavy cream will typically create a richer, deeper brown crust and a slightly shinier finish, thanks to its fat content. Milk will still provide a nice golden color and help the coarse sugar adhere. Both options work effectively to give the pastry a beautiful, appetizing baked appearance.
Once cooled and glazed, these homemade blueberry pop tarts are best stored in an airtight container at room temperature for up to 2-3 days. For longer storage, or if your kitchen is particularly warm, you can refrigerate them for up to a week. If refrigerated, allow them to come to room temperature or gently warm them in a toaster oven before enjoying for the best taste and texture. For extended storage, refer to the freezing tips provided in the “Make-Ahead Tips” section.
For that fresh-from-the-oven experience, gently reheat your pop tarts in a toaster oven for 5-10 minutes at a low temperature (around 250°F / 120°C). This will crisp up the crust and warm the filling without overcooking them. If using a microwave, heat briefly for 10-15 seconds; be careful not to overheat, as this can make them tough. If frozen, thaw completely first before reheating.
Discover More Delicious Recipes from Our Kitchen
If you’ve enjoyed making these homemade blueberry pop tarts, you’ll love exploring some of our other cherished recipes. Each one is crafted with care to bring joy to your kitchen and your taste buds. Browse through these favorites for more baking inspiration:
- Blueberry Cinnamon Rolls
- Oreo Pop Tarts
- Blueberry Birthday Cake
- Blueberry Cupcakes with Blueberry Cream Cheese Frosting
Happy baking, and enjoy your delightful homemade creations!
Did you make this recipe? I would love for you to rate this recipe and hear what you think in the comments below! Your feedback truly helps others discover and successfully make delicious treats. Share your delicious creation on Instagram and tag @flouringkitchen so I can see your masterpieces. Don’t forget to follow me on Pinterest for more inspiring recipe ideas, baking tips, and behind-the-scenes glimpses into my kitchen!
📖 Recipe
Blueberry Pop Tarts
Mary
Pin Recipe
Shop Ingredients
Equipment
-
Cookie sheet
Ingredients
Crust
- 1 cup water with ice
- 1 tablespoon apple cider vinegar
- 2 ½ cups all purpose flour 300g, spooned & leveled
- ½ teaspoon sea salt
- 1 cup butter cold, unsalted and cut into ½-inch cubes
- 1 large egg
- 1 tablespoon milk or water, for egg wash
- 2 tablespoons coarse sugar for sprinkling on top
Filling
- 2 cups blueberries fresh or frozen (no need to thaw if frozen)
- ¼ cup granulated sugar
- 1-2 tablespoons lemon juice freshly squeezed, from 1 lemon
- 1 tablespoon cornstarch or all-purpose flour, for thickening
- ½ teaspoon ground cinnamon
- 2 tablespoons water
Glaze
- 1 cup powdered sugar
- 1-3 tablespoons heavy whipping cream adjust to desired consistency
Shop Ingredients on Jupiter
Instructions
Crust Preparation
-
In a small bowl, combine the ice water and apple cider vinegar. Stir gently and set this mixture aside, preferably back in the refrigerator, to keep it as cold as possible until you’re ready to use it.1 cup water with ice, 1 tablespoon apple cider vinegar
-
In a large mixing bowl, sift together the all-purpose flour and sea salt. This ensures even distribution and removes any lumps. Add the very cold butter, cut into small cubes, and toss gently with your hands or a spoon until all the butter cubes are completely coated in flour.2 ½ cups all purpose flour, ½ teaspoon sea salt, 1 cup butter
-
Using a pastry cutter, two knives, or by pulsing briefly in a food processor, cut the butter into the flour mixture. Continue until the mixture resembles coarse breadcrumbs with some larger, pea-sized pieces of butter still visible. Work quickly to prevent the butter from melting.
-
Gradually add a few tablespoons of the ice water and vinegar mixture to the flour and butter. Mix gently with a fork or your fingertips until the liquid is just distributed. Continue adding the vinegar water one tablespoon at a time, mixing minimally after each addition, just until a shaggy dough forms and holds together when you pack a small amount tightly in your hand. Be careful not to add too much liquid.
-
Turn the dough out onto a lightly floured surface. Using your hands and working quickly, gather the mixture to form a cohesive dough, gently pressing and packing it tightly into a ball. Avoid kneading. To create layers, lightly flatten the ball, then fold it in half. Repeat this flattening and folding process 1-2 more times. Divide the dough into two equal halves and roughly shape each half into a square or disc. Wrap each portion tightly with wax paper or cling wrap and refrigerate for at least 45 minutes, or ideally, overnight (up to 2 days) to chill thoroughly.
Blueberry Filling
-
In a medium saucepan, combine all the filling ingredients: blueberries (fresh or frozen), granulated sugar, lemon juice, cornstarch (or flour), ground cinnamon, and water. Stir everything together thoroughly until well combined and the cornstarch is dissolved. Place the saucepan over medium-low heat and bring the mixture to a gentle simmer, stirring occasionally.2 cups blueberries, ¼ cup granulated sugar, 1-2 tablespoons lemon juice, 1 tablespoon cornstarch, ½ teaspoon ground cinnamon, 2 tablespoons water
-
Continue to let the filling simmer gently, stirring frequently to prevent sticking, until it has thickened to a gooey, jam-like consistency (it will thicken further as it cools). This typically takes about 5-10 minutes. Once thickened, remove the saucepan from the heat and immediately transfer the hot filling to a non-metal, heat-safe bowl or container to cool completely. The filling must be at room temperature or refrigerated and cold before using it in the pop tarts to avoid melting the butter in the crust.
Assembly and Baking
-
In a small bowl, whisk together the large egg and tablespoon of milk (or water) until smooth. This is your egg wash. Set it aside.1 large egg, 1 tablespoon milk
-
On a lightly floured surface, take one chilled piece of dough and roll it out into a square or rectangle, about ¼ inch thick. Use a sharp knife or pizza cutter to trim the edges so they are even and straight. Repeat with the second piece of dough.
-
On one of the rolled-out crusts, use a knife to gently score it into 6 (or more, for smaller pop tarts) evenly sized rectangles. Spoon a generous amount of the cooled blueberry filling into the center of each scored rectangle, leaving a ½-inch border around the edges. Remember to keep the bowl from the blueberry filling for the glaze! Using a pastry brush, apply the egg wash along the edges and in between the filling mounds to help the crusts seal.
-
Carefully place the second rolled-out crust square directly on top of the first, aligning the edges. Use your fingers to gently press down in between each pop tart to help seal the edges and remove any air pockets. Once sealed, use a pizza cutter or sharp knife to cut along the scored lines, separating them into individual pop tarts.
-
To ensure a tight seal and add a classic aesthetic, use the tines of a fork to firmly press down on all the edges of each pop tart. Then, poke several holes on the tops of the pop tarts with the fork; this allows steam to escape during baking and prevents them from puffing up too much. Transfer the assembled pop tarts to a parchment-lined baking sheet, ensuring there’s 1-2 inches of space between each.
-
Place the baking sheet with the pop tarts into the freezer for 10 minutes. This quick chill helps the butter firm up, contributing to a flakier crust. While they’re chilling, Preheat your oven to 375°F (190°C).
-
Remove the chilled pop tarts from the freezer. Brush the tops generously with the remaining egg wash, and then sprinkle liberally with coarse sugar for added crunch and sparkle. Bake for approximately 20 minutes, or until they are beautifully golden brown and the filling is slightly bubbling. Once baked, let the pop tarts cool on the baking sheet for 10 minutes before transferring them to a wire rack to cool completely.2 tablespoons coarse sugar
Glazing
-
Once the pop tarts are completely cool (or at least lukewarm), it’s time to glaze. Add the powdered sugar into the reserved bowl from the blueberry filling. Gradually add heavy whipping cream, one tablespoon at a time, whisking continuously until it forms a thick, smooth, and spreadable glaze. Be cautious not to add too much cream too quickly. Spread this creamy glaze generously over the tops of the cooled blueberry pop tarts. Allow the glaze to set for a few minutes before serving. Enjoy your delicious homemade treats!1 cup powdered sugar, 1-3 tablespoons heavy whipping cream
Notes
Make-Ahead Instructions:
For ultimate convenience, you can prepare and chill both the pie crust dough and the blueberry filling up to two days before you plan to bake the pop tarts. Ensure both are stored separately in airtight containers in the refrigerator. This significantly reduces active prep time on baking day.
Freezing Leftovers:
Leftover baked pop tarts (unglazed is best for freezing, as glaze can get sticky upon thawing) can be frozen in an airtight container or freezer bag for up to two months. Lay them flat on a baking sheet and freeze until solid before transferring to a bag or container to prevent sticking. Thaw at room temperature for an hour or so, then you can glaze them if desired, or gently reheat in a toaster oven from frozen for a warm snack.
