Irresistible Brown Butter Toffee Cookies: Your Ultimate Guide to Chewy, Gooey Perfection
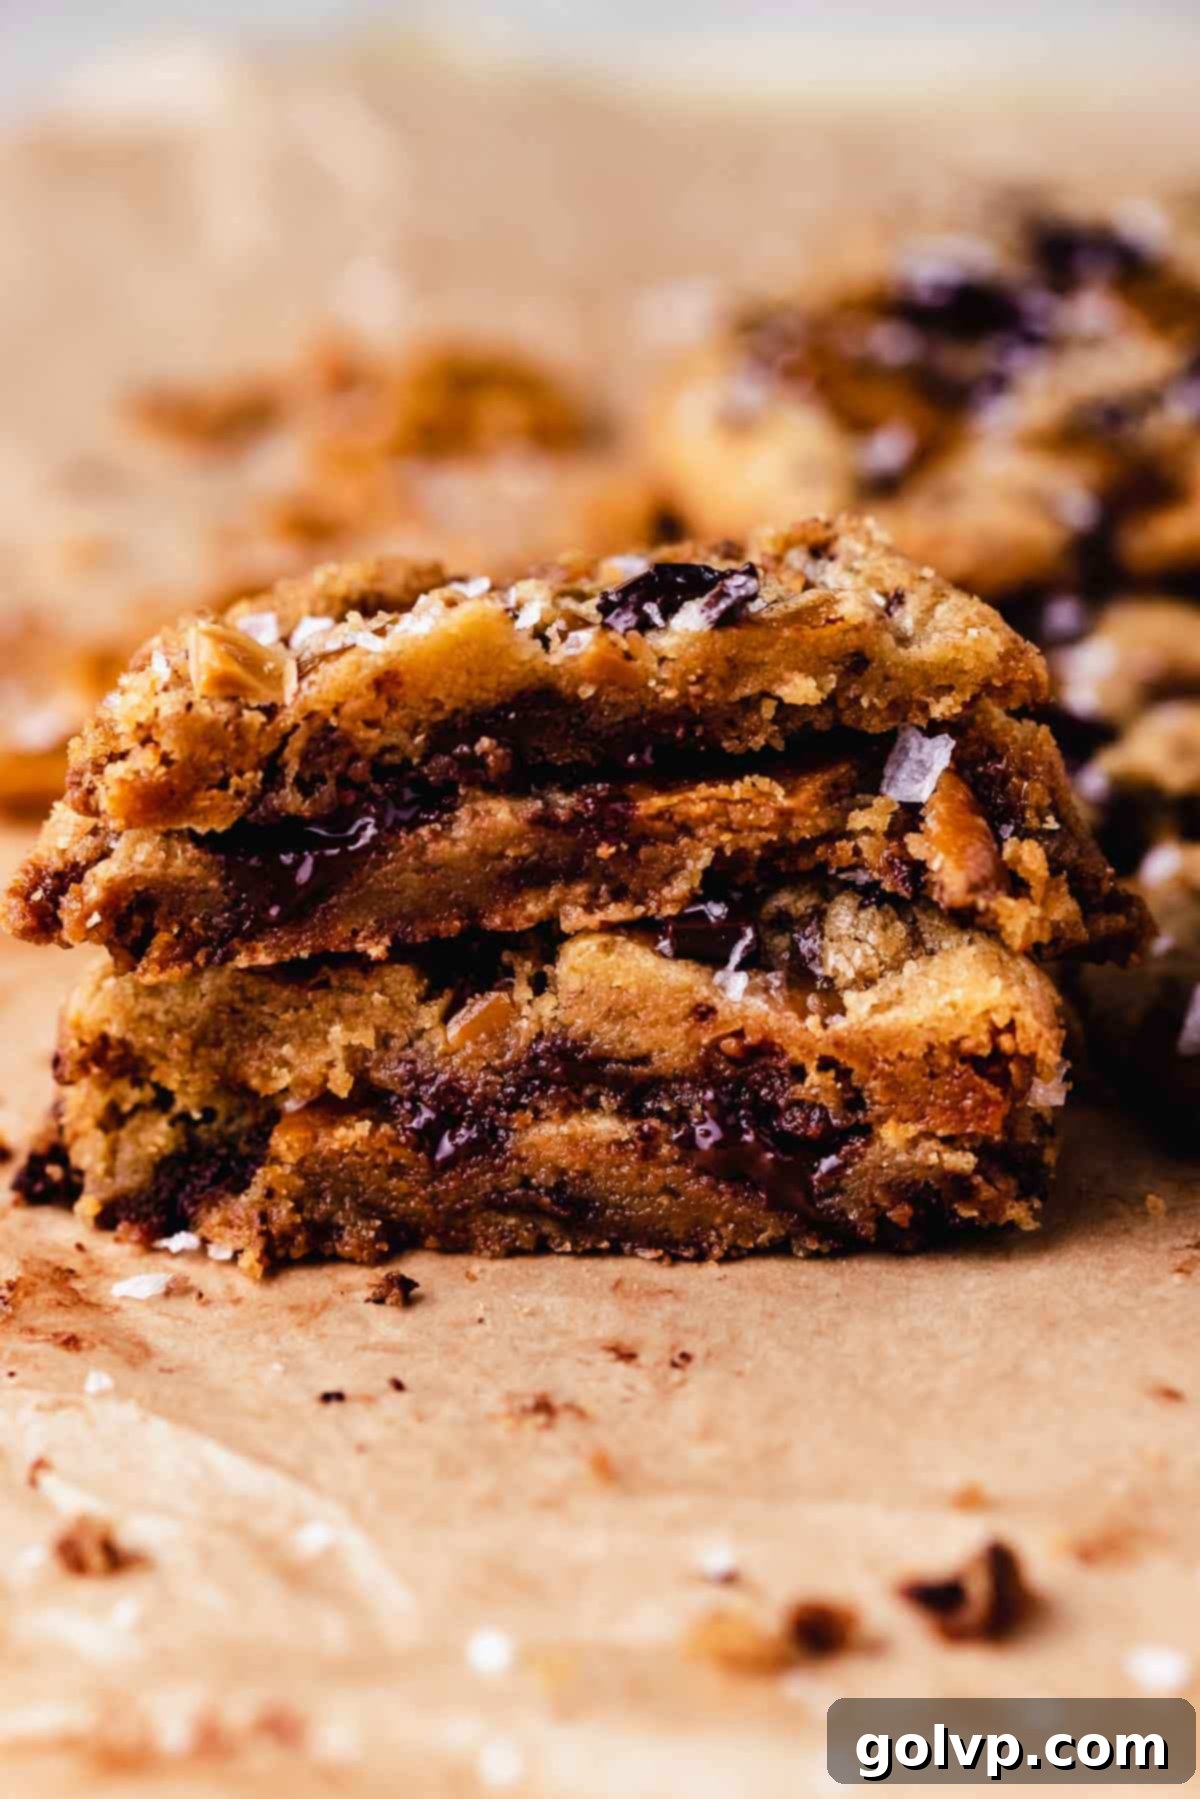
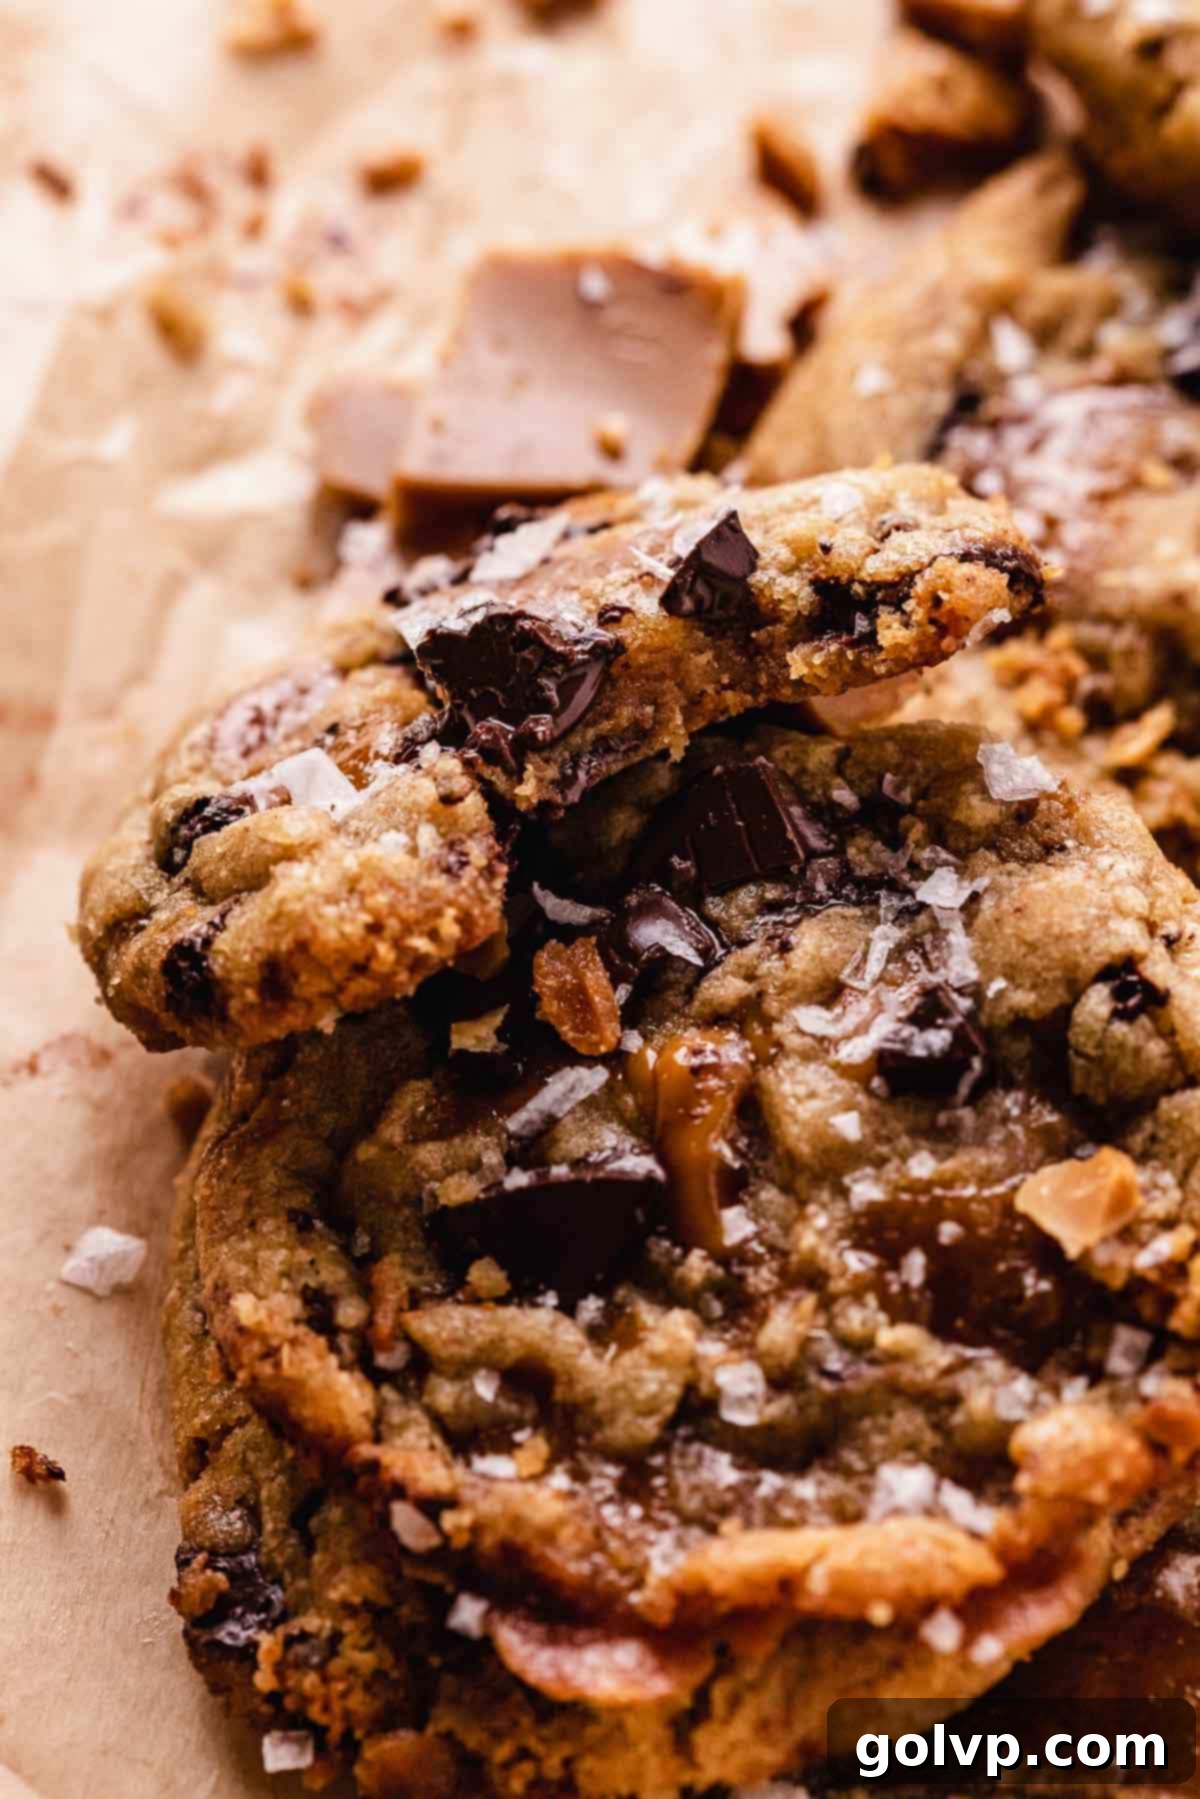
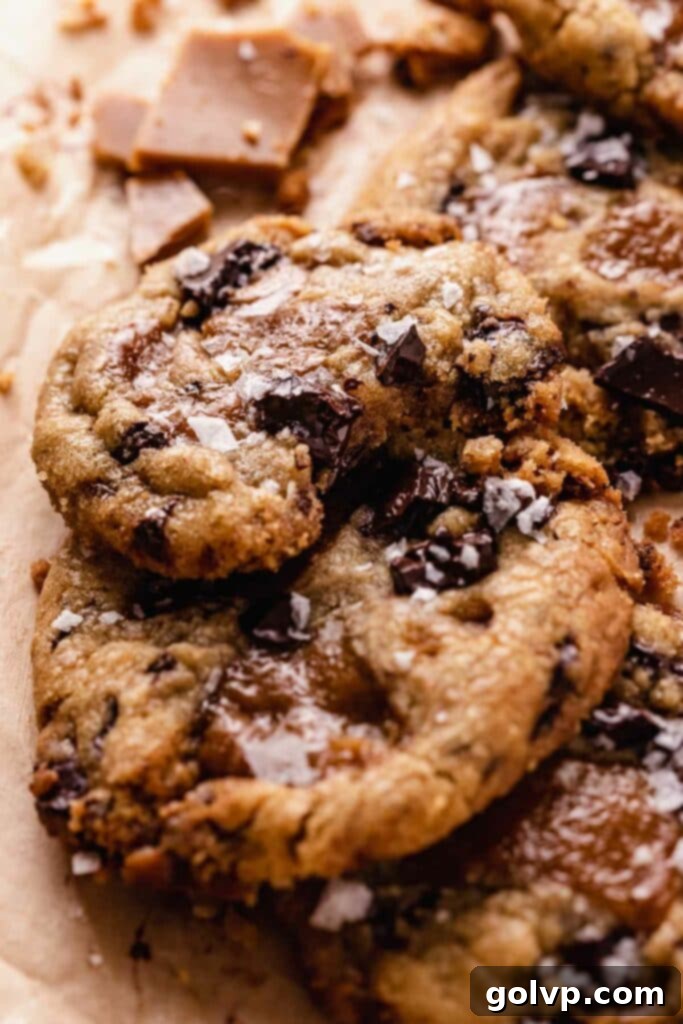
Prepare to be enchanted by these incredible brown butter toffee cookies. They strike the perfect balance between soft, chewy centers and delightfully crisp edges, each bite loaded with sweet, buttery homemade toffee and rich chocolate pieces. As they bake, the toffee lovingly melts, creating luscious, chewy caramel puddles throughout the cookie – an absolute dream for any dessert lover! The secret to their profound depth of flavor lies in the brown butter cookie dough, whose nutty notes harmonize exquisitely with the caramel undertones of the toffee. What’s even better? When you make the toffee from scratch using our foolproof recipe, these sensational cookies are completely nut-free, making them a safe and delicious treat for more to enjoy.

🍪 Why You’ll Adore This Brown Butter Toffee Cookie Recipe:
- Effortlessly Easy: Forget the electric mixer and complicated steps! This recipe comes together beautifully in just one bowl, requiring minimal effort. For those days when you’re short on time, you can even use quality store-bought toffee to speed up the process even more, without sacrificing flavor.
- Unbeatable Homemade Toffee: While store-bought options are available, our recipe includes a truly foolproof guide to crafting your own toffee from scratch. This ensures a superior texture and taste, creating those irresistible, melt-in-your-mouth caramel pockets within each cookie. We provide all the essential tips for a perfect batch every single time.
- Rich Brown Butter Foundation: Learning to make brown butter is a simple technique that elevates these cookies to a gourmet level. The process of gently browning butter introduces an incredible depth of nutty, toasted flavor that complements the sweet toffee and chocolate perfectly, adding a complex layer to the overall taste profile.
- Perfectly Balanced Texture: Prepare for a textural symphony! These cookies boast wonderfully crisp, buttery edges that yield to a lusciously soft, gooey, and chewy middle. The interplay of these textures, combined with the delightful crunch of the toffee pieces, makes every bite a memorable experience.
📝 Essential Ingredients for Your Best Toffee Cookies
Crafting the perfect brown butter toffee cookie begins with understanding each key ingredient and its role. While we highly recommend making your own toffee for the ultimate flavor and texture, you can always opt for a convenient shortcut by using store-bought toffee bits or crushed Skor bars. However, please note that Skor bars contain almonds and are not nut-free. This article focuses on creating a truly delightful and potentially nut-free treat.
For optimal success, read through all the tips and detailed instructions provided below.
Full step-by-step guidance and ingredient quantities are in the recipe card at the bottom.
Crafting Foolproof Homemade Toffee
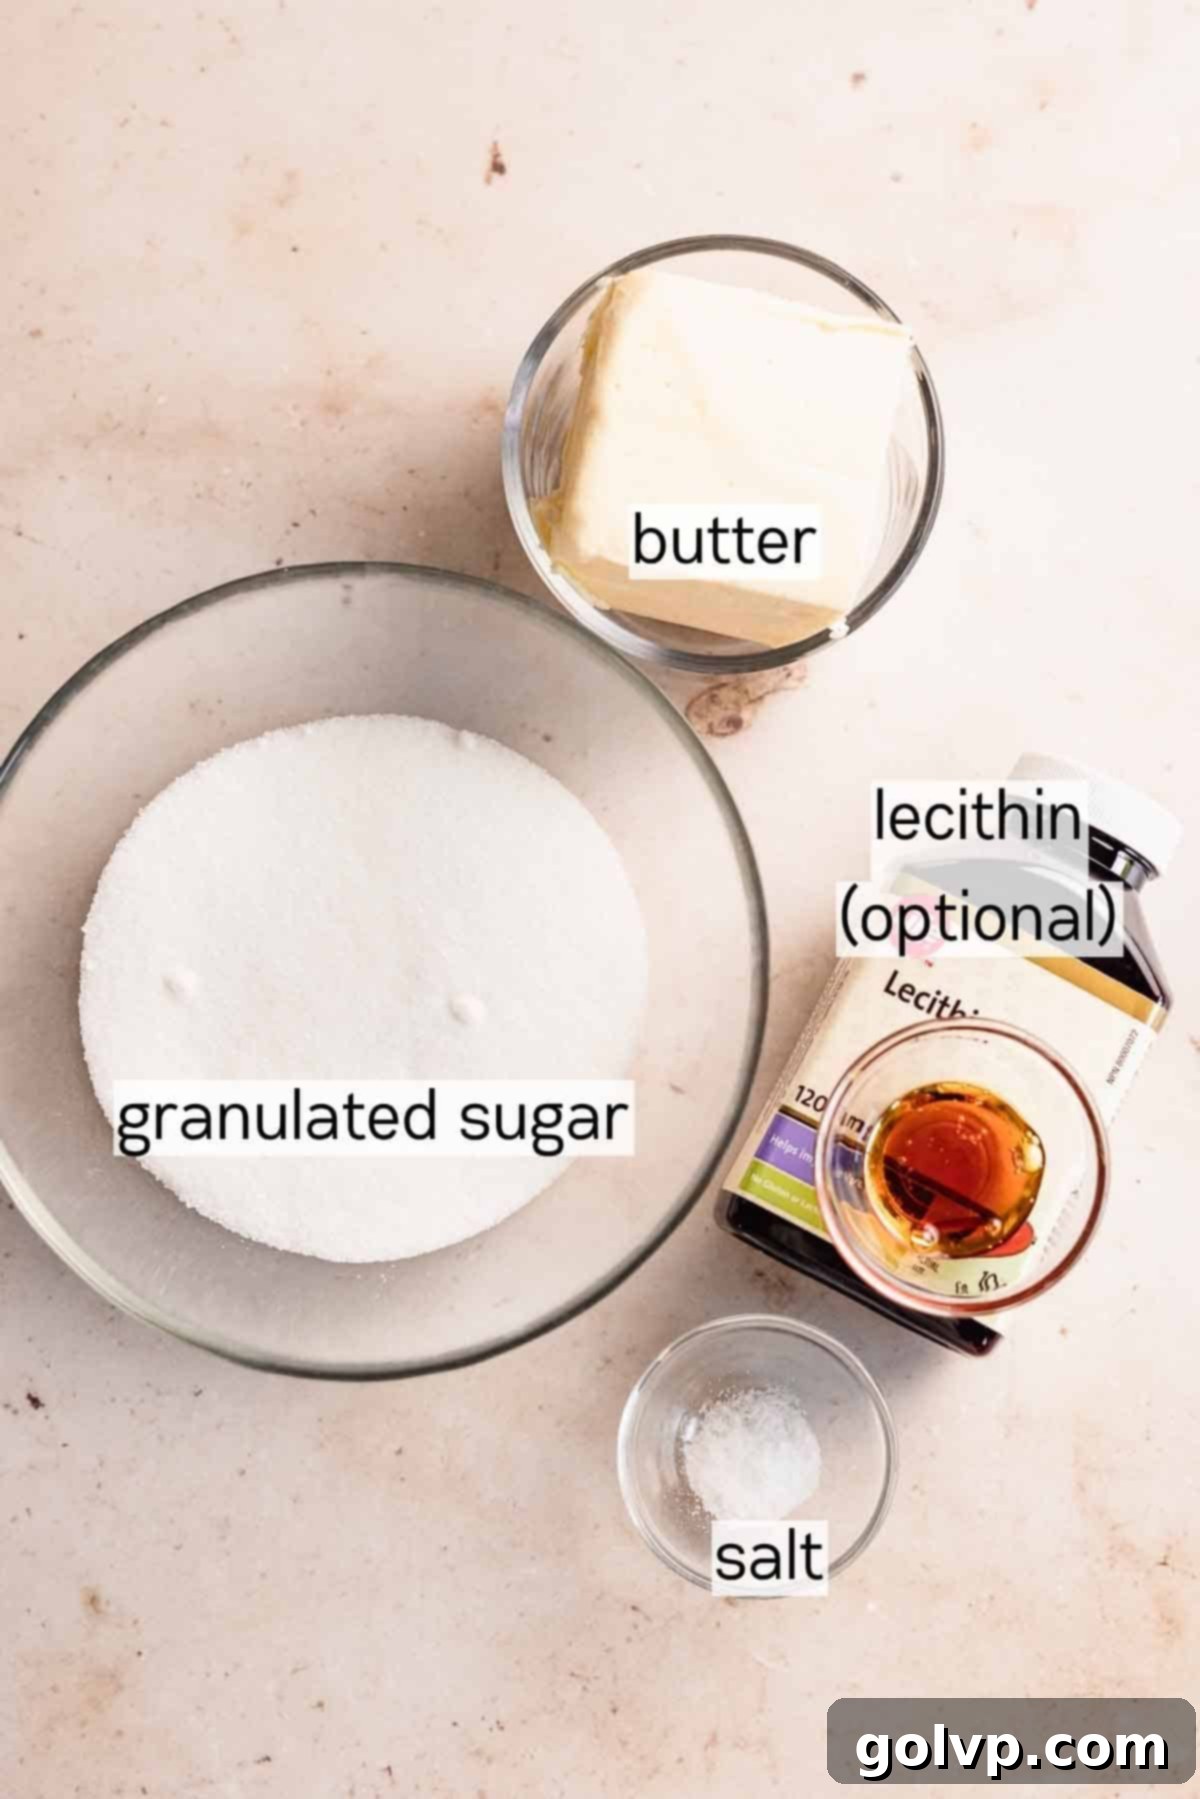
The addition of lecithin is a game-changer for homemade toffee, acting as an emulsifier to prevent separation and graininess, ensuring a silky-smooth caramel texture every time. While optional, it’s highly recommended if you’ve encountered issues with toffee consistency in the past.
- Granulated Sugar: After experimenting with various sugars, granulated sugar proved to be the superior choice for our toffee. It consistently yields a clearer, more crisp toffee texture and a clean, pure caramel flavor that brown sugar couldn’t quite match in this specific application.
- Lecithin: For truly foolproof toffee, we advocate for using soy or sunflower lecithin. This ingredient helps stabilize the mixture, making it much more forgiving to cook and preventing common problems like splitting or becoming grainy. You can typically find lecithin at your local health food store, often in powder form or as gel capsules (which can be squeezed out).
- Unsalted Butter: Using unsalted butter allows for precise control over the saltiness of your toffee. It also browns more evenly without the risk of the added salts becoming bitter during the caramelization process.
- Sea Salt: A touch of sea salt perfectly balances the sweetness of the toffee, enhancing its overall flavor and adding a subtle complexity.
Perfect Cookie Dough Ingredients
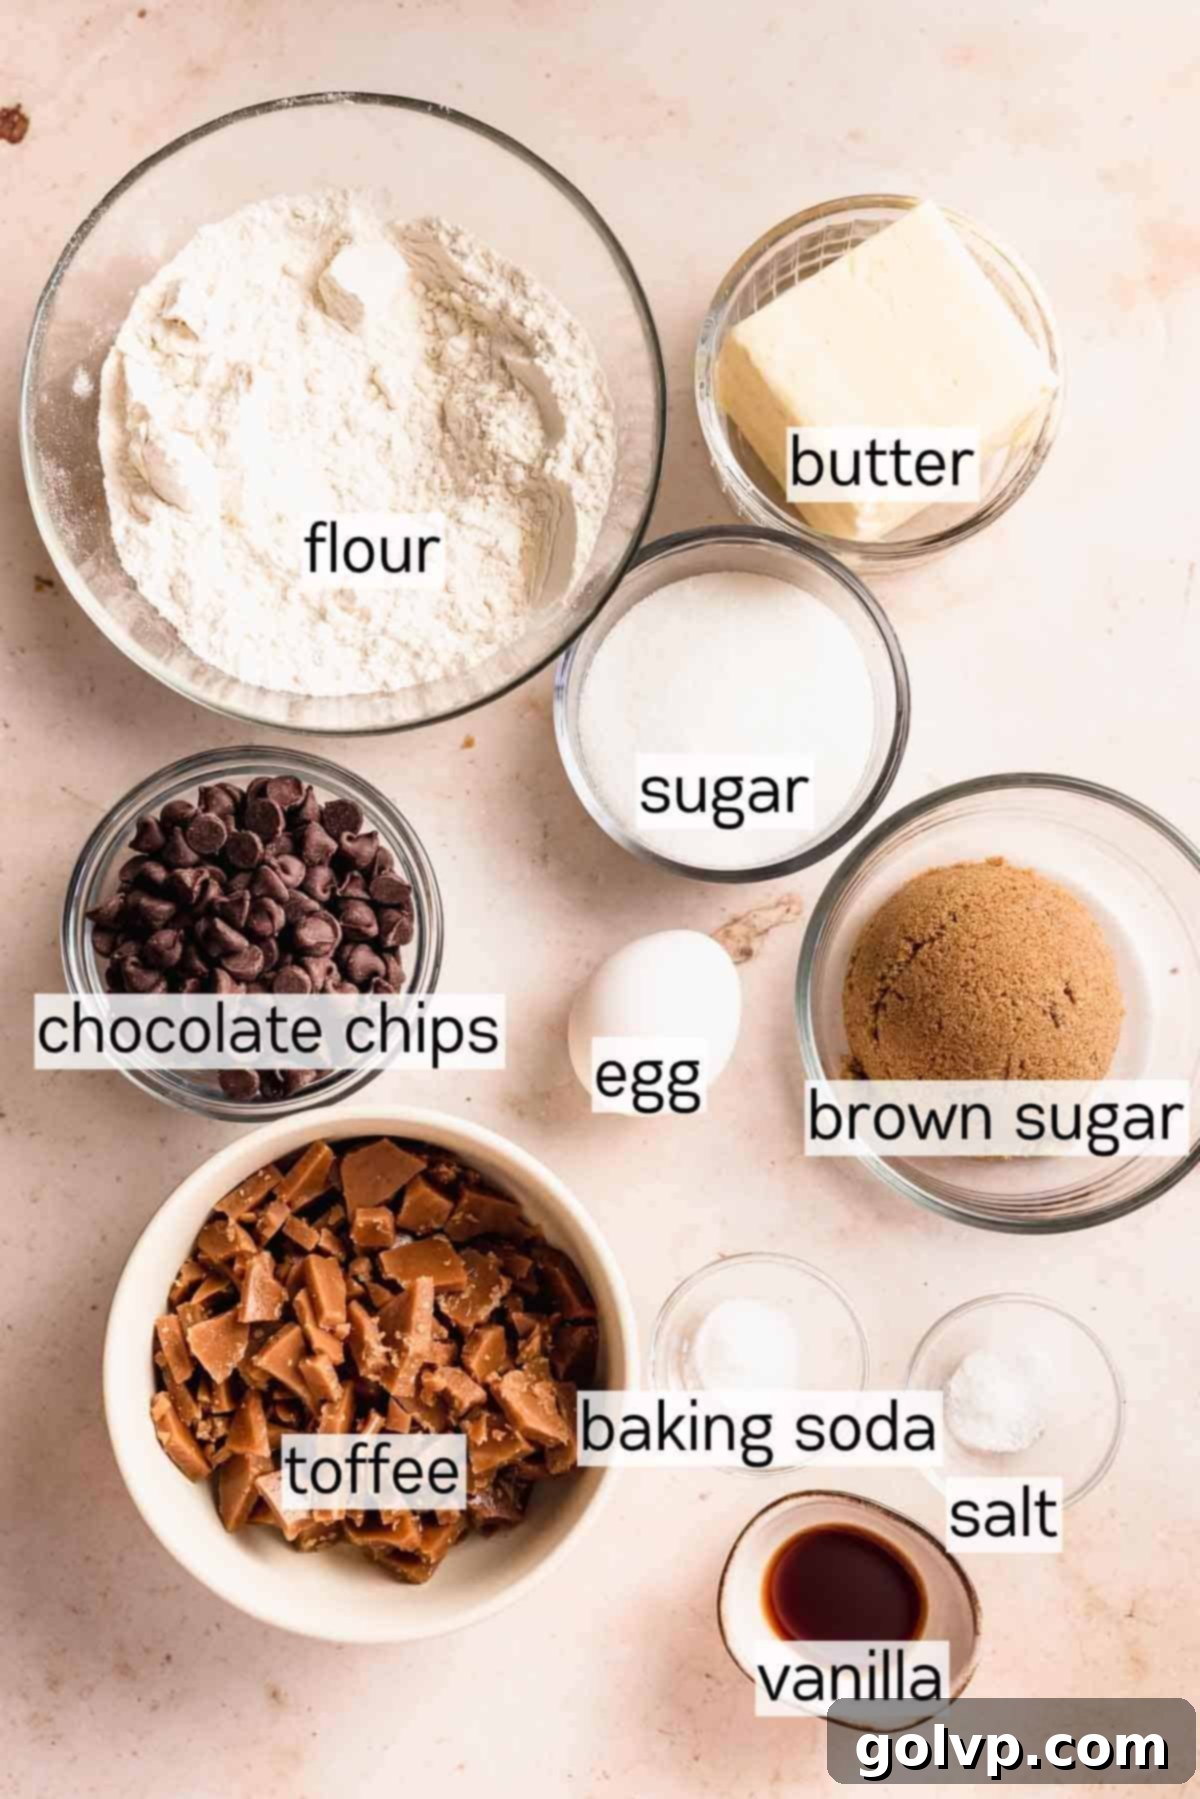
The foundation of these exceptional cookies is a rich brown butter cookie dough, which guarantees a wonderfully chewy texture with perfectly crisp, salted edges – a delightful contrast to the soft, melty toffee and chocolate.
- Unsalted Butter: High-quality unsalted butter is paramount here. We specifically use unsalted butter because, when browned, the milk solids caramelize beautifully without the risk of salted butter developing a harsh, bitter flavor. The browning process is key to the cookie’s signature nutty taste.
- All-Purpose Flour: Achieving the ideal cookie texture largely depends on accurate flour measurement. For the most precise results, we highly recommend weighing your flour with a kitchen scale. If a scale isn’t available, employ the spoon-and-level method: gently stir the flour in its bag or container, then lightly spoon it into a dry measuring cup. Avoid packing it down, and level off the excess with the straight edge of a knife. This prevents over-measuring, which can lead to dry, dense cookies.
- Toffee: This recipe provides comprehensive instructions for making your own delectable homemade toffee. However, if time is a constraint, feel free to use store-bought toffee bits or crush some Skor bars. Remember to break them into varied pieces for interesting textural contrasts – a rolling pin and a Ziploc bag work wonders! Please be aware that Skor bars contain almonds if you’re aiming for a nut-free cookie.
- Chocolate Chips: The choice of chocolate can significantly impact your cookie experience. A mix of semisweet and milk chocolate chips offers a balanced sweetness and richness. For those desirable “melted pools” of chocolate that look so inviting, opt for chopped chocolate from a bar rather than standard chips, as chopped chocolate melts more smoothly and artistically. Dark chocolate can also be added for a more intense cocoa flavor.
- Brown Sugar (packed): Contributes to the cookies’ chewiness and adds a deep, molasses-like flavor. Ensure it’s firmly packed for accurate measurement.
- Granulated Sugar: Works alongside brown sugar to achieve the perfect balance of sweetness and contributes to the crispness of the cookie edges.
- Sea Salt (for cookies): Enhances all the other flavors, particularly the rich brown butter and sweet toffee.
- Large Egg (room temperature): A room temperature egg emulsifies more easily with the butter and sugar, creating a smoother, more uniform cookie dough.
- Pure Vanilla Extract: A crucial flavor enhancer that adds warmth and depth to the cookie base.
- Baking Soda: The leavening agent responsible for the cookies’ rise and helps create those wonderfully soft and chewy centers.
📖 Creative Substitutions and Flavorful Variations
This versatile brown butter toffee cookie recipe offers plenty of room for culinary creativity, allowing you to adapt it to dietary needs or explore new flavor profiles. Here are some popular and delicious variations:
- Gluten-Free Adaptation: Making these cookies gluten-free is incredibly straightforward. Simply substitute the all-purpose flour with a 1:1 gluten-free flour blend. Ensure your chosen blend contains xanthan gum for optimal texture and structure, mimicking traditional flour effectively.
- Classic Brown Butter Chocolate Chip Cookies: If you’re a purist who loves the deep, nutty flavor of brown butter combined with classic chocolate, simply omit the toffee entirely. You’ll be left with wonderfully rich and complex brown butter chocolate chip cookies, similar to these exceptional brown butter chocolate chip cookies.
- Luscious Caramel Chocolate Chip Cookies: For a different kind of gooey delight, swap out the toffee for soft caramel pieces or caramel chips. These will melt into sweet, tender pockets of caramel throughout the cookie. Alternatively, you could experiment with butterscotch chips for a distinct, creamy butterscotch flavor, reminiscent of these fudgy butterscotch blondie bars.
- Nut-Free Toffee Cookies: To ensure your cookies are truly nut-free, it is essential to follow our recipe instructions for making homemade toffee. This guarantees control over all ingredients. If purchasing store-bought toffee, carefully check the labels to confirm it is nut-free, as many commercial toffee products, such as Skor bars, contain almonds.
👩🍳 The Art of Crafting These Perfect Toffee Cookies
The journey to these delectable cookies involves a few distinct stages, each contributing to their exceptional flavor and texture. You’ll begin by preparing the homemade toffee, then move on to browning the butter, and finally, bring it all together into the irresistible cookie dough. This layered approach ensures every component shines.
Remember, if you’re looking for a quicker path to deliciousness, you have the option to bypass the homemade toffee step and use good quality store-bought toffee or crushed Skor bars instead. Just keep in mind the distinction for nut-free baking: homemade toffee allows for complete control, while Skor bars typically contain nuts.
And let’s be honest, part of the joy of baking cookies is undoubtedly sampling the dough! If you’re a fan of safe-to-eat cookie dough, check out this recipe for brown butter edible cookie dough – just imagine adding some of our homemade toffee pieces to that! You can even transform it into an indulgent easy cookie dough no-churn ice cream for an extra special treat.
Mastering Homemade Toffee: A Step-by-Step Guide
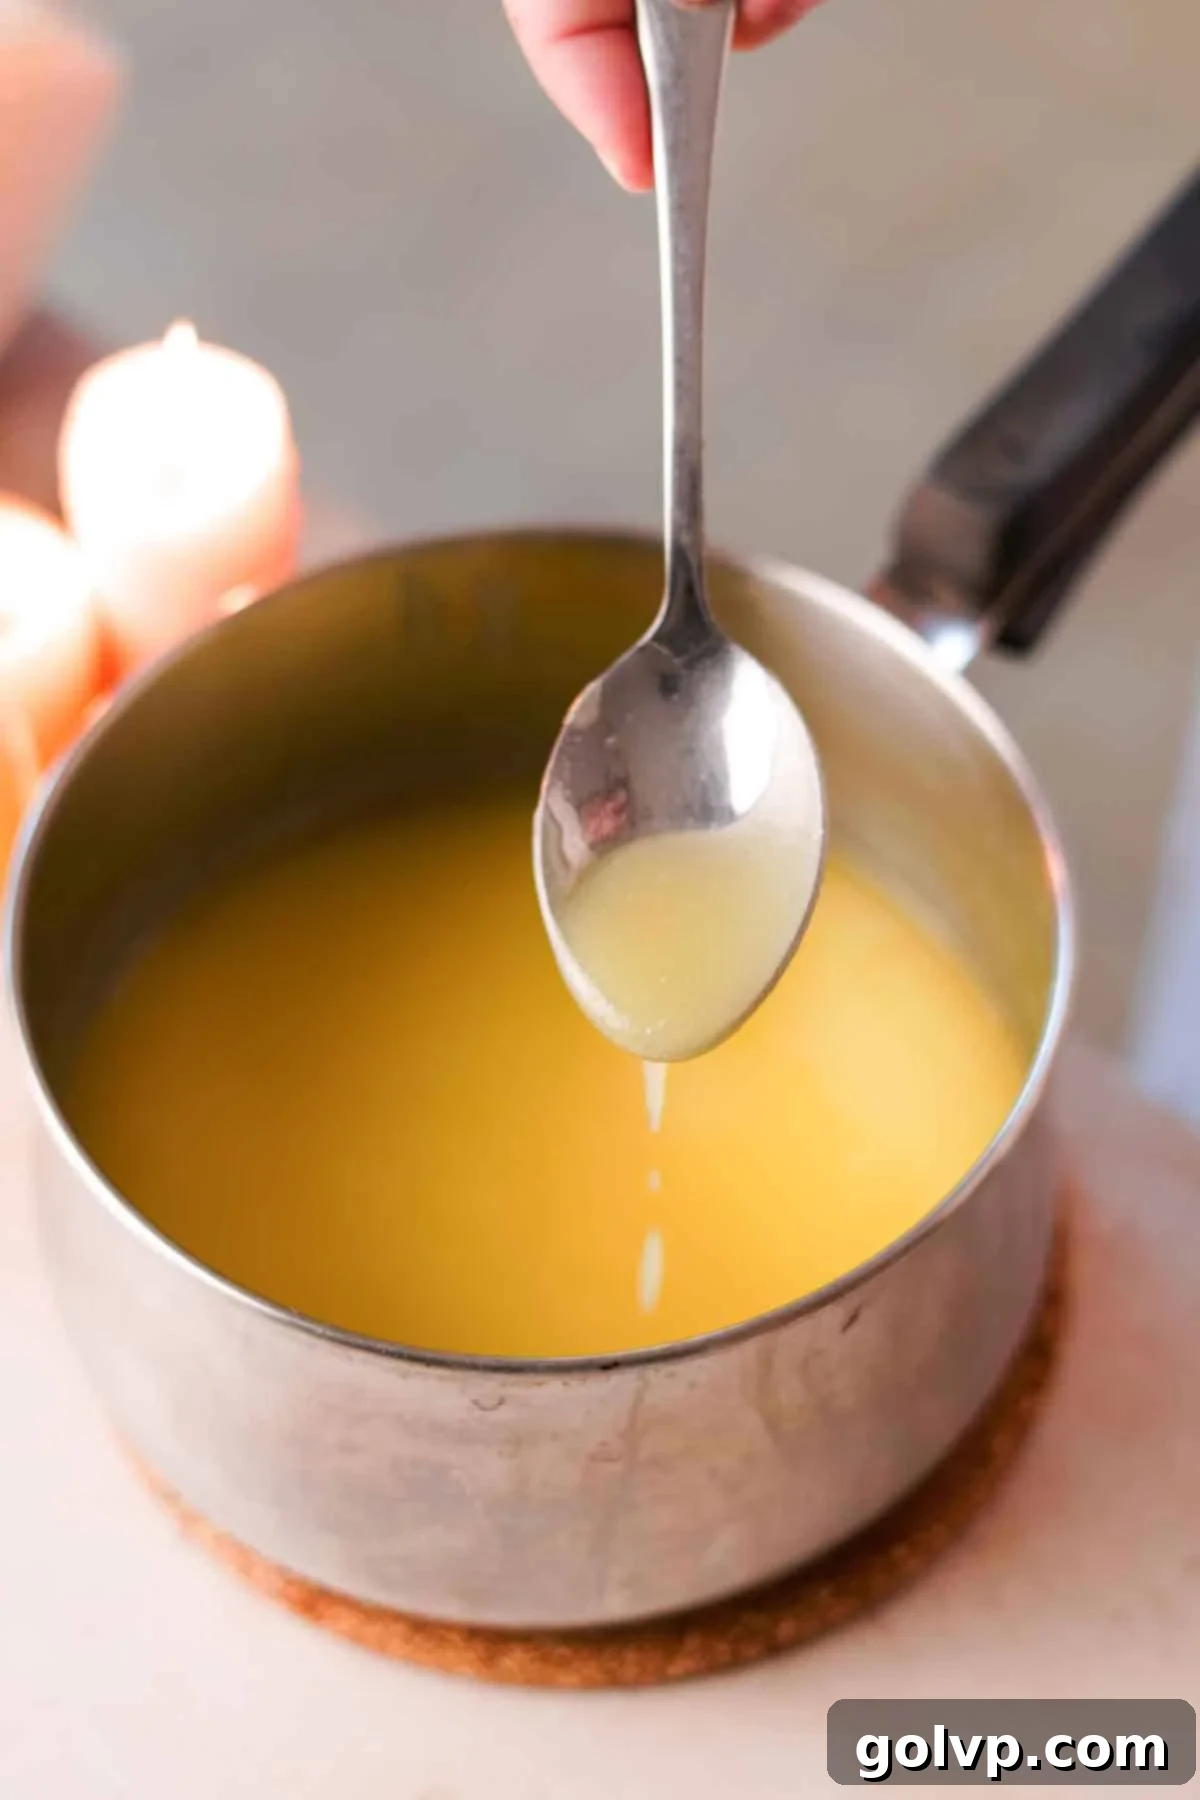
Step 1: In a small, heavy-bottomed saucepan, combine the butter and salt. Heat on consistently **low heat** until the butter is completely melted. Once melted, add the granulated sugar and the optional lecithin. Whisk these ingredients vigorously until the mixture is completely smooth and begins to thicken. It might appear slightly separated at first, but continuous whisking on low heat will help it emulsify and come together beautifully. If it seems stubborn, you may need to briefly return it to **very low heat** to aid in achieving a uniform, creamy consistency.
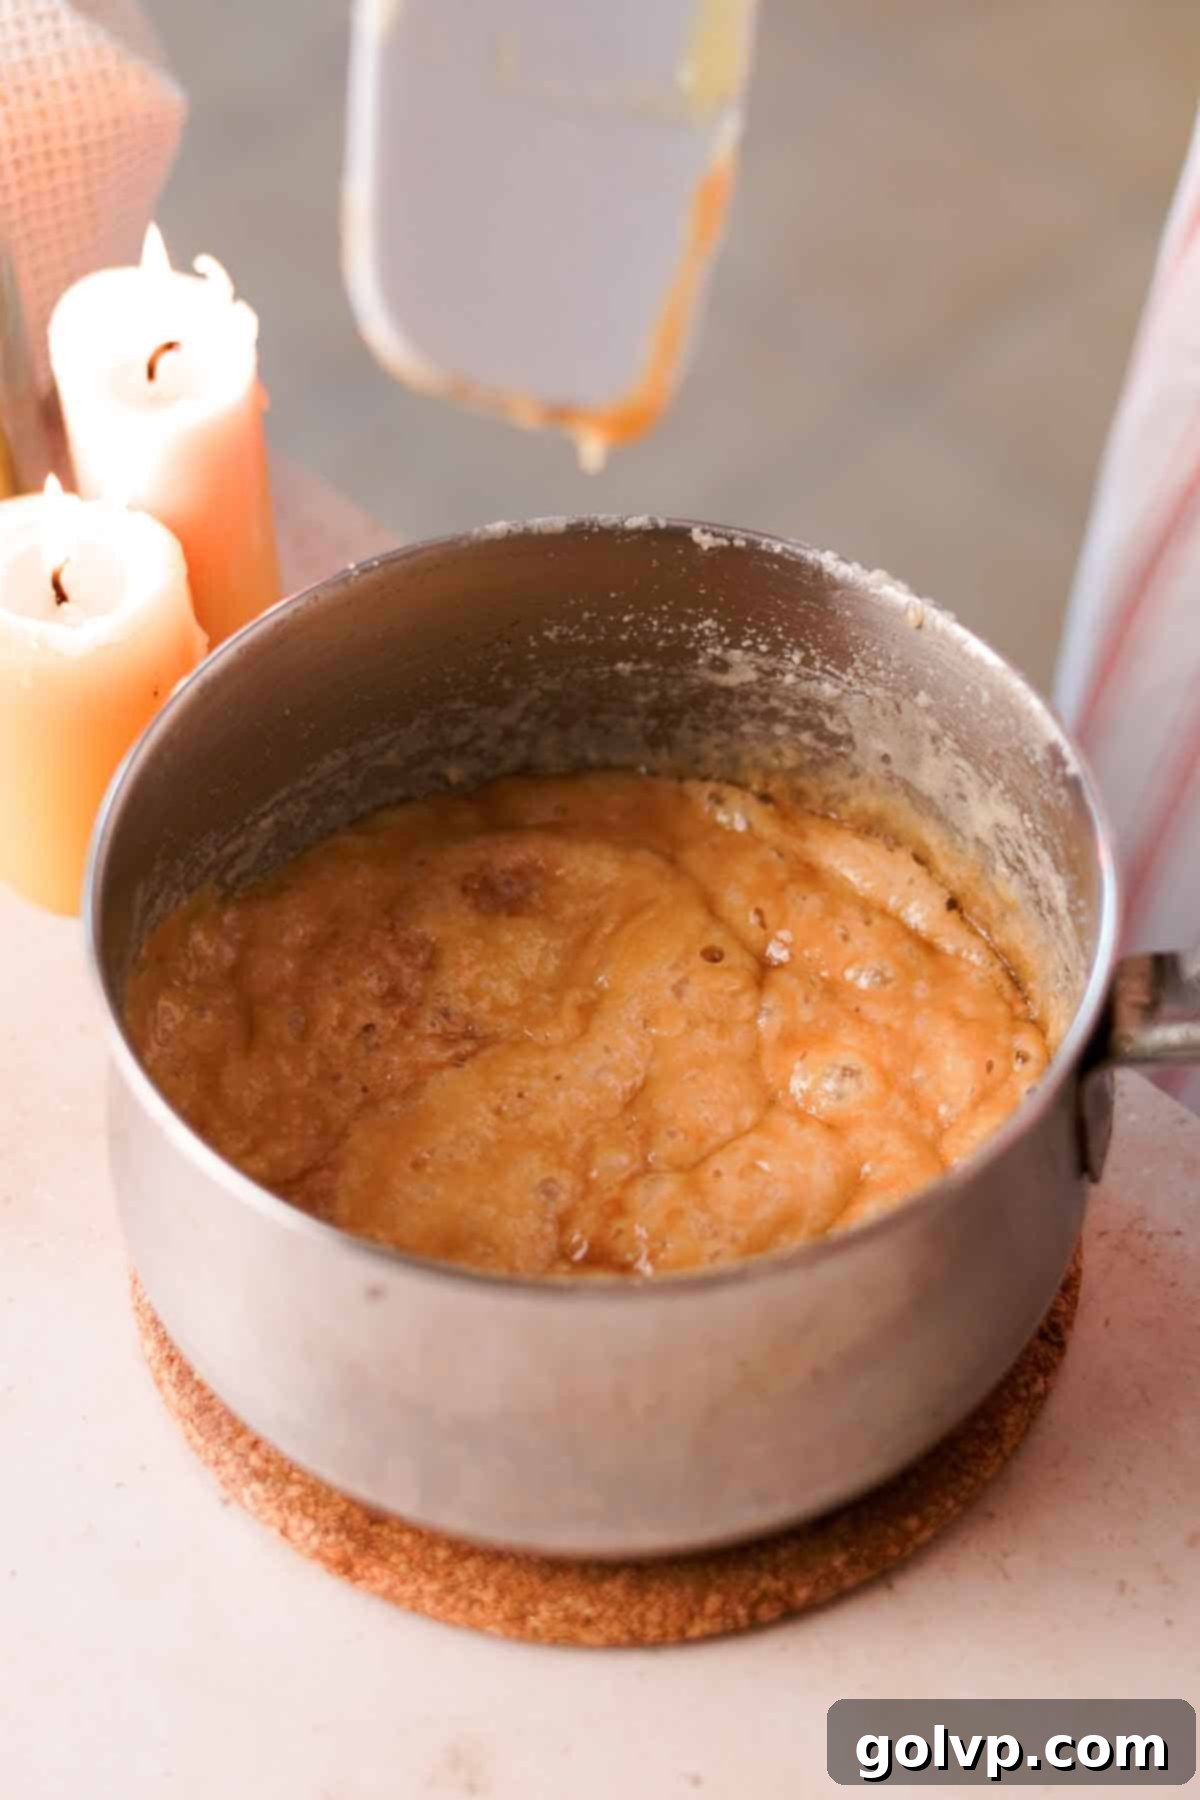
Step 2: Once the mixture has reached a smooth, thickened consistency, **stop whisking immediately**. Continue to heat the toffee on **low heat**, stirring very gently and sparingly. The key here is patience and minimal agitation. The toffee will gradually begin to bubble and transform, slowly turning a beautiful golden brown. Observe it closely, as this stage can progress quickly. The gentle, infrequent stirring (just a few times) is merely to prevent it from sticking or burning on the bottom, not to mix it vigorously.
Pro Tip for Perfect Toffee: To prevent your toffee from splitting, which is a common issue, always maintain a **consistently low heat** throughout the cooking process. Abrupt increases in temperature, often referred to as “heat jumps,” can cause the emulsion to break and the butter to separate. Additionally, resist the urge to over-stir. Toffee is a delicate confection; once it starts to bubble and turn golden brown, you only need to stir it a few times to ensure even cooking and prevent scorching. Excessive stirring can disrupt the delicate sugar crystal structure and lead to separation.
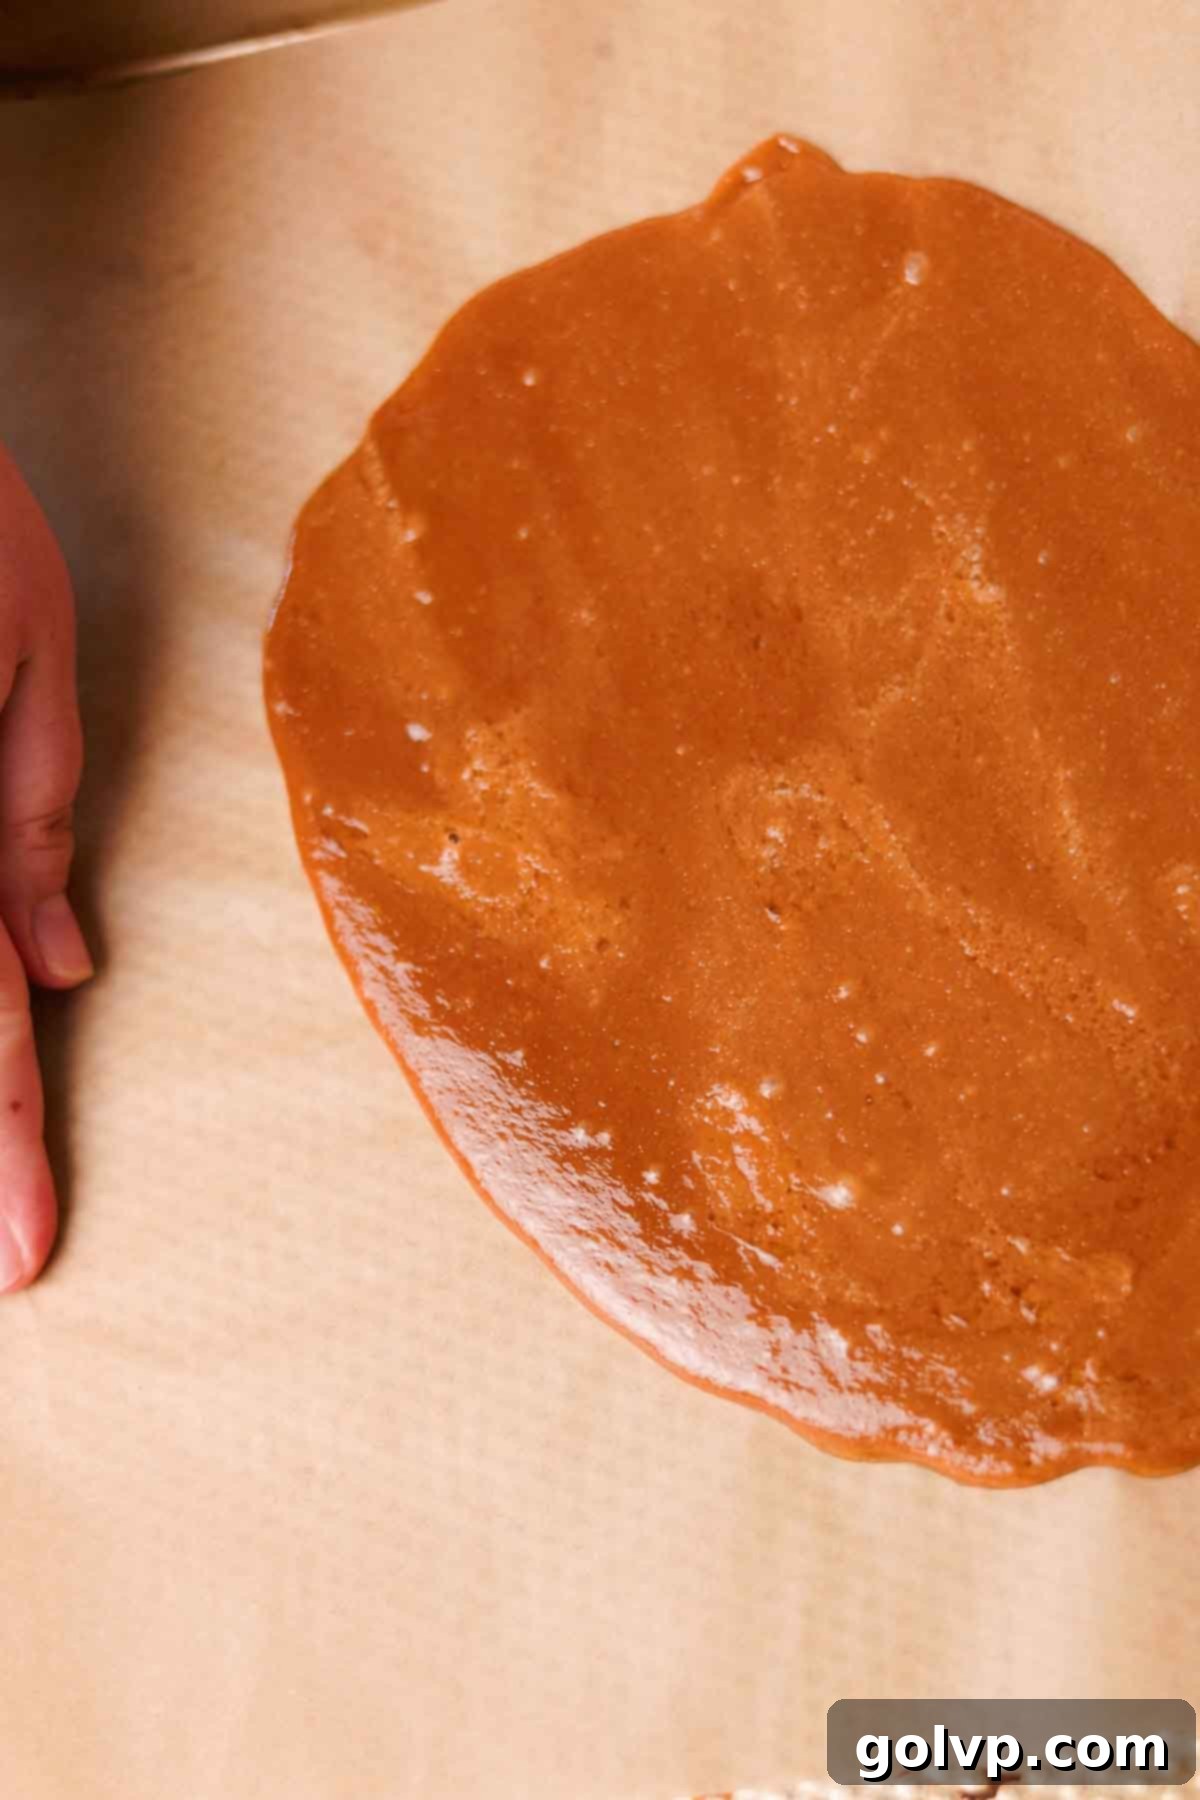
Step 3: Once the toffee has achieved a rich, golden brown color and has a wonderfully fragrant, caramelized aroma (or reaches a temperature of 295-300°F / 146-149°C on a candy thermometer for a precise hard crack stage), immediately remove it from the heat. Carefully pour the hot toffee onto a parchment-lined baking sheet. Spread it quickly and evenly with a spoon or spatula to form a thin, uniform layer. It’s crucial **not to scrape the bottom of the pan** as this can introduce un-caramelized sugar crystals, which may lead to a grainy texture. Set the sheet aside in a cool place to allow the toffee to completely set and harden.
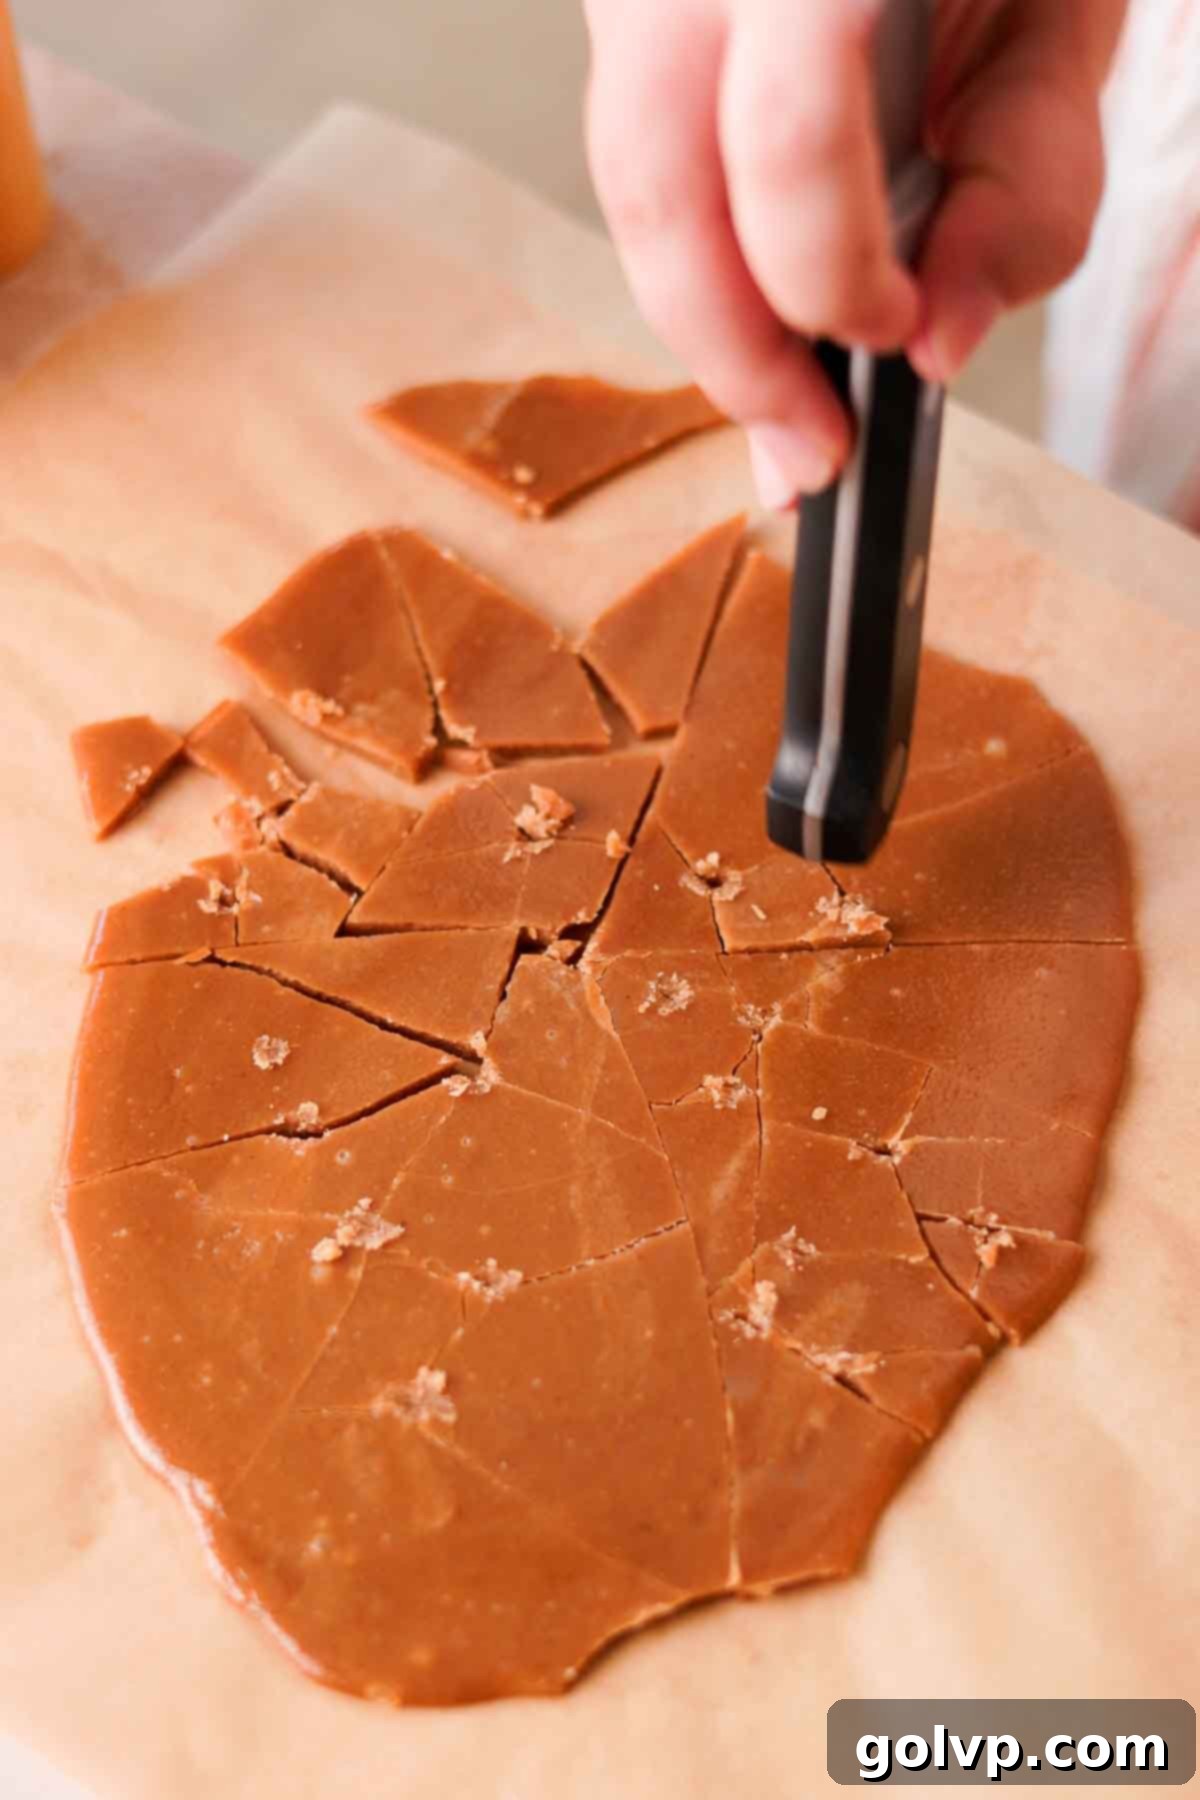
Step 4: Once the toffee has cooled completely and is brittle, it’s time to break it into delicious pieces. You can do this by using the back of a sturdy knife handle, a meat mallet, or even by simply snapping it with your hands. Aim for a variety of shard sizes – some smaller for blending into the cookies, and a few larger ones for topping. Store your homemade toffee in an airtight container at room temperature for up to 7 days, or for extended freshness, refrigerate it for up to 3 months. This makes it a perfect make-ahead component for your cookies!
Achieving Perfection: How to Make Brown Butter
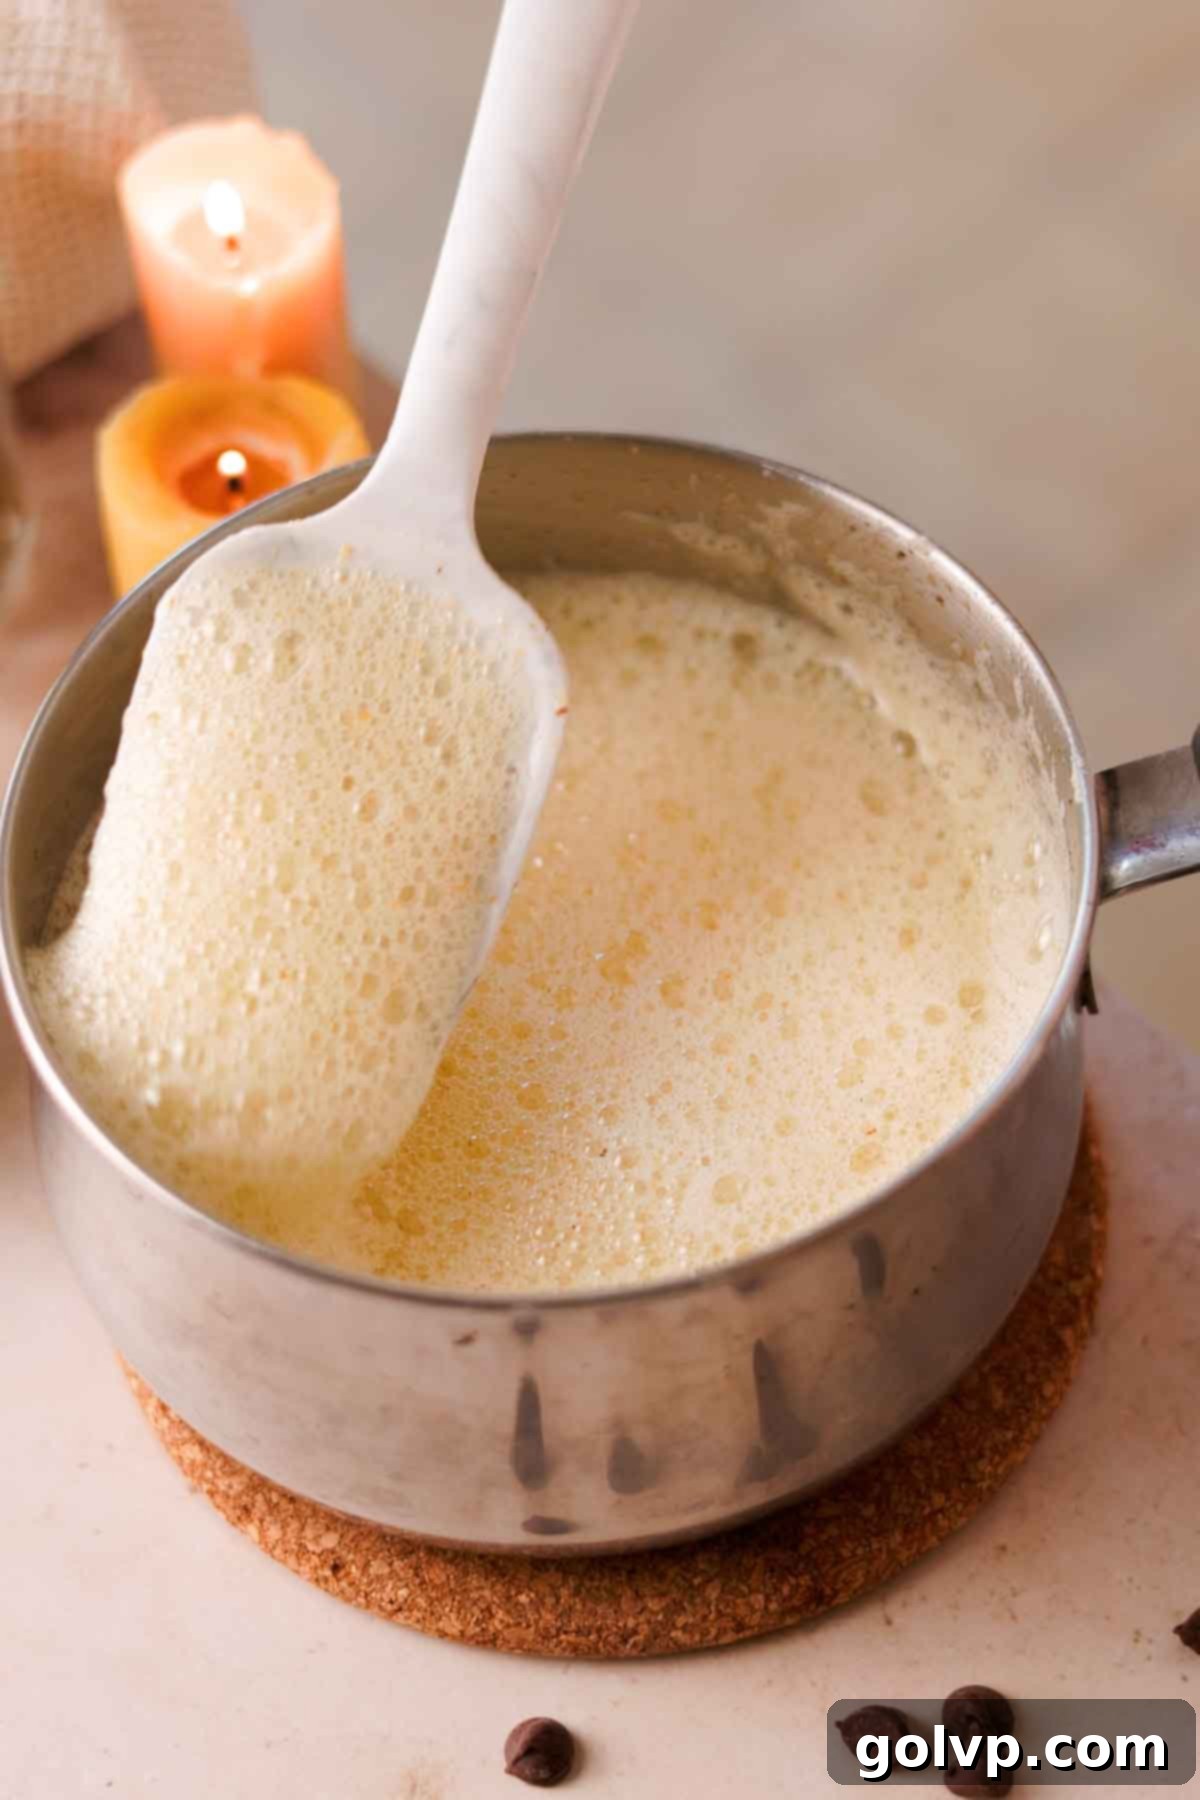
Step 1: To begin the brown butter process, place your butter in a light-colored saucepan (this helps you monitor the color change effectively) over medium-low heat. As the butter melts, it will begin to foam and simmer. It’s crucial to stir the butter constantly during this stage. This continuous stirring ensures even cooking and prevents the milk solids from sticking to the bottom of the pan and burning. The initial foam will eventually subside, and you’ll then start to observe tiny bits of white milk solids gathering at the bottom of the pan. These solids will gradually transform, changing from white to a beautiful, toasted golden-brown color, indicating the development of that rich, nutty flavor we desire.
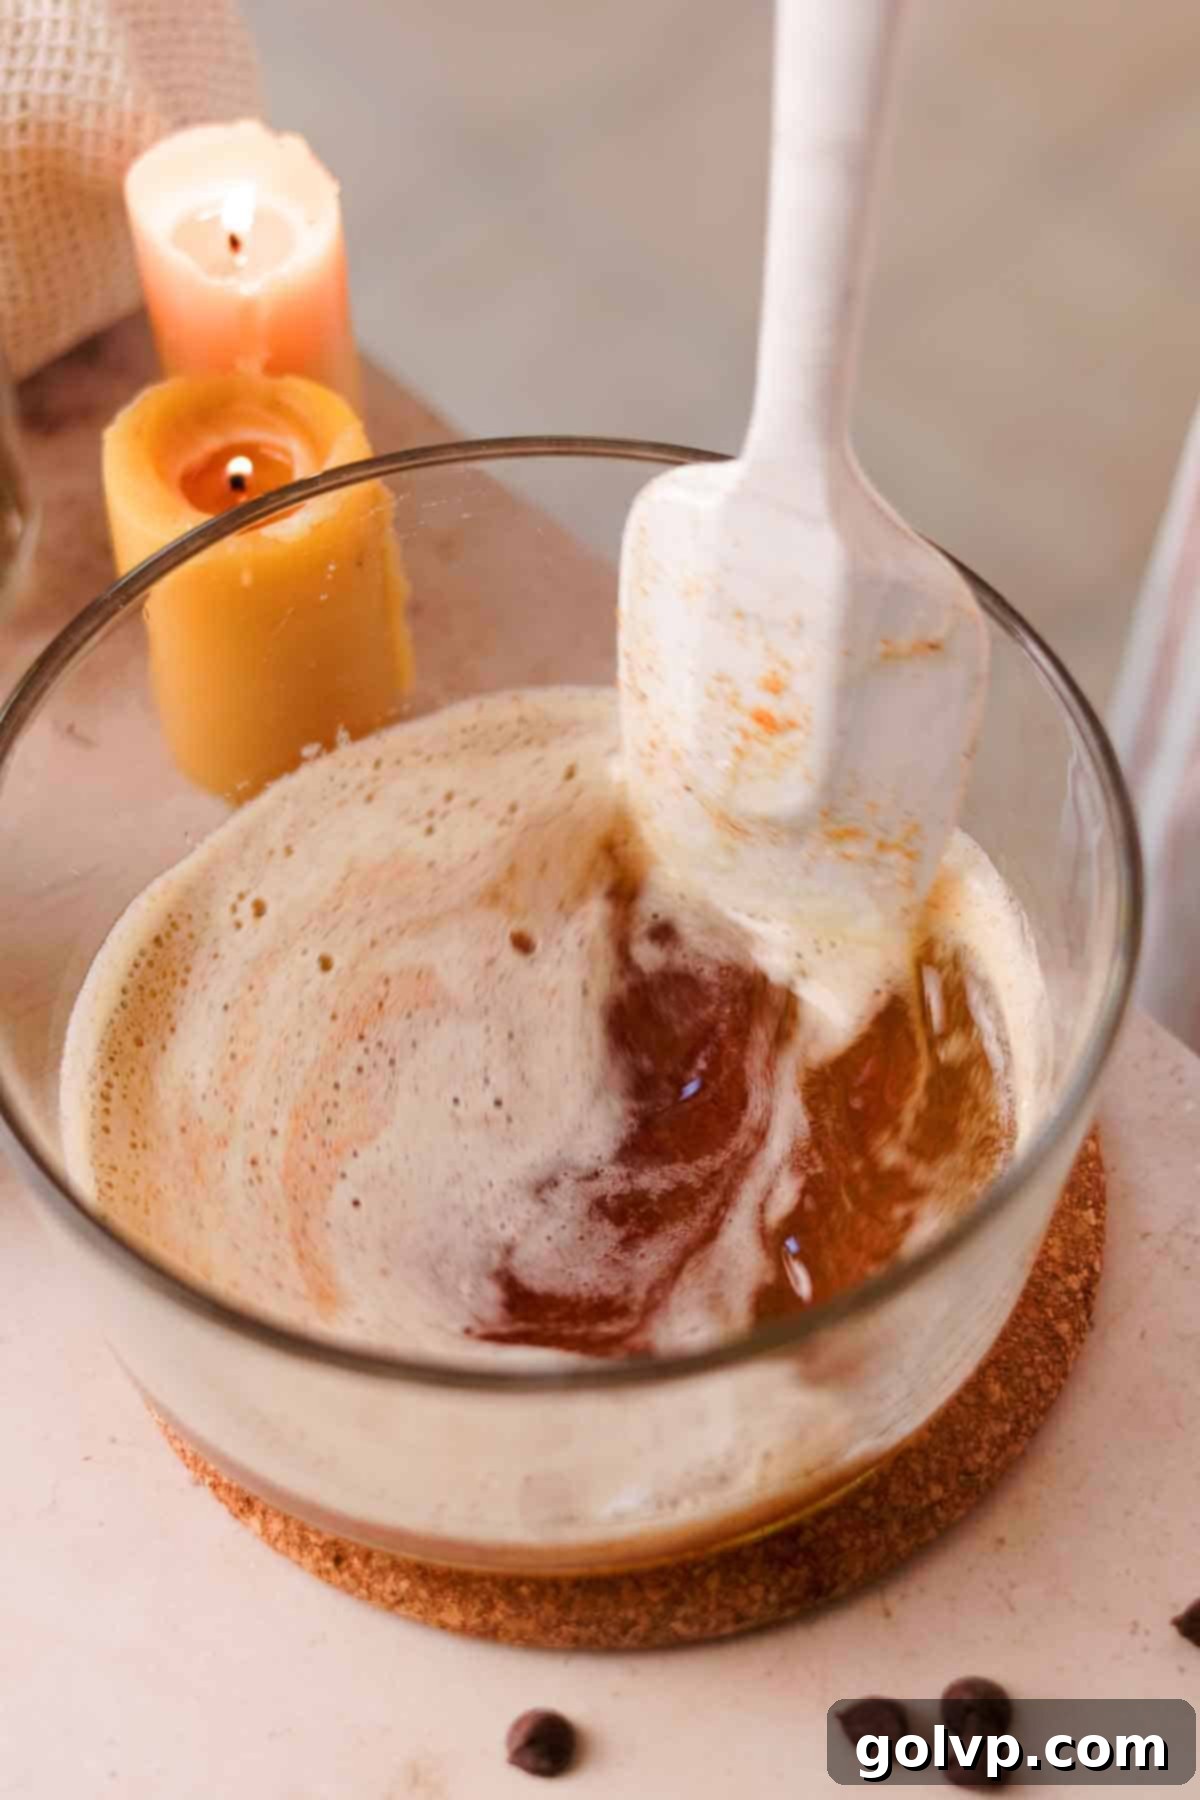
Step 2: Continue stirring and watching carefully. Just as the butter starts to foam up a second time and the milk solids achieve a rich, golden-brown hue (they should smell wonderfully nutty, like toasted hazelnuts), immediately remove the saucepan from the heat. Timing is critical here; the butter can go from perfectly browned to burned in a matter of seconds, which would impart a bitter taste. Promptly transfer the hot brown butter, including all the toasted bits, to a heat-safe bowl. This halts the cooking process. Allow the brown butter to cool completely to room temperature before incorporating it into your cookie dough. This cooling step is essential for the proper texture of your cookies.
Assembling Your Delicious Brown Butter Toffee Cookie Dough
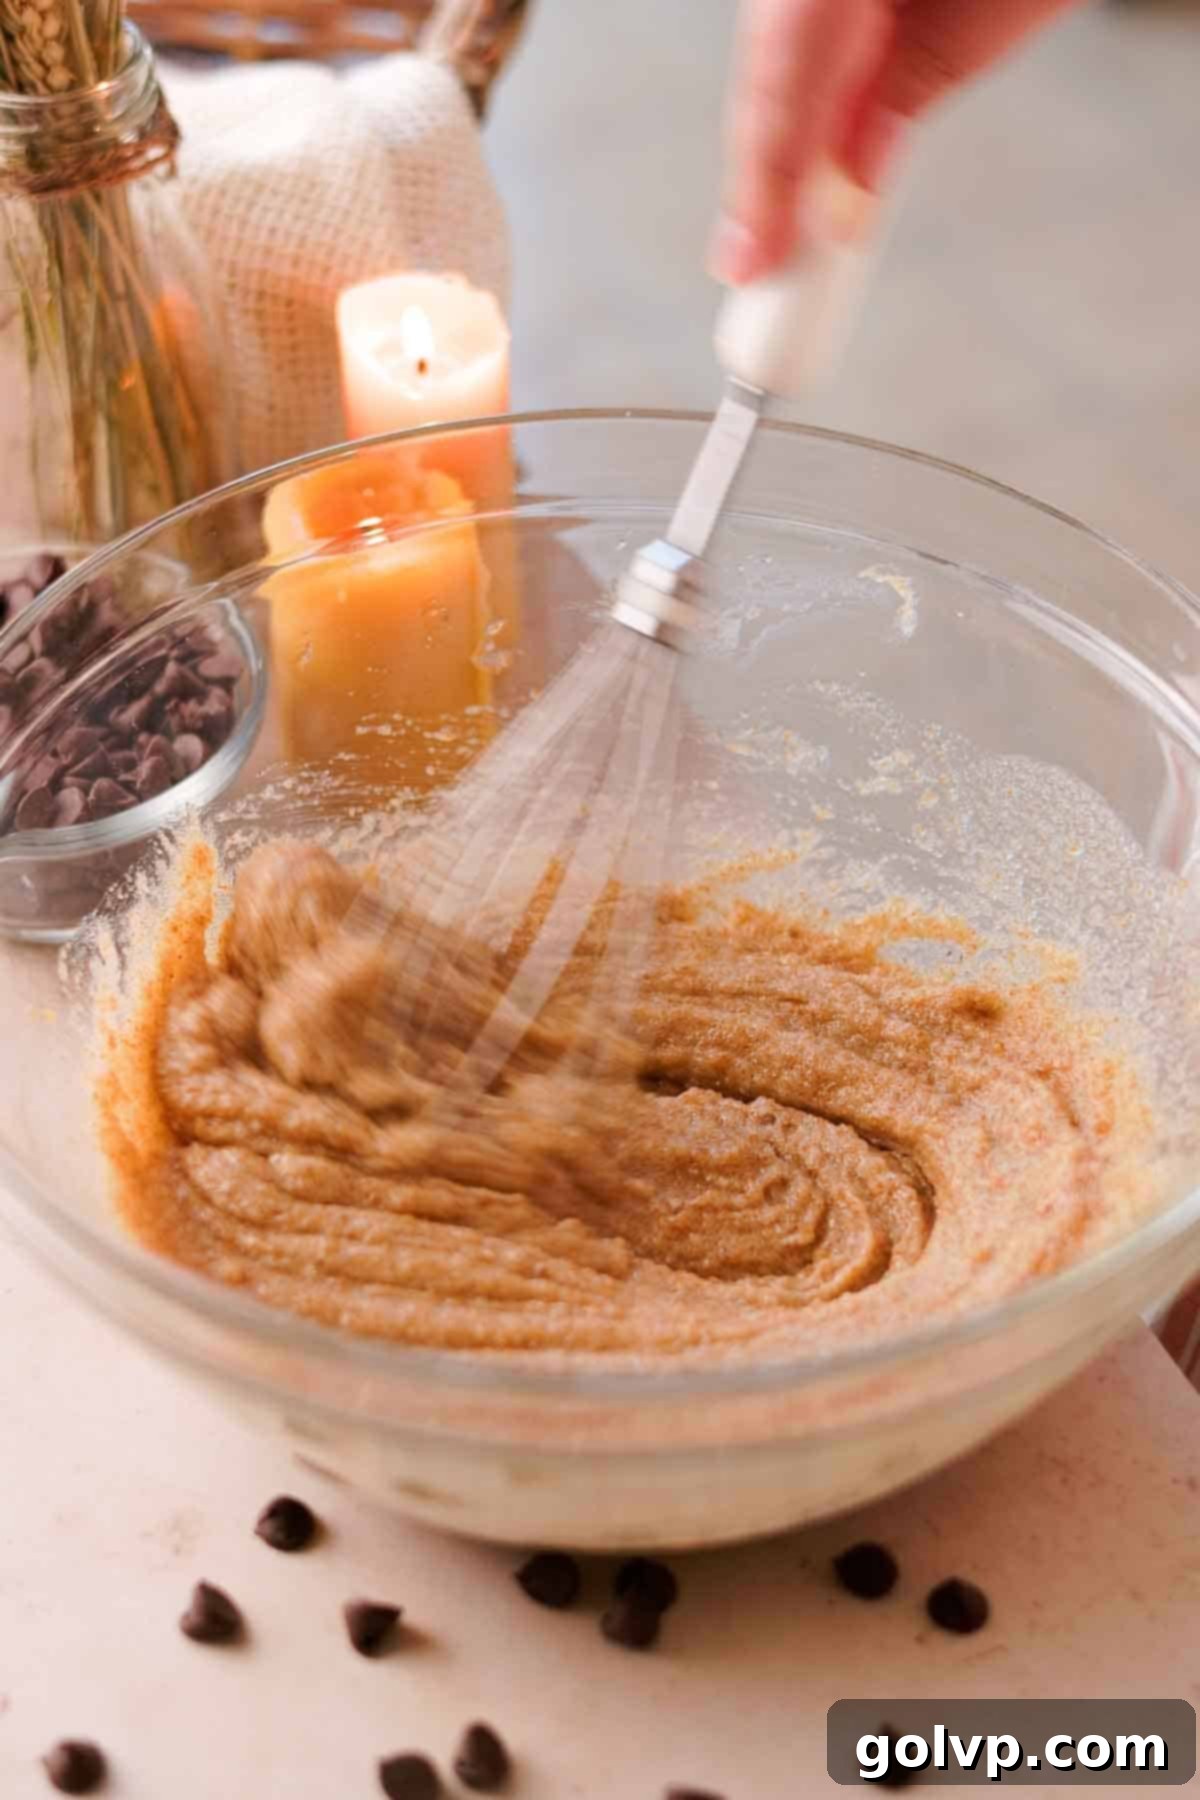
Step 1: Once your brown butter has cooled to room temperature (it should still be liquid or semi-soft, not fully solidified), pour it into a large mixing bowl. Add the brown sugar, granulated sugar, and sea salt. Using a sturdy whisk, combine these ingredients thoroughly, making sure to break up any lumps in the brown sugar. Whisk until the mixture is well-incorporated and appears smooth and creamy. This step creates the sweet, flavorful base for your cookies.
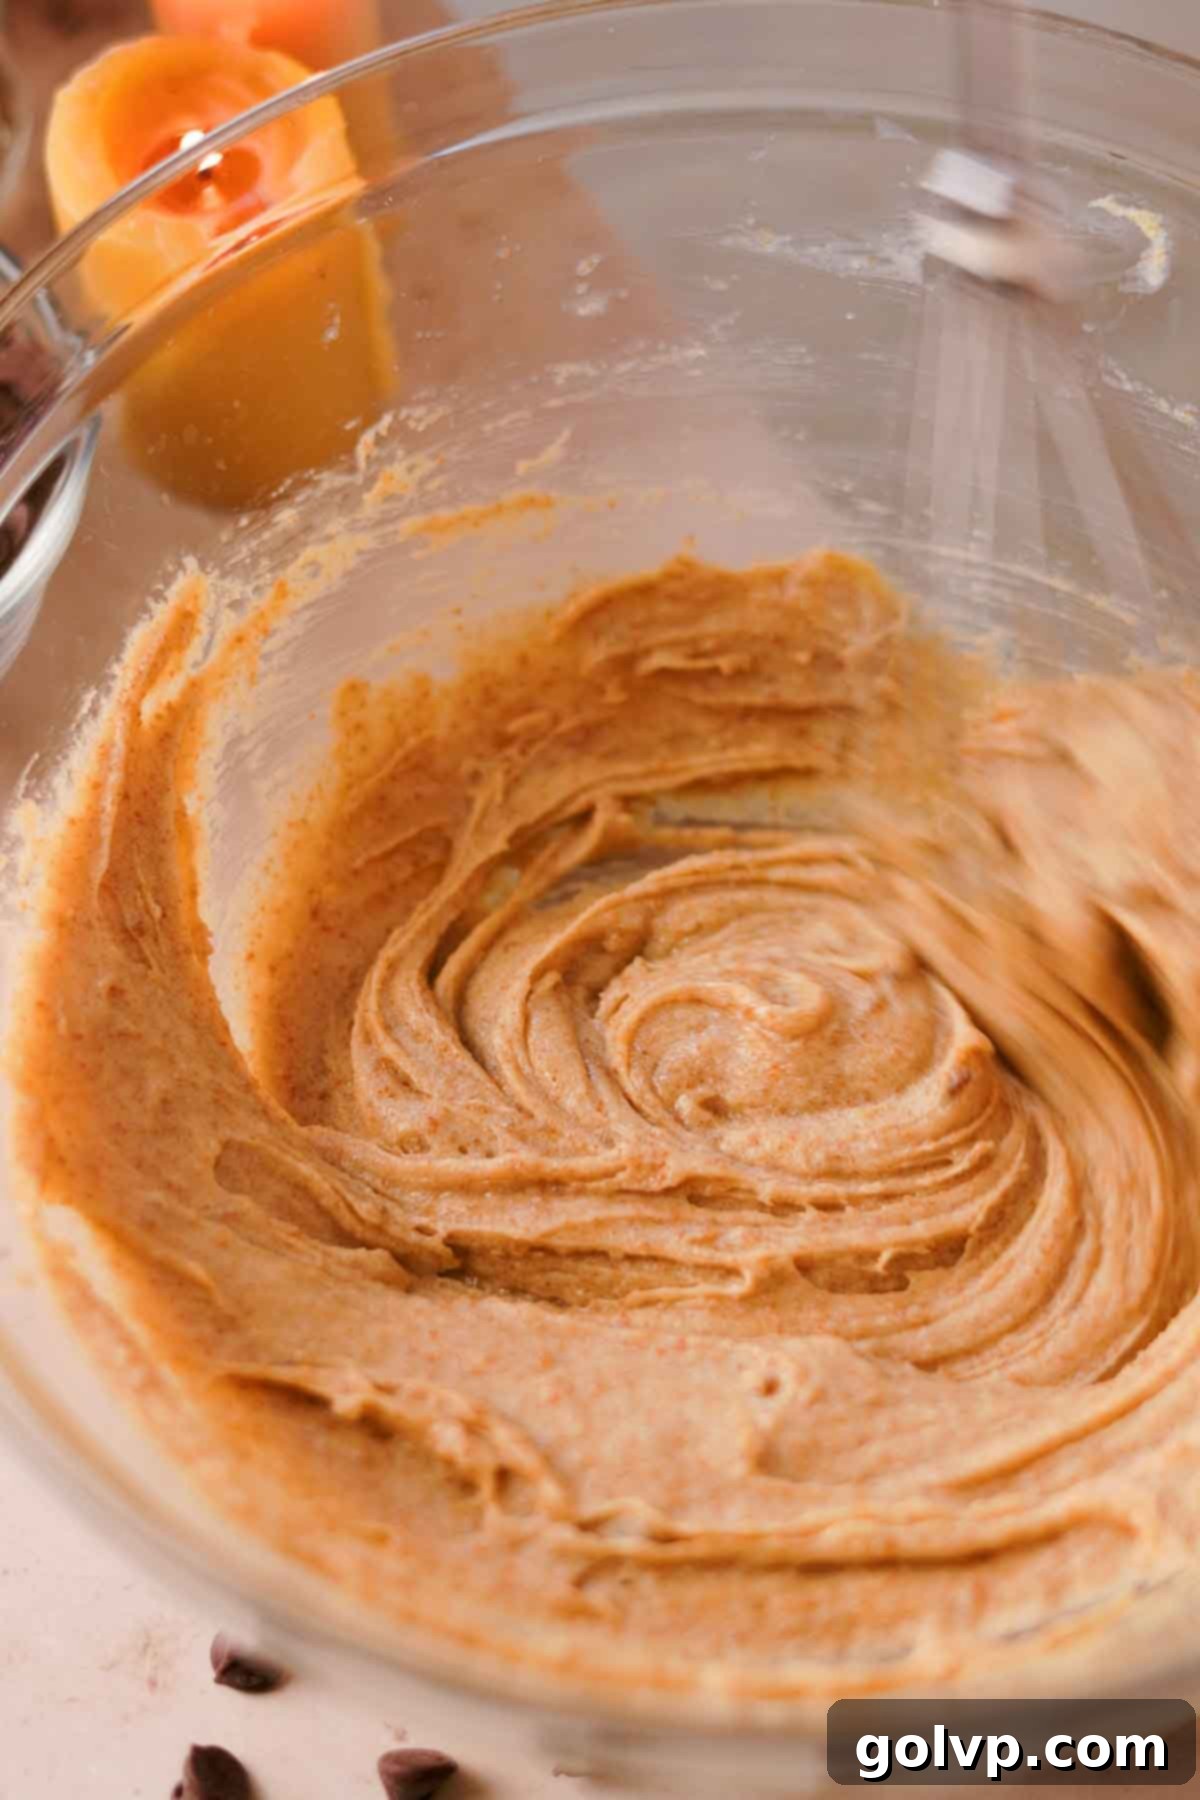
Step 2: Crack in the large egg (at room temperature for best emulsification) and add the pure vanilla extract to the butter and sugar mixture. Continue to whisk vigorously. You’ll notice the batter undergoing a transformation: it will become noticeably thicker, lighter in color, and more airy as the egg is fully incorporated and creates an emulsion. This step is crucial for the cookies’ structure and chewiness.
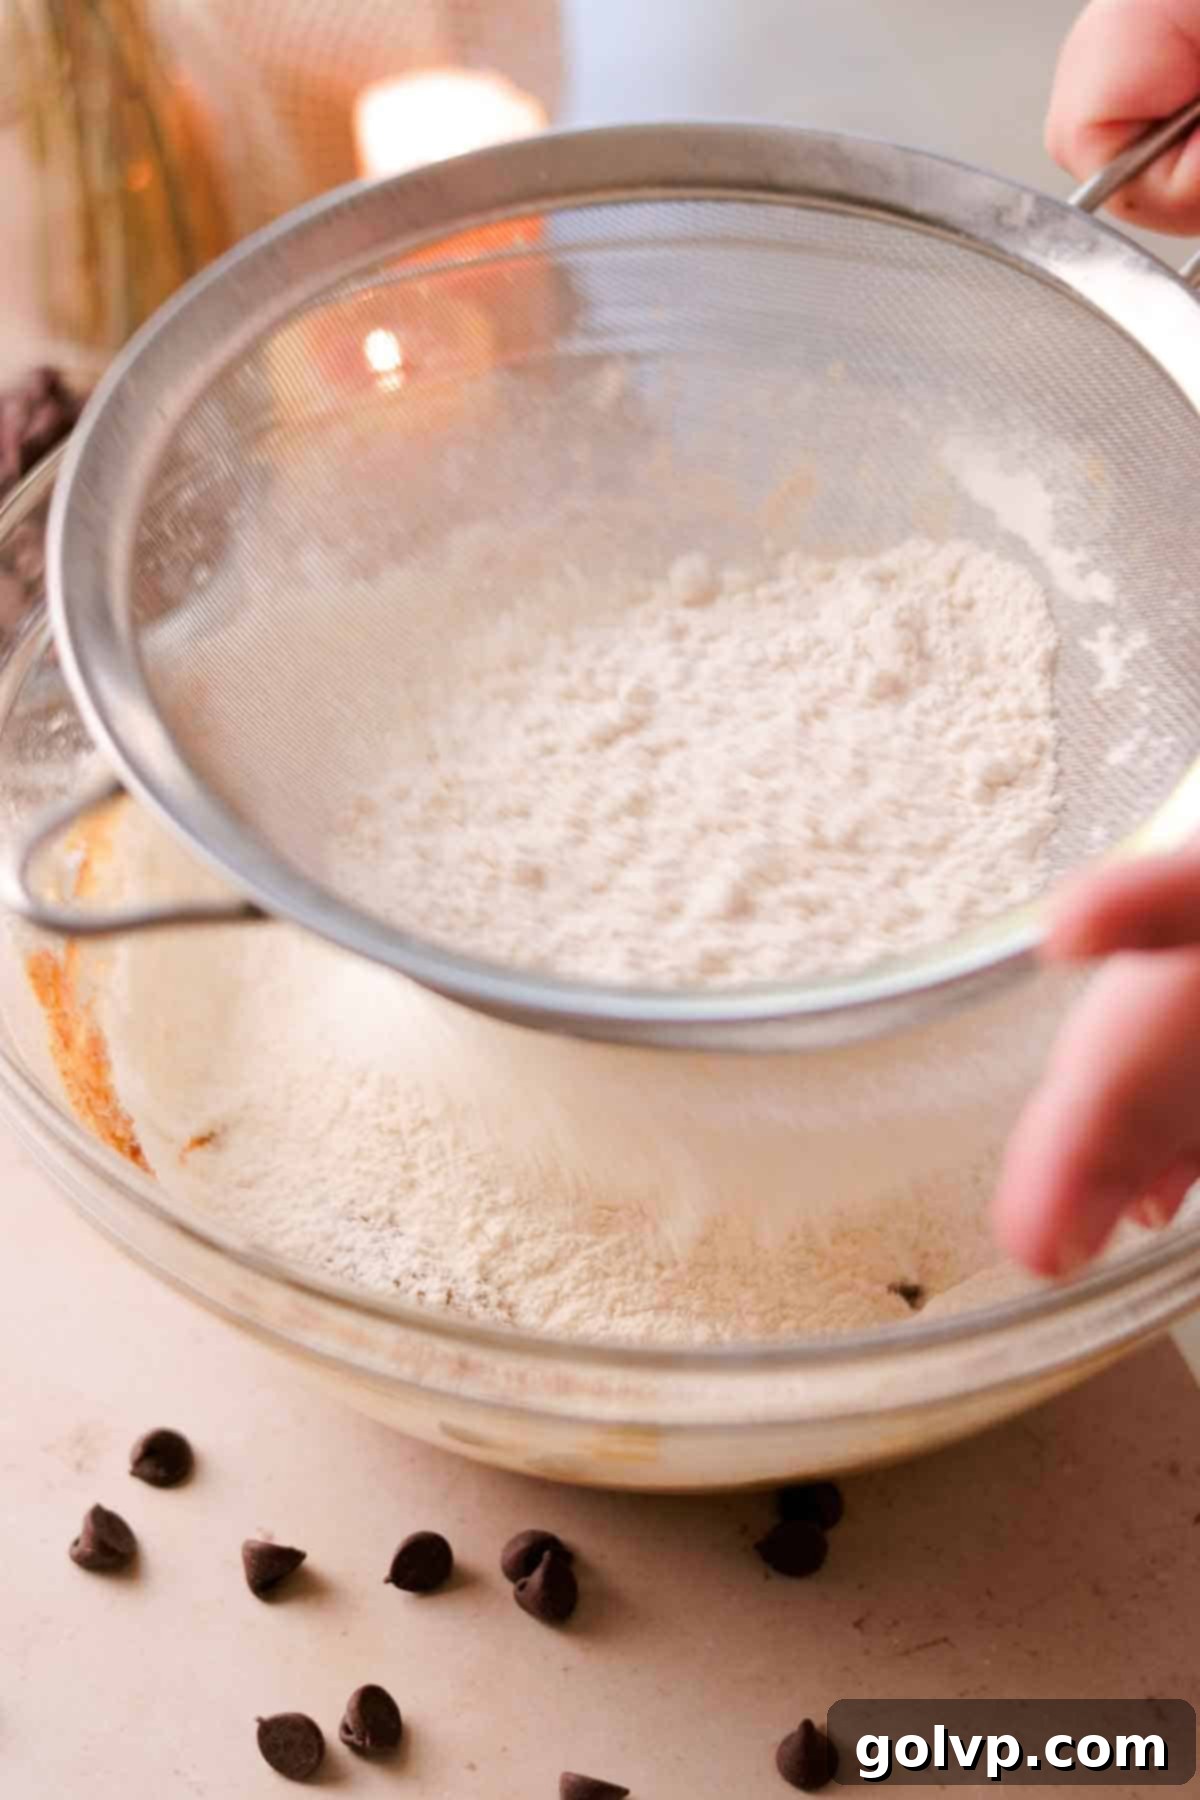
Step 3: Place a fine-mesh sieve over your mixing bowl. Measure out the all-purpose flour and baking soda, then sift them directly into the wet ingredients. Sifting is an important step that aerates the flour, prevents lumps, and helps the dry ingredients incorporate more smoothly and evenly into the wet mixture, contributing to a tender crumb in the final cookie.
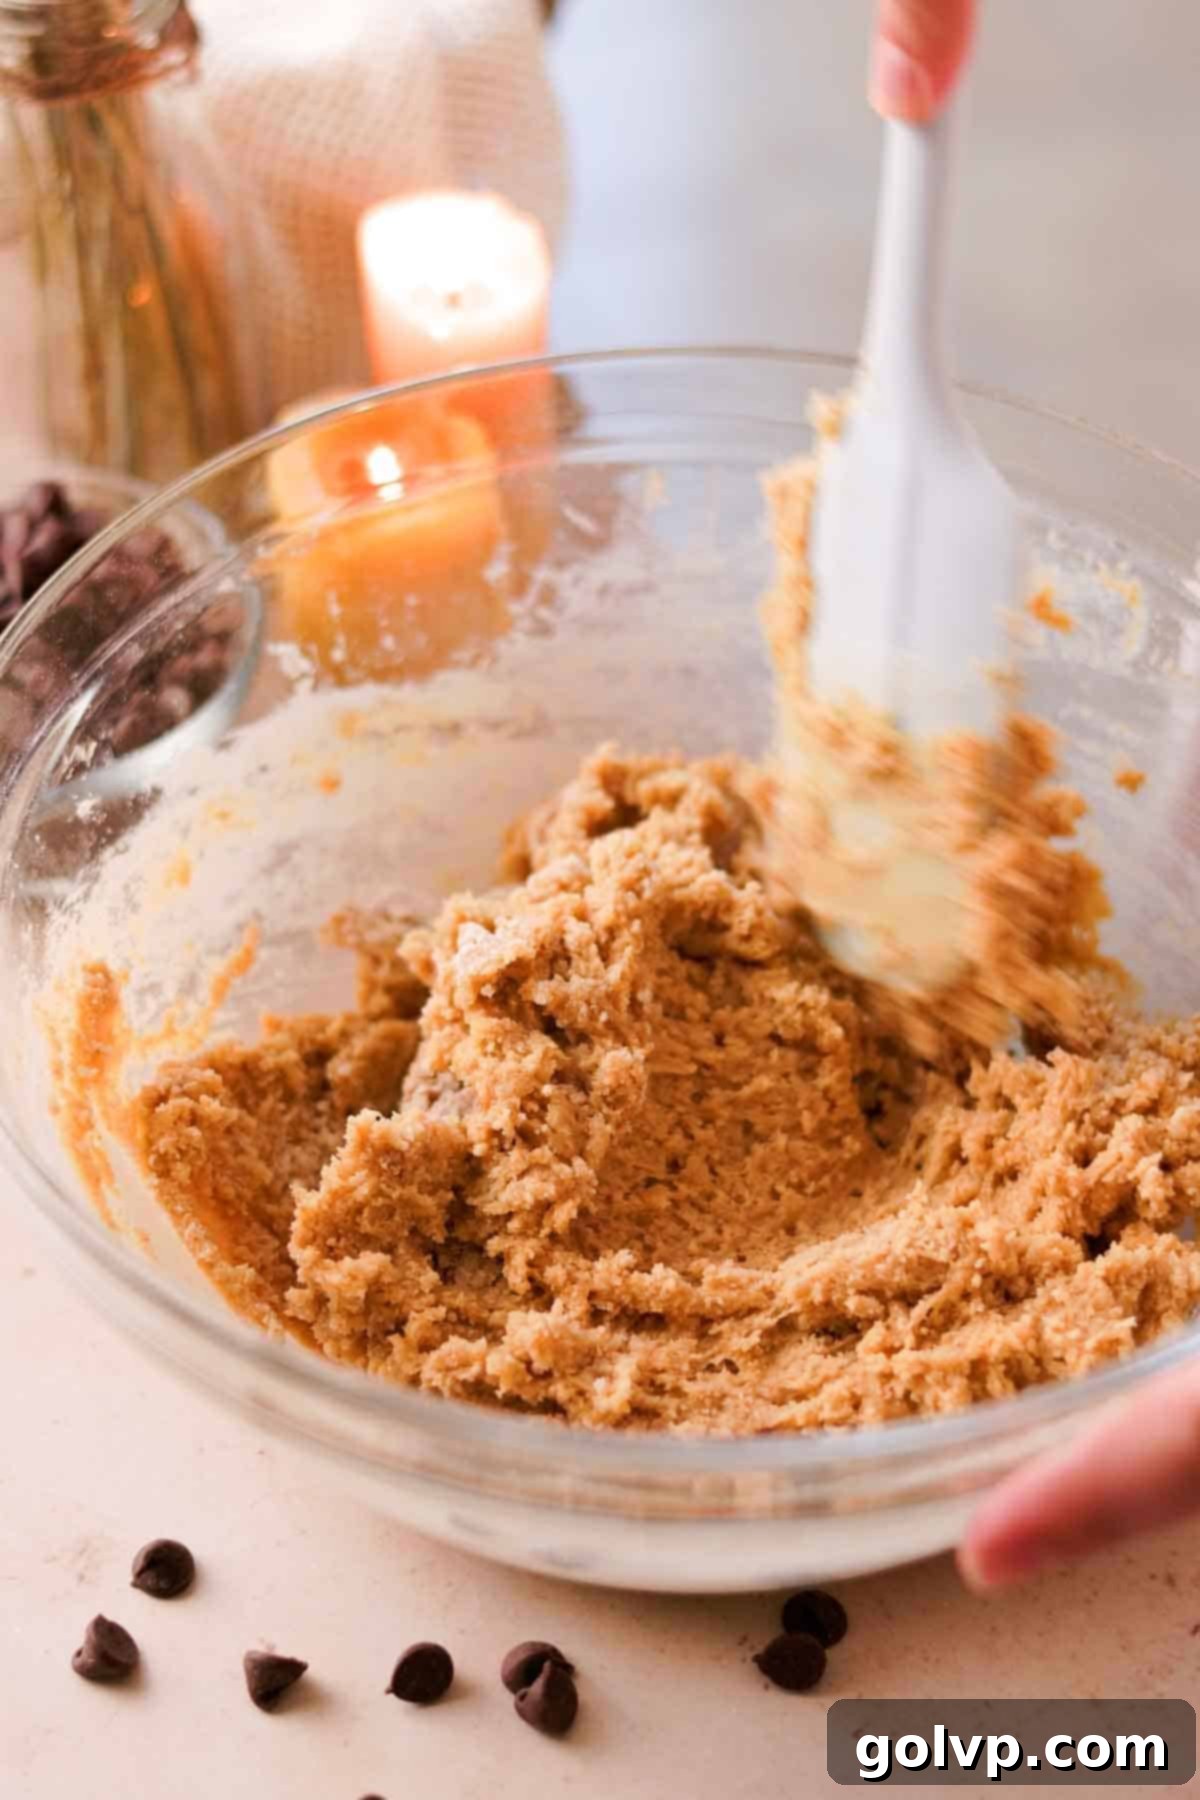
Step 4: Using a rubber spatula, gently fold the dry ingredients into the wet mixture. The key here is to mix *just until* there are no more visible dry streaks of flour. Overmixing at this stage can overdevelop the gluten in the flour, resulting in tough, dry cookies. A light hand and gentle folding will ensure your cookies remain soft, chewy, and tender.
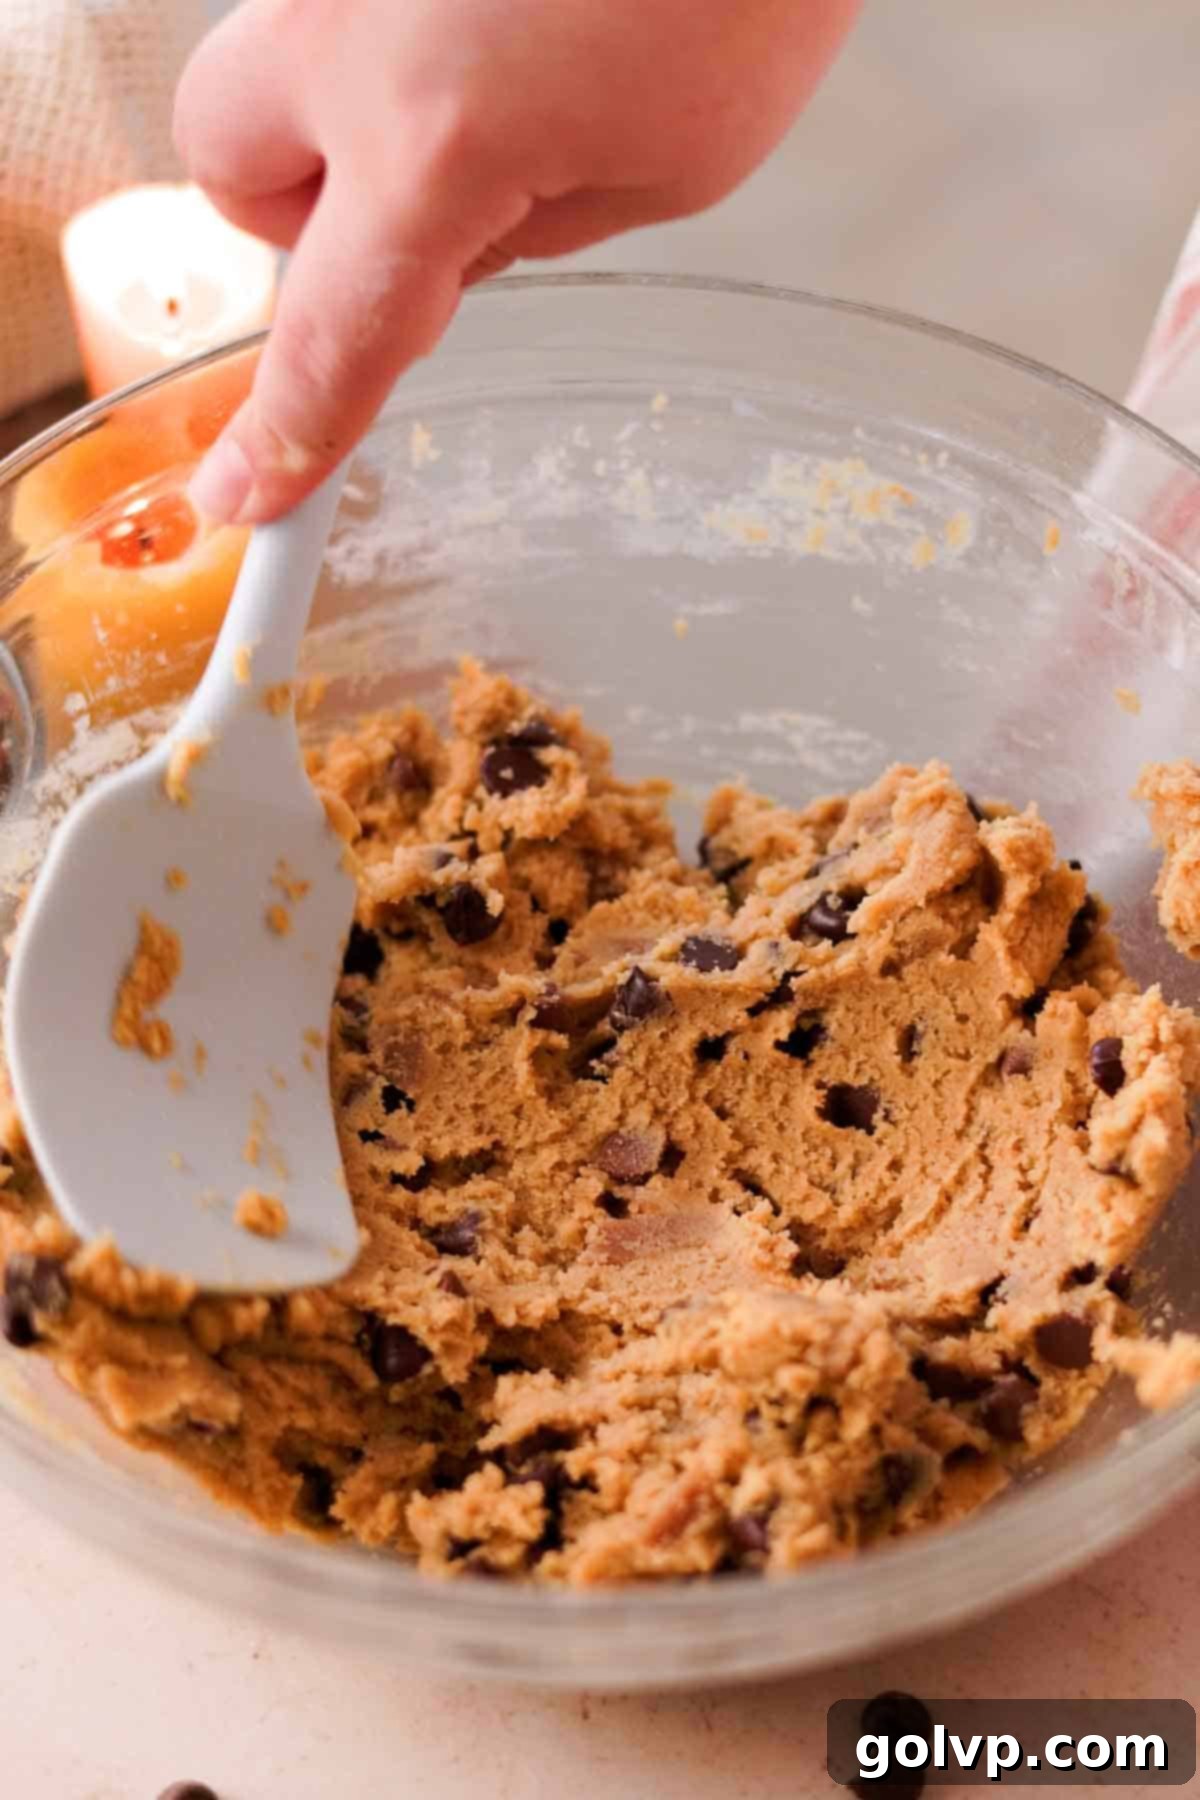
Step 5: Now for the stars of the show! Add your crushed toffee pieces and chocolate chips (or chopped chocolate) to the cookie dough. Gently fold them in with your spatula until they are evenly distributed throughout the dough. As a little trick for presentation and an extra burst of flavor, reserve a small handful of both the toffee and chocolate for topping the scooped cookie dough balls later. Once mixed, scoop the dough into uniform balls onto a parchment-lined cookie sheet or a plate, ready for chilling.

Step 6: Take your reserved toffee and chocolate pieces and gently press them onto the tops of each scooped cookie dough ball. This ensures beautiful pools of chocolate and visible toffee bits once baked. This recipe yields approximately 12 large cookies (about 3 tablespoons of dough per cookie), but you can easily make smaller cookies if preferred. Now, the crucial step: refrigerate the cookie dough balls for a minimum of 45 minutes to allow them to chill completely. For an even better texture and deeper flavor, chilling overnight is highly recommended. If you’re in a hurry, 30 minutes in the freezer can suffice, but longer is always better.
Essential Chilling Tip: Do not skip the chilling step! The longer you chill the cookie dough, the more time the butter has to resolidify, which prevents excessive spreading in the oven, resulting in thicker, chewier cookies. Furthermore, chilling allows the flour to fully hydrate and the sugar crystals to dissolve more completely, leading to a significantly more flavorful and complex cookie. You can chill the dough for up to 48 hours in the refrigerator for optimal results.
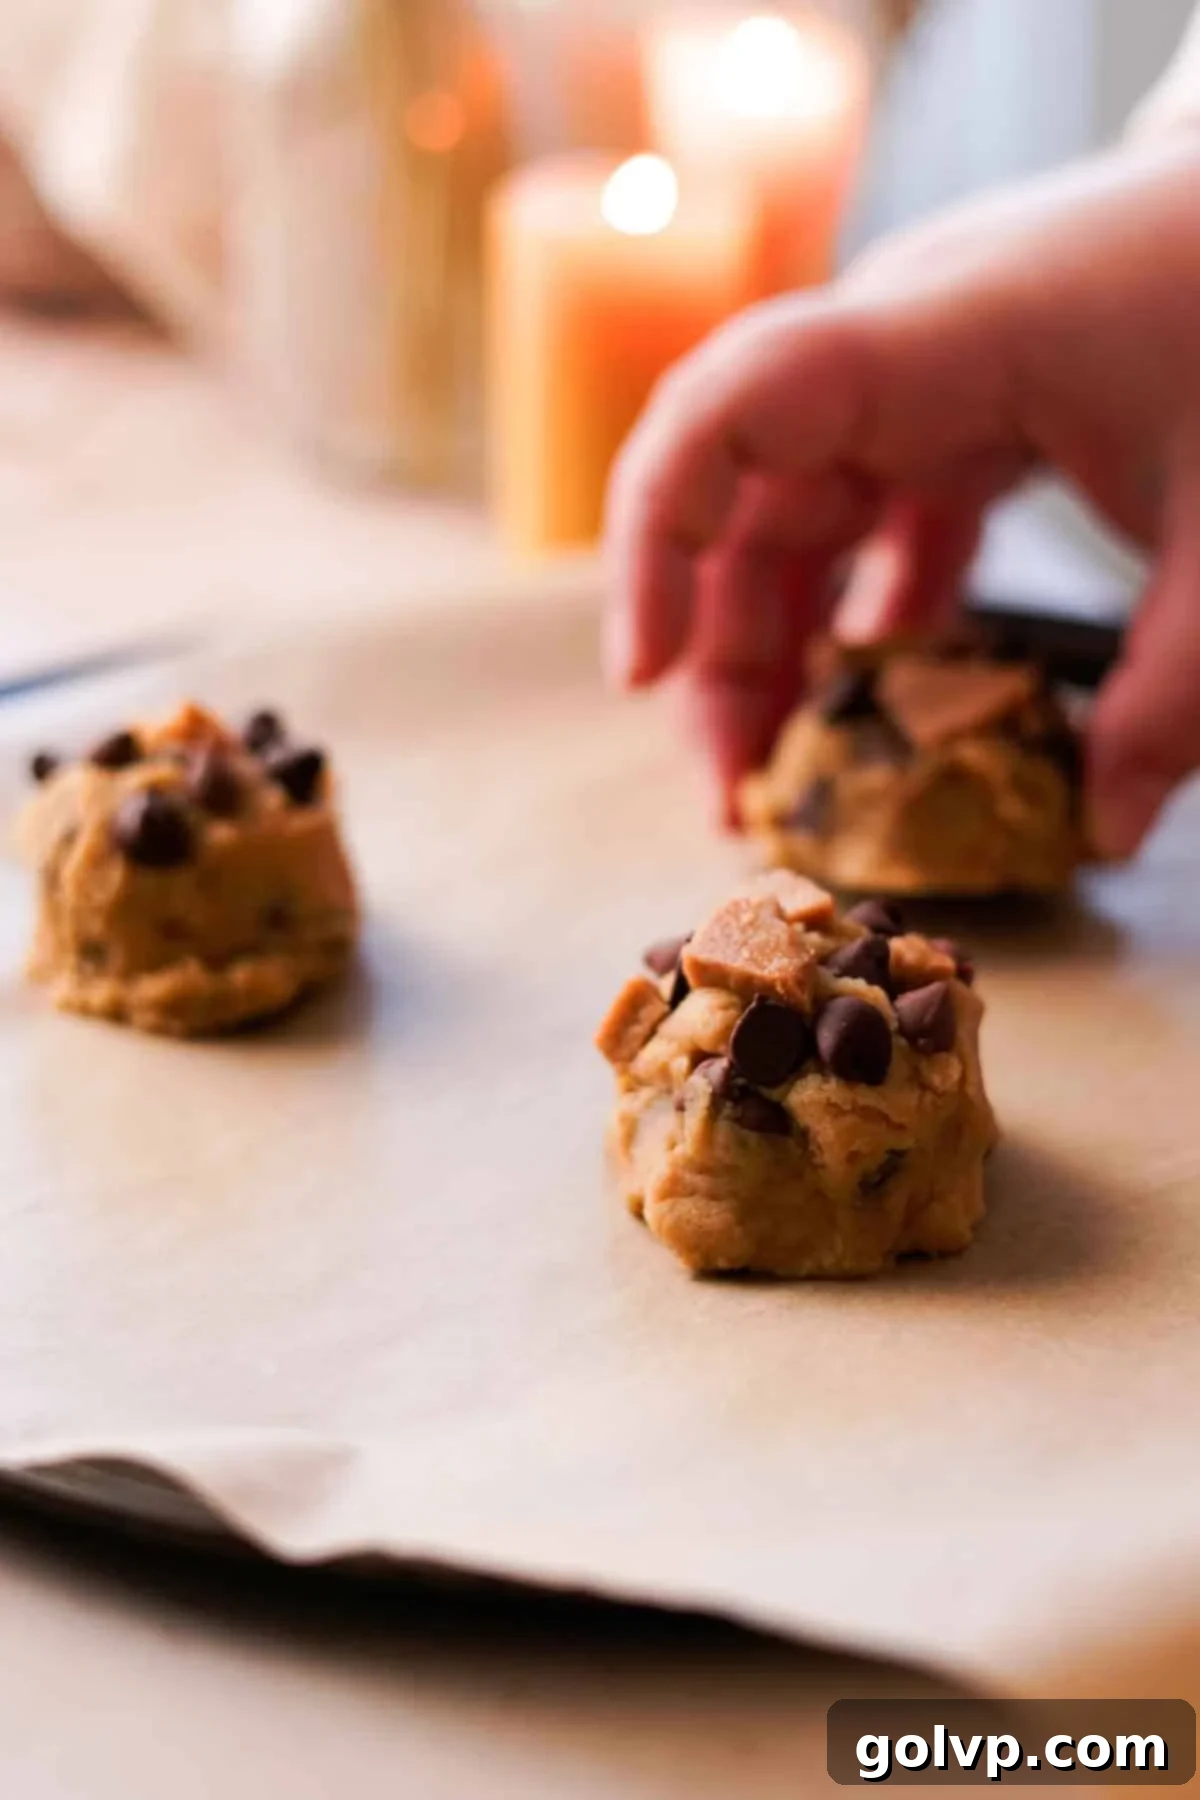
Step 7: Preheat your oven to 355°F (180°C). Arrange no more than 3 cookie dough balls at a time on a parchment-lined baking sheet, ensuring ample space (at least 4 inches) between each cookie. This generous spacing is important as the cookies will spread during baking. Bake larger cookies for approximately 10-12 minutes, or medium-sized cookies for 8-10 minutes. You’ll know they’re ready when the edges are lightly browned and set, but the centers remain soft and slightly puffed, indicating a perfectly gooey interior.

Step 8: Immediately upon removing the cookies from the oven, perform the “cookie scoot” technique for perfectly round and thicker cookies. Place a round cookie cutter (or a glass/bowl) that is slightly larger than the cookie over each warm cookie. Gently scoot or swirl the cutter around the cookie to push in any uneven edges and coax it into a beautiful, uniform circle. This simple trick makes a significant difference in appearance. Finally, for an extra touch of gourmet flavor and visual appeal, sprinkle each cookie with a pinch of flaky sea salt while they are still warm.
Cooling Caution: Baked cookies are extremely delicate right out of the oven. Allow them to cool and set on the baking sheet for at least 5-10 minutes before attempting to transfer them to a wire cooling rack or plate. This short resting period allows their structure to firm up, preventing them from breaking apart.
🥡 Make-Ahead Options and Storage Guidelines
These brown butter toffee cookies are not only delicious but also incredibly convenient, offering excellent make-ahead and storage options to enjoy fresh-baked goodness whenever a craving strikes.
Baked toffee cookies will maintain their optimal freshness and chewiness when stored in an airtight container at room temperature for up to three days. For longer storage, they can be frozen for up to two months. Simply thaw at room temperature before serving.
The homemade toffee itself is a fantastic component to prepare in advance. It can be made up to a week before you plan to bake and stored in an airtight container at room temperature, ready to be incorporated into your cookie dough or used for other treats. For even longer preservation, the toffee can be refrigerated for up to three weeks.
The cookie dough itself is incredibly freezer-friendly. You can prepare the dough, scoop it into balls, and then refrigerate it for up to 48 hours before baking. For even longer-term planning, freeze the unbaked cookie dough balls in a single layer on a baking sheet until firm, then transfer them to an airtight freezer-safe container or bag for up to 3 months. When you’re ready to bake, simply place the frozen dough balls on a prepared baking sheet and add an extra minute or two to the suggested baking time. Baking from frozen often results in a slightly thicker, chewier cookie! You can also enjoy similar freezer prep convenience with these small-batch chocolate chip cookies and these festive slice and bake peppermint shortbread cookies.
✔️ Craving Thin and Chewy Toffee Cookies? Here’s How!
While this current recipe has been optimized to create a thicker, more substantial cookie (a popular preference!), we understand that some bakers adore the classic thin and chewy texture. This recipe actually originated as a thin and chewy version, so it’s easy to revert to that delightful style!
If your heart desires a thinner, chewier toffee cookie, simply adjust the flour quantity. Instead of the amount specified in the recipe card for thick cookies, use exactly 1 ⅓ cups (160g) of all-purpose flour. This slight reduction in flour content will result in cookies that spread more in the oven, giving you that signature thin profile.
When baking these thinner cookies, it’s even more critical to exercise patience during the cooling process. They will emerge from the oven incredibly soft and delicate. Allow them to cool completely on the baking pan before attempting to move them. This crucial step prevents them from breaking and ensures they set into their wonderfully chewy form.
❔ Why Did My Homemade Toffee Separate?
Toffee separation, often appearing as an oily layer or a grainy texture, is a common frustration for home bakers but is usually easily preventable. The most frequent culprit is exposing the toffee to **too high of heat**, or experiencing **abrupt temperature jumps** during the cooking process. When the heat is inconsistent or too intense, the delicate emulsion of butter and sugar can break, causing the fat to separate from the sugar mixture. Maintaining a consistently low heat throughout is key to a stable emulsion.
Another common reason for separation is **over-mixing or mixing too quickly**. While some initial whisking is needed to combine ingredients, once the toffee starts to cook and thicken, excessive or vigorous stirring can disrupt the forming sugar crystals and cause the mixture to split. Toffee requires gentle, infrequent stirring (just enough to prevent scorching) once it begins to caramelize. Its delicate nature means it can easily be thrown off by too much agitation. This can also occur with homemade toffee sauce, as demonstrated in this delicious banoffee cake which features a homemade toffee sauce and caramelized bananas.
❔ How Can I Prevent Toffee from Separating?
Preventing toffee separation primarily boils down to two critical factors: **heat control and gentle handling.**
- **Maintain Low, Consistent Heat:** This is the golden rule for foolproof toffee. Ensure your stovetop heat remains consistently low throughout the entire cooking process. While it may take a little longer for the toffee to reach the hard crack stage, this patient approach prevents the “heat jumps” that cause the butter and sugar to separate. Resist the urge to rush the process by increasing the heat.
- **Stir Gently and Sparingly:** Once the toffee begins to bubble and caramelize, excessive or vigorous stirring can disrupt its delicate structure. Stir only occasionally and gently, just enough to ensure even cooking and prevent the bottom from scorching. Think of it as nudging, not churning.
- **Consider Lecithin:** For an extra layer of insurance against separation, particularly if you’ve had past challenges, we highly recommend adding a bit of sunflower or soy lecithin. This natural emulsifier helps stabilize the mixture, making it more robust against minor heat fluctuations or stirring. You can usually find lecithin at health food stores. My friend and professional candy-making expert, Hannah from One Sweet Mama, is a guru when it comes to preventing these issues and offers fantastic advice in her handy toffee guide.
❔ Can I Rescue Separated Toffee?
If you notice your toffee starting to separate, don’t despair immediately! You can attempt a rescue by immediately whisking the mixture vigorously as soon as you observe the separation. Sometimes, rapid whisking can help re-emulsify the fats and sugars, bringing the toffee back together. However, this method isn’t always successful. If the separation is severe or you’ve been cooking it for a while, unfortunately, the mixture might be too far gone, and you’ll likely need to start over to achieve the desired smooth consistency for your delicious brown butter toffee cookies.
❔ How to Remedy Grainy Toffee?
Grainy toffee, characterized by small, gritty sugar crystals, can sometimes be salvaged! A common technique involves adding a tablespoon or two of hot water to the grainy toffee in the saucepan. Stir this mixture gently over very low heat. The goal is for the added water to help dissolve the rogue sugar crystals and encourage the toffee to become smooth again as its temperature slowly rises. I have personally saved a batch of grainy toffee using this method, though it’s important to note that success is not guaranteed every time.
To prevent graininess from recurring, or to avoid it in the first place, try this simple trick: periodically brush down the sides of your saucepan with a pastry brush dipped in a little water during the cooking process. This washes down any sugar crystals that might cling to the sides of the pan, preventing them from falling back into the mixture and seeding new crystallization, which causes graininess.
❔ Frequently Asked Questions About These Toffee Cookies
Absolutely, yes! While a candy thermometer offers precision, you can successfully make toffee by carefully observing visual cues. Watch the toffee closely for it to turn a rich, golden brown color and emit a strong, caramelized aroma (refer to our process photos for visual guidance). If you prefer accuracy, a candy thermometer is recommended to ensure the toffee reaches the hard crack stage, which is typically between 295-300°F (146-149°C).
A bitter taste in toffee most commonly stems from two main issues. Firstly, using salted butter can sometimes lead to a slightly bitter aftertaste when it’s browned to the toffee stage. For this reason, we stick to unsalted butter and add salt separately for controlled seasoning. Secondly, and more critically, toffee burns very quickly once it reaches its ideal golden-brown color. Overcooking it by even a minute can cause the sugars to burn, resulting in a distinctly bitter flavor. Remove it from the heat promptly once it reaches the desired color and aroma.
Calibrating your candy thermometer is a crucial step for accurate temperature readings and successful candy making. To do this, place the thermometer in a pot of rapidly boiling water, ensuring the tip doesn’t touch the bottom of the pot. Observe the temperature reading. Pure boiling water should register at 100°C (212°F) at sea level. The difference between what your thermometer reads and 100°C (212°F) indicates how far off it is. For example, if it reads 95°C, it’s 5 degrees low, so you’d adjust your target temperature accordingly. My own thermometer was once off by a whole 9°C, and trust me, that made a significant difference in results!
Cookies that spread too much are a common problem with two primary culprits: insufficient chilling of the dough or an incorrect oven temperature. If the cookie dough isn’t thoroughly chilled, the butter in the dough will melt too quickly in the oven, causing the cookies to flatten out before their structure can set. Similarly, an oven that is running too cool won’t set the cookies fast enough, leading to excessive spreading. Always ensure your dough is well-chilled and your oven temperature is accurate (using an oven thermometer can help verify this).
Yes, chilling the cookie dough is an absolutely critical step that cannot be stressed enough for these cookies! As the dough chills, several important processes occur. Firstly, the butter solidifies, which prevents the cookies from spreading too rapidly in the oven, resulting in a thicker, chewier texture. Secondly, and often overlooked, chilling allows the flour to fully hydrate and the sugar crystals to dissolve more completely into the dough. This leads to a much more flavorful cookie with enhanced depth and complexity. For the best possible results – a rich flavor, perfect texture, and minimal spread – aim to chill your dough for at least 45 minutes, or ideally, overnight.
While you technically *can* use regular melted butter, it’s important to understand the difference. When butter is browned, its water content evaporates as the milk solids caramelize, which slightly reduces its overall volume. If you decide to use regular melted butter instead of brown butter, we recommend using approximately 2 tablespoons less butter than the recipe calls for. This adjustment accounts for the absent water content and helps maintain the proper fat-to-flour ratio, preventing your cookies from becoming too greasy or spreading excessively.
There could be several reasons why your cookies aren’t quite matching the photos, as baking can be sensitive to small variations. Here are the most common factors to check:
1. **Flour Measurement:** This is paramount. Did you measure your flour accurately? Weighing your flour with a kitchen scale provides the most precise results. If you don’t have a scale, use the proper spoon-and-level method: stir the flour in its bag, gently spoon it into a measuring cup, and scrape off any excess with a flat edge without packing it down.
2. **Oven Temperature:** Oven temperatures can vary significantly. Have you checked your oven temperature with a separate oven thermometer? An oven that’s too hot can lead to burnt edges and raw centers, while one that’s too cool causes excessive spreading.
3. **Dough Chilling:** Did the cookie dough chill completely before baking? As stressed earlier, this step is super important for preventing spread and developing flavor.
Addressing these key points will significantly improve your chances of achieving the perfect cookie!
It’s quite common for cookies, especially those with chunky mix-ins like toffee and chocolate, to emerge from the oven looking a bit uneven around the edges. This often happens because the melting toffee pieces can pull the cookie dough in different directions, creating an irregular circle. Don’t worry, there’s an easy fix! As soon as the cookies come out of the oven and are still warm and pliable, use the “cookie scoot” technique. Take a large round cookie cutter or a bowl that’s slightly bigger than your cookies, place it over each cookie, and gently swirl it around to push in any uneven edges. This simple trick will reshape them into beautifully round and perfectly thick cookies.
🍪 Discover More Delicious Cookie Recipes:
- Easy Rocky Road Cookies
- Pumpkin Cheesecake Cookies
- Lemon Curd Cookies
- Cookie Butter Cookies
Did you make these incredible Brown Butter Toffee Cookies? We’d love to see your creations! Share your masterpieces on Instagram and tag @flouringkitchen. Follow me on Pinterest to save this recipe and discover even more delightful baking ideas!
📖 Recipe

Brown Butter Toffee Cookies with Foolproof Homemade Toffee
Mary
Pin Recipe
Shop Ingredients
Equipment
-
candy thermometer
Ingredients
Homemade Toffee
- ½ cup unsalted butter
- ½ cup granulated sugar
- ¼ teaspoon sea salt
- 2 grams sunflower lecithin or soy lecithin (optional)
Cookies
- 1 cup unsalted butter (for browning)
- ¾ cup light brown sugar packed
- ½ cup granulated sugar
- ¼ teaspoon sea salt
- 1 large egg room temperature
- 1 teaspoon pure vanilla extract
- 1 ⅔ cup all purpose flour 200 g
- ½ teaspoon baking soda
- ⅔ cup homemade toffee or Skor bars crushed into pieces
- 1 cup semisweet chocolate chips or chopped chocolate, I use a mix of milk and dark
- 1 teaspoon flaky sea salt (for topping)
Shop Ingredients on Jupiter
Instructions
Foolproof Homemade Toffee
-
Begin by preparing a baking sheet: line it completely with parchment paper and set aside. This will be where your hot toffee cools.
-
In a small, heavy-bottomed saucepan, melt the unsalted butter and sea salt together over consistently low heat until the butter is completely liquefied.½ cup unsalted butter, ¼ teaspoon sea salt
-
Add the granulated sugar and the optional lecithin to the butter mixture. Return the pan to low heat and whisk continuously until the mixture is smooth and visibly thickened. Once thickened, cease whisking. Maintain the low heat, allowing the toffee to bubble and gradually turn golden brown. Stir gently and sparingly, only as needed to prevent scorching. Refer to our detailed tips in the main article for more advice on preventing toffee separation.½ cup granulated sugar, 2 grams sunflower lecithin
-
The moment the toffee reaches a rich golden brown color and emits a wonderfully caramelized aroma (or hits 295-300°F / 146-149°C on a candy thermometer), remove it from the heat. Promptly pour the hot toffee onto your prepared parchment-lined baking sheet and spread it evenly into a thin layer with a spoon. Important: avoid scraping the bottom of the pot, as this can introduce un-caramelized sugar crystals and lead to a grainy texture.
-
Allow the toffee to cool completely on the baking sheet until it is firm and brittle. Once fully cooled, break it into varied pieces using the back of a knife or a meat mallet. Store your homemade toffee in an airtight container at room temperature for up to one week, or refrigerate it for up to three weeks for prolonged freshness.
Brown Butter Toffee Cookies
-
In a light-colored saucepan, melt the 1 cup of unsalted butter over medium-low heat. Stir consistently with a spatula or whisk as it melts, foams, and simmers. The initial foam will subside, and you’ll observe white milk solids forming at the bottom, gradually turning a toasty brown. Continue stirring to prevent burning.1 cup unsalted butter
-
As soon as the butter starts to foam a second time and the milk solids at the bottom achieve a rich golden-brown hue (and smell wonderfully nutty), immediately remove it from the heat. This prevents scorching! Transfer all the brown butter, including the toasted bits, to a heat-safe mixing bowl and allow it to cool completely to room temperature.
-
Once the brown butter is at room temperature, add the brown sugar, granulated sugar, and ¼ teaspoon sea salt to the bowl. Whisk vigorously to combine all ingredients and break up any sugar lumps, achieving a smooth and creamy mixture.¾ cup light brown sugar, ½ cup granulated sugar, ¼ teaspoon sea salt
-
Incorporate the room temperature large egg and pure vanilla extract into the batter. Whisk thoroughly until the mixture thickens and visibly lightens in color and texture, becoming airy and well-emulsified.1 large egg, 1 teaspoon pure vanilla extract
-
Sift the all-purpose flour and baking soda directly into the wet ingredients using a fine-mesh sieve. Gently fold these dry ingredients into the batter with a rubber spatula, mixing just until no dry streaks of flour remain. Avoid overmixing to keep the cookies tender.1 ⅔ cup all purpose flour, ½ teaspoon baking soda
-
Add the crushed toffee pieces and chocolate chips (or chopped chocolate) to the cookie dough. Gently fold them in until they are evenly distributed. For a beautiful finish, reserve a small portion of both the toffee and chocolate to press onto the tops of the cookies later.⅔ cup homemade toffee or Skor bars, 1 cup semisweet chocolate chips
-
Using a 3-tablespoon cookie scoop (for large cookies) or a smaller scoop, portion the dough into balls and arrange them on a parchment-lined cookie sheet or plate. If the dough feels too soft to handle easily, refrigerate it briefly for a few minutes until it firms up. This recipe yields about 12 large cookies.
-
Press the reserved chopped chocolate and toffee pieces onto the tops of each scooped cookie dough ball. Transfer the cookie dough balls to the refrigerator and chill for a minimum of 45 minutes, or ideally, overnight, to allow the flavors to meld and the butter to firm up.
-
Preheat your oven to 355°F (180°C). Arrange the chilled cookie dough balls on a parchment-lined baking sheet, ensuring at least 4 inches of space between each cookie to accommodate spreading during baking. Bake in batches if necessary.
-
Bake for 10-12 minutes for larger cookies, or 8-10 minutes for medium-sized cookies. The cookies are perfectly baked when their edges are lightly golden brown and set, while the centers remain wonderfully soft and slightly puffed. They will continue to set as they cool.
-
Immediately after removing the cookies from the oven, perform the “cookie scoot” trick for perfectly round cookies: place a round cookie cutter or a bowl slightly larger than the cookie over each warm cookie and gently swirl it around to nudge in any uneven edges. This creates a beautiful, symmetrical shape. Finish by sprinkling each warm cookie with flaky sea salt. Let the cookies cool on the baking sheet for a few minutes to set before carefully transferring them to a wire cooling rack or plate to cool completely.1 teaspoon flaky sea salt
Video
Notes
Freezer-Friendly Dough: Prepare and scoop cookie dough balls, then freeze them solid in an airtight container or freezer bag for up to 3 months. When ready to bake, place frozen dough balls directly on a prepared baking sheet and add an extra 1-2 minutes to the suggested baking time. Baking from frozen often results in a slightly thicker, chewier cookie!
Homemade Toffee Perfection Tips: To achieve consistently perfect toffee and prevent it from splitting, always cook it on **low heat** and **stir sparingly**. Abrupt fluctuations in heat can cause the emulsion to break, leading to separation. Once the toffee begins to turn golden brown, you only need to stir it a few times to ensure even cooking. Remember, toffee is very delicate, and excessive stirring can easily cause it to split or become grainy.
