Decadent Sweet Potato Crème Brûlée: A Creamy, Caramelized Autumn Dessert
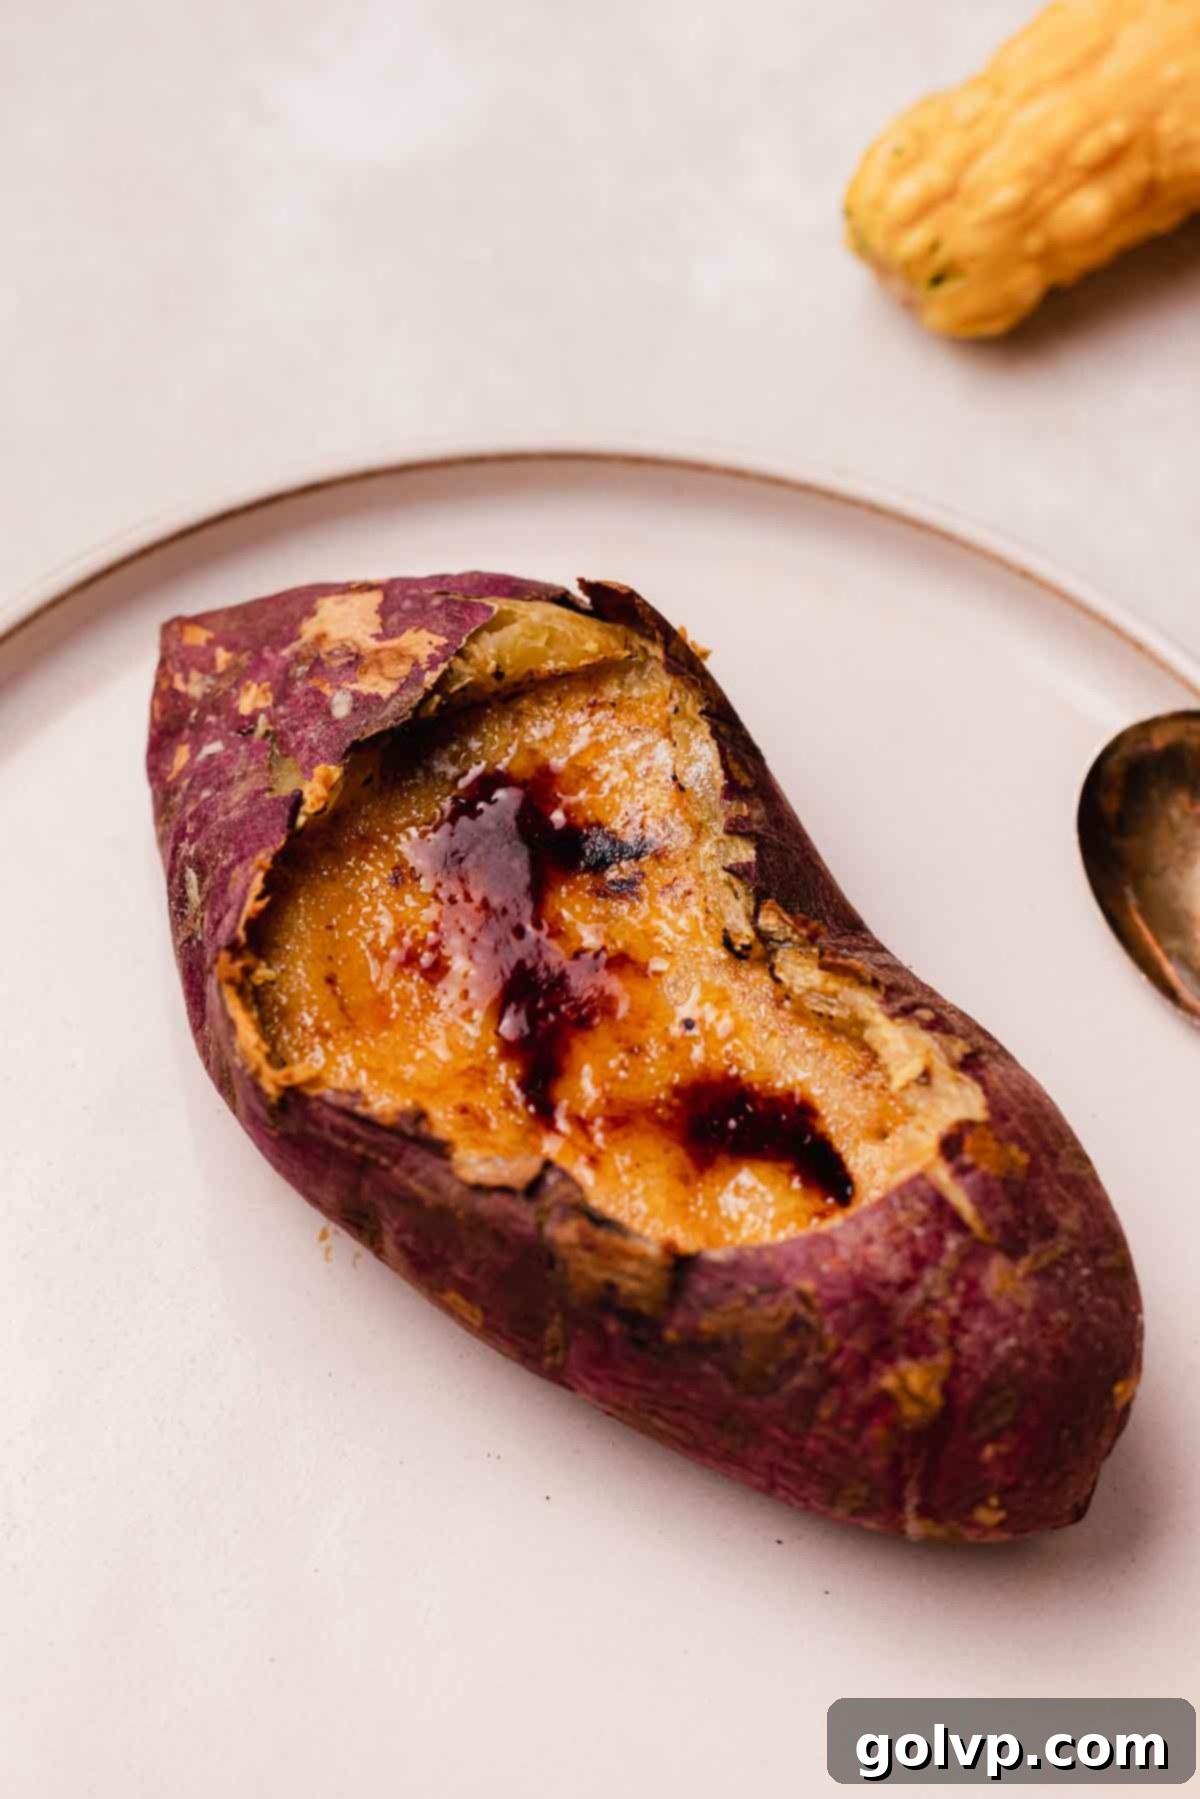
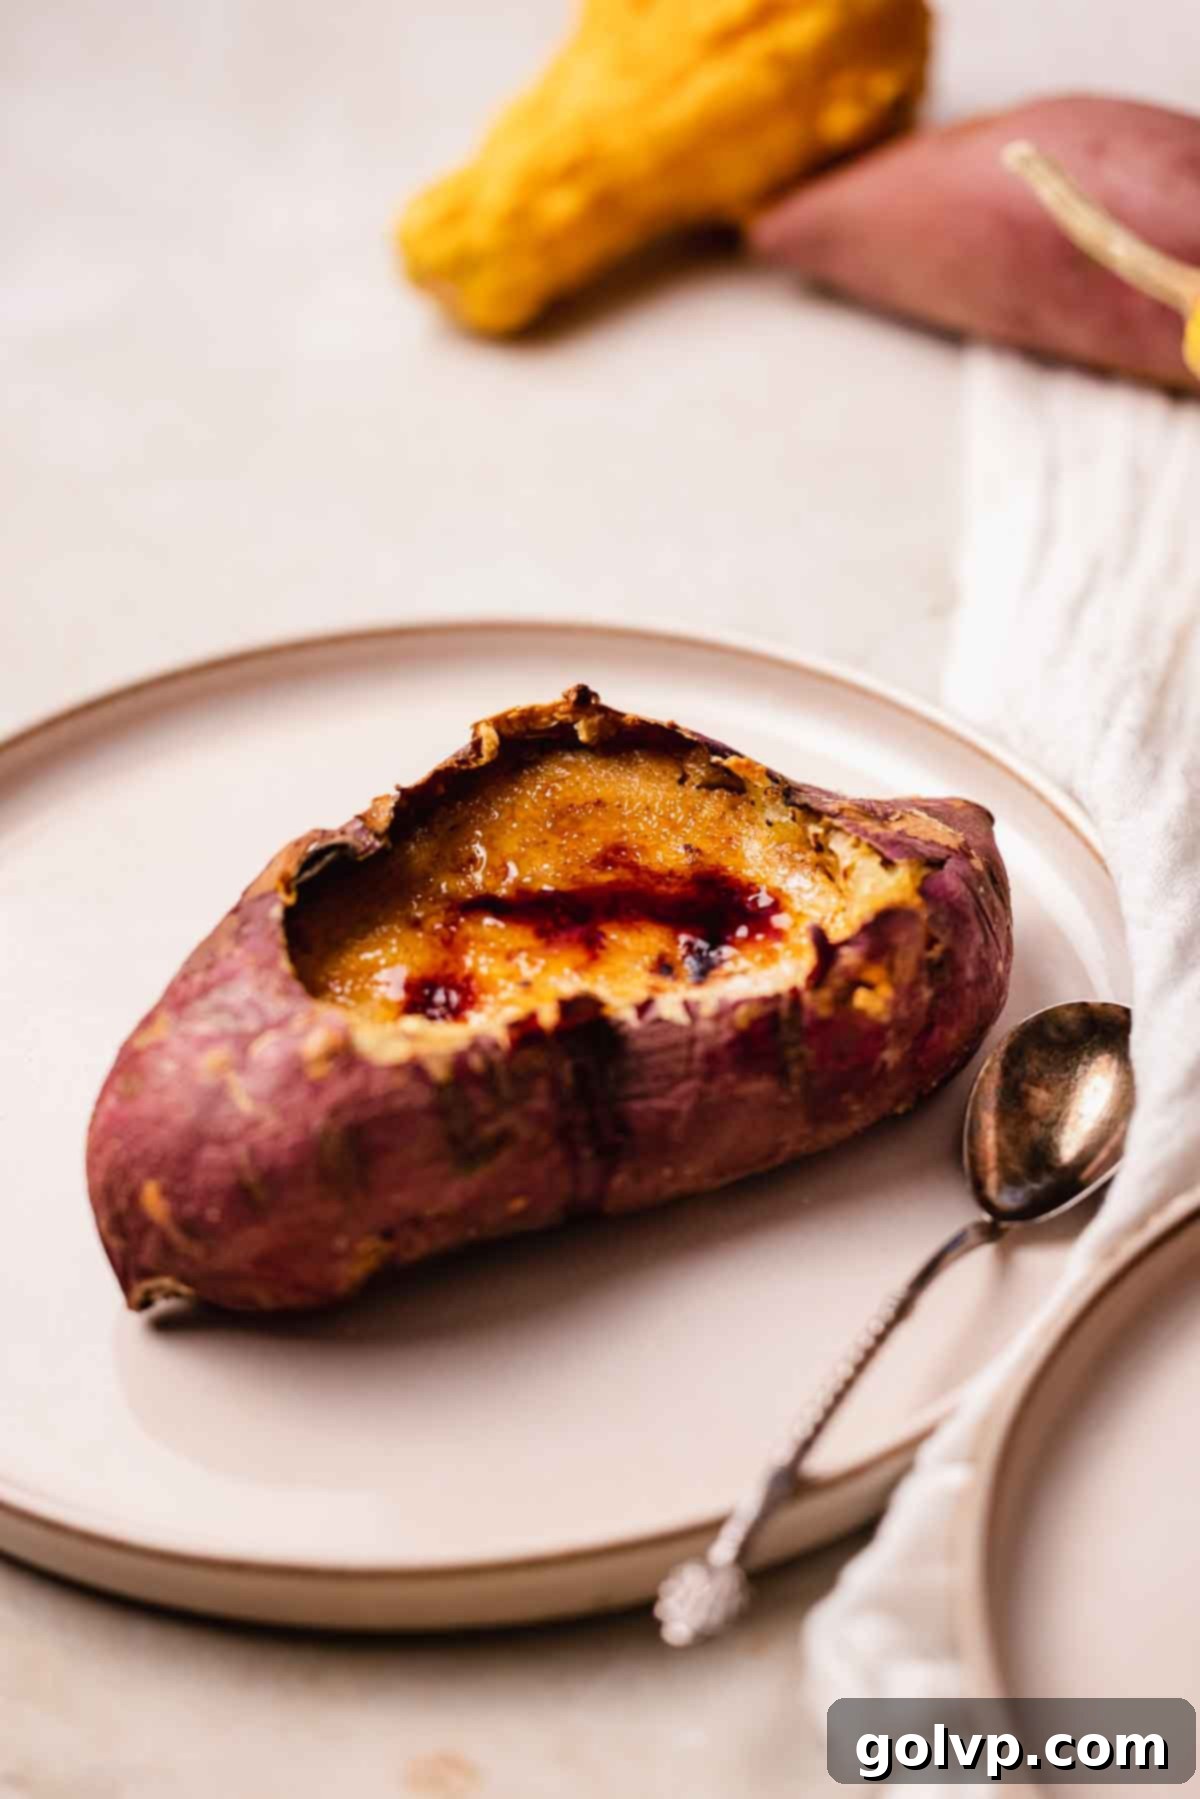
Indulge in the ultimate fall and winter dessert with this incredibly easy Sweet Potato Crème Brûlée. Imagine a rich, silky-smooth custard infused with warm cinnamon and the comforting flavor of sweet potato, all crowned with a perfectly crunchy, caramelized sugar topping that shatters with every spoonful. This recipe takes classic crème brûlée to a delightful new level, offering a unique presentation by optionally serving it right inside roasted sweet potato shells for a completely edible and show-stopping treat. Prepare to impress your guests (or simply yourself!) with this gourmet-level dessert that surprisingly comes together in just about 5 minutes of active prep time. Whether you prefer traditional ramekins or the charming sweet potato bowls, we’ll guide you through both methods to ensure a flawless finish every time.
This delightful sweet potato version draws inspiration from our popular pumpkin crème brûlée recipe, taking those beloved autumn flavors and transforming them into a truly unforgettable dessert experience.

🍠 Why You’ll Absolutely LOVE This Sweet Potato Crème Brûlée Recipe
This sweet potato crème brûlée isn’t just a dessert; it’s an experience. Here’s why you’ll want to make it again and again, especially during the festive seasons:
- Effortlessly Easy: Despite its sophisticated appearance, this crème brûlée recipe is remarkably simple to prepare. With minimal hands-on time, you can create an elegant dessert that’s sure to garner compliments. It’s perfect for both seasoned bakers and beginners looking to try something new and impressive.
- Irresistibly Crunchy Top: The hallmark of any great crème brûlée is its glass-like caramelized sugar crust. Our recipe guarantees a top that’s perfectly torched to a beautiful golden-brown, offering that satisfying crack with every tap of the spoon, revealing the creamy custard beneath.
- Luxurious Texture: Prepare for an ultra-smooth, incredibly creamy, and perfectly set custard that melts in your mouth. The addition of sweet potato puree contributes to a richer, more velvety texture than traditional crème brûlée, making each bite truly decadent.
- Unique Sweet Potato Shell: Elevate your presentation by serving this dessert directly within hollowed-out sweet potatoes. This innovative approach means no need for extra ramekins, and it transforms the dessert into a fully edible, charmingly rustic, and utterly delicious individual serving. It adds an extra layer of sweet potato flavor and a touch of seasonal elegance.
- Seasonal Flavor Profile: The harmonious blend of sweet potato and warm spices like cinnamon makes this dessert the quintessential treat for autumn, Thanksgiving, Christmas, or any cozy gathering. It captures the essence of the season in every bite.
📝 Key Ingredients for the Perfect Sweet Potato Crème Brûlée
For flawless results, take a moment to read through these essential tips before you begin!
Full steps and ingredients can be found in the detailed recipe card below.
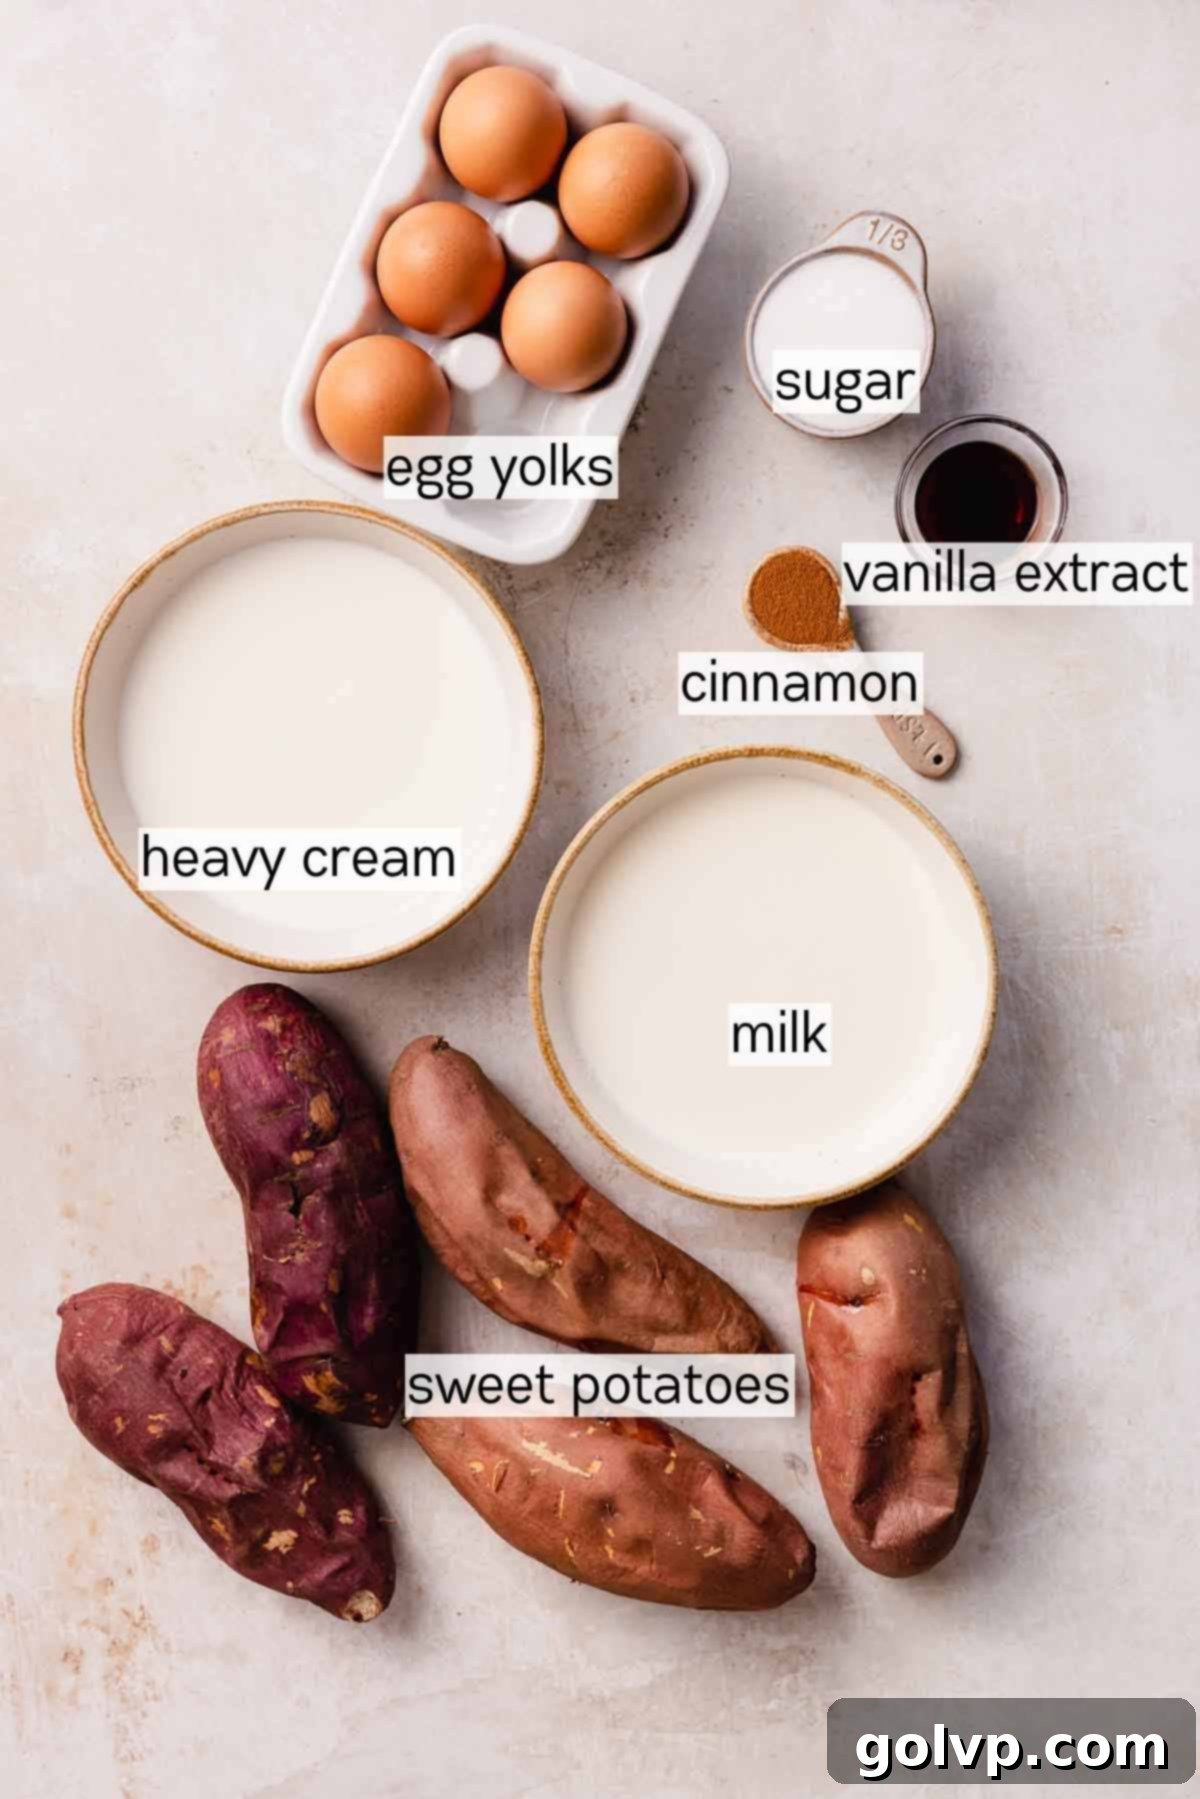
- Sweet Potatoes: These are the star of our show, serving a dual purpose. Not only do we incorporate mashed sweet potato puree directly into the custard for a rich, earthy flavor, but we also use hollowed-out sweet potatoes as unique, edible serving bowls. This enhances the sweet potato flavor profile considerably. I’ve tested this recipe with both classic orange-fleshed sweet potatoes and the less common purple-skinned (white-fleshed) varieties, and both yield fantastic results. Choose firm, medium-sized sweet potatoes for the best “bowl” shape.
- Cinnamon: This warm, aromatic spice is the perfect companion to sweet potato, accentuating its natural sweetness and adding a cozy, inviting aroma. You can also experiment with a blend of fall spices like a pinch of nutmeg, ginger, or even a tiny dash of cloves for a more complex “sweet potato pie” flavor profile.
- Egg Yolks: These are fundamental to any crème brûlée. Egg yolks act as the primary thickener for the custard, providing its characteristic richness and smooth, silken texture. Using only yolks ensures a dense, creamy result without the chewiness that egg whites might introduce.
- Granulated Sugar: Essential for both sweetening the custard and creating that signature crunchy caramelized topping. Its fine crystals melt quickly and evenly under a torch or broiler.
- Heavy Whipping Cream & Milk: This combination forms the creamy base of the custard. Heavy cream adds luxurious richness, while milk lightens the texture slightly, preventing it from being overly dense. Using a full-fat milk is recommended for the best flavor and consistency.
- Pure Vanilla Extract: A splash of high-quality vanilla extract enhances all the other flavors, adding a subtle warmth and complexity to the custard.
- Sea Salt: Just a tiny pinch of salt balances the sweetness and brings out the full depth of the sweet potato and cinnamon flavors.
Should you find yourself with any leftover sweet potato puree, don’t let it go to waste! It’s fantastic for thickening soups, adding to smoothies, or even incorporating into your morning oatmeal or lunch/dinner meal prep. Alternatively, feel free to substitute pumpkin puree for sweet potato puree in any of my other delightful pumpkin dessert recipes for a seasonal twist.
👩🍳 How to Make Sweet Potato Crème Brûlée: A Step-by-Step Guide
This recipe offers two fantastic ways to enjoy your sweet potato crème brûlée: baked directly inside the sweet potatoes themselves, or in traditional ramekins. Both methods produce a spectacularly creamy dessert with that irresistible crunchy topping.
Baking in Sweet Potatoes: Step-by-Step
This method is perfect for a unique, edible presentation that’s sure to impress!

Step 1: Prepare and Roast the Sweet Potatoes. Preheat your oven to 375°F (190°C). Line a large baking sheet with parchment paper for easy cleanup. Place the clean, unpeeled sweet potatoes onto the prepared baking sheet. Using a fork, gently poke several holes into the top of each sweet potato. This allows steam to escape during baking, preventing them from bursting. Bake in the preheated oven for approximately 45-55 minutes, or until they are fork-tender and soft when squeezed. Once baked, remove them from the oven and allow them to cool completely before handling, as they will be very hot.
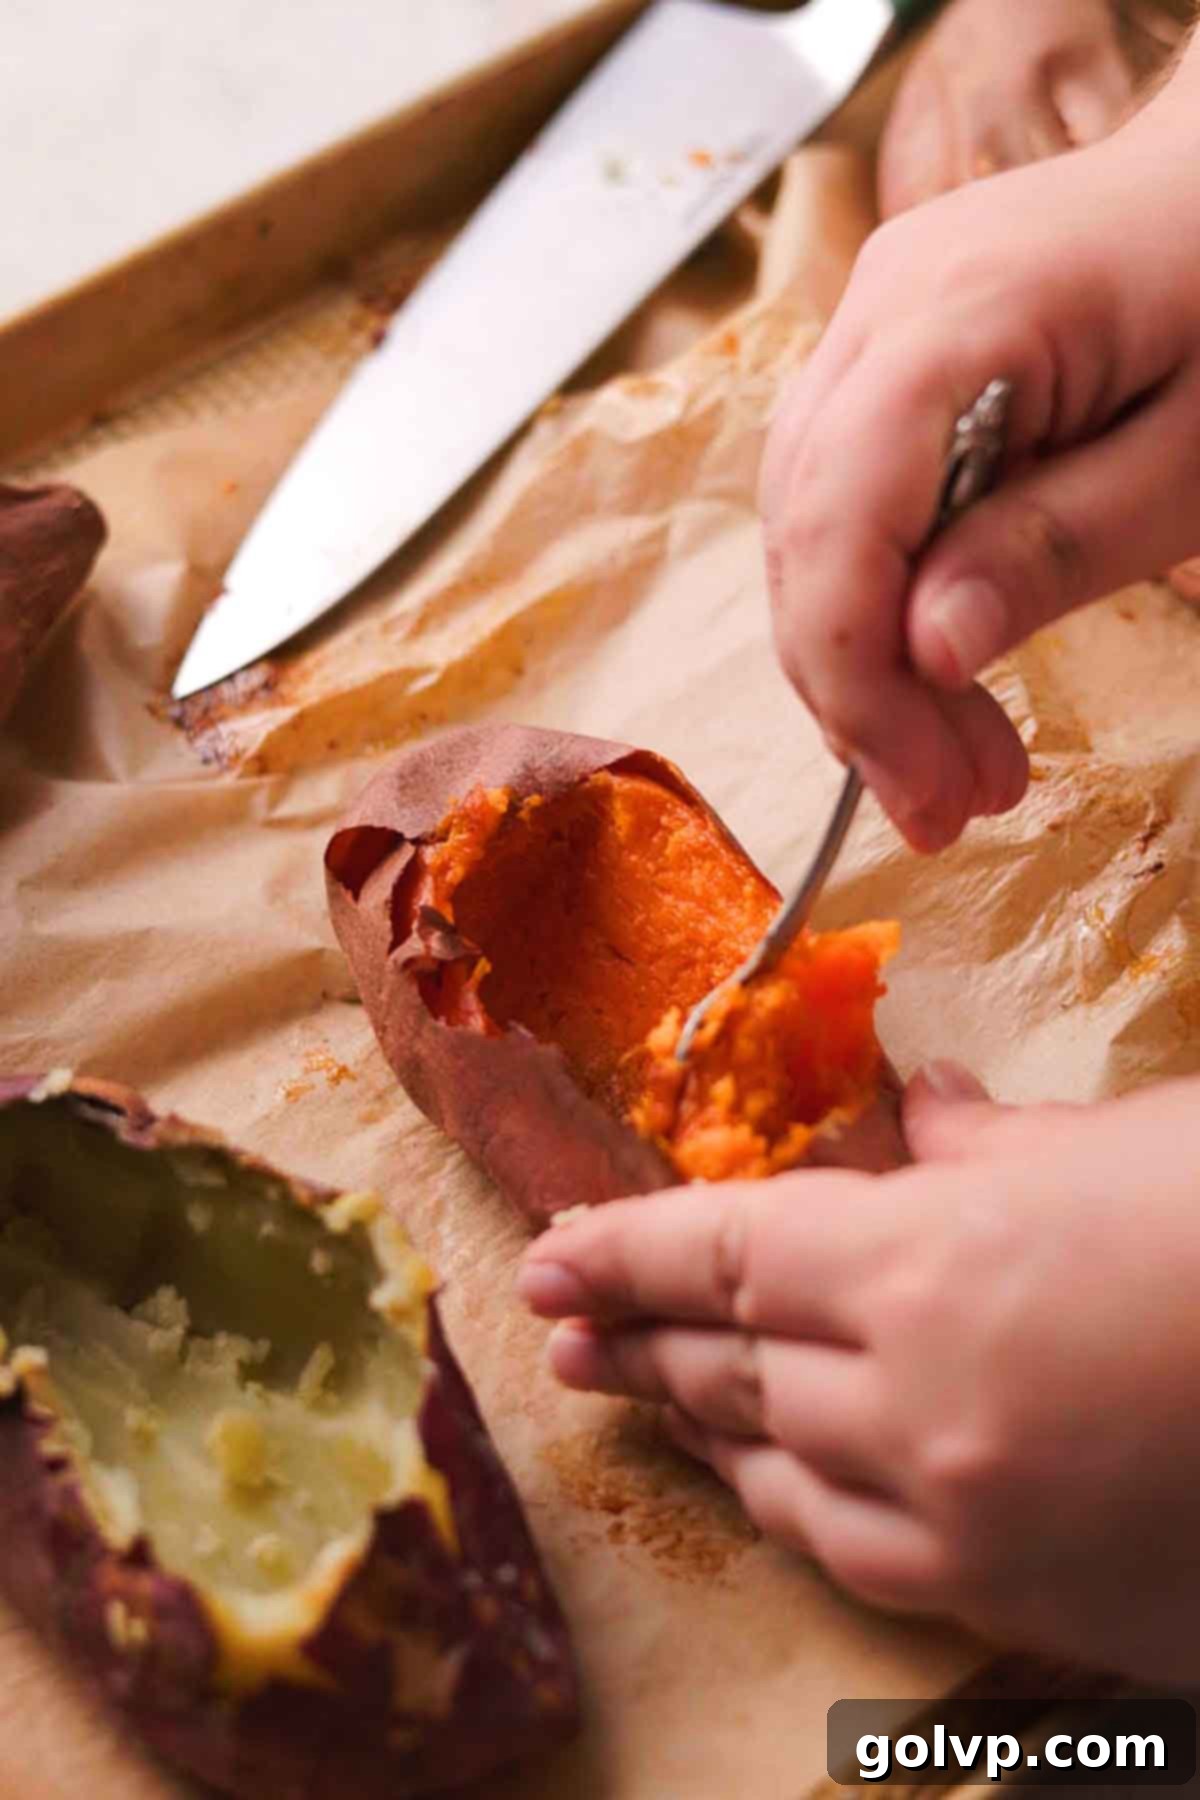
Step 2: Hollow Out the Sweet Potatoes and Prepare Puree. Once the sweet potatoes are cool enough to handle, gently press down on the top of each one with your hands to slightly flatten the surface. Carefully slice off the top piece of skin to create an opening. With a spoon, meticulously scoop out most of the cooked sweet potato flesh, leaving a sturdy ½-inch wall of flesh all around, creating a natural bowl. From the scooped-out excess, measure out ½ cup of sweet potato flesh. Mash this portion with a fork until smooth, or blend it into a puree for an even silkier texture. Set this puree aside, as it will be incorporated into our crème brûlée custard. If you accidentally create a small hole in the sweet potato shell, simply use some of the mashed flesh to patch it up and press it into shape.

Step 3: Combine Egg Yolks, Sugar, and Puree. In a large pitcher or measuring cup (one with a spout makes pouring easier), combine the egg yolks, granulated sugar, and the ½ cup of sweet potato puree you prepared earlier. Stir these ingredients together gently until the mixture is smooth and well combined. Be careful not to overmix, as incorporating too much air can lead to a foamy top on your custard.

Step 4: Add Remaining Custard Ingredients. To the sweet potato mixture, add the sea salt, cinnamon, pure vanilla extract, heavy whipping cream, and milk. Stir everything together gently until all ingredients are fully incorporated and the mixture is uniform. Again, avoid vigorous stirring to prevent excess air bubbles.
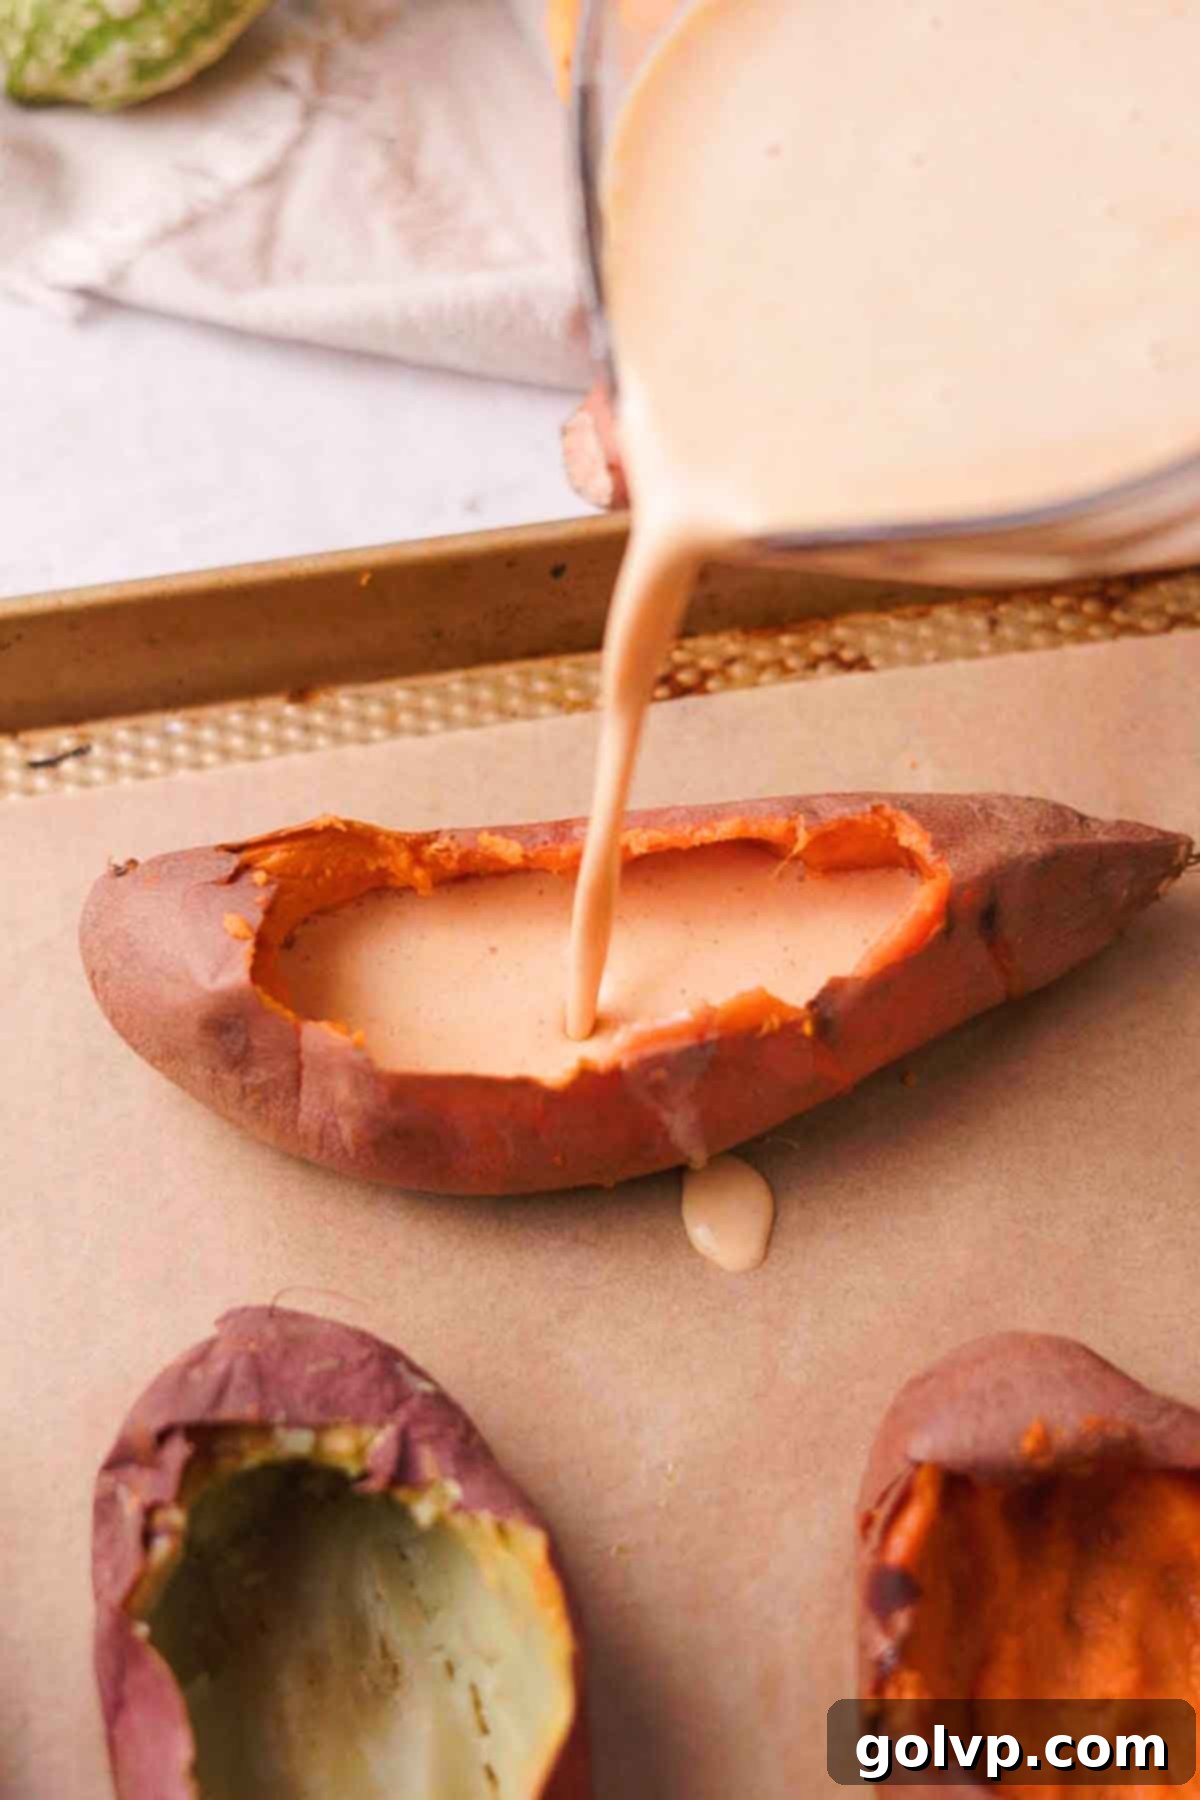
Step 5: Fill the Sweet Potato Shells. Carefully pour the prepared crème brûlée mixture into the hollowed-out sweet potatoes, filling them almost to the top. Arrange the filled sweet potatoes on a baking sheet. If you happen to have any extra custard mixture beyond what fits into your sweet potato shells, don’t discard it! You can bake it in a separate ramekin. Refer to the “Baking in Ramekins” instructions below for guidance on how to bake crème brûlée in a traditional dish.

Step 6: Bake and Chill. Bake the filled sweet potatoes in a preheated oven at 340°F (170°C) for 20-25 minutes. The crème brûlée is ready when the edges appear set, but the center still has a slight jiggle when gently shaken. Baking times may vary depending on the size of your sweet potatoes. Once baked, remove them from the oven and let them cool completely on a wire rack at room temperature. After cooling, transfer the sweet potato crème brûlées to the refrigerator and chill for a minimum of 2 to 4 hours, or ideally overnight. This crucial chilling period allows the custard to fully set, achieving its signature silky-smooth, firm texture.
Baking in Ramekins: Step-by-Step
For a more traditional presentation or when you prefer not to use sweet potato shells, baking in ramekins is a classic and equally delicious option. This method utilizes a water bath for even cooking.

Step 1: Prepare Sweet Potato Puree and Combine Egg Yolks & Sugar. First, bake one sweet potato until it’s very soft and squishy, which typically takes about 45 to 55 minutes at 375°F (190°C). Allow it to cool, then mash it thoroughly with a fork or blend it into a smooth puree. In a large pitcher or measuring cup, combine the egg yolks and granulated sugar. Stir these ingredients together until the mixture is completely smooth and the sugar is mostly dissolved.

Step 2: Add Remaining Custard Ingredients. To the egg yolk and sugar mixture, add the sea salt, cinnamon, pure vanilla extract, the prepared sweet potato puree, heavy whipping cream, and milk. Stir everything gently until all the ingredients are fully combined and the mixture is smooth and uniform. Remember, light stirring is key to avoid incorporating too much air, which can lead to an uneven custard texture.
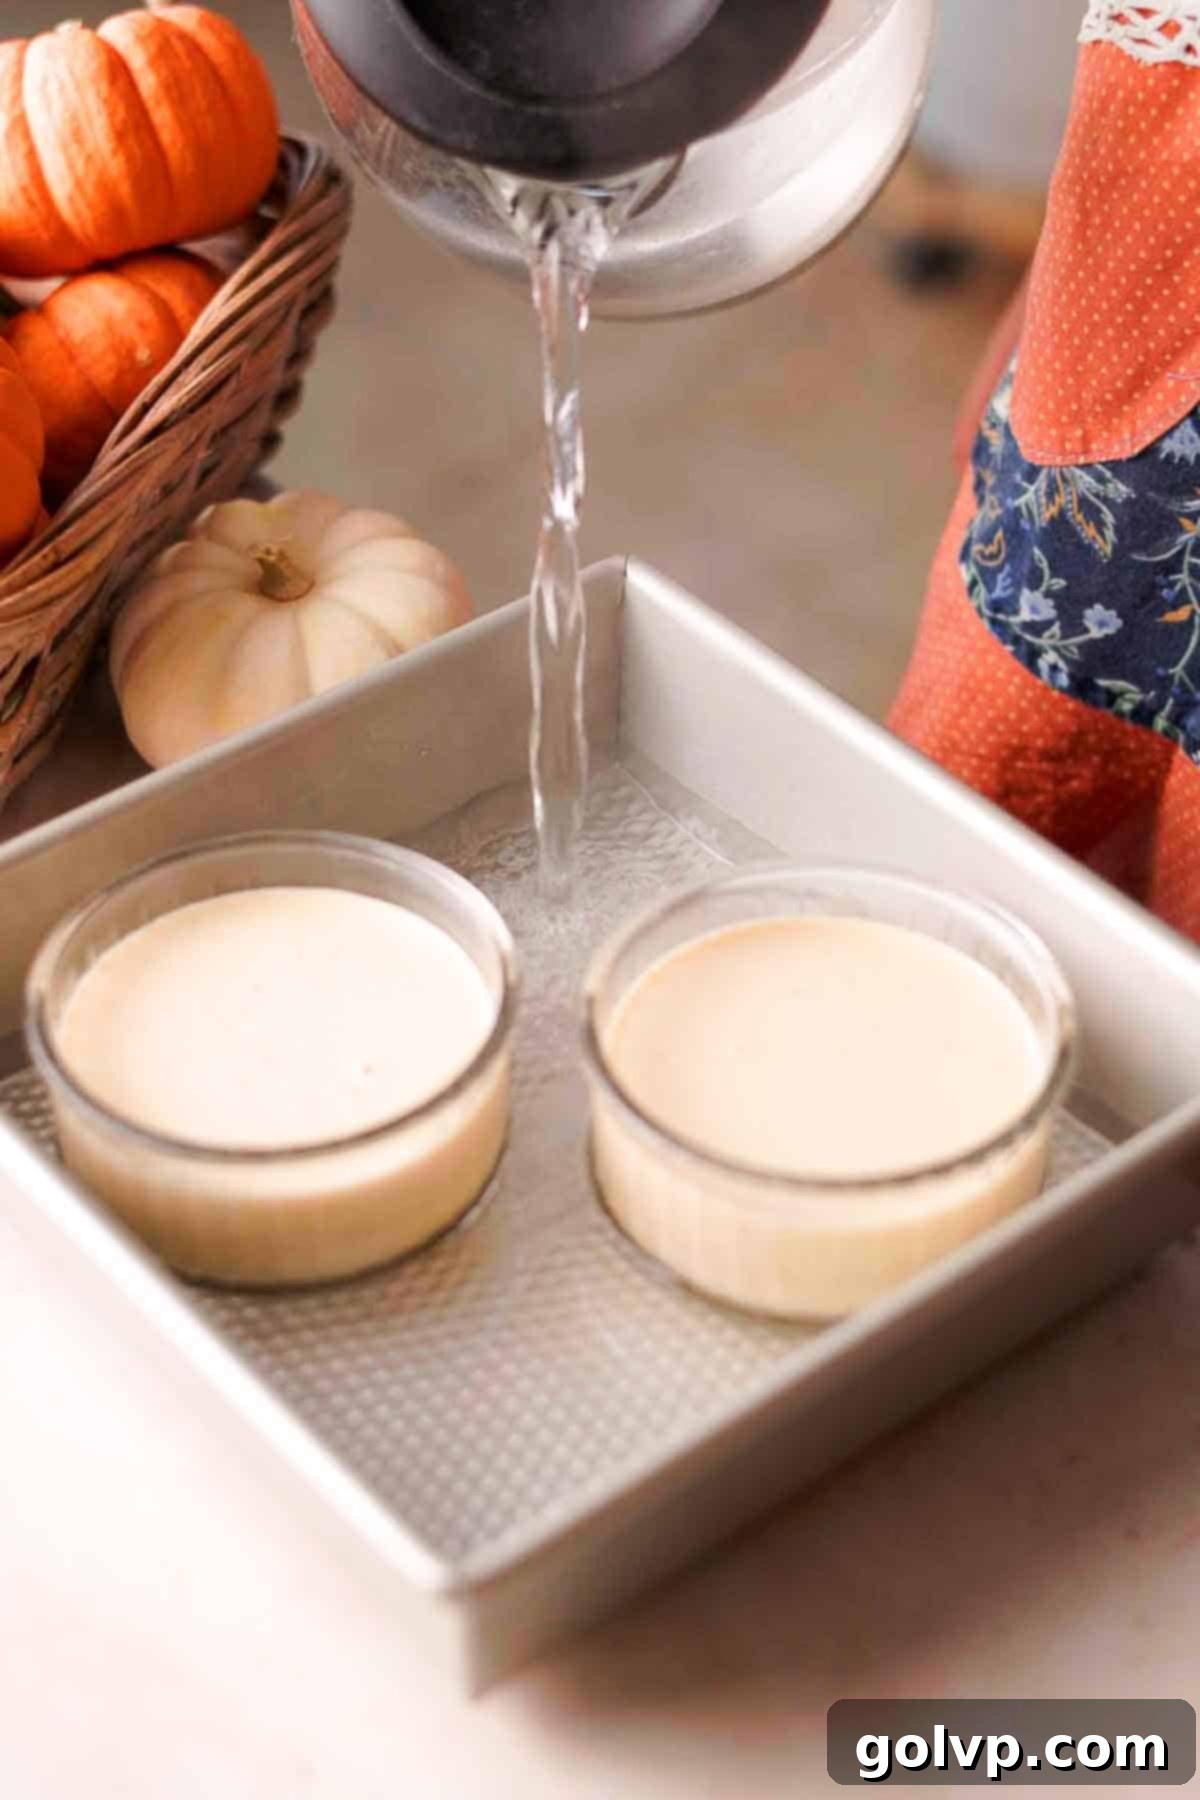
Step 3: Fill Ramekins and Prepare Water Bath. Carefully pour the sweet potato crème brûlée mixture into 4-6 oven-safe ramekins, filling them almost to the brim. Place the filled ramekins into a larger baking pan that has tall edges. Heat water to boiling in a kettle or saucepan. Once boiling, carefully pour the hot water into the larger baking pan, around the ramekins, until the water reaches about halfway up the sides of the ramekins. This water bath (or “bain-marie”) is crucial for ensuring the custards bake gently and evenly, preventing them from cracking or becoming rubbery.

Step 4: Bake and Chill. Carefully transfer the baking pan with the ramekins and water bath into your oven, preheated to 340°F (170°C). Bake for approximately 18-22 minutes. The crème brûlée is perfectly done when the edges are set and firm, but the center still has a slight, delicate jiggle. Remove the baking pan from the oven, then carefully lift the ramekins out of the water bath. Allow them to cool completely on a wire rack at room temperature. Once cooled, transfer the ramekins to the refrigerator and chill for a minimum of 2 to 4 hours, or ideally overnight, to allow the custard to fully set and achieve its desired silky texture.
Assembly: The Final Crunchy Top
The caramelized sugar topping is what truly makes crème brûlée shine. This step should always be done just before serving for the best results!

Step 1: Sugar the Top. Just before you’re ready to serve, take your chilled crème brûlées out of the refrigerator. Sprinkle one to two teaspoons of granulated sugar evenly over the top of each custard. Gently tilt and rotate the sweet potato or ramekin to ensure the sugar creates a thin, uniform layer across the entire surface. This even coating is key to achieving a perfectly crisp and continuous caramelized crust.
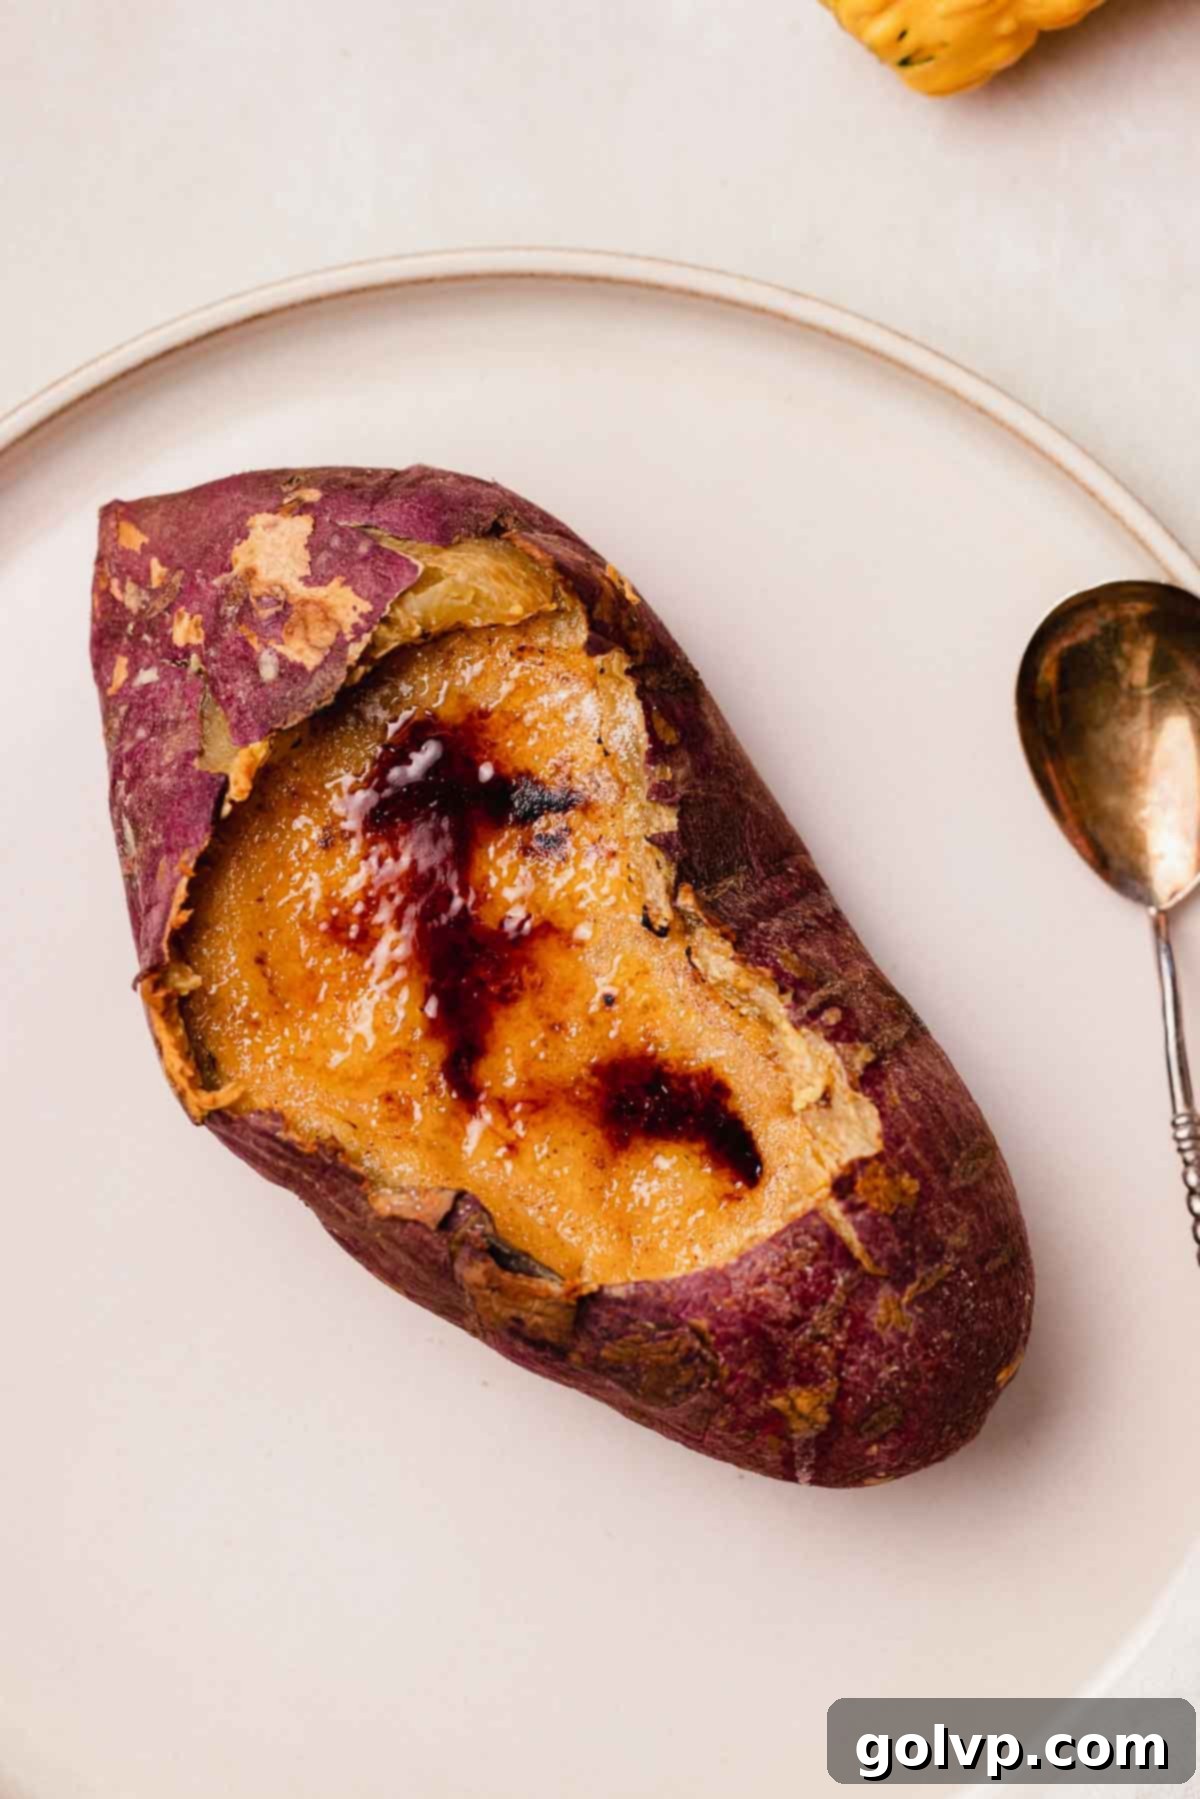
Step 2: Caramelize and Serve. Using a kitchen torch, carefully melt and caramelize the sugar on top of each crème brûlée until it turns a deep, golden-amber color and forms a hard, crunchy shell. When torching crème brûlée served in sweet potato shells, exercise extra caution to avoid igniting the sweet potato skins; direct the flame only at the sugar. For this reason, I strongly recommend using a kitchen torch for sweet potato shells over an oven broiler, as a torch offers much greater precision. If you are using ramekins, an oven broiler can be used (see FAQs below for instructions). Allow the caramelized sugar to set and harden for about 1-2 minutes, then serve immediately for the ultimate “crack” effect and delightful contrast in temperatures and textures.
✔️ Expert Tips for Sweet Potato Crème Brûlée Perfection
Achieving a perfect crème brûlée is simple when you know these expert tricks:
- Avoid Overmixing Yolks and Sugar: When combining your egg yolks and sugar, mix them just enough until they are smooth and fully incorporated. Overmixing introduces too much air into the mixture, which can result in a foamy top layer on your custard, and potentially create unwanted air bubbles or a less silky texture after baking. A gentle whisk is all you need.
- Embrace the Water Bath Method for Ramekins: The water bath (or bain-marie) is a crucial technique for baking custards evenly and gently. The hot water surrounding the ramekins insulates the custard, preventing the edges from cooking too quickly and curdling, while allowing the center to set perfectly and smoothly. This slow, even heat transfer ensures a consistently creamy and perfectly set crème brûlée. Use boiling water from a kettle for quick setup.
- Know When It’s Done: Your crème brûlée is perfectly baked when the edges are set and firm to the touch, but the very center still has a slight, delicate jiggle. It will continue to set as it cools and chills in the refrigerator. Overbaking can lead to a rubbery or grainy texture, so keep a close eye on it! When baking in sweet potatoes, be aware that their varying sizes might mean some are ready sooner than others.
- Allow Ample Chilling Time: This step is non-negotiable for achieving the ideal creamy, silky-smooth, and thick texture of crème brûlée. After baking and cooling to room temperature, refrigerate your custards for at least 2 to 4 hours, or even better, overnight. This extended chilling time allows the custard to fully firm up and develop its exquisite mouthfeel.
- Choose the Right Sweet Potatoes: For the sweet potato shell method, opt for medium-sized, firm sweet potatoes that can hold their shape well after roasting and hollowing. Consistent size helps with even baking.
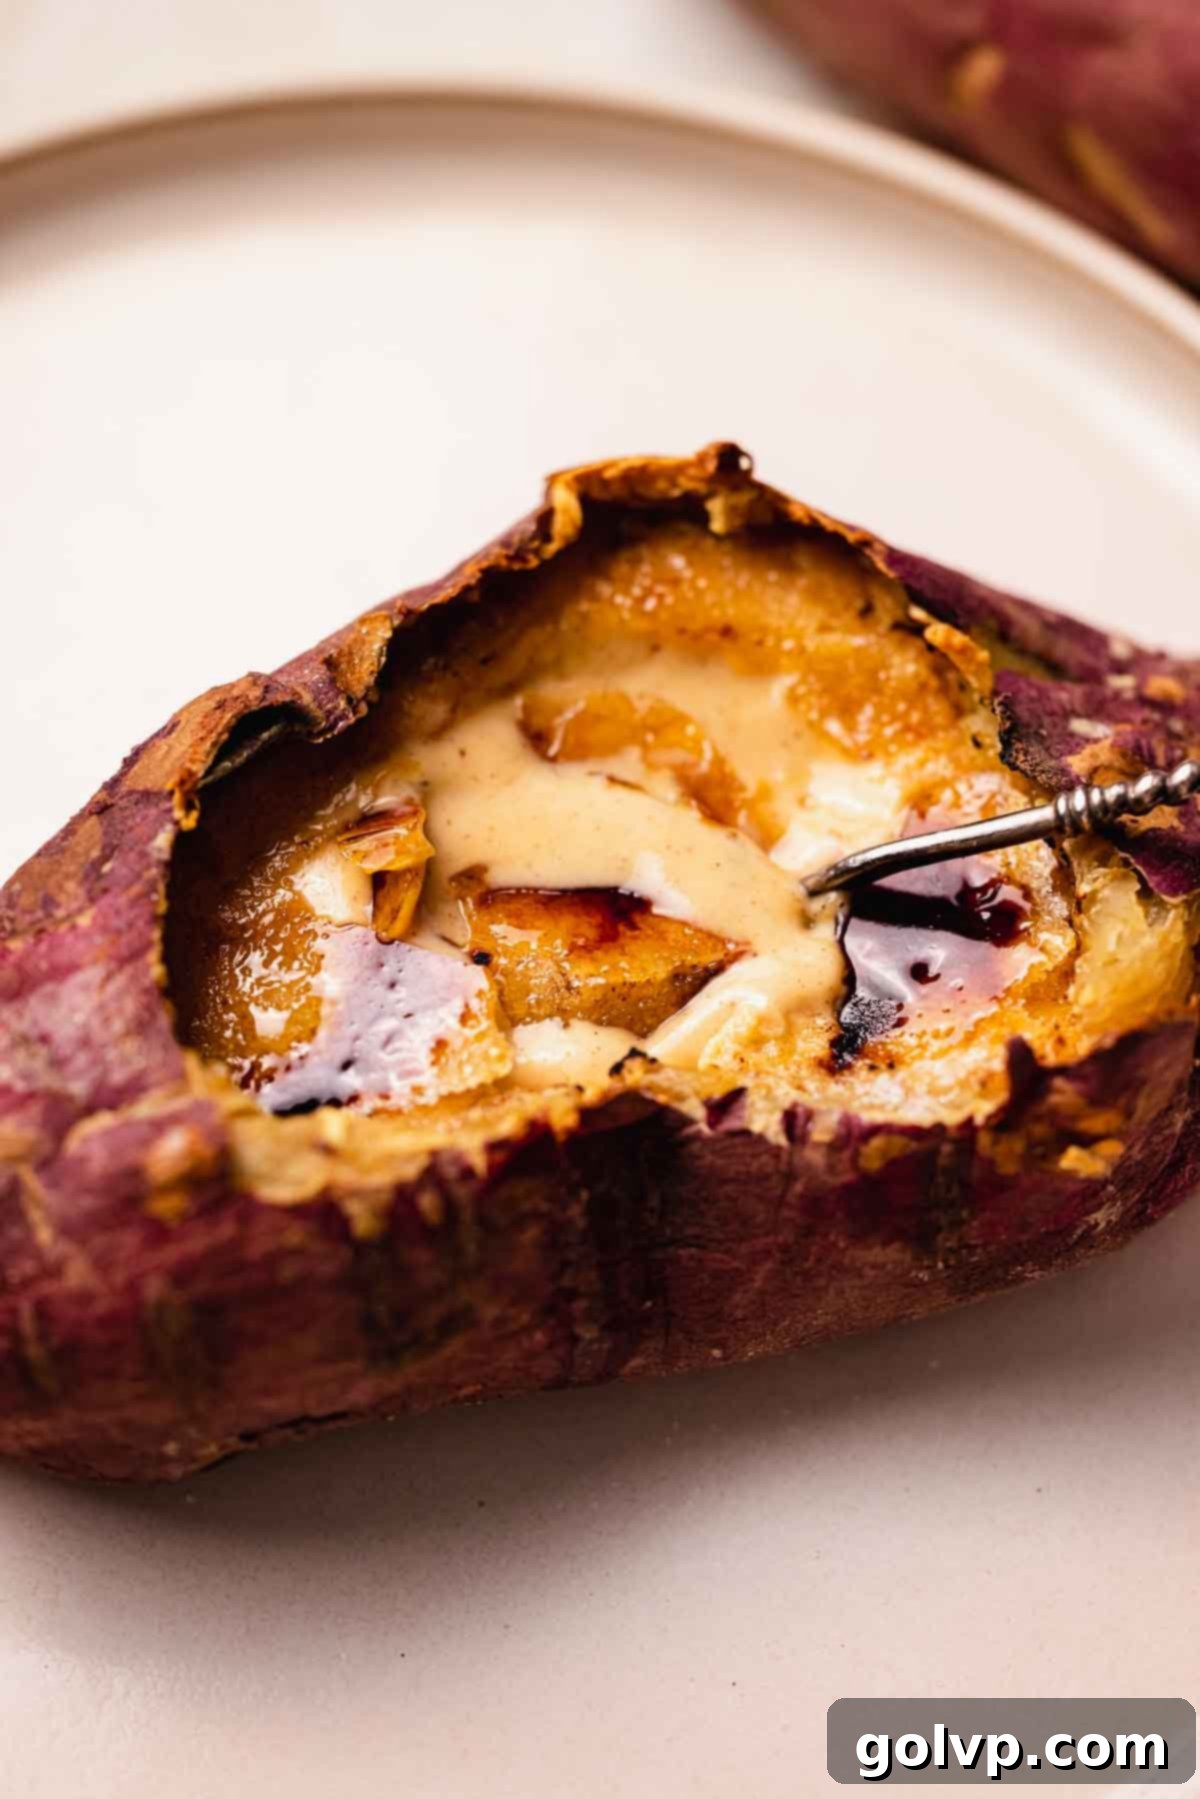
🥄 Make Ahead and Storage Tips for Sweet Potato Crème Brûlée
Sweet potato crème brûlée is an excellent dessert to prepare in advance, making it ideal for entertaining or busy holidays. Its flavors deepen beautifully with a bit of rest.
Make Ahead: Crème brûlée absolutely needs time to chill and set properly, so it’s perfectly suited for making ahead. I actually prefer to bake it a day or two before serving. After baking and cooling to room temperature, cover the individual sweet potatoes or ramekins tightly with plastic wrap to prevent a skin from forming and absorb any refrigerator odors. Store them in the refrigerator for up to 48 hours. This allows the custard to fully firm up and develop its rich flavor. Just remember, the caramelization step should always be done right before serving.
Storage: Any leftover crème brûlée should be stored in the fridge in an airtight container. It will remain delicious for up to 2 days. If you’ve already torched the top, the sugar crust may soften over time. If this happens, you can scrape off the softened sugar, add a new layer of granulated sugar, and re-torch just before serving to regain that satisfying crack. For longer storage, crème brûlée can be frozen for up to 2 months. To freeze, ensure it’s fully chilled, then cover tightly in plastic wrap and then foil. Thaw in the refrigerator overnight before serving, and torch the top fresh.
For the absolute best experience – that ultimate satisfying crack and warm caramel against cool, creamy custard – it’s always best to torch or broil the sugar topping just moments before serving.
❔ Can You Make Crème Brûlée Without a Torch?
IMPORTANT NOTE: If you’ve baked your crème brûlée inside sweet potato shells, I highly advise against using your oven’s broiler to caramelize the sugar. The sweet potato skins can dry out quickly and potentially catch fire under direct, intense heat. A kitchen torch offers precise control and is much safer for this unique presentation. However, if you’ve prepared your crème brûlée in ramekins, the broiler method can be a viable alternative to a torch.
Using Your Oven’s Broiler (for Ramekins ONLY):
- Ensure your chilled crème brûlées in ramekins are ready with a thin, even layer of granulated sugar on top.
- Place the oven rack on the highest position, typically about 4-6 inches from the broiler element.
- Preheat your broiler to its highest setting.
- Carefully place the sugar-covered ramekins directly under the broiler.
- Watch them constantly! Do not walk away. The sugar can go from perfectly caramelized to burnt in a matter of seconds.
- Broil until the sugar melts, bubbles, and turns a rich, golden-brown color with a few darker, caramelized spots. This usually takes only 1-3 minutes.
- Remove the ramekins from the oven. Let the caramelized sugar cool and harden for a minute or two before serving immediately.
The goal is to melt and caramelize the sugar quickly to create a crisp topping without allowing the underlying custard to warm up too much. This technique will give you a perfectly set crème texture with a beautifully crisp sugar topping, even without a torch.
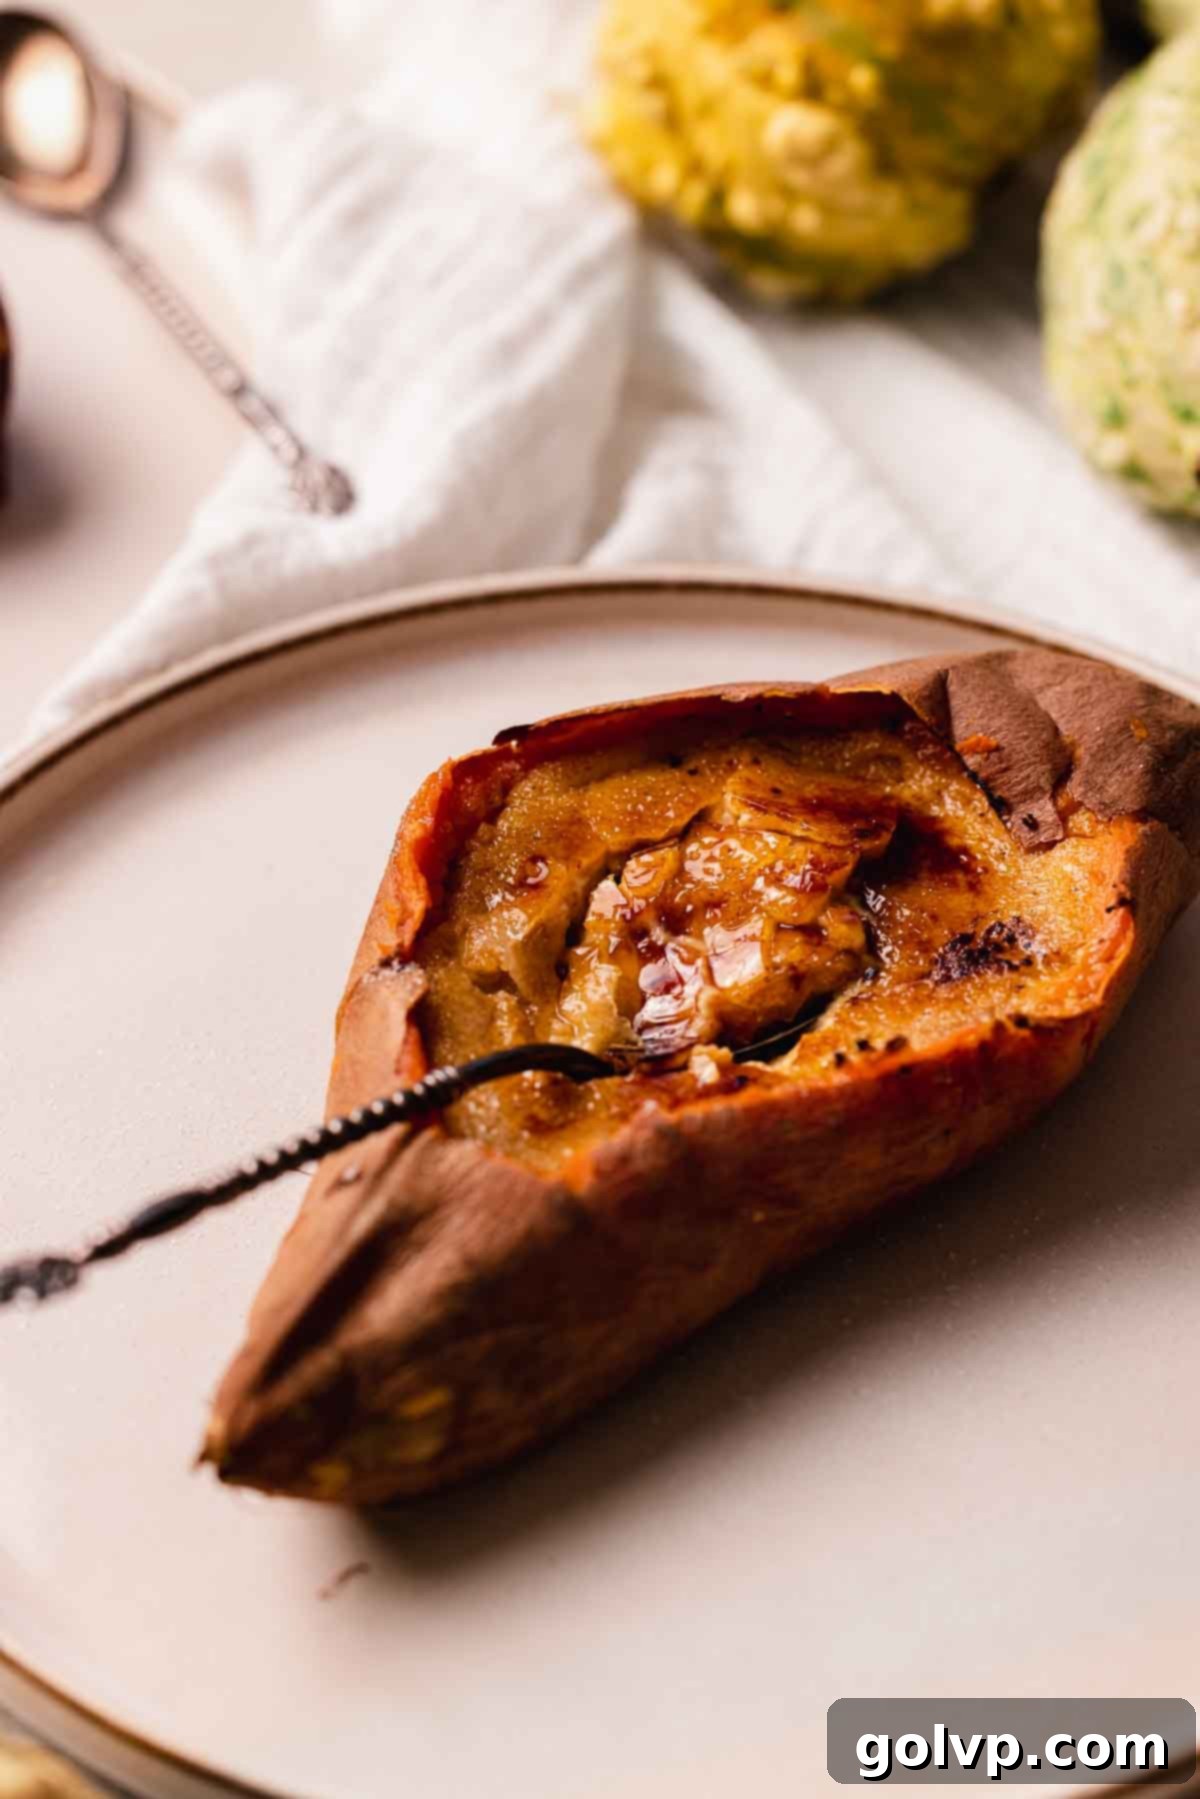
❔ Can You Make Crème Brûlée Without a Water Bath?
When baking crème brûlée in traditional ramekins, I unequivocally recommend using a water bath (bain-marie). This method is a game-changer for custards. The hot water surrounding the ramekins provides a gentle, consistent, and indirect heat, which prevents the edges of the custard from overcooking and becoming rubbery or curdled while the center struggles to set. It ensures an incredibly smooth, silky, and evenly cooked custard from edge to center, truly achieving that desirable delicate texture.
However, you can indeed skip the water bath if you are baking your crème brûlée directly inside hollowed-out sweet potatoes. The thick, natural walls of the sweet potato itself act as a fantastic insulator. This natural insulation helps to distribute the heat more evenly around the custard, mimicking some of the benefits of a water bath by preventing drastic temperature fluctuations and promoting a more gentle bake. While perhaps not as perfectly even as a traditional water bath, it’s sufficiently effective for this specific preparation. Moreover, I do not recommend placing sweet potatoes inside a water bath, as they would absorb moisture and become soggy, compromising the overall dish. This concept of a water bath for even baking is very similar to how it’s used for delicate cheesecakes, much like in my popular Nutella Cheesecake recipe.
📖 Sweet Potato Crème Brûlée Recipe FAQs
For the perfect, shatteringly crisp crust, granulated sugar or fine cane sugar are your best choices for the top of a crème brûlée. Their fine crystal structure melts quickly and evenly, forming a smooth, continuous, glass-like crust when torched. Avoid using brown sugar or golden sugar, as these contain molasses, which causes them to burn much faster than they can properly melt and caramelize, often resulting in a bitter, charred taste rather than a sweet, toffee-like crunch.
While tempting for convenience, I strongly advise against torching the top of your crème brûlée too far in advance. After just a few hours, the caramelized sugar topping will begin to absorb moisture from the air and the custard, causing it to soften and melt back into a syrupy liquid. This will ruin the signature crunchy texture. For the ultimate satisfying crack, always caramelize the sugar topping just before serving. If you do find your topping has softened, simply pour off any accumulated syrup, gently dab the top with a clean paper towel, and then sprinkle on a fresh layer of sugar to torch or broil again.
I’ve successfully tested this recipe with both common orange-fleshed sweet potatoes and purple-skinned (which typically have white or pale flesh) sweet potatoes, and both varieties yield fantastic results. Orange-fleshed sweet potatoes tend to be sweeter and slightly more moist or “stringy” when pureed, offering a vibrant color. Purple-skinned sweet potatoes, on the other hand, often have a starchier, denser, and smoother white flesh, which I personally find creates an even creamier, subtly flavored puree that holds up wonderfully in the custard. Feel free to use whichever variety you prefer or have available!
While often confused and sometimes used interchangeably in grocery stores, true yams and sweet potatoes are botanically distinct. Sweet potatoes are generally sweeter, have smoother skin (ranging from orange, red, brown, or white), and a creamier, more vibrant flesh. True yams, more common in African and Asian cuisine, have rough, bark-like skin and a starchier, drier, white or purple flesh. Most “yams” sold in American supermarkets are actually a type of orange-fleshed sweet potato. This recipe was developed specifically for sweet potatoes, and I haven’t tested it with true yams, so I cannot guarantee the same results if you choose to substitute.
Absolutely, yes! If you prefer a more classic presentation or don’t want to use sweet potato shells, you can easily bake this crème brûlée in individual oven-safe ramekins or similar heatproof dessert bowls. Simply follow the detailed instructions provided in the “Baking in Ramekins Step-by-Step” section above, including the use of a water bath for optimal results.
This recipe is designed to yield approximately 4-6 servings. You should be able to fill about 6 medium-sized hollowed-out sweet potatoes. If you’re using ramekins, the quantity will depend on their size. Standard crème brûlée ramekins typically hold about 4-6 ounces, so you’ll likely need 4-6 ramekins. Keep in mind that ramekins are often larger in volume than the natural cavities you create in sweet potatoes, so adjust accordingly.
Yes, absolutely! That’s one of the most delightful aspects of serving crème brûlée in sweet potato shells – the entire creation is edible, including the roasted sweet potato flesh and even the skin (if thoroughly washed and softened during roasting). It creates a beautiful, rustic, and completely nourishing dessert that’s both decadent and satisfying. This unique, edible bowl presentation makes for a fantastic holiday showstopper that’s also incredibly convenient to prepare ahead of time.
🍮 More Delicious Dessert Recipes You’ll Love
If you enjoyed this sweet potato crème brûlée, explore some of our other favorite dessert creations perfect for any occasion:
- Pumpkin Crème Brûlée
- Earl Grey Crème Brûlée
- Pumpkin Pie Cookies
- Lemon Posset
Did you make this delectable Sweet Potato Crème Brûlée? We would be absolutely thrilled for you to rate this recipe and share your thoughts in the comments section below! Your feedback is invaluable. Don’t forget to showcase your culinary creation on Instagram and tag @flouringkitchen. Follow me on Pinterest to save this recipe and discover even more inspiring ideas.
📖 Recipe Card
Sweet Potato Crème Brûlée
Mary
Pin Recipe
Shop Ingredients
Equipment
-
4-6 oven safe ramekins or use 6 sweet potatoes instead of ramekins
Ingredients
- 6 large sweet potatoes washed and not peeled
- 6 large egg yolks
- ⅓ cup granulated sugar
- ½ cup sweet potato puree
- ⅛ teaspoon sea salt
- 1 teaspoon cinnamon
- 1 tablespoon pure vanilla extract
- 1 cup heavy whipping cream
- 1 cup milk
- 4-6 teaspoons granulated sugar
Shop Ingredients on Jupiter
Instructions
Instructions to bake in sweet potatoes (if baking in ramekins skip to next section):
-
Preheat the oven to 375°F (190°C). Line a large baking pan with parchment paper and place sweet potatoes onto the pan. Take a fork and poke holes into the top of each sweet potato. Place into the oven and bake for 45-55 minutes, until soft if poked with a fork. Set aside until cool enough to handle.6 large sweet potatoes
-
Press down with your hands on top of each sweet potato to slightly flatten the top. Cut the top piece of sweet potato skin off and remove. Using a spoon, carefully scoop out most of the sweet potato flesh, leaving about ½” of flesh all the way around – like a bowl. Measure out ½ cup of sweet potato from the excess and mash with a fork or blend into a puree. If you accidentally make a hole, patch it up with some mashed sweet potato flesh and press it into shape. Set aside.
-
In a large pitcher or measuring cup, combine egg yolks, sugar, and sweet potato puree. Stir together until smooth.6 large egg yolks, ⅓ cup granulated sugar, ½ cup sweet potato puree
-
Add salt, cinnamon, vanilla extract, whipping cream, and milk. Stir to combine.⅛ teaspoon sea salt, 1 teaspoon cinnamon, 1 tablespoon pure vanilla extract, 1 cup heavy whipping cream, 1 cup milk
-
Pour the crème brûlée mixture into the hollowed out sweet potatoes. If you have extra mixture, you can bake it in a ramekin (see below instructions for how to bake crème brûlée in a ramekin).
-
Bake at 340°F (170°C) for 20-25 minutes, until the crème brûlée is set on edges and still wiggly in the center. This may take more or less time, depending on the size of the sweet potato. Let cool completely and refrigerate until set – 2 to 4 hours or overnight.
Instructions to bake in ramekins:
-
Bake one sweet potato in an oven preheated to 375°F (190°C). Bake until soft and squishy, about 45 to 55 minutes. Let cool and mash with a fork or a blender.
-
In a large pitcher or measuring cup, combine egg yolks and sugar. Stir together until smooth.6 large egg yolks, ⅓ cup granulated sugar
-
Add salt, cinnamon, vanilla extract, sweet potato puree, whipping cream, and milk. Stir to combine.½ cup sweet potato puree, ⅛ teaspoon sea salt, 1 teaspoon cinnamon, 1 tablespoon pure vanilla extract, 1 cup heavy whipping cream, 1 cup milk
-
Pour the crème brûlée mixture into 4-6 ramekins. Place ramekins into a larger baking pan with tall edges. Pour boiling water into the baking pan, around the ramekins.
-
Bake at 340°F (170°C) for 18-22 minutes, until the crème brûlée is set on edges and still wiggly in the center. Let cool completely and refrigerate until set – 2 to 4 hours or overnight.
Assembly
-
Sprinkle one to two teaspoons of granulated sugar on top of each crème brûlée and spread to cover liberally.4-6 teaspoons granulated sugar
-
Just before serving, using a kitchen torch, carefully melt and burn the top of the crème brûlées. Be careful not to light the sweet potato skins. You can also use the broil setting in your oven to do this – I don’t recommend this if you made the crème brûlée inside of the sweet potatoes because the skin might light on fire. The broil oven function will work on ramekins. Let the sugar set and serve immediately!
Video
Notes
Make ahead: Crème brûlée needs to chill to set. I like baking it a day or two ahead of serving. Cover with plastic wrap and set in the fridge for up to 48 hours.
Serving: It’s best to torch or broil the top just before serving for the ultimate satisfying crack.
Tips for success:
- Don’t overmix the yolks and sugar
- Use the waterbath method for an evenly set texture (for ramekins)
- You’ll know its ready when the edges are set and the middle is still jiggly
- Give the crème brûlée enough time to set in the fridge
