Ultimate Homemade Butterscotch Cake: Moist Brown Butter Layers & Silky Caramel Drip
Jump to Recipe
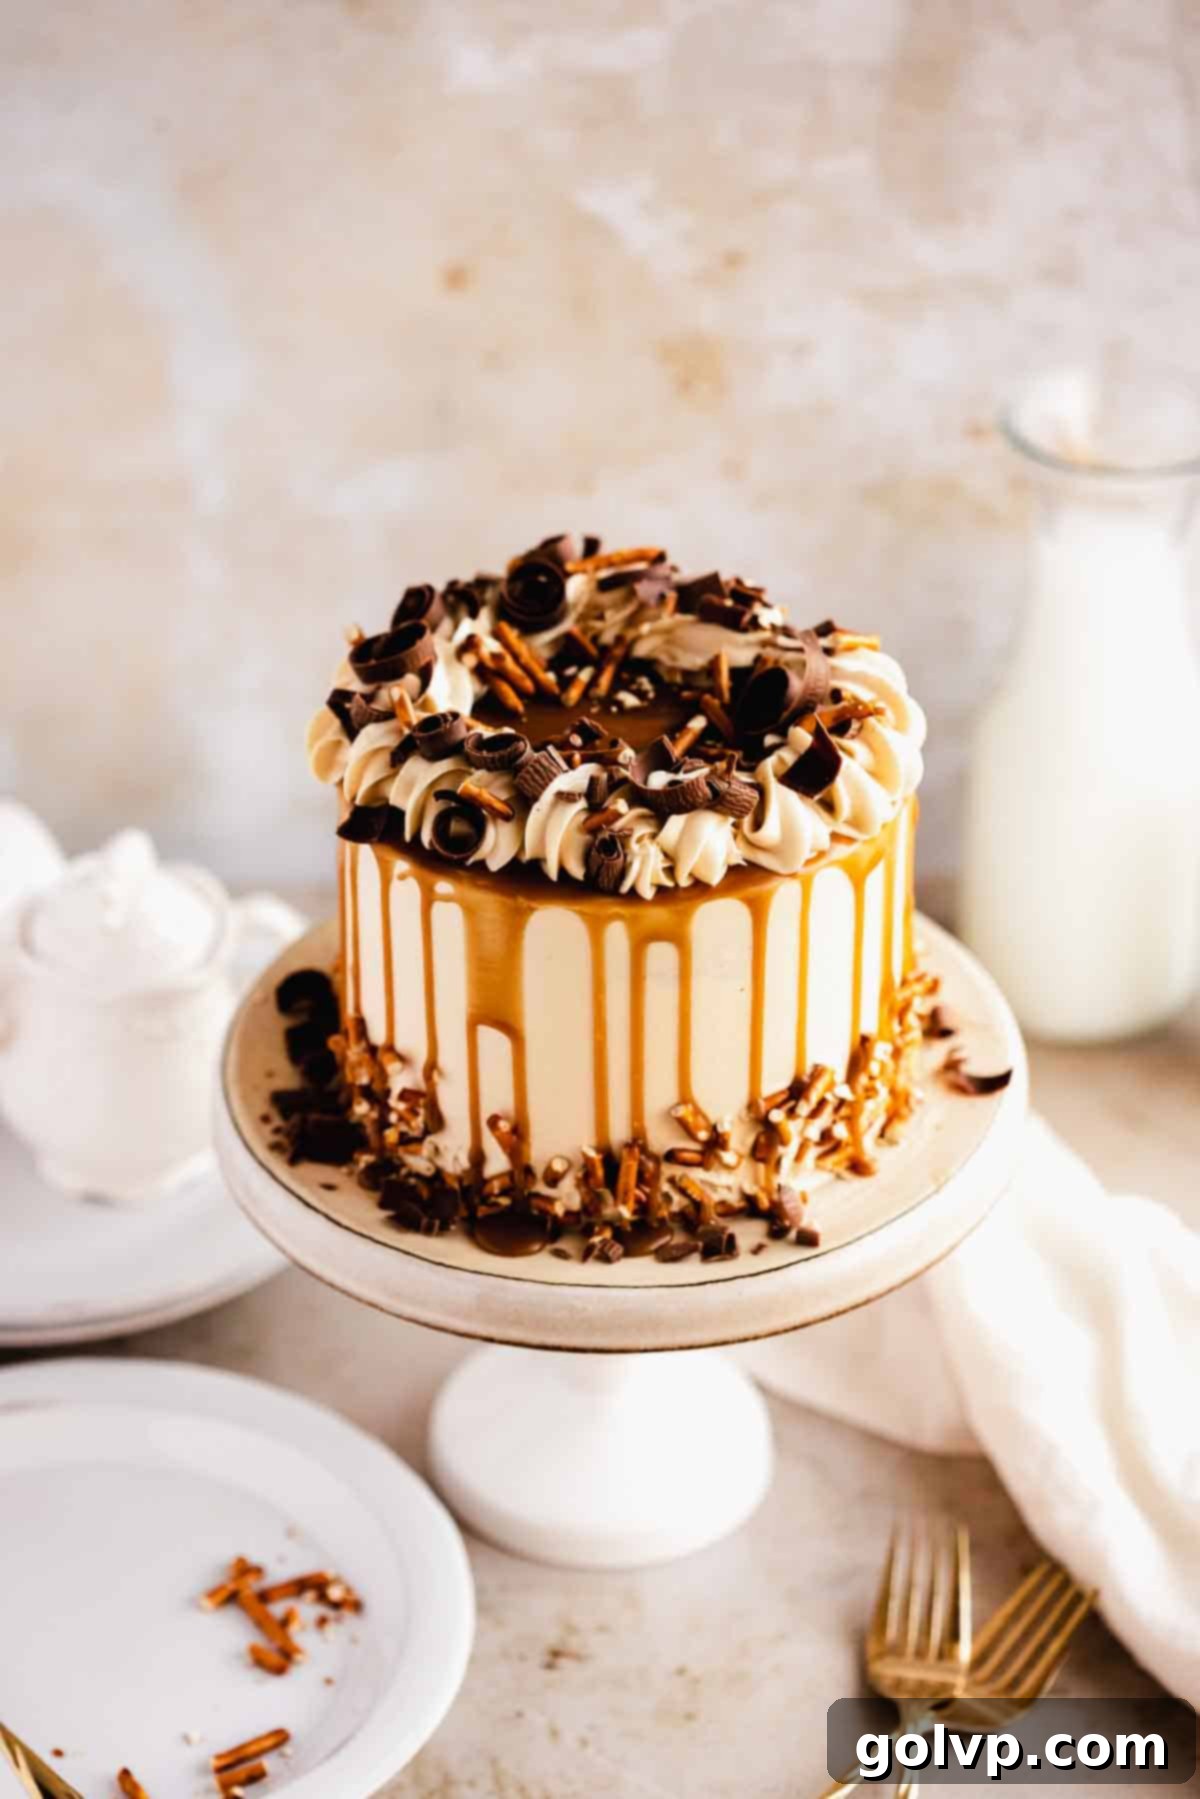
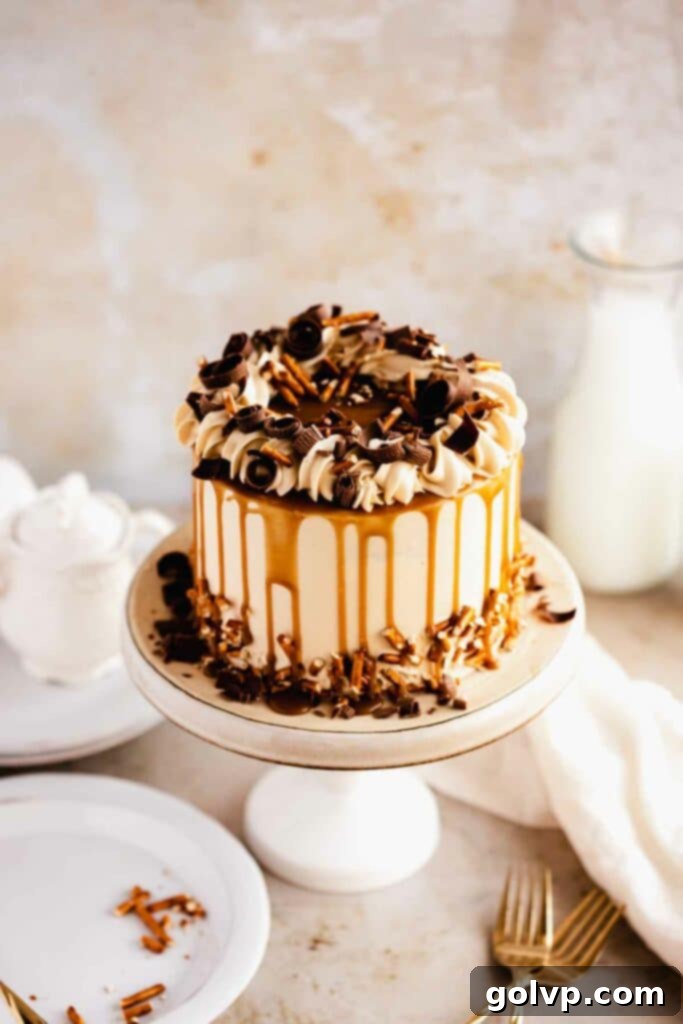
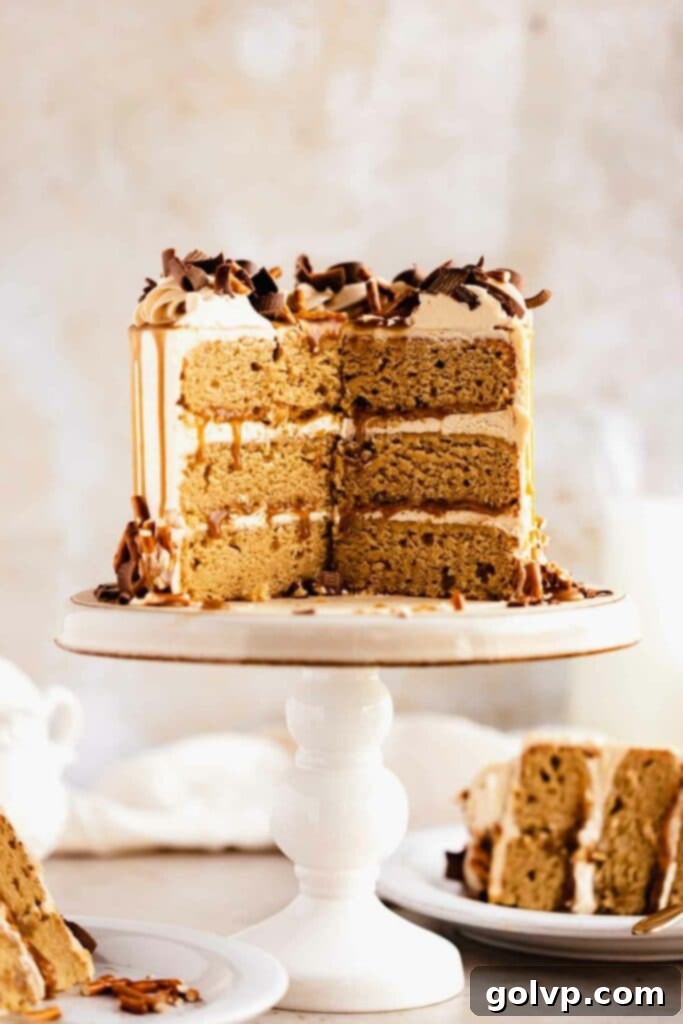
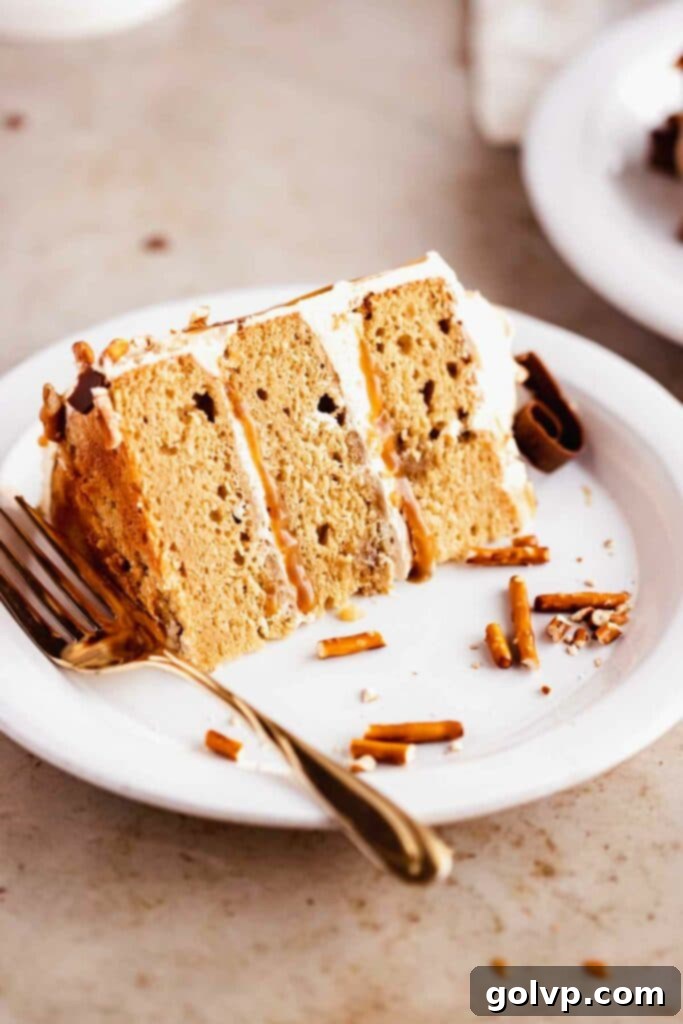
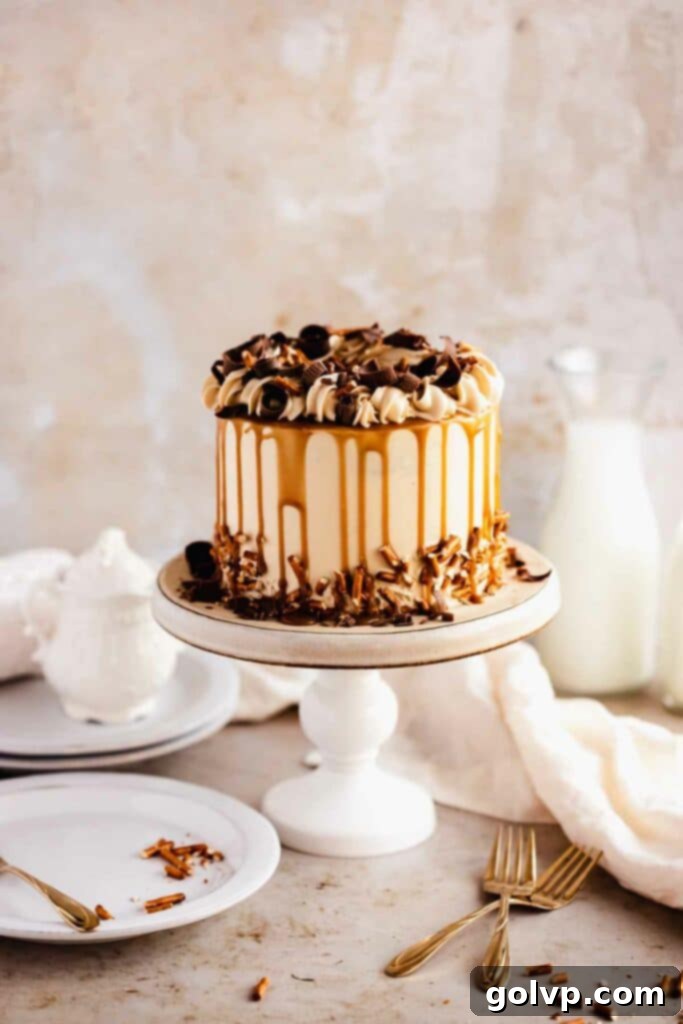
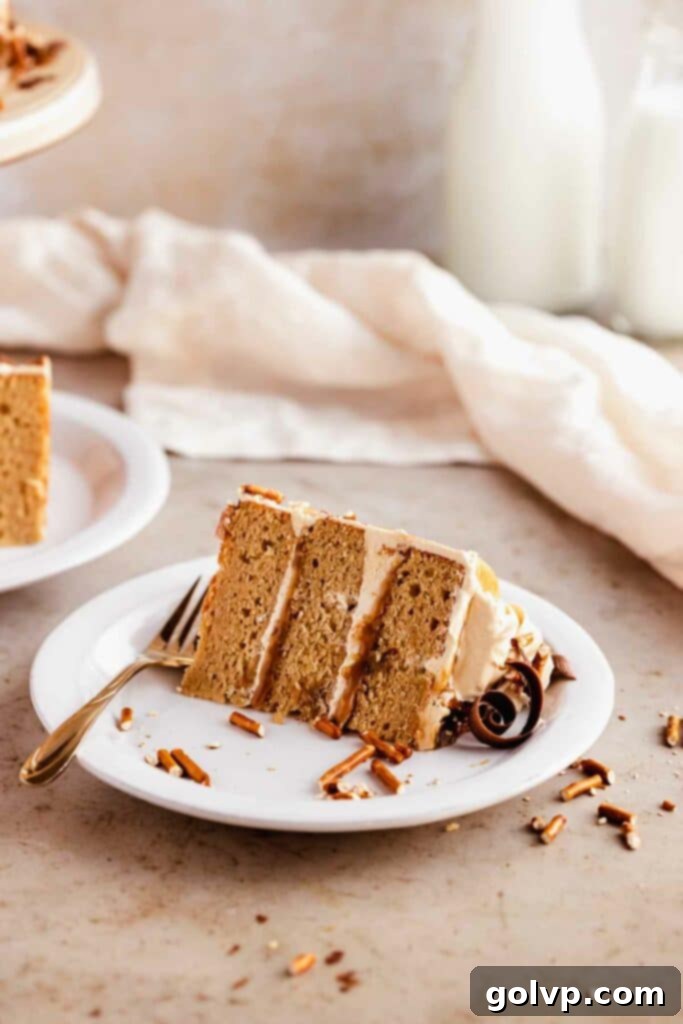
Prepare to fall in love with this truly exquisite butterscotch cake, a symphony of warm and comforting flavors. Each bite offers tender, incredibly moist cake layers infused with rich brown butter, perfectly complemented by a silky smooth butterscotch buttercream. The star of the show, a homemade butterscotch sauce, is incredibly simple to prepare and adds a delightful depth, not only within the buttercream but also generously drizzled between the layers. For an irresistible finish, the cake is adorned with an alluring butterscotch drip, a sprinkle of salty, crunchy pretzels, and elegant chocolate curls. This isn’t just a cake; it’s a celebration of classic flavors, elevated to perfection, making it an ideal centerpiece for any special occasion or a comforting treat on a cozy evening.
Why You Will Absolutely LOVE This Butterscotch Cake Recipe:
- Unforgettable Butterscotch Flavor: Our homemade butterscotch sauce is remarkably easy to whip up from scratch. Forget complex candy-making; just a few simple ingredients simmered together yield a rich, flavorful sauce. This glorious liquid gold is then incorporated directly into the buttercream and layered between the cake layers, ensuring an intense and authentic butterscotch experience in every mouthful. It’s the very essence of comfort, bottled and baked into a cake.
- Deep, Nutty Brown Butter: What sets this butterscotch cake apart is the inclusion of brown butter in the cake layers themselves. This magical ingredient, created by gently cooking butter until its milk solids toast, develops a wonderfully nutty, caramelized aroma. This warm, complex flavor pairs exquisitely with the sweet, deep notes of butterscotch, adding an extra dimension that takes this cake from good to extraordinary. It’s a subtle yet impactful enhancement that you won’t want to skip.
- Incredibly Moist and Tender Cake Layers: Say goodbye to dry, crumbly cakes! Thanks to the thoughtful addition of sour cream and buttermilk, these cake layers boast an unparalleled moistness and a wonderfully tender crumb. These dairy ingredients add essential fat and acidity, reacting with the leavening agents to create a cake that is light, fluffy, and practically melts in your mouth. You’ll be amazed at how consistently perfect they turn out.
- Perfectly Balanced Butterscotch Buttercream: The frosting for this cake is a dream come true. Infused with our irresistible homemade butterscotch sauce, it achieves a luxurious, silky-smooth texture that pipes beautifully and spreads like a dream. To prevent it from being overly sweet, we add a touch of fresh lemon juice. This bright acidity cleverly cuts through the richness and sweetness, creating a perfectly balanced flavor profile that will keep you coming back for more. It’s the ultimate butterscotch frosting!
Butterscotch VS. Caramel: Understanding the Delicious Differences
While often confused or used interchangeably, butterscotch and caramel are distinct confections, each with its unique charm and preparation method. Understanding their differences will not only deepen your appreciation but also explain why butterscotch is the star of this particular cake.
Butterscotch, at its heart, is a much simpler and more forgiving creation. It predominantly relies on brown sugar as its base. The beauty of butterscotch lies in its straightforward preparation: all ingredients, primarily brown sugar, butter, and cream, are simply combined in a saucepan and gently simmered until thickened. There’s no delicate balancing act of caramelizing granulated sugar to achieve a specific color or flavor. This makes butterscotch a fantastic choice for home bakers, as it consistently delivers a rich, buttery, and subtly molasses-flavored sauce without the stress of potential burning or crystallization often associated with caramel.
Caramel, on the other hand, begins with a more precise culinary technique: the caramelization of granulated sugar. This process involves heating white sugar until it melts and transforms into a deep amber liquid, developing complex, toasted notes. Once the desired caramel color and flavor are achieved, other ingredients like butter and cream are carefully added. The temperature control throughout this process is crucial, as even a slight overcook can result in a bitter taste, and undercooking leaves it lacking depth. Caramel offers a broader spectrum of flavors, from light and sweet to deeply smoky, depending on the degree of caramelization, but it requires more attention and experience.
For this recipe, butterscotch was chosen for its inherent ease of preparation, its comforting brown sugar-forward flavor profile that perfectly complements the brown butter cake, and its consistent deliciousness. It truly is caramel’s more approachable and equally delightful cousin!
The Magic of Brown Butter: Elevating Your Cake Layers
Brown butter, also known as beurre noisette, is a fundamental technique in classic French cuisine that transforms ordinary butter into an ingredient bursting with incredible depth and nutty flavor. It’s surprisingly easy to make and, in this recipe, it plays a pivotal role in adding a sophisticated warmth to the cake layers that perfectly complements the butterscotch.
The process involves gently melting unsalted butter in a saucepan over medium-low heat. As the butter melts, the water evaporates, and the milk solids begin to separate and cook. These milk solids will first foam, then gradually turn from white to a beautiful golden-brown color. During this transformation, the butter releases a distinctly nutty, toasted aroma, often described as smelling like hazelnuts or popcorn, with underlying notes of caramel. It’s crucial to stir constantly and keep a close eye on it, as the transition from perfectly browned to burned can happen in a matter of seconds. Once those golden-brown bits appear at the bottom and the aroma is rich and nutty, immediately remove it from the heat and transfer it to a separate, heat-safe bowl to stop the cooking process.
For this cake, the brown butter needs to cool and solidify slightly to achieve a thick, spreadable, almost soft-butter-like consistency. This allows it to whip up beautifully with the sugar, creating a creamy base for your cake batter. To speed up the cooling process, you can place the bowl of brown butter into an ice bath, stirring frequently (every minute or so) to ensure even cooling and prevent the edges from hardening excessively. Alternatively, the fridge or freezer can be used, but remember to stir it often to maintain that ideal soft, thick texture, preventing it from becoming rock-hard and difficult to incorporate.
Key Ingredients for Butterscotch Cake Success
While full steps and precise measurements are in the recipe card below, take a moment to read these essential tips for each key ingredient to ensure your butterscotch cake turns out perfectly!
Brown Sugar: This is the foundation of our delightful butterscotch sauce, imparting a rich, molasses-like flavor and a beautiful caramel hue. The molasses content in brown sugar also helps thicken the sauce naturally. You have some flexibility here: using a darker brown sugar will result in a deeper, more robust butterscotch flavor, while a lighter brown sugar will yield a milder, sweeter taste. Choose according to your preference for a truly personalized butterscotch experience. Always make sure it’s packed when measuring for accuracy.
Butter: Quality matters significantly here. Opt for a high-quality, unsalted real butter for the best flavor and texture, especially when browning. I strongly advise against using salted butter for the brown butter component, as the salt can intensify and produce an undesirable bitter, metallic taste when cooked to that degree. For the rest of the cake and the butterscotch sauce, salted butter can be used if that’s what you have on hand, but unsalted is generally preferred for baking to control salt levels precisely.
Buttermilk: This acidic ingredient is a secret weapon for incredibly moist and tender cake layers. Store-bought buttermilk typically provides the most consistent results. However, if you find yourself without any, you can easily create a substitute at home: simply add ½ tablespoon of apple cider vinegar or white vinegar to ½ cup of room-temperature milk. Stir it gently and let it sit for about 5 minutes. The milk will curdle slightly and become thick and lumpy, mimicking the acidity of real buttermilk. This homemade version works wonderfully to achieve that desired tender crumb.
Sour Cream: Another crucial dairy component for moisture and richness in the cake layers. Do not substitute sour cream if possible, as its unique fat content and tang are integral to the cake’s texture and flavor. The higher the fat content in your sour cream, the more luxurious and moist your cake will be. It contributes to the velvety texture and keeps the cake fresh for longer.
Lemon Juice: This seemingly small addition plays a vital role in the butterscotch buttercream. Its bright acidity acts as a counterbalance to the inherent sweetness and richness of the butterscotch, preventing the frosting from being cloyingly sweet. For the freshest and most vibrant flavor, always use freshly squeezed lemon juice. You can adjust the amount to your personal taste – add a little for a subtle lift, or a bit more for a tangier finish.
Cream: For the butterscotch sauce, heavy cream or whipping cream (with a fat content of 35% or higher) is essential. The high fat content is what gives the sauce its rich body and luxurious thickness. Avoid substituting with half-and-half or regular milk, as these alternatives have a lower fat content and will result in a sauce that is too thin and won’t set properly for the drip or mix well into the buttercream.
All-Purpose Flour: Accurate measurement of flour is key to a perfectly structured cake. The most reliable method is to weigh your flour using a kitchen scale – this eliminates guesswork and inconsistencies. If a scale isn’t available, use the “spoon and level” method: gently stir the flour in its bag to aerate it, then lightly spoon it into your measuring cup. Do not scoop directly from the bag or pack the flour down. Finally, use the flat edge of a knife to scrape off any excess from the top, ensuring a level measurement without compacting the flour into the cup.
Step-by-Step Guide to Baking Your Decadent Butterscotch Cake
This recipe might seem like a project, but breaking it down into simple, manageable steps makes it an enjoyable baking experience. Follow these detailed instructions for a truly show-stopping dessert.
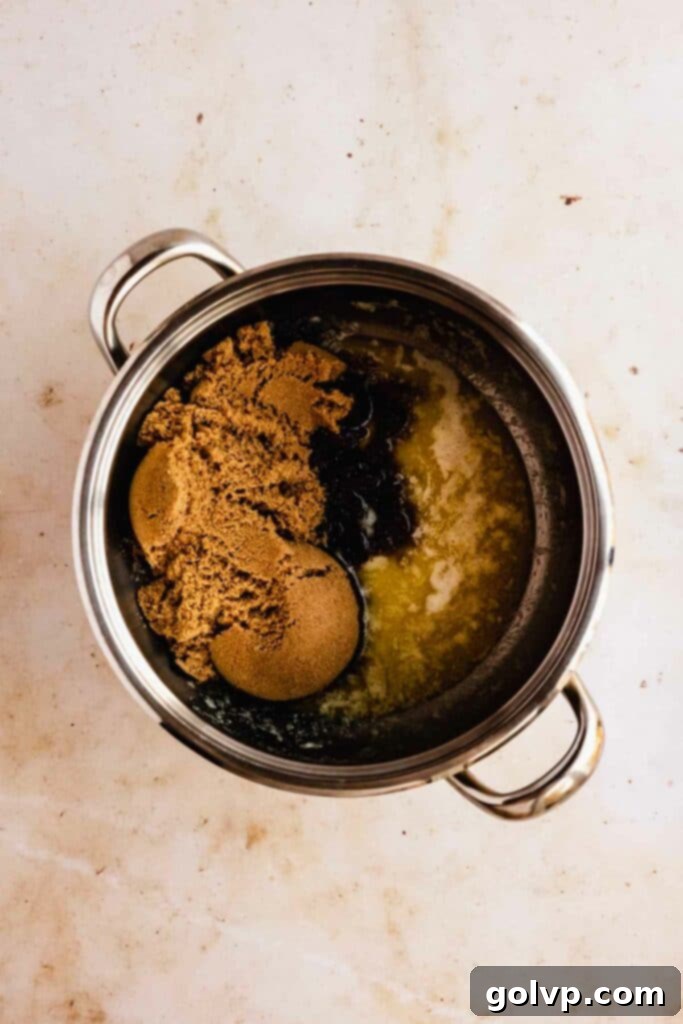
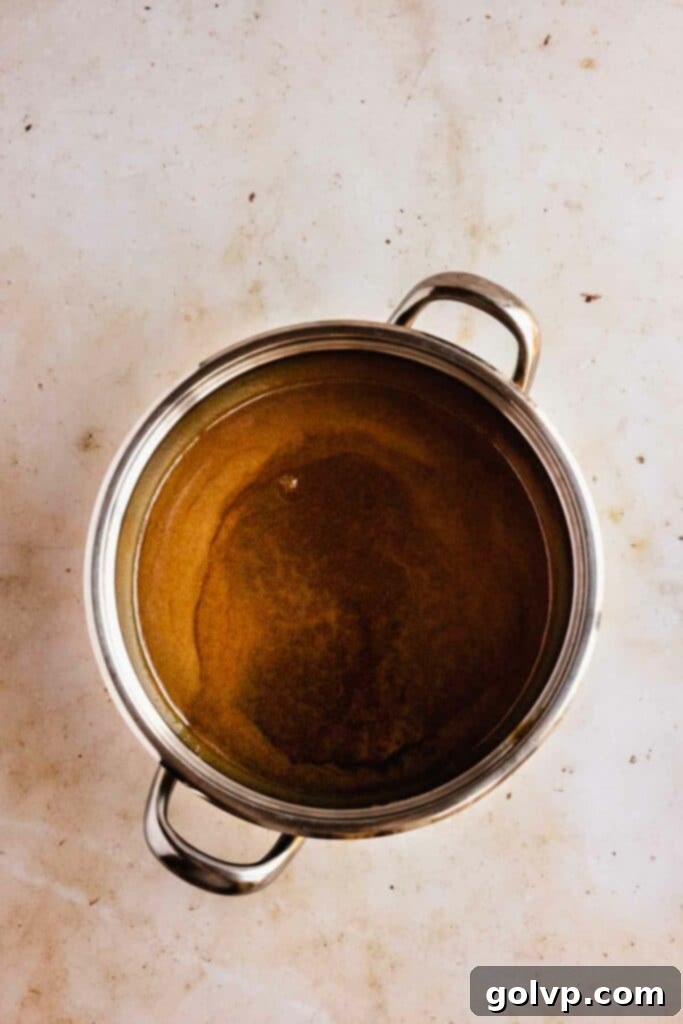
Step 1 – Prepare the Homemade Butterscotch Sauce. Begin by combining all the ingredients for your butterscotch sauce – butter, brown sugar, heavy cream, vanilla extract, and sea salt – in a medium-sized saucepan. Place the saucepan over medium-low heat and stir constantly until the brown sugar has completely dissolved, forming a smooth mixture. Once dissolved, bring the mixture to a gentle simmer. Allow it to simmer for exactly 3 minutes, stirring gently but continuously to prevent any burning at the bottom of the pan. The sauce should noticeably thicken during this time. As soon as the 3 minutes are up, remove the saucepan from the heat immediately. Carefully pour the hot butterscotch sauce into a heat-safe container to cool completely at room temperature. Once it has cooled to room temperature, transfer it to the refrigerator. Chilling it will make it thicker and perfect for both the buttercream and the drip.
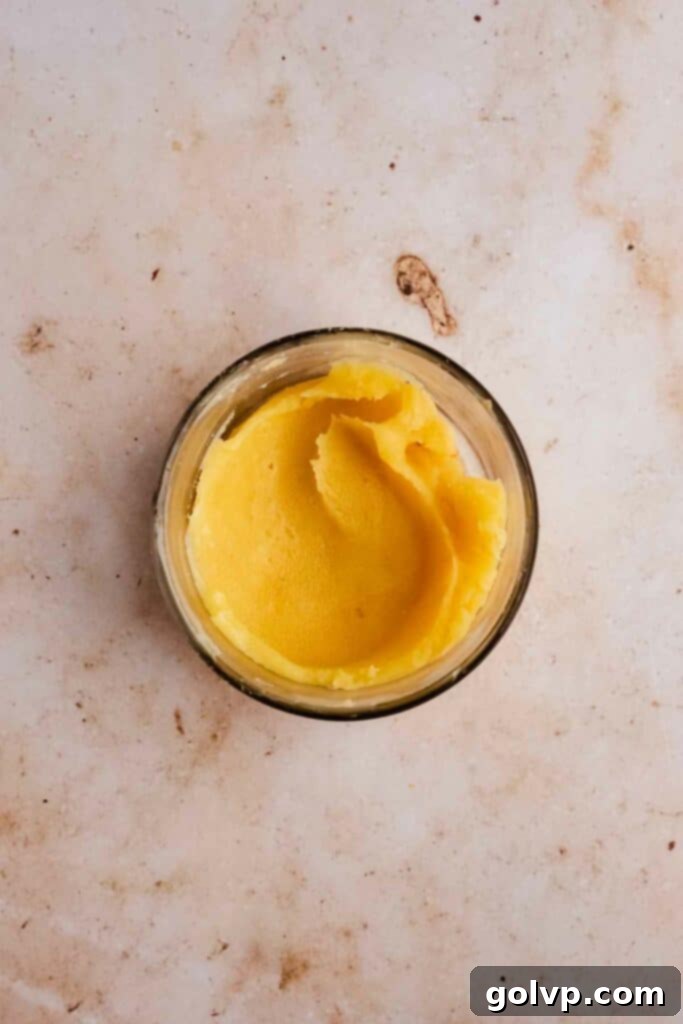
Step 2 – Craft the Brown Butter. Melt the unsalted butter in a medium saucepan over medium-low heat. Stir constantly throughout this process. Initially, the butter will melt and foam; this foam will gradually subside as the butter continues to cook. Keep stirring and watching carefully. You’ll notice small white milk solids begin to form at the bottom of the pan. These will slowly caramelize, turning a beautiful golden-brown color. A distinct aroma, reminiscent of toasted nuts and rich caramel, will fill your kitchen. The moment it starts foaming again and you see those lovely golden-brown bits, immediately remove the pan from the heat and pour the brown butter (including the browned bits, which are full of flavor!) into a heat-safe bowl or container. Allow the brown butter to cool completely to room temperature, then refrigerate it until it reaches a thick but still spreadable consistency. It’s crucial to stir it occasionally as it cools to reincorporate any hard bits that might form on the edges. To expedite this, you can place the bowl in an ice water bath, stirring every minute until it’s ready.
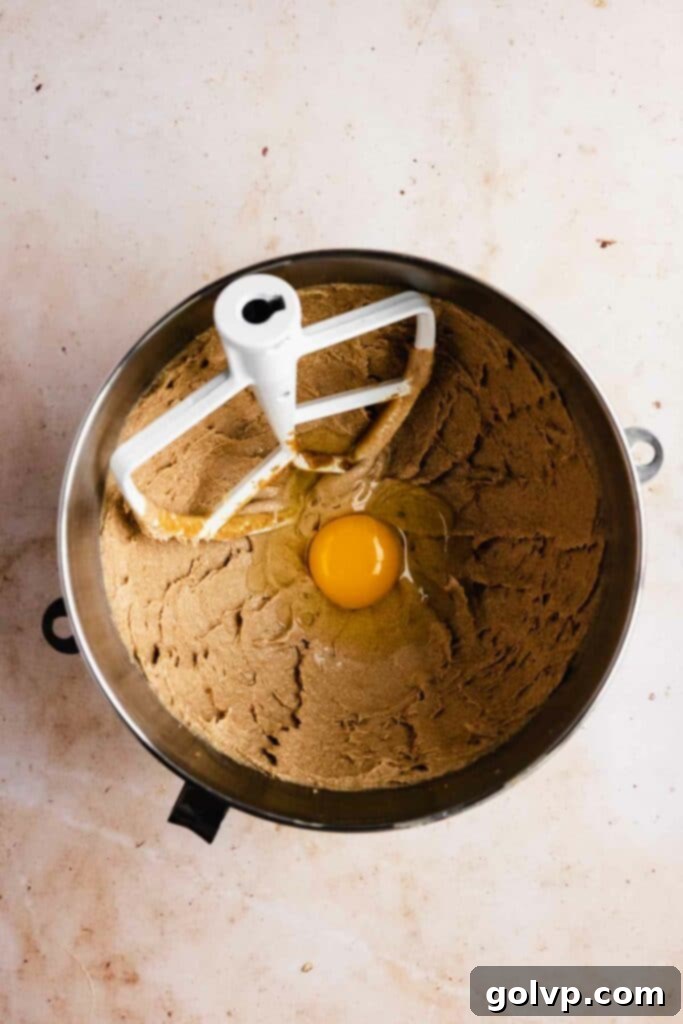
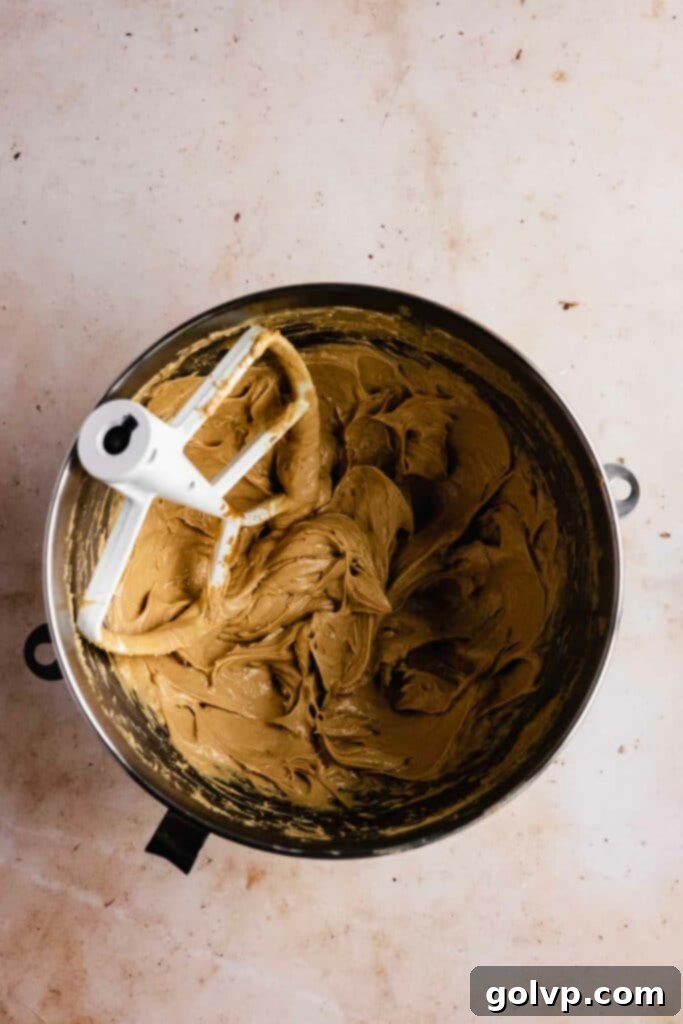
Step 3 – Combine the Wet Ingredients for the Cake. Once your brown butter is at the ideal thick, spreadable consistency, place it along with the vegetable oil, brown sugar, and sea salt into a large mixing bowl or the bowl of a stand mixer. Using the whisk attachment, beat these ingredients together until the mixture significantly increases in volume and becomes very light and creamy. Make sure to scrape down the sides and bottom of the bowl frequently to ensure all ingredients are evenly blended. Next, add the vanilla extract, followed by the eggs, one at a time. Beat well after each egg addition to fully incorporate it. Finally, add the sour cream and buttermilk, and blend thoroughly. Don’t be concerned if the mixture appears to separate slightly; this is normal and will come together once the dry ingredients are added.
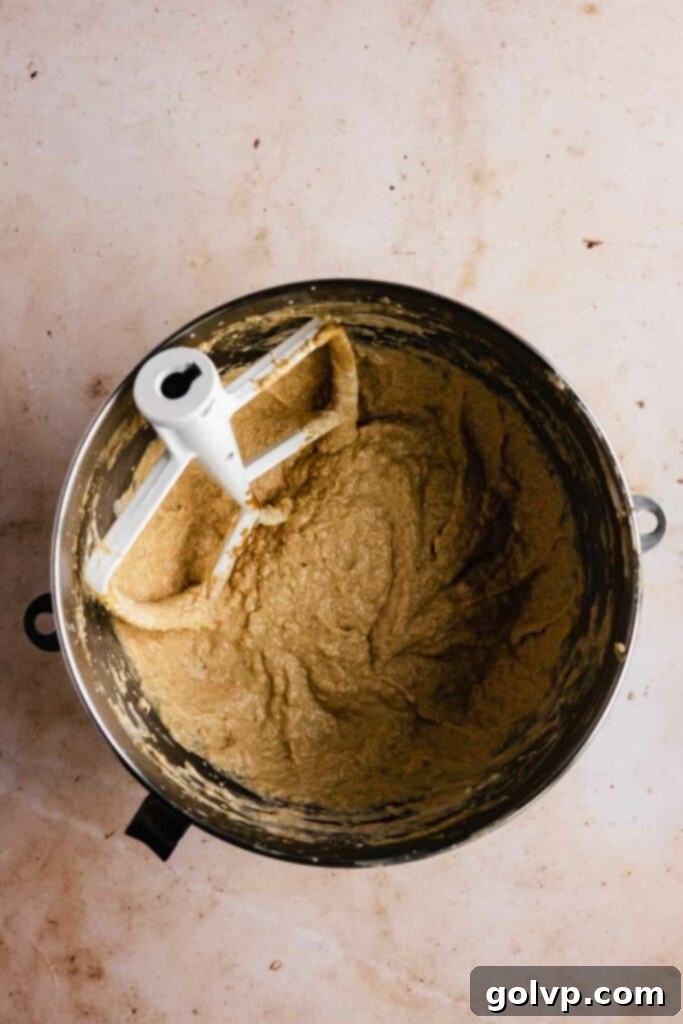
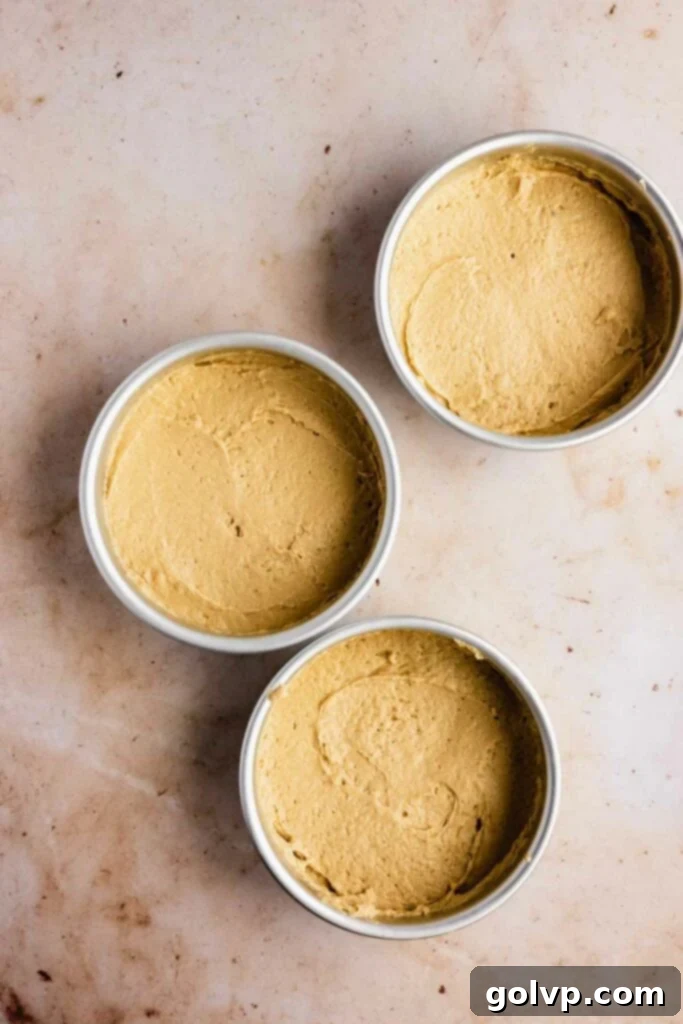
Step 4 – Create the Cake Batter. Into the same bowl with the wet ingredients, sift together the all-purpose flour, baking soda, and baking powder. This sifting step helps to aerate the flour and prevent lumps, contributing to a lighter cake. Replace your whisk attachment with a paddle attachment (if using a stand mixer) and mix on low speed. Alternatively, use a spatula to gently fold the dry ingredients into the wet until just a smooth batter forms. Be careful not to overmix, as this can develop the gluten in the flour, leading to a tough cake. Distribute the batter evenly among your prepared baking pans, smoothing the tops with a spatula. For the most precise and consistent layers, use a kitchen scale to measure the batter into each pan.
Step 5 – Bake and Cool the Cake Layers. Preheat your oven to 350°F (180°C). Bake the cake layers for approximately 20-25 minutes. To test for doneness, insert a toothpick into the center of a cake layer; it should come out clean. Once baked, remove the pans from the oven and let them cool on a wire rack for 15 minutes. After 15 minutes, carefully invert the cakes onto the cooling rack. You might need to run a knife or a thin spatula around the edges of the pans to help release the layers. Allow the cake layers to cool completely on the wire rack before attempting to frost them. Frosting warm cake layers will cause your buttercream to melt and slide off.
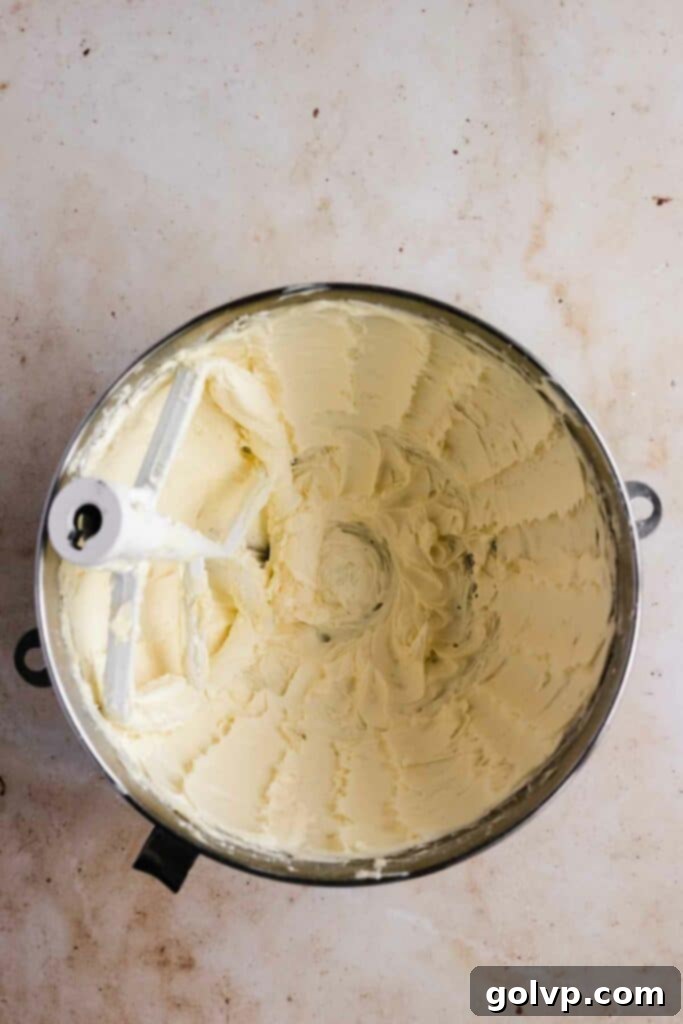
Step 6 – Prepare the Butterscotch Buttercream. In a large bowl or stand mixer fitted with the paddle attachment, beat the softened butter and powdered sugar together until the mixture is incredibly light, fluffy, and significantly increased in volume. This can take several minutes. Stop and scrape down the sides and bottom of the bowl periodically to ensure all ingredients are thoroughly combined and no pockets of unmixed sugar remain. The paddle attachment is recommended for achieving a very smooth, airy buttercream texture, free of large air bubbles.
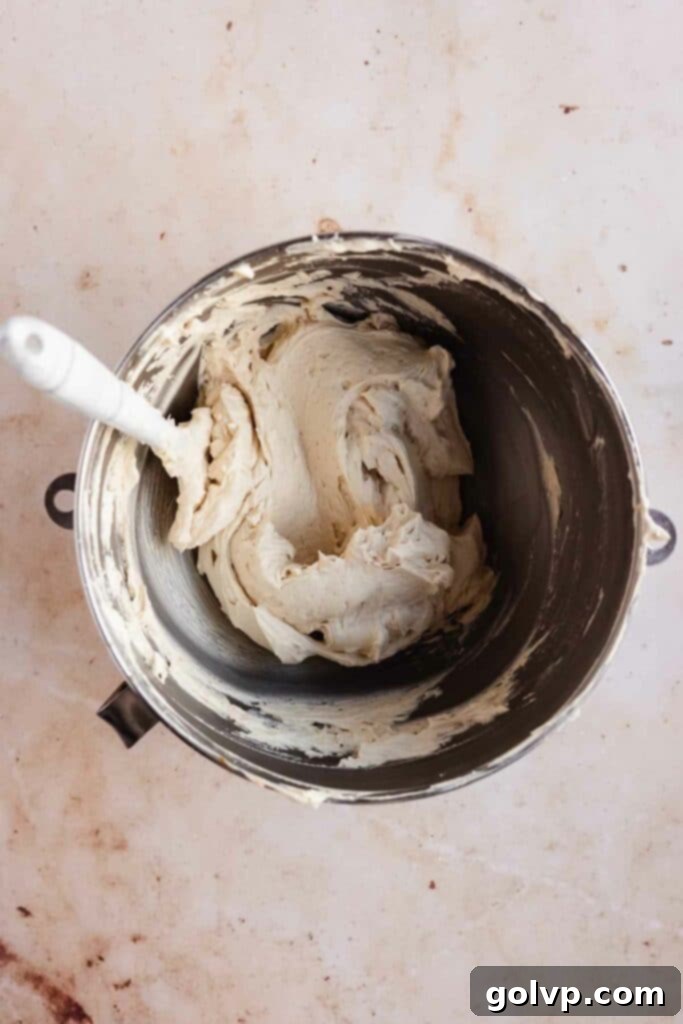
Step 7 – Finish the Buttercream to Perfection. Gradually add the chilled butterscotch sauce to the butter-sugar mixture, beating continuously until the buttercream becomes even fluffier and lighter. This is where the magic happens, infusing the frosting with that incredible butterscotch flavor. Next, add the freshly squeezed lemon juice, starting with a small amount (1 teaspoon) and adding more to taste. The lemon juice is vital for balancing the sweetness and richness of the buttercream. Continue beating until you are completely satisfied with the flavor. Finally, gradually add the heavy cream, a tablespoon at a time, beating until the buttercream reaches your desired fluffy consistency. For an ultra-smooth finish and to eliminate any large air pockets, switch to low speed and beat with the paddle attachment for an additional 3-5 minutes. If you plan to make the frosting ahead of time, store it in an airtight container in the refrigerator. Before using, allow it to come to room temperature and re-beat until it’s smooth and creamy again.
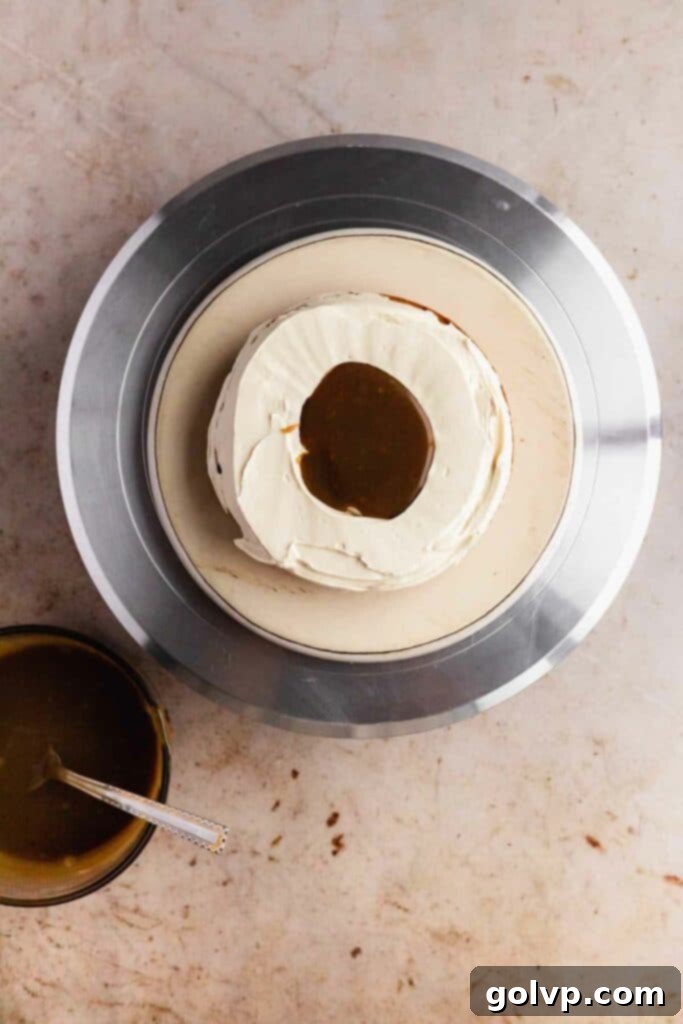
Step 8 – Stack Your Cake Layers. To begin assembling your stunning butterscotch cake, place a small dollop of buttercream onto the center of your cake plate or stand. This acts as an anchor to prevent the cake from sliding. Carefully place your first cooled cake layer on top. Spread an even layer of butterscotch buttercream over this cake layer. For an extra burst of flavor, drizzle some of your homemade butterscotch sauce directly on top of the buttercream. This is my preferred method, as it minimizes the risk of the sauce escaping the sides.
*If you desire a more substantial butterscotch layer between your cake tiers, pipe a thick border of buttercream around the perimeter of the cake layer, creating a “dam.” Then, carefully spoon a few tablespoons of the butterscotch sauce into the middle of this buttercream dam. It is crucial to chill the cake completely in the freezer for at least 15-20 minutes after this step before placing the next cake layer. This allows the butterscotch to firm up, preventing it from oozing out the sides and ensuring your cake layers remain stable and don’t slide around.
Repeat this layering process with the remaining cake layers, buttercream, and butterscotch sauce until all your cake layers are stacked.
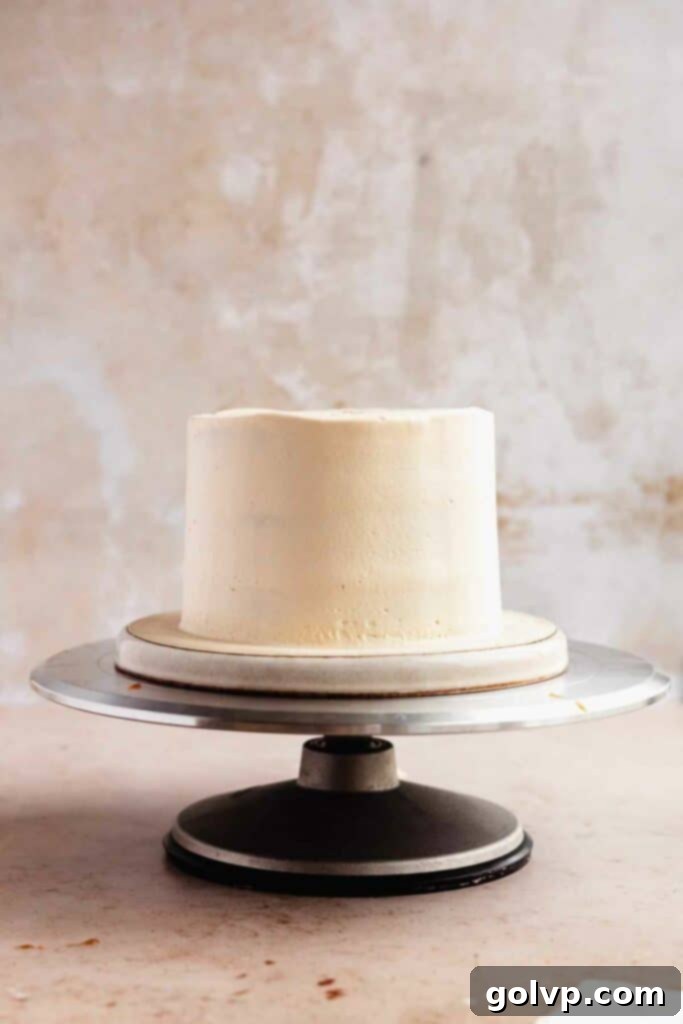
Step 9 – Apply a Crumb Coat. Once your cake layers are stacked, cover the entire cake – both the sides and the top – with a very thin, even layer of buttercream. This thin layer is known as a “crumb coat” and its purpose is to trap any loose crumbs, preventing them from mixing into your final, pristine layer of frosting. After applying the crumb coat, transfer the cake to the freezer and chill it for about 10 minutes. This will allow the crumb coat to firm up quickly, creating a stable base for your final frosting layer.
Step 10 – Apply the Final Coat and Decorate the Base. Remove the cake from the freezer. Now, apply a much thicker and more generous layer of butterscotch buttercream to the sides and top of the cake. Use a bench scraper and/or an offset spatula to smooth the frosting evenly around the cake. Take your time to achieve smooth, clean sides and a flat top. Once frosted, gently press crushed pretzels onto the bottom half of the cake’s sides. The salty crunch of the pretzels provides a wonderful contrast to the sweet butterscotch. Place the cake back into the freezer for another 10 minutes to allow this final layer of frosting to firm up.
Step 11 – Create the Signature Butterscotch Drip. Take your remaining butterscotch sauce (which should be at room temperature or slightly chilled for the best consistency) and transfer it into a piping bag. Snip off a small tip from the end of the piping bag. With the cake well-chilled from the freezer, carefully pipe drips of butterscotch sauce around the top edge of the cake, allowing them to slowly cascade down the sides. Experiment with some longer and some shorter drips for an organic look. Once you’re satisfied with the drips, fill in the entire top surface of the cake with a very thin layer of butterscotch sauce, smoothing it gently with a spoon or small offset spatula. Return the cake to the freezer for a final 10 minutes to ensure the drips and top layer of sauce set beautifully.
Step 12 – Add the Finishing Touches and Border. With the butterscotch drip set, it’s time for the final decorations. Transfer any remaining butterscotch buttercream to a piping bag fitted with your desired tip (a Wilton 1M tip creates a classic rope border, as demonstrated). Pipe an elegant border around the top edge of the cake. This adds a beautiful finishing detail and helps to contain any toppings. Finally, sprinkle the remaining crushed pretzels and chocolate curls generously over the top of the cake, especially within the piped border. These elements not only add visual appeal but also provide delightful textures and flavors.
Step 13 – Serve and Store Your Masterpiece! For the absolute best flavor and texture, serve your magnificent butterscotch cake at room temperature or slightly chilled. At room temperature, the buttercream will soften beautifully and become incredibly creamy, enhancing the overall experience. To store your cake, place it in an airtight container or a dedicated cake carrier. It will keep wonderfully in the refrigerator for up to 3 days, maintaining its freshness and deliciousness. For longer storage, slices or the whole cake (if properly wrapped) can be frozen for up to 2 months. Thaw frozen cake slowly in the refrigerator before bringing to room temperature to serve.
Frequently Asked Questions (FAQ)
If your homemade butterscotch sauce becomes grainy, it means some sugar crystals have reformed. Don’t worry, it’s easily fixable! Gently reheat the butterscotch sauce in a saucepan over very low heat, stirring constantly until all the sugar crystals have completely dissolved and the sauce is smooth again. Adding a tablespoon of heavy whipping cream can also assist in dissolving the crystals and restoring the silky texture. Once smooth, remove it from the heat and allow it to cool back down to room temperature before using it in your cake.
Several factors can contribute to dense cake layers. First, ensure you are measuring flour correctly, ideally by weighing it with a kitchen scale for precision. If measuring by volume, use the “spoon and level” method to avoid overpacking. Second, underbaking can result in a dense, gummy texture, so always bake until a toothpick comes out clean. Third, check the expiration date of your baking powder and baking soda; inactive leavening agents won’t allow the cake to rise properly. Lastly, an oven that isn’t at the correct temperature (too low) can hinder proper rising and lead to a dense cake, so consider using an oven thermometer to verify accuracy.
I strongly advise against using salted butter when preparing brown butter. The salt in salted butter can intensify and often results in a bitter, almost metallic taste once the milk solids are browned. For the best, purest nutty flavor in your brown butter, always stick to unsalted butter. You can certainly use salted butter for other components of the cake, such as the regular butter in the cake batter (adjusting any added salt) or for the butterscotch sauce, where its flavor is less likely to become undesirable upon cooking.
The secret to clean, professional-looking cake sides lies in the crumb coat. After stacking your cake, apply a very thin, even layer of frosting over the entire surface of the cake. This “crumb coat” effectively seals in all the loose crumbs, preventing them from mixing into your final frosting layer. Once applied, chill the cake in the freezer for about 10-15 minutes to allow the crumb coat to firm up. Then, apply a second, thicker layer of frosting. Use a bench scraper held at a 90-degree angle against the cake’s side, and an offset spatula for the top, to smooth the frosting with consistent, deliberate motions. Practice makes perfect!
For a flawless drip, two main factors are crucial: the temperature of your cake and the consistency of your sauce. Firstly, ensure your cake is thoroughly chilled on the outside. A cold cake will help the warm or room-temperature drips set almost instantly upon contact, preventing them from running too far down the sides. Secondly, your butterscotch (or caramel) sauce should be at room temperature or slightly chilled, but never hot. Test a single drip on the back of the cake first to gauge its consistency. If it runs too quickly, chill the sauce for a few more minutes; if it’s too thick, gently warm it for a few seconds. I recommend piping the drips using a piping bag (or a ziploc bag with the corner snipped off) around the top edge of the cake. This method gives you more control over the length and placement of each drip. After piping the drips, then fill the entire top surface of the cake with a thin layer of sauce. This two-step process is particularly effective for thicker sauces like butterscotch or caramel, as they set slower than chocolate ganache drips.
If your buttercream is too soft or “gloopy,” it often means it’s either too warm or has too much liquid. A quick fix is to chill the buttercream in the freezer for about 10-15 minutes. After chilling, return it to your mixer and beat it again until it becomes light, fluffy, and firm enough to hold its shape. If it’s still too soft after chilling and re-beating, gradually add more powdered sugar, a quarter cup at a time, beating well after each addition until the desired consistency is achieved. Remember, the butter should be softened but still cool to the touch when you start.
The most important tip for a smooth cake batter that yields a moist and tender crumb is to ensure all your ingredients, especially the dairy and eggs, are at room temperature before you begin mixing. Room-temperature ingredients emulsify more effectively, creating a homogenous and creamy batter. Cold ingredients can cause the batter to curdle or become lumpy, preventing proper aeration and leading to a less desirable cake texture. Also, ensure you sift your dry ingredients to remove any lumps and incorporate them gently into the wet ingredients to avoid overmixing.
Discover More Delicious Recipes:
- The Best Brown Butter Chocolate Chip Cookies
- Salted Caramel Cake with Blackberries
- Salted Caramel Apple Pie Bars
Happy baking, and enjoy every decadent slice of this butterscotch dream!
Did you make this recipe? I would absolutely love for you to rate this recipe and share your thoughts in the comments section below! Your feedback helps other bakers, and I cherish hearing about your culinary creations.
Don’t forget to share your stunning cake creation on Instagram and tag @flouringkitchen. For more inspiring recipe ideas, baking tips, and delicious treats, make sure to follow me on Pinterest.
📖 Recipe
Decadent Butterscotch Cake with Silky Drip
Mary
Pin Recipe
Shop Ingredients
Equipment
-
three 6″ cake pans (see notes for alternatives)
Ingredients
Butterscotch Sauce
- ½ cup butter
- 1 ½ cup brown sugar packed
- ¾ cup heavy cream whipping cream
- 1 tablespoon pure vanilla extract
- ½ teaspoon sea salt
Brown Butter Layers
- ¾ cup unsalted butter
- 2 tablespoons vegetable oil
- 1 cup brown sugar packed
- ¼ teaspoon sea salt
- 2 large eggs room temperature
- 1 tablespoon pure vanilla extract
- ½ cup sour cream room temperature
- ½ cup buttermilk room temperature
- 2 cups all purpose flour (240g)
- ¼ teaspoon baking soda
- 1 ¼ teaspoon baking powder
Butterscotch Buttercream
- 1 cup butter softened
- 2 ½ cups powdered sugar icing sugar
- ⅔ cup butterscotch sauce cold
- 1-3 teaspoons freshly squeezed lemon juice
- 3-5 tablespoons heavy cream whipping cream
Assembly
- 1 cup pretzels crushed
- ½ cup chocolate curls
Shop Ingredients on Jupiter
Instructions
Butterscotch Sauce
-
Combine all of the ingredients in a medium saucepan and heat until sugar dissolves. Bring to simmer and simmer for 3 minutes, until slightly thickened. Stir gently so that it doesn’t burn.½ cup butter, 1 ½ cup brown sugar, ¾ cup heavy cream, 1 tablespoon pure vanilla extract, ½ teaspoon sea salt
-
Remove from heat and pour into a heat safe container to cool completely. Refrigerate once it reaches room temperature.
Brown Butter Layers
-
Melt butter in medium saucepan stirring constantly, on medium low heat. The foam will subside as the butter browns. Keep stirring, watching the whole time. The milk solids (little white bits at the bottom) will slowly caramelize and turn a golden brown colour. It will smell like toasted nuts and caramel. Once it starts foaming again and there are golden brown bits, remove from heat and pour into a heat safe bowl or container.¾ cup unsalted butter
-
Let the brown butter come to room temperature and then refrigerate until it becomes thick but still spreadable. Stir it occasionally to incorporate any hard bits on the edges back inside. Use an ice water bath, stirring every minute to speed up the process.
-
Grease three 6” round baking pans with cold butter and line the bottoms with circles of parchment paper. See notes for different sized baking pans. Preheat oven to 350°F (180°C).
-
Once thickened, combine brown butter, oil, sugar, and salt in a large bowl or stand mixer. Using the whisk attachment, beat until increased in volume and becomes very light. Scrape down the bowl to blend evenly.2 tablespoons vegetable oil, 1 cup brown sugar, ¼ teaspoon sea salt
-
Add vanilla and eggs, one at a time, blending well between each addition. Add sour cream and buttermilk, blending well. It’s ok if the mixture separates.2 large eggs, ½ cup sour cream, ½ cup buttermilk, 1 tablespoon pure vanilla extract
-
Sift flour, baking soda, and baking powder into the same bowl. Replace whisk attachment with paddle attachment and fold on low speed until a smooth batter forms. Alternatively, use a spatula to fold.2 cups all purpose flour, ¼ teaspoon baking soda, 1 ¼ teaspoon baking powder
-
Distribute evenly into baking pans, smoothing the tops. Use a scale for the most precise measurements.
-
Bake for 20-25 minutes, or until a toothpick inserted through the middle comes out clean. Let cool for 15 minutes before flipping over on a cooling rack. Use a knife or spatula to help release the edges of the layers. Let cool completely before frosting.
Butterscotch Buttercream
-
Beat butter and sugar in a large bowl or stand mixer until very light and fluffy. Scrape down the bowl. Use a paddle attachment for a very smooth buttercream.1 cup butter, 2 ½ cups powdered sugar
-
Gradually add in the butterscotch, beating until very fluffy and light. Add in the freshly squeezed lemon juice to taste. Stop adding when you are happy with the flavour. This will help balance the sweetness of the frosting.⅔ cup butterscotch sauce, 1-3 teaspoons freshly squeezed lemon juice
-
Gradually add heavy cream and beat until it becomes fluffy. To make the frosting extra smooth, beat on low speed with a paddle attachment to remove any large air pockets.3-5 tablespoons heavy cream
Assembly
-
Assemble the cake by placing a dollop of frosting onto the bottom of the cake plate or stand. Place the first cake layer down. Add a layer of buttercream. Drizzle butterscotch on top. This is my preferred, less riskier method.
-
For a thicker butterscotch layer, pipe a thick border around the cake and spoon a few tablespoons of the butterscotch into the middle. Chill completely before placing the next layer of cake on top or the butterscotch will come out the sides and the layers will slide around.
-
Repeat until all of the cake layers are used up. Cover the sides and top with a very thin layer of frosting (crumb coat) and chill in the freezer for 10 minutes. Frost the sides and top with a thicker layer of frosting, smoothing with a bench scraper and/or a spatula. Cover the bottom half with crushed pretzels. Place back into freezer for 10 minutes to firm up the frosting.1 cup pretzels
-
Fill a piping bag with butterscotch sauce and snip the end off. Pipe drips of butterscotch at the edge of the cake. Fill in the top of the cake with a very thin layer of butterscotch and smooth with a spoon or spatula. Place back into the freezer for 10 minutes so that the drips set.
-
Use the remaining frosting to pipe a border on top of the cake. I piped a rope border using a Wilton 1M tip. Sprinkle crushed pretzels and chocolate curls on top of the cake.½ cup chocolate curls
Notes
Baking pan sizes: If you prefer a larger cake, you can easily double this recipe to make an 8” or 9” round three-layer cake. Alternatively, these same measurements can be used to create a delightful 9” by 12” sheet cake. For a sheet cake, simply frost the entire top with butterscotch buttercream and drizzle generously with the butterscotch sauce. You can slightly elevate the edges of the frosting around the perimeter to create a shallow well, keeping all that luscious butterscotch inside. Finish by sprinkling crushed pretzels and chocolate curls over the top and along the edges.
Make ahead: To streamline your baking process, many components of this cake can be prepared in advance:
- The cake layers can be baked up to 2 days before you plan to assemble the cake. Once completely cooled, wrap each layer tightly in plastic wrap and store them in the refrigerator.
- The homemade butterscotch sauce is also perfect for making ahead, up to 2 days before assembly. Store it in a clean jar or an airtight container in the refrigerator. If you notice it becomes grainy after storing, gently reheat it over low heat, stirring continuously, until all sugar crystals dissolve and it returns to its smooth consistency. Allow it to cool back to room temperature before using for decorating.
- The butterscotch buttercream can also be prepared a day or two in advance. Store it in an airtight container in the refrigerator. Before you’re ready to frost, let the buttercream come to room temperature, then re-beat it in your mixer until it’s light, fluffy, and creamy again. This re-whipping step is crucial for achieving the perfect spreadable texture.
