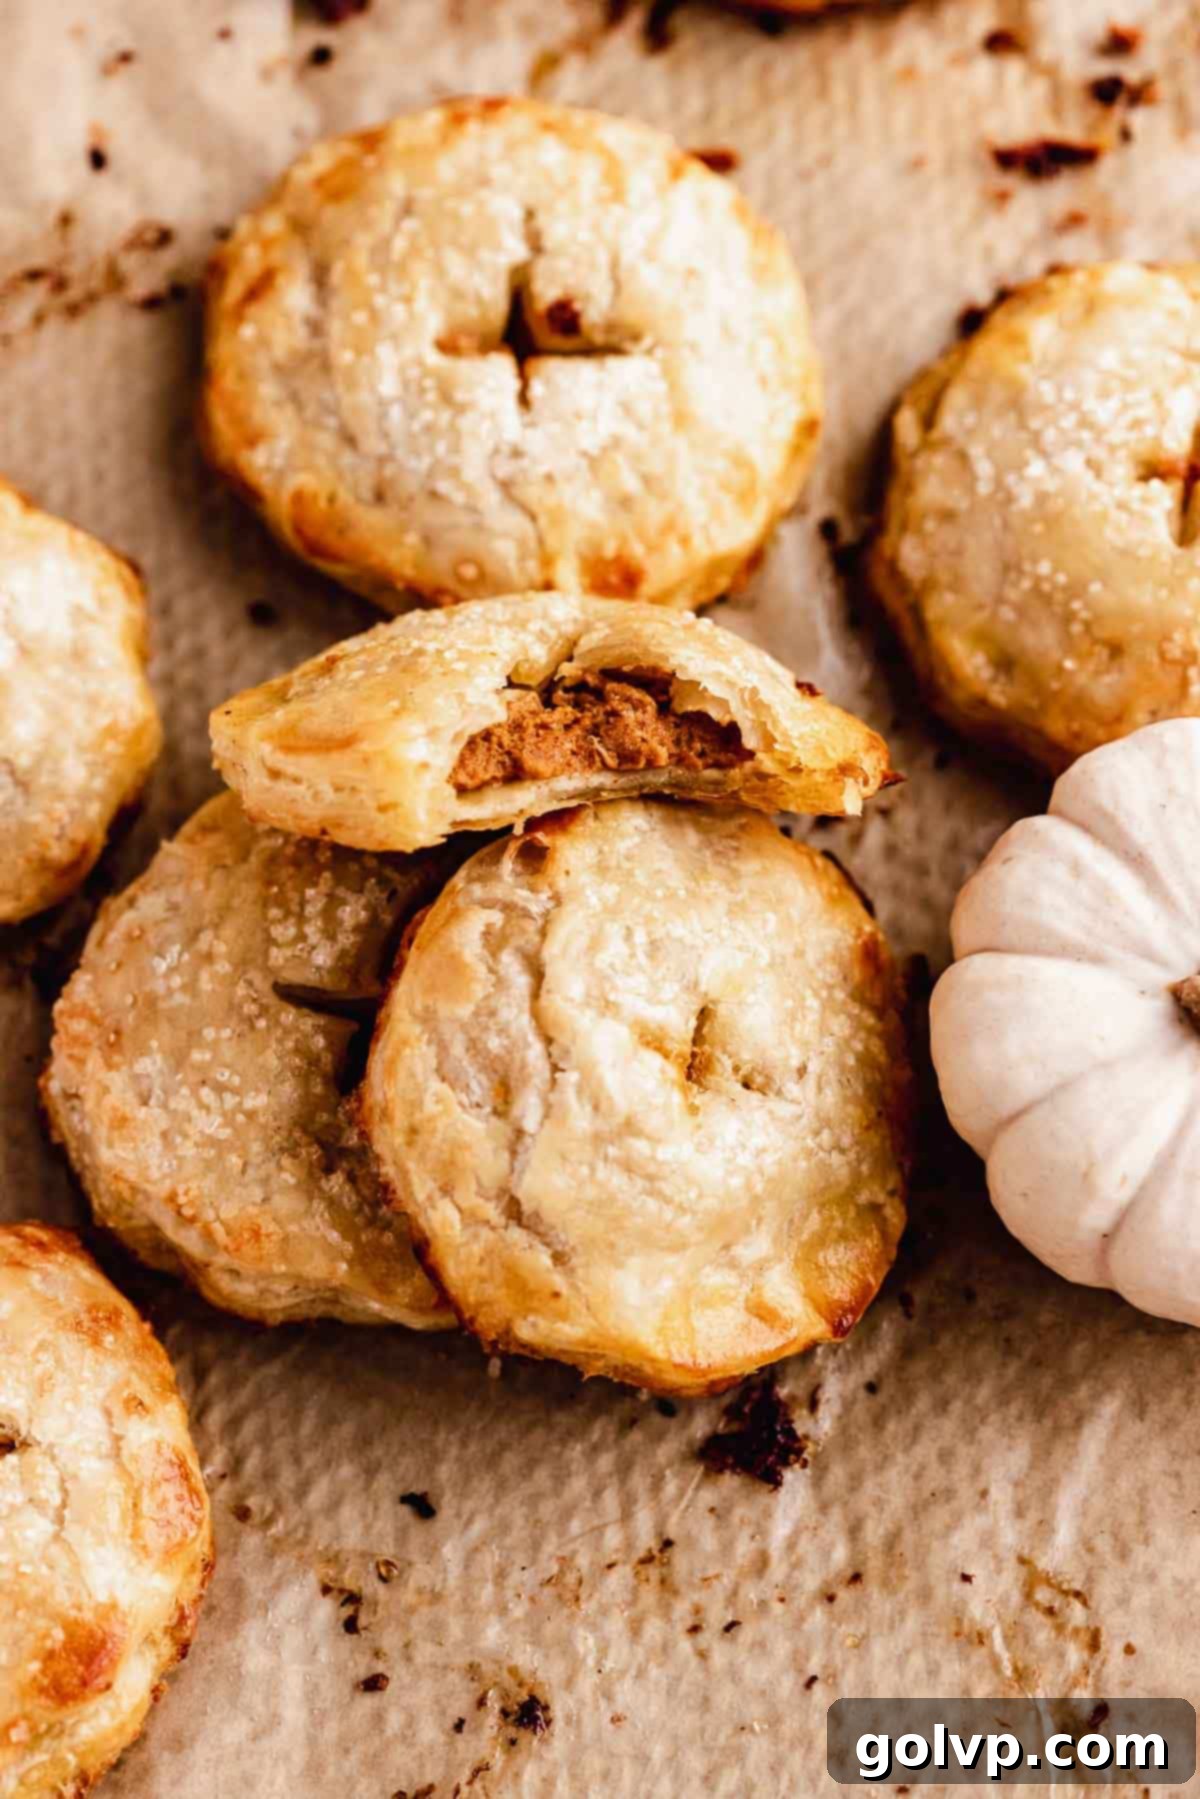
Perfect Pumpkin Hand Pies: Your Guide to Flaky Crust & Creamy Filling
Step into the cozy flavors of autumn with these truly irresistible Pumpkin Hand Pies! Imagine a luscious, perfectly spiced pumpkin pie filling, all nestled within an unbelievably flaky, all-butter pastry crust. Each bite delivers a delightful crunch from its bakery-style sugared top, followed by the rich, creamy warmth of pumpkin. These charming individual pies are not only incredibly delicious but also significantly faster and less intimidating to prepare than a traditional full-sized pumpkin pie. You’ll find yourself reaching for another, happily savoring the generous and utterly delectable crust-to-filling ratio that makes these a standout treat.
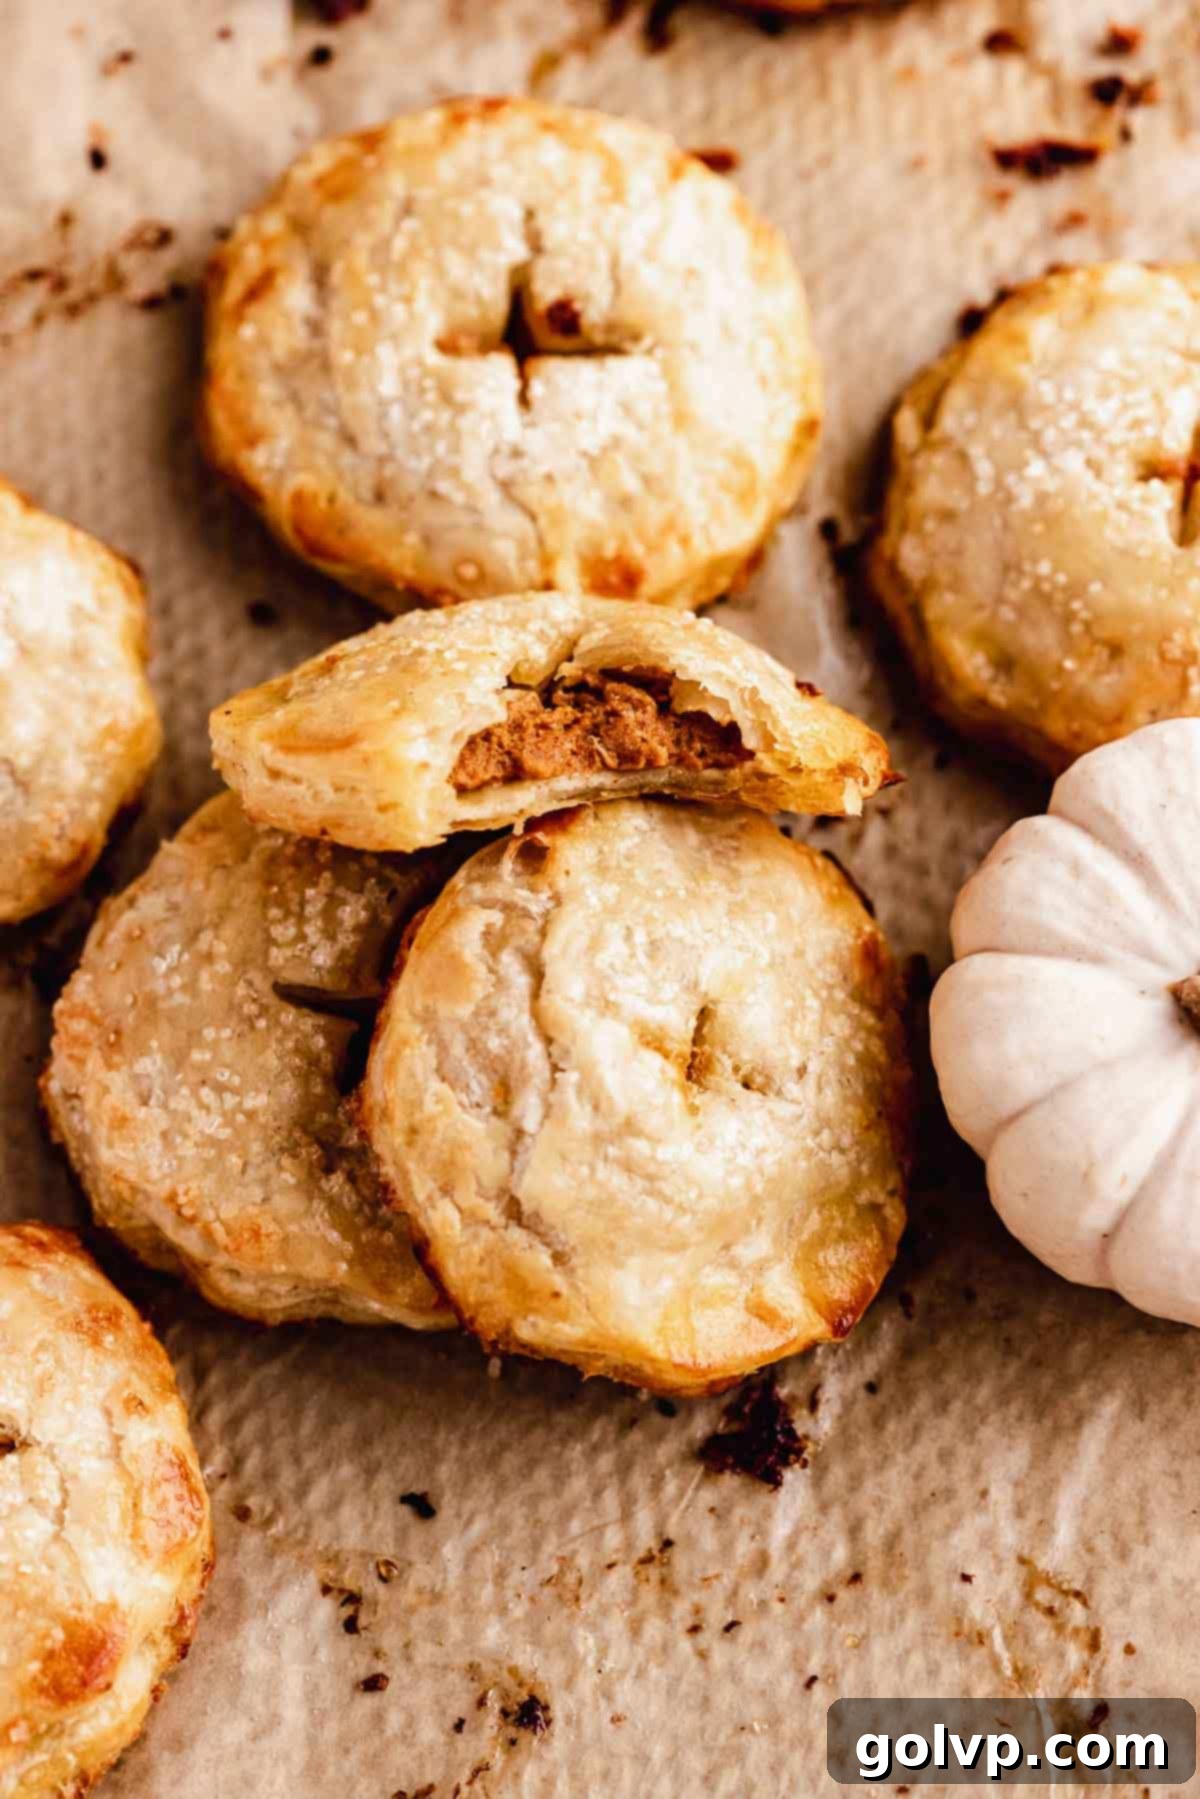
🥧 Why You’ll Absolutely Adore This Pumpkin Hand Pie Recipe
These pumpkin hand pies are more than just a dessert; they’re a celebration of seasonal flavors and textures. Here’s why this recipe is set to become your go-to for fall and beyond:
- Unbelievably Flaky Crust: When we describe this crust as flaky, we mean it in the most authentic sense of the word. Our secret lies in a special folding technique, akin to a rough puff pastry, which creates countless delicate, crispy, and tender layers. Each bite offers a satisfying crispness that gives way to a tender, buttery interior, making for an exquisite textural experience.
- Remarkably Easy to Make: Despite their gourmet appearance and taste, the pumpkin filling for these hand pies is incredibly simple. It comes together quickly with just a stir, demanding minimal effort for maximum flavor payoff. For those extra busy days, feel free to use a good quality store-bought pie crust as a clever shortcut, ensuring delicious results without the extra fuss.
- Rich, Authentic Pumpkin & Spice Flavor: Our hand pies are generously filled with the true essence of pumpkin, perfectly complemented by a warm and inviting blend of pumpkin spice. This classic flavor combination instantly evokes the comforting spirit of autumn and the holiday season. If you prefer a milder spice, simply use cinnamon, or experiment with your own favorite seasonal spice mix.
- Perfectly Portable and Convenient: Unlike a traditional pie that requires careful slicing and serving, these individual hand pies are designed for effortless enjoyment. They’re ideal for on-the-go snacks, lunchbox treats, festive potlucks, or an elegant addition to any holiday dessert table. Their single-serving size also makes portion control a breeze!
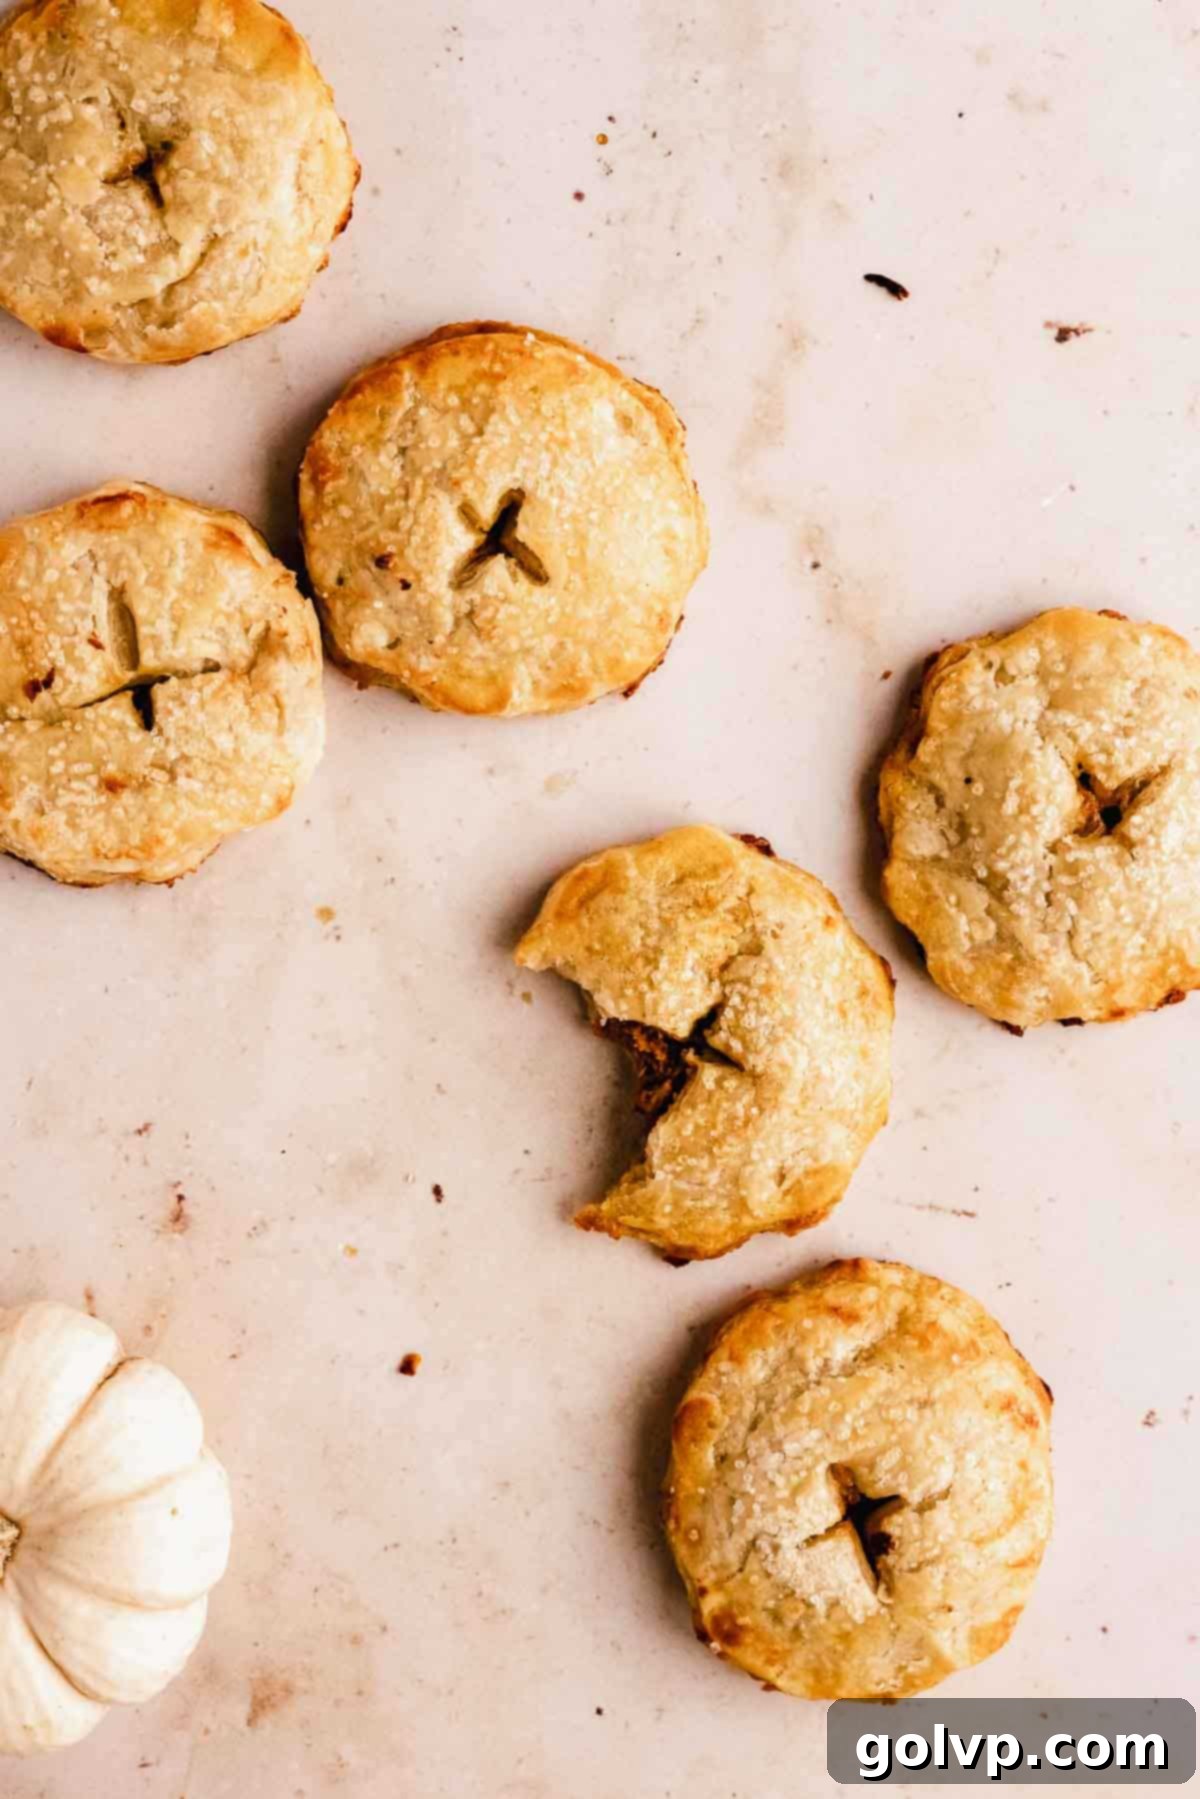
- Stunning Bakery-Style Finish: With their golden-brown, beautifully crimped edges and a glistening, coarse-sugared top, these hand pies look like they came straight from a professional bakery. The coarse sugar caramelizes during baking, adding a delightful crunch and extra sweetness that elevates the entire experience.
📝 Essential Ingredients for Flawless Pumpkin Hand Pies
The success of these delightful hand pies hinges on a few key ingredients, each carefully chosen to contribute to the perfect balance of taste and texture. Below, you’ll find our cherished recipe for an exceptionally flaky, all-butter pie crust. For those times when a quicker solution is needed, a high-quality, premade store-bought pie crust can be a fantastic alternative – we promise, your secret is safe with us!
Read through for all the tips you will need for success!
Full steps and ingredients in recipe card below.
For the Signature Flaky All-Butter Pie Crust:
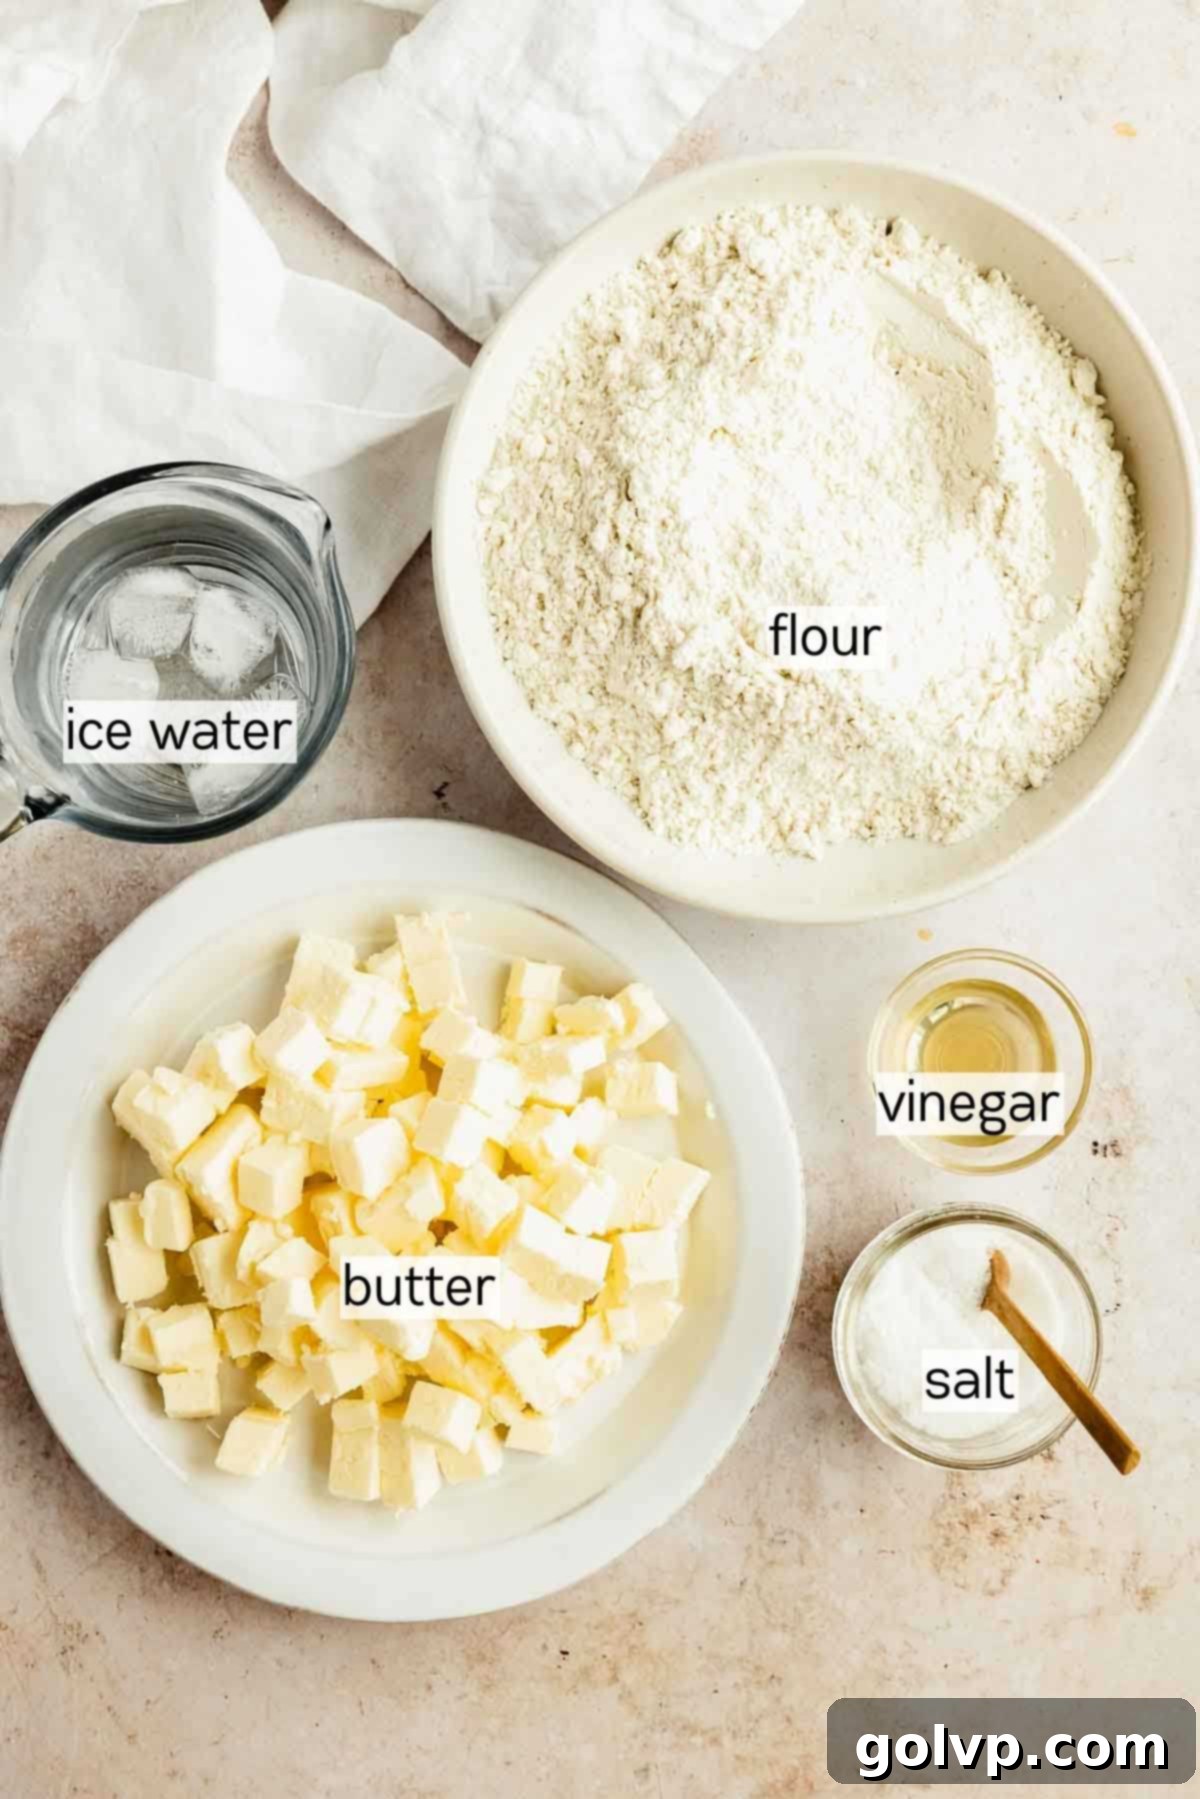
- High-Quality Unsalted Butter: This is the cornerstone of any truly flaky and flavorful pie crust. It’s imperative to cut the butter into small, ¼-inch cubes and freeze them for at least 10 to 15 minutes before you begin mixing. This critical step ensures the butter remains incredibly cold and firm, creating tiny pockets within the dough. During baking, the butter’s water content transforms into steam, separating the dough layers and resulting in that characteristic flakiness. Using unsalted butter also gives you precise control over the overall salt content.
- Vinegar (Apple Cider, White, or Lemon Juice): A small but powerful addition. Vinegar provides a barely detectable tang that helps to cut through the richness of the butter, balancing the flavor profile. More importantly, it plays a vital role in tenderizing the dough by hindering excessive gluten development, which prevents the crust from becoming tough or chewy. Apple cider vinegar is a great choice for its subtle fruitiness, but standard white vinegar or fresh lemon juice will work just as well.
- Ice Water: The temperature of your water is paramount for achieving a flaky crust. Always ensure your water is ice-cold, ideally with ice cubes still floating in it. This keeps the butter firm and prevents it from melting prematurely into the flour, a key factor in developing those distinct, layered pockets. Add it very gradually, only enough to bring the dough together, to avoid over-hydrating.
- All-Purpose Flour: This provides the necessary structure for your crust. For the most accurate and consistent results, we highly recommend weighing your flour using a digital kitchen scale. If a scale isn’t available, properly measure by stirring the flour in its bag or container, then gently spooning it into a dry measuring cup. Level off the excess with the straight edge of a knife, being careful not to pack the flour down into the cup.
- Sea Salt: A modest amount of sea salt is essential to enhance the overall flavor of the crust, providing a pleasant contrast and balance to the sweet filling.
For the Creamy Pumpkin Filling:
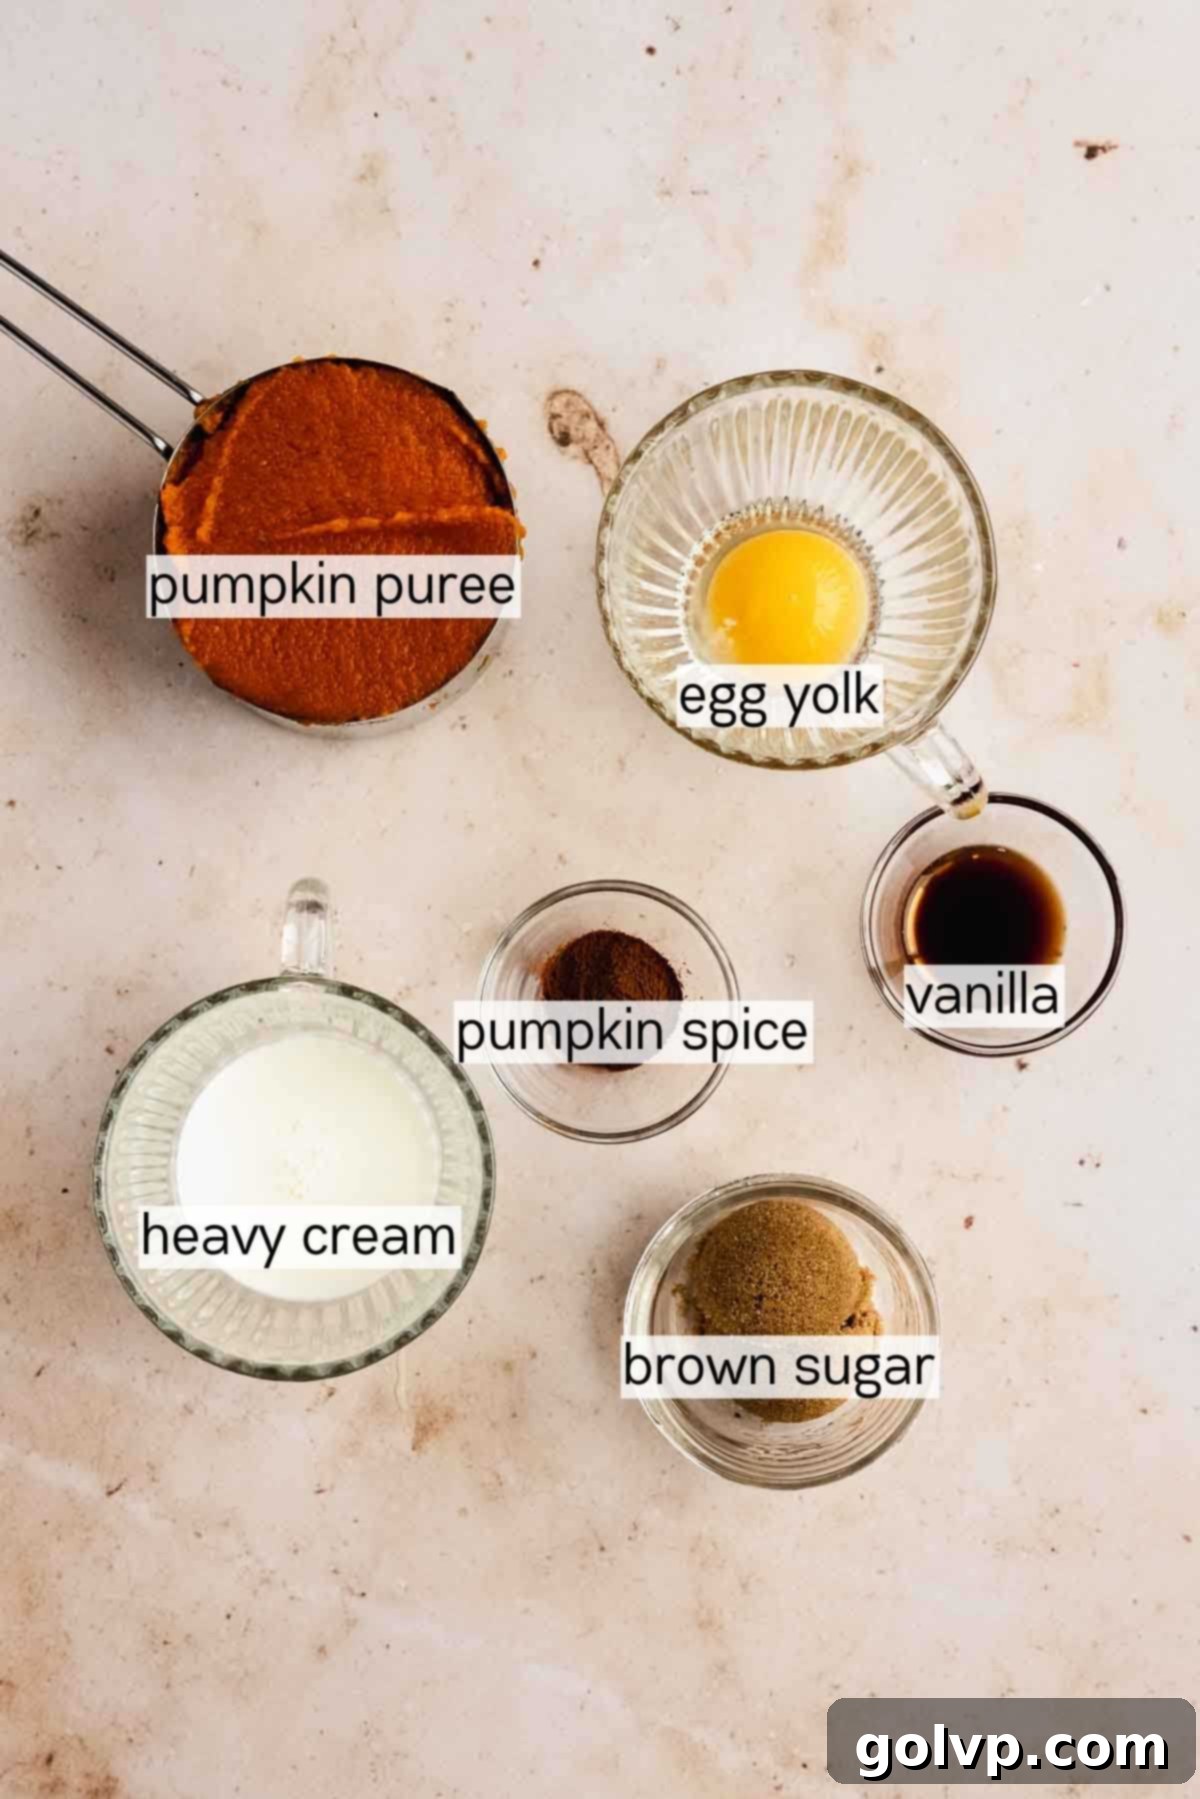
- Pumpkin Puree: The heart of these hand pies! You can use either high-quality canned pumpkin puree (make sure it’s 100% pure pumpkin, not pumpkin pie filling) or a thick, homemade puree. The key is to achieve a consistency similar to that of thick Greek yogurt. If your puree is too watery, it can lead to a soggy crust. Gently strain it through a cheesecloth or reduce it in a pan over medium-low heat, stirring frequently, until it reaches the desired thickness.
- Pumpkin Spice: This aromatic blend of cinnamon, nutmeg, ginger, and cloves is what gives pumpkin desserts their quintessential autumn flavor. If you’re not a fan of the full blend, a simple substitution with ground cinnamon works well. For an extra boost of fresh, intense flavor, consider making your own pumpkin spice blend.
- Large Egg Yolk: This ingredient acts as a vital binder, helping the pumpkin filling to set beautifully and hold its shape perfectly within the hand pie. It also contributes to the filling’s rich and creamy texture.
- Brown Sugar: Adds a deep, molasses-like sweetness and contributes moisture to the filling, complementing the pumpkin’s natural flavor profile. Be sure to pack the brown sugar firmly when measuring to ensure accuracy.
- Heavy Cream: Essential for imparting a luxurious, velvety smooth consistency to the filling. It’s important not to substitute with lighter milks or half-and-half, as these contain less fat and could make the filling too thin, potentially leading to leaks or a less rich texture. For those avoiding dairy, full-fat coconut cream or cashew cream can be suitable alternatives.
- Pure Vanilla Extract: A splash of high-quality vanilla extract enhances and harmonizes all the other flavors, adding a layer of warmth and complexity to the filling.
- Sea Salt: A tiny pinch of sea salt is added to the filling to balance the sweetness and bring out the full depth of the pumpkin and spice flavors.
👩🍳 Step-by-Step Guide: How to Craft Irresistible Pumpkin Hand Pies
Follow these detailed instructions to create perfectly flaky and delicious pumpkin hand pies with confidence.
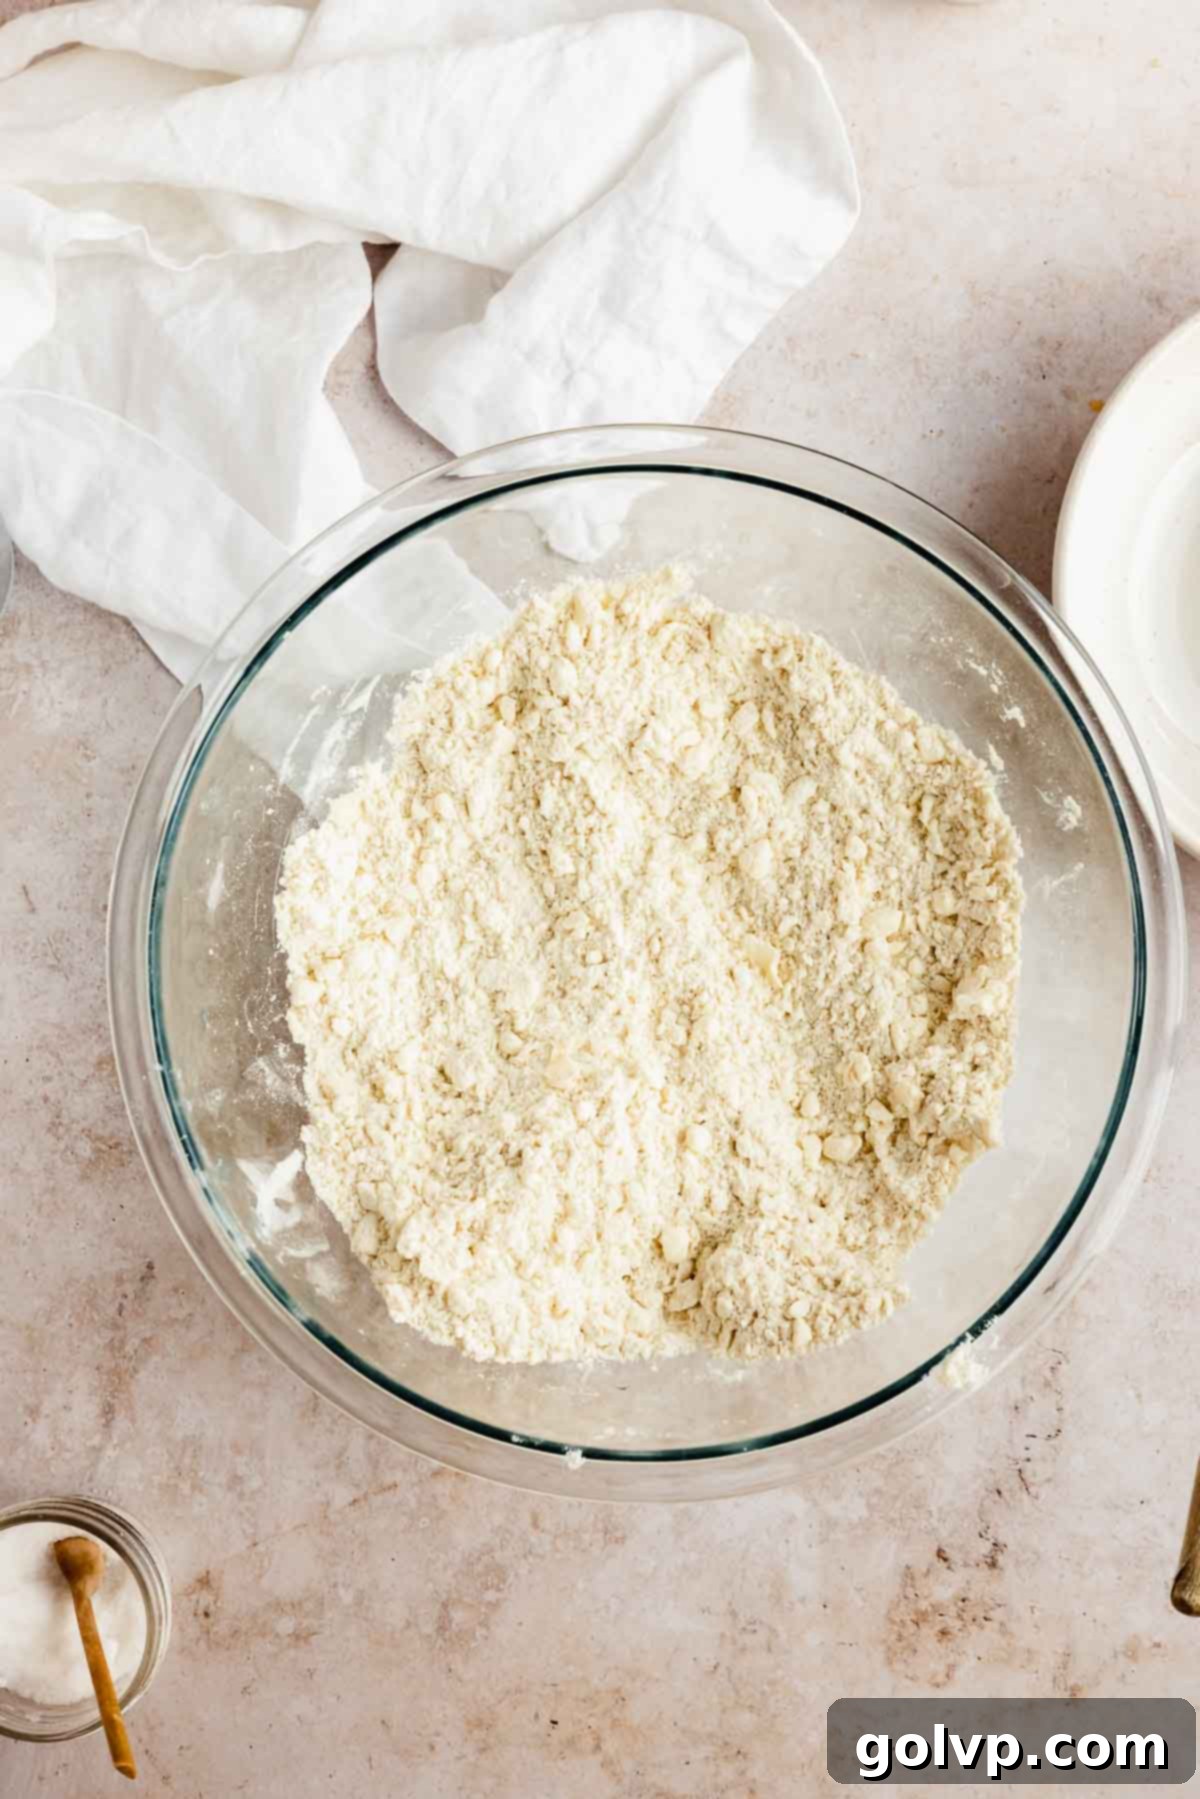
Step 1: Prepare Cold Ingredients for the Crust. Start by cutting your very cold unsalted butter into small, ¼-inch cubes. Spread these cubes in a single layer on a plate and place them in the freezer for about 10-15 minutes. This ensures the butter remains firm throughout the dough-making process. In a separate small bowl, combine the tablespoon of vinegar with 1 cup of ice water; stir gently to combine. In a large mixing bowl, whisk together the all-purpose flour and sea salt to break up any lumps and ensure the salt is evenly distributed. Add the frozen butter cubes to the flour mixture. Using a pastry cutter, a sturdy fork, or even pulsing briefly in a food processor, cut the butter into the flour until the mixture resembles coarse breadcrumbs with some larger pea-sized pieces of butter still visible. These larger butter pieces are crucial for achieving the flakiest layers!
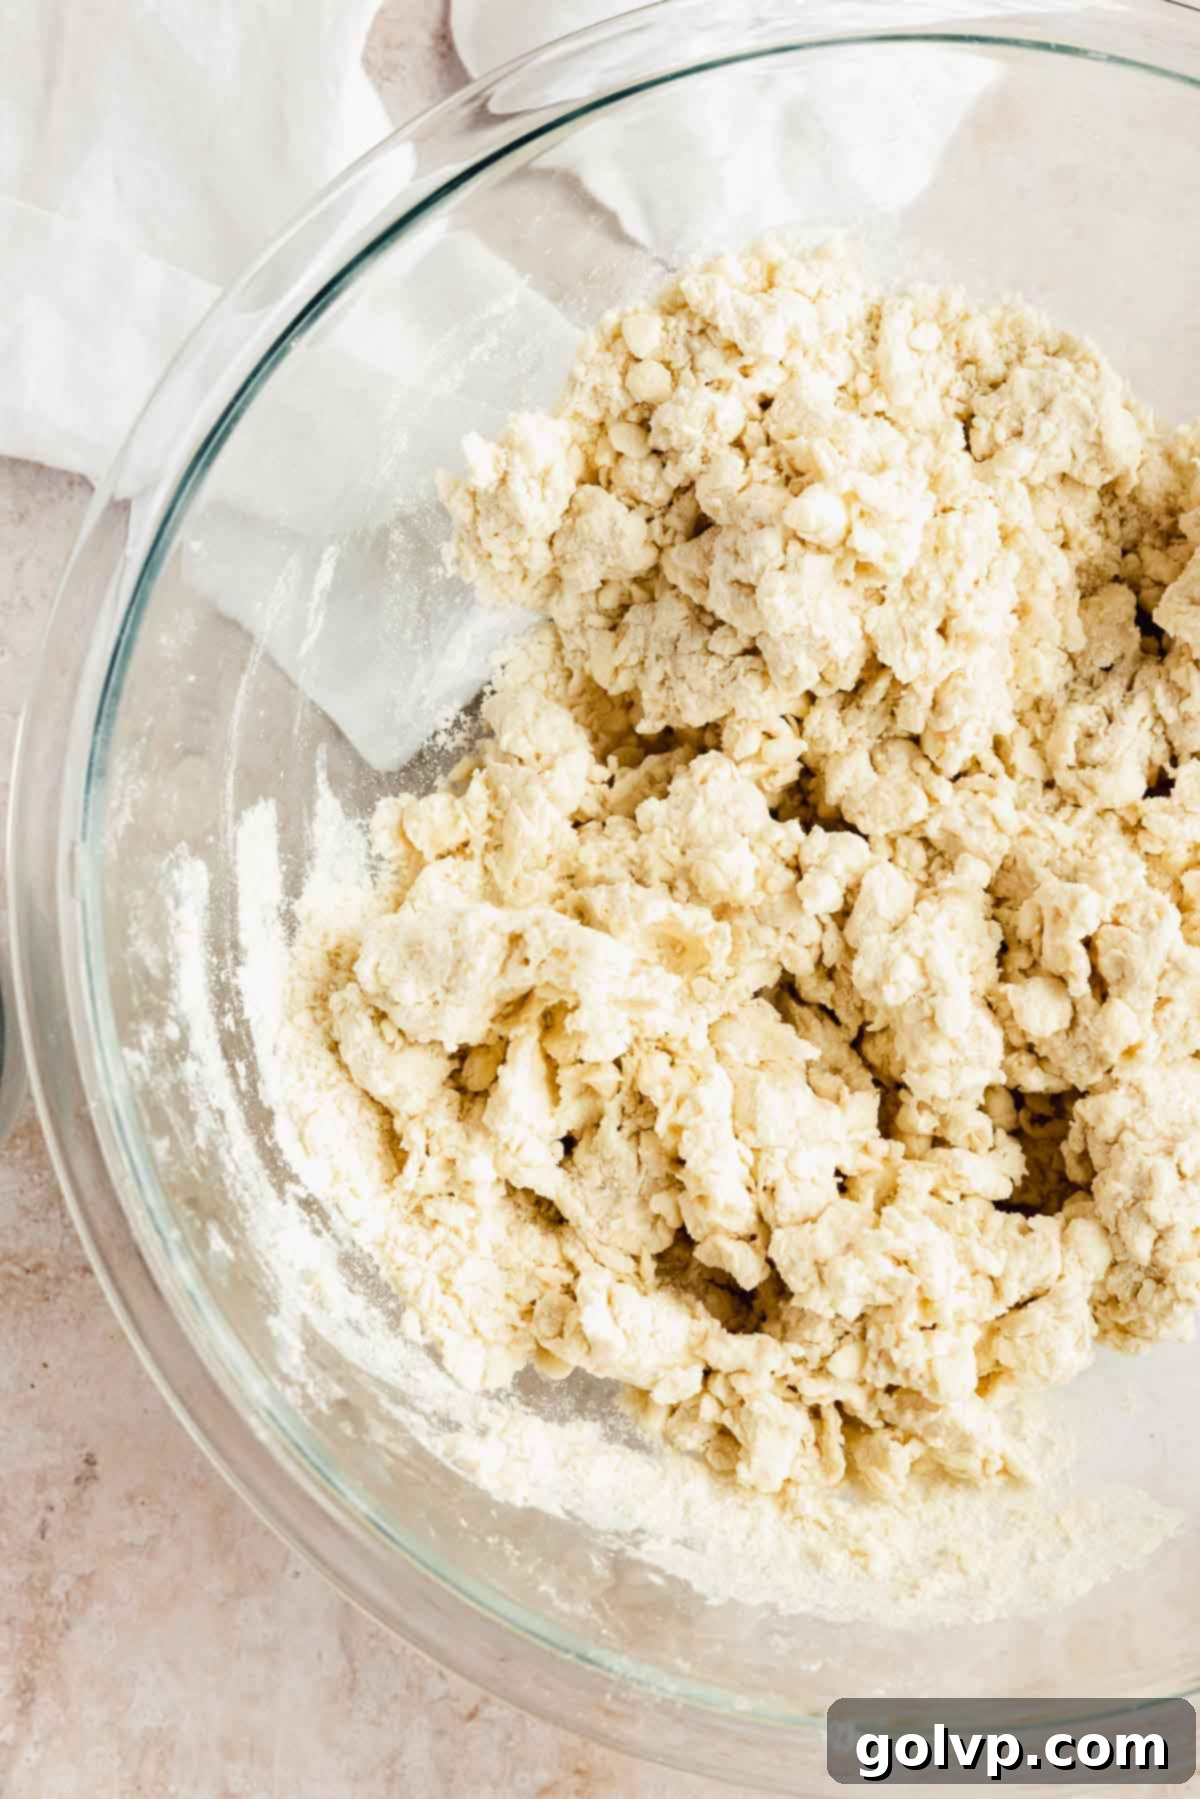
Step 2: Form the Dough. Gradually add the prepared vinegar-ice water mixture to the flour and butter, adding it a couple of tablespoons at a time. Mix gently but thoroughly after each addition. Continue adding water until the mixture just begins to form clumps and holds together when pressed lightly. Be careful not to over-hydrate the dough; adding too much water will lead to a tough, rather than tender, crust. The dough should still look somewhat shaggy and not fully cohesive at this stage.
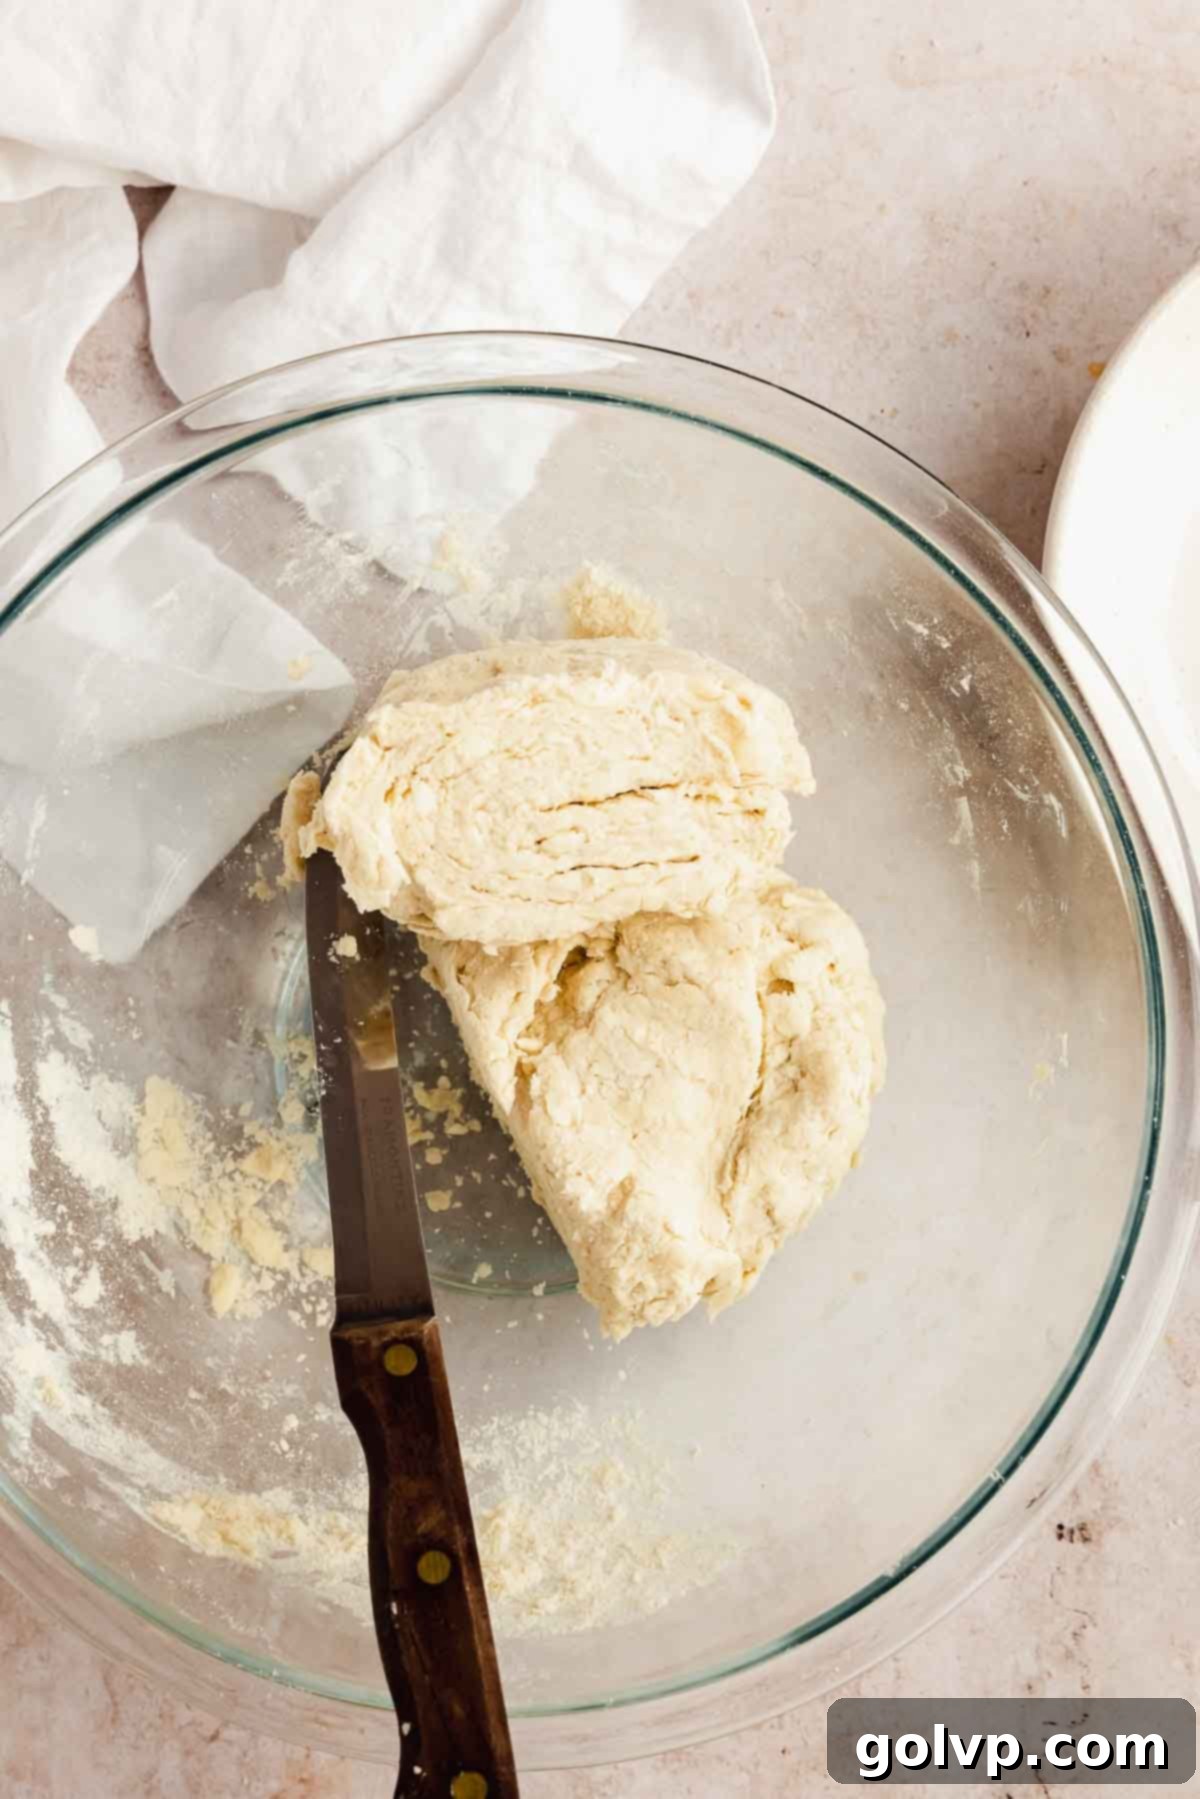
Step 3: Laminate and Chill the Dough. Working quickly to maintain the butter’s cold temperature, gently gather the dough and press it into a rough disk shape. Fold the disk in half, press gently, and then fold it in half again. This simple lamination technique helps create layers within the dough. Cut the folded dough in half and gently press each half into a neat disk. Wrap each disk tightly in plastic wrap and refrigerate for at least 30 minutes, or ideally for 1-2 hours. This chilling period is crucial for allowing the butter to re-solidify and the gluten in the dough to relax, which will make the dough much easier to roll out later and ensure a tender final crust.
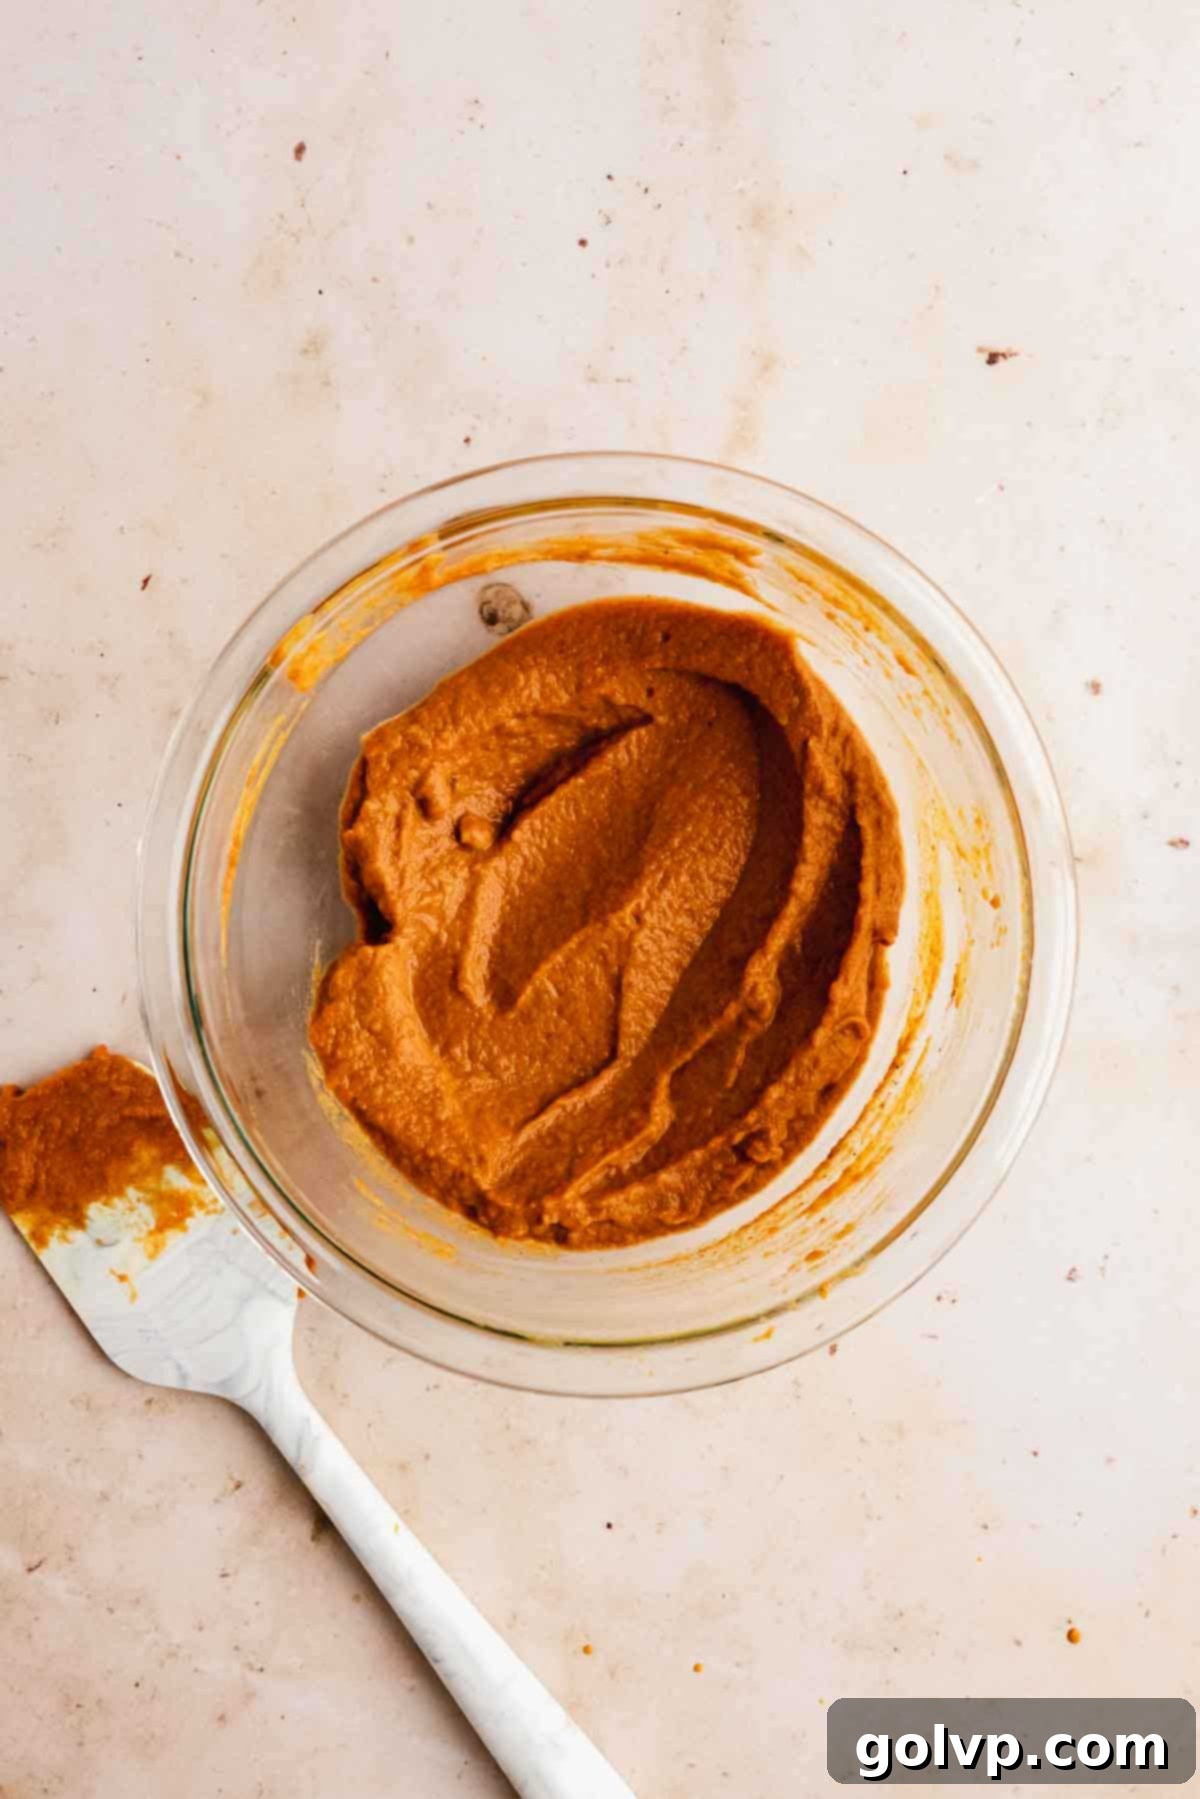
Step 4: Prepare the Pumpkin Filling. While your pie dough is chilling, it’s the perfect time to prepare the luscious pumpkin filling. In a medium-sized bowl, combine the thick pumpkin puree, large egg yolk, packed brown sugar, heavy cream, pumpkin spice, pure vanilla extract, and the small pinch of sea salt. Whisk all the ingredients together until they are thoroughly combined and the mixture is smooth and uniform. Cover the bowl and place it in the refrigerator to chill alongside your dough until you are ready to assemble the hand pies. This chilling allows the flavors to meld beautifully and ensures the filling is firm enough to work with.
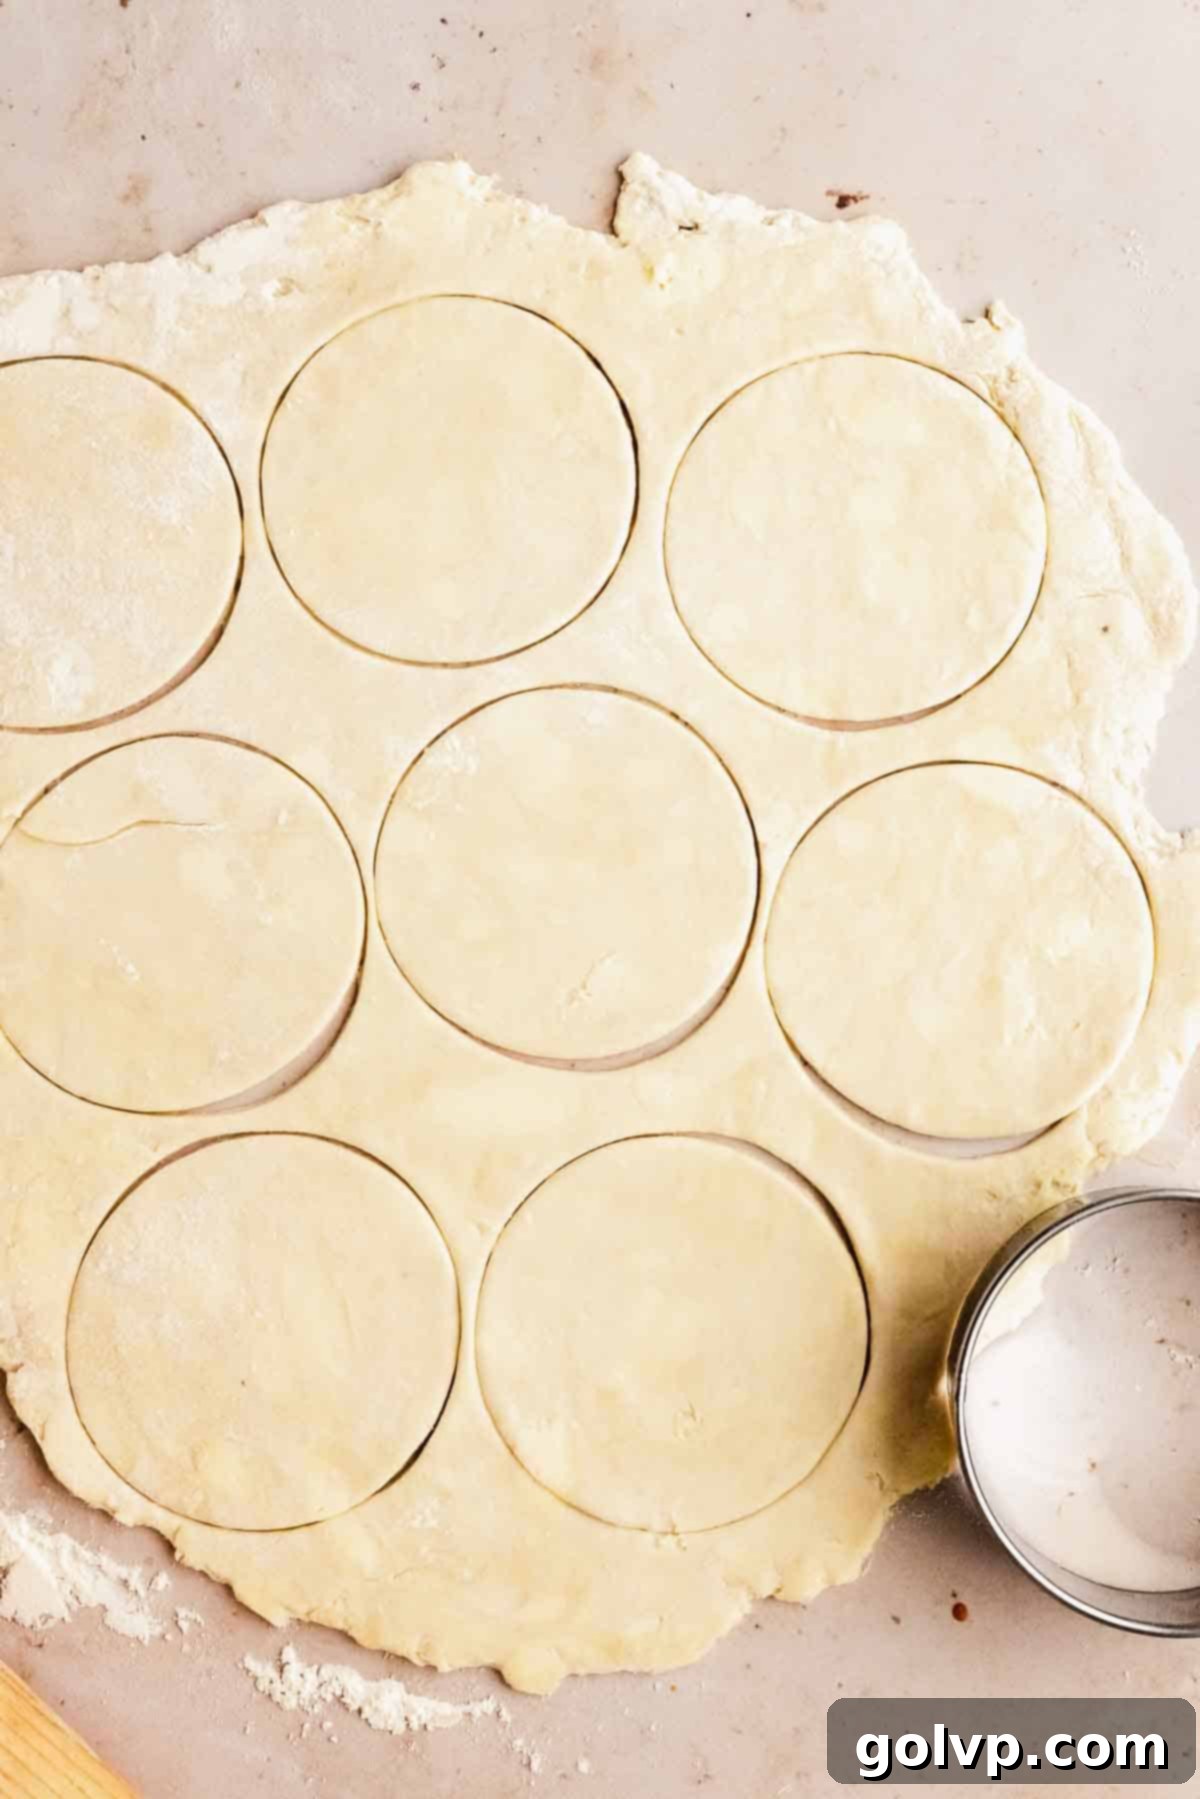
Step 5: Roll and Cut the First Dough Disk. Lightly flour a clean work surface and your rolling pin. Take one disk of chilled pie dough from the refrigerator and roll it out evenly to approximately ⅛-inch thickness. Using a 4-inch round cutter (a clean glass rim works too), cut out ten perfect circles. Gently gather any dough scraps, lightly press them together (without overworking), re-roll, and cut out any additional circles if you can. Place these pastry circles onto a baking sheet lined with parchment paper – this will prevent sticking and simplify transfer.
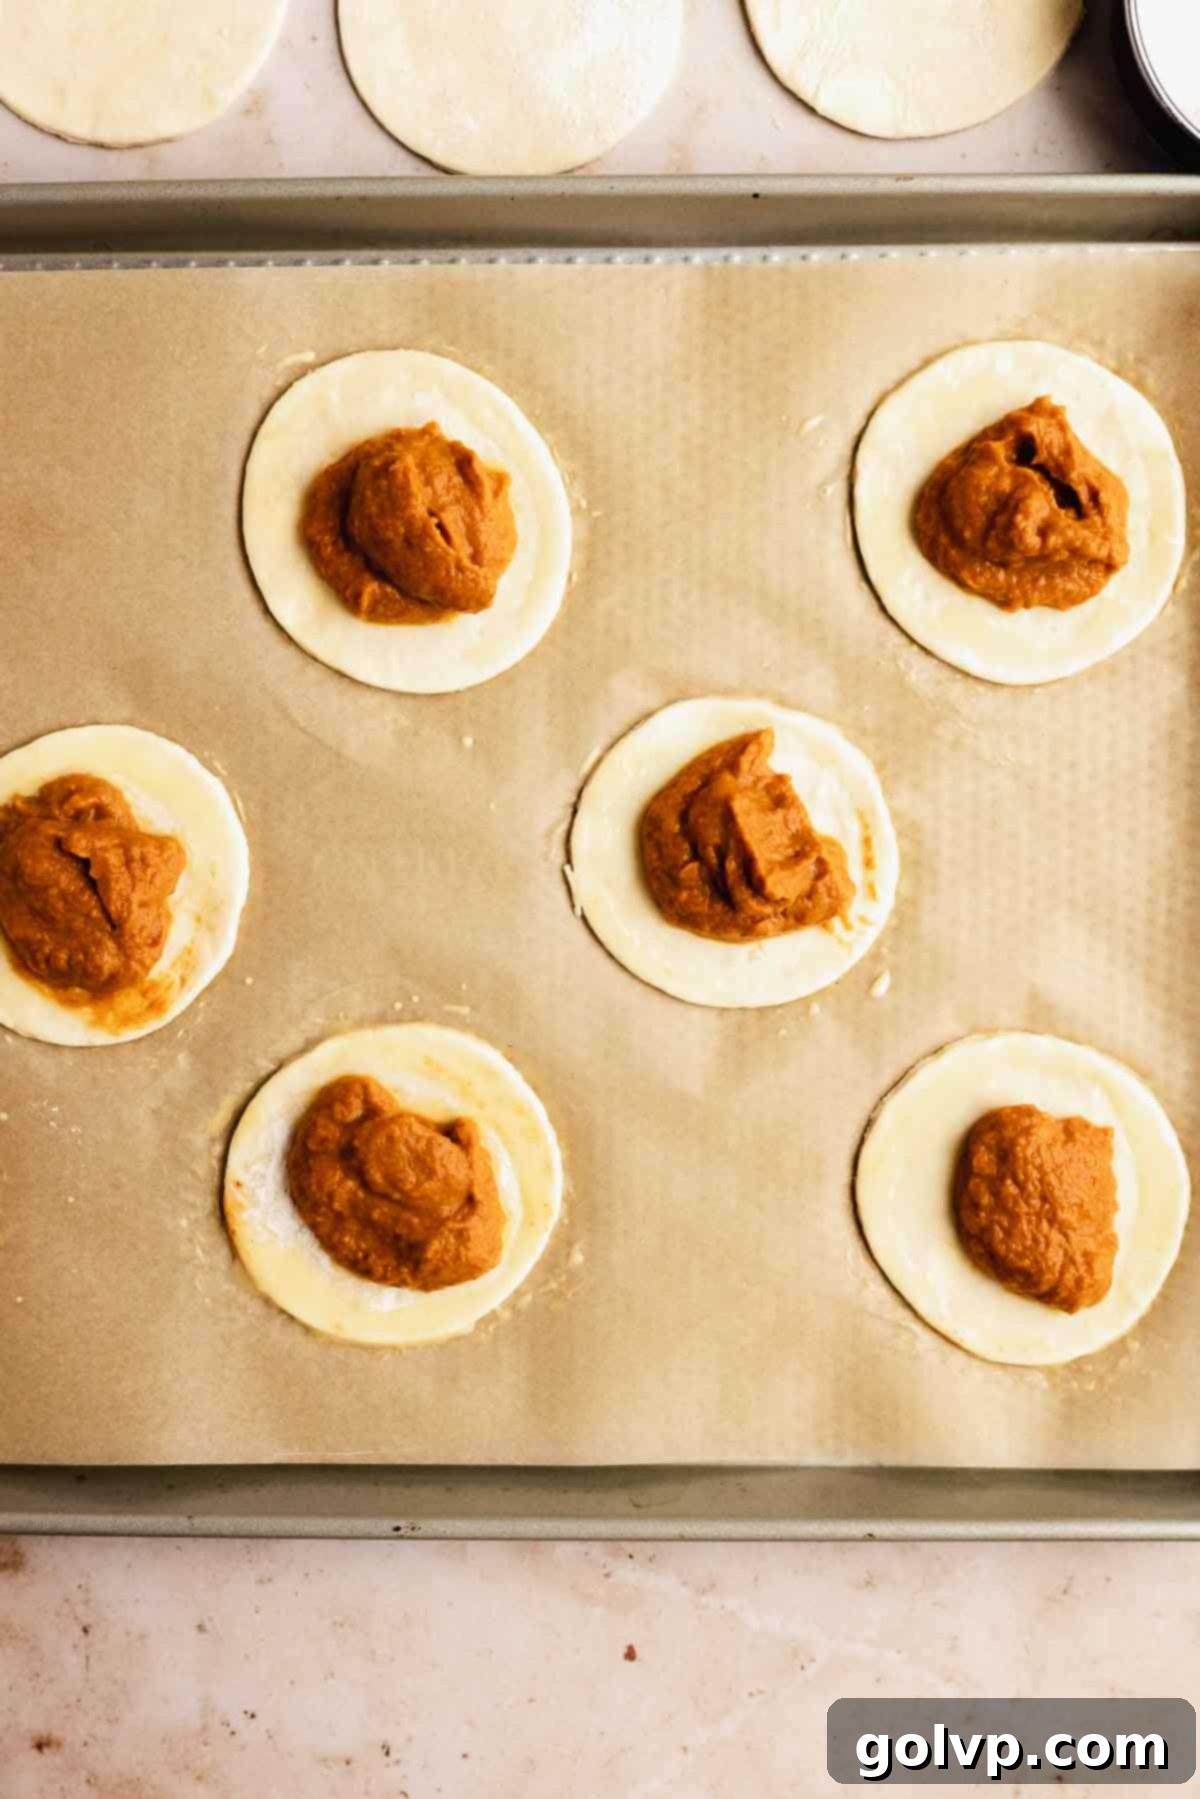
Step 6: Fill the Pie Bases. In a small bowl, whisk together one whole egg with one tablespoon of heavy cream to create your egg wash. This mixture will serve two purposes: to seal the pies and to give them a beautiful golden crust when baked. Place about 2 tablespoons of your chilled pumpkin filling into the center of each dough round, ensuring you leave a clear border around the edges. Lightly brush these exposed edges with the prepared egg wash. This acts as a ‘glue’ to help the top crust adhere securely. Once filled and brushed, return the baking sheet with the pie bases to the refrigerator to keep everything cool while you prepare the top crusts.
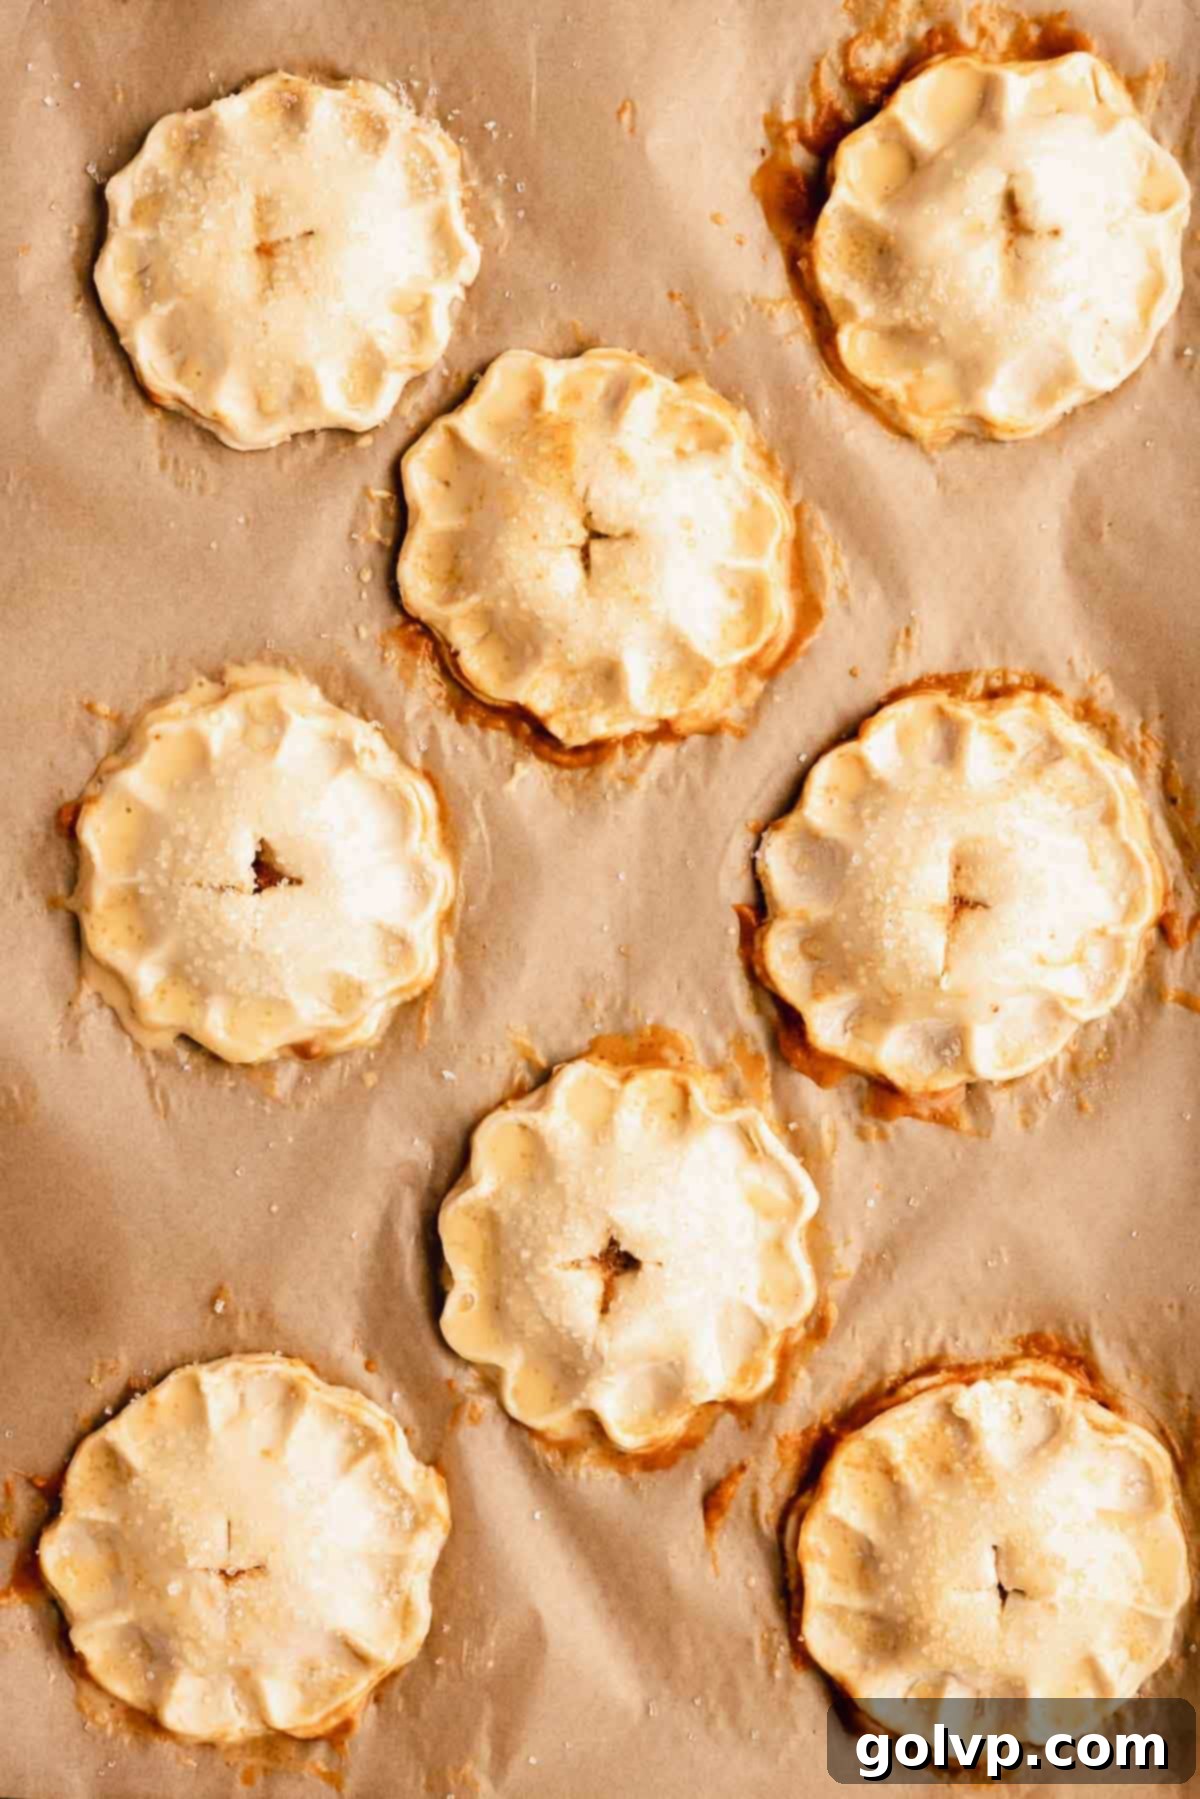
Step 7: Assemble and Chill. Take out the second disk of chilled dough and roll it out to ⅛-inch thickness, just like the first. Cut out ten more 4-inch circles. Carefully place one of these top circles over each filled bottom circle, gently aligning the edges. Lightly press down around the filling to remove any trapped air. Using the tines of a fork or your fingers, firmly crimp the edges of each pie to seal them completely. Don’t worry if a tiny bit of filling peeks out – it adds to the homemade charm! Once all pies are assembled, place the entire baking sheet into the freezer for a final, crucial 10-minute chill. This step helps firm up the butter one last time before baking, guaranteeing maximum flakiness.
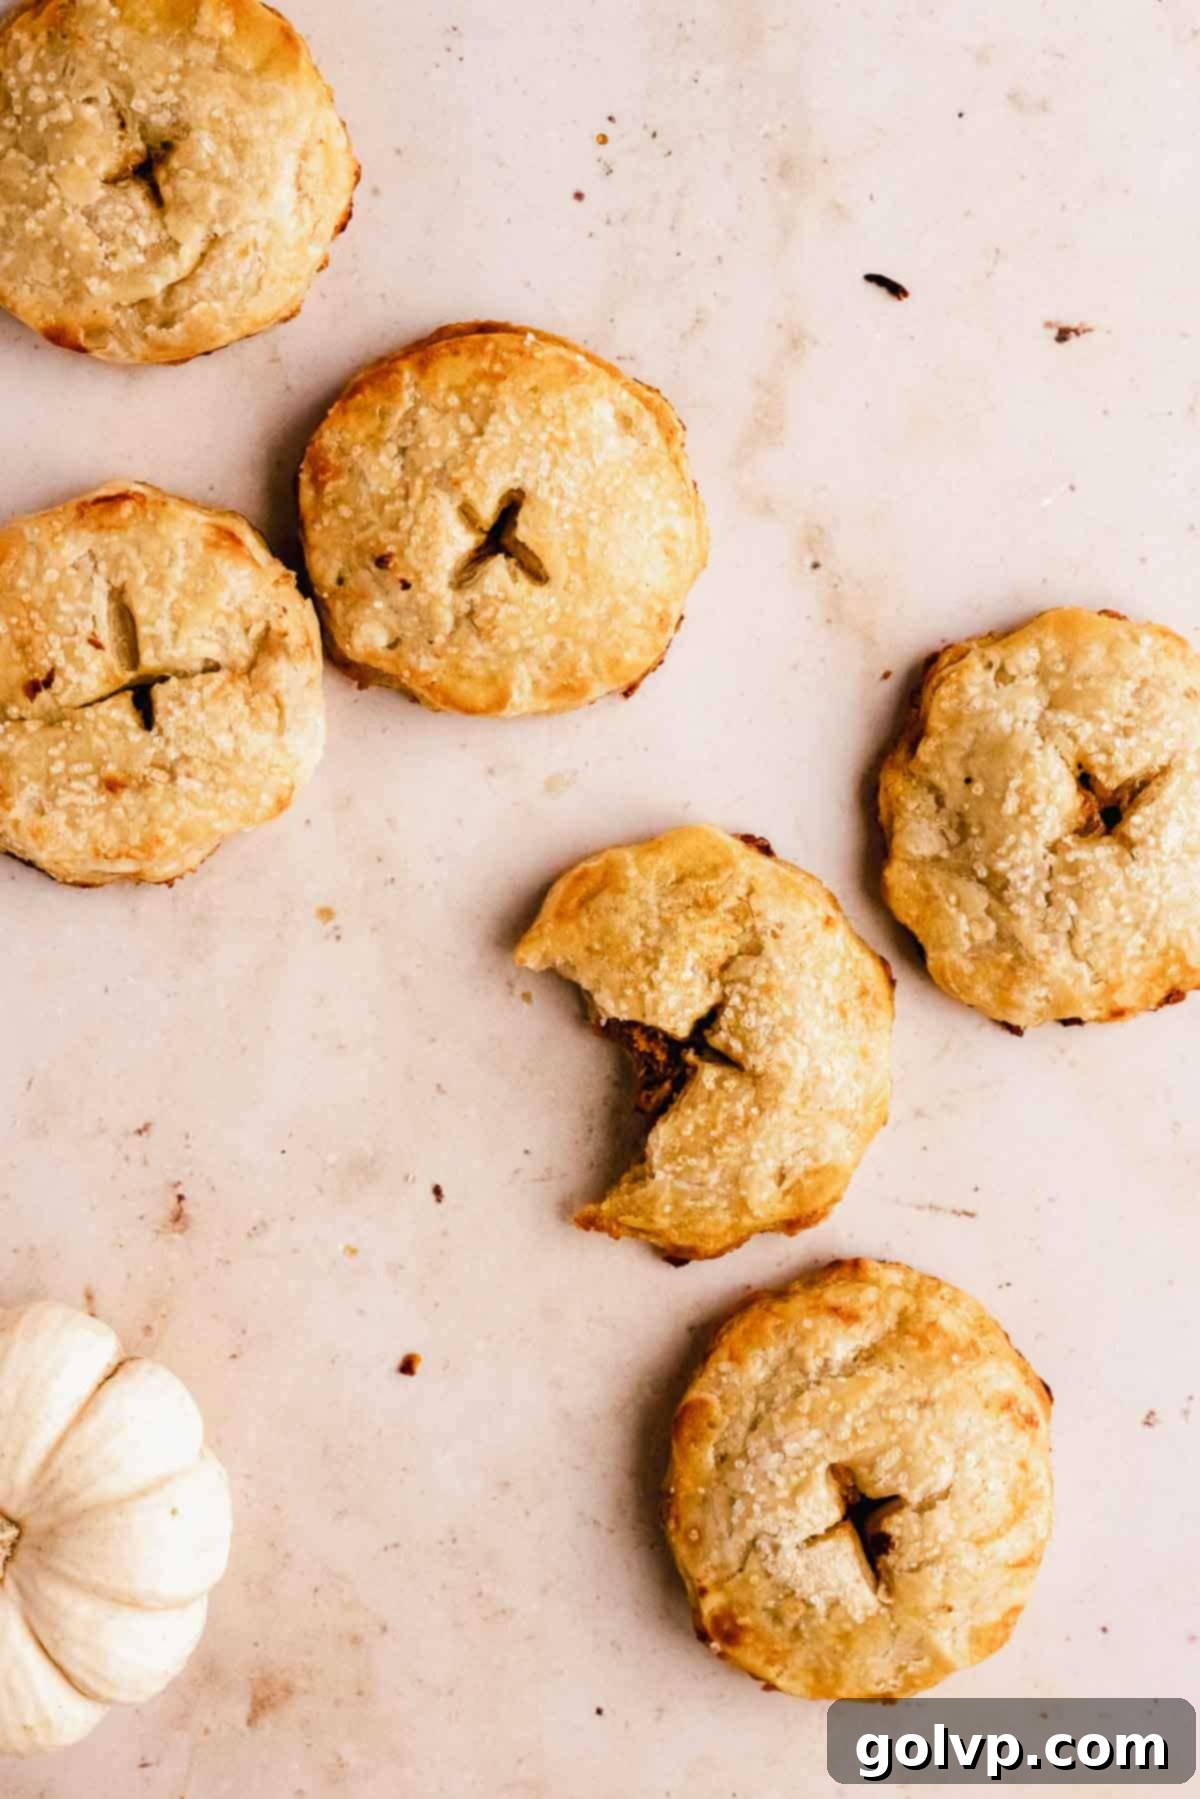
Step 8: Bake to Golden Perfection. While the pies are undergoing their final chill, preheat your oven to 375°F (190°C). Once the oven is ready and the pies are perfectly chilled, remove them from the freezer. Brush the tops of each pie generously with the remaining egg wash and sprinkle a tablespoon of coarse sugar over them for that beautiful, crunchy bakery-style finish. Using a sharp paring knife, carefully cut a small “x” or a few short slits into the top of each pie. These vents allow steam to escape during baking, preventing the pies from puffing up unevenly or bursting and ensuring a perfectly crisp crust. Bake for 20-22 minutes, or until the pastry is a gorgeous golden brown and crisp all over. Allow the pies to cool on the baking tray for a few minutes before transferring them to a wire rack to cool completely. These hand pies are delicious served warm or at room temperature!
✔️ Expert Tips for Unforgettable Pumpkin Hand Pies
Achieving truly stellar pumpkin hand pies is simple with these insider tips:
- Ensure Butter Stays Chilled: This is the golden rule for a flaky crust. Cold butter is paramount because the water within it turns to steam during baking, creating air pockets that separate the dough layers. If butter melts too early, it incorporates into the flour, resulting in a dense, tough crust. Freezing cubed butter and using ice water are essential steps.
- Work the Dough Swiftly: Pie dough is sensitive to warmth. Excessive handling or slow work will cause the butter to soften and melt, and promote gluten development, leading to a tough, less tender crust. Be quick and efficient when mixing, pressing, and rolling. If the dough ever feels warm or sticky, immediately return it to the fridge for 10-15 minutes to re-chill.
- Briefly Freeze Pies Before Baking: This final chilling step, even just 10 minutes in the freezer, is a game-changer. It ensures the butter in the assembled pies is completely solidified. When these super-cold pies enter a hot oven, the sudden temperature shock causes the butter to quickly convert into steam, creating an immediate puff and setting those beautiful, crisp, and flaky layers. This also helps the pies maintain their shape.
- Avoid Overworking the Dough: Overmixing develops gluten excessively, which can make your crust chewy and tough rather than tender. Mix only until the ingredients are just combined and the dough barely comes together. You should still see distinct, pea-sized pieces of butter throughout the dough – these are your guarantee of flakiness!
- Properly Vent Your Pies: The small “x” cuts or slits on top of each hand pie are not merely decorative. They are critical steam vents. Without them, the steam generated by the moisture in the filling and the butter in the crust would build up, potentially causing the pies to burst or resulting in a soggy bottom. Proper venting ensures a crisp crust and a stable, beautifully baked pie.
- Bake Until Truly Golden: Don’t be shy about letting your hand pies bake until they achieve a deep, rich golden-brown color. This vibrant hue indicates that the crust is fully cooked through, crisp, and has developed its maximum flavor. A pale crust is often an undercooked crust, lacking in both texture and taste.
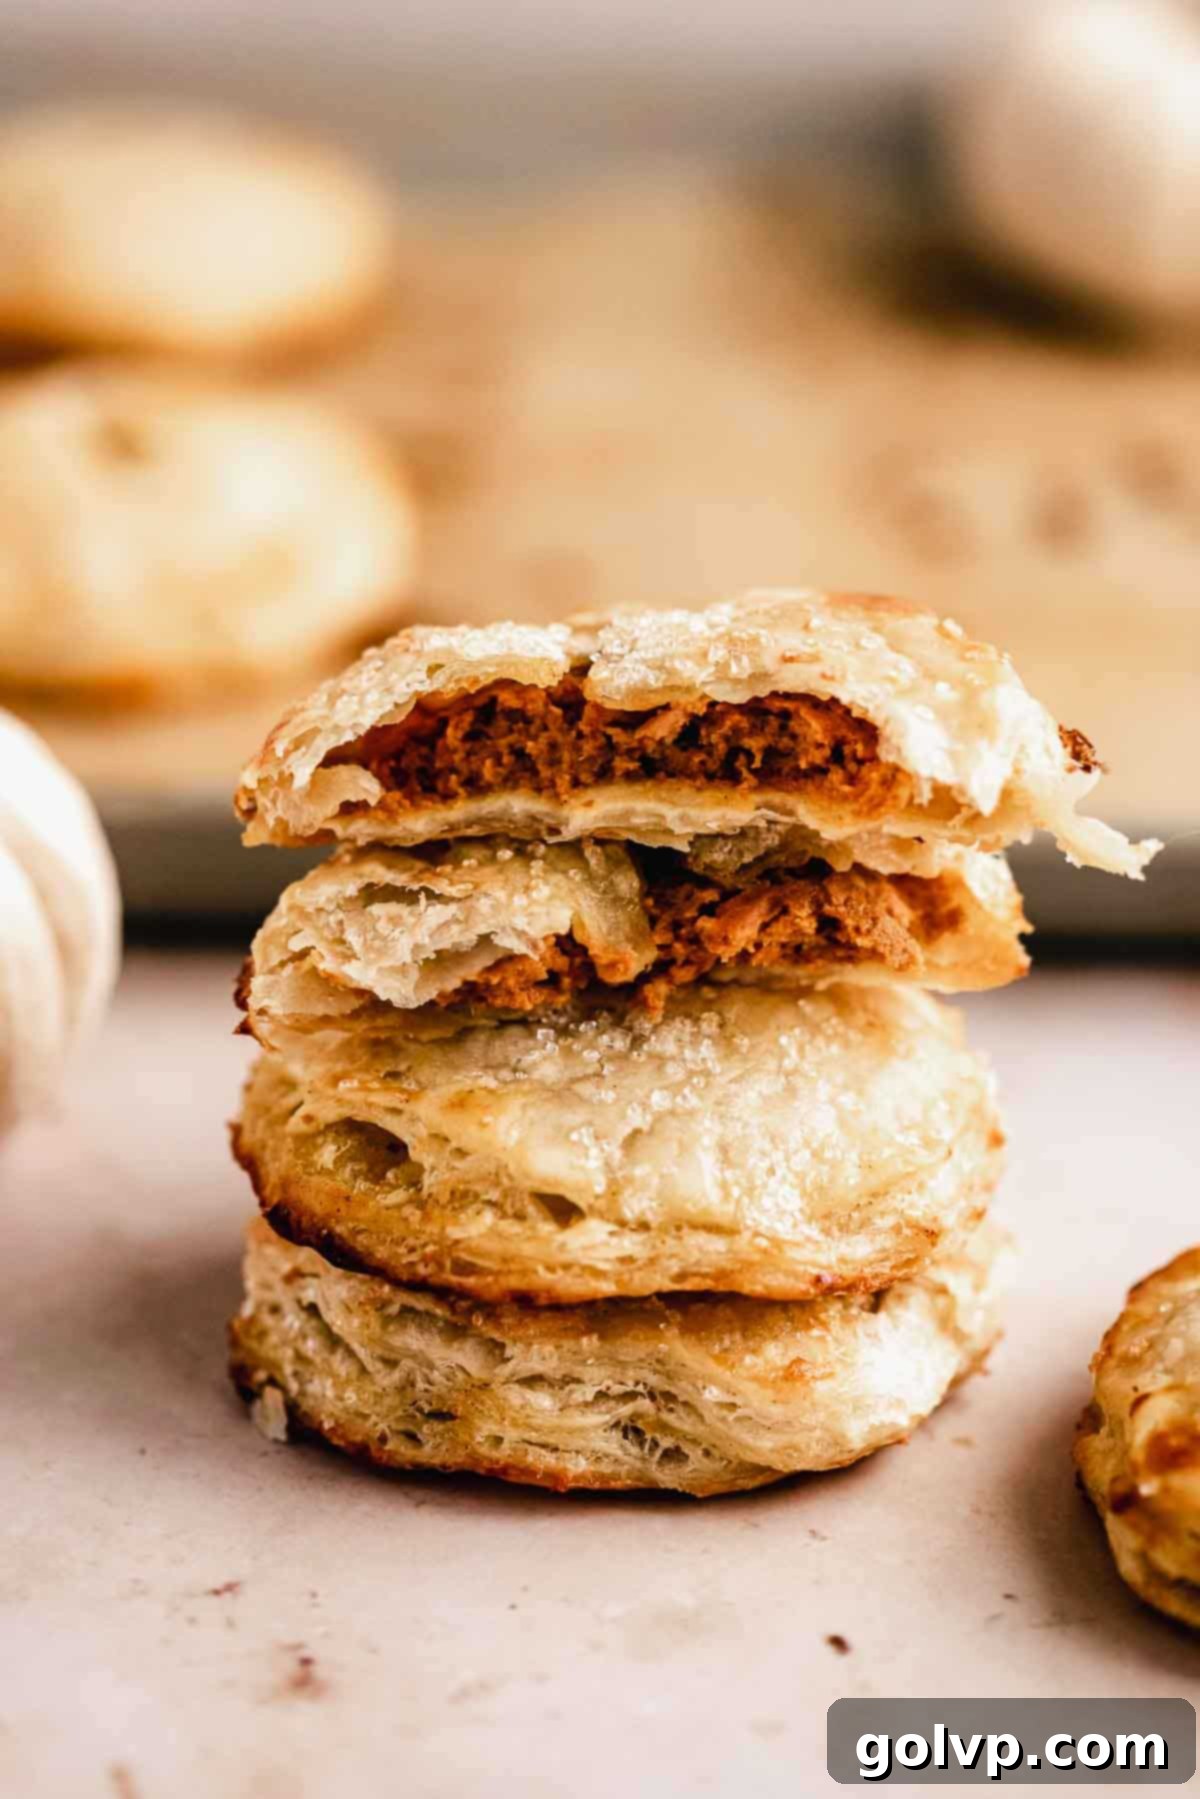
🥄 Make Ahead and Storage for Ultimate Convenience
These delightful pumpkin hand pies are incredibly versatile, offering excellent make-ahead and storage options that seamlessly fit into your busy schedule, ensuring you always have a comforting treat at hand.
While hand pies are undoubtedly at their peak of flavor and flakiness when served warm, directly from the oven on the day they are baked, any leftovers can be stored and enjoyed with ease. Once completely cooled, place your hand pies in an airtight container and refrigerate them for up to 3 days. To bring them back to their freshly baked glory, simply reheat them gently in a preheated oven (around 300°F/150°C) for 10-15 minutes until they are warmed through and the crust regains its desired crispness.
Make Ahead Options: You can prepare the pie crust dough a full day in advance. After forming the dough disks in Step 3, wrap them tightly in plastic wrap and store them in the fridge overnight. The following day, you can then proceed with making the filling, assembling, and baking. For even greater convenience, you can assemble the entire pies (up to Step 7) and keep them refrigerated for a few hours before baking. Always ensure both the raw dough and assembled pies are properly refrigerated to maintain optimal coldness.
Freezing Unbaked Pies: For the ultimate make-ahead solution, these hand pies freeze beautifully unbaked! Simply assemble the pies completely through Step 7. Instead of baking, arrange them in a single layer on a parchment-lined baking sheet and freeze until they are completely solid (this prevents them from sticking together). Once frozen solid, transfer the individual pies to an airtight, freezer-safe container or a heavy-duty freezer bag. They can be stored in the freezer for up to 2 months. When you’re ready to enjoy, there’s no need to thaw them! Bake the pies directly from frozen, adding an extra 5-10 minutes to the total bake time, until they are golden brown and the filling is bubbly. This method is perfect for unexpected guests, holiday entertaining, or simply having a comforting treat readily available.
✔️ Mastering the Art of a Flaky & Tender Pie Crust Every Time
The secret to an outstanding pumpkin hand pie lies in its foundation: a perfectly flaky and tender crust. Achieving this coveted texture isn’t an elusive baking mystery; it’s a science that’s easy to master once you understand a few key principles. Here’s a deeper dive into how our recipe ensures you get that phenomenal crust every single time:
The Pivotal Role of Super Cold Butter: The magic behind truly flaky layers originates from keeping the butter as cold as possible throughout the entire dough preparation process. When you incorporate tiny, firm cubes of cold butter into the flour, they remain distinct and do not fully blend. As these butter pieces encounter the high heat of the oven, the water content within them rapidly turns into steam. This steam then forces apart the delicate layers of gluten that have formed in the dough, creating those characteristic, airy, and incredibly flaky pockets that define an exceptional pie crust. If the butter is too warm and melts into the flour prematurely, you’ll end up with a dense, shortbread-like crust rather than a light, flaky one.
Embrace Pea-Sized (and Larger!) Butter Chunks: While you need to integrate the butter into the flour, it’s crucial not to overmix it. You should actively aim to see visible pieces of butter, roughly pea-sized, scattered throughout your dough. Don’t be afraid of even some slightly larger, ¼-inch chunks. These more substantial pieces are especially effective at creating larger, more dramatic flakes in the baked crust. Resist the urge to continue blending until the mixture looks uniformly smooth; a bit of lumpiness is a promise of future flakiness!
Precision with Liquid – The Danger of Over-Hydration: Adding too much liquid is a common misstep that can quickly turn a potentially flaky crust into a tough and unappetizing one. Water is necessary to bring the dough together, but excessive water encourages the development of too much gluten, making the dough overly elastic and chewy. Always add the ice-cold vinegar water gradually, a tablespoon or two at a time, mixing just enough until the dough barely clumps together when squeezed. It is always better to have a slightly crumbly dough that requires a little gentle pressing to form a disk than a sticky, overly wet dough.
The Benefits of Our Folding Technique (Rough Lamination): Our recipe incorporates a simple yet effective folding technique – pressing the dough into a disk, folding it in half, pressing, and folding again – before its initial chill. This basic form of lamination helps to create multiple, distinct layers of butter and dough, mimicking the process of making a rough puff pastry. These deliberate layers are precisely what will puff up and become extra crispy and tender in the oven, contributing significantly to the overall flaky texture and structural integrity of your hand pies.
The Critical Pre-Baking Chill: Just as keeping ingredients cold during preparation is vital, chilling the assembled pumpkin hand pies (especially for 10 minutes in the freezer) before they enter a hot oven is absolutely essential for perfect results. This step ensures the butter within the pies is completely solidified. When these deeply chilled pies are introduced to the high heat of the oven, the butter undergoes a rapid thermal shock, creating an immediate and vigorous burst of steam that lifts and separates the dough layers. This effect is the key to achieving those beautifully crisp, airy, and exceptionally flaky results. Skipping this final chill can lead to butter melting too soon, resulting in a flatter, less impressive crust.
📖 Recipe Frequently Asked Questions
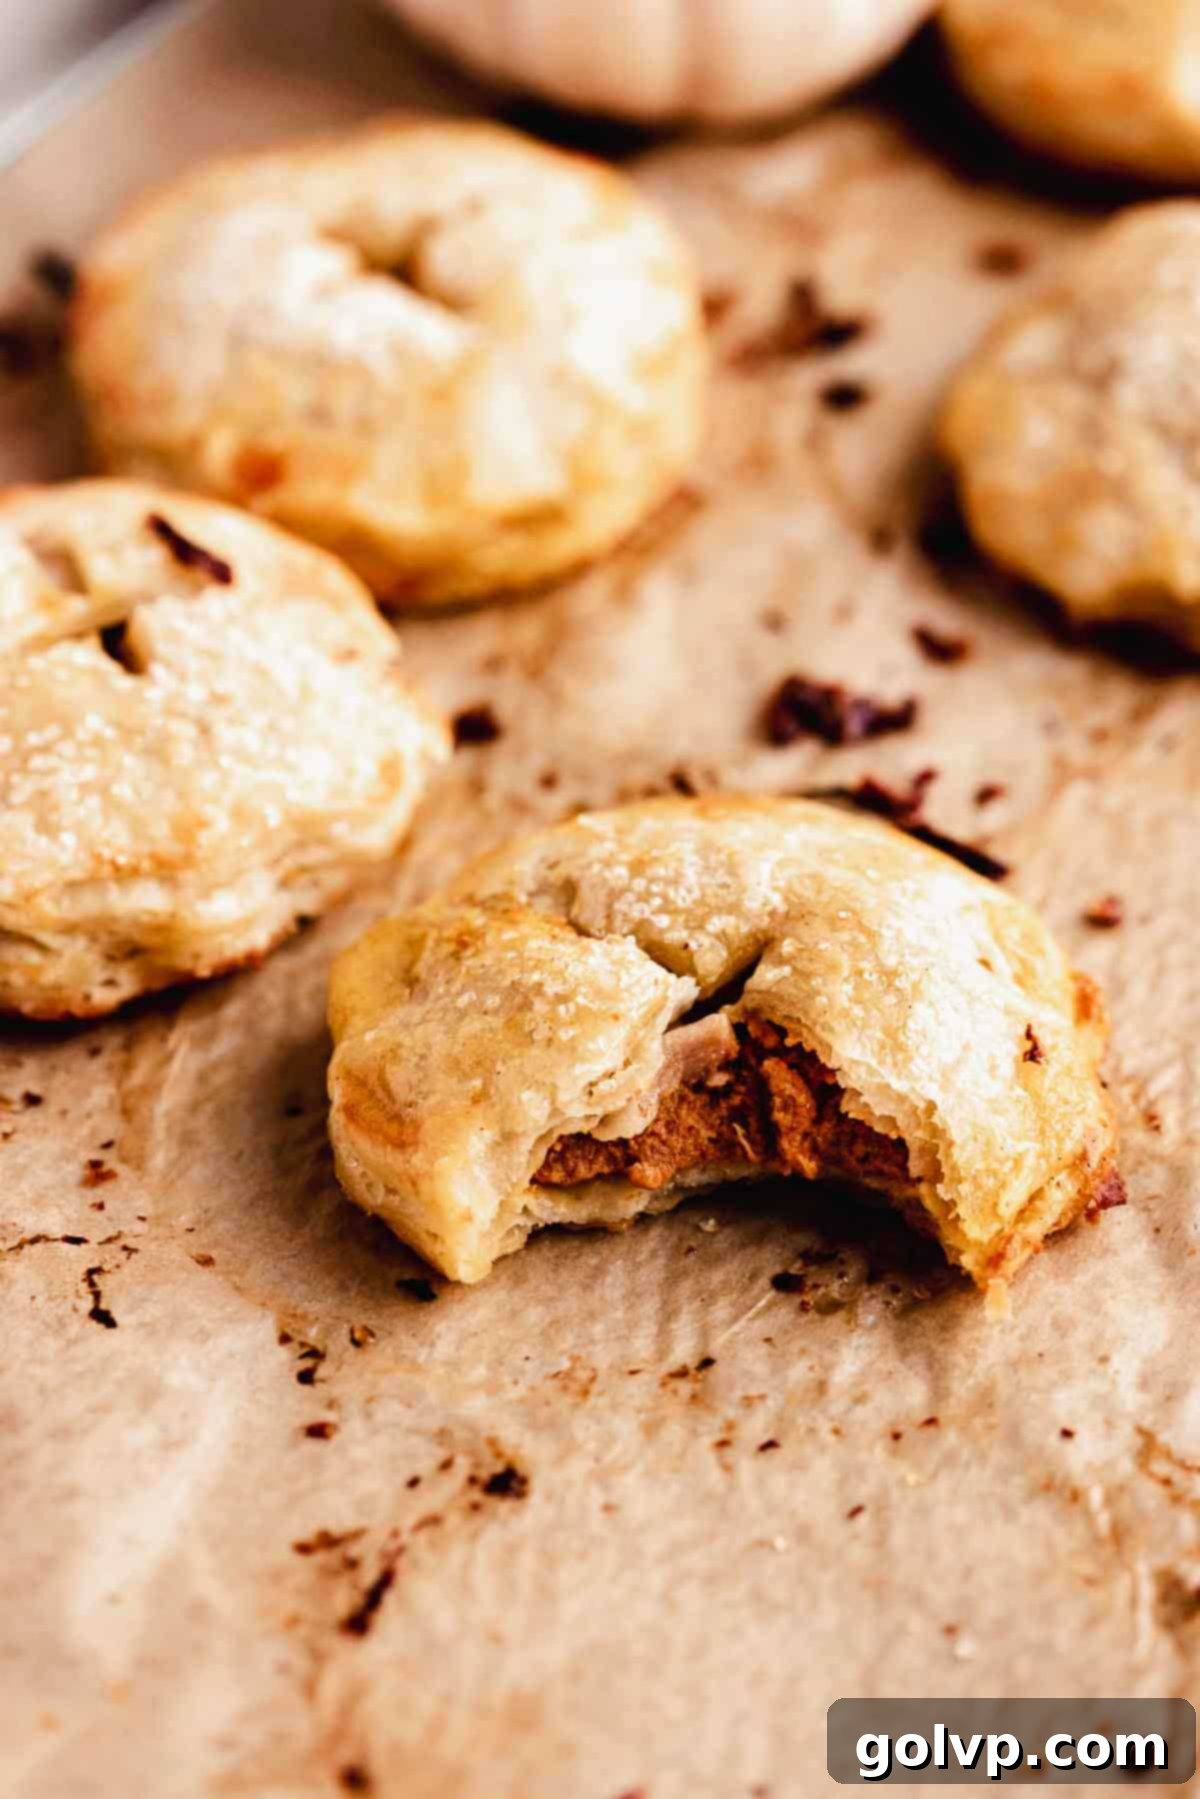
Yes, absolutely! Do not be tempted to skip any chilling steps in this recipe. Each chilling period serves a crucial and distinct purpose. The first chill after initially mixing and folding the dough helps to relax the gluten, preventing a tough crust, and re-solidifies the butter, making the dough much easier to roll out evenly without tearing. The second chill, specifically freezing the assembled pies for 10 minutes before baking, ensures the pies enter the oven as cold as possible. This “thermal shock” effect causes the butter to rapidly release steam, creating an immediate puff and setting those beautiful, crisp, and flaky layers. Chilling throughout the entire process is key to maintaining optimal butter temperature, which is the cornerstone of truly flaky pastry.
Freezing your butter, cut into small cubes, for 10-15 minutes before incorporating it into the flour is a crucial technique for achieving maximum flakiness. The primary goal is for the butter to remain solid and distinct within the dough until it hits the hot oven. If you use merely refrigerated butter, it will soften much faster as you work with the dough, especially if your kitchen is warm or if you take more time. Frozen butter provides a buffer, ensuring it stays in those firm, separate pieces that are essential for creating the steam pockets that yield incredibly flaky layers. If the butter melts into the flour too early, your crust will be dense and less tender.
You can certainly use homemade pumpkin puree, and it can add a wonderful fresh dimension of flavor to your hand pies! However, many bakers, including myself, often opt for high-quality store-bought canned pumpkin puree (make sure it’s 100% pure pumpkin, not pie filling) for its consistent texture and sheer convenience. The most critical factor for both homemade and canned puree is its consistency: it needs to be very thick, similar to the texture of Greek yogurt. If your homemade puree (or occasionally even certain canned brands) appears too thin or watery, take the necessary step to gently strain it through a cheesecloth for an hour or two, or reduce it in a saucepan over medium-low heat, stirring frequently, until it achieves that thick consistency. Excess moisture in the filling is a primary cause of soggy pie crusts.
We strongly advise against substituting milk or lighter cream for heavy cream in both the filling and the egg wash. In the filling, heavy cream provides the essential fat content for a rich, luxurious, and velvety smooth texture, and it helps the filling set properly. Using a lighter cream or milk will result in a thinner, more watery filling that is prone to leaking out of the pies and could lead to a soggy crust. For the egg wash, heavy cream contributes significantly to achieving a deeper, more appetizing golden-brown color during baking and helps create that desirable, crispier crust texture. The higher fat content in heavy cream simply yields a superior result.
Preventing a soggy bottom is a common concern in pie baking, but it’s entirely achievable with a few careful steps. Firstly, and most importantly, ensure your pumpkin puree is as thick as possible, like Greek yogurt (as discussed in the FAQ above). Excess moisture in the filling is the primary culprit. Secondly, make sure your dough is rolled to an even ⅛-inch thickness and is adequately chilled before baking. A very cold crust hitting a hot oven helps the butter set quickly, forming a crucial barrier against moisture. Lastly, ensure your oven is fully preheated to the correct temperature, and consider baking the pies on the lowest rack for the initial portion of the bake to ensure the bottom crust receives ample direct heat, promoting a crisp finish.
Absolutely! The beauty and versatility of this flaky all-butter crust recipe mean it can be adapted to a variety of delicious fillings. While the pumpkin filling is undeniably perfect for autumn, you can easily substitute it with other thickened fruit pie fillings such as apple, cherry, blueberry, or mixed berry. The key is to ensure that whatever fruit filling you choose is not too runny, as excess liquid can compromise the flakiness and structural integrity of the crust. You might need to adjust the amount of filling slightly depending on the natural moisture content of the fruit, always aiming for a firm, scoopable consistency that won’t seep through the pastry.
🍁 More Autumn-Inspired Recipes You’ll Love
If these pumpkin hand pies have sparked your craving for more delightful autumn and fall-themed treats, be sure to explore my curated collection of the best pumpkin desserts for a wide variety of easy and inspiring ideas. From comforting cookies to decadent bars, you’ll find something wonderful for every seasonal celebration!
- Pumpkin Cheesecake Cookies
- Mini Blueberry Pies with Flaky Crust
- Salted Caramel Apple Pie Bars
- Blueberry Pop Tarts
Did you create these delightful hand pies? We would absolutely love for you to rate this recipe and share your thoughts in the comments below! Don’t forget to share your delicious creation on Instagram and tag @flouringkitchen. Follow us on Pinterestto save and discover even more inspiring recipe ideas and baking tips!
📖 Recipe Card: Flaky Pumpkin Hand Pies
Flaky Pumpkin Hand Pies
Mary
Pin Recipe
Shop Ingredients
Equipment
-
Baking sheet
-
Parchment paper
-
Rolling pin
-
4-inch round cutter
-
Pastry cutter or food processor (optional)
Ingredients
For the Flaky Crust
- 1 cup (226g) unsalted butter cold and cubed (freeze for 10-15 minutes)
- 1 tablespoon vinegar apple cider, white, or lemon juice
- 1 cup ice water (plus more if needed)
- 2 ½ cups (300g) all purpose flour
- ¼ teaspoon sea salt
For the Creamy Pumpkin Filling
- 1 cup (240g) pumpkin puree thick (see notes)
- 1 large egg yolk
- 2 tablespoons brown sugar packed
- 1 tablespoon heavy cream
- 1 teaspoon pumpkin spice (or ground cinnamon)
- ½ teaspoon pure vanilla extract
- ⅛ teaspoon sea salt
For Assembly & Topping
- 1 large egg
- 1 tablespoon heavy cream
- 1 tablespoon coarse sugar (for sprinkling)
Shop Ingredients on Jupiter
Instructions
Preparing the Flaky Crust
-
Ten minutes before starting the crust, cut the cold unsalted butter into small ¼-inch cubes. Spread them in a single layer on a plate and place in the freezer. In a separate small bowl, combine the vinegar with the ice water and stir gently.1 cup unsalted butter, 1 tablespoon vinegar, 1 cup ice water
-
In a large bowl, whisk together the all-purpose flour and sea salt until well combined. Add the frozen butter cubes to the flour mixture. Using a pastry cutter, fork, or a food processor, cut the butter into the flour until the mixture resembles coarse breadcrumbs with distinct pea-sized (and some larger) pieces of butter remaining.2 ½ cup all purpose flour,
