Decadent Triple Chocolate Cake with Velvety Whipped Ganache and Drip
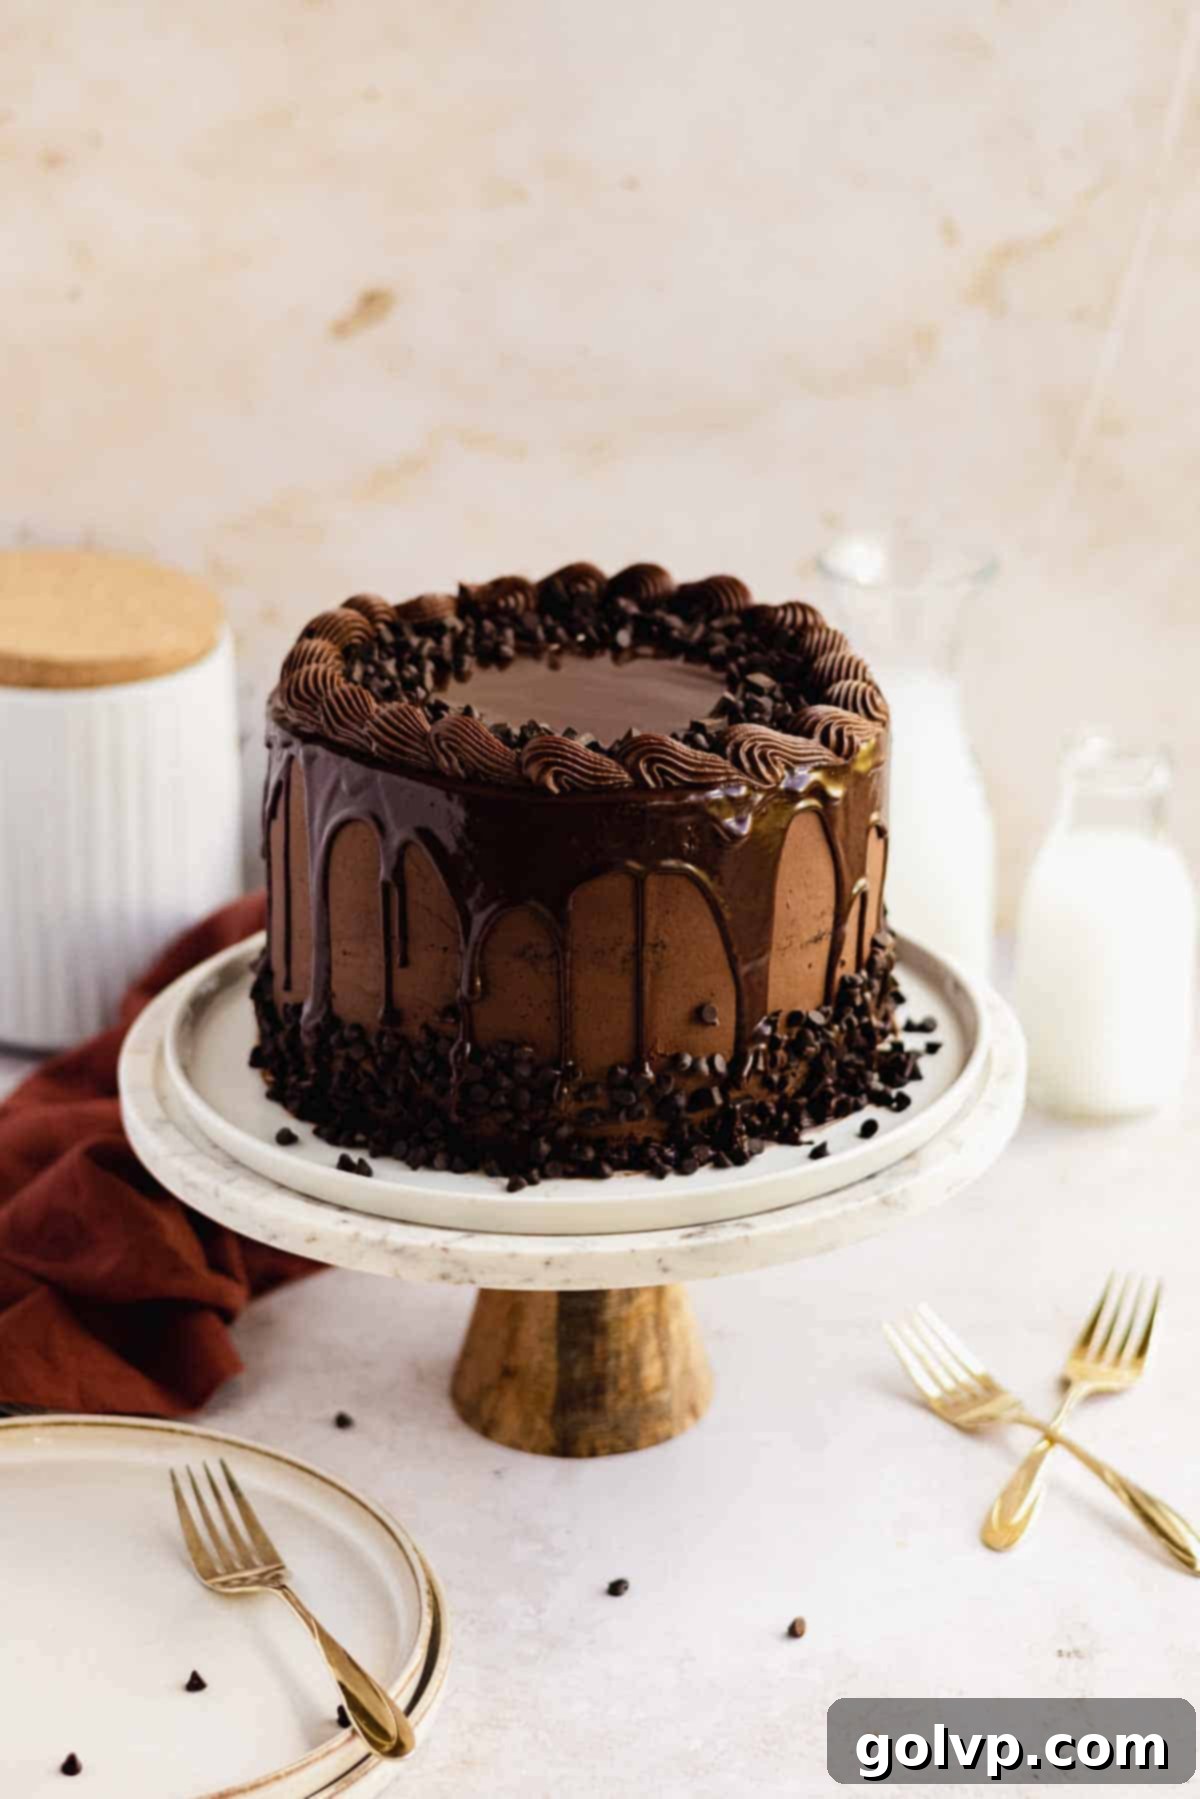
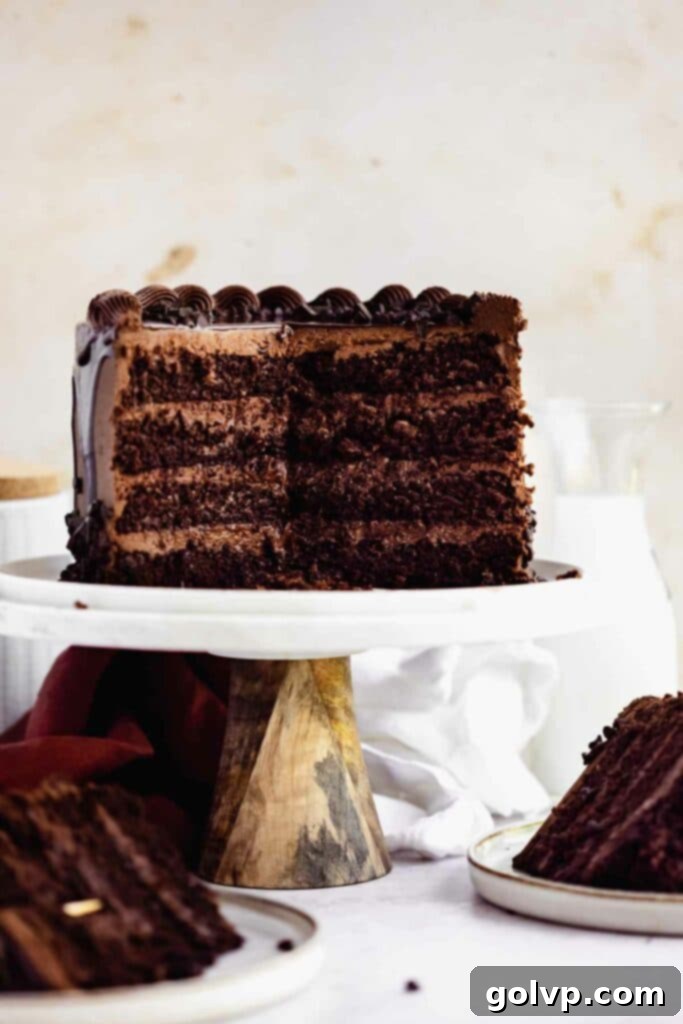
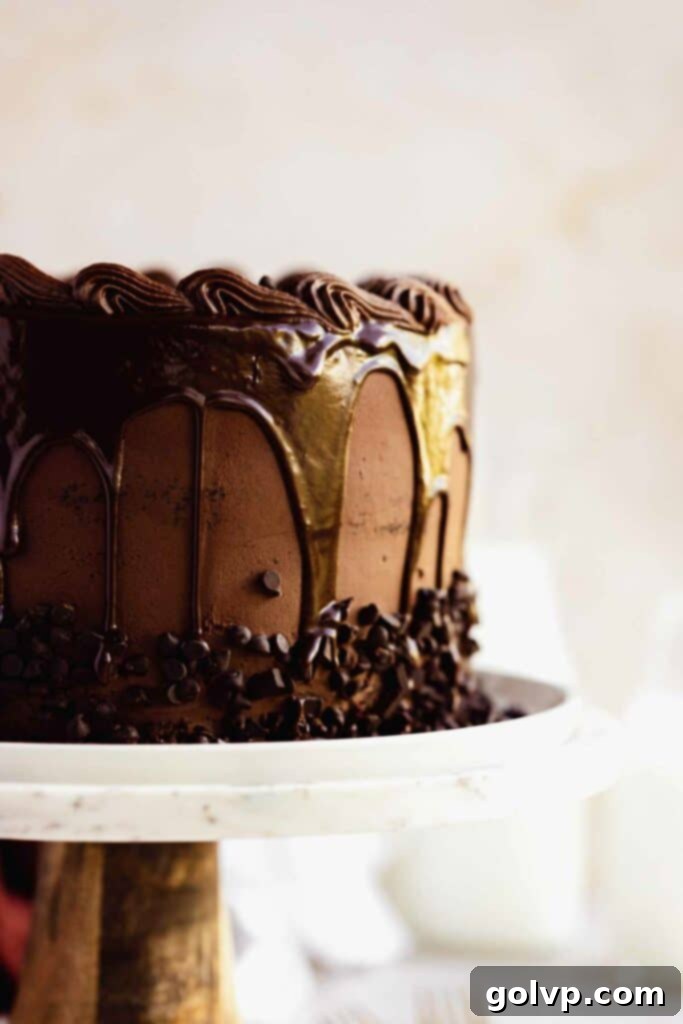
Prepare to impress with this ultimate triple chocolate cake recipe – a true masterpiece of texture and flavor! This stunning dessert features intensely rich, incredibly moist, and wonderfully fluffy chocolate cake layers, generously filled with a creamy, airy whipped chocolate ganache, and elegantly crowned with a glossy chocolate drip. Forget dry, crumbly cakes or overly sweet buttercreams; this recipe is designed for perfection, delivering a cake that is both deeply satisfying and remarkably light. Best of all, the cake layers are a simple, one-bowl affair, ensuring consistently moist and tender results every single time. The whipped ganache, an indulgent yet surprisingly easy alternative to traditional frosting, is less sweet, allowing the pure chocolate flavor to shine through, creating a truly decadent experience.
Jump to Recipe
Unveiling the Secrets of a Perfect Chocolate Cake
Creating a show-stopping chocolate cake might seem daunting, but this recipe breaks it down into approachable steps, ensuring even novice bakers can achieve professional-quality results. Let’s delve into what makes each component of this triple chocolate cake truly exceptional.
The Marvelous Cake Layers: Effortless Perfection
The foundation of any great cake lies in its layers, and these chocolate cake layers are nothing short of miraculous in their ease and deliciousness. We’re talking about a genuine one-bowl recipe, meaning minimal cleanup and maximum convenience. You simply combine all your wet ingredients in a large bowl, then sift in the dry components. A gentle fold with a wire whisk is all it takes to bring the batter together – no fancy electric mixer required! This streamlined process ensures a consistent, lump-free batter, which translates to perfectly uniform and tender cake layers. Once divided into your baking pans and baked, you’ll be amazed at how moist, tender, and fluffy they turn out. The secret? A careful balance of ingredients, including buttermilk for moisture and acidity, and a touch of instant coffee to deepen that incredible chocolate flavor.
The simplicity of this one-bowl method means you don’t need to be a seasoned baker to achieve impressive results. The key is in gentle mixing to avoid overdeveloping the gluten, which can lead to a tough cake. This recipe prioritizes a melt-in-your-mouth texture that will have everyone asking for your secret!
The Dreamy Filling: Ultra-Creamy Whipped Chocolate Ganache
Moving beyond traditional buttercream, our whipped chocolate ganache offers a sublime contrast to the rich cake. It’s incredibly creamy, wonderfully airy, and significantly less sweet than most frostings, making it the ideal complement for a truly chocolate-forward dessert. This ganache is a delightful paradox: rich in flavor yet light in texture, creating a “floofy” cloud of chocolatey goodness that you won’t be able to resist. It’s my absolute favorite chocolate frosting to prepare, and for good reason!
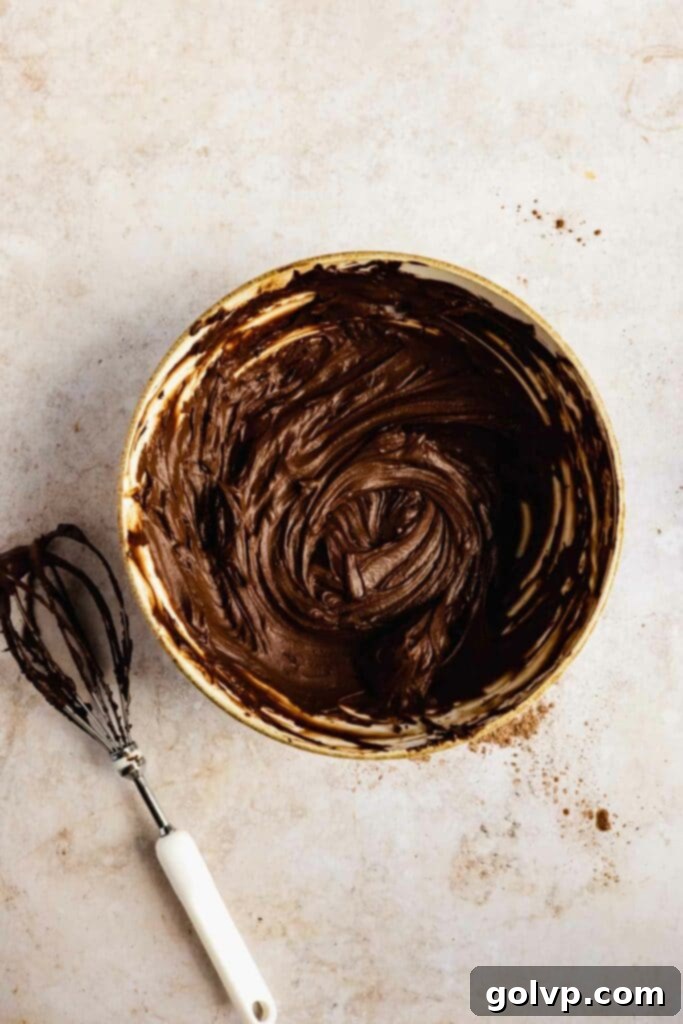
Making this whipped ganache is surprisingly straightforward. It starts with heating heavy cream to a gentle simmer and pouring it over high-quality chocolate chips. The heat from the cream melts the chocolate into a smooth, glossy emulsion. After a period of chilling, the magic truly happens. Once the ganache is cool to the touch but still liquid, a quick whisking session transforms it into a light, spreadable, and fluffy frosting. Be mindful not to overwhip, as this can lead to a grainy texture. (Don’t worry, our FAQ section provides a simple fix if that happens!). This whipped ganache provides an ethereal texture that elevates the entire cake.
Mastering the Art of the Perfect Chocolate Drip Cake
A beautifully executed chocolate drip instantly elevates any cake from delicious to dazzling. While it may look intricate, achieving that perfect cascading effect is truly a combination of a reliable recipe, precise temperature control, and a bit of practice. The more you experiment, the more confident you’ll become in creating stunning drips every time!
Our chocolate drip uses semisweet chocolate chips, eliminating the need for tedious chopping and ensuring the drip isn’t excessively sweet, harmonizing perfectly with the cake and ganache. The process mirrors the initial stages of making ganache: simply pour hot heavy cream over the chocolate chips, allow them to melt, and then whisk until completely smooth. The crucial step for a successful drip is chilling. You want the drip ganache to cool until it reaches the consistency of a thick caramel sauce – still pourable, but no longer watery. This thicker consistency is what allows for controlled, elegant drips rather than a full glaze.
For the best results, the cake itself needs to be thoroughly chilled before applying the drip. This rapid cooling ensures that the warm ganache sets quickly upon contact, forming those distinct, beautiful drips. I recommend placing your frosted cake in the freezer for about 15 minutes. This firms up the exterior ganache, creating an ideal surface for the drip to cling to and set. When applying, pour the chocolate drip into the center of the chilled cake and gently guide it towards the edges using an offset spatula or the back of a spoon. For optimal control and an even drip, consider using a pourable measuring cup to apply the ganache. This tool makes it easy to add small amounts precisely where needed and achieve symmetrical drips all around the cake.
Frequently Asked Questions (FAQ) for Your Triple Chocolate Cake Success
The most important step for consistently buttery, light, and fluffy cake layers is accurate flour measurement. Using a kitchen scale to weigh your flour (as specified by weight in the recipe, e.g., 360g for 3 cups) is highly recommended for the most precise results. A simple, inexpensive kitchen scale can dramatically improve your baking accuracy. If you don’t have a scale, you can measure flour properly using dry measuring cups: first, fluff up your flour in its container with a spoon, then gently spoon it into your measuring cup, and finally, level off the top with the flat edge of a knife without packing the flour down. While not as accurate as weighing, this is the best alternative.
After adding the flour and cocoa powder to the wet ingredients, fold the batter *just* until you no longer see streaks of dry ingredients. Overmixing develops too much gluten, which can lead to a dry, tough, and dense cake. A whisk is ideal for folding, as it helps break up any small clumps of flour efficiently without overworking the batter.
For this specific recipe, I only recommend using natural cocoa powder for the cake layers. Natural cocoa powder is slightly acidic and reacts with the baking soda in the recipe to create a wonderfully fluffy texture and a richer, more complex chocolate flavor. Dutch-processed cocoa powder, being alkalized, lacks this acidity and will react differently, potentially affecting the cake’s rise and overall texture.
Grainy whipped ganache is typically a sign of overwhipping. If this happens, don’t despair! You can fix it by gently remelting the ganache. Do this either over a double boiler (bain-marie) or in the microwave in very short 5-second increments, stirring thoroughly after each interval, until it becomes smooth and liquid again. Once remelted, let it cool completely until it’s cold to the touch but still liquid, then try whipping it again, being careful to stop as soon as it reaches a thick, spreadable consistency.
I primarily use semisweet chocolate chips for both the whipped ganache and the chocolate drip. They are readily accessible, eliminate the need for chopping, and provide a perfectly balanced sweetness that isn’t overpowering. While chopped semisweet baking chocolate will also yield excellent results, I strongly advise against using milk chocolate chips or white chocolate chips, as their fat and sugar content differ significantly, requiring different cream-to-chocolate ratios that are not accounted for in this recipe.
Achieving perfect chocolate drips comes down to two main factors: temperature and consistency. Firstly, ensure the ganache for the drips is adequately cooled before pouring it over the cake. It should be a thick syrup-like consistency; if it’s too runny, it will simply slide down the sides of the cake rather than forming distinct drips. Secondly, and critically, make sure the cake itself is well-chilled in the freezer for about 15 minutes before applying the drip. This rapid cooling of the cake’s surface helps the warm ganache set quickly, preventing excessive running. After dripping, chill the cake again to fully set the drips.
To test the consistency, you can perform a small test drip on the backside of the cake first. Spoon a tiny bit of ganache off the edge. If it’s too thick, gently warm it (e.g., in a microwave for a few seconds) to thin it out. If it’s too thin, continue chilling it and stir occasionally until it reaches your desired, pourable but thick, consistency.
Chilling the cake is essential for creating beautiful, defined drips that set quickly. A cold cake surface causes the warm chocolate ganache to firm up almost instantly upon contact. Without chilling, the chocolate ganache will remain liquid for longer and continue to run down the sides of the cake, potentially glazing the entire cake rather than forming distinct drips.
If your chocolate drip is too liquidy, it’s most likely because it hasn’t been chilled enough. Place it back into the freezer for approximately 10 minutes, stirring and scraping the sides halfway through to encourage faster, more even cooling. Keep an eye on it to ensure it doesn’t become too solid.
Essential Ingredients for Your Triple Chocolate Masterpiece
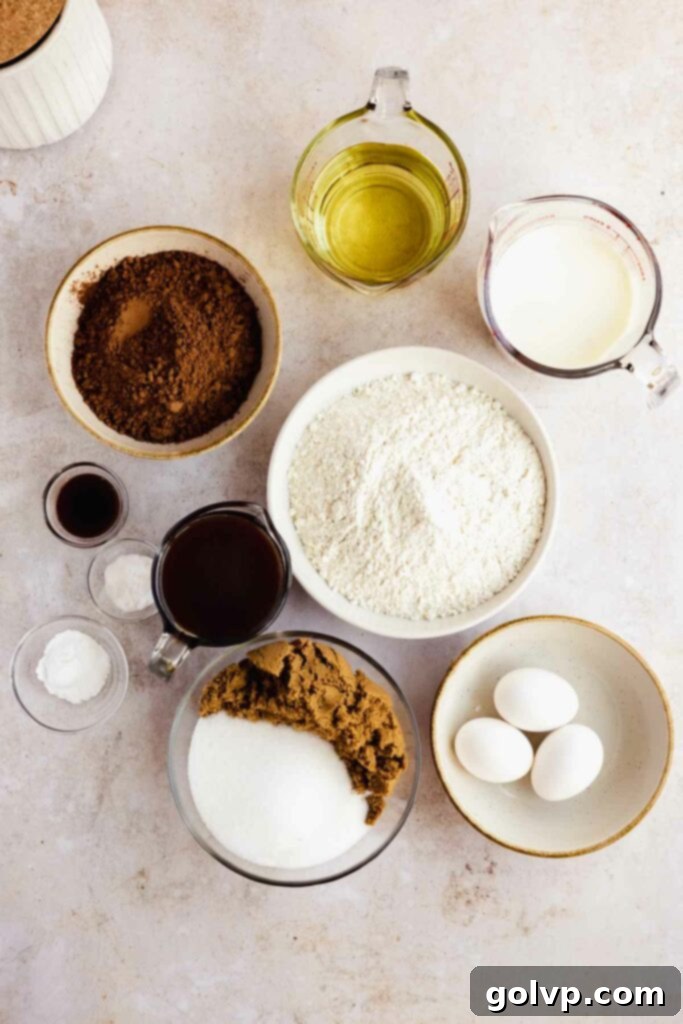
The complete list of ingredients and detailed recipe can be found in the recipe card below. Please read through this section for vital ingredient substitutions, expert baking tips, and a deeper understanding of each component’s role.
- Instant Coffee: A small amount of instant coffee is truly a secret weapon in chocolate baking. It doesn’t make the cake taste like coffee; instead, it remarkably amplifies and deepens the rich chocolate flavor, making it even more profound. If you prefer not to use instant coffee, you can substitute the hot water with an equal amount of hot brewed coffee for a similar effect, or simply omit it entirely.
- Buttermilk: This ingredient is crucial for achieving an incredibly moist, tender, and fluffy chocolate cake. Its acidity reacts with the baking soda to help the cake rise beautifully, while its fat content contributes to a rich texture. If genuine buttermilk isn’t available, I strongly recommend using kefir as a substitute, as it offers a similar thickness and acidity. I do not advise making your own “buttermilk” by combining milk and vinegar or lemon juice, as these homemade versions tend to be thinner and can sometimes result in cakes that sink slightly in the middle.
- Vegetable Oil: For the softest, most consistently moist chocolate cake, vegetable oil is the preferred fat. I typically use canola or grapeseed oil due to their neutral flavor. Any neutral-tasting oil will work perfectly. I’ve experimented with butter in this recipe, but found that it consistently led to drier cake layers, as butter solidifies when cooled and can hinder moisture retention. While butter is fantastic for vanilla cakes, oil is the champion for chocolate cakes in this context. Coconut oil is also not a good substitute here, as it behaves similarly to butter and can make the cake dry.
- All-Purpose Flour: Precision in measuring flour is paramount for cake success. The most accurate method is to weigh your flour using a digital kitchen scale. If a scale isn’t available, use the spoon-and-level method: gently stir the flour in its bag or container, then spoon it loosely into your dry measuring cup until overflowing. Use the flat edge of a knife to level off the top without packing the flour into the cup. This prevents over-measurement, which can lead to a dense, dry cake.
- Natural Cocoa Powder: Natural cocoa powder is essential for this recipe, providing a deep, robust chocolate flavor. Its slight acidity is vital, as it reacts with the baking soda to create the perfect rise and a wonderfully fluffy texture. Do not substitute with Dutch-processed cocoa powder here, as its alkalized nature will not interact with the baking soda in the same way, resulting in a different and potentially less desirable cake texture.
- Heavy Cream: You’ll need high-quality heavy cream, also known as whipping cream or 35% cream, for both the luscious whipped ganache and the elegant chocolate drip. The high fat content of heavy cream is necessary for achieving the desired rich texture and stability in both components.
- Semisweet Chocolate Chips: Semisweet chocolate chips are my choice for this recipe because they provide a perfectly balanced chocolate flavor without making the ganache or drip overly sweet. Their chip form is also incredibly convenient, as it eliminates the need for chopping, significantly simplifying the preparation process. As mentioned previously, I do not recommend using milk chocolate or white chocolate chips, as their differing fat and sugar compositions require adjusted cream-to-chocolate ratios that are not compatible with this recipe. High-quality chopped semisweet baking chocolate can also be used with excellent results.
Crafting the Fluffy Chocolate Cake Layers
Follow these steps carefully to ensure your cake layers are moist, tender, and rise perfectly, forming the ideal foundation for your triple chocolate masterpiece.
- **Prepare Your Pans:** Begin by greasing two 8-inch round cake pans thoroughly with vegetable oil. This ensures easy release. Then, line the bottoms of the pans with parchment paper rounds. Preheat your oven to 180°C (350°F).
- **Activate Coffee (Optional):** Add the instant coffee to the hot water and stir until it’s completely dissolved. Set this mixture aside. If you’re opting out of instant coffee, simply have the hot water ready.
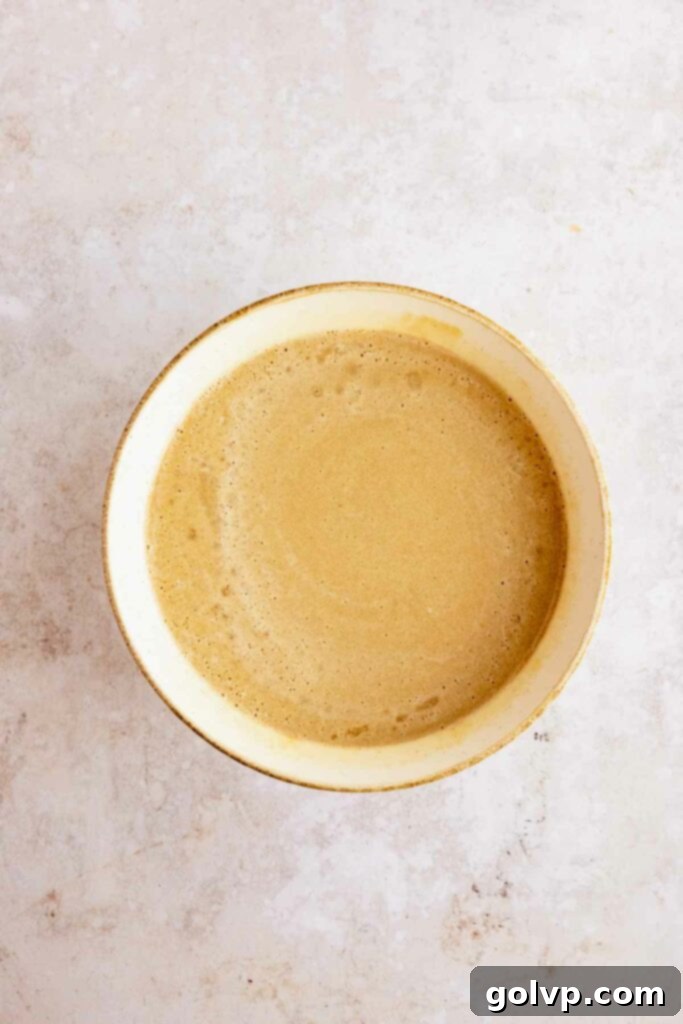
- **Combine Wet Ingredients:** In a very large mixing bowl, combine the room temperature eggs, packed brown sugar, granulated sugar, and sea salt. Whisk these ingredients together vigorously until they are very well combined and slightly lightened in color.
- **Add Fats and Liquids:** Pour in the buttermilk and vegetable oil. Continue to stir until these liquids are fully incorporated into the sugar-egg mixture, forming a smooth base.
- **Sift and Fold Dry Ingredients:** Directly into the wet mixture, sift in the all-purpose flour, natural cocoa powder, baking soda, and baking powder. Using a whisk, gently begin to fold the dry ingredients into the wet. About halfway through the folding process, pour in the hot water and dissolved instant coffee mixture (or just hot water). Continue to fold gently until you no longer see any visible streaks of dry flour. Be careful not to overmix; overmixing can lead to a tough cake.
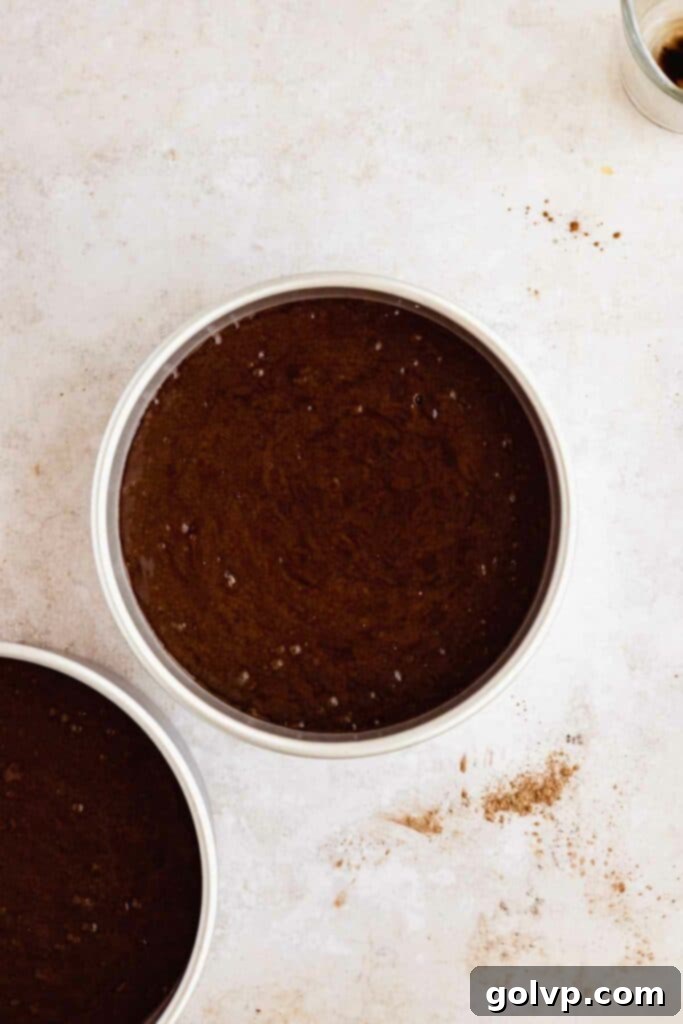
- **Bake the Layers:** Divide the cake batter evenly between your two prepared baking pans. Bake in the preheated oven for 35 to 45 minutes, or until a wooden skewer or toothpick inserted into the center of a cake layer comes out clean, indicating it’s fully cooked.
- **Cooling Process:** Once baked, remove the cake pans from the oven and let them cool at room temperature for precisely 10 minutes. This allows the cakes to firm up slightly before handling. After 10 minutes, run a small knife or offset spatula around the edges of the pans to help release the cakes. Invert them onto a wire cooling rack to cool completely. Ensure the cakes are entirely cool before proceeding with assembly to prevent the ganache from melting.
Preparing the Velvety Whipped Chocolate Ganache
This whipped ganache is a game-changer! Its light, airy texture and deep chocolate flavor make it the perfect frosting. Starting it early is key to ensure it has ample time to chill and achieve the right consistency.
- **Early Start:** For best results, I recommend beginning the ganache preparation before you even start the cake layers. This allows it sufficient time to cool down to the ideal temperature for whipping.
- **Heat Cream, Melt Chocolate:** In a small saucepan, gently bring the heavy cream to a slight simmer. Watch it closely to prevent it from boiling vigorously. While the cream is heating, place your semisweet chocolate chips in a large, heat-safe bowl.
- **Steep and Melt:** As soon as the cream reaches a simmer, remove it from the heat and immediately pour it over the chocolate chips in the bowl. Cover the bowl tightly with a plate or lid and let it sit undisturbed for 7 minutes. This allows the hot cream to gently melt the chocolate chips.
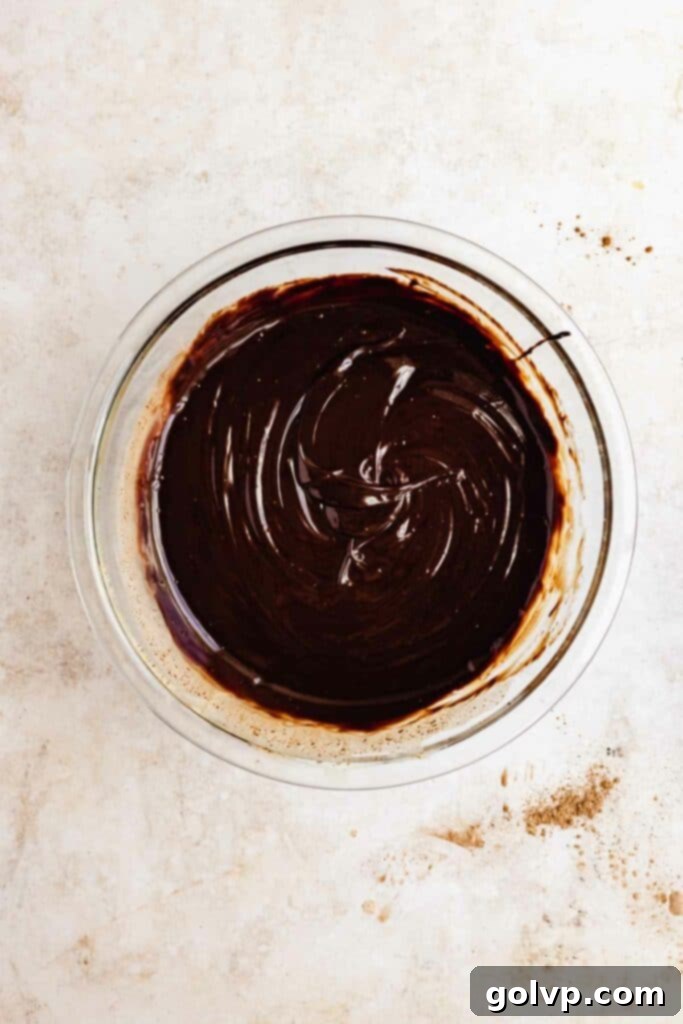
- **Whisk to Smoothness:** After 7 minutes, remove the lid and begin whisking the chocolate chips and cream. Continue whisking until the mixture is completely glossy and smooth, with no lumps of chocolate remaining. This may take a few minutes of consistent whisking.
- **Crucial Chilling:** Now, the ganache needs to chill. Place the bowl in the refrigerator for 1 to 2 hours. The goal is for it to be cool to the touch but still liquid and pourable, though noticeably thicker than when you first whisked it. It should not be rock hard; if it becomes too solid, gently warm it slightly in a microwave or over a double boiler until it softens again.
- **Whip to Perfection:** Just before you plan to assemble your triple chocolate cake, it’s time to whip the ganache. You can do this by hand with a sturdy wire whisk (which I prefer for control) or using a stand mixer fitted with a whisk attachment on medium-high speed. Whisk the cooled ganache until it transforms into a thick, lightened in color, and fluffy consistency. Stop whisking as soon as it reaches a spreadable frosting consistency. Overwhipping will make it grainy, so be vigilant!
Crafting the Glossy Chocolate Drip
The chocolate drip is the dazzling finishing touch. Prepare it while your cake layers cool to ensure it’s ready when you are.
- **Set Up:** While your cake layers are cooling (and before you start decorating), prepare the chocolate drip. Place the semisweet chocolate chips in a medium-sized, heat-safe bowl.
- **Heat Cream & Combine:** Heat the heavy cream in a small saucepan until it’s just about to boil, with small bubbles forming around the edges. Immediately pour the hot cream over the chocolate chips in the bowl. Cover the bowl with a lid or plate and let it sit for 5 minutes to allow the chocolate to melt.
- **Whisk and Chill:** After 5 minutes, remove the lid and whisk the chocolate chips and cream until the mixture is completely glossy and smooth. There should be no visible lumps of chocolate. Place the bowl in the fridge to cool for approximately 1 hour, stirring occasionally, until it reaches a thicker, pourable, caramel-like consistency. This consistency is essential for controlled, beautiful drips.
Assembling Your Decadent Triple Chocolate Cake
Now for the exciting part – bringing all the components together to create your spectacular triple chocolate cake!
- **Level and Layer:** Once your cake layers are completely cool, use a long serrated bread knife to carefully cut each cake in half horizontally, creating four thinner cake layers. This step is crucial for achieving an impressive layered look.
- **First Layer:** Place a small dollop of the whipped ganache on your cake stand or serving plate. This acts as an “adhesive” to prevent the cake from sliding. Carefully place the first cake layer down onto the board, pressing gently. Spread approximately 1 cup of whipped ganache evenly over this layer, extending it all the way to the edge.
- **Build the Layers:** Repeat the layering process with the remaining cake layers and whipped ganache, ensuring each layer is evenly coated.
- **Crumb Coat & Final Frosting:** Reserve about ½ cup of the whipped ganache for piping decorative borders later. Use the remaining ganache to frost the entire cake, covering both the top and sides. This initial thin layer can act as a crumb coat, trapping any loose crumbs. For an extra touch of chocolate, gently press mini chocolate chips or chocolate chunks onto the bottom edge of the cake while the ganache is still soft.
- **Chill for Drips:** Place the frosted cake in the freezer for about 15 minutes. This quick chill will firm up the exterior ganache, creating a cold surface that will help the chocolate drip set perfectly and cleanly.
- **Apply the Chocolate Drip:** Remove the chilled cake from the freezer. Pour the prepared chocolate drip into the center of the cake. Using an offset spatula or a large spoon, gently push the drip towards the edges, allowing it to cascade beautifully down the sides of the cake. If you have a turntable or lazy Susan, it will make achieving an even drip much easier.
- **Final Chill & Decoration:** Once the drip is applied, return the triple chocolate cake to the freezer for another 15 minutes to allow the drip to fully firm up and set. While it chills, you can gently soften the reserved ½ cup of whipped ganache (see notes on how to do this if it became too firm). Pipe a decorative border using this softened ganache on top of the chocolate drip around the edge of the cake. For an extra flourish, sprinkle more chocolate chips or chunks on the inside edge of this border.
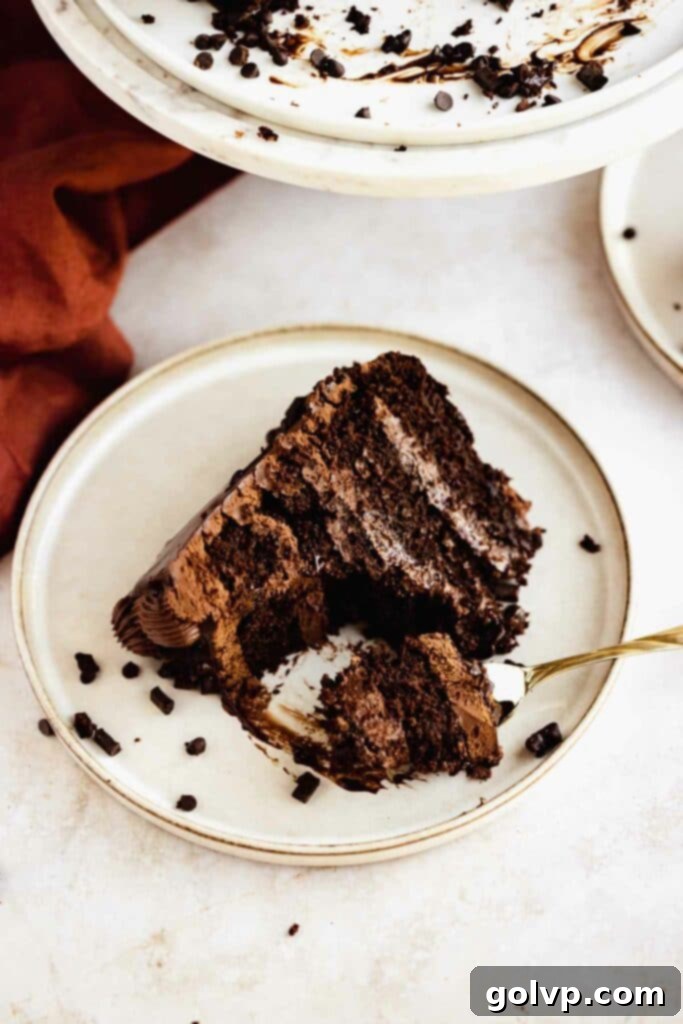
- **Serve and Enjoy:** Allow the cake to come to room temperature for at least 30-60 minutes before slicing to ensure the ganache is wonderfully soft and creamy. Slice and serve your magnificent triple chocolate cake, and bask in the appreciation!
Explore More Delectable Cake Recipes:
- Salted Caramel Cake with Blackberries
- Mango Crepe Cake with Easy Homemade Crepes
- Black Forest Cupcakes
Happy baking! xx
Did you make this recipe? I would love for you to rate this recipe and hear what you think in the comments!
Share your creation on Instagram and tag@flouringkitchen
📖 Recipe
Triple Chocolate Cake
Mary
Pin Recipe
Shop Ingredients
Equipment
-
two 8″ round pans
Ingredients
Chocolate Cake Layers
- 1 ½ cup hot water
- 1 teaspoon instant coffee (optional)
- 3 large eggs room temperature
- 1 ½ cup brown sugar packed
- 1 ½ cup granulated sugar
- ½ teaspoon sea salt
- 1 ½ cup buttermilk
- 1 ½ cup vegetable oil (I use canola oil)
- 3 cups all purpose flour (360g)
- 1 cup natural cocoa powder (129g)
- 1 ½ teaspoon baking soda
- 3 teaspoon baking powder
Whipped Chocolate Ganache
- 3 cups heavy cream (35% or whipping cream)
- 6 cups semisweet chocolate chips (1020g)
Chocolate Drip (optional)
- ⅓ cup heavy cream (35% or whipping cream)
- ½ cup semisweet chocolate chips (85g)
Assembly
- 1 cup mini chocolate chips (and/or chocolate chunks) (170g)
Shop Ingredients on Jupiter
Instructions
Chocolate Cake Layers
-
Grease two 8” round cake pans with vegetable oil and line the bottoms with rounds of parchment paper. Preheat oven to 180°C (350°F).
-
Add instant coffee into the hot water and stir until dissolved, set aside. If you won’t be using instant coffee, just set the hot water aside for later.1 teaspoon instant coffee, 1 ½ cup hot water
-
In a very large bowl combine eggs, brown and granulated sugars, salt, and whisk until very well combined.3 large eggs, 1 ½ cup brown sugar, 1 ½ cup granulated sugar, ½ teaspoon sea salt
-
Add buttermilk and vegetable oil, stir until combined.1 ½ cup buttermilk, 1 ½ cup vegetable oil
-
Sift flour, cocoa powder, baking soda, and baking powder right into the bowl. Use a whisk to gently fold the batter. Halfway through, add the hot water and instant coffee mixture. Fold just until you stop seeing streaks of dry flour.3 cups all purpose flour, 1 cup natural cocoa powder, 1 ½ teaspoon baking soda, 3 teaspoon baking powder
-
Pour the batter evenly into the prepared baking pans and bake for 35-45 minutes, or just until a toothpick inserted into the center comes out clean.
-
Remove the baking pans from the oven and let cool at room temperature for 10 minutes before flipping them over onto a cooling rack. Use a small knife or spatula to run around the edges to release the cake easier. Let cool completely.
Whipped Chocolate Ganache
-
I like to start the ganache before the cake layers to give it plenty of time to cool.
-
Bring the cream to a slight simmer in a small saucepan. Keep an eye on it so that it doesn’t boil. While it is heating up, pour the chocolate chips in a large heat safe bowl.3 cups heavy cream, 6 cups semisweet chocolate chips
-
Pour the hot cream over the chocolate chips, cover with a plate or a lid and let it sit for 7 minutes.
-
Whisk the chocolate chips and cream until glossy and smooth. This might take some time.
-
Let the ganache cool in the fridge for 1-2 hours or until it is cool to the touch but still liquidy. It should be thicker but not yet rock hard.
-
Right before stacking the cake, use a whisk (I do this by hand but you can use a stand mixer), whisk the ganache until it becomes thick and lighter in colour. Stop whisking as soon as it becomes a spreadable consistency to not overwhip.
Chocolate Drip (optional)
-
While the cake layers cool (before decorating), make the chocolate drip. Place chocolate chips in a medium bowl.½ cup semisweet chocolate chips
-
Heat the cream in a small saucepan until just before boiling. Pour the hot cream over the chocolate chips and cover with a lid or a plate for 5 minutes.⅓ cup heavy cream
-
Whisk the chocolate chips and cream until glossy and smooth. Place in fridge to cool until it becomes a thicker, pourable consistency. About 1 hour.
Assembly
-
Cut the cakes in half to create 4 cake layers. Use a long serrated bread knife.
-
Place a dollop of whipped ganache on your cake stand or plate. Place the first layer of cake down on the board. Spread about 1 cup whipped ganache over the cake layer, spreading all the way to the edge. Repeat with the rest of the cake layers.
-
Reserve about ½ cup of ganache for piping the border. Spread the rest of the ganache over the cake, covering the sides. Press chocolate chips or chunks onto the bottom of the cake while the ganache is not yet set.1 cup mini chocolate chips (and/or chocolate chunks)
-
Place the cake in the freezer for 15 minutes to firm up and set the ganache on the outside.
-
Pour the chocolate drip into the center of the cake. Use an offset spatula or a large spoon to spread the drip over the edges so that it drips down the sides. A turntable or lazy Susan will make it easier to get an even drip.
-
Place the cake into the freezer for 15 minutes to firm up the drip. Pipe a border using the reserved whipped ganache on top of the chocolate drip (see notes on how to soften it again). Sprinkle more chocolate chips on the inside edge of the border. Slice to serve and enjoy!
Notes
- The cake is best eaten at room temperature. That way the ganache is silky smooth and fluffy. It hardens and becomes very stiff when cold.
- Cake leftovers will keep well wrapped tightly or in an airtight container for up to 3 days in the refrigerator or up to 2 months in the freezer. Make sure to serve it at room temperature so that the ganache becomes soft again.
- If the ganache becomes to hard, blast it in the microwave at 5 second intervals and whisk in between until you get a workable consistency.
- You can also use two 9″ cake pans to make the cake, the layers will just be a bit thinner.
Make ahead:
You can make the cake layers a day or two ahead of decorating. Just wrap tightly and refrigerate them so they keep well.
I recommend to make the whipped ganache and drip the day of assembling the cake. That way it is easiest to work with because it will set even harder in the refrigerator.
The cake can be made the day before serving, just store in the refrigerator and let it come to room temperature for a few hours before serving so that the ganache softens up again.
