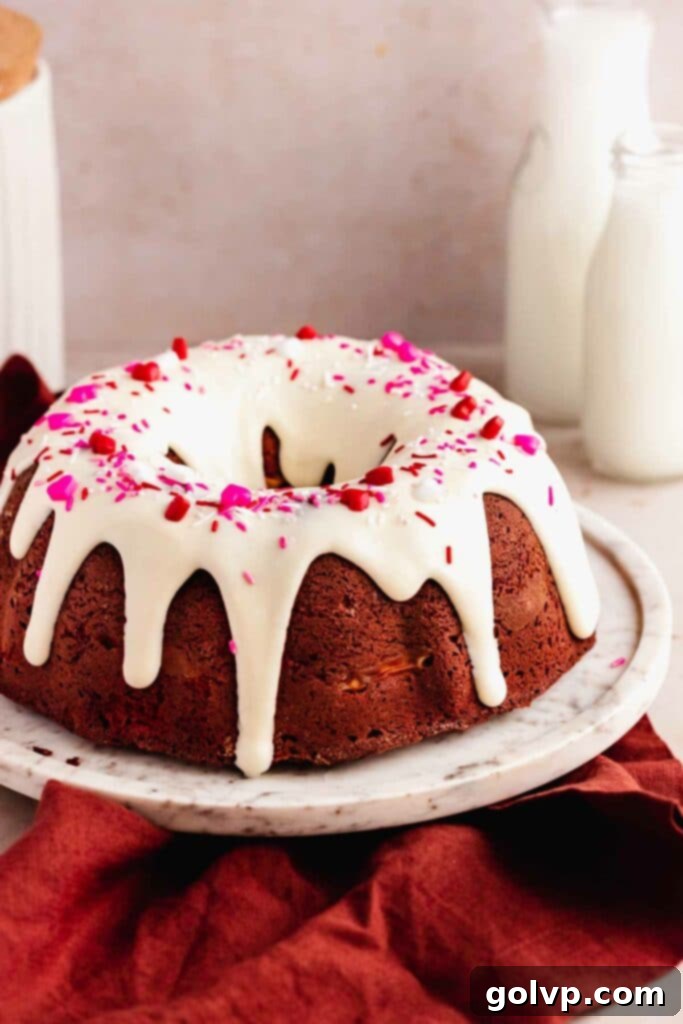
Indulge in Our Decadent Red Velvet Bundt Cake with a Luscious Cream Cheese Swirl and Tangy Glaze
Jump to Recipe
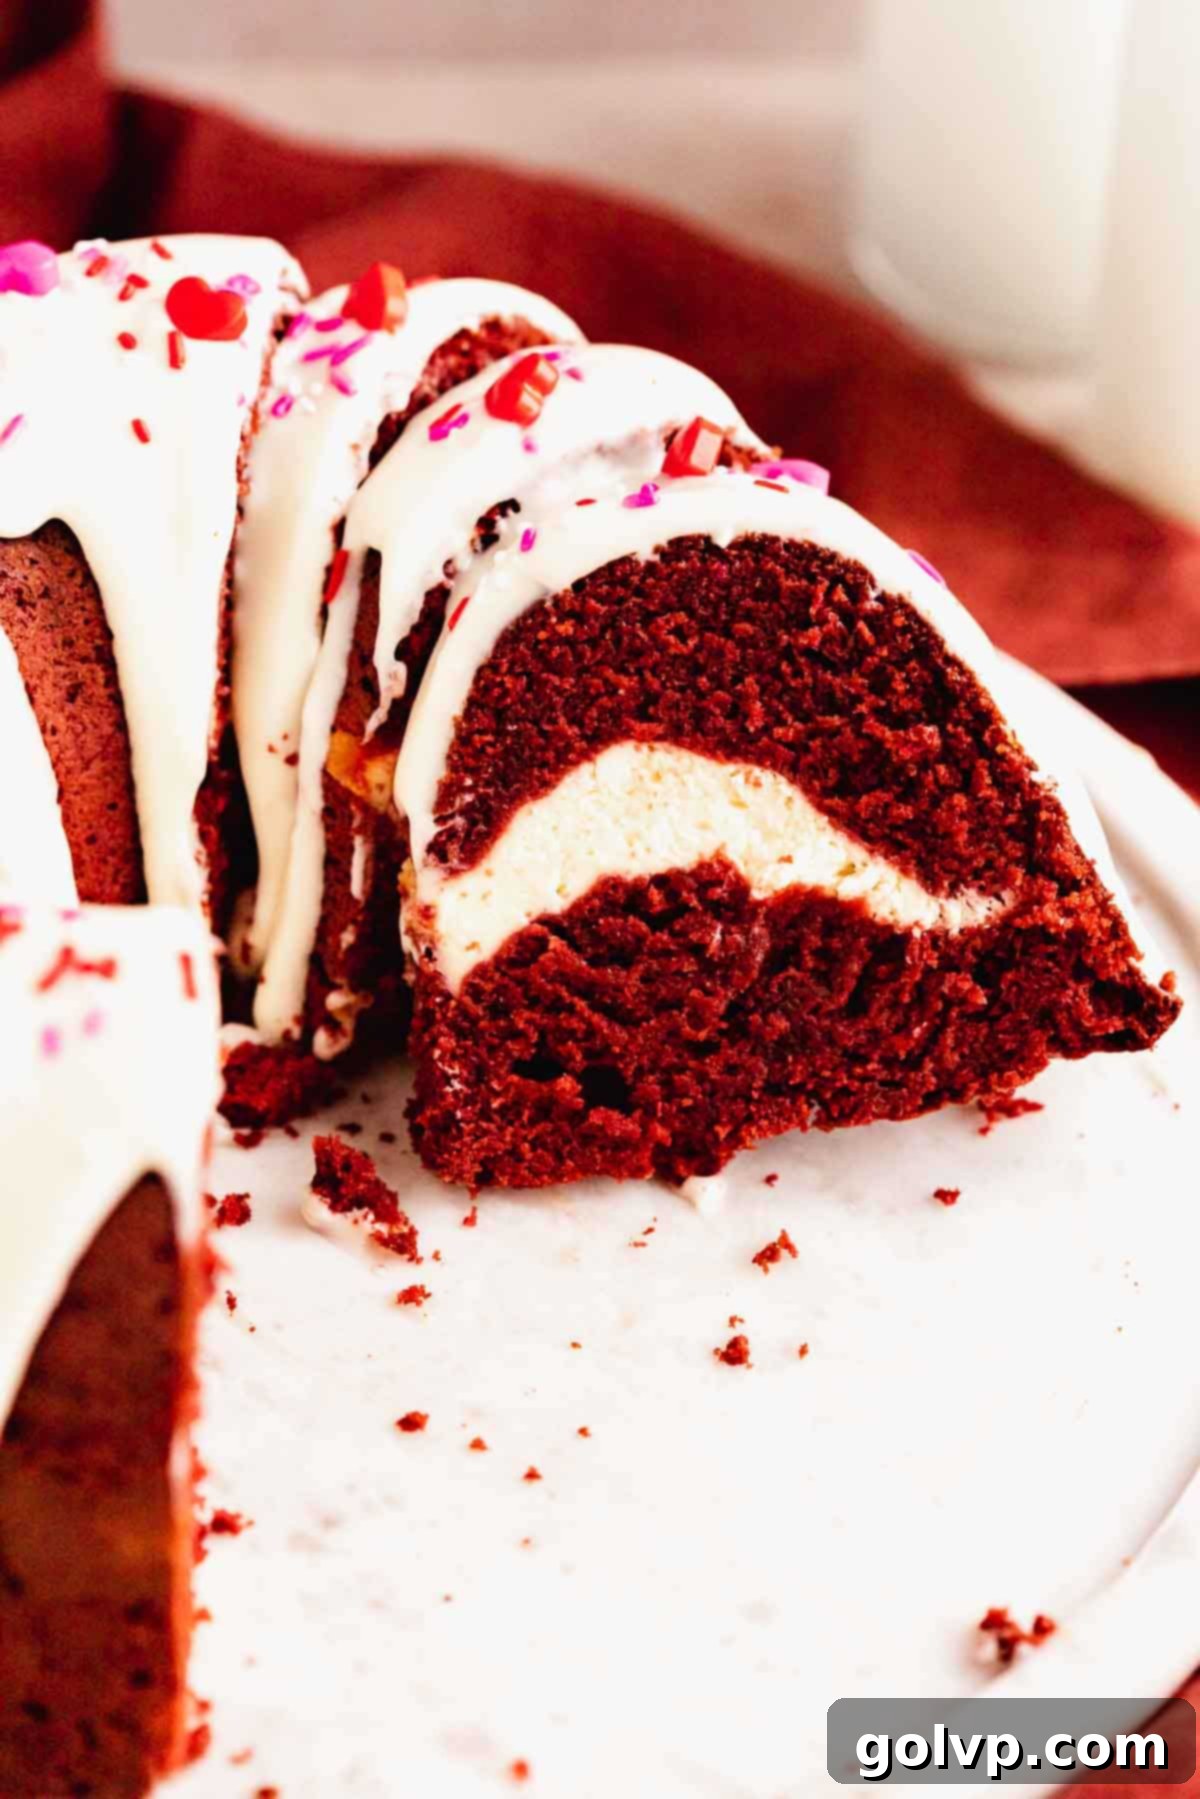
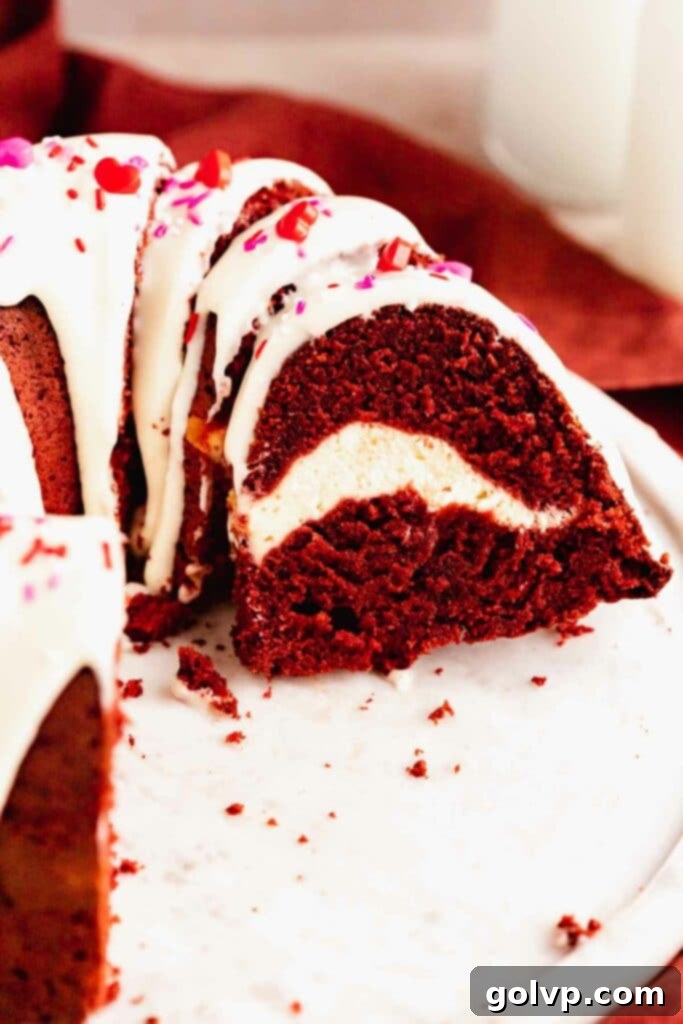
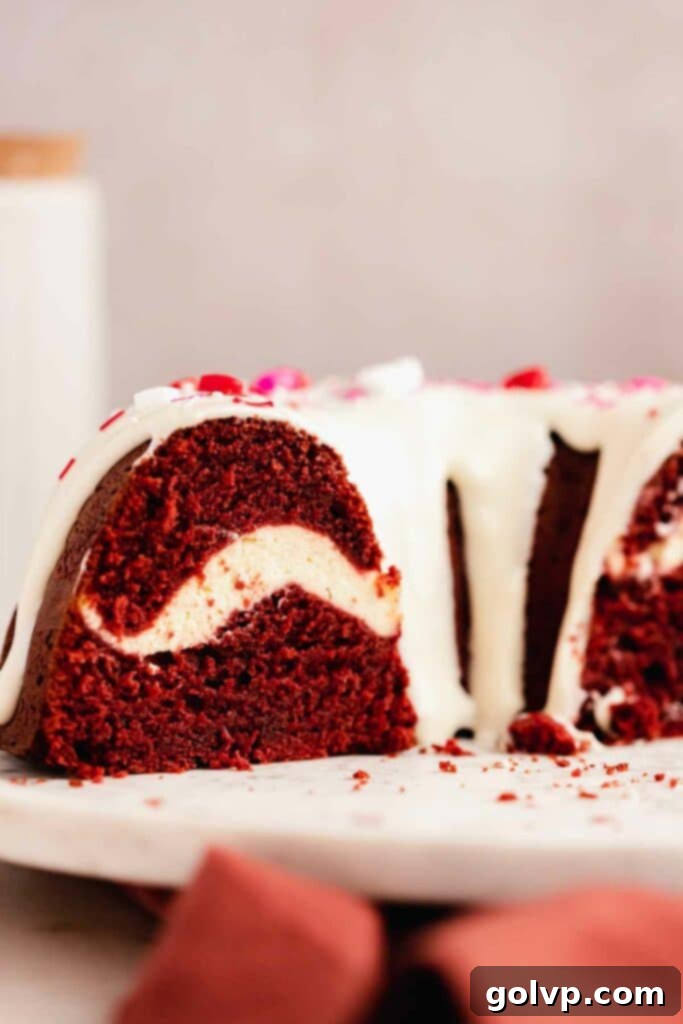
Prepare to be enchanted by this incredible Red Velvet Bundt Cake, a truly show-stopping dessert that’s as delightful to look at as it is to eat. Each slice reveals a magnificent surprise: a velvety, bright red cake beautifully swirled with an irresistible, easy-to-make cream cheese filling. Crowned with a luxurious cream cheese glaze and a scattering of festive sprinkles, this bundt cake isn’t just a treat; it’s an experience. Its remarkably soft and moist texture, achieved through a thoughtful combination of sour cream and both butter and oil, ensures a perfect crumb that stays fresh for days. The butter provides that rich, classic flavor we all crave, while the oil guarantees enduring moisture and fluffiness. This recipe captures all the iconic tastes of traditional red velvet cake, reimagined in the elegant and impressive form of a bundt.
Purchasing the items in this post supports this blog, at no additional cost to you. As an Affiliate Product marketer and Amazon Associate, I earn from qualifying purchases.
Why This Red Velvet Bundt Cake Recipe Will Be Your New Favorite
This isn’t just another red velvet recipe; it’s a meticulously crafted dessert designed to deliver maximum flavor and an unforgettable experience. Here’s why this particular Red Velvet Bundt Cake will quickly become a beloved staple in your baking repertoire:
- Unbeatable Texture: Imagine a cake that’s not just moist but deeply velvety, wonderfully soft, and beautifully fluffy. Our bundt cake promises exactly that, retaining its irresistible texture for several days, making it perfect for preparing ahead or enjoying leisurely. The secret lies in a balanced blend of fats and dairy that keeps every bite tender and delightful.
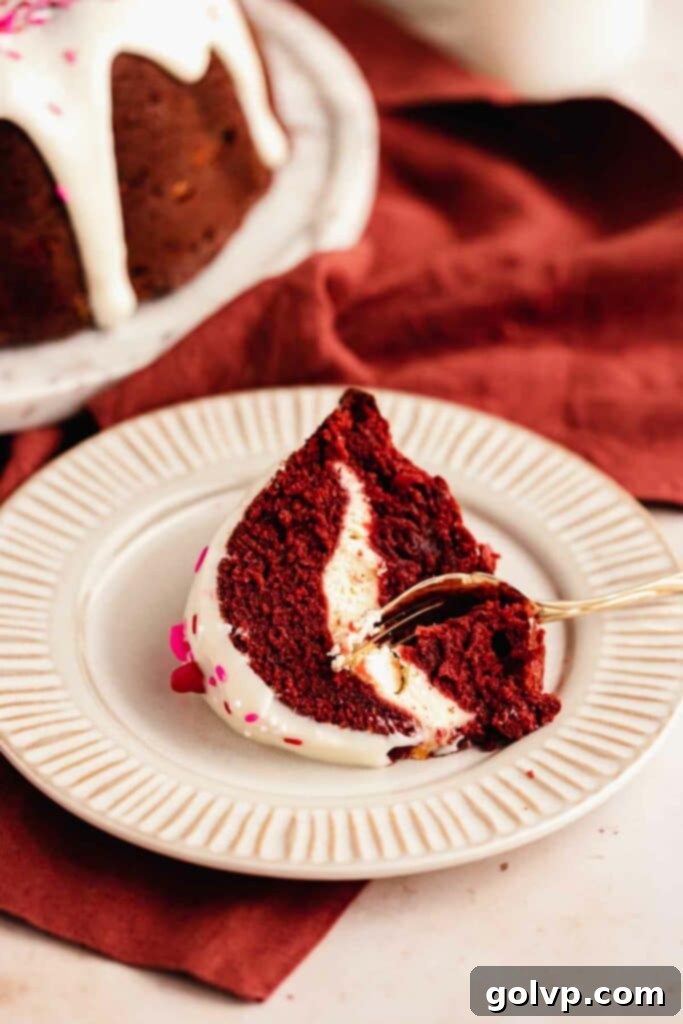
- Gorgeous Cream Cheese Swirl: Cutting into this cake reveals a stunning, cheesecake-like cream cheese swirl that adds both visual appeal and an incredible burst of flavor. It’s remarkably easy to prepare yet creates an elegant “wow” factor, transforming a classic cake into something extraordinary. This creamy surprise perfectly complements the red velvet, creating a harmonious balance.
- Luscious Cream Cheese Glaze: Forget dry cakes! This bundt is generously drizzled with a rich, tangy cream cheese glaze that is utterly creamy and flawlessly complements the cake’s subtle chocolate notes. Whether you prefer a delicate drip or a thicker spread, this glaze elevates the entire dessert, adding a professional finish and an extra layer of decadence.
- Authentic Red Velvet Flavor: Experience the true essence of red velvet – a nuanced blend of mildly chocolatey and distinctly tangy flavors. Paired with the sweet and savory cream cheese components, every mouthful is a symphony of classic tastes that will satisfy even the most discerning palates.
This bundt cake is more than a dessert; it’s a celebration of flavor and texture, designed for both seasoned bakers and enthusiastic beginners. Its ease of preparation combined with its impressive presentation makes it ideal for special occasions, holidays, or simply a luxurious weekend treat.
[feast_advanced_jump_to]
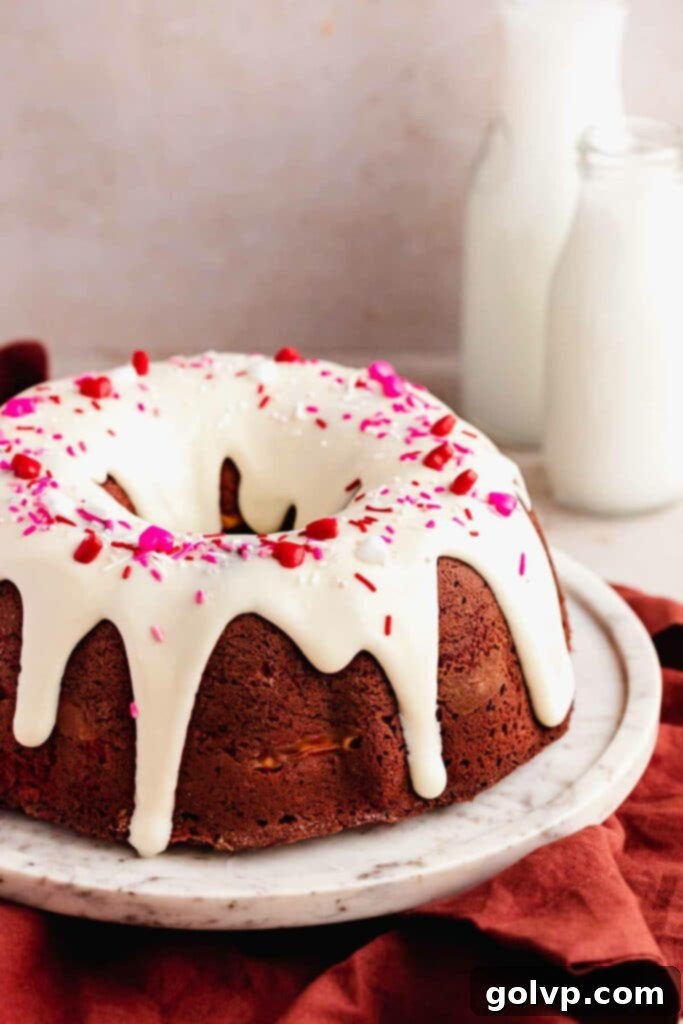
Achieving the Perfect Soft & Moist Bundt Cake Texture
The hallmark of an exceptional Red Velvet Bundt Cake is its texture: incredibly soft, fluffy, and consistently moist. This desirable quality isn’t left to chance; it’s carefully engineered through the precise combination of key ingredients, particularly the fats, sour cream, and buttermilk.
Many bakers often face a dilemma: butter offers unparalleled flavor, while oil is known for imparting superior moisture. To achieve the best of both worlds, this recipe ingeniously combines them. The butter delivers that rich, nuanced depth of flavor that is essential for a truly decadent cake, while the oil ensures the cake remains beautifully moist and soft for an extended period, preventing it from drying out quickly. This synergistic approach guarantees a cake that’s both flavorful and has an exceptional, melt-in-your-mouth texture that lasts for days.
Furthermore, the inclusion of sour cream and buttermilk plays a crucial role. Sour cream, with its higher fat content, contributes to the cake’s velvety smoothness and richness. Buttermilk, on the other hand, reacts with the leavening agents (baking soda and baking powder), creating a tender crumb and adding a subtle tang that is characteristic of classic red velvet. These dairy components work together to provide moisture, tenderize the cake, and enhance its overall luxurious mouthfeel.
Mastering the Effortless Cream Cheese Swirl
The cream cheese swirl inside this Red Velvet Bundt Cake is more than just a filling; it’s a delightful surprise and a simple technique that elevates the cake from delicious to extraordinary. It adds a layer of creamy, tangy “cheesecake” flavor and a visually stunning contrast that makes every slice Instagram-worthy.
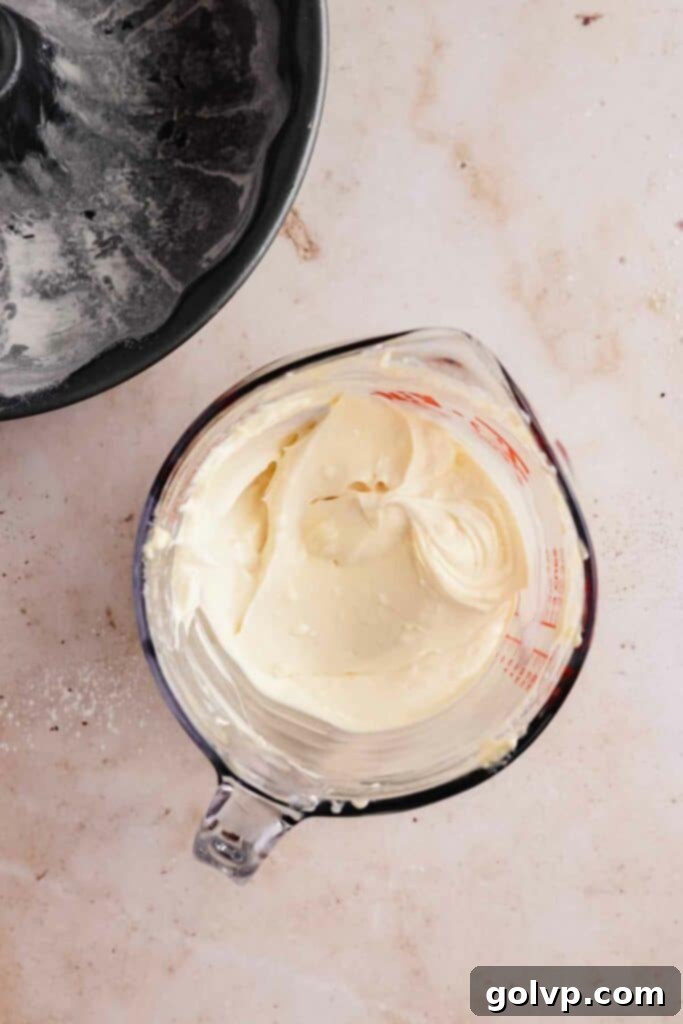
The beauty of this swirl is its simplicity. To ensure a smooth baking process, it’s highly recommended to prepare the cream cheese mixture before you even begin working on the red velvet batter. This way, your swirl is ready to be layered as soon as your cake batter is mixed and ready for the pan. All you need to do is blend the ingredients for the swirl in the order specified in the recipe, beating until completely smooth and creamy. A stand mixer works wonderfully, but an immersion blender can also achieve a perfectly smooth consistency with minimal effort. Simply blend until there are no lumps, and set it aside. This proactive step ensures a stress-free assembly when it’s time to create those beautiful layers, making the process seamless and enjoyable.
Achieving that Signature Vibrant Red Color in Your Red Velvet Cake
The iconic vibrant red hue is a defining characteristic of a truly classic red velvet cake. To achieve the most striking and rich color in your Red Velvet Bundt Cake, your choice of food coloring is paramount.
We strongly recommend using a high-quality **gel food coloring**. Gel colors are concentrated and produce a much more intense and stable hue compared to liquid food colorings. Typically, about a half teaspoon of gel food coloring will suffice, but it’s always best to eyeball it and add gradually until you reach your desired shade, as concentration can vary between brands. Liquid food colorings, while readily available, are not ideal for red velvet; you would need a significant amount to achieve a deep red, and the added liquid can negatively affect the cake batter’s consistency and moisture balance. This often leads to a less vibrant, more diluted color and a potentially denser cake.
For those seeking a natural alternative, powdered natural red food coloring is an option. While we haven’t personally tested this specific variety with this recipe, it’s worth exploring if you prefer to avoid artificial colors. Just remember that natural colorings might yield a slightly different shade and intensity. Regardless of your choice, ensuring a rich, deep red color will make your Red Velvet Bundt Cake truly pop and fulfill its promise of visual delight.
Ensuring a Flawless Release from Your Bundt Pan Every Time
The moment of truth for any bundt cake is the release from the pan. It can feel intimidating, but with the right technique, you can achieve a perfect, intact cake every single time. A pristine, beautiful bundt cake starts with proper pan preparation.
- **Choose the Right Pan:** Begin with a high-quality non-stick bundt pan. Critically, ensure its non-stick coating is fully intact – no peeling, scratches, or visible wear. A compromised coating is the most common culprit for cakes sticking.
- **Expert Greasing and Flour Dusting:** This is the most vital step. Generously grease every nook and cranny of your bundt pan with cold butter or shortening. It’s important to use cold fat because it will adhere better to the pan and won’t melt too quickly. Avoid using cooking sprays or oil alone, as oil tends to bead up and run down, leaving areas unprotected. Once thoroughly buttered, add about a tablespoon of all-purpose flour to the pan. Rotate, shake, and tap the pan vigorously to ensure the flour evenly coats all the buttered surfaces, creating a thin, protective layer. Once coated, invert the pan and gently tap out any excess flour. This creates a superior non-stick barrier that helps the cake release effortlessly.
- **Optimal Cooling Time:** Patience is a virtue here. After baking, remove your Red Velvet Bundt Cake from the oven and allow it to cool in the pan for precisely 10 minutes. This brief cooling period allows the cake to firm up slightly while still retaining enough warmth to prevent it from sticking to the pan. Placing a cooling rack or a sturdy plate over the bundt pan and then confidently flipping it over will allow the cake to detach smoothly. A gentle tap on the top of the pan (now the bottom of the cake) can assist in release. Attempting to unmold too early can cause the cake to tear, while cooling too long in the pan can cause it to stick as the fats resolidify.
By following these simple yet crucial steps, you can banish bundt cake anxiety and consistently achieve beautifully released, perfectly shaped cakes.
Essential Ingredients for Your Red Velvet Bundt Cake Success
Understanding the role of each ingredient is key to mastering this Red Velvet Bundt Cake. While the full list of ingredients and precise measurements are detailed in the recipe card below, take a moment to read through these tips to ensure optimal results and a truly exceptional cake.
- Cream Cheese: For both the luscious swirl and the tangy glaze, always opt for full-fat, brick-style cream cheese. This is non-negotiable for achieving the perfect thick, creamy texture. Low-fat or whipped cream cheese varieties contain too much water, which can lead to a runny, disappointing swirl and glaze that won’t hold their shape or flavor as intended.
- Unsalted Butter: Use high-quality unsalted butter for the best flavor in your cake and glaze. Ensure it is at room temperature before you begin mixing. Softened butter creams beautifully with sugar, incorporating air for a lighter, fluffier cake. If your butter is too cold, it won’t cream properly; if it’s melted, your cake could become greasy or dense.
- Buttermilk: This ingredient is fundamental to authentic red velvet. Buttermilk not only contributes to the cake’s signature tangy flavor but also reacts with the baking soda and baking powder, tenderizing the crumb and ensuring a wonderfully fluffy texture. Its acidity helps activate the leavening agents, creating a lighter lift.
- Sour Cream: Similar to buttermilk, full-fat sour cream adds an extra layer of moisture, richness, and that distinct velvety texture to the cake. Its slight acidity also helps to keep the cake tender and moist for days, contributing significantly to the cake’s luxurious mouthfeel.
- Red Gel Food Colouring: As discussed, gel food coloring is preferred for its highly concentrated pigment, which delivers the most vibrant, true red color. Liquid food colorings are less effective and can alter batter consistency. For a natural option, consider a natural red powder food coloring, though results may vary.
- Cocoa Powder: Red velvet cake isn’t deeply chocolatey; its cocoa flavor is subtle. Use natural unsweetened cocoa powder to achieve this delicate chocolatey undertone and to enhance the red color without overpowering it. You can also use Dutch-processed cocoa powder, which yields a slightly darker cake with a milder chocolate flavor.
- All-Purpose Flour: Accurate flour measurement is critical for cake texture. We highly recommend weighing your flour with a kitchen scale for the most consistent results (390g for 3 ¼ cups). If you don’t have a scale, use the “spoon and level” method: gently stir the flour in its bag or container, then spoon it lightly into a dry measuring cup, scraping off the excess with the flat edge of a knife. Avoid packing the flour into the cup.
Step-by-Step Guide to Baking Your Perfect Red Velvet Bundt Cake
Baking this decadent Red Velvet Bundt Cake is a rewarding process, and following these steps carefully will ensure a delicious and beautifully presented dessert. Remember to have all your ingredients at room temperature, as this greatly aids in proper mixing and achieving the desired cake texture.
Step 1 – Prepare the Cream Cheese Swirl. In a spacious bowl or the bowl of your stand mixer, combine the softened cream cheese, granulated sugar, and a pinch of sea salt. Beat these ingredients until the mixture is exceptionally smooth and entirely free of lumps. Next, incorporate the large egg and vanilla extract, beating until the mixture is creamy and uniform. Make sure to scrape down the sides of the bowl to ensure everything is well combined. Once smooth, set this delightful cream cheese filling aside, ready for layering later.
Step 2 – Prepare Your Bundt Pan. Preheat your oven to 180°C (350°F). Grease the interior of your bundt pan meticulously with a pat of cold butter or shortening, ensuring every crevice is coated. Then, add a tablespoon of all-purpose flour to the greased pan, shaking and rotating it to create a thin, even layer of flour that adheres to the butter. Invert the pan and tap out any excess flour to prevent a thick, white coating on your baked cake.
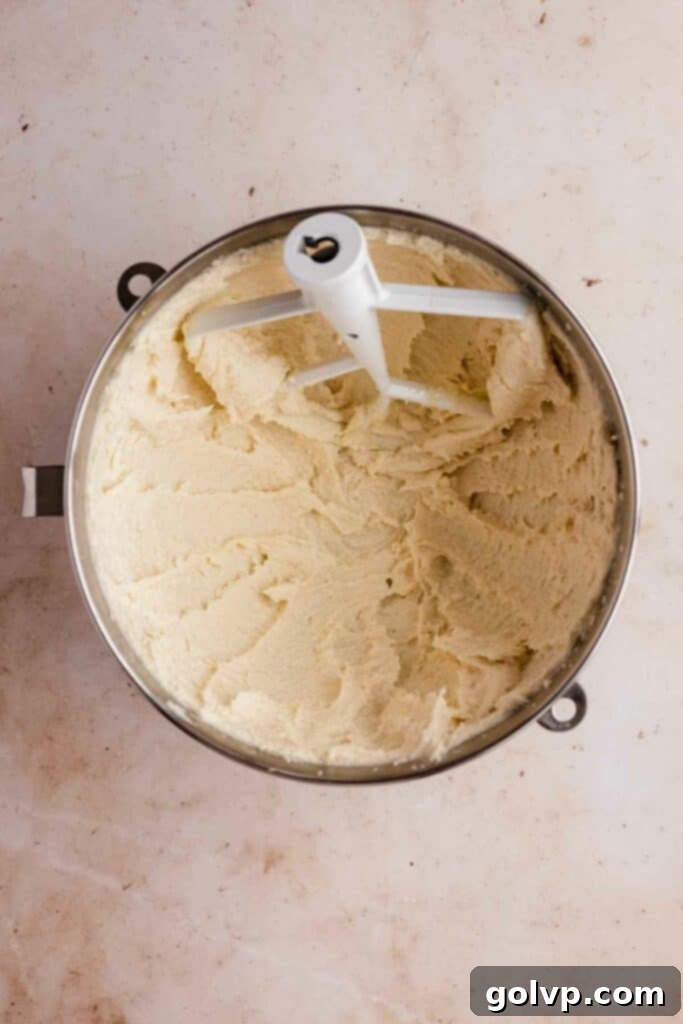
Step 3 – Cream Butter and Sugar. In a large mixing bowl or your stand mixer, combine the softened unsalted butter, vegetable oil, granulated sugar, and sea salt. Beat this mixture on medium-high speed for 5-7 minutes until it becomes notably light, fluffy, and pale in color. Remember to pause halfway through to scrape down the sides of the bowl, ensuring all ingredients are fully incorporated.
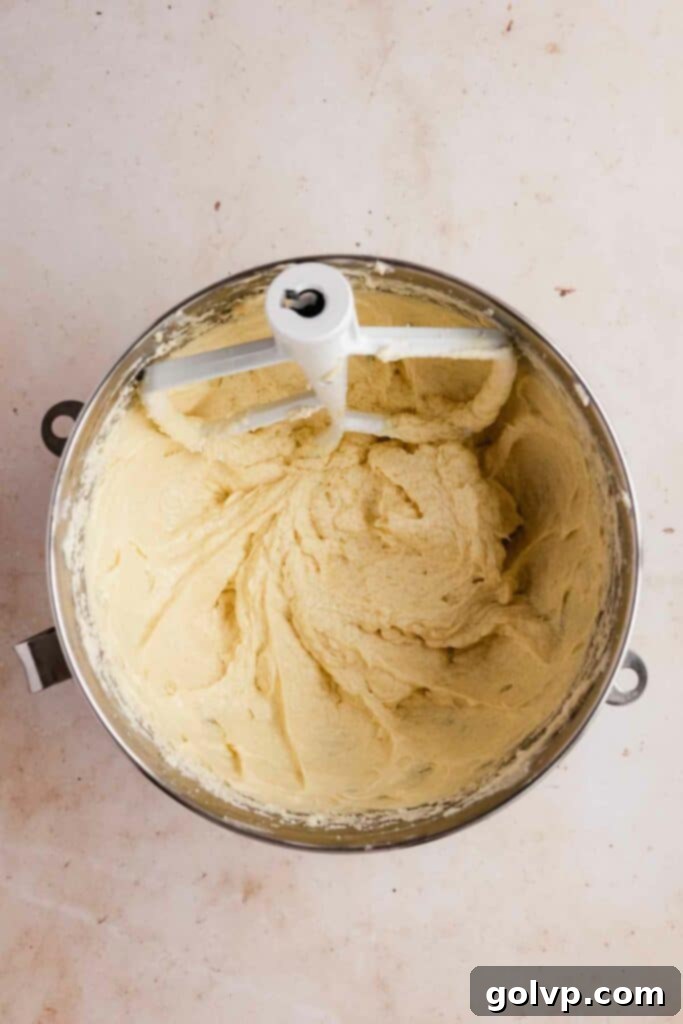
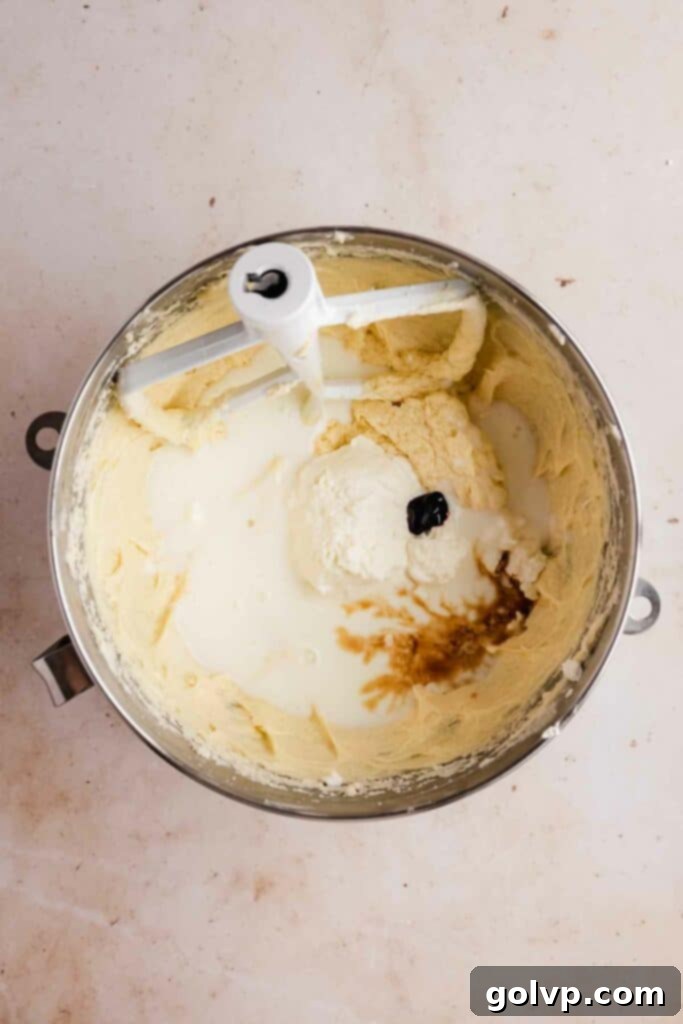
Step 4 – Incorporate Wet Ingredients. To the creamed butter mixture, add the vanilla extract. Then, introduce the large eggs one at a time, beating well after each addition until fully combined. Continue to scrape down the bowl frequently. Next, add the room-temperature sour cream and beat until just combined. Finally, pour in the buttermilk and mix until incorporated. Don’t be alarmed if the mixture appears somewhat curdled or “gloopy” at this stage; this is a normal reaction and will smooth out with the dry ingredients.
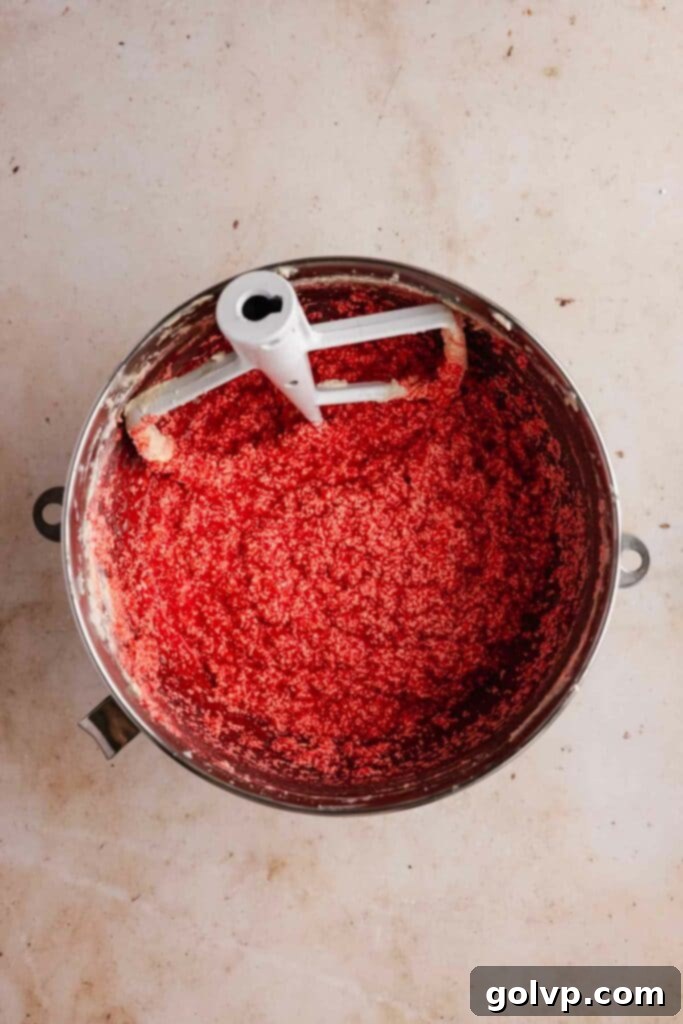
Step 5 – Achieve the Red Color. With the mixer on low speed or using a hand whisk to prevent splattering, gradually add red gel food coloring, drop by drop, until you achieve your desired vibrant red hue. Gel coloring is best for intensity without adding too much liquid.
Step 6 – Add Dry Ingredients. Sift together the all-purpose flour, baking powder, baking soda, and cocoa powder directly into the wet ingredients in the same bowl. Gently fold these dry ingredients into the wet mixture using a whisk or mix on the lowest speed of your mixer. Mix only until the batter is thick and smooth, and just until you no longer see any streaks of dry flour. Overmixing can lead to a tough cake, so stop as soon as it’s combined.
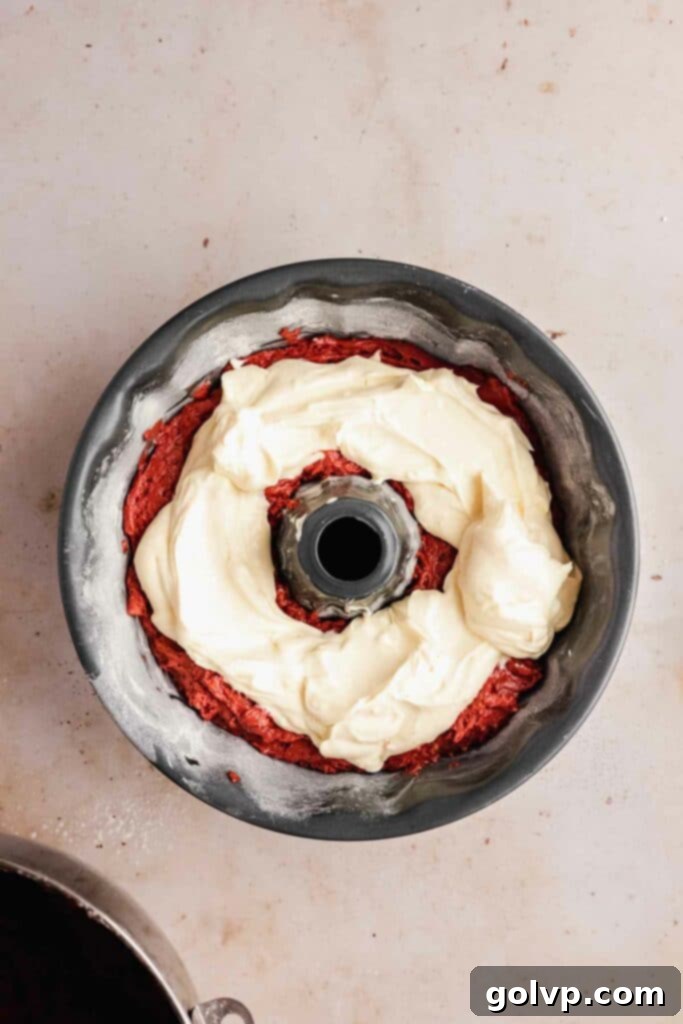
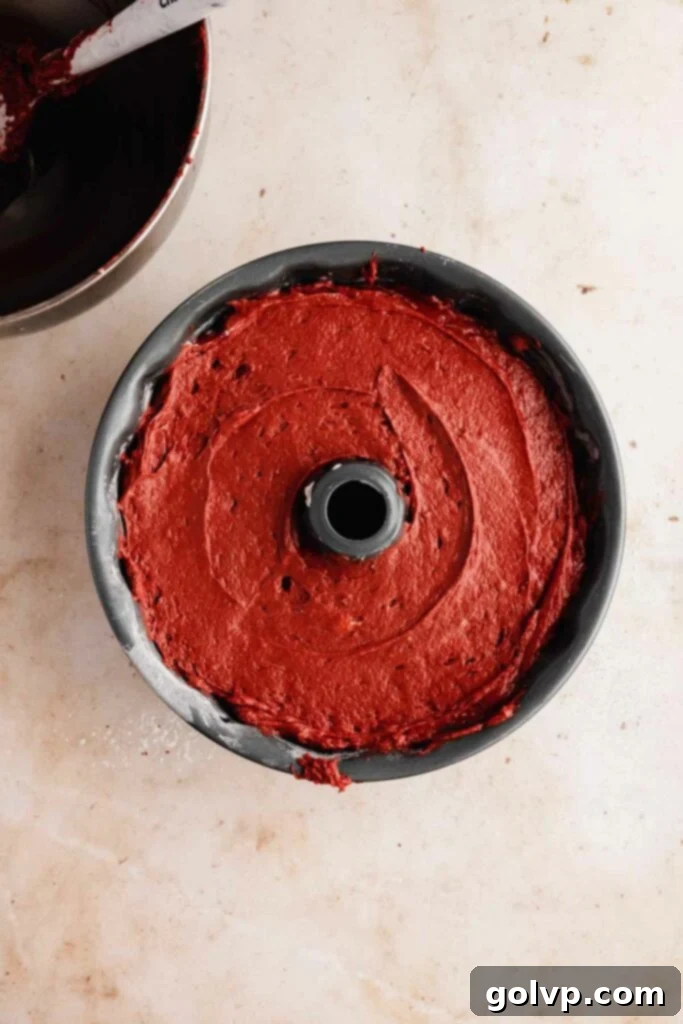
Step 7 – Layer the Cake. Pour approximately half of the red velvet batter into your meticulously prepared bundt pan, spreading it evenly across the bottom. Carefully scoop spoonfuls of the reserved cream cheese swirl mixture over the batter, being cautious not to let it touch the edges of the pan. This helps maintain the distinct swirl. Gently spoon the remaining red velvet batter over the cream cheese layer, smoothing the top. Tap the pan lightly on a flat surface a few times to release any large air pockets, ensuring an even bake.
Step 8 – Bake. Place the bundt pan into your preheated oven and bake for 55-70 minutes. The cake is done when a wooden skewer or toothpick inserted into the center comes out mostly clean. A few moist crumbs from the cream cheese filling are acceptable, but it should not be covered in raw batter.
Step 9 – Release the Cake. Once baked, remove the bundt cake from the oven and let it cool in the pan for exactly 10 minutes. This crucial cooling time allows the cake to set without sticking. After 10 minutes, place a wire cooling rack or a sturdy serving plate firmly over the top of the bundt pan, then carefully and confidently flip the entire assembly over. A gentle tap on the bottom of the pan (which is now the top) can help dislodge the cake. It should release beautifully!
Step 10 – Cool Completely. Allow the bundt cake to cool completely on the wire rack before glazing. For an even more intense “cheesecake” flavor from the swirl, consider chilling the cooled bundt cake in the fridge for 2-12 hours. While not strictly necessary for enjoyment, this allows the flavors to meld and deepen beautifully.
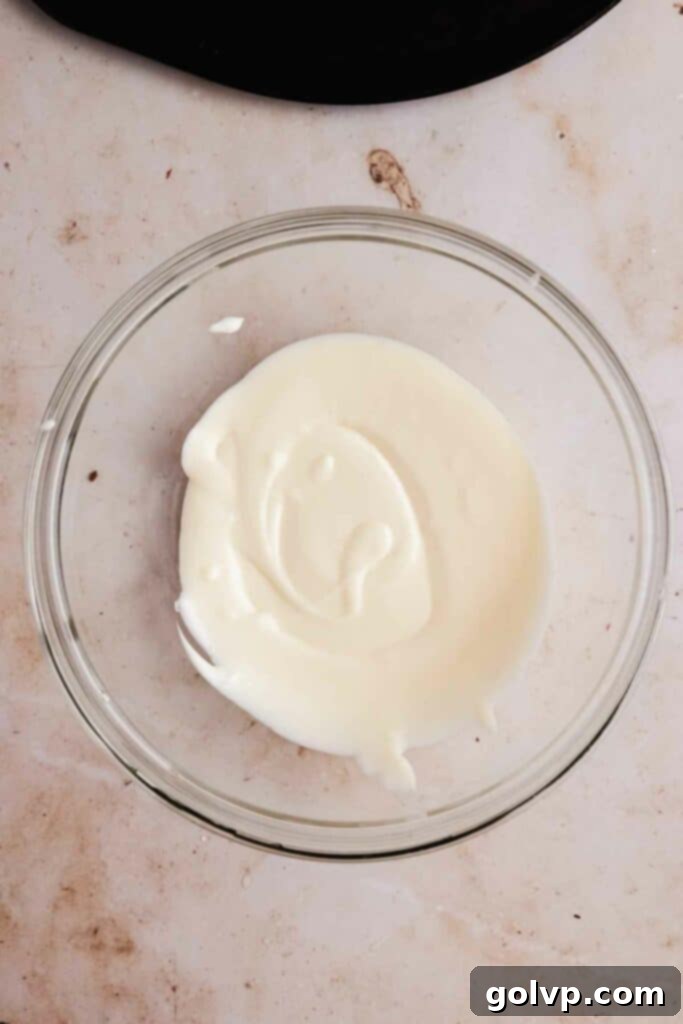
Step 11 – Prepare the Glaze. In a large bowl or your stand mixer, beat the softened unsalted butter, powdered sugar, and a dash of sea salt until smooth and combined. Scrape down the bowl thoroughly and beat again. Add the softened cream cheese and continue beating until the mixture is completely smooth and creamy, again scraping the bowl halfway through. Finally, add the vanilla extract and milk, one tablespoon at a time, beating well after each addition. Continue adding milk until your desired glaze consistency is reached. For an elegant drip effect down the sides of the bundt cake, aim for a runnier consistency. If you prefer a thicker, more frosting-like glaze, use less milk. Test the drip consistency on an inconspicuous part of the cake first.
Step 12 – Serve and Enjoy. Just before serving, generously adorn your beautiful Red Velvet Bundt Cake with colorful sprinkles for a festive touch. Due to the cream cheese in both the swirl and glaze, store any leftovers in the refrigerator. However, for the best flavor and texture, allow the cake to come to room temperature for about 30 minutes before serving. This ensures the cake is soft, moist, and its flavors are fully vibrant. Enjoy every delicious slice!
Frequently Asked Questions About Baking Your Red Velvet Bundt Cake
Absolutely! While this recipe is optimized for a bundt pan, you can easily adapt it. This recipe yields enough batter to be split into two standard loaf pans. If using loaf pans, reduce the baking time significantly; they will typically be ready in about 30-40 minutes. Always check for doneness with a wooden skewer, ensuring it comes out clean from the center of the loaves.
Technically, yes, you can omit the cream cheese swirl. The red velvet cake portion of this recipe is incredibly delicious and moist on its own. However, we highly recommend including the cream cheese swirl! It adds an extra layer of flavor and a beautiful visual element that truly takes this cake to the next level, and it requires very little additional effort for such a big payoff.
For best results and a perfect release, we strongly advise against using liquid cooking oil to grease your bundt pan. Oil tends to pool at the bottom or bead up on the sides, failing to provide an even, protective coating, which can lead to your cake sticking. Instead, always use a solid fat like cold butter or shortening. These fats cling better to the intricate details of the bundt pan and, when dusted with flour, create a superior non-stick barrier.
Because this bundt cake contains a cream cheese swirl and glaze, it must be stored in the refrigerator. Wrap it tightly in plastic wrap or place it in an airtight cake carrier to prevent it from drying out. It will stay fresh in the fridge for up to 3-4 days. For optimal flavor and texture, allow the cake to sit at room temperature for about 30 minutes before serving.
Yes, you can! This bundt cake freezes beautifully. For best results, freeze the cake *before* adding the glaze. Once the cake has cooled completely, wrap it tightly in several layers of plastic wrap, then an additional layer of aluminum foil. You can freeze it for up to 2-3 months. To thaw, simply transfer it to the refrigerator overnight. Once thawed, you can prepare and apply the cream cheese glaze and sprinkles before serving.
Discover More Delicious Recipes You’ll Love:
If you enjoyed baking and savoring this magnificent Red Velvet Bundt Cake, you’re in for a treat! Our kitchen is filled with more delightful recipes that promise to bring joy to your taste buds. Explore these other fantastic creations that share the same commitment to flavor, texture, and ease:
- Red Velvet Oreo Cheesecake
- Giant Valentine’s Heart Cookie
- Cinnamon Bundt Cake with Gooey Cinnamon Swirl
Happy baking, and may your kitchen always be filled with delicious aromas!
Did you make this recipe? We’d absolutely love to hear about it! Please take a moment to rate this recipe and share your thoughts in the comments below. Your feedback helps us grow and inspires other bakers. Don’t forget to share your beautiful creation on Instagram and tag @flouringkitchen. For more delectable recipe ideas and to save your favorites, be sure to follow us on Pinterest!
📖 Recipe
Red Velvet Bundt Cake with Cream Cheese Swirl
Mary
Pin Recipe
Shop Ingredients
Equipment
-
1 Standard non-stick bundt pan (12 cups)
Ingredients
Cream Cheese Swirl
- 12 oz cream cheese softened
- 1 large egg room temperature
- ⅓ cup granulated sugar
- ⅛ teaspoon sea salt
- 1 teaspoon pure vanilla extract
Batter
- 1 cup unsalted butter softened
- ¼ cup vegetable oil
- 1 ½ cup granulated sugar
- ¼ teaspoon sea salt
- 1 tablespoon pure vanilla extract
- 5 large eggs room temperature
- ⅔ cup sour cream room temperature
- 1 ¼ cup buttermilk room temperature
- red gel food colouring
- 3 ¼ cup all purpose flour 390g
- ¼ cup natural cocoa powder you can also use dutch processed
- 2 ½ teaspoon baking powder
- ¼ teaspoon baking soda
Glaze
- 4 tablespoons unsalted butter softened
- 1 cup powdered sugar
- ⅛ teaspoon sea salt
- 4 oz cream cheese softened
- 1 teaspoon pure vanilla extract
- 2-6 tablespoons milk
- 3 tablespoons sprinkles
Shop Ingredients on Jupiter
Instructions
Cream Cheese Swirl
-
In a large bowl or stand mixer, beat together cream cheese, sugar, and salt until completely smooth.12 oz cream cheese, ⅓ cup granulated sugar, ⅛ teaspoon sea salt
-
Add egg and vanilla and beat until smooth and creamy, scraping down the bowl. Set aside until later.1 large egg, 1 teaspoon pure vanilla extract
Batter
-
Preheat oven to 180°C (350°F). Grease the inside of a bundt pan with a pat of cold butter. Add a tablespoon of flour and shake it around the pan so it sticks to the butter and forms a thin layer. Shake out any excess.
-
In a large bowl or stand mixer, beat together butter, oil, sugar, and salt until light and fluffy, 5-7 minutes. Scrape the bowl halfway.1 cup unsalted butter, ¼ cup vegetable oil, 1 ½ cup granulated sugar, ¼ teaspoon sea salt
-
Add vanilla and eggs, one at a time, beating well in between each egg and scraping the bowl.5 large eggs, 1 tablespoon pure vanilla extract
-
Add sour cream, beat well. Add buttermilk and mix well. It will start to look very gloopy, that’s ok.⅔ cup sour cream, 1 ¼ cup buttermilk
-
Add red food coloring one drop at a time until it looks red. So that it doesn’t splatter you can switch to a hand whisk.red gel food colouring
-
Sift the flour, baking powder, baking soda, and cocoa powder right into the same bowl. Fold with a whisk or mix on low to make a thick, smooth batter. Stop mixing as soon as it becomes creamy and you stop seeing streaks of dry ingredients.3 ¼ cup all purpose flour, ¼ cup natural cocoa powder, 2 ½ teaspoon baking powder, ¼ teaspoon baking soda
-
Add half the batter to the prepared bundt pan. Spread so it’s smooth. Scoop cream cheese on top, trying to not let it touch the edges of the pan. Add the rest of the batter on top and smooth. Tap the pan a few times on a flat surface to remove any large air pockets.
-
Bake in preheated oven for 55-70 minutes, until a wooden skewer inserted into the middle comes out clean. It will have a few crumbs sticking to it because of the filling but it shouldn’t be covered in batter.
-
Remove from the oven and let cool for 10 minutes. Place a plate or cooling rack on top of the bundt cake and flip over to release the cake. Tap the top of the bundt pan gently to help release. It should come right out!
-
Let the bundt cake cool completely. The cheesecake swirl tastes even better once the bundt cake chills in the fridge (2-12 hours) and the swirl has time to develop its flavour but this isn’t necessary.
Glaze
-
In a large bowl or stand mixer, beat together butter, sugar, and salt until smooth. Scrape down the bowl and beat again.4 tablespoons unsalted butter, 1 cup powdered sugar, ⅛ teaspoon sea salt
-
Add cream cheese and beat until smooth, scraping down the bowl halfway. Add vanilla extract and milk, one tablespoon at a time. Beat the milk in well and scrape the bowl down frequently to make sure the glaze is completely smooth.4 oz cream cheese, 1 teaspoon pure vanilla extract, 2-6 tablespoons milk
-
Add milk until you get the consistency you want. I went for a runnier consistency so that it drips down the bundt cake but you can also go for a thicker consistency to spread it on like a frosting. Make test drips on the back of the cake to get the perfect drip.
-
Add sprinkles on top right before serving and enjoy! Store in the fridge because of the cream cheese but serve at room temperature.3 tablespoons sprinkles
Notes
Make ahead:
You can make and glaze the cake the day before serving! The cheesecake swirl will taste even better the next day after being chilled. The glaze will hold up well overnight as well. Store it in a cake carrier overnight to not disturb the glaze. Top with sprinkles right before serving so they don’t bleed. Serve it at room temperature so the cake becomes softer but store it in the fridge.
How to get the perfect bundt release every time
- Use a non-stick bundt pan that has an intact coating
- Butter the inside with a cold piece of butter or shortening. You don’t want to use oil because it will just drip down the sides. Add a tablespoon of flour and shake it all around the pan so that it sticks to the butter.
- Let the cake cool for 10 minutes before flipping to release. It will release better when it’s still hot.
