The Ultimate No-Bake Mango Crepe Cake: An Easy 30-Layer Recipe with Creamy Mascarpone Filling
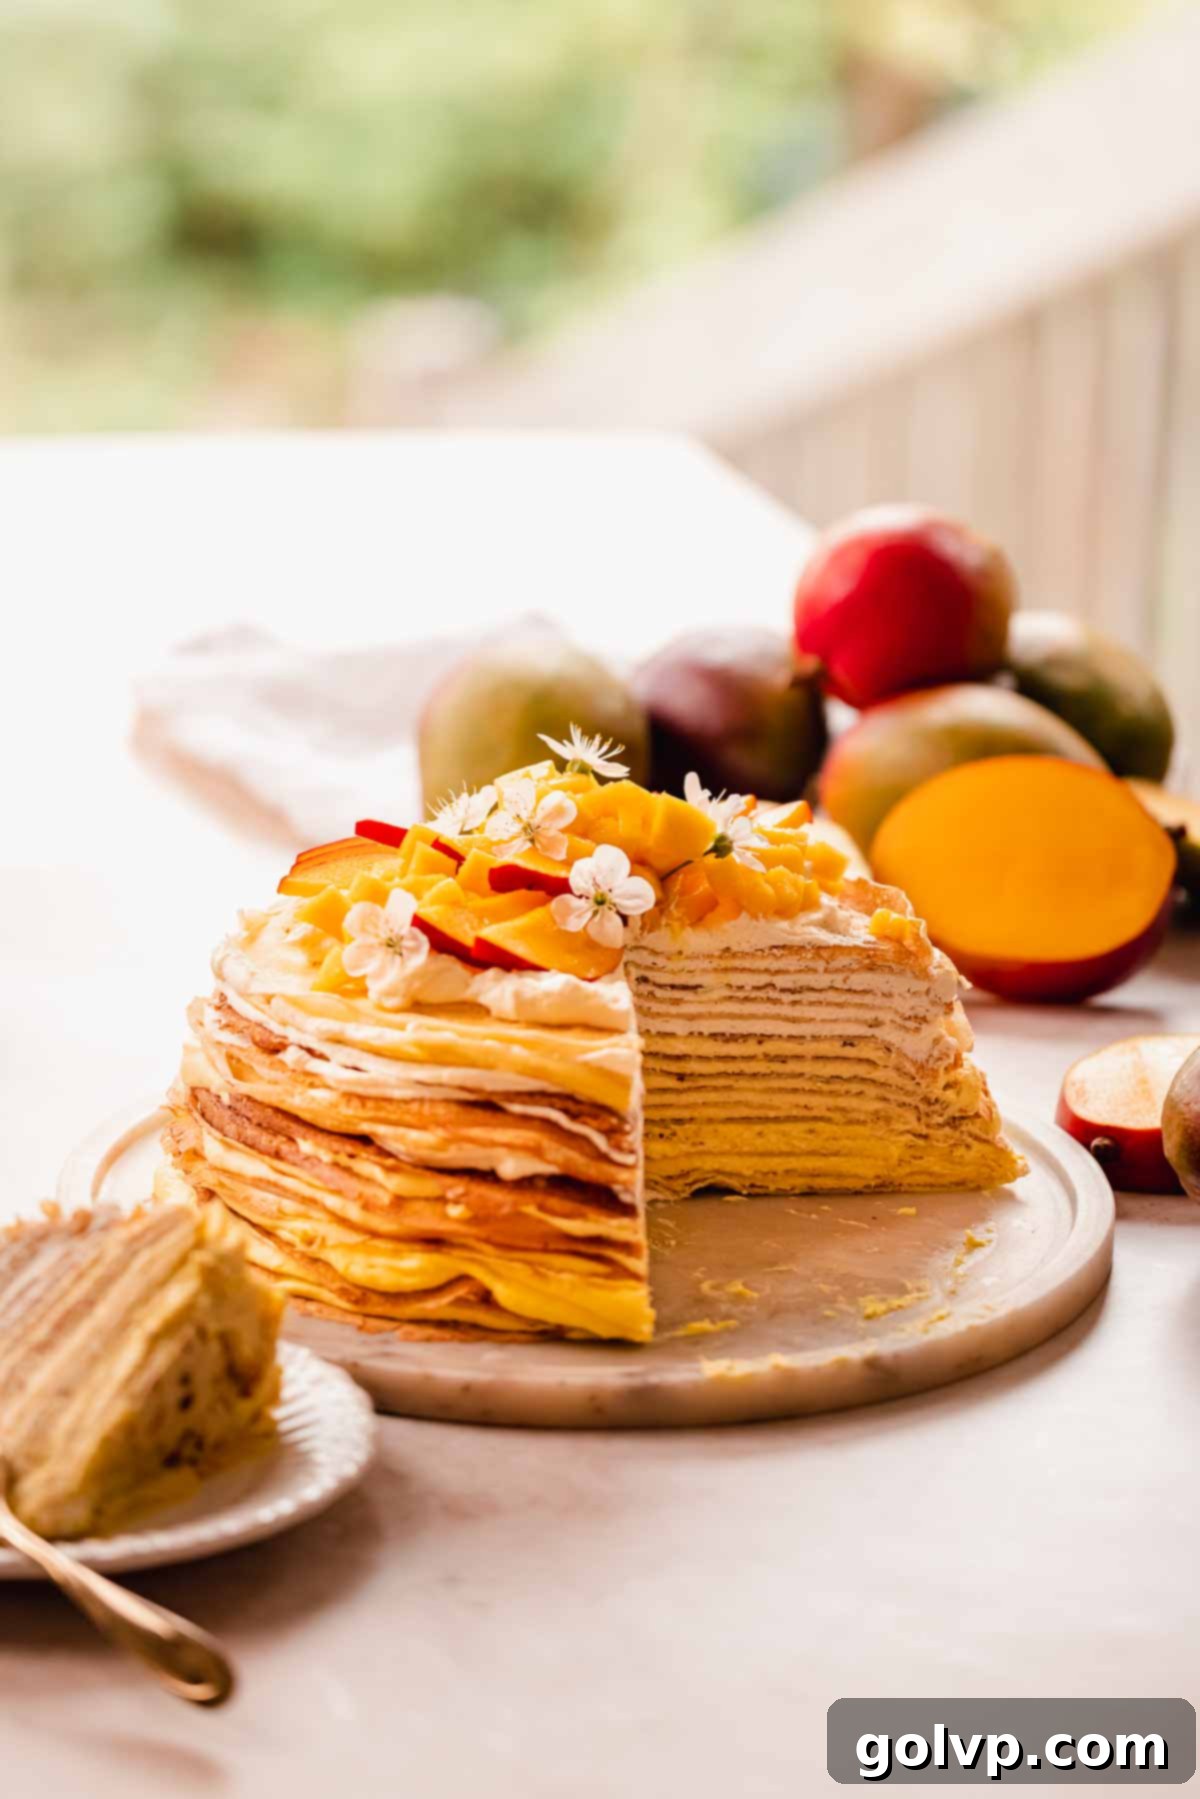
Prepare to be mesmerized by this show-stopping Mango Crepe Cake, a culinary masterpiece boasting over 30 delicate layers of thin, tender crepes generously filled with a luscious, ombré whipped mango mascarpone cream. This isn’t just any cake; it’s a delightful, no-bake marvel that brings vibrant tropical flavors and an impressive presentation to any occasion. Forget the oven – this recipe proves that the most magnificent cakes can be assembled with ease, perfect for warm weather or when you simply crave a hassle-free yet extraordinary dessert.
Each slice of this mango crepe cake offers an exquisite symphony of textures: the soft, bouncy crepes intertwine with the incredibly creamy filling, bursting with authentic mango flavor. What makes this recipe truly special is our foolproof method for creating perfectly delicate crepes, complete with a genius shortcut you’ll wish you discovered sooner! This technique ensures success every time, even for novice crepe makers. Whether you opt for fresh, ripe mangoes or convenient frozen ones, this recipe adapts beautifully, transforming them into a rich, jam-like filling that forms the heart of this tropical sensation. And if you find yourself with an abundance of mangoes, don’t miss out on trying my fluffy mango cake roll for another delightful treat.
🥭 Why You’ll Adore This Mango Crepe Cake Recipe
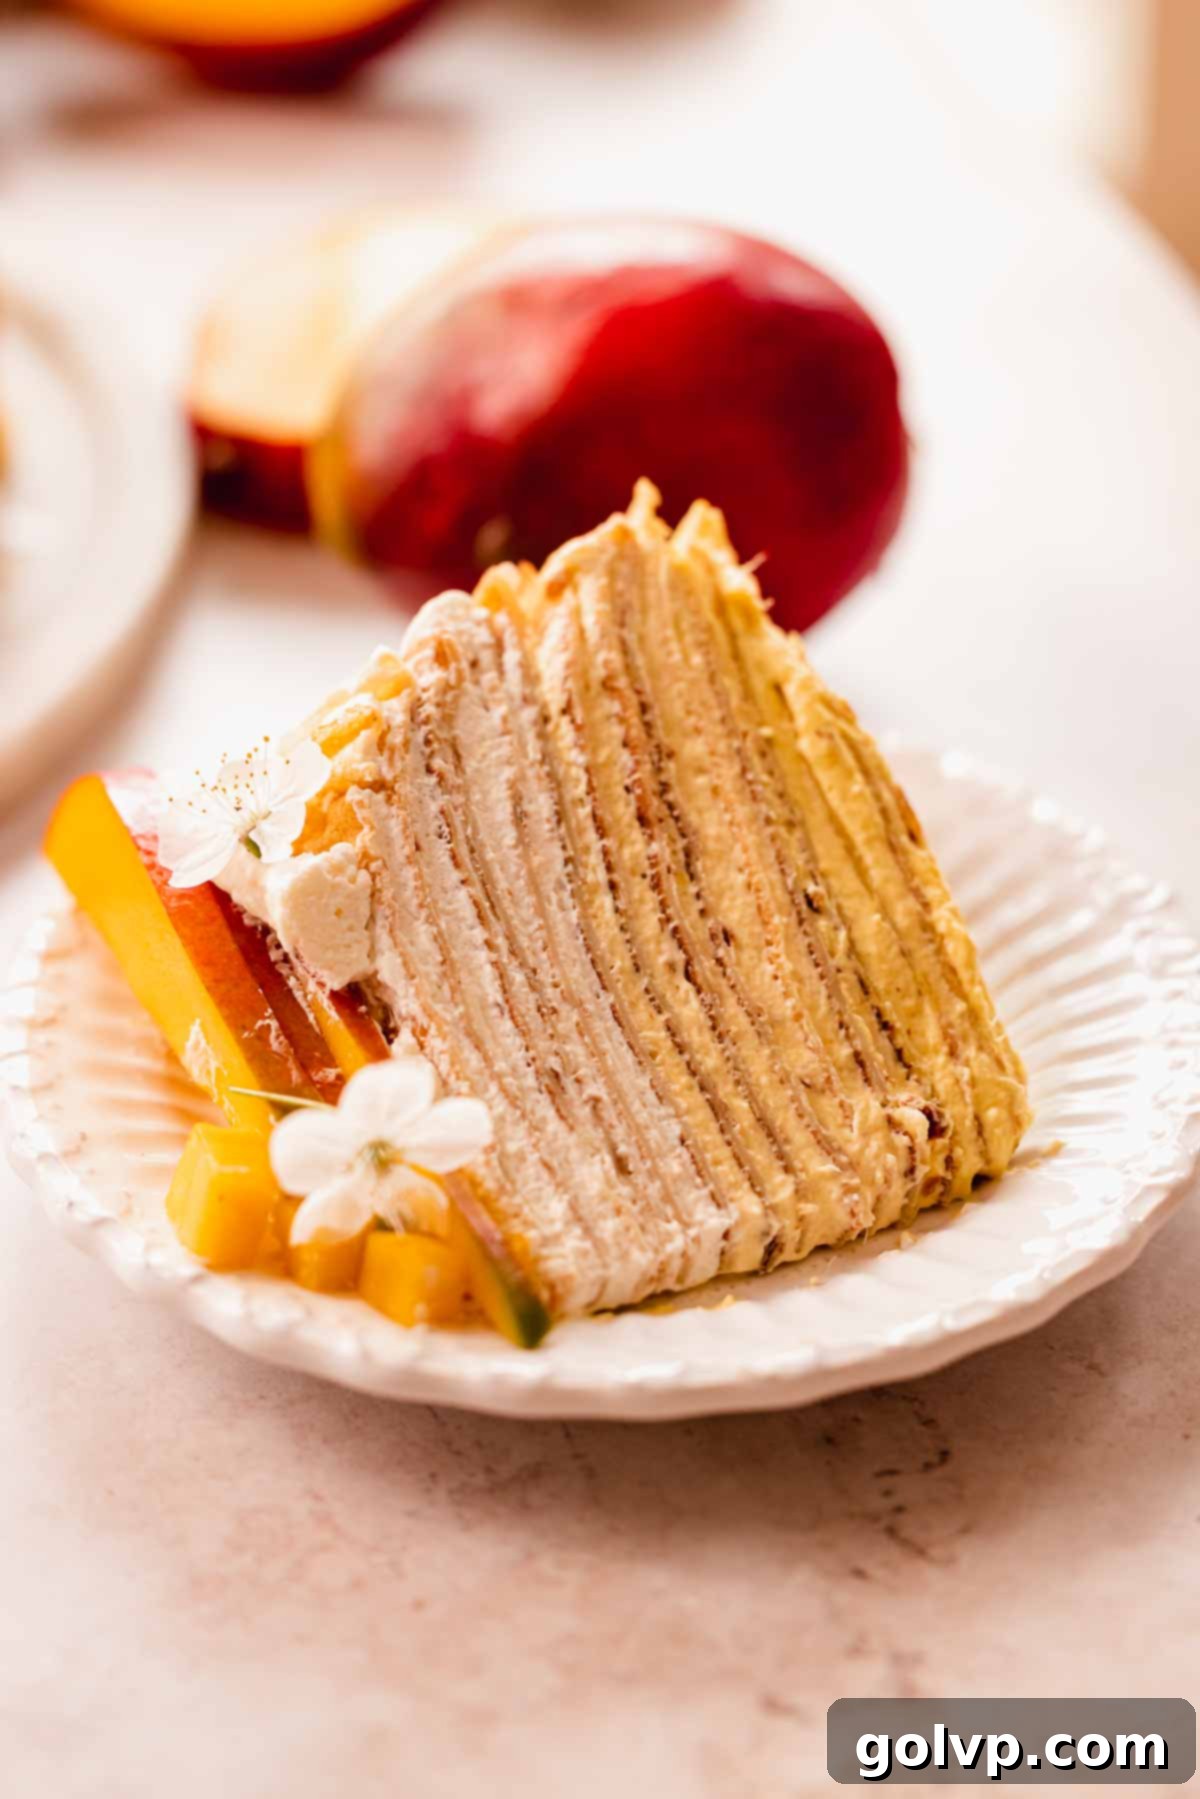
- Over 30 Layers of Pure Delight: Imagine slicing into a cake with more than thirty ethereal layers, each separated by velvety smooth cream. This isn’t just visually stunning; it creates an unparalleled melt-in-your-mouth experience. Despite its impressive height, this truly is one of the simplest layered cakes you’ll ever assemble, making it perfect for both beginners and seasoned bakers looking for a showstopper without the fuss.
- Effortless No-Bake Masterpiece: Say goodbye to turning on your oven, especially during warmer months! This incredible dessert requires absolutely no baking, making it an ideal choice when you want a cool, refreshing treat. For an even quicker assembly, you can even seek out quality store-bought crepes, though our homemade version is incredibly easy and highly recommended.
- Intense, Authentic Mango Flavor: The star of the show is, of course, the mango. We create a homemade mango reduction that’s cooked down to concentrate its sweet and tangy essence. This rich, jam-like puree is then gently folded into our whipped mascarpone cream, infusing every bite with a bright, milky, and intensely fruity mango flavor that tastes like a bite of sunshine.
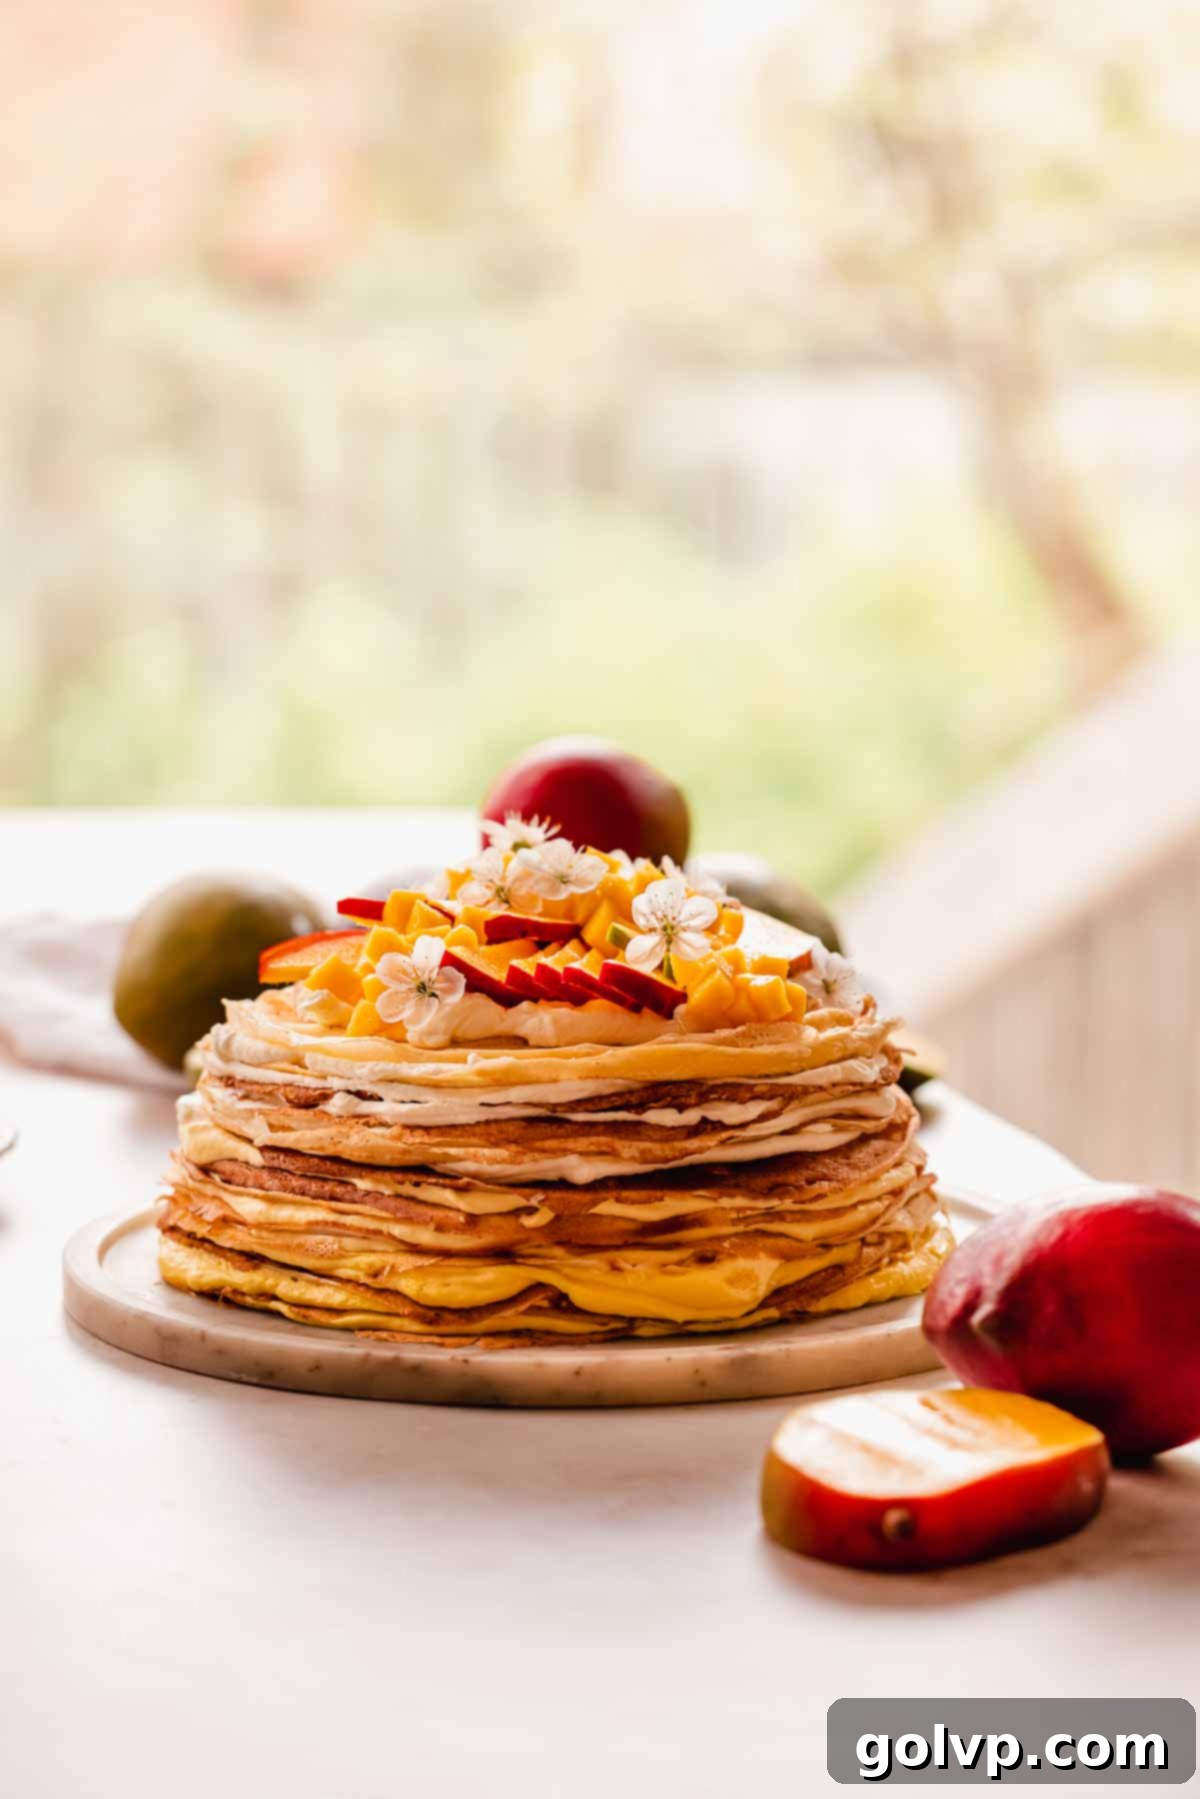
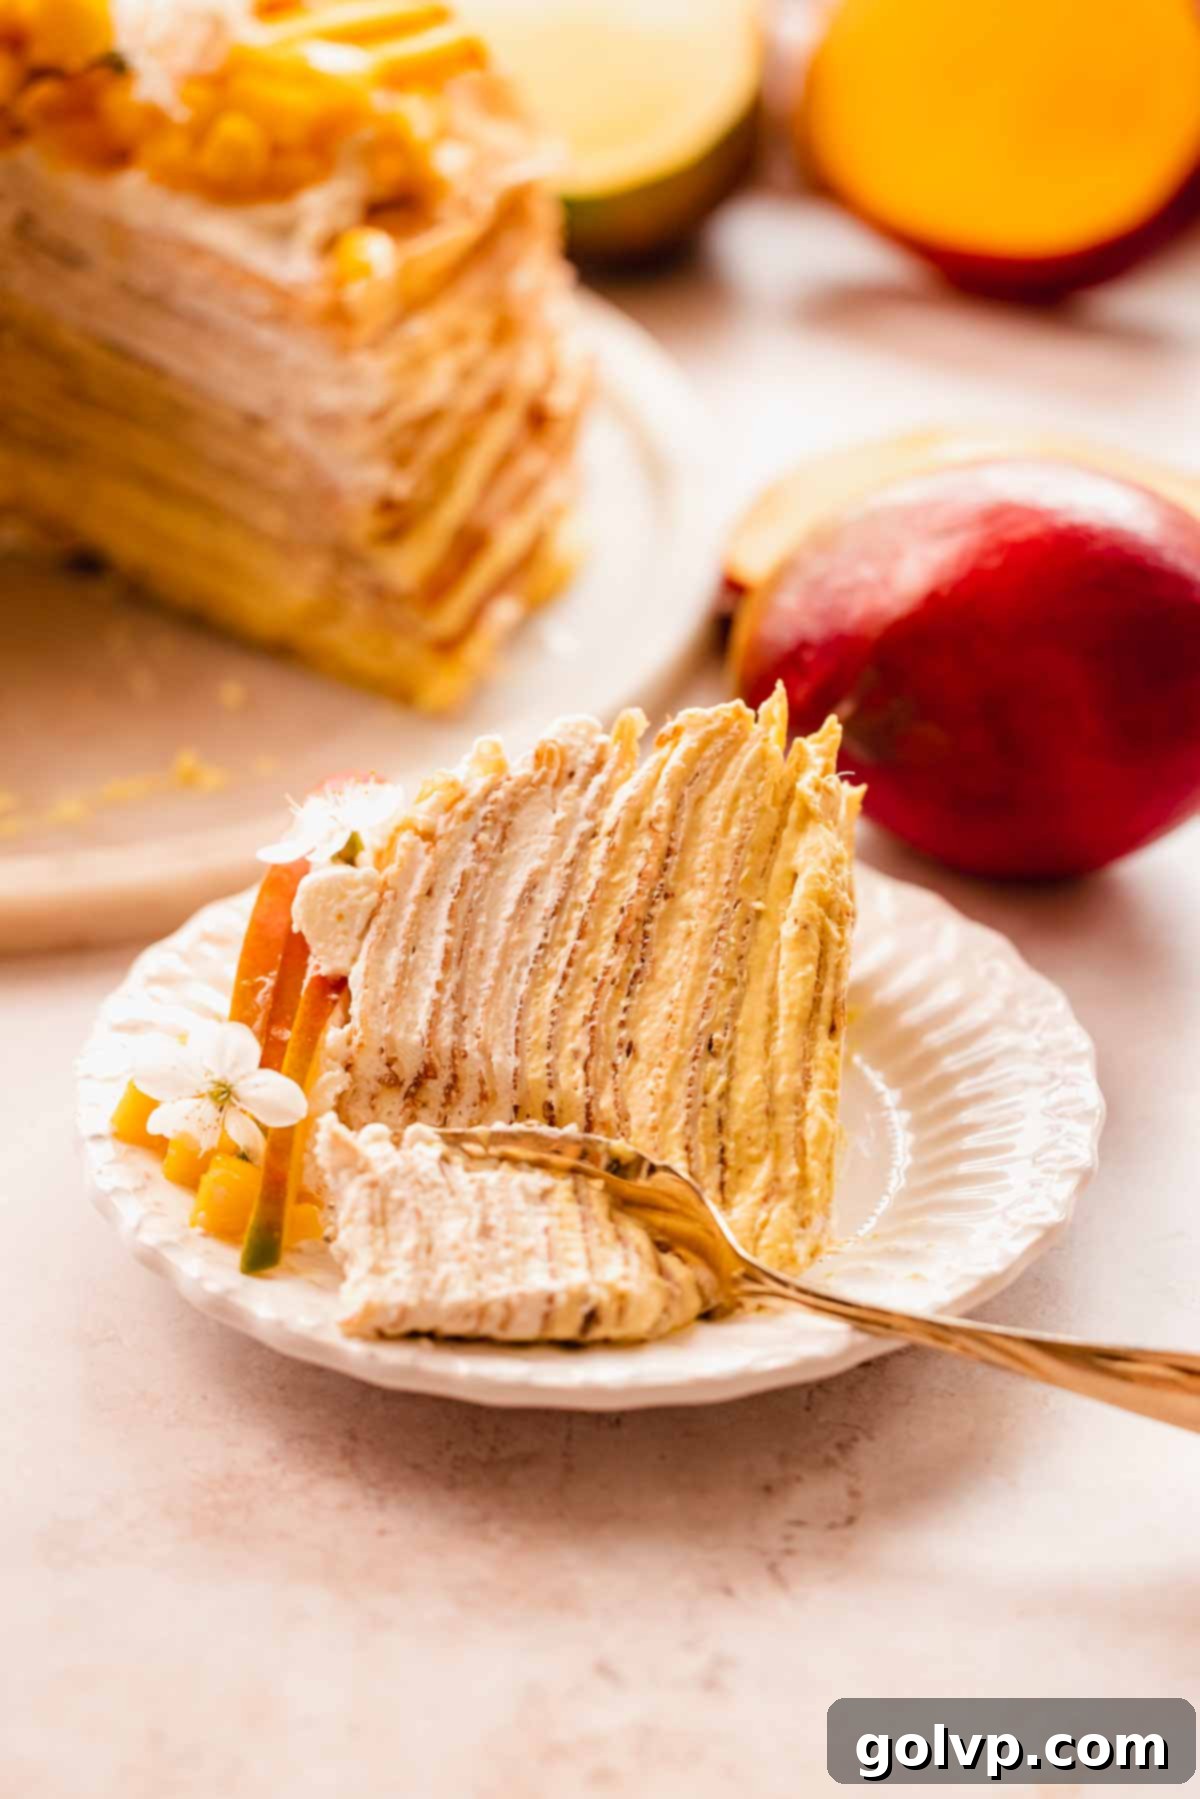
- Stunning Ombré Effect: Beyond its incredible taste, this crepe cake is a feast for the eyes. We artfully layer the filling to create a beautiful ombré gradient: the bottom layers feature a deeper yellow, boasting the most intense mango flavor, gradually transitioning to a lighter yellow in the middle, and culminating in a classic, delicate vanilla cream at the top. This not only adds visual appeal but also offers a subtle range of flavors throughout the cake, keeping each bite exciting.
- Stress-Free Crepe Making with Extras: Our recipe is designed for success, providing a generous batch of crepes. This means you don’t have to fret over a few imperfect crepes—simply snack on them or use them for other delicious creations! The extra crepes provide a buffer, allowing you to relax and enjoy the process of perfecting your technique without pressure.
📝 Essential Ingredients for Your Mango Crepe Cake
Mastering this recipe starts with understanding your ingredients. Below, you’ll find essential tips for each component to ensure your crepe cake is nothing short of perfect.
For precise measurements and full instructions, please refer to the recipe card at the bottom of the page.
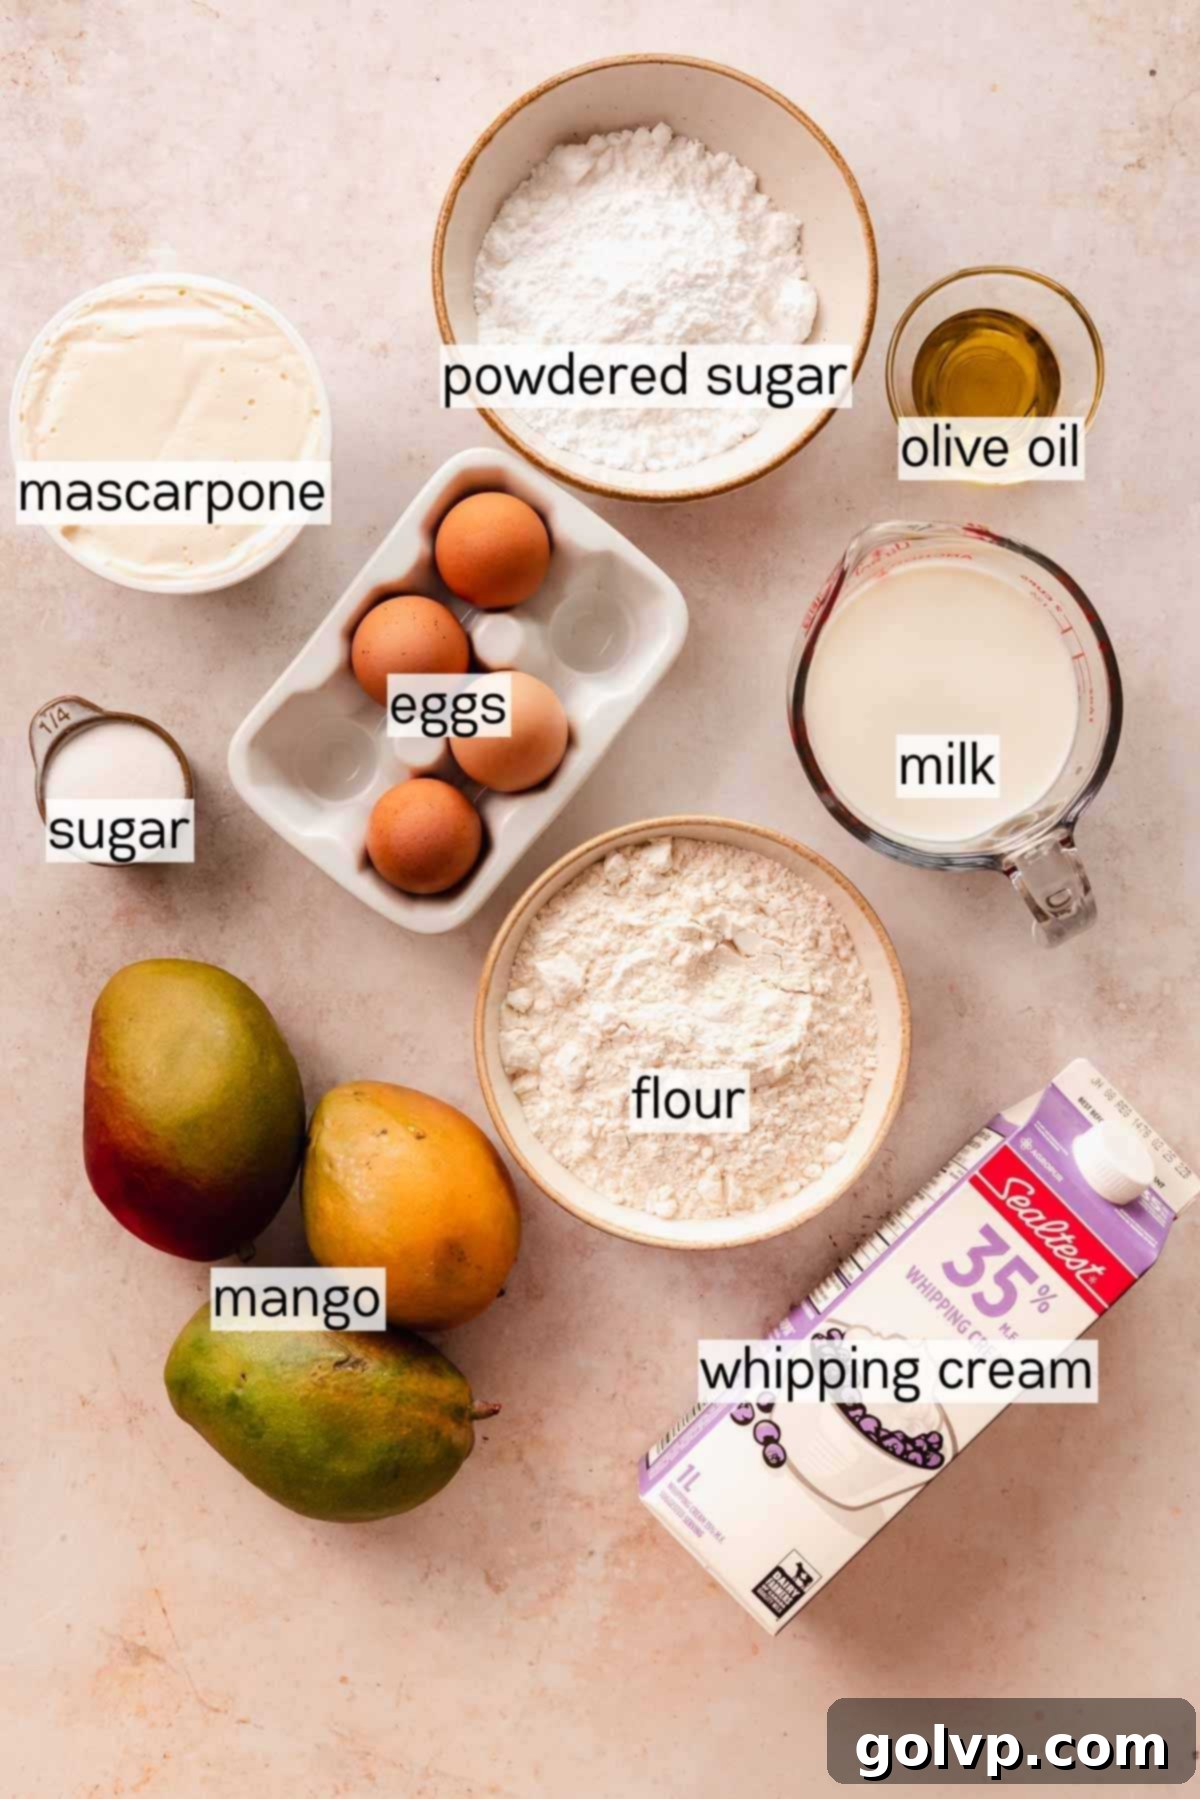
Mango: The star of our show! You can use either fresh or frozen mango for the cooked-down filling. When using fresh, opt for ripe, sweet varieties like Ataulfo or Honey mangoes. If using frozen, there’s no need to thaw them beforehand as they will be cooked down. For decorating the top, fresh, firm mangoes are essential for clean slices and cubes. If you’re using store-bought mango puree, make sure to cook it in a saucepan until it thickens significantly to a jam-like consistency; otherwise, it will make your filling too runny.
All-Purpose Flour: Accuracy is key for delicate crepes. To achieve the best results, always weigh your flour using a kitchen scale. If a scale isn’t available, use the spoon-and-level method: gently stir the flour in its bag, then spoon it into a measuring cup without packing it. Level off the excess with the flat edge of a knife. This prevents over-measuring, which can lead to thick, tough crepes.
Milk & Water: My secret to perfect crepes lies in using both! Milk contributes rich flavor and a tender texture, while water helps create exceptionally thin, delicate crepes with those coveted lacy edges. I recommend using whole or 2% milk for the best flavor, but feel free to use your preferred milk type.
Whipping Cream: You’ll need chilled 35% (heavy) whipping cream for the luxurious filling. Ensure it’s very cold before whipping, as this significantly aids in achieving stiff peaks and a stable cream.
Mascarpone Cheese: This Italian cream cheese is crucial for stabilizing the whipped cream, ensuring your crepe cake holds its beautiful shape without collapsing. It also lends a wonderfully mild, milky richness and a velvety texture that complements the mango beautifully. Make sure it’s slightly softened at room temperature for about 10 minutes before use to prevent lumps when mixing.
Olive Oil: While melted butter is often used for fresh crepes, for a chilled crepe cake, a liquid oil like olive or vegetable oil is preferred. It keeps the crepes incredibly soft and pliable even after refrigeration, preventing them from becoming stiff or brittle. Don’t worry, the flavor is very subtle and will not overpower the mango.
👩🍳 How to Make the Mango Crepe Cake
Crepes: Step-by-Step Perfection
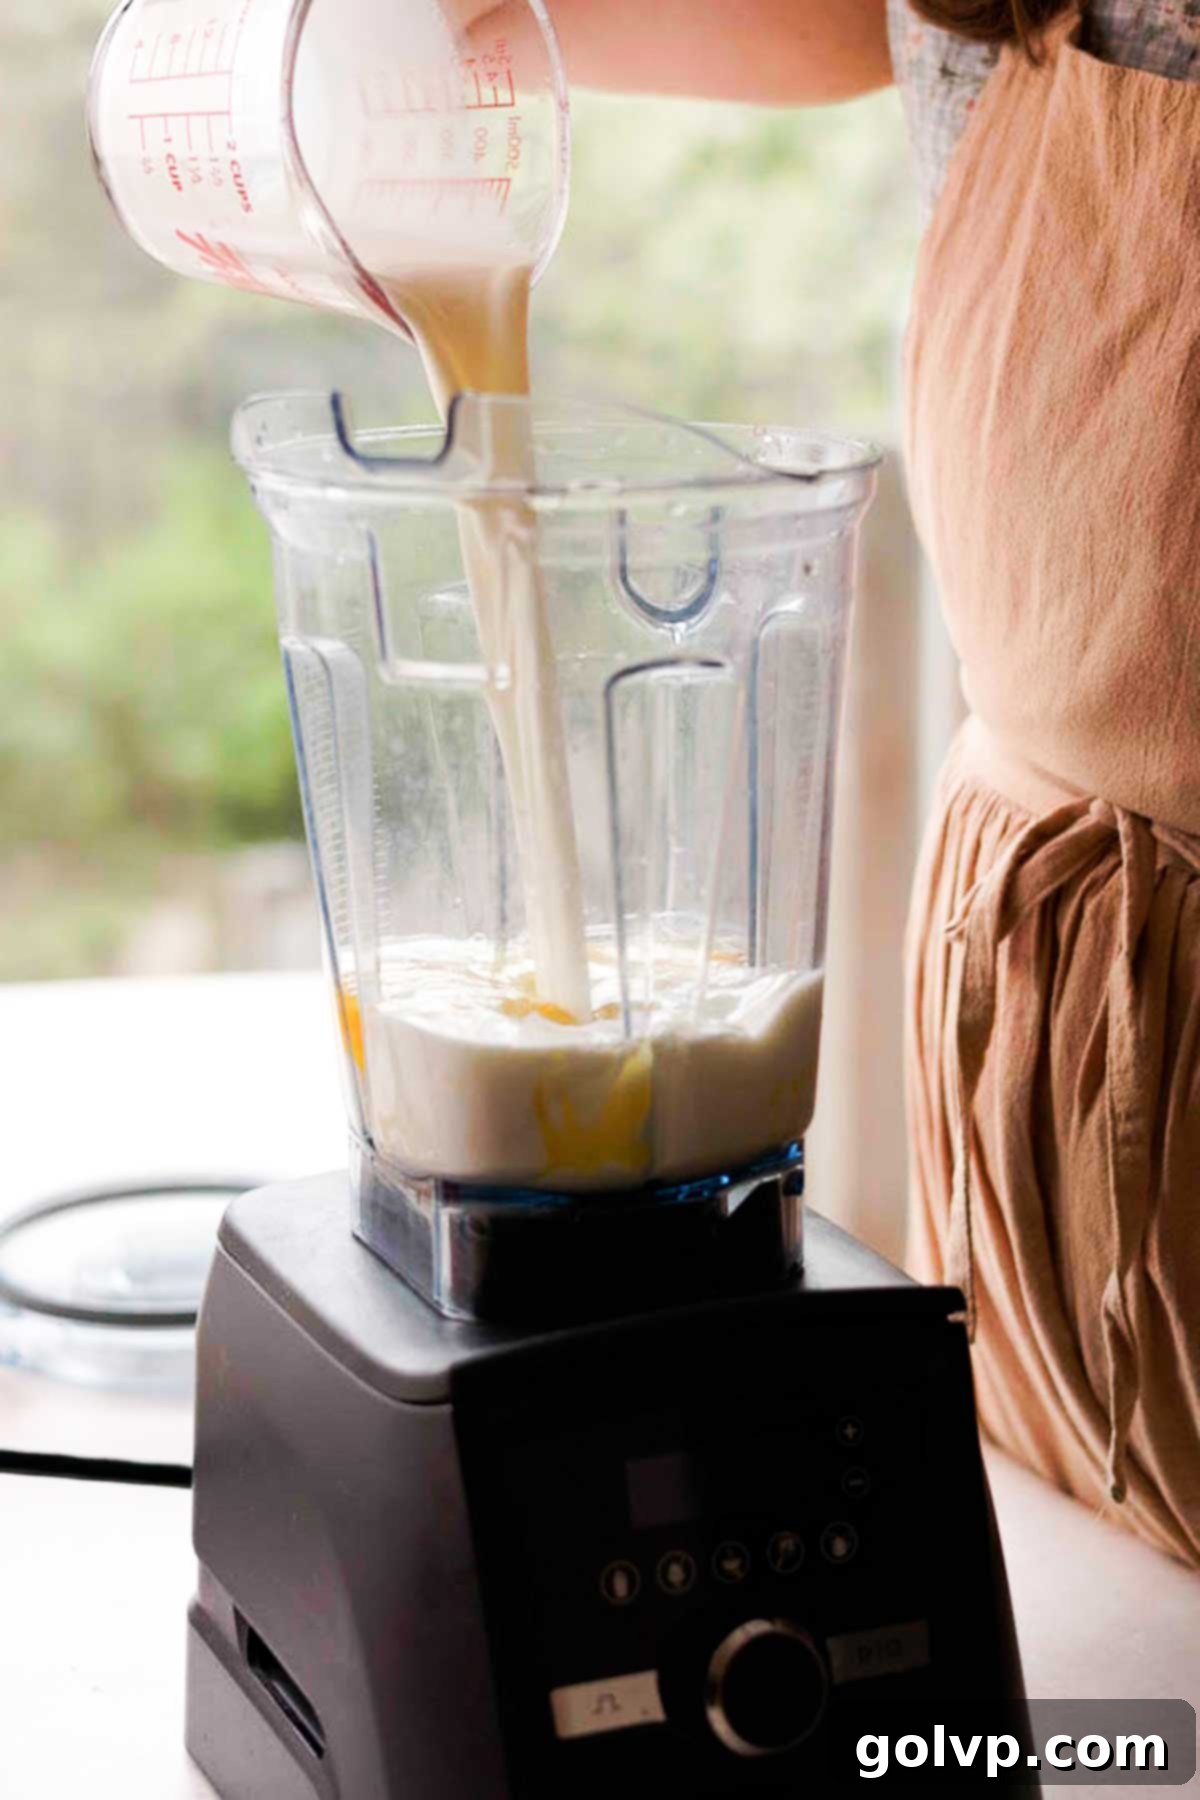
Step 1: The Blender Shortcut. Begin by combining all your crepe ingredients directly into a blender. To ensure a smooth mix, always start with the wet ingredients: eggs, milk, water, and oil. Then, add the dry ingredients: sugar, flour, and baking soda. This order helps prevent dry pockets of flour at the bottom and ensures a perfectly uniform batter.
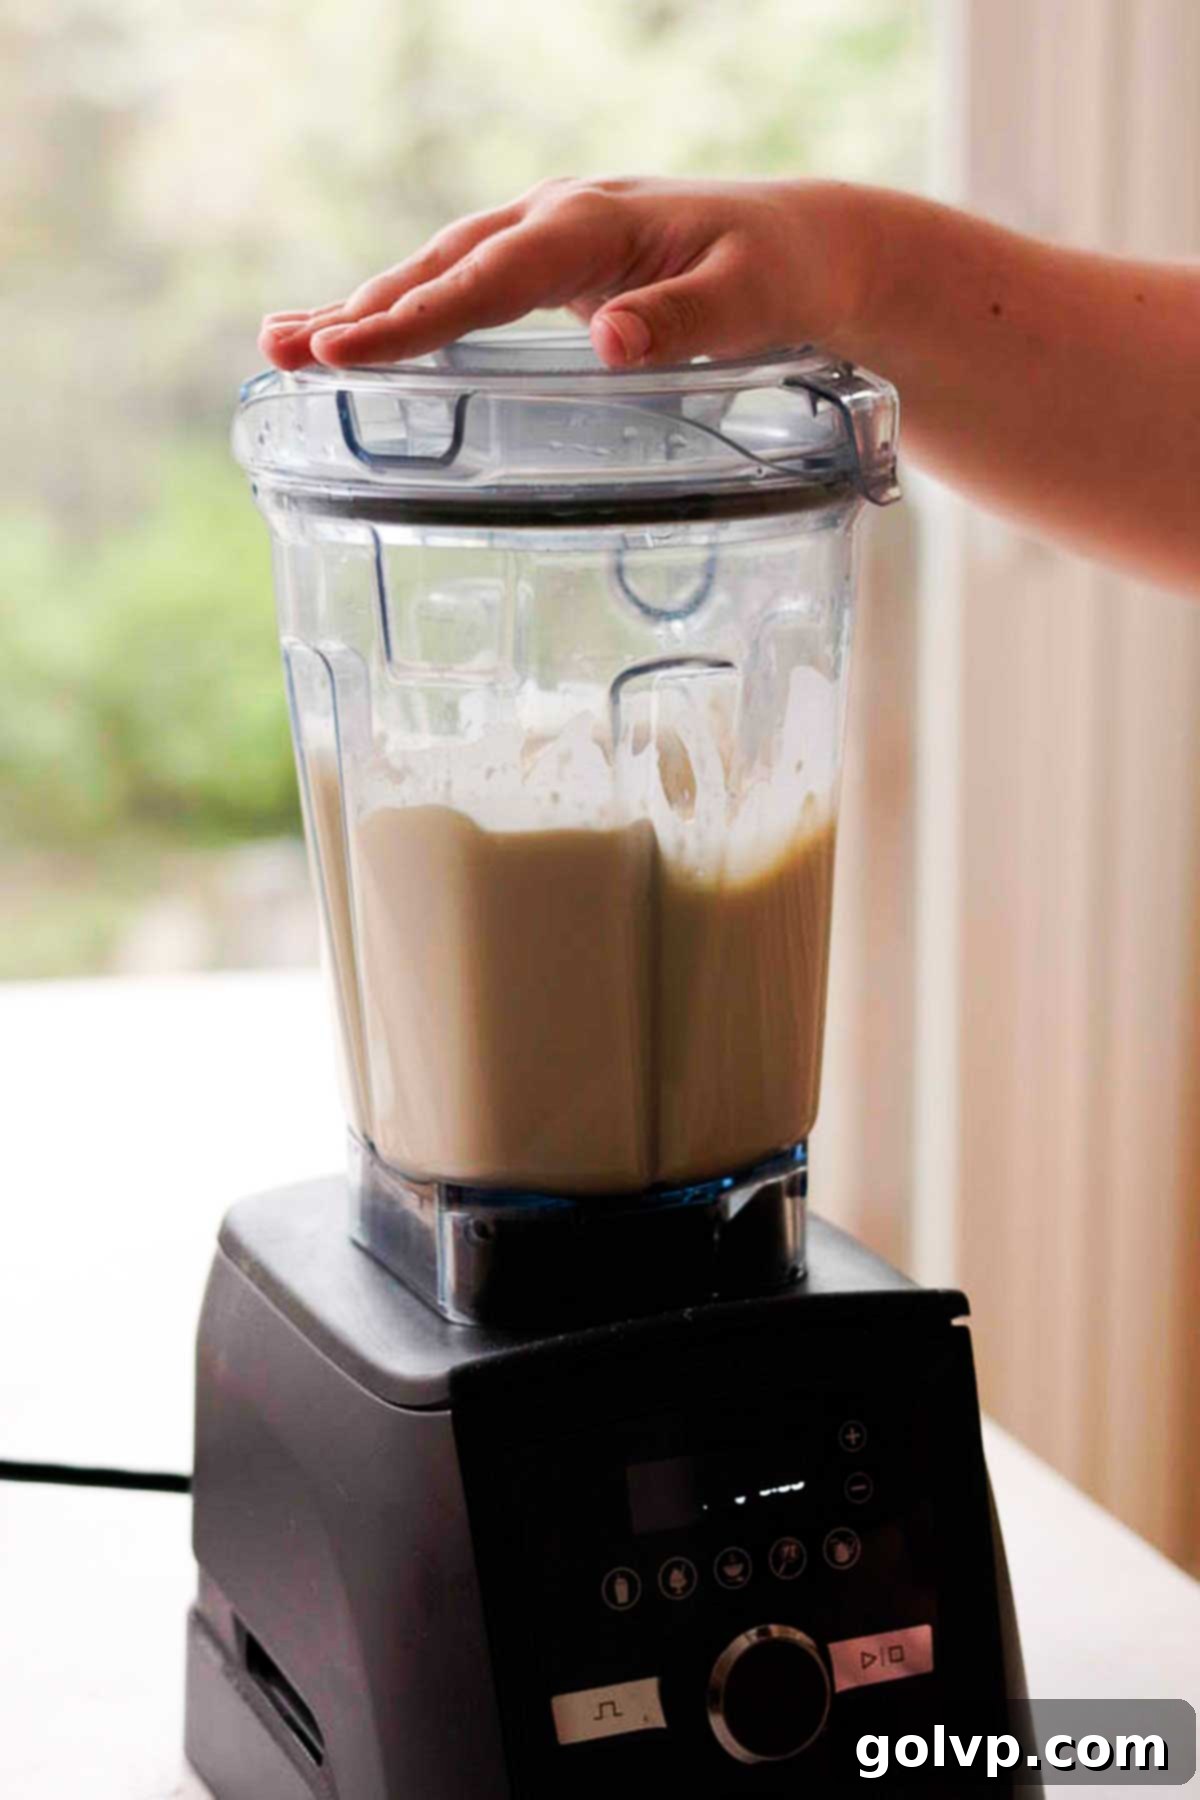
Step 2: Blend and Rest. Start blending on the lowest speed to gently combine the ingredients. Once most of the batter looks mixed, turn off the blender. Use a spatula to scrape down any flour stuck to the sides, ensuring everything gets incorporated. Blend again briefly until the batter is completely smooth, but be careful not to over-blend, which can develop too much gluten. Transfer the blender jar (or the batter into a pitcher) to the fridge and let it rest for at least 20 minutes. This resting period is crucial for the gluten to relax and the flour to fully hydrate, resulting in truly delicate and resilient crepes.

Step 3: Preheat and Pour. Place your chosen crepe pan – either a non-stick pan or a well-seasoned cast iron skillet – over medium-low heat and allow it to preheat thoroughly. Add a small teaspoon of butter and let it melt, swirling to coat the pan. This initial butter helps season the pan and ensures the first crepe doesn’t stick. From your blender’s spout, pour just enough batter to thinly coat the bottom of the pan, quickly tilting and rotating the pan to spread the batter into an even, thin layer. Work quickly but smoothly for best results.

Step 4: Cook and Flip. Cook the crepe on medium-low heat. You’ll know it’s ready to flip when the top surface turns opaque, you see small bubbles of steam forming underneath, and the edges begin to lift and turn a delicate golden brown. Using a thin, flexible spatula, carefully slide it under the perimeter of the crepe to release the edges, then quickly move to the middle to free it from the pan. Swiftly flip the crepe over. Cook the second side for approximately one minute, or until it too achieves a light golden hue. Promptly remove the cooked crepe from the pan with your spatula.
Step 5: Continue Cooking. Repeat the cooking process with the remaining batter. Typically, you won’t need to add more butter after the first crepe, as the pan retains enough grease. Don’t be discouraged if your first crepe or two are a bit “wonky” – this is common as the pan fully preheats and seasons. The subsequent crepes will be much better! Remember, any imperfections will be cleverly hidden within the many layers of your finished cake. Adjust your stove’s heat as needed; consistent medium-low heat works best for even cooking and delicate browning.
Step 6: Cool and Store. As you finish cooking each crepe, stack them neatly on a plate. It’s essential to let them cool completely to room temperature before you begin assembling your cake. Crepes can be made ahead of time: once cooled, cover the stack tightly with plastic wrap or a lid to prevent them from drying out, then refrigerate for up to two days. When you’re ready to assemble, allow the crepes to warm up to room temperature for about 20 minutes; this makes them easier to separate without tearing.
Mango Puree: Creating the Flavor Base
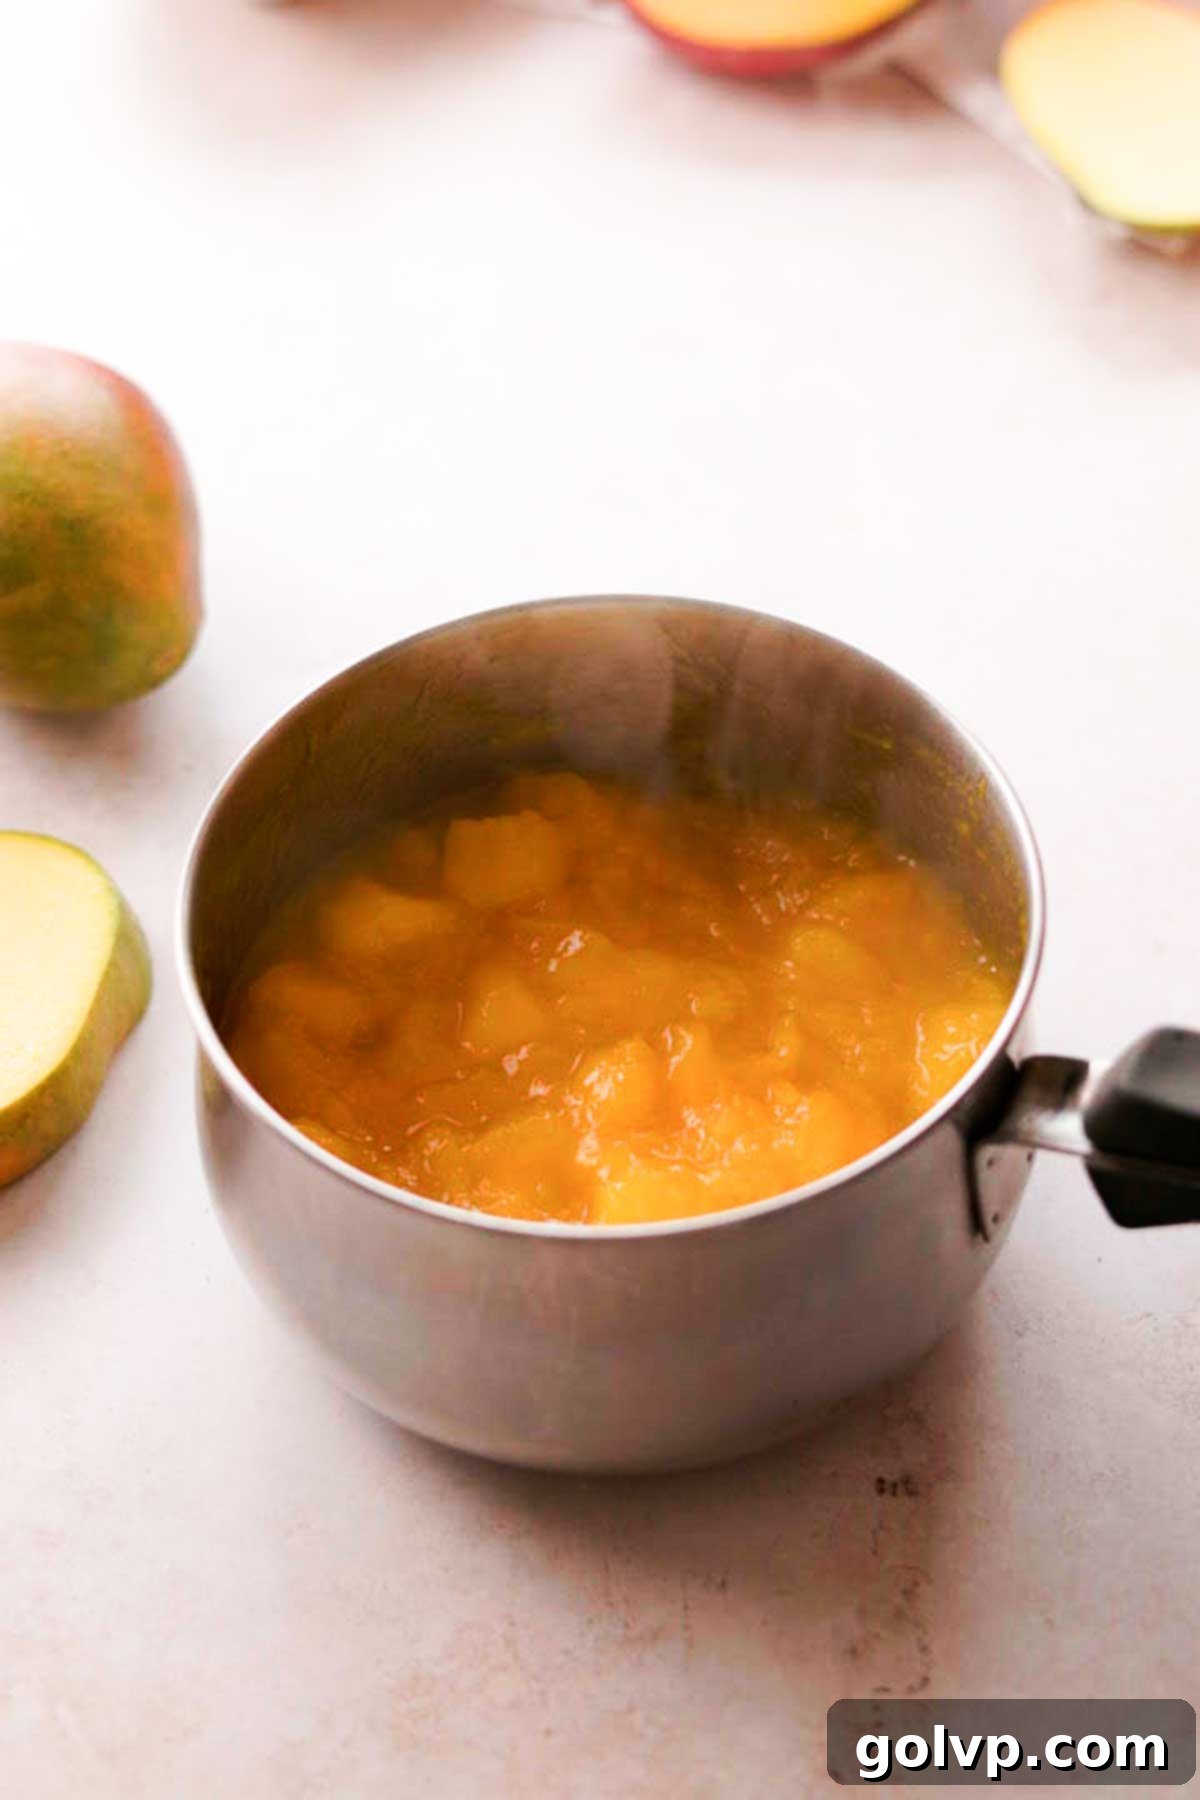
Step 1: Simmer and Reduce. In a medium saucepan, combine your diced mango (fresh or frozen), water, and granulated sugar. Bring the mixture to a gentle simmer over medium heat, stirring frequently to prevent it from sticking or burning to the bottom of the pan. Continue to cook for approximately 10 minutes, or until the mango mixture has significantly reduced and thickened to a jam-like consistency. The thicker it is, the more robust the mango flavor and the more stable your filling will be.
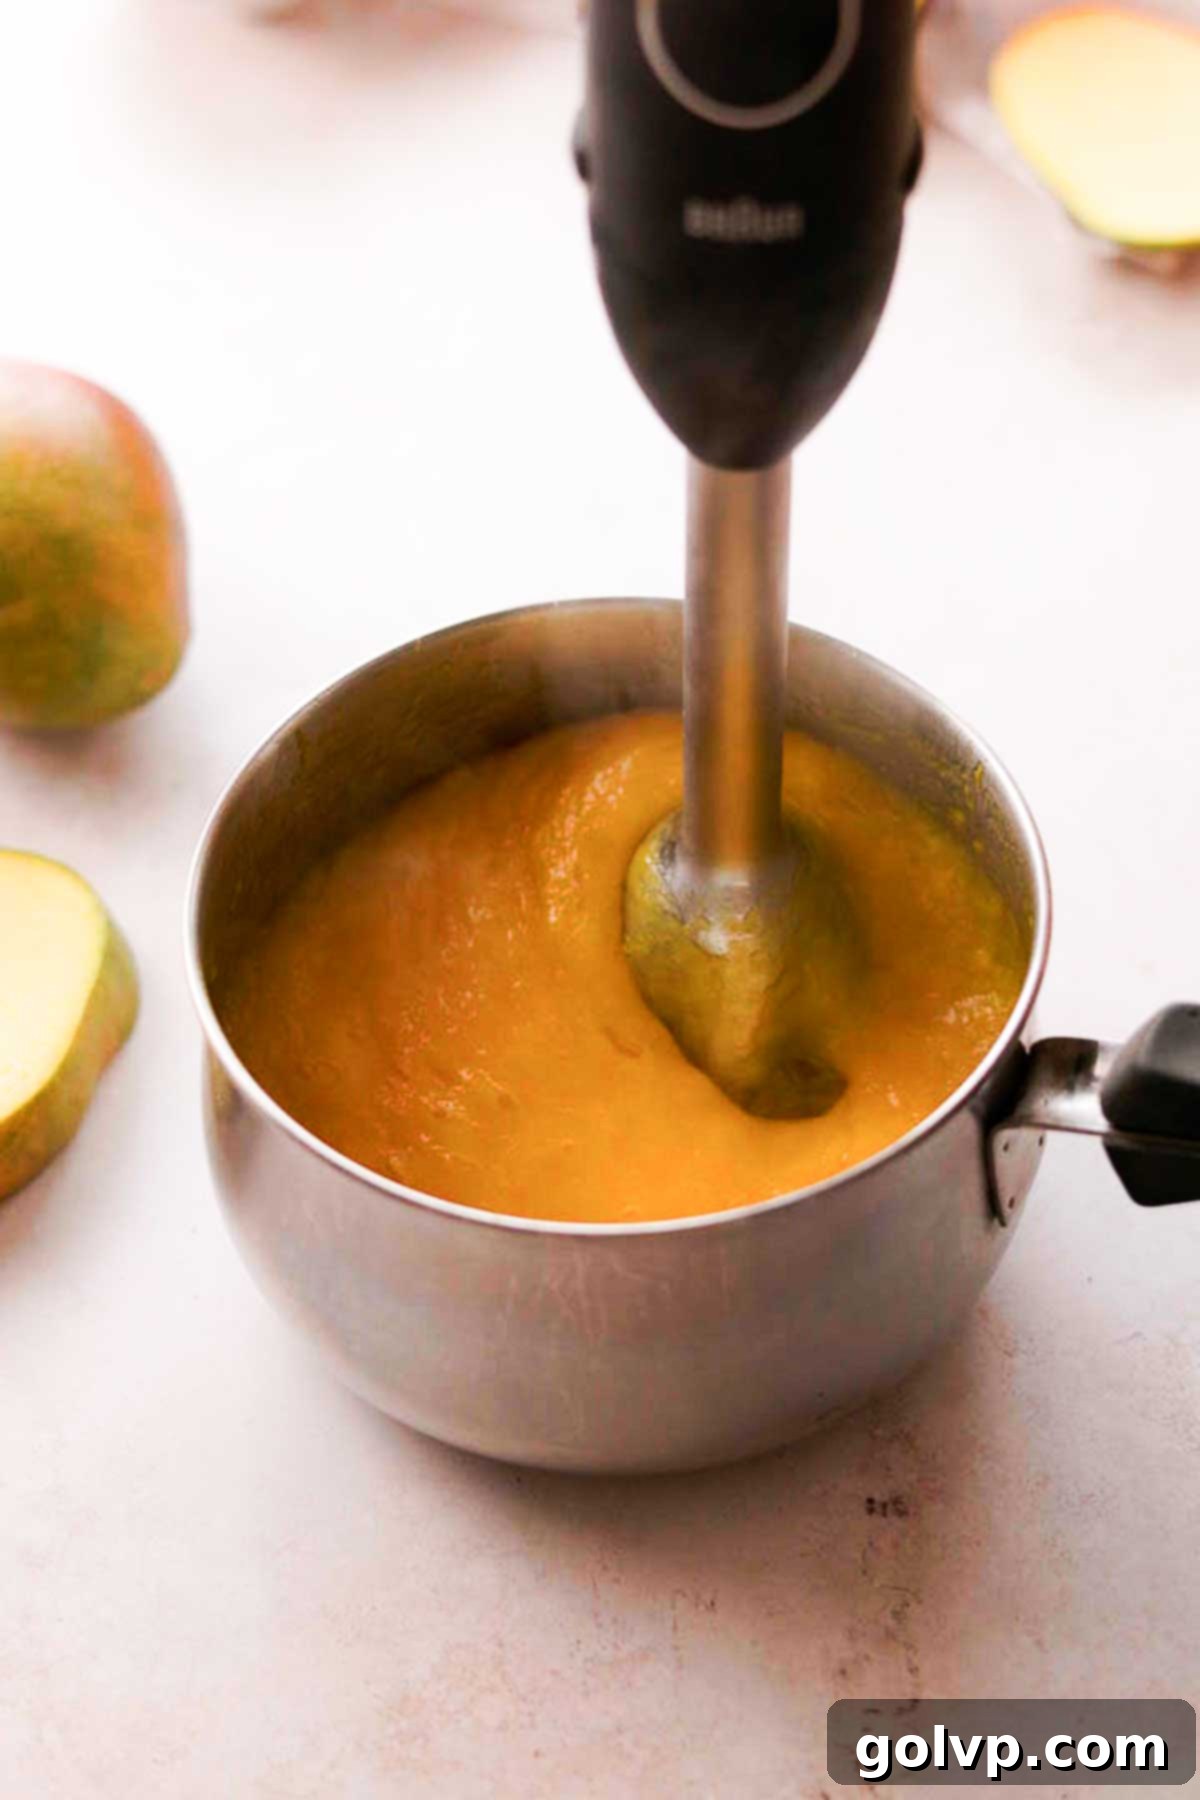
Step 2: Cool and Blend. Once the mango mixture is reduced, remove it from the heat and immediately transfer it to a non-metal bowl (this prevents any metallic flavor transfer, especially important with acidic fruits). Allow it to cool completely. Once cool, use an immersion blender or a regular blender to process the mixture until it is perfectly smooth. If your mango variety is particularly fibrous, for an extra silky puree, you can push it through a fine-mesh sieve to remove any lingering strings.
Whipped Cream Filling: Layers of Creamy Goodness
Preparation Tip: For the absolute best results when whipping cream, place your mixing bowl (and whisk attachment, if using a stand mixer) into the freezer for 5-10 minutes before you begin. A thoroughly chilled bowl significantly helps the cream whip up faster and hold its volume better.
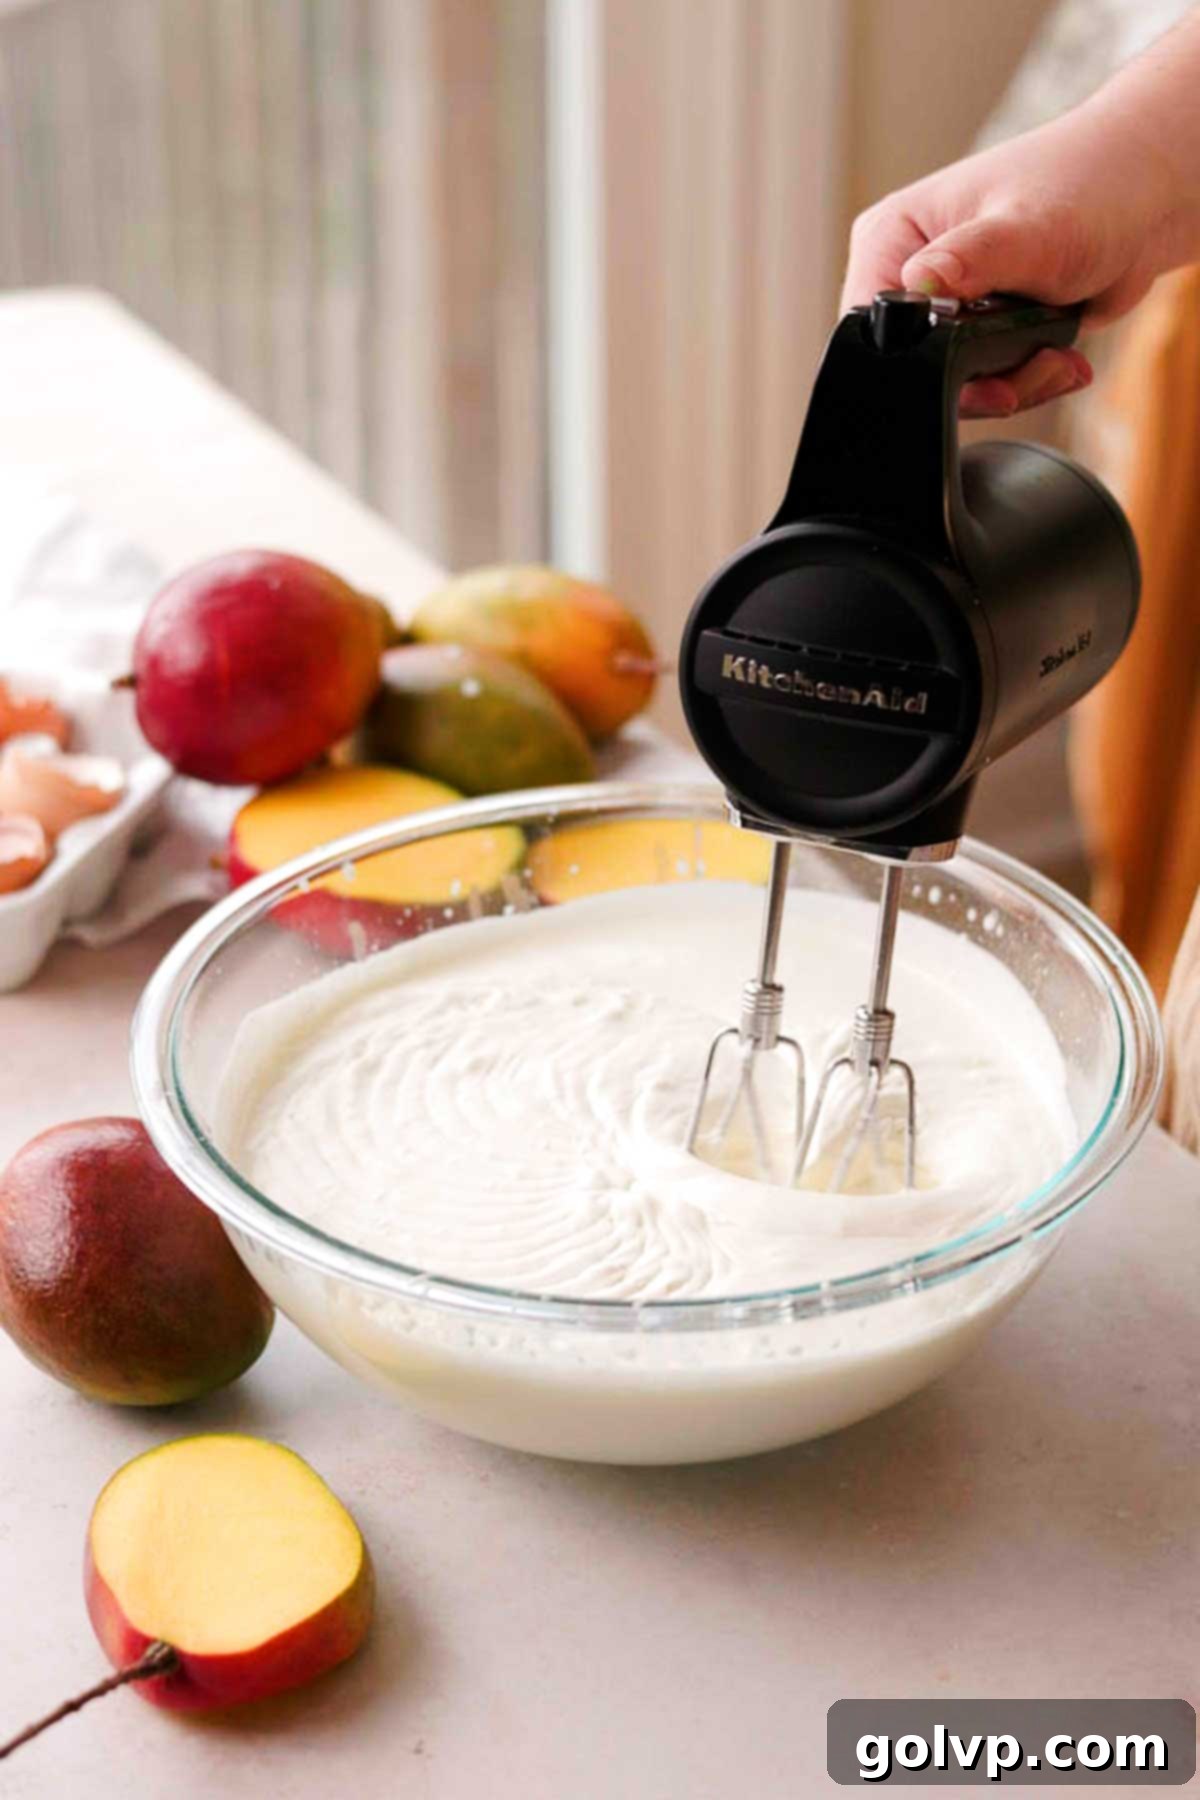
Step 1: Whip the Cream to Medium Peaks. Pour the well-chilled whipping cream into your cold mixing bowl. Add the powdered sugar. Using a whisk attachment, begin whipping the cream on medium-high speed. Continue to whip until the cream forms medium peaks – this is when you can see distinct lines or outlines of the cream as you lift the whisk, but it doesn’t quite hold a firm shape yet. It should still be somewhat soft.
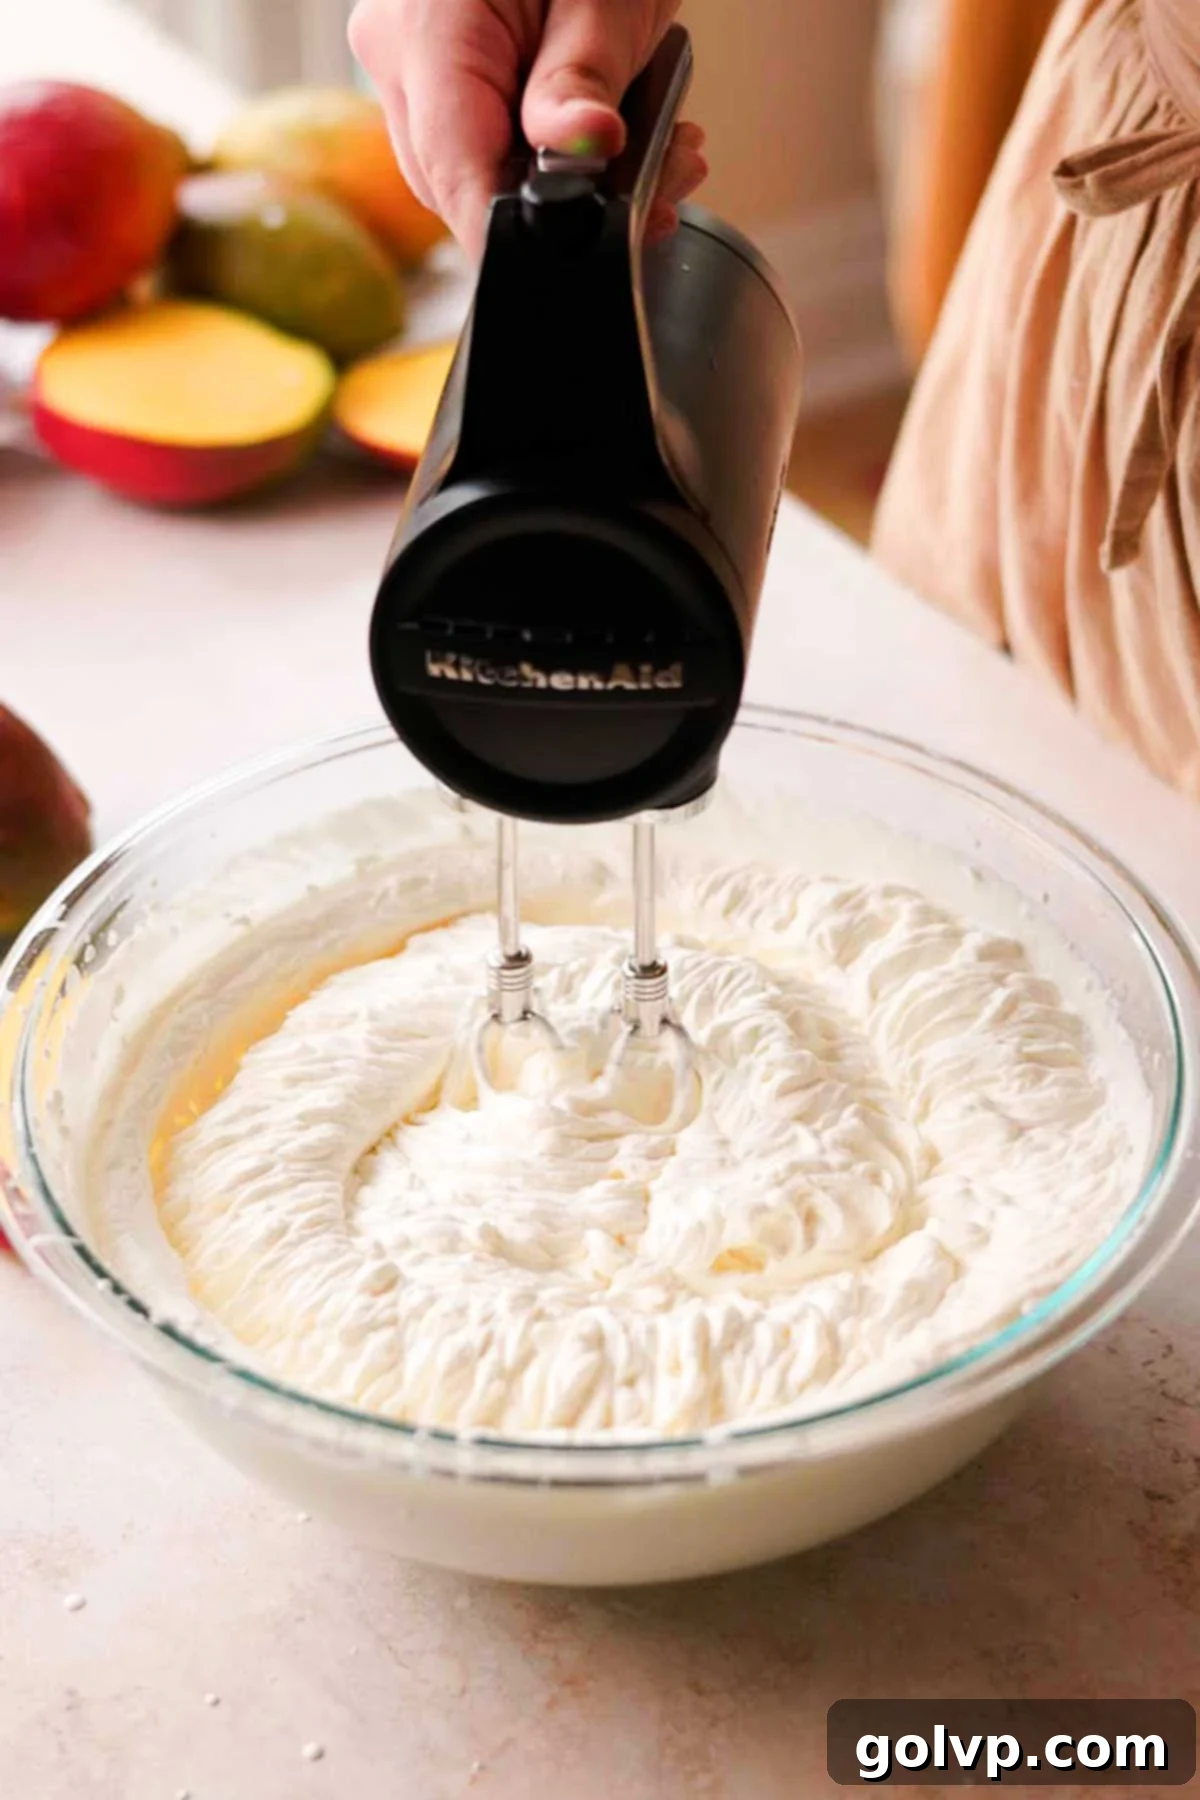
Step 2: Incorporate Mascarpone. In a separate small bowl or even directly in your measuring cup, briefly mash the slightly softened mascarpone cheese with a fork or spatula to break up any clumps. This step ensures it blends smoothly into the cream. Add the mashed mascarpone cheese, vanilla extract, and a pinch of salt to the whipped cream. Continue whipping the mixture just until it forms stiff peaks. At this stage, the cream should hold its shape firmly when the whisk is lifted. Be careful not to over-whip, as this can lead to a grainy or curdled texture.
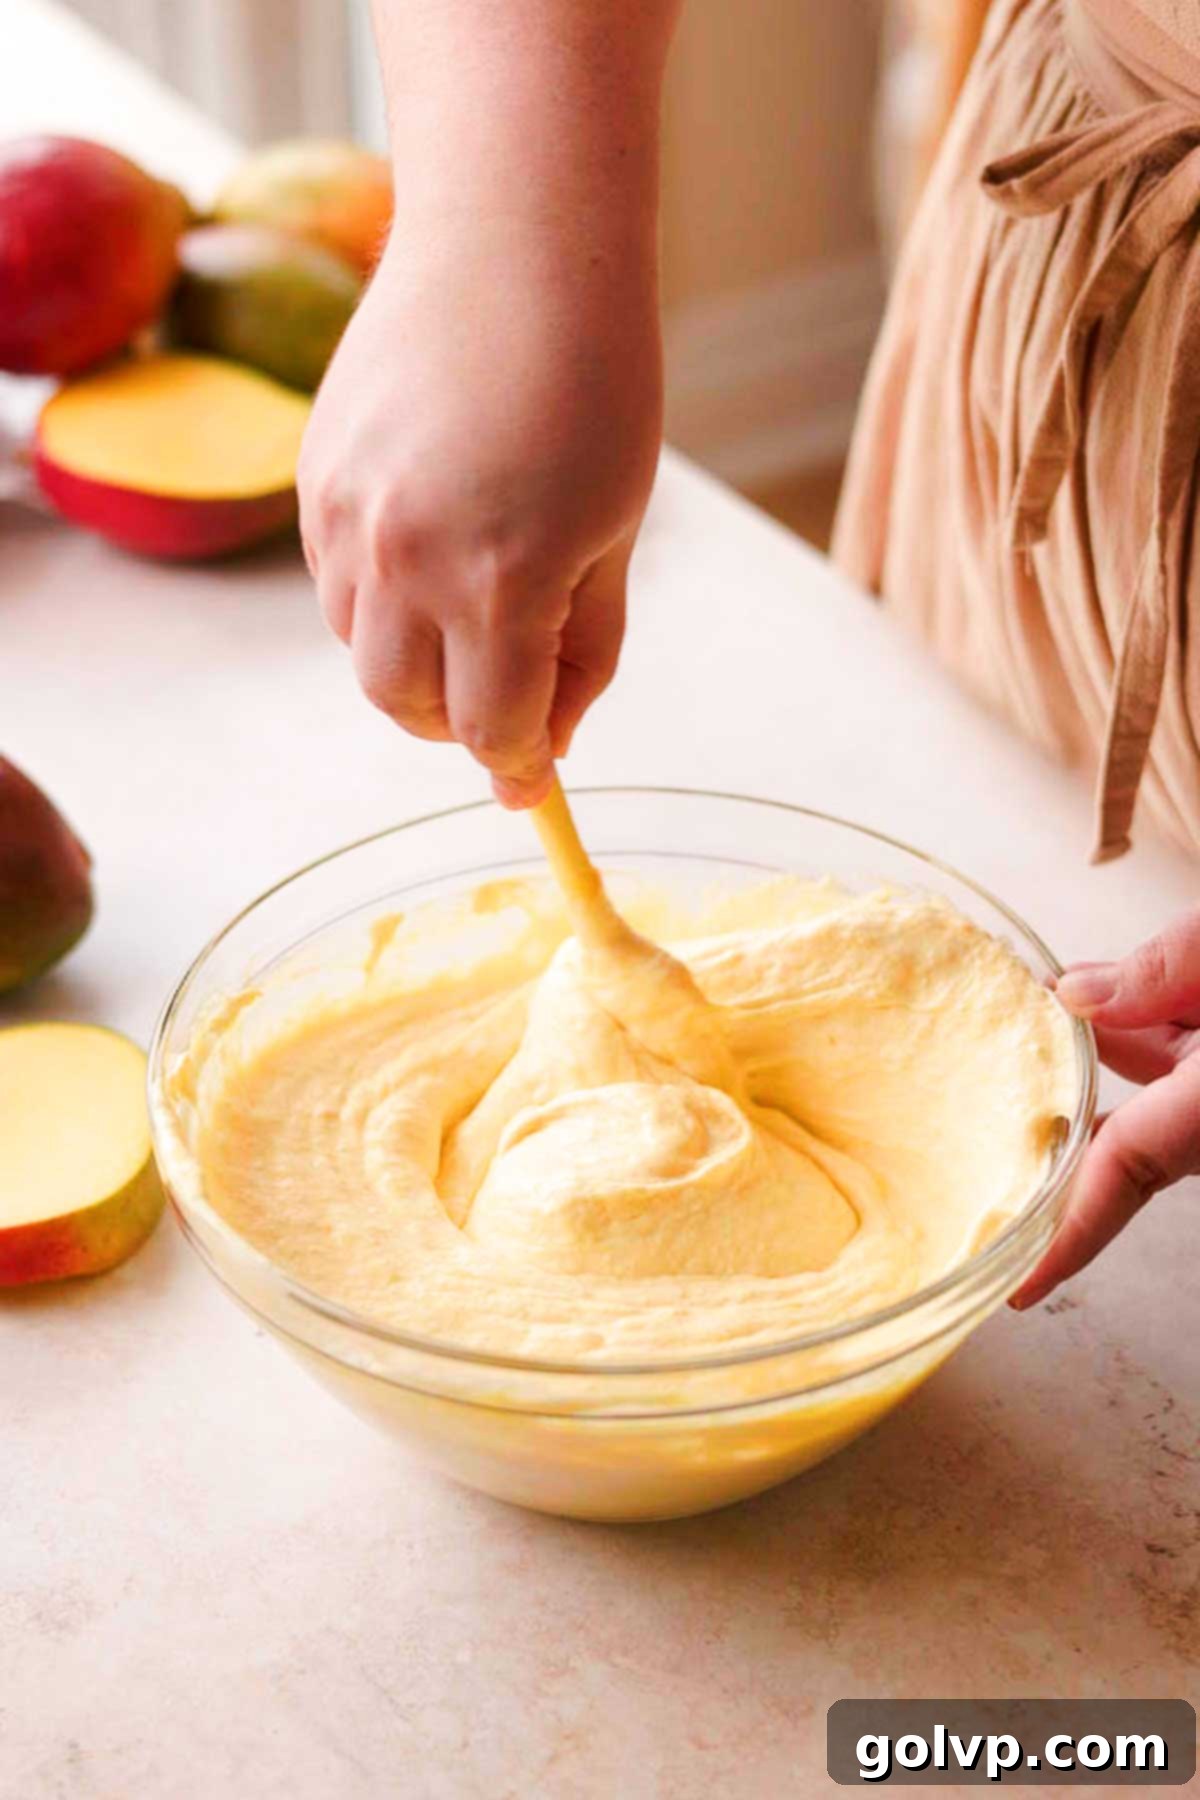
Step 3: Create the Ombré Filling. Set aside about one-third of the plain whipped cream in a separate bowl – this will be your white, vanilla-flavored layer for the top. To the remaining two-thirds of the whipped cream, add the completely cooled mango puree mixture. Gently fold it in with a spatula until just combined. Next, divide this mango-infused whipped cream in half into two separate bowls. For an even more pronounced ombré effect, add a tiny drop of yellow food coloring to one of these halves, creating a slightly brighter yellow shade. You should now have three distinct bowls of filling: a darker yellow (most mango flavor), a lighter yellow, and a pure white (vanilla) cream.
Assembling Your Masterpiece: Mango Crepe Cake Step by Step
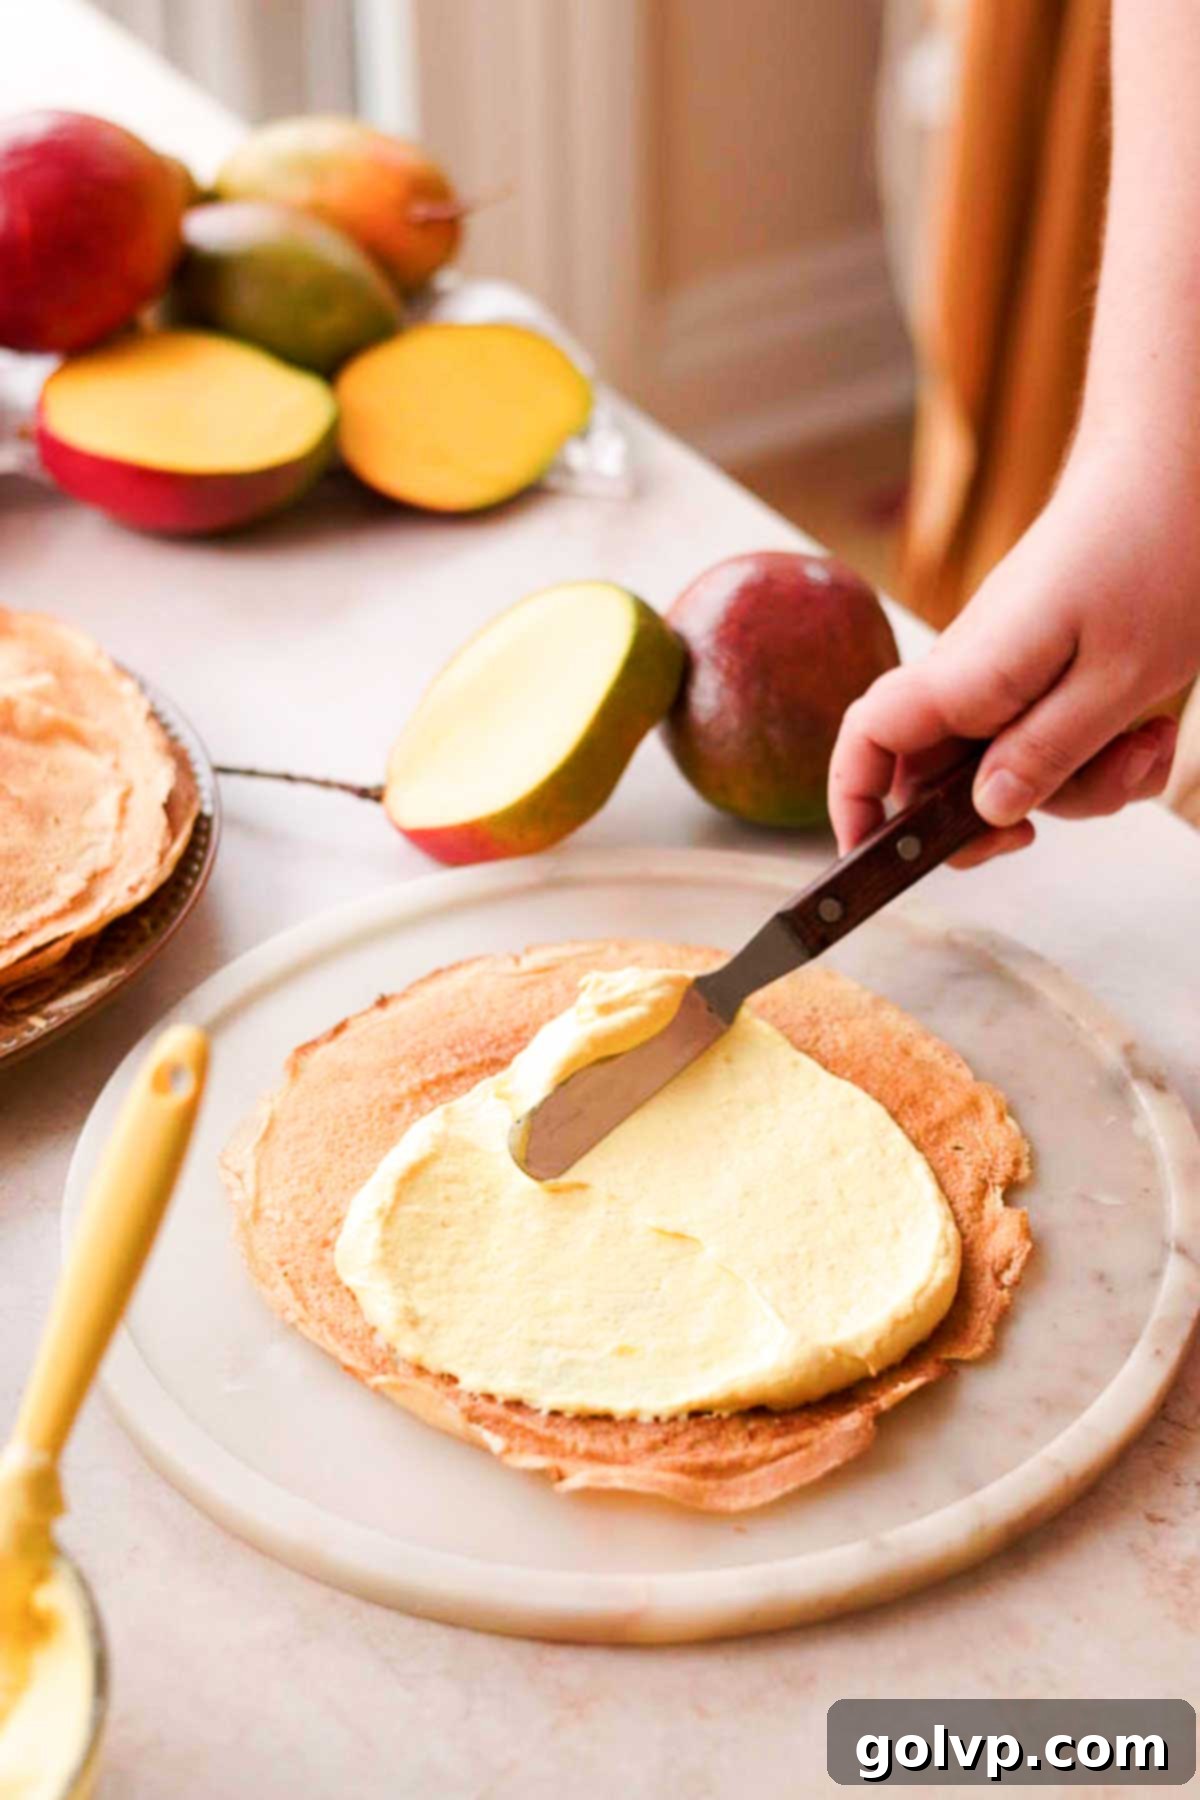
Step 1: The First Layer. On a large, flat serving plate or cake stand, place a small dollop of the darkest yellow mango filling. This acts as an anchor for your cake. Carefully lay your first, largest crepe directly on top. Using an offset spatula, spread a thin, even layer of the darker yellow filling all the way to the very edge of the crepe. Consistency in spreading is key to achieving a perfectly round cake with a flat top; aim for a filling thickness of about 2-3 millimeters. Place the next crepe precisely on top, aligning the edges.
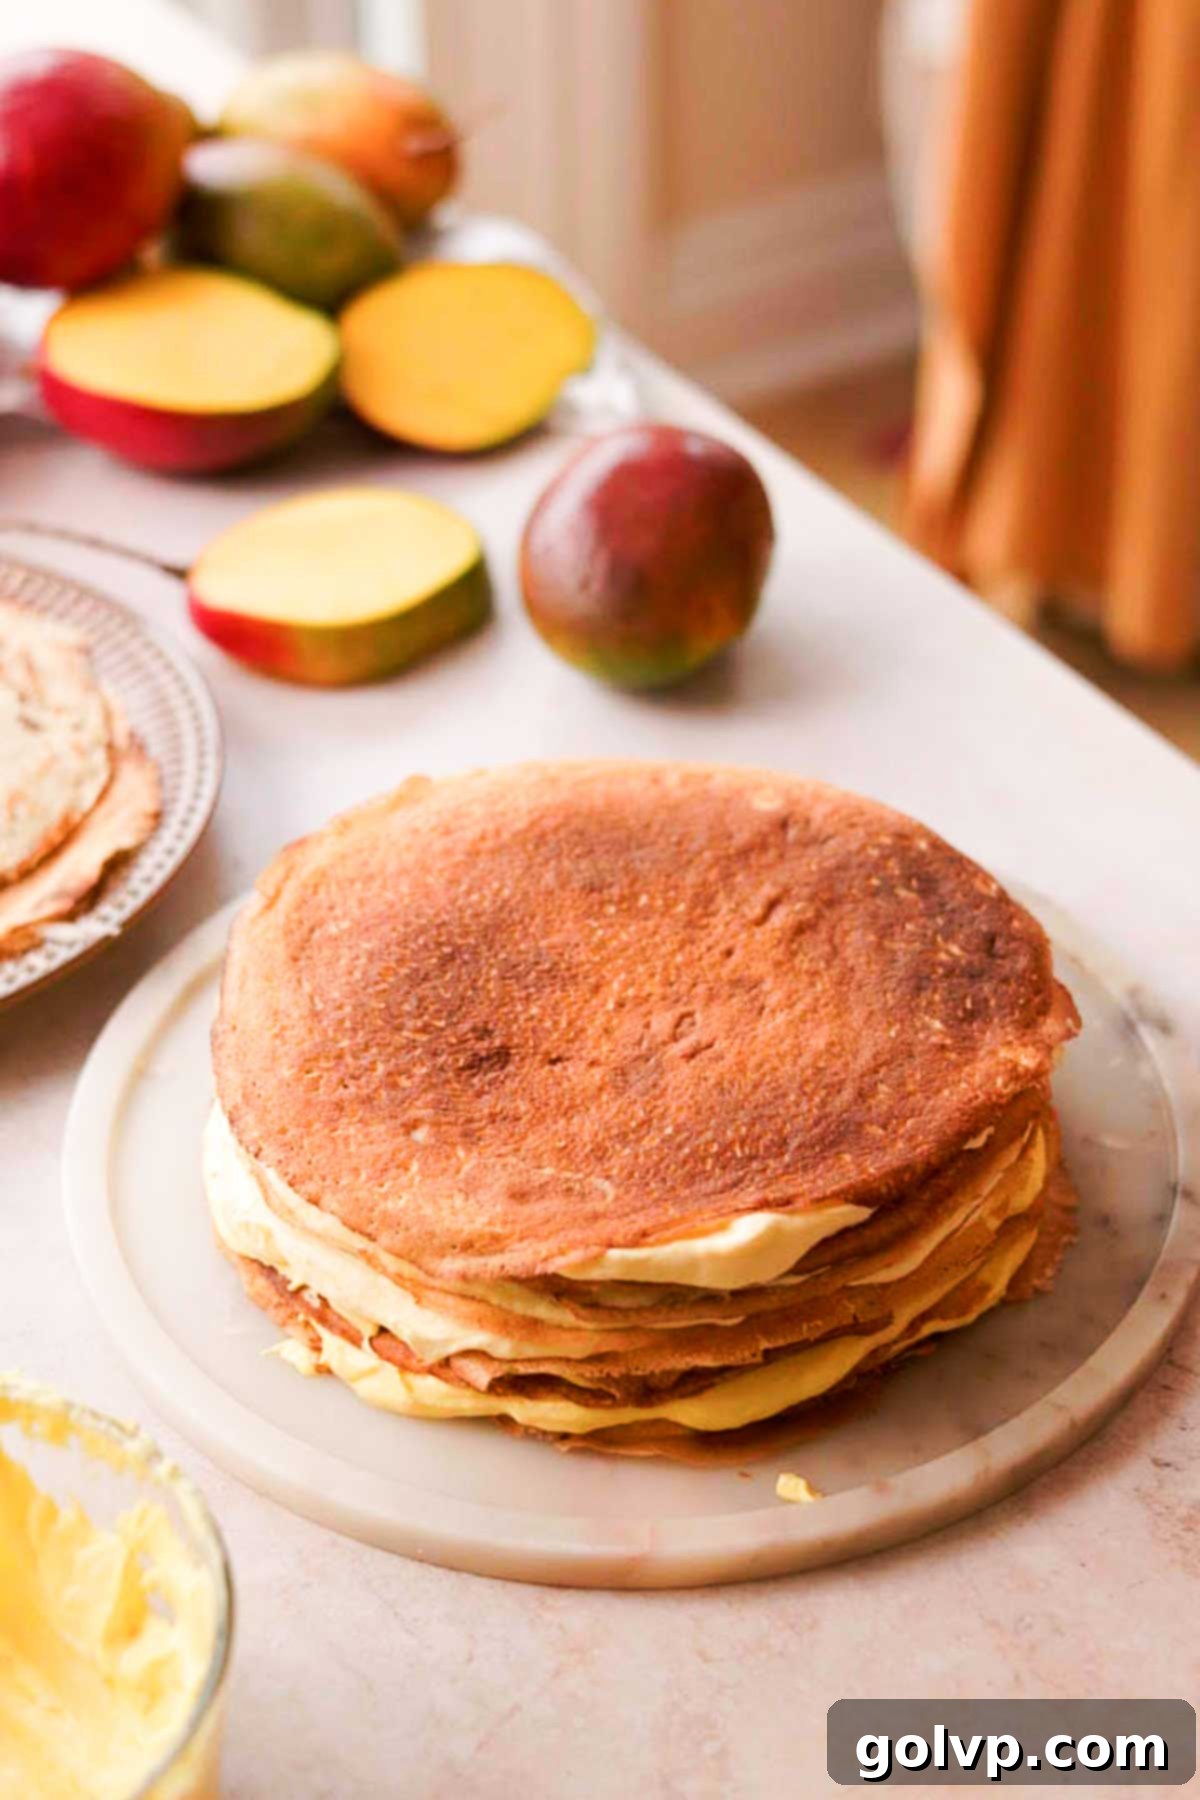
Step 2: Building the Ombré Layers. Continue this process, layering crepes and the darker yellow filling until that bowl is empty. Then, switch to the lighter yellow filling, continuing to layer it between the crepes until it’s used up. Finally, use the pure white vanilla filling for the remaining crepes. Remember to reserve about half a cup of the white filling for the top decoration. Don’t worry if you have a few crepes left over; these can be enjoyed separately or saved for another recipe!
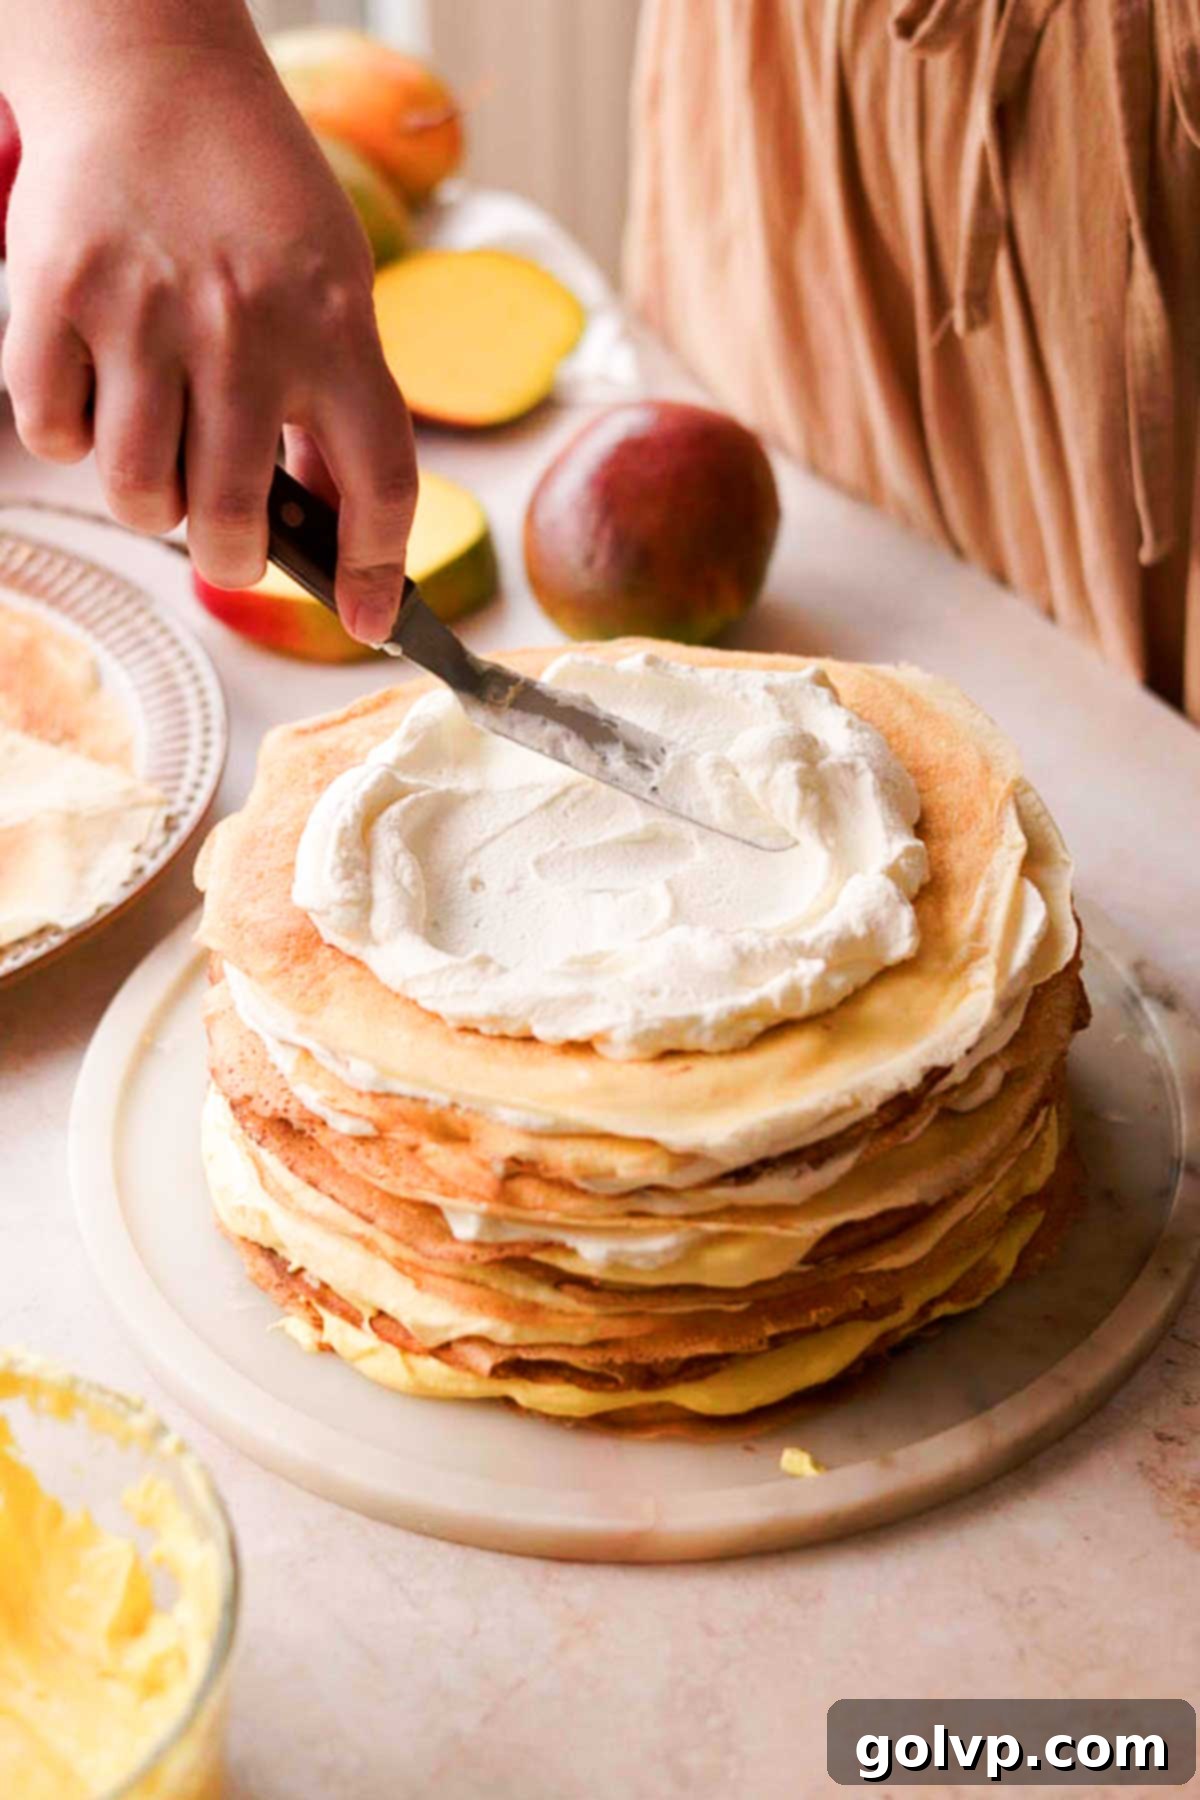
Step 3: Finishing the Top. Take the reserved half-cup of white filling and spread it over the very top crepe layer. Use the back of a spoon or an offset spatula to create elegant swoops, swirls, or a smooth finish, adding a final touch of sophistication to your cake.
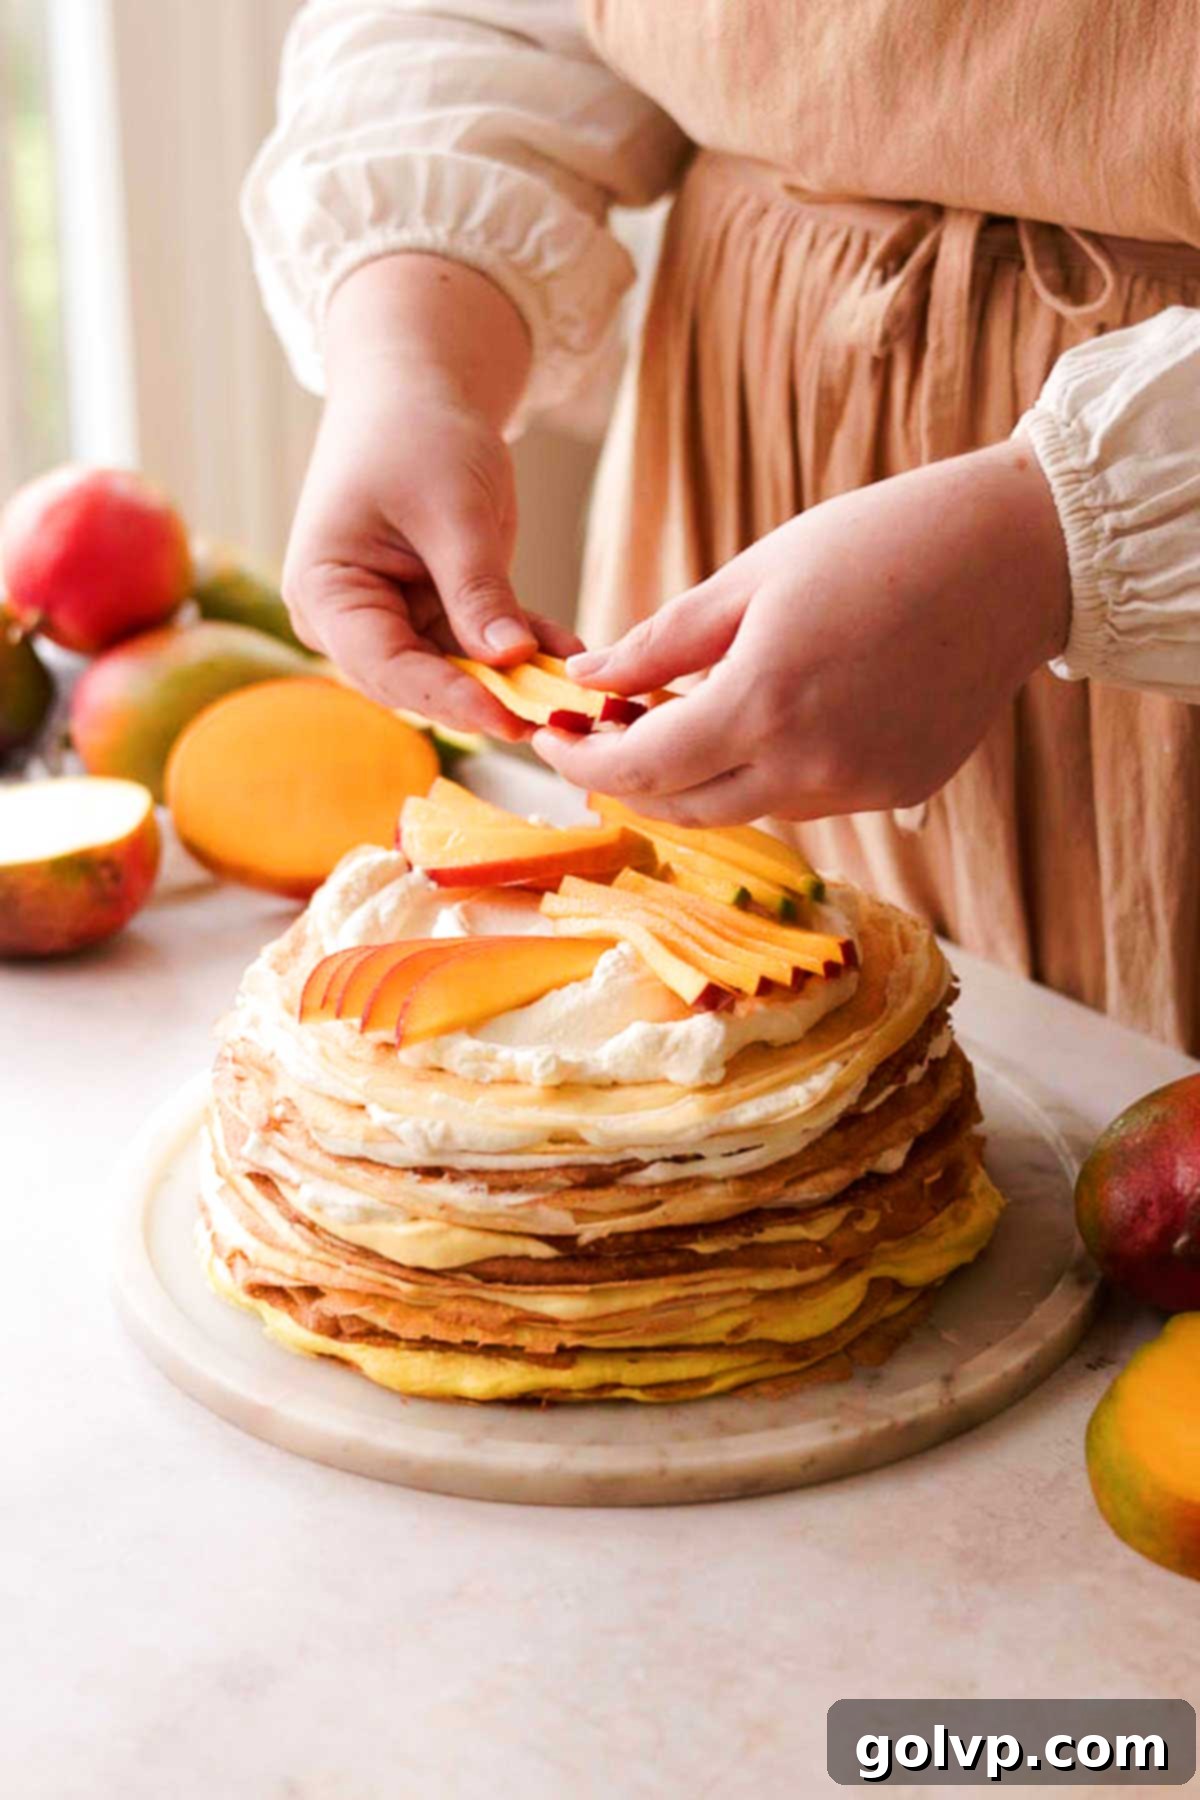
Step 4: Garnish and Chill. Arrange generous piles of freshly sliced and cubed mango on top of your cake. For an extra touch of elegance and visual appeal, consider decorating with fresh berries or delicate edible blossoms (this step is optional but highly recommended for a truly gourmet look). Once decorated, cover the cake loosely and refrigerate for at least 4 hours, or ideally overnight, to allow the flavors to meld and the filling to set perfectly.
✔️ Expert Tips for a Flawless Mango Crepe Cake
- Adjusting Crepe Batter Consistency: If, after resting, your crepe batter feels too thin, gummy, or produces crepes that tear easily, gradually add 2-4 extra tablespoons of all-purpose flour and blend briefly until just combined. If the batter seems too thick, add 2-4 tablespoons of water, stirring until you reach the desired thin consistency. The ideal batter should be like thin cream.
- Choosing the Right Pan: A high-quality non-stick frying pan or a well-seasoned cast iron skillet is crucial for successful crepes. These pans prevent sticking, making flipping much easier and ensuring your crepes come out perfectly round and intact. Avoid using stainless steel pans, as crepes are highly prone to sticking without specialized technique.
- Preventing Overwhipped Cream: Pay close attention when whipping your cream and mascarpone mixture. The goal is stiff peaks – the cream should hold its shape firmly when you lift the whisk. Overwhipping will result in a grainy, curdled texture and can cause the cake filling to become dry and less pleasant. Stop whipping as soon as stiff peaks are achieved.
- Essential Refrigeration Time: This step cannot be rushed! For clean, effortless slices and to allow the delicate flavors to fully meld, it’s imperative to refrigerate your assembled mango crepe cake for a minimum of 4 hours. Ideally, let it chill overnight. This setting time allows the mascarpone cream to firm up, ensuring each layer remains distinct and the cake holds its structure beautifully.
🥄 Make Ahead & Freeze Like a Pro
One of the beauties of this mango crepe cake is how many components can be prepared in advance, streamlining your assembly process for entertaining or a weekend project!
Crepes: Making the crepes ahead of time is a brilliant strategy, as this is often the most time-consuming part of the recipe. Once cooked, stack your cooled crepes on a plate and cover them tightly with plastic wrap to prevent them from drying out. Refrigerate for up to 2 days. When you’re ready to assemble the cake, remove the stack from the fridge and let the crepes come to room temperature for about 20 minutes. This makes them more pliable and easier to separate without tearing.
Mango Puree: The homemade mango puree is another excellent component for advance preparation. You can make it up to 3 days prior to assembling your cake. Store the cooled puree in an airtight, non-metal container in the refrigerator to preserve its fresh flavor and vibrant color.
Whipped Cream Filling: This is one component you should *not* prepare far in advance. The whipped mascarpone cream is best made right before you assemble the cake. If prepared too early, it can set too firmly and become grainy, making it difficult to spread smoothly between the delicate crepe layers. Freshly whipped cream ensures the luscious, airy texture that defines this cake.
✔️ Storage Solutions for Your Crepe Cake
This mango crepe cake is one of those rare desserts that often tastes even better the day after assembly, as the flavors have more time to fully develop and meld. Proper storage ensures its delicate texture and vibrant taste persist.
Refrigeration: To keep your mango crepe cake fresh, store it in a cake carrier or an airtight container in the refrigerator for up to 4 days. It’s crucial to ensure it’s well-covered or tightly wrapped to prevent the crepe edges from drying out and becoming stale or chewy. The moist environment of an airtight container helps maintain the crepes’ delicate softness.
Freezing: For longer storage, this cake freezes surprisingly well! To freeze, cut the cake into individual slices. Wrap each slice tightly in plastic wrap, then place them in an airtight freezer-safe container or a heavy-duty freezer bag. The cake can be stored in the freezer for up to 2 months. To enjoy, simply thaw individual slices in the refrigerator overnight or at room temperature for a couple of hours.

❔ Why I’ll Forever Make My Crepe Batter in a Blender
I fondly recall the day I “invented” the blender crepe batter method. I was a tired 15-year-old on a Saturday morning, desperately craving homemade crepes but absolutely unwilling to embark on the tedious traditional process: mixing wet and dry ingredients in separate bowls, then slowly whisking them together to avoid lumps. My eyes fell upon the blender on the countertop, and a simple thought sparked: “Why not?”
That moment changed my crepe-making life forever. Since then, using a blender has become my non-negotiable shortcut. I’ve discovered it doesn’t just save time and effort; it actually produces a superior crepe texture. The high-speed blending creates an incredibly smooth, lump-free batter that results in crepes that are exceptionally delicate, remarkably thin, and surprisingly resilient – they rarely tear! Plus, you get those coveted crispy, lacy edges that are a hallmark of perfect crepes.
If you’ve never experienced the sheer convenience and consistent quality of blender crepes, I urge you to try it! The ease of pouring the batter directly from the blender’s spout into the pan is an added bonus that simplifies the cooking process even further. Once you go blender, you’ll never look back – I certainly haven’t!
📖 Recipe FAQs
For truly superior crepes, I highly recommend a well-seasoned cast iron pan. Look for one with very shallow edges, as this makes it significantly easier to slide your spatula under the crepes and flip them without tearing. Cast iron pans, when properly cared for, develop a natural non-stick surface over time and impart the best crispy edges. Unlike non-stick pans which eventually need replacing, a good cast iron skillet can be a cherished kitchen tool passed down through generations.
If cast iron isn’t an option, a good quality non-stick pan is your next best bet and is likely something you already have. They offer excellent release for delicate crepes. However, I strongly advise against using a regular stainless steel pan, as it’s incredibly difficult to prevent crepes from sticking, even with a perfect batter and technique.
This is a common issue, but there are several troubleshooting steps you can take:
1. Insufficient Grease: Start by buttering your pan extra well, especially for the first few crepes. I usually add a generous amount of butter or oil for the initial crepes to properly grease and season the pan. You can then adjust the amount for subsequent crepes. Often, after the first few, you’ll find you need much less.
2. Incorrect Spatula: Use a thin metal spatula if you’re working with a cast iron pan, or a thin, flexible plastic spatula for non-stick pans. Thicker wooden or rubber spatulas can be too clunky and tend to catch on the crepes, causing them to tear.
3. Dirty Spatula: Ensure your spatula is clean and free of any bits of cooked batter. These small pieces can inadvertently grab onto the crepe and cause it to rip during flipping.
4. Batter Consistency: Your batter might be too thin. For the most accurate results, always weigh your flour. If the batter seems too watery, try adding an extra tablespoon or two of all-purpose flour and pulsing once or twice in your blender or food processor to incorporate. This subtle adjustment can make a big difference.
5. Resting Time: Most importantly, make sure you allow the crepe batter to rest for at least 20 minutes (or even longer, ideally) before cooking. This crucial step allows the gluten to relax and the flour to fully hydrate, which prevents sticking and tearing, leading to beautifully delicate crepes.
Absolutely! This is my go-to secret shortcut for achieving perfectly smooth, thin crepe batter with minimal effort. Simply combine all your ingredients in the blender or food processor and pulse 2-3 times. If needed, stop halfway through to scrape down the sides with a spatula, then blend again until everything is just combined and smooth. The key is not to over-blend, as excessive blending can overdevelop the gluten in the flour, leading to tougher crepes rather than delicate ones.
Yes, you certainly can if you don’t have a blender or food processor! To mix by hand, first whisk all the dry ingredients (flour, sugar, salt, baking soda) in one bowl. In a separate bowl, whisk all the wet ingredients (eggs, milk, water, oil, vanilla). Then, gradually pour the wet ingredients into the dry ingredients, whisking constantly and vigorously to prevent any lumps from forming. Continue whisking until the batter is completely smooth, then proceed with the resting step as outlined in the recipe.
Yes, absolutely! Making the crepe batter the night before is an excellent way to streamline your dessert preparation. The batter requires at least 20 minutes of resting time before cooking, and an even longer rest (like overnight in the fridge) is actually beneficial. This extended rest allows ample time for the gluten in the flour to fully relax and the flour particles to hydrate completely, which is essential for yielding thin, delicate, and tender crepes that are less likely to tear or stick during cooking.
While this mango crepe cake is truly delightful when enjoyed on the day of assembly, it also keeps remarkably well and even tastes better after a day or two in the refrigerator as the flavors deepen. To prepare in advance, you can make the crepes up to 2 days prior, covering and refrigerating them. Also, the mango puree can be made 3 days ahead and stored in the fridge. For assembly, allow the crepes to sit at room temperature for about 20 minutes so they soften and separate easily. Assemble the cake just before you plan to serve it, allowing it to chill for at least 4 hours (or overnight) for the best setting and slicing experience.
To achieve those coveted extra-thin crepes, it’s all about having a slightly thinner batter consistency. Be cautious, however, not to make the batter *too* thin, as this can make the crepes more prone to tearing during flipping. If your batter seems a little too thick after resting, try adding an extra tablespoon or two of water and pulsing once or twice in the blender to gently incorporate it. The goal is a batter that coats the back of a spoon very thinly and flows easily when poured into the pan.
Allowing your crepe batter to rest is a critical step that significantly impacts the final texture of your crepes. This resting period, ideally at least 20 minutes (or even overnight in the refrigerator), serves two main purposes: Firstly, it gives the gluten proteins in the flour time to relax. This relaxation prevents the crepes from being chewy or tough. Secondly, it allows the flour particles to fully hydrate, absorbing all the liquid in the batter. This complete hydration results in smoother, more delicate, and less prone-to-tearing crepes that cook beautifully with those desirable lacy edges.
If you’re unable to find mascarpone cheese, a suitable substitute for this recipe is full-fat cream cheese. Ensure the cream cheese is softened to room temperature before mixing to prevent lumps. While cream cheese will work to stabilize the whipped cream and provide a rich texture, it’s important to note that it will impart a slightly tangier, more “cheesy” flavor compared to mascarpone, which has a very mild, buttery, and subtle taste. The mascarpone offers a creamier, less assertive profile that truly lets the mango shine.
Achieving perfectly clean slices of your mango crepe cake depends heavily on proper chilling. After assembling the entire cake, allow it to firm up in the refrigerator for at least 4 hours, or ideally overnight. This extended chilling time is essential for the whipped cream and mascarpone filling to fully set, preventing it from oozing out when cut. When you’re ready to serve, use a very sharp, thin knife. For the cleanest cuts, dip your knife in hot water and wipe it clean between each slice.
Yes, you absolutely can use store-bought mango puree! However, it is crucial to cook it down on the stove in a saucepan first. You need to reduce it significantly until it reaches a thick, jam-like consistency. If you use store-bought puree without reducing it, it will be too thin and will likely thin out your whipped cream filling too much, compromising the cake’s structure and creamy texture. The reduction step concentrates the flavor and achieves the ideal consistency for the filling.
🍰 More Delightful Dessert Recipes
- Mango Coconut Swiss Roll Cake
- Mango Cupcakes with Mango Filling
- Honey Cake Medovik
- Lilac Cake with Lemon
Did you make this tropical masterpiece? I would love to hear your thoughts and see your beautiful creations! Please rate this recipe and share your feedback in the comments below. Don’t forget to share your photos on Instagram and tag @flouringkitchen. Follow me on Pinterest for more inspiring recipes and baking ideas!
📖 Recipe

Mango Crepe Cake with Easy Homemade Crepes
Mary
Pin Recipe
Shop Ingredients
Equipment
-
9″ cast iron or non-stick pan
-
blender or food processor
Ingredients
Crepes
- 4 large eggs room temperature
- 2 ¼ cups all purpose flour 270g
- ¼ cup granulated sugar
- ¼ teaspoon sea salt
- ⅛ teaspoon baking soda
- 1 ½ cup milk whole or 3.25% milk is best
- 1 ½ cup water room temperature
- 2 tablespoons olive oil or vegetable oil
- 1 tablespoon pure vanilla extract
- 2 tablespoons butter for oiling pan
Mango Puree
- 3 cups mango fresh or frozen, diced
- ¼ cup water
- 3 tablespoons granulated sugar
Whipped Cream Filling
- 3 cups whipping cream 35% cream, chilled
- ⅔ cup powdered sugar
- 1 tablespoon pure vanilla extract
- 1 cup mascarpone cheese softened for 10 minutes at room temperature
Assembly & Garnish
- 2 fresh mangoes sliced and cubed for decoration
- berries optional, for garnish
- edible flowers optional, for decoration
Shop Ingredients on Jupiter
Instructions
Crepes
-
Combine all of the crepe ingredients into a blender or food processor, starting with the wet ingredients in this order: eggs, milk, water, oil, sugar, flour, and baking soda.4 large eggs, 2 ¼ cups all purpose flour, ¼ cup granulated sugar, ¼ teaspoon sea salt, ⅛ teaspoon baking soda, 1 ½ cup milk, 1 ½ cup water, 2 tablespoons olive oil, 1 tablespoon pure vanilla extract
-
Blend the mixture on the lowest speed until mostly combined. Stop, scrape down the sides to ensure no flour bits are stuck, then blend again until fully smooth. Do not over-blend. Let the batter rest in the fridge for at least 20 minutes (or overnight) to allow gluten to relax.
-
Preheat your crepe pan (nonstick or seasoned cast iron) over medium-low heat. Add a teaspoon of butter and melt. Pour enough batter from the blender spout to thinly coat the bottom, tilting the pan to form an even layer.2 tablespoons butter
-
Cook the crepe until the top is opaque, steam bubbles appear underneath, and edges lift and turn golden brown. Carefully run a thin spatula under the perimeter and then the center to release, then flip quickly.
-
Cook the second side for about one minute until golden brown, then remove from the pan.
-
Repeat with the remaining batter. You typically won’t need to add butter after the first crepe. Adjust heat as necessary to maintain even cooking. Don’t worry about minor imperfections; they’ll be hidden in the layers.
-
Stack cooked crepes on a plate and let cool to room temperature. Cover tightly with plastic wrap or a lid to prevent drying out. Refrigerate until ready to assemble, allowing them to warm to room temperature before separating.
Mango Filling
-
Combine diced mango, water, and granulated sugar in a medium saucepan. Bring to a simmer over medium heat, stirring frequently. Cook for about 10 minutes, or until the mixture reduces and thickens to a jam-like consistency. The thicker, the better.3 cups mango, ¼ cup water, 3 tablespoons granulated sugar
-
Remove from heat and transfer to a non-metal bowl to cool completely. Blend until smooth. If fibrous, push through a sieve for a silkier puree.
Whipped Cream Filling
-
Chill your mixing bowl and whisk attachment in the freezer for 5 minutes before you begin to aid in whipping.
-
Right before assembling, pour chilled whipping cream into the cold bowl. Add powdered sugar and vanilla extract, then whip with a whisk attachment to medium peaks.3 cups whipping cream, ⅔ cup powdered sugar, 1 tablespoon pure vanilla extract
-
Briefly mash the softened mascarpone cheese. Add it to the whipped cream along with any remaining vanilla extract and a pinch of salt. Whip until stiff peaks form. Be careful not to overwhip.1 cup mascarpone cheese
-
Set aside about one-third of the plain whipped cream for the top and for the white layers. Gently fold the cooled mango puree into the remaining whipped cream until just combined.
-
Divide the mango whipped cream in half into two separate bowls. Optionally, add a touch of yellow food coloring to one half to create a darker yellow shade for the ombré effect. You now have three fillings: dark yellow, light yellow, and white.
Assembly
-
Place a small dollop of the darkest yellow filling on a large flat plate or cake stand to anchor the cake. Lay the first, largest crepe down. Spread a thin, even layer (2-3mm thick) of the darkest yellow filling all the way to the edge. Place the next crepe on top.
-
Continue layering crepes with the darkest yellow filling until it’s used up. Then switch to the lighter yellow filling for the next set of layers. Finally, use the white filling for the remaining crepes, reserving about half a cup for decorating the top.
-
Spread the reserved white filling on the very top crepe layer, creating swoops and swirls with a spoon or offset spatula for an elegant finish.
-
Decorate the top with generous piles of freshly sliced and cubed mango. Optionally, add fresh berries and edible blossoms for a more elaborate presentation. Cover loosely and refrigerate for at least 4 hours, or ideally overnight, for best setting and flavor development.2 fresh mangoes, berries, edible flowers
Video
Notes
- Crepes: Save time by preparing your crepes up to 2 days in advance. Stack them once cooled, cover tightly with plastic wrap to maintain moisture, and refrigerate. Before assembly, let them reach room temperature for easier handling.
- Mango Puree: The delicious mango puree can also be made up to 3 days ahead. Store it in an airtight, non-metal container in the fridge to keep its fresh flavor.
- Whipped Cream Filling: This component is best made just before assembly. Preparing it too early can cause it to set and become grainy, making it difficult to spread smoothly.
Storage: Keeping Your Cake Fresh
Store the assembled mango crepe cake in a cake carrier or an airtight container in the fridge for up to 4 days. Ensure it’s covered to prevent the crepes from drying out. For longer storage, slices can be individually wrapped and frozen for up to 2 months.
Tips for Success: Your Best Crepe Cake Yet
- Batter Consistency: If your crepe batter is too thin or gummy, add 2-4 tablespoons of flour; if too thick, add 2-4 tablespoons of water. Blend briefly to adjust.
- Pan Choice: Use a non-stick frying pan or a well-seasoned cast iron skillet to prevent sticking and ensure easy flipping.
- Whipping Cream: Avoid overwhipping the cream and mascarpone mixture. Stop as soon as stiff peaks form to maintain a silky-smooth texture.
- Chilling is Key: Refrigerate the assembled crepe cake for at least 4 hours, or ideally overnight. This allows the filling to set completely, ensuring clean, beautiful slices.
Nutrition
