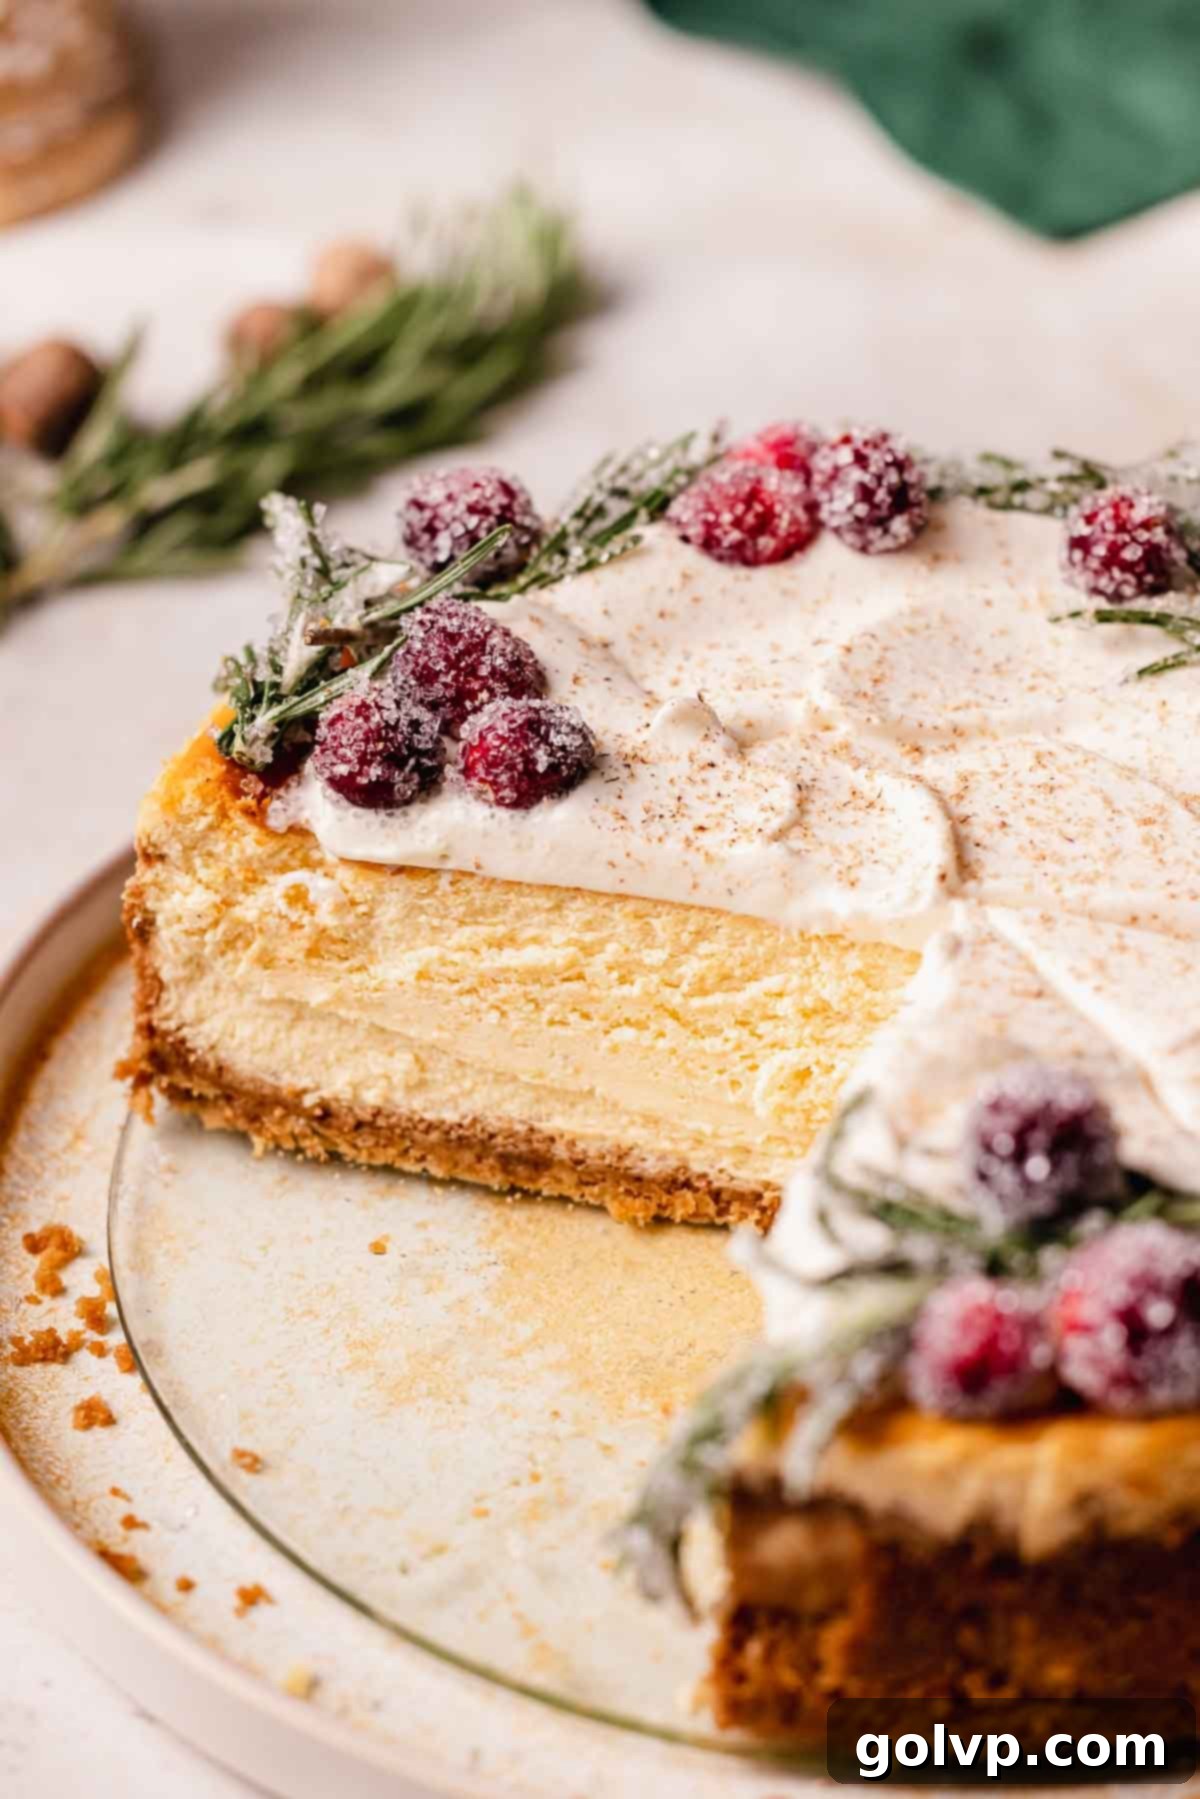
Decadent Eggnog Cheesecake with Gingersnap Crust: The Ultimate Holiday Dessert
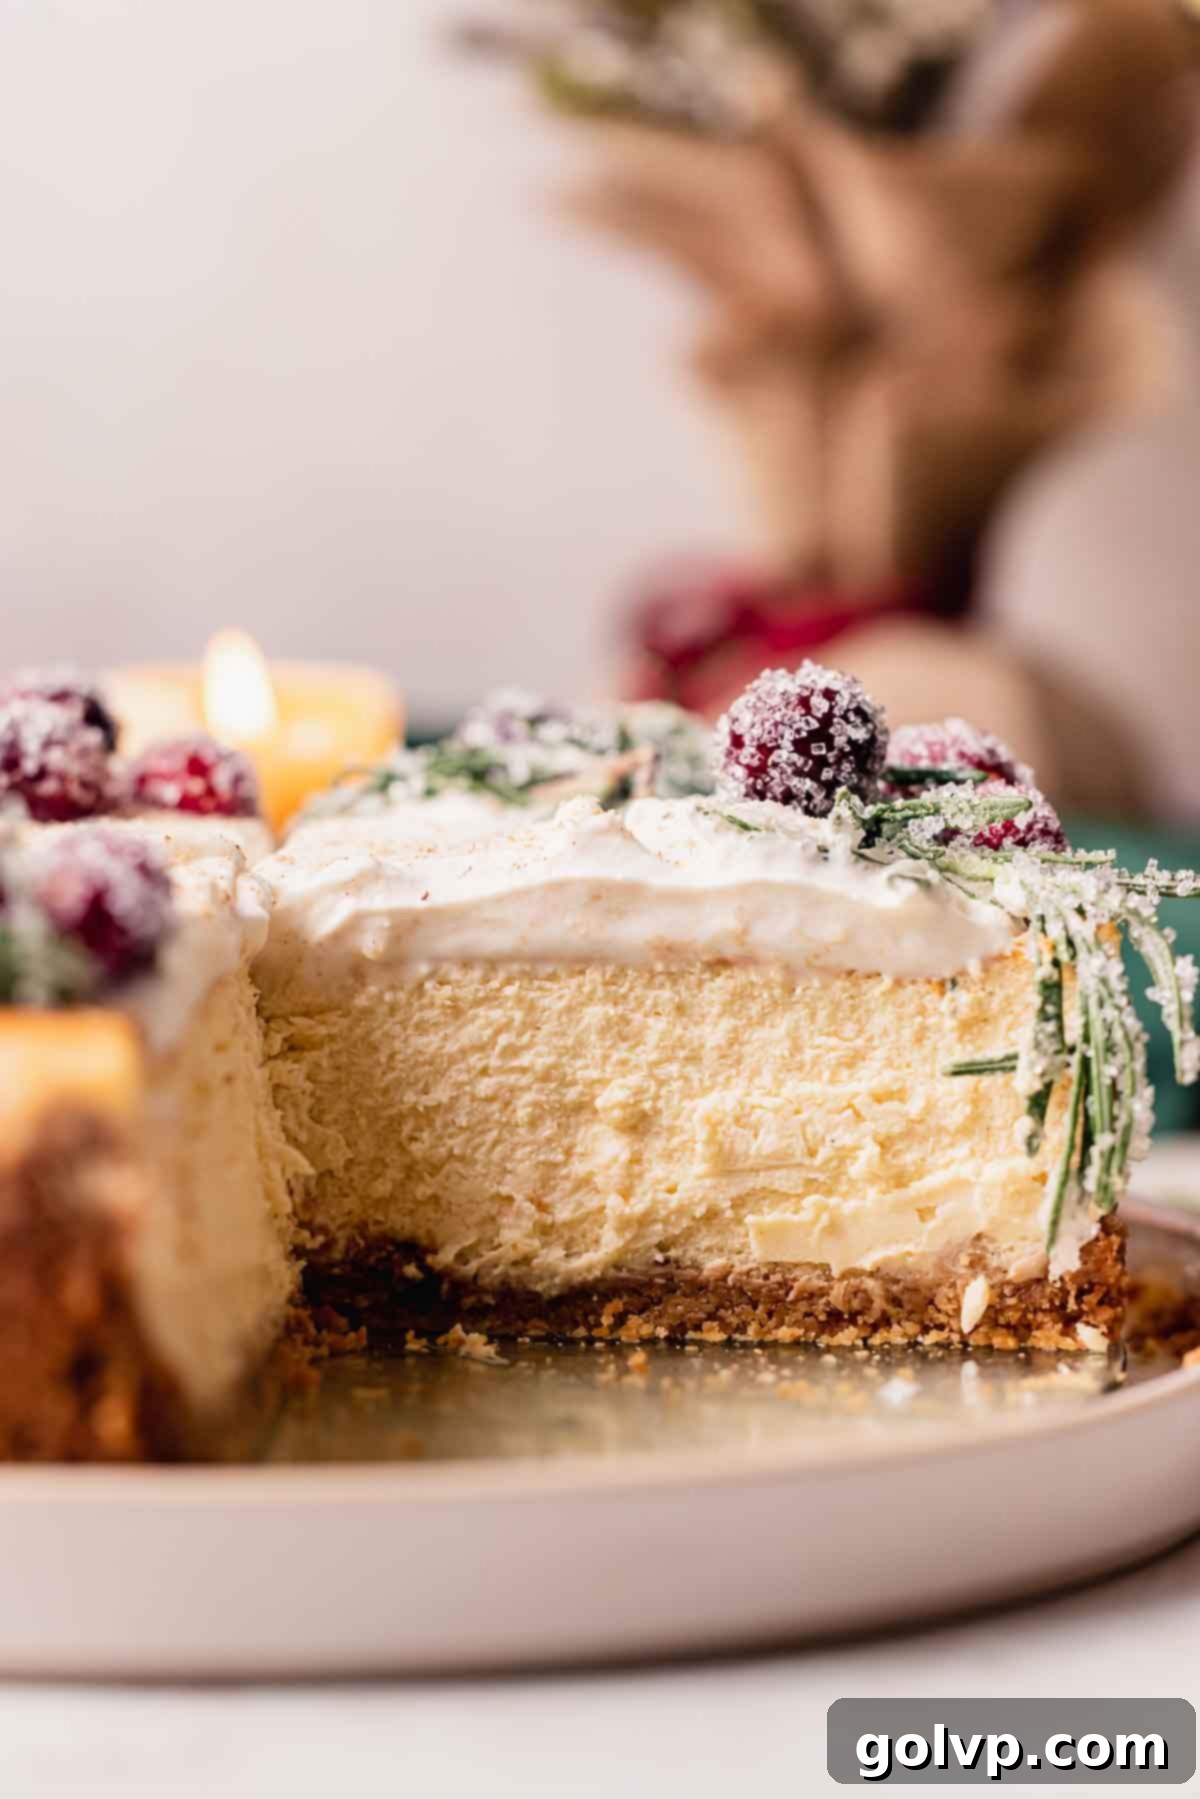
Prepare to be enchanted by this incredibly rich and utterly luscious Eggnog Cheesecake, a true embodiment of holiday cheer! This festive dessert is brimming with the classic, creamy flavor of eggnog, elevated by a spiced gingersnap crust and crowned with a light, rum-infused whipped cream, elegantly decorated with a festive wreath. It’s not just a cheesecake; it’s the ultimate Christmas and holiday centerpiece, guaranteed to impress your guests and delight every palate. One of its most convenient features is that it absolutely needs to be made ahead of time, allowing you to confidently prepare it a day or two in advance and alleviate holiday stress. If you adore the warm, inviting blend of creamy egg, aromatic rum, and fragrant nutmeg that defines traditional eggnog, then this cheesecake is destined to become your new favorite seasonal indulgence. It’s truly a celebration in every bite!
For more festive dessert inspiration, don’t miss my equally delightful gingerbread cheesecake, featuring a beautiful gingerbread swirl and its own delightful gingersnap crust. You might also fall in love with my vibrant chocolate orange cheesecake, another perfect treat for the holiday season.
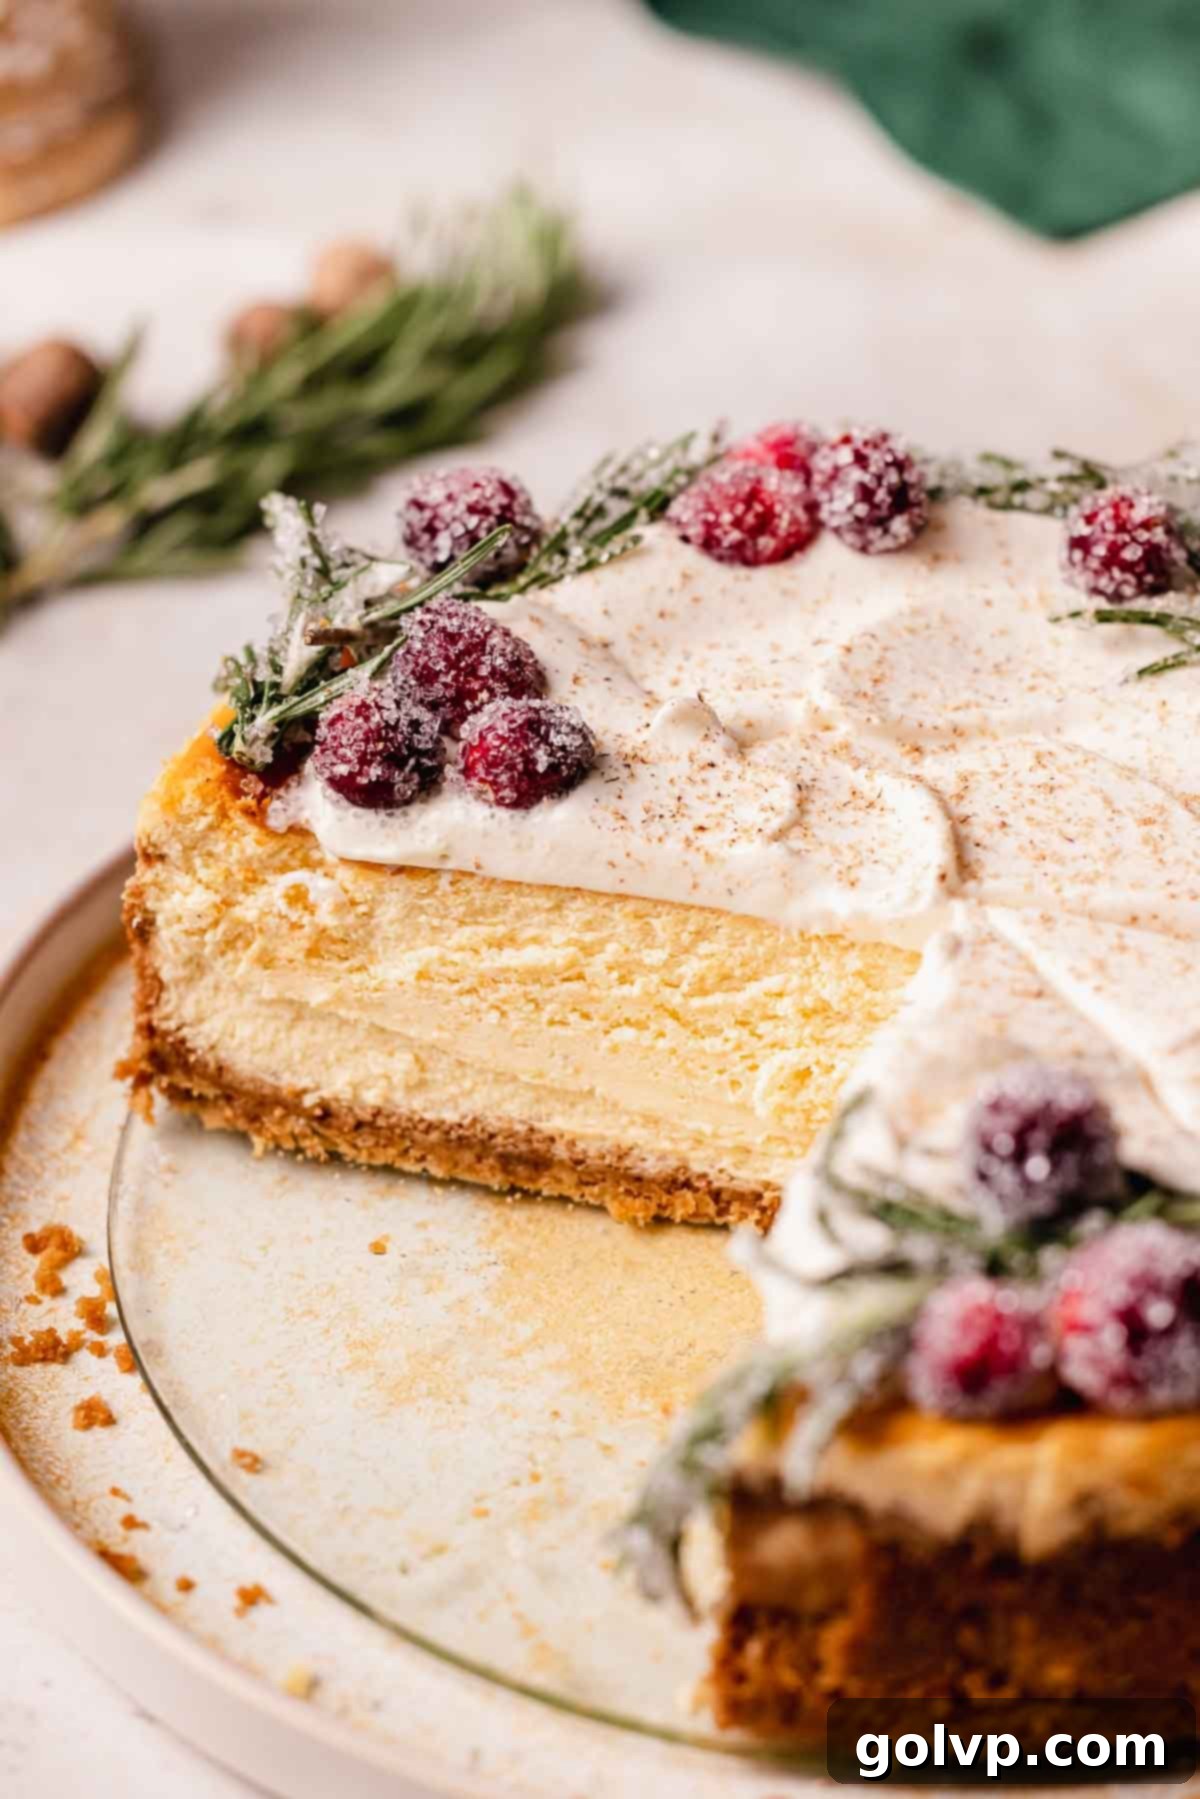
❤️ Why you’ll LOVE this Eggnog Cheesecake Recipe
- Irresistible Gingersnap Cheesecake Crust: Forget plain graham crackers! This holiday cheesecake features a unique crust made from finely crushed English-style gingersnap cookies. The spicy, aromatic ginger notes from the gingersnaps create a harmonious, unforgettable flavor profile that perfectly complements the creamy eggnog filling, adding an extra layer of warmth and festive spice to every slice. It’s a truly inspired choice for a Christmas dessert.
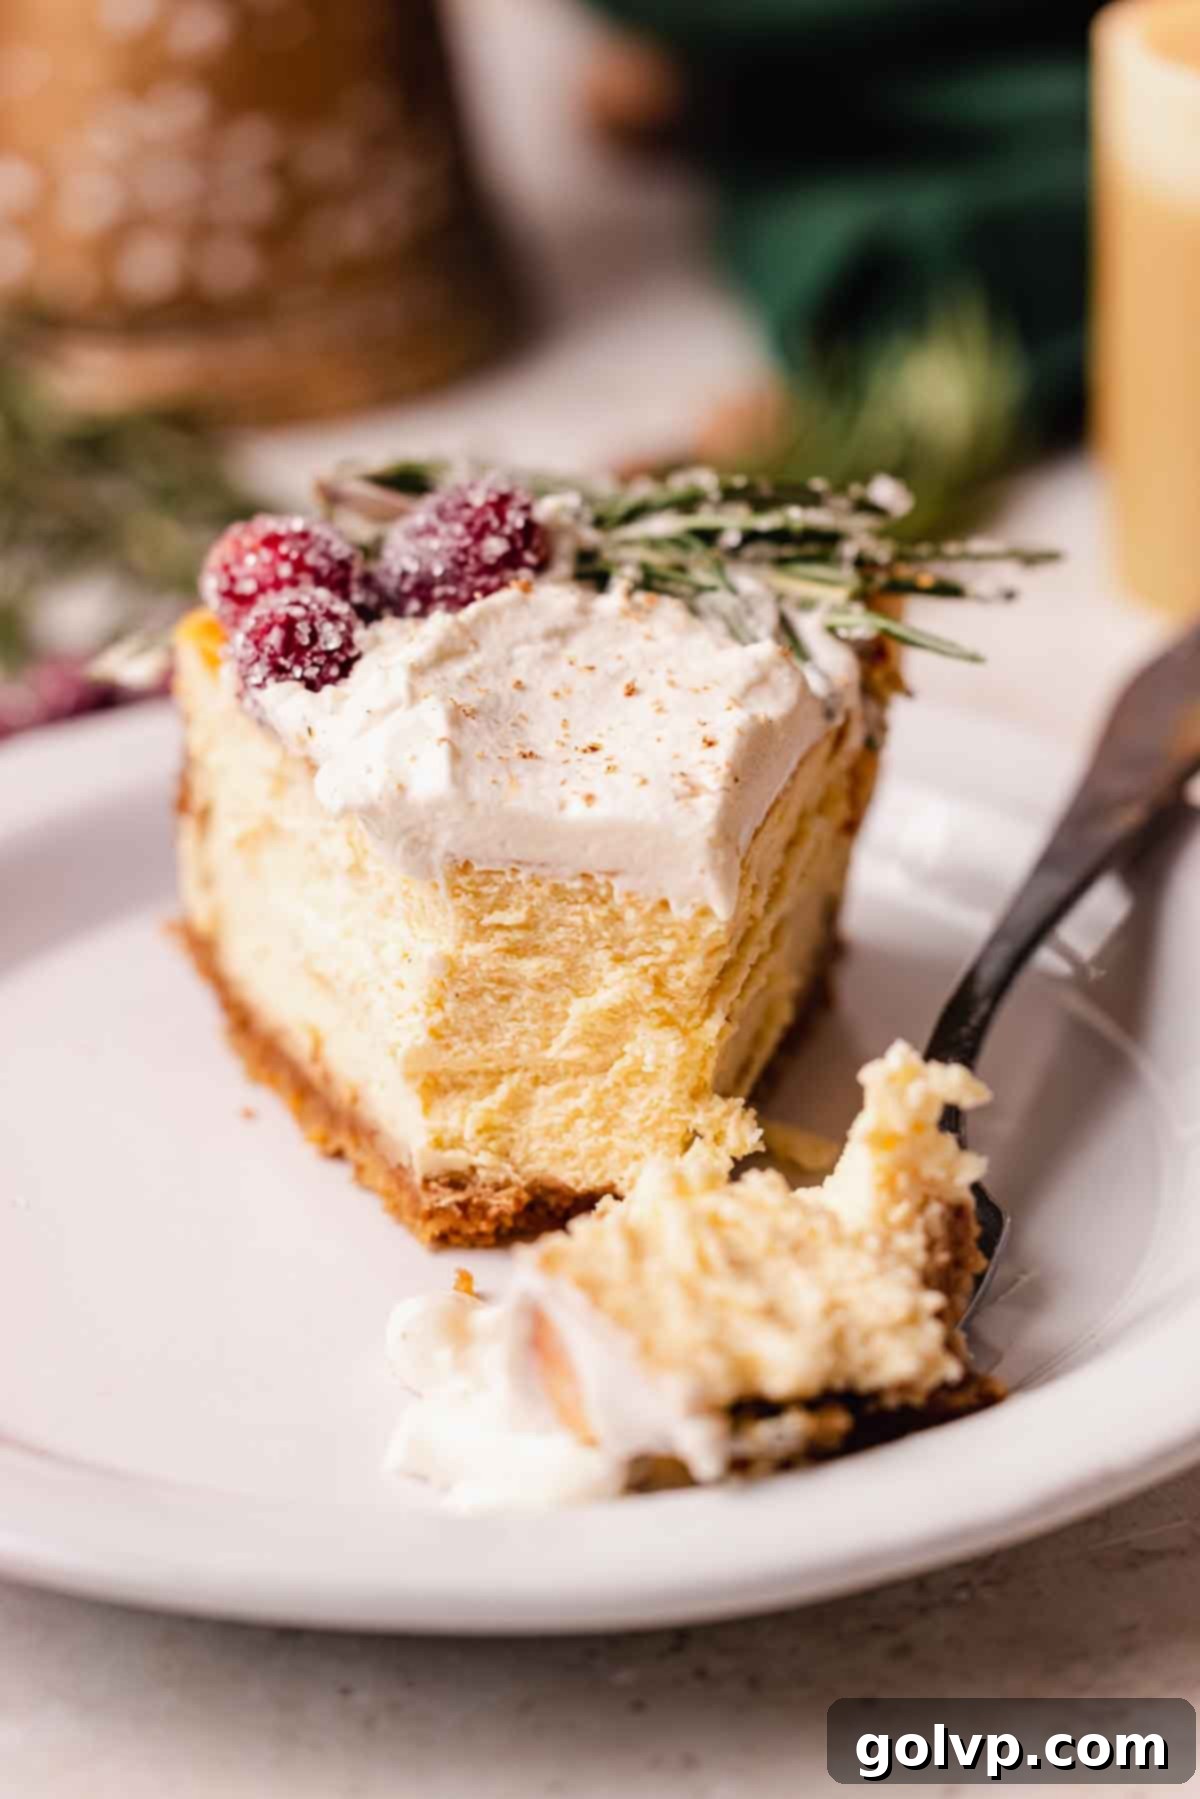
- Luxuriously Creamy Baked Cheesecake Texture: This isn’t just any cheesecake; it’s a perfectly baked masterpiece that achieves that classic, rich cheesecake flavor and firm-yet-silky texture. Despite its robust flavor, it remains incredibly ultra-creamy, melting in your mouth with every bite. The water bath method ensures an even bake, preventing cracks and guaranteeing a smooth, delightful consistency.
- Stress-Free Make-Ahead Holiday Dessert: Holiday entertaining can be hectic, but this eggnog cheesecake is designed to simplify your preparations. Cheesecakes are renowned as ideal make-ahead desserts because they require ample chilling time to fully set and develop their flavors. For the absolute best results and a perfectly firm cheesecake, plan to bake this at least one or two days in advance. This means less work on the big day and more time to enjoy with loved ones!
- Authentic Eggnog Flavor Infusion: Every component of this cheesecake is carefully crafted to highlight the beloved taste of eggnog. From the creamy filling itself to the optional rum-infused whipped cream, the distinct blend of dairy, eggs, rum, and nutmeg shines through, making it a true celebration of this iconic seasonal beverage. It’s the perfect treat for eggnog enthusiasts!
📝 Key Ingredients for the Perfect Eggnog Cheesecake
Read through for all the tips you will need for success!
Full steps and ingredients in recipe card below.
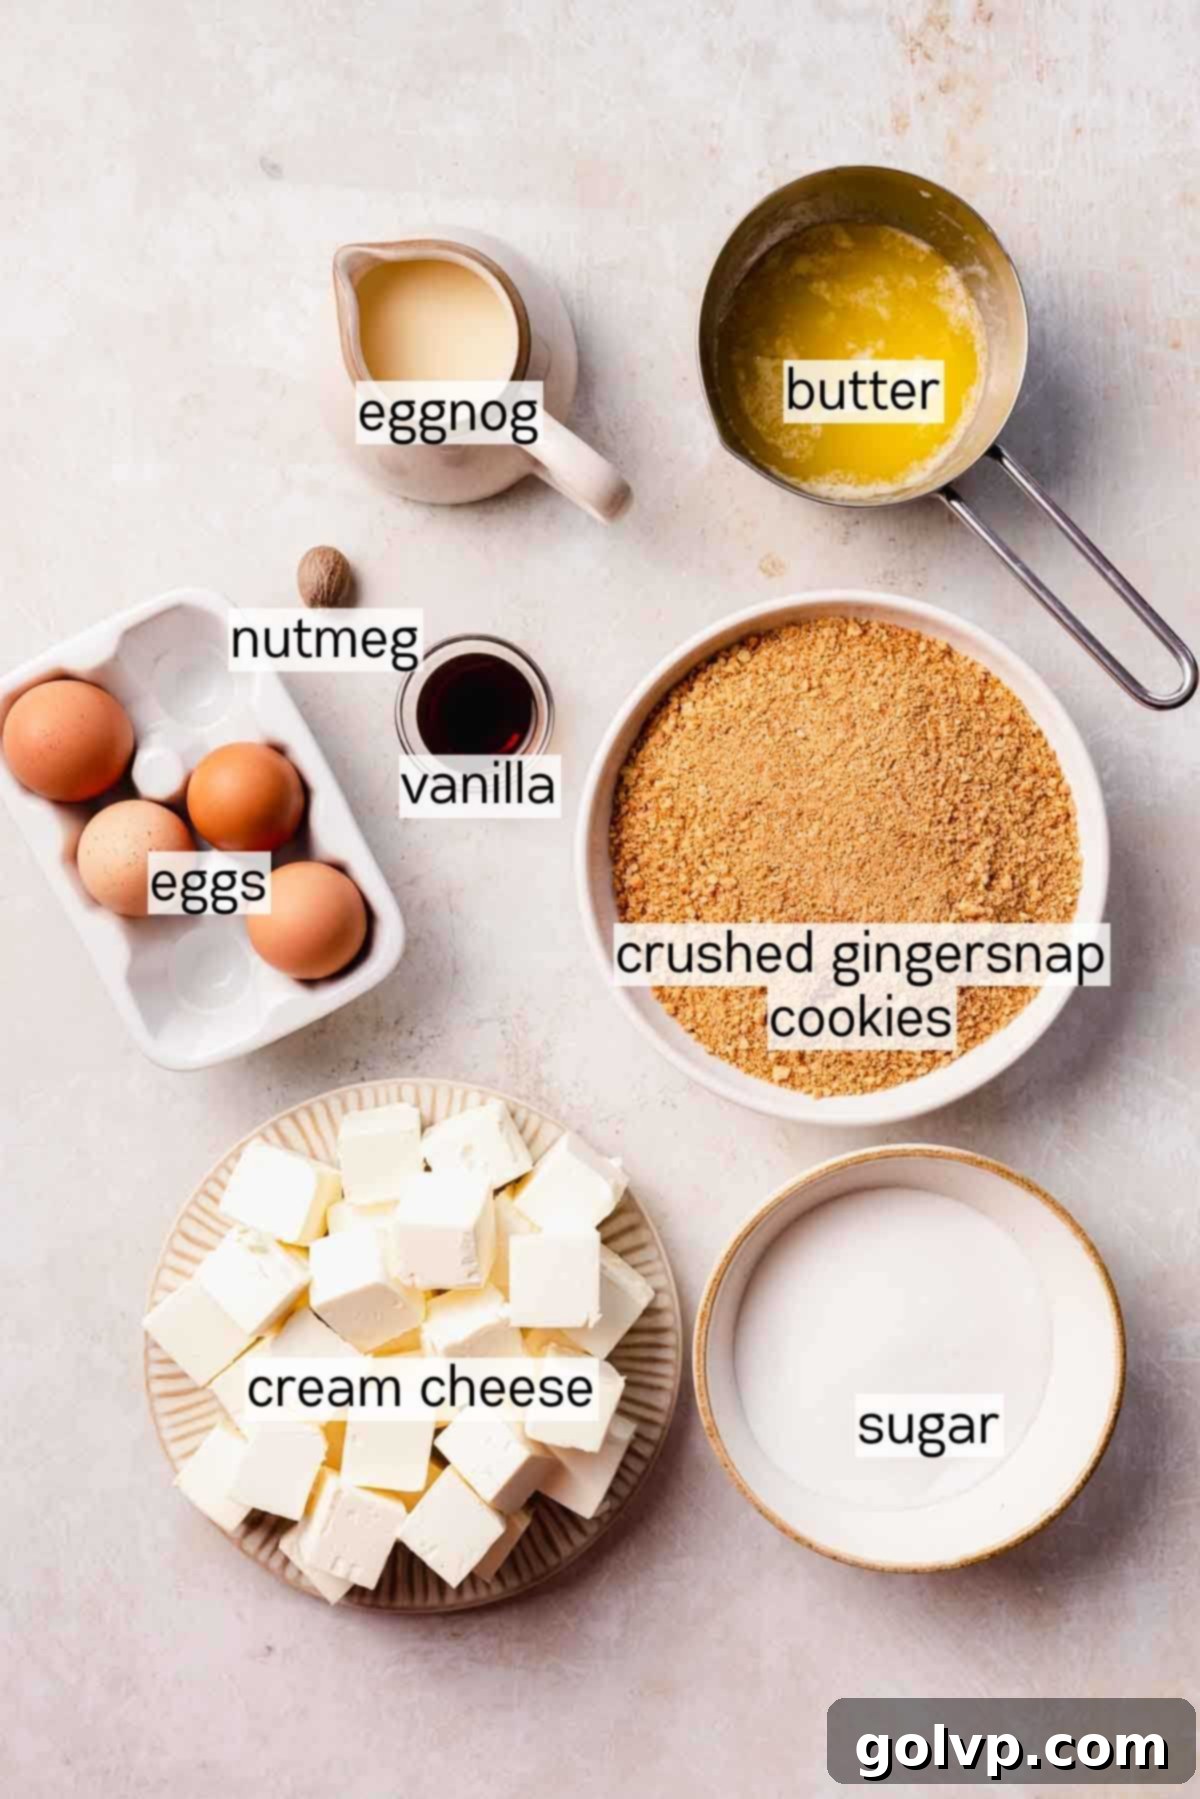
Pro Tip for a Smooth Cheesecake: Always bring all of your cold ingredients, especially cream cheese and eggs, to room temperature for at least 30 minutes (or even an hour) before mixing! This crucial step ensures that all ingredients blend together seamlessly, preventing lumps and resulting in a perfectly smooth, velvety cheesecake batter.
- Eggnog: This festive, thick, and sweet drink, characterized by notes of rum and nutmeg, is the star of our cheesecake. It’s a popular holiday staple typically available in grocery stores from November through early January. While I’ve successfully used store-bought eggnog for convenience in this recipe, you can certainly opt for your favorite homemade eggnog for an even more personalized touch. Just ensure it’s at room temperature before adding it to the batter.
- Full-Fat Brick Cream Cheese: The foundation of any great cheesecake! For the absolute best results—a rich, firm, and undeniably creamy texture—always use full-fat, brick-style cream cheese. I recommend using four 8-ounce blocks to achieve the perfect consistency. Avoid low-fat or whipped cream cheese varieties, as they contain too much water and can lead to a watery, less satisfying cheesecake texture. Ensure it’s fully softened to room temperature for smooth mixing.
- Gingersnap Cookies: Moving beyond the traditional graham cracker crust, crushed English-style gingersnap cookies offer a delightful, spiced alternative. Their intense ginger flavor and crisp texture create a wonderfully aromatic and sturdy crust that perfectly complements the creamy eggnog filling, truly enhancing the holiday theme. If you can’t find gingersnaps, gingerbread cookies or Biscoff cookies also make excellent substitutions.
- Large Eggs: Eggs are essential for binding the cheesecake batter and providing its signature smooth, rich texture and custardy set. Using room temperature eggs is vital as they incorporate more easily and uniformly into the cream cheese mixture, helping to prevent overmixing and the introduction of too much air, which can lead to cracks.
- Granulated Sugar: Provides the necessary sweetness to balance the tang of the cream cheese and the richness of the eggnog. Adjusting the amount slightly can cater to your preference, but stick close to the recipe for the best structural integrity of the cheesecake.
- Pure Vanilla Extract: A splash of high-quality vanilla extract enhances all the other flavors in the cheesecake, adding a layer of warmth and complexity without overpowering the distinct eggnog taste.
- Freshly Grated Nutmeg: While eggnog already contains nutmeg, an extra hint of freshly grated nutmeg in the batter and as a garnish amplifies that classic holiday spice, adding depth and a lovely aroma to the finished dessert.
- Unsalted Butter: Used for the crust, melted butter binds the cookie crumbs together, ensuring a firm, flavorful base. Using unsalted butter allows you to control the overall saltiness of the recipe.
- Sea Salt: A pinch of salt in both the crust and the filling balances the sweetness and enhances all the other flavors, making the cheesecake taste even more vibrant and complex.
- Heavy Whipping Cream & Optional Dark Rum (for topping): These are for the luscious, fluffy whipped cream that adorns the finished cheesecake. The dark rum, while optional, truly elevates the eggnog experience, adding a sophisticated, boozy kick that’s perfectly in line with holiday indulgence. Ensure the cream is well-chilled for optimal whipping.
👩🍳 How to Make the Ultimate Eggnog Cheesecake
Crafting the Perfect Gingersnap Crust: Step-by-Step
Preparation is Key: Begin by preheating your oven to 355°F (180°C). Take a 9-inch round springform pan and lightly butter both the bottom and sides with a piece of cold butter. This ensures easy removal of your beautiful cheesecake later.
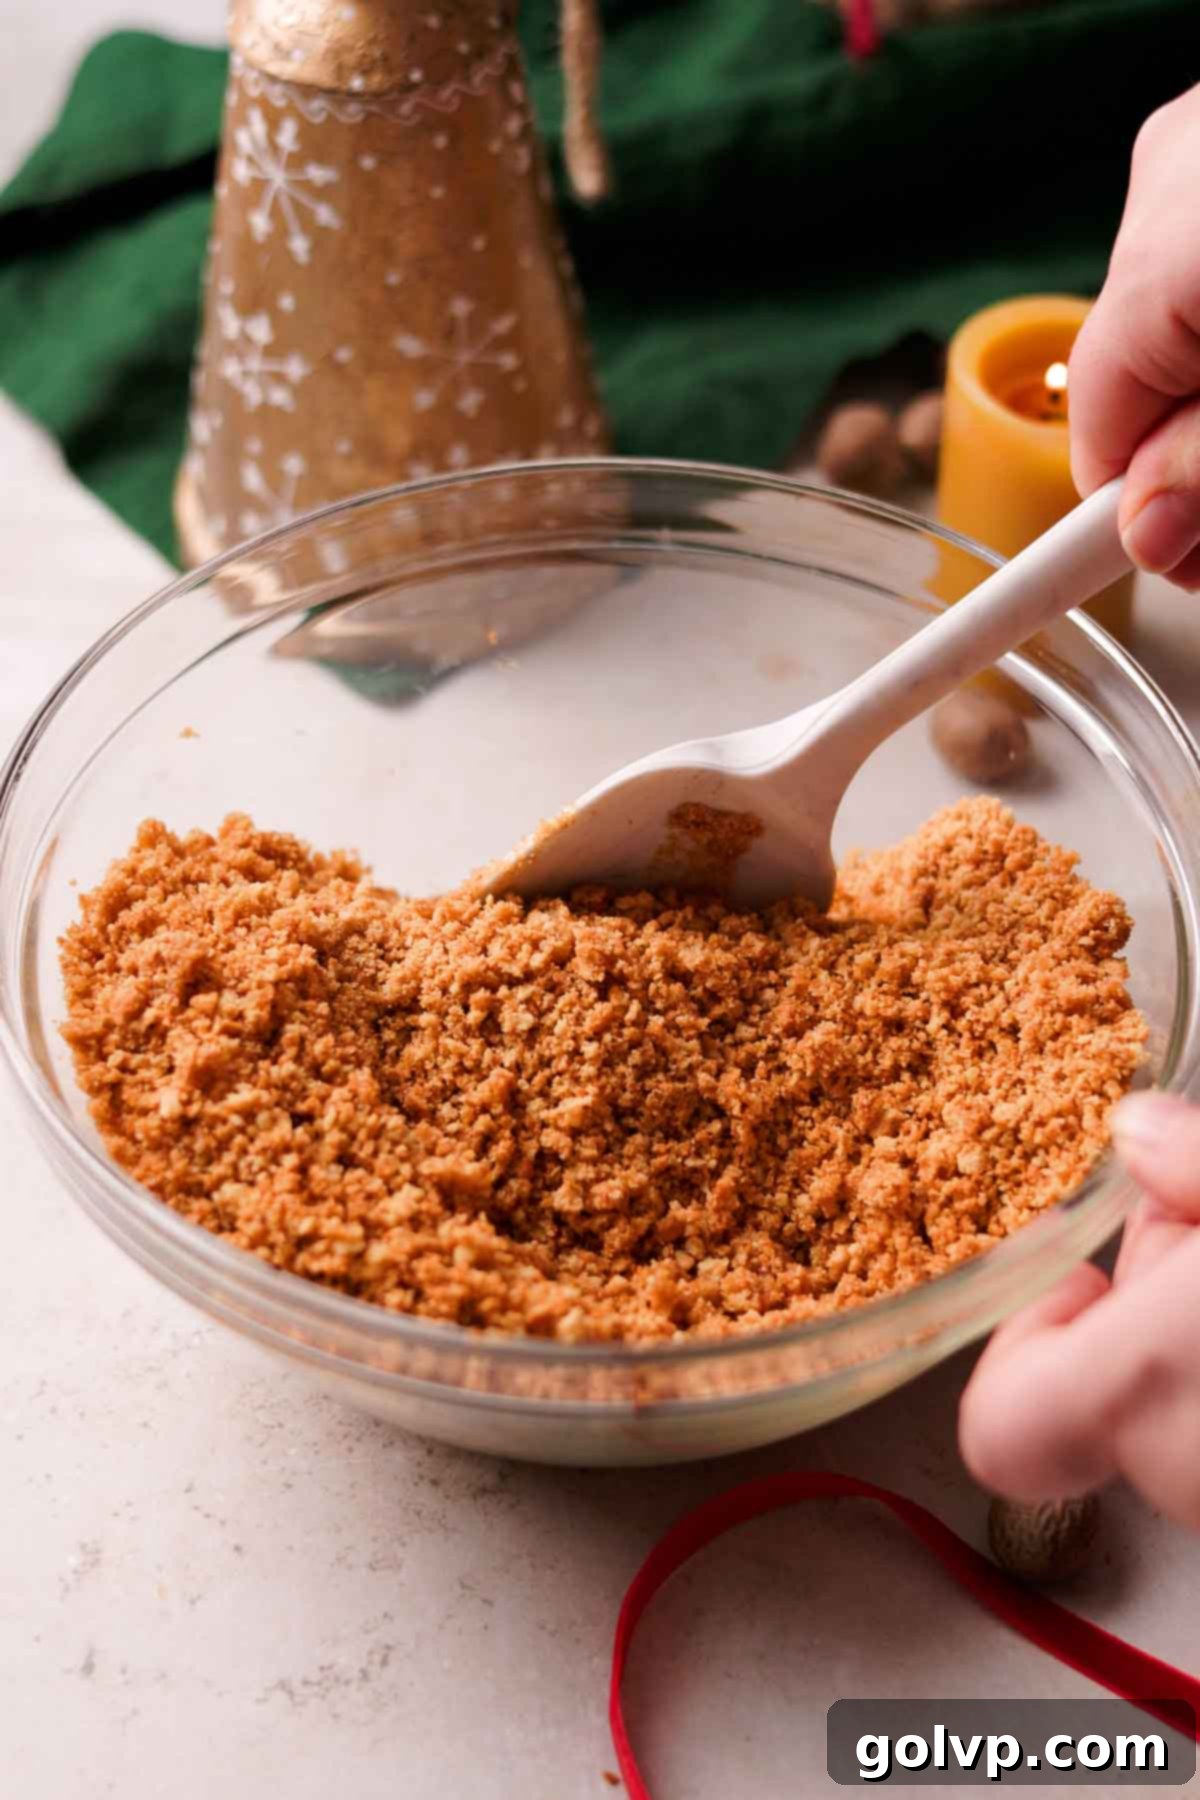
Step 1: Combine Crust Ingredients. In a spacious mixing bowl, combine the finely crushed gingersnap cookies, melted unsalted butter, and a pinch of sea salt. Mix these ingredients thoroughly until they are well combined and the crumbs are uniformly moistened. The cookies I used were already quite sweet, so I didn’t find it necessary to add brown sugar. However, if your gingersnaps are less sweet or you prefer a sweeter crust, you can add 1-2 tablespoons of packed brown sugar at this stage.
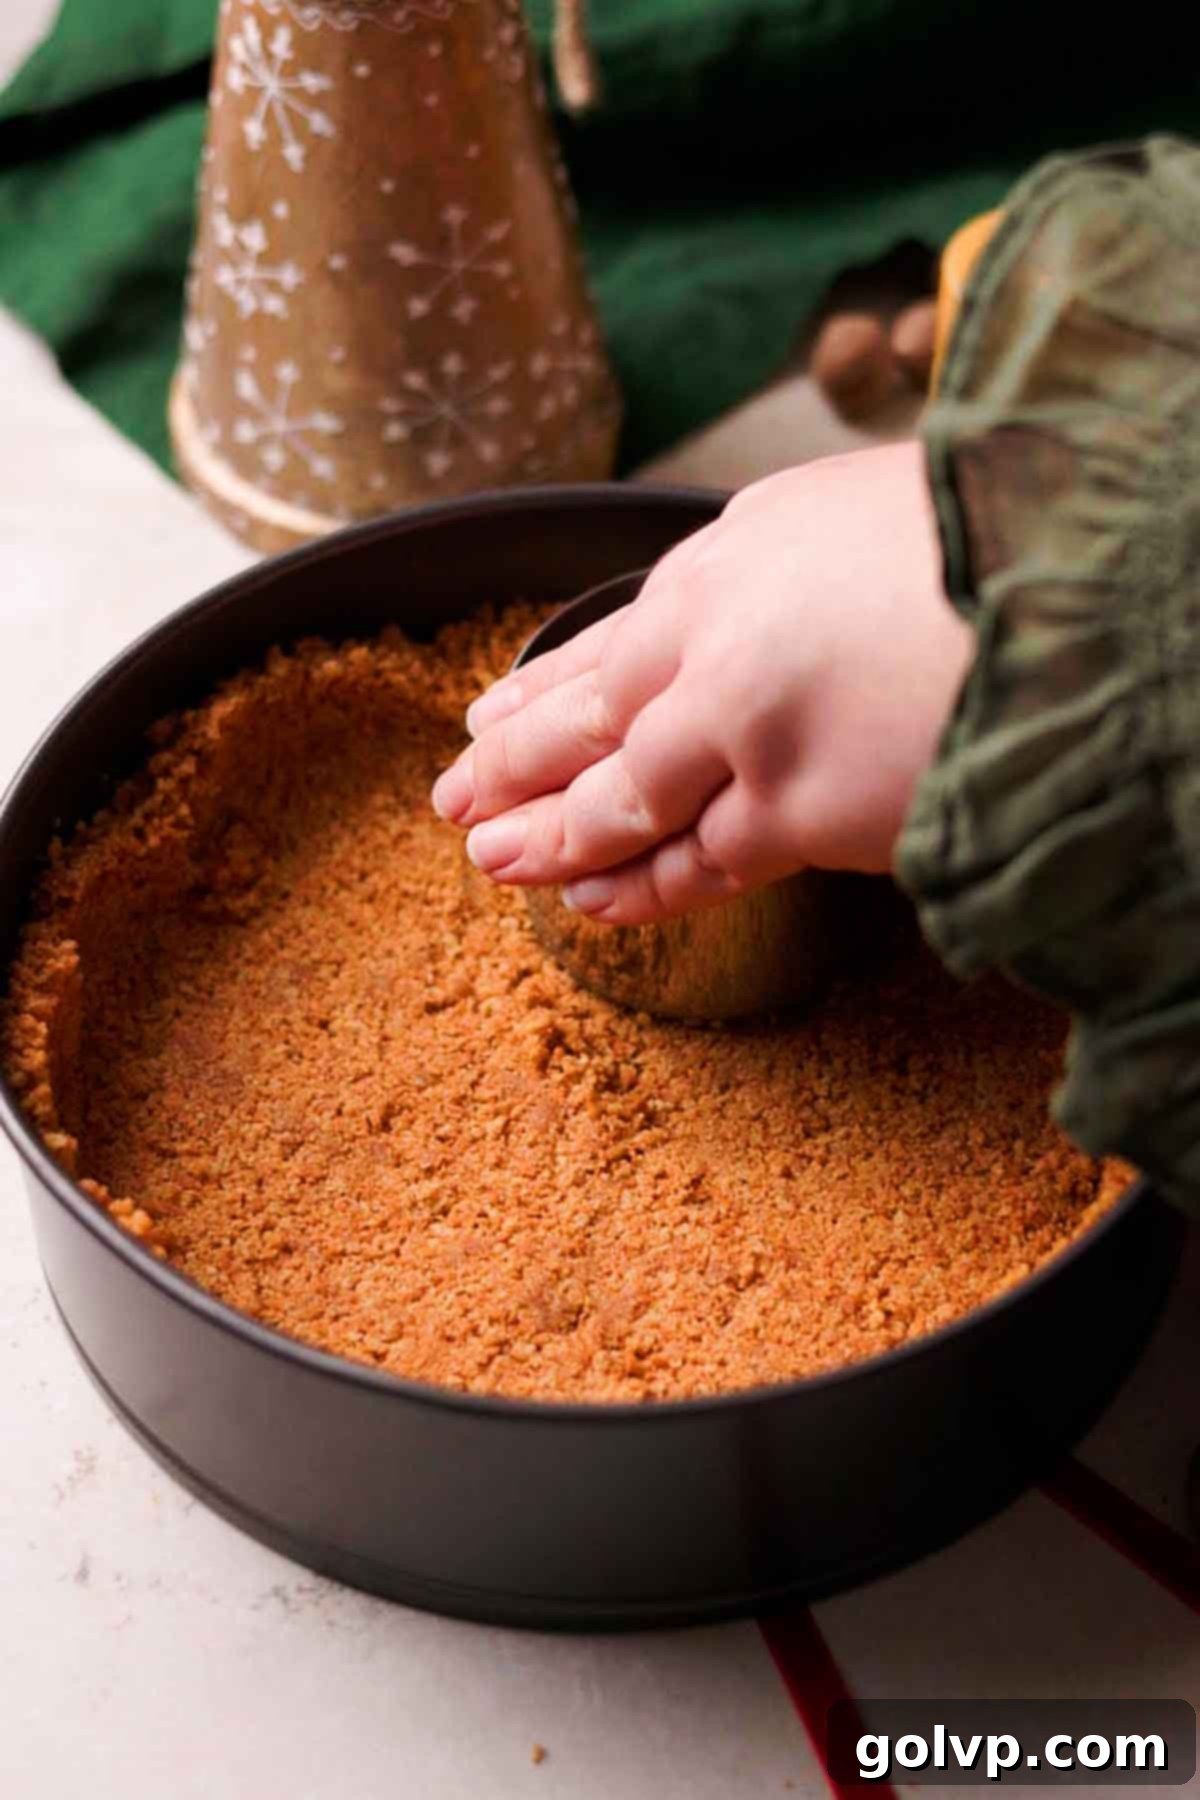
Step 2: Form and Bake the Crust. Transfer the gingersnap crust mixture into your prepared springform pan. Using the bottom of a flat glass or your fingers, firmly press the mixture evenly across the bottom and slightly up the sides of the pan. A well-packed crust ensures it won’t crumble when sliced. Bake this crust for 8-10 minutes, or until the edges appear lightly golden and fragrant. While the crust bakes and cools slightly, begin preparing your luscious eggnog cheesecake batter. Crucially, do not turn off your oven after the crust is done, as it will be needed for the cheesecake itself!
Preparing the Creamy Eggnog Cheesecake Batter: Step-by-Step
Advance Preparation: Before you start mixing, fill a kettle with water and set it to boil. This will be used for the crucial water bath later on.
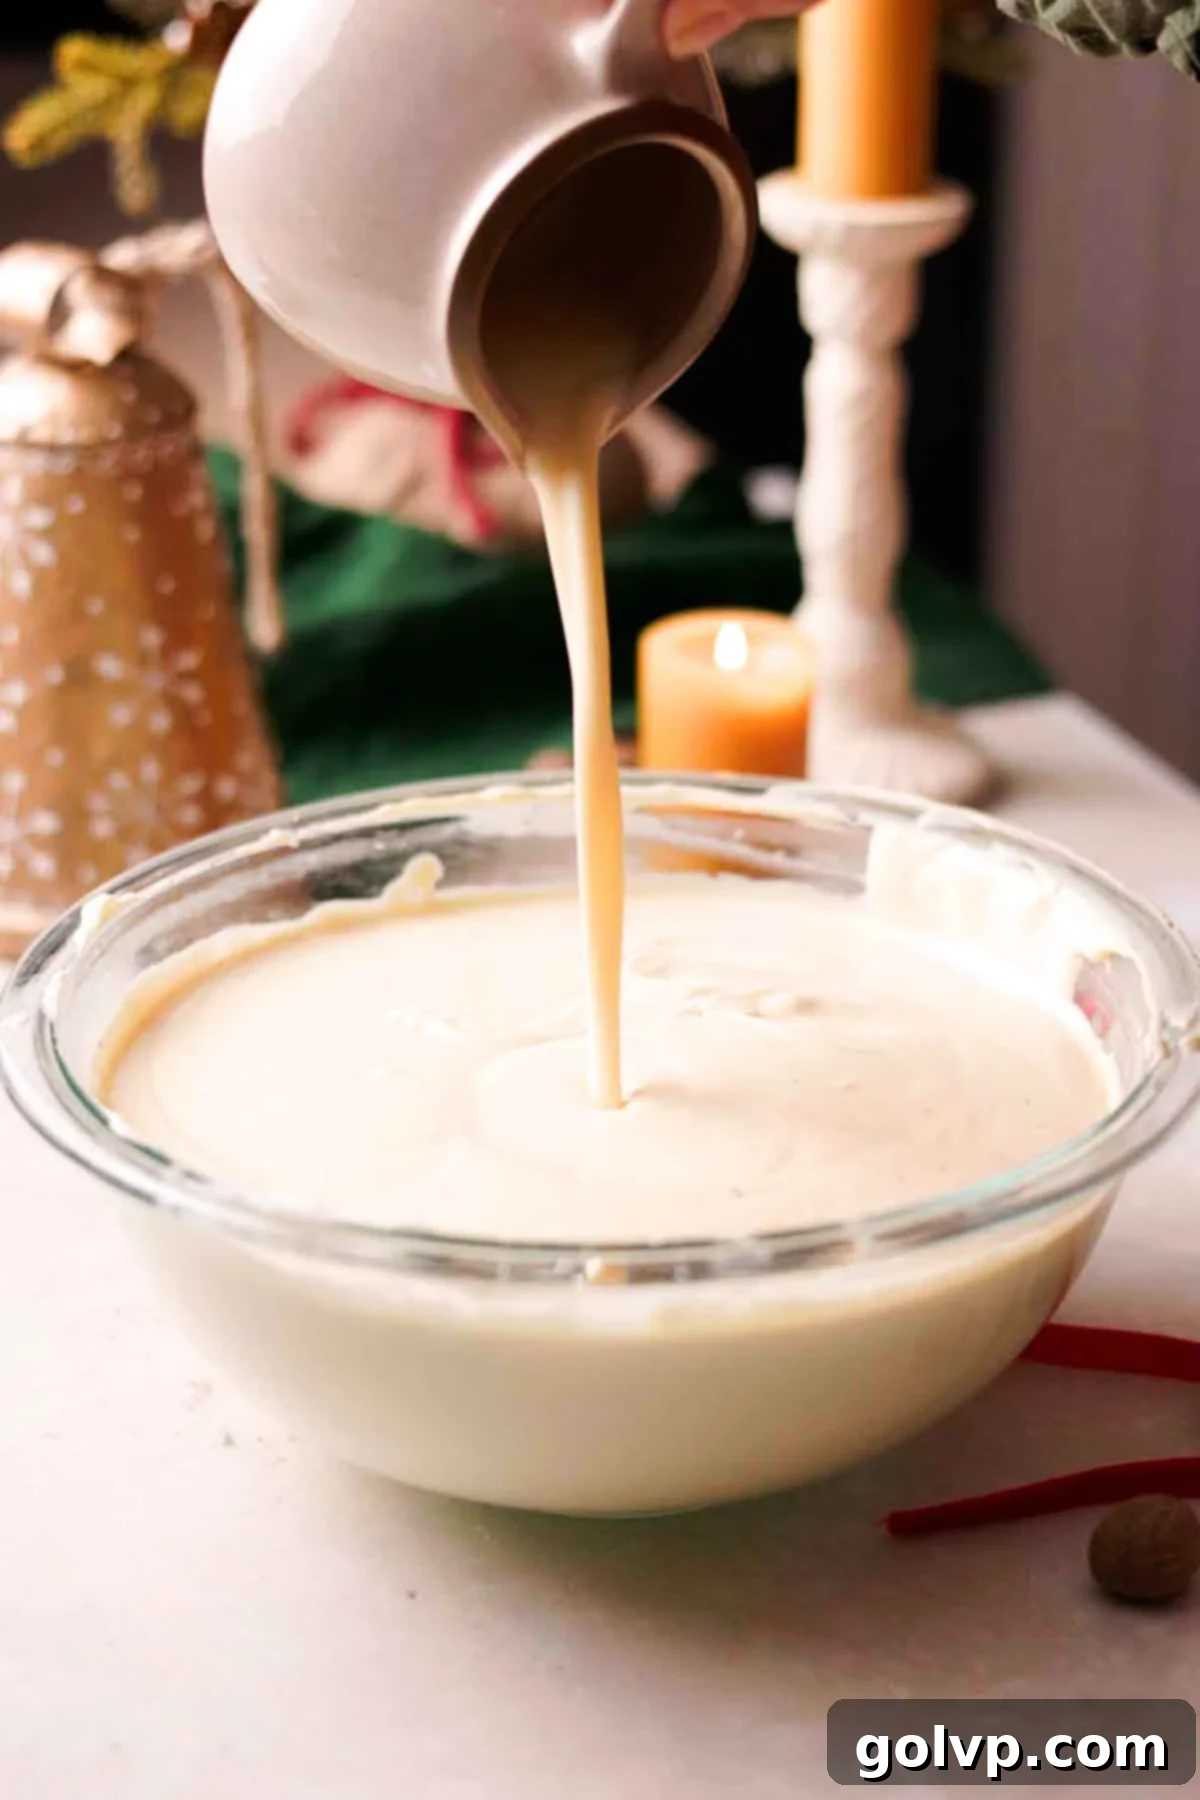
Step 1: Cream Cheese Base. In a large mixing bowl or the bowl of a stand mixer fitted with the paddle attachment, beat the softened full-fat cream cheese on medium-low speed until it is utterly creamy and smooth, with no lumps remaining. Stop and scrape down the sides of the bowl frequently to ensure even mixing. Next, add the granulated sugar, sea salt, and pure vanilla extract. Continue to beat on low speed until just combined, again scraping the bowl. Avoid overmixing at this stage to prevent incorporating too much air.
Step 2: Incorporate Eggs Gradually. Add the large, room-temperature eggs one at a time. After each egg addition, beat on very low speed just until it is fully incorporated into the cream cheese mixture. It’s essential not to overmix the batter once the eggs are added, as excessive beating can introduce too much air, which can cause the cheesecake to puff up significantly during baking and then crack or collapse as it cools.
Step 3: Add Eggnog and Nutmeg. Finally, pour the room-temperature eggnog into the cheesecake batter, along with the freshly grated nutmeg. Gently mix with a spatula or on the lowest speed of your electric mixer until the batter is smooth and uniformly combined. A spatula is often best here to avoid further aeration.
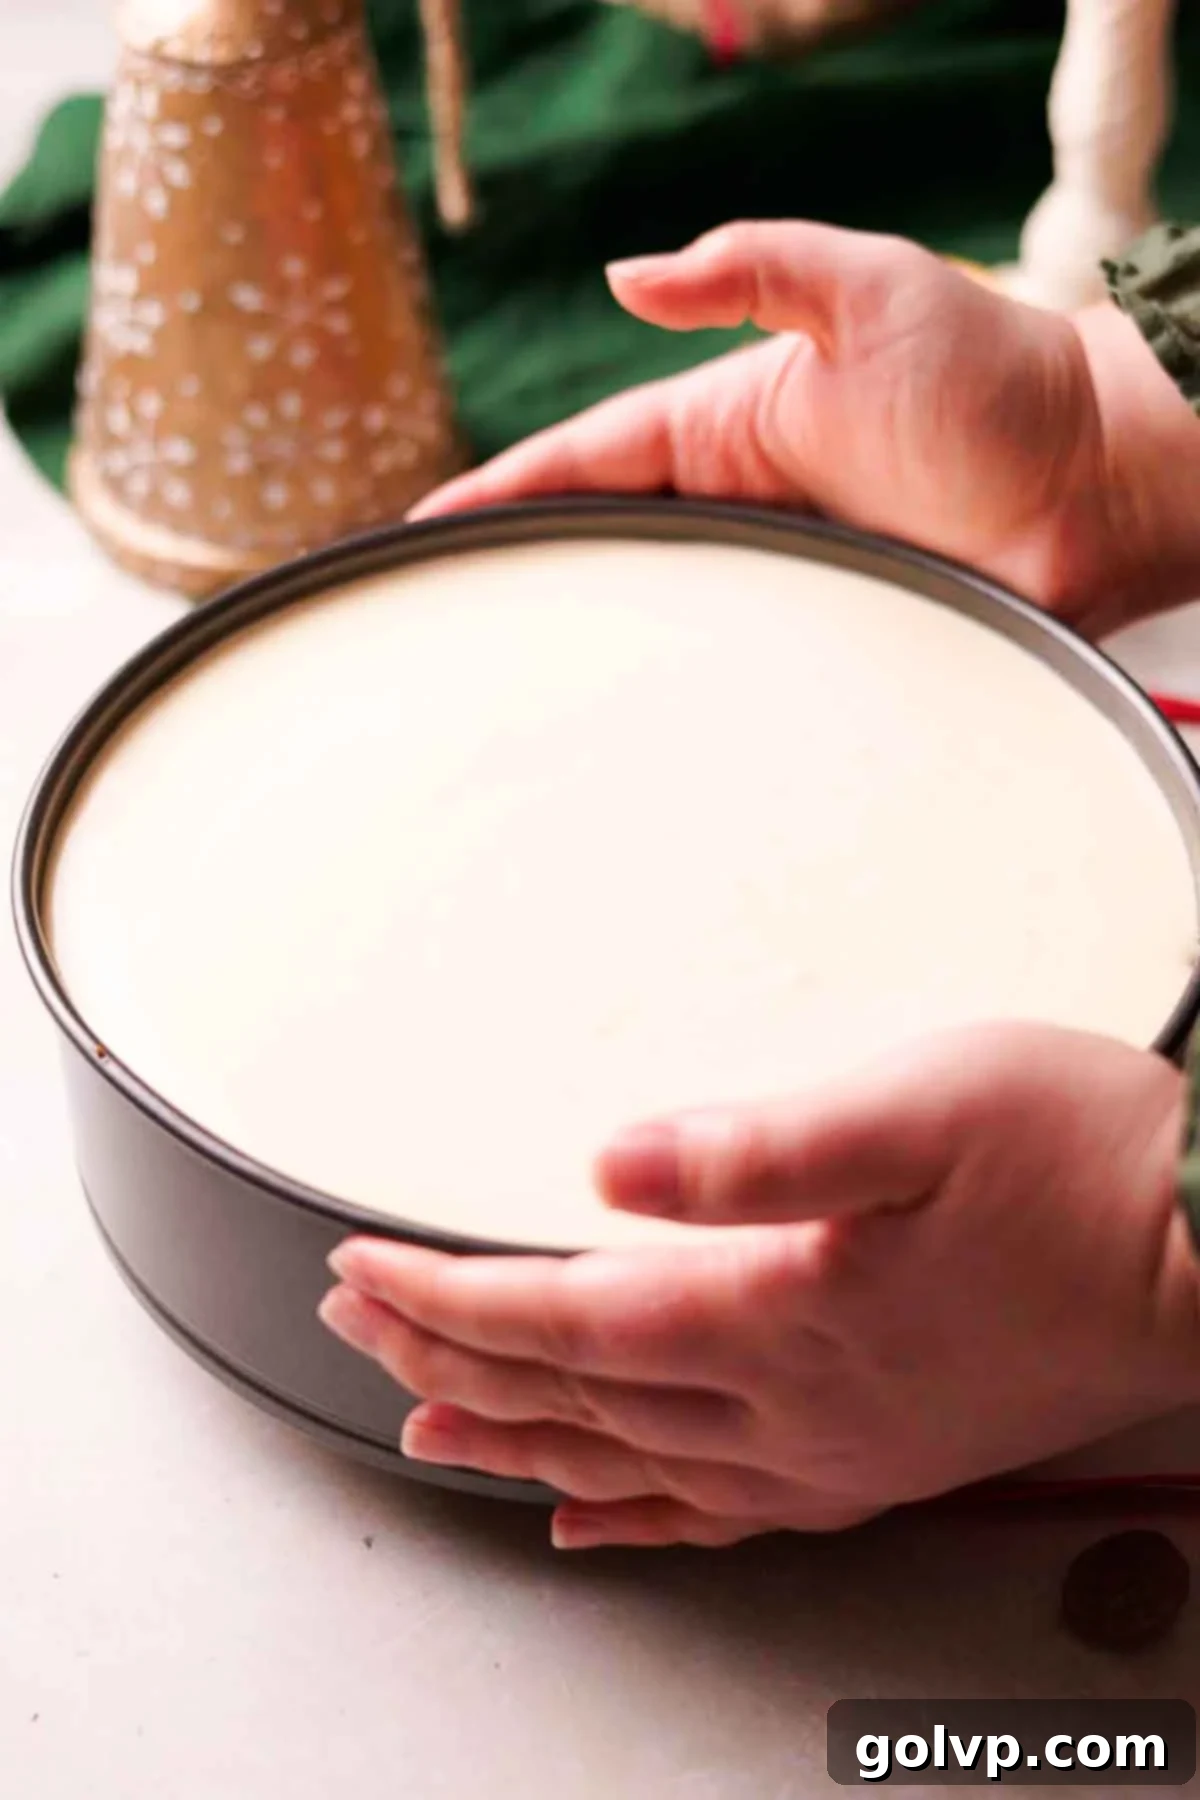
Step 4: Prepare for Water Bath. Carefully pour the prepared eggnog cheesecake batter into the cooled, baked gingersnap crust in the springform pan. Gently tap the pan several times on a flat counter surface. This action helps to release any trapped air pockets within the batter, which contributes to a perfectly smooth surface and prevents large air bubbles from forming. Now, prepare your water bath: place the cheesecake springform pan into a slightly larger round baking pan or an oven-safe saucepan. Then, place this nested setup into an even larger roasting pan or baking pan that will hold the hot water. This double-pan method offers an extra layer of protection against water leaking into your springform pan, which is crucial for cheesecake success.
See detailed water bath options below for more guidance on choosing the best method for your equipment.
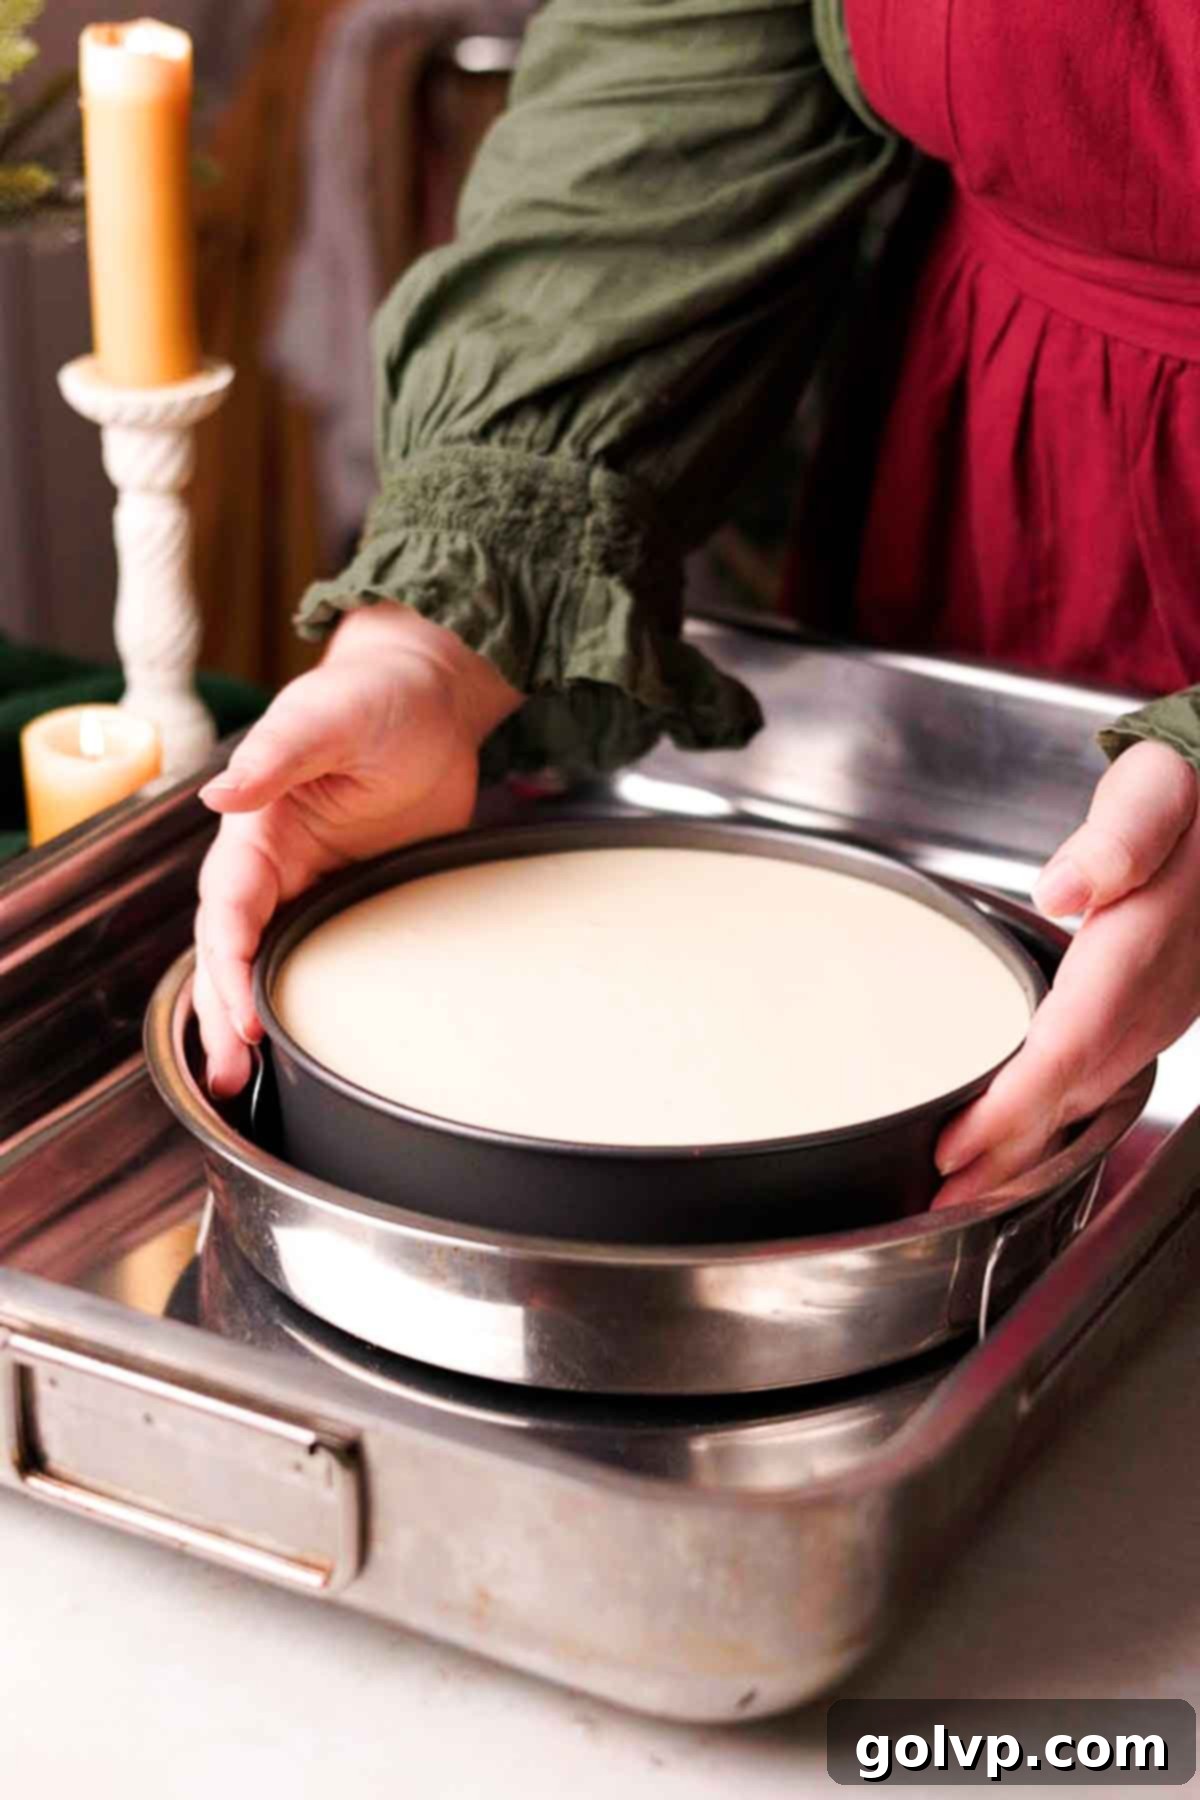
Step 5: The Water Bath Bake. Carefully transfer the nested pans, with the cheesecake nestled inside, into your preheated oven. Once positioned, very carefully pour the boiling hot water from your kettle into the largest baking pan, filling it to about halfway or almost all the way up the sides of the middle pan (the one holding your springform). You might need a few kettles of water to reach the appropriate level. This water bath creates a moist, even heat environment, preventing cracks and ensuring a creamy, uniform texture for your cheesecake. Bake for 70-80 minutes. The cheesecake is ready when the edges are set and firm, while the center still appears slightly puffed and jiggly when gently nudged. The center of the top should also look matte or almost matte, not glossy.
Step 6: Gradual Cooling is Essential. Once baked, turn off your oven but do not remove the cheesecake immediately. Instead, prop the oven door open slightly with a wooden spoon and allow the cheesecake to cool gradually inside the oven for an additional 20 minutes. This slow cooling process is vital for preventing drastic temperature changes that can cause cracks. After 20 minutes, carefully remove the cheesecake from the oven, being extremely cautious of the hot water in the roasting pan. Let the cheesecake cool completely to room temperature on a wire rack before transferring it to the refrigerator. Chill for at least 8 hours, or ideally overnight, for the best texture and flavor. This chilling period is non-negotiable for a perfectly set cheesecake.
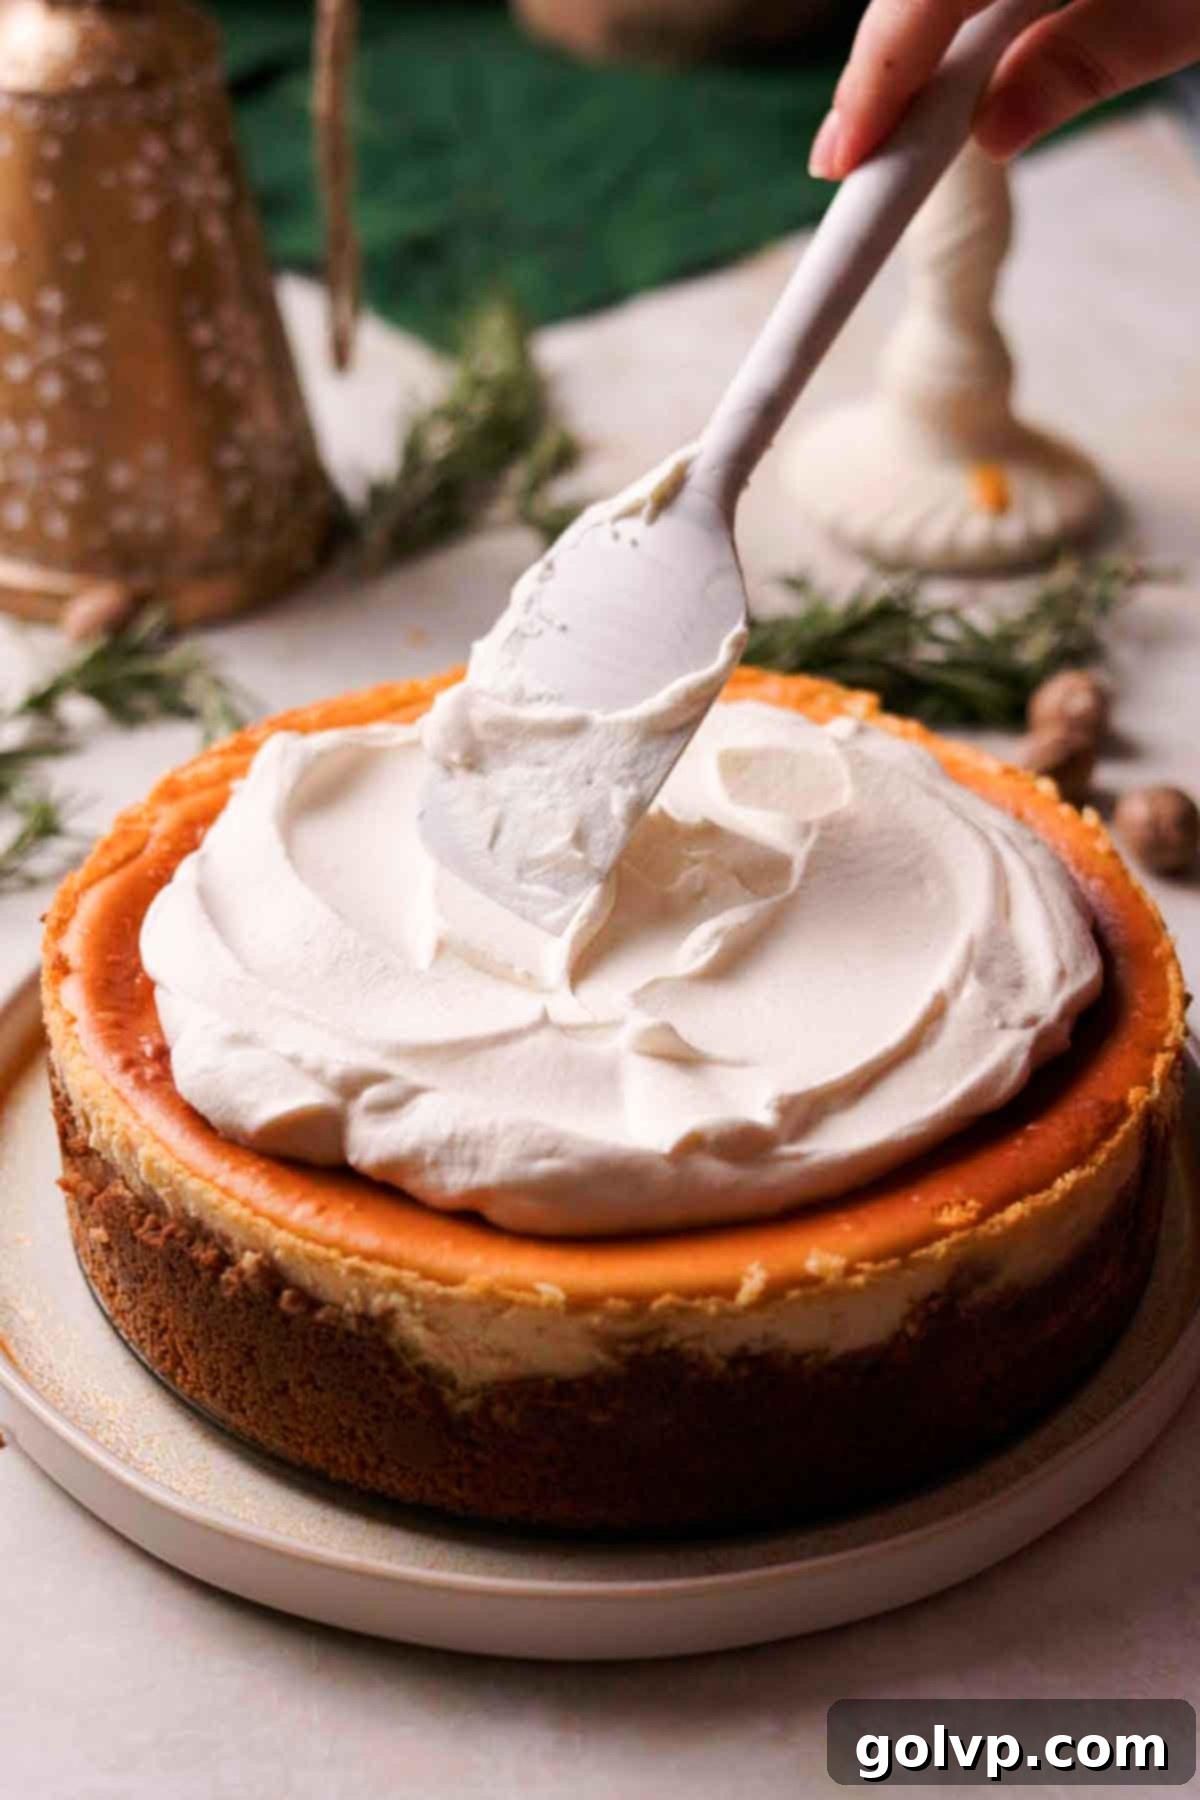
Step 7: Prepare the Rum Whipped Cream. For best results, place your mixing bowl and whisk (or electric mixer attachments) in the freezer for about 5-10 minutes before starting. In the chilled bowl, combine the heavy whipping cream, granulated sugar, and pure vanilla extract. Whisk by hand or with an electric mixer on high speed until stiff peaks form, indicating the cream is perfectly whipped and holds its shape. If desired, gently fold in the dark rum at this stage to add a wonderful, boozy complement to the eggnog flavors. Be careful not to overmix, or it can become grainy.
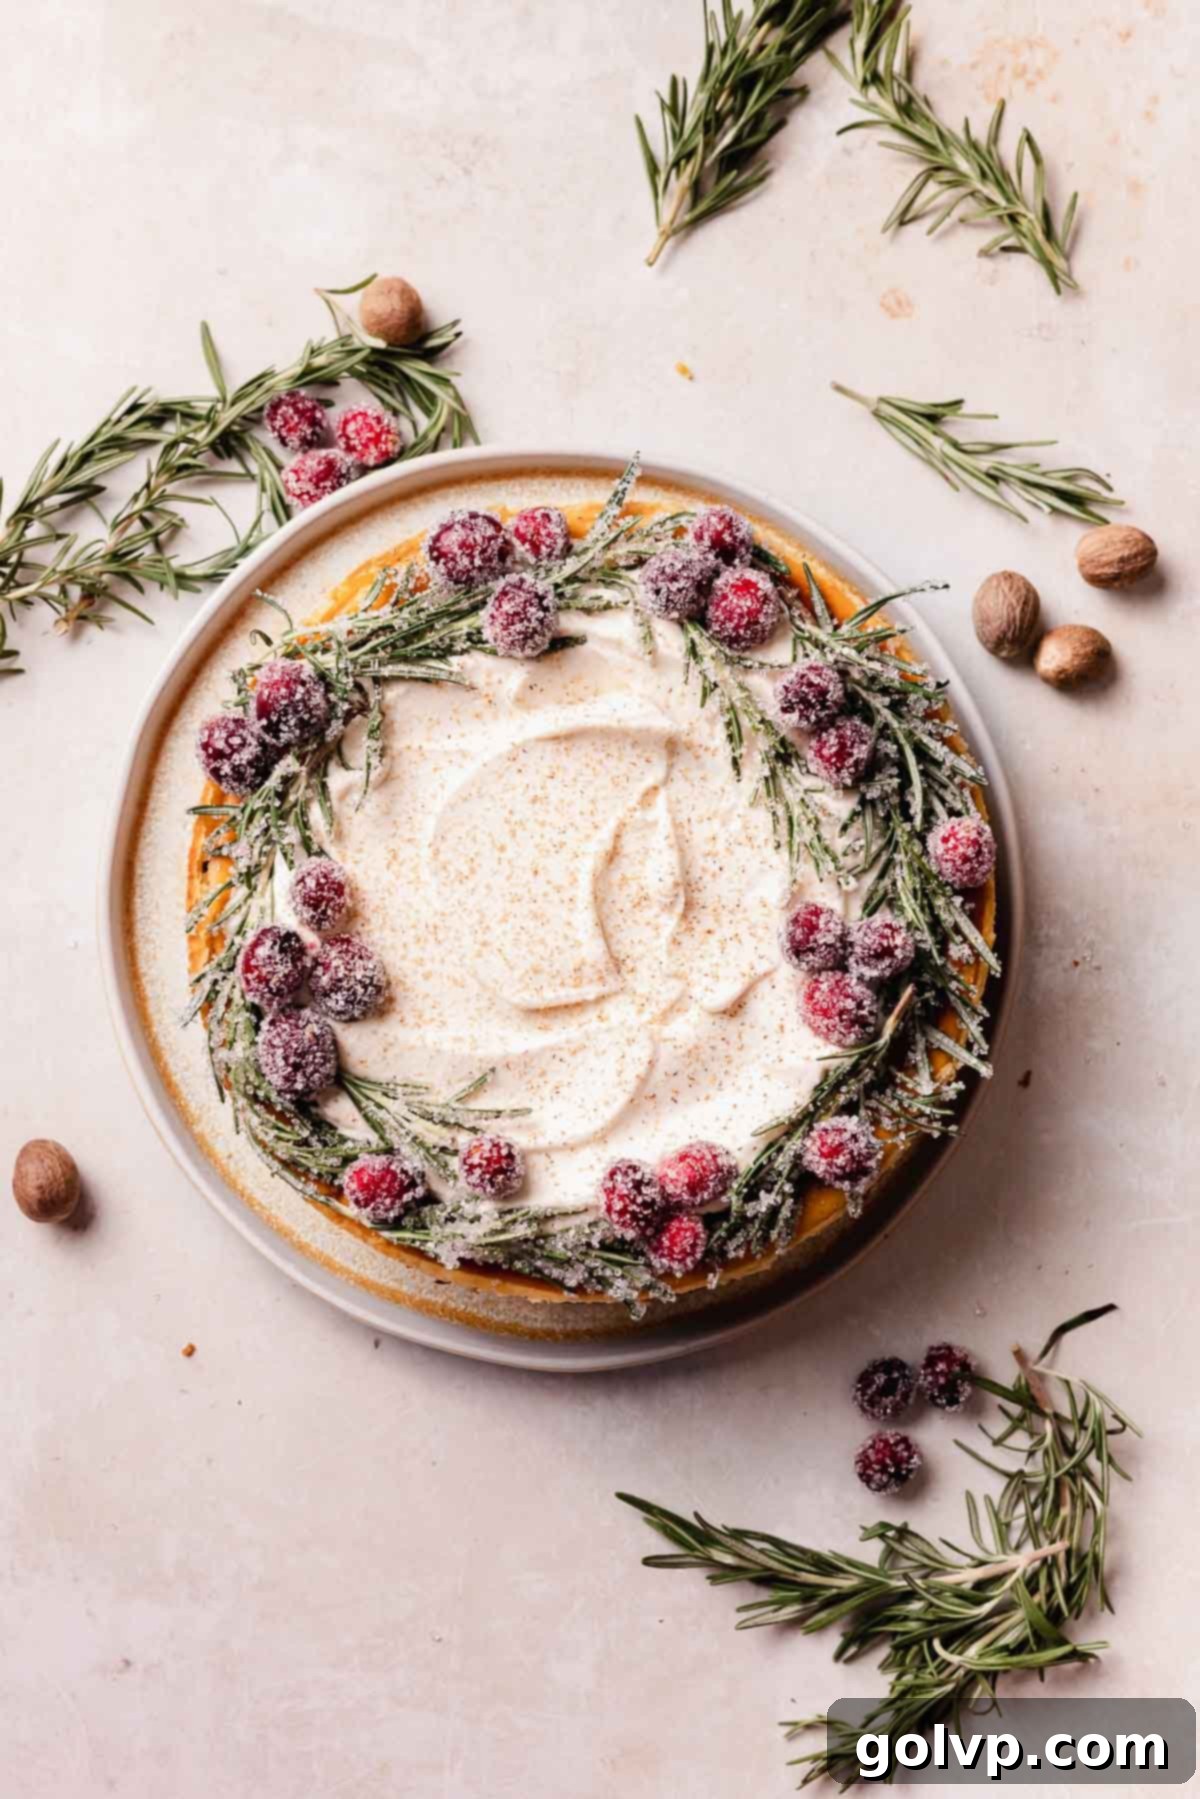
Step 8: Final Assembly and Decoration. Once the cheesecake is thoroughly chilled and set, carefully remove it from its springform pan. Spread the freshly made rum-infused whipped cream generously over the top of the cheesecake. For a truly show-stopping presentation, decorate the border with sugared cranberries and fresh sprigs of rosemary to create a beautiful festive wreath effect. Finish with a delicate sprinkle of freshly grated nutmeg over the whipped cream for an added touch of aroma and flavor. Slice and serve this magnificent holiday dessert!
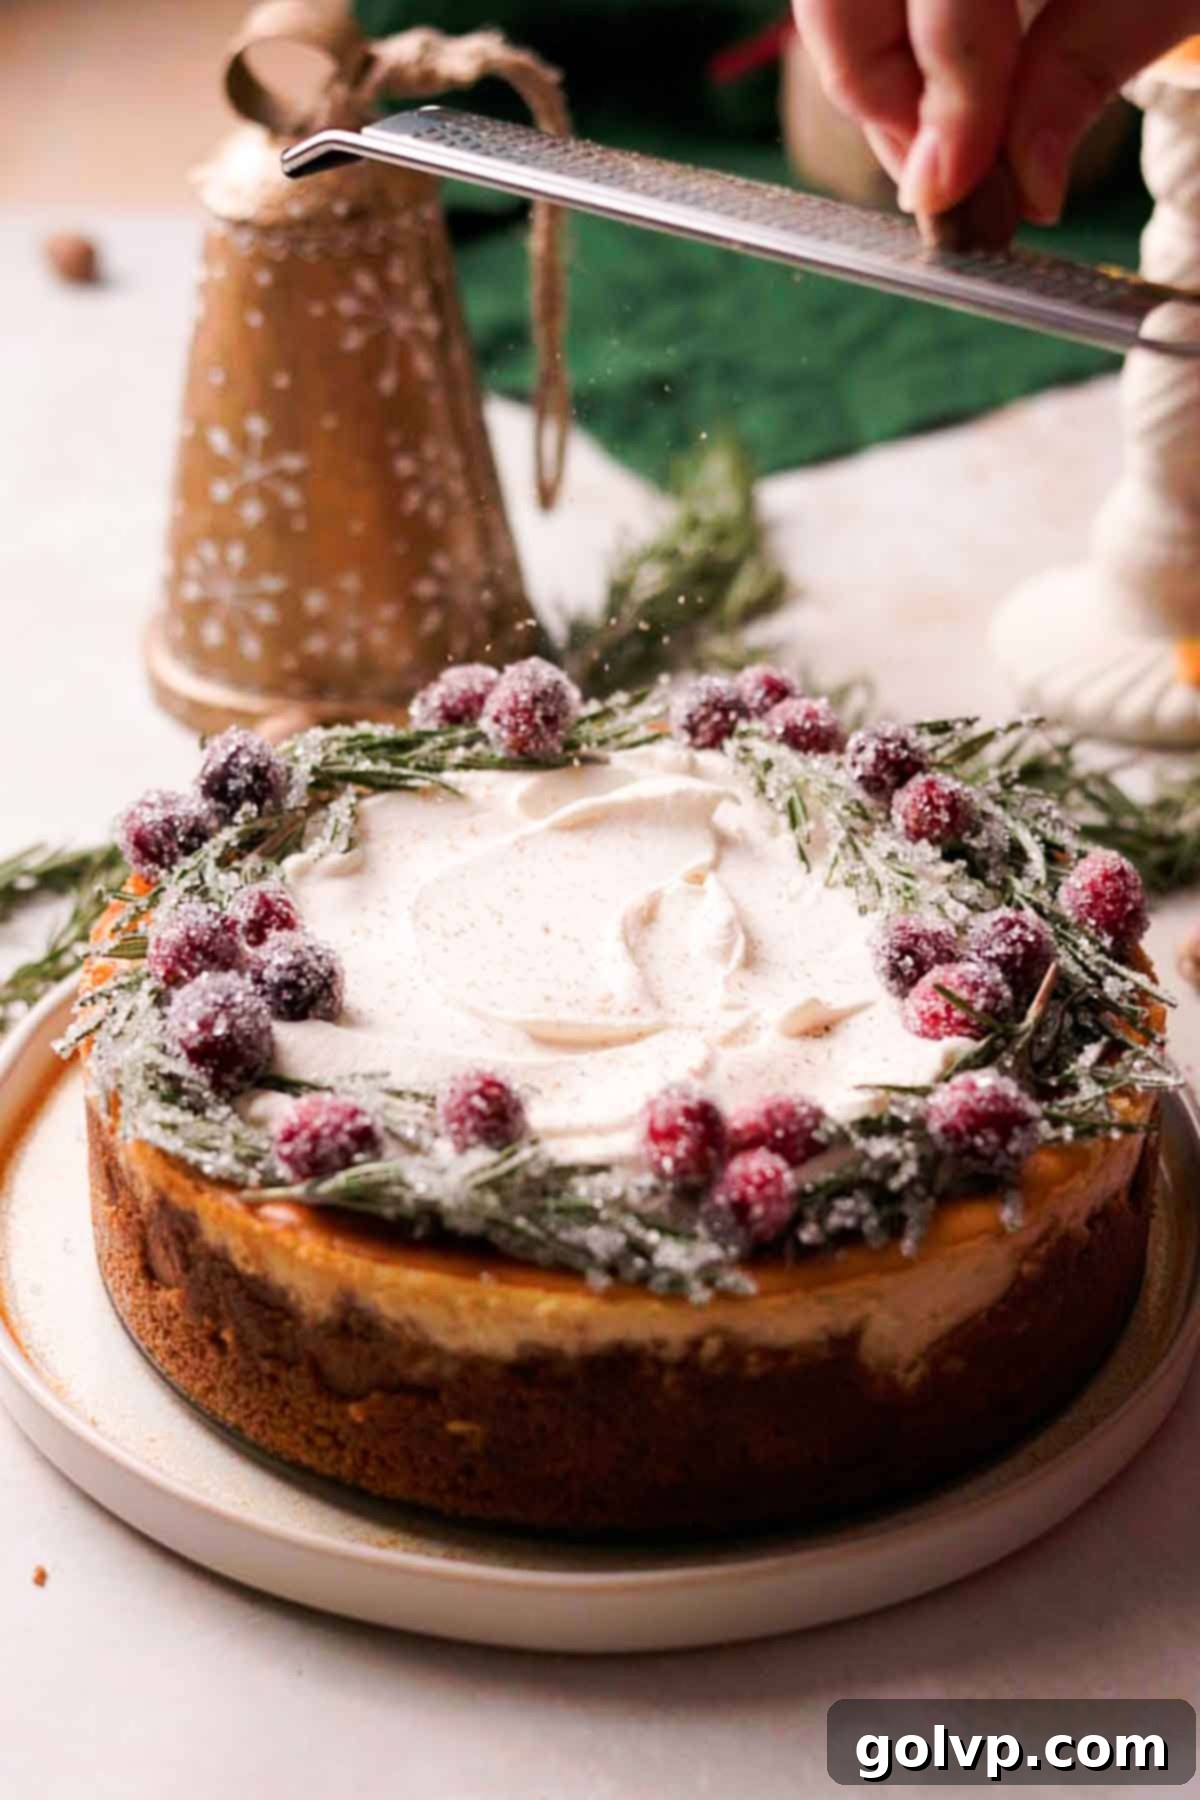
Step 9: Garnish and Serve. For an extra touch of holiday elegance and flavor, garnish your cheesecake with sugared cranberries and fresh sprigs of rosemary arranged artfully around the border. A final sprinkle of freshly grated nutmeg will complete the presentation and aromatic experience. This beautiful decoration makes the eggnog cheesecake truly stand out as a festive centerpiece!
✔️ Expert Cheesecake Baking Tips for Success
- Avoid Overmixing the Cheesecake Batter After Eggs are Added: This is arguably the most critical tip for a perfectly smooth, crack-free cheesecake. Once the eggs are introduced to the cream cheese mixture, it’s very easy to overmix the batter. Overmixing whips too much air into the mixture, causing the cheesecake to puff up excessively during baking. As it cools, this trapped air escapes, leading to a dramatic collapse and unsightly cracks on the surface. To prevent this, mix only until each egg is just incorporated, then stop. Use a low speed on your mixer or even a spatula to gently fold in subsequent ingredients like eggnog.
- Always Use Full-Fat, Brick-Style Cream Cheese at Room Temperature: The type and temperature of your cream cheese significantly impact the final texture. Full-fat, brick-style cream cheese (not whipped or spreadable tubs) provides the essential richness and firmness needed for a classic, decadent cheesecake. Ensure it is fully softened to room temperature before you begin mixing. Cold cream cheese will result in a lumpy batter and can make it harder to achieve a smooth consistency without overmixing.
- Implement a Water Bath (Bain-Marie) for Even Baking: A water bath is a game-changer for cheesecakes. Baking in a water bath creates a moist, even heat environment in your oven, which prevents the edges of the cheesecake from baking too quickly and cracking while the center remains undercooked. It also contributes to that signature silky, custardy texture. While it might seem like an extra step, it’s absolutely worth it for a professional-looking and tasting cheesecake. Refer to the “Cheesecake Water Bath Method Options” section below for detailed instructions on how to set it up securely.
- Chill Thoroughly and Patiently: Resist the urge to cut into your eggnog cheesecake too soon! Cheesecakes require a minimum of 8 hours, but ideally overnight (12-24 hours), in the refrigerator to fully set. This chilling time allows the flavors to meld and the internal structure to firm up completely, resulting in clean slices and the perfect creamy density.
- Ensure Ingredients are at Room Temperature: Beyond the cream cheese and eggs, having your eggnog and vanilla extract at room temperature helps them incorporate smoothly into the batter, preventing curdling and ensuring a consistent texture. Cold ingredients can cause the batter to seize up.
- Don’t Forget to Scrape Down the Bowl: Regularly stopping your mixer to scrape down the sides and bottom of the bowl ensures all ingredients are evenly incorporated, preventing streaks of unmixed cream cheese or sugar in your final batter.
🥄 Make Ahead and Storage Tips for Eggnog Cheesecake
This eggnog cheesecake truly excels as the ultimate make-ahead dessert, perfectly suited for busy holiday schedules. It requires a significant chilling period of at least 8 hours, or preferably overnight, to allow its rich flavors to meld and its creamy texture to set beautifully. You can confidently prepare and bake this cheesecake up to 2 days in advance of when you plan to serve it. When storing it ahead of time, make sure to keep it well-covered in the refrigerator to prevent it from absorbing any ambient odors and to maintain its freshness. A dedicated cake carrier works wonderfully for this purpose, providing both protection and easy transport.
A special note on decoration: If you plan to adorn your cheesecake with delicate elements like sugared cranberries and fresh rosemary, as suggested for the festive wreath design, I highly recommend adding these garnishes just before you are ready to serve. The moisture from the chilled cheesecake can unfortunately cause the sugar coating on the cranberries and rosemary to melt, diminishing their sparkling appearance over time. Applying them at the last minute ensures your centerpiece looks its absolute best.
For longer storage, this eggnog cheesecake is quite versatile. Leftovers can be stored in an airtight container in the refrigerator for up to 4 days, ensuring each slice remains as fresh and delicious as the first. For an even more extended period, you can freeze the cheesecake for up to 2 months. To freeze, first chill the cheesecake until very firm, then wrap individual slices or the entire cheesecake (if uncut) tightly in several layers of plastic wrap, followed by a layer of aluminum foil. This double wrapping helps to prevent freezer burn. When you’re ready to enjoy it, thaw the frozen cheesecake overnight in the refrigerator. The cheesecake freezes exceptionally well, making it a fantastic option for enjoying a taste of the holidays long after the season has passed.
🌊 Cheesecake Water Bath Method Options for a Perfectly Smooth Dessert
The water bath (also known as a bain-marie) is a crucial technique for baking cheesecakes, as it provides a moist, even cooking environment that helps prevent cracks and ensures a creamy, custardy texture. Here are several reliable methods for setting up your water bath, catering to different kitchen setups:
1. The Most Secure Option (Recommended for Springform Pans): To absolutely prevent any water from seeping into your springform pan (which can ruin your crust), use a triple-layer pan setup. First, place your springform pan containing the cheesecake batter into a slightly larger round baking pan (1 to 2 inches larger in diameter). Then, place this second pan into an even larger roasting tray or baking dish. This creates an effective barrier. You will pour the hot water into this largest outer pan, ensuring it surrounds the cheesecake without directly touching the springform pan’s bottom seam. This method offers the highest protection against leaks.
2. Direct Placement (Ideal for Regular Round Pans, Not Springform): If your cheesecake is baked in a regular round cake pan (without a removable bottom like a springform), you can typically place the pan directly into the larger roasting tray for the water bath. Since regular pans don’t have a bottom seam where water can leak in, this method is straightforward. For easier removal of the cheesecake after chilling, consider lining the pan with parchment paper, leaving a slight overhang on the sides to act as “handles.”
3. Springform Pan with Foil or Sous Vide Bag (When a Larger Pan isn’t Available): If you are using a springform pan and do not have a second larger round pan to nest it in, you’ll need to create a leak-proof seal directly around your springform. Tightly wrap the exterior of your springform pan with a double layer of heavy-duty aluminum foil. Ensure the foil extends all the way up the sides, completely covering the bottom and edges. Press the foil firmly around the pan to create a tight seal. Alternatively, for a more modern and potentially more reliable seal, you can carefully nestle the springform pan into a heat-safe sous vide bag, then seal it tightly, ensuring no water can penetrate. Once sealed, place the foiled or bagged springform directly into the large roasting pan and fill with hot water.
Regardless of the method you choose, always be extremely careful when transferring the pans with boiling water into and out of the hot oven to avoid burns or spills.
📖 Eggnog Cheesecake Recipe FAQs
Absolutely! While the gingersnap crust adds a unique holiday spice, you can easily substitute it with a classic graham cracker crust if you prefer. Just swap out the gingersnap cookies for an equal amount of crushed graham crackers or even Biscoff cookies for another delicious spiced alternative. The method for preparation remains the same.
Yes, you certainly can use homemade eggnog! While I have developed and tested this recipe primarily with readily available store-bought eggnog, homemade versions should work wonderfully and might even add an extra layer of gourmet flavor. Just ensure your homemade eggnog is chilled and brought to room temperature before incorporating it into the cheesecake batter, similar to the store-bought variety.
Creating sugared rosemary is a charming way to add a festive touch! You can adapt my sugared cranberry recipe for this. Simply dip fresh sprigs of rosemary into the same simple syrup mixture used for cranberries, ensuring they are fully coated. Then, immediately roll or sprinkle them generously with coarse sparkling sugar. Allow them to dry completely on parchment paper. The coarse sugar creates a beautiful, glistening “frosted” effect that resembles ice, perfect for holiday decor.
Determining when your cheesecake is perfectly baked involves a visual and tactile test. The edges of the cheesecake should appear set and slightly firm. When you gently nudge the pan, the center of the cheesecake should still have a slight, delicate jiggle, much like gelatin. It shouldn’t be liquidy or wobbly, but it also shouldn’t be completely firm. Additionally, the very center of the top surface of the cheesecake should look matte or almost matte, indicating it’s cooked through without being overbaked. Trust this visual cue combined with the jiggle test for perfect results.
If you prefer to avoid alcohol or don’t have dark rum on hand, you can easily omit it from the whipped cream. For a similar flavor profile without the alcohol, you can add a tiny splash of rum extract (use sparingly, as extracts are very concentrated) or simply increase the amount of vanilla extract slightly. You could also try a touch of almond extract for a different but equally delicious flavor boost.
🎄 More Festive and Related Cheesecake Recipes
- Gingerbread Cheesecake
- Chocolate Orange Cheesecake
- Baileys Cheesecake No Bake
- Nutella Cheesecake
Did you make this recipe? I would love for you to rate this recipe and hear what you think in the comments below! Share your creation on Instagram and tag @flouringkitchen. Follow me on Pinterestto save and for more delicious recipe ideas.
📖 Recipe
Eggnog Cheesecake
MaryEquipment
- 9-inch Springform Baking Pan
- Large Mixing Bowl
- Electric Mixer (handheld or stand mixer)
- Large Roasting Pan or Baking Dish (for water bath)
- Kettle
- Spatula
- Wire Rack
Ingredients
Gingersnap Crust
- 3 cups gingersnap cookies crushed into fine crumbs (or gingerbread/Biscoff cookies)
- ½ cup unsalted butter melted
- 2 tablespoons brown sugar packed (optional, for sweeter crust)
- ¼ teaspoon sea salt
Cheesecake Batter
- 32 oz full-fat cream cheese softened to room temperature (four 8 oz blocks)
- ¾ cup granulated sugar
- ¼ teaspoon sea salt
- 4 large eggs room temperature
- 1 tablespoon pure vanilla extract
- 1 teaspoon freshly grated nutmeg
- 1 cup eggnog room temperature
Whipped Cream Topping
- ½ cup heavy whipping cream 35% fat, well chilled
- 1 tablespoon granulated sugar
- 1 teaspoon pure vanilla extract
- 1 tablespoon dark rum (optional, for a boozy kick)
- sugared cranberries and rosemary for decorating (see FAQs for how-to)
- Extra freshly grated nutmeg for garnish
Instructions
Gingersnap Crust
- Preheat oven to 355°F (180°C). Prepare a 9-inch round springform pan by lightly buttering both the bottom and sides with a piece of cold butter. This ensures your cheesecake will release cleanly after baking and chilling.
- In a large bowl, combine the crushed gingersnap cookies, melted unsalted butter, and sea salt. Mix these ingredients thoroughly until the cookie crumbs are uniformly moistened and resemble wet sand. If your cookies aren’t particularly sweet, or if you prefer a sweeter crust, you can incorporate the optional 2 tablespoons of packed brown sugar at this step.3 cups gingersnap cookies, ½ cup unsalted butter, 2 tablespoons brown sugar, ¼ teaspoon sea salt
- Transfer the crust mixture into the prepared springform pan. Using the bottom of a flat glass or your clean fingers, firmly press the mixture evenly across the base of the pan and slightly up the sides. Ensure it’s packed in well for a sturdy crust.
- Bake the crust for 8-10 minutes, or until its edges are lightly golden and you can smell the warm ginger aroma. Once baked, remove it from the oven and allow it to cool slightly while you prepare the cheesecake batter. Importantly, do not turn the oven off after baking the crust!
Eggnog Cheesecake Batter
- In a large bowl or the bowl of a stand mixer, add the softened full-fat cream cheese. Beat with an electric mixer on medium-low speed until the cream cheese is completely creamy and smooth, ensuring no lumps remain. Stop periodically to scrape down the sides and bottom of the bowl with a spatula to ensure everything is evenly incorporated. Add the granulated sugar, sea salt, and pure vanilla extract, then mix on low speed until just combined, again scraping down the bowl as needed.32 oz cream cheese, ¾ cup granulated sugar, ¼ teaspoon sea salt, 1 tablespoon pure vanilla extract
- Add the large, room-temperature eggs into the cream cheese mixture one at a time. After each egg, beat on the lowest speed just until it is fully incorporated, stopping as soon as it disappears into the batter. This step is crucial for preventing overmixing, which can lead to cracks in your finished cheesecake. Remember to scrape down the bowl after each egg addition.4 large eggs
- Pour the room-temperature eggnog into the cheesecake batter and add the freshly grated nutmeg. Gently mix with a spatula or on the absolute lowest speed of your electric mixer until the batter is smooth and well combined. This gentle mixing minimizes air incorporation.1 teaspoon nutmeg, 1 cup eggnog
- Pour the smooth cheesecake batter into the pre-baked and cooled gingersnap crust. Gently tap the pan several times on a flat surface to release any trapped air pockets, ensuring a smooth top. Prepare for the water bath: place the cheesecake springform pan into a slightly larger round baking pan or an oven-safe saucepan. Then, place this nested setup into an even larger roasting pan (refer to the “Water Bath Options” section for detailed guidance).
- Fill a kettle with water and bring it to a boil. Carefully transfer the pans (with the cheesecake nested inside) into your preheated oven. Once inside, carefully pour the boiling hot water into the largest baking pan, filling it to about halfway or almost all the way up the sides of the middle pan. You may require a few kettles of water to achieve the optimal level.
- Bake the cheesecake for 70-80 minutes. It’s ready when the edges are set and firm, but the middle still has a slight, delicate jiggle when gently nudged. The center of the top should also appear matte or almost matte, not glossy. Once baked, turn off the oven but do not remove the cheesecake. Leave the oven door propped open slightly (e.g., with a wooden spoon) to allow the cheesecake to cool gradually for 20 minutes. Then, carefully remove the cheesecake from the oven, being very cautious of the hot water.
- Allow the cheesecake to cool completely to room temperature on a wire rack. Once cooled, transfer it to the refrigerator and chill for at least 8 hours, or ideally overnight (12-24 hours), to ensure it sets perfectly and develops its full flavor.
Whipped Cream Topping
- For the best results and easiest whipping, place your mixing bowl and whisk (or electric mixer attachments) in the freezer for about 5 minutes before you begin.
- In the chilled mixing bowl, combine the very cold heavy whipping cream, granulated sugar, and pure vanilla extract. Whisk by hand or with an electric mixer on high speed until stiff peaks form, meaning the cream holds its shape firmly.½ cup heavy whipping cream, 1 tablespoon granulated sugar, 1 teaspoon pure vanilla extract
- If using, add the dark rum to the whipped cream and gently fold it in with a spatula until evenly incorporated. Be careful not to deflate the whipped cream.1 tablespoon dark rum
- Once the cheesecake is thoroughly chilled and set, carefully remove it from its springform pan. Generously top the cheesecake with the rum-infused whipped cream. For a truly festive presentation, sprinkle a bit of extra freshly grated nutmeg on top. Decorate the border of the cheesecake with sugared cranberries and fresh sprigs of rosemary to create a beautiful wreath effect. Slice and serve this delightful holiday masterpiece! Enjoy!
Notes
- Most Secure (for Springform): Place your springform pan (with cheesecake) into a second round baking pan (1-2 inches larger). Then place both into a larger roasting pan. Pour hot water into the largest pan.
- For Regular Round Pans (non-springform): The pan can be placed directly into the water bath. Line the pan with parchment paper overhang for easy removal.
- Springform with Foil/Sous Vide Bag: If no larger pan is available, tightly wrap the springform pan’s exterior with a double layer of heavy-duty aluminum foil, ensuring it covers all seams. Alternatively, nestle the springform into a heat-safe sous vide bag and seal it securely before placing in the water bath.
- Do not overmix the cheesecake batter, especially after adding eggs, to prevent cracks.
- Always use full-fat, brick-style cream cheese and ensure all cold ingredients are at room temperature.
- A water bath is highly recommended for an evenly baked, creamy, and crack-free cheesecake.
- Allow for ample chilling time (8 hours or overnight) for the best texture and flavor.
