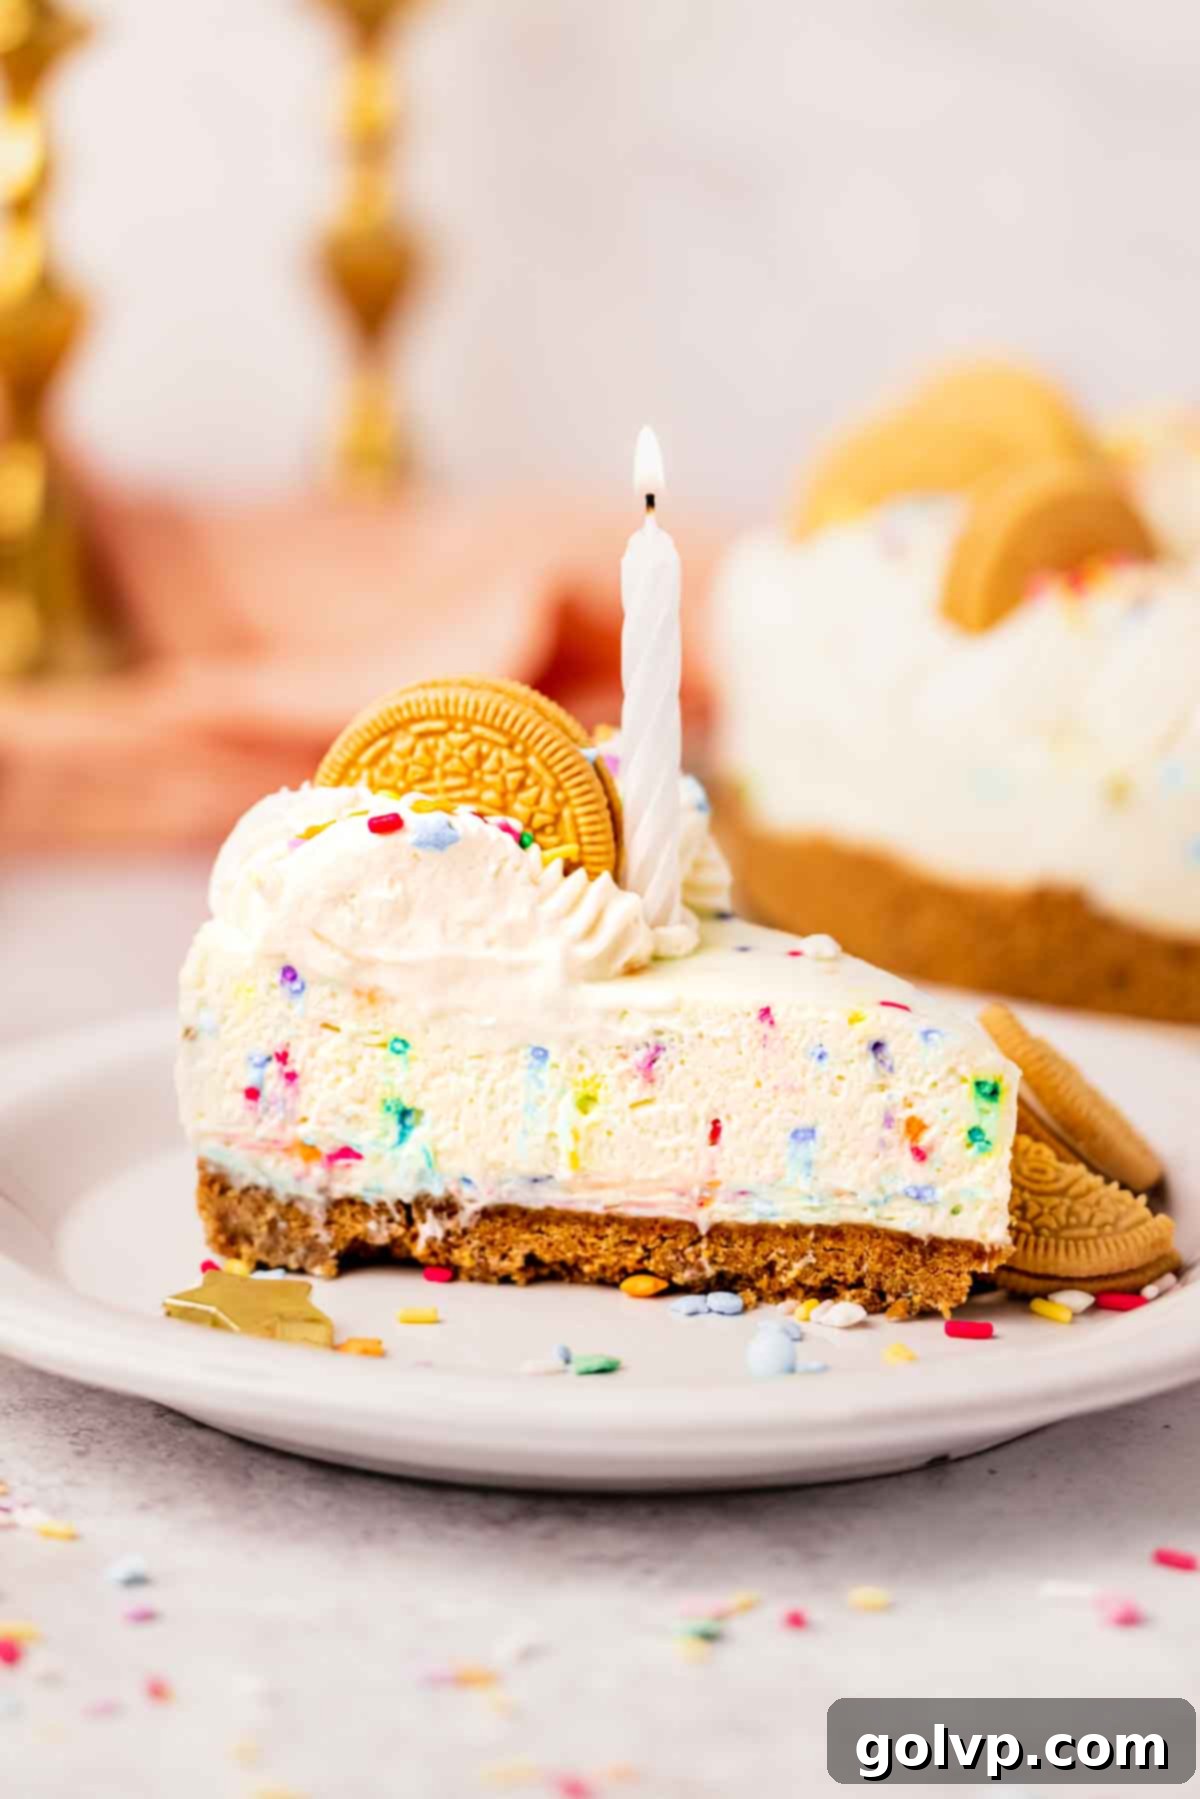
Delicious No-Bake Funfetti Cheesecake: Your Ultimate Guide to a Creamy, Nostalgic Dessert
Prepare to delight your taste buds with this incredible no-bake funfetti cheesecake. It’s a dessert that perfectly blends rich creaminess with a smooth texture, all while delivering a joyful burst of nostalgic sprinkles. What sets this recipe apart is its unique brown sugar cinnamon graham cracker crust, evoking the beloved flavors of classic Dunkaroo cookies. Imagine a dreamy, scoopable Dunkaroo cheesecake, elevated with a cloud of fluffy whipped cream, crunchy Golden Oreos, and a generous shower of vibrant sprinkles. This comprehensive guide will walk you through every step of creating this show-stopping dessert, ensuring a perfect, stress-free experience from start to finish.
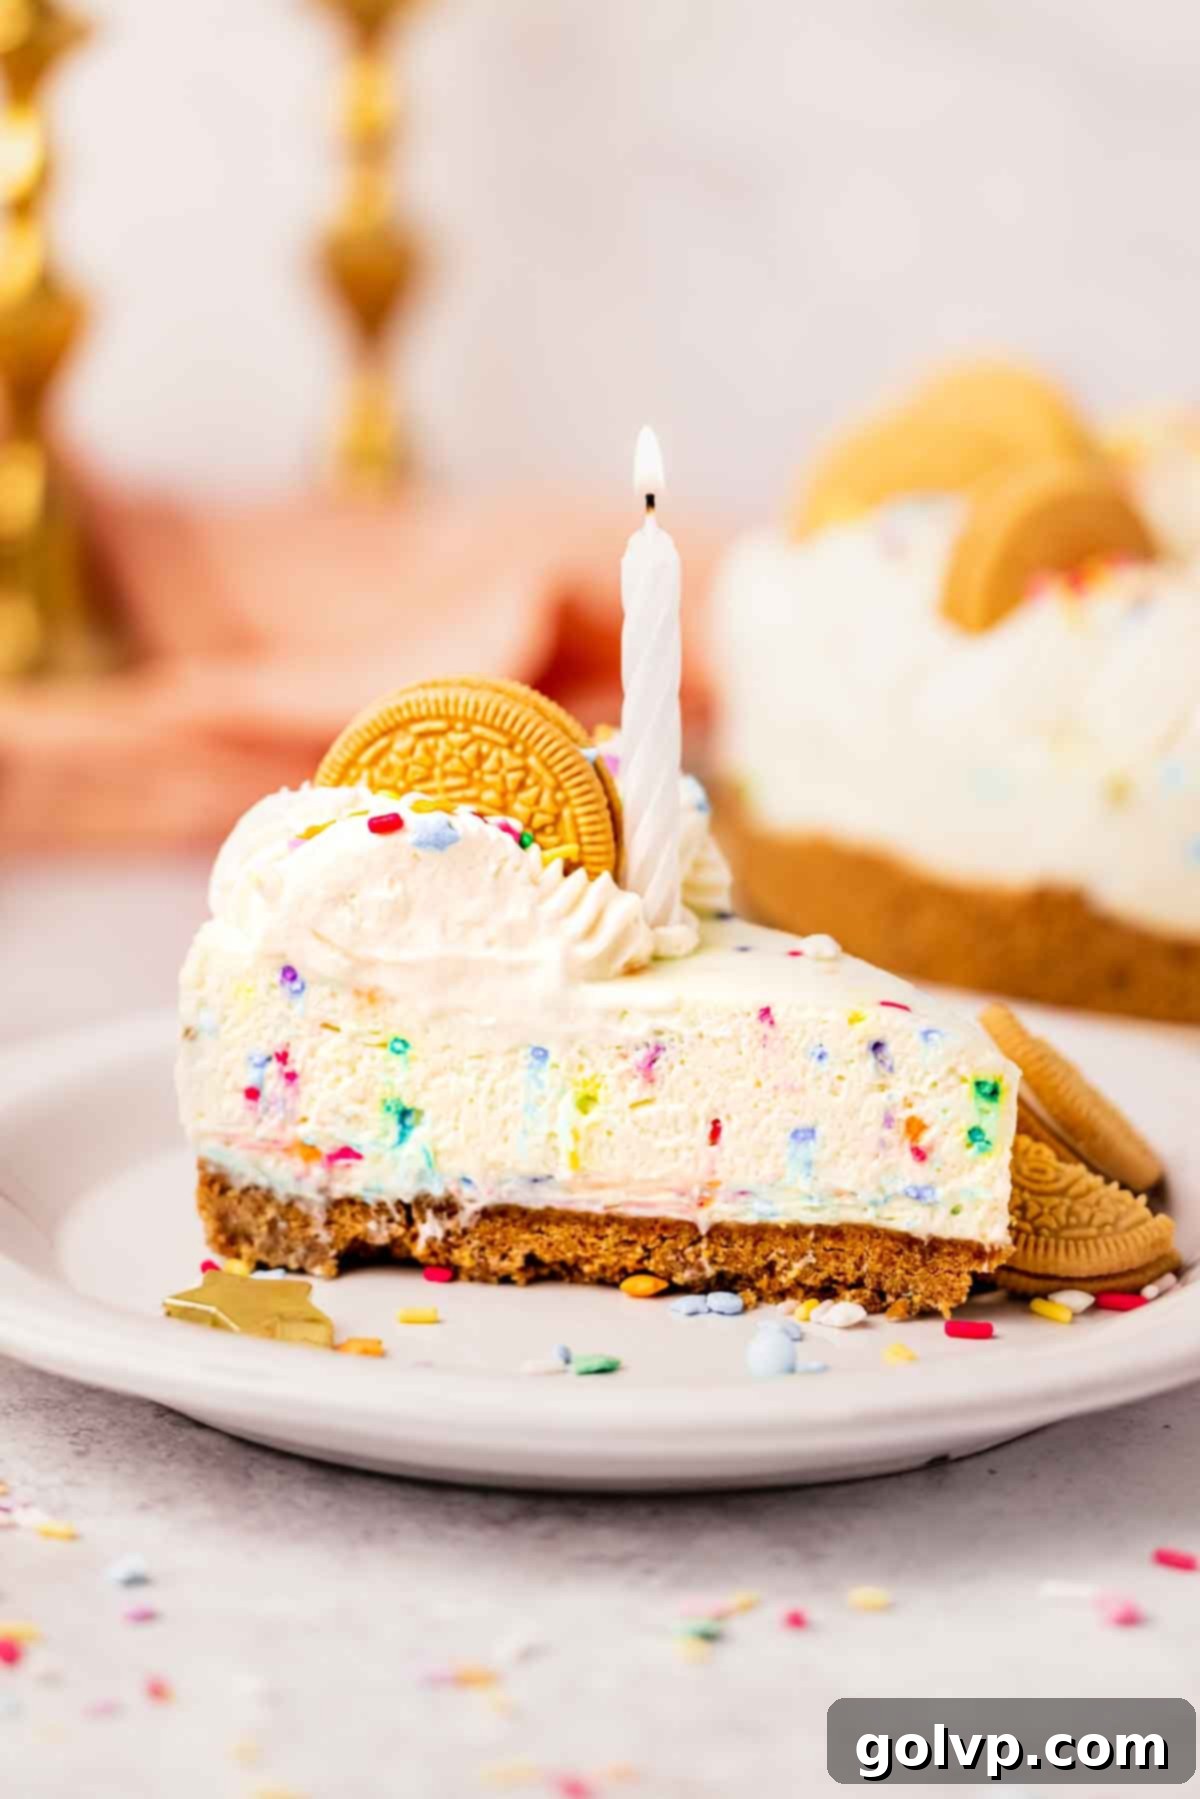
Why You’ll Adore This No-Bake Funfetti Cheesecake Recipe
This funfetti cheesecake isn’t just a dessert; it’s an experience. Here’s why you’ll fall in love with it:
- Effortless Preparation: Say goodbye to the complexities of traditional baked cheesecakes. This no-bake version eliminates the need for water baths, cracking concerns, or precise oven temperatures. Simply mix the ingredients, assemble, and let your refrigerator do the rest. It’s perfect for both novice bakers and seasoned dessert enthusiasts looking for a simple yet impressive treat.
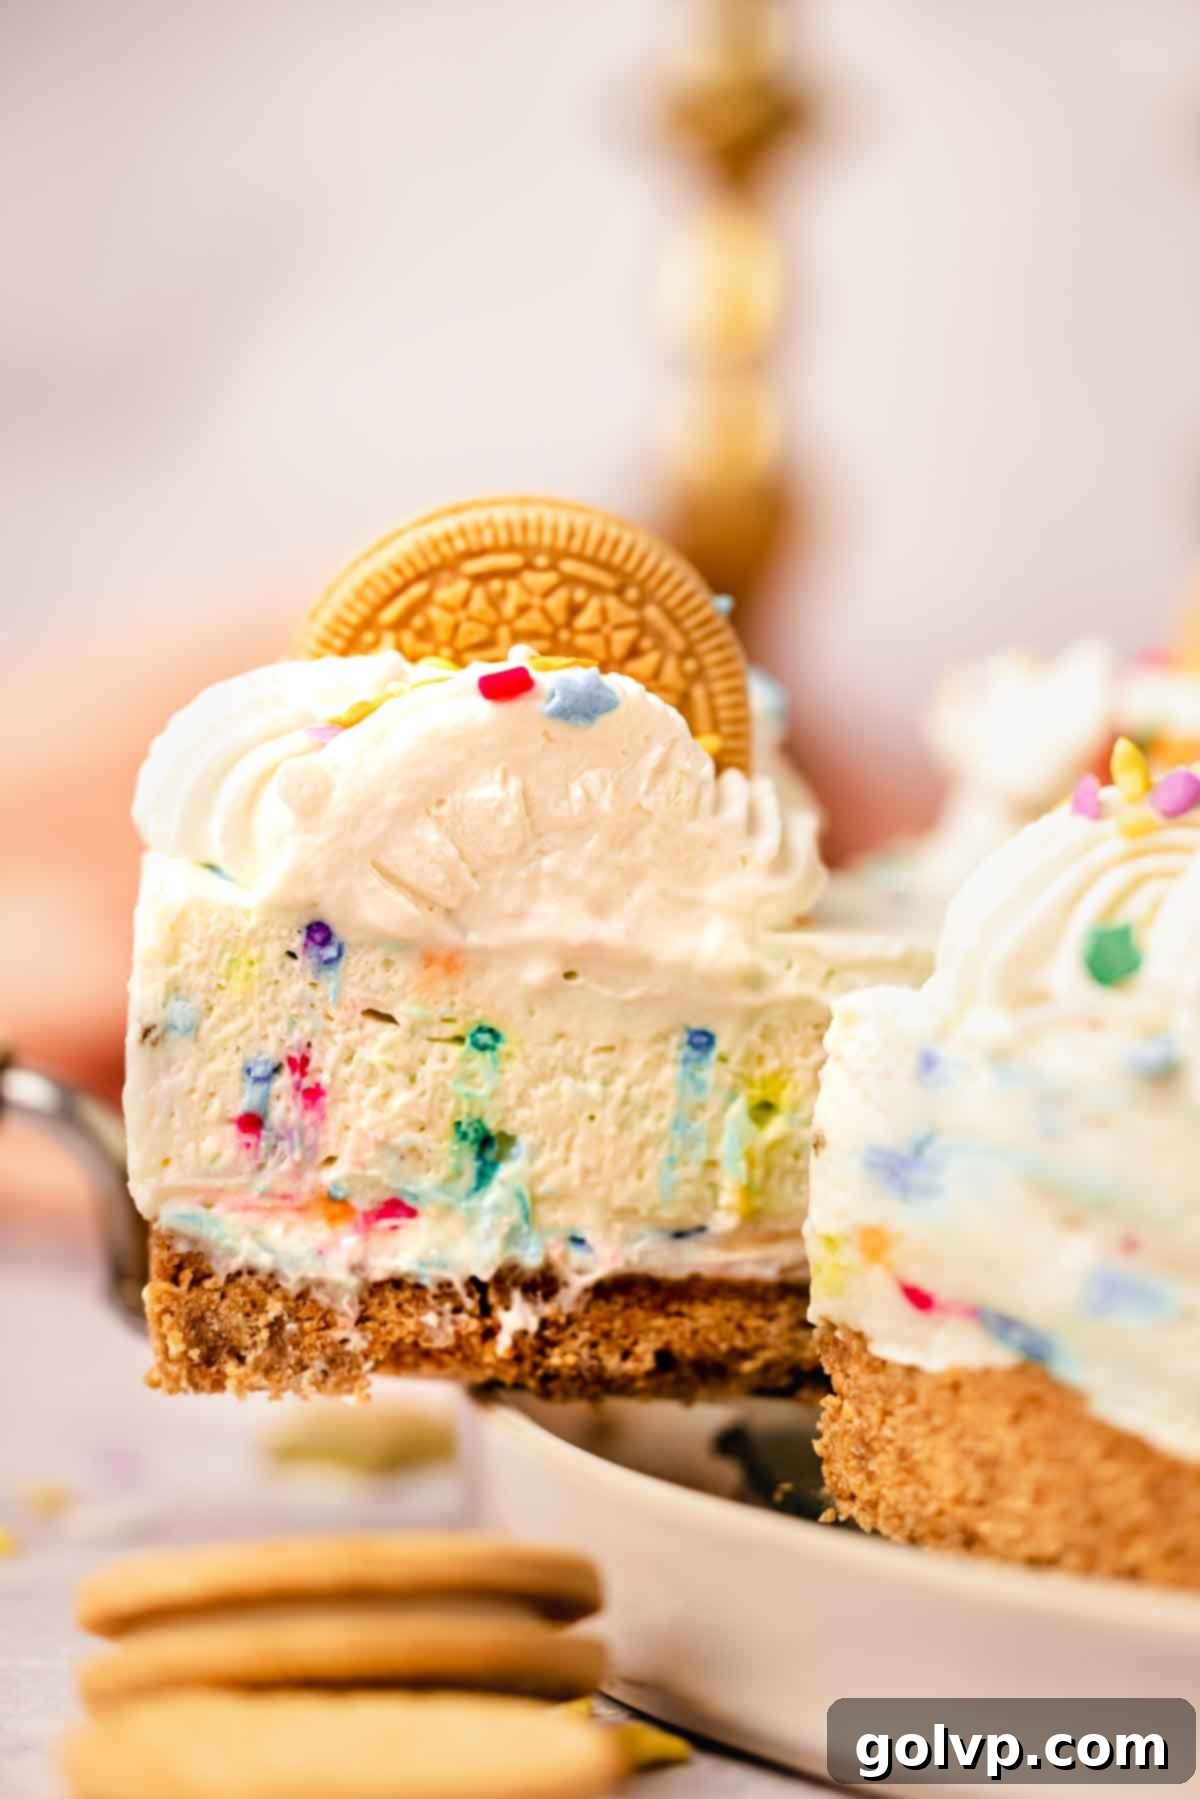
- Irresistibly Creamy Texture: Achieving the perfect cheesecake consistency can be challenging, but this recipe guarantees an ultra-creamy, velvety smooth filling that melts in your mouth. Despite its luxurious richness, it holds its shape beautifully, making it ideal for slicing and serving without any fuss.
- Pure Funfetti Joy: This cheesecake is a celebration! It’s generously loaded with colorful sprinkles, creating a festive appearance and a delightful textural contrast. The authentic vanilla flavor, reminiscent of classic birthday cake, brings a wave of sweet nostalgia with every bite, making it a hit for any occasion, from birthdays to casual gatherings.
- Signature Graham Cinnamon Crust: The foundation of this cheesecake is a thick, flavorful graham cracker crust. Infused with brown sugar and a hint of cinnamon, it elevates the entire dessert, giving it a distinctive taste that many compare to the cherished Dunkaroo cookies and their iconic frosting dip. This unique crust provides the perfect counterpoint to the sweet, creamy filling.
If you’re seeking other delectable no-bake alternatives, explore our red velvet Oreo cheesecake or the intriguing chocolate orange cheesecake for more delightful dessert ideas.
Essential Ingredients for Your Funfetti Cheesecake
This delightful funfetti cheesecake is composed of three harmonious layers: a robust graham cracker crust, an incredibly creamy funfetti filling, and a luscious whipped cream topping. Each component plays a crucial role in the overall flavor and texture. Understanding the importance of each ingredient will ensure your success.
Insider Tip: For comprehensive guidance and expert advice, make sure to read through all the tips provided!
The full recipe steps and ingredient list can be found in the recipe card below.
Crust Ingredients: Building the Perfect Foundation
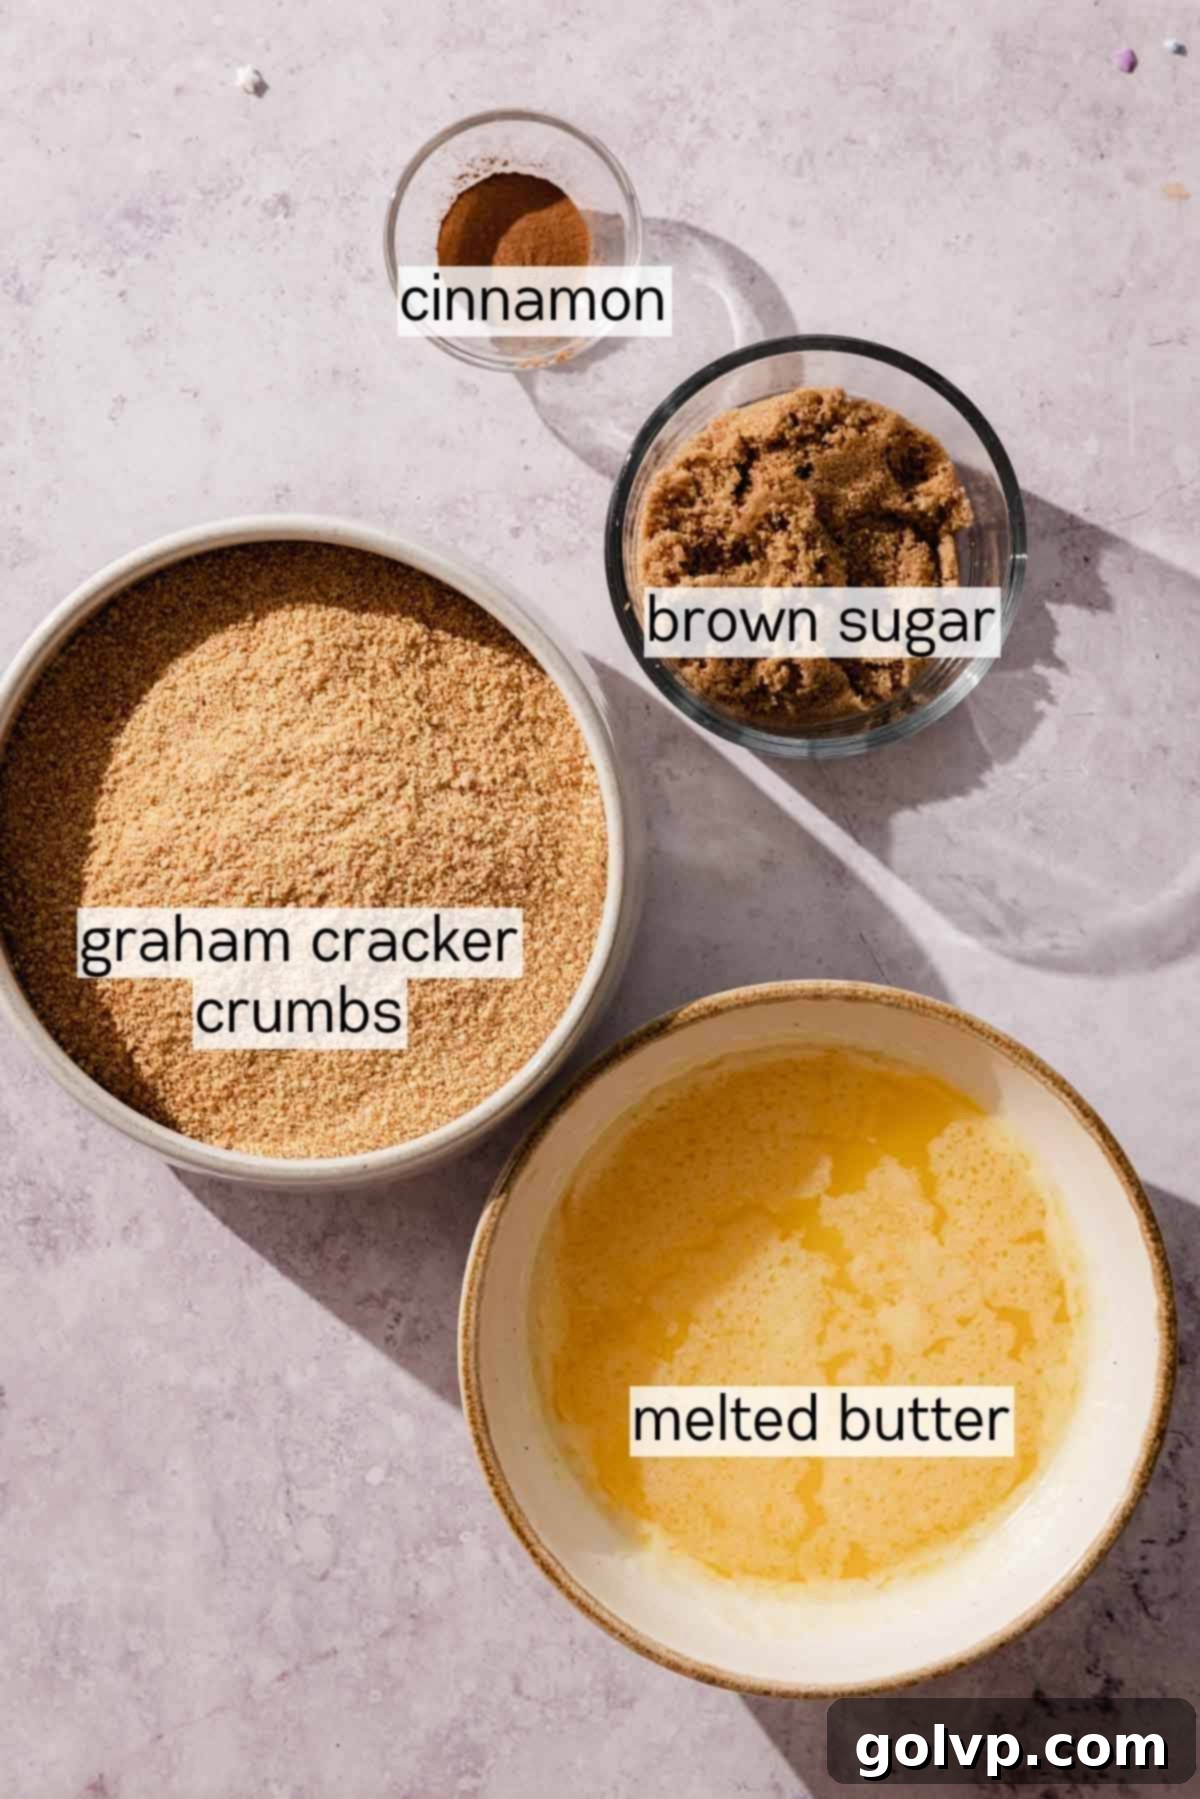
- Ground Cinnamon (Optional but Recommended): While entirely optional, a touch of cinnamon is a game-changer for this crust. It introduces a warm, comforting spice that beautifully complements the graham crackers and deepens the flavor profile, reminiscent of classic Dunkaroo cookies. If you prefer a simpler crust, feel free to omit it.
- Graham Cracker Crumbs: The backbone of our crust. You can purchase pre-crushed graham cracker crumbs for convenience, or easily make your own by crushing whole graham crackers in a food processor or by placing them in a sealed bag and using a rolling pin. If graham crackers are not available in your region, digestive biscuits or similar plain, sweet cookies make an excellent substitute, providing a similar texture and mild flavor.
- Brown Sugar: This isn’t just for sweetness; brown sugar adds a wonderful depth of flavor and a slightly chewy texture to the crust, enhancing its overall appeal. Its molasses notes pair perfectly with the cinnamon and graham crackers. Granulated sugar can be used in a pinch, but brown sugar yields a superior, richer taste.
- Melted Butter: The binding agent for our crust. Unsalted melted butter is preferred, allowing you to control the saltiness. It coats the crumbs, helping them clump together and form a firm, flavorful base once chilled. Make sure it’s fully melted but not boiling hot.
Creamy Filling Ingredients: The Heart of the Funfetti Cheesecake
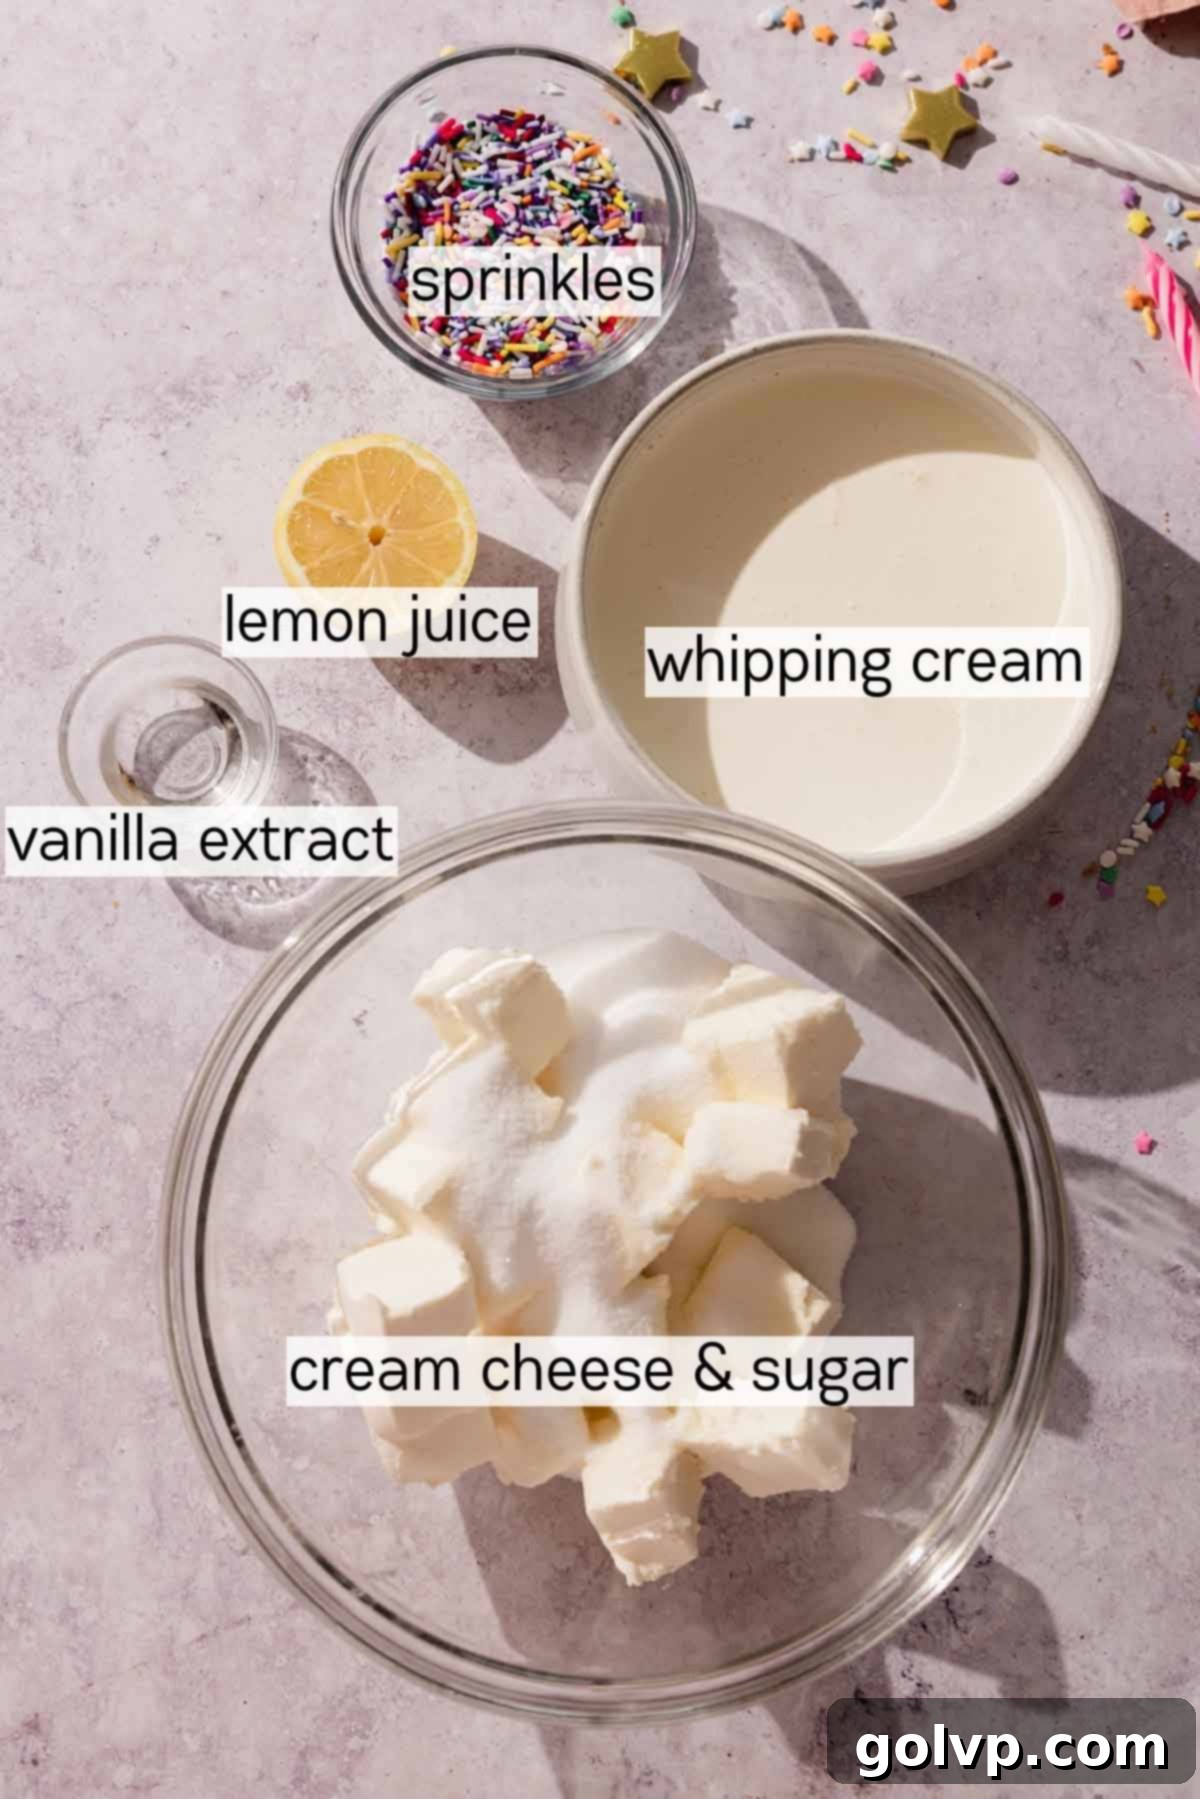
- Heavy Whipping Cream (35% Fat or Higher): This is crucial for both the creamy texture and the structural integrity of your no-bake cheesecake. Use only cold heavy cream (or 35% whipping cream) to ensure it whips up to stiff peaks, which provides the necessary lift and helps the cheesecake set firmly without gelatin.
- Full-Fat Cream Cheese (Brick Style): For optimal results, always opt for full-fat, brick-style cream cheese. Brands like Philadelphia Original are highly recommended. Low-fat cream cheese contains a higher water content, which can prevent the cheesecake from setting properly, resulting in a runny texture. Ensure your cream cheese is softened to room temperature for a lump-free, smooth filling.
- Clear Vanilla Extract: This ingredient is absolutely essential for achieving that distinctive, nostalgic “funfetti” or “birthday cake” flavor without altering the cheesecake’s bright, white appearance. While pure vanilla extract can be used, it will impart a brownish tint and a slightly different flavor profile. Clear vanilla is key to the authentic funfetti experience.
- Granulated Sugar: Provides the perfect level of sweetness, balancing the tanginess of the cream cheese and lemon.
- Lemon Juice: A small amount of fresh lemon juice is added to cut through the richness of the cream cheese and whipping cream. It provides a subtle tang that brightens the overall flavor and prevents the cheesecake from tasting overly heavy or one-dimensional. Freshly squeezed lemon juice offers the best aroma and taste.
- Sprinkles: The star of the “funfetti”! For the interior of the cheesecake, a mix of jimmies (small rod-shaped sprinkles) and confetti (flat, pastel shapes and circles) works best. These types hold their color well and distribute evenly. Avoid nonpareil sprinkles (tiny balls) for the filling, as their small size and dense packing can lead to color bleeding and a somewhat muddy, brownish appearance within the cheesecake. For topping, feel free to get creative with any gourmet sprinkle mix you desire. Be mindful that naturally colored sprinkles may bleed more easily.
Crafting Your Perfect Funfetti Cheesecake: A Step-by-Step Guide
Making this no-bake funfetti cheesecake is surprisingly straightforward. The process is divided into two main stages: preparing the flavorful crust and then creating the dreamy, creamy filling.
Cheesecake Crust: Simple Steps for a Sturdy Base
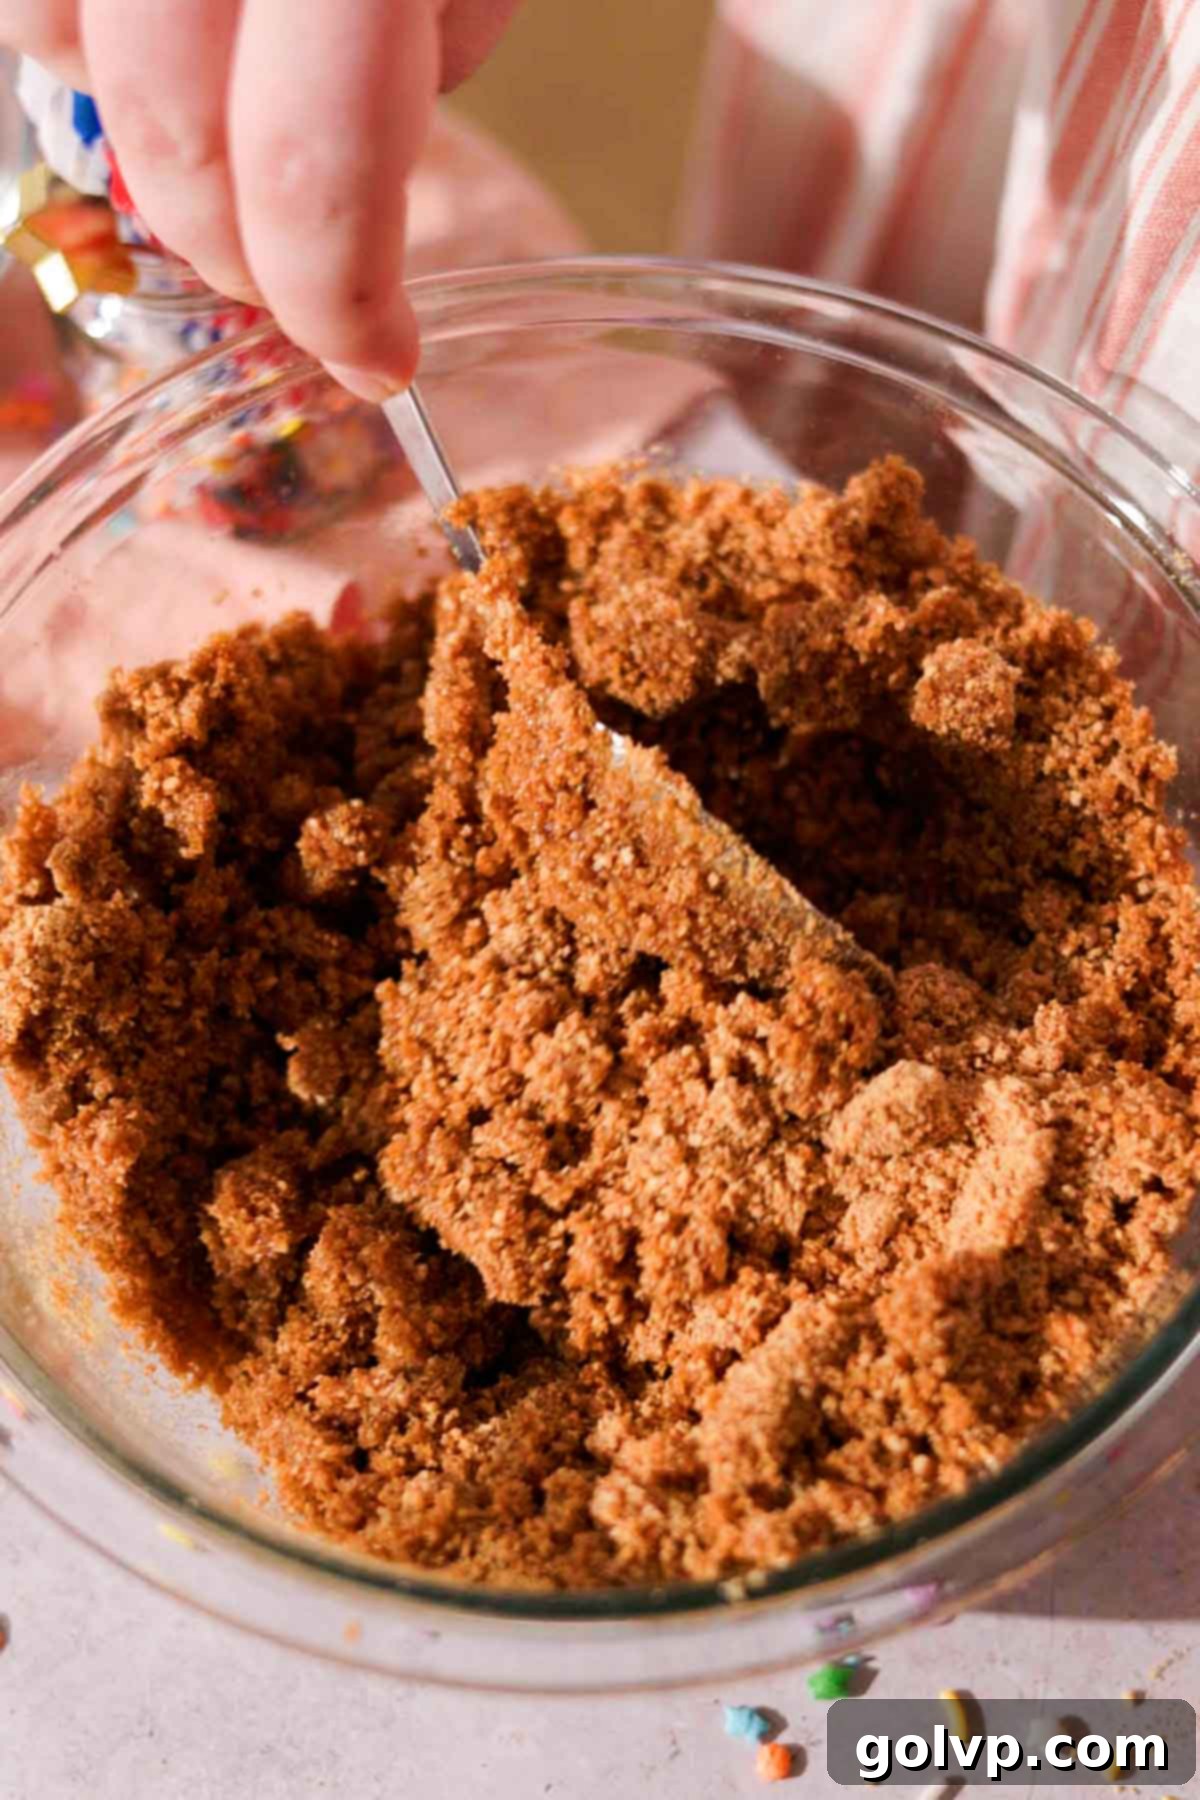
Step 1: Combine Dry Ingredients. In a large mixing bowl, thoroughly combine the graham cracker crumbs, brown sugar, cinnamon (if using), and sea salt. Stir well to ensure all ingredients are evenly distributed.
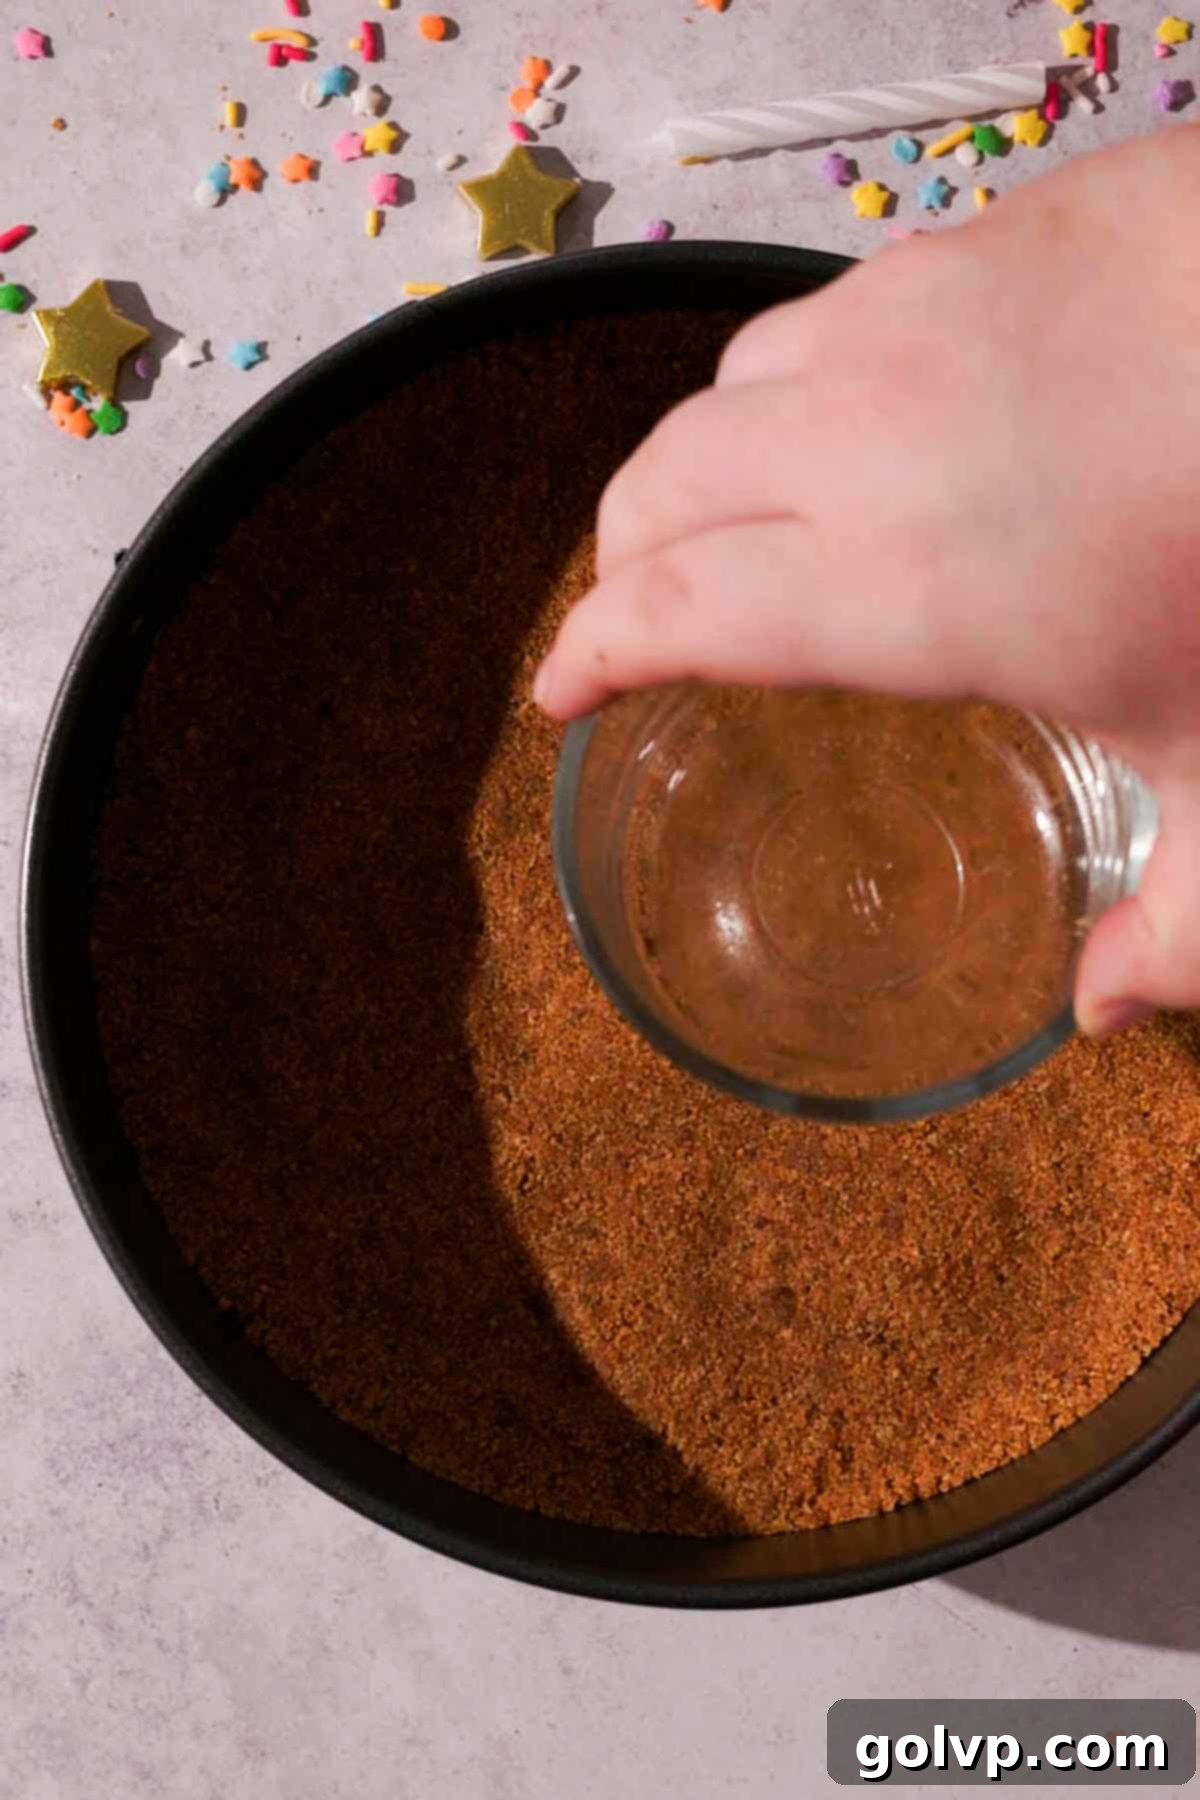
Step 2: Add Melted Butter and Press. Pour the melted butter over the dry crust mixture and stir until everything is well combined and resembles wet sand. Transfer this mixture into a greased 9-inch round springform baking pan. Using the flat bottom of a glass or a measuring cup, firmly press the crumbs down into an even, compact layer at the bottom of the pan. This creates a dense and sturdy crust that won’t crumble when sliced. Set the prepared crust aside while you make the filling.
Pro Tip for Easy Removal: Line the bottom of your springform pan with a round of parchment paper before adding the crust. This simple step makes it incredibly easy to remove the finished cheesecake from the pan’s base without any sticking or damage. Using a springform pan is highly recommended for the cleanest presentation.
Cheesecake Filling: Achieving Velvety Perfection
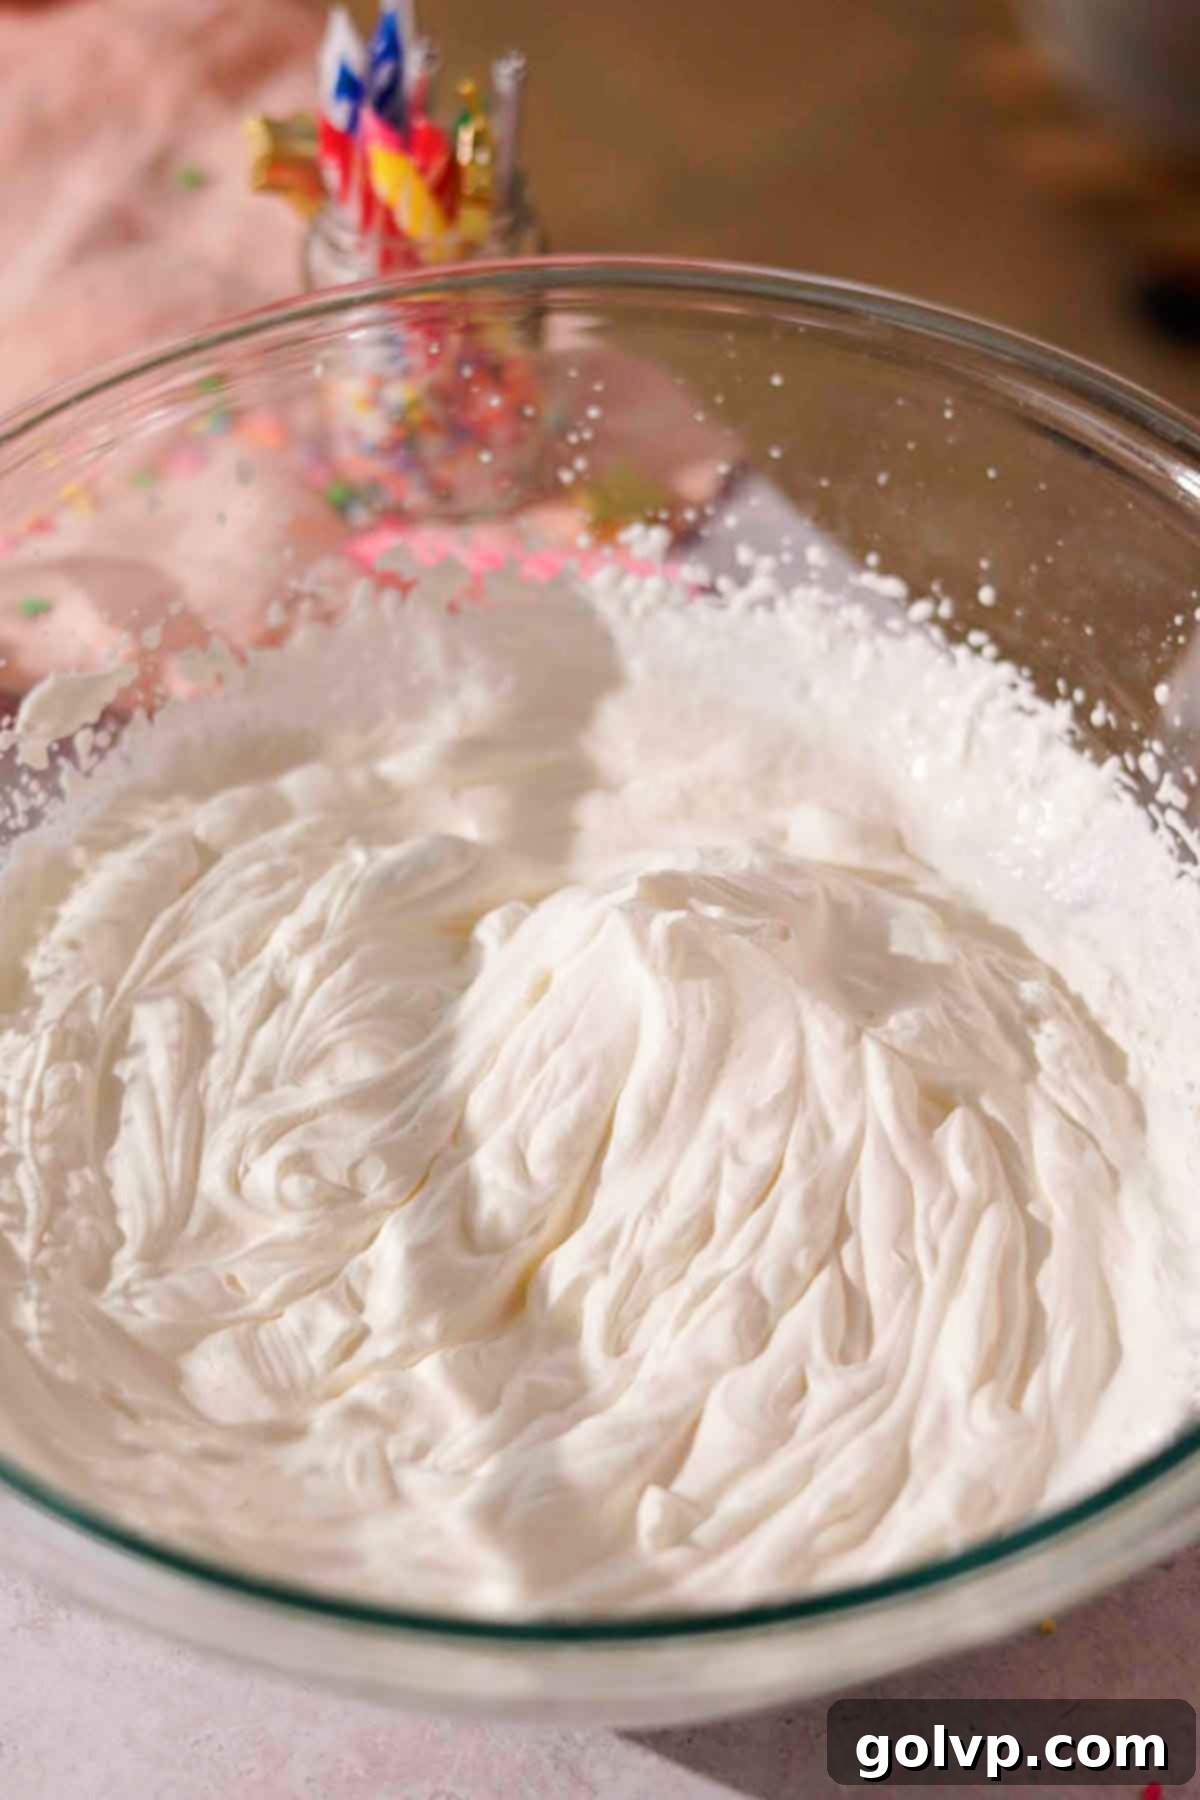
Step 1: Whip the Cream. In a large, chilled glass bowl, whip the cold heavy cream to stiff peaks using a stand mixer or a hand mixer. The cream should hold its shape firmly and not be runny. Place the whipped cream in the fridge to keep it cold until you’re ready to use it. This step is crucial for the cheesecake’s structure.
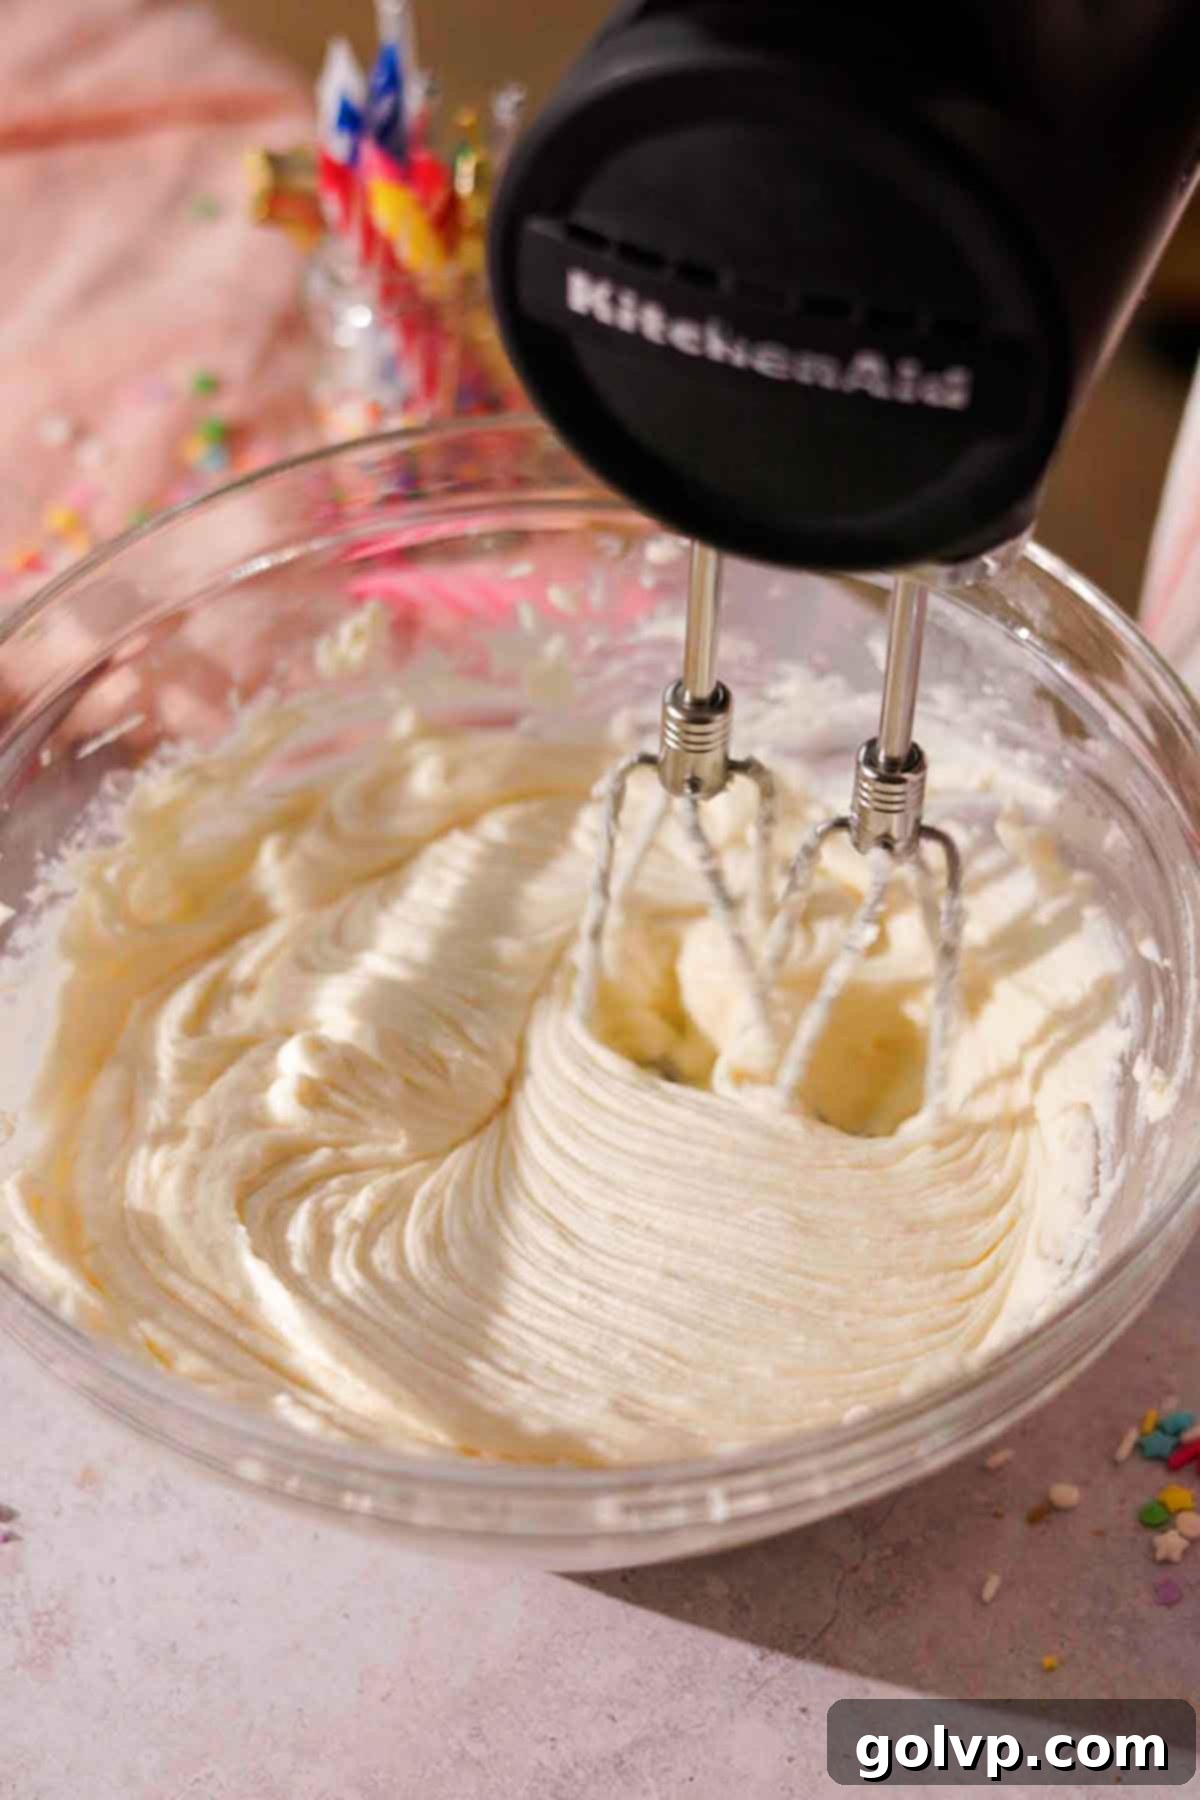
Step 2: Prepare the Cream Cheese Mixture. In a separate, large bowl, combine the softened cream cheese, granulated sugar, sea salt, clear vanilla extract, and lemon juice. Beat these ingredients together using an electric mixer until the mixture is completely smooth and creamy, with no lumps. Be sure to scrape down the sides of the bowl frequently to ensure everything is fully incorporated.
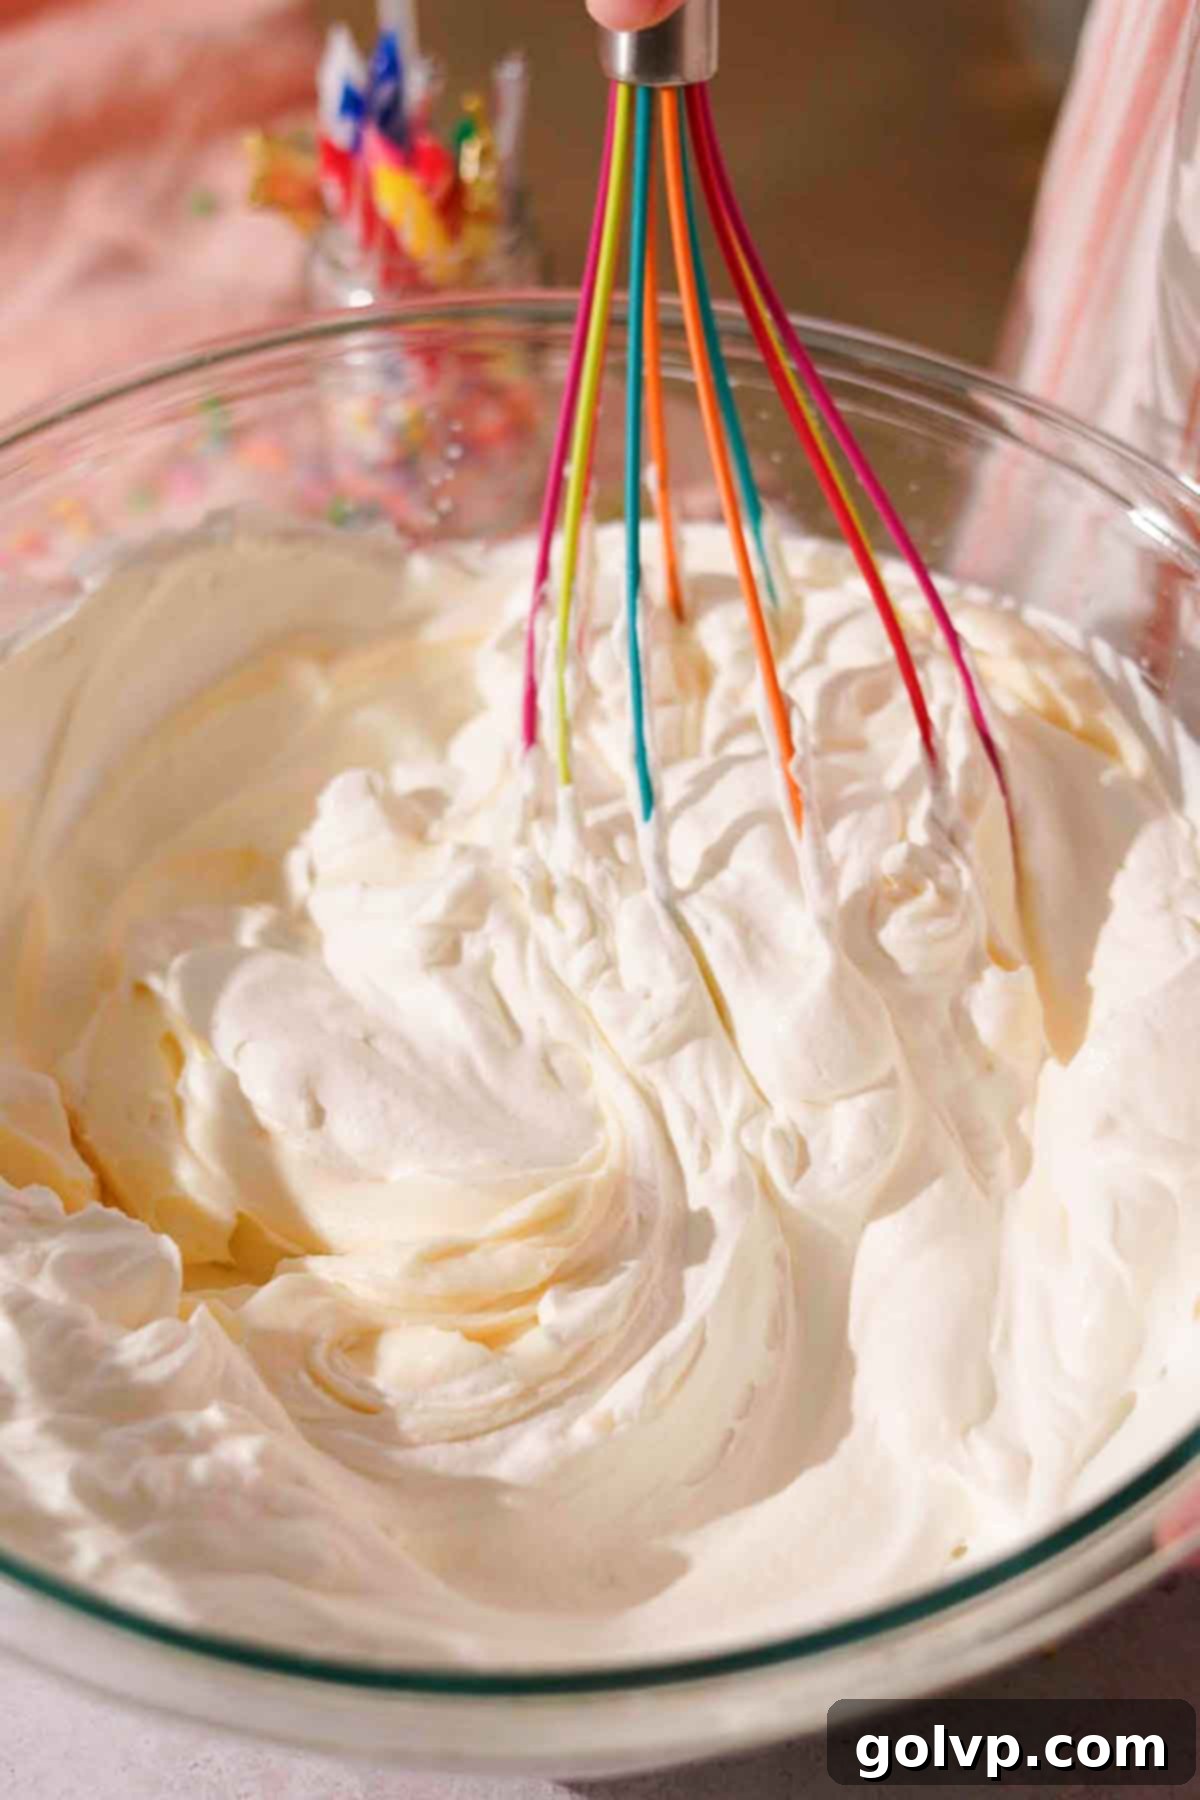
Step 3: Gently Fold in Whipped Cream. Carefully add the chilled whipped cream to the cream cheese mixture. Using a spatula, gently fold the whipped cream into the cream cheese mixture. The key here is to be gentle to avoid deflating the whipped cream, which helps create that light, airy, yet firm texture. Continue folding until no streaks of whipped cream remain and the mixture is uniformly combined.
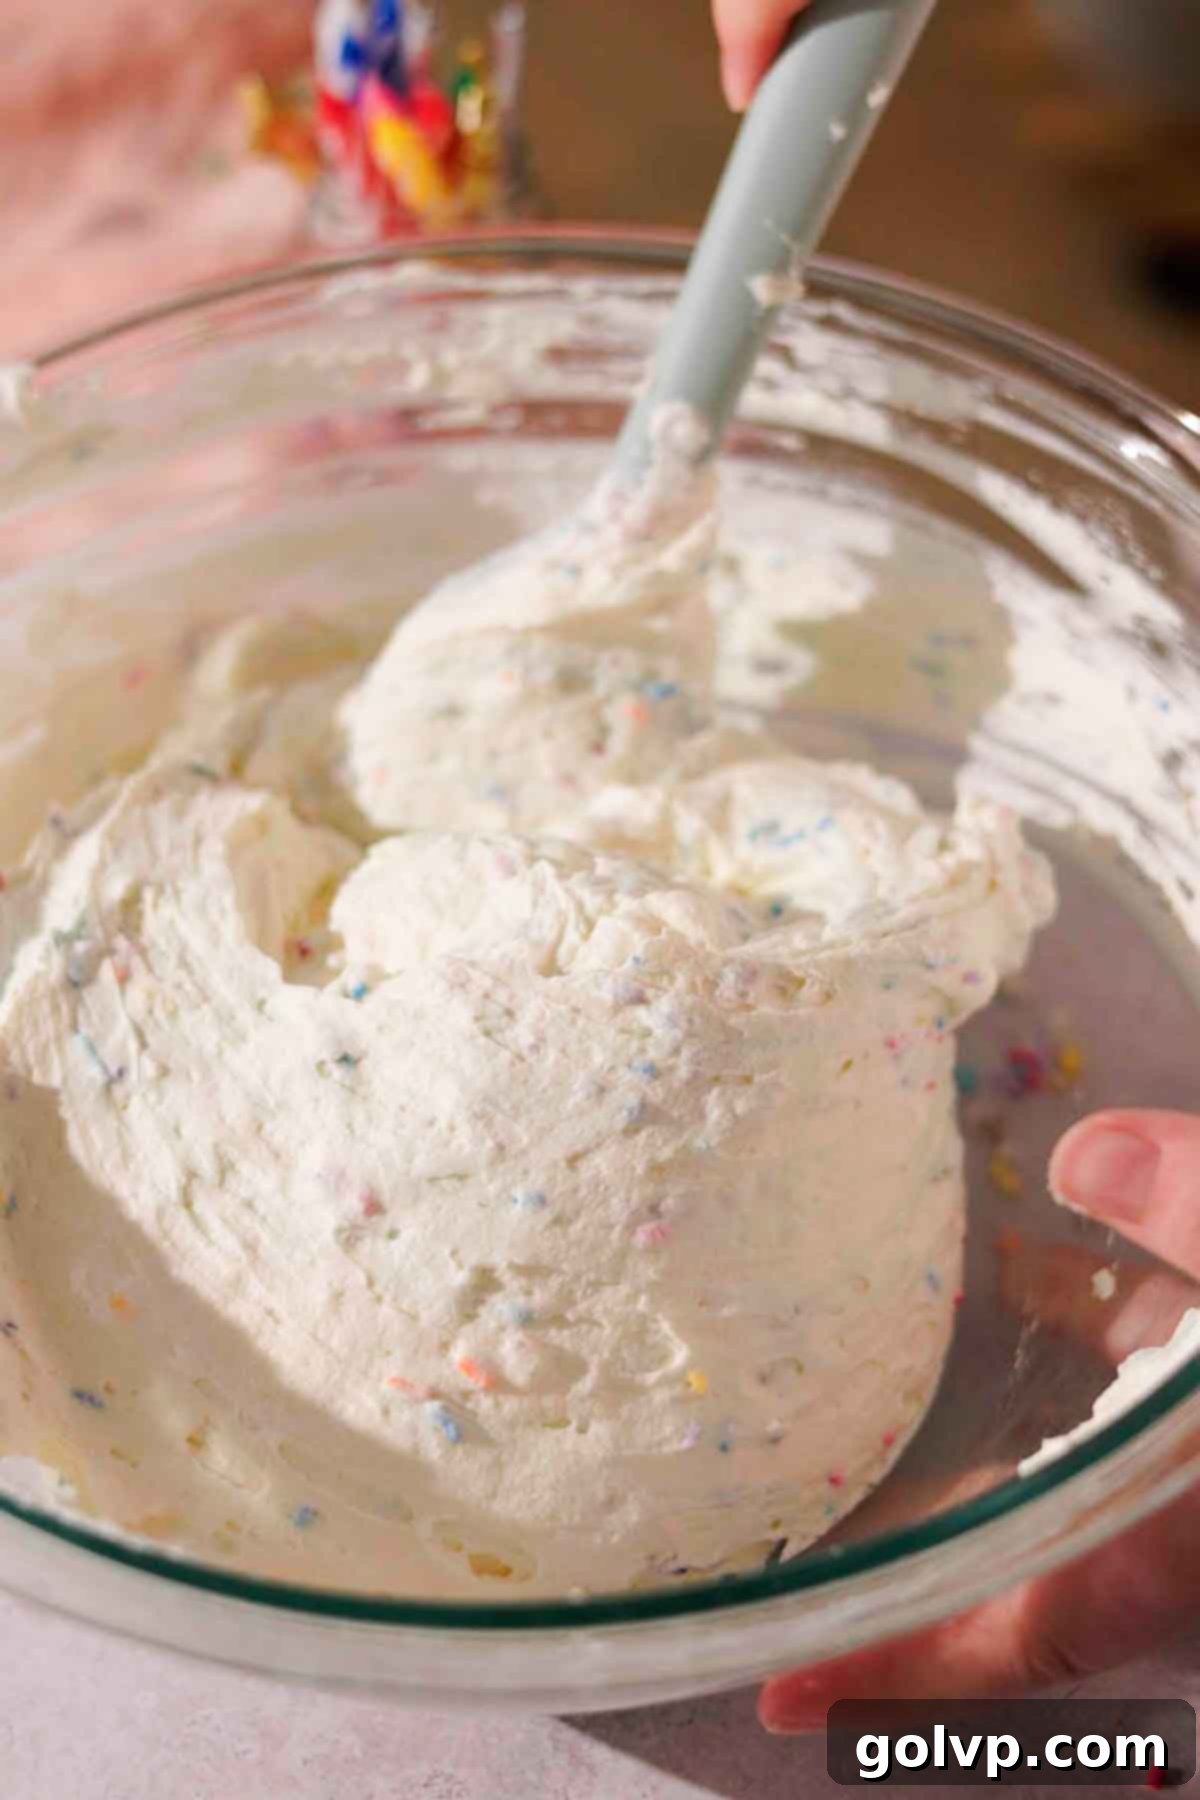
Step 4: Incorporate Sprinkles. Add your chosen sprinkles to the cheesecake filling. Work quickly and fold them in gently until they are evenly dispersed throughout the mixture. Avoid overmixing, as this can cause the colors to bleed. Immediately proceed to the next step.
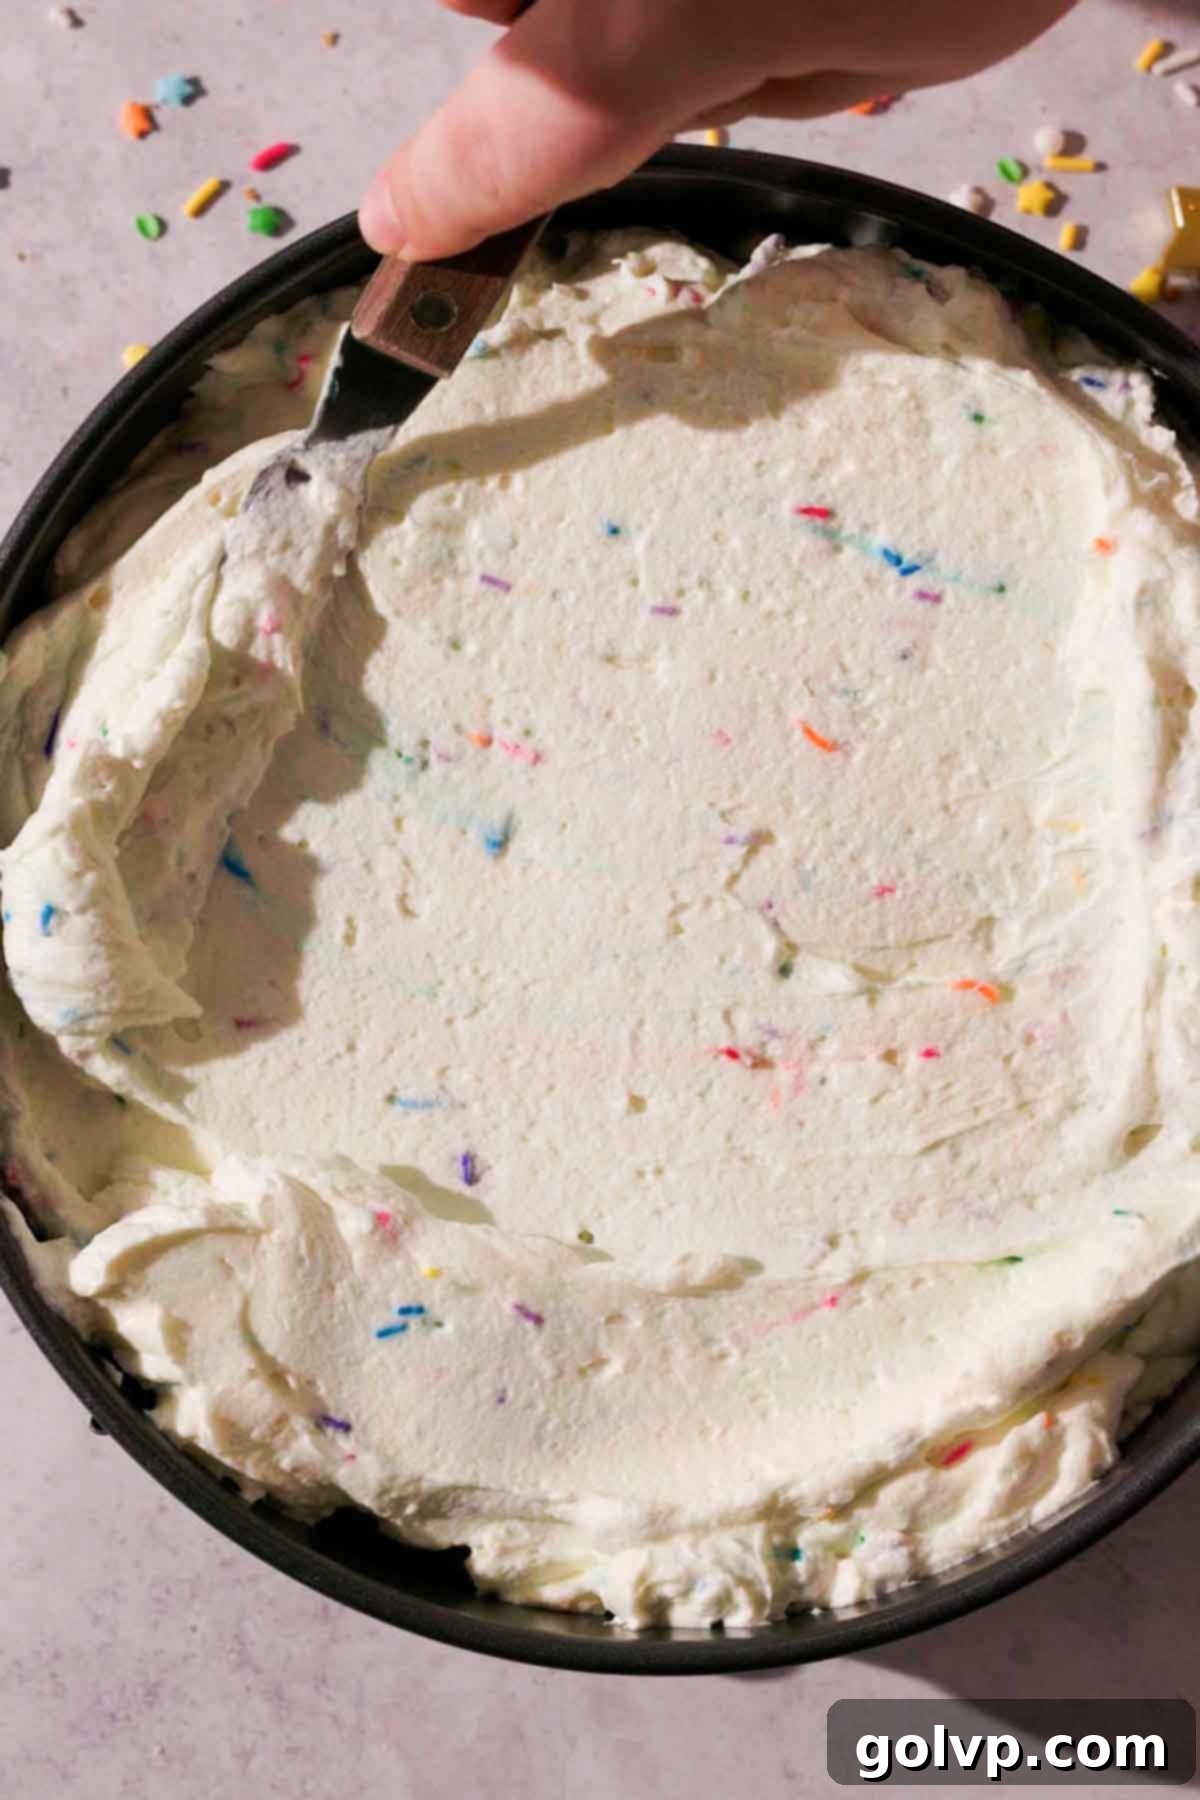
Step 5: Assemble and Chill. Spoon the funfetti cheesecake filling evenly over the prepared graham cracker crust. Use an offset spatula or the back of a spoon to smooth the top surface. Gently tap the baking pan on your countertop a few times to release any large air bubbles. Cover the pan loosely with plastic wrap or a plate and refrigerate for a minimum of 6 hours, or preferably overnight, to allow the cheesecake to set completely and for the flavors to meld beautifully.
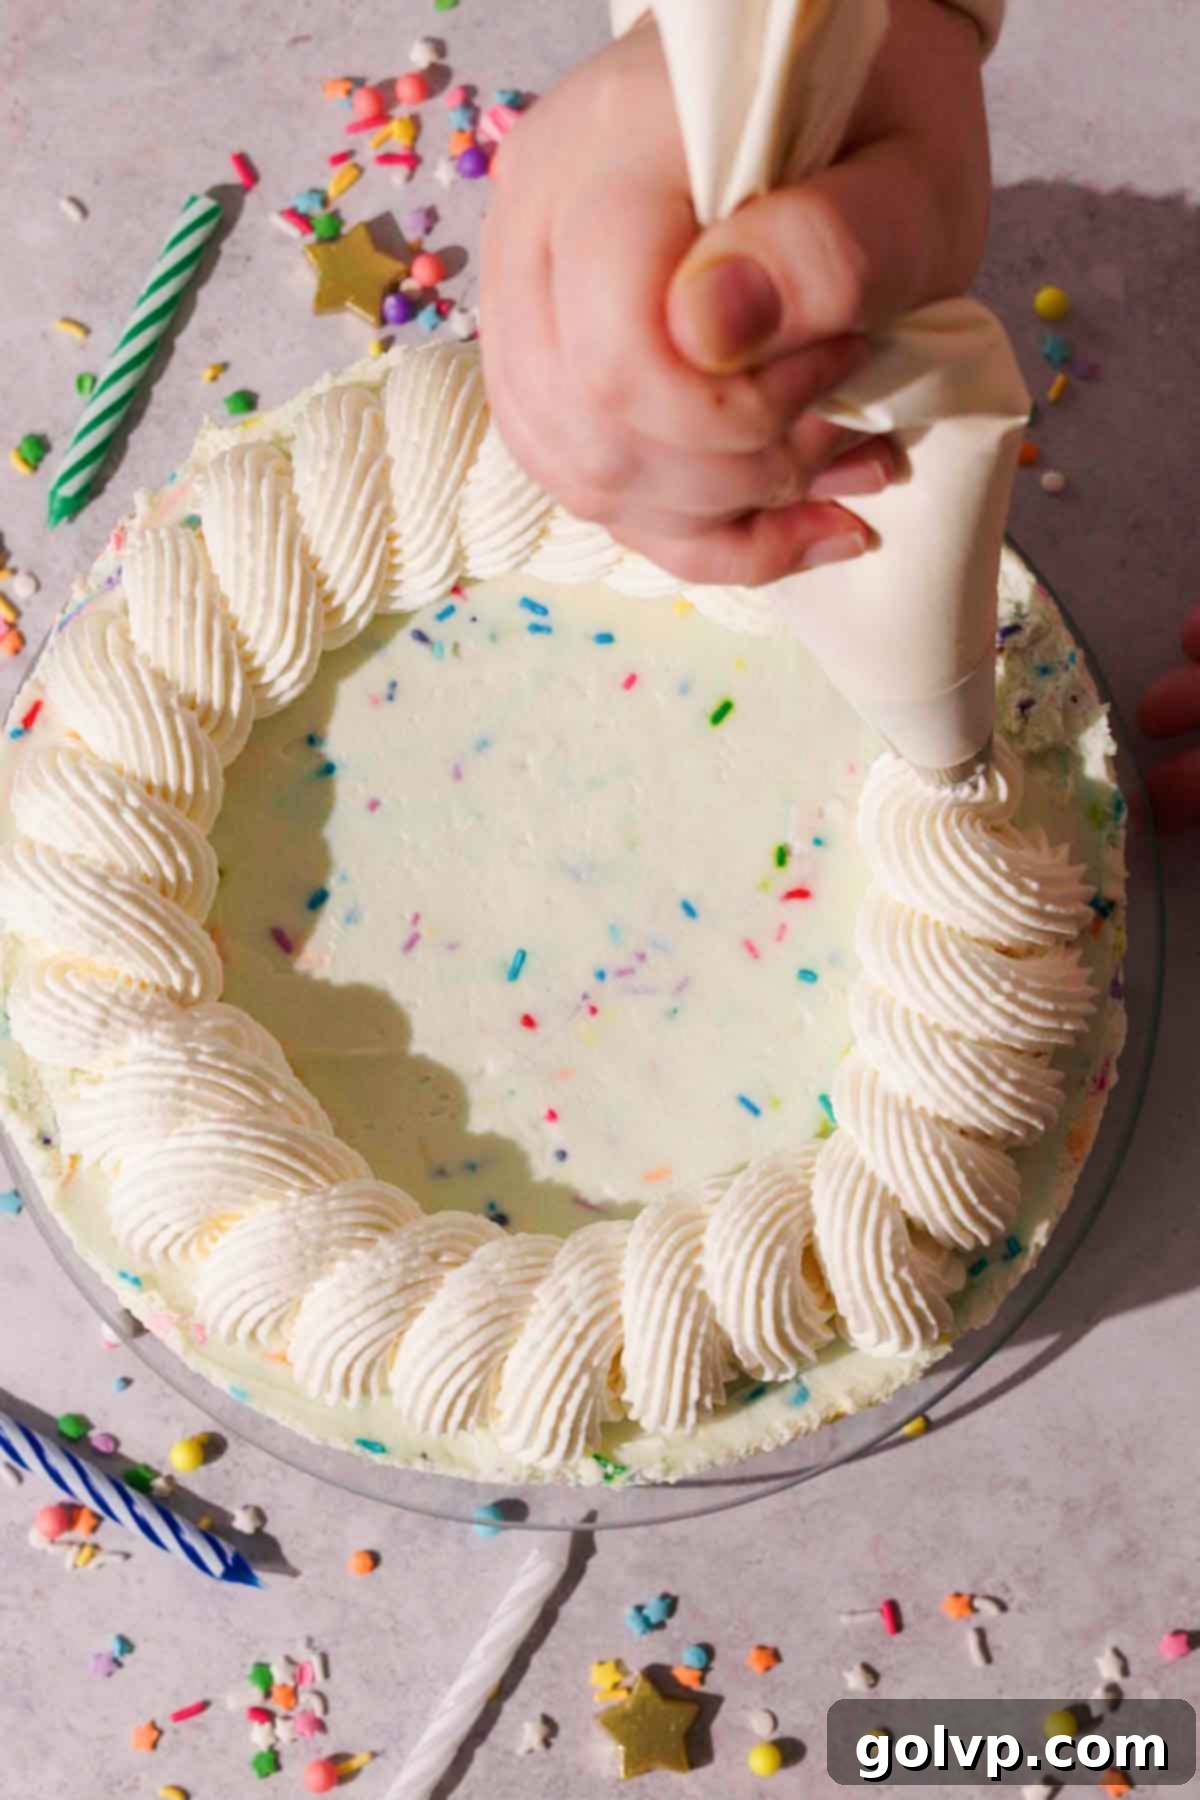
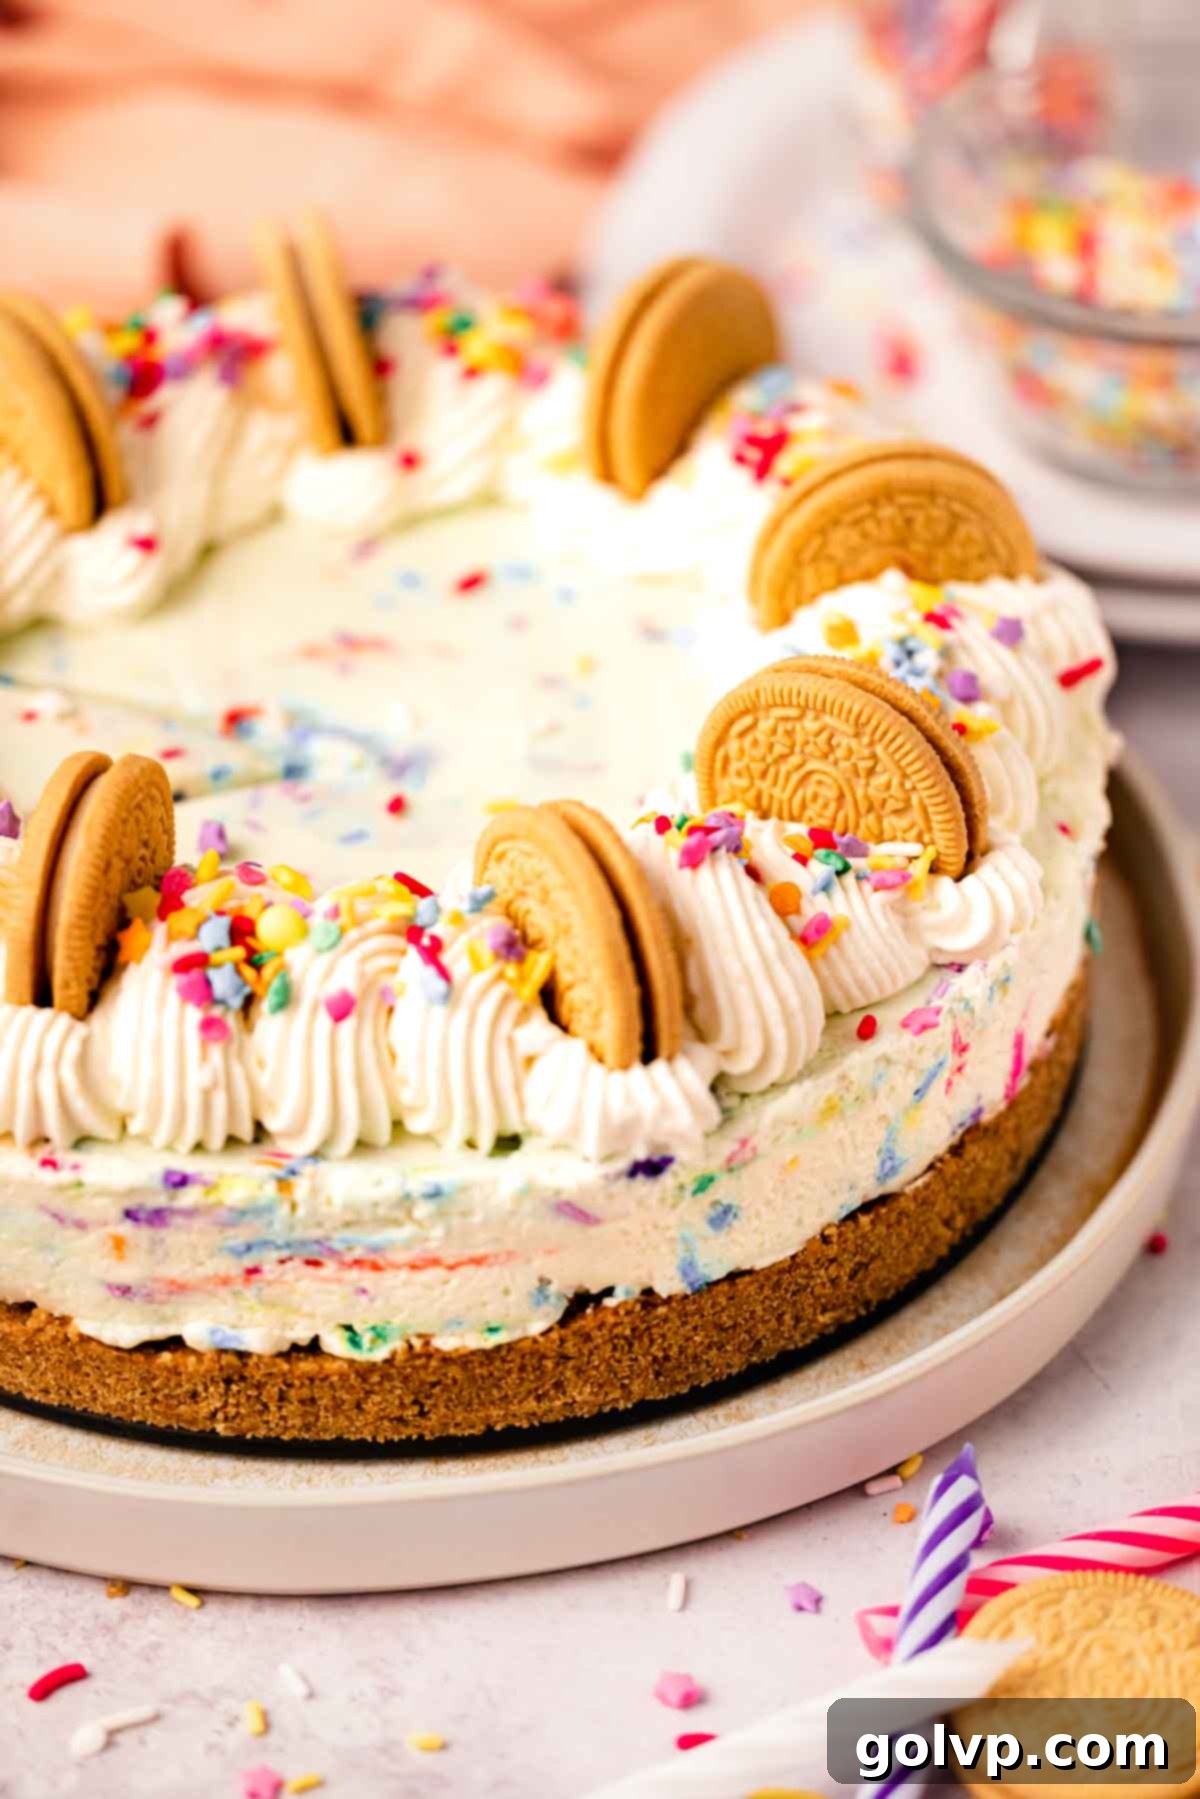
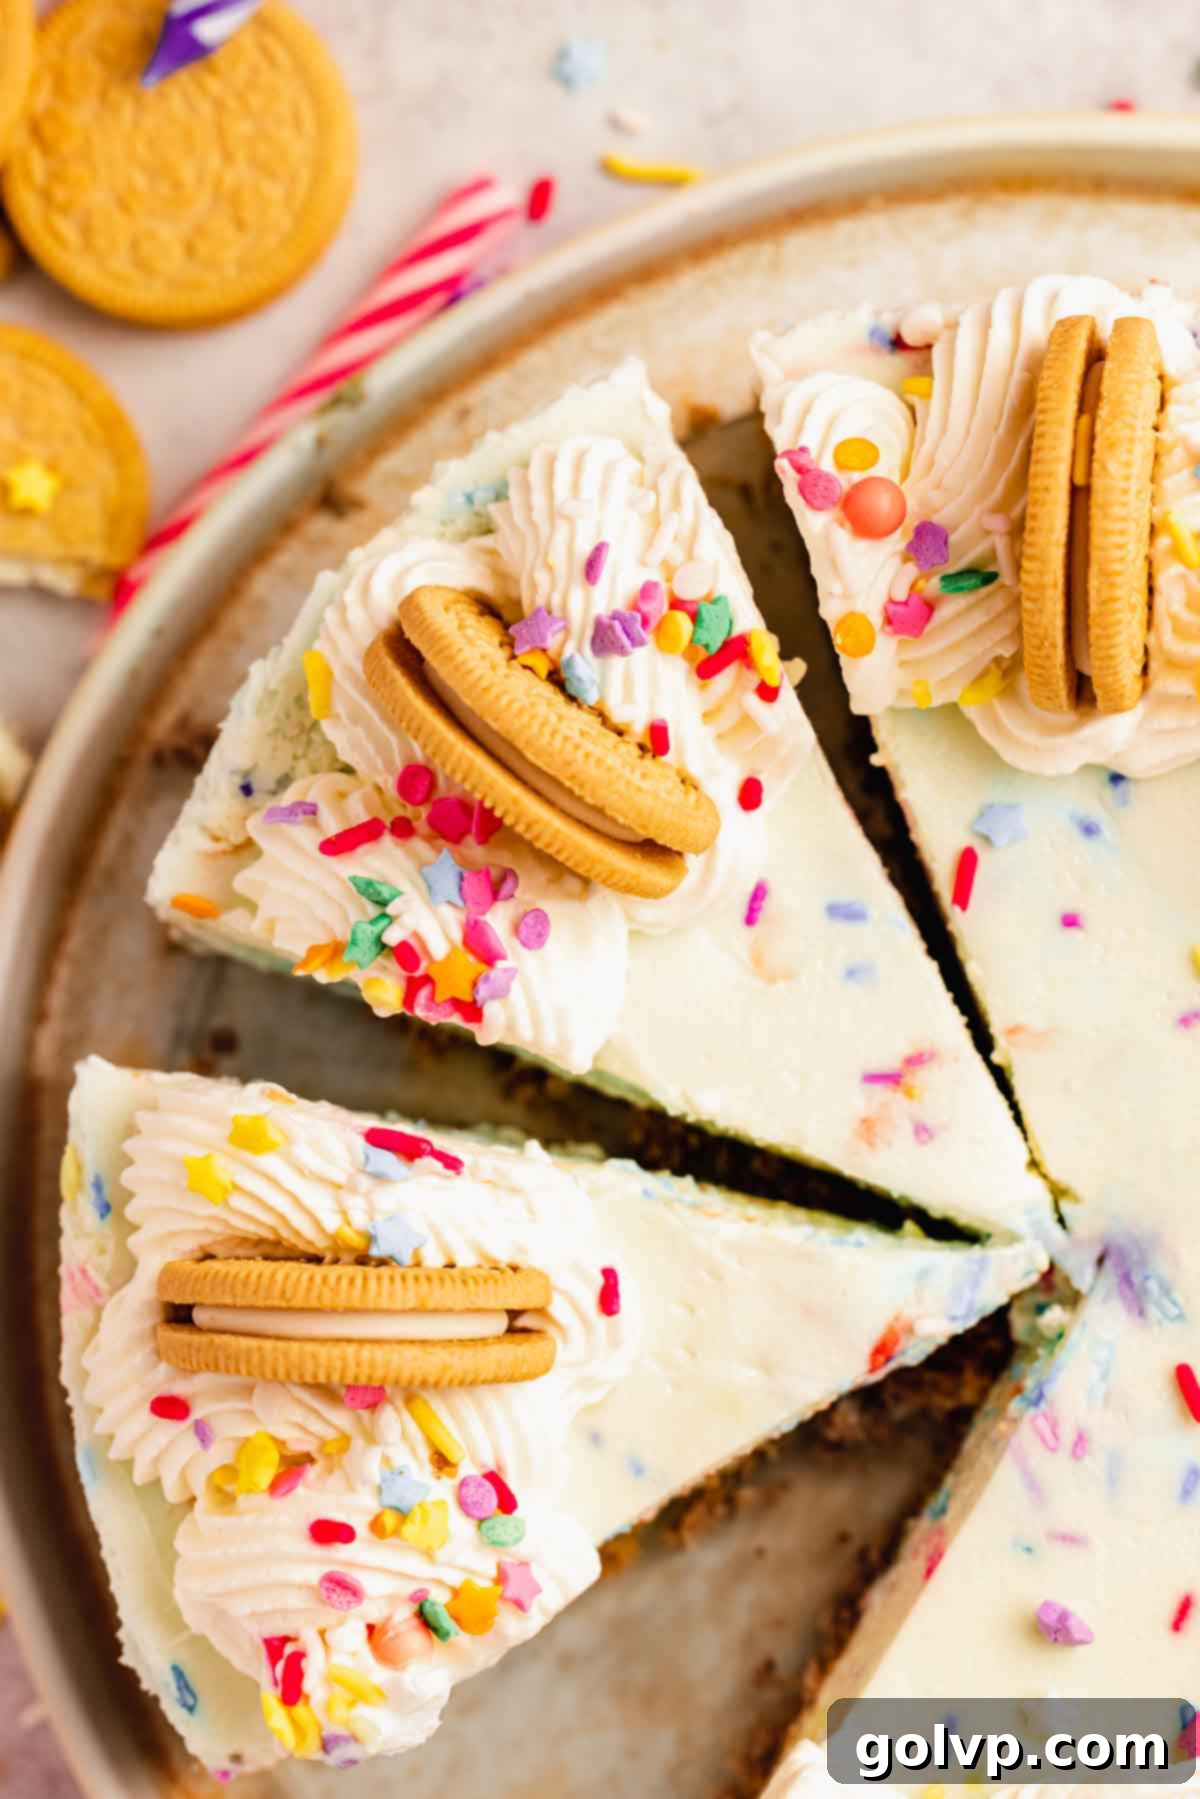
Step 6: Decorate and Serve. Just before serving, prepare the whipped cream topping. Whip cold whipping cream with sugar and clear vanilla extract to stiff peaks. Transfer the whipped cream to a piping bag fitted with an open star tip and pipe a decorative rope border around the edge of the cheesecake. Arrange Golden Oreos artfully on top, and scatter a final flourish of extra sprinkles. Slice the cheesecake with a clean, sharp knife (wiping the blade between each cut for neat slices) and serve cold. Enjoy your festive creation!
Make Ahead and Storage Guidelines
This funfetti cheesecake is a fantastic make-ahead dessert, perfect for entertaining or enjoying throughout the week. For the best presentation and texture, we recommend topping the cheesecake with Golden Oreos and additional sprinkles just before serving. This prevents the cookies from becoming soggy and ensures the sprinkles retain their vibrant colors without bleeding into the whipped cream.
Always store your cheesecake in the refrigerator. It must be kept cold to maintain its firm, creamy texture. When stored in an airtight container, it will remain fresh and delicious in the fridge for up to 4 days. For longer storage, this cheesecake freezes beautifully. Place it in an airtight container and freeze for up to 3 months. To serve after freezing, simply transfer it to the refrigerator and allow it to thaw for several hours or overnight.
You can prepare the entire cheesecake base and filling up to one or two days in advance. Store it securely in a cake carrier to protect its surface and keep it fresh. Remember to add the Golden Oreos and decorative sprinkles only just before serving to preserve their crunch and bright appearance. The delightful crunch of Oreos, much like in our popular red velvet Oreo cheesecake, adds a wonderful textural element.
Expert Tips for No-Bake Cheesecake Success:
- Achieve Stiff Peaks for Whipped Cream: This is arguably the most critical step for a no-bake cheesecake. Ensure your heavy cream is very cold, and for an extra boost, chill your mixing bowl and whisk attachment for 10-15 minutes before whipping. The cream should form stiff peaks, meaning it holds its shape when the whisk is removed and doesn’t appear gloopy or runny. Properly whipped cream provides the necessary aeration and stability for the cheesecake to set without gelatin.
- Select Quality Cream Cheese: Always use full-fat, brick-style cream cheese for the best results. Brands like Philadelphia Original are formulated to be firm and less watery, which is essential for a cheesecake that sets beautifully. Low-fat or whipped cream cheese varieties contain too much moisture and will likely result in a cheesecake that struggles to firm up. Make sure it’s softened to room temperature for smooth mixing.
- Allow Ample Chill Time: Patience is key! Your cheesecake requires a minimum of 6 hours in the refrigerator to properly set. For optimal flavor development and a truly firm, sliceable texture, chilling it overnight (12+ hours) is highly recommended. This allows all the ingredients to meld together and the structure to solidify completely.
- Master Clean Slices: For impeccably clean cuts, pop the chilled cheesecake into the freezer for 1-2 hours before slicing. This firms up the mousse-like texture slightly, making it easier to cut. Use a large, sharp knife, and wipe the blade clean with a hot, damp cloth after every single cut. This prevents dragging crumbs or filling and ensures each slice looks professional and appealing.
Adapting Your Funfetti Cheesecake: Bars and Mini Cheesecakes
While this recipe is presented as a traditional round cheesecake, it’s incredibly versatile and can easily be adapted into no-bake funfetti cheesecake bars or adorable mini cheesecakes, similar to our popular pumpkin cheesecake bars or mini Oreo cheesecakes. Here’s how to achieve these variations:
How to Make Funfetti Cheesecake Bars:
To create cheesecake bars, you’ll need an 8-inch or 9-inch square baking pan. Begin by lining the pan with parchment paper. Position two strips of parchment paper in a cross shape, ensuring they cover the bottom and all sides of the pan, leaving an overhang on each side to serve as “handles.” Crease the parchment paper at the bottom edges to help it conform to the pan’s shape. Fold the parchment handles over the edges of the pan to keep them out of your way during preparation.
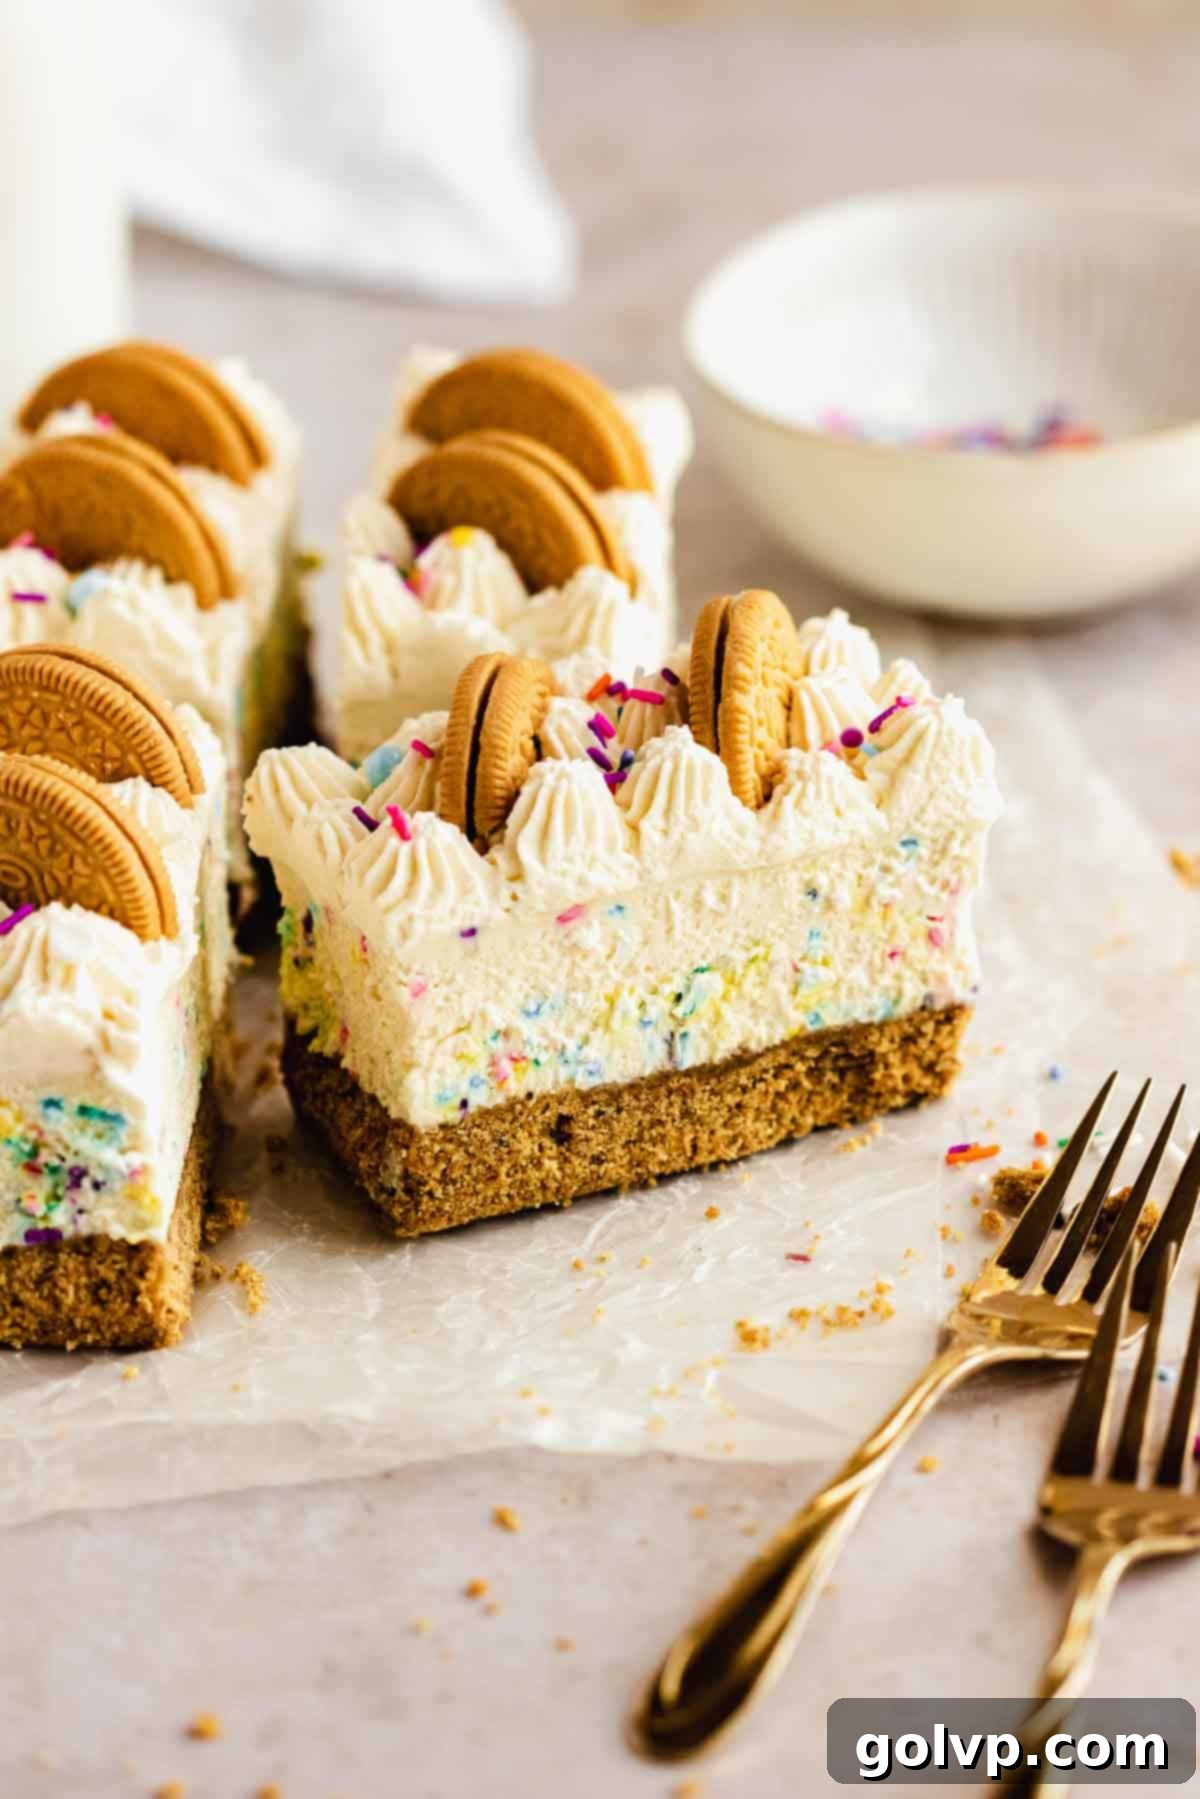
Follow the rest of the recipe instructions exactly as written for the crust and filling. Once the cheesecake has set overnight in the refrigerator, use the parchment paper handles to carefully lift the entire cheesecake out of the pan. Place it on a cutting board. Now for decorating: instead of a single rope border, pipe individual dollops or swirls of whipped cream evenly across the top of the cheesecake. Before serving, slice the cheesecake into eight (or more, depending on desired size) uniform bars. Top each bar with two Golden Oreo halves and a sprinkle of extra funfetti. Remember to clean your knife blade between each cut for the cleanest, most attractive slices.
How to Make Mini Funfetti Cheesecakes:
For bite-sized delights, turn this recipe into mini funfetti cheesecakes using a muffin tin! Line each cup of a standard muffin tin with cupcake liners. This will prevent the mini cheesecakes from sticking and make them easy to remove and serve. Prepare the graham cracker crust and press a small amount into the bottom of each lined muffin cup. Then, spoon the funfetti filling into each cup, smoothing the tops. Chill the mini cheesecakes for at least 6 hours (or overnight) until firm. Once set, you can pipe a swirl of whipped cream on top of each, add a mini Golden Oreo or a piece of one, and a sprinkle of funfetti for a charming individual dessert.
The Magic Behind Gelatin-Free Cheesecake Setting
Many no-bake cheesecake recipes rely on gelatin to achieve a firm, sliceable consistency. However, this funfetti cheesecake recipe masterfully sets without any gelatin, resulting in a wonderfully creamy, fluffy, and mousse-like texture that is distinctively delightful. The secret lies in the precise ratio and preparation of two key ingredients: full-fat cream cheese and heavy whipping cream.
When cold heavy whipping cream is whipped to stiff peaks, it traps air, creating a stable, airy structure. This whipped cream, when gently folded into the rich, softened full-fat cream cheese, provides the necessary body and lightness. As the mixture chills, the fat content in both the cream cheese and the whipped cream solidifies. The dairy proteins in the cream cheese also contribute to its setting capabilities. The cold temperature allows these fats to firm up, creating a stable emulsion that holds its shape beautifully. This method results in a cheesecake that is incredibly creamy and smooth, dissolving on the palate rather than having the slightly gelatinous mouthfeel of some other no-bake desserts.
Because this cheesecake relies purely on chilling for its structure, adequate refrigeration time is paramount. A minimum of 6 hours, and ideally overnight, allows the fats to fully solidify and the flavors to deepen and meld, resulting in the perfect mousse-like consistency. This extended chill time also makes it an ideal dessert to prepare in advance, reducing stress on the day of your event.
As mentioned earlier, we highly recommend decorating the cheesecake on the day of serving. This ensures that the Golden Oreos remain delightfully crunchy and that any sprinkles added to the top retain their vibrant colors without bleeding into the pristine whipped cream, which can happen over prolonged refrigeration.
For those who appreciate the gelatin-free approach, explore our other equally delicious recipes such as the decadent Biscoff cheesecake, the rich Baileys cheesecake, or the exotic passionfruit cheesecake. If you do prefer a gelatin-assisted set, our strawberry crunch cheesecake offers a different textural experience.
Choosing the Best Sprinkles for Your Funfetti Cheesecake
The type of sprinkles you choose can significantly impact both the appearance and texture of your funfetti cheesecake. It’s not just about color; it’s about how they interact with the creamy filling.
For incorporating into the cheesecake filling itself, we strongly recommend using jimmies (the small, rod-shaped sprinkles) and confetti sprinkles (flat, pastel shapes and circles). These varieties tend to hold their color well and create a distinct, celebratory pop of color throughout the creamy white base. Nonpareil sprinkles (the tiny, spherical ones) are generally not ideal for mixing into the filling. Their small size and high concentration of dye can cause them to bleed significantly when exposed to moisture for an extended period, potentially resulting in a muddy, brownish, and unappetizing appearance within the cheesecake. Furthermore, their texture can become slightly grainy. If you’re concerned about artificial dyes, you can certainly opt for naturally colored sprinkles, but be aware that these sometimes have a higher tendency to bleed.
To minimize color bleeding, especially with the sprinkles mixed into the filling, it’s crucial to add them at the very last moment. Fold them into the cheesecake mixture quickly and gently, then immediately spread the filling over the crust. This rapid action limits their exposure to the moist filling, giving them less time to bleed. This same technique is effectively used in our funfetti ice cream recipe to keep the colors vibrant.
When it comes to decorating the top of your funfetti cheesecake, the world is your oyster! You can use any type of sprinkle you fancy, from classic jimmies to elaborate gourmet mixes. For the best visual impact and to prevent any potential color bleeding into the whipped cream topping, sprinkle them on just before serving. We often use a fancy gourmet sprinkle mix for an extra touch of pizzazz and a truly celebratory finish.
Funfetti Cheesecake Recipe FAQs
While a minimum of 6 hours of refrigeration is required for this no-bake funfetti cheesecake to set, letting it chill overnight is highly recommended for optimal results. The flavors deepen and become more pronounced as the cheesecake rests, and the texture becomes even creamier, richer, and more wonderfully firm. This makes it an ideal make-ahead dessert, allowing you to prepare it a day in advance and simply decorate before serving.
A perfectly smooth funfetti cheesecake filling starts with properly softened cream cheese. To ensure a lump-free mixture, cut your brick-style cream cheese into cubes and allow it to sit at room temperature for at least one to two hours before you begin. This makes it much easier to beat until perfectly creamy, whether you’re using a hand whisk or an electric mixer. Ensure you beat the cream cheese and sugar together until absolutely smooth before gently folding in the whipped cream. Scraping down the bowl frequently during mixing also helps.
This particular funfetti cheesecake recipe sets to a soft, creamy, mousse-like texture without the aid of gelatin. The primary reasons for it not setting properly are usually related to the whipping cream or cream cheese. Firstly, ensure your whipping cream is whipped to very stiff peaks; it needs to be firm enough to hold its shape to provide the necessary structure. Fold it into the cream cheese mixture very gently to avoid deflating the air you’ve incorporated, which is crucial for its set. Secondly, always use good quality, full-fat, brick-style cream cheese (like Philadelphia original cream cheese). Low-fat versions have a higher water content and won’t firm up reliably.
Adding cinnamon to the graham cheesecake crust is an optional but highly recommended step that elevates the entire dessert. The cinnamon imparts a warm, aromatic spice that beautifully complements the sweet, buttery graham crackers. This subtle addition amplifies that classic graham flavor and introduces an extra layer of complexity, making the crust taste incredibly rich and cozy. Many find this combination delightfully reminiscent of Dunkaroo cookies and their iconic vanilla frosting dip, adding a wonderful touch of pure nostalgia to your funfetti cheesecake.
For achieving those picture-perfect, extra smooth cheesecake slices, a little preparation goes a long way. After the cheesecake has fully set (preferably overnight), transfer it to the freezer for 1-2 hours before you plan to slice it. This brief freezing period will firm up the mousse-like texture slightly, making it much easier to cut cleanly without smushing or dragging the filling. Use a large, very sharp knife, and here’s the trick: wipe the knife blade clean with a hot, damp cloth after every single cut. This prevents crumbs and filling from sticking to the blade and ensures each subsequent slice is crisp and impeccably clean.
More Delightful Dessert Recipes You’ll Love
If you enjoyed this funfetti cheesecake, be sure to explore these other fantastic recipes from our collection:
- Baileys Cheesecake No Bake
- Funfetti Ice Cream
- Passion Fruit No Bake Cheesecake [No Gelatin]
- Funfetti Cinnamon Rolls – No Knead
Did you create this fantastic funfetti cheesecake? We’d love to hear your thoughts! Please consider rating this recipe and sharing your experience in the comments section below. Don’t forget to share your beautiful creation on Instagram and tag @flouringkitchen. Follow us on Pinterest for more inspiring recipe ideas and culinary adventures!
Funfetti Cheesecake Recipe

Funfetti Cheesecake
By Mary
This no-bake funfetti cheesecake is a delightful treat that’s incredibly creamy, smooth, and bursting with nostalgic sprinkle fun! It features a distinctive brown sugar cinnamon graham cracker crust, reminiscent of a dreamy Dunkaroo cheesecake. Topped with fluffy whipped cream, crunchy Golden Oreos, and a generous scattering of colorful sprinkles, it’s the perfect festive dessert for any celebration.
Prep Time: 30 mins
Cook Time: 0 mins
Chill Time: 6 hrs
Total Time: 6 hrs 30 mins
Course: Cheesecake, Dessert
Cuisine: American
Servings: 12 people
Calories: 496 kcal
Equipment
- 9-inch round springform pan (see notes for alternatives)
Ingredients
Crust
- 4 tablespoons brown sugar
- 1 teaspoon cinnamon (optional)
- ⅛ teaspoon sea salt
- 2 ⅓ cup graham cracker crumbs (350g)
- ⅔ cup butter, melted
Cheesecake Filling
- 1 ½ cup whipping cream, cold
- 16 oz cream cheese, softened (500g)
- ¾ cup granulated sugar
- ⅛ teaspoon sea salt
- 2 teaspoons clear vanilla extract
- 2 teaspoons lemon juice, freshly squeezed
- ¼ cup sprinkles (see notes about which to use)
Whipped Cream Topping
- 1 cup whipping cream, cold
- 2 tablespoons granulated sugar
- 1 teaspoon clear vanilla extract
- 1 tablespoon sprinkles
- 8 whole Golden Oreos
Makes: 9-inch round cheesecake
Instructions
Crust
- Prepare a 9-inch round springform pan by lightly greasing it with oil and lining the bottom with a round of parchment paper. (See notes for alternative pan options).
- In a large bowl, combine the brown sugar, cinnamon (if using), sea salt, and graham cracker crumbs. Add the melted butter and stir until the mixture is evenly combined and resembles wet sand.
- Pour the mixture into the prepared pan and gently smooth it out. Use the flat bottom of a glass or a measuring cup to pack the crust down tightly and evenly. Set aside.
Cheesecake Filling
- In a stand mixer or with a hand mixer, whip the cold whipping cream to stiff peaks in a large, chilled glass bowl. Place the whipped cream in the fridge until ready to use.
- In a separate large bowl, beat together the softened cream cheese, granulated sugar, sea salt, clear vanilla extract, and lemon juice until the mixture is completely smooth and creamy. Scrape down the sides of the bowl frequently to ensure no lumps remain.
- Gently fold the chilled whipped cream into the cream cheese mixture using a spatula, being careful not to deflate the whipped cream. Continue until no streaks of whipped cream are visible and the mixture is uniformly combined.
- Add the sprinkles to the filling. Working quickly, fold them in until evenly dispersed. Immediately spoon the filling onto the prepared crust in the baking pan and smooth the top with an offset spatula or spoon. Gently tap the baking pan on a countertop a few times to release any large air bubbles.
- Cover the baking pan loosely with a plate or plastic wrap and refrigerate for at least 6 hours, or preferably overnight, to allow the cheesecake to set completely.
Whipped Cream Topping & Serving
- For the best presentation, we recommend topping the cheesecake just before serving to prevent the whipped cream from losing its pristine appearance and to keep toppings fresh.
- In a large bowl or stand mixer, combine the cold whipping cream, granulated sugar, and clear vanilla extract. Beat with a whisk until stiff peaks form. Immediately pipe or spread the whipped cream on top of the thoroughly chilled cheesecake.
- Right before serving, arrange the whole Golden Oreos on top and scatter additional sprinkles for a festive finish. This prevents the cookies from getting soggy and the sprinkles from bleeding their colors prematurely.
- Slice and serve cold! For extra clean slices, wipe your knife clean between every cut. The finished cheesecake can be stored in an airtight container in the fridge for up to 4 days, or in the freezer for up to 3 months.
Video Guide
Notes
No Bake Cheesecake Expert Tips:
- Whip the cream to stiff peaks. It should hold its shape and not be gloopy. Make sure the cream is cold and use a chilled bowl to help. This is critical in helping the cheesecake set.
- Use good quality, full-fat, brick-style cream cheese for the cheesecake to set properly.
- The cheesecake needs to set in the fridge for at least 6 hours. It’s best to let it set overnight because this will let the flavors develop and firm up successfully.
- To get extra clean cuts, freeze the cheesecake for 1-2 hours before cutting and clean the knife after every cut.
What sprinkles to use:
The best sprinkles to use are jimmies (little rods) and confetti (flat pastel shapes and circles) for inside the cheesecake. We used a fun gourmet mix of sprinkles for the top. Nonpareils don’t work very well because they are so small and tend to bleed, making the inside look a little brown. Naturally colored sprinkles may bleed more, so watch out for that if it matters to you.
To make cheesecake bars:
Prepare an 8” or 9” square pan by lining it with parchment paper. Place two strips of parchment paper in a cross shape, covering all the sides and leaving handles at the end. Crease the bottom edges so that it holds its shape. Follow the recipe exactly until the end. Pipe dollops of whipped cream evenly on top and cut the cheesecake into 8 bars before topping with oreo halves and more sprinkles.
Nutrition Information
Calories: 496kcal | Carbohydrates: 45g | Protein: 9g | Fat: 32g | Saturated Fat: 19g | Polyunsaturated Fat: 2g | Monounsaturated Fat: 9g | Trans Fat: 0.4g | Cholesterol: 88mg | Sodium: 548mg | Potassium: 198mg | Fiber: 1g | Sugar: 33g | Vitamin A: 1065IU | Vitamin C: 0.3mg | Calcium: 189mg | Iron: 1mg
