The Ultimate Chewy & Fudgy Brown Butter Blondies: An Easy One-Bowl Recipe for Irresistible Flavor
Jump to Recipe
Prepare to fall in love with these incredibly chewy, delightfully fudgy, and effortlessly easy brown butter blondies! If you’ve been searching for a simple yet show-stopping dessert that satisfies all your sweet cravings, look no further. This is a true one-bowl wonder, requiring minimal equipment – just a hand whisk, a spoon, and a medium saucepan to work its magic. Imagine the rich, nutty aroma of a brown butter cookie combined with the dense, tender chewiness of a perfect brownie, and you’ve got the essence of these divine brown butter blondies. They’re not just a treat; they’re an experience, promising to be the best you’ve ever tasted.
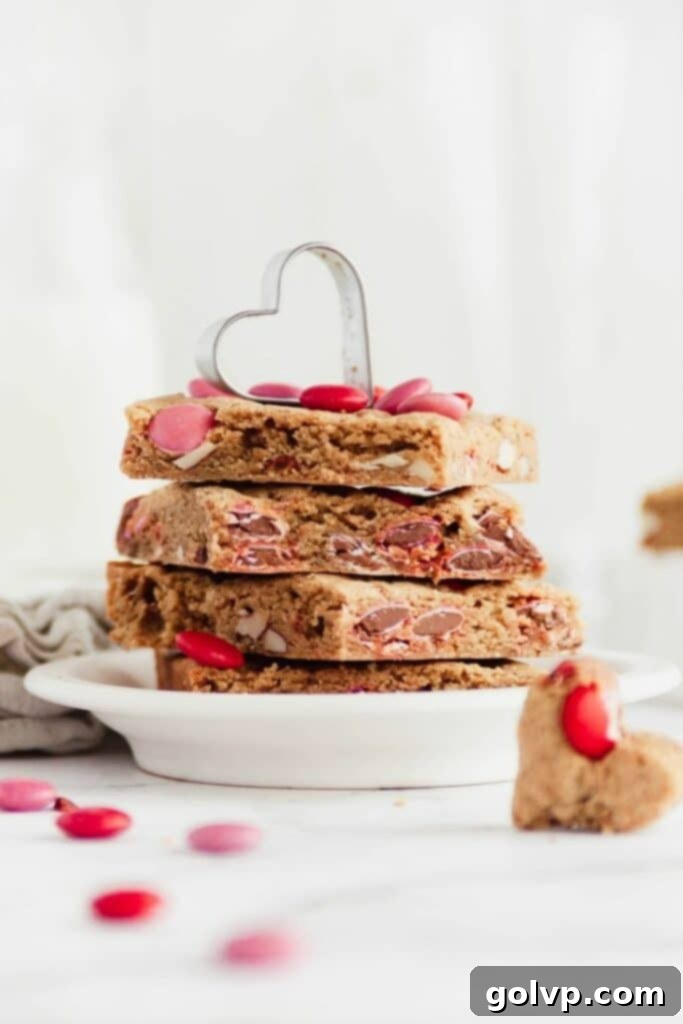
What makes these blondies truly exceptional is the deep, complex flavor profile imparted by the brown butter, elevating a classic dessert to gourmet status. And the best part? Their versatility knows no bounds! While perfect for any occasion, I particularly enjoy customizing them for holidays. For Valentine’s Day, for instance, a vibrant mix of candy-coated chocolates and crunchy toasted almonds creates a festive and utterly delicious indulgence. Get ready to impress your family and friends with this simple yet sophisticated recipe!

The Magic of Brown Butter: Why It’s Worth the Extra Step
While you could certainly simplify this recipe by using regular melted butter, browning the butter is the secret ingredient that transforms these blondies from good to absolutely phenomenal. It’s a quick and easy process that adds an incredible depth of flavor you won’t want to miss. When butter is gently heated, the milk solids undergo the Maillard reaction, caramelizing and creating beautiful golden-brown specks. This process infuses the butter with a rich, nutty, and toasted aroma, reminiscent of toffee or caramel, which then translates into an unparalleled flavor in your blondies.
This nutty, warm undertone complements the sweet brown sugar perfectly, creating a more sophisticated and irresistible dessert. Don’t be intimidated; if you’re already melting butter, taking it a few extra minutes to brown it is surprisingly simple and completely worth the effort. Just keep a close eye on it, stirring frequently, to ensure it doesn’t burn. Once you try brown butter blondies, you might never go back to plain melted butter again!
Achieving That Perfect Chewy and Fudgy Texture
The hallmark of an outstanding blondie is its texture: perfectly chewy edges giving way to a rich, fudgy center. Achieving this is simpler than you might think, and a few key steps make all the difference. Many of these tips come directly from baking wisdom passed down through generations, ensuring your blondies are always a success:
- Room Temperature Eggs are Key: This is a crucial step for achieving that silky, smooth batter. When eggs are at room temperature, they emulsify more effectively with the fats and sugars, creating a uniform mixture without lumps. To quickly bring eggs to room temperature, simply place them in a bowl of warm (not hot!) water for about 5-10 minutes before you start.
- Vigorous Whisking: After incorporating the eggs into the brown butter and brown sugar mixture, whisk vigorously. You’re looking for the batter to lighten in color and volume, forming “ribbons” when you lift the whisk. This process incorporates air, which contributes to the blondies’ rise and lightens their texture while maintaining fudginess.
- Don’t Overmix the Flour: Once you add the flour, switch from whisking to gently folding. Overmixing flour develops the gluten too much, leading to a tough, cake-like texture rather than the desired chewy and fudgy consistency. Stop folding as soon as the flour streaks have disappeared.
- Fold in Fillings Gently: Similarly, when adding your chosen fillings, fold them in just until they are evenly distributed. Excessive mixing here can also toughen the batter.
- The Art of Underbaking: This is perhaps the most critical tip for fudgy blondies. You want to remove them from the oven when the edges are golden brown and set, but the very center still looks slightly underdone and might jiggle a bit. Blondies continue to bake and set as they cool in the hot pan, so taking them out a minute or two early prevents them from drying out and becoming crumbly. Trust your instincts – and a slightly wobbly center!
Unleash Your Creativity: Customize the Fillings
One of the truly delightful aspects of these brown butter blondies is their incredible adaptability. They serve as the perfect canvas for a myriad of flavor combinations, allowing you to tailor each batch to your mood, occasion, or whatever delectable treats you have in your pantry. The key is to select ingredients that complement the rich, nutty base of the brown butter. I often opt for a mix of half chocolate and half toasted nuts. The nuts, with their slight bitterness and crunch, beautifully cut through the sweetness of the chocolates, creating a balanced and addictive bite.
For my Valentine’s Day batch, I used 1 cup of colorful candy-coated chocolate bits (like Smarties or M&M’s) and 1 cup of finely chopped toasted almonds, offering a delightful contrast in texture and taste. But the possibilities are endless!
Here are some other fantastic combinations to inspire your next baking adventure:
- Classic Chocolate Chip: Sometimes, simplicity is supreme. Use 2 cups of your favorite chocolate chips – milk, semi-sweet, dark, or a blend – for a timeless treat that everyone loves. The brown butter takes this classic to a new level.
- Decadent Toffee Crunch: For those who love a buttery, caramel note, combine 1 cup of chopped Skors bars (toffee coated in milk chocolate) with 1 cup of chopped toasted almonds. The toffee melts slightly, creating pockets of gooey goodness, while the almonds add texture.
- Hearty Cowboy Brown Butter Blondies: Embrace a rustic, wholesome flavor with ⅔ cup unsweetened shredded coconut, ⅔ cup chopped pecans, and ⅔ cup semi-sweet chocolate chips. This combination offers a delightful chewiness from the coconut and a robust crunch from the pecans.
- Indulgent Triple Chocolate: For the ultimate chocolate lover, load them up with ⅔ cup white chocolate chips, ⅔ cup milk chocolate chips, and ⅔ cup semi-sweet chocolate chips. Each bite will be a symphony of different chocolate intensities.
- Exotic White Chocolate Macadamia: A luxurious pairing, this combination features 1 ½ cups of creamy white chocolate chips alongside ½ cup of finely chopped toasted macadamia nuts. The buttery macadamias are a perfect match for the sweet white chocolate.
- Seasonal Swaps: Consider dried cranberries and white chocolate for a festive holiday treat, or chopped pretzels and caramel bits for a salty-sweet crunch. The options are truly limitless!
A Hint of Almond: The Optional Flavor Boost
For an extra layer of sophisticated flavor, I often add a small amount of pure almond extract. Just a quarter teaspoon can impart a subtle, sweet almond note that is beautifully reminiscent of a classic sugar cookie. It harmonizes wonderfully with the nutty brown butter, adding a unique twist that sets these blondies apart. However, taste preferences are personal, so if you’re not a fan of almond flavor, feel free to omit it entirely. Remember, in your kitchen, you’re the master chef, and every recipe can be adapted to suit your palate!

Explore More Delights from My Kitchen:
- The Best Brown Butter Chocolate Chip Cookies
- Blueberry Cream Cheese Cookies – Soft & Chewy
- Brown Butter Chocolate Chip Edible Cookie Dough
Let’s Get Baking: Your Step-by-Step Guide to Perfect Blondies!
Now that you’re armed with all the tips and tricks for creating the perfect chewy and fudgy brown butter blondies, it’s time to gather your ingredients and get started. The process is straightforward, designed for ease and maximum deliciousness. Remember to follow each step carefully, paying special attention to the browning of the butter and the gentle mixing of the flour, to ensure your blondies turn out absolutely perfect.
First, we begin with the star of the show: the brown butter. In a medium saucepan, melt your butter over low heat. As it melts, keep stirring consistently. You’ll notice the butter will froth up, but don’t worry – this is normal. Continue to stir as the foam gradually subsides, revealing the beautiful transformation happening beneath. The white milk solids at the bottom of the pan will start to caramelize, slowly turning a rich golden brown and emitting a wonderfully nutty, toasty aroma. This is the magical moment! Be vigilant, as the butter can quickly go from perfectly browned to burnt, so remove it from the heat as soon as it reaches that inviting golden hue.
Immediately transfer the hot brown butter into a large heatproof bowl to stop the cooking process. Let it cool for about 10 minutes; this allows the flavors to deepen slightly and prevents the eggs from scrambling when added later. While the butter cools, prepare your baking pan. Preheat your oven to a moderate 180°C (350°F). Line the bottom of a 9”x12” baking pan with parchment paper, making sure to leave two long flaps on the sides. These “handles” will be incredibly useful for effortlessly lifting the baked blondies out of the pan. Finish by greasing the sides of the pan with a small piece of cold butter for easy removal.
Once the brown butter has cooled, add the packed brown sugar directly into it and stir until the mixture is uniform and smooth. Next, incorporate the room-temperature eggs one at a time, whisking vigorously after each addition. Continue whisking until the batter becomes visibly lighter in color and texture, forming those desired long ribbons when lifted. Finally, whisk in the pure vanilla extract and, if using, the optional almond extract until everything is fully combined and fragrant.
Now for the flour! Gently stir the all-purpose white flour into the wet ingredients, folding just until it is almost fully incorporated. This is where you want to be careful not to overmix. As soon as most of the flour streaks have disappeared, fold in your chosen fillings. Whether you’re using candy-coated chocolates and toasted almonds like I did, or any other delicious combination, stir just enough until they are evenly distributed throughout the thick batter. Overmixing at this stage can lead to tough blondies, and we’re aiming for that irresistible chewy-fudgy perfection!
Transfer the rich, thick batter into your prepared baking pan, using a spoon or an offset spatula to smooth out the top evenly. For an extra touch of visual appeal and flavor, sprinkle some additional chocolate chips or candy pieces over the surface. Bake for 20-22 minutes. Remember the crucial underbaking tip: the blondies are ready when the edges are beautifully golden and set, but the center still appears slightly soft or a tiny bit underdone. This ensures maximum fudginess!
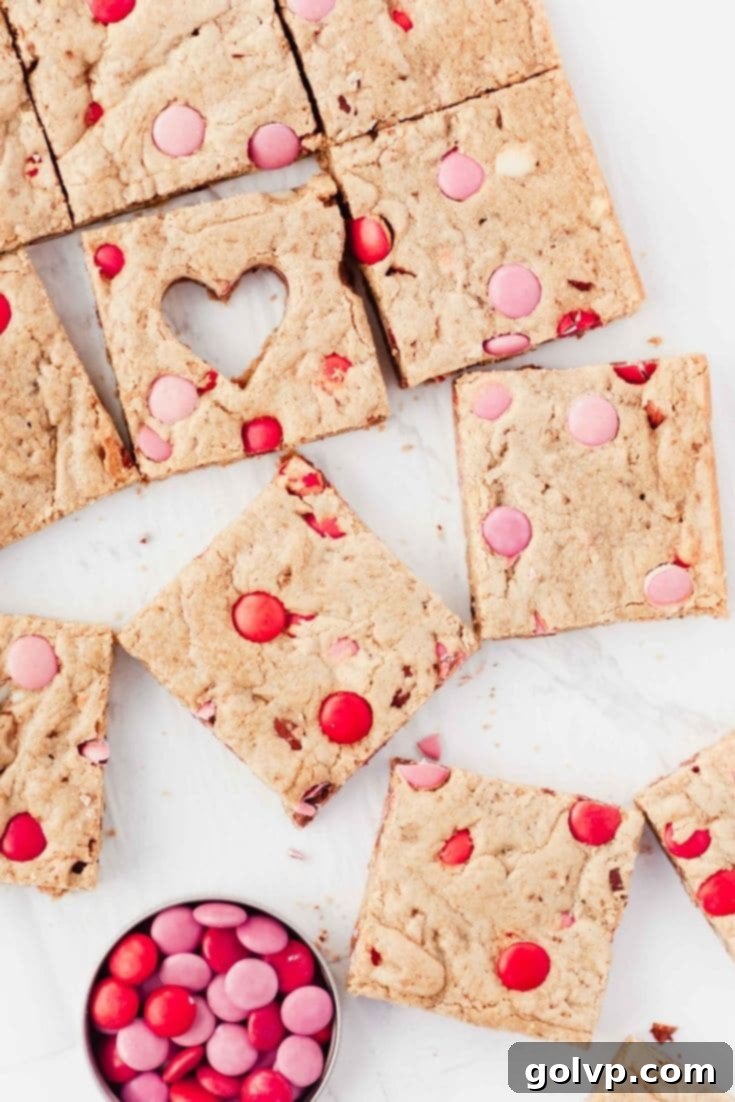
Once baked, let the blondies cool in the pan until they are just warm to the touch. Then, using those convenient parchment paper “handles,” lift the entire slab out of the pan and transfer it to a cutting board. Cut into twelve perfectly sized squares, or whatever size you prefer.
Serving and Storing Your Delicious Blondies
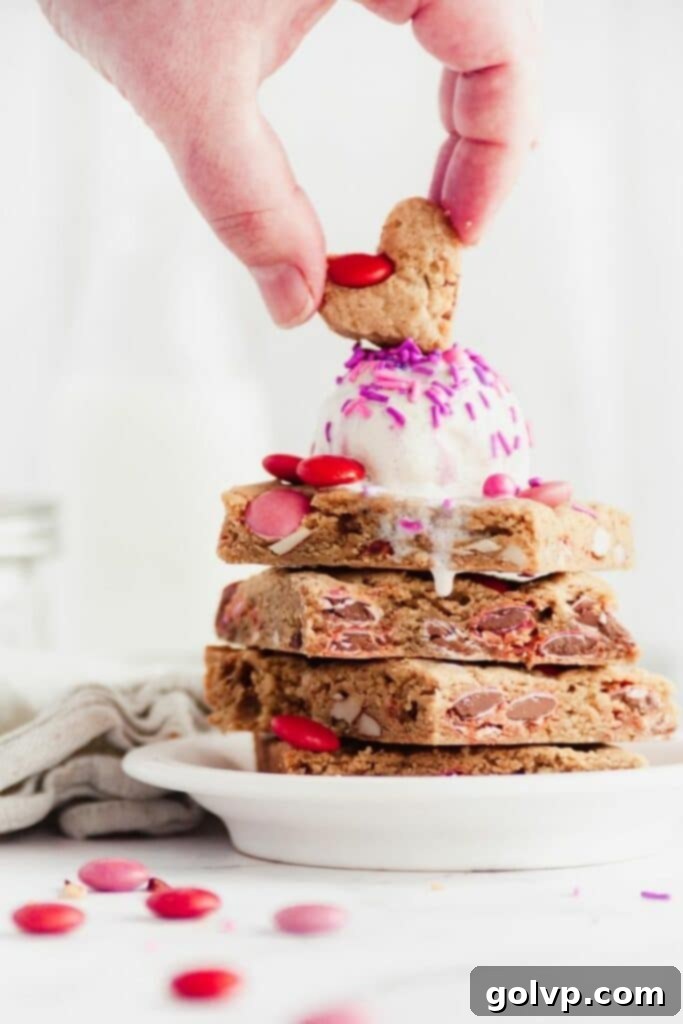
These brown butter blondies are truly at their best when served warm, perhaps with a scoop of vanilla bean ice cream, or simply at room temperature for a delightful anytime treat. The flavors deepen as they cool, making them just as delicious the next day!
To keep them fresh, store the blondies in an airtight container at room temperature for up to 1 week. For longer preservation, they freeze beautifully! Wrap individual blondies tightly in plastic wrap and then place them in a freezer-safe bag or container for up to 3 months. When you’re ready to enjoy them again, simply reheat them gently in the microwave or oven, and they’ll taste as wonderfully fresh as if they were just baked.
Happy baking! xx
Did you make this recipe? I would love for you to rate this recipe and hear what you think in the comments!
Share your creation on Instagram and tag @flouringkitchen
📖 Recipe

Brown Butter Blondies
Mary
Pin Recipe
Shop Ingredients
Equipment
-
9”x13” baking pan
Ingredients
- ¾ cup butter
- 2 cups brown sugar packed
- 2 large eggs room temperature
- 1 tablespoon pure vanilla extract
- ¼ teaspoon pure almond extract (optional)
- 2 cups all purpose white flour (240g)
- 2 cups favourite fillings (reserve ¼ cup to sprinkle on top) chopped candy bars, chocolate chips, nuts…
Shop Ingredients on Jupiter
Instructions
-
Brown the butter: In a medium saucepan on low heat, melt the butter. Keep stirring as the butter froths up. The foam will subside as the butter browns. Keep stirring for a few minutes, watching the whole time. The white bits at the bottom (milk solids) will slowly caramelize, turn a golden brown colour, and smell toasty. Be careful because it is very easy to take it from brown to burnt butter.¾ cup butter
-
Remove the butter from heat immediately. Transfer the butter into a large heatproof bowl. Let cool for 10 minutes.
-
Preheat the oven to 180°C (350°F). Line the bottom of a 9”x12” baking pan with parchment paper, leaving two long flaps on the sides to help lift out the blondies when they are baked. Grease the sides of the pan by rubbing a small piece of cold butter over the edges.
-
Add the brown sugar into the brown butter and stir until even.2 cups brown sugar
-
Add the eggs one at a time, whisking in between each addition. Whisk vigorously until the batter forms long ribbons and becomes lighter. Whisk the vanilla and almond extract (optional) until incorporated.2 large eggs, 1 tablespoon pure vanilla extract, ¼ teaspoon pure almond extract
-
Stir the flour into the batter, folding until almost fully incorporated. Fold in the fillings of choice (I used 1 cup candy coated chocolate bits and 1 cup chopped almonds). Stop folding as soon they are evenly incorporated.2 cups all purpose white flour, 2 cups favourite fillings (reserve ¼ cup to sprinkle on top)
-
Transfer the thick batter into the prepared baking pan, using a spoon to smooth it out. Sprinkle some extra chocolate chips or candy on top.2 cups favourite fillings (reserve ¼ cup to sprinkle on top)
-
Bake for 20-22 minutes, or until the edges are golden, and the center is slightly underdone. Let cool until warm in the pan, lift out by the parchment paper “handles” and cut into twelve pieces.
-
Enjoy! They are best served warm or at room temperature. Store in an airtight container at room temperature for up to 1 week, or freeze for up to 3 months. Reheat before serving and they will taste as if they were just baked.
Notes
- Bring the eggs to room temperature by running them under warm tap water.
- This will help them incorporate completely and create a very smooth batter.
- Make sure to beat the batter with your whisk really well after adding the eggs.
- You want to beat until the batter lightens a little bit and falls off the whisk in ribbons.
- Do not overmix the batter after the flour is added: stir the flour into the batter until it is just incorporated, then add the chocolate and chopped nuts. Stir just until everything is even.
- Be careful not to overbake! It is always better to underbake brownies and blondies. You want them to be slightly golden on the edges and a bit underbaked in the center when you take them out.
Almond Extract
I like to add a little bit of pure almond extract to give the brown butter blondies a bit of a sweet almond flavour. It is slightly reminiscent of a sugar cookie. I recommend giving it a try, or you can just leave it out if you aren’t a fan.
Other flavour combinations to try:
- Chocolate chip: 2 cups of your favourite chocolate chips
- Toffee: 1 cup Chopped Skors (toffee bars coated in milk chocolate) and 1 cup chopped toasted almonds
- Cowboy Brown Butter Blondies: ⅔ cup unsweetened shredded coconut, ⅔ cup chopped pecans, and ⅔ cup semisweet chocolate chips
- Triple Chocolate: ⅔ cup white chocolate, ⅔ cup milk chocolate, ⅔ cup and semisweet chocolate chips
- White chocolate macadamia: 1 ½ cup white chocolate chips and ½ cup chopped toasted macadamia nuts
