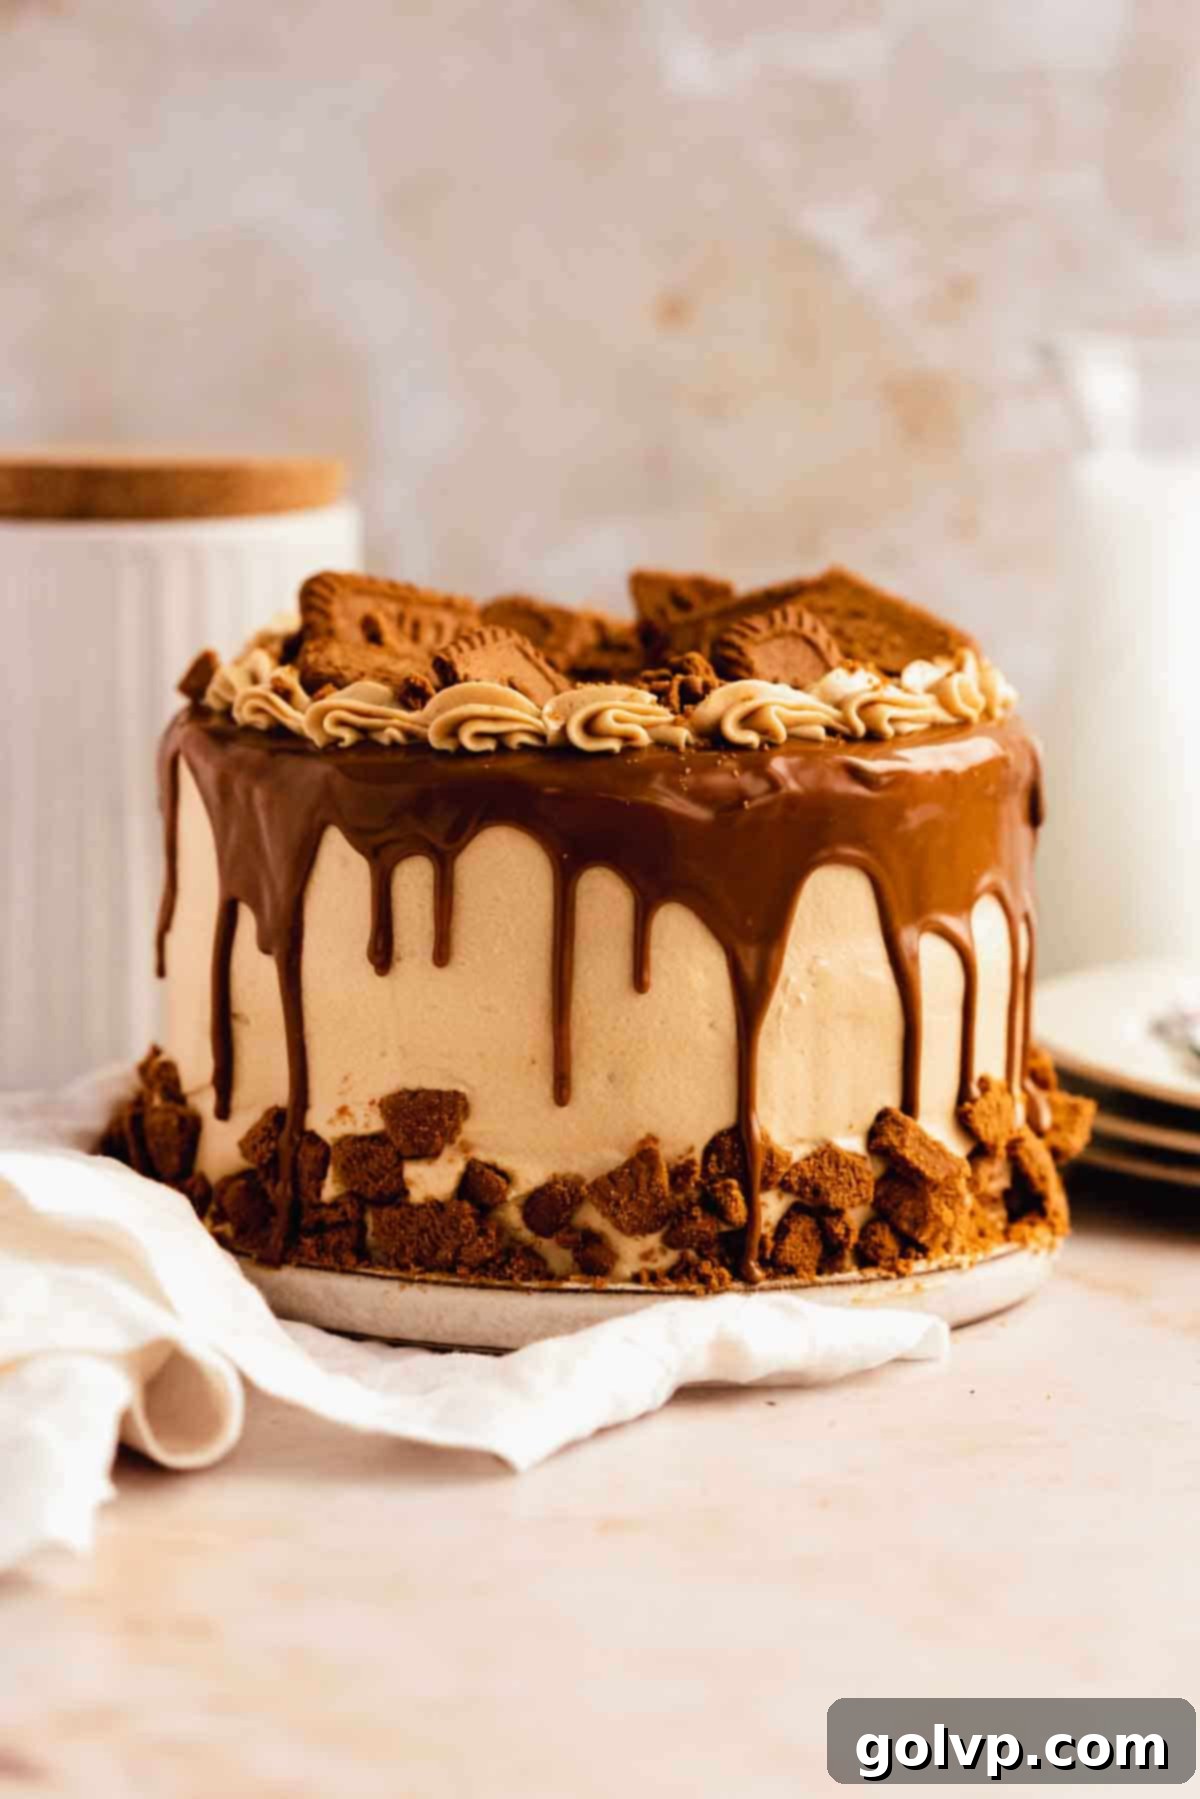
Irresistible Biscoff Cake: Layers of Moist Sponge with Whipped Cookie Butter Cream Cheese Frosting and a Signature Drip
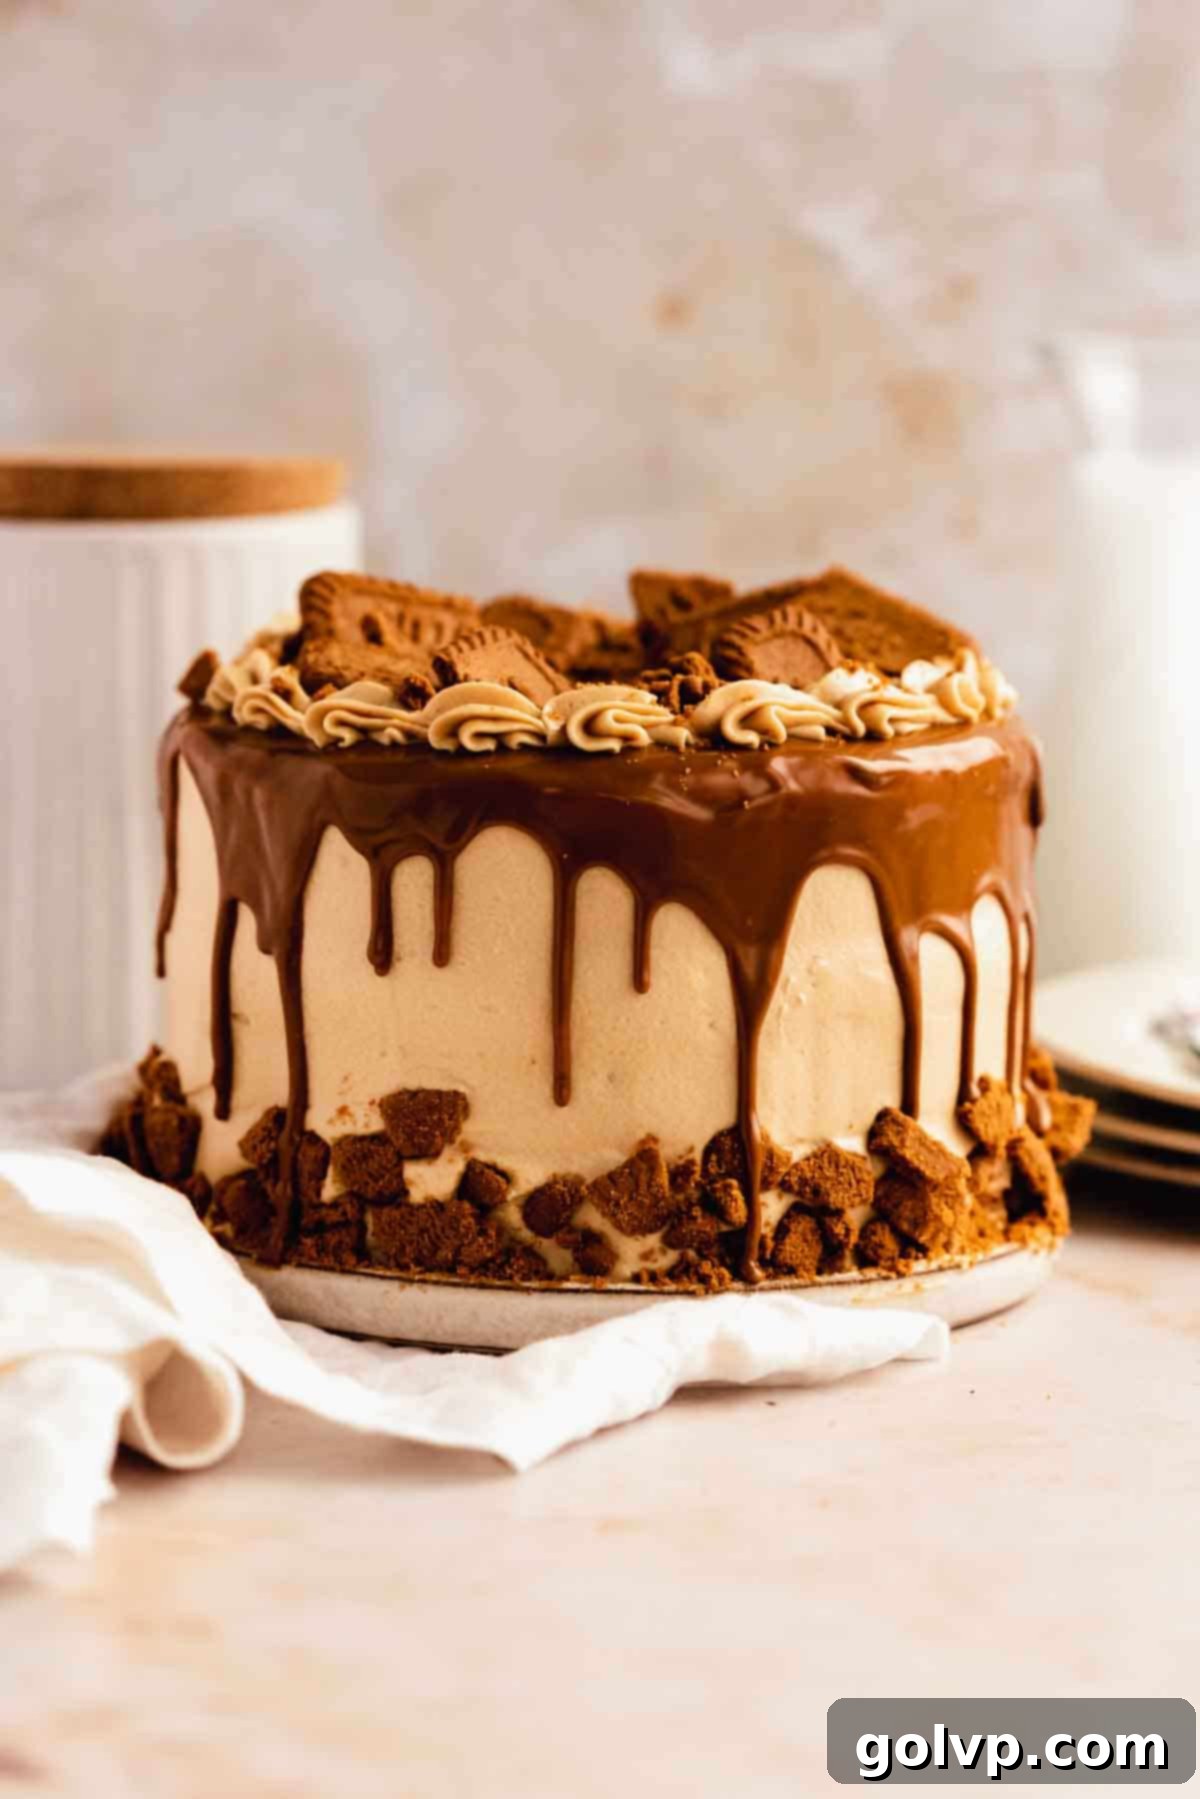
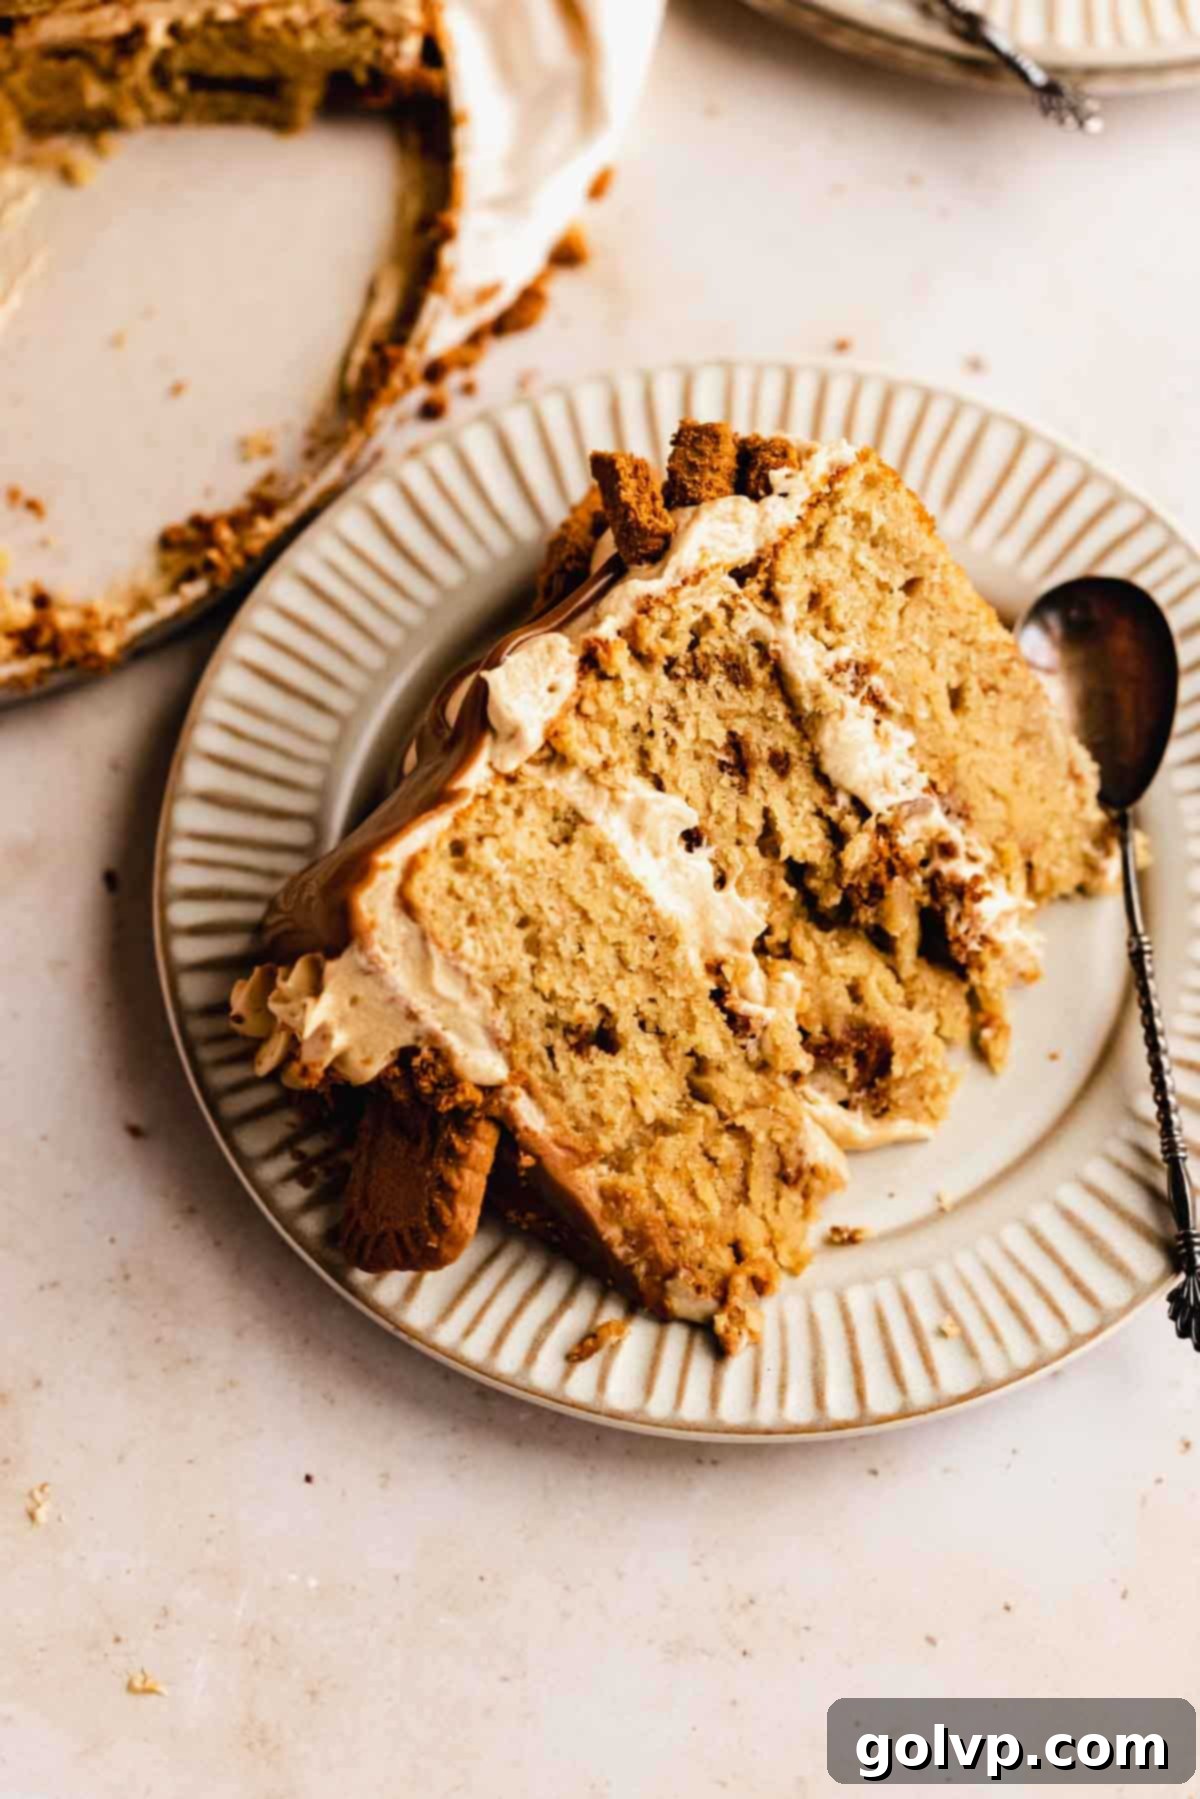
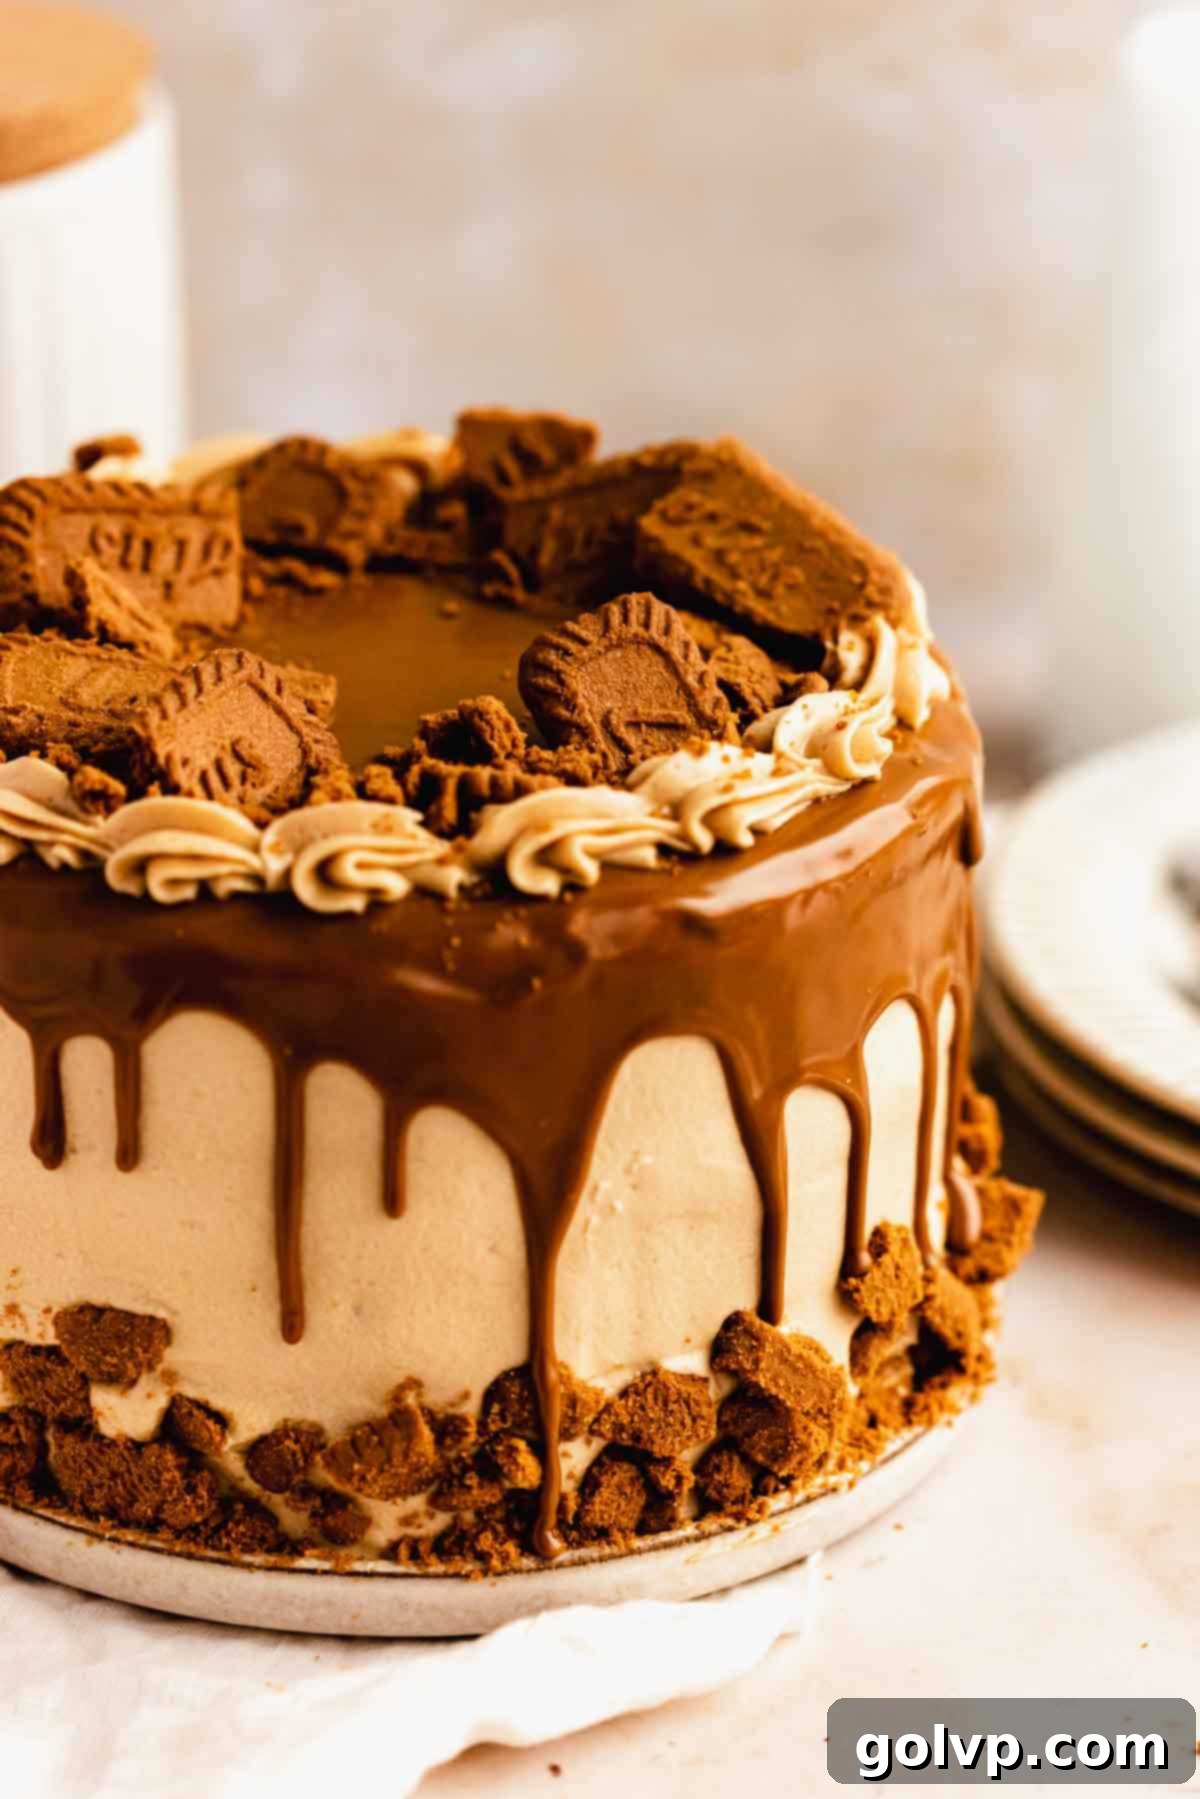
Prepare to be enchanted by this truly irresistible Biscoff cake, a dessert masterpiece featuring unbelievably soft and moist cake layers, generously slathered with a luscious whipped cookie butter cream cheese frosting, and elegantly finished with a smooth Biscoff drip. But the magic doesn’t stop there – every single layer is studded with crunchy crushed Biscoff cookies, ensuring a delightful texture and an explosion of signature caramelized spice flavor in every single bite. This cake isn’t just a treat; it’s a celebration of all things Biscoff, delivering an intense, comforting cookie and cookie butter flavor that will leave you craving more. The frosting, a harmonious blend of light creaminess and rich cookie butter, is so utterly divine it’s impossible not to lick the spoon clean. Its velvety texture and tangy notes perfectly complement the airy, fluffy, and supremely moist cake layers, making this the ultimate Biscoff dessert experience.
[feast_advanced_jump_to]
🍪 Why You’ll Adore This Biscoff Drip Cake Recipe
This Biscoff cake is more than just a dessert; it’s an experience designed to delight your senses with its incredible flavor and texture. Here’s why this recipe will quickly become your new favorite:
- Intense Cookie Butter Flavor: The star of our creamy, dreamy cream cheese frosting is a generous amount of Biscoff cookie butter spread. This infuses every swirl of frosting with that iconic, deeply caramelized, and subtly spiced flavor that Biscoff lovers simply can’t get enough of. It’s the concentrated essence of your favorite cookie, transformed into a luxurious topping.
- Biscoff in Every Layer: We believe that if you’re making a Biscoff cake, every component should sing with Biscoff goodness! That’s why crushed Biscoff cookies are incorporated not only into the cake batter, adding a delicate crunch and enhancing the spiced flavor, but also scattered generously between the cake layers within the frosting. This ensures a delightful surprise and a burst of cookie texture in every forkful.
- Unforgettable Frosting: Prepare yourself for an incredibly light, fluffy, and utterly irresistible cream cheese cookie butter frosting. Its whipped texture makes it airy, while the cream cheese adds a perfect tang that cuts through the sweetness, balancing the rich cookie butter flavor. It’s so good, you’ll be tempted to eat it straight from the bowl – a true testament to its amazing taste and texture.
- Perfectly Moist Cake Layers: Say goodbye to dry cakes! Our cake layers are a marvel of softness and moisture, designed to remain tender for days. This secret lies in the clever combination of both sour cream, which adds tenderness and a slight tang, and a blend of both butter and vegetable oil. The butter provides that rich, classic cake flavor, while the oil ensures an unparalleled moistness that keeps the cake succulent without being greasy.
📝 Essential Ingredients for Your Biscoff Masterpiece
To achieve the perfect Biscoff cake, understanding the role of each ingredient is crucial. Here are the key components and why they are essential for your baking success.
For detailed measurements and full instructions, please refer to the recipe card below.
- Biscoff Spread (Cookie Butter): This is the heart of our cake’s flavor. You’ll need a full jar (approximately 14 ounces or 400g) of Biscoff spread to achieve that rich, caramelized taste in both the frosting and the signature drip. Its unique flavor is what sets this cake apart. If true Biscoff spread is unavailable, speculoos cookie butter spread can be used as an alternative, though Biscoff’s distinct caramelized notes are preferred for the authentic experience.
- Biscoff Cookies: To ensure that wonderful crunch and concentrated cookie flavor throughout the cake, we use original Biscoff cookies. You’ll need about 38 cookies in total, which equates to roughly one and a half regular-sized 250g packs. These are crushed and incorporated into the cake batter and sprinkled between the layers for an extra textural dimension.
- Eggs: This recipe calls for seven large eggs, a seemingly generous amount that is key to creating an exceptionally light, fluffy, and tender cake sponge. Eggs provide structure, moisture, and richness, contributing significantly to the cake’s delicate crumb. Ensure they are at room temperature for optimal emulsification with other ingredients.
- Sour Cream: A true game-changer for cake texture, sour cream is vital for keeping our cake layers incredibly moist, tender, and flavorful for several days. Its acidity also helps activate the baking powder, contributing to a good lift and a beautifully even crumb. Like the eggs, ensure it’s at room temperature.
- Butter & Vegetable Oil: The combination of these two fats is a secret to cake perfection. Butter imparts a rich, deep, buttery flavor that is simply irreplaceable, contributing to a more luxurious taste. Vegetable oil, being a liquid at room temperature, ensures the cake stays wonderfully moist and soft, preventing it from drying out quickly. Together, they create layers that are both flavorful and exceptionally tender, a technique also used in our chai cake and cinnamon swirl bundt cake.
- Cream Cheese: For the ultimate thick and stable cream cheese frosting, it’s imperative to use full-fat, brick-style cream cheese. Lower-fat versions contain too much water, which can result in a runny, gloopy frosting that won’t hold its shape. Its tangy profile perfectly balances the sweetness of the Biscoff spread.
- Heavy Whipping Cream: This ingredient is crucial for achieving that light, airy, and stable whipped frosting consistency. Opt for heavy cream with at least 32% milk fat (preferably 35-36%) to ensure it whips up properly and creates a thick, creamy frosting that pipes beautifully and holds its form.
- All-Purpose Flour: Accuracy in flour measurement is paramount for baking success. We highly recommend weighing your flour with a kitchen scale for the most consistent results. If a scale isn’t available, properly measure by stirring the flour in its bag to aerate it, then gently spoon it into a dry measuring cup. Level off the excess with the flat edge of a knife, avoiding packing the flour into the cup.
- Sugars (Brown & Granulated): Brown sugar adds deep molasses notes and moisture to the cake, while granulated sugar provides sweetness and contributes to the cake’s tender crumb. This blend ensures a perfectly balanced flavor profile.
- Baking Powder: Our primary leavening agent, ensuring the cake layers rise beautifully and achieve their fluffy texture. Always check that your baking powder is fresh for optimal results (see expert tips below).
- Cinnamon: A touch of ground cinnamon in the cake batter enhances the natural spiced notes of the Biscoff cookies, adding an extra layer of warmth and complexity to the overall flavor.
- Milk: Adds essential liquid to the cake batter, ensuring it comes together smoothly and contributes to the cake’s final moist texture. Use room temperature milk for better emulsification.
If you find yourself with extra cookie butter, don’t let it go to waste! Consider making these delightful cookie butter stuffed cookies or whipping up this super easy Biscoff cheesecake for more Biscoff bliss.
👩🍳 Step-by-Step Guide: Crafting Your Luxurious Lotus Biscoff Cake
Creating this magnificent Biscoff cake is a rewarding process, broken down into two main stages: baking the perfectly moist cake layers and then mastering the art of frosting and assembly. Follow these detailed steps for a truly show-stopping dessert.
Cake Layers: A Foundation of Flavor and Moisture
Preparation is Key: Begin by preheating your oven to 355°F (180°C). Prepare three 8-inch round cake pans by generously greasing them with a pat of cold butter. Then, line the bottom of each pan with a round of parchment paper. This meticulous preparation ensures your cake layers release easily and bake evenly.
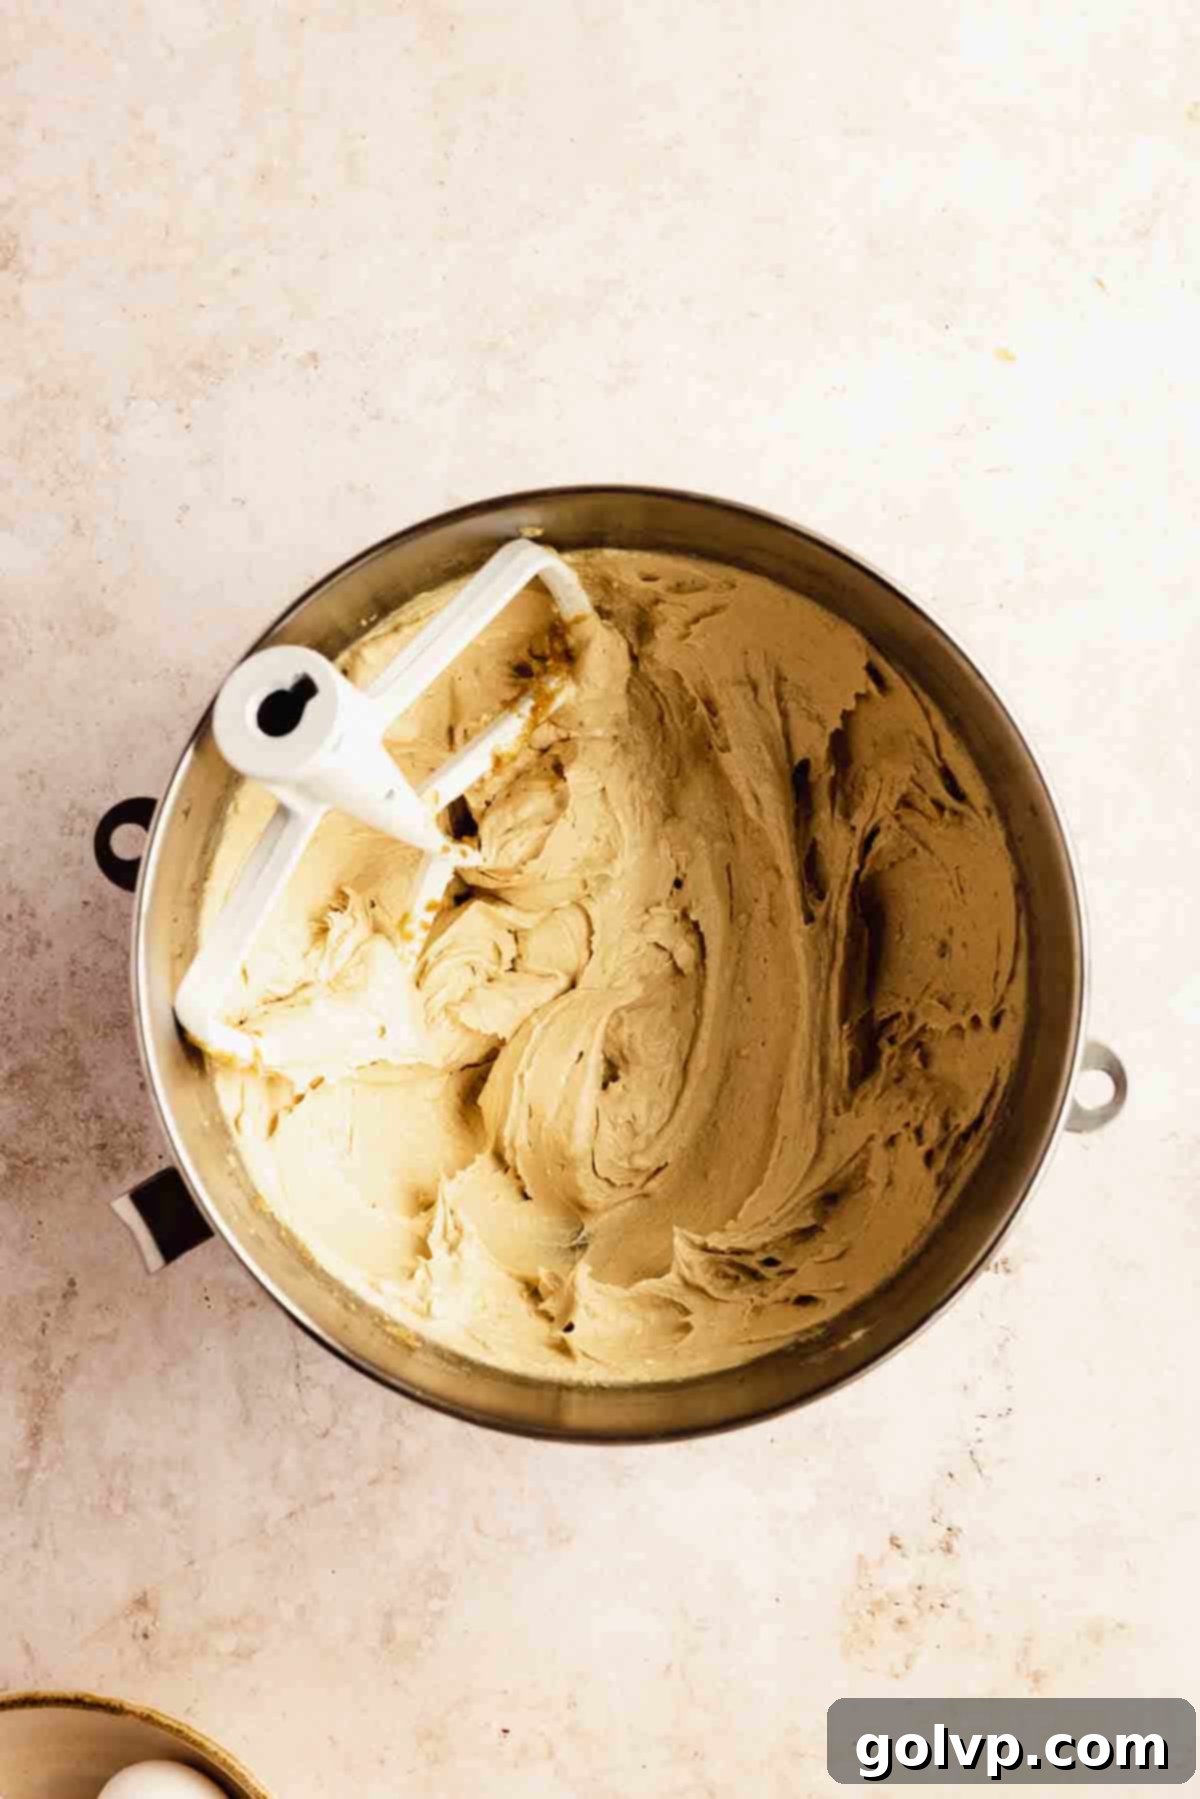
Step 1: Creaming the Fats and Sugars. In the bowl of a stand mixer fitted with a paddle attachment (or a large bowl with an electric hand mixer), combine the softened unsalted butter, vegetable oil, packed brown sugar, granulated sugar, and sea salt. Beat these ingredients together on medium-high speed for 6-8 minutes until the mixture is visibly light in color and incredibly fluffy. This creaming process incorporates air, essential for a tender cake. Remember to pause and scrape down the sides of the bowl halfway through to ensure everything is evenly combined. Next, add the pure vanilla extract. Incorporate the large eggs one by one, beating well after each addition until fully combined. Scrape the bowl again. Finally, add the room-temperature sour cream and beat until well incorporated. Don’t worry if the mixture appears slightly lumpy at this stage; it’s perfectly normal.
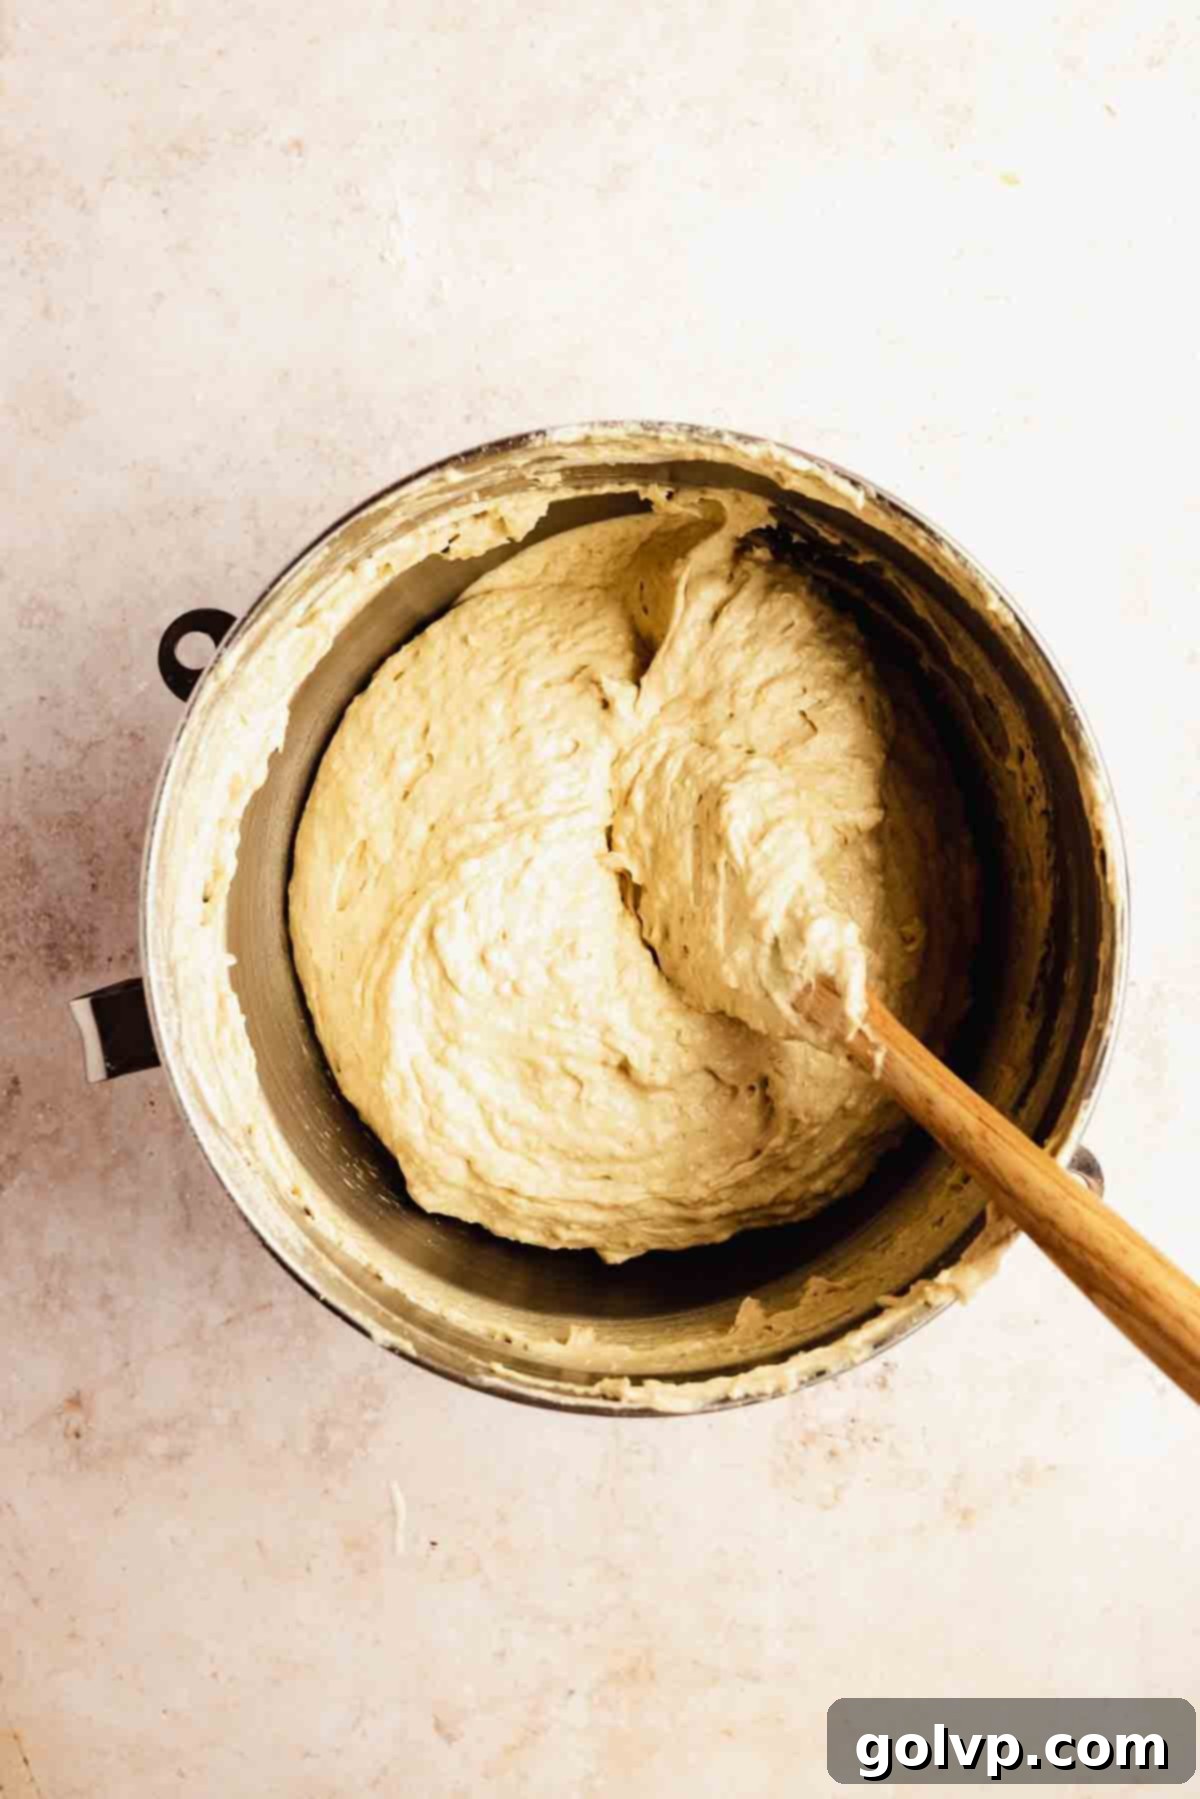
Step 2: Incorporating Dry and Wet Ingredients. Directly into the same bowl, sift together the all-purpose flour, baking powder, and cinnamon. Sifting ensures there are no lumps and helps to aerate the dry ingredients. Gently fold the dry ingredients into the wet mixture using a spatula until they are mostly incorporated, being careful not to overmix. Overmixing develops gluten, which can lead to a tough cake. Pour in the room-temperature milk and add the crushed Biscoff cookies. Continue folding until the batter is smooth and all ingredients are just combined. The crushed cookies should be evenly distributed throughout the batter.
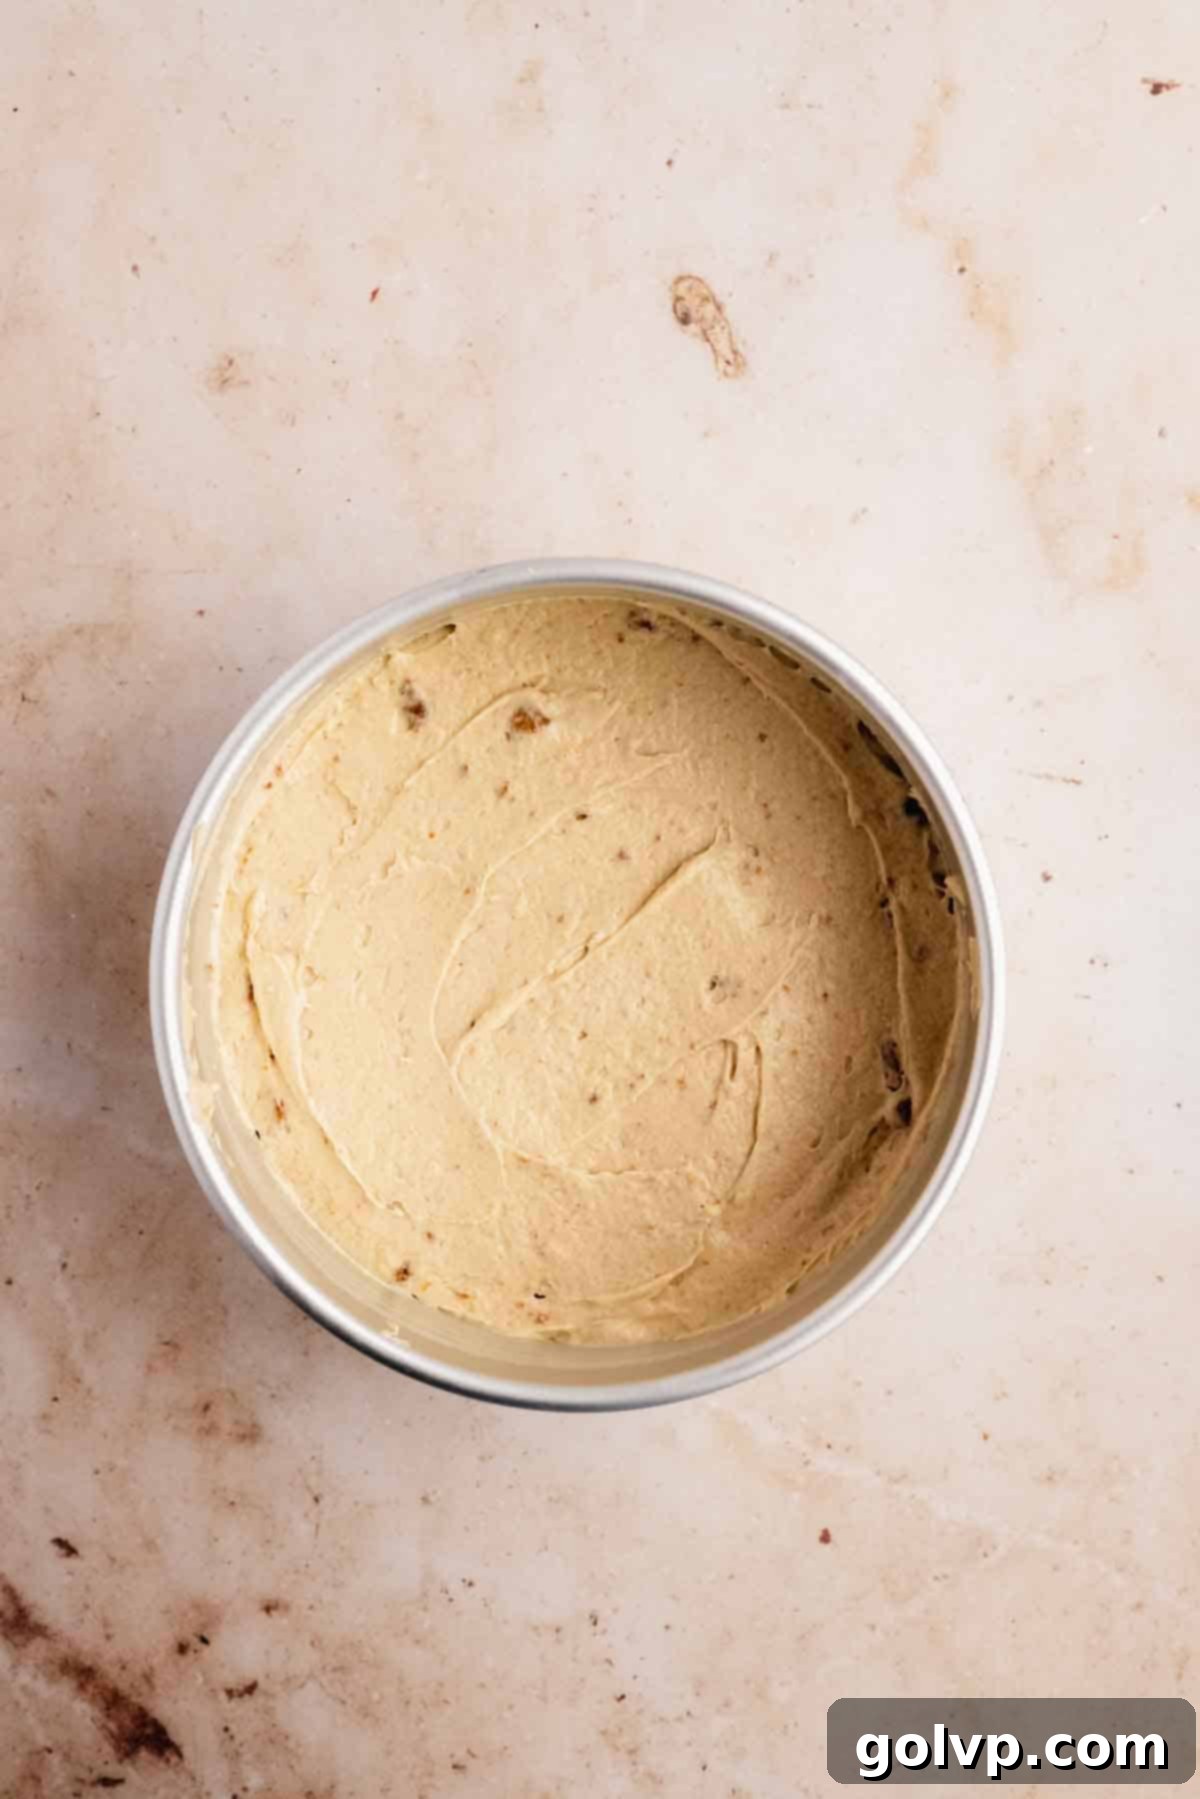
Step 3: Baking the Cake Layers. Divide the prepared cake batter evenly among the three greased and parchment-lined 8-inch cake pans. Use an offset spatula or the back of a spoon to gently smooth the tops of the batter in each pan. Bake for 30-35 minutes, or until a wooden toothpick inserted into the center of a cake layer comes out clean. This indicates that the cakes are fully baked through. Avoid opening the oven door too early, as this can cause the cakes to sink.
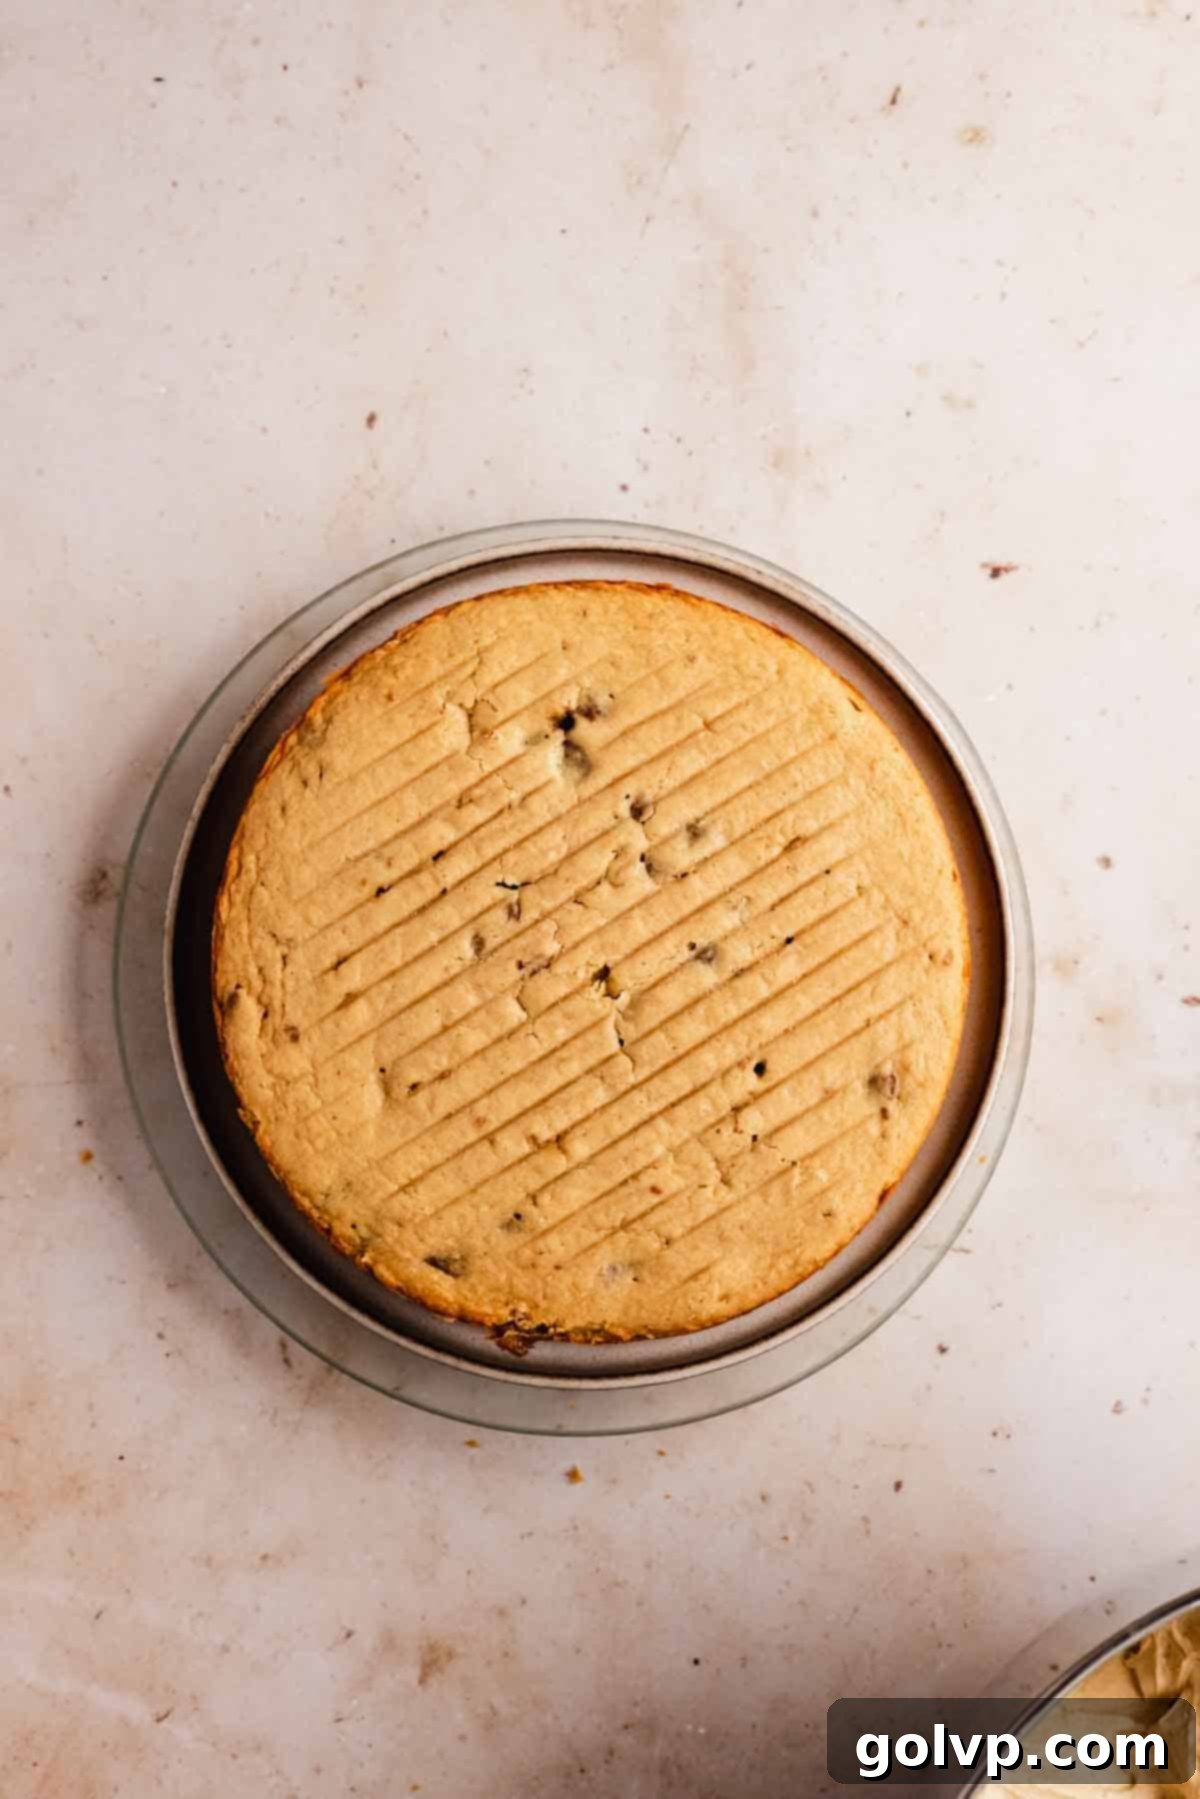
Step 4: Cooling the Cake Layers. Once baked, remove the cake pans from the oven and allow them to cool on a wire rack for precisely 10 minutes. This crucial resting period allows the cakes to set slightly before handling. After 10 minutes, gently run a thin knife around the outer edge of each cake to help release it from the pan. Invert the cake pans onto the cooling rack, carefully remove the parchment paper from the bottoms, and let the cake layers cool completely upside down. Cooling upside down helps to flatten the tops, making assembly much easier.
Frosting and Assembly: Bringing Your Biscoff Cake to Life
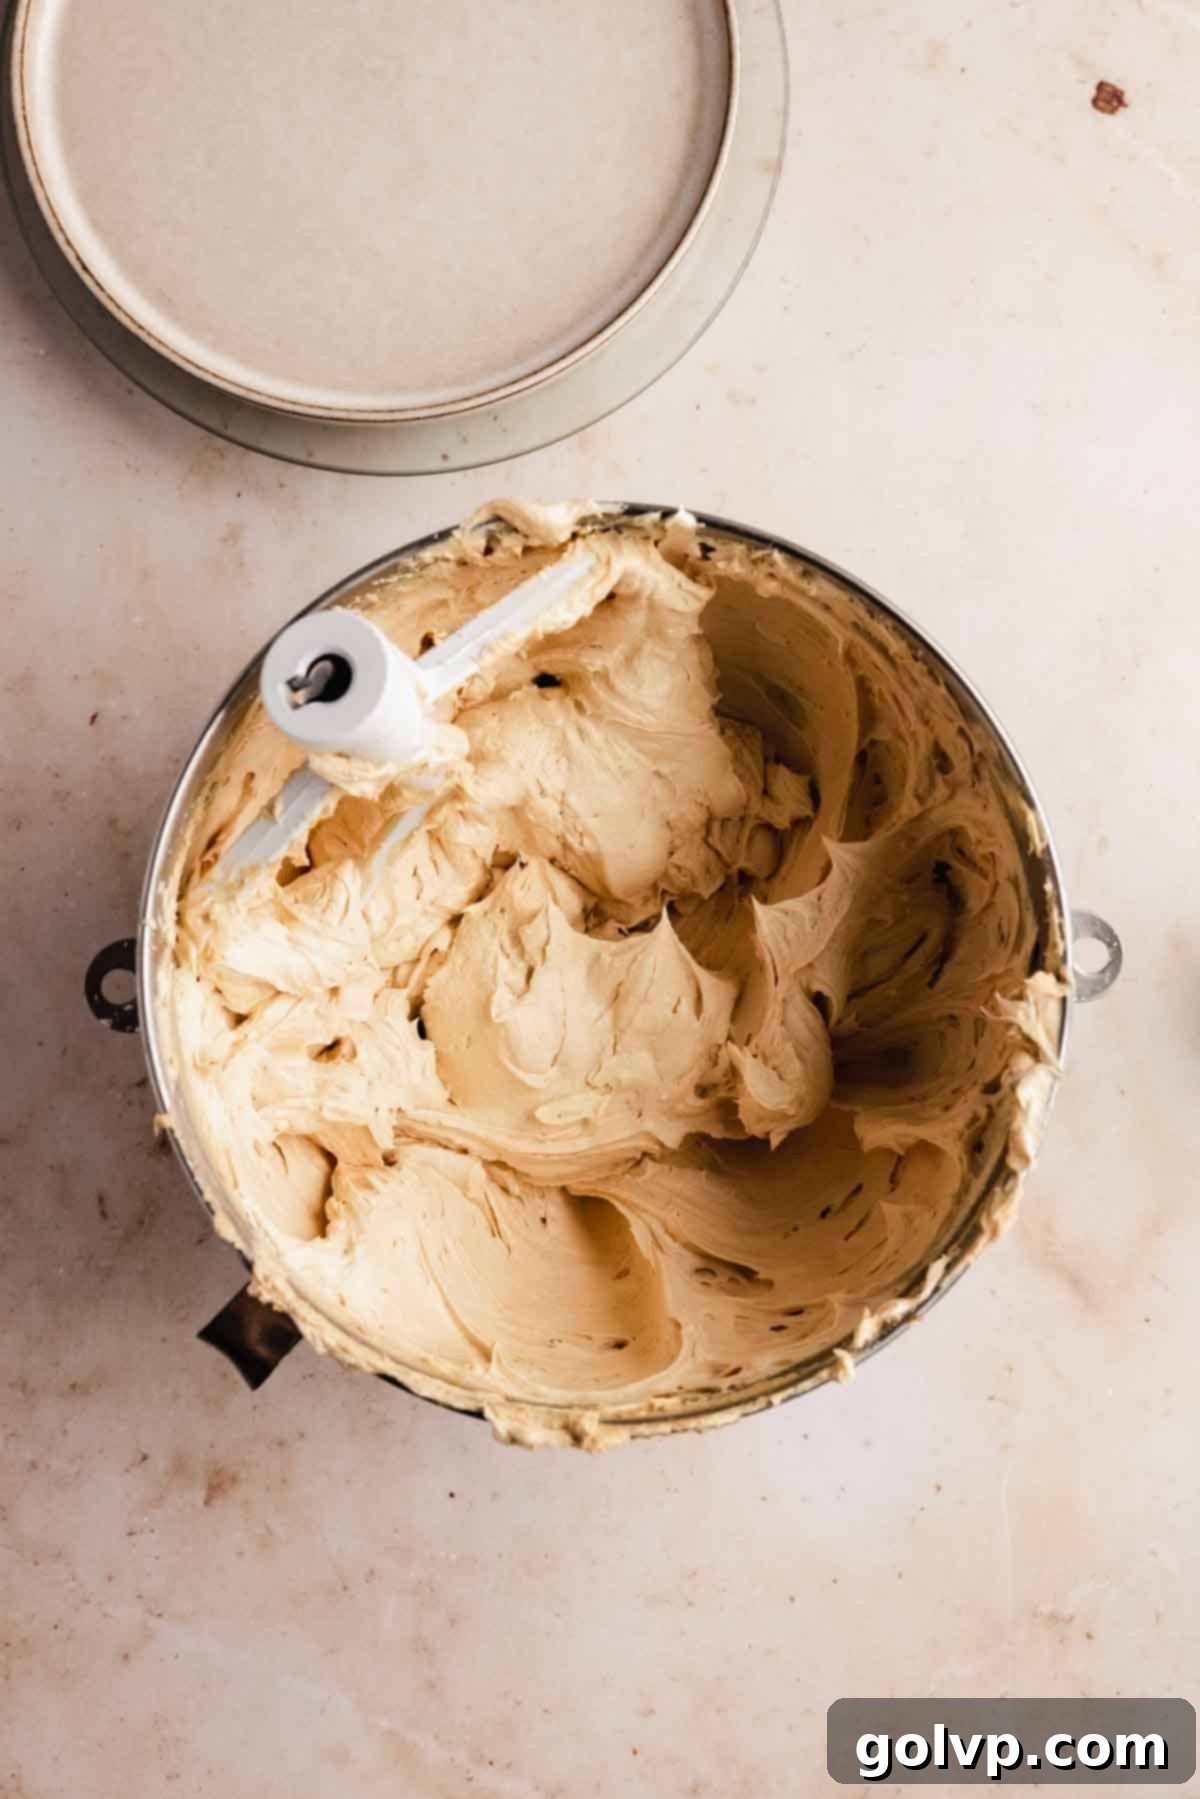
Step 1: Preparing the Biscoff Cookie Butter Cream Cheese Frosting. In a stand mixer with the paddle attachment, beat the slightly softened unsalted butter (ideally, at room temperature for just 30 minutes) and 3 cups of powdered sugar. Beat on medium-high speed for 6-8 minutes until the mixture is very light in color and fluffy. This extended beating time is key for a truly airy frosting. Stop to scrape down the sides of the bowl frequently. Add the room-temperature Biscoff spread and beat for another 2 minutes until it’s fully combined and the mixture is light and well-aerated. Now, with the mixer running on low, add the cream cheese one small piece at a time. The cream cheese should be softened for only about 10 minutes at room temperature – it needs to still be slightly cool to prevent a gloopy frosting. Beat until the frosting is fluffy, then scrape down the bowl and beat again to ensure uniformity. If you prefer a sweeter frosting, incorporate the remaining cup of powdered sugar now. Finally, add the cold heavy whipping cream, one tablespoon at a time, until the frosting reaches your desired consistency – light, fluffy, and holds its shape beautifully. You’ll likely add between 3 to 6 tablespoons, depending on the thickness of your cream cheese and desired fluffiness.
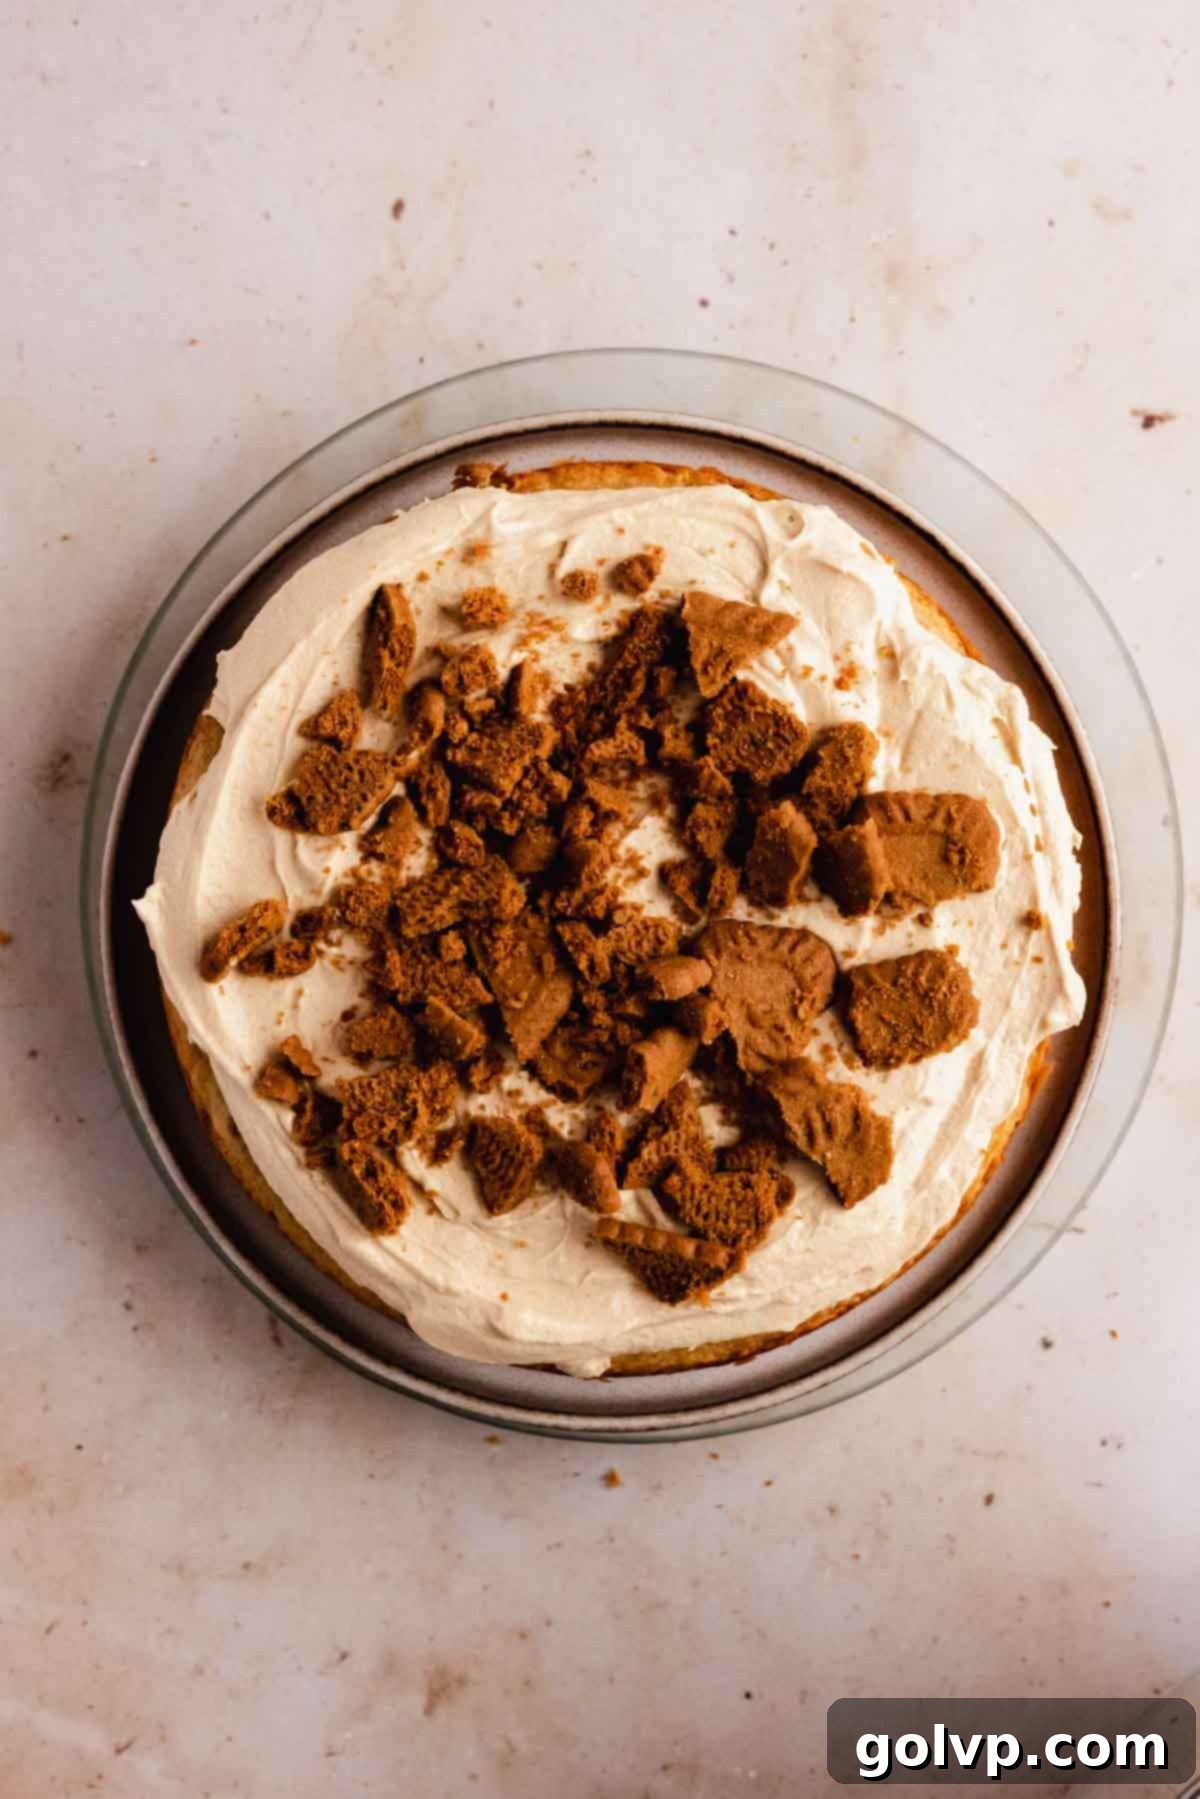
Step 2: Layering the Cake. To begin assembly, place a small dollop of frosting in the center of your cake plate or cake stand. This acts as an anchor to prevent the cake from sliding. Carefully place the first cooled cake layer on top, right side up. Spread a generous layer of the prepared Biscoff frosting evenly over the top of this layer, extending almost to the edges. Crumble 5 Biscoff cookies over the frosting for an added crunch. Repeat this process with the second cake layer, adding frosting and another 5 crumbled cookies. For the final layer, place the third cake layer on top upside down. This provides a perfectly flat top surface for a beautifully smooth finish.
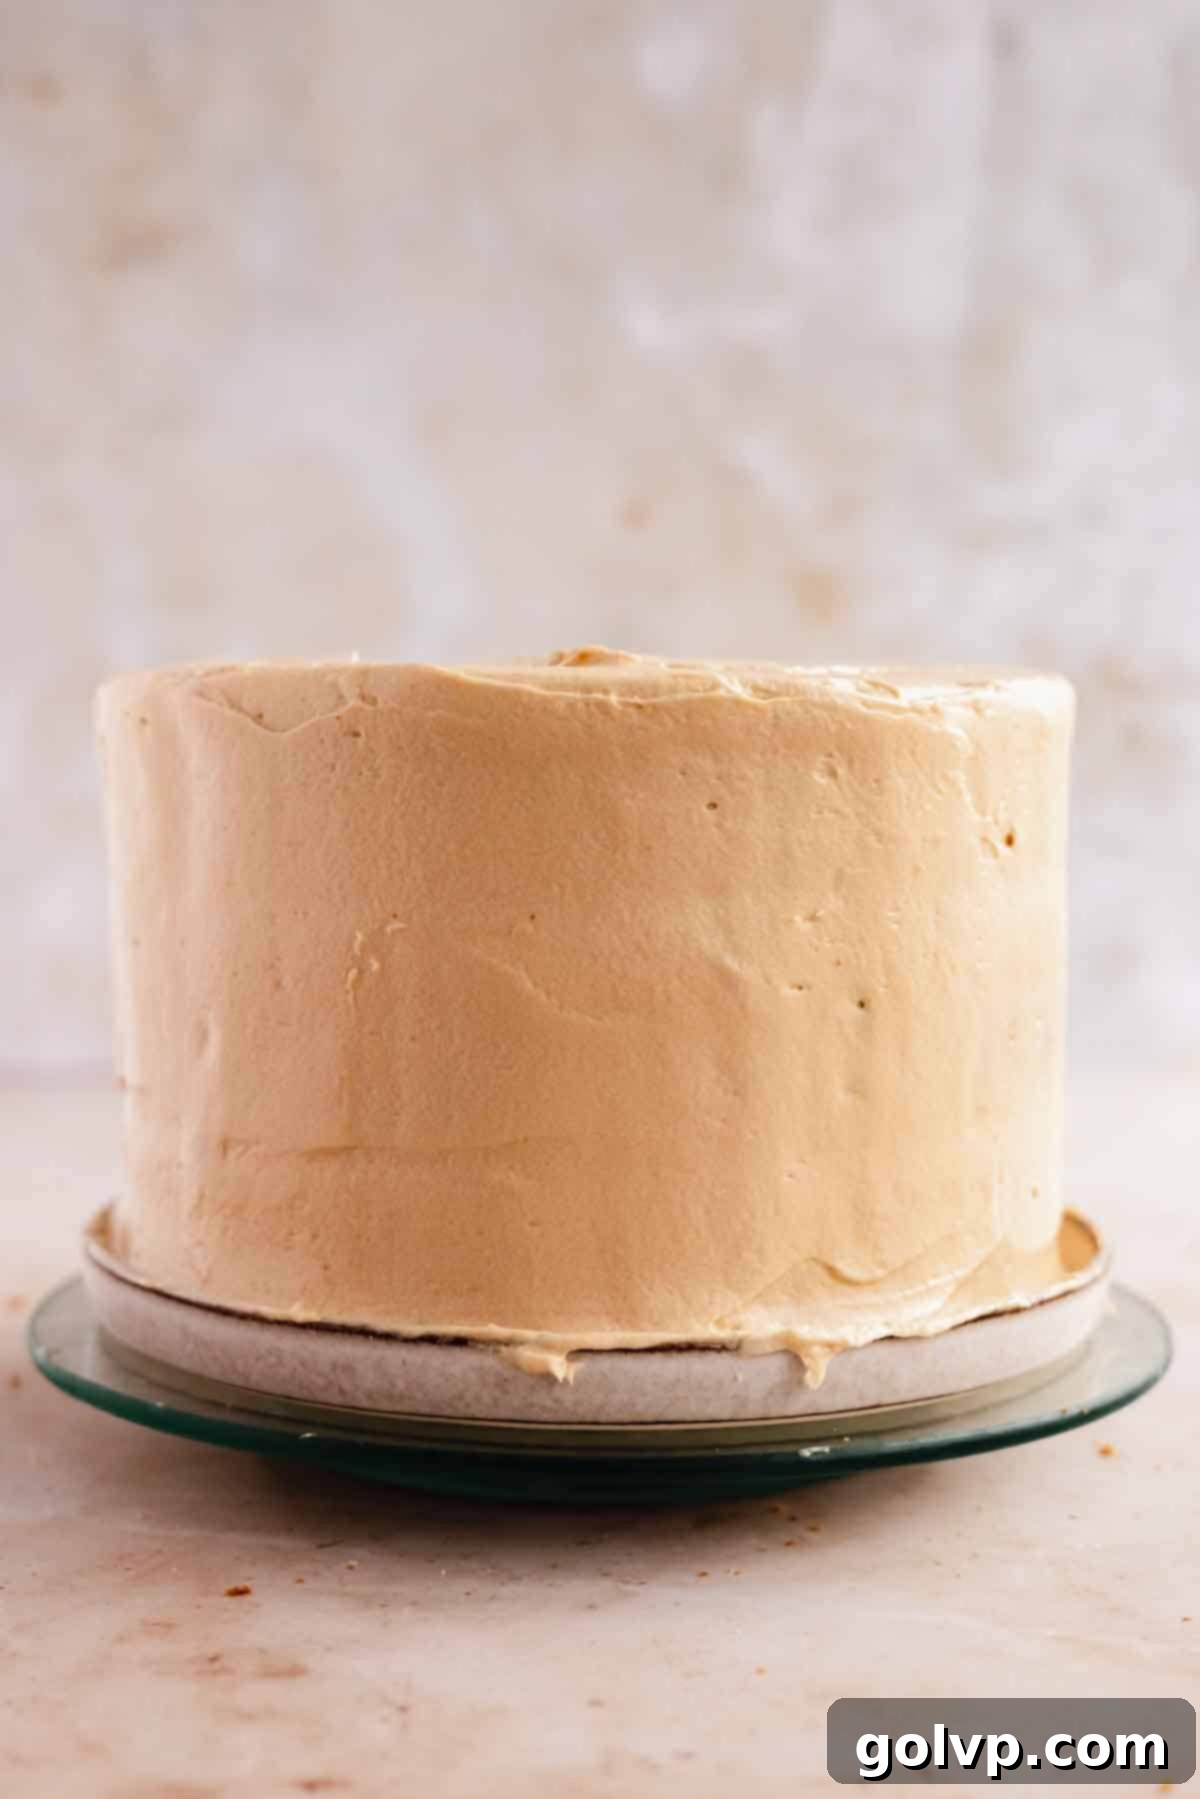
Step 3: Crumb Coat and Final Frosting. Apply a thin layer of the remaining frosting all over the outside of the cake, including the top and sides. This is your “crumb coat,” which traps any loose crumbs and creates a smooth base. Chill the cake in the freezer for about 10-15 minutes to set the crumb coat. Once firm, apply the remaining frosting to the entire exterior of the Lotus Biscoff cake, using a long offset spatula or bench scraper to smooth the sides and top to your desired finish. For a decorative touch, gently press 8 crumbled Biscoff cookies onto the bottom half of the cake’s sides, creating a lovely cookie crust. Return the cake to the freezer for another 10 minutes to firm up the frosting before the drip.
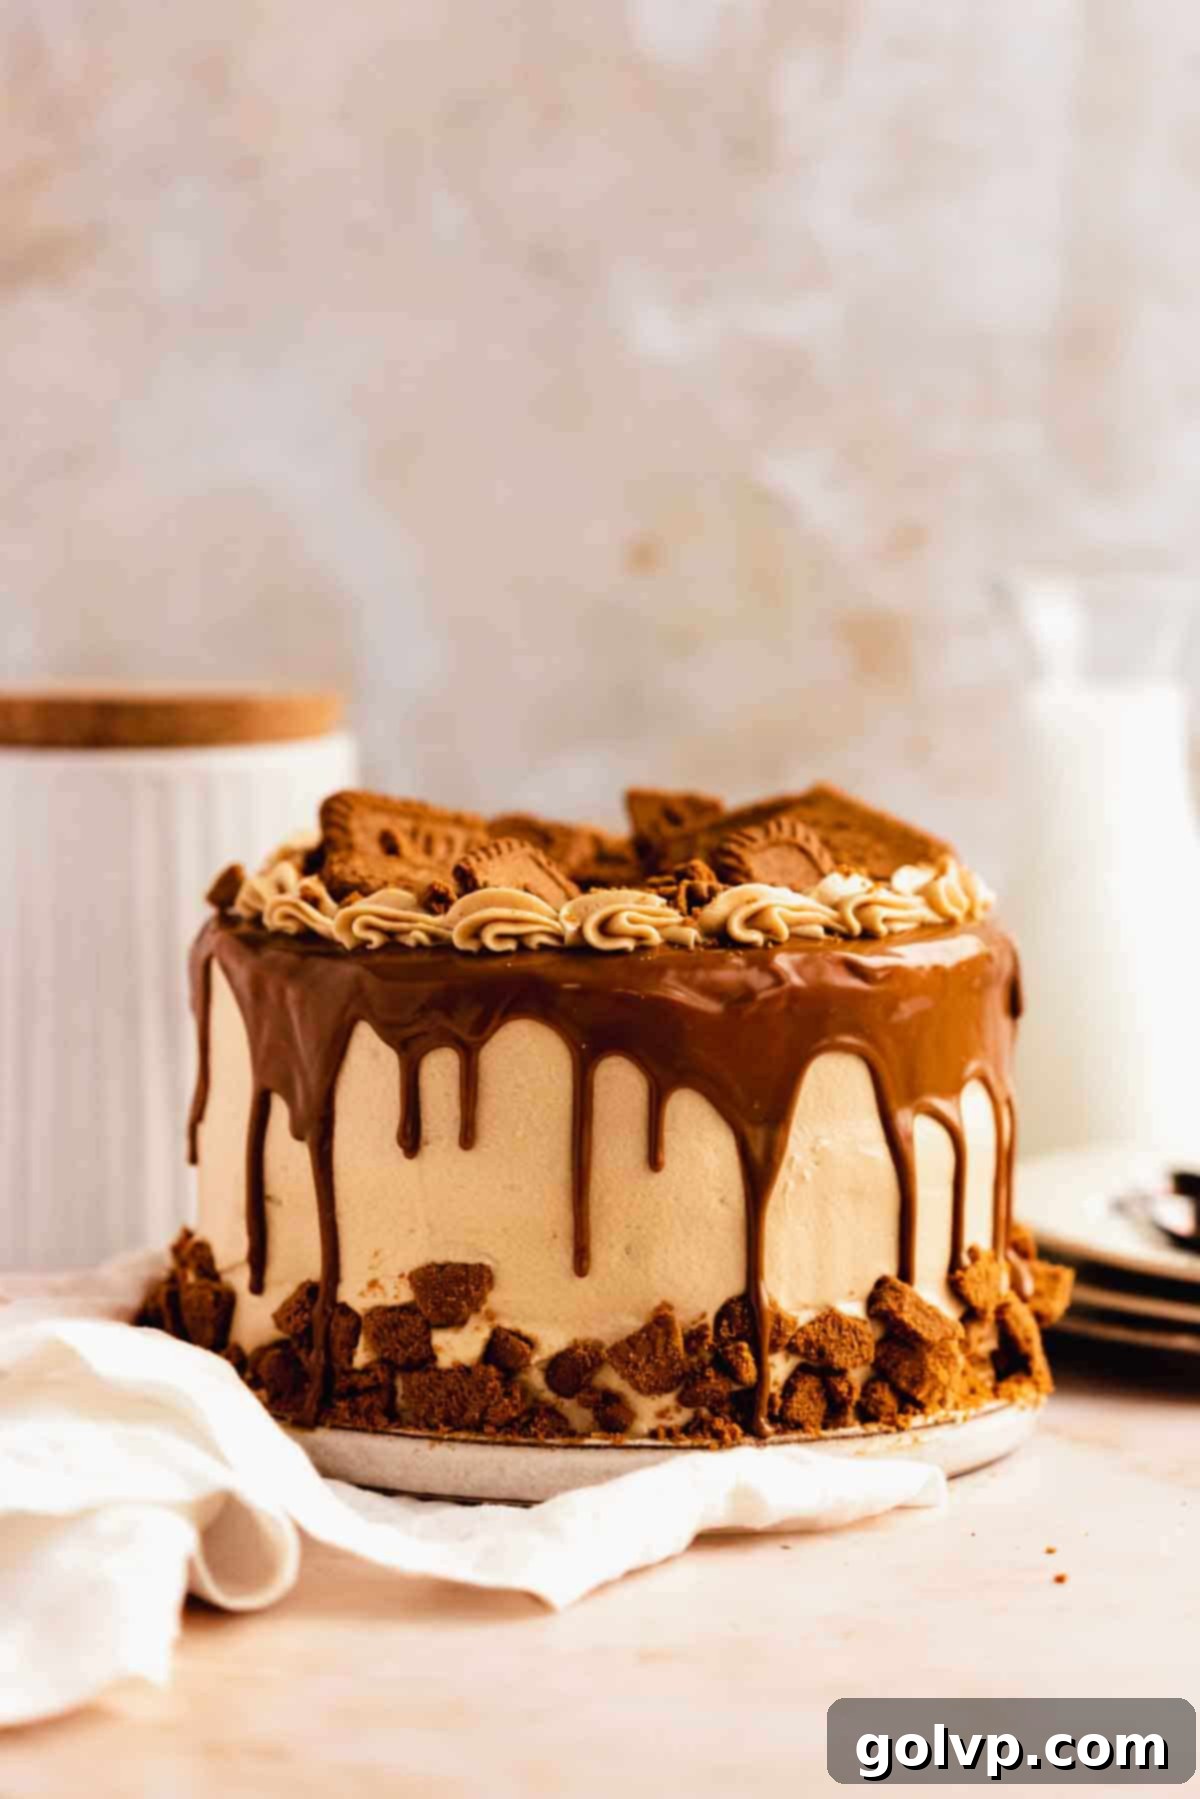
Step 4: The Signature Biscoff Drip and Final Touches. Carefully pour the melted and cooled Biscoff spread over the top of the chilled cake. Use an offset spatula or the back of a spoon to gently push the Biscoff spread off the edges, creating beautiful, controlled drips down the sides of the cake. Smooth the top surface of the cake with the remaining melted Biscoff spread. Chill the cake once more in the freezer for about 10 minutes to allow the drip to set completely. For a final flourish, pipe any leftover frosting decoratively around the top edge of the cake using a star tip, and then artfully arrange the remaining 8 crumbled Biscoff cookies on top. Your stunning Biscoff cake is now ready to be sliced and served! Enjoy the fruits of your labor.
✔️ Expert Baking Tips for a Flawless Biscoff Cake
Achieving a bakery-quality Biscoff cake at home is entirely possible with these essential expert tips:
- Ensure Room Temperature Batter Ingredients: This is perhaps the most critical tip for a truly superior cake. Ingredients like butter, eggs, sour cream, and milk should all be at room temperature. This allows them to emulsify properly, creating a smooth, homogenous batter that traps air more effectively. The result is an even crumb, a beautifully tender texture, and a cake that stays moist for days. Plan ahead and take out all these ingredients 20-30 minutes before you begin mixing.
- Never Overmix the Batter After Adding Flour: Once the flour is introduced, mixing should be kept to an absolute minimum. Overmixing develops gluten in the flour, which can lead to a dense, tough, and chewy cake rather than the desired soft and fluffy texture. Stop folding as soon as you no longer see any dry streaks of flour. A few small lumps are preferable to an overmixed batter.
- Verify Your Baking Powder’s Freshness: Baking powder is your cake’s primary leavening agent. If it’s expired or inactive, your cake won’t rise properly, resulting in a flat, dense, and unappetizing result. To test its freshness, place a teaspoon of baking powder in a small bowl and pour a quarter cup of boiling water over it. If it fizzes vigorously, it’s still good to use. If there’s little to no reaction, it’s time to replace it.
- Serve the Cake at Room Temperature: While storing the cake in the refrigerator is essential for freshness and structural integrity, serving it directly from the fridge can make the butter in both the cake layers and frosting quite firm. For the best flavor and texture experience, allow the cake to sit at room temperature for at least an hour before slicing and serving. This gives the butter a chance to soften, resulting in a tenderer cake and a wonderfully creamy frosting.
- Achieve Clean Slices by Chilling: For presentation-perfect slices, it’s best to cut the cake while it’s still slightly chilled. The firm frosting will hold its shape beautifully. For extra clean cuts, use a sharp, thin knife and wipe the blade clean with a damp cloth after each slice. This prevents frosting from transferring and smudging subsequent pieces.
- Accurate Flour Measurement: While mentioned in ingredients, it bears repeating. Weighing your flour (570g for 4 ¾ cups) is the most accurate method. If using measuring cups, spoon the flour lightly into the cup and level with a straight edge to avoid compacting it, which can add too much flour and lead to a dry cake.
🥄 Make Ahead & Storage Instructions for Your Biscoff Cake
This exquisite Lotus Biscoff cake is truly at its best when served at room temperature. This allows the butter in both the cake layers and the frosting to soften beautifully, enhancing its tender texture and rich flavors. For any delightful leftovers, ensure they are stored in an airtight container in the refrigerator, where they will remain fresh and delicious for up to 4 days. If you wish to enjoy this cake even further into the future, it can be frozen for up to 2 months.
Planning ahead for a special occasion? You can easily bake the cake layers a day in advance of your decorating schedule. Once completely cooled, wrap each layer tightly in plastic wrap or cover them well to prevent them from drying out, and store them at room temperature. This significantly streamlines your baking process on the day of assembly.
For ultimate convenience, the entire cake can be fully assembled and decorated the day before you plan to serve it. Store the finished cake in the refrigerator. On the day of serving, remember to take the cake out of the fridge at least one hour before you plan to slice it. This allows the butter in the frosting and cake layers to return to a softer, more yielding consistency, ensuring the most enjoyable eating experience.
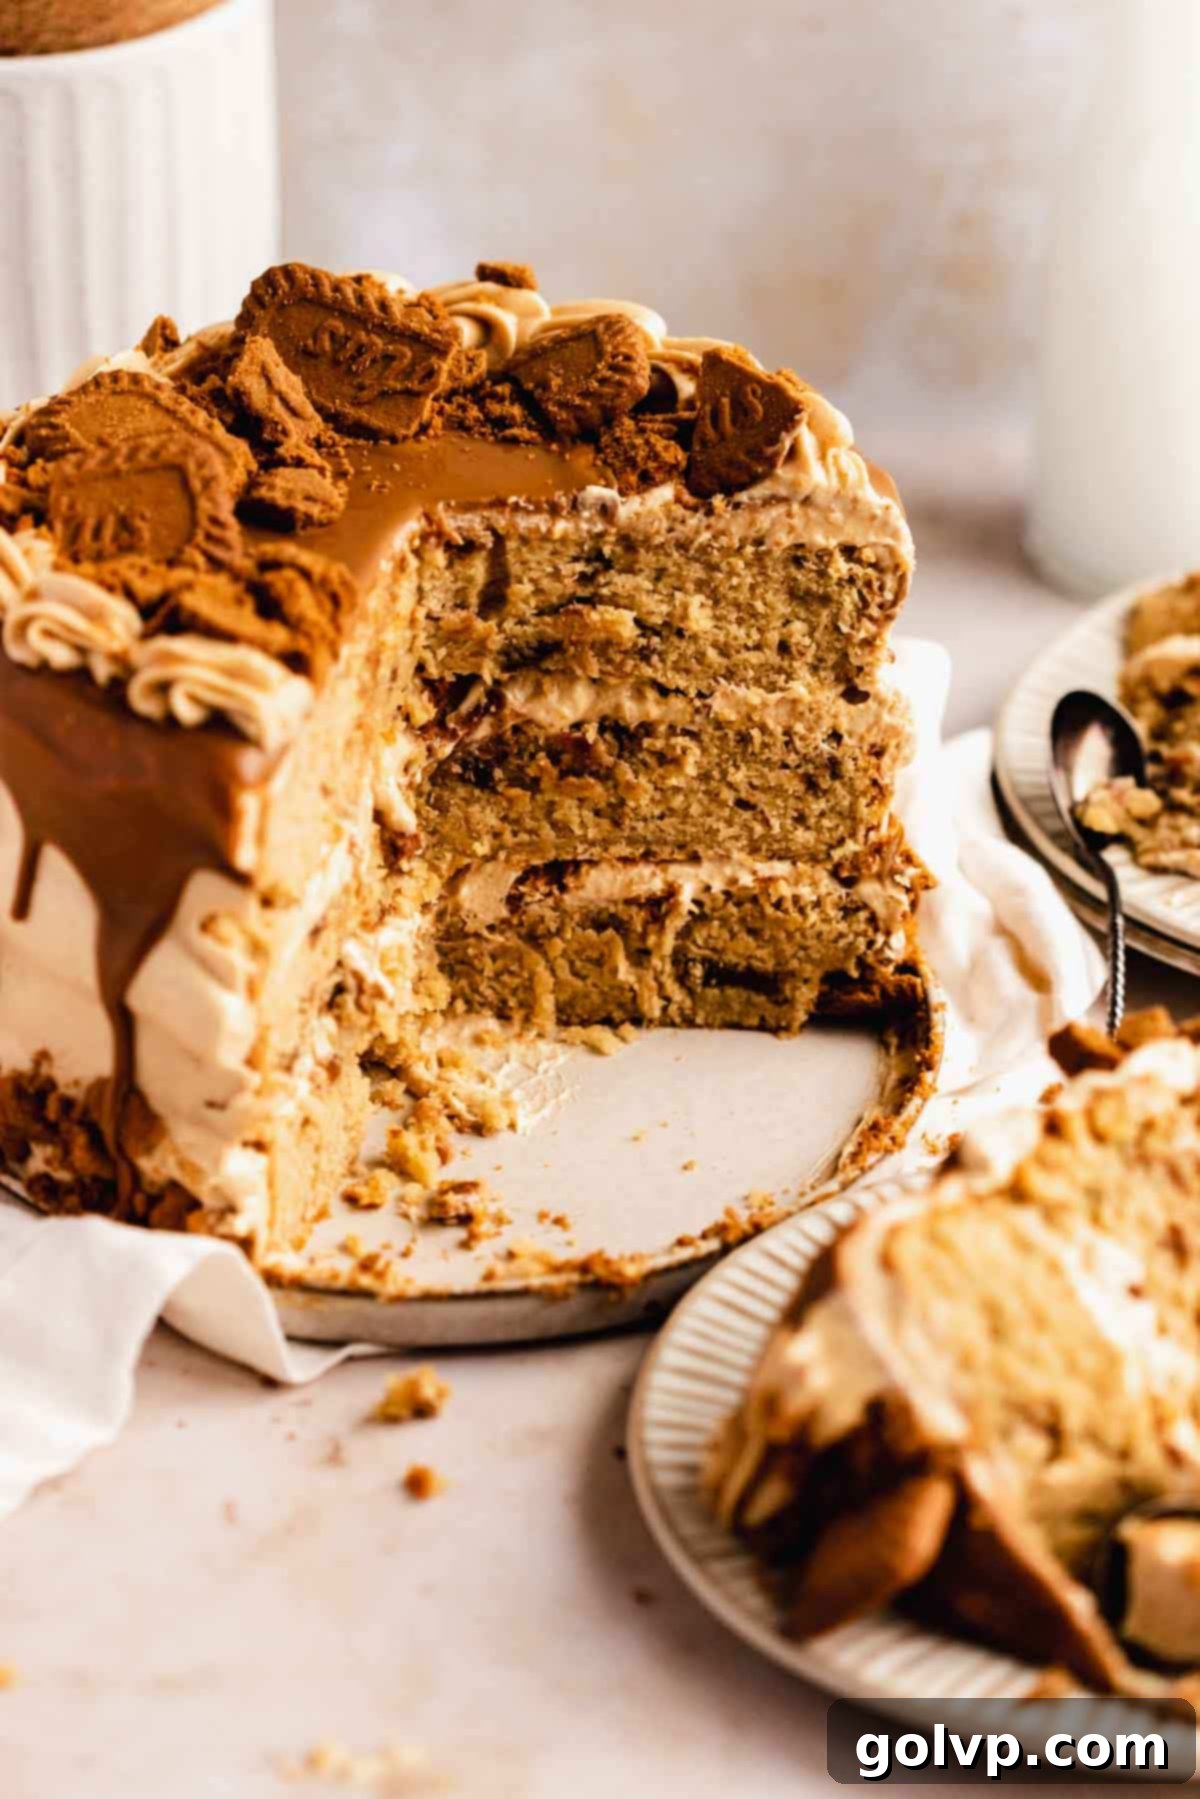
❔ The Perfect Harmony: Why Oil AND Butter Create the Ultimate Cake Layers
The secret to our cake layers being incredibly soft and moist without ever feeling dense or heavy lies in a carefully balanced blend of two essential fats: butter and vegetable oil. You truly need both to achieve this superior texture and flavor profile.
Butter is indispensable for its rich, complex flavor and luxurious mouthfeel. It brings that classic, deeply satisfying “bakery taste” to the cake, adding a depth that no other fat can replicate. However, cakes made solely with butter can sometimes become dry or crumbly, especially when chilled, as butter solidifies when cold.
This is where vegetable oil comes into play. Unlike butter, oil remains liquid at room temperature and even when cold, meaning it contributes unparalleled moisture to the cake. It keeps the cake tender, soft, and moist for days, preventing it from drying out prematurely. Cakes made with just oil, however, often lack the nuanced flavor of butter and can sometimes feel a bit oily or greasy.
By using both butter and oil, we achieve the best of both worlds: the rich, aromatic flavor and tender crumb from the butter, combined with the incredible, long-lasting moisture from the oil. This synergistic approach results in cake layers that are perfectly balanced, staying soft, flavorful, and moist for longer. It’s a technique we proudly employ in other beloved recipes, like our incredibly flavorful chai cake with spiced apple filling and our comforting cinnamon swirl bundt cake, demonstrating its consistent success in creating truly exceptional baked goods.
🧁 Crafting the Dreamy Biscoff Cookie Butter Cream Cheese Frosting
Get ready to fall in love with this Biscoff cookie butter cream cheese frosting – we promise, it’s virtually impossible to resist! It boasts a thick, irresistibly creamy texture, a delightful tangy note from the cream cheese, and an intense, authentic cookie butter flavor that will have you reaching for just one more spoonful. This frosting isn’t just a topping; it’s a star in its own right, perfectly complementing the moist cake layers.
The secret to achieving a cream cheese frosting that is both thick and stable enough to hold its shape beautifully lies in the temperature of your ingredients, particularly the butter. You want the butter to be barely softened – typically, about 10 minutes at room temperature is all it needs. It should still feel cool to the touch and firm enough to leave a slight indentation when pressed, but not completely soft or melted. Beating this barely softened butter with powdered sugar for an extended period (6-8 minutes) incorporates a lot of air, making the frosting light and fluffy.
Once your butter and sugar mixture is light and aerated, it’s time to introduce the cream cheese. This is another crucial step for preventing a soupy, gloopy frosting. Add the full-fat, brick-style cream cheese in small chunks, with the mixer running. The cream cheese should also be slightly firm and cool, not overly softened. This helps it emulsify properly into the butter mixture without breaking down and releasing excess water. Beat until the frosting is light, fluffy, and smooth, scraping down the bowl as needed.
Finally, to achieve that ultimate light and airy consistency without sacrificing thickness, we incorporate cold heavy whipping cream. It’s essential to use cream with at least 32% milk fat (preferably 35% or 36%) for optimal whipping and stability. Add the whipping cream one tablespoon at a time, beating just until the frosting loosens up to your preferred piping consistency and becomes even fluffier. Be careful not to add too much, as this can make the frosting too thin. Stop once it holds a firm peak when lifted with a spatula. This meticulous process ensures a frosting that is not only packed with flavor but also has the perfect consistency for spreading, piping, and creating beautiful cake designs.
💧 Mastering the Art of the Biscoff Drip
Creating that stunning Biscoff drip cascading down the sides of your cake might look fancy, but it’s surprisingly simple to achieve! The key is in preparing the Biscoff spread correctly and applying it at the right temperature.
First, you’ll need to melt your Biscoff cookie butter spread until it reaches a thin, pourable consistency, similar to melted chocolate or caramel sauce. This can be done easily in a microwave: heat it in short 15-20 second intervals, stirring well after each, until smooth. Alternatively, you can use a double boiler method, gently heating the spread in a heatproof bowl set over a saucepan of simmering water, stirring until melted and smooth. The gentle heat helps prevent scorching and ensures an even consistency.
The most crucial step after melting is to let the Biscoff spread cool down significantly to around room temperature. This is vital to prevent the warm drip from melting or disturbing your beautifully frosted cake layers. If the drip is too hot, it will simply melt through your cream cheese frosting, ruining your design. Test its temperature with your finger – it should feel comfortably warm or lukewarm, not hot.
Once cooled to the perfect temperature, carefully pour the melted Biscoff spread over the center of your chilled, frosted cake. For precise drips, use an offset spatula or the back of a spoon to gently guide and push the Biscoff spread off the edges of the cake, controlling where and how long the drips fall. For a more spontaneous look, you can also use a squeeze bottle for finer control. Smooth the remaining melted Biscoff spread evenly across the top of the cake. To set the drip and ensure it stays in place, chill the cake again for another 10-15 minutes in the freezer. This brief chill will solidify the Biscoff drip, creating a professional and visually appealing finish that’s ready to impress!
📖 Recipe FAQs – Your Biscoff Cake Questions Answered
While often used interchangeably and belonging to the same family of spiced shortcrust biscuits, speculoos and Biscoff (specifically Lotus Biscoff) spreads are similar but have subtle differences. Biscoff spread is known for its distinctive deep caramelized flavor and a smooth, creamy texture. Speculoos spreads can sometimes have a lighter, less intense spiced flavor profile and a slightly stickier, more peanut butter-like texture. Both are delicious, but for the true signature taste of this recipe, Biscoff spread is recommended.
Yes, you absolutely can use speculoos cookie butter as a substitute for Biscoff spread in this recipe. Both varieties are delicious and will yield a fantastic cake. However, as noted above, Biscoff spread typically offers a more pronounced caramelized flavor and a slightly different texture, which many find ideal for this specific cake. If you’re looking for the most authentic and intense Biscoff flavor, stick with Lotus Biscoff spread. If you prefer a milder spiced cookie butter or it’s what’s available, speculoos will still work wonderfully.
Absolutely, adding a layer of pure cookie butter as a filling would elevate this cake to another level of Biscoff indulgence! To do this, after spreading your frosting on a cake layer, you can gently warm some Biscoff spread (just enough to make it easily spreadable, but not hot) and spread a thin, even layer of it on top of the frosting before adding your crushed cookies and the next cake layer. This would create an extra burst of concentrated cookie butter flavor and a delightful textural contrast. Ensure the layer isn’t too thick to maintain the cake’s stability.
Yes, this recipe can be adapted to a sheet cake format! Instead of three 8-inch round pans, you can bake it in a 9-inch by 13-inch baking pan. You will need to adjust the baking time, as a single, larger cake will take longer to bake than individual layers. Start checking for doneness around 40-50 minutes, or until a toothpick inserted into the center comes out clean. Once baked and cooled, simply cover the entire top surface with the creamy Biscoff frosting, sprinkle generously with crushed Biscoff cookies, and drizzle with the melted cookie butter for a delicious and easy sheet cake version.
🎂 Explore More Delectable Biscoff & Drip Cake Recipes
If you’ve fallen in love with the flavors of Biscoff and the beauty of drip cakes, you’ll be thrilled to discover more delightful recipes from our kitchen. Expand your baking repertoire with these irresistible treats:
- Biscoff CheesecakeIndulge in a creamy, crunchy cheesecake bursting with Biscoff cookie butter flavor – surprisingly easy to make!
- Cookie Butter CookiesDiscover soft and chewy bakery-style cookies generously stuffed with a gooey Biscoff cookie butter center.
- Butterscotch Cake with Butterscotch DripTreat yourself to a rich butterscotch cake, complete with luscious drips and elegant chocolate curls.
- Chai Cake with Spiced Apple FillingExperience the cozy flavors of chai spice combined with a delightful gooey apple filling in this unique cake.
Did you make this glorious Biscoff cake recipe? We’d absolutely love to hear about your experience! Please take a moment to rate this recipe and share your thoughts in the comments below. Your feedback helps us grow and inspires other bakers! Don’t forget to share your beautiful creation on Instagram and tag @flouringkitchen. Follow us on Pinterestto save this recipe and discover even more delicious baking ideas.
📖 Recipe
Biscoff Cake
Mary
Pin Recipe
Shop Ingredients
Equipment
-
3 eight inch round cake pans
-
1 offset small spatula
-
1 long spatula
-
1 turntable This makes it much easier to frost the cake and add the drip
-
1 1M Wilton star tip
Ingredients
Layers
- 1 ½ cup unsalted butter softened
- ⅓ cup vegetable oil
- 1 ½ cup brown sugar packed
- ⅓ cup granulated sugar
- ½ teaspoon sea salt
- 1 tablespoon pure vanilla extract
- 7 large eggs room temperature
- ¾ cup sour cream room temperature
- 4 ¾ cup all purpose flour (570g)
- 3 ¾ teaspoon baking powder
- 1 ½ tablespoon cinnamon
- 1 cup milk room temperature
- 12 biscoff cookies crushed
Frosting
- 1 cup unsalted butter slightly softened at room temperature for 30 minutes
- 3-4 cups powdered sugar
- ¾ cup biscoff spread room temperature
- 8 oz cream cheese softened for 10 minutes at room temperature
- 3-6 tablespoons heavy whipping cream cold
Assembly
- ½ cup biscoff spread melted
- 10 biscoff cookies for between layers
- 8 biscoff cookies for around base
- 8 biscoff cookies for top
Shop Ingredients on Jupiter
Instructions
Layers
-
Preheat oven to 180°C (350°F). Grease three 8” round cake pans with a pat of cold butter and line the bottoms with rounds of parchment paper.
-
Combine butter, oil, brown sugar, granulated sugar, and salt in a stand mixer or a large bowl. Beat until light and fluffy. Scrape down the bowl.1 ½ cup unsalted butter, ⅓ cup vegetable oil, 1 ½ cup brown sugar, ⅓ cup granulated sugar, ½ teaspoon sea salt
-
Add vanilla and eggs, one by one. Scrape down the bowl between each egg and beat well to combine. Add sour cream and beat well. It’s ok if it looks lumpy.1 tablespoon pure vanilla extract, 7 large eggs, ¾ cup sour cream
-
Sift flour, baking powder, and cinnamon right into the same bowl. Fold until mostly incorporated. Add milk, crushed biscoff cookies, and fold until smooth.4 ¾ cup all purpose flour, 3 ¾ teaspoon baking powder, 1 ½ tablespoon cinnamon, 1 cup milk, 12 biscoff cookies
-
Divide the batter evenly into the cake pans and smooth. Bake for 30-35 minutes or until a toothpick inserted into the middle comes out clean.
-
Let cool for 10 minutes before flipping the cake pans onto a cooling rack. Run a knife around the outside edge of the cake to help release it if needed. Let cool completely upside down on cooling rack.
Frosting
-
Using a paddle attachment, beat butter and 3 cups powdered sugar until very light in colour for 6-8 minutes, scraping down the sides of the bowl halfway through.1 cup unsalted butter, 3-4 cups powdered sugar
-
Add biscoff spread and beat until well combined and light, about 2 minutes.¾ cup biscoff spread
-
With the mixer running, add cream cheese one small piece at a time into the beaten butter mixture. Beat until light and fluffy, scrape down the bowl, and beat again. Add the last cup of powdered sugar if you want it sweeter.8 oz cream cheese
-
Add whipping cream, 1 tablespoon at a time until the frosting loosens up and becomes even fluffier to the consistency that you prefer. I added about 5 tablespoons.3-6 tablespoons heavy whipping cream
Assembly
-
Melt biscoff spread in a microwave or in a double boiler (as you would chocolate) until it becomes thin – like melted chocolate or caramel sauce. Set aside to cool to room temperature.½ cup biscoff spread
-
Place a dollop of frosting on the cake plate or cake stand. Place the first layer on top, right side up. Spread frosting on top and crumble 5 biscoff cookies over the frosting. Continue with the second cake layer, frosting, and another 5 crumbled cookies. Place the last cake layer on top, upside down.10 biscoff cookies
-
Spread the rest of the frosting all over the outside of the cake, smoothing the sides with a long spatula. Push 8 crumbled cookies onto the side of the cake on the bottom half. Chill the cake in the freezer for 10 minutes.8 biscoff cookies
-
Pour the melted and cooled biscoff spread on top of the cake, pushing it off the edges to make drips with an offset spatula or spoon. Smooth the top. Chill the cake again for 10 minutes to set the drip.
-
Top the cake with piped leftover frosting, and 8 crumbled cookies. Slice and serve!8 biscoff cookies
Notes
Make ahead: You can make the cake layers a day ahead of decorating. Wrap or cover so that they don’t dry and leave at room temperature. The cake can be assembled and decorated the day before serving. Store in the refrigerator and let it come to room temperature for one hour before serving so that the butter in the frosting and cake layers become soft again.
Tips for success:
- Room temperature cake batter ingredients for a soft and even crumb.
- Don’t overmix the batter after adding the flour to prevent a tough cake.
- Check if your baking powder is expired. Expired baking powder won’t give your cake any lift, resulting in a dense cake.
- Serve the cake at room temperature for a soft cake and fluffy frosting.
- Cut the cake while it’s chilled and wipe the knife clean with every cut for extra clean slices
