Ultimate One-Bowl Pumpkin Spice Cake with Luxurious Brown Butter Cream Cheese Frosting
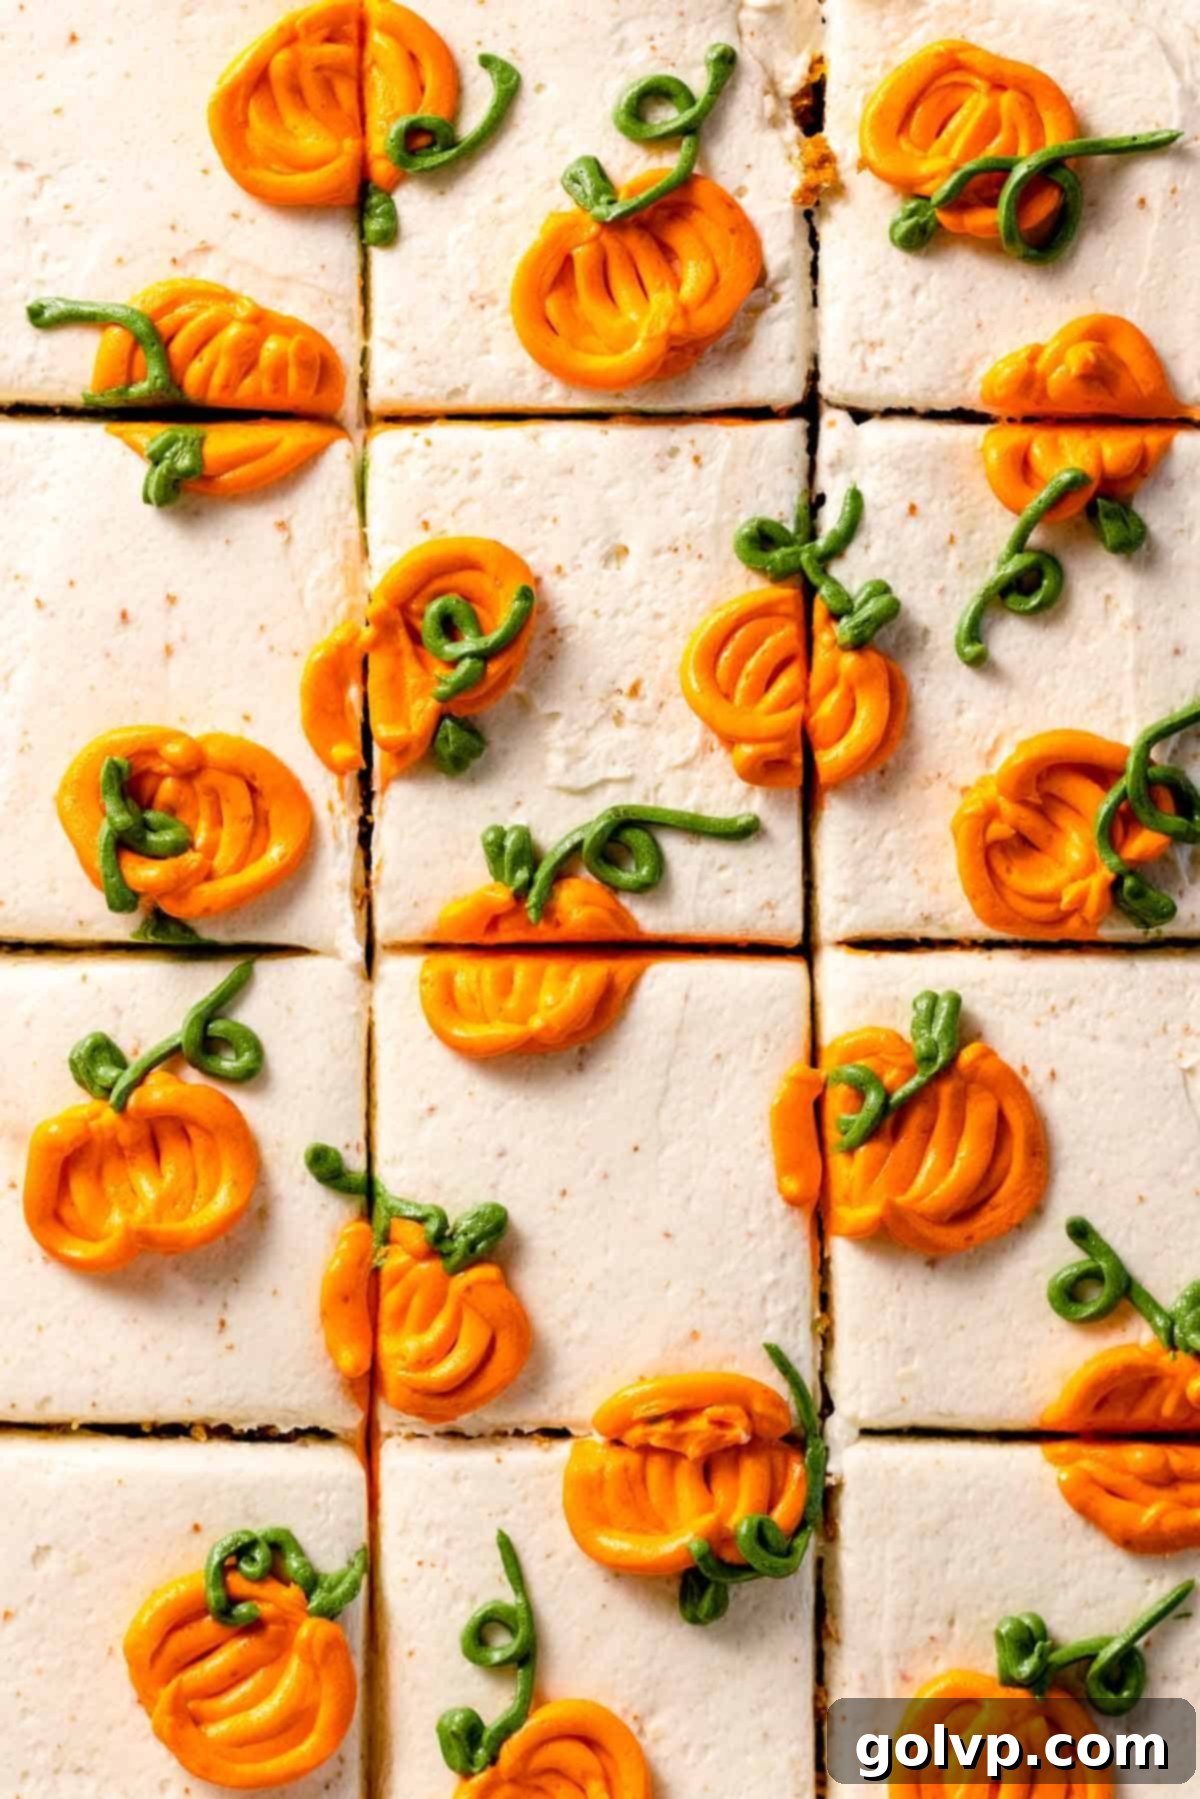
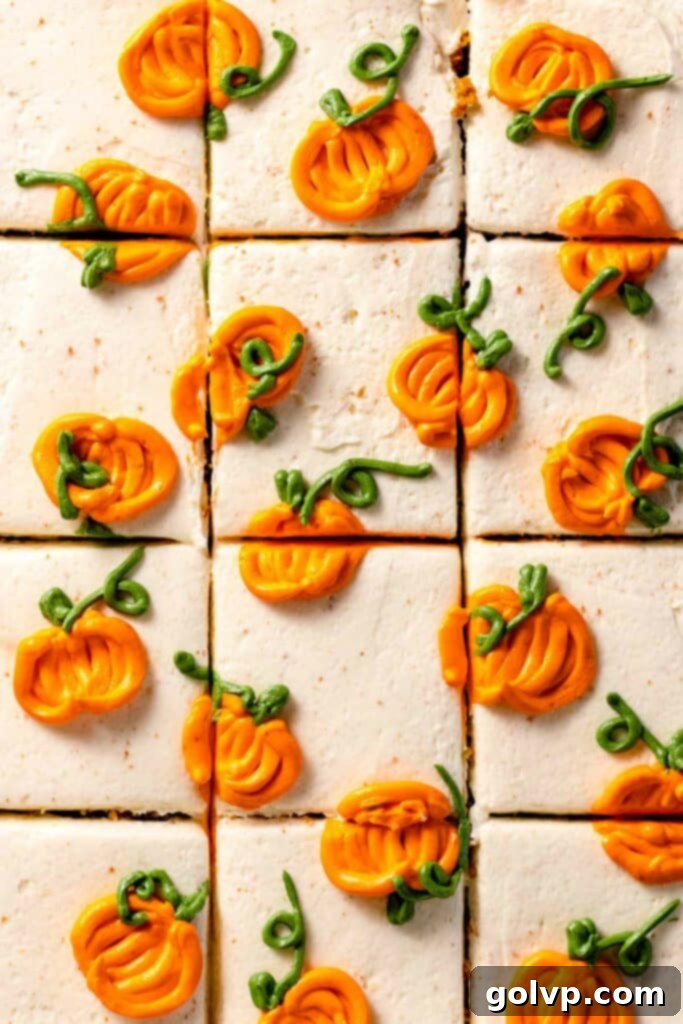
Prepare to fall in love with this incredible pumpkin cake, a true celebration of autumn flavors. This recipe delivers a cake that’s exceptionally soft, wonderfully moist, and bursting with warm, inviting spices. It’s perfectly crowned with an ultra-creamy, deeply flavorful brown butter cream cheese frosting, creating a harmonious blend of textures and tastes that’s simply irresistible. What makes this recipe even more delightful is its simplicity – the cake batter comes together effortlessly in just one bowl, requiring no electric mixer, making it an ideal choice for both novice and experienced bakers. The frosting, with its luscious tang and unique nutty, caramel undertones from the browned butter, perfectly complements the rich pumpkin flavor. To add a festive touch, the cake is adorned with charming piped mini pumpkins, making it a show-stopping centerpiece for any fall gathering, Thanksgiving celebration, or cozy weekend treat.
Purchasing items through the affiliate links in this post helps support this blog, at no additional cost to you. As an Affiliate Product marketer and Amazon Associate, I earn from qualifying purchases. Your support allows me to continue sharing delicious recipes and helpful baking tips!
Why You’ll Adore This Easy Pumpkin Cake Recipe:
- Rich Pumpkin Flavor: This cake isn’t shy on pumpkin. We use a generous amount of pumpkin puree and a balanced blend of pumpkin spice to ensure every bite is deeply autumnal and satisfying. It’s the quintessential flavor of fall, perfectly captured in cake form.
- Irresistible Frosting: The star companion to our pumpkin cake is a brown butter cream cheese frosting that’s truly out of this world. It’s incredibly creamy, offers a delightful tang from the cream cheese, and features warm, nutty, and subtly caramelized notes from the browned butter. It strikes the perfect balance, being intensely flavorful without being overly sweet, making it utterly addictive.
- Effortlessly Easy: Forget complicated baking processes! This cake is designed for simplicity. It’s a true one-bowl wonder, meaning less cleanup and more time to enjoy your creation. Plus, you won’t even need an electric mixer for the cake batter itself, making it accessible for everyone.
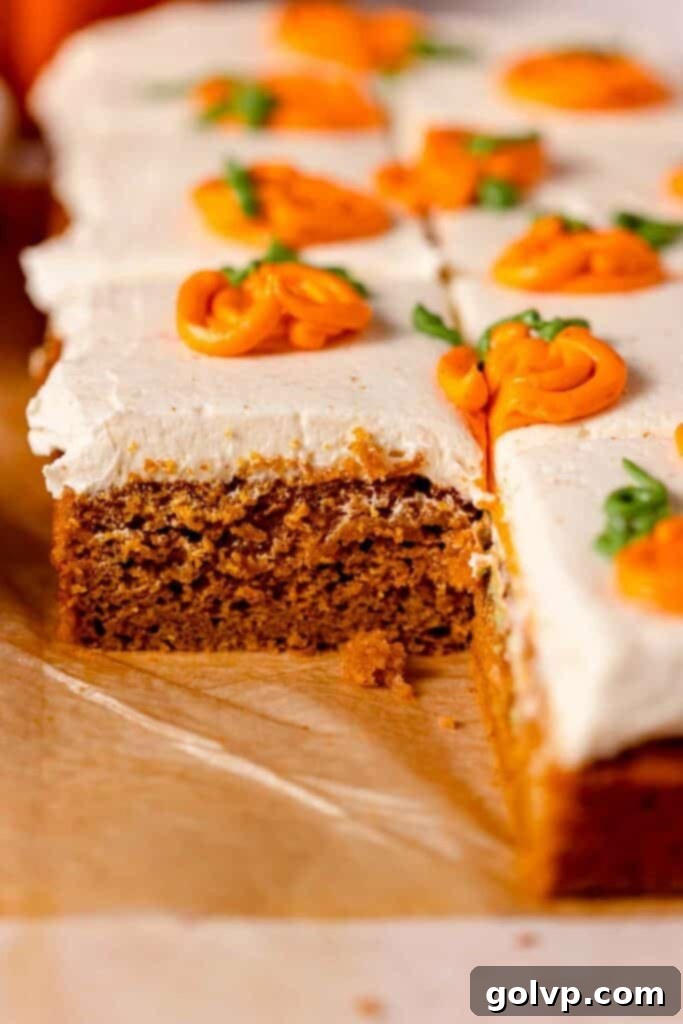
- Unbelievably Moist: Thanks to the strategic combination of butter, vegetable oil, and pumpkin puree, this cake boasts an unparalleled softness and moistness that lasts for days. Each slice is tender and luscious, never dry, ensuring a truly delightful dessert experience.
The Epitome of Fall Baking: Your Go-To Pumpkin Cake
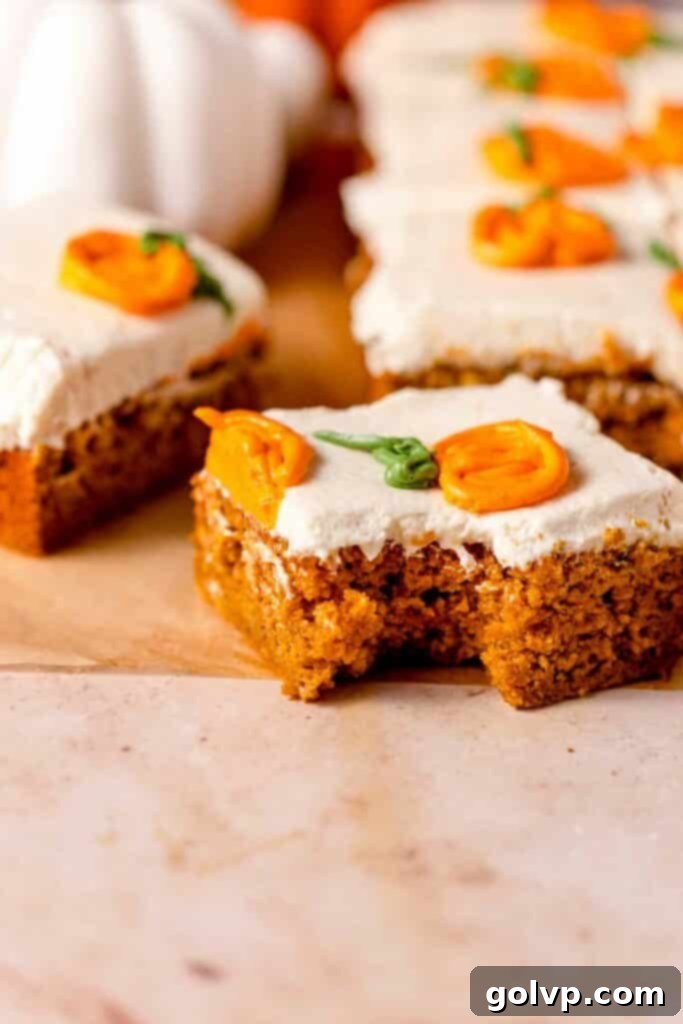
As the leaves begin to change and the air turns crisp, there’s nothing quite as comforting as the aroma of pumpkin spice wafting from the kitchen. This pumpkin cake is more than just a dessert; it’s a celebration of the season. Packed with genuine pumpkin flavor and delicately spiced to perfection, it embodies the cozy essence of autumn. The festive piped pumpkins on top add a charming visual appeal, making it an ideal choice for any fall party, Thanksgiving dinner, or simply a delightful treat to share with loved ones. The velvety, nutty brown butter cream cheese frosting elevates the pumpkin notes beautifully, creating a balanced and rich taste profile that is neither too sweet nor overwhelming, ensuring every bite is a pure pleasure. This recipe was lovingly inspired by our popular chocolate cake with pumpkin, which also features a pumpkin chocolate buttercream and adorable piped pumpkin decorations, proving that pumpkin and decadent frosting are a match made in heaven.
The Secret to Ultimate Moistness: Why We Use Both Butter and Oil
Achieving a cake that remains moist and flavorful for days is a delicate balance, and here at Flouring Kitchen, we believe in using the best of both worlds: butter and oil. Butter is indispensable for its rich, complex flavor, imparting that classic buttery taste that makes any cake exceptional. However, relying solely on butter can sometimes lead to a drier crumb, especially after a day or two. This is where vegetable oil comes into play. By incorporating a neutral-tasting vegetable oil, we introduce a type of fat that remains liquid at room temperature, contributing significantly to a cake’s moistness and ensuring it stays tender and delicious for an extended period. This brilliant combination prevents the cake from drying out without compromising on the luxurious buttery flavor. You can use any neutral oil you prefer; grapeseed oil is a fantastic choice, or even canola or sunflower oil. For best results, we advise against using coconut oil, as its distinct flavor can alter the cake’s profile.
Mastering the Art of Brown Butter: A Flavor Game-Changer
If you’ve never made brown butter, you’re in for a treat! This simple technique transforms ordinary butter into a golden, nutty, and subtly caramelized ingredient that elevates any dish, especially frosting. The depth of flavor it adds is truly worth the extra few minutes of effort. When combined with tangy cream cheese, brown butter creates a frosting that is incredibly creamy, rich, and so uniquely flavorful, you’ll find it hard to stop at just one bite. It’s a sophisticated twist on classic cream cheese frosting that truly sets this pumpkin cake apart.
To make brown butter, begin by melting your butter in a light-colored saucepan over medium-low heat. The light pan helps you monitor the color changes effectively. Stir the butter constantly as it melts and begins to cook. You’ll notice it starts to foam, then the foam will subside, and the butter will bubble gently. Continue stirring. The milk solids in the butter will gradually separate and sink to the bottom of the pan, slowly caramelizing and turning a beautiful golden-brown. Once these specks at the bottom achieve a rich, amber hue and a fresh layer of fragrant foam appears on the surface, your brown butter is ready! Immediately remove the pan from the heat and pour the browned butter into a separate heat-safe bowl to prevent it from burning. Moving quickly is key here to stop the cooking process. Allow it to cool completely to room temperature. As it cools, the browned butter will solidify, becoming opaque, thick, and creamy, ready to be incorporated into your exquisite frosting.
Expert Tips for Achieving the Ultimate Cake Texture Every Time
Baking a consistently soft, moist, and perfectly crumbed cake is easier than you think when you follow a few simple, yet crucial, tips:
- Ensure All Ingredients Are at Room Temperature: This step is non-negotiable for success. Room temperature ingredients (like eggs, sour cream, and even melted butter that has cooled) emulsify much more effectively, resulting in a smooth, homogenous batter. This even mixing creates a consistent cake crumb, free from lumps or dense pockets. Plan ahead and take these ingredients out of the fridge at least an hour before you begin baking.
- Accurately Measure Flour with a Kitchen Scale: For truly professional and consistent baking results, weighing your flour with a digital kitchen scale is paramount. Volume measurements (cups) can vary wildly depending on how densely the flour is packed. If you don’t have a scale, use the “spoon and level” method: gently stir your flour in its bag or container to aerate it, then lightly spoon it into your measuring cup. Do not pack it down. Finally, use the flat edge of a knife to scrape off any excess from the top, ensuring an accurate, unpacked measurement.
- Avoid Overmixing the Batter Once Flour is Added: This is a common pitfall that leads to dry, tough cakes. Once you add the flour, gluten begins to develop. Overmixing at this stage overdevelops the gluten, resulting in a dense, chewy, and dry cake. Mix just until no dry streaks of flour are visible, and then stop. A few small lumps are preferable to an overmixed batter.
- Don’t Overbake Your Cake: Overbaking is the quickest way to ruin a perfectly good cake, turning it dry and crumbly. Keep a close eye on your cake as it nears the end of its baking time. It’s ready when a wooden toothpick or thin skewer inserted into the very center comes out clean or with a few moist crumbs attached. A completely clean toothpick often indicates it’s already slightly overbaked. I personally prefer toothpicks over specialized cake testers as they tend to give a more reliable reading for this kind of cake.
Convenient Make-Ahead and Storage Solutions
This pumpkin cake is not only delicious but also practical, with options for making parts ahead of time and storing leftovers efficiently.
- Brown Butter Prep: The brown butter can be made several days in advance. Once browned and cooled, store it in an airtight container in the refrigerator. When you’re ready to make the frosting, simply take the brown butter out of the fridge about an hour before use to allow it to soften slightly at room temperature, making it easier to beat into a creamy consistency.
- Baked Cake and Frosting: Once the cake is baked and frosted, it will maintain its exquisite quality when stored in an airtight cake container in the refrigerator for up to 4 days. The airtight seal is crucial to prevent the cake from drying out and to keep the frosting fresh.
- Freezing Leftovers: If you find yourself with any extra slices (though that’s a rare occurrence with this cake!), they freeze beautifully. Wrap individual slices tightly in plastic wrap, then place them in an airtight container or freezer bag. They will keep well in the freezer for up to 3 months. To enjoy, simply thaw them in the refrigerator overnight or at room temperature for a few hours.
Essential Ingredients for Your Perfect Pumpkin Cake
Below are the key ingredients for this recipe. For full steps and precise measurements, please refer to the comprehensive recipe card located further down the page. Reading through these tips will provide invaluable insights for guaranteed baking success!
Butter: Opt for a high-quality, unsalted real butter. It’s the foundation of both the cake’s rich flavor and the frosting’s luxurious texture, especially when browned.
Vegetable Oil: A neutral-tasting vegetable oil is essential for adding and retaining moisture in the cake, ensuring it stays soft and tender for days without compromising flavor.
Brown Sugar: This provides more than just sweetness; it imparts a beautiful golden-brown color to the cake and introduces delightful molasses notes, enhancing the overall autumnal flavor profile.
Pumpkin Puree: For consistent results every time, we highly recommend using canned pumpkin puree. If you opt for homemade puree, ensure it is very thick, resembling the consistency of mashed potatoes, not watery like applesauce. Excess moisture can drastically alter the cake’s texture.
Pumpkin Spice: This warm blend of spices is the heart of our pumpkin cake’s aroma and taste. You can easily find pre-mixed pumpkin spice at most grocery stores during fall, or for an extra fresh kick, you can whip up your own pumpkin spice blend at home.
All-Purpose Flour: Accuracy in measuring flour is vital for the perfect cake texture. We strongly advise weighing your flour with a kitchen scale. If a scale isn’t available, remember to measure properly by first stirring the flour in its bag, then spooning it gently into your measuring cup, and finally leveling off the excess with the flat edge of a knife without packing it down.
Cream Cheese: For the frosting, choose a high-quality, full-fat brick-style cream cheese. This type of cream cheese ensures a firm, creamy frosting that won’t become runny, providing the ideal consistency for spreading and piping.
Powdered Sugar: Also known as confectioners’ sugar, this ingredient not only sweetens the frosting but also contributes significantly to its smooth, creamy, and pipeable texture.
Simple Step-by-Step Guide to Baking Your Pumpkin Cake
Creating this delicious pumpkin cake is a straightforward process, designed for ease and enjoyment. Follow these steps for a perfect, moist cake base:
Step 1 – Prepare Your Baking Pan: Preheat your oven to a cozy 350°F (180°C). Line a 9” by 12” or 9” by 13” baking pan with parchment paper, allowing some overhang on the sides to create “handles.” These parchment handles will make it incredibly easy to lift the cooled cake out of the pan later.
Step 2 – Combine Wet Ingredients (Part 1): In a spacious large bowl, pour in your melted and cooled butter, vegetable oil, and brown sugar. Whisk these ingredients together thoroughly until they are well combined and smooth, laying the foundation for a rich batter.
Step 3 – Incorporate Pumpkin and Flavor: Add the pumpkin puree, a generous tablespoon of pure vanilla extract, and a pinch of sea salt to the mixture. Continue whisking until the mixture is perfectly smooth and the vibrant orange hue of the pumpkin is evenly distributed.
Step 4 – Add Eggs and Sour Cream: Crack in the large, room-temperature eggs, one at a time, whisking well after each addition until fully incorporated. Then, add the room-temperature sour cream and whisk again until the batter is smooth and homogeneous, contributing to the cake’s moistness.
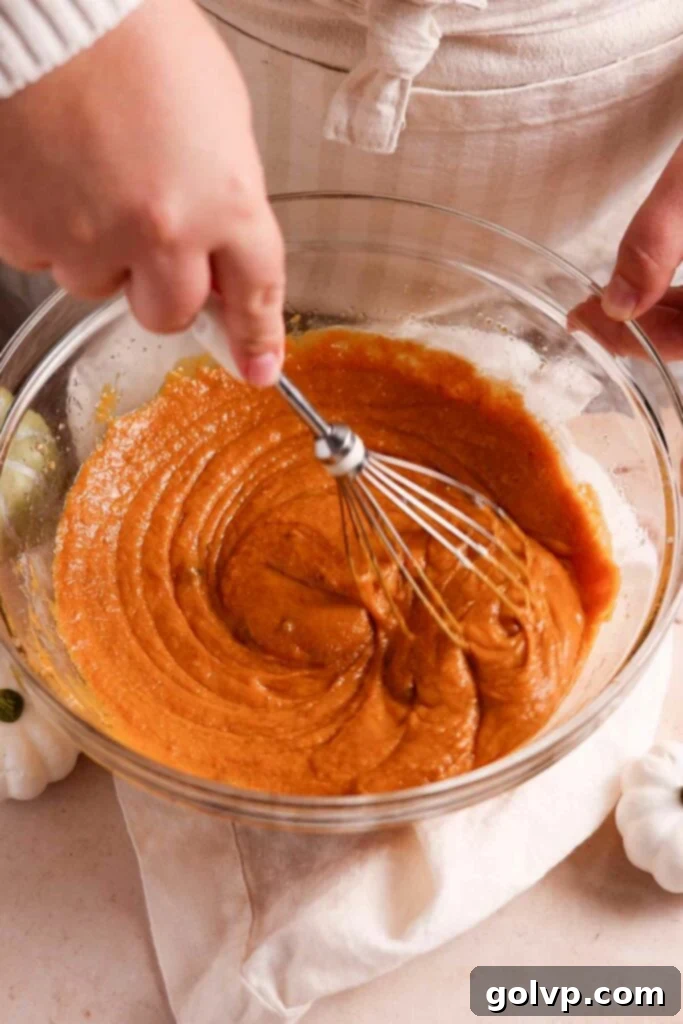
Step 5 – Gently Fold in Dry Ingredients: Sift the all-purpose flour, baking soda, baking powder, and aromatic pumpkin spice directly into the same bowl containing your wet mixture. Using a rubber spatula or a whisk, gently fold the dry ingredients into the wet until just combined. Be careful not to overmix; stop as soon as no dry streaks of flour remain to ensure a tender cake crumb.
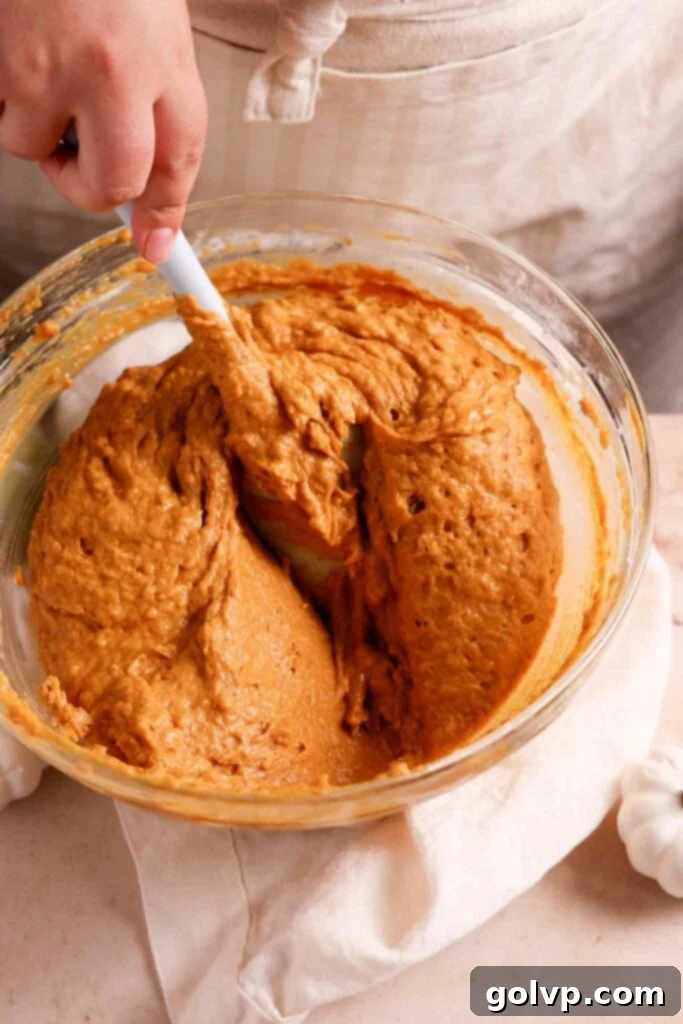
Step 6 – Bake and Prepare for Frosting: Transfer the beautifully spiced batter into your prepared baking pan and gently smooth the top with your spatula. While the cake bakes and subsequently cools, you can begin preparing your sensational brown butter cream cheese frosting.
Step 7 – Check for Doneness and Cool: Bake the cake for approximately 22-27 minutes. The exact time may vary slightly depending on your oven. The cake is ready when a toothpick inserted into the center comes out mostly clean, with only a few moist crumbs clinging to it. This indicates it’s perfectly baked and still wonderfully moist. Once baked, let the cake cool completely within the pan on a wire rack. Patience here is key for a successful frosting application!
Crafting the Dreamy Brown Butter Cream Cheese Frosting
This frosting is a game-changer for any fall dessert. Follow these steps carefully to achieve its rich, creamy, and nutty perfection:
Step 1 – Begin Browning the Butter: Start by cubing your unsoftened butter (it doesn’t need to be soft for browning). Place the butter in a medium, light-colored saucepan or pan. Begin melting it over medium-low heat. The light color of the pan will help you observe the butter’s transformation.
Step 2 – Monitor the Browning Process: Continue cooking the butter, stirring constantly with a whisk or spatula. This prevents the milk solids from sticking and burning at the bottom. The butter will first melt, then foam, and the foam will recede to reveal bubbling butter. Keep stirring. The crucial stage is when the milk solids at the bottom of the pan begin to turn a beautiful golden-brown, emitting a rich, nutty aroma. A second layer of foam will often reappear on the surface. This is your cue that the brown butter is ready!
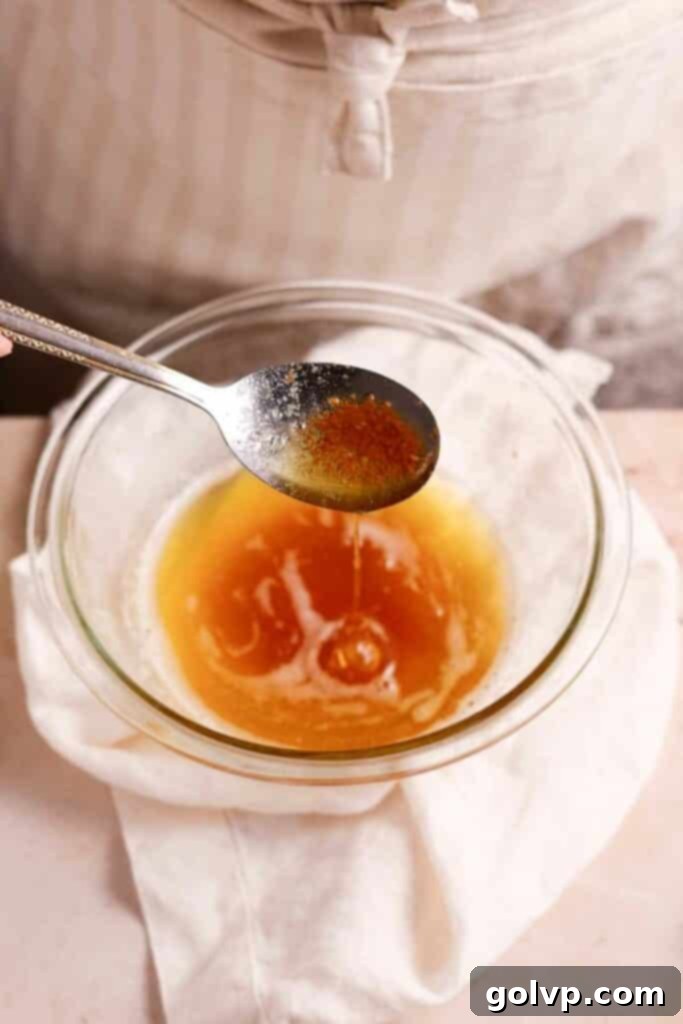
Step 3 – Cool the Brown Butter: Immediately remove the saucepan from the heat to stop the cooking process. Carefully pour the hot brown butter into a heat-safe bowl. Let it cool down to room temperature. If you’re in a hurry, you can pop it into the fridge for about 15-20 minutes, stirring occasionally, until it reaches an opaque, thick, and creamy consistency. It should be semi-solid but still spreadable, like soft butter.
Step 4 – Beat Brown Butter and Powdered Sugar: Once the brown butter has cooled and solidified, transfer it to a large mixing bowl. Using a stand mixer fitted with a paddle attachment or an electric hand mixer, beat the cooled brown butter until it becomes creamy and light. Gradually add about half of the powdered sugar, beating well after each addition until fully combined and smooth. This creates a stable base for the frosting.
Step 5 – Incorporate Flavorings and Cream Cheese: Add the pure vanilla extract and a tiny pinch of sea salt to the butter-sugar mixture. Next, add the softened cream cheese, a few tablespoons at a time, beating until the mixture is creamy and lump-free. Continue adding the remaining powdered sugar in stages, beating until you achieve your desired smooth, creamy, and fluffy frosting texture. Avoid over-beating once the cream cheese is in to keep the frosting from becoming too soft.
Artful Decorating: Creating Festive Piped Pumpkins
Add a charming, festive touch to your pumpkin cake with these easy piped pumpkins:
Step 1 – Color Your Frosting: Take about ¾ cup of the prepared brown butter cream cheese frosting and place it in a small bowl. Set aside another ¼ cup of frosting in a separate, even smaller bowl. Add a few drops of orange gel food coloring to the larger portion of frosting and a tiny drop of green gel food coloring to the smaller portion. Mix thoroughly until you achieve vibrant, desired shades of orange and green.
Step 2 – Prepare Piping Bags: Transfer the orange frosting into one piping bag (or a disposable plastic bag) and the green frosting into another. You don’t need special piping tips for this design. Snip off a very small piece from the end of each piping bag, creating a small opening for controlled piping.
Step 3 – Position the Cake: Carefully lift the completely cooled cake from its baking pan using the parchment paper handles. Transfer it onto a cutting board or your preferred serving plate. Ensure the cake is stable before proceeding to frost.
Step 4 – Apply White Frosting Base: With an offset spatula, generously spread the remaining white (uncolored) brown butter cream cheese frosting evenly over the entire top surface of the cake, extending it all the way to the edges. Smooth the frosting as much as possible for a clean canvas for your decorations.
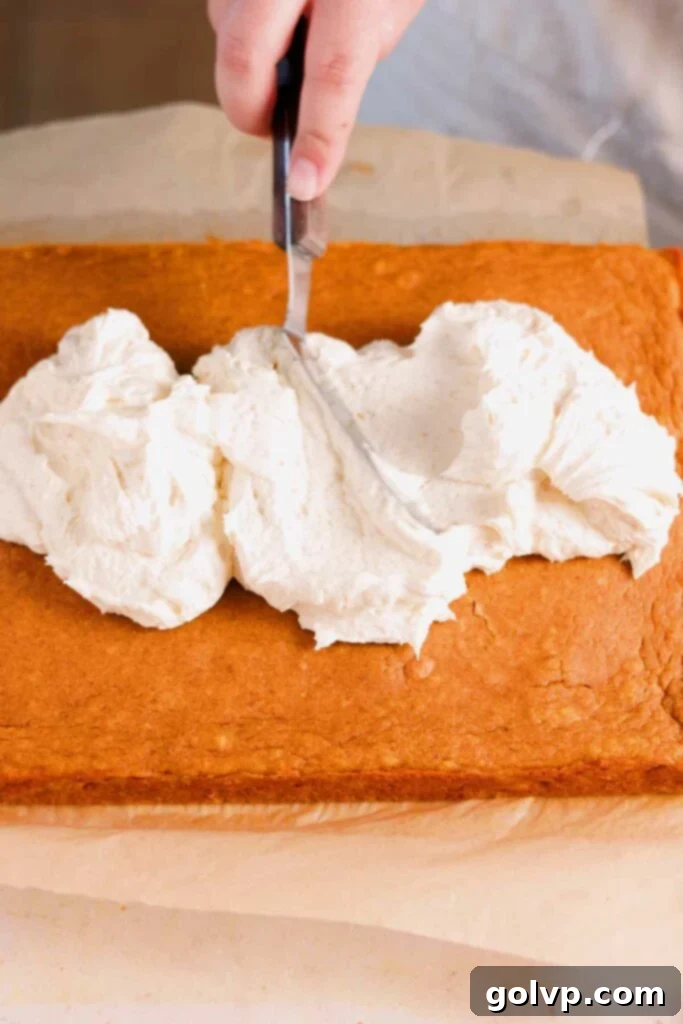
Step 5 – Pipe the Pumpkin Bodies: Using the piping bag filled with orange frosting, pipe small, plump circles onto the cake to form the bodies of your pumpkins. Then, fill in the center of each circle with slightly curved lines, mimicking the natural segments of a pumpkin. For a more rounded, realistic pumpkin shape, pipe two additional curved lines on the outside of each circle to widen it slightly.
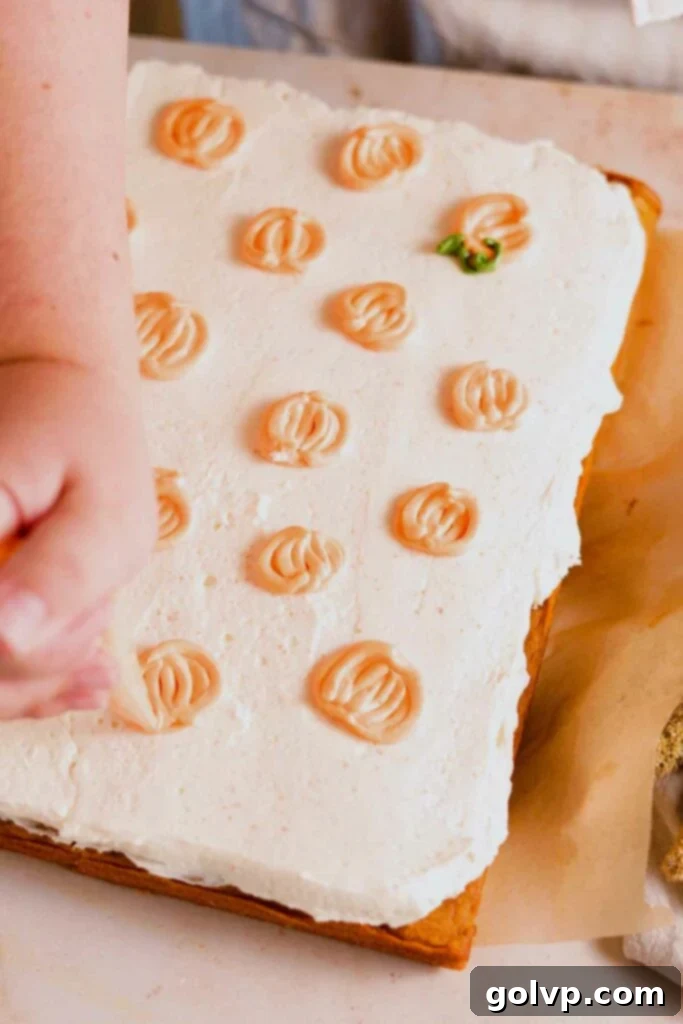
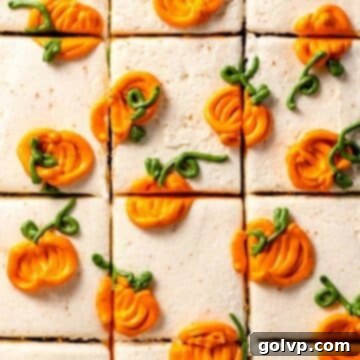
Step 6 – Add Stems and Vines: Switch to the green frosting piping bag. Pipe small, short stems directly on top of each orange pumpkin. For an extra touch of charm, pipe a delicate, swirling vine trailing from each stem. Arrange the pumpkins artistically across the cake top.
Step 7 – Slice and Serve: Once decorated, your magnificent pumpkin cake is ready to be enjoyed! For the cleanest slices, make sure to wipe your knife clean after each cut. Store any remaining cake in the refrigerator due to the cream cheese frosting, but remember, it’s always best served at room temperature to allow the frosting to achieve its optimal creamy consistency and flavor.
Frequently Asked Questions About This Pumpkin Cake
Yes, absolutely! To make this pumpkin cake gluten-free, simply substitute the all-purpose flour with a 1:1 gluten-free all-purpose flour blend. Ensure your chosen blend contains xanthan gum for optimal texture, or add it according to package directions if not already included. The rest of the recipe can remain the same.
While the brown butter cream cheese frosting is a highlight of this recipe, if cream cheese isn’t to your taste, you can substitute it with softened unsalted butter. You would essentially be making a brown butter buttercream. You might need to adjust the amount of powdered sugar to reach your desired sweetness and consistency. To achieve an ultra-fluffy and creamy texture, consider adding 1-2 tablespoons of heavy whipping cream at the very end of mixing, beating it in until light and airy.
You can certainly use homemade pumpkin puree, but it’s crucial that it has a very thick, paste-like texture, similar to mashed potatoes. It should be scoopable and dense, not watery like applesauce, as excess moisture can significantly impact the cake’s consistency. The results might vary slightly depending on the specific type of pumpkin or squash you use for your puree. For guaranteed consistency and predictable results, we generally recommend using store-bought, canned pumpkin puree.
While the brown butter truly elevates the flavor of the frosting with its nutty, caramel notes, we understand that sometimes you might be short on time. If you prefer to skip the browning step, you can simply use softened regular unsalted butter for the frosting instead. The frosting will still be delicious and creamy, just without that distinctive depth of brown butter flavor.
Yes, this recipe can be adapted for round cake pans. We recommend dividing the batter between two 8-inch round cake pans. Keep a close eye on the baking time, as it may vary slightly from the sheet pan instructions. If you plan to frost the sides of a two-layer round cake, you will likely need to double the frosting recipe to ensure ample coverage and a beautifully finished presentation.
More Delightful Fall Recipes to Explore:
If you’re loving the flavors of fall, be sure to check out our collection of best pumpkin desserts for even more easy and inspiring pumpkin recipe ideas to fill your kitchen with warmth and deliciousness!
- Pumpkin Chocolate Cake
- No Bake Pumpkin Cheesecake Bars
- Pumpkin Whipped Cream
- Pumpkin Cheesecake Cookies
Did you indulge in this delightful recipe? We’d be thrilled if you could rate it and share your thoughts in the comments below! Don’t forget to share your beautiful creation on Instagram and tag @flouringkitchen. Follow us on Pinterest for endless inspiration and more fantastic recipe ideas.
📖 Recipe
Pumpkin Spice Cake
Mary
Pin Recipe
Shop Ingredients
Equipment
-
electric mixer for frosting
Ingredients
Cake
- ½ cup butter melted and cooled
- ½ cup vegetable oil
- 1 cup brown sugar packed
- 2 cups pumpkin puree one 15oz can
- ½ teaspoon sea salt
- 1 tablespoon pure vanilla extract
- 4 large eggs room temperature
- ½ cup sour cream room temperature
- 2 ¼ cups flour 270 g
- ½ teaspoon baking soda
- 1 tablespoon baking powder
- 1 tablespoon pumpkin spice
Frosting
- 1 cup butter cubed, unsoftened
- 8 oz cream cheese softened
- 3 ½ cups powdered sugar
- 1 teaspoon pure vanilla extract
- ⅛ teaspoon sea salt
- Orange gel food colouring optional
- Green gel food colouring optional
Shop Ingredients on Jupiter
Instructions
Cake
-
Preheat oven to 350°F (180°C). Line a 9” by 12” or 9” by 13” pan with parchment paper. Leave parchment paper handles so that you can easily lift the cake out after baking.
-
In a large bowl, add melted butter, vegetable oil, and sugar. Whisk well to combine.½ cup butter, ½ cup vegetable oil, 1 cup brown sugar
-
Add pumpkin puree, vanilla extract, and salt. Whisk until smooth.2 cups pumpkin puree, 1 tablespoon pure vanilla extract, ½ teaspoon sea salt
-
Add eggs and whisk until fully incorporated. Add sour cream and whisk.4 large eggs, ½ cup sour cream
-
Sift flour, baking soda, baking powder, and pumpkin spice right into the same bowl. Gently fold with a spatula or whisk until no more dry streaks remain.2 ¼ cups flour, ½ teaspoon baking soda, 1 tablespoon baking powder, 1 tablespoon pumpkin spice
-
Transfer batter into the prepared baking pan and smooth the top. Make the frosting while the cake bakes and cools.
-
Bake for 22-27 minutes or until a toothpick inserted into the middle of the cake comes out mostly clean with a few crumbs attached. Let the cake cool completely inside the cake pan.
Frosting
-
Make brown butter by melting the butter in a medium saucepan or pan on medium-low heat.1 cup butter
-
Keep on heat, stirring constantly so that it doesn’t burn. It will start to foam and then the foam will go away and you will see it bubble. It’s ready when the specks at the bottom turn golden-brown and a foam starts to appear on the surface again.
-
Remove from heat and transfer to a heat safe bowl to cool to room temperature. Pop in the fridge to cool faster if needed. It’s cooled and ready when the butter becomes opaque and is thick and creamy.
-
Using a stand or electric mixer, beat cooled brown butter until creamy in a large bowl. Add about half of the powdered sugar in stages, beating until combined.3 ½ cups powdered sugar
-
Add vanilla and salt. Add softened cream cheese a few tablespoons at a time and beat until creamy. Add more powdered sugar until desired texture is achieved. Beat until creamy and fluffy.1 teaspoon pure vanilla extract, ⅛ teaspoon sea salt, 8 oz cream cheese
-
Set aside about ¾ cup frosting in a small bowl and ¼ cup frosting in a separate bowl. Add orange food coloring to the bowl with more frosting and green into the bowl with less frosting.Orange gel food colouring, Green gel food colouring
-
Transfer the orange and green frosting into separate piping bags (without piping tips) or into disposable plastic bags. Cut the end off both piping bags, making sure that it’s a small hole.
-
Lift the cooled cake out of the pan by the parchment paper handles and place onto a cutting board or serving plate.
-
Spread the white frosting on top of the cake, all the way to the edges. Smooth it out with an offset spatula.
-
To make the pumpkins, pipe a circle with orange frosting. Fill in the middle with lines like the segments of a pumpkin. Add two lines on the outside of the circle to widen it and make it look more like a pumpkin.
-
Pipe stems on top of the pumpkins with the green frosting. Pipe a vine on each stem.
-
Slice the cake and serve! Make sure to wipe the knife after every cut for clean slices. Store in the fridge and serve at room temperature.
Video
Notes
The frosted cake will keep refrigerated in an airtight container for up to 3 days.
