Delicious No-Knead Vatrushka: Fluffy Cottage Cheese Brioche Buns with Optional Streusel
Step into the delightful world of Eastern European baking with Vatrushka, a beloved treat known for its incredibly soft, fluffy brioche-style bun and a luscious, sweet, creamy cottage cheese filling. These individual filled buns, often referred to in the plural as “vatrushki,” are a cherished staple across Slavic countries, offering a taste of comforting tradition. For those who enjoy an extra layer of texture, this recipe includes an optional streusel topping, adding a wonderful, delicate crunch that perfectly complements the tender bun and smooth filling.
While the classic cottage cheese filling is exquisite on its own, Vatrushka is wonderfully versatile. Feel free to personalize your buns by swirling in a dollop of your favorite jam or fruit curd, or by scattering fresh or frozen berries for a vibrant, fruity twist. What truly sets this recipe apart, making it accessible even for novice bakers, is its no-knead dough. This innovative method eliminates the need for an electric mixer and extensive manual kneading, yet consistently yields a dough that is remarkably soft, moist, and airy—achieving the luxurious texture of brioche with significantly less effort.

🍞 Why You’ll LOVE This Vatrushka Recipe
This Vatrushka recipe is designed to bring joy and deliciousness to your kitchen. Here’s why it will quickly become one of your favorite baking projects:
- Rich and Creamy Cottage Cheese Filling: The heart of any Vatrushka is its filling, and this recipe truly delivers. We use a generous amount of a sweet, moist, and exquisitely fragrant cottage cheese mixture. It’s blended to a luscious consistency, ensuring every bite is bursting with delightful flavor. This isn’t just a bun; it’s a vehicle for this incredible, aromatic filling that many consider the absolute best part!
- Effortless No-Knead Dough: Forget the arm-aching work of traditional brioche! Our no-knead dough simplifies the baking process immensely. You won’t need an electric mixer or tireless hand kneading. The dough practically makes itself, relying on a series of gentle folds and resting periods to develop gluten, resulting in a wonderfully soft, moist, and fluffy texture that rivals classic brioche.
- Delightful Streusel Topping (Optional, but Highly Recommended!): While Vatrushka is traditionally enjoyed without it, the optional sweet and buttery streusel topping adds a fantastic textural contrast. Its golden, crunchy crumble provides a delightful counterpart to the soft bun and creamy filling, elevating the experience with a playful crunch and an extra layer of sweetness.
- A Taste of Nostalgia: For many, Vatrushka evokes fond childhood memories and the warmth of home. This recipe captures that authentic, comforting flavor, making it perfect for sharing with loved ones or simply indulging in a moment of sweet nostalgia.
If you cherish traditional Eastern European desserts as much as we do, you’ll also adore our Ukrainian poppy seed roll and the comforting cottage cheese cheesecake (Zapekanka). These recipes are steeped in culinary heritage and offer another journey into classic flavors.

📝 Key Ingredients for Perfect Vatrushka
Read through for all the essential tips you will need for success!
Full steps and ingredients can be found in the comprehensive recipe card below.
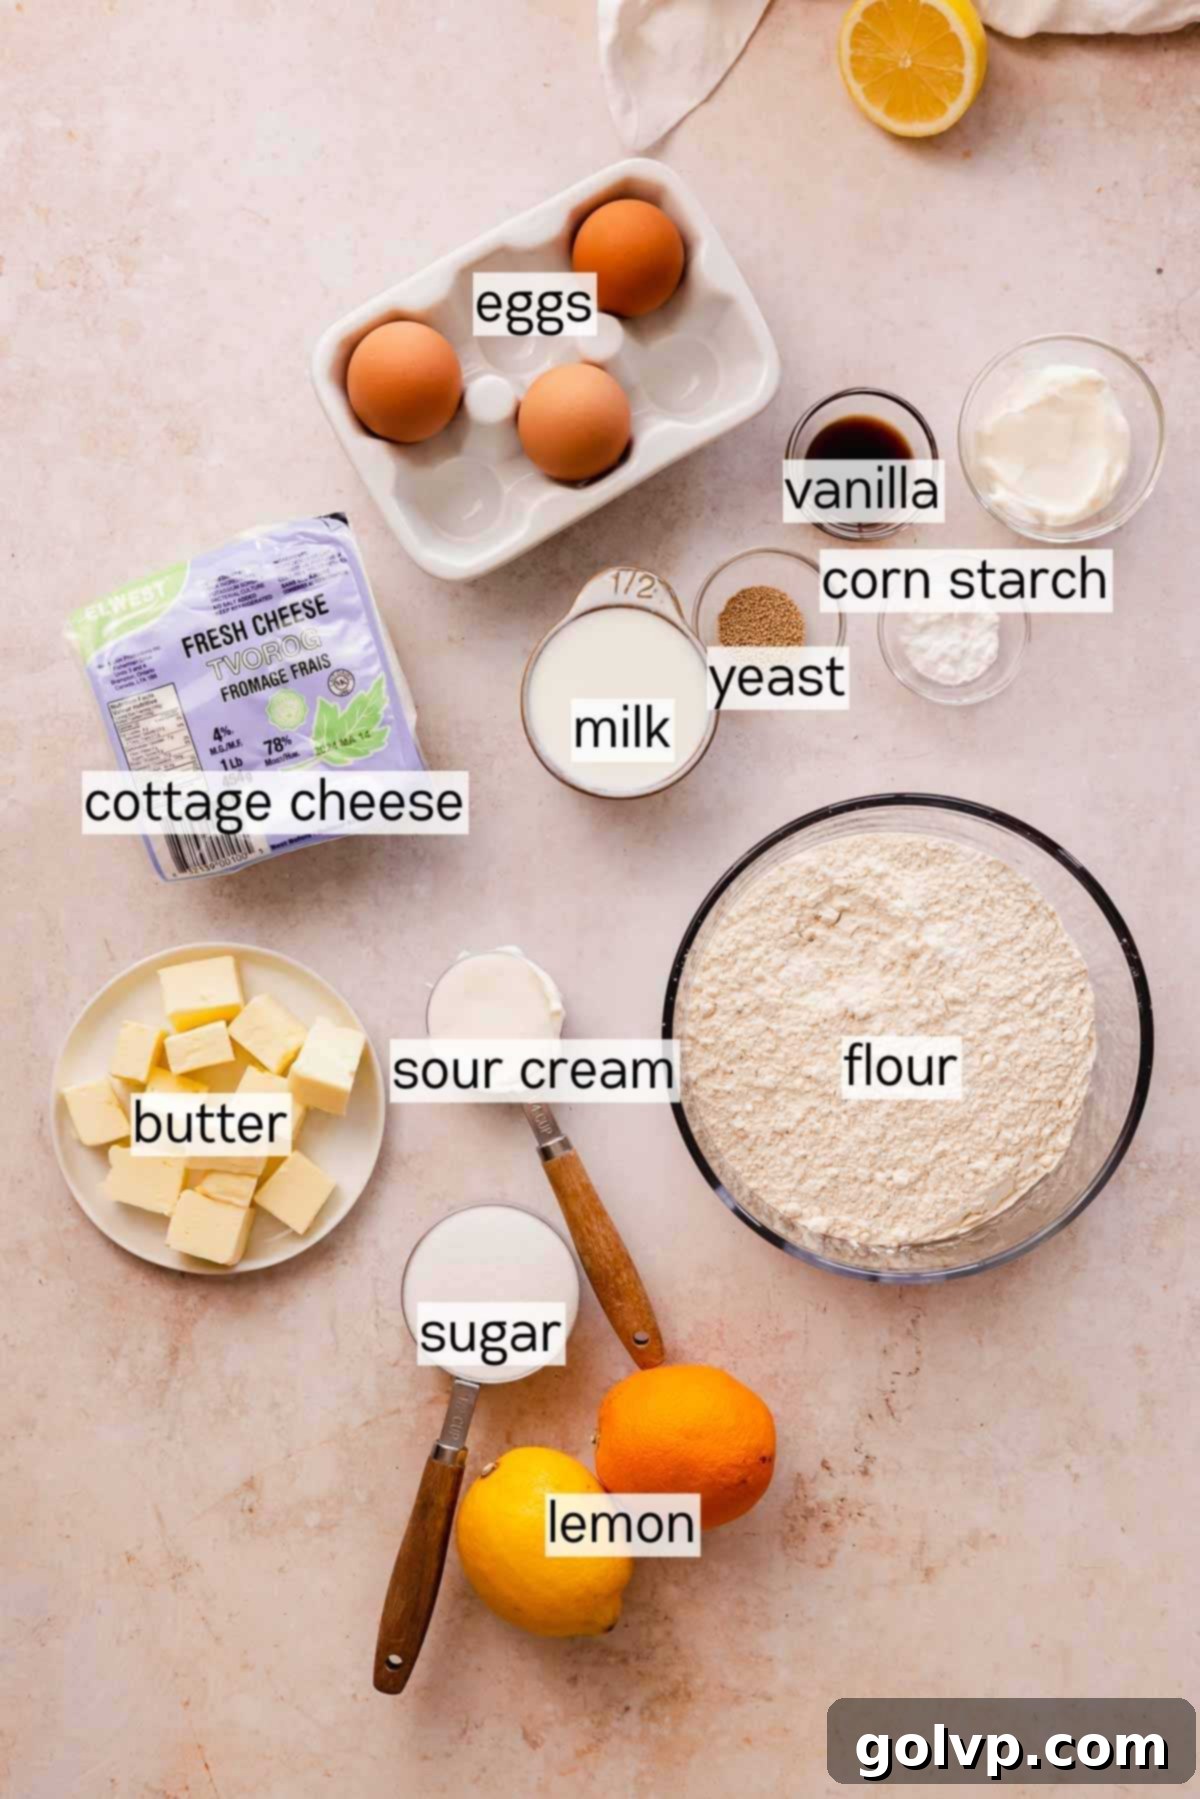
To achieve the authentic taste and texture of these delightful cottage cheese brioche buns, selecting the right ingredients is crucial. Here’s a breakdown of what you’ll need and why:
- Pressed Cottage Cheese: This is perhaps the most critical ingredient for the filling. You absolutely need a firm, “pressed” style cottage cheese, not the liquidy, yogurt-like variety found in tubs in many Western supermarkets. Pressed cottage cheese is dense and crumbly, providing the ideal texture and moisture content for the creamy filling. Look for it sold as Farmer’s cheese, Ukrainian cottage cheese, Polish cottage cheese, Russian style cottage cheese, “Twarog,” or “Tvorog” in specialty stores or international aisles. The milk fat percentage can be to your preference. If these options are unavailable, quark cheese can be a good substitute, though you might need to add an extra teaspoon of potato starch as quark tends to have more moisture. As a last resort, a well-drained or firmer ricotta cheese could work, but it may alter the authentic flavor slightly. This distinct cheese is also fantastic in our traditional cottage cheese cheesecake.
- All-Purpose Flour: For the soft and fluffy no-knead brioche dough, unbleached all-purpose wheat flour is ideal. Accuracy in measurement is paramount for baking success, so it’s highly recommended to weigh your flour using a kitchen scale. If you don’t have a scale, use the “scoop and level” method: gently spoon flour into a dry measuring cup until it’s overflowing, then use the flat edge of a knife or spoon handle to scrape off the excess, without packing the flour down.
- Lemon Zest: A touch of finely grated lemon zest is a secret weapon for the filling. It infuses a bright, zesty aroma and flavor that perfectly complements the sweetness of the cheese and vanilla, without being overly citrusy. It truly elevates the overall fragrance and taste of the Vatrushka.
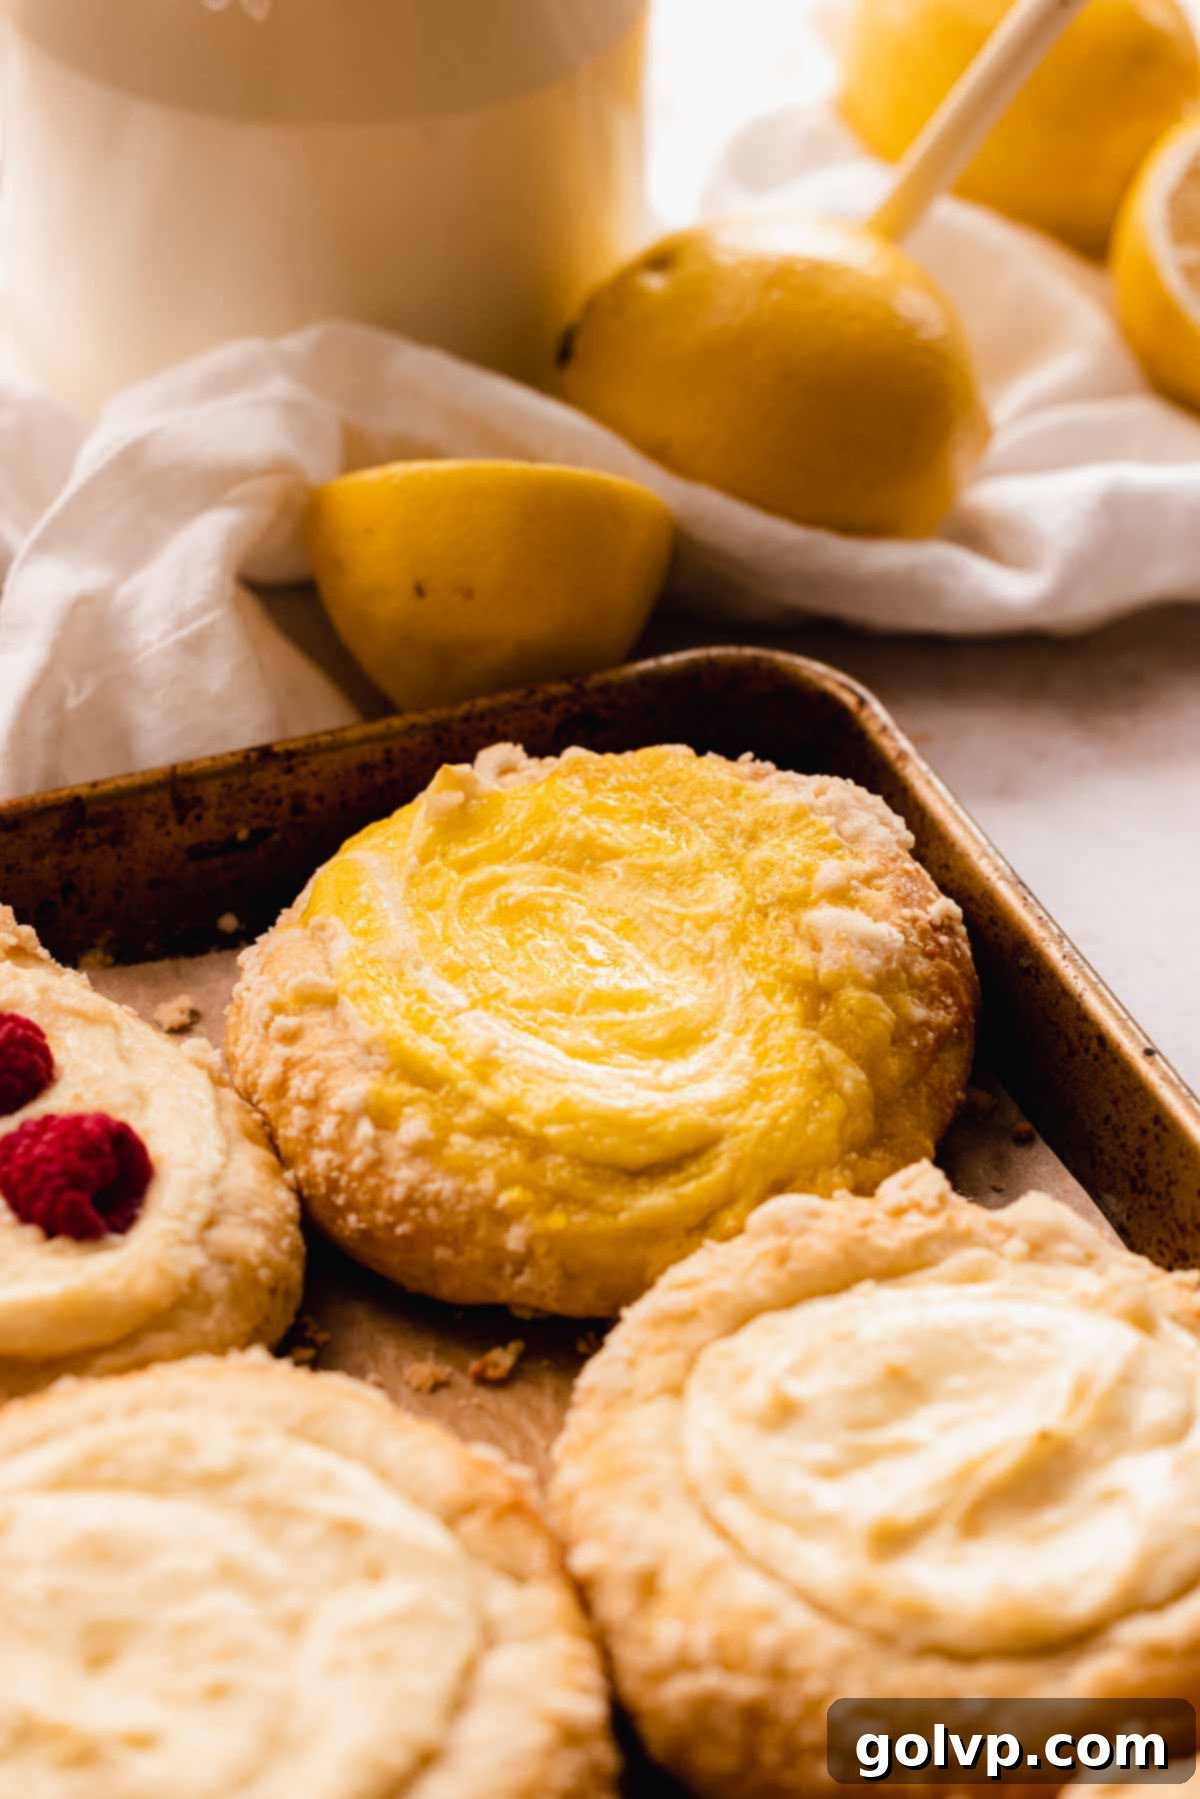
- Lemon Curd, Jam, or Fresh Berries: These are optional additions that allow for wonderful variations in your Vatrushka. Swirling a teaspoon of homemade lemon curd, your favorite fruit jam, or placing fresh raspberries or blueberries into the center of the filling before baking can create exciting new flavor profiles and visual appeal.
- Sour Cream: This humble ingredient plays a dual role in this recipe. In the filling, sour cream contributes to an ultra-creamy, smooth texture and adds a subtle tangy depth. In the brioche dough, it enhances richness, moisture, and ultimately, creates a softer, more luxurious texture.
- Active Dry Yeast: We opt for active dry yeast for its superior flavor development. While instant dry yeast can be used as a quicker alternative, active dry yeast provides a slightly more nuanced taste. If you’re using fresh yeast, double the amount specified for active dry yeast. Fresh yeast is traditional but can be harder to source.
- Salt: Often underestimated, salt is a crucial ingredient in dough. It not only enhances the flavor of the brioche but also plays a vital role in regulating yeast activity and strengthening the gluten structure, which is essential for achieving that desirable fluffy, airy texture. Do not omit or reduce the salt in this recipe.
- Butter & Eggs: These are classic brioche ingredients, providing richness, tenderness, and flavor to the dough, contributing to its signature melt-in-your-mouth quality. Ensure eggs are at room temperature for better incorporation into the dough.
- Vanilla Extract: Both the dough and the filling benefit from the warm, aromatic notes of pure vanilla extract, tying all the sweet flavors together beautifully.
👩🍳 How to Make Vatrushka Cottage Cheese Buns: A Step-by-Step Guide
Crafting these delectable Vatrushka buns is a rewarding process, made even easier with our no-knead technique. Follow these steps for perfect results:
Vatrushka Dough: Step by Step
The foundation of these incredible buns is a simple yet effective no-knead brioche dough, requiring minimal effort for maximum flavor and fluffiness.
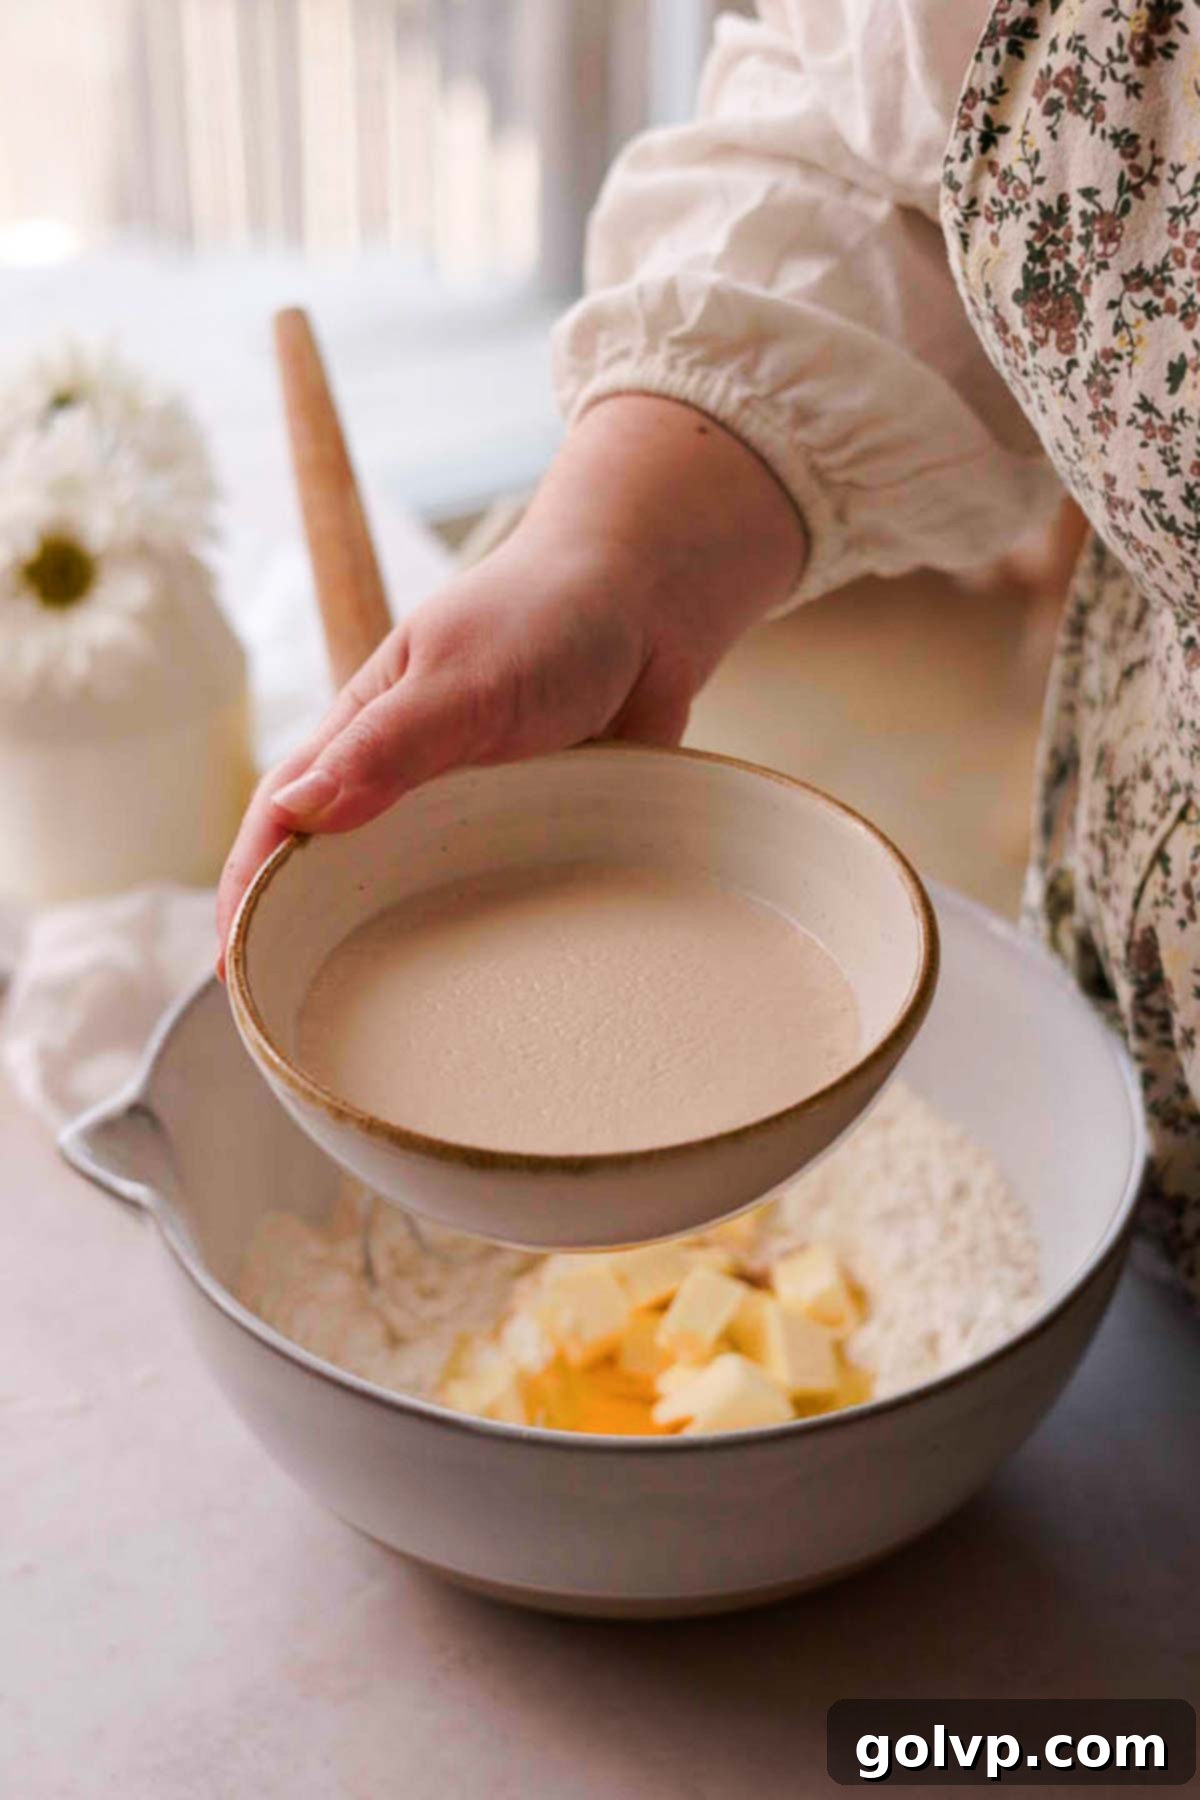
Step 1: Activate the Yeast. In a medium-sized bowl, pour the warm milk. Ensure the milk is lukewarm (around 105-115°F or 40-46°C) to properly activate the yeast without killing it. Stir in the active dry yeast and one teaspoon of sugar. Whisk these ingredients gently until the yeast and sugar are dissolved. Set the bowl aside in a warm spot for about 10 minutes. During this time, the mixture should become foamy on top, which is a clear sign that your yeast is active and ready to work its magic. If no foam forms, your yeast may be old or inactive, and you should start again with a fresh batch.
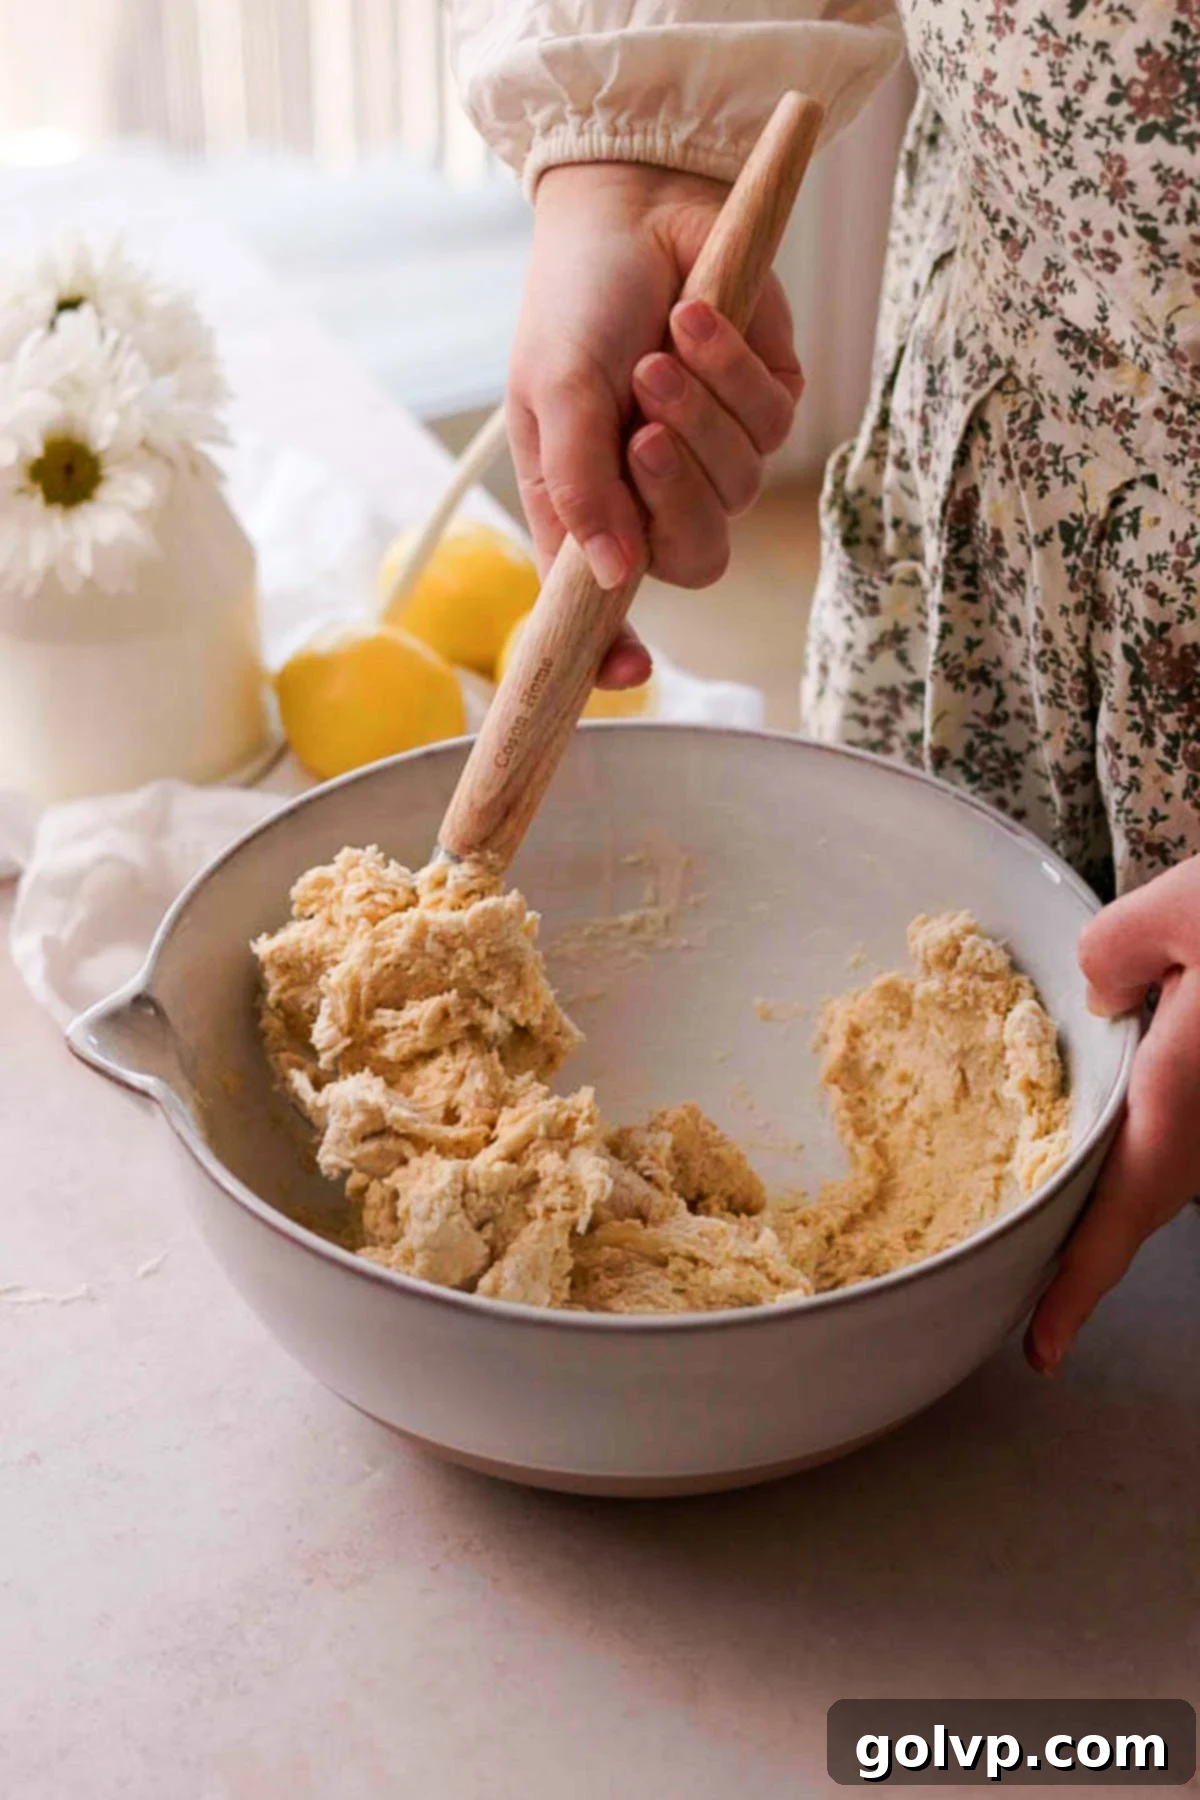
Step 2: Combine Wet and Dry Ingredients. In a separate, large mixing bowl, sift the measured all-purpose flour. Create a generous well in the center of the flour. Into this well, add the remaining granulated sugar, sea salt, room temperature eggs, sour cream, softened unsalted butter, and vanilla extract. Finally, pour in the bloomed yeast-milk mixture from Step 1. Using a sturdy spoon or spatula, stir all the ingredients together thoroughly until they are well combined and form a cohesive, albeit shaggy, dough ball. There’s no need for intense kneading at this stage.
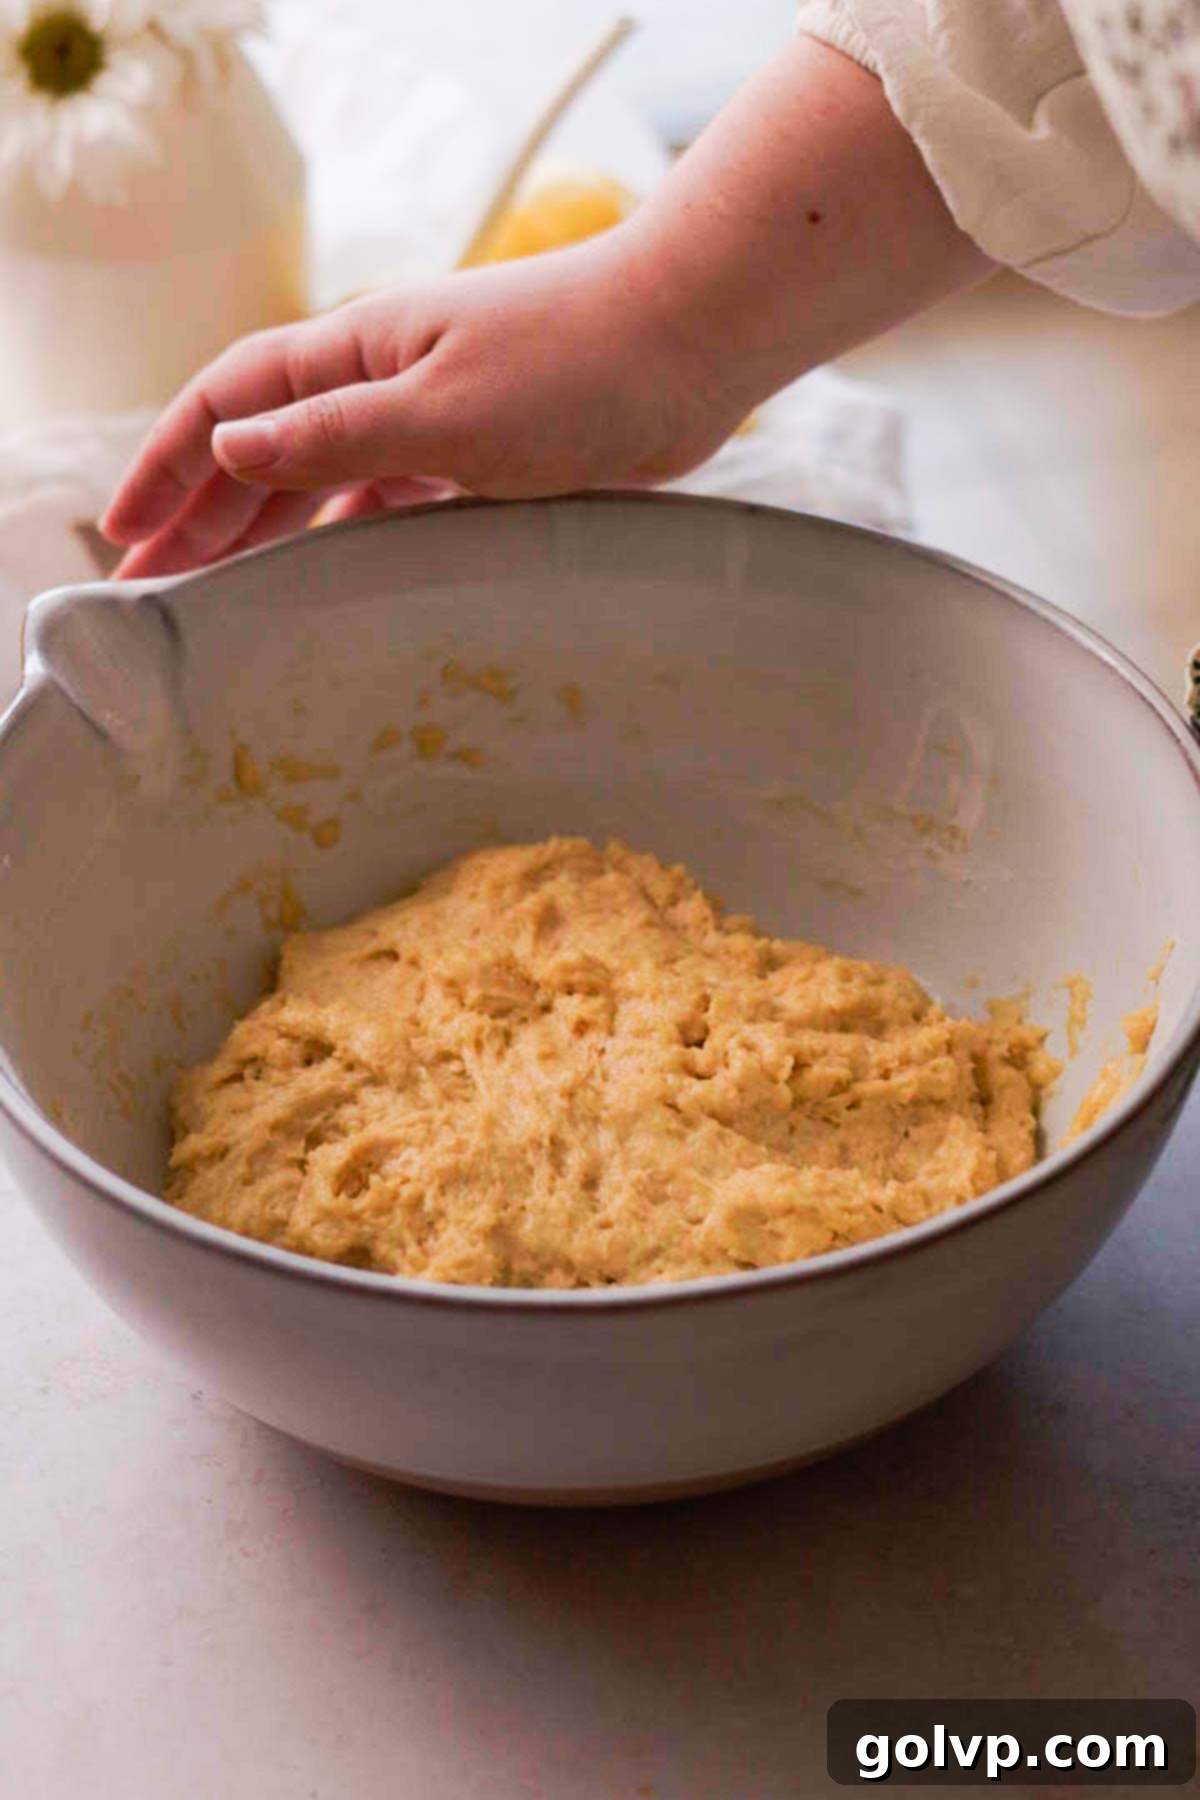
Step 3: First Rise. Once the dough is mixed, cover the bowl tightly with a clean kitchen towel or plastic wrap. Place it in a warm, draft-free spot in your kitchen. Let the dough rise for approximately 45-50 minutes. During this time, the yeast will work, and the dough will noticeably puff up and double in size. This first rise is crucial for flavor development and texture.
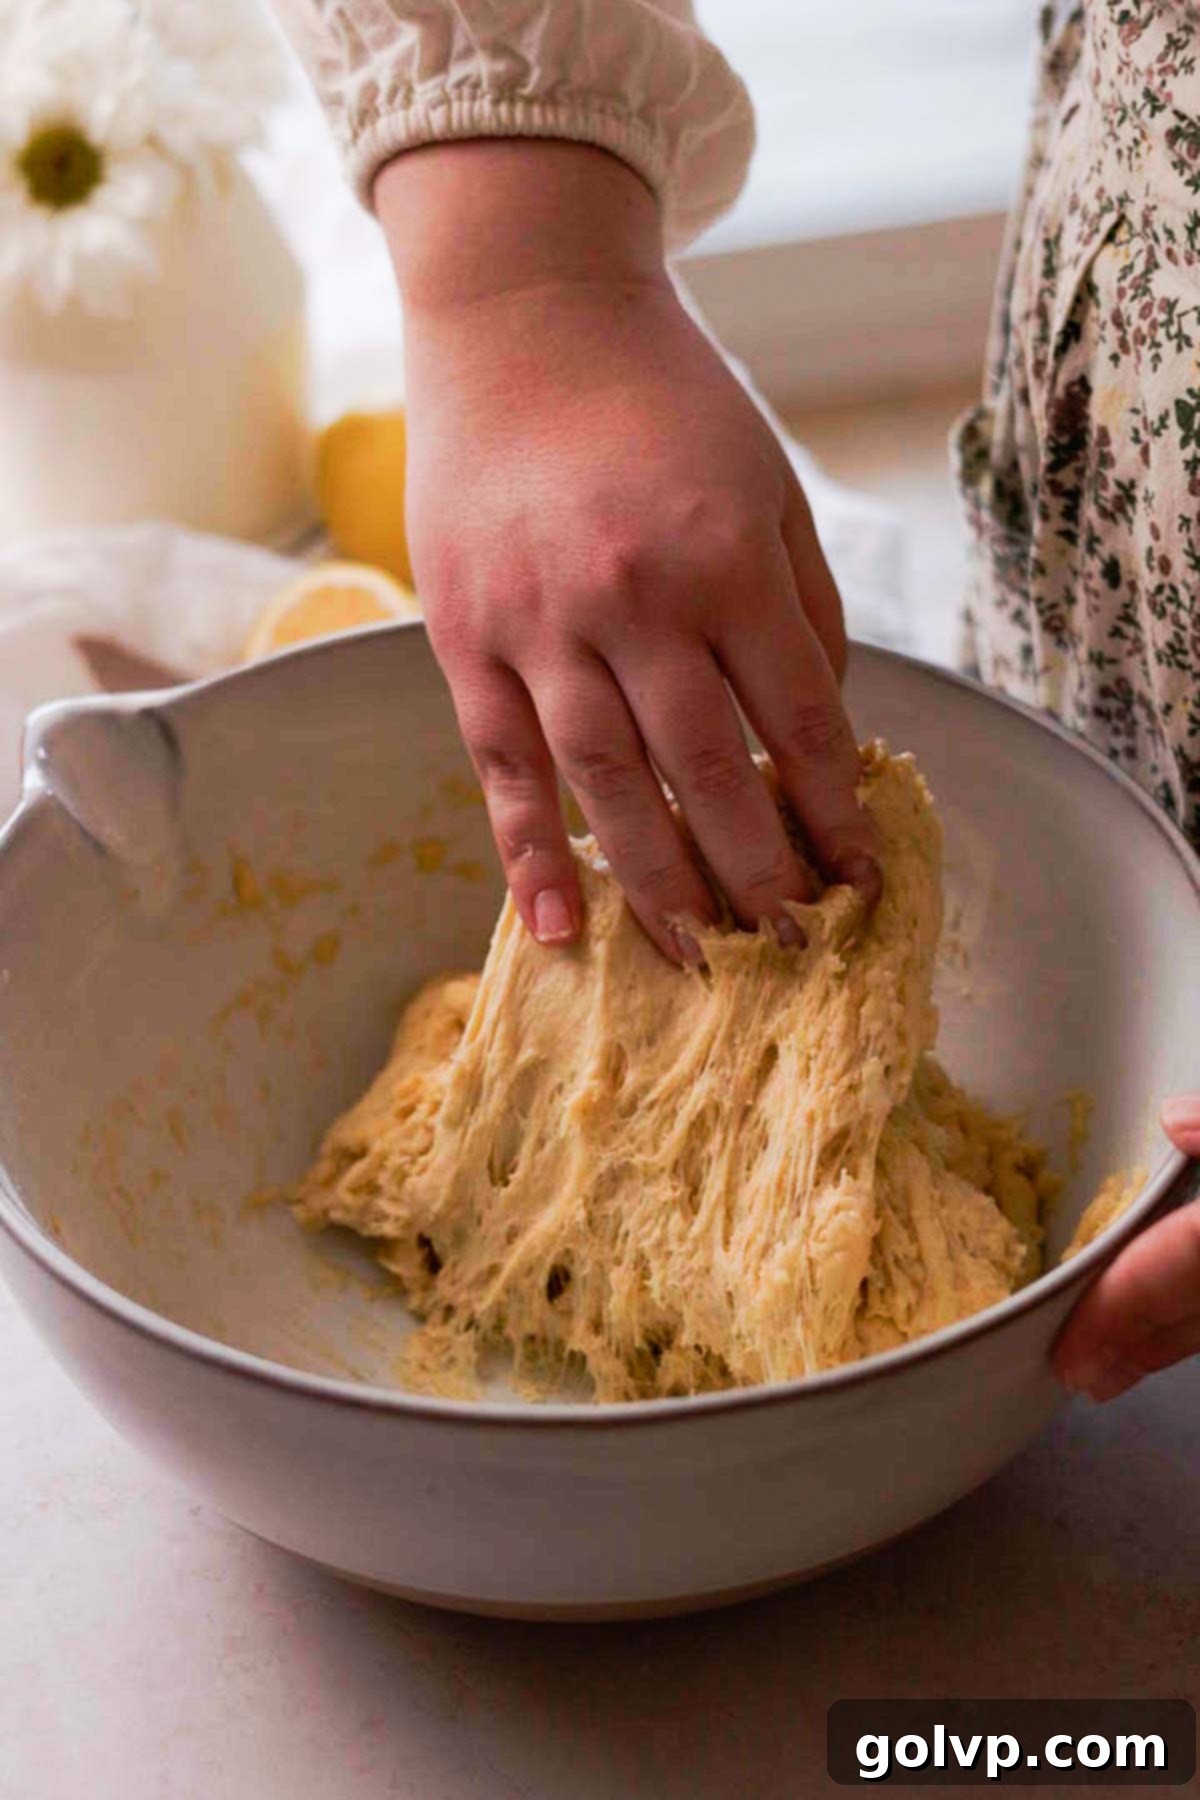
Step 4: Stretch and Fold (First Time) and Second Rise. After the first rise, it’s time for a gentle stretch and fold to build strength in the dough. With lightly oiled fingers, lift one edge of the dough from the bowl, stretch it upward, and then fold it over the dough ball towards the opposite side. Repeat this process about six times, rotating the bowl as you go, until the dough is deflated and feels slightly more elastic. Reshape the dough into a smooth ball and place it back into the bowl. Cover it again with the towel or plastic wrap.
Allow the dough to undergo a second rise in a warm place for another 25-30 minutes, or until it has again puffed up and doubled in size. This double rise and folding technique is what gives our no-knead dough its incredible brioche-like texture.
In the meantime: While your dough enjoys its second rest, this is the perfect opportunity to prepare the delicious cottage cheese filling, mix up the optional streusel topping, and prepare the egg wash.
Cottage Cheese Filling: Step by Step
The creamy, sweet filling is what makes Vatrushka truly special. Here’s how to prepare it:
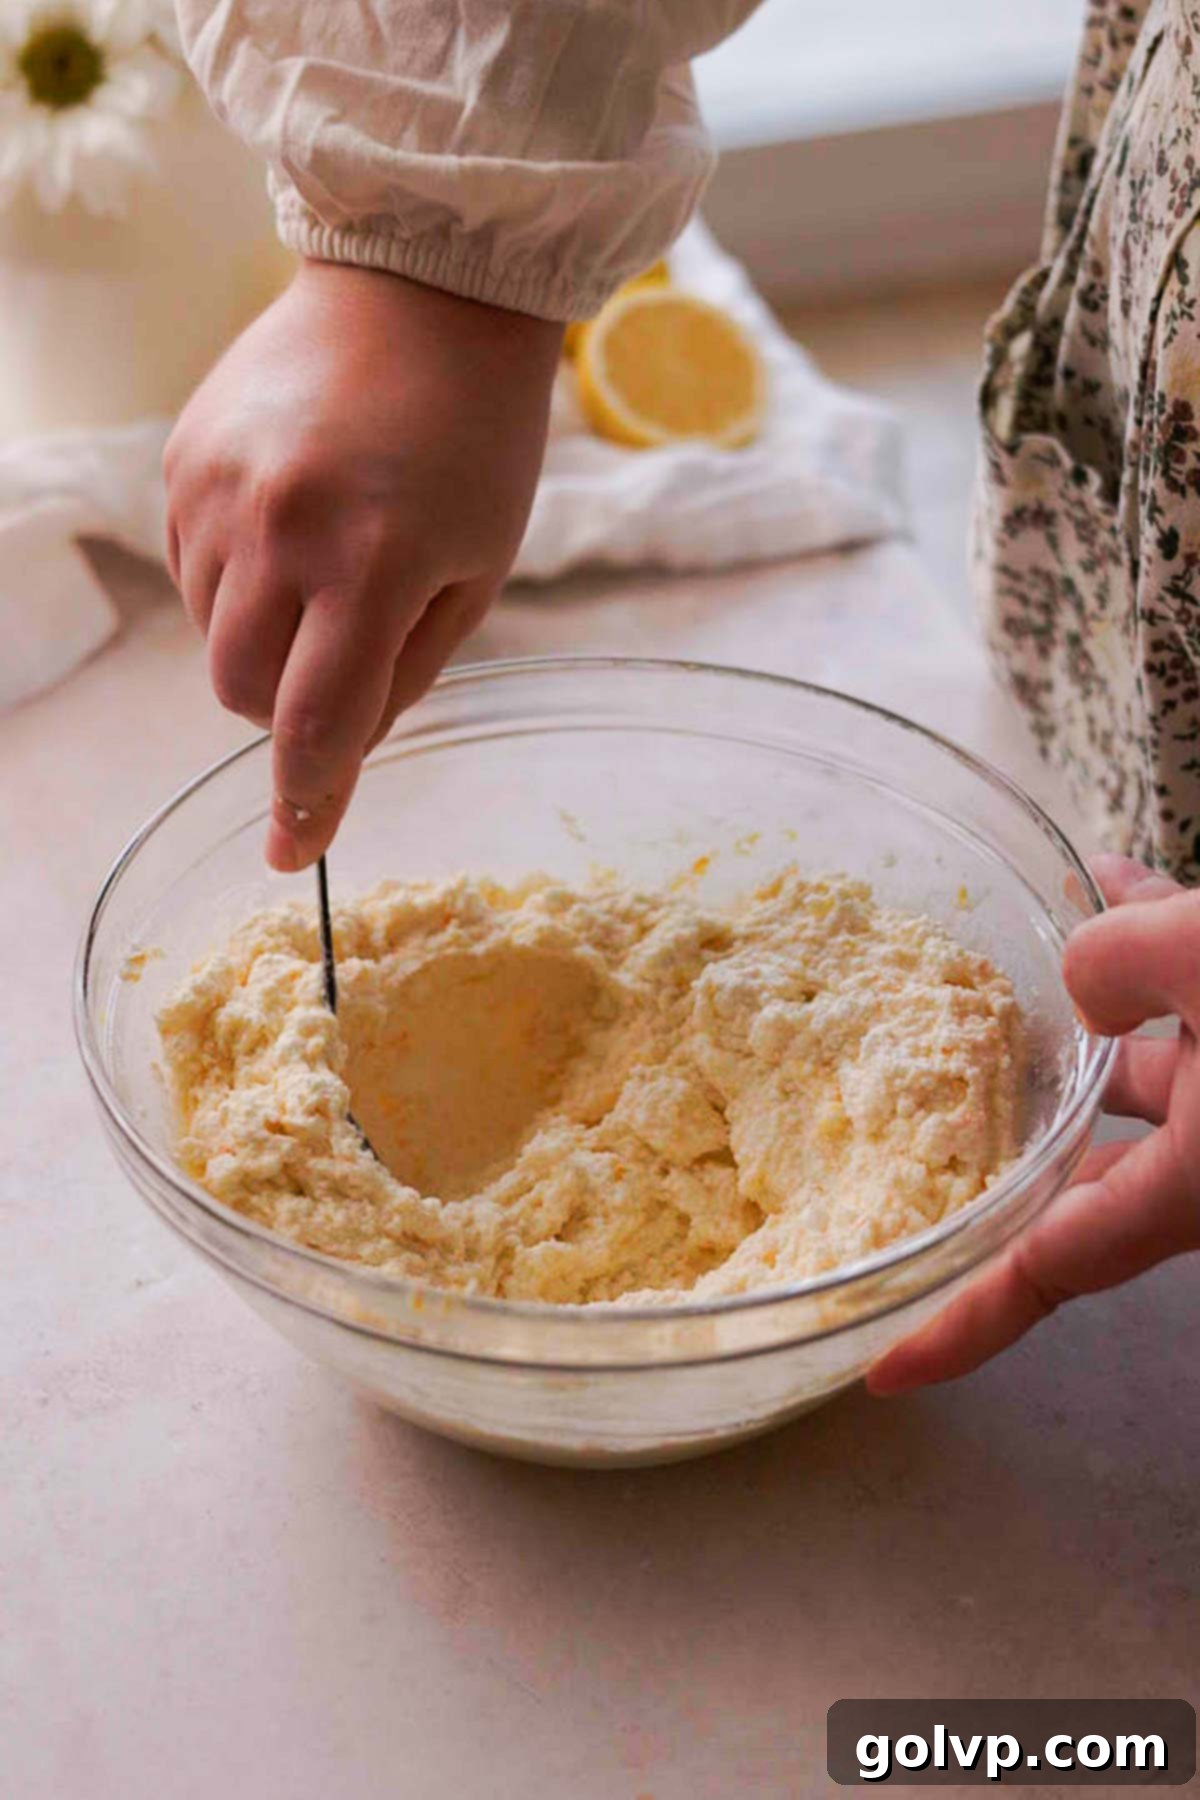
Prepare the Filling: In a large mixing bowl or a blender, combine the pressed cottage cheese, granulated sugar, grated lemon zest, potato starch (this helps absorb excess moisture and thickens the filling), egg yolk, sour cream, and vanilla extract. For the smoothest, most luxurious filling, blend the mixture using an immersion blender or a regular blender until it is thick and mostly smooth. Make sure to scrape down the sides of the bowl or blender periodically to ensure everything is thoroughly incorporated. If you prefer a slightly more rustic texture, you can simply mix all the ingredients vigorously with a spoon until well combined. While it might be a little grainier, it will still be incredibly delicious.
Optional Streusel Topping & Egg Wash
These two components add the finishing touches that make Vatrushka visually appealing and even more flavorful.
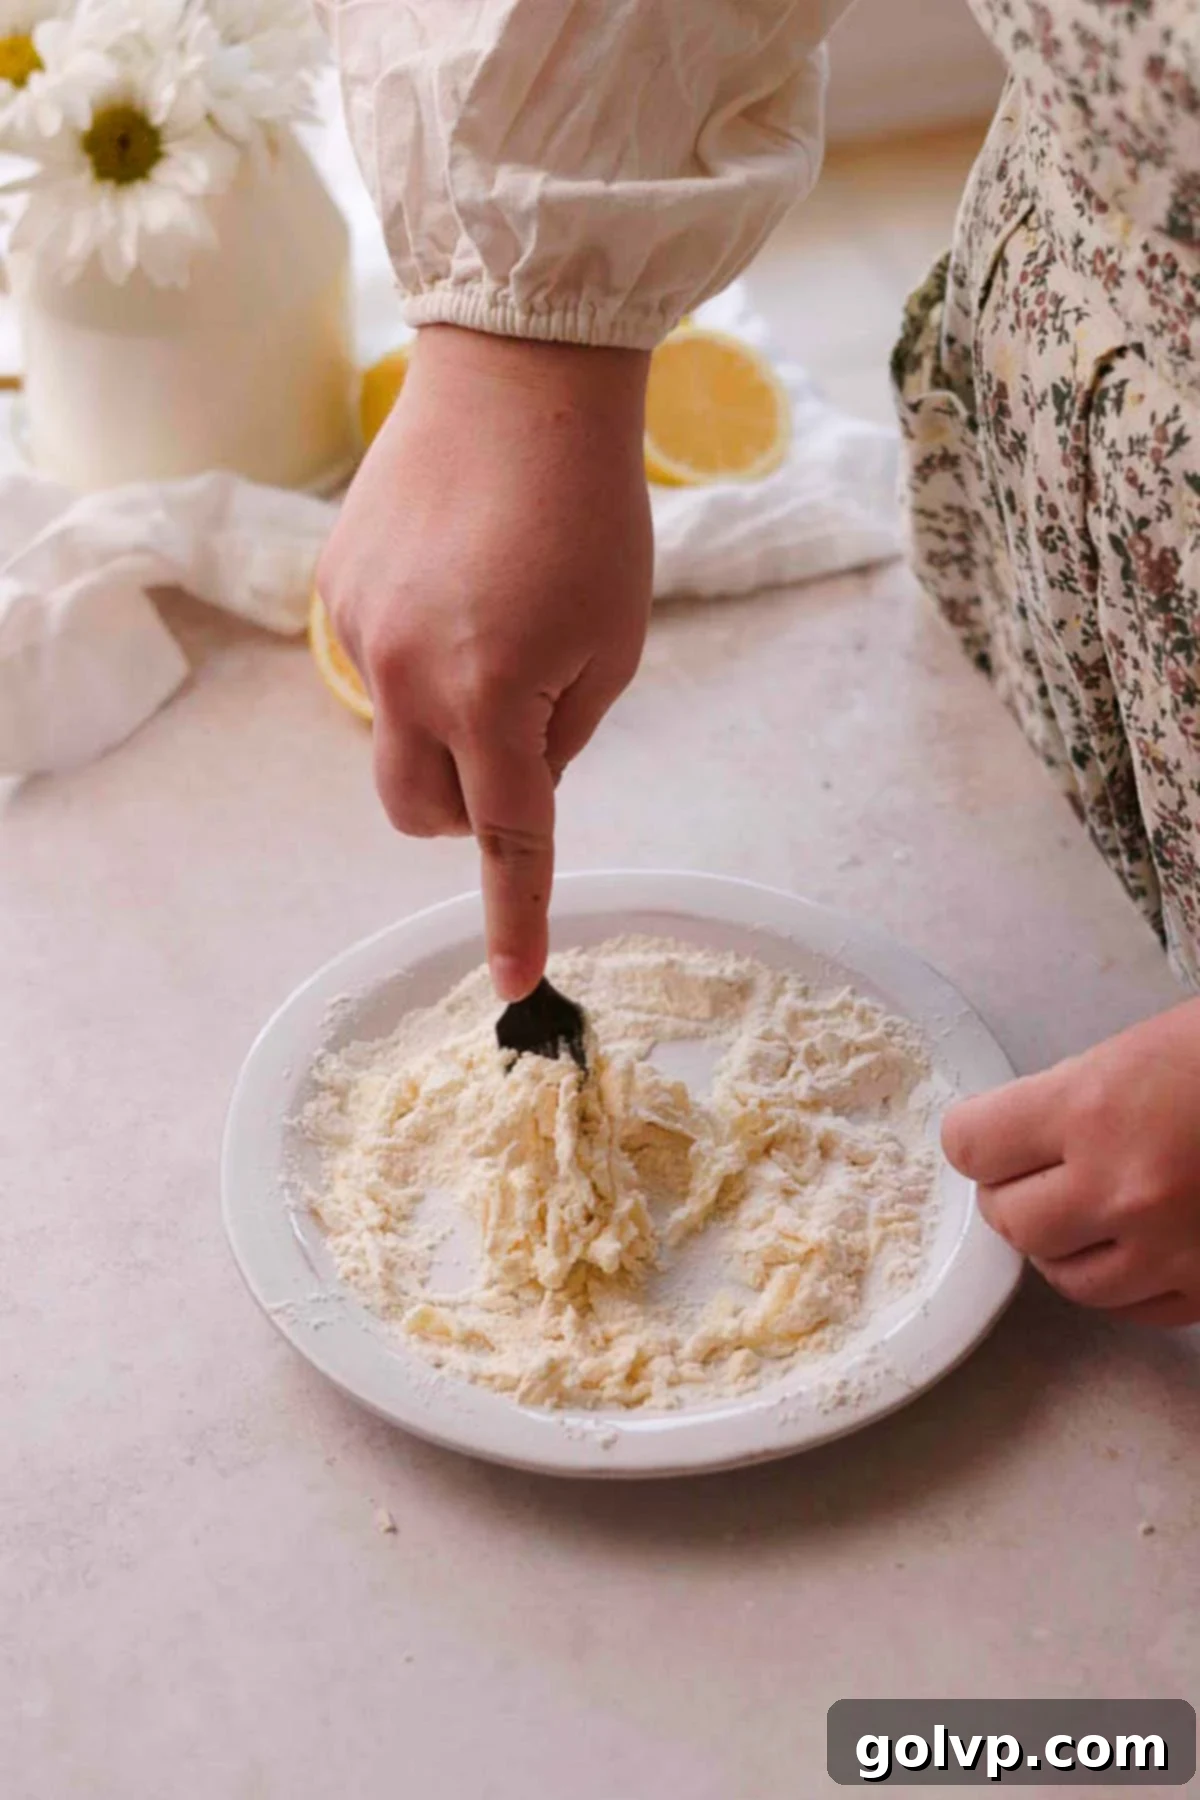
Optional Streusel Topping: If you’re adding the streusel, grab a dinner plate or a shallow bowl. Add the all-purpose flour, granulated sugar, softened butter, and sea salt. Using the back of a fork, work the softened butter into the dry ingredients. Continue until the mixture resembles coarse crumbles and there are no dry pockets of flour left. This quick and easy topping adds a fantastic sweet crunch. Set aside.
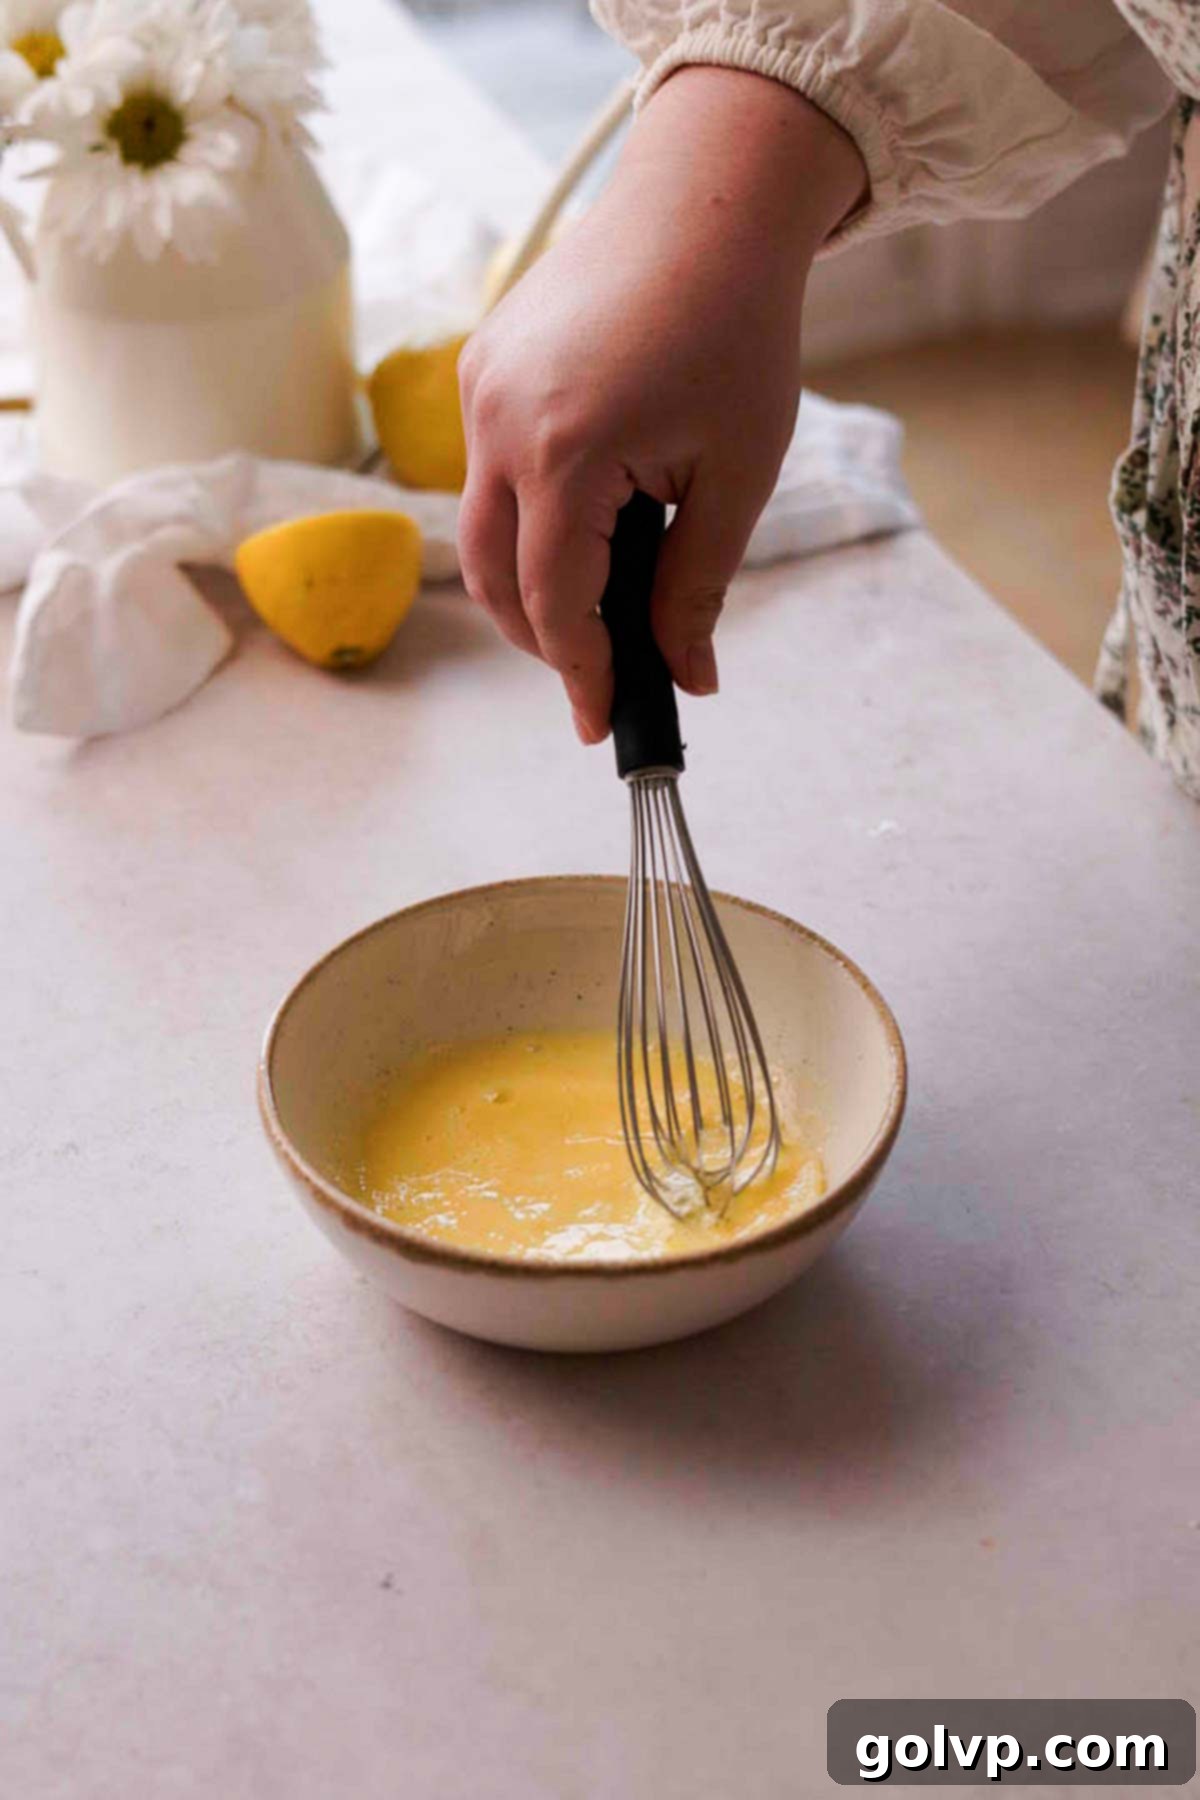
Egg Wash: In a small bowl, crack the large egg and add the milk. Whisk thoroughly until the egg and milk are fully combined and smooth. This egg wash will give your Vatrushka a beautiful golden-brown crust and help the streusel adhere. Cover and set aside in the fridge until you’re ready to use it for shaping.
Shaping and Filling Vatrushka Buns: Step by Step
Now for the fun part – transforming your soft dough into individual, filled Vatrushka buns!
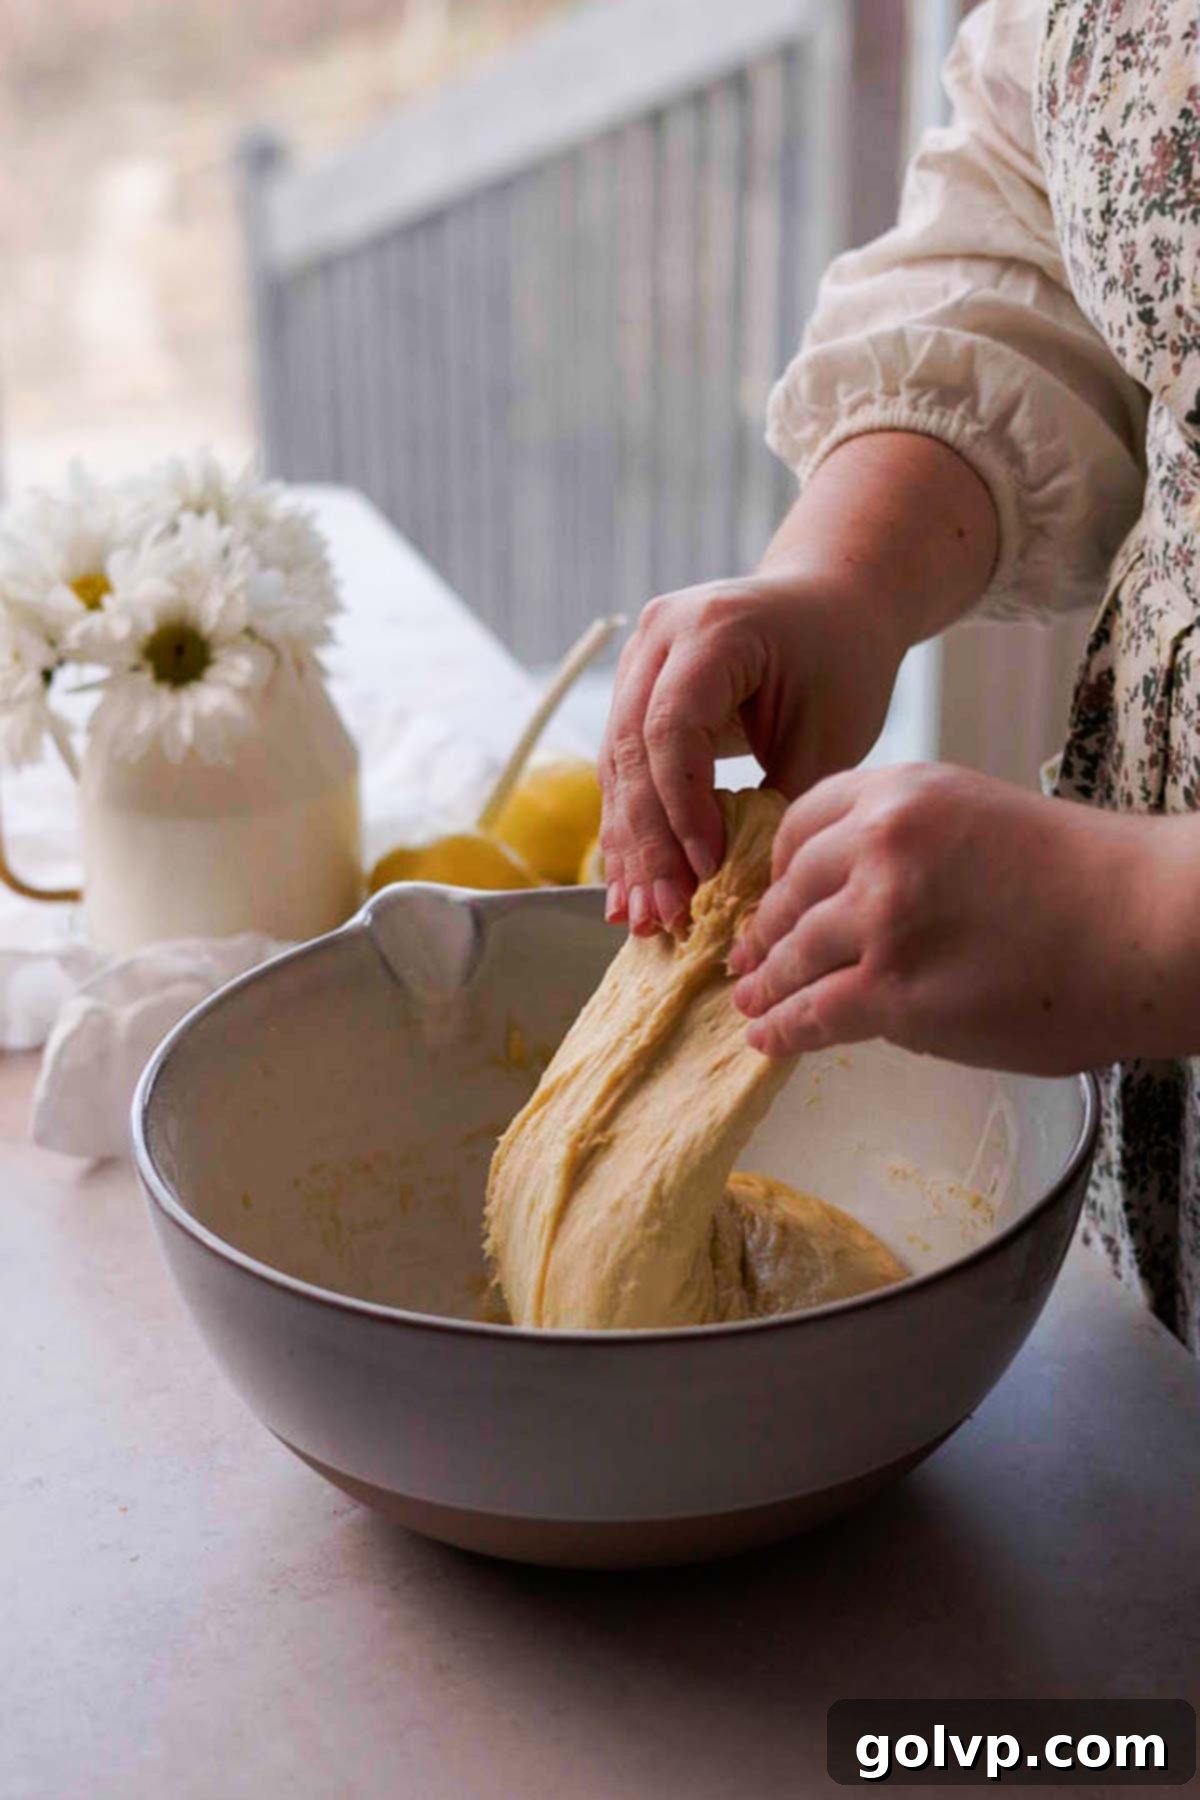
Step 1: Final Stretch and Fold. After the second rise, repeat the stretch and fold process one more time. Gently lift an edge of the dough, stretch it upward, and fold it over the rest of the dough. Do this five more times. By now, the dough should feel noticeably more elastic, buttery, and should no longer stick excessively to your fingers, indicating excellent gluten development.
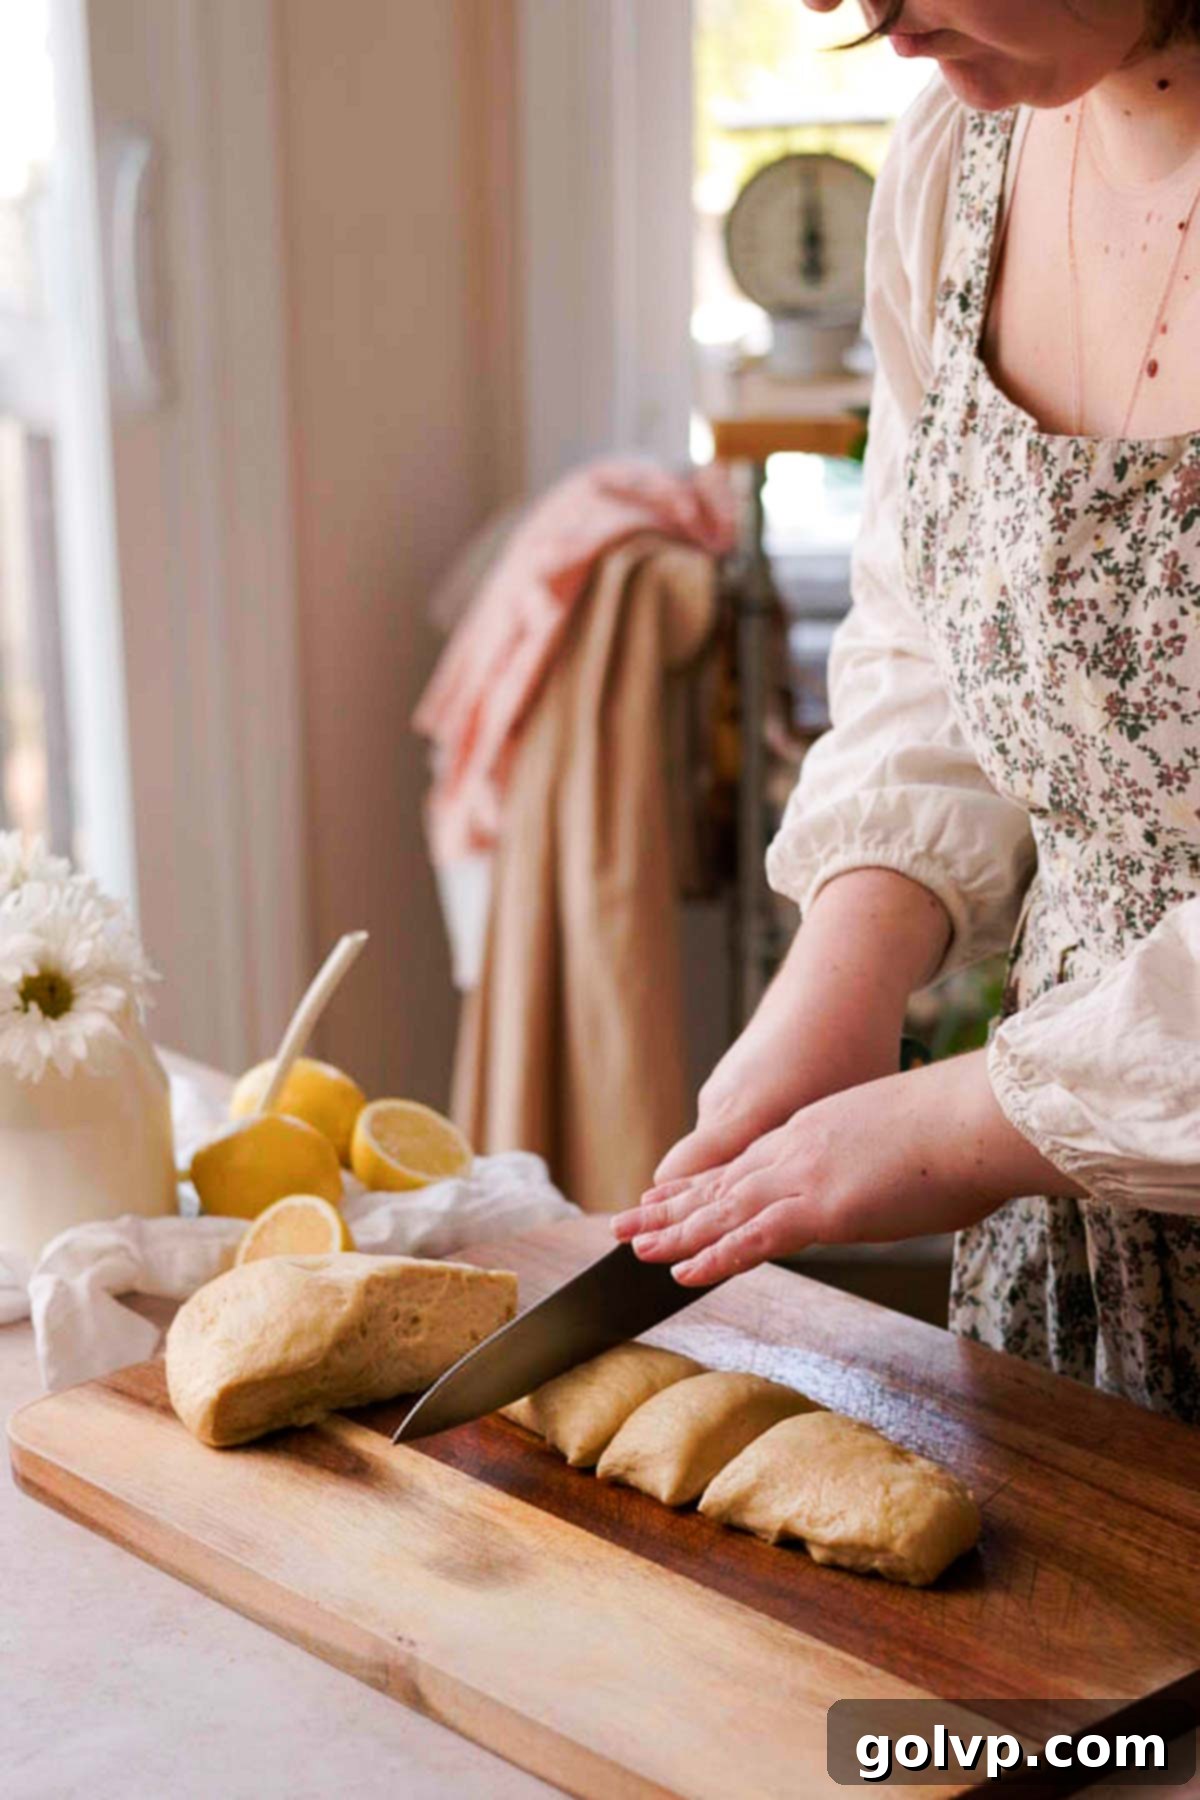
Step 2: Divide the Dough. Lightly grease a clean work surface with a neutral oil, such as light olive oil or vegetable oil, to prevent sticking. Carefully turn the dough out onto the prepared surface. Using a sharp knife or a bench scraper, cut the dough ball in half. Roll each half into an even log shape, then cut each log into five equal pieces. This should give you a total of 10 uniformly sized pieces of dough, perfect for making 10 Vatrushka buns.
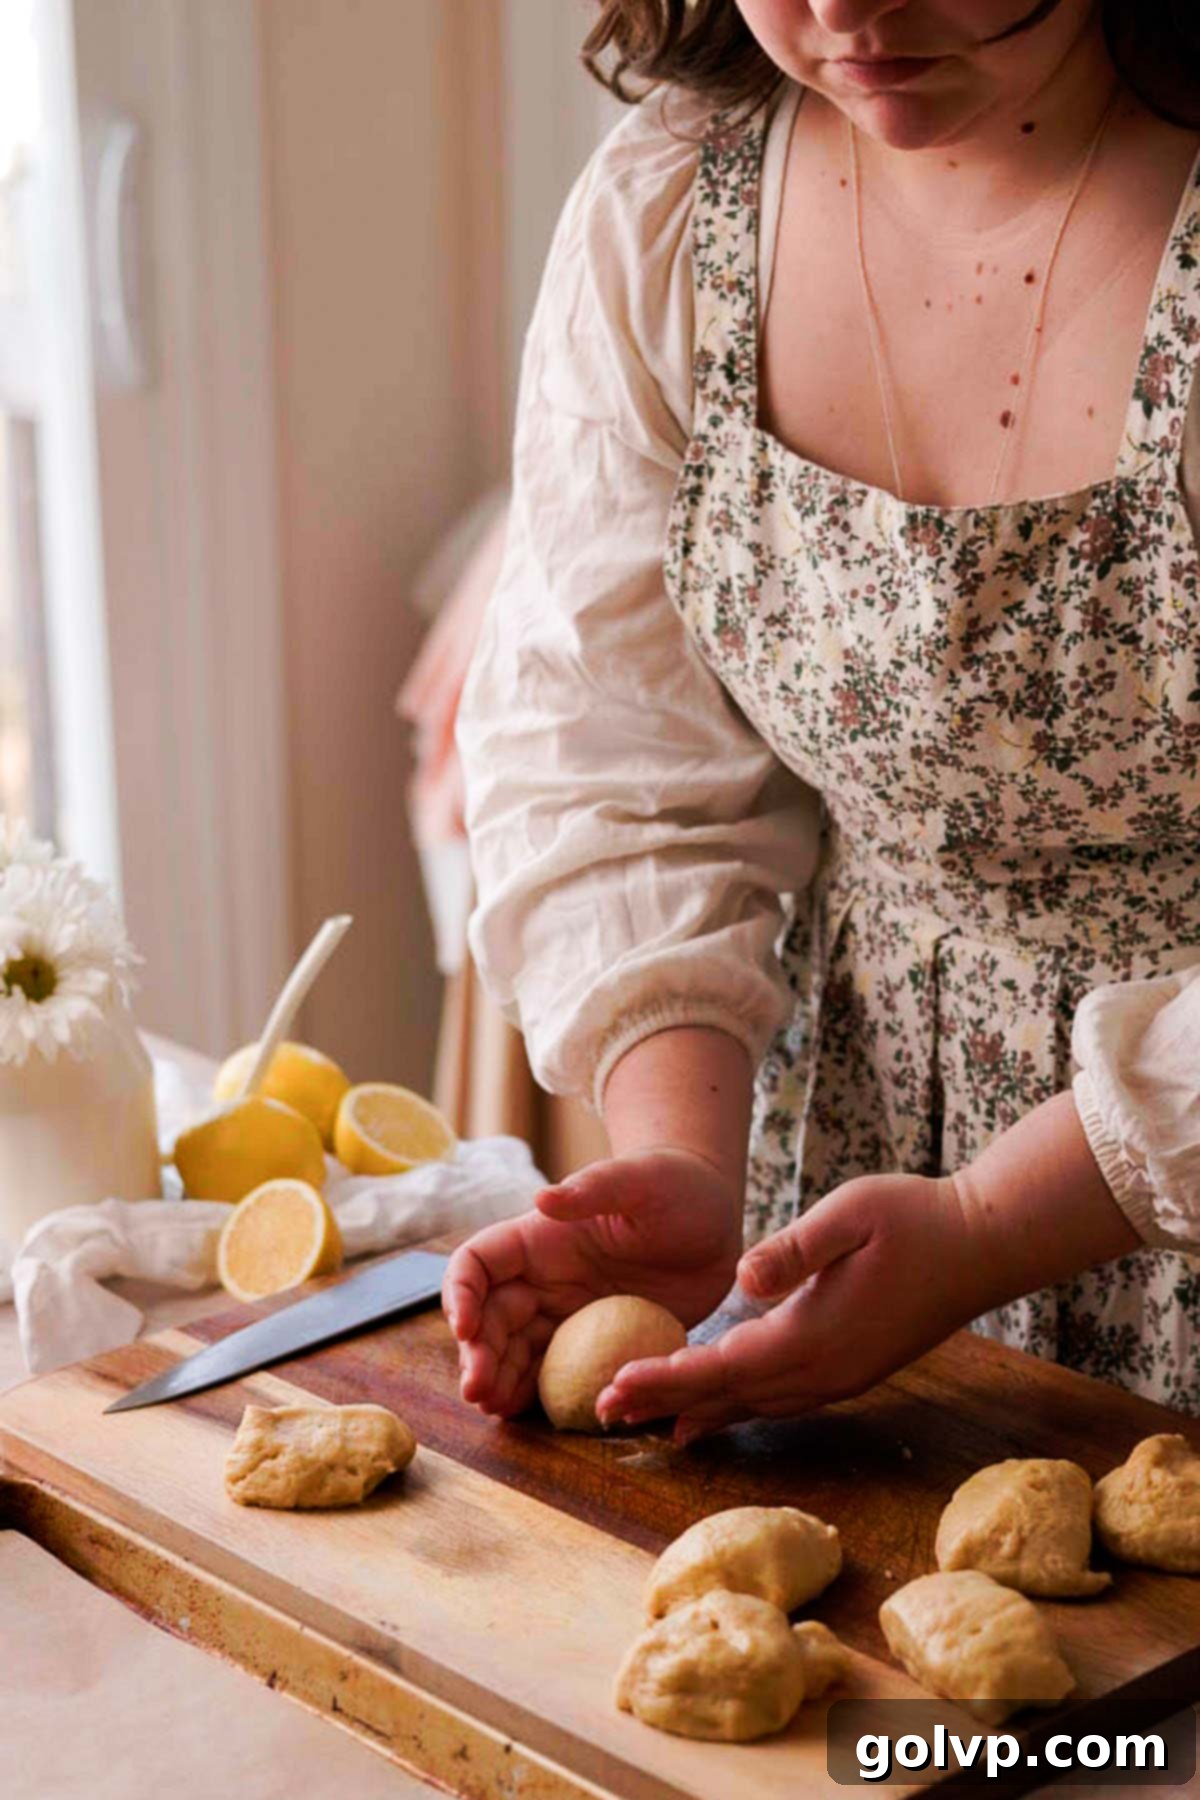
Step 3: Shape the Buns. Take each dough piece and gently shape it into a smooth, tight ball. You can do this by rolling it against the work surface with the palm of your hand, applying light pressure. Alternatively, place your hand over the dough ball and drag its bottom edge along the work surface in a circular motion, creating a tight, tense surface on top. This technique helps ensure a beautiful, smooth, and even rise for your Vatrushka.
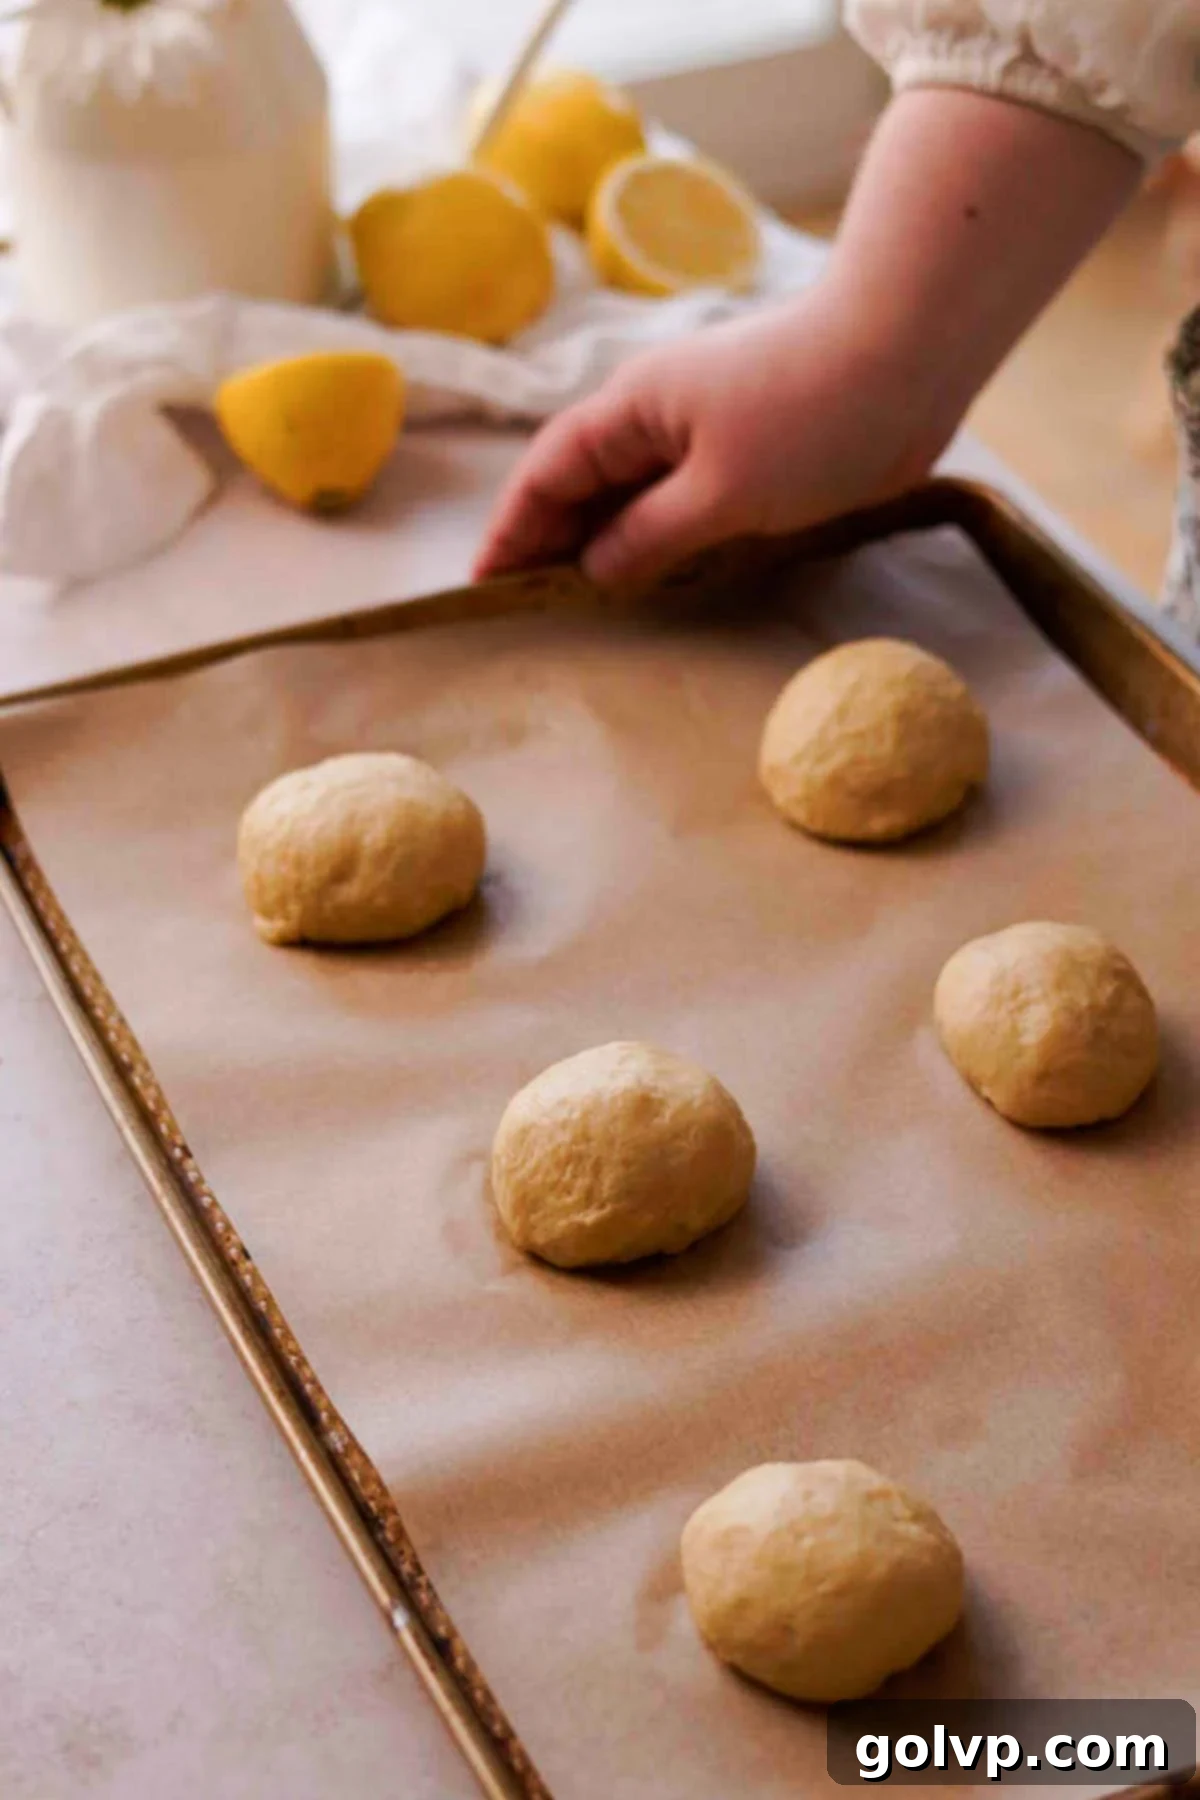
Step 4: Arrange for Final Rise. Place the shaped dough balls, smooth side facing up, onto large baking sheets lined with parchment paper. It’s crucial to space them out generously, leaving at least 4 inches of space between each bun, as they will expand significantly during their final rise and baking. You’ll likely need two large baking sheets for all 10 buns. Cover loosely with a clean towel.
Step 5: Final Proofing & Oven Preheat. Let the dough balls rise on the baking sheets for an additional 15 minutes. During this short proofing period, preheat your oven to 355°F (180°C). Getting your oven to the correct temperature beforehand is key for even baking.
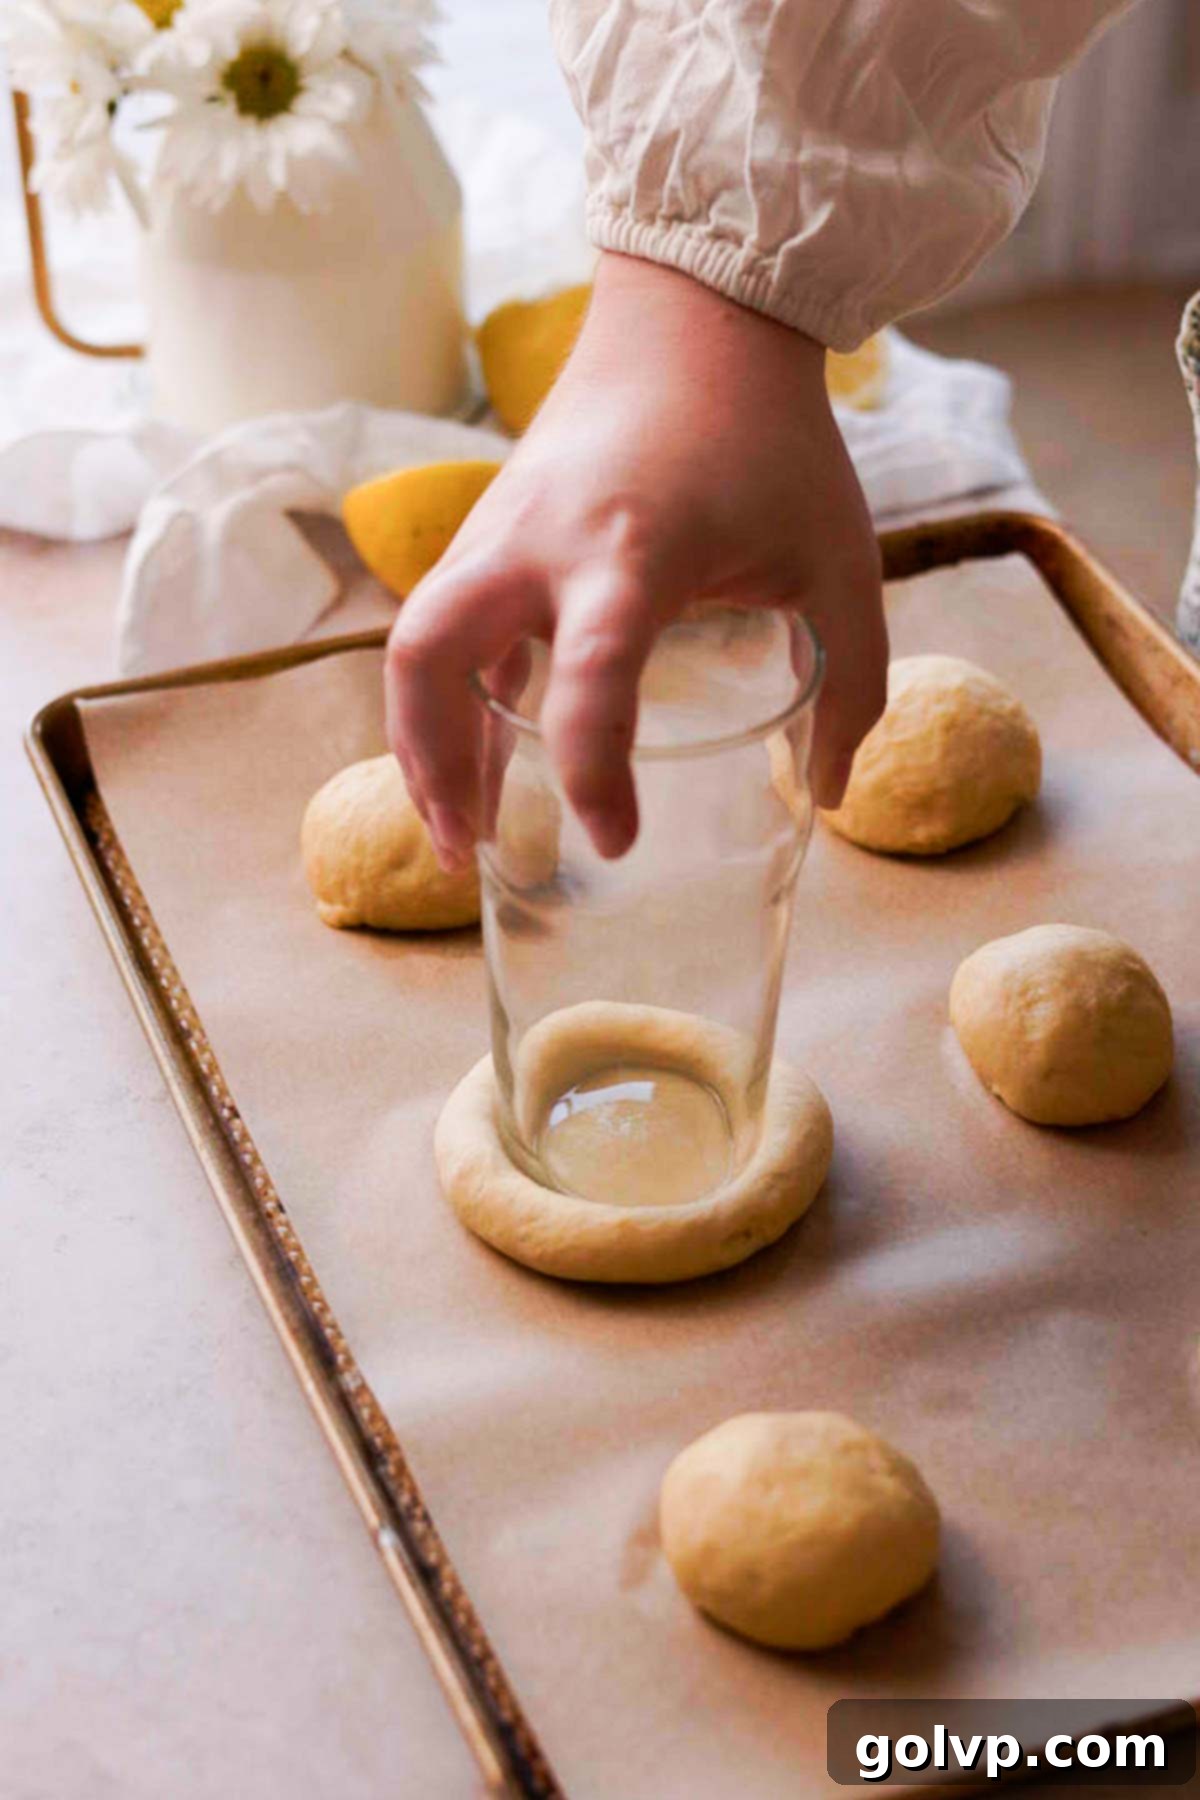
Step 6: Create the Filling Wells. Find a drinking glass with a flat bottom, roughly 2.5 inches in diameter. Lightly grease the bottom of the glass with a neutral oil (like light olive oil or vegetable oil) to prevent sticking. Once the dough has had its short rise on the baking sheets, gently but firmly press the bottom of the greased glass into the center of each dough ball. Press down hard enough to create a distinct, deep well, which will serve as the perfect pocket for your creamy cottage cheese filling.
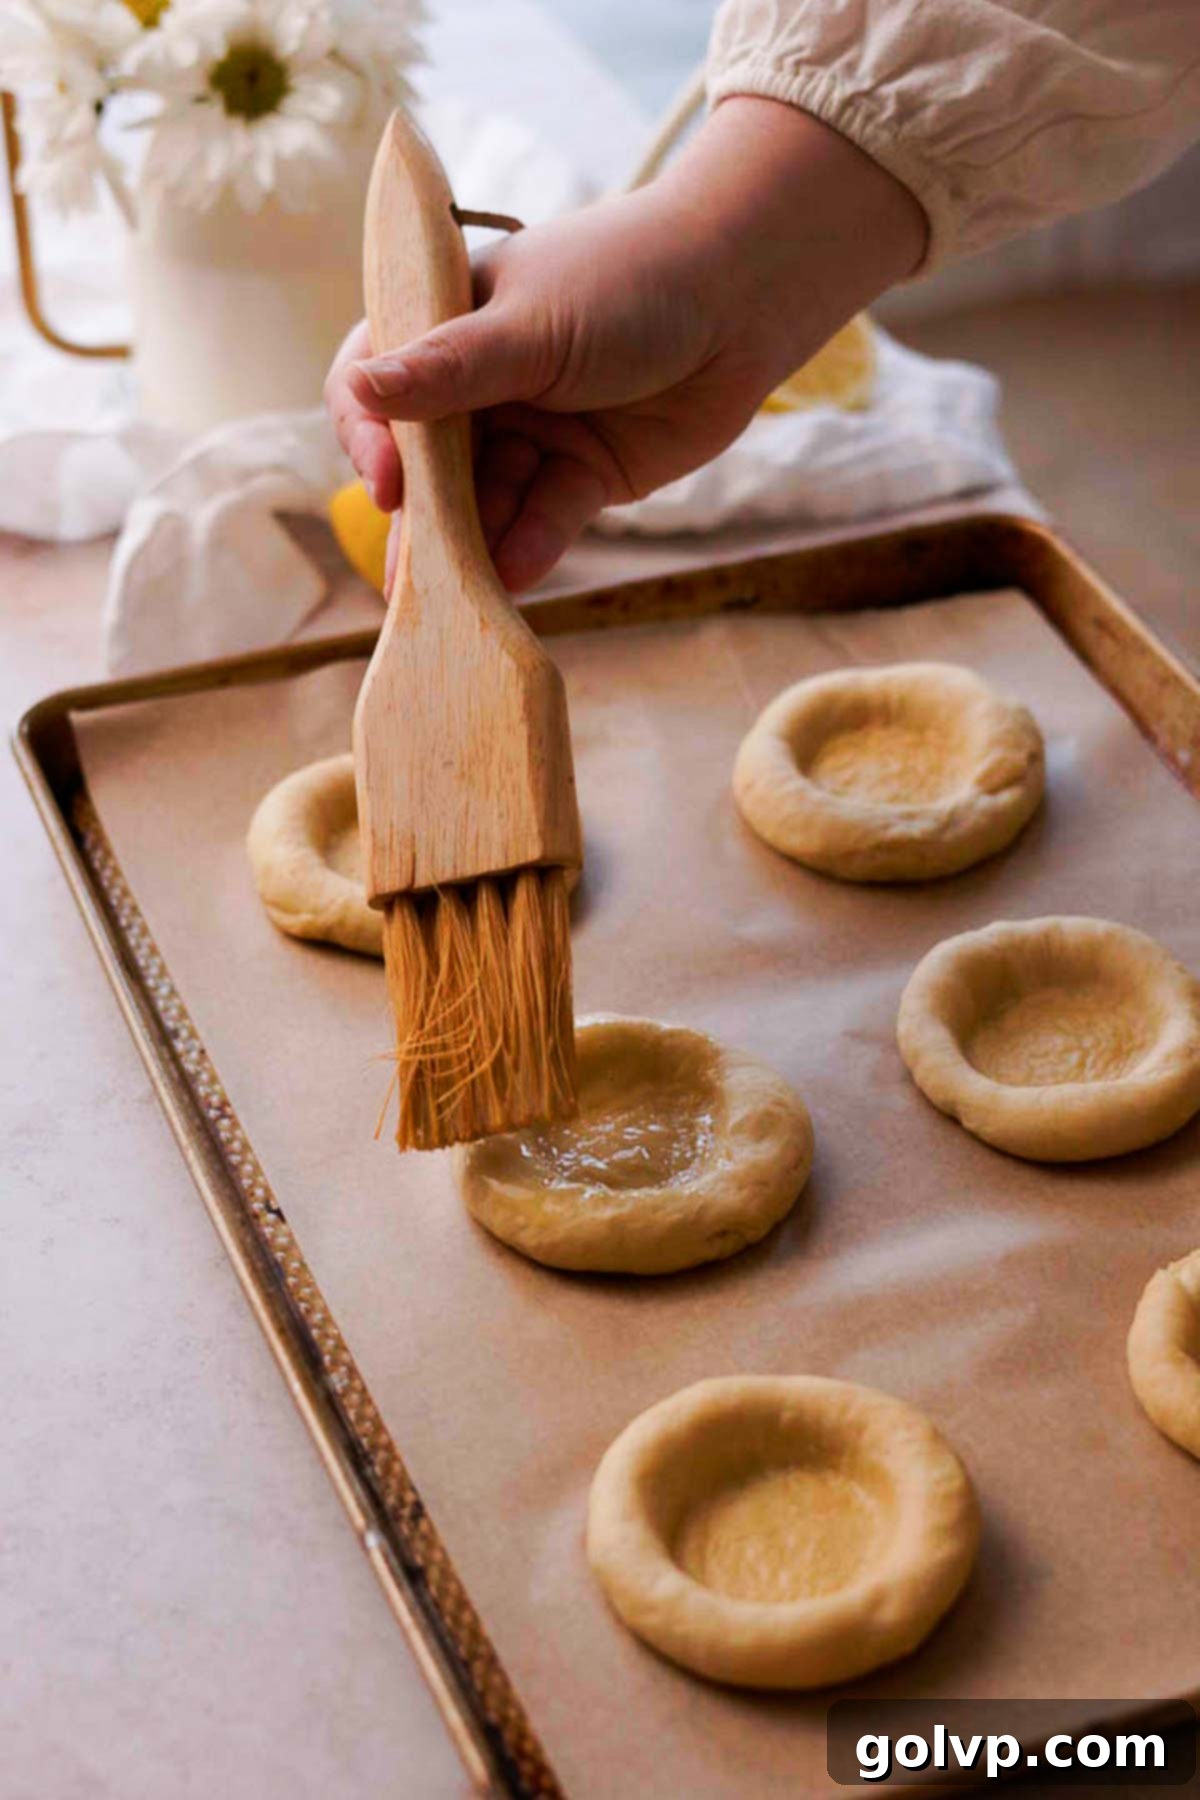
Step 7: Apply Egg Wash. Retrieve your prepared egg wash from the fridge. Using a pastry brush, gently and carefully brush the egg wash over the exposed dough surface and edges of each bun, taking care not to let it pool in the created well. This step contributes to a beautiful golden crust and helps the optional streusel adhere later.

Step 8: Fill the Buns. Now, it’s time for the star of the show! Evenly divide the prepared cottage cheese filling among the 10 dough wells, placing generous scoops into the center of each. Don’t be shy; it might seem like you’re overfilling them, but as the dough rises further and spreads during baking, it will beautifully make space for the ample filling, creating a perfect balance.
Optional Additions: For a delightful variation, you can add about a teaspoon of your chosen jam or curd into the center of the filled buns. Use a toothpick to gently swirl it into the cottage cheese filling, creating pretty marbled patterns. Alternatively, dot the filling with a few fresh or frozen berries – raspberries are a particularly lovely choice, adding a burst of color and tartness!
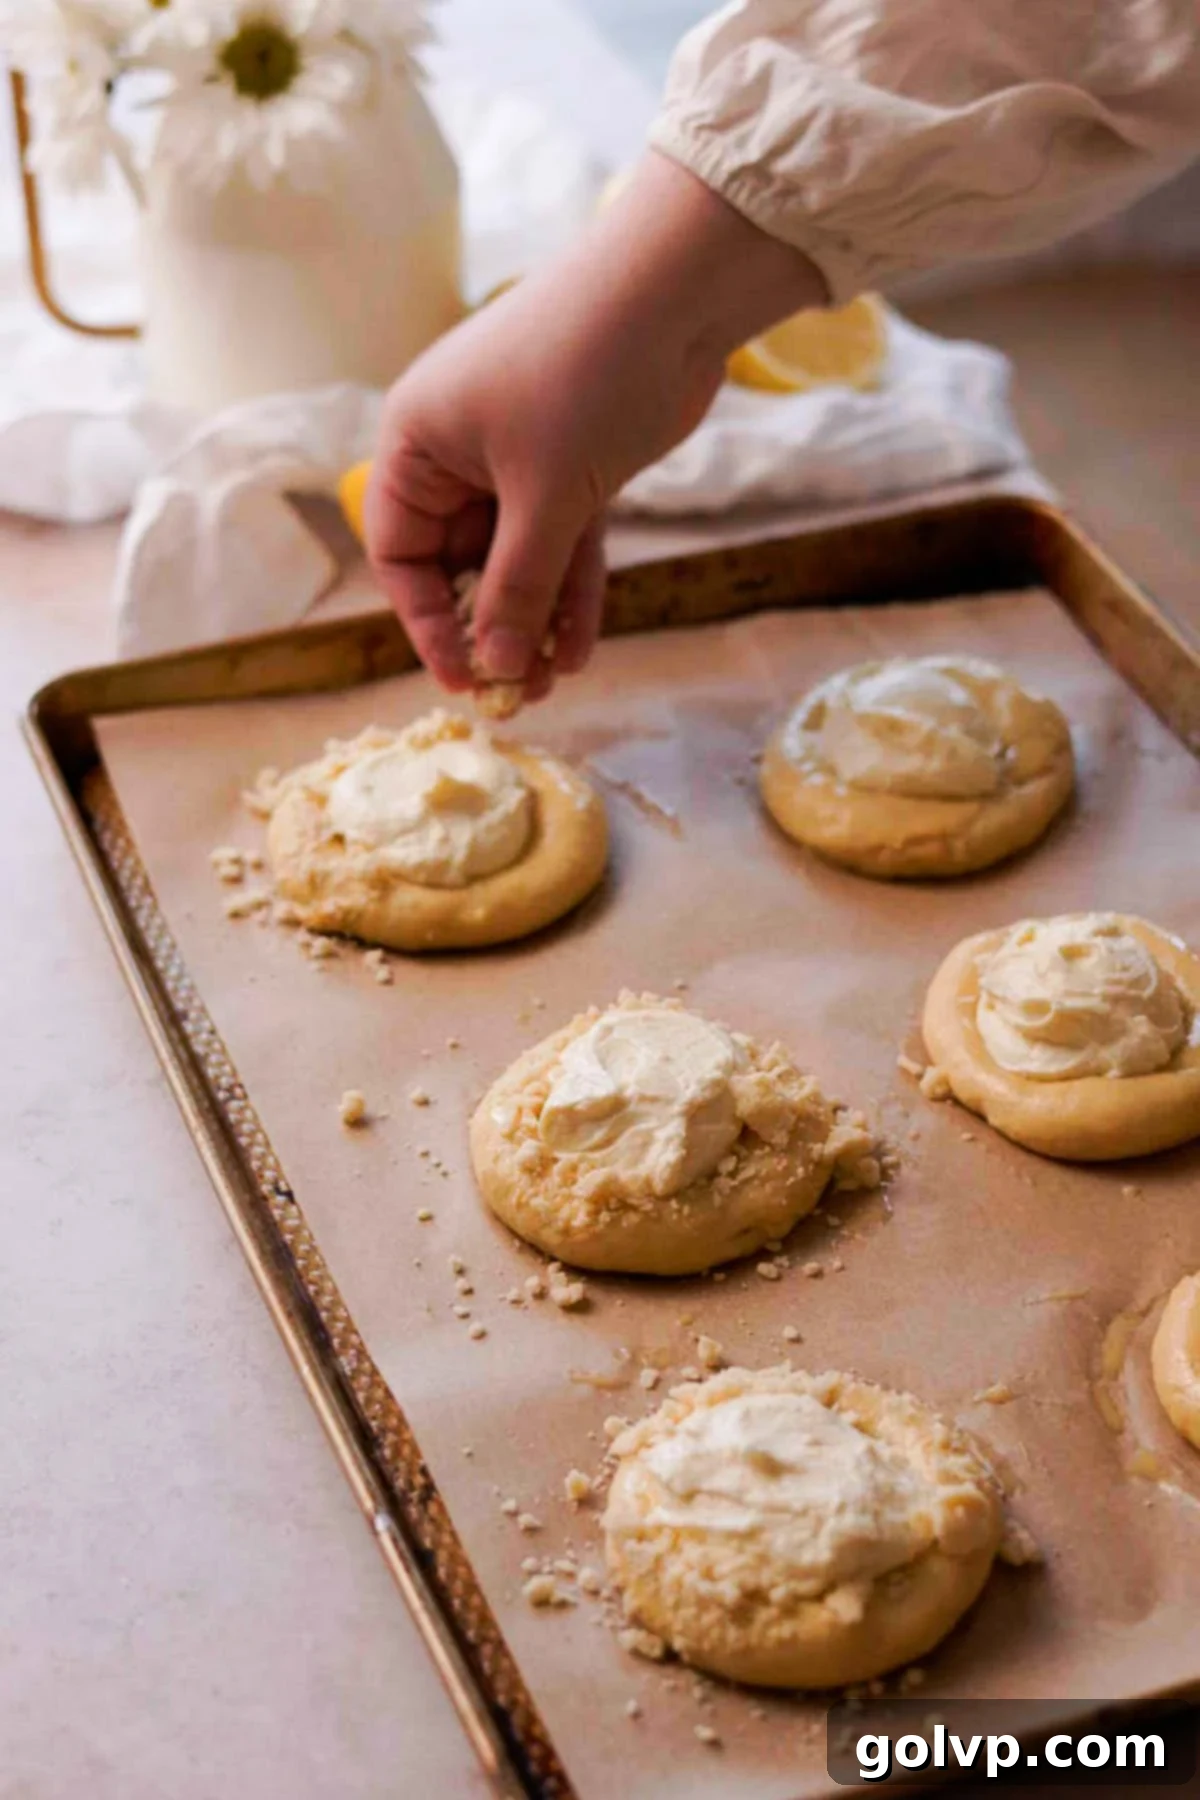
Step 9: Add Streusel and Bake. If using the optional streusel, sprinkle the crumbles generously onto the egg-washed edges of the buns, avoiding the filling itself. The egg wash will help the streusel adhere beautifully. Carefully transfer the baking sheets to the preheated oven, placing them in the center. Bake for 17 to 20 minutes, or until the buns are a beautiful golden brown on the crust, and a toothpick inserted into the brioche (not the filling) comes out clean. Keep an eye on them, as oven temperatures can vary.
Once baked, remove the Vatrushka from the oven and let them cool slightly on the baking sheets before transferring to a wire rack. They are truly best enjoyed warm, fresh out of the oven, allowing the soft dough and creamy filling to shine.
✔️ Expert No-Knead Brioche Tips for Vatrushka
Achieving perfectly soft and fluffy Vatrushka buns with a no-knead dough is entirely possible with these expert tips:
- Measure Flour Accurately: Precision is key in baking, especially with flour. For the most consistent and best results, always use a kitchen scale to weigh your flour. If a scale isn’t available, employ the “scoop and level” method: gently scoop flour into your measuring cup without packing it, then use the straight edge of a knife or the back of a spoon to level off the excess. This prevents adding too much flour, which can lead to a dense dough.
- Respect the Rising Times: Do not rush the rising processes. Since this is a no-knead dough, sufficient rising time is absolutely critical for gluten development and to ensure the dough becomes light, airy, and fluffy. Each rise contributes to the final texture and flavor of your Vatrushka, so allow the dough ample time in a warm environment to puff up and double in size.
- Use the Correct Cottage Cheese: This is a non-negotiable for authentic Vatrushka! You must use a firm, “pressed” style cottage cheese (also known as Farmer’s cheese, Polish, Ukrainian, or Russian style cottage cheese, “Twarog,” or “Tvorog”). The liquid-filled cottage cheese varieties commonly found in Western supermarkets are far too moist and will make your filling runny. If you’re struggling to find pressed cottage cheese, quark cheese can be a good alternative (add an extra teaspoon of potato starch to the filling), or a very firm, well-drained ricotta cheese.
- Savor Fresh from the Oven: Vatrushka are truly at their peak when enjoyed warm or at room temperature on the day they are baked. The brioche dough is at its softest and most tender immediately after baking. If you have leftovers, a quick reheat in the oven or microwave will gently soften the butter in the dough, bringing back that delightful fresh-baked texture.
- Don’t Forget Room Temperature Ingredients: For better emulsification and a smoother dough, ensure your eggs, butter, and sour cream are at room temperature before mixing. This allows them to incorporate more evenly and contribute to a more consistent dough texture.
- Proper Yeast Activation: Always check your yeast’s activity by letting it bloom in warm milk with a pinch of sugar. If it doesn’t foam within 5-10 minutes, replace it. Inactive yeast is the most common reason for a dough that doesn’t rise.
🥄 Make Ahead – Overnight Vatrushka Option
Preparing Vatrushka can fit into your schedule with an easy make-ahead option. For an overnight rise, after the first stretch and fold (Step 4 of the dough instructions), instead of letting the dough rise at room temperature for its second proof, cover the bowl tightly with plastic wrap to prevent it from drying out. Place the dough in the refrigerator for up to 12 hours. The cold temperature will significantly slow down the fermentation, allowing the dough to develop deeper flavors. The next day, simply remove the dough from the fridge, let it sit at room temperature for about 30 minutes to warm up slightly, and then proceed with the final stretch and fold, shaping, and filling the buns according to the remaining instructions. This is perfect for fresh-baked Vatrushka in the morning with minimal fuss!
🍽️ Brioche Bun Storage
To keep your delicious Vatrushka fresh, store the completely cooled buns in an airtight container at room temperature for up to 2-3 days, or in the refrigerator for up to 5 days. For longer storage, Vatrushka freeze beautifully: place them in an airtight container or a heavy-duty freezer bag for up to 2 months. To enjoy again, simply thaw them at room temperature and then gently reheat in a preheated oven (around 300°F or 150°C) for 5-10 minutes, or microwave for 15-30 seconds, until soft and fluffy once more. Reheating is key to restoring their tender texture and buttery aroma.

❔ Why I Prefer a No-Knead Technique Over Traditional Kneading
Through countless experiments and taste tests, my team and I have consistently found that a no-knead approach yields a superior Vatrushka dough compared to traditional kneading. When this particular brioche dough was subjected to extensive mechanical kneading, it often resulted in a dryer, less moist final product. Even with adjustments to hydration, the texture was not as appealing.
Conversely, our no-knead method, which incorporates two rises and strategic stretch-and-fold sessions, allows for sufficient gluten formation without the need for an electric mixer or strenuous manual labor. This gentle development of gluten results in a dough that remains remarkably soft, rich, and moist when baked. While the process involves more “inactive” or waiting time, it significantly reduces hands-on effort and eliminates the need for specialized equipment.
The feedback from our taste testers was unanimous: the no-knead Vatrushka produced a bun that was not only softer and moister initially but also retained its tender quality for a longer period. The traditionally kneaded dough, while sometimes airier, tended to dry out much faster, even when extra moisture was added to the recipe. This no-knead method proves that patience and gentle handling can often surpass aggressive kneading for achieving truly delightful, soft brioche buns.

The Rich Origins of Vatrushka
Vatrushka, or its plural form Vatrushki, carries a rich history deeply rooted in ancient Slavic traditions of Eastern Europe. Its origins can be traced back to historic times when these pastries were often made as a single, large bun baked in a communal oven or hearth, rather than individual portions. This grand pastry would then be cut and shared among many. Early savory versions were also common, often made with rye and whole grain dough, filled with cottage cheese and onions, showcasing the versatility of the dish.
Legend has it that these impressive, sun-like pastries were originally crafted to celebrate the sun god during spring equinox festivities in ancient cultures. Their round shape and golden hue were symbolic of the sun’s warmth and the return of light and fertility after winter. Today, Vatrushka remains a significant part of cultural celebrations, most notably enjoyed during Crepe Week or Butter Week (“Maslenitsa”), a joyful Eastern Slavic religious holiday celebrated before the beginning of Lent, marking the end of winter.
The very name “vatrushka” is believed to derive from the Old Slavic word “vatr”, meaning “hearth” or “fire.” This connection reflects the traditional method of baking these delightful buns inside a warm hearth, highlighting their ancient culinary roots.
Many Eastern European countries boast similar beloved pastries, each with its unique regional twist. This specific version of Vatrushka is widely cherished in Ukraine and Russia. The Czech Republic offers “Kolaches,” which can feature various fillings, including both fruit and the familiar sweet cottage cheese. Hungary also presents a related pastry, though it is more frequently prepared with a delicate puff pastry or “Danish” pastry rather than a brioche-style dough. These variations speak to a shared culinary heritage across the region, with Vatrushka standing out as a true emblem of Slavic baking.
📖 Recipe FAQs
The two rises are essential for developing the necessary gluten structure in a no-knead dough, which in turn creates incredibly soft and fluffy rolls. This method, combined with gentle stretching and folding, consistently produces a more moist and tender bun than traditional kneading, which can sometimes lead to a drier texture. It’s mostly inactive waiting time, making it much easier than constant manual kneading.
Unfortunately, the typical “wet” cottage cheese commonly found in many Western supermarkets is not suitable for this recipe as it contains too much liquid. For authentic Vatrushka, you need a European-style “pressed” cottage cheese. This variety is much firmer and creamier, similar in texture to a firm ricotta cheese but with softer, distinguishable grains.
Yes, you can use cream cheese as a substitute for the cottage cheese in the filling. It will create a very rich and creamy filling, though it will result in a slightly different flavor profile and texture compared to the traditional Vatrushka, making it less authentic but still delicious.
Traditionally, Vatrushka is made without a streusel topping. However, adding streusel has become increasingly popular as it contributes a delightful, sweet crunch that beautifully complements the soft bun and creamy filling. If you have a little extra time, we highly recommend including it, as it’s quick to prepare and truly enhances the overall experience!
🥧 More Related Recipes to Explore
- Cottage Cheese Cheesecake [Zapekanka]
- Lemon Rolls with Lemon Curd
- Creamy Basque Burnt Cheesecake
- Ukrainian Poppy Seed Roll
Did you make this recipe? We would love for you to rate it and share your thoughts in the comments below! Share your beautiful creation on Instagram and tag @flouringkitchen. Follow us on Pinterest for more inspiring recipe ideas and saves.
📖 Recipe

Cottage Cheese Brioche Buns [Vatrushka]
Mary
Pin Recipe
Shop Ingredients
Details
Categories
Serving
Equipment
- Immersion blender (optional, for blending cottage cheese filling)
Ingredients
Dough
- ½ cup milk (warm)
- 1 teaspoon sugar
- 3 g yeast (½ packet, about 1 teaspoon)
- 3 ¼ cup all purpose flour (390g)
- ¼ cup granulated sugar
- ½ teaspoon sea salt
- 2 large eggs (room temperature)
- ¼ cup sour cream
- ½ cup unsalted butter (softened)
- 1 tablespoon pure vanilla extract
Cheese Filling
- 1 lb pressed cottage cheese (Can be found as farmer’s cheese, tvorog, twarog, Ukrainian cottage cheese, Russian cottage cheese)
- ½ cup granulated sugar (add ¼ cup sugar if not adding the streusel topping)
- 1 tablespoon grated lemon zest (from about 1 lemon)
- 1 tablespoon potato starch (or cornstarch in a pinch)
- 1 large egg yolk
- 3 tablespoons sour cream
- 1 tablespoon pure vanilla extract
- ¼ teaspoon sea salt
Optional Streusel Topping
- ½ cup all purpose flour (60g)
- 2 tablespoons granulated sugar
- 2 tablespoons butter (softened)
- ¼ teaspoon sea salt
Egg Wash
- 1 large egg
- 1 tablespoon milk
Shop Ingredients on Jupiter
Instructions
Dough
- Pour the warm milk into a medium bowl. Add the yeast and 1 teaspoon sugar. Whisk together to dissolve the yeast and set aside for 10 minutes. The yeast mixture should form a foam on top. If it doesn’t form, that means that the yeast isn’t active. Try with a new batch or packet of yeast.
½ cup milk, 1 teaspoon sugar, 3 g yeast - Sift the flour into a separate large bowl. Make a well in the center. Into the center, add the sugar, salt, eggs, sour cream, butter, vanilla extract, and bloomed yeast-milk mixture. Stir together to form a cohesive dough ball.
3 ¼ cup all purpose flour, ¼ cup granulated sugar, ½ teaspoon sea salt, 2 large eggs, ¼ cup sour cream, ½ cup unsalted butter, 1 tablespoon pure vanilla extract - Cover the bowl with a clean kitchen towel and let rise in a warm place for 45-50 minutes. The dough will be puffed and doubled in size.
- Using your fingers, lift up one edge of the dough and pull it over the dough ball to the other side. Do this six times, until the dough is deflated. Form the dough into a smooth ball and place it back into the bowl. Cover with a towel again.
- Let the dough rise in a warm place again, for 25- 30 minutes until puffed and doubled in size.
In the meantime: make the cheese filling, streusel, and egg wash.
Cheese Filling
- Combine the cottage cheese, sugar, lemon zest, potato starch, egg yolk, sour cream, vanilla extract, and salt in a large bowl or blender. Blend the mixture together in the blender or using an immersion blender. It should be thick and mostly smooth. Scrape down the sides of the bowl or blender to get it as smooth as possible.
1 lb pressed cottage cheese, 1 tablespoon grated lemon zest, 1 tablespoon potato starch, 1 large egg yolk, 3 tablespoons sour cream, 1 tablespoon pure vanilla extract, ¼ teaspoon sea salt, ½ cup granulated sugar - Note: Alternatively, you can just mix the filling together with a spoon, without blending it together. It just might be a little grainier – but will still be really delicious.
Optional Streusel Topping
- Combine all of the ingredients in a flat dinner plate. Use a fork and flatten the butter into the flour with the back of the fork. Once the mixture resembles crumbles without dry bits of flour- it’s ready.
½ cup all purpose flour, 2 tablespoons granulated sugar, 2 tablespoons butter, ¼ teaspoon sea salt
Egg Wash
- Crack the egg into a medium bowl. Add the milk and whisk to combine. Set it aside in the fridge until it’s ready to use.
1 large egg, 1 tablespoon milk
Shaping and Filling
- Repeat the stretch and fold process: lift up one edge of the dough and fold it over the rest of the dough to the other side. Repeat another 5 times. The dough should now be stretchy, buttery, and not stick to your fingers.
- Grease a clean work surface with some neutral oil. Dump out the dough onto the work surface. Use a knife to cut the dough ball in half. Roll out each half into a log and cut each log into 5 pieces. You should have a total of 10 pieces.
- Shape each piece of dough into a smooth ball. Do this by rolling them into balls on the work surface. Then, place your hand over the ball and drag the bottom on the work surface. This should create a tight, tense surface on the dough- helping create a beautiful and smooth ball.
- Place the dough balls, smooth side up, onto large, parchment lined baking sheets. Space them out with 4″ of space in between because they need to spread. I used two large baking sheets.
- Let the dough balls rise on the baking sheets for 15 minutes – preheat the oven to 355°F (180°C) in the meantime.
- Find a glass with a flat bottom that’s about 2.5″ in diameter. Grease the bottom of the glass with neutral oil – like light olive oil or vegetable oil. Once the dough has risen, push the bottom of the glass into the middle of each dough ball, pressing down hard to create space for the filling.
- Brush egg wash gently over the surface and edges of each bun.
- Divide the cottage cheese filling evenly amongst the dough balls, placing scoops of it into the center. It’ll seem like you’re overfilling the buns but the dough will make space for the filling as it rises and spreads.
- Optional: You can add about a teaspoon of jam or curd into the center of the filled buns and swirl it into the cottage cheese filling with a toothpick. You can also dot the filling with fresh or frozen berries-I love adding raspberries!
- Sprinkle the streusel crumbles onto the bun edges- it should stick to the egg wash. Bake the buns in the center of the oven for 17 to 20 minutes. The buns are ready when they’re golden brown on the crust, and a toothpick inserted into the crust comes out clean.
Video
[Video Placeholder: Embed your Vatrushka tutorial here]
Notes
Storage: Store the cooled buns in an airtight container in the fridge for up to 5 days. They can be frozen in an airtight container or bag for up to 2 months. Make sure to reheat the buns before serving to get soft and fluffy rolls again.
Tips for success:
- Measure the flour with a scale for the best results.
- Don’t skip any of the rises; they’re important in developing a fluffy, stretchy, and bouncy texture in the buns.
- Use a pressed cottage cheese: can also be found under the names Farmer’s cheese, Polish style cottage cheese, Russian style cottage cheese, Ukrainian style cottage cheese, “twarog” or “tvorog.” You can also use quark (add an extra teaspoon of potato starch into the filling) or a firm ricotta if you can’t find a pressed cottage cheese.
- These are best enjoyed fresh out of the oven – reheat any leftovers to soften up the bun.
Nutrition
Carbohydrates: 55g
Protein: 12g
Fat: 18g
Saturated Fat: 10g
Polyunsaturated Fat: 1g
Monounsaturated Fat: 5g
Trans Fat: 0.5g
Cholesterol: 114mg
Sodium: 424mg
Potassium: 165mg
Fiber: 1g
Sugar: 20g
Vitamin A: 596 IU
Vitamin C: 0.1mg
Calcium: 85mg
Iron: 2mg
Let us know how it was!
