Irresistible No-Bake Mini Egg Cheesecake: Your Ultimate Guide to a Creamy Easter Delight
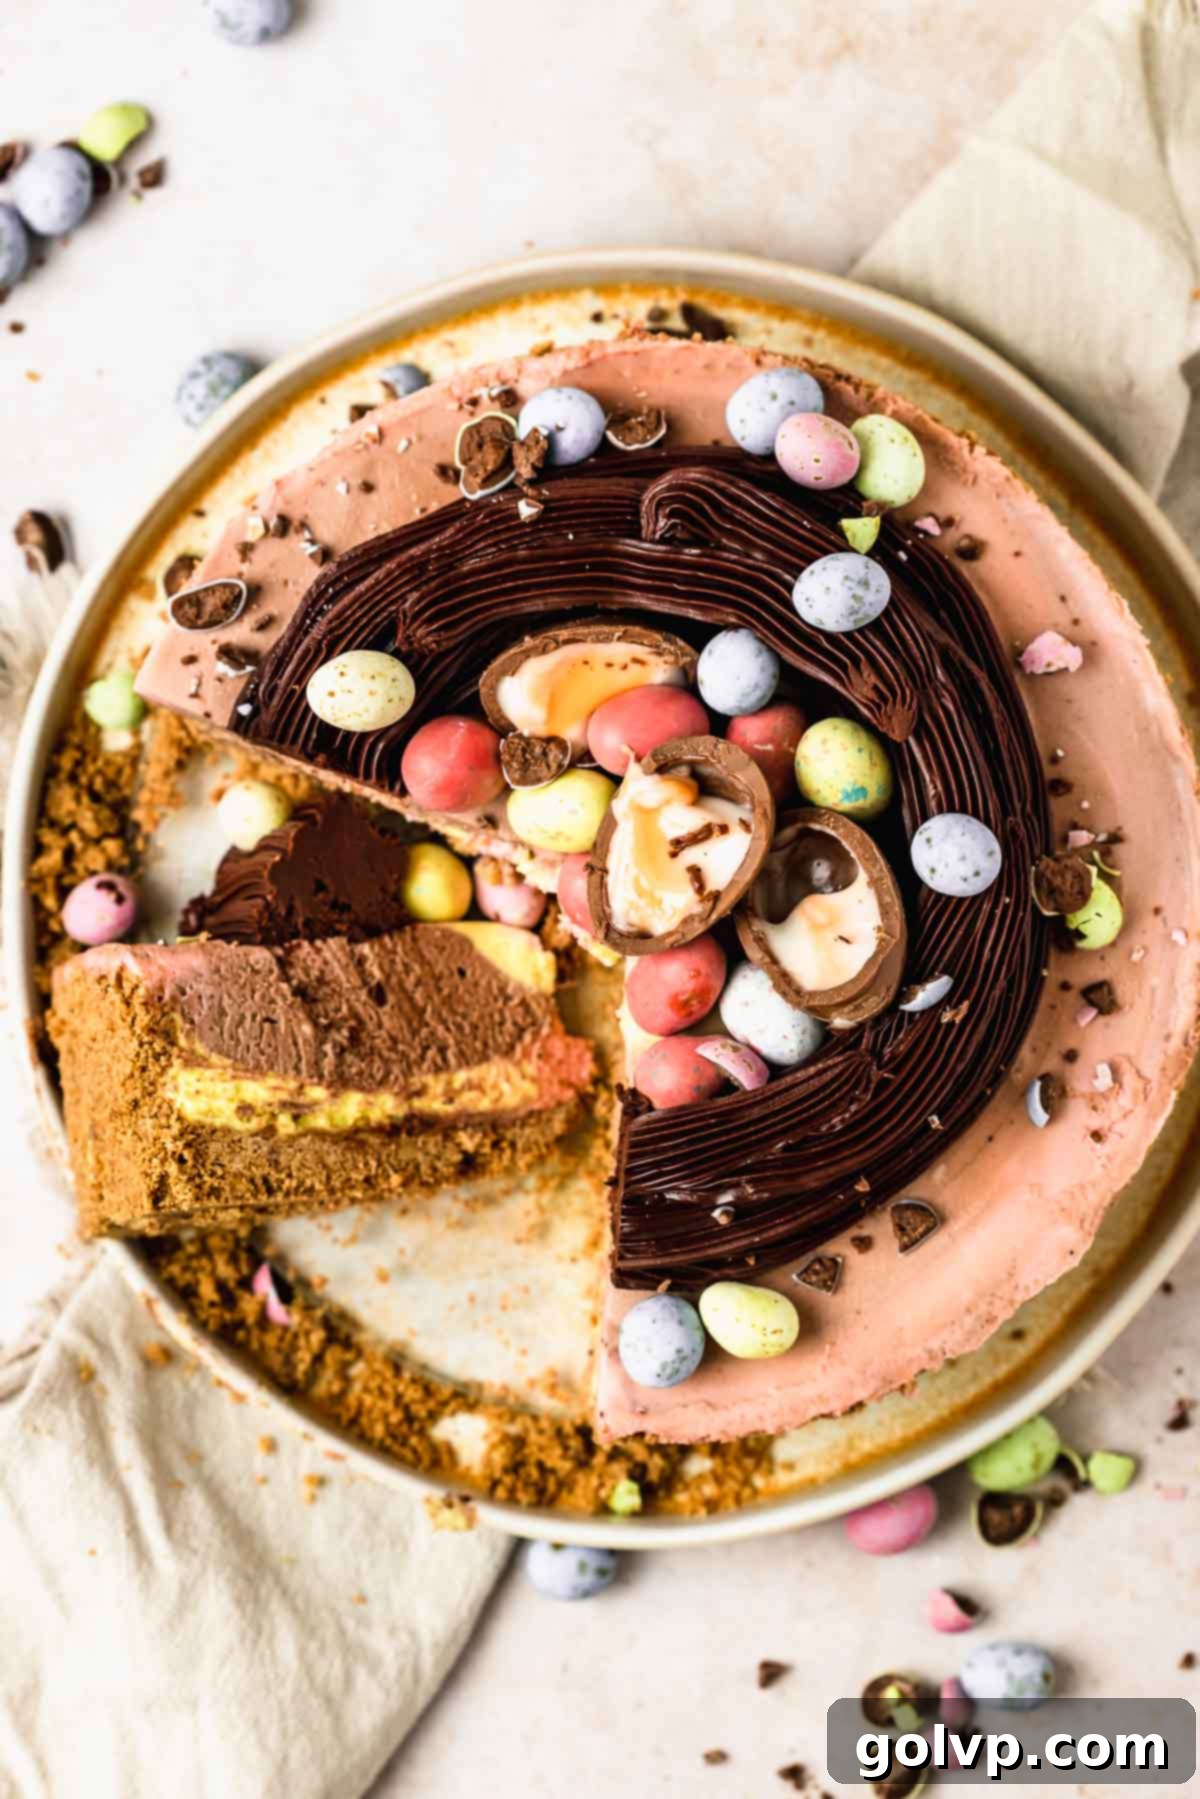
Prepare to delight your taste buds with this utterly irresistible Mini Egg Cheesecake, a celebration of spring and chocolate that requires absolutely no baking! This dessert masterpiece features a luxuriously creamy filling, artfully swirled with rich milk chocolate and vibrant pastel white chocolate, mirroring the beloved candy it’s inspired by. The foundation is a buttery graham cracker crust, generously studded with crunchy bits of colorful mini eggs, adding delightful texture and bursts of flavor in every bite. Capping off this spectacular treat is an incredibly easy-to-make chocolate ganache nest, a decadent and visually stunning decoration that tastes as rich and chocolatey as it looks. Perfect for your Easter gathering or any spring celebration, this no-bake cheesecake promises an ultra-creamy texture, thanks to the ingenious use of both milk and white chocolate to ensure a perfect set without any oven time.
Purchasing the items in this post supports this blog, at no additional cost to you. As an Affiliate Product marketer and Amazon Associate, I earn from qualifying purchases. Your support helps keep delicious recipes like this coming!
Why You’ll Absolutely Adore This Mini Egg Cheesecake Recipe:
This isn’t just another cheesecake; it’s a meticulously crafted dessert designed for maximum enjoyment and minimal stress. Here’s why this no-bake mini egg cheesecake will become your new favorite Easter tradition:
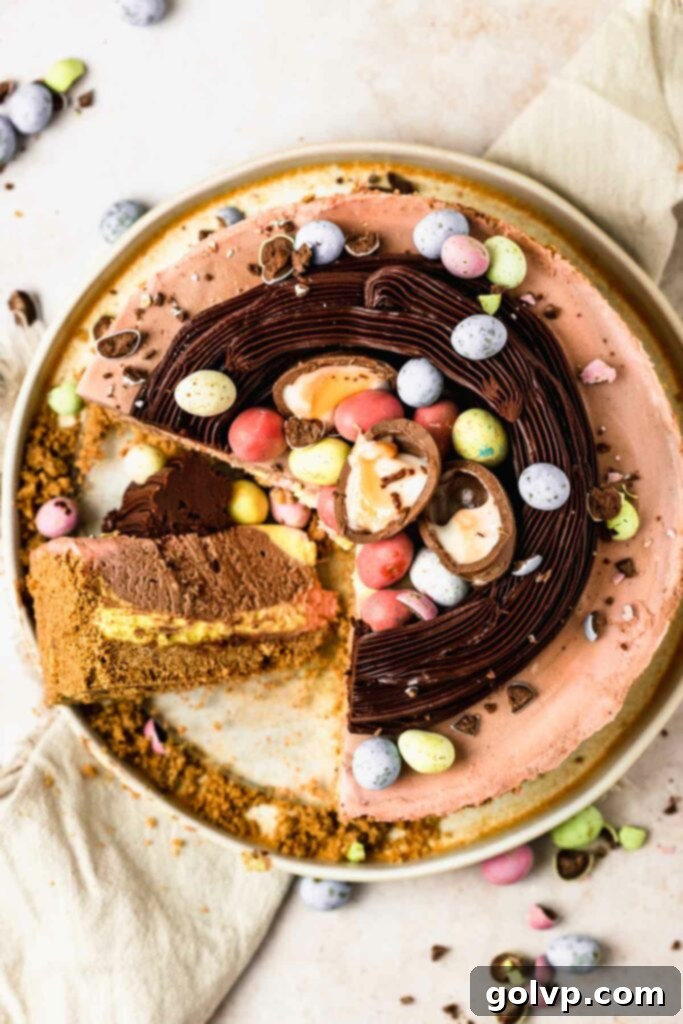
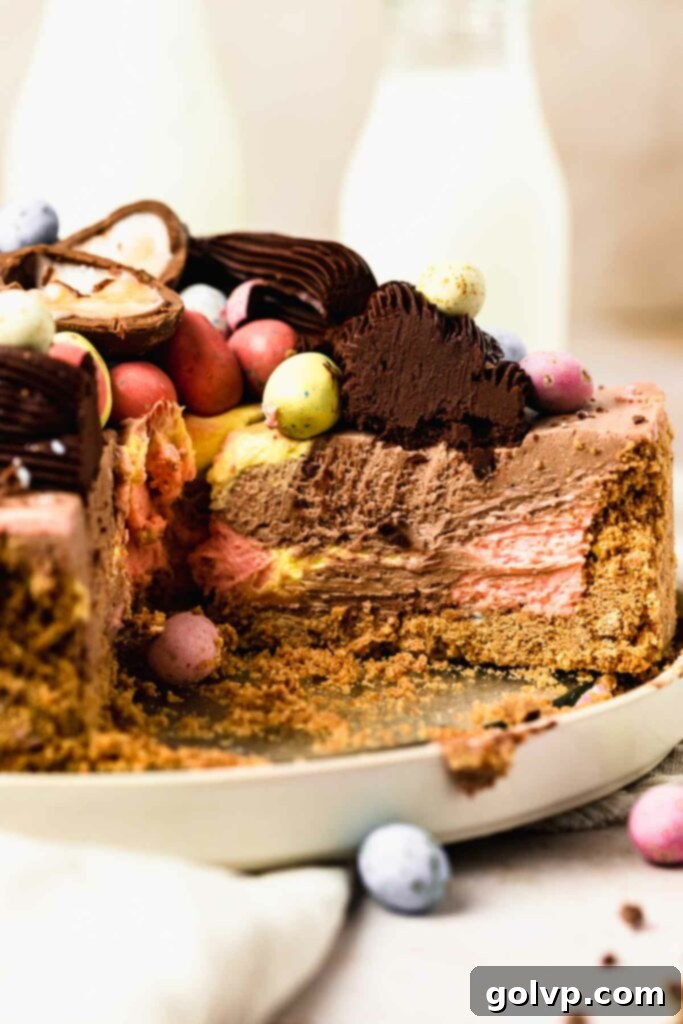
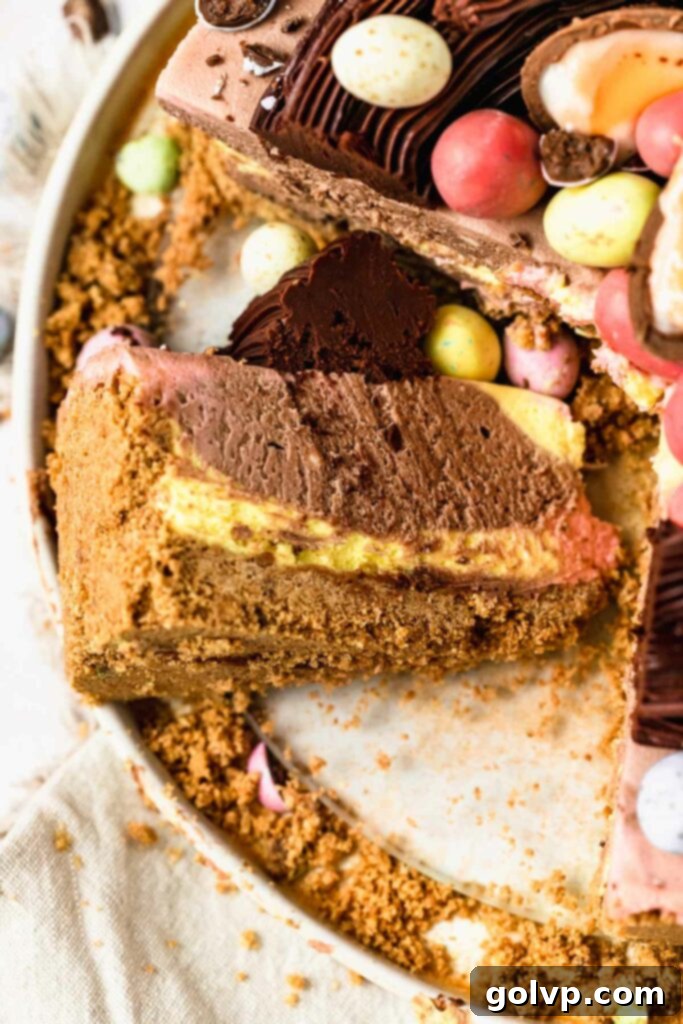
- Exquisite Milk Chocolate and Pastel Swirls: The visual appeal of this cheesecake is simply captivating! Its creamy filling mimics the iconic look of Cadbury Mini Eggs with a harmonious blend of rich milk chocolate and delicate pastel white chocolate swirls. Each slice reveals a beautiful marbling of colors, making it as pleasing to the eye as it is to the palate. This unique aesthetic elevates a simple dessert into a show-stopping centerpiece.
- Effortlessly No-Bake: Say goodbye to water baths, cracked cheesecakes, and oven worries! This recipe is entirely no-bake, making it incredibly easy and stress-free. It’s perfect for busy holidays when oven space is precious, or for warmer days when you want a decadent dessert without heating up your kitchen. The setting process is handled by the magic of melted chocolate and whipped cream, ensuring a firm yet silky-smooth consistency every time.
- Crunchy Graham Cracker Mini Egg Crust: What’s better than a classic graham cracker crust? One that’s bursting with delicious candy-coated mini eggs! We’ve taken the traditional crust to the next level by incorporating crushed mini eggs, which add delightful pops of vibrant color, an irresistible crunch, and an extra layer of sweet, chocolatey flavor. This innovative crust provides the perfect textural contrast to the smooth, creamy filling.
- The Perfect Make-Ahead Easter Dessert: Planning for Easter just got easier! This mini egg cheesecake is an ideal make-ahead dessert, as it requires several hours of chilling (or even overnight) to set perfectly. This allows you to prepare it a day or two in advance, freeing up your time on Easter Sunday to enjoy with family and friends. It also ensures the flavors have ample time to meld and deepen, resulting in an even more delicious treat.
[feast_advanced_jump_to]
Achieving Perfect Swirls in Your No-Bake Cheesecake:
Creating those stunning milk chocolate and pastel white chocolate swirls in this mini egg cheesecake is simpler than you might think! While it involves a few extra steps to manage the different colored fillings, the technique itself is straightforward and very forgiving. The goal is to achieve a beautiful marbled effect that resembles the inside of a mini egg, with distinct yet harmonious color transitions.
Here’s the trick: once you have your different colored cheesecake fillings prepared (chocolate, pink, and yellow in this recipe), all you need to do is dollop them alternately into your prepared graham cracker crust. Don’t overthink the placement; simply drop spoonfuls of each color randomly across the surface. After all the filling is in the crust, gently tap the cheesecake pan down on your kitchen counter a few times. This simple action helps to release any large air pockets trapped within the filling, ensuring a smooth, dense cheesecake. Finally, use an offset spatula or the back of a spoon to lightly smooth the top surface, being careful not to overwork it.
A crucial tip for maintaining vibrant, distinct swirls: I strongly advise against using a knife or spatula to actively swirl the cheesecake after dolloping. Over-swirling can lead to the colors becoming muddled and indistinct, losing that beautiful marbled effect we’re aiming for. The gentle tapping and light smoothing are usually sufficient to create an appealing pattern.
While I chose lovely pink and yellow pastel colors for this recipe to emulate mini eggs, the beauty of this technique is its versatility! You can customize your no-bake cheesecake with any two or three of your favorite colors. Feel free to experiment by swapping out the pink and yellow for shades of purple, blue, and/or green, depending on your preference or the occasion. Gel food colorings work best for achieving vibrant hues without altering the cheesecake’s consistency.
How to Achieve a Perfect Set in Cheesecake Without Gelatin:
Many no-bake cheesecake recipes rely on gelatin to firm up, but this mini egg cheesecake employs a much more delicious and natural setting agent: chocolate! The science is simple yet effective: melted chocolate, whether milk, white, or dark, contains cocoa butter and other solids that solidify as they cool. When incorporated correctly into the cheesecake batter, this property provides the necessary structure to set the cheesecake firmly, resulting in a stable slice that holds its shape beautifully once chilled.
Beyond its structural benefits, using chocolate as a setting agent infuses the entire cheesecake with a rich, decadent flavor. In this specific recipe, the milk chocolate not only contributes to the setting but also provides a deep, comforting chocolate base. For the vibrant pastel sections, white chocolate is used, which offers a creamy texture and a subtle vanilla flavor while allowing the food coloring to truly pop. This thoughtful combination means you’re essentially enjoying a triple chocolate cheesecake, counting the luscious ganache nest on top!
The key to success when using chocolate for setting is to ensure it’s melted smoothly and then cooled slightly before being folded into the cream cheese mixture, and then chilling the entire cheesecake for a sufficient amount of time. This method yields a cheesecake that is not only perfectly set but also wonderfully creamy and intensely flavorful, without any of the sometimes-rubbery texture that gelatin can impart. It’s a game-changer for no-bake desserts!
Crafting a Beautiful Chocolate Ganache Nest Cake Topper:
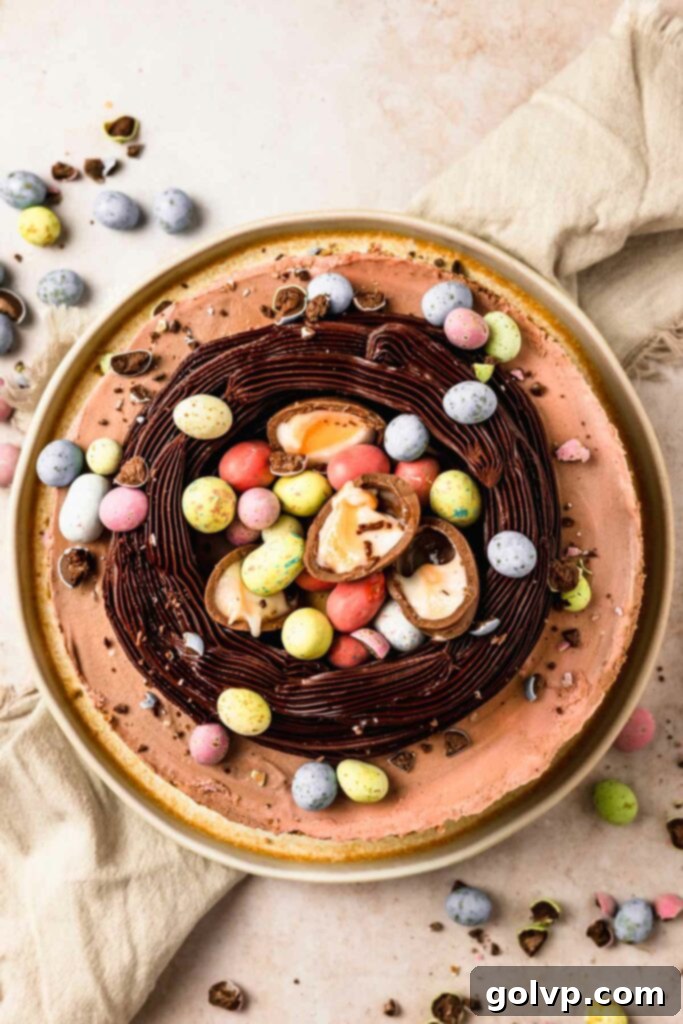
The chocolate ganache nest is the crown jewel of this mini egg cheesecake, transforming it into a truly festive and eye-catching dessert, ideal for Easter or any spring celebration. The best part? It’s incredibly easy to create, even for novice bakers, and adds an extra layer of rich, smooth chocolate goodness to every bite.
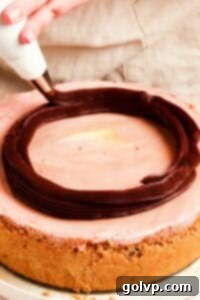
To create the nest, you’ll pipe cooled and thickened chocolate ganache directly onto the top of your chilled cheesecake in a circular pattern. For a more intricate, twig-like appearance, use an open star piping tip. If you don’t have one, no worries! Simply snip off a corner of a resealable plastic bag, and you can still achieve a lovely rustic nest. Layer the ganache in concentric circles, building it up slightly to create a three-dimensional, inviting nest shape. This simple decoration takes only minutes to assemble but makes a huge impact as the perfect centerpiece for your holiday table.
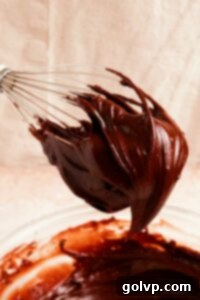
Making the chocolate ganache itself is also wonderfully straightforward. You’ll need just two ingredients: good quality chocolate chips and heavy cream. Simply heat the cream until it’s simmering (just before boiling), then pour it over your chocolate chips. Let this mixture sit undisturbed for about seven minutes to allow the hot cream to melt the chocolate thoroughly. After waiting, gently whisk the mixture by hand until it comes together into a smooth, glossy ganache. This typically takes less than a minute. The trick is then to let the ganache cool until it thickens sufficiently to hold its piped shape. To expedite this cooling process, I often pop my ganache into the freezer for a few minutes at a time, stirring periodically to ensure even chilling.
One significant advantage of making your nest out of ganache, as opposed to a crunchy cereal Easter nest (like this alternative recipe), is that you don’t have to remove it before slicing the cheesecake. The ganache nest cuts through smoothly with your knife, integrating seamlessly with the creamy cheesecake below. This not only makes serving easier but also ensures every portion includes a taste of that ultra-rich and creamy chocolate, enhancing the overall dessert experience.
Essential Tips for No-Bake Cheesecake Success:
Achieving a perfectly creamy and stable no-bake cheesecake is entirely within your reach, especially with these crucial tips. Follow these guidelines to ensure your mini egg cheesecake turns out flawlessly every time:
- Prioritize Good Quality Full-Fat Cream Cheese: The foundation of any great cheesecake is its cream cheese, and for a no-bake variety, quality is paramount. Always opt for full-fat, brick-style cream cheese. This type of cream cheese has a lower water content and a richer, firmer consistency, which is essential for your cheesecake to set properly and achieve that classic dense, creamy texture. Avoid cream cheese that comes in a tub or is labeled as “low-fat” or “whipped,” as these varieties contain too much water and will likely result in a runny, unstable cheesecake that won’t hold its shape. Ensure your cream cheese is at room temperature before mixing to prevent lumps and ensure a smooth, homogenous batter.
- Whip to Stiff Peaks for Structure: The heavy cream and melted chocolate mixture (ganache) plays a critical role in providing body and stability to your no-bake cheesecake. It’s imperative that this mixture is whipped to stiff peaks. This means the cream will hold its shape when you lift the beaters, standing tall and firm. The air incorporated during whipping creates a light, airy, yet stable structure. For best results, ensure your heavy cream is very cold to the touch before whipping, as cold cream whips up faster and holds its peaks better. Over-whipping can lead to a grainy texture, so whip just until stiff peaks are achieved.
- Allow Ample Chilling Time: Patience is key for no-bake cheesecakes! This dessert requires a minimum of 7 hours of chilling in the refrigerator, but ideally, it should be chilled overnight. This extended cooling period is not just for setting; it allows the chocolate and fats to fully solidify, firming up the cheesecake to a perfect sliceable consistency. More importantly, proper chilling time allows all the delicious flavors to meld and develop, resulting in a much richer, more harmonious taste. Rushing this step will compromise both the texture and the flavor of your cheesecake, leading to a softer, less satisfying result.
Make-Ahead Instructions for Stress-Free Serving:
The beauty of this no-bake mini egg cheesecake lies in its ability to be prepared well in advance, making it the ultimate stress-free dessert for any occasion, especially busy holidays like Easter. Since the cheesecake absolutely needs time to chill and set before it can be sliced and served, it’s perfectly suited for making a day or even two days before you plan to serve it. This wonderful feature allows you to focus on other preparations or simply relax, knowing your delicious dessert is patiently firming up in the fridge.
When it comes to the chocolate ganache nest, you have some flexibility. You can choose to pipe the nest onto the cheesecake either before it goes into the fridge for its final chill, or you can wait until after it has fully set and is closer to serving time. My personal preference is to pipe the nest just before serving. This ensures the ganache remains pristine and perfectly shaped, without any risk of it being accidentally bumped or squashed while maneuvering the cheesecake in and out of the refrigerator.
Similarly, for adding decorative mini eggs directly on top of the ganache nest or around the edges, I highly recommend doing this right before serving. The vibrant candy coatings on mini eggs can sometimes bleed their colors if they sit for too long on a moist surface, especially when chilled. By adding them at the last minute, you guarantee that their colors remain bright, crisp, and picture-perfect, providing that extra festive pop that makes this dessert so special.
Storing Your Mini Egg Cheesecake:
Proper storage is essential to maintain the freshness, texture, and deliciousness of your mini egg cheesecake. Due to its cream cheese base, this dessert must always be stored in the refrigerator. It’s truly at its best when served cold, offering a refreshing and creamy experience with every bite.
To protect your beautifully decorated cheesecake and keep it fresh, I highly recommend storing it in a cake carrier. A cake carrier provides a sturdy, enclosed environment that prevents the top of the cheesecake, especially the delicate ganache nest, from getting smudged or ruined. Furthermore, it acts as a barrier, preventing your cheesecake from absorbing any lingering odors from other foods in your fridge, ensuring its pure, sweet flavor remains untainted.
If you find yourself with leftover slices (a rare occurrence with this delicious cheesecake!), they can be easily frozen for future enjoyment. To freeze, wrap individual slices tightly in plastic wrap, then place them in an airtight container or a heavy-duty resealable freezer bag. This double protection helps prevent freezer burn. Frozen slices will maintain their quality for up to two months, allowing you to savor a taste of spring long after Easter has passed. Thaw individual slices in the refrigerator for a few hours before serving.
Key Ingredients for the Perfect Mini Egg Cheesecake:
While the full list of ingredients and precise steps are detailed in the recipe card below, understanding the role of a few key components will greatly enhance your success and enjoyment in making this delightful mini egg cheesecake. Each ingredient plays a crucial part in achieving the perfect texture, flavor, and festive appearance.
Cream cheese: As the star of any cheesecake, the cream cheese choice is vital. For this no-bake recipe, always use full-fat, brick-style cream cheese. Its firm texture and rich flavor are non-negotiable for a cheesecake that sets beautifully and tastes authentically decadent. Avoid spreadable or low-fat versions, as their higher water content will prevent your cheesecake from achieving the desired firm, creamy consistency.
Heavy whipping cream: This ingredient is essential for creating the light, airy, yet stable structure of the cheesecake filling. Ensure you use heavy cream with at least 35% milk fat (or higher) for optimal whipping. Lower fat creams may not whip to stiff peaks, compromising the cheesecake’s set and overall texture. When whipped correctly, it adds volume and a luxurious mouthfeel.
Mini eggs: These iconic candy-coated chocolate eggs are the inspiration and namesake of this dessert. While various brands exist, Cadbury candy-coated chocolate mini eggs are highly recommended for their superior taste and vibrant colors. They’re incorporated into the crust for crunch and flavor, and used generously for decoration, making the cheesecake undeniably festive and delicious.
Graham crumbs: Forming the base of our delicious crust, graham cracker crumbs provide a subtly sweet and buttery foundation. If graham cracker crumbs are unavailable or if you prefer a different flavor profile, feel free to substitute with your favorite crushed cookies, such as Biscoff, traditional Oreos, or Golden Oreos. Remember that different cookies may require slight adjustments to the amount of melted butter to achieve the ideal crust consistency.
Milk, semi-sweet, and white chocolate chips: This recipe cleverly utilizes three different types of chocolate, each for a specific purpose. Milk chocolate chips are used in the main filling to help it set and provide a familiar, creamy chocolate flavor that harmonizes with the mini eggs. White chocolate chips are crucial for the pastel-colored swirls, providing a stable base for food coloring while also contributing to the cheesecake’s setting. Lastly, semi-sweet chocolate chips are reserved for crafting the rich and smooth ganache nest on top, offering a deeper, slightly less sweet contrast that balances the overall sweetness of the dessert. This trifecta of chocolates ensures complexity in flavor and a perfect set.
Frequently Asked Questions About Mini Egg Cheesecake:
There are a few common culprits when a no-bake cheesecake fails to set. Firstly, ensure it was refrigerated for a minimum of 7 hours, or ideally, overnight. This prolonged chill time is crucial for the chocolate and fats to solidify and for the flavors to fully develop. Secondly, the heavy cream in your ganache mixture needs to be whipped to stiff peaks. This process incorporates air and builds the necessary body and structure for the cheesecake to firm up. Without adequately stiff peaks, the cheesecake will lack stability. Lastly, the quality of your cream cheese matters immensely. Always use good quality, full-fat, brick-style cream cheese. Low-fat or whipped cream cheese varieties contain too much water, which can prevent the cheesecake from setting firmly.
Absolutely, the graham cracker crust is versatile! You can certainly substitute other crushed cookies to create a unique flavor profile for your cheesecake crust. Popular choices include Biscoff cookies for a spiced caramel note, regular Oreos for a rich chocolatey base, or Golden Oreos for a vanilla-flavored alternative. When making substitutions, be mindful that the butter quantity might need slight adjustments. Different cookies absorb butter differently. The best way to check is to grab a handful of the crushed cookie mixture and squeeze it. If it holds its shape firmly, you have the right amount of butter; if it’s too crumbly, add a little more melted butter, a tablespoon at a time, until it binds together.
Yes, you can definitely substitute semi-sweet chocolate chips for milk chocolate chips in the cheesecake filling. This alteration will result in a cheesecake with a richer, deeper, and more intensely chocolatey flavor profile, as semi-sweet chocolate contains a higher percentage of cocoa solids. While I personally preferred the milk chocolate for its milder sweetness and closer resemblance to the flavor of actual mini eggs, using semi-sweet chocolate will still work perfectly for setting the cheesecake and will appeal to those who enjoy a more robust chocolate taste.
Cadbury Mini Eggs are a seasonal treat, typically available in grocery stores around springtime, coinciding with the Easter holiday. You’ll usually find them stocked alongside other Easter candies and seasonal confectionery items. If you’re struggling to find them locally or want to stock up, they are also widely available for purchase online through retailers like Amazon. While Cadbury brand is highly recommended for its classic taste and quality, other brands of candy-coated chocolate eggs will also work if Cadbury is unavailable.
The candy coating on mini eggs is quite hard, so attempting to cut them with a knife can be dangerous and difficult. Please do not try to chop them, as you risk injuring yourself. The safest and most effective way to crush mini eggs is to place them in a sturdy resealable plastic bag, remove as much air as possible, and then use a rolling pin to gently but firmly crush them into smaller pieces. Alternatively, you can place them on a cutting board and use the flat side of a wide chef’s knife or a meat mallet to crush them. Aim for a mix of fine crumbs and small, recognizable candy bits for the best texture in the crust.
No, regular granulated sugar is not an appropriate substitute for powdered sugar in this no-bake cheesecake recipe. Powdered sugar (also known as confectioners’ sugar or icing sugar) contains a small amount of cornstarch, which helps absorb moisture and contributes to the cheesecake’s smooth, firm texture. Granulated sugar, with its larger crystals, will not dissolve properly in the cold cream cheese mixture, resulting in a gritty texture. More critically, without the setting properties of powdered sugar, your cheesecake will likely be too sweet and fail to set correctly, remaining soft and soupy.
For the cheesecake filling itself, good quality chocolate bars can be used as a substitute for chocolate chips. If using a chocolate bar, make sure to chop it finely into small, chip-sized pieces to ensure it melts evenly when hot cream is poured over it. Measure by weight if possible, or visually approximate the volume equivalent to chocolate chips. However, for the ganache nest on top, I strongly advise against using chocolate bars. Chocolate bars often contain different emulsifiers and fat percentages compared to baking chocolate chips, which are formulated to hold their shape better when melted and cooled. Using a chocolate bar for the ganache nest might result in a ganache that is too soft or doesn’t thicken sufficiently to be piped into a stable nest shape, causing it to lose its structure.
Discover More Delicious Desserts:
If you’ve enjoyed creating and savoring this delightful Mini Egg Cheesecake, you’re in for a treat with these other fantastic recipes. Each one offers a unique and delicious experience, perfect for any occasion:
- Blueberry Lemon Cream Cheese Cobbler
- Smores Rice Krispies Treats
- Oatmeal Ice Cream Sandwiches
- Raspberry Coconut Cake
Happy baking and even happier no-baking!
Did you make this recipe? We would absolutely love for you to rate this recipe and share your thoughts in the comments below! Your feedback is invaluable. Don’t forget to share your beautiful creation on Instagram and tag @flouringkitchen. For more delectable recipe ideas and to save your favorites, be sure to follow us on Pinterest.
📖 Recipe
Mini Egg Cheesecake
Mary
Pin Recipe
Shop Ingredients
Equipment
-
nine inch springform round baking pan
Ingredients
Crust
- 3 cups graham cracker crumbs
- ½ cup mini eggs crushed (place in resealable bag and crush with rolling pin)
- ¼ teaspoon sea salt
- ½ cup butter melted and cooled
Filling
- 1 cup milk chocolate chips
- ½ cup white chocolate chips
- 1 ½ cup heavy whipping cream
- 24 oz cream cheese room temperature, full fat, brick style
- 1 ¼ cup powdered sugar
- 1 tablespoon pure vanilla extract
- ⅛ teaspoon sea salt
- 1 tablespoon cocoa powder
- pink gel food colouring or colour of choice
- yellow gel food colouring or colour of choice
Nest
- ¾ cup heavy whipping cream
- 1 ½ cup semi-sweet chocolate chips
- Mini eggs and creme eggs for decorating
Shop Ingredients on Jupiter
Instructions
Crust
-
In a large mixing bowl, combine the graham cracker crumbs, ½ cup of crushed mini eggs, and ¼ teaspoon of sea salt. Mix these dry ingredients thoroughly until they are well combined. Then, pour in the ½ cup of melted and cooled butter. Stir everything together until the crumbs are evenly moistened and resemble wet sand, ensuring all the ingredients are fully integrated.3 cups graham cracker crumbs, ½ cup mini eggs, ¼ teaspoon sea salt, ½ cup butter
-
Carefully transfer the prepared crust mixture into a 9-inch round springform pan. For easier removal and a cleaner slice later, it is highly recommended to line the bottom of the pan with a circle of parchment paper before adding the crust. This simple step makes serving a breeze.
-
Spread the crust mixture evenly across the bottom of the pan. Then, using the flat bottom of a glass or a measuring cup, firmly pack the crust down. While packing, gently push the crust approximately three-quarters of the way up the sides of the pan to form a sturdy edge. A well-packed crust ensures it won’t crumble when sliced. Once packed, set the pan aside while you prepare the filling.

Filling
-
Begin by preparing two separate, heat-safe mixing bowls. In the first bowl, place the 1 cup of milk chocolate chips. In the second bowl, add the ½ cup of white chocolate chips. Keeping them separate is key for creating the distinct color swirls later.1 cup milk chocolate chips, ½ cup white chocolate chips
-
In a small saucepan, gently heat the 1 ½ cups of heavy cream over medium heat until it just begins to simmer, with small bubbles forming around the edges (do not let it come to a rolling boil). Carefully measure ¾ cup of the hot cream and pour it over the milk chocolate chips. Then, pour the remaining cream over the white chocolate chips.1 ½ cup heavy whipping cream
-
Cover both bowls with plates or plastic wrap and let them sit undisturbed for 7 minutes. This allows the heat from the cream to melt the chocolate thoroughly. After 7 minutes, uncover the white chocolate mixture and gently whisk by hand until it’s completely smooth and glossy. Repeat this whisking process for the milk chocolate mixture until it’s also smooth. It’s crucial for the ganache to be cool to the touch and slightly thickened before mixing with the cream cheese. To speed up chilling, you can place both ganaches in the freezer for a few minutes, stirring every couple of minutes to ensure even cooling and prevent hardening.

-
While your ganache is chilling, begin preparing the cream cheese base. In a large mixing bowl, beat together the softened, room-temperature cream cheese and powdered sugar with an electric mixer (or by hand with a sturdy whisk) until the mixture is completely smooth and free of any lumps. Stop occasionally to scrape down the sides of the bowl with a spatula to ensure all ingredients are evenly incorporated.24 oz cream cheese, 1 ¼ cup powdered sugar
-
Next, add the 1 tablespoon of pure vanilla extract and ⅛ teaspoon of sea salt to the cream cheese mixture. Beat well again, just until these additional ingredients are fully combined. This enhances the overall flavor of the cheesecake base.1 tablespoon pure vanilla extract, ⅛ teaspoon sea salt
-
Once both the milk chocolate and white chocolate ganaches are chilled and cool to the touch (but still pliable), use your electric mixer to whip each ganache separately. Whip each until it becomes thick, fluffy, and roughly doubled in volume, forming stiff peaks. Be careful not to overwhip, as this can cause the ganache to become grainy. Whip just until distinct stiff peaks hold their shape.

-
Now, divide your plain cream cheese filling into two separate bowls. Add a slightly larger portion of the filling into one bowl, as this will be combined with the milk chocolate. The other bowl will be for the white chocolate colored portions.
-
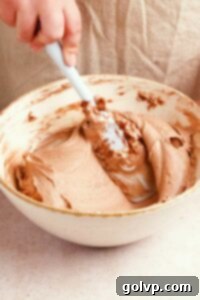
To the bowl containing the larger portion of cheesecake filling, add the whipped milk chocolate ganache. Sift the 1 tablespoon of cocoa powder directly into this bowl. Gently fold all these ingredients together using a spatula until the mixture is uniform in color and completely smooth. Be careful not to deflate the whipped ganache.1 tablespoon cocoa powder

-
To the second bowl of cheesecake filling, add the whipped white chocolate ganache. Gently fold until smooth. Then, divide this white chocolate mixture in half. Add a few drops of pink gel food coloring (or a touch of red for pink) to one half and a few drops of yellow gel food coloring to the other half. Carefully fold each portion until the color is evenly distributed and no streaks remain. You should now have three distinct bowls of filling: rich chocolate, vibrant pink, and cheerful yellow.pink gel food colouring, yellow gel food colouring
-
Now for the fun part: creating the swirls! Alternate adding spoonfuls (dollops) of the chocolate, pink, and yellow fillings into the prepared crust. Distribute them randomly to achieve a beautiful marble or swirled effect. Once all the filling is in the pan, gently tap the cheesecake pan on your counter a few times. This helps to release any large air pockets, ensuring a denser, smoother cheesecake. Finally, lightly smooth the top surface with an offset spatula. Place the cheesecake in the refrigerator to chill for at least 7 hours, or preferably overnight, to allow it to fully set and for the flavors to develop.

Nest
-
You have the flexibility to prepare the ganache nest either before the cheesecake goes into the fridge for its initial chill, or after it has fully set. This depends entirely on your schedule and preference. If you prefer a pristine look, piping it closer to serving time is recommended.
-
To make the ganache for the nest, heat the ¾ cup of heavy cream in a small saucepan until it just begins to simmer, with small bubbles forming around the edges (avoid boiling). In a large, heat-safe bowl, place the 1 ½ cups of semi-sweet chocolate chips.¾ cup heavy whipping cream, 1 ½ cup semi-sweet chocolate chips
-
Once the cream is simmering, pour it evenly over the semi-sweet chocolate chips. Sprinkle a tiny pinch of salt on top (this enhances the chocolate flavor). Cover the bowl with a plate or plastic wrap and let it sit undisturbed for 7 minutes to allow the chocolate to melt completely. Do not stir during this time.
-
After 7 minutes, uncover the bowl and whisk the ganache by hand until it becomes completely smooth and glossy. To achieve a pipeable consistency, place the ganache in the fridge for 10-15 minutes, stirring it thoroughly every 5 minutes to ensure it chills evenly and thickens without becoming too solid. You’re looking for a consistency that is thick but still soft enough to pipe.

-
Once the ganache has reached a thick, pipeable consistency, transfer it into a large piping bag fitted with an open star tip (such as a Wilton 1M or 21). If you don’t have a piping tip, you can simply use a resealable plastic bag and snip off one of the corners to create an opening for piping.
-
On top of your fully chilled and set cheesecake, pipe a circular pattern with the ganache, forming the base of your nest. Continue to layer the ganache, building it up to create a realistic, three-dimensional nest shape. For the best visual appeal and to prevent any color bleeding, fill the ganache nest with additional mini eggs and/or creme eggs right before serving. This ensures the candy coating remains bright and fresh for presentation.Mini eggs and creme eggs

Video
Notes
To ensure your cheesecake remains fresh, protected, and free from absorbing any unwanted odors from your fridge, I highly recommend storing it in a dedicated cake carrier. This will not only preserve its delicate top decorations but also maintain its pure, delicious flavor.
Should you have any leftover slices – a rare occurrence, we know! – they can be easily frozen for future indulgence. Simply wrap each individual slice tightly in plastic wrap, then place them in an airtight container or a heavy-duty freezer bag. When stored correctly, they will keep beautifully for up to two months. Remember to thaw them in the refrigerator before serving.
