The Ultimate No-Bake Strawberry Crunch Cheesecake: Your Perfect Summer Dessert
Prepare to be amazed by this incredible no-bake strawberry crunch cheesecake, a dessert that effortlessly combines creamy texture, vibrant strawberry flavor, and an irresistible crunchy topping. This isn’t just a cheesecake; it’s a delightful experience, ideal for warm weather gatherings or anytime you crave a sweet, fruity treat without turning on the oven. Each slice promises a luxurious, smooth filling bursting with real strawberry goodness, crowned with a homemade strawberry sauce and our signature easy-to-make strawberry crunch. We’ll guide you through creating this showstopper, ensuring every component, from the tangy sauce to the airy filling, is absolutely perfect for a truly memorable dessert.
Purchasing the items in this post supports this blog, at no additional cost to you. As an Affiliate Product marketer and Amazon Associate, I earn from qualifying purchases.
Why You’ll Absolutely Adore This Strawberry Crunch Cheesecake
This dessert isn’t just another cheesecake recipe; it’s a celebration of flavor and ease. Here are compelling reasons why this strawberry crunch cheesecake will quickly become your new favorite, perfect for any occasion:
- Effortless No-Bake Perfection: Say goodbye to hot kitchens and complicated baking steps! This recipe requires absolutely no oven time, making it the quintessential summer dessert. Despite its elegant appearance and multiple delicious layers, the assembly process is surprisingly straightforward and achievable for all skill levels. You can enjoy a sophisticated dessert without the stress of traditional baking. It’s truly a breeze to put together.
- Intense Strawberry Flavor in Every Bite: We’ve engineered this cheesecake to deliver an unparalleled strawberry experience. The secret lies in a harmonious combination of real homemade strawberry sauce and a strawberry jello mix, ensuring that every spoonful is packed with authentic, sweet, and slightly tart strawberry notes. Unlike artificial flavors, this recipe captures the true essence of fresh strawberries, making it incredibly refreshing and genuinely delicious.
- Luxuriously Creamy Texture: Prepare for an incredibly smooth and decadent mouthfeel. The cheesecake filling is expertly whipped to perfection, creating an ultra-creamy consistency that melts in your mouth while still holding its beautiful, sliceable shape. It’s light, airy, and utterly satisfying, striking the perfect balance between richness and a delicate finish that will leave you wanting more.
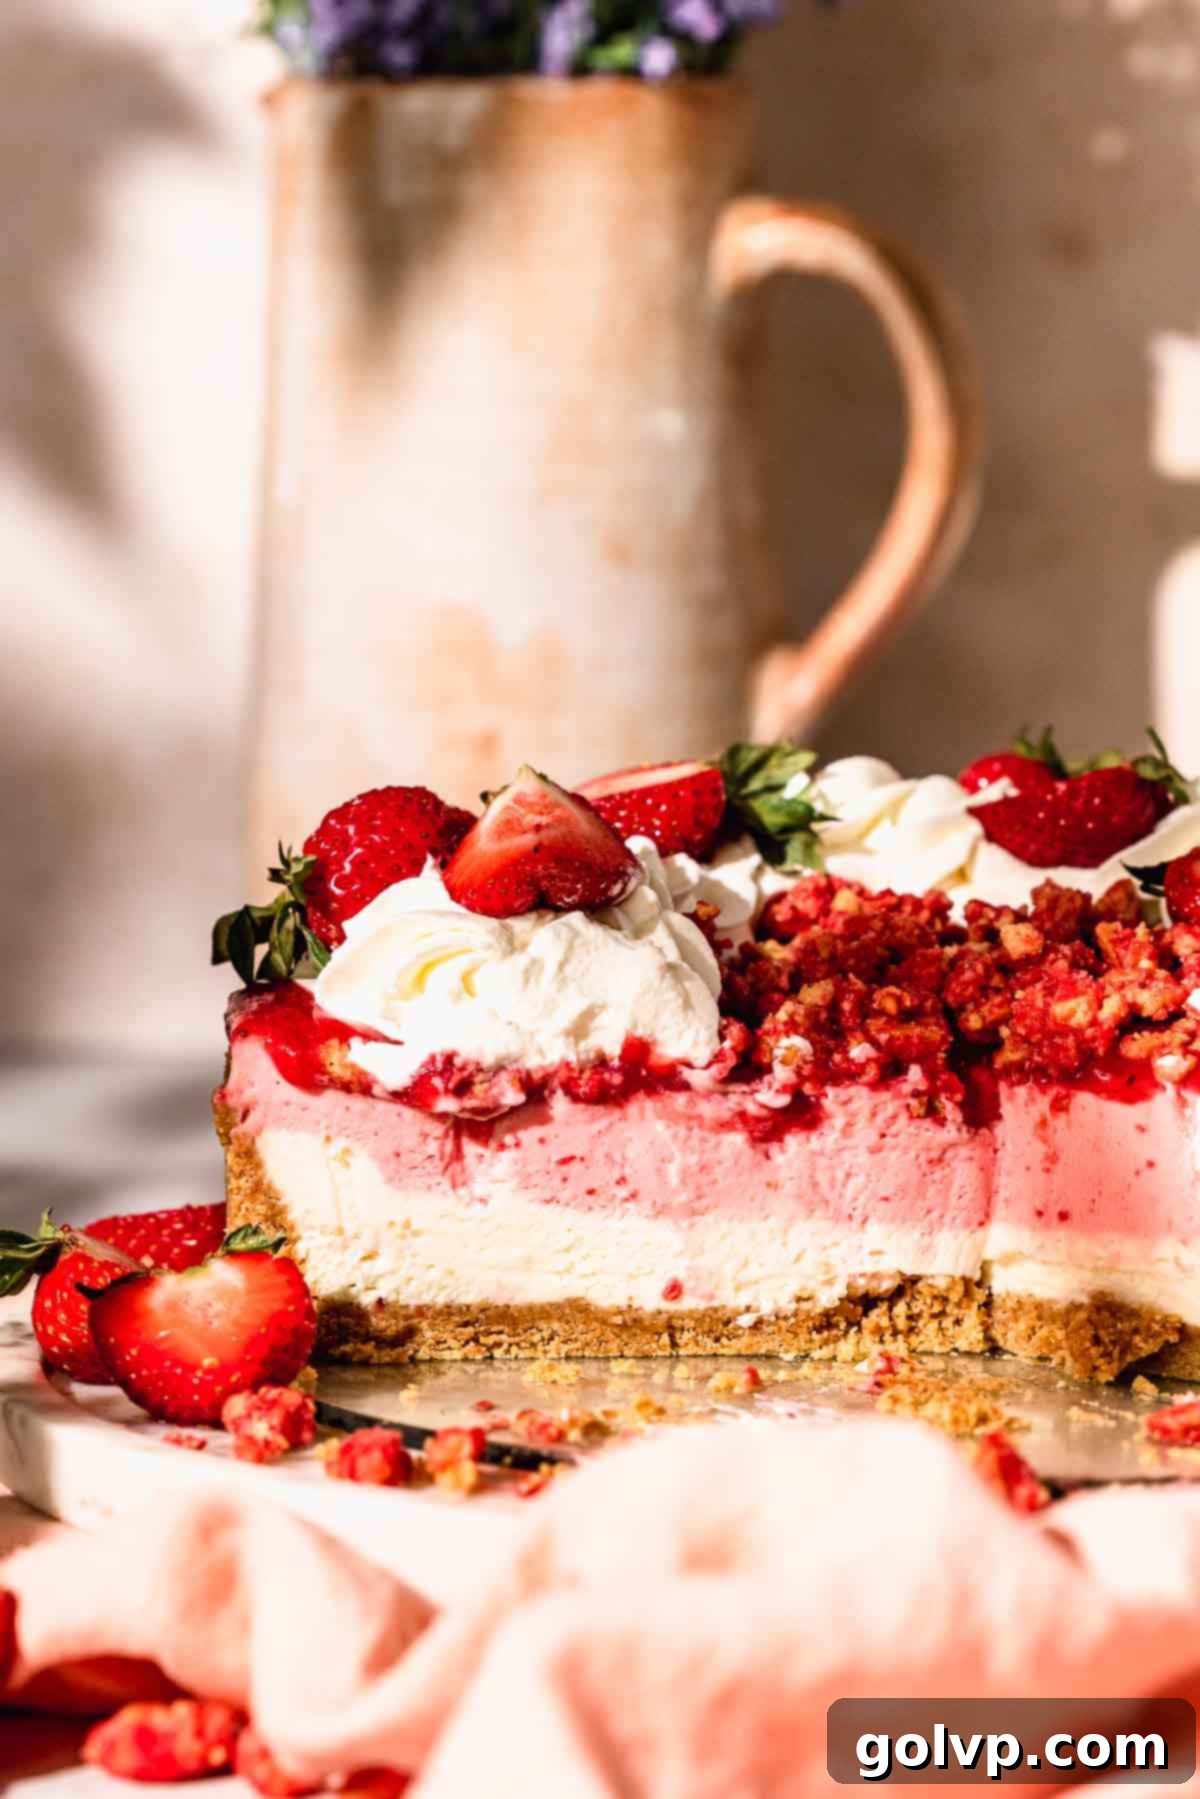
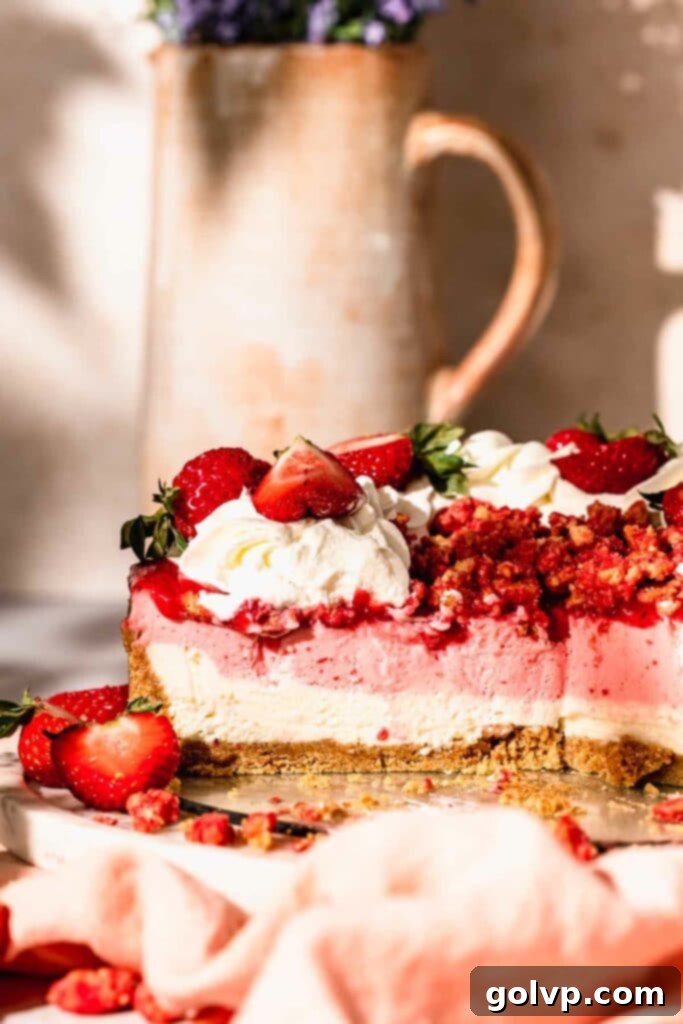
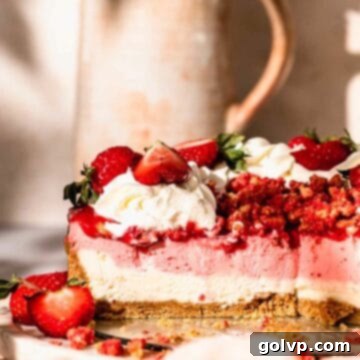
- Stunning Two-Tone Appearance: Elevate your dessert presentation with an effortlessly beautiful two-layered filling. This cheesecake features a delicate vanilla base topped with a vibrant, eye-catching strawberry layer, offering not only a visual treat but also a subtle flavor contrast. It’s an easy way to add a gourmet touch that will impress your guests and make your dessert table pop.
- Irresistible Strawberry Crunch Topping: What truly sets this cheesecake apart is its signature strawberry crunch topping. Made with crushed golden Oreos, aromatic strawberry jello powder, and a touch of our luscious strawberry sauce, it provides a delightful textural contrast to the smooth cheesecake. The sweet, crispy crumble adds an exciting and addictive dimension that makes each bite unforgettable.
- The Perfect Make-Ahead Dessert: Planning for a gathering? This cheesecake is your best friend! Many components, and even the entire cheesecake itself, can be prepared in advance, allowing you to focus on other things on the day of your event. Its flavors also tend to deepen and meld beautifully with a good chill, making it a fantastic stress-free option for entertaining.
[feast_advanced_jump_to]
The Essential Role of Gelatin in Our No-Bake Cheesecake
Achieving a perfectly set, sliceable no-bake cheesecake often requires a little help, especially when incorporating liquid elements like a rich fruit sauce into the filling. My initial attempts to let this strawberry cheesecake hold its shape without a setting agent proved challenging. The addition of luscious homemade strawberry sauce directly into the cheesecake filling, while fantastic for flavor, unfortunately made the mixture too runny to achieve that desired firm, yet luxuriously creamy, consistency without a stabilizer.
That’s where the strawberry jello packet comes in as a game-changer. It provides the necessary structure for the cheesecake to set beautifully, allowing for clean, elegant slices that hold their form. Beyond its functional role, the jello also significantly amplifies the delicious, authentic strawberry flavor without introducing any artificial aftertaste. This method proved far simpler and more effective than alternative setting agents like melted white chocolate, which can sometimes alter the delicate texture or flavor profile of the cheesecake. The jello seamlessly integrates, providing both structural integrity and an extra punch of fruitiness, making the entire process much easier and more delicious.
For those who prefer a gelatin-free no-bake cheesecake, I recommend exploring recipes specifically designed without it, such as my Biscoff Cheesecake or Funfetti No-Bake Cheesecake Bars, which rely on different techniques and ingredient ratios to achieve their set.
Crafting Beautiful Two-Toned Layers: A Simple Technique for Visual Appeal
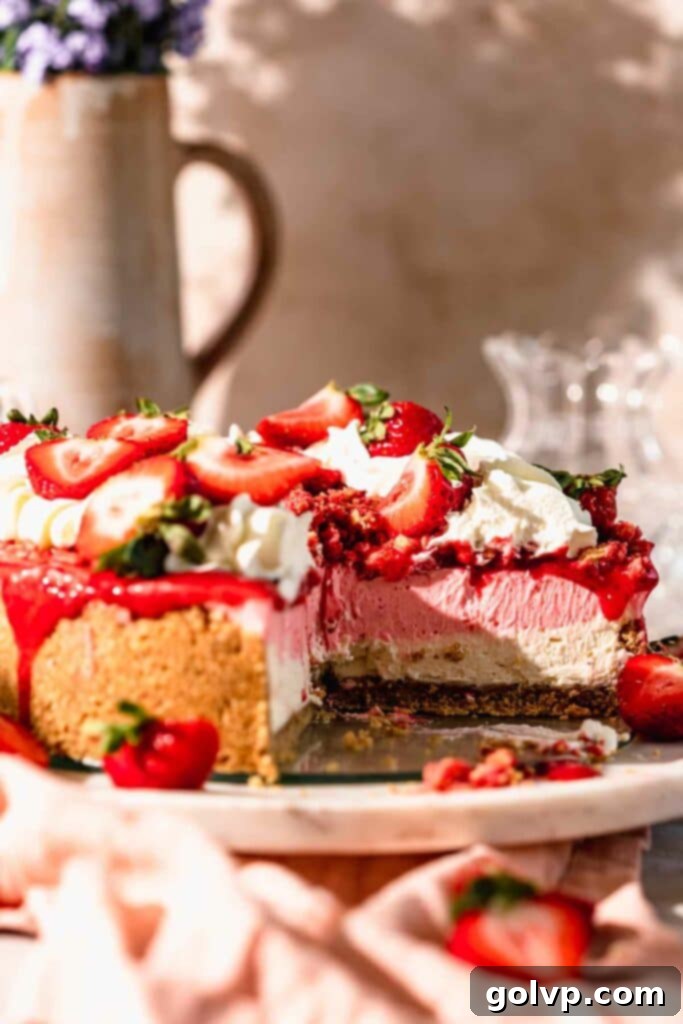
One of the most striking and appealing features of this strawberry crunch cheesecake is its gorgeous two-toned appearance. This elegant effect is achieved with surprising ease and adds a sophisticated touch to your dessert. The bottom layer offers a classic, creamy vanilla cheesecake flavor, providing a perfect, subtle contrast to the vibrant strawberry top. To create this stunning visual, you first prepare your foundational layer by spreading half of your creamy cheesecake filling evenly into the prepared crust. This forms the smooth and delicious vanilla base.
For the second, upper half of the filling, we introduce the cooled, dissolved strawberry jello mix along with a bit of unwhipped heavy cream. This addition not only infuses the remaining filling with that beautiful, bright pink hue and intensified strawberry taste but also subtly influences the texture, creating a delightful contrast between the layers. Once thoroughly combined and smooth, this strawberry-infused filling is gently spread over the chilled vanilla base, creating a seamless and visually captivating transition between the two colors. This simple yet effective technique elevates the cheesecake from delicious to truly extraordinary, making it look as good as it tastes and adding an extra layer of gourmet appeal.
Unlock the Secret to an Effortless & Irresistible Strawberry Crunch Topping
The signature strawberry crunch topping is undeniably one of the stars of this cheesecake, offering a delightful crispy texture and an extra burst of vibrant flavor. What makes this recipe truly special is how incredibly easy it is to prepare, requiring just three simple ingredients. You’ll need reserved strawberry jello powder, a few tablespoons of our homemade strawberry sauce (though a good quality store-bought option can certainly be used in a pinch), and the crucial crunchy element: golden Oreos. These vanilla sandwich cookies provide the perfect buttery, slightly sweet base, crushing down into an ideal texture that holds up beautifully against the creamy cheesecake.
The preparation process couldn’t be simpler: begin by crushing your golden Oreos into a coarse crumble, aiming for a mix of fine crumbs and larger, pea-sized pieces for varied texture. This can be done quickly in a food processor or by hand in a large Ziploc bag with a rolling pin. Next, mix in the vibrant strawberry jello powder, which is key for both intense color and amplified strawberry essence. Finally, add just enough strawberry sauce to lightly moisten the mixture, allowing it to clump together slightly but still remain distinct and crunchy. It’s vital not to add too much sauce, as this will result in a soggy rather than crispy crunch. This easy combination ensures that each piece of crunch is coated with delicious strawberry goodness, providing a fantastic counterpoint to the smooth cheesecake.
It’s important to prepare this strawberry crunch topping just before you plan to assemble and serve your cheesecake. While incredibly delicious, it tends to lose some of its crispness if made too far in advance and exposed to the moisture of the cheesecake. However, don’t limit this fantastic crunch to just cheesecake! It’s a wonderfully versatile topping that can elevate ice cream sundaes, cupcakes, yogurt parfaits, or even a simple bowl of fresh fruit. Keep this easy recipe in your back pocket for a quick and impressive finishing touch on a variety of desserts, adding that perfect touch of crispiness and flavor.
Decadent Toppings: Elevating Your Strawberry Crunch Cheesecake
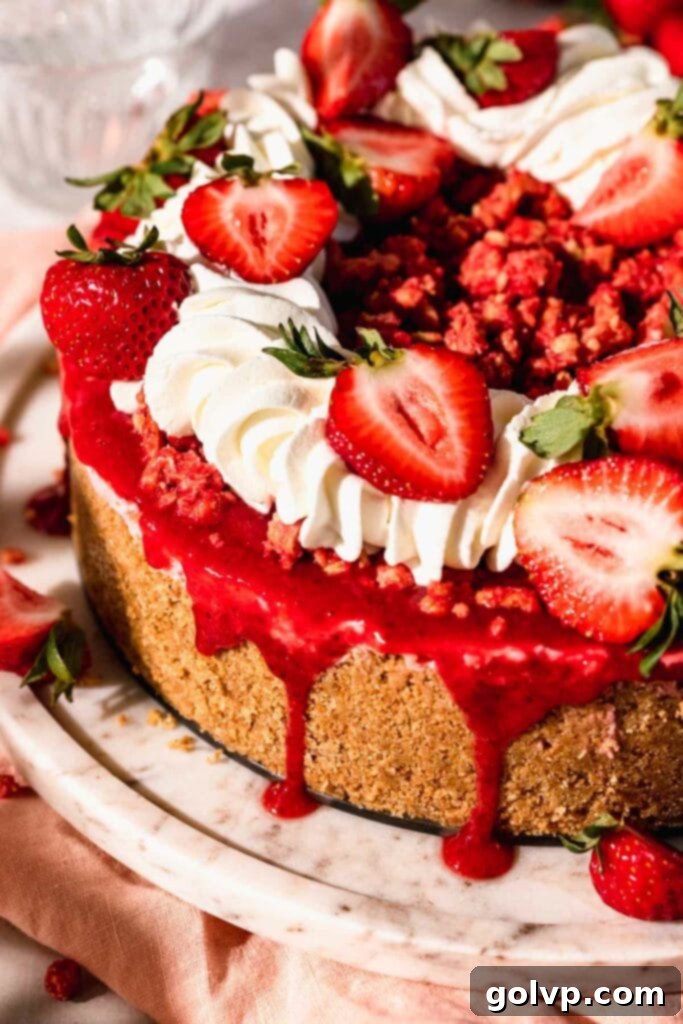
Once your no-bake cheesecake is perfectly chilled and set, it’s time to adorn it with a magnificent array of toppings that not only enhance its flavor but also make it a visually stunning centerpiece. The primary topping is our luscious homemade strawberry sauce, which provides a glossy, fruity layer and a beautiful, inviting drip effect down the sides. While making your own sauce ensures the freshest, most vibrant taste, a good quality store-bought strawberry sauce can certainly be used if you’re short on time. This creates the ideal smooth, sweet canvas for the next exciting layer.
Next comes the star texture component: the irresistible strawberry crunch. Sprinkle it generously and evenly over the strawberry sauce, creating an exciting textural contrast that is both delightful and unexpected. This crunchy layer adds another dimension of strawberry flavor and a satisfying bite. For an added touch of elegance and creamy indulgence, you have the option of piping freshly whipped cream around the edges or in decorative dollops across the top. This light, airy cream perfectly complements the richness of the cheesecake and the crispness of the topping. Finally, complete your masterpiece with an abundance of fresh, ripe strawberries. Sliced, halved, or whole, these vibrant berries add natural sweetness, a hint of acidity, and an undeniable fresh appeal, transforming your cheesecake into a truly unforgettable dessert that is as beautiful as it is delicious.
Mastering the Art of a Perfectly Set No-Bake Cheesecake
While “no-bake” might sound incredibly simple, there are a few crucial techniques and tips that guarantee your cheesecake sets flawlessly, yielding clean, firm, and beautifully defined slices every time. Follow these steps carefully to ensure success and avoid any common pitfalls:
- Achieve Stiff Peaks with Your Heavy Cream: This is arguably the most critical step for a stable and airy no-bake cheesecake. The air whipped into the heavy cream provides much of the necessary structure and lightness. To ensure your cream whips up perfectly to stiff peaks, make sure your mixing bowl, whisk attachments (or stand mixer whisk), and the heavy cream itself are all thoroughly chilled. Even placing your bowl and whisk in the freezer for 10-15 minutes beforehand can significantly aid the whipping process. Furthermore, always use heavy cream with at least 35% milk fat or higher; anything lower might not whip adequately and could result in a softer, less stable, or even runny cheesecake.
- Gentle Folding is Absolutely Key: Once your heavy cream is perfectly whipped, the way you incorporate it into the cream cheese mixture is vital. Use a large rubber spatula or a balloon whisk and fold the whipped cream in gently, using an upward motion and turning the bowl as you go. The goal is to combine the mixtures thoroughly without deflating the airy structure you’ve worked so hard to create. Overmixing at this stage will release the trapped air, leading to a denser, less creamy, and potentially less stable cheesecake that may struggle to set properly.
- Patient Chilling for Optimal Set: The most challenging part of any no-bake dessert is often the wait! For this strawberry crunch cheesecake, patience is paramount. It needs at least 7 hours in the refrigerator, but for the very best results, chilling it overnight (10-12 hours) is highly recommended. This extended chilling period allows the gelatin to fully activate and the cream cheese mixture to solidify and firm up properly, ensuring that your cheesecake is firm enough to slice cleanly and maintain its shape beautifully. This also makes it a fantastic make-ahead dessert, freeing up your time on the day you plan to serve it.
- Utilize a Springform Pan: A good quality springform pan is your best friend for making and serving cheesecakes. Its unique design, with removable sides, makes releasing the cheesecake incredibly easy without damaging its delicate structure or beautiful edges. Look for one with a removable bottom, as this design allows you to lift the cheesecake base directly onto a serving plate, eliminating an extra and potentially precarious transfer step. Some high-quality springform pans even come with a glass bottom, which can elegantly double as a serving plate, making presentation even simpler.
Planning Ahead: Tips for a Stress-Free Dessert Experience
One of the many wonderful advantages of this no-bake strawberry crunch cheesecake is its flexibility, allowing you to prepare components in advance and assemble it closer to serving time. This makes it an ideal dessert for parties, holidays, or any occasion where you want to minimize last-minute kitchen stress and ensure a relaxed experience.
The homemade strawberry sauce is particularly well-suited for advance preparation. You can easily make it up to three to four days ahead of time, storing it in an airtight container or jar in the refrigerator. This not only allows its vibrant flavors to deepen and meld beautifully but also ensures it’s perfectly chilled and ready to go when you need it. The cheesecake itself can also be assembled and chilled up to 2 days before you plan to serve it. This is incredibly convenient, as the long chilling period is essential for it to set properly and develop its full flavor profile. However, for the very best textural experience, it’s crucial to prepare the strawberry crunch topping and decorate the cheesecake with fresh whipped cream and fresh strawberries right before serving. The crunch is at its crispiest when freshly made, and fresh berries look their absolute best when added just before presentation. Planning these steps effectively will ensure your dessert is both deliciously fresh and visually stunning without any last-minute rush.
Essential Ingredients for Your Strawberry Crunch Cheesecake Success
The quality and type of your ingredients significantly impact the final taste, texture, and overall success of this delightful no-bake cheesecake. Here’s a closer look at the key components and why they are important for achieving perfection:
Cream cheese: For that signature rich, ultra-creamy texture and optimal setting, always opt for **full-fat, brick-style cream cheese**. Brands like Philadelphia are highly recommended for their consistent quality and ideal fat content. Avoid low-fat, reduced-fat, or whipped cream cheese varieties, as they contain more water and less fat, which will prevent your cheesecake from setting correctly and can result in a runny, disappointing texture. Ensure it’s softened to room temperature before mixing to achieve a smooth, lump-free filling.
Strawberry jello mix: This ingredient plays a crucial dual role in our recipe: it helps the cheesecake achieve a perfect, firm set and infuses it with an amazing, authentic strawberry flavor. I specifically use and recommend a standard strawberry-flavored powdered Jell-O mix. It’s absolutely crucial to use the regular, sugar-sweetened kind, not the sugar-free version, as the sugar also contributes significantly to the setting properties and the overall rich flavor profile of the cheesecake.
Strawberries: When it comes to the berries themselves, both fresh or frozen strawberries will work wonderfully for making the homemade strawberry sauce. Frozen strawberries are often more cost-effective and readily available year-round, breaking down easily during the cooking process. However, when it comes to decorating the finished cheesecake, **always use fresh, ripe strawberries**. Frozen berries, once thawed, will inevitably release excess water, making them soggy and potentially causing unwanted drips and discoloration on your beautifully set dessert, detracting from its fresh appearance.
Graham crackers: These form the delightful, buttery, and slightly sweet base of our cheesecake, providing a perfect textural contrast. To save time and effort, I often purchase pre-crushed graham cracker crumbs. If you can’t find them, simply crush whole graham crackers in a food processor or a sturdy Ziploc bag using a rolling pin until fine crumbs are formed. You can also experiment with other cookie bases like Biscoff cookies or traditional Oreos for a different flavor profile, adjusting the amount of melted butter as needed. The crumb mixture should hold its shape when squeezed to ensure a firm, stable crust that won’t fall apart when sliced.
Heavy whipping cream: This is another non-negotiable ingredient for achieving the perfect light, airy, and stable texture in your cheesecake filling. Always use heavy cream with **at least 35% milk fat or higher**. Anything with a lower fat content, such as light cream or half-and-half, will not whip up properly into stiff peaks, which is crucial for the cheesecake’s airy consistency and its ability to set firmly. To ensure successful whipping, always start with well-chilled cream, mixing bowl, and whisk attachments—this makes all the difference!
Crafting Your Own Luscious Homemade Strawberry Sauce
A vibrant, fresh strawberry sauce is not just a topping but an essential component for this cheesecake, offering both incredible flavor and a beautiful visual appeal. Making it from scratch is surprisingly simple and yields a far superior taste to most store-bought options, allowing you to control the sweetness and consistency. Here’s how to prepare this delicious sauce:
Step 1 – Simmering the Berries: In a medium saucepan, combine your destemmed and finely chopped strawberries (whether fresh or frozen, both work wonderfully here), granulated sugar, the freshly squeezed juice from half a lemon (which brightens the flavor), and cornstarch (our thickening agent). Stir all these ingredients together thoroughly to ensure they are well mixed and the cornstarch is dissolved. Place the saucepan over medium heat and bring the mixture to a gentle simmer. Continue stirring constantly to prevent sticking and to encourage the strawberries to release their natural liquids. The sugar will dissolve, and the fruit will begin to soften, creating a fragrant base for your sauce.
Step 2 – Thickening and Blending: As the strawberries soften and the sauce begins to thicken to your desired consistency – a good indicator is when it coats the back of a spoon – remove the saucepan from the heat. For a smooth, velvety sauce, use an immersion blender directly in the pot, blending until it reaches a beautiful, uniform consistency. If you prefer a chunkier sauce with some delightful pieces of fruit, you can simply mash the strawberries with a potato masher instead. Taste and adjust sweetness or tartness if necessary, adding a touch more sugar or lemon juice to balance the flavors to your preference.
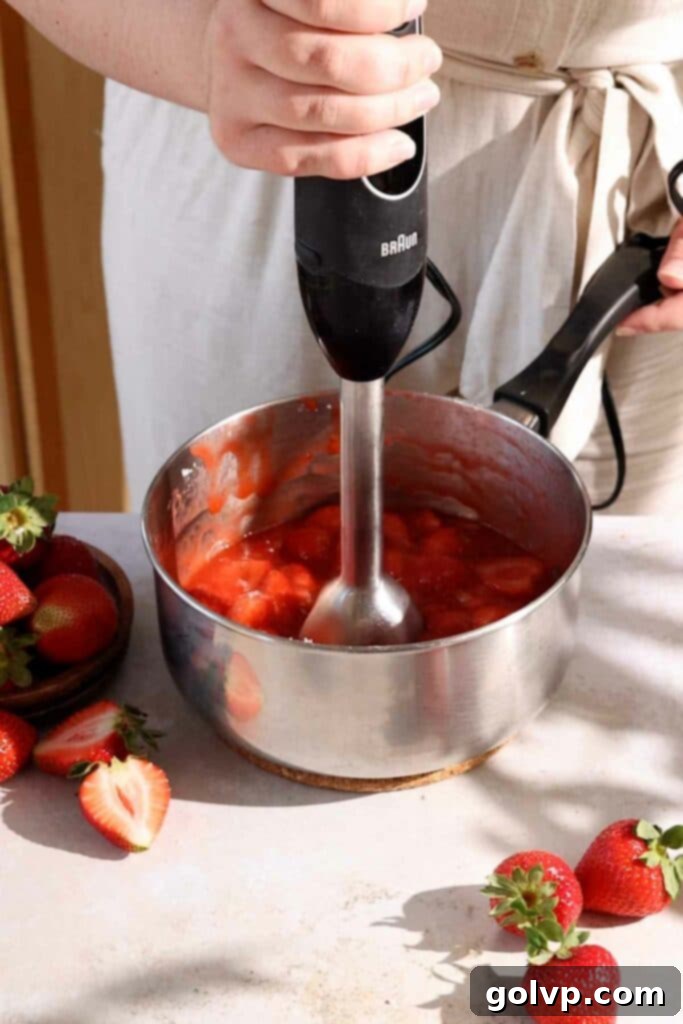
Step 3 – Chilling for Perfection: Once blended to your desired smoothness, transfer the hot strawberry sauce into a non-metal container. Allow it to cool slightly at room temperature to release some of the initial heat, then cover it tightly and refrigerate until thoroughly chilled. Chilling is crucial as it allows the sauce to thicken further and ensures it’s cool enough to use on your cheesecake without compromising the delicate filling’s set. This versatile sauce can be made several days in advance, and its delicious flavor will only intensify with a good chill.
Building the Perfect Foundation: How to Make Your Cheesecake Crust
A sturdy, flavorful crust is the essential base for any great cheesecake, providing structure and a delightful textural contrast. Our graham cracker crust is no exception – it’s simple to make and perfectly complements the creamy filling. Here’s a detailed guide on how to prepare it to perfection:
Step 1 – Preparing the Crumb Mixture: In a large mixing bowl, combine the finely crushed graham crackers (or your chosen cookie crumbs) with a pinch of sea salt, which enhances the flavor, and the cooled melted butter. It’s important that the butter is melted but not hot, as hot butter can “fry” the crumbs. Stir these ingredients thoroughly until all the crumbs are evenly moistened and coated with butter. To test for the right consistency, squeeze a small amount of the mixture firmly in your hand. If it holds its shape without crumbling, you have enough butter. If it crumbles apart, add more melted butter, one tablespoon at a time, mixing well after each addition until the desired sticky consistency is achieved. This ensures a stable crust that won’t fall apart when sliced.
Step 2 – Lining and Spreading the Crust: Take a 9-inch round springform pan. For easy removal and serving later, it’s highly recommended to line its bottom with a circle of parchment paper. This simple step prevents sticking. Pour the prepared crumb mixture into the bottom of the pan. Use the back of a spoon or your clean fingers to spread the crumbs evenly across the base, ensuring a uniform layer. Don’t worry about getting it perfectly smooth yet.
Step 3 – Compacting the Crust: To create a firm and well-formed crust that can withstand slicing, use the flat bottom of a drinking glass or a dedicated tamper to firmly and evenly compact the crumb mixture into the pan. Press down firmly across the entire surface to create a dense, stable base. For an extra touch and to help contain the cheesecake filling, carefully push some of the crumb mixture up the sides of the pan to create a small, neat wall. Once compacted, transfer the crust to the refrigerator and chill it for at least 15-20 minutes while you prepare the cheesecake filling, allowing the butter to solidify and bind the crumbs even further, resulting in a perfectly set crust.
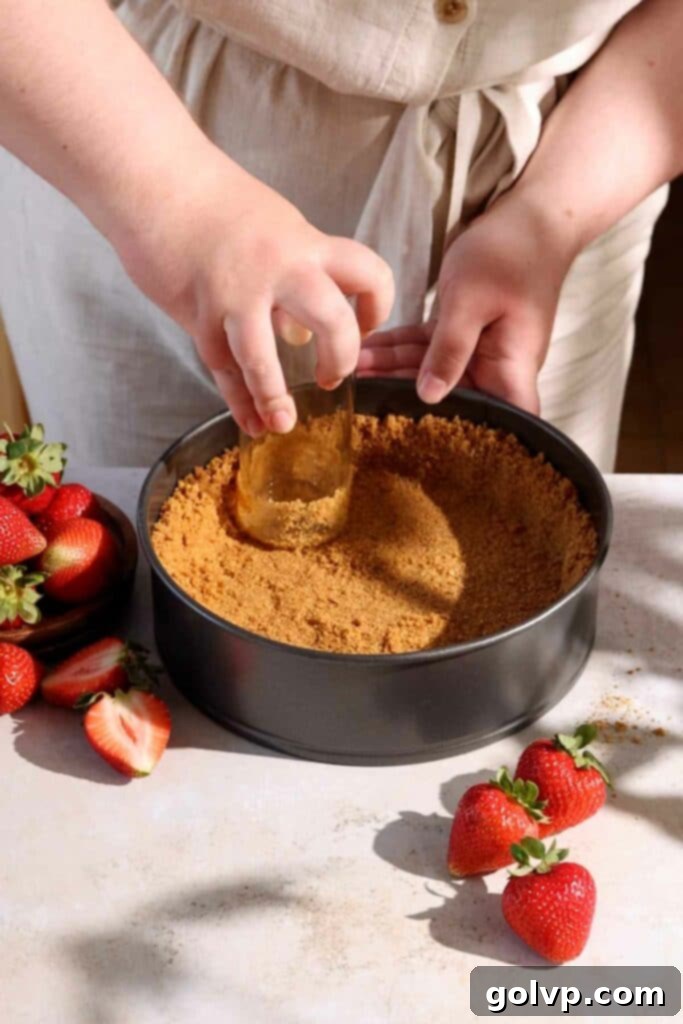
Preparing the Creamy, Two-Layered Cheesecake Filling
The heart of our dessert is the luscious, two-toned cheesecake filling. This section details the precise steps to create both the delicate vanilla and vibrant strawberry layers, ensuring a smooth, airy, and intensely flavorful result that forms the core of your magnificent cheesecake.
Step 1 – Dissolving the Jello: Begin by carefully setting aside two tablespoons of the dry strawberry jello powder; this crucial amount will be used later to enhance the strawberry crunch topping. In a medium-sized heatproof bowl, dissolve the remaining contents of the jello packet in ¼ cup of actively boiling hot water. Stir frequently and thoroughly, using a whisk or spoon, until all the jello crystals have completely dissolved and no granules remain at the bottom of the bowl. Set this mixture aside to cool slightly, ensuring it reaches room temperature or is even slightly cool to the touch before it’s incorporated into the cream cheese filling, preventing it from setting too quickly or melting other ingredients.
Step 2 – Whipping the Heavy Cream: In a large mixing bowl, preferably one that has been chilled, or in the bowl of a stand mixer fitted with a whisk attachment, pour the 1 ¼ cups of heavy whipping cream. Beat the cream on medium-high speed until it transforms into stiff peaks. Stiff peaks mean that when you lift the whisk, the cream holds its shape firmly without collapsing or drooping. Be vigilant not to overbeat, as it can quickly turn granular or separate. Immediately transfer the perfectly whipped cream to the refrigerator to keep it cold and stable until you’re ready to gently fold it in, preserving its airy texture.
Step 3 – Preparing the Cream Cheese Base: In a separate large bowl, or using the stand mixer (if available, after transferring the whipped cream), combine the softened, full-fat cream cheese with the powdered sugar. Beat these together on medium speed until the mixture is completely creamy, smooth, and entirely lump-free. This foundational step is crucial for achieving the silky, luxurious texture that defines a great cheesecake. Remember to scrape down the sides and bottom of the bowl as needed to ensure all ingredients are thoroughly incorporated.
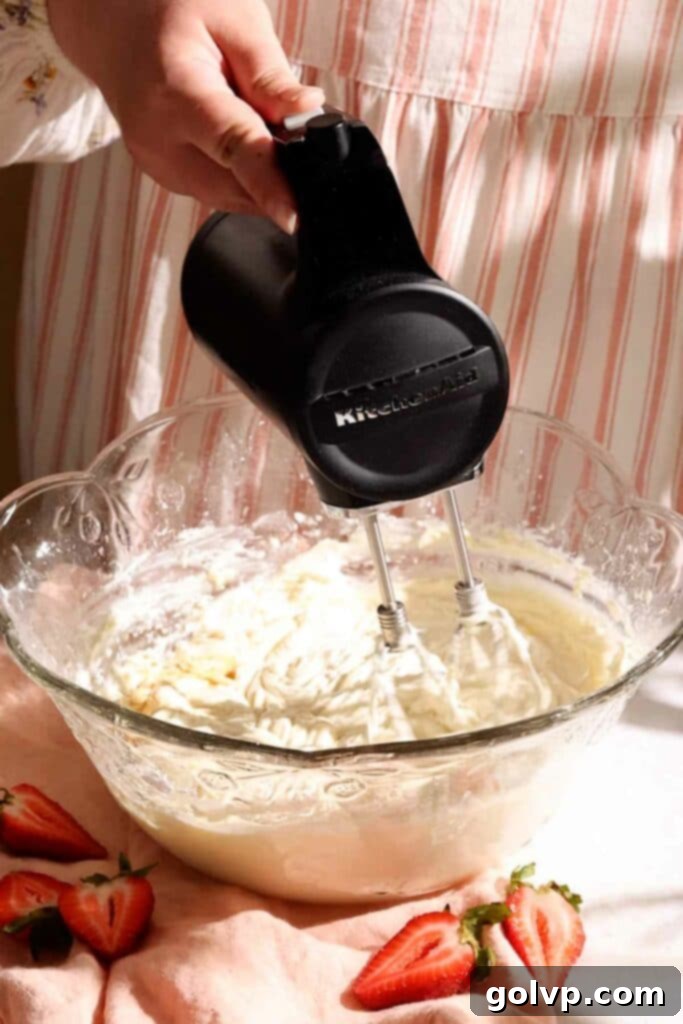
Step 4 – Flavoring the Base and Gentle Folding: To the creamy cream cheese mixture, add the pure vanilla extract, freshly squeezed lemon juice (which adds a bright counterpoint), and a pinch of sea salt. Beat briefly, just until these additional ingredients are uniformly combined. Now, carefully retrieve the previously whipped heavy cream from the refrigerator. Using a large rubber spatula, gently fold half of the whipped cream into the cream cheese mixture. The key here is to use a light hand and a folding technique (cutting through the middle and scooping from the bottom, turning the bowl) to maintain as much air as possible in the mixture, ensuring a light and airy cheesecake. Continue folding until no streaks of cream cheese or whipped cream are visible, creating a homogeneous, fluffy consistency.
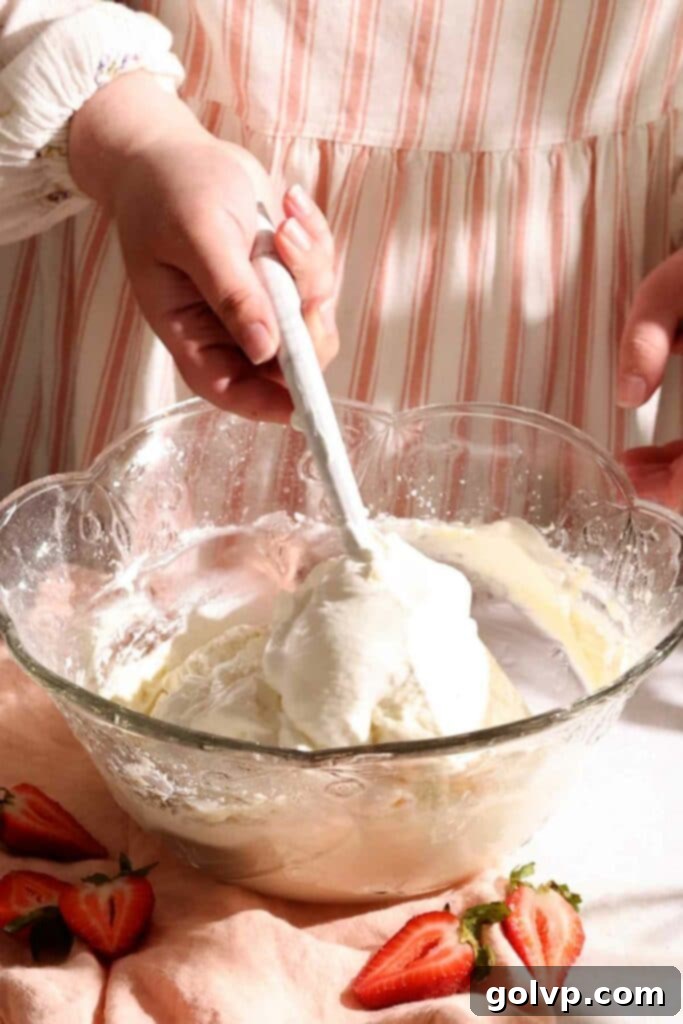
Step 5 – Creating the Vanilla Layer: With the first stage of the filling complete, spread exactly half of this creamy, unflavored (vanilla) cream cheese filling evenly over your prepared graham cracker crust in the springform pan. This will form the delicious, rich bottom vanilla layer of your cheesecake. Take your time to smooth the top with a spatula, creating a perfectly even and flat base for the next, vibrant layer.
Step 6 – Infusing the Strawberry Layer: To the remaining half of the cream cheese filling, add the cooled, dissolved strawberry jello mix. Then, incorporate the remaining ¼ cup of unwhipped heavy cream. Gently fold these ingredients in until they are fully incorporated and the filling achieves a uniform, beautiful pink color and a cohesive strawberry flavor. The addition of the unwhipped heavy cream at this stage helps to maintain the desired consistency of the strawberry layer, ensuring it’s smooth and perfectly integrated without becoming too stiff or watery.
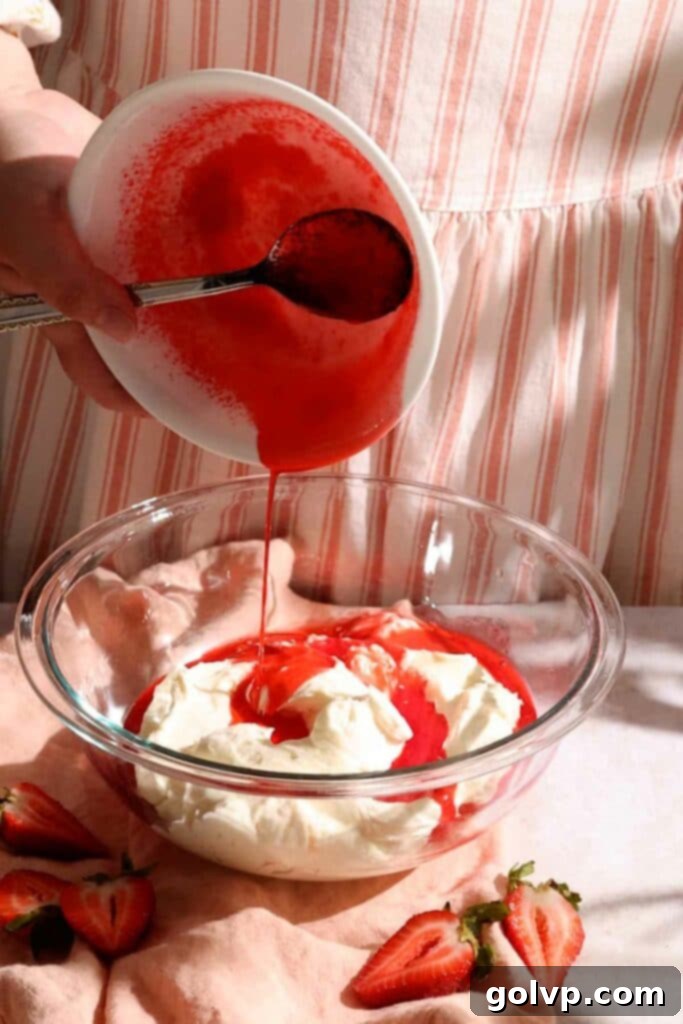
Step 7 – Layering and Chilling: Carefully pour or spoon the strawberry-flavored filling on top of the vanilla layer in the springform pan. Gently spread it out with a spatula or the back of a spoon to create a smooth, even top surface that looks appealing. Once both layers are perfectly complete and smooth, transfer the cheesecake to the refrigerator and chill it for at least 7 hours, or preferably overnight (10-12 hours). This extended chilling period is absolutely crucial for the cheesecake to set completely, ensuring perfect, firm slices and maximum flavor development, making it ready to be the star of your dessert spread.
Whipping Up Your Irresistible Homemade Strawberry Crunch Topping
The strawberry crunch topping is truly the crowning glory of this cheesecake, delivering a delightful crispy texture and an extra burst of vibrant berry flavor that complements the creamy filling beautifully. Its simplicity is part of its charm, and it’s best made just before serving to maximize its fresh crunchiness and impact.
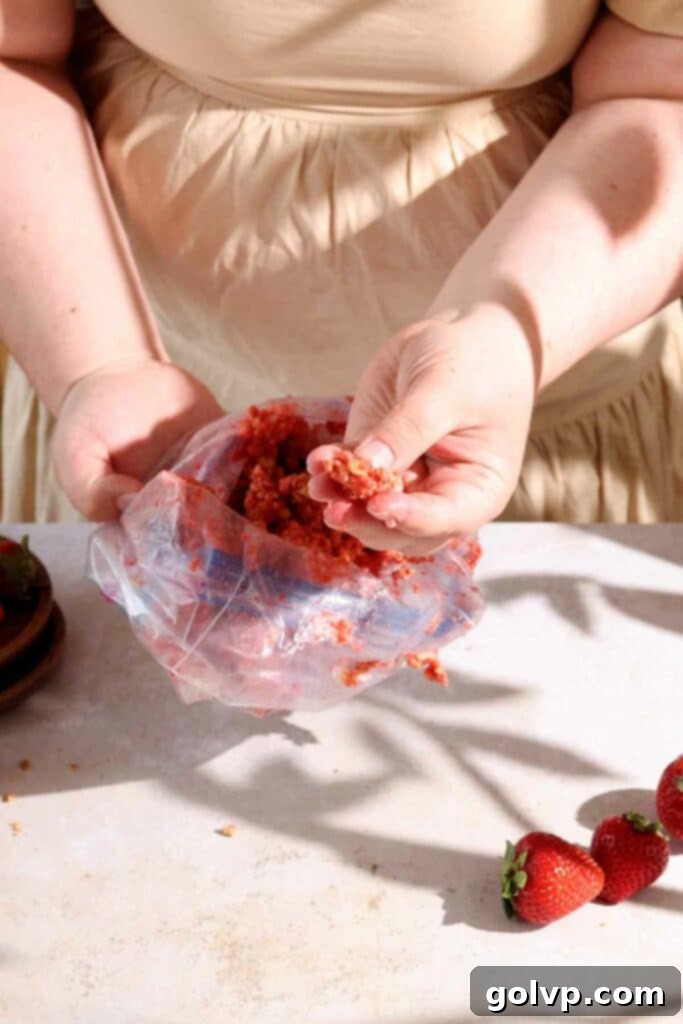
Step 1 – Crushing the Golden Oreos: Gather your packet of golden Oreos. You have a couple of efficient ways to crush them: for maximum convenience, pulse them in a food processor until they form large, pea-sized crumbs. It’s important to avoid over-processing them into a fine powder, as we want that distinct crunch. Alternatively, for a more hands-on approach, place the entire pack of cookies in a large, sturdy Ziploc bag, seal it securely, and use a rolling pin to crush them by hand. Aim for a mix of varied textures, from slightly finer crumbs to slightly larger pieces, for a more appealing and satisfying bite. This variation in texture adds to the overall experience.
Step 2 – Combining Flavors for the Crunch: Once your golden Oreos are crushed to perfection, transfer the cookie pieces to a bowl or keep them conveniently in the Ziploc bag. Add the two tablespoons of strawberry jello mix that you so wisely reserved earlier. This dry powder is a key player, providing both an intensified, bright pink color and a concentrated burst of authentic strawberry flavor to the crunch. Next, add two tablespoons of the prepared homemade strawberry sauce. Now, mix everything thoroughly. The goal here is to barely moisten the crumble, allowing it to clump together slightly but still remain distinct and wonderfully crunchy. Be very careful not to add too much sauce, as this will quickly turn your crisp crunch into a soggy, less appealing mixture. If you opted to mix it in a bag, you can simply knead the bag gently to combine the ingredients evenly, ensuring that each piece of crunch is coated with delicious strawberry goodness, ready to be sprinkled generously over your finished cheesecake.
Final Touches: Assembling Your Magnificent Strawberry Crunch Cheesecake
Once your cheesecake is fully chilled, firm, and patiently set in the refrigerator, it’s time for the exciting final step: assembly! This is where all your hard work comes together to create a truly stunning and utterly delicious dessert that will impress everyone.
Step 1 – Releasing the Cheesecake: Carefully remove the chilled cheesecake from the refrigerator. To facilitate its release from the springform pan, run a thin, sharp knife gently along the inner edge of the pan. This helps to loosen the cheesecake from the sides without damaging its delicate structure. Next, unlatch and carefully remove the springform ring. If your pan has a removable bottom, you can carefully slide the cheesecake base (with the cake still on it) directly onto your chosen cake stand or serving plate. If not, you may need to use a wide, thin spatula to carefully transfer it, or serve it directly from the pan base for convenience and to avoid potential mishaps.
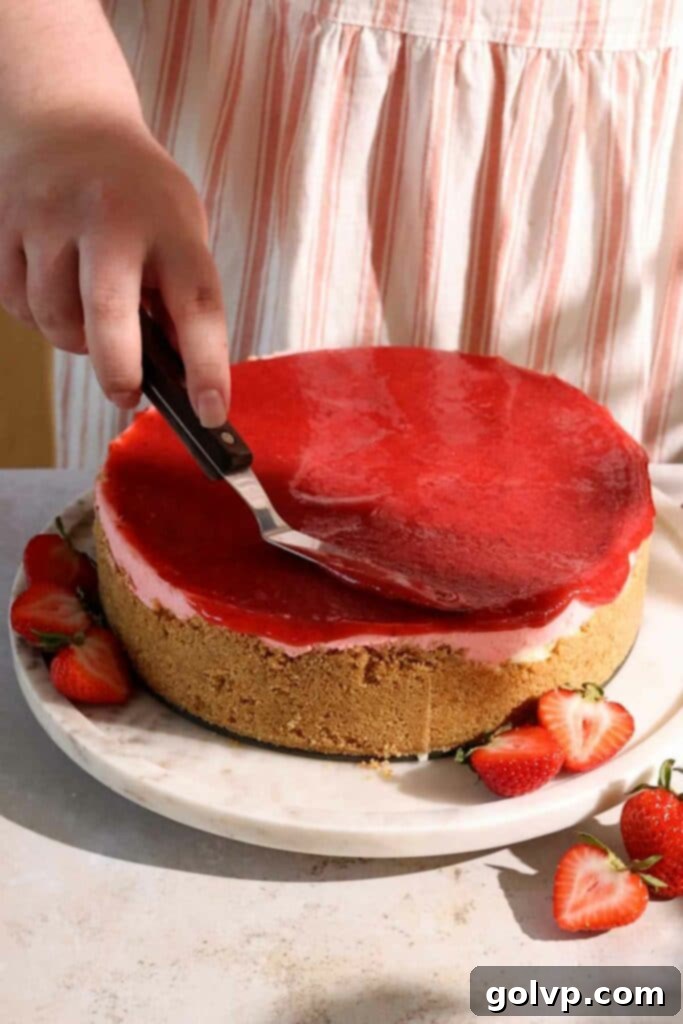
Step 2 – Adding the Sauce and Crunch: With the cheesecake now proudly displayed, spread a generous layer of your homemade strawberry sauce over the entire top surface. Don’t be shy – let some of that vibrant red sauce gracefully drip down the sides of the cheesecake for an appealing, rustic, and inviting look. This visual element adds to the dessert’s charm. Immediately after, take your freshly prepared strawberry crunch topping and sprinkle it evenly and generously over the strawberry sauce. This ensures the crunch adheres well to the sauce and stays delightfully crisp until serving, providing that essential textural contrast.
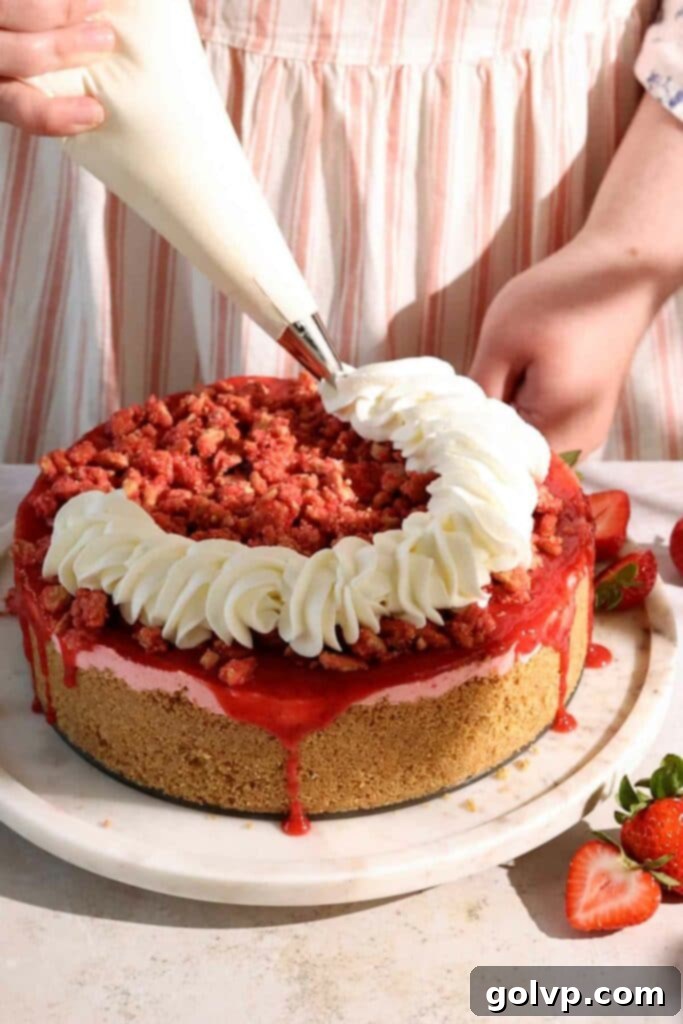
Step 3 – Optional Whipped Cream and Fresh Strawberries: For an extra touch of elegance and creamy indulgence, you can prepare additional heavy whipping cream. Whip it with a touch of powdered sugar until stiff peaks form. Then, using a piping bag fitted with a decorative tip, pipe this whipped cream into a beautiful rope border around the edge of the cheesecake, or create individual dollops artistically arranged across the top. Finally, complete your masterpiece with an abundance of fresh, ripe strawberries. Halved or sliced, these vibrant berries add a burst of natural sweetness, a hint of acidity, and an undeniable fresh appeal, transforming your cheesecake into a truly unforgettable dessert that is ready to be admired and savored. Serve immediately and enjoy the delightful reactions!
Frequently Asked Questions About Strawberry Crunch Cheesecake
For the best flavor and consistent results, I highly recommend using a standard **strawberry-flavored powdered Jell-O mix** (like the classic Jell-O brand itself, if available in your region). It’s absolutely crucial to use the regular, sugar-sweetened kind, not the sugar-free version. The sugar content in regular jello plays an important role not only in contributing to the delicious taste but also in helping the cheesecake set properly and achieve its desired firm consistency.
No worries at all if golden Oreos aren’t readily available! You can easily substitute them with any similar vanilla-flavored sandwich cookie (like vanilla cream sandwich cookies from other brands) or even shortbread cookies. The goal is to have a sturdy, vanilla-based cookie that will crush into a delicious crumble for the crunch topping, providing that perfect buttery texture. You could even use vanilla wafers for a slightly different, finer texture if preferred.
Yes, absolutely! While the recipe is designed and optimized for a 9-inch round springform pan, you can certainly adapt it to a larger pan, such as a 9×13-inch rectangular baking dish, to create cheesecake bars. Keep in mind that when using a larger pan, the cheesecake layers will naturally be thinner, resulting in a dessert that’s more like bars or squares rather than a tall, traditional cheesecake slice. The chilling time should remain the same (at least 7 hours, preferably overnight) to ensure it sets properly, and you might consider slightly increasing the amount of crust and topping to maintain a good proportional balance in a larger pan.
Frozen strawberries are perfectly fine and, in fact, highly recommended for making the **homemade strawberry sauce**. They thaw and break down easily during the simmering process, and their flavor is excellent and often more consistent year-round. However, I strongly advise against using frozen strawberries for decorating the top of the finished cheesecake. Once thawed, they inevitably become soggy, release a lot of excess liquid, and can cause drips and discoloration on your beautifully set cheesecake, detracting significantly from its fresh and appealing appearance.
Yes, this recipe is wonderfully adaptable to other fruit flavors! You can certainly substitute the strawberry jello mix and fresh/frozen strawberries with other berries and their corresponding jello flavors. Popular and delicious alternatives include raspberry (using raspberry jello and raspberries), mixed berry (using a mixed berry jello and blend of berries), or even cherry (with cherry jello and cherries). Just ensure the jello flavor you choose perfectly matches your chosen fruit for the sauce and decoration to maintain a cohesive and delightful flavor profile throughout the cheesecake. This versatility allows for fantastic customization to suit your taste preferences!
Discover More Delicious Recipes from Our Kitchen!
If you’ve enjoyed making and tasting this delightful strawberry crunch cheesecake, you’re in for a treat! Our kitchen is filled with many more irresistible recipes waiting for you to explore. Whether you’re looking for another no-bake wonder, a classic baked dessert, or something completely new, we have something to satisfy every sweet craving and expand your baking repertoire. Here are a few other popular selections that are sure to bring joy to your table:
- Biscoff Cheesecake
- Lemon Butter Cake
- Strawberry Cheesecake Cookies
- Strawberry Cinnamon Rolls
Happy baking, and happy eating! We sincerely hope you find more joy and delicious inspiration in our culinary creations. Don’t forget to share your experience with us!
Did you make this recipe? We would love for you to rate this recipe and hear what you think in the comments below! Share your creation on Instagram and tag @flouringkitchen. Follow us on Pinterestto save and for more recipe ideas.
📖 Recipe
Strawberry Crunch Cheesecake
Mary
Pin Recipe
Shop Ingredients
Equipment
-
nine inch springform round baking pan
-
electric mixer
Ingredients
Strawberry sauce
- 1 ½ cups strawberries destemmed and chopped
- ¼ cup granulated sugar
- ½ lemon squeezed
- 1 tablespoon cornstarch
Crust
- 3 cups graham crackers crushed into crumbs
- ¼ teaspoon sea salt
- ¾ cup butter melted and cooled
Filling
- 3 oz packet strawberry jello mix packet set aside 2 tablespoons
- ¼ cup boiling water
- 1 ¼ cup heavy whipping cream
- 24 oz cream cheese softened
- 2 cups powdered sugar
- 1 tablespoon pure vanilla extract
- 1 tablespoon lemon juice freshly squeezed
- ⅛ teaspoon sea salt
- ¼ cup heavy whipping cream unwhipped
Strawberry crunch topping
- 2 tablespoons jello mix reserved
- 2 tablespoons strawberry sauce
- 1 pack golden oreos
Assembly (optional)
- ½ cup whipped cream
- 2 tablespoons powdered sugar
- 6 fresh strawberries halved
