Homemade Mini Blueberry Hand Pies: The Ultimate Flaky & Jammy Delight
Jump to Recipe
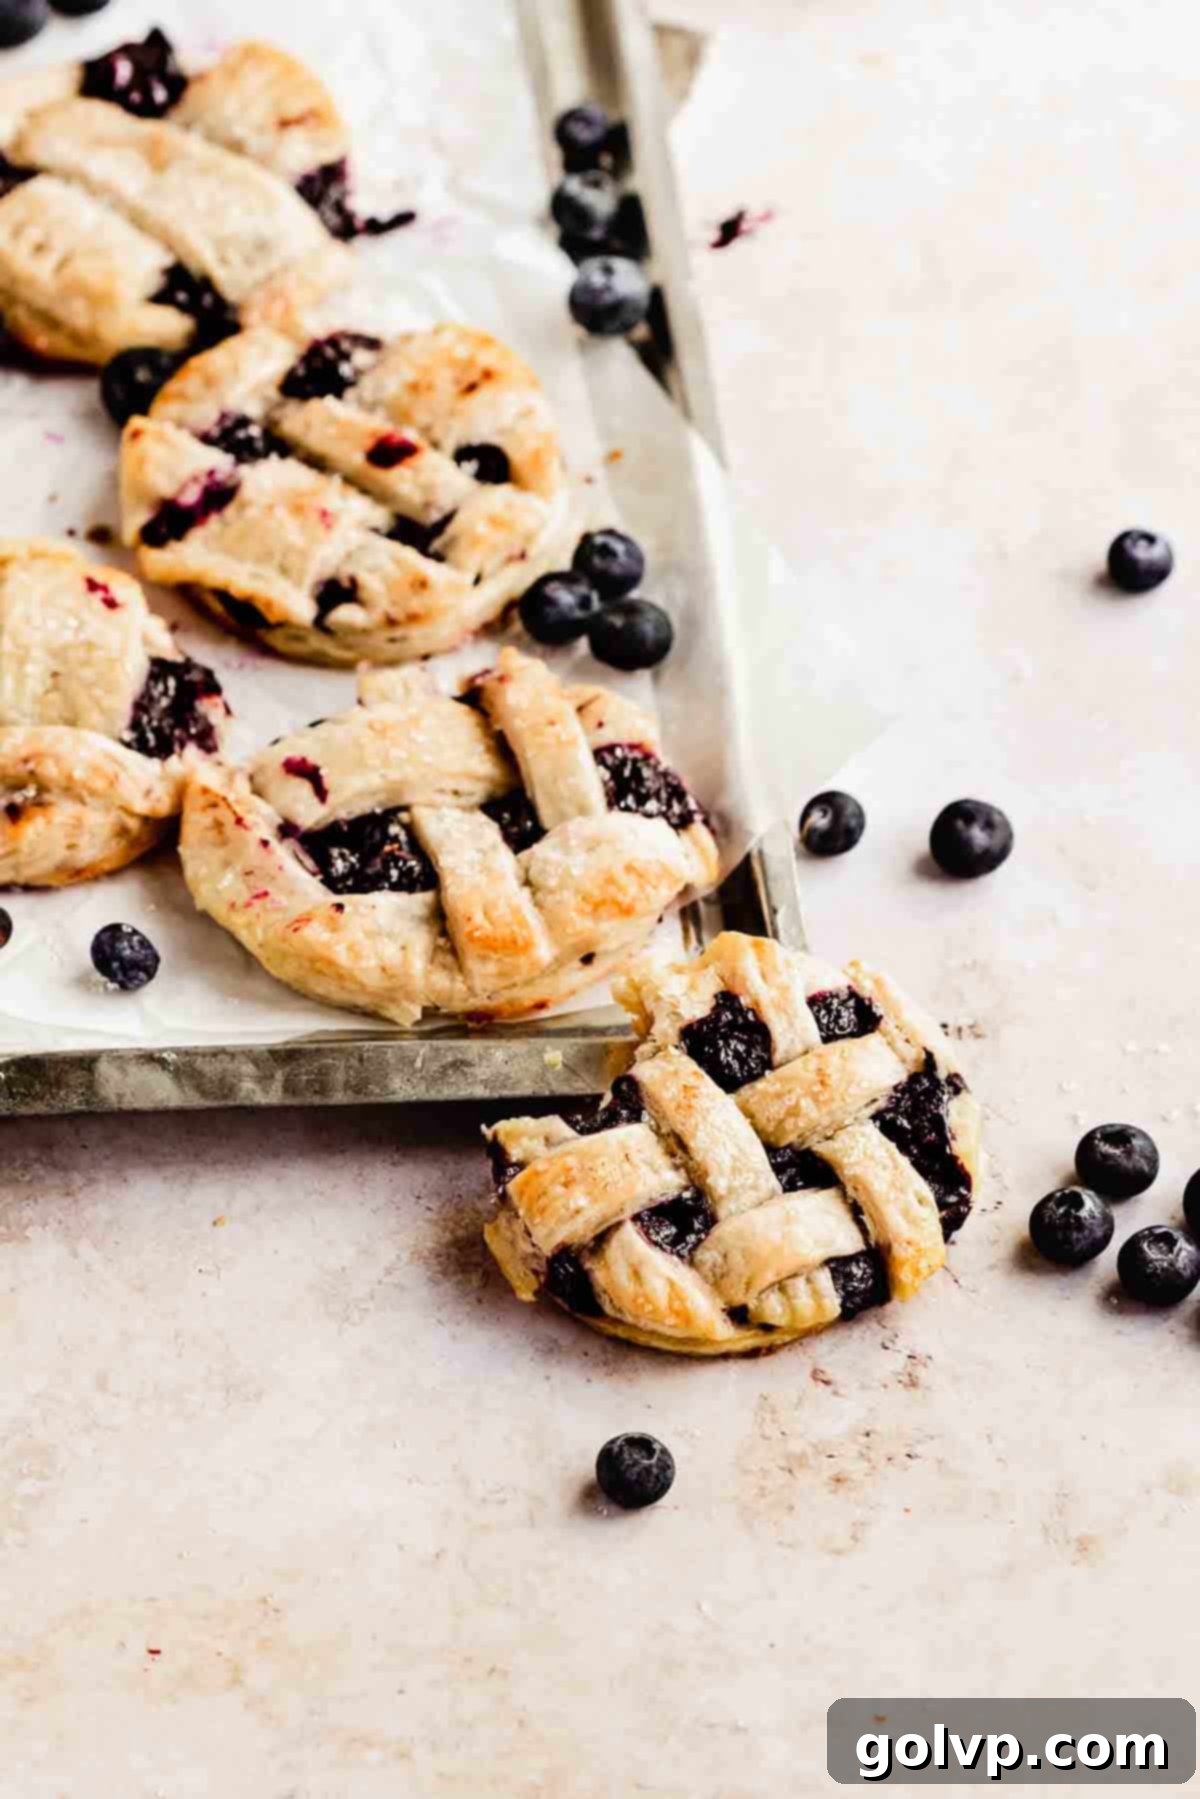
There’s something uniquely charming and utterly delicious about a perfectly made hand pie. These mini blueberry pies are an absolute revelation, combining a rich, jammy blueberry filling with an incredibly flaky, all-butter crust. They offer all the beloved flavors of a classic blueberry pie, but in a more accessible, individual format that’s perfect for picnics, parties, or simply a delightful treat at home. What makes them truly special? They’re significantly faster to prepare than a large, traditional pie, and their adorable presentation is sure to impress.
Our secret to an extraordinary blueberry filling lies in a touch of warm cinnamon and a hint of butter, which together profoundly enhance the natural sweetness and depth of the blueberries. This creates a filling that isn’t just sweet, but complex and deeply satisfying. When encased in our signature all-butter crust, baked to a bakery-style crunchy top, these hand pies become truly irresistible – you’ll find it impossible to stop at just one!
The Secret to a Flaky All-Butter Pie Crust
The foundation of any exceptional pie is its crust, and for these mini blueberry hand pies, we’ve perfected an easy all-butter pie crust recipe that consistently delivers a delicate, flaky, and tender result every single time. The key ingredient that sets our crust apart is a small addition of vinegar. This simple trick makes a significant difference, helping to inhibit gluten formation, which in turn ensures a more tender bite. Beyond texture, the vinegar also imparts a subtle tang that beautifully balances the richness of the butter, adding an extra layer of nuanced flavor to the crust.
The technique for achieving those coveted flaky layers is equally important. After mixing, we intentionally flatten and fold the dough a few times before it undergoes its crucial chilling period. This process works to create distinct layers of butter within the dough, which, when baked, release steam and push the dough upwards, resulting in that wonderfully airy and flaky texture we all adore. Temperature control is paramount throughout this process; keeping the butter cold is the golden rule for pie perfection.
Effortless Make-Ahead Strategy for Stress-Free Baking
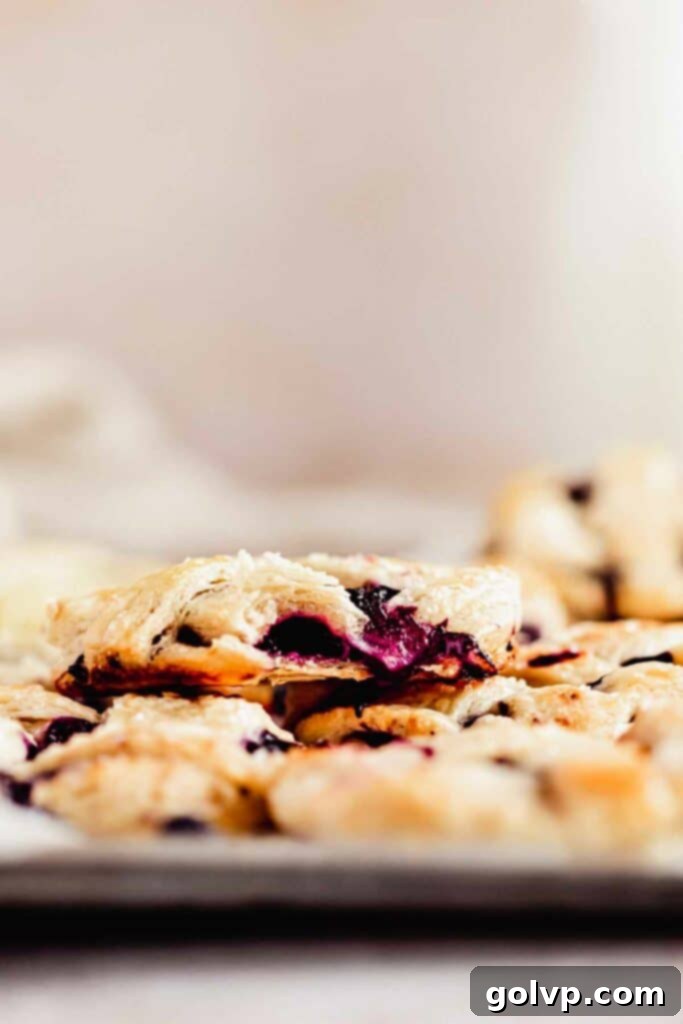
One of the many advantages of this mini blueberry pie recipe is its flexibility for make-ahead preparation, allowing you to streamline your baking process and enjoy fresh, crisp pies without a last-minute rush. Both the luscious blueberry filling and the tender pie crust require a complete chilling period, ideally for at least 30 minutes. However, for maximum convenience, you can easily prepare both components the day before you plan to bake. This forward planning significantly reduces prep time on baking day, transforming a potentially lengthy process into a quick assembly and bake session.
Having your filling and dough ready and thoroughly chilled is crucial. Cold dough is easier to work with, less prone to sticking, and contributes to a flakier crust. A well-chilled filling prevents excessive bubbling out of the pies during baking and ensures it sets beautifully. By handling these steps a day in advance, all that’s left is the fun part: assembling and baking your adorable mini blueberry pies. This ensures they emerge from the oven perfectly crisp, golden, and at their absolute peak of freshness, ready to be enjoyed.
Essential Ingredients for Perfect Mini Blueberry Pies
Every great recipe relies on quality ingredients, and these mini blueberry pies are no exception. Here’s a closer look at the key components and why they are vital to achieving that ultimate flaky crust and jammy filling:
- Blueberries: The star of the show! You have the flexibility to use either fresh or frozen blueberries for this recipe. Since they are cooked down into a delightful jammy consistency anyway, the initial state doesn’t drastically affect the final outcome. Both fresh summer berries and convenient frozen blueberries (no need to thaw!) will work wonderfully. For an even more intense berry flavor, consider using wild blueberries if you can find them.
- Cornstarch: This unassuming ingredient is critical for achieving the perfect consistency in your blueberry filling. As the blueberries cook and release their juices, cornstarch acts as a thickener, preventing the filling from becoming too watery and spilling out of your perfectly formed pies. It ensures a beautifully jammy, stable filling that holds its shape.
- Lemon Juice: A splash of fresh lemon juice is a game-changer for the filling. Blueberries, while sweet, can sometimes benefit from a bright counterpoint. The lemon juice cuts through the sweetness, adding a necessary tartness that “brightens” the overall flavor profile of the filling, making it taste more vibrant and complex.
- Cinnamon: While you won’t distinctly taste “cinnamon” as a dominant flavor, its role here is to enhance and deepen the blueberry experience. It acts as a subtle spice, bringing out the inherent warmth and complexity of the blueberries, elevating them beyond simple sweetness into something truly aromatic and comforting.
- Butter: For both the crust and the filling, using a high-quality, real butter is paramount. In the crust, cold butter is fundamental for flakiness; we cube it and freeze it for about 10 minutes to ensure it remains solid during mixing. This creates pockets of butter that melt in the oven, producing steam and those desired flaky layers. A small amount of butter is also stirred into the hot filling at the end, lending it a velvety smoothness and a richer mouthfeel.
- Vinegar: A unique but incredibly effective addition to the pie crust. While its flavor is barely noticeable in the finished product, vinegar plays a dual role: it helps prevent excessive gluten development, resulting in a more tender crust, and it adds a very subtle tang that deepens the flavor profile and balances the richness of the butter. Apple cider vinegar is a great choice, but white vinegar or even lemon juice can be substituted.
- Egg + Milk (for Egg Wash): Whisked together, these create an egg wash that is brushed over the pies just before baking. This step is essential for achieving a gorgeous golden-brown color and a crisp, bakery-style top crust. For those avoiding eggs, a simple brush with just milk can still provide a lovely golden sheen.
Crafting the Luscious Blueberry Filling
The heart of these mini pies is undoubtedly the vibrant, jammy blueberry filling. Preparing it is straightforward, but attention to detail ensures a perfect texture and flavor. Begin by combining the sugar and cornstarch in a small saucepan. This initial dry mix helps prevent the cornstarch from clumping when the liquids are added. Next, introduce your blueberries (fresh or frozen), lemon juice, water, cinnamon, and a pinch of salt. Place the saucepan over low heat, stirring continuously. As the blueberries begin to warm, gently smash some of them with the back of your spoon or a potato masher. This releases their juices and creates a more robust, jam-like consistency. Continue stirring and cooking until the mixture comes to a gentle simmer.
Once simmering, let it cook for just a minute or two, stirring, until it visibly thickens. The cornstarch will activate and transform the runny liquid into a beautiful, glossy, and jammy filling. Immediately remove the saucepan from the heat and stir in the butter until it is completely melted and incorporated. The butter adds a lovely richness and a smooth finish to the filling. Transfer the hot filling into a non-metal container (glass or ceramic works well) to prevent any metallic taste development. Allow it to cool completely to room temperature before covering and refrigerating. It’s crucial for the filling to be thoroughly chilled before assembling the pies; this ensures it’s firm enough to work with and prevents it from making the pie crust soggy during assembly.
Mastering the Flaky All-Butter Pie Crust
A truly flaky pie crust is a baker’s triumph, and with our method, you’ll achieve it consistently. Remember, the crust also needs to chill completely, so it’s another perfect candidate for make-ahead preparation. Start by adding the vinegar to your ice water, stir gently, and set it aside. This ensures the vinegar is evenly distributed when added to the flour mixture.
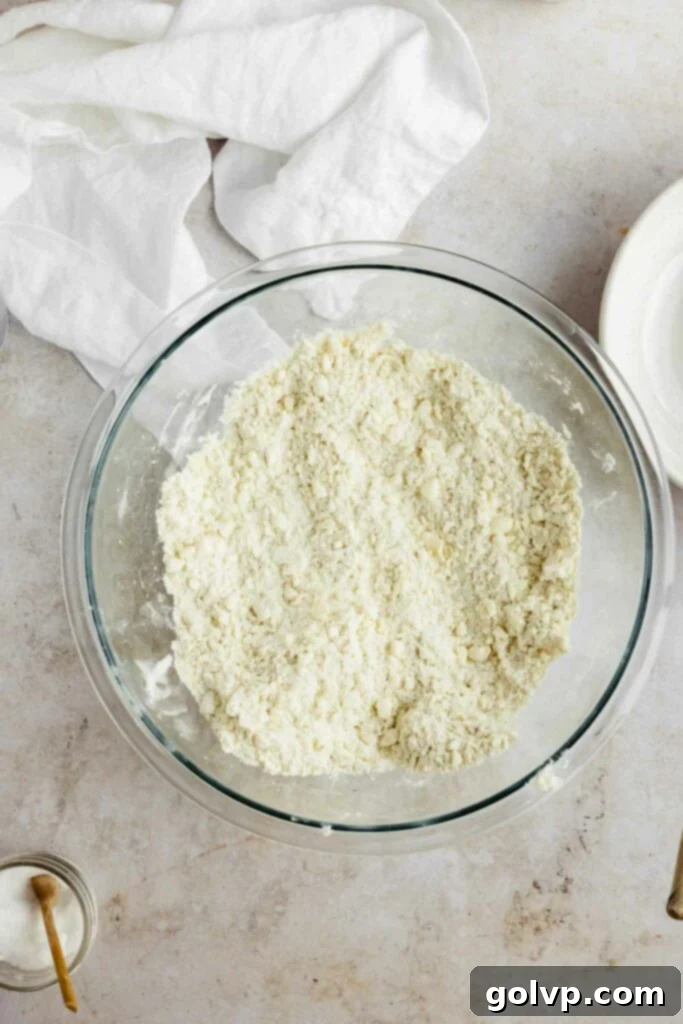
In a large mixing bowl, or using a food processor fitted with a blade attachment, combine the all-purpose flour and sea salt. Pulse or whisk them together until thoroughly incorporated. Now comes the critical step: adding the butter. Introduce the frozen, small-cubed butter into the flour mixture. If using a food processor, pulse quickly in short bursts. If working by hand, use a pastry blender, two knives, or even your fingertips. The goal is to cut the butter into the flour until the mixture resembles coarse breadcrumbs, with some larger pea-sized pieces of butter still visible. Work swiftly to minimize the warmth from your hands or the friction from the food processor, as keeping the butter cold is essential for flakiness.
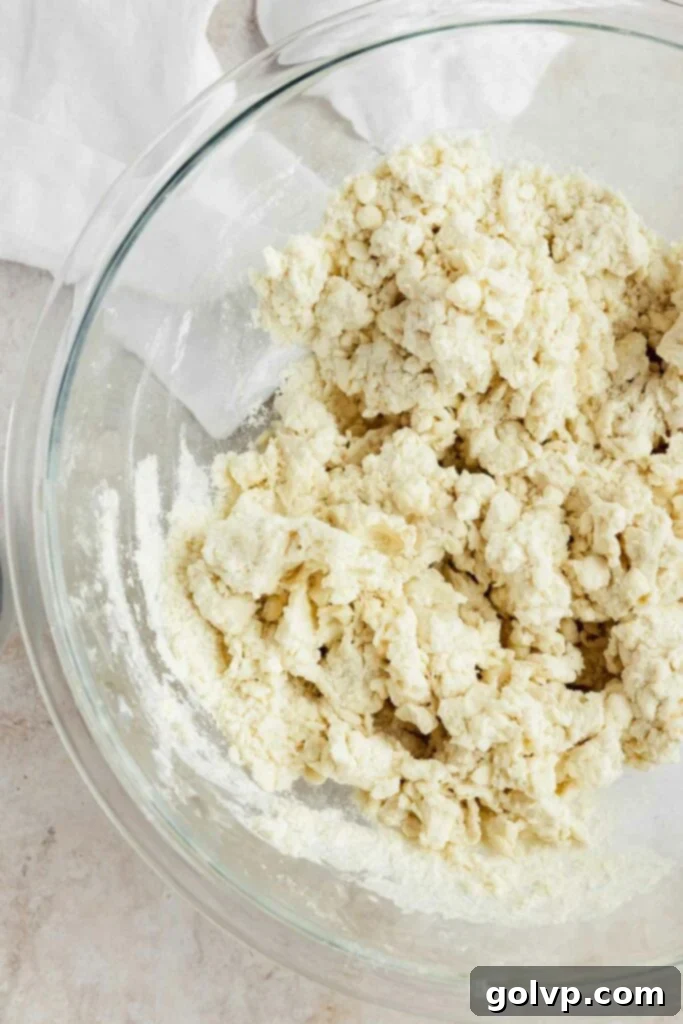
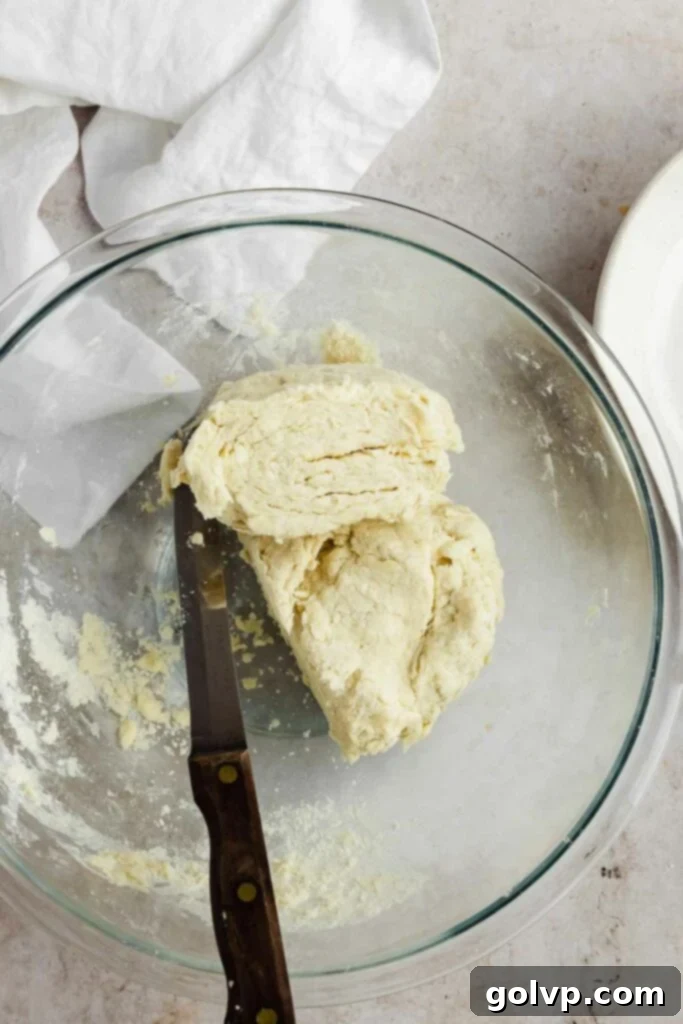
Gradually add the vinegar water, a tablespoon at a time, stirring or pulsing briefly after each addition. The dough will start to come together but will appear very shaggy. It’s important not to add too much liquid; only use enough until the dough just barely starts to cohere. You might not need all of the mixture; for this recipe, about ¾ of the mixture is usually sufficient. Turn the shaggy dough out onto a lightly floured surface. Gently flatten the dough into a rough disk with your hands, pressing any dry bits into the main mass. The unique “flatten and fold” technique is next: fold the dough in half, flatten it gently, and then fold it in half again. Repeat this process a few times. This crucial step is what develops those incredibly tender, flaky layers. Finally, cut the dough in half and form two equal disks. Wrap each disk tightly in plastic wrap and refrigerate for at least 30 minutes, or preferably overnight. A well-chilled dough is easier to roll out and yields a superior flaky texture.
Assembling Your Adorable Mini Blueberry Pies
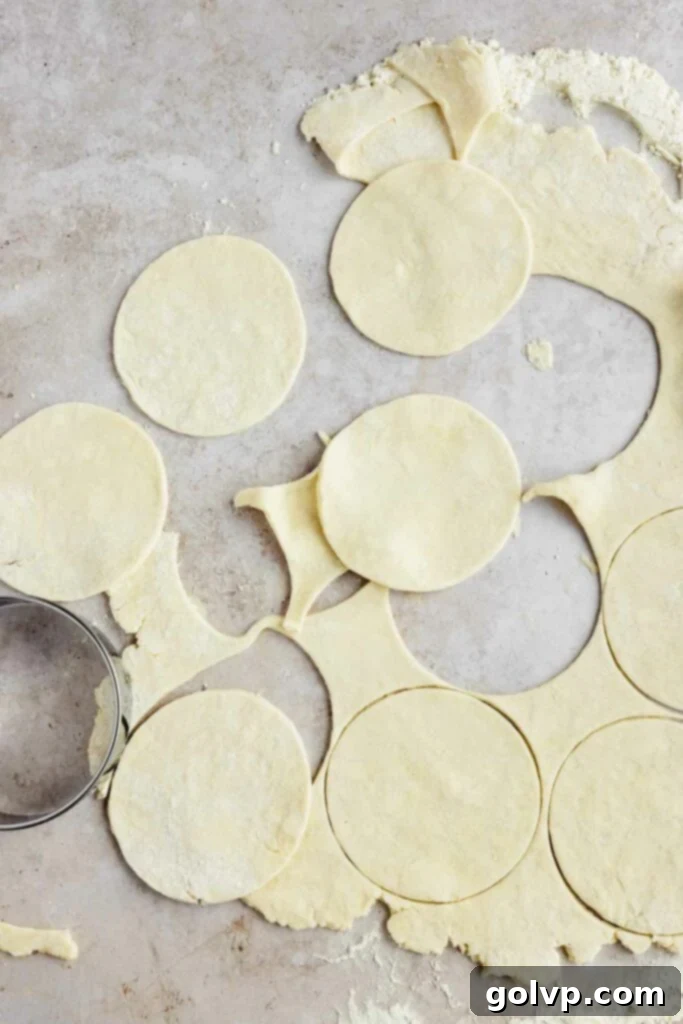
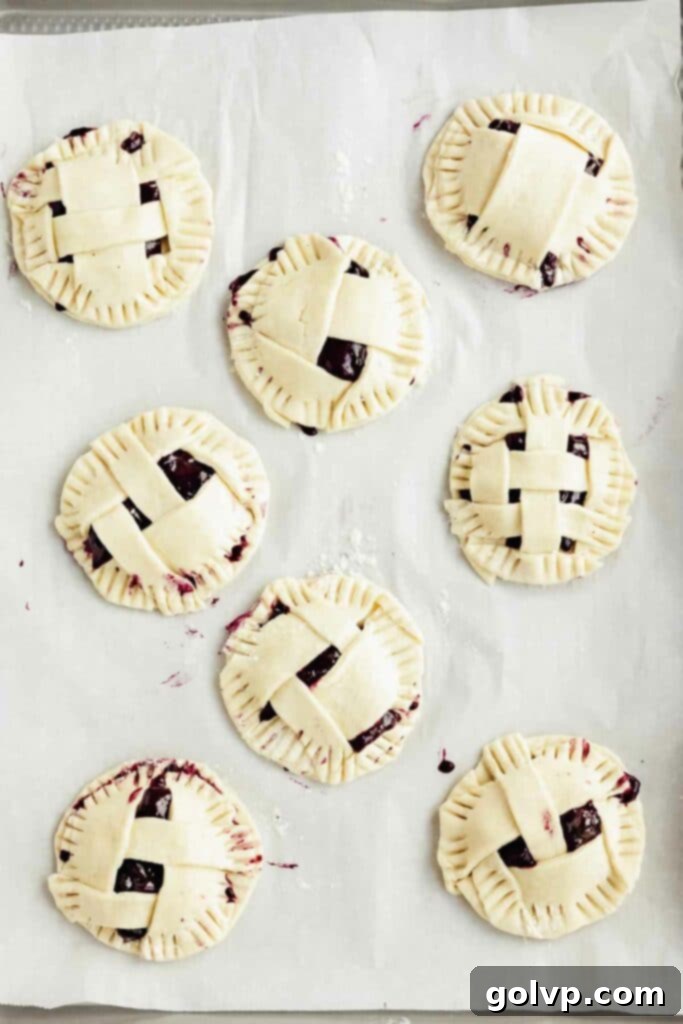
With your perfectly chilled crusts and luscious blueberry filling ready, it’s time for the creative part: assembly! This process is quite enjoyable and rewarding, especially as you see your mini pies take shape. First, retrieve one disk of your chilled pie dough. On a lightly floured surface, roll out the dough evenly to about ⅛” thick. Use a 4” circular cookie cutter or the rim of a glass to cut out ten perfect circles. Carefully transfer these dough circles onto a baking sheet lined with parchment paper, leaving a little space between each. These will form the base of your mini pies.
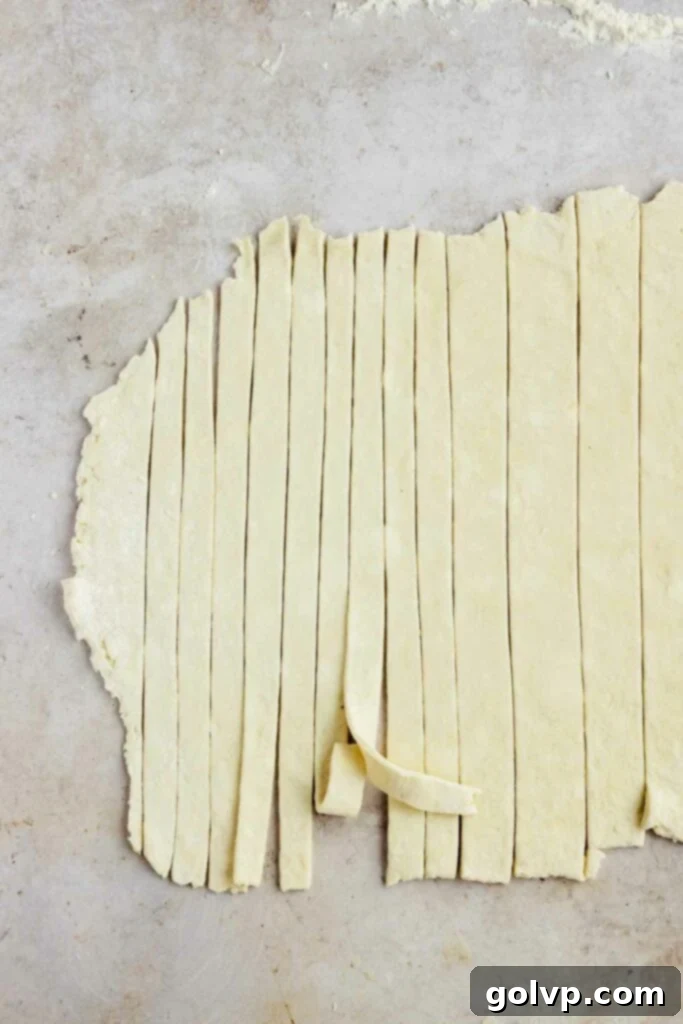
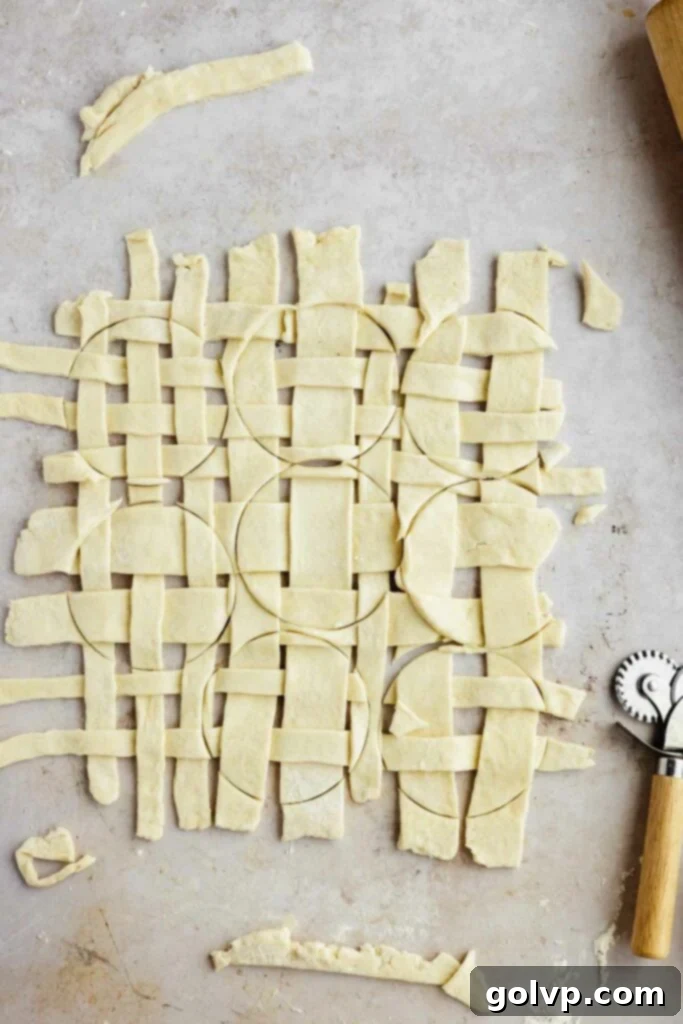
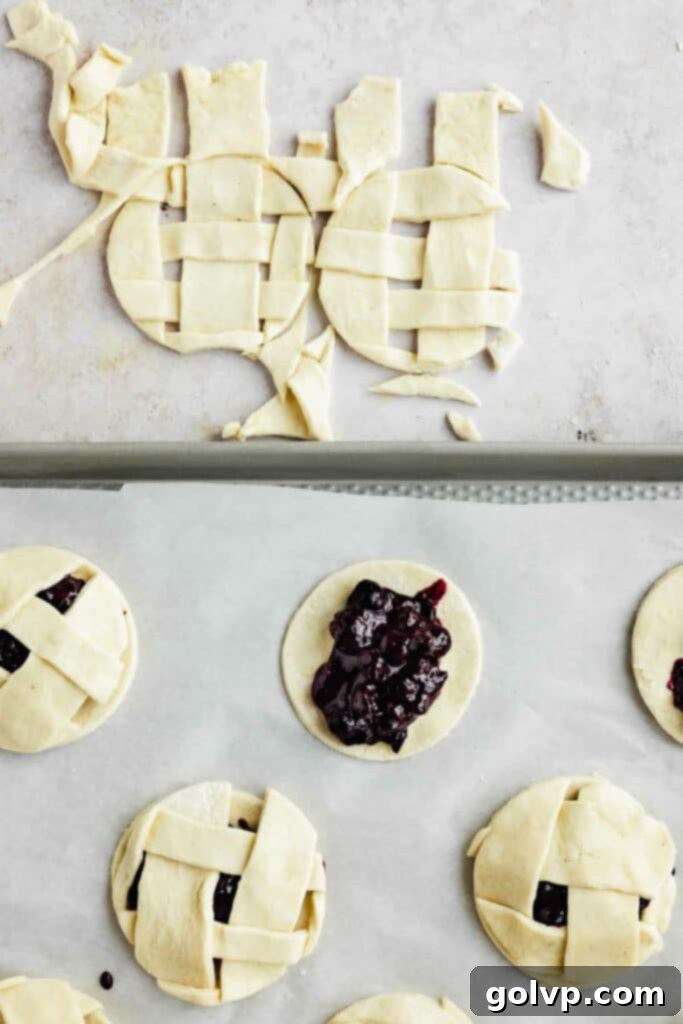
Next, spoon a generous tablespoon of the thoroughly chilled blueberry filling precisely into the center of each dough circle. Be mindful not to overfill, as this can lead to the filling oozing out during baking. Now for the top crust! Gather all the remaining dough scraps from your first disk and combine them with your second disk of dough. Roll this combined dough out to the same ⅛” thickness. For a beautiful, classic bakery-style look, use a pizza cutter or a sharp knife to cut strips of dough in various thicknesses – some wider, some narrower – for your lattice tops. To create the lattice, carefully overlap the strips of dough, weaving them in an out pattern directly on your work surface. Once your lattice is formed, press down lightly on it to ensure the strips adhere to each other before cutting.
Using the same 4” circular cutter, cut out ten circles from your prepared lattice work. With the aid of a spatula, carefully transfer each lattice circle onto the top of a filled dough circle. Don’t worry if a few pieces of the lattice come apart; simply reattach them gently. To securely seal your mini pies, dip a fork in a little flour to prevent sticking, and then press it firmly around the edges of each pie. This creates a pretty crimped edge and ensures the filling stays put. Once all pies are assembled, pop them into the freezer for 10 minutes. This quick chill helps the crust hold its shape better during baking and contributes to maximum flakiness.
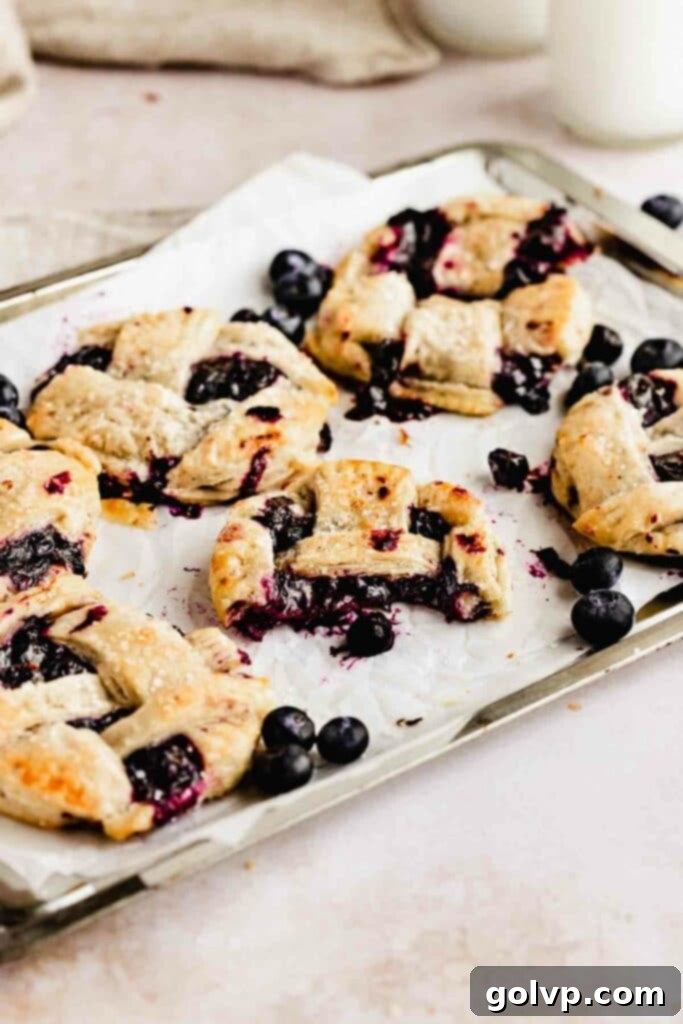
While your pies are chilling, preheat your oven to 190°C (375°F). In a small bowl, whisk together the egg and milk to create your egg wash. After the pies have chilled, retrieve them from the freezer. Brush the egg wash generously over the top of each mini pie, ensuring an even coating. Finally, sprinkle coarse sugar over the wet egg wash; this adds a lovely sparkle and a delightful crunch to the finished crust. Bake the pies for approximately 20-25 minutes, or until they are beautifully golden brown and their bottoms appear crispy. It’s crucial not to overbake, as this can cause the filling to bubble out excessively and potentially make the crust dry.
Once baked to perfection, allow the mini blueberry pies to cool slightly on the baking tray before carefully transferring them. They are at their absolute best when served warm, shortly after they are baked, when the crust is crispiest and the filling is wonderfully jammy.
Serving and Storing Your Mini Delights
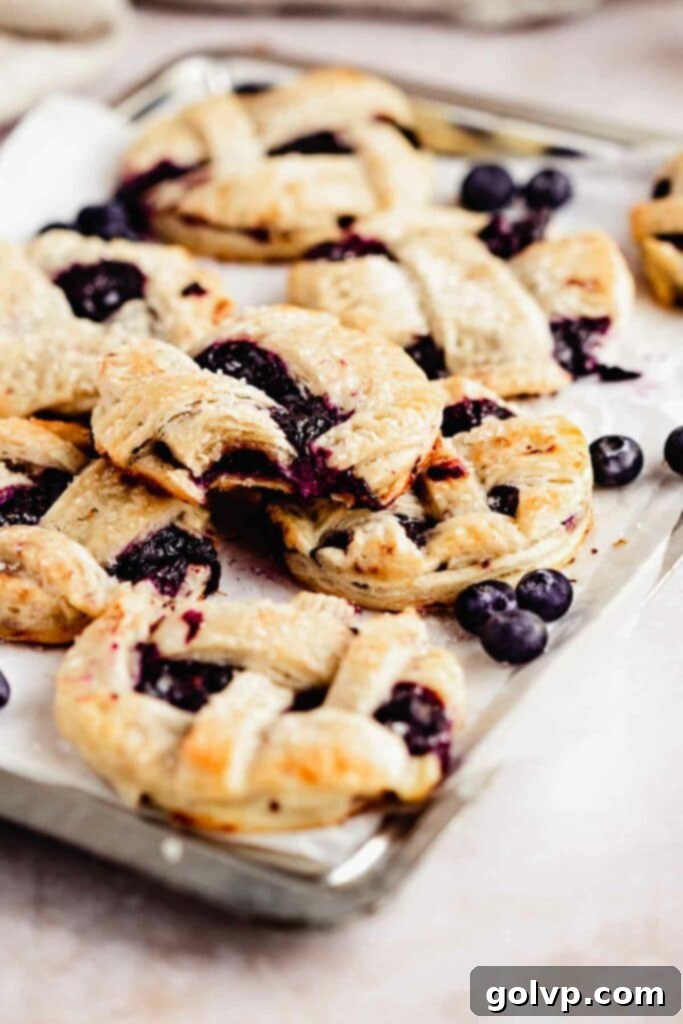
While these mini blueberry pies are an absolute joy fresh from the oven, they can also be stored and enjoyed later. Always allow the pies to cool completely on the baking tray before attempting to move them or store them. This allows the filling to fully set and prevents the bottom crust from becoming soggy. They truly are best served on the day they are baked, when the crust is at its crispiest and the flavors are most vibrant.
Should you have any delectable leftovers (a rare occurrence!), store them in an airtight container in the refrigerator for up to 3-4 days. When you’re ready to enjoy them again, avoid microwaving, as this will soften the crust. Instead, reheat any leftover blueberry pies in a preheated oven (around 150°C/300°F) for 10-15 minutes, or until warmed through and the crust is crisp once more. This brings them remarkably close to their freshly baked glory, ensuring every bite is as delicious as the first.
Explore More Berry-Inspired Recipes:
- Blueberry Cream Cheese Cookies – Soft & Chewy
- Strawberry Galette
- Blueberry Cinnamon Rolls – No Knead
Happy baking! xx
Did you make this recipe? I would love for you to rate this recipe and to hear what you think in the comments!
Share your creation on Instagram and tag @flouringkitchen
📖 Recipe

Mini Blueberry Pies with Flaky Crust
Mary
Pin Recipe
Shop Ingredients
Equipment
-
1 4″ circle cutter or glass
Ingredients
Blueberry Filling
- 2 tablespoon sugar
- 1 tablespoon cornstarch
- 1 ½ cup blueberries fresh or frozen
- 2 tablespoon lemon juice more if you have tart blueberries
- 1 tablespoon water
- ¼ teaspoon cinnamon
- ⅛ teaspoon sea salt
- ½ tablespoon butter
Pie Crust
- 2 ½ cup all purpose flour 300g
- ¼ teaspoon sea salt
- 1 cup unsalted butter small cubes and frozen for 10 minutes
- 1 tablespoon vinegar apple cider, white, or lemon juice
- 1 cup ice water
- 1 egg
- 1 tablespoon milk
- 1 tablespoon coarse sugar for sprinkling on top
Shop Ingredients on Jupiter
Instructions
Blueberry Filling
-
The filling needs to chill completely before filling the pies so you can make this the day before and refrigerate.
-
Combine the sugar and cornstarch in a small saucepan. Add the blueberries, lemon juice, water, cinnamon, and salt, and heat on low heat stirring and smashing the blueberries until it comes to a simmer.2 tablespoon sugar, 1 tablespoon cornstarch, 1 ½ cup blueberries, 2 tablespoon lemon juice, 1 tablespoon water, ¼ teaspoon cinnamon, ⅛ teaspoon sea salt
-
Simmer until thickened, for a minute or two. Take off the heat and add the butter, stirring until melted. Transfer into a non metal container and let cool to room temperature before refrigerating until completely chilled.½ tablespoon butter
Pie Crust
-
You can make the pie crust the day before as it needs to chill completely. Add the vinegar into the ice water and stir.1 tablespoon vinegar, 1 cup ice water
-
Combine the flour and salt in a large bowl or food processor with blade attachment. Mix until incorporated.2 ½ cup all purpose flour, ¼ teaspoon sea salt
-
Add the frozen cubed butter into the flour and pulse or use a knife (or your fingers) to cut it in. Work quickly to not melt the butter. The texture should be like breadcrumbs with larger pea sized pieces.1 cup unsalted butter
-
Add the vinegar water gradually, stirring or pulsing in between additions until it begins to form a very shaggy dough. I used ¾ of the mixture.
-
Turn the dough out onto a floured surface and flatten the dough into a disk with your hands. Press any dry bits into the dough. Fold in half, flatten, and fold again. Cut in half and form two disks. Wrap each in plastic wrap and refrigerate for at least 30 minutes (or overnight).
Assembly
-
Roll out one disk of dough on a lightly floured surface to ⅛” thick. Cut out ten 4” circles using a cookie cutter or the bottom of a glass. Set aside onto a sheet lined with parchment paper.
-
Spoon a tablespoon of chilled blueberry filling into the middle of each circle.
-
Add the rest of the dough into the second disk of dough and roll it out to ⅛” thick. Use a pizza cutter or knife to cut strips of dough in various thicknesses. Make a lattice by overlapping the strips of dough, weaving them in and out. Press down lightly onto the lattice so that it holds together.
-
Using the same circle cutter, cut out 10 circles of the lattice. Use a spatula to carefully transfer the lattices onto each filled circle of dough.
-
Use a fork dipped in flour to seal the edges of the pies. Pop the pies into the freezer for 10 minutes.
-
Preheat oven to 190°C (375°F). Whisk together the egg and milk to form an egg wash.1 egg, 1 tablespoon milk
-
Brush the egg wash over the chilled pies and sprinkle with coarse sugar. Bake for 20-25 minutes or until they are golden brown and the bottoms are crispy. Do not overbake because the filling will begin to bubble out of the pies.1 tablespoon coarse sugar
