Exquisite Lemon Raspberry Cake: Moist Layers, Tangy Curd & Cream Cheese Frosting
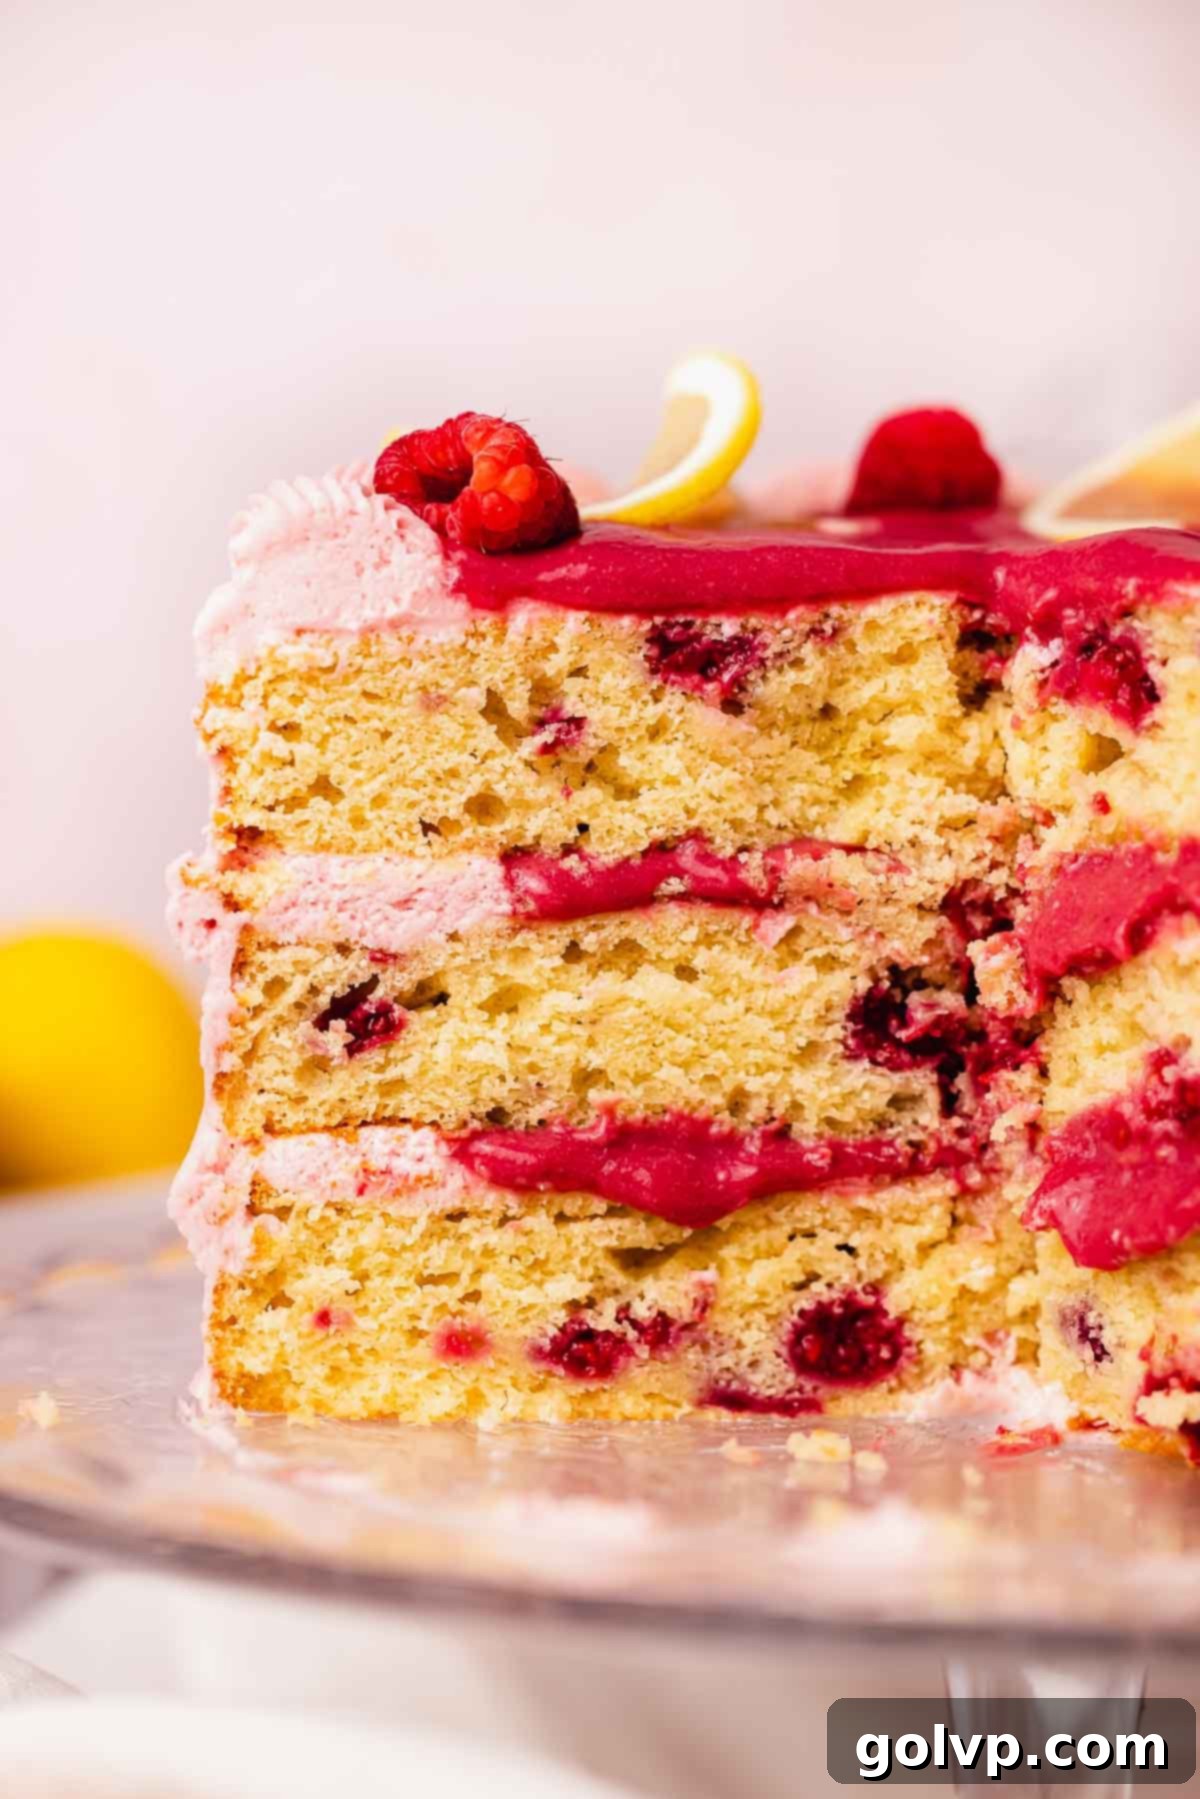
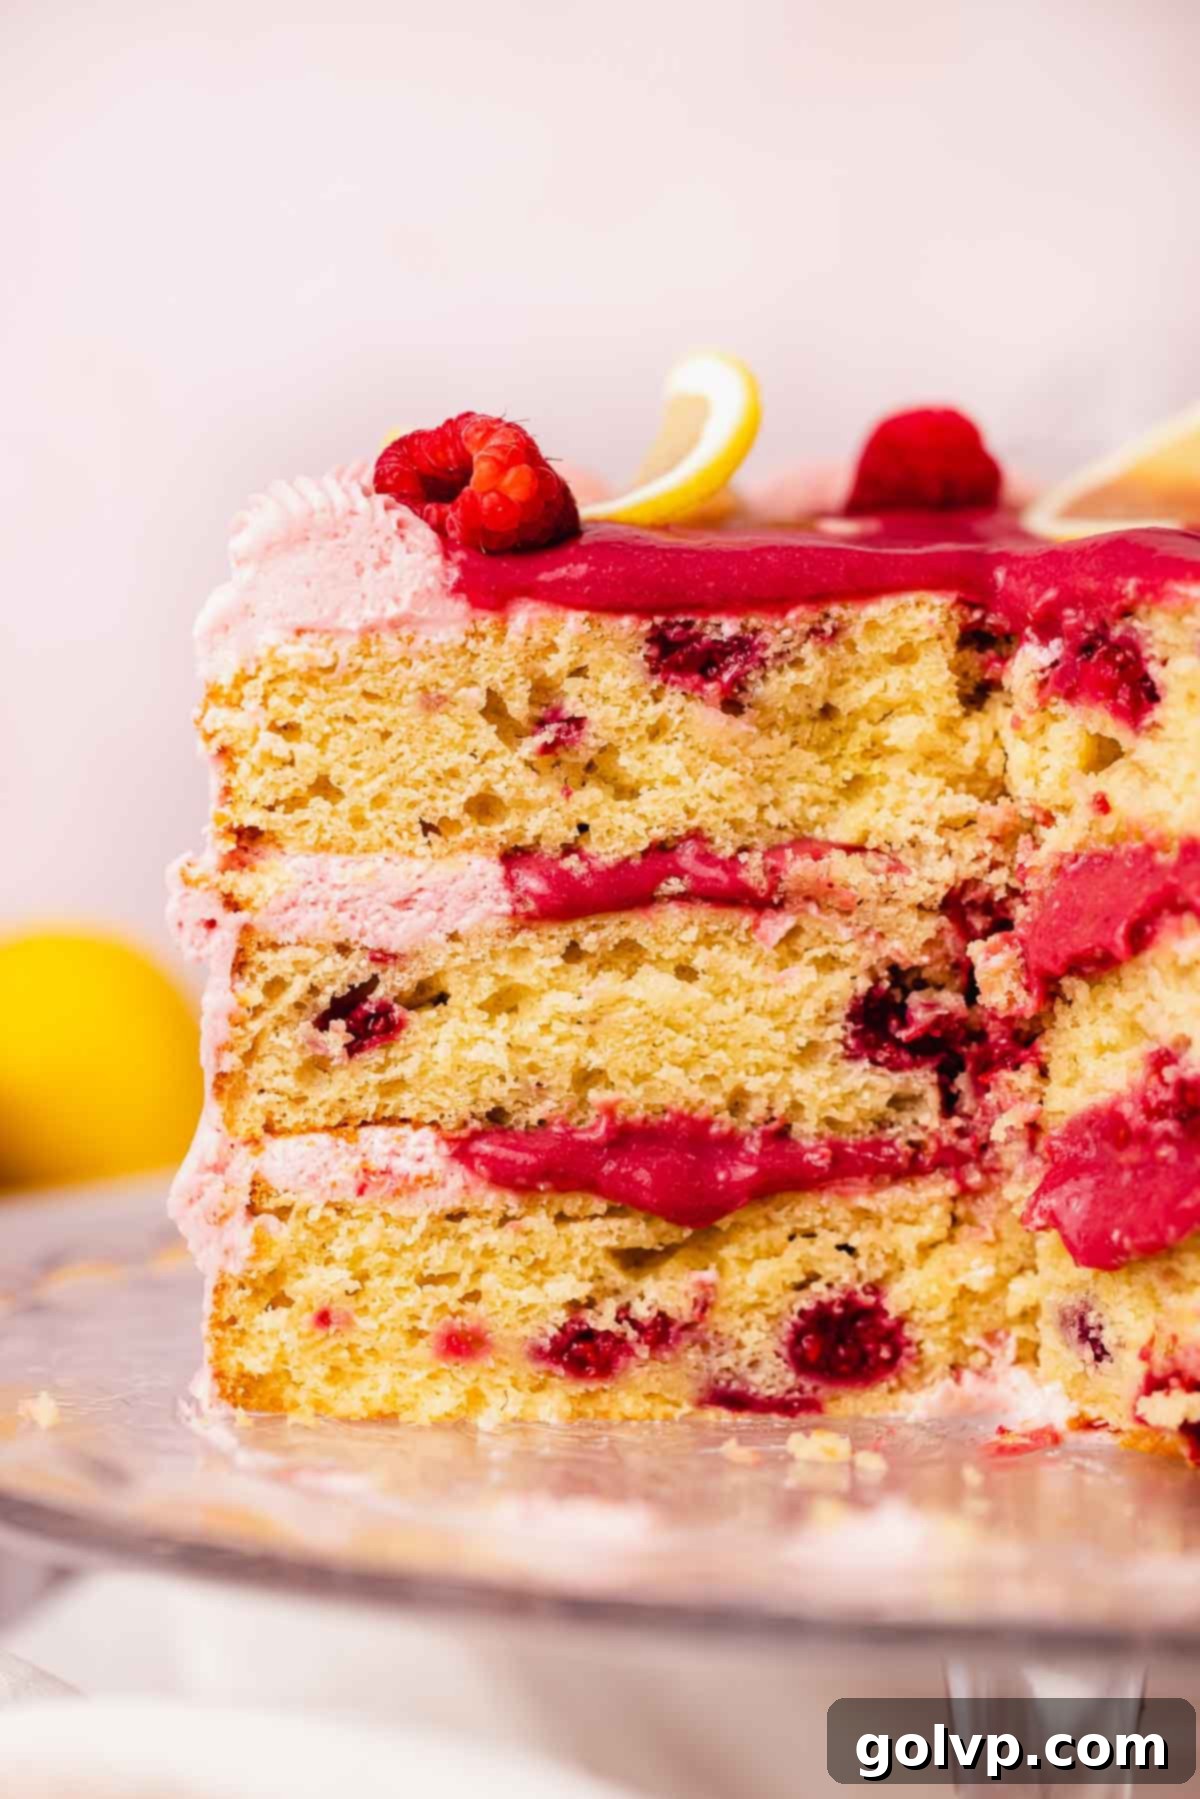
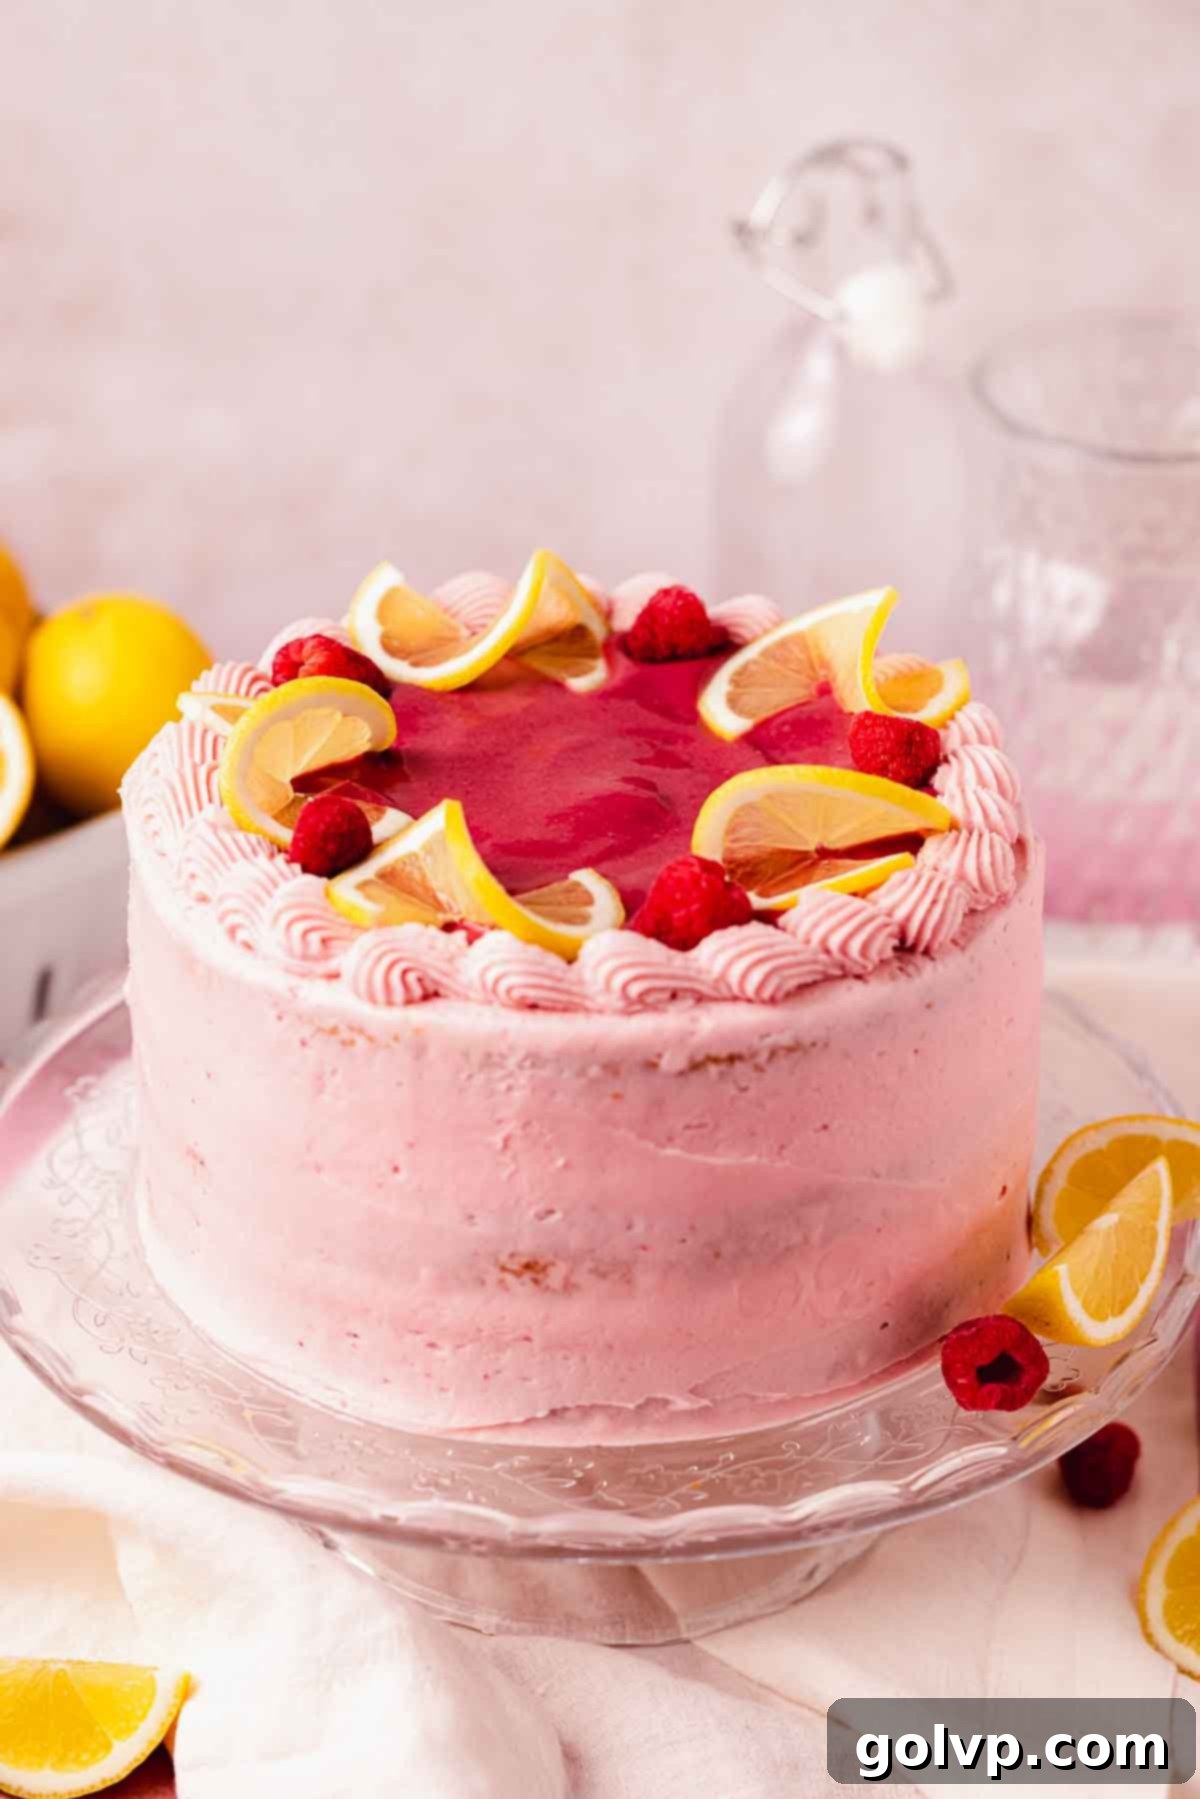
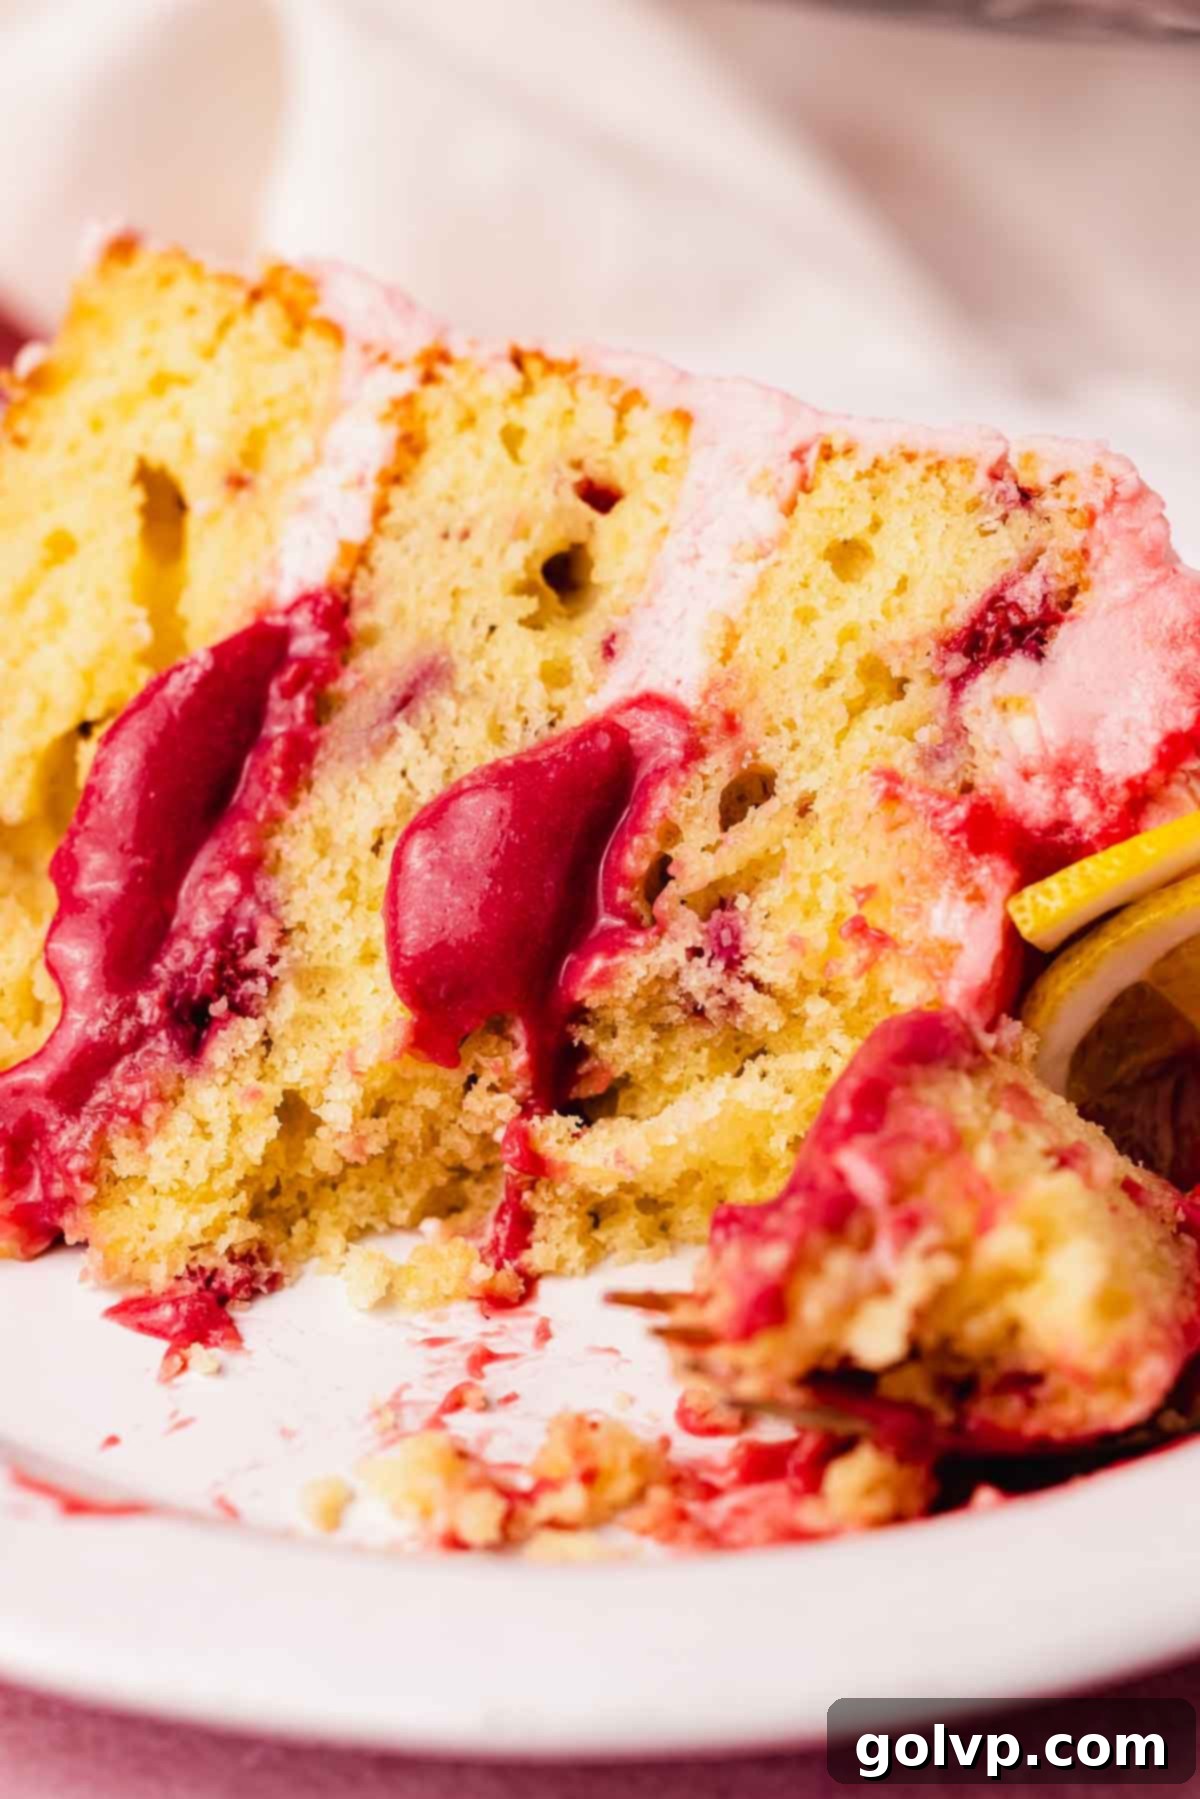
Prepare to fall in love with this exquisite lemon raspberry cake, a true masterpiece of flavors and textures. Each slice reveals incredibly moist and fluffy cake layers, generously filled with a creamy, vibrant, and perfectly tangy raspberry curd. It’s all crowned with a luscious lemon raspberry cream cheese frosting, making every bite an unforgettable experience. This cake is an explosion of refreshing lemon and sweet-tart raspberry notes, designed to be the perfect dessert for any occasion, from casual gatherings to elegant celebrations. The homemade raspberry curd, with its smooth, buttery texture and intense fruit flavor, truly stands out as the star of this delightful creation, offering a sophisticated twist that elevates the entire cake.
For those who adore a cheesecake twist, don’t miss our equally delightful lemon raspberry cheesecake recipe, offering a different yet equally satisfying dessert experience!
🎂 Why You’ll LOVE This Lemon Raspberry Cake Recipe
This lemon raspberry cake isn’t just another dessert; it’s an experience designed to delight your senses. Here’s why it’s guaranteed to become a new favorite:
- Perfectly Tangy: The harmonious blend of bright lemon zest and the sweet-tartness of fresh raspberries creates a beautifully balanced flavor profile. This cake offers a refreshing tang that cuts through the sweetness, making it incredibly satisfying without being overly rich. It’s the ideal choice for those who appreciate desserts with a vibrant, zesty punch.
- Decadent Raspberry Cream Cheese Frosting: Imagine a frosting that is wonderfully tangy, incredibly creamy, and just sweet enough to complement the cake layers, rather than overpower them. Our raspberry cream cheese frosting is naturally tinted with a beautiful pink hue from homemade raspberry puree, adding both visual appeal and an intense burst of fresh raspberry flavor. It’s light, fluffy, and provides the perfect contrast to the rich cake.
- Irresistible Raspberry Curd Filling: While lemon curd often takes the spotlight, our homemade raspberry curd is equally simple to prepare and offers an intensely fruity, creamy, and smooth filling that truly makes this cake special. Its velvety texture and robust raspberry taste provide a luxurious surprise in every bite, making it a filling you’ll want to put on everything!
- Super Soft & Moist Cake Layers: Achieving a cake that remains soft and moist for days is an art, and this recipe delivers just that. The cake layers are meticulously crafted, similar to our beloved blueberry birthday cake, ensuring a tender crumb that melts in your mouth. This exceptional texture is a hallmark of a truly well-made cake, promising a delightful eating experience from the first slice to the last.
📝 Key Ingredients for a Perfect Lemon Raspberry Cake
Crafting this exquisite lemon raspberry cake involves three distinct yet harmonious components: the vibrant raspberry curd, the tender cake layers, and the creamy raspberry cream cheese frosting. Each element plays a crucial role in creating the cake’s signature flavor and texture. The good news is that the raspberry curd can be prepared a few days in advance, simplifying your baking process.
Raspberries: Raspberries are the undeniable star of this cake, infusing every component with their bright, sweet-tart flavor. You have the flexibility to use either fresh or frozen raspberries throughout this recipe. For convenience and consistency, I often opt for frozen raspberries in most parts of the recipe, reserving a few fresh ones for decoration to add a beautiful finish. Make sure to have a generous supply on hand!
In total, you’ll need approximately 4 ½ cups of raspberries, plus a few extra for garnishing the finished cake. This translates to about 550 grams or 18.5 ounces by weight.
For absolute success, delve into all the helpful tips provided below!
Full steps and detailed ingredients can be found in the recipe card at the bottom of this page.
Raspberry Curd Ingredients
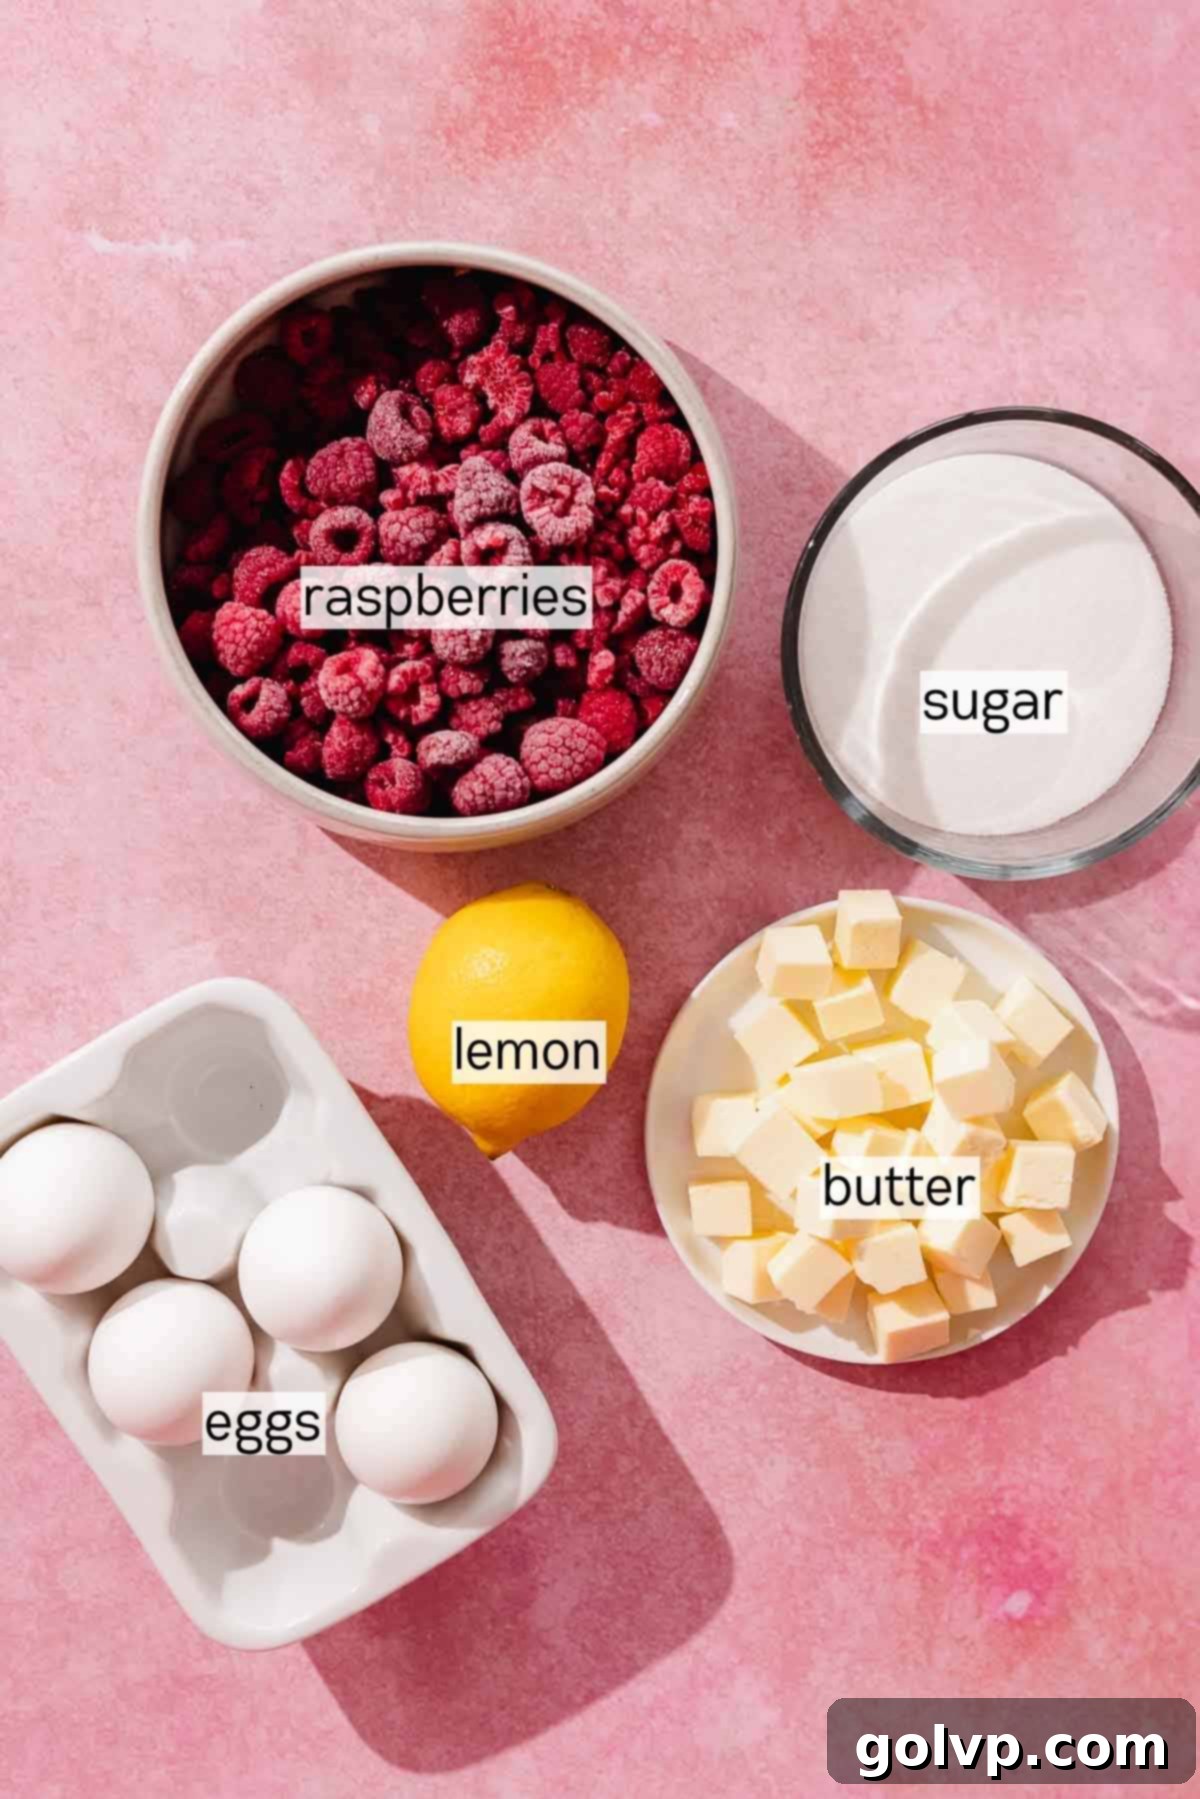
The raspberry curd is the tangy heart of this cake. Here are the essential ingredients:
- Eggs: A combination of two whole eggs and two egg yolks is crucial for achieving the perfect rich consistency and a beautiful, vibrant color in your curd. The yolks add richness and help with thickening, while the whole eggs contribute to the overall structure.
- Raspberries: Whether you choose fresh or frozen raspberries, both will yield a delicious curd. Using high-quality raspberries is key to a flavorful result.
- Lemon: Lemon juice provides a much-needed pop of acidity that balances the sweetness of the raspberries and prevents the curd from being cloying. Don’t forget to use the lemon zest as well for an extra layer of bright, aromatic lemon flavor that truly shines.
- Butter: Unsalted butter is incorporated at the end to enrich the curd, making it incredibly smooth, glossy, and luxurious. It also helps to further thicken the curd as it chills, creating that irresistible velvety texture.
For those who prefer an even more lemony flavor, consider swapping the raspberry curd for a vibrant lemon curd. You might also enjoy our popular lemon raspberry bars, featuring a delightful gooey baked raspberry curd filling over a buttery shortbread crust.
Cake Layer Ingredients
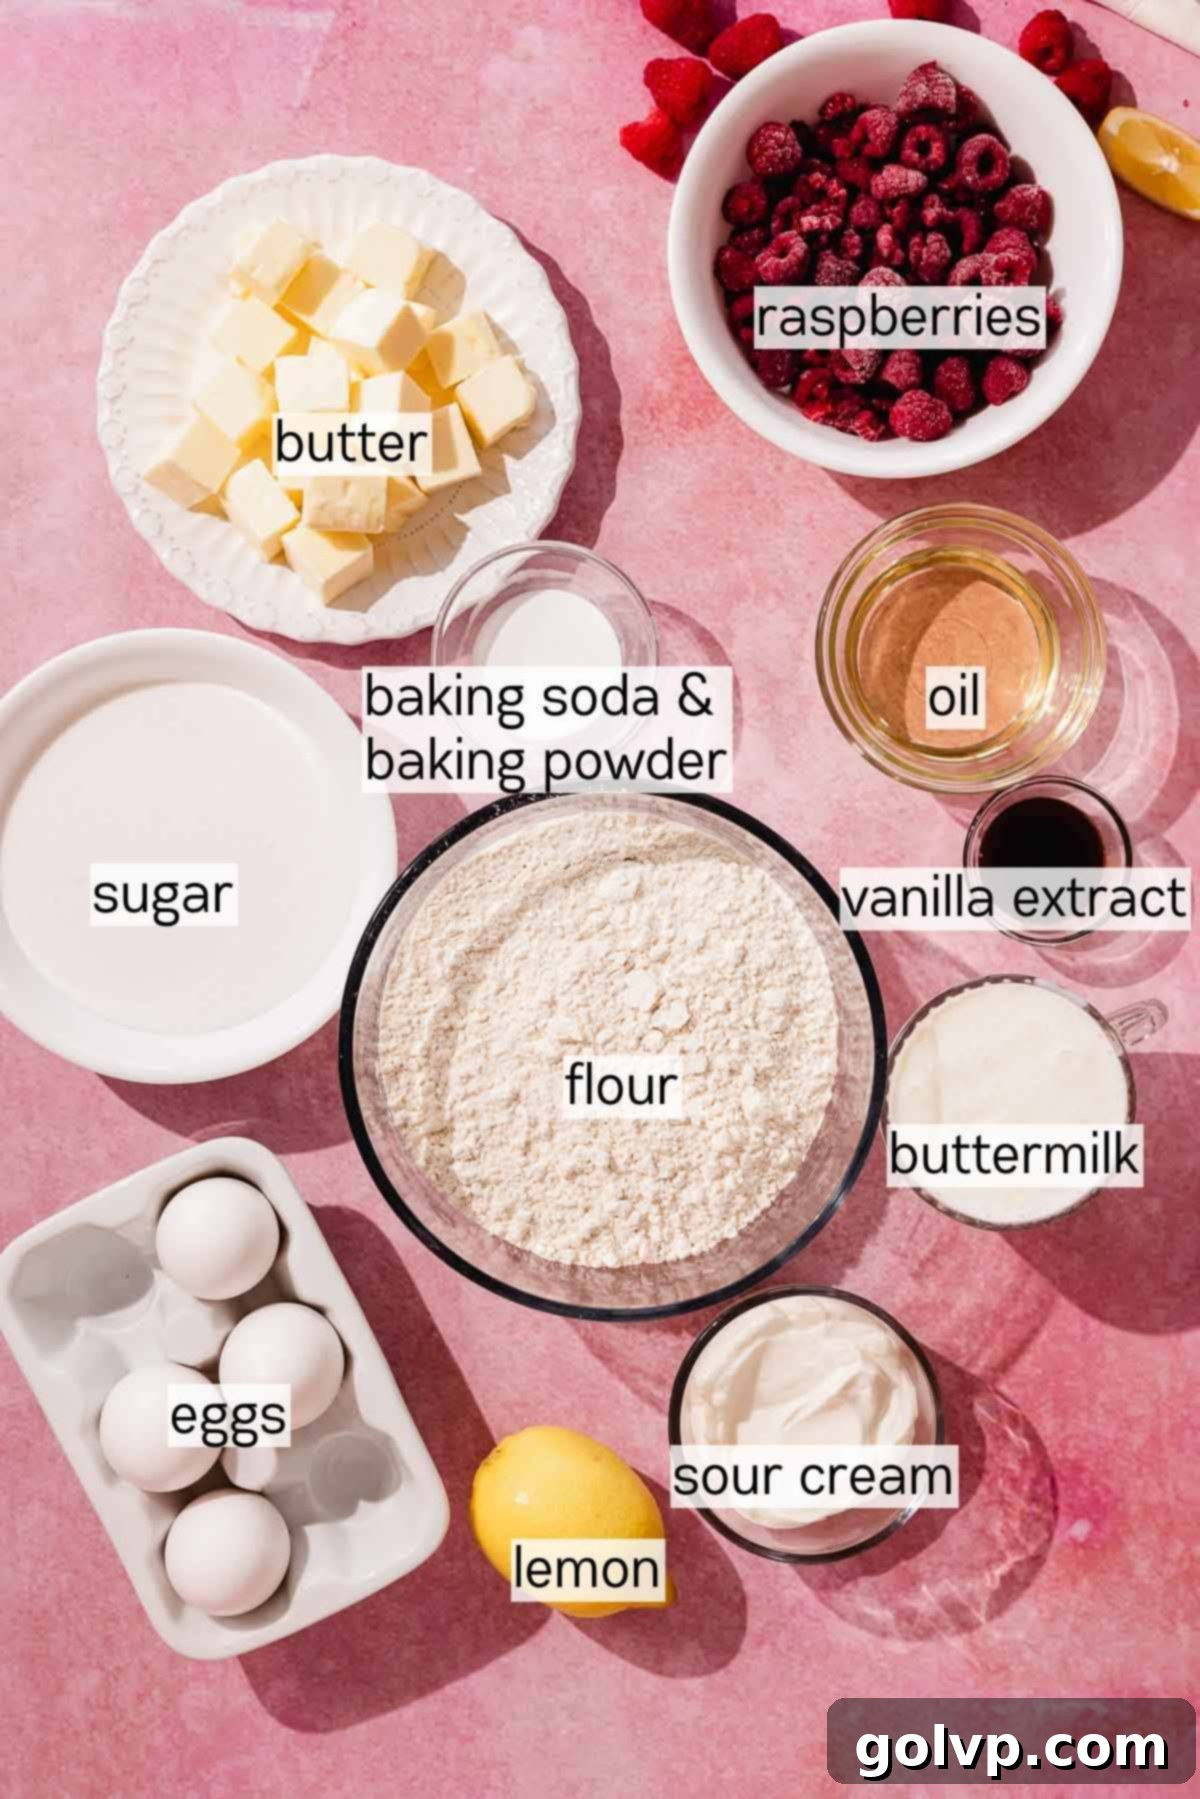
These ingredients are carefully selected to ensure your cake layers are incredibly moist, tender, and full of flavor:
- Raspberries: Again, fresh or frozen raspberries work beautifully here. If you’re using frozen raspberries in the cake batter, it’s important not to thaw them beforehand; this helps them maintain their shape and prevents them from bleeding too much into the batter, ensuring pockets of bright fruit in the final cake. These are similar to how our lemon raspberry cookies incorporate frozen berries.
- Butter & Oil: This winning combination is the secret to a cake with both incredible flavor and an unbeatable texture. The butter imparts a rich, classic buttery taste, while the neutral vegetable oil (or any other neutral oil you prefer) guarantees that the cake layers remain exceptionally moist and tender for days, without drying out.
- Buttermilk & Sour Cream: These dairy components are essential for creating moist and tender cake layers. Their natural acidity reacts with the baking soda, promoting a light and airy crumb, while also adding a subtle tang that beautifully enhances the lemon and raspberry flavors.
- All-Purpose Flour: For the most precise and consistent baking results, always weigh your flour using a kitchen scale. If you don’t have a scale, measure properly by first stirring the flour in its bag to aerate it, then gently spooning it into your measuring cup. Level off any excess with the flat edge of a knife, being careful not to pack the flour into the cup.
Raspberry Cream Cheese Frosting Ingredients
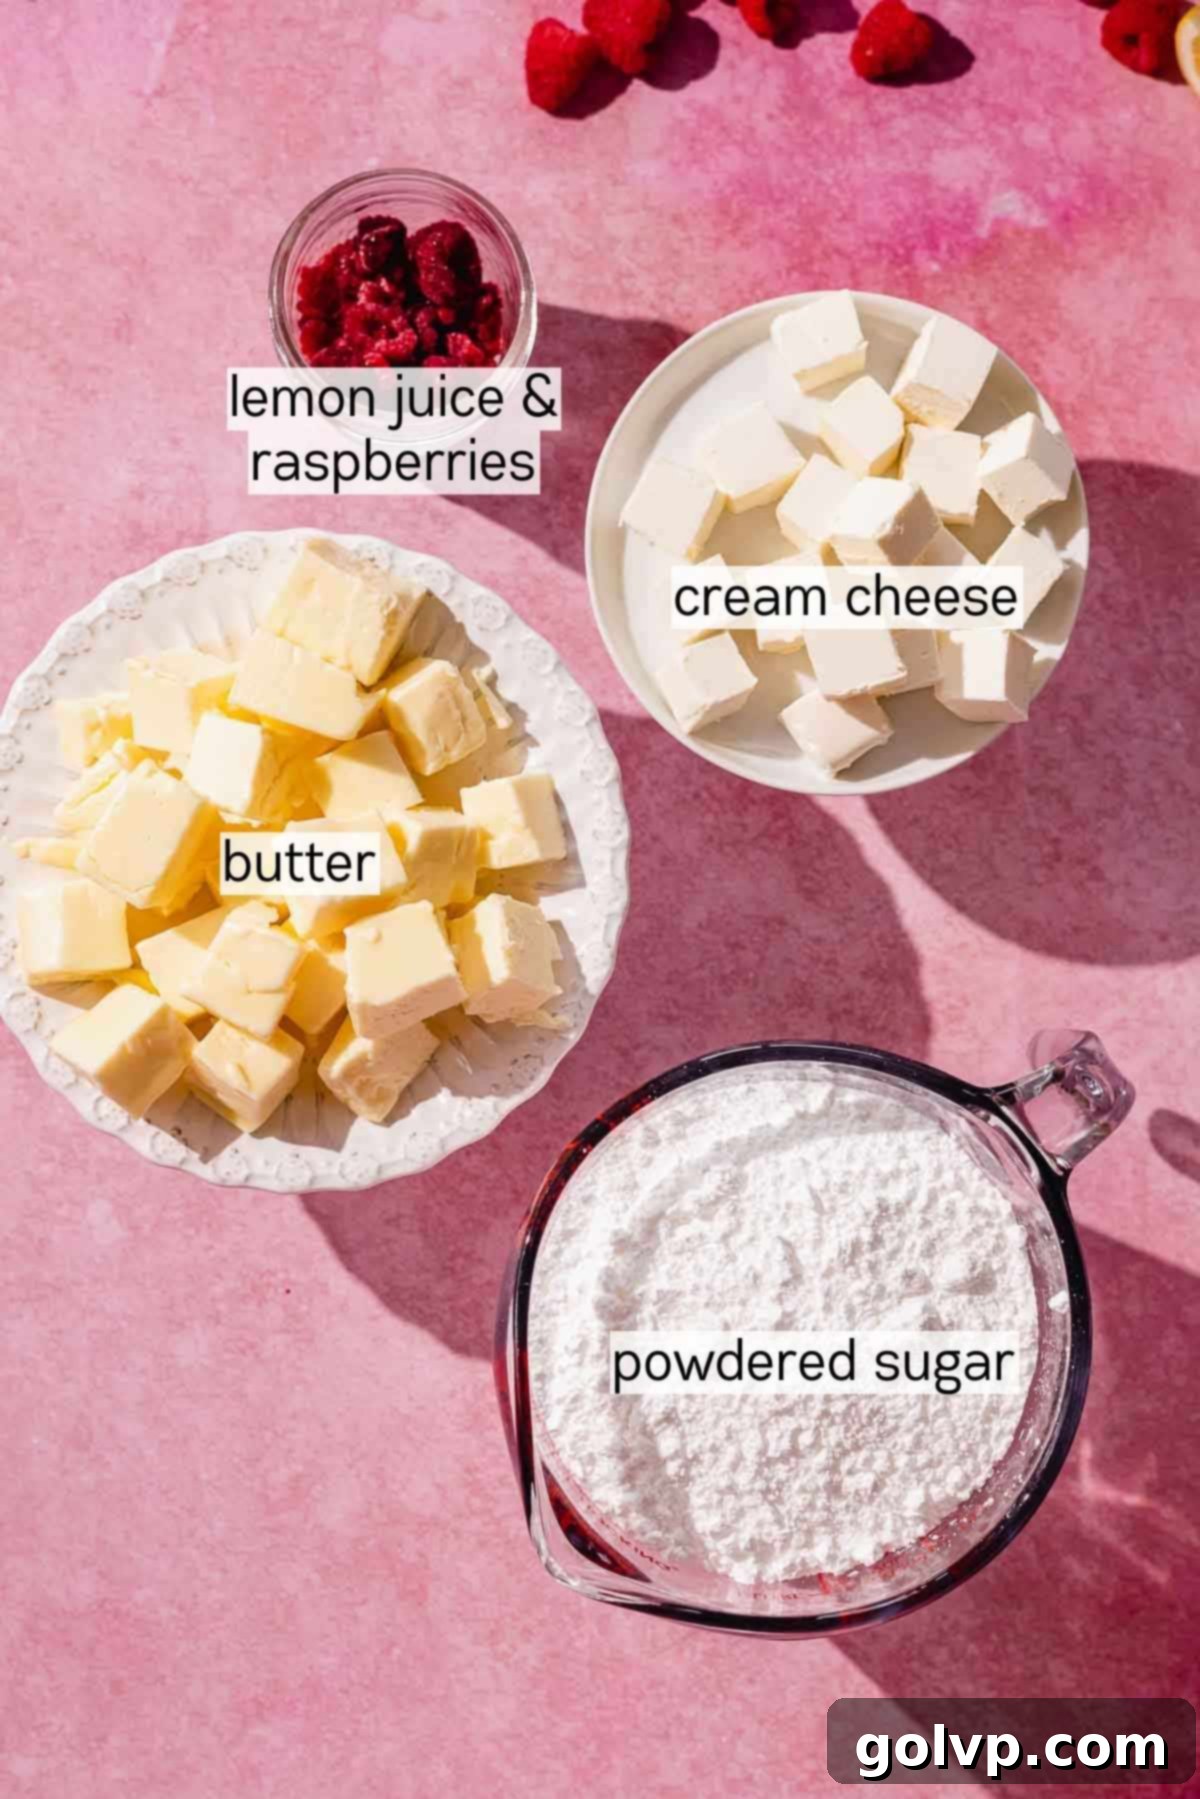
This frosting is the perfect sweet-tangy crown for your cake, crafted with these key components:
- Lemon Juice: A touch of freshly squeezed lemon juice is vital for brightening the frosting, adding a delightful tang that cuts through the sweetness and perfectly complements the raspberries. It helps create a balanced flavor profile.
- Raspberries: Fresh or frozen raspberries both work wonderfully for the puree that gives this frosting its natural color and intense fruit flavor. If using frozen, make sure to thaw them completely before preparing the puree.
- Butter: Unsalted, softened butter forms the rich and creamy base of this delightful frosting. Ensure it’s at the correct softened temperature for optimal whipping.
- Cream Cheese: For the best results and a frosting that holds its shape beautifully without becoming “gloopy,” always use full-fat, brick-style cream cheese, such as Philadelphia brand. Avoid whipped or spreadable cream cheese, as they contain too much water and will yield a runny frosting.
✔️ Ingredient Substitutions to Customize Your Cake
While this recipe is designed for optimal flavor and texture, you can certainly make a few substitutions to suit your preferences or what you have on hand. These changes might slightly alter the final taste or consistency but will still yield a delicious cake.
Filling: The raspberry curd is truly special, but if you’re looking for an alternative, you can easily substitute it. A classic lemon curd would be a fantastic choice, intensifying the citrus notes. For a quick shortcut, feel free to use a good quality store-bought curd. Alternatively, a raspberry pie filling could provide a similar fruity experience, or even a simple raspberry jam, though be mindful that jam tends to be significantly sweeter, so adjust other sweet elements if necessary.
👩🍳 How to Make the Perfect Lemon Raspberry Cake: Step-by-Step Guide
Creating this stunning lemon raspberry cake is a rewarding process broken down into manageable steps for each component. Follow along closely to ensure a delicious outcome.
Raspberry Curd Step by Step
The raspberry curd is best made in advance, allowing it ample time to chill and thicken to a luxurious consistency.
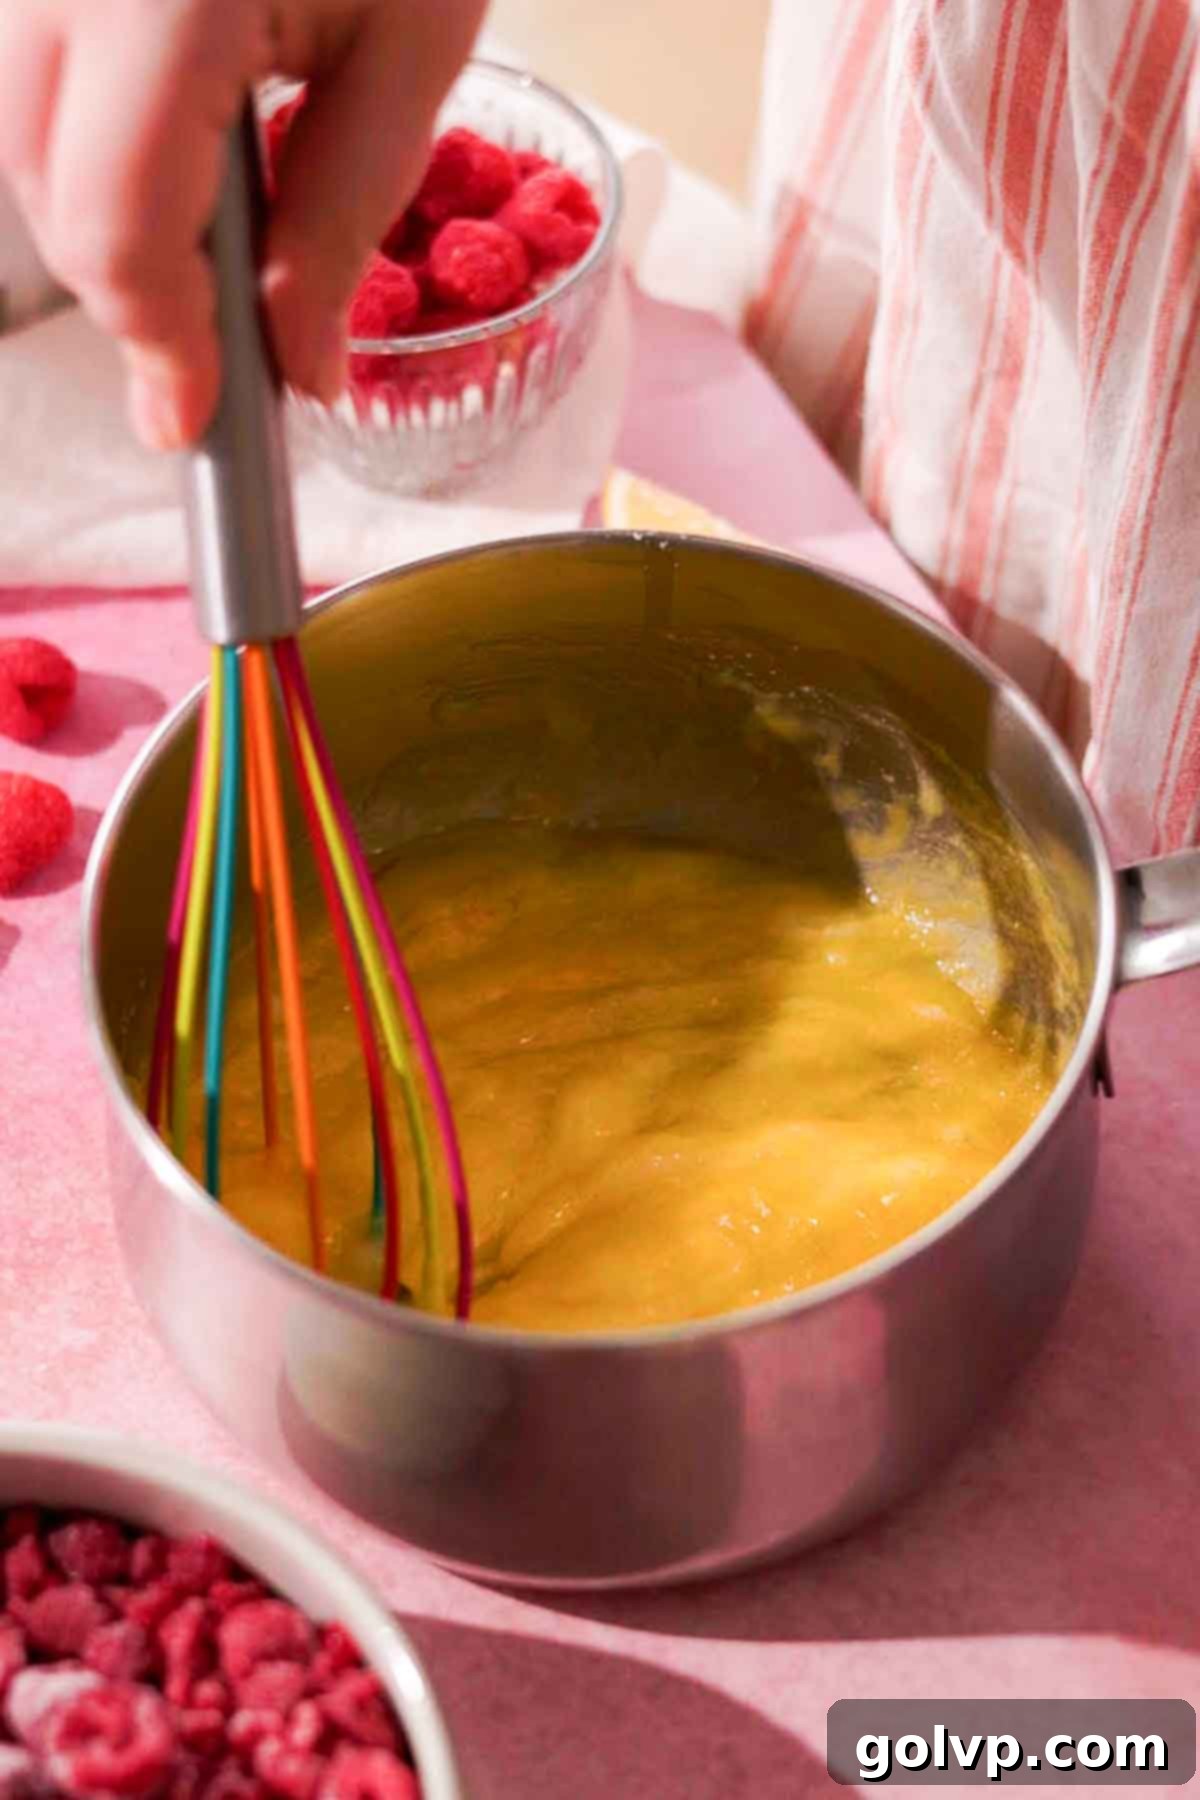
Step 1: Combine Ingredients. In a medium-sized, heavy-bottomed saucepan, combine the eggs, egg yolks, granulated sugar, and sea salt. Whisk these ingredients together until they are thoroughly combined and smooth. Next, add the fresh or frozen raspberries and the freshly squeezed lemon juice. For an intensified lemon flavor, you can also grate in some lemon zest at this stage. Give everything another good stir to ensure it’s well mixed.
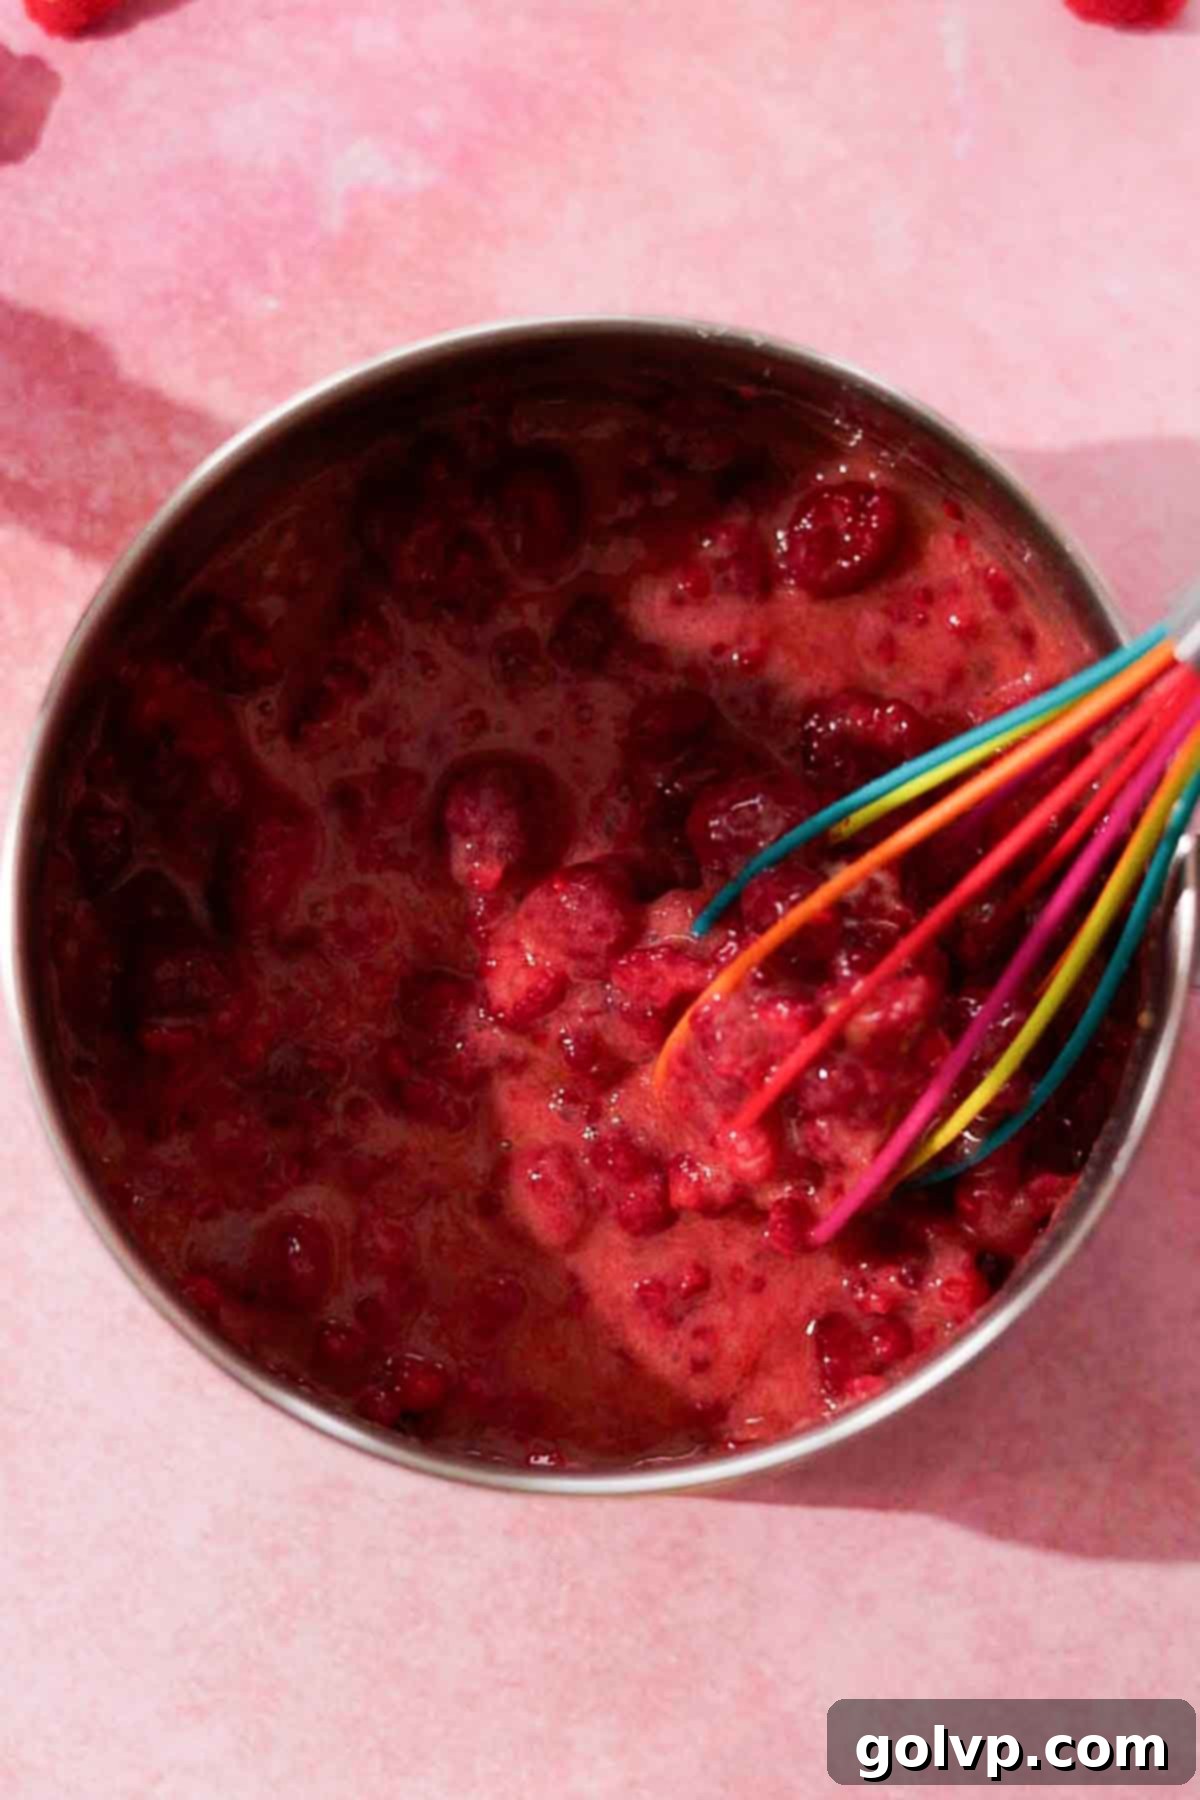
Step 2: Cook the Curd. Place the saucepan over medium-low heat. It’s absolutely crucial to stir this mixture constantly to prevent the eggs from scrambling and sticking to the bottom, which can lead to a burnt taste. As the mixture heats, it will begin to simmer gently and gradually thicken. Continue to stir or whisk frequently until the curd coats the back of a spoon and holds a clear path when you run your finger across it.
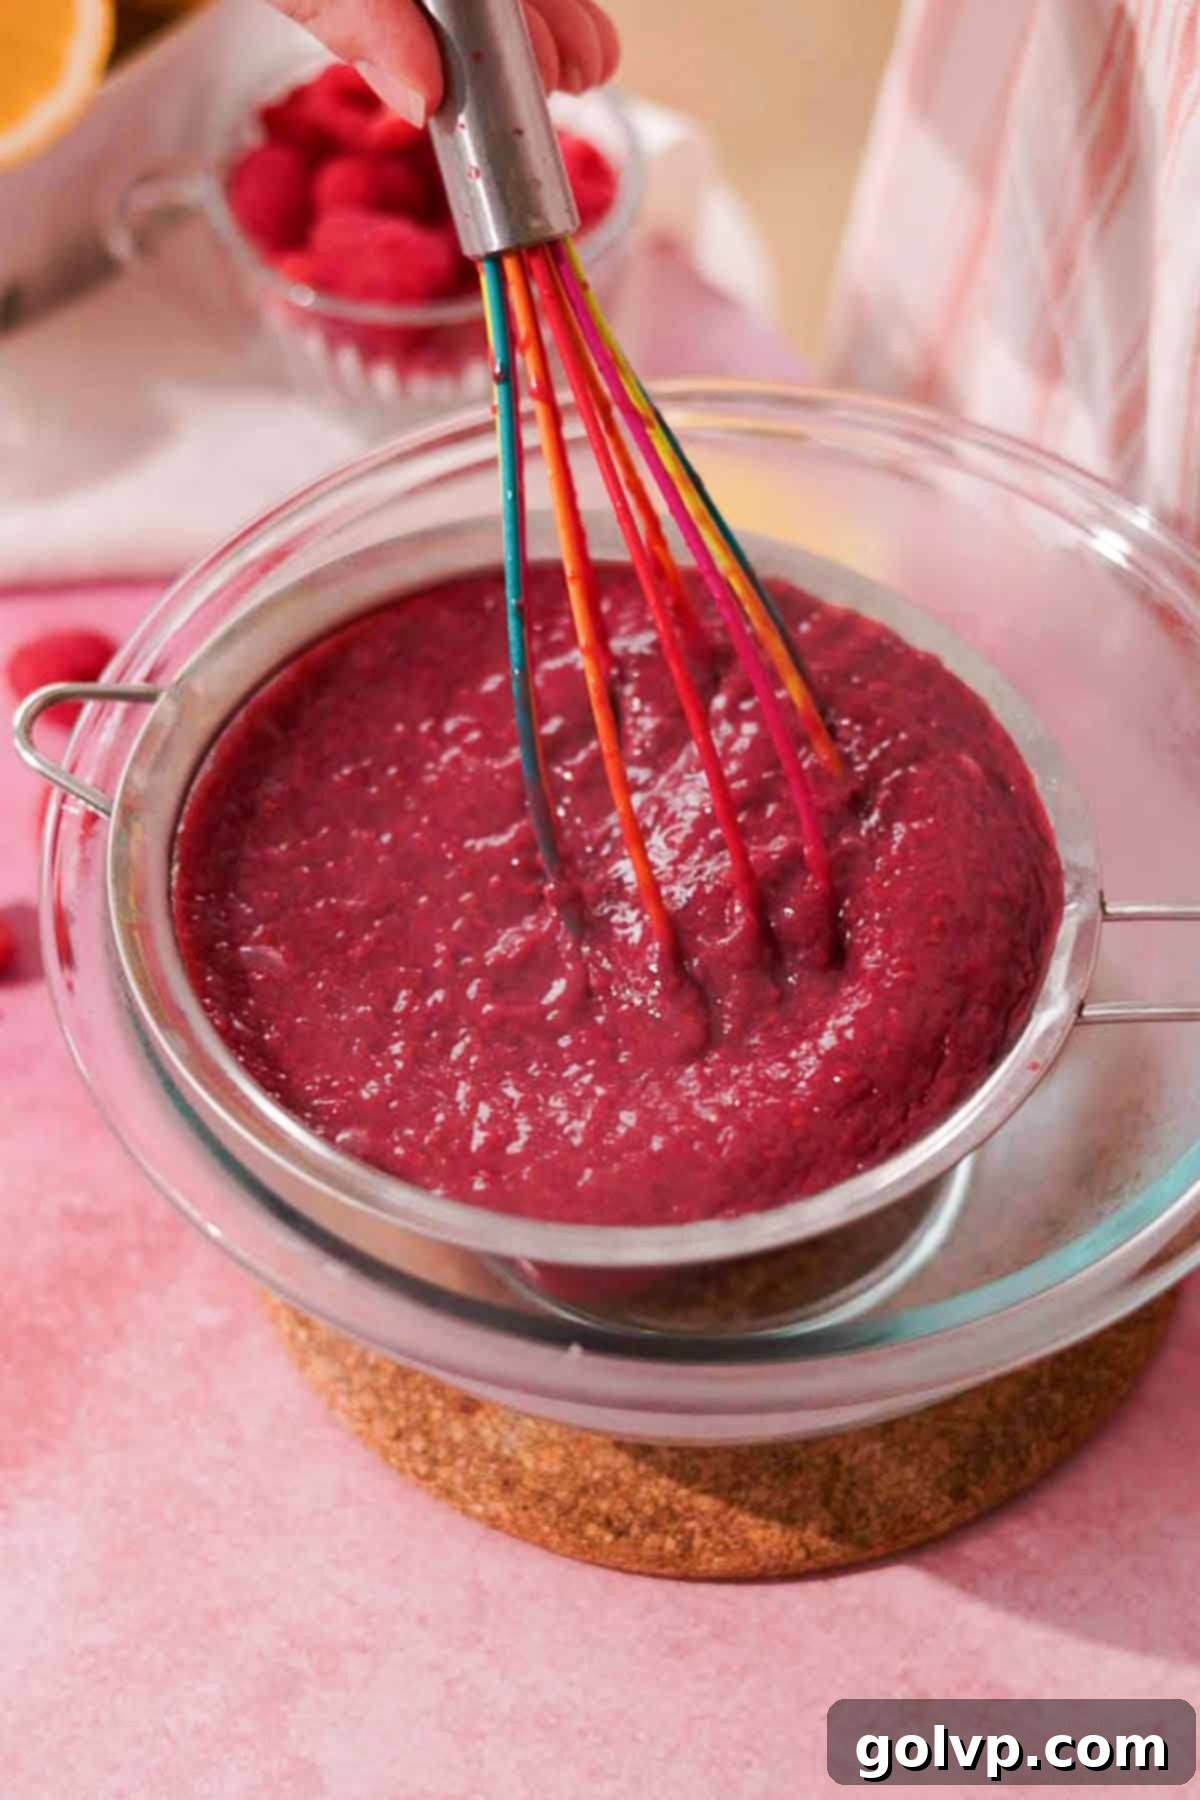
Step 3: Strain for Smoothness. Once the curd has reached the desired thickened consistency, let it simmer for another couple of minutes while continuously stirring. Immediately remove the saucepan from the heat. Carefully strain the hot curd through a fine-mesh metal sieve into a clean, non-metal container. Use a spoon or whisk to gently press the mixture through the strainer. This essential step removes all the raspberry seeds and any small cooked egg bits, ensuring your curd is incredibly smooth and velvety.
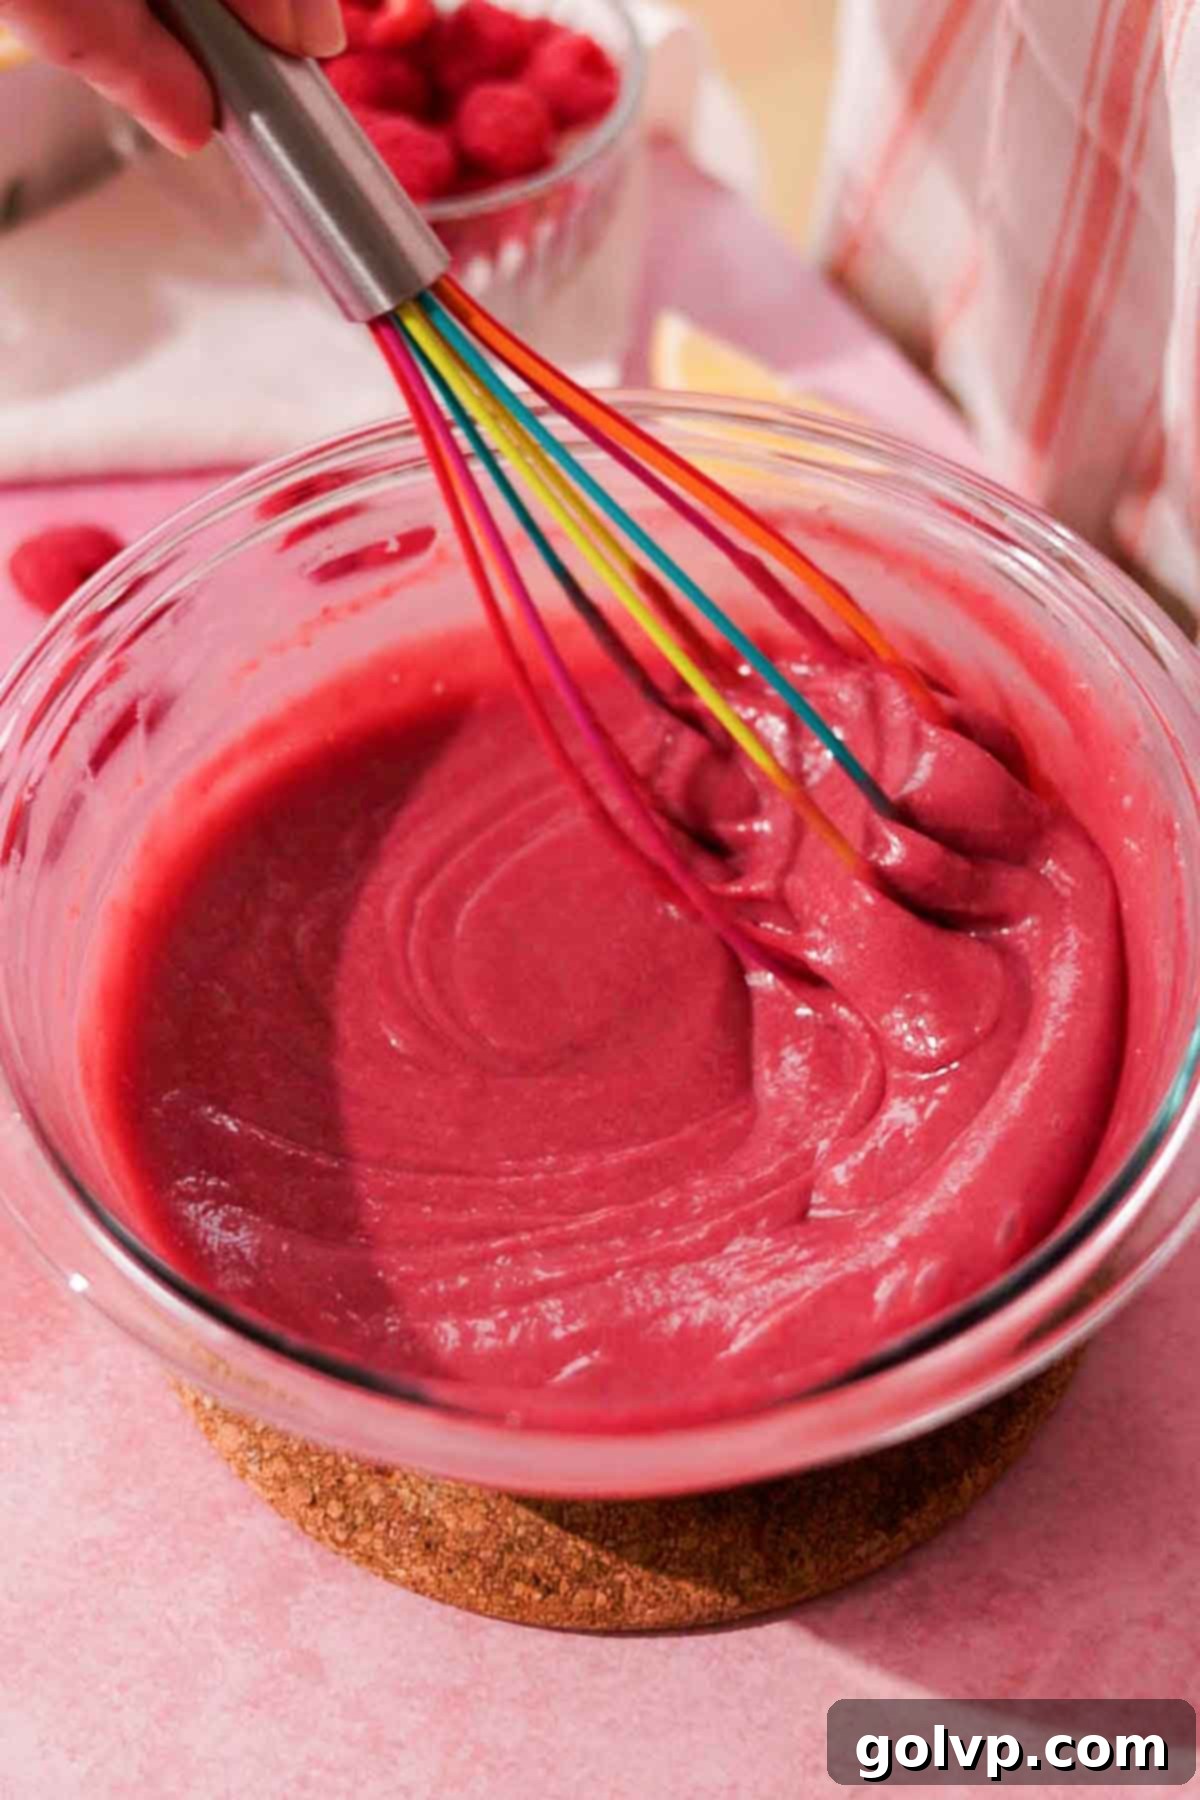
Step 4: Incorporate Butter and Chill. Add the cold, cubed unsalted butter directly into the warm, strained curd. Stir vigorously until the butter is completely melted and fully incorporated, creating a beautifully smooth and glossy curd. To prevent a skin from forming and to keep it fresh, press a piece of plastic wrap directly onto the surface of the curd. Refrigerate the curd until it is thoroughly chilled and significantly thickened, which will take several hours or preferably overnight. The colder it is, the firmer it will become.
Tip: For maximum convenience, you can easily prepare and chill the raspberry curd up to three days before you plan to assemble the cake. This helps streamline your baking process!
Cake Layers Step by Step
These instructions will guide you to perfectly moist and flavorful cake layers.
Preparation: Begin by preheating your oven to 355°F (180°C). Lightly grease three 8-inch round baking pans with a thin layer of cold butter or a generous spray of cooking spray. To ensure easy release, line the bottom of each pan with a round of parchment paper. This prep work is crucial for flawless cake layers.
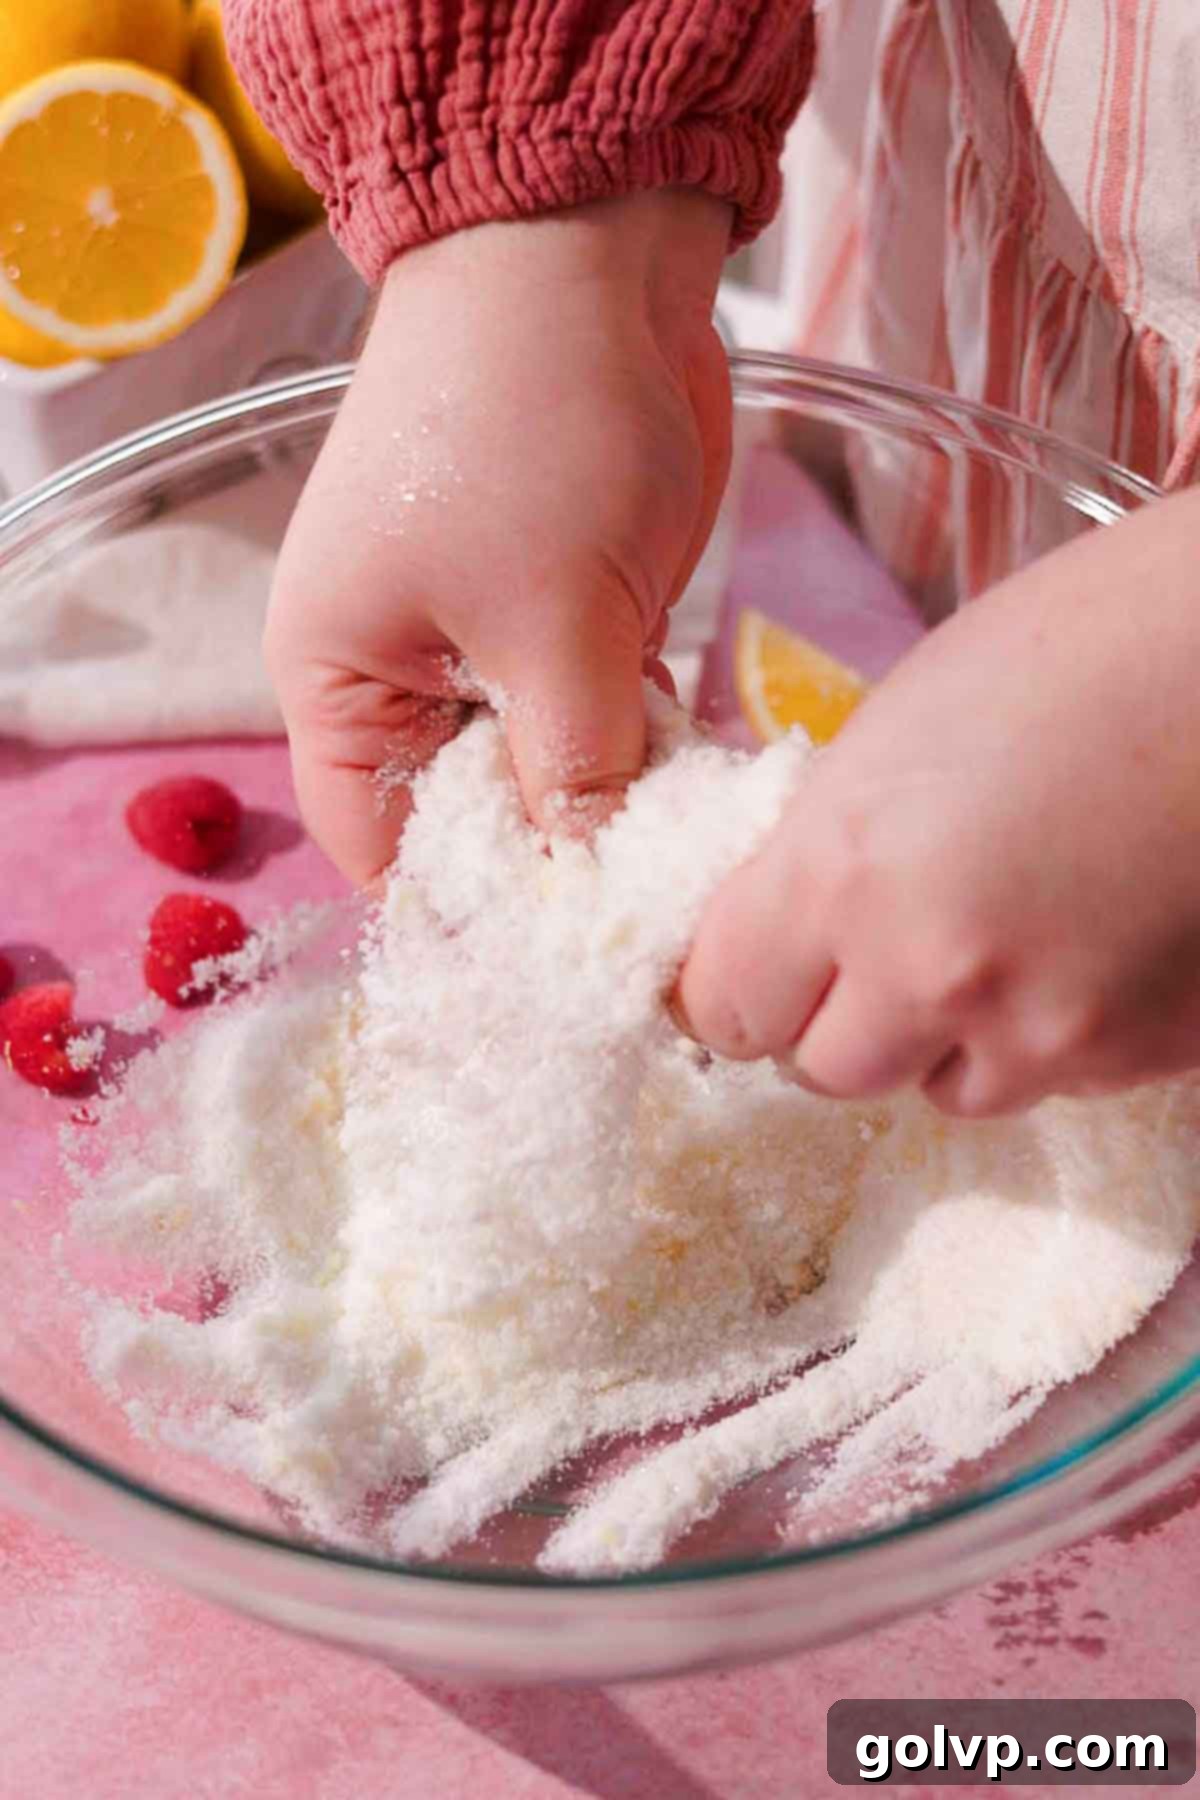
Step 1: Infuse Sugar with Lemon. In a large mixing bowl or the bowl of a stand mixer, combine the granulated sugar and the finely grated lemon zest. Use your fingertips to rub the lemon zest into the sugar. This releases the essential oils from the zest, infusing the sugar with an intense lemon aroma and flavor. Continue rubbing until the sugar becomes fragrant and slightly damp to the touch.
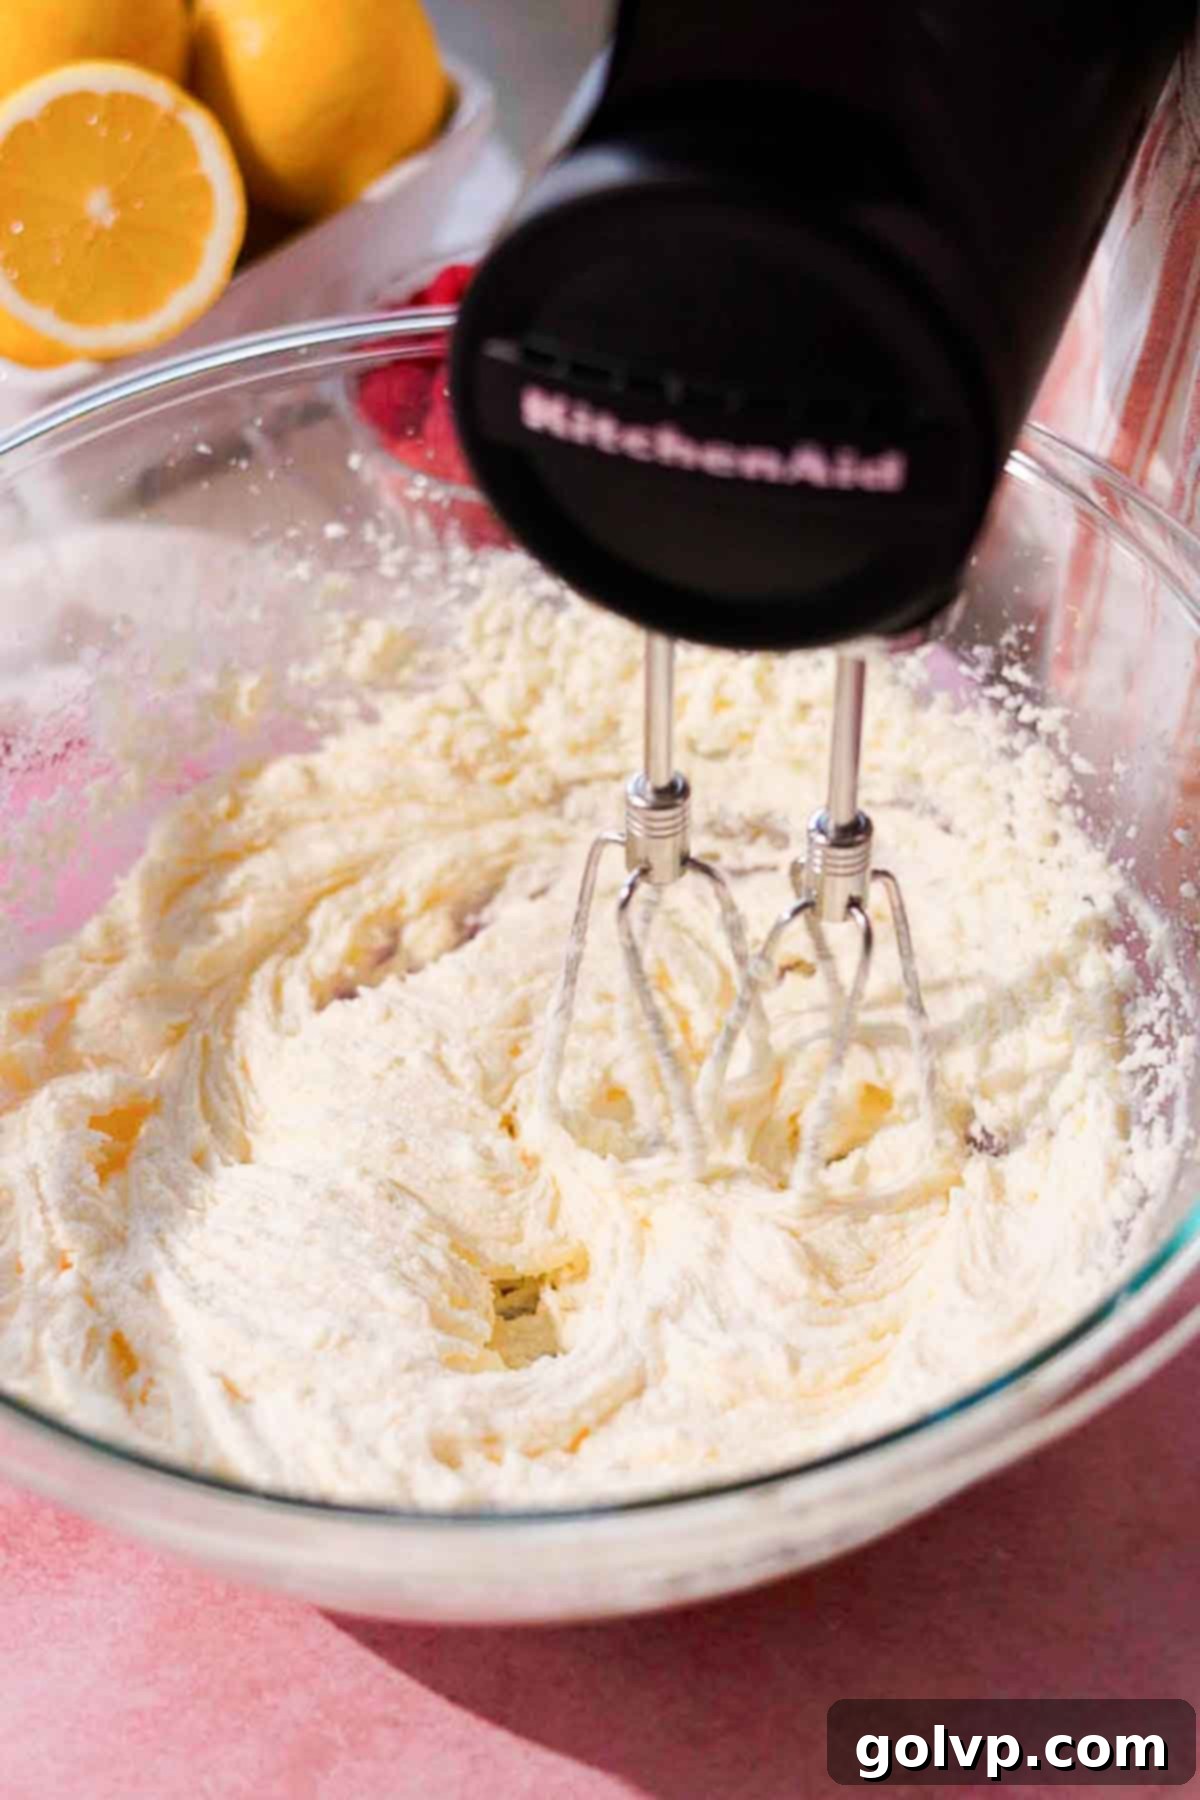
Step 2: Cream Butter and Oil. Add the softened unsalted butter, vegetable oil, and a pinch of sea salt to the lemon-infused sugar mixture. Beat this combination with an electric mixer (or stand mixer) on medium speed until it becomes noticeably light, fluffy, and pale in color. Remember to stop halfway through and scrape down the sides of the bowl to ensure everything is evenly incorporated. This creaming process usually takes about one to two minutes.
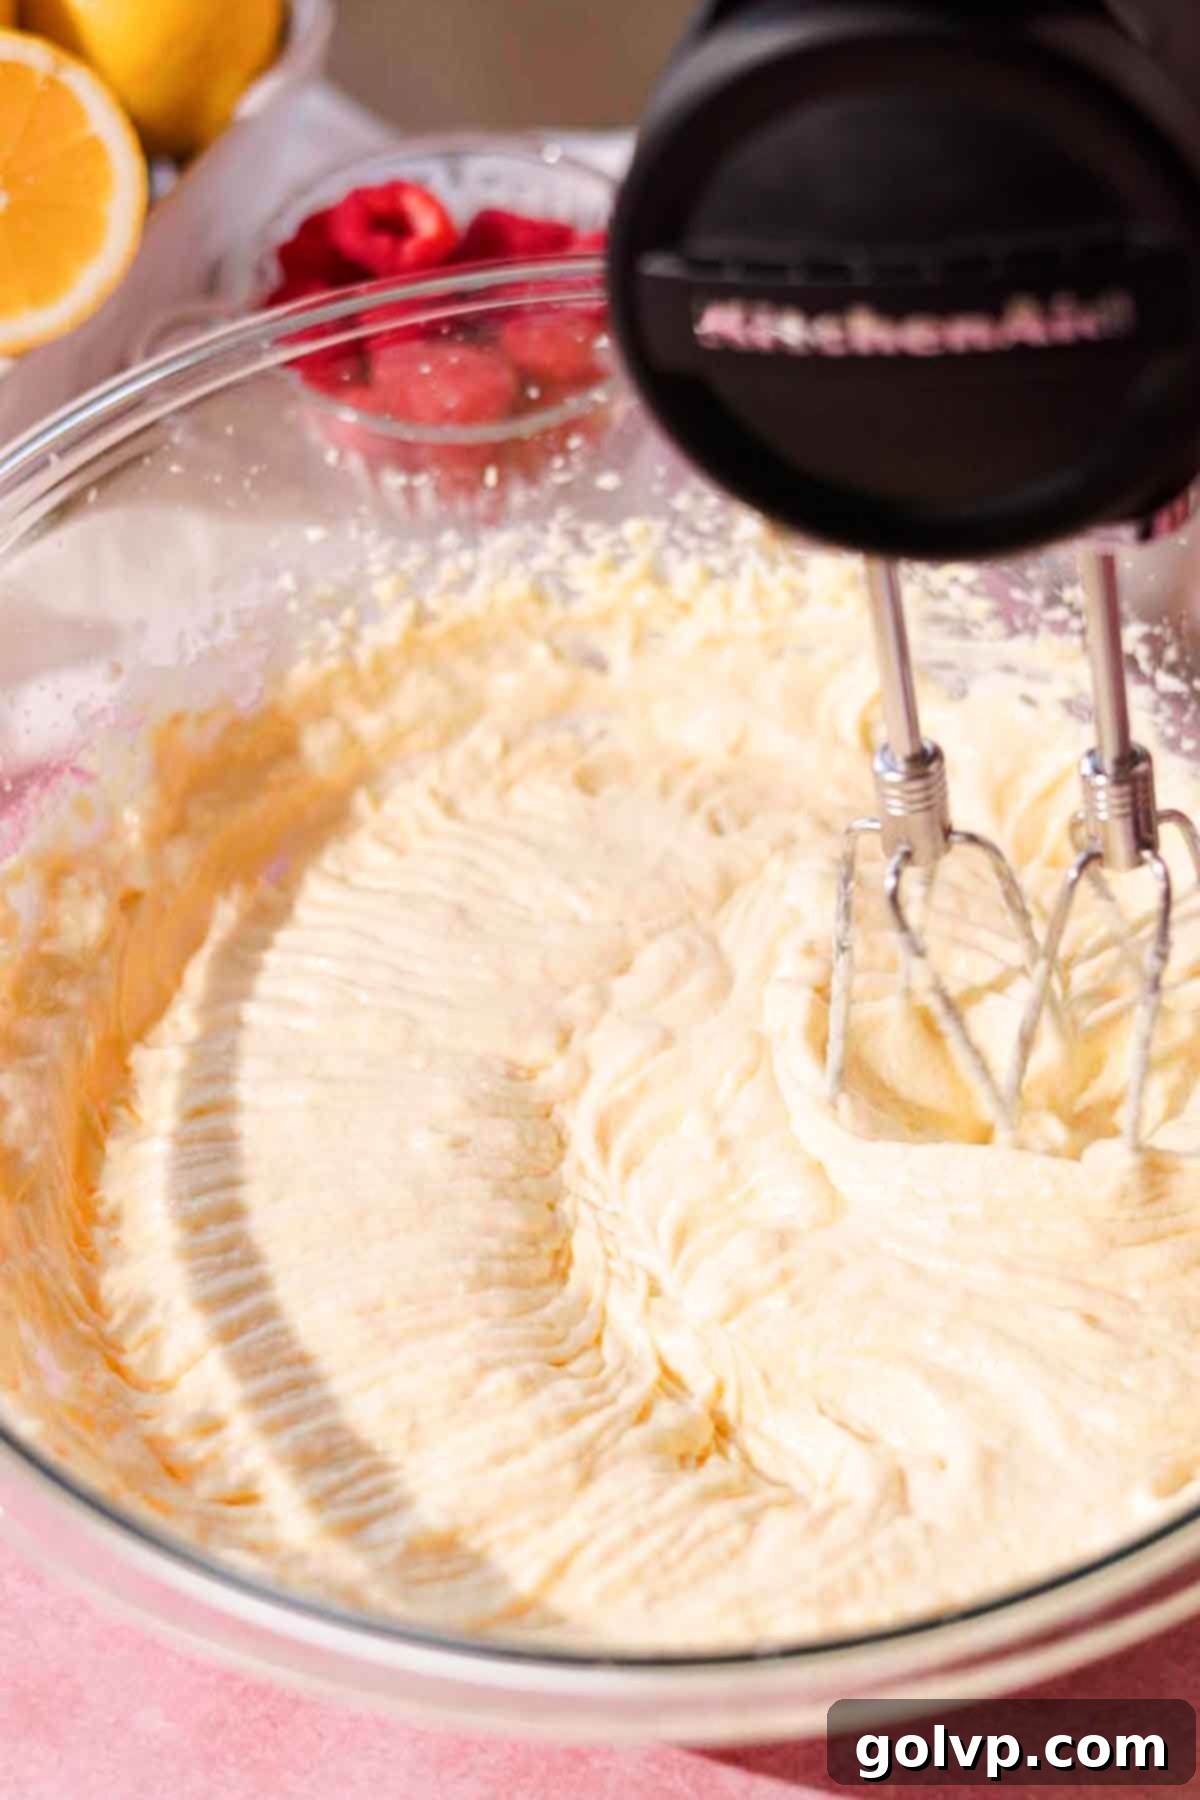
Step 3: Add Wet Ingredients. Introduce the room temperature eggs one at a time, beating thoroughly after each addition until fully combined. Make sure to scrape down the bowl frequently to integrate all ingredients. Then, mix in the vanilla extract, sour cream, and the remaining lemon juice and zest. Beat again until everything is well combined, ensuring a smooth and homogenous wet mixture.
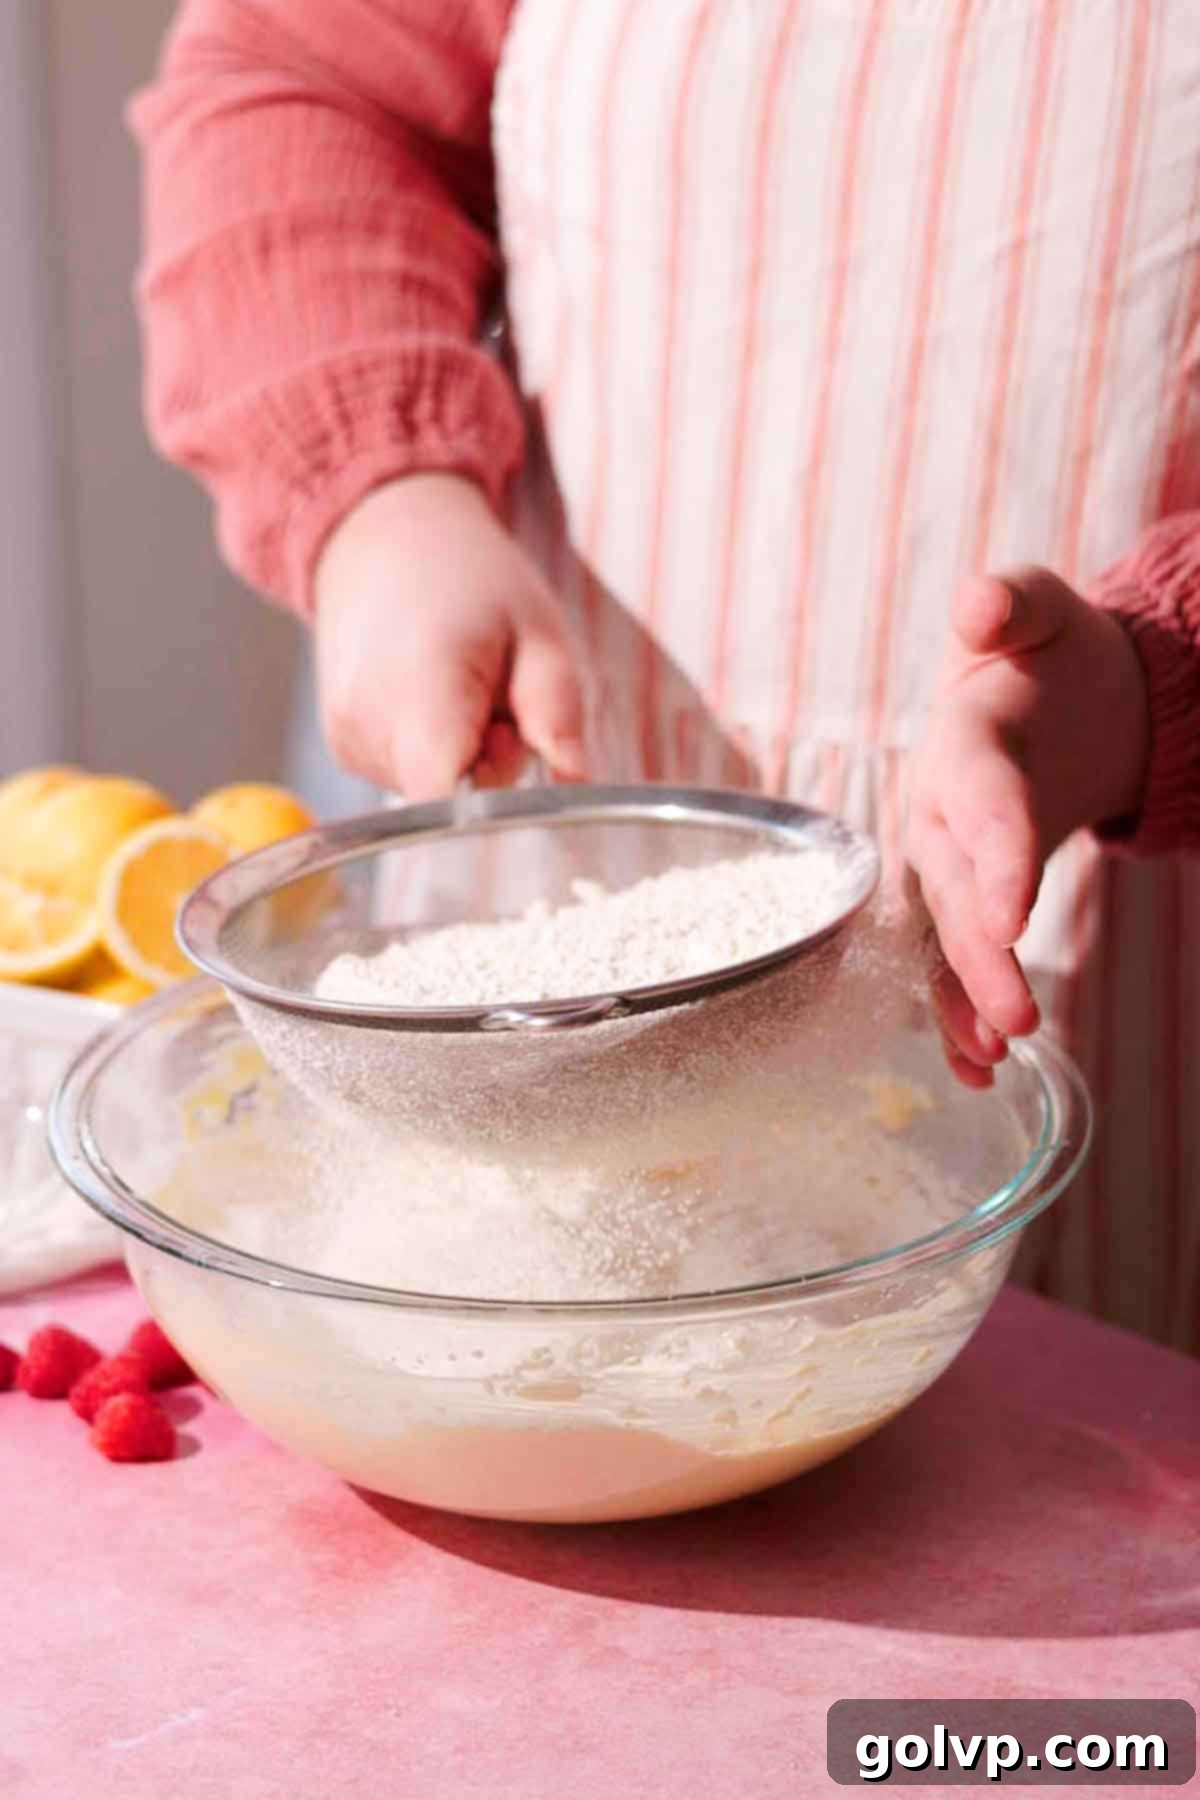
Step 4: Incorporate Dry Ingredients (First Half). Sift half of the all-purpose flour, all of the baking powder, and all of the baking soda directly into the wet mixture in the bowl. Using a spatula or wooden spoon, gently fold these dry ingredients into the batter until they are mostly incorporated. Be careful not to overmix at this stage, as it can lead to a tough cake.
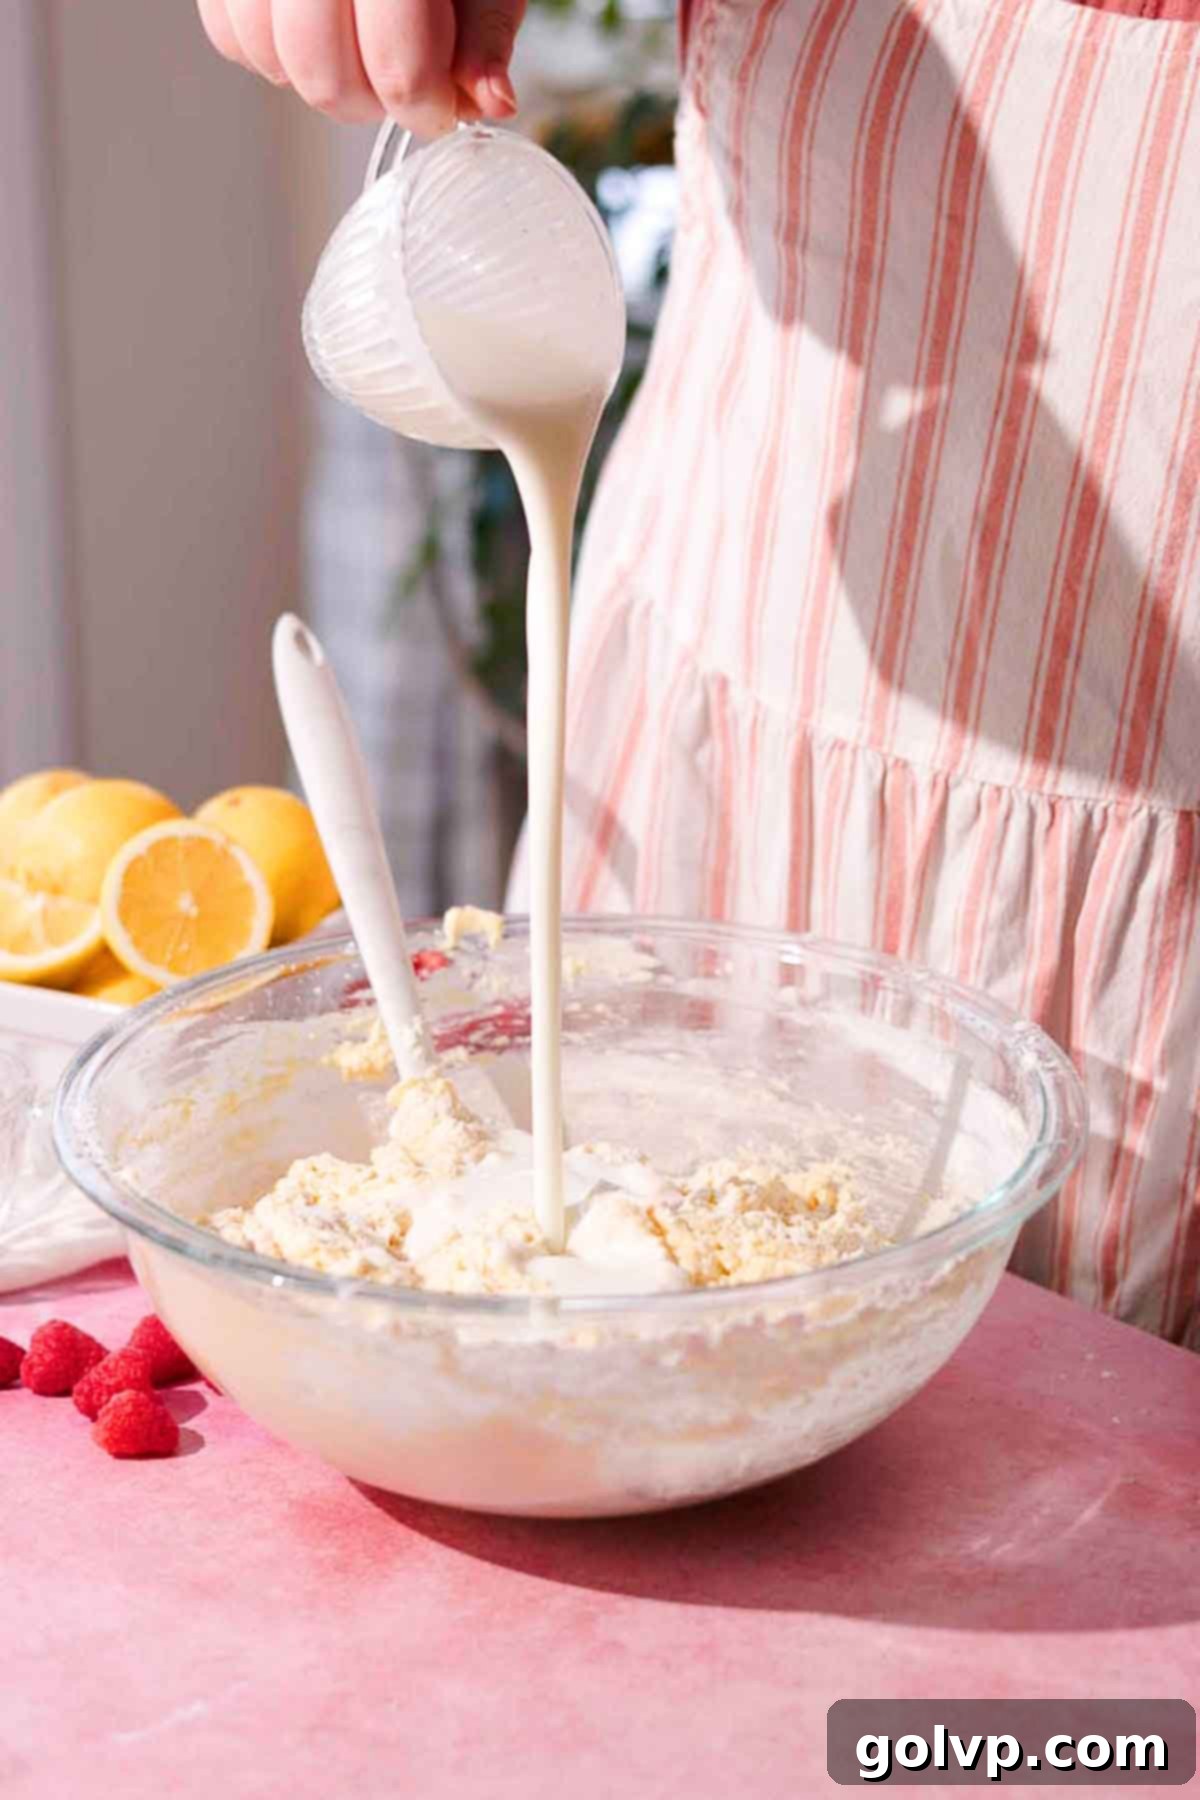
Step 5: Add Buttermilk and Remaining Flour. Pour in the room temperature buttermilk, then sift the remaining half of the all-purpose flour over the batter. Continue to gently fold the mixture with your spatula until just combined. Stop mixing as soon as no dry streaks of flour are visible. Overmixing at this stage can develop too much gluten, resulting in a dense cake.
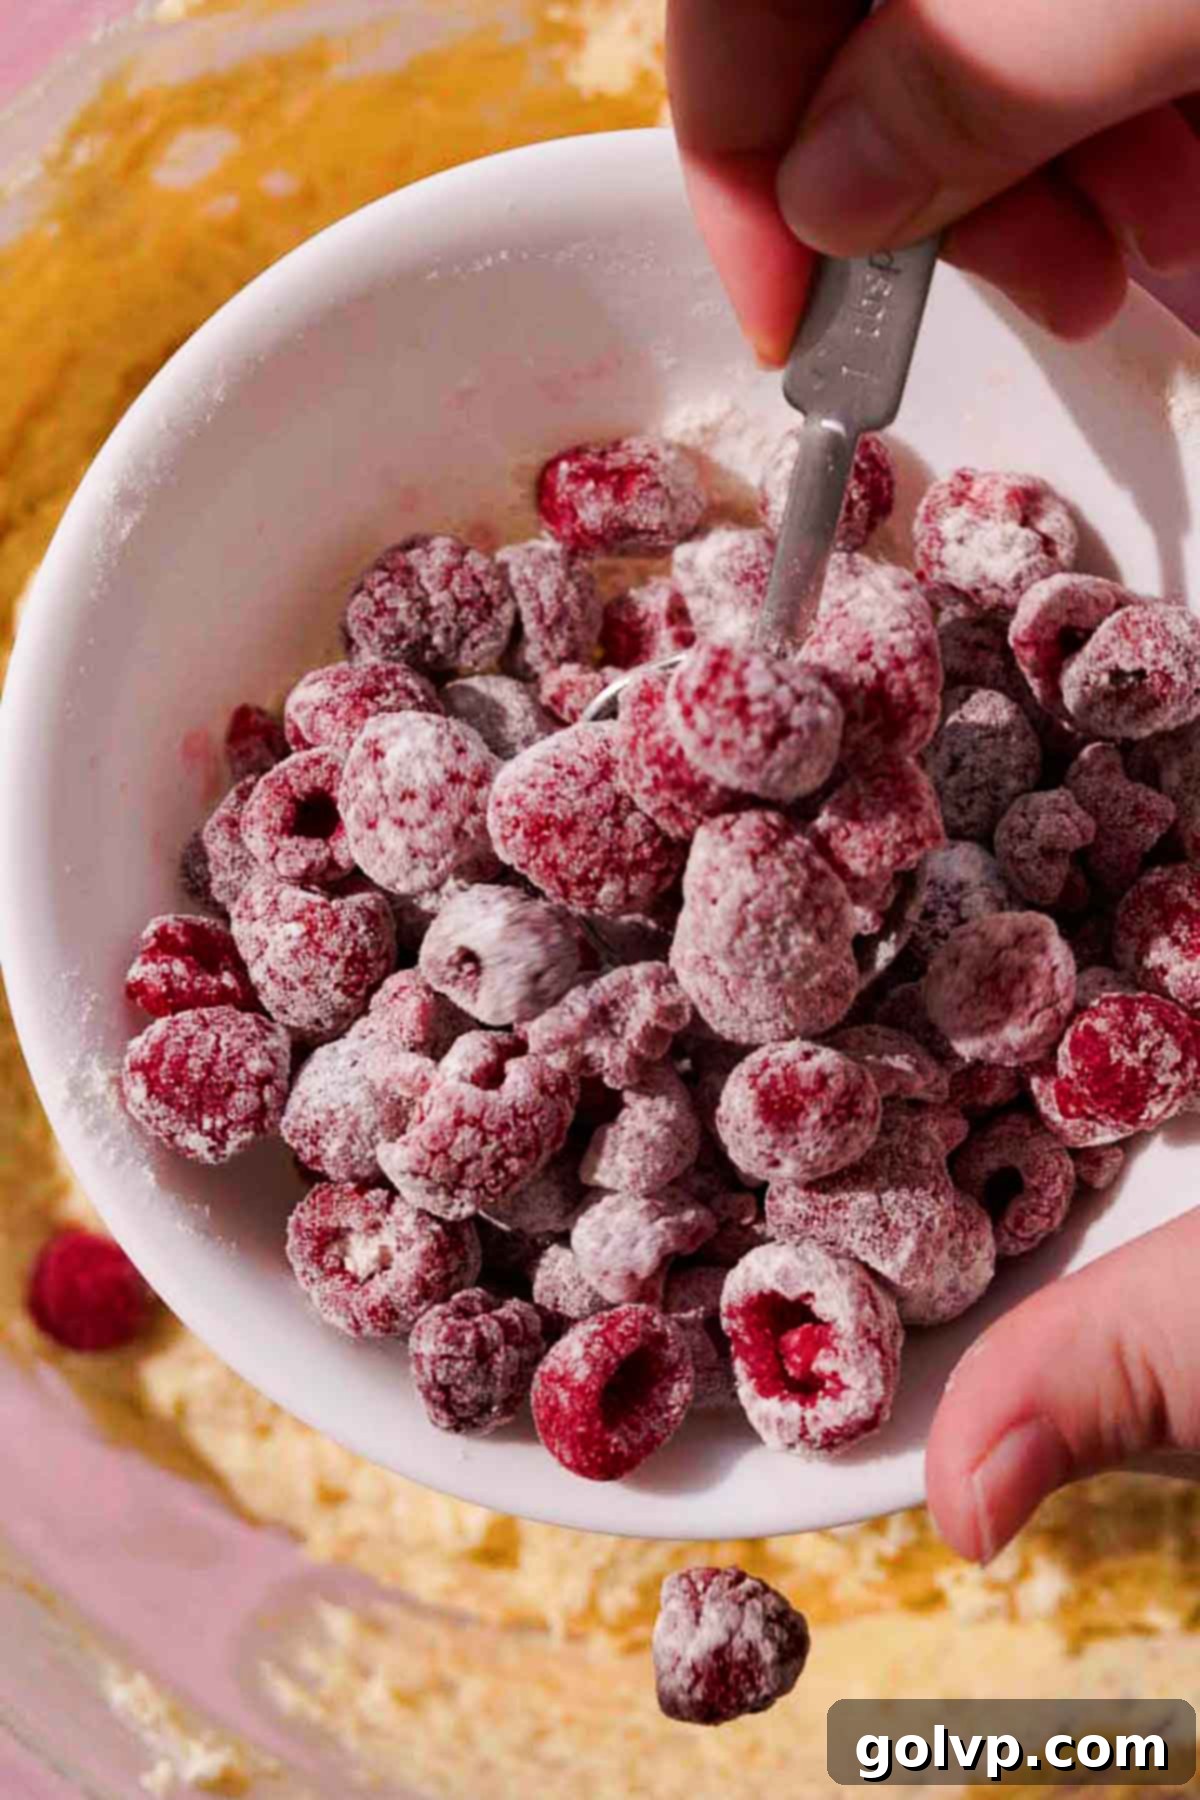
Step 6: Fold in Raspberries. In a separate small bowl, gently toss the fresh or frozen raspberries with one tablespoon of all-purpose flour. This light coating helps prevent the raspberries from sinking to the bottom of the cake layers during baking. If using frozen raspberries, do not thaw them. Carefully fold the coated raspberries into the cake batter. Be sure to leave any dry bits of flour that might have accumulated at the bottom of the raspberry bowl; only add the fruit to the batter.
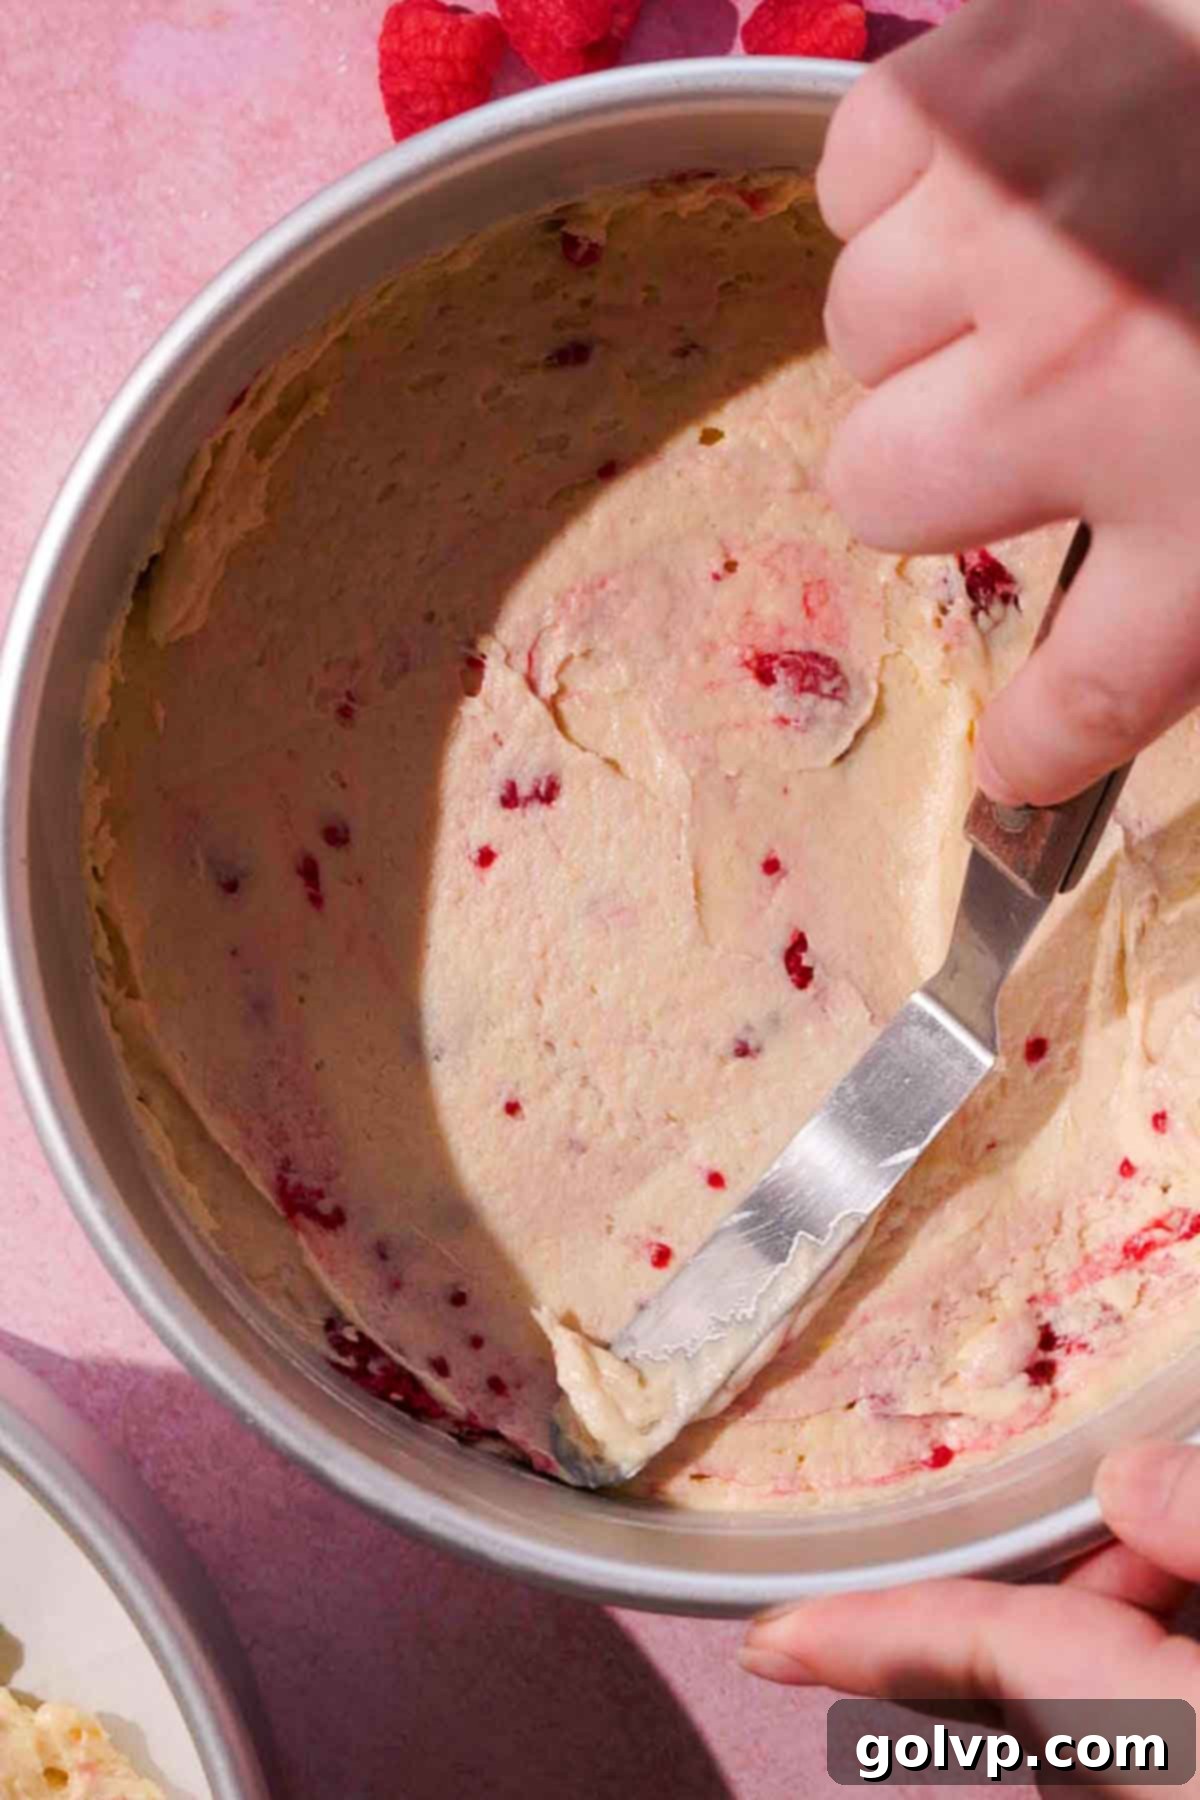
Step 7: Divide and Bake. Divide the cake batter evenly among the three prepared and lined baking pans. For best results and uniform layers, use an ice cream scoop or a kitchen scale to ensure each pan receives an equal amount of batter. Gently smooth out the tops of the batter in each pan. Place the pans into the preheated oven. If your oven cannot accommodate all three pans at once, you can temporarily place one of the cake layers in the refrigerator until the others have finished baking.
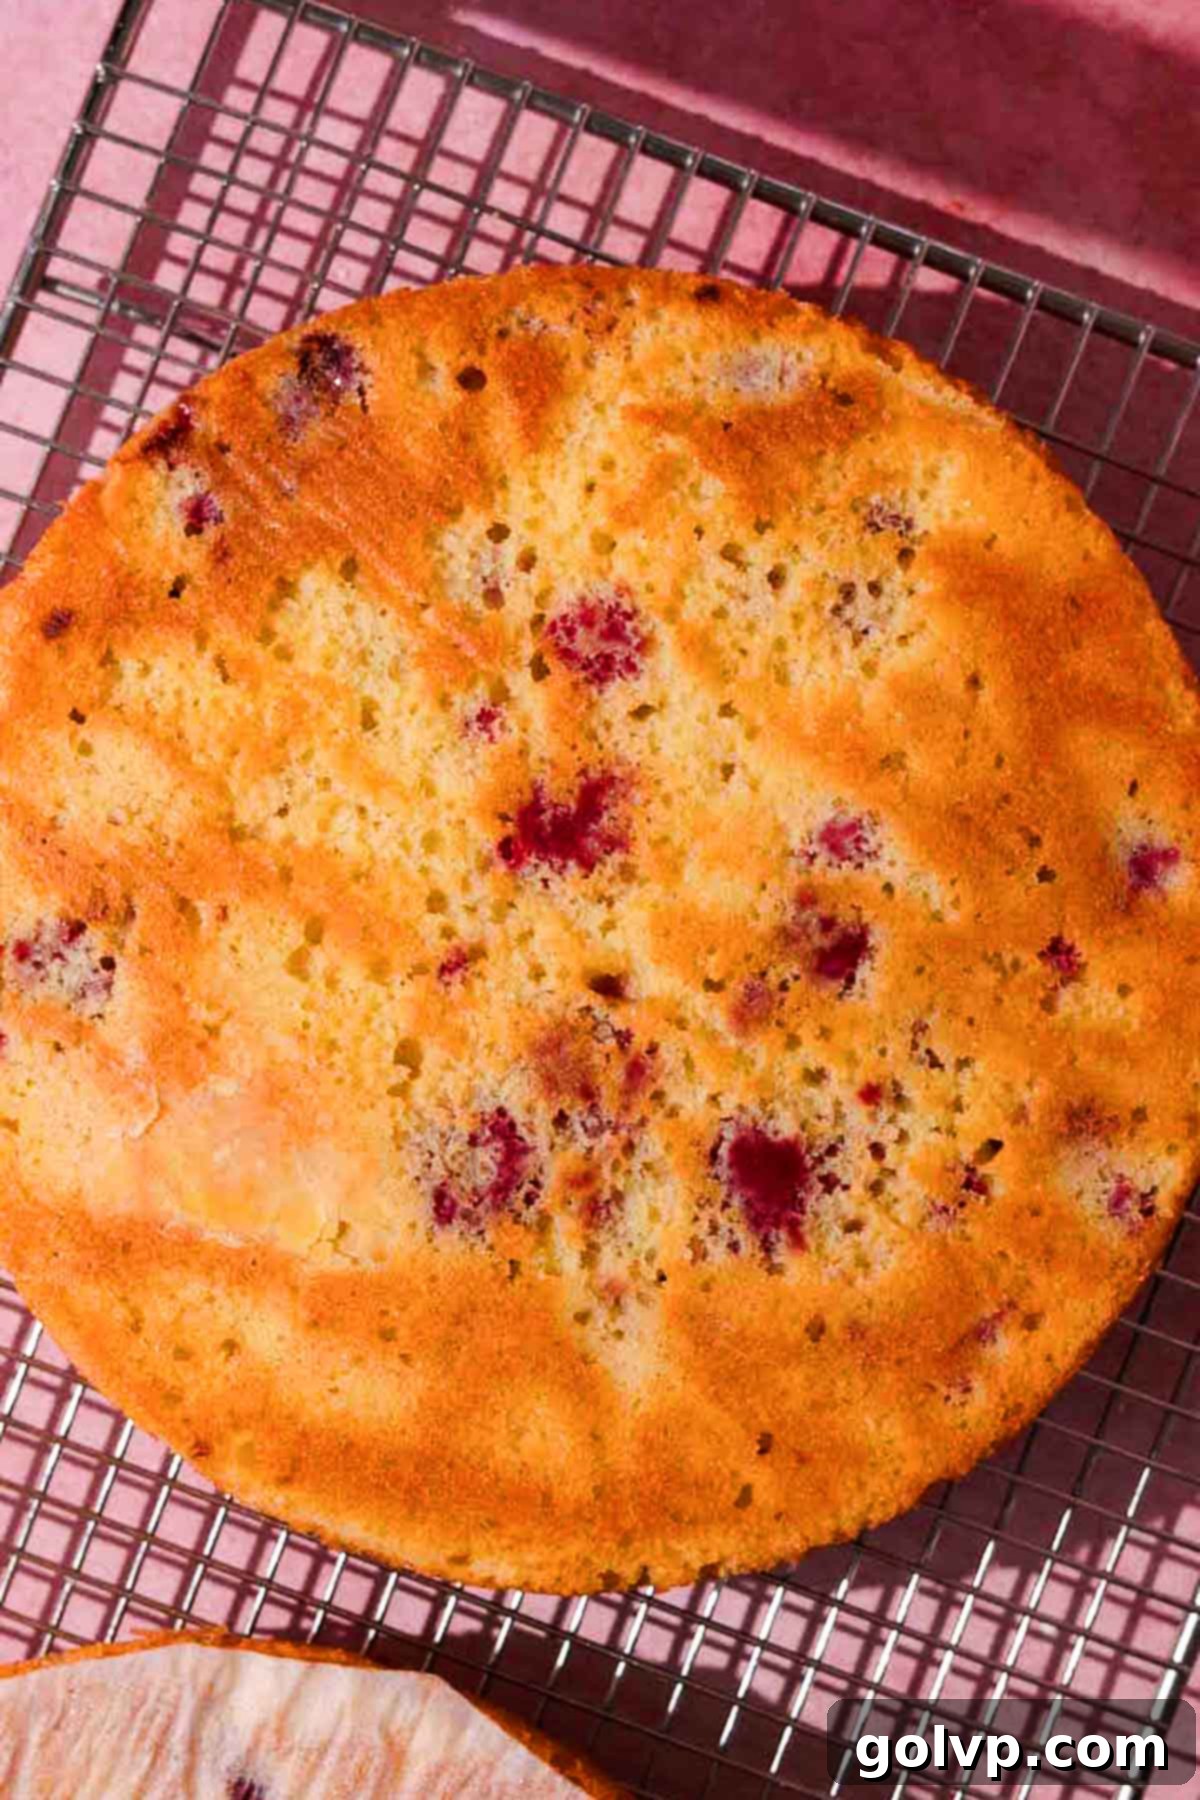
Step 8: Cool the Cake Layers. Bake the cake layers for 20-25 minutes, or until a toothpick inserted into the center of each cake comes out mostly clean, with only a few moist crumbs attached. Once baked, remove the pans from the oven and let the cake layers cool in their pans for about 5 minutes. Then, carefully run a knife around the edges of each cake to help release it, and invert them onto a wire cooling rack. Allow the cake layers to cool completely to room temperature before frosting, as warm cake will melt your frosting.
Frosting Step by Step
Tip: The consistency of your softened butter is critical for perfect frosting. It should be pliable enough to make a slight indent with your finger, but firm enough that no greasy residue transfers to your finger. Avoid overly soft or melted butter.
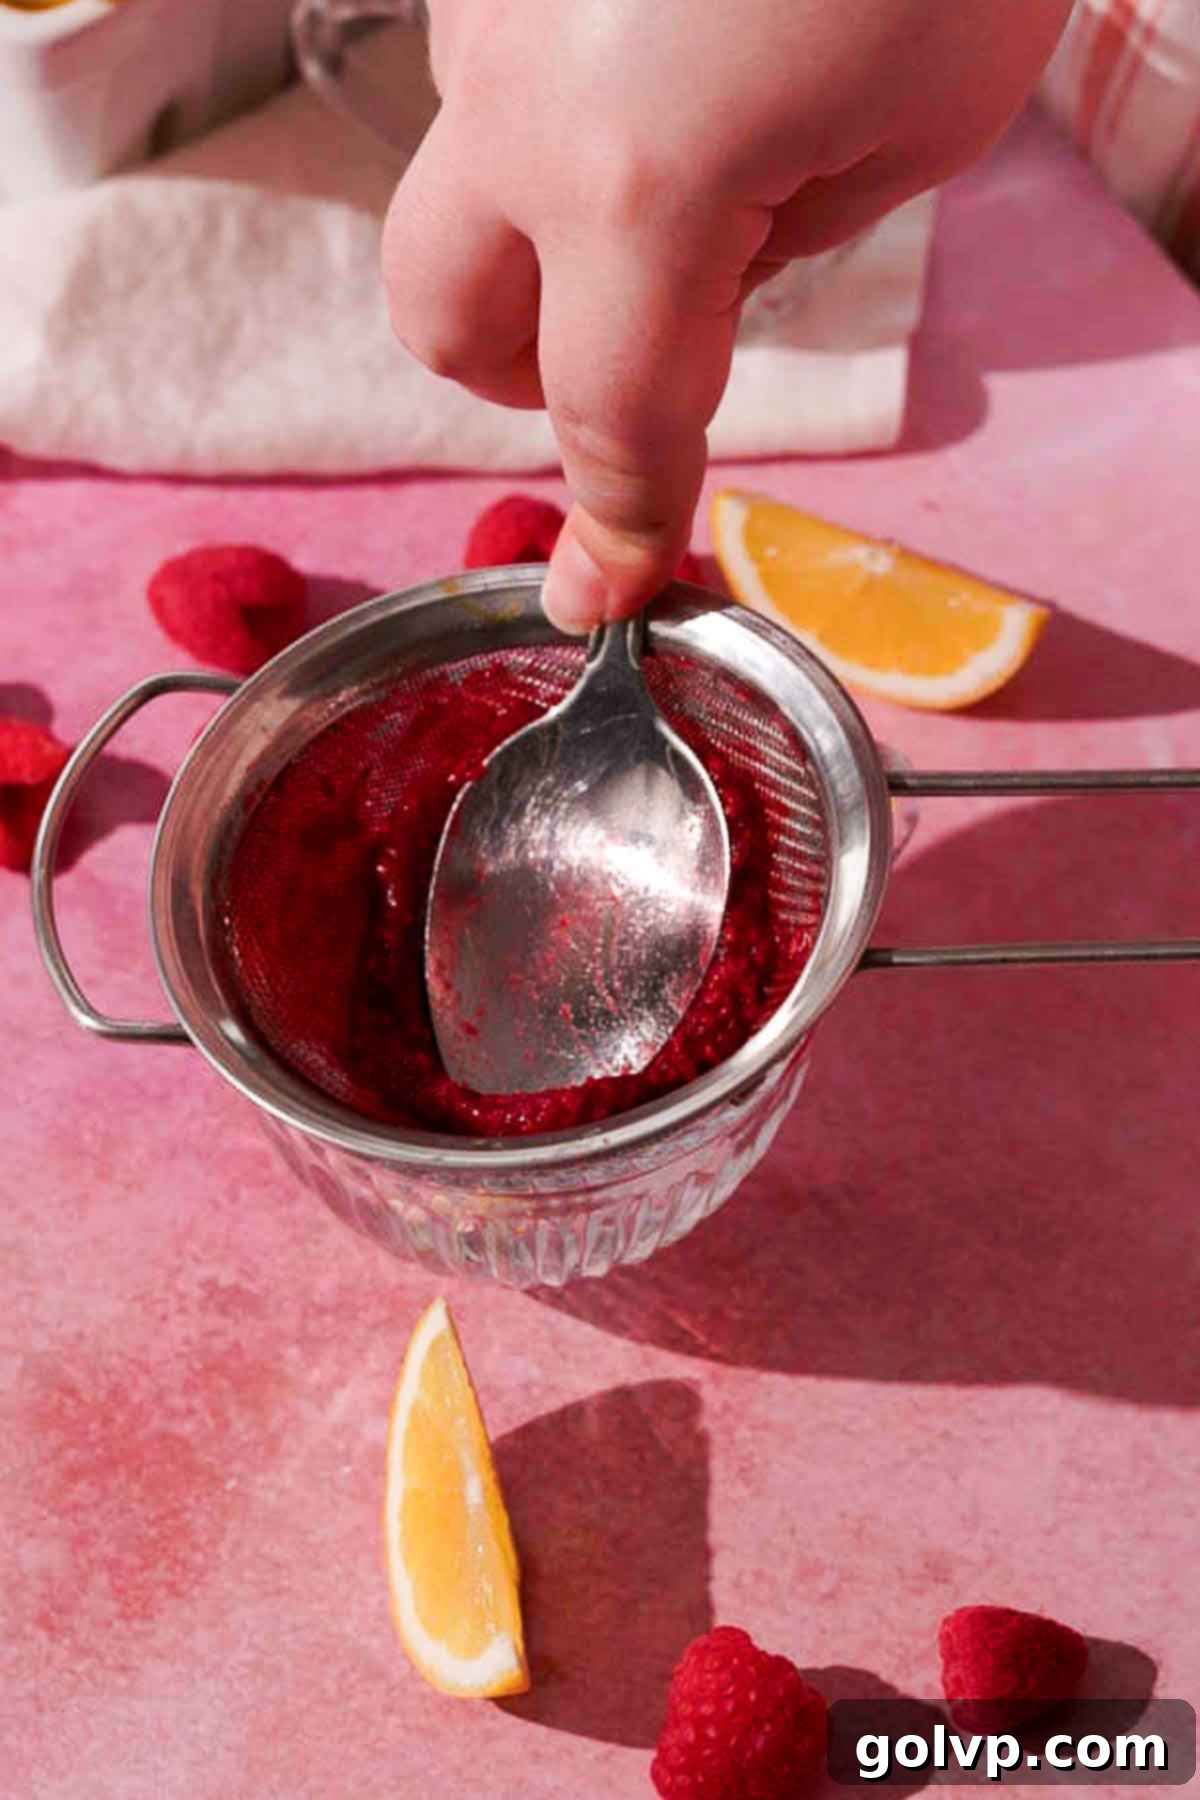
Step 1: Prepare Raspberry Puree. Begin by gently smashing your thawed fresh or frozen raspberries with the back of a spoon. Once mashed, push the raspberries through a fine-mesh sieve, ensuring all the seeds are removed. This process yields a smooth, intensely flavored, and naturally colored raspberry puree. Set this seedless puree aside to be incorporated later into the frosting.
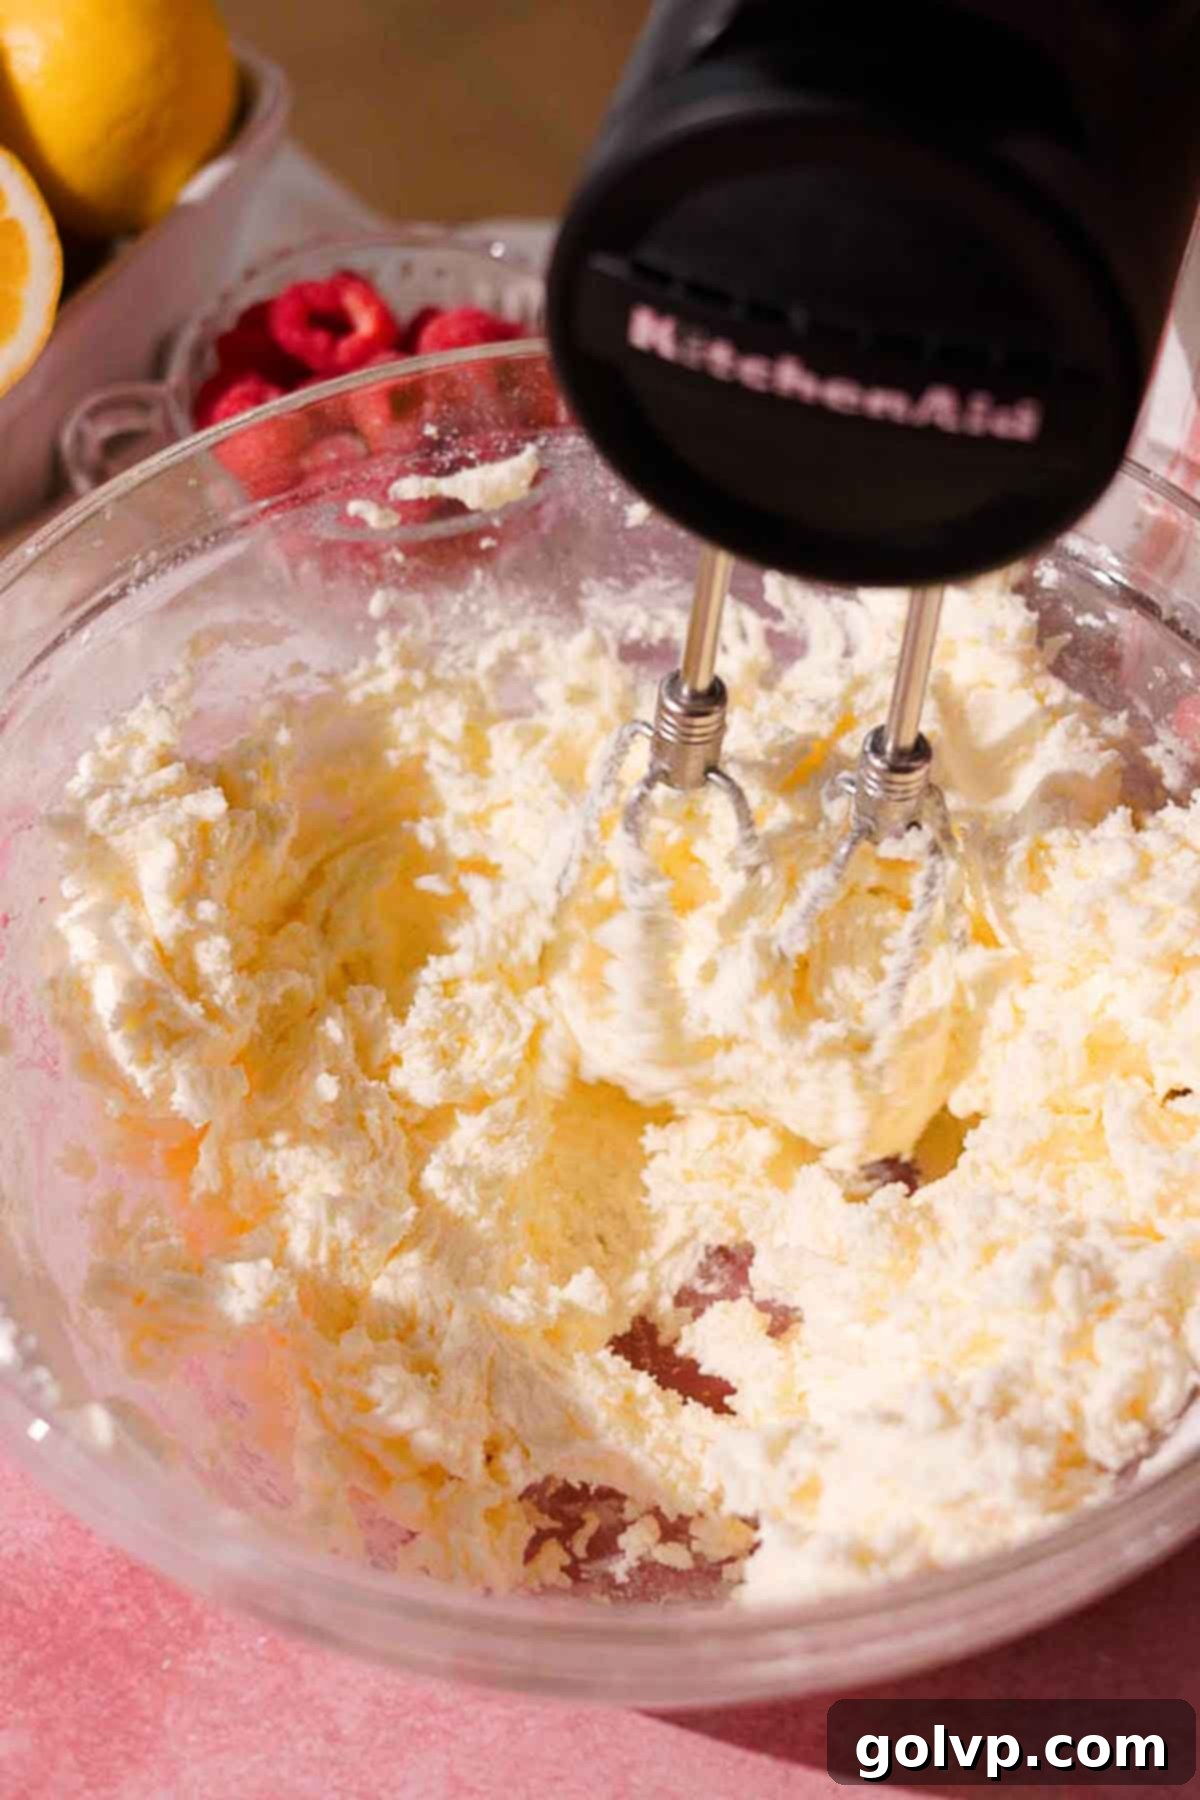
Step 2: Cream Butter and Sugar. In a large mixing bowl or the bowl of a stand mixer, beat the softened unsalted butter until it is light, pale, and fluffy. Gradually add the sifted powdered sugar, half a cup at a time, beating well after each addition. Continue to beat on medium-high speed, scraping down the bowl frequently, until the mixture becomes very light in color and achieves a wonderfully fluffy consistency. This crucial step can take anywhere from 5 to 10 minutes to reach perfection, so be patient!
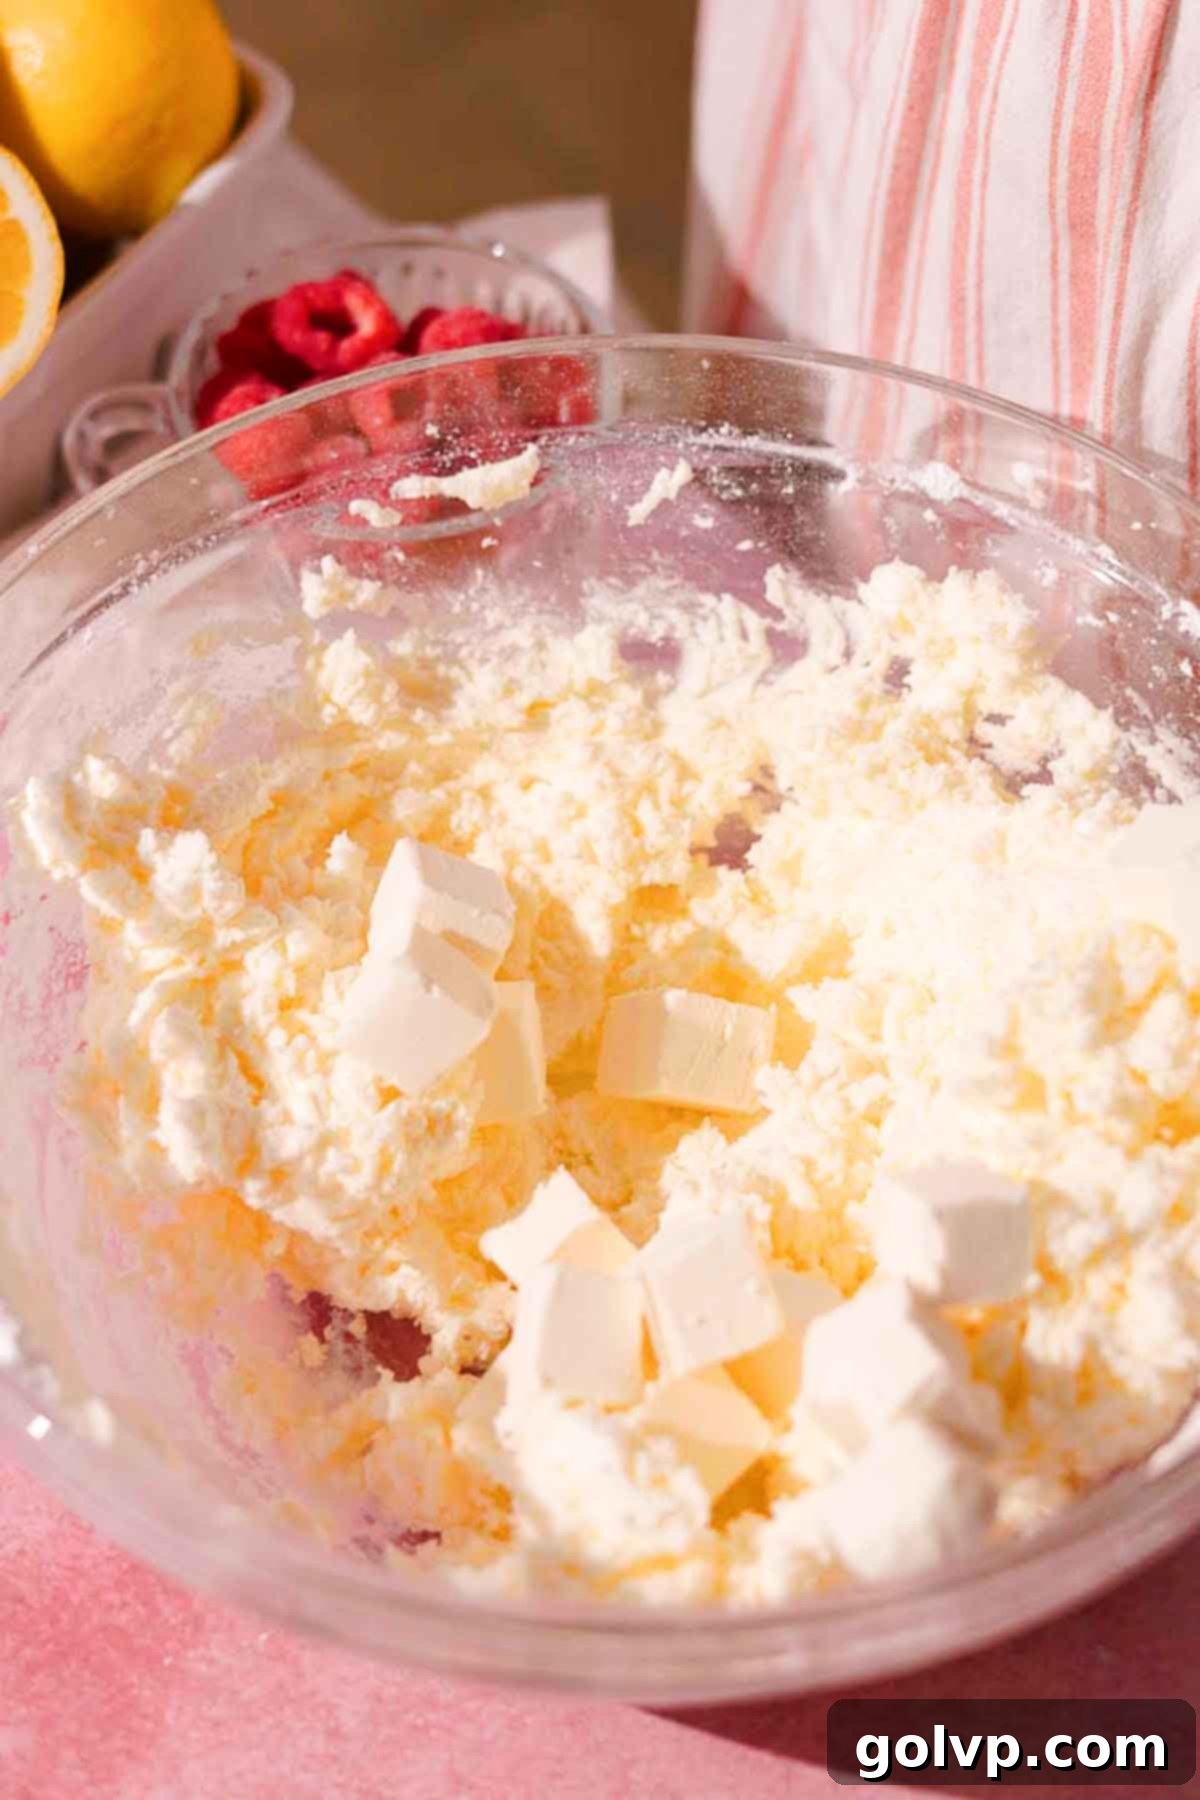
Step 3: Add Cream Cheese. Add the softened cream cheese to the butter and powdered sugar mixture. Beat on medium speed until the cream cheese is fully incorporated and the frosting is light and fluffy. Be careful not to overmix the cream cheese, as this can cause the frosting to become runny.
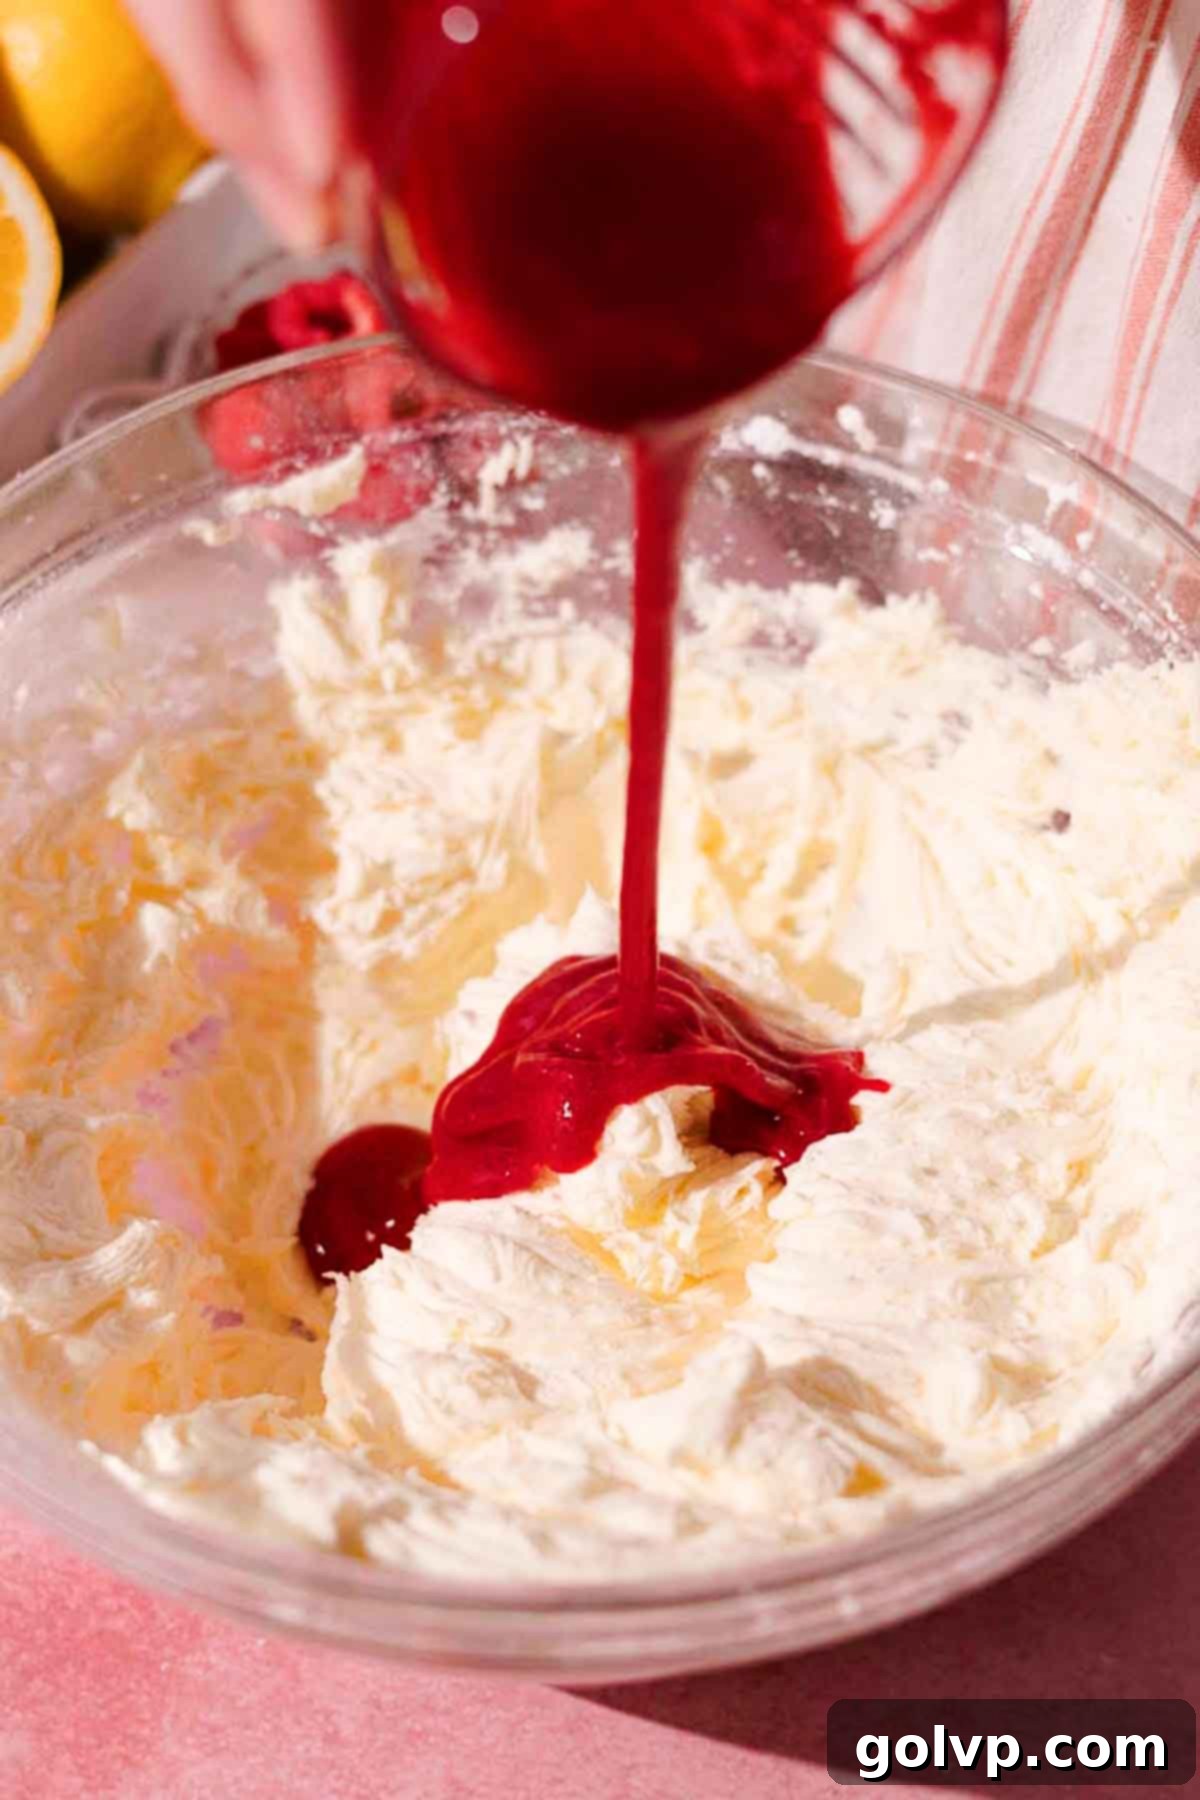
Step 4: Incorporate Raspberry and Lemon. Pour in the prepared seedless raspberry puree and the freshly squeezed lemon juice. Beat again on medium speed until these liquids are completely combined and evenly distributed throughout the frosting, resulting in a beautifully pink and tangy cream cheese frosting.
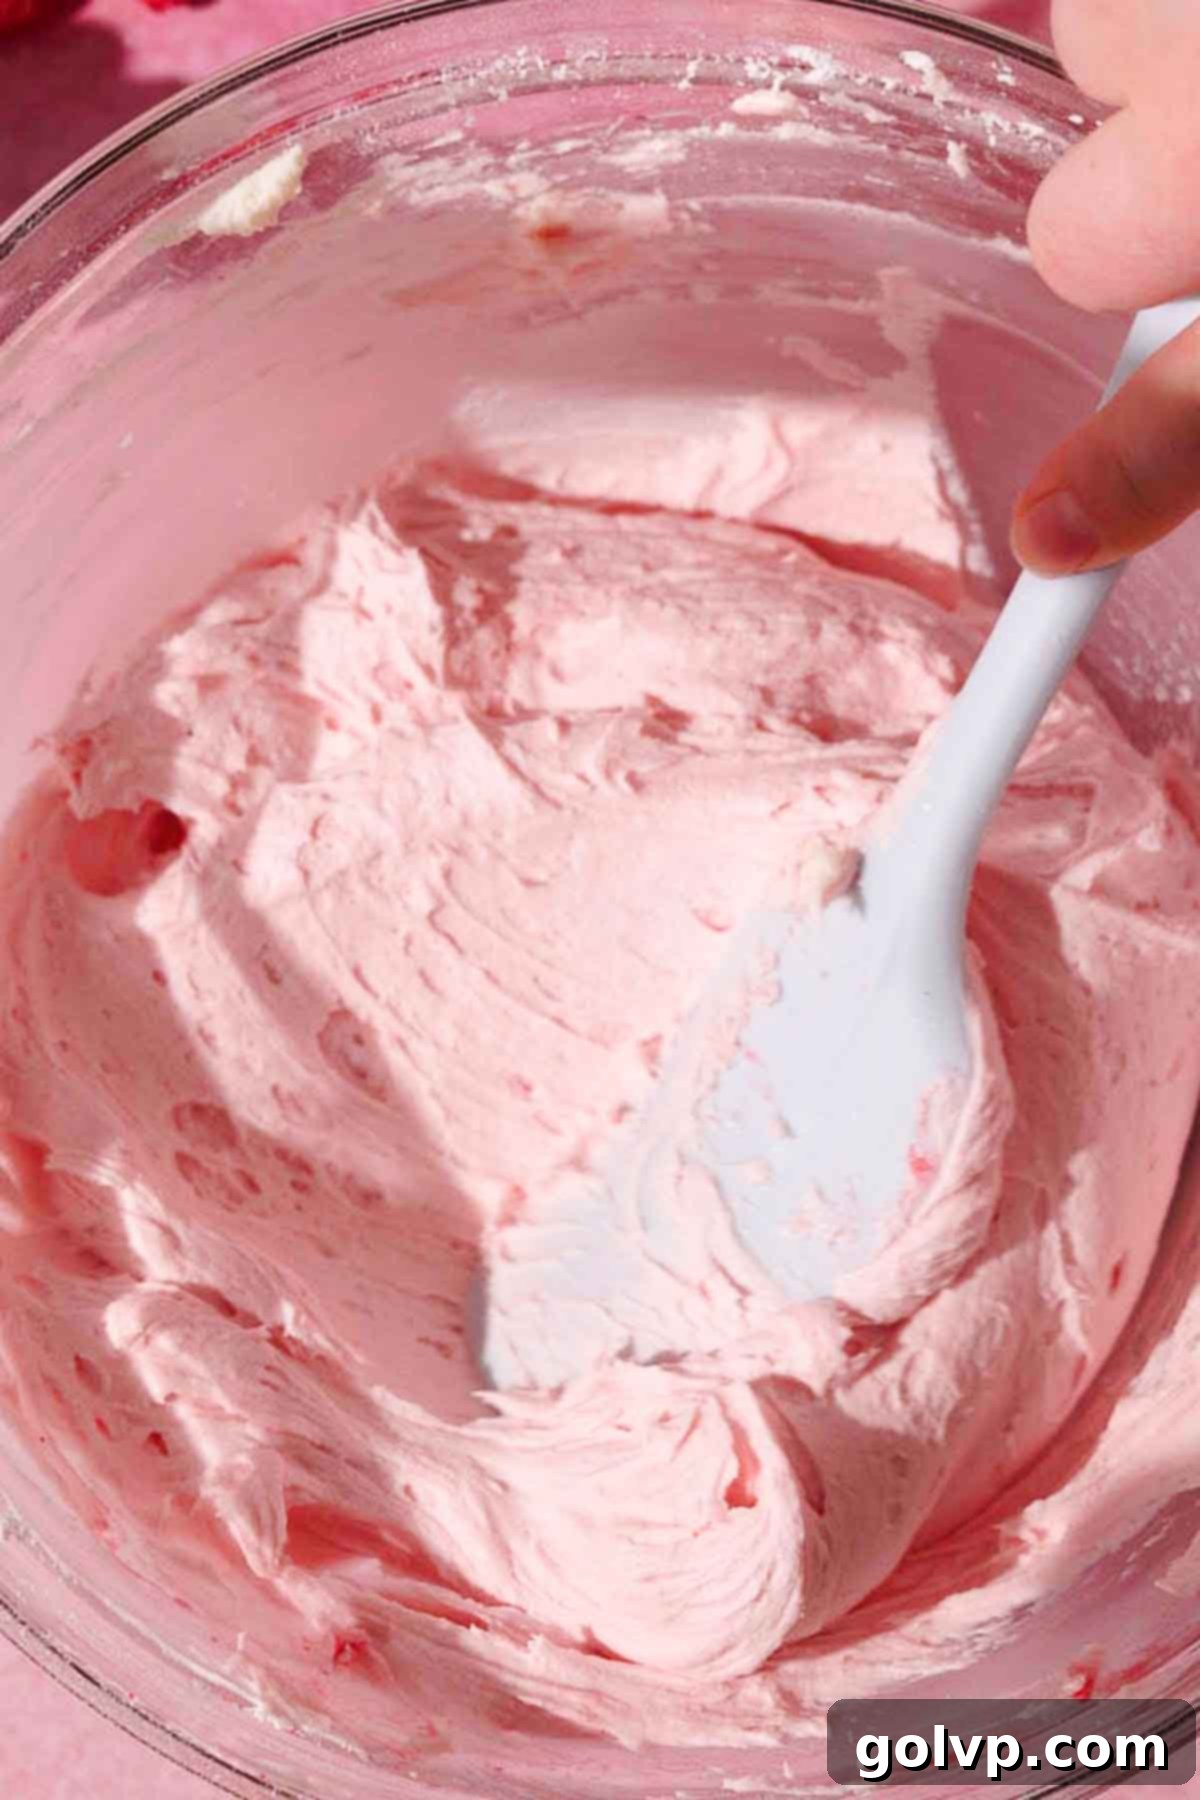
Step 5: Smooth the Frosting. Before you start frosting, take a spatula and gently fold the frosting by hand for a minute or two. This action helps to remove any large air pockets or bubbles that may have formed during beating, resulting in an exceptionally smoother and more professional-looking frosting when applied to the cake. Don’t skip this step for a polished finish.
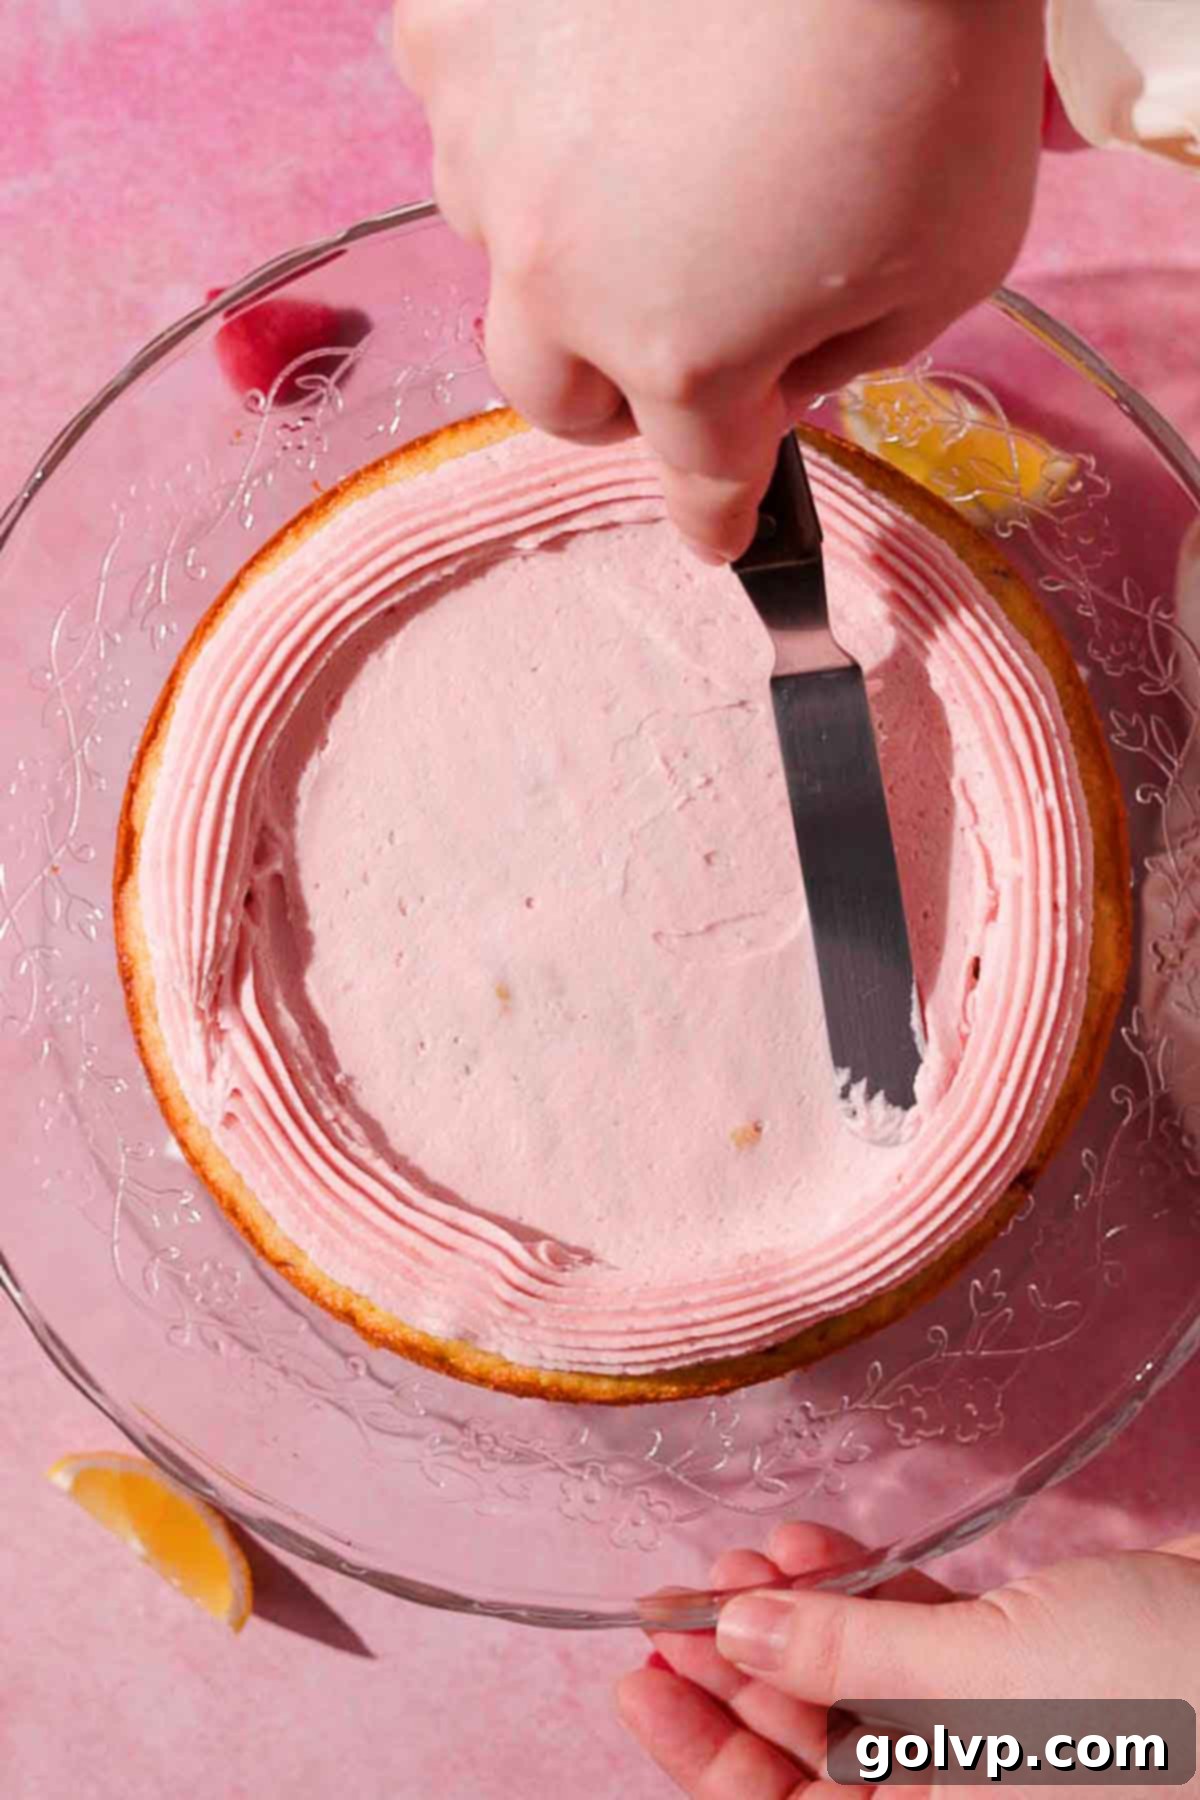
Step 6: Begin Assembling Layers. To start assembling, place a small dollop of frosting on your cake board or serving plate; this acts as an anchor to prevent the cake from sliding. Carefully place the first cooled cake layer on top. Spread a thin, even layer of raspberry cream cheese frosting over the top of this layer. Next, pipe a thick border of frosting around the very edge of the cake layer. This border is crucial as it creates a dam that will contain the raspberry curd filling and prevent it from leaking out the sides. A thicker border provides more security.
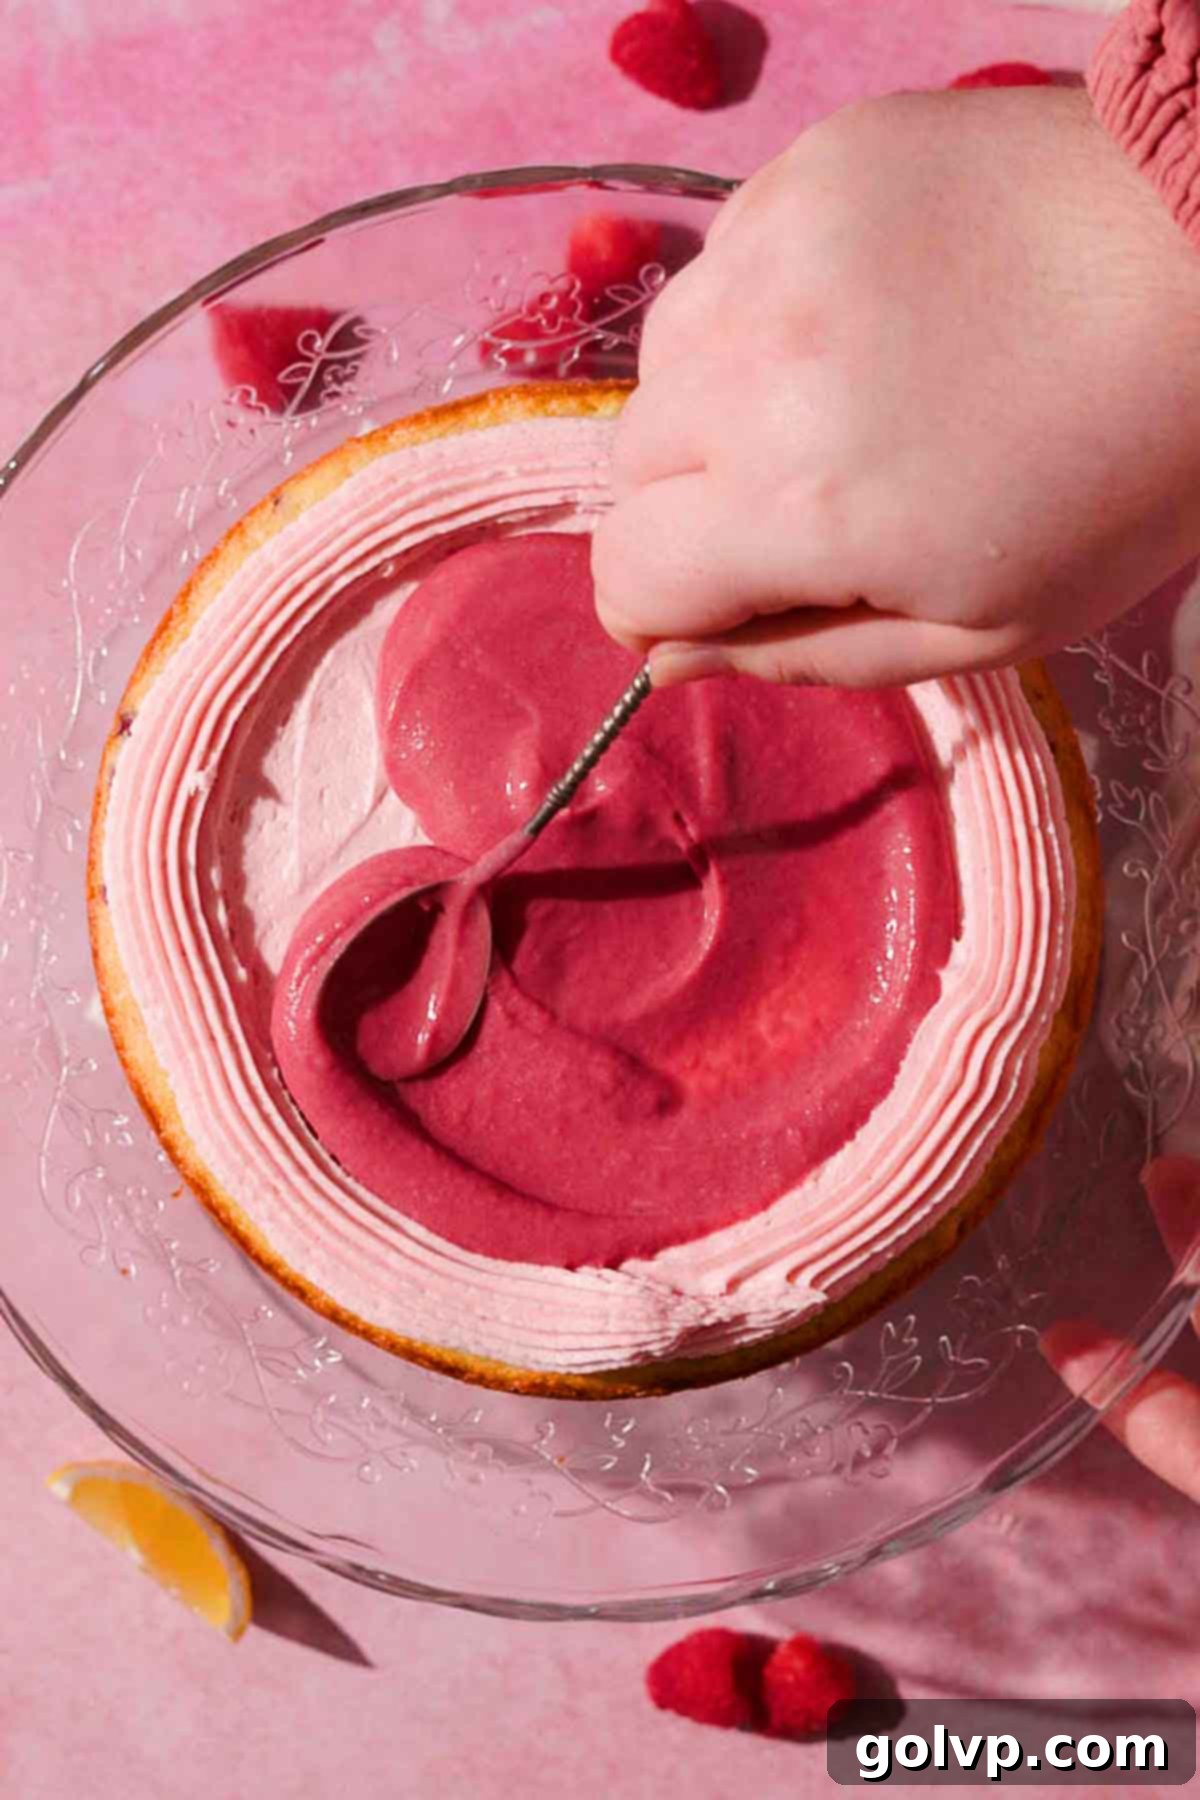
Step 7: Fill and Stack. Carefully spoon about ¼ cup of the chilled raspberry curd into the middle of the piped frosting border, gently spreading it out to reach the edges of the border. It’s important not to overfill with curd, as too much filling can cause the cake layers to slide around or the curd to burst through the frosting dam. Place the next cake layer on top and repeat the frosting and filling process. After adding the third and final top layer of cake, place the entire cake into the freezer for about 10 minutes. This quick chill allows the frosting and curd to set, making the cake much more stable and easier to frost completely.
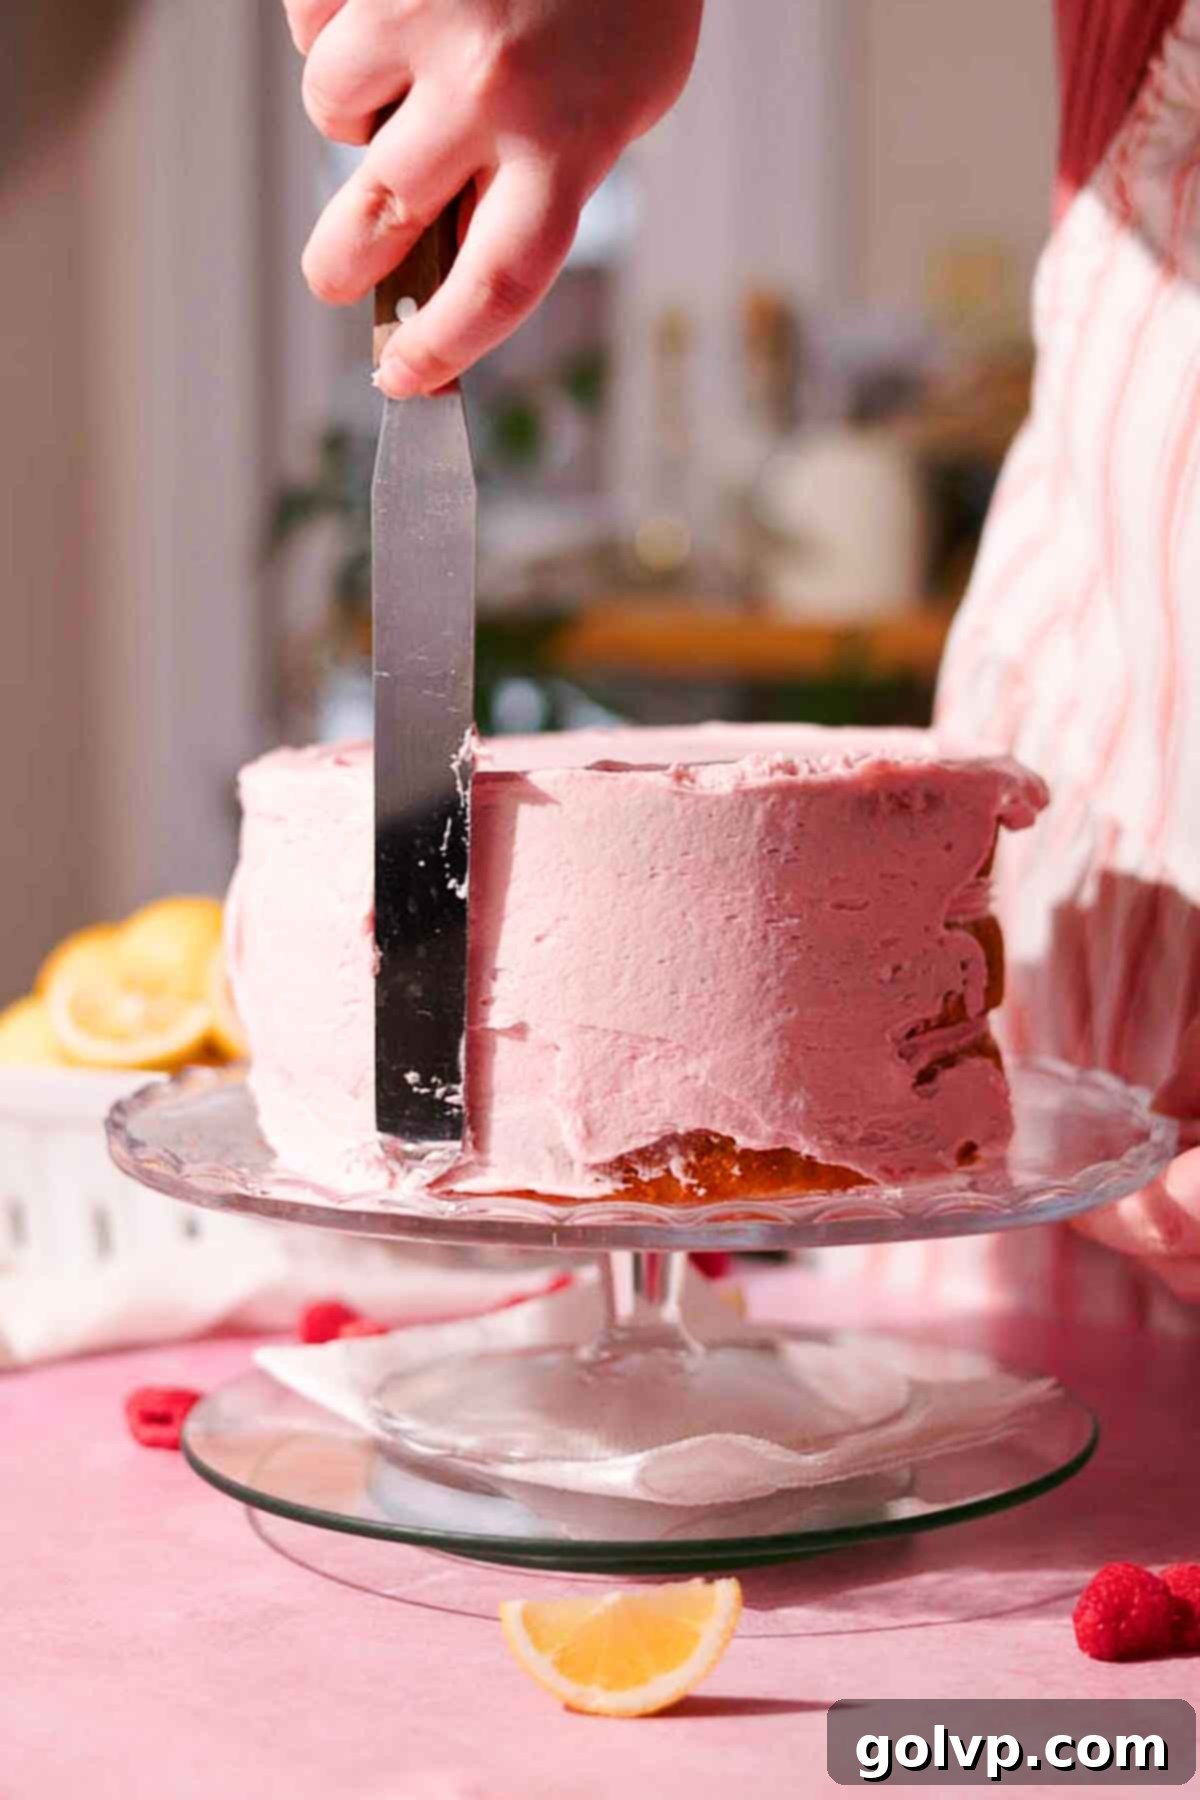
Step 8: Crumb Coat and Final Frosting. Retrieve the chilled cake from the freezer. Apply a thin layer of frosting all over the top and sides of the cake. This is known as a “crumb coat,” which traps any loose crumbs and creates a smooth surface for your final layer of frosting. If you prefer a “naked cake” look, this layer can be your final layer. Otherwise, ensure you reserve enough frosting for your final decorative piping. Use a metal spatula or cake scraper to smooth the sides and top for a neat finish.
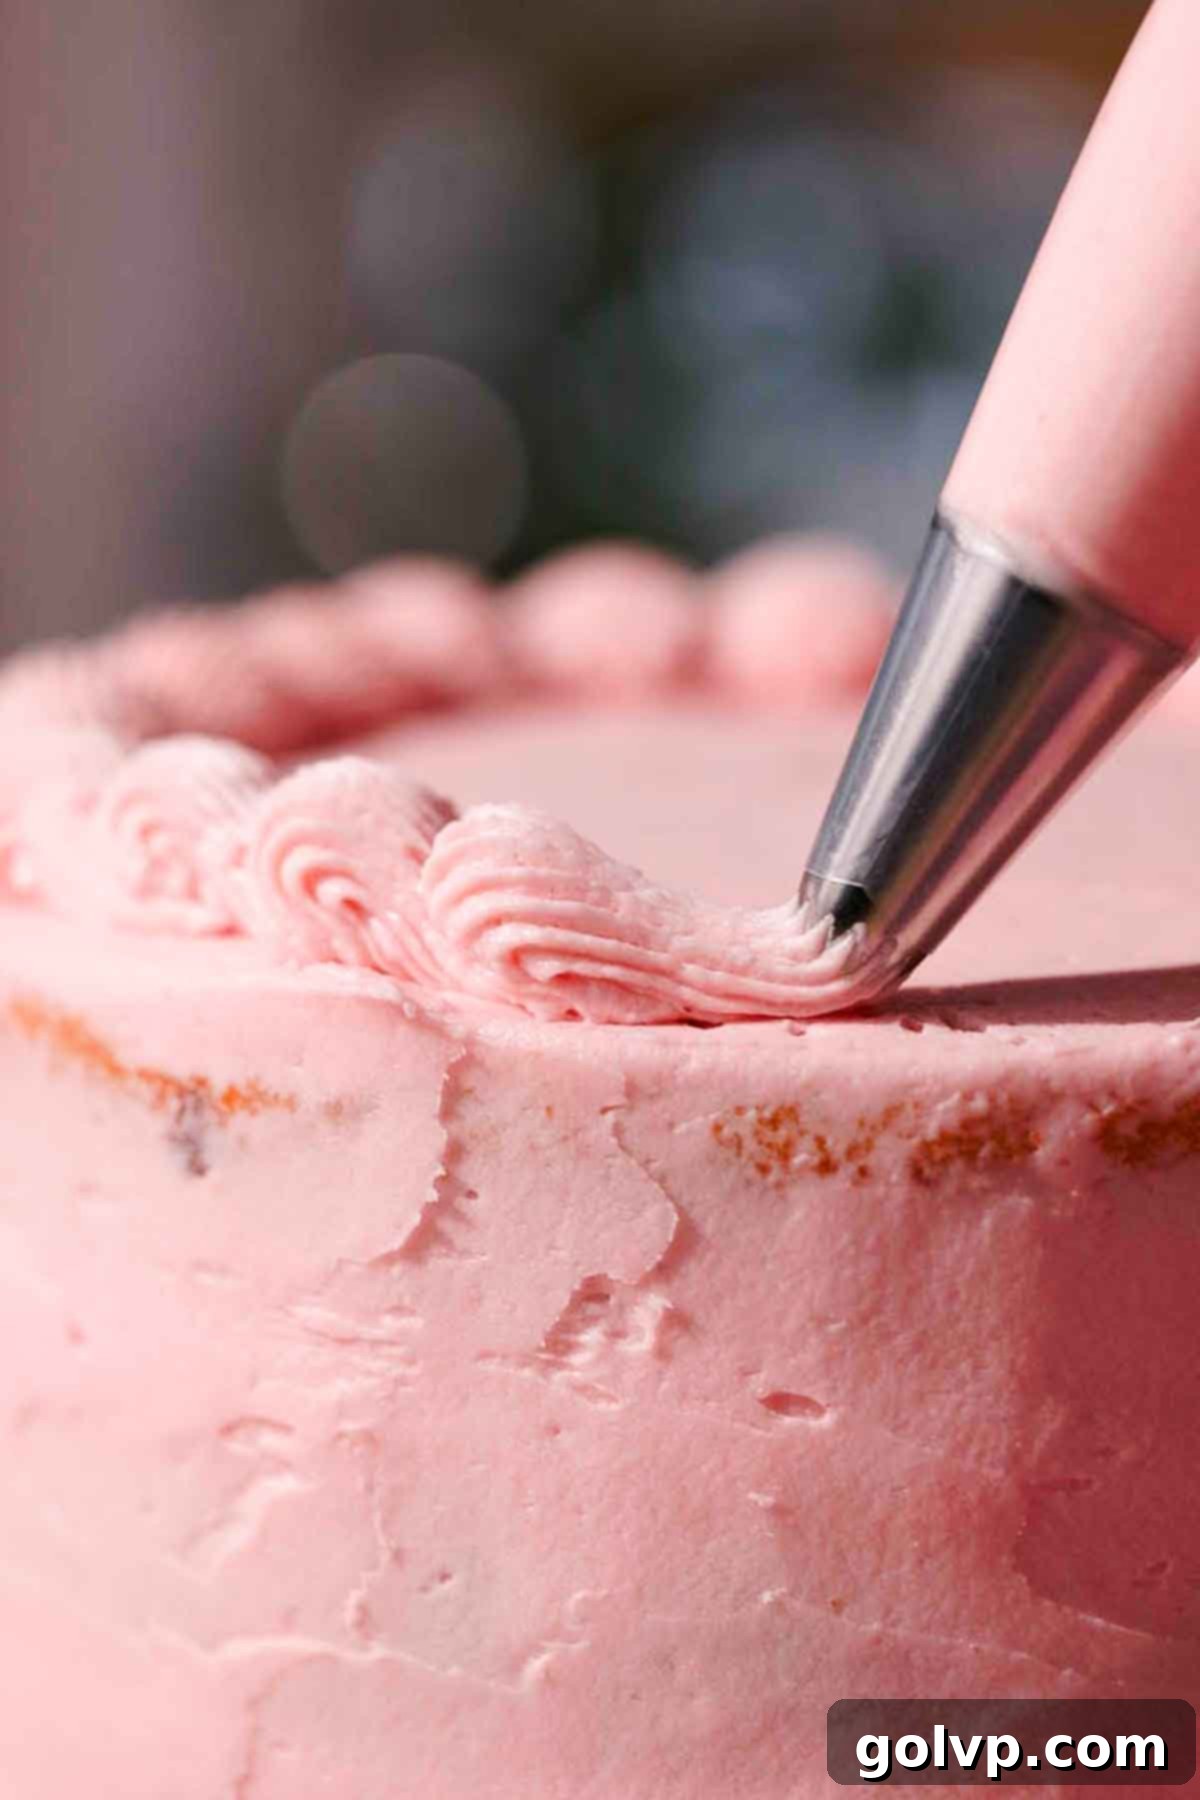
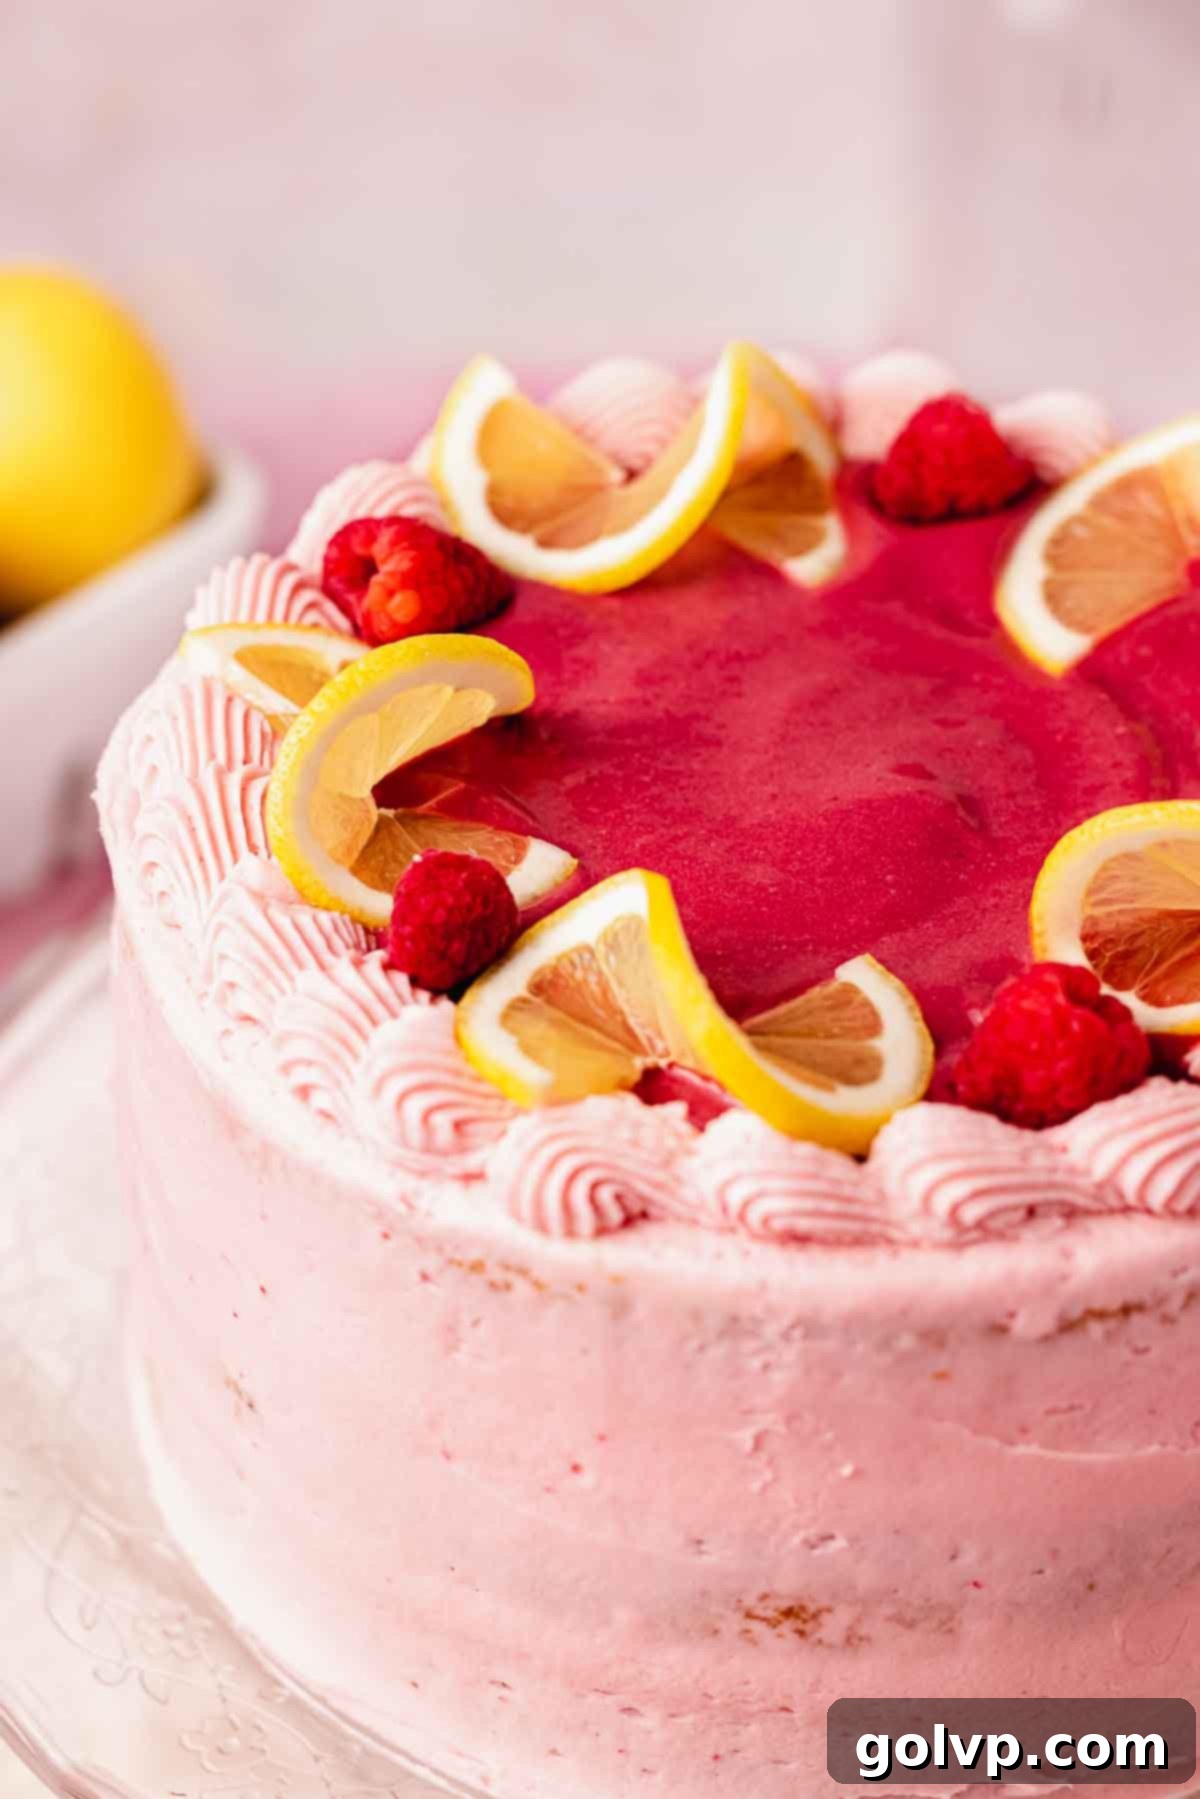
Step 9: Pipe and Fill Top. Using the remaining frosting, piped through a piping bag fitted with an open star tip (or a simple round tip if you’ve snipped off the corner of a Ziploc bag), create a decorative border around the top edge of the cake. This adds an elegant touch and creates another small dam. Fill the center of this piped border with a bit more of the luscious raspberry curd. This not only enhances the flavor but also makes for a stunning presentation.
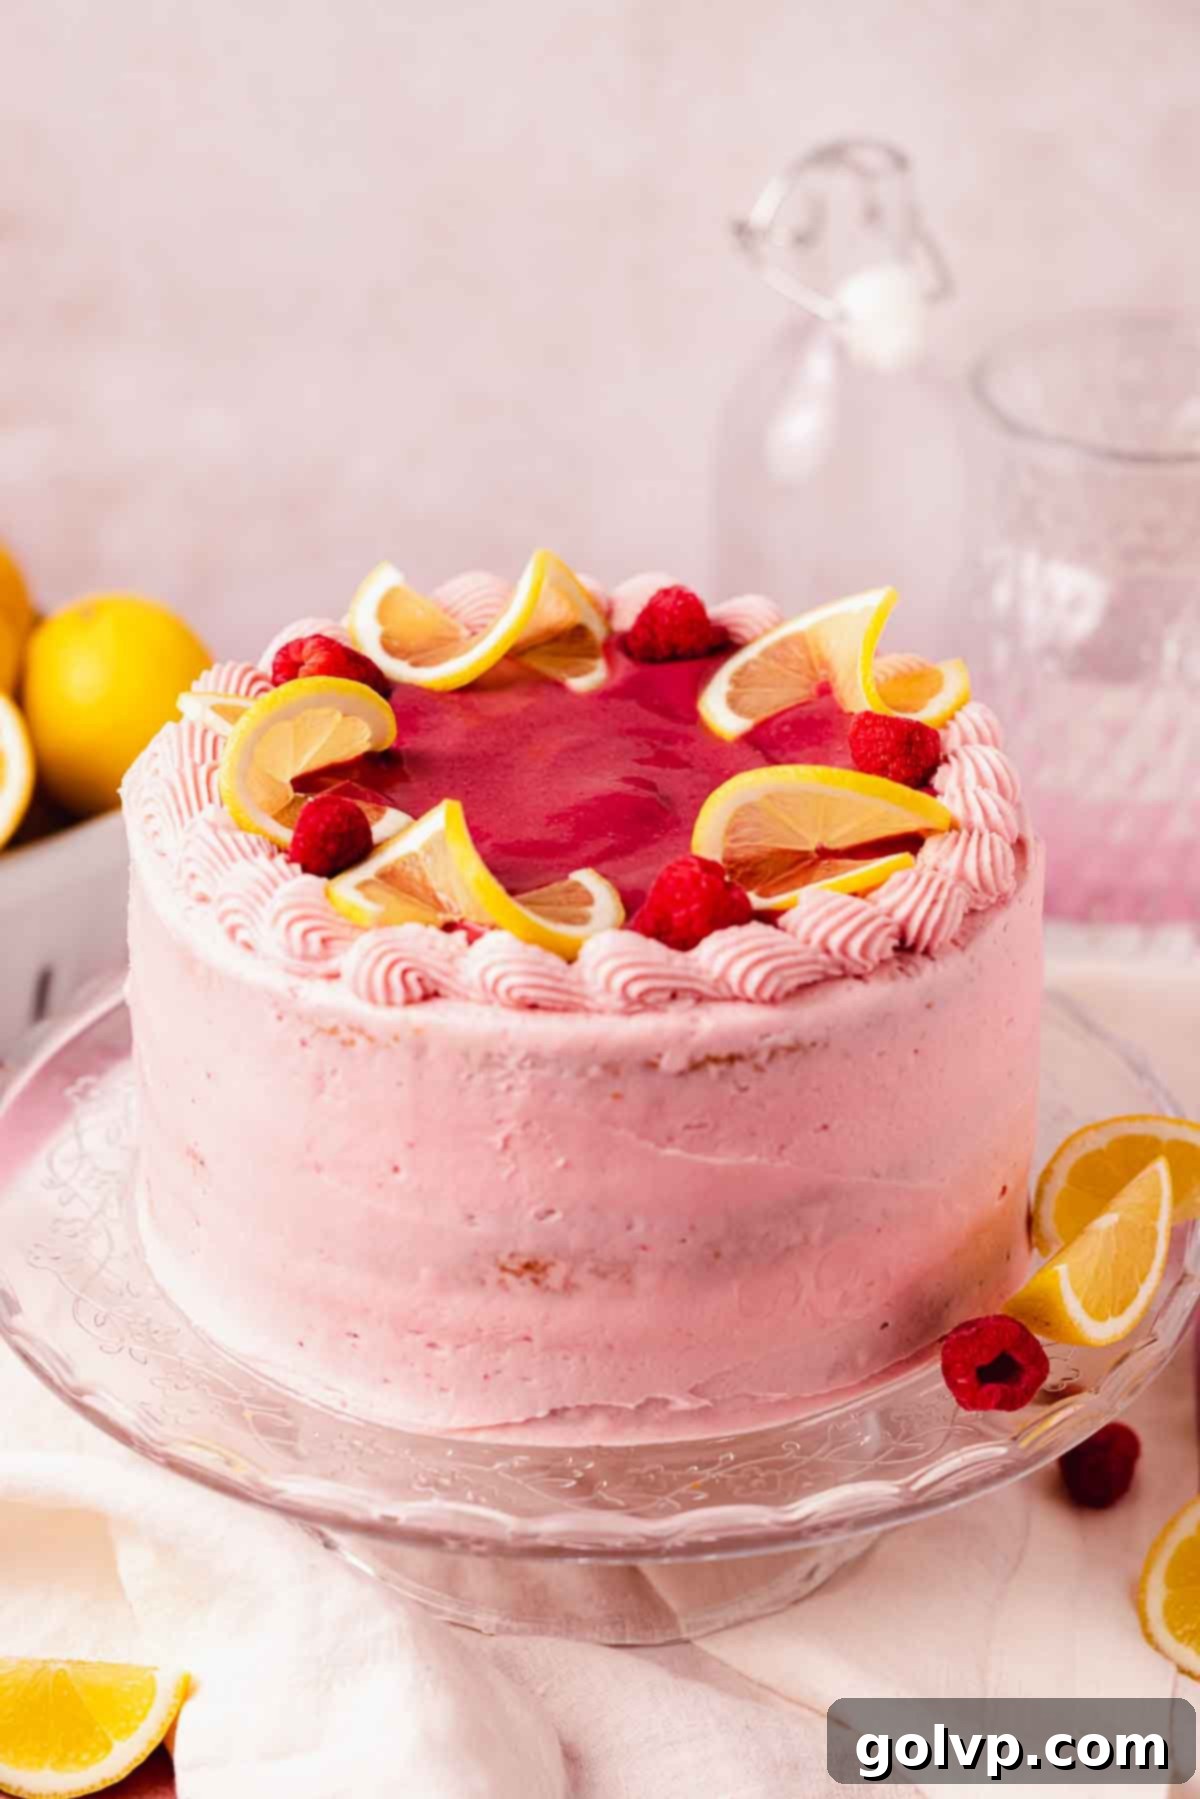
Step 10: Garnish and Serve. Complete your beautiful creation by decorating the top of the cake with fresh lemon slices and a scattering of fresh raspberries. These garnishes add a final flourish of color and freshness. Your exquisite Lemon Raspberry Cake is now ready to be enjoyed! Slice, serve, and savor every delightful bite.
Expert Cake Decorating Tips for a Flawless Finish:
- Filling Control: To avoid any messy leaks, be judicious with the amount of raspberry curd you add between layers. Overfilling is a common mistake that can compromise the cake’s structure. A thinner layer is often sufficient to impart flavor without causing issues. You might have some extra curd left over, which is perfect for serving alongside individual cake slices.
- Frosting Coverage: This recipe provides a generous amount of frosting, enough to fully cover the cake with a smooth, even layer. While I personally appreciate a “naked cake” aesthetic where some of the cake layers peek through, you have the flexibility to apply as much or as little frosting as you desire to achieve your preferred look.
- Serving Temperature: For the best flavor and texture experience, this cake is ideally served at room temperature. Allowing it to sit out for a short period before serving softens the cream cheese frosting, making it wonderfully creamy and enhancing the overall taste.
- Storage Requirements: Due to the cream cheese in the frosting and the fruit curd filling, this cake must be stored in the refrigerator to maintain its freshness and food safety.
- Clean Slices: For impeccably clean slices that showcase the beautiful layers, it’s best to cut the cake while it is still chilled. For an even sharper cut, wipe your knife clean with a warm, damp cloth after each slice.
🥄 Make Ahead and Storage Tips for Convenience
Planning ahead can make baking this lemon raspberry cake a breeze. Here are some smart make-ahead and storage suggestions:
The **raspberry curd** is a fantastic component to prepare in advance. It can be made up to a few days prior to assembling your cake, allowing you to break up your baking tasks. Any leftover curd can be stored in a freezer-safe bag or container and kept in the freezer for up to 3 months, ready for your next culinary adventure. For more in-depth details and tips on making and storing raspberry curd, refer to this dedicated raspberry curd recipe.
Once assembled, the entire **cake needs to be stored in the fridge** due to the perishable ingredients in the frosting and filling. However, for the best taste and texture, it **should be served at room temperature**. Simply take the cake out of the refrigerator about 30-60 minutes before serving to allow the frosting to soften slightly and the flavors to fully develop. Leftovers will remain delicious and keep well in an airtight container in the fridge for up to three days.
You can also prepare the **cake layers a day ahead** of time. Once completely cooled, wrap each cake layer individually and tightly in plastic food wrap to prevent them from drying out. Store these wrapped layers at room temperature overnight, and they’ll be perfectly fresh and ready for assembly the next day.
If you plan to **assemble the cake a day before serving**, store it in the fridge in a cake container or carrier. A dedicated cake container is excellent for protecting the cake from being damaged in the fridge and helps to keep it fresh and moist until it’s time to slice and enjoy.
❔ Secrets to Achieving Soft and Moist Cake Layers
The foundation of an exceptional cake lies in its layers, and these lemon raspberry cake layers are engineered for unparalleled softness and moisture. Here’s how we achieve that perfect texture:
Our recipe ingeniously combines both **butter and vegetable oil** to harness the best of both worlds. Butter is indispensable for imparting that rich, beloved classic flavor that defines a delicious cake. On the other hand, neutral vegetable oil is key to ensuring the cake remains incredibly soft and moist for several days, preventing it from drying out quickly. This dual-fat approach is a technique I also employ with great success in my popular lemon raspberry loaf cake.
A dynamic duo of **buttermilk and sour cream** is utilized to further enhance the moisture and fluffiness of the cake layers. The acidity in these ingredients works to tenderize the cake’s crumb, resulting in a delightfully light and airy texture. Additionally, their inherent tanginess provides a subtle yet crucial acidic counterpoint that brightens and deepens the vibrant lemon and raspberry flavors throughout the cake.
It’s critically important to **avoid overmixing the batter, especially once the flour has been added**. As soon as you add the flour, switch to a gentle folding motion with a spatula. Stop mixing as soon as there are no longer any visible dry streaks of flour. Overmixing develops the gluten in the flour too much, which can lead to a tough, dense, and less enjoyable cake texture.
Finally, always **double-check the freshness and potency of your baking powder and baking soda**. Expired leavening agents are a common culprit for cakes that don’t rise properly or have an undesirable texture. Here’s a quick test you can perform to ensure your baking powder is still active and ready to help your cake reach its full fluffy potential.
✔️ Why Raspberry Curd is the Ultimate Cake Filling
When it comes to cake fillings, our homemade raspberry curd truly stands in a league of its own. It’s more than just a filling; it’s a luscious component that elevates the entire cake experience. This curd is exceptionally creamy, wonderfully tangy, and bursting with an intense, authentic raspberry flavor that far surpasses a simple berry compote.
The careful combination of eggs and butter during its preparation gives the curd a remarkably silky and velvety texture that is utterly irresistible. This rich mouthfeel, coupled with its vibrant fruitiness, makes it the perfect luxurious complement to our moist lemon raspberry cake layers. You’ll quickly discover you’re going to want to put this incredible raspberry curd on absolutely everything!
You’ll likely have a bit of this delectable curd leftover, which is fantastic! It’s incredibly versatile and can be served with a variety of other treats. Try it dolloped over warm lemon poppy seed scones, drizzled on fluffy blueberry lemon ricotta pancakes, spread on toast for a gourmet breakfast, or simply enjoyed straight from the spoon (we won’t tell!).
In fact, the raspberry curd is so sensationally delicious that I’ve dedicated an entire separate recipe to it, recognizing its standalone greatness in this luscious raspberry curd recipe.
If you’re a fan of epic fruit curd cakes, don’t stop here! Be sure to explore other delightful recipes like our creamy strawberry tiramisu and the show-stopping raspberry meringue pie with mile-high meringue.
📖 Lemon Raspberry Cake Recipe FAQs
Yes, absolutely! If you prefer a simpler cake or just want to highlight the cake layers and frosting, you can choose to use only the raspberry cream cheese frosting between the layers instead of adding the raspberry curd filling. The cake will still be delicious.
Certainly! The beauty of baking is customization. You can easily fill this cake with a classic lemon curd for an extra citrus kick. Alternatively, a store-bought raspberry pie filling or even a high-quality raspberry jam can be used. If opting for jam, be mindful that it’s typically much sweeter than curd, so you might want to adjust other sweet elements or serve smaller slices.
Yes, this recipe is adaptable for a sheet cake format! Simply bake the entire batter in a greased and parchment-lined 9″ x 12″ baking pan. You will need to increase the baking time, as sheet cakes are generally thicker. The cake is ready when a toothpick inserted into the center comes out mostly clean with just a few moist crumbs attached. Once cooled, frost the entire sheet cake with the raspberry cream cheese frosting, pipe a decorative border around the edge, and then fill the top center with the luscious raspberry curd.
While I haven’t specifically tested this recipe with other berries, I can’t definitively recommend direct substitutions without knowing the impact on flavor and moisture content. However, if you’re looking for other berry cake options, I do have a fantastic blueberry cake version and a unique lilac lemon cake recipe that you might enjoy trying out.
If your cream cheese frosting becomes too soft or “gloopy,” don’t despair! A common fix is to place the entire bowl of frosting into the refrigerator for 10-15 minutes to allow the butter and cream cheese to firm up slightly. After chilling, beat the frosting again. If it still seems too soft, you can gradually add more sifted powdered sugar, a quarter cup at a time, until it reaches the desired consistency. To re-balance the sweetness from the extra sugar, add a few extra drops of lemon juice. Be cautious not to add too much liquid, as this can ironically make the frosting gloopy again.
Filling leakage is usually caused by two main factors: either you’ve added too much filling between the cake layers, or the frosting border you piped around the edge wasn’t high or thick enough to adequately contain it. It’s important to remember that you only need a thin, even layer of raspberry curd to impart plenty of flavor. When serving, you can always offer extra curd on the side for those who desire more.
🍰 Explore More Delicious Related Recipes
If you loved this lemon raspberry cake, you’ll surely enjoy these other fruity and delightful baking creations from our kitchen:
- Blueberry Birthday Cake
- Lemon Raspberry Loaf Cake with Raspberry Glaze
- Lemon Raspberry Cheesecake
- Lemon Raspberry Bars
Did you bake this delightful recipe? We would absolutely love to hear your thoughts and see your creations! Please take a moment to rate this recipe and share your feedback in the comments section below. Don’t forget to share your beautiful cake on Instagram and tag @flouringkitchen. Follow us on Pinterestfor endless inspiration and more delicious recipe ideas!
📖 Recipe
Lemon Raspberry Cake
MaryEquipment
- electric mixer
- eight inch round baking pans
Ingredients
Raspberry Curd Filling
- 2 large egg yolks
- 2 whole eggs
- ½ cup granulated sugar
- ⅛ teaspoon sea salt
- 2 ½ cups raspberries (10 oz or 300 g) fresh or frozen
- 1 lemon juiced and zested
- ½ cup unsalted butter cold and cut into small cubes
Cake Layers
- 1 lemon zested (you will need the juice later)
- 1 ¼ cup granulated sugar
- ¾ cup unsalted butter softened
- ¼ cup vegetable oil
- ⅛ teaspoon sea salt
- 4 large eggs room temperature
- ½ cup sour cream room temperature
- 1 tablespoon pure vanilla extract
- 3 tablespoons lemon juice freshly squeezed
- 3 ¼ cup all purpose flour 400g
- ½ teaspoon baking soda
- 1 tablespoon baking powder
- ¾ cup buttermilk room temperature
- 1 ½ cups raspberries (6.3 oz or 180 g) fresh or frozen
- 1 tablespoon all purpose flour
Raspberry Cream Cheese Frosting
- ½ cup raspberries (2 oz or 60 g) fresh or frozen (thawed)
- 1 ½ cups unsalted butter softened
- ⅛ teaspoon sea salt
- 5-6 cups powdered sugar
- 4 oz cream cheese
- 1 teaspoon lemon juice freshly squeezed
- 1 lemon sliced (for decorating)
- raspberries fresh, for decorating
Instructions
Raspberry Curd Filling
- In a medium saucepan, combine eggs, yolks, sugar, and salt. Whisk to combine and add raspberries and lemon juice (grated lemon zest optional for more zesty lemon flavor). Stir.2 large egg yolks, 2 whole eggs, ½ cup granulated sugar, ⅛ teaspoon sea salt, 2 ½ cups raspberries, 1 lemon
- Heat on medium low, stirring constantly to prevent it from burning. The mixture will start to simmer and thicken, keep stirring or whisking frequently.
- Once thickened, let it simmer for a few minutes, stirring. Remove from heat and strain it through a metal strainer into a clean, non-metal container. Use a spoon or whisk to help push it through the strainer. This will remove the seeds and create a smooth curd.
- Add butter into the strained curd and stir until melted and smooth. Press a piece of plastic wrap right over the curd’s surface and refrigerate until chilled. It will thicken more as it chills.½ cup unsalted butter
Cake Layers
- Preheat oven to 355°F (180°C). Grease three 8” round baking pans with a cold bit of butter or cooking spray. Line the bottoms with a round of parchment paper.
- In a large bowl or stand mixer, combine sugar and grated lemon zest. Rub the mixture together using your fingers until fragrant and the sugar starts to look damp.1 lemon, 1 ¼ cup granulated sugar
- Add butter, oil, and salt into the lemon sugar mixture. Beat until light and fluffy, scraping down the bowl halfway. This will take a minute or two.¾ cup unsalted butter, ¼ cup vegetable oil, ⅛ teaspoon sea salt
- Add room temperature eggs one at a time, beating well to combine in between and scraping down the bowl. Add vanilla, sour cream, lemon juice, and zest. Beat well to combine.4 large eggs, ½ cup sour cream, 1 tablespoon pure vanilla extract, 3 tablespoons lemon juice
- Sift half of the flour, all of the baking powder, and all the baking soda into the same bowl. Fold until mostly incorporated. Add the buttermilk and sift in the rest of the flour. Fold just until no more dry streaks of flour remain.3 ¼ cup all purpose flour, ½ teaspoon baking soda, 1 tablespoon baking powder, ¾ cup buttermilk
- In a separate bowl, combine raspberries and flour. If using frozen raspberries, do not thaw. Mix to coat and add the raspberries into the batter. Don’t add any dry bits of flour at the bottom of the raspberry bowl into the batter.1 ½ cups raspberries, 1 tablespoon all purpose flour
- Divide evenly into lined baking tins. Use an ice cream scoop or scale to divide evenly. Smooth out the tops and bake. If they don’t all fit in the oven you can place one of the cake layers in the fridge until the others finish baking.
- Bake for 20-25 minutes. Check if they’re ready with a toothpick – it should come out mostly clean with a few crumbs attached. Let cake layers cool for 5 minutes in their pans before running a knife along the outside of the cake to help release and flipping upside down on a cooling rack. Let cool completely.
Raspberry Cream Cheese Frosting
- Smash raspberries with a spoon and push through a sieve to remove seeds. Set the seedless puree aside.½ cup raspberries
- Start off with softened butter, making sure that it isn’t too soft. You should be able to make an indent on the butter with your finger without getting a greasy residue all over it.1 ½ cups unsalted butter
- In a large bowl or stand mixer, beat the butter and salt until light and fluffy. Add sifted powdered sugar, half a cup at a time. Beat until light and fluffy. Scrape down the bowl frequently. Beat until it becomes very light in color and fluffy. This will take about 5-10 minutes.⅛ teaspoon sea salt, 5-6 cups powdered sugar
- Add cream cheese, and beat until light and fluffy. Add the prepared seedless raspberry puree and lemon juice, and beat well.4 oz cream cheese, 1 teaspoon lemon juice
- Using a spatula, fold the frosting to remove any large air pockets and bubbles before frosting. This makes a smoother frosting.
Assembly
- Fill a piping bag fitted with a star tip (or just the end cut off) with the frosting. You can also use a resealable plastic food bag with the end cut off.
- On a cake board or serving plate, place a small dollop of frosting. Place the first cake layer down. Spread a thin layer of frosting on top and pipe a thick border of frosting. The thicker the border, the more insurance you will have that the filling won’t leak through the sides.
- Fill the middle with about ¼ cup of raspberry curd, spreading it out to the frosting border. Don’t add too much filling or the cake will slide around. Add the next cake layer and repeat the process.
- Add the third, top layer of cake. Pop the cake into the freezer for 10 minutes so the frosting sets and the cake is more stable.
- Cover the top and sides with frosting. Make sure you leave some frosting to pipe on top. Smooth the sides down with a metal spatula or cake scraper.
- Pipe the remaining frosting into a border on top of the cake. Fill the middle of the cake with some more raspberry curd. Decorate with fresh lemon slices and raspberries. Enjoy!1 lemon, raspberries
