Irresistible Salted Caramel Blackberry Cake: A Fluffy, Homemade Masterpiece
Jump to Recipe
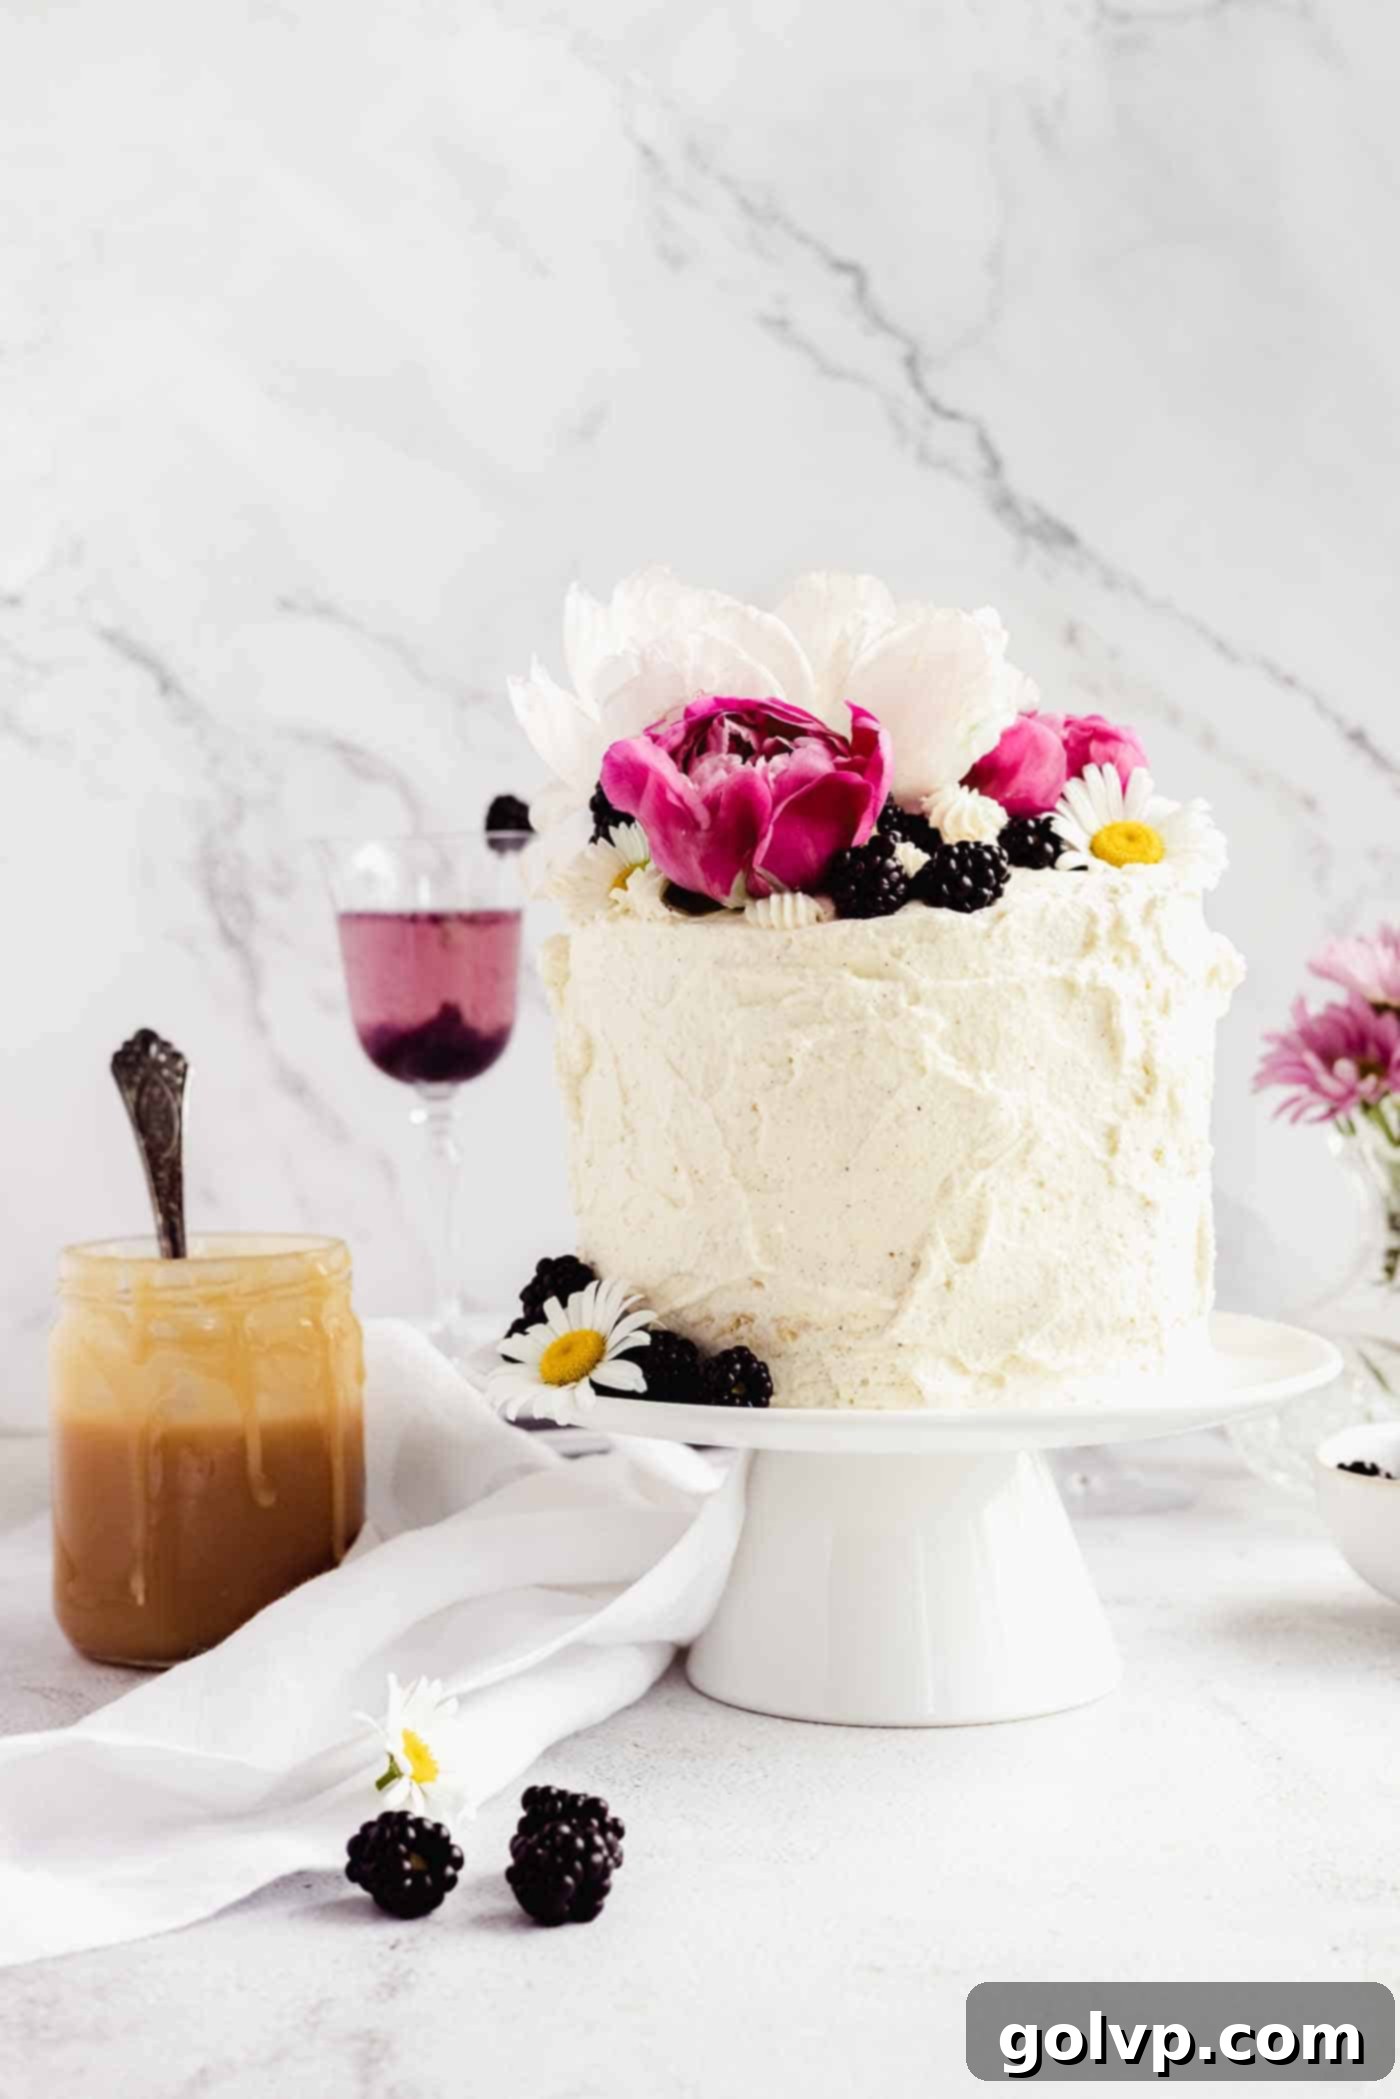
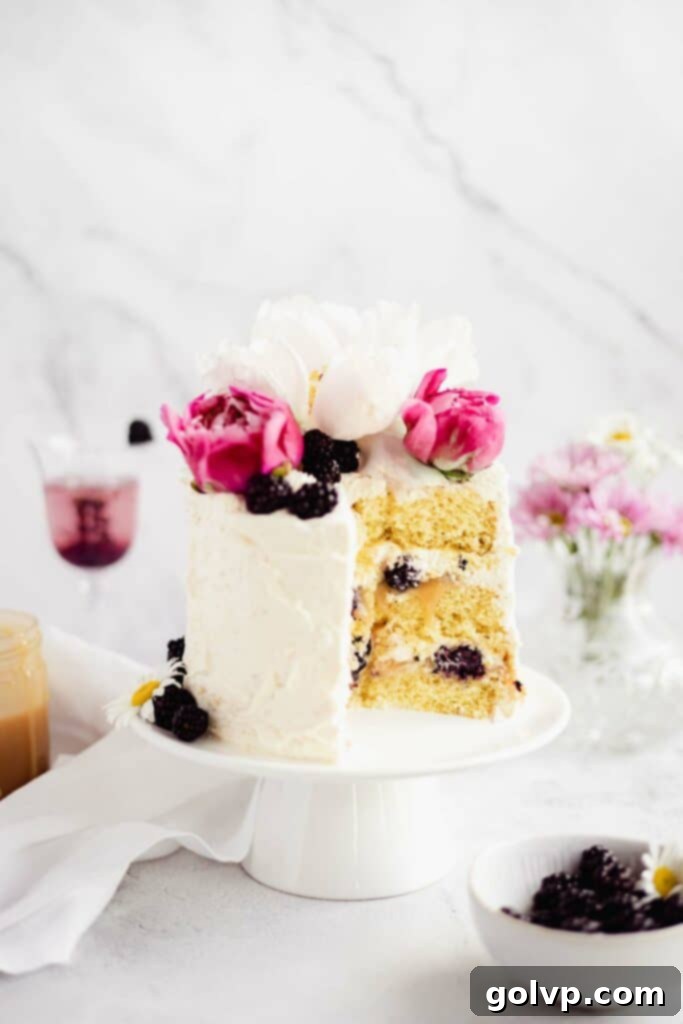
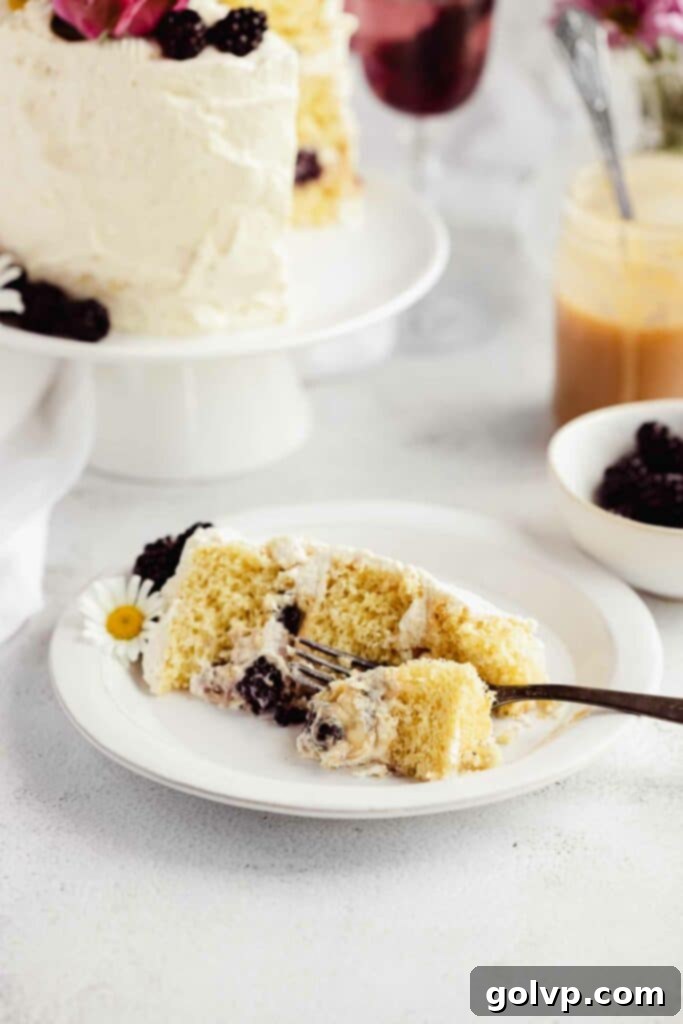
Prepare to fall in love with this truly spectacular salted caramel blackberry cake! Imagine three decadent layers of incredibly light and airy vanilla sponge, generously filled with luscious, homemade salted caramel sauce, and draped in a cloud-like mascarpone whipped cream that’s surprisingly easy to create. Each bite is further elevated by bursts of tangy, fresh blackberries, offering a perfect counterpoint to the sweetness. This cake achieves a flawless flavor balance: the rich saltiness of the caramel, the vibrant tartness of the blackberries, the luxurious creaminess of the mascarpone, and the delicate lightness of the vanilla cake. It’s the ultimate showstopper dessert – elegant, flavorful, and remarkably balanced, without being overly sweet. It’s so good, it has become a cherished annual tradition for my birthday celebrations!
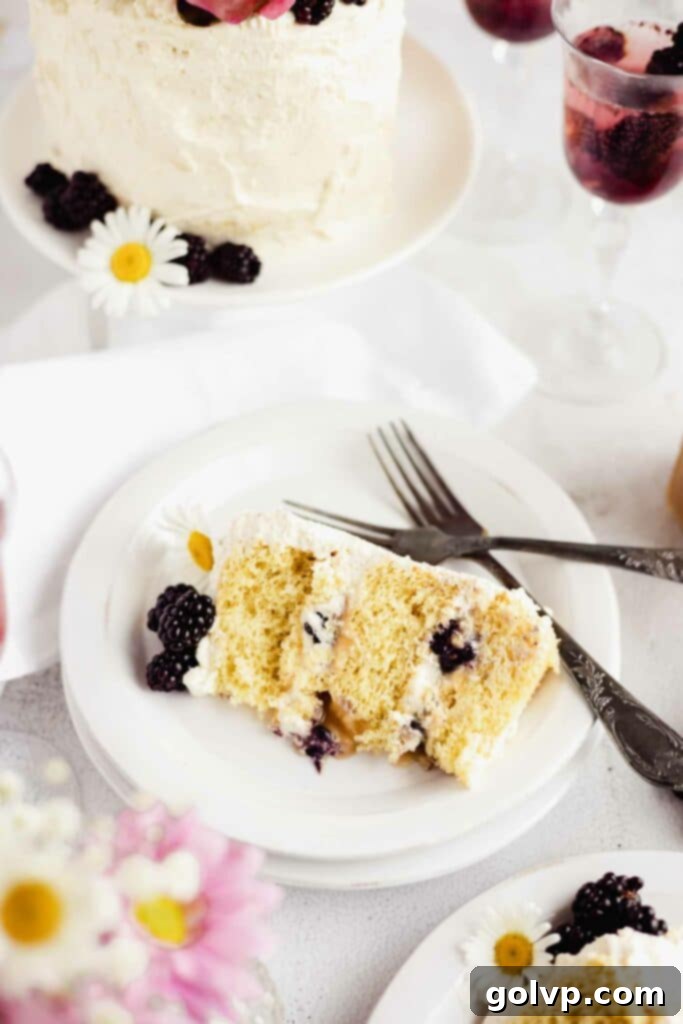
This recipe is designed to yield a beautifully tall, triple-layer 6-inch cake. However, we’ve included options for various pan sizes below the main recipe, ensuring you can bake this delightful treat regardless of the bakeware you have on hand. For the best “oozing caramel” experience, this salted caramel blackberry cake is ideally served on the day it’s assembled. This allows the distinct layers of caramel to remain separate and flow beautifully when sliced. As the cake sits overnight, the salted caramel gradually soaks into the vanilla sponge layers, transforming into an equally delicious, moist, and tender texture, though you won’t get the same dramatic caramel drip. Both ways are absolutely heavenly!
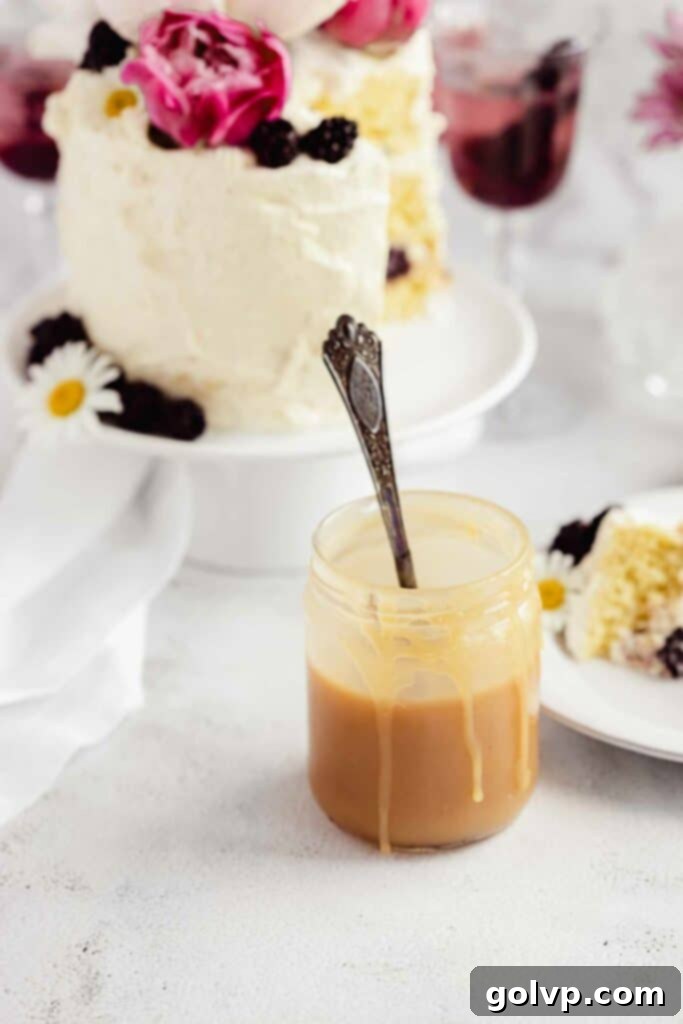
Our comprehensive salted caramel recipe yields a generous batch, making it more robust and easier to perfect than a smaller quantity. You’ll only need about half of the prepared caramel for assembling this cake, leaving you with a delightful surplus. Don’t worry, this extra liquid gold won’t go to waste! You can spoon additional caramel over each cake slice when serving, or store the remaining sauce in a sealed jar in your refrigerator for up to two weeks. It’s fantastic drizzled over other desserts, stirred into your morning coffee, topping a scoop of ice cream, or simply enjoyed straight from the spoon – we won’t tell!
Achieving the Ultimate Fluffy Vanilla Sponge
The secret to the unbelievably light and airy sponge in this blackberry salted caramel cake lies in the “all-in-one” method. This technique simplifies the baking process immensely, as there’s no need to separate egg yolks and whites and beat them individually. It’s a true time-saver and means one less bowl to wash – a win-win in any kitchen! While a stand mixer with a whisk attachment is the easiest and most efficient way to achieve the perfect consistency, an electric hand mixer will also work wonderfully. Just be aware that it might take a few extra minutes to beat the eggs and sugar to the desired thick ribbon stage.
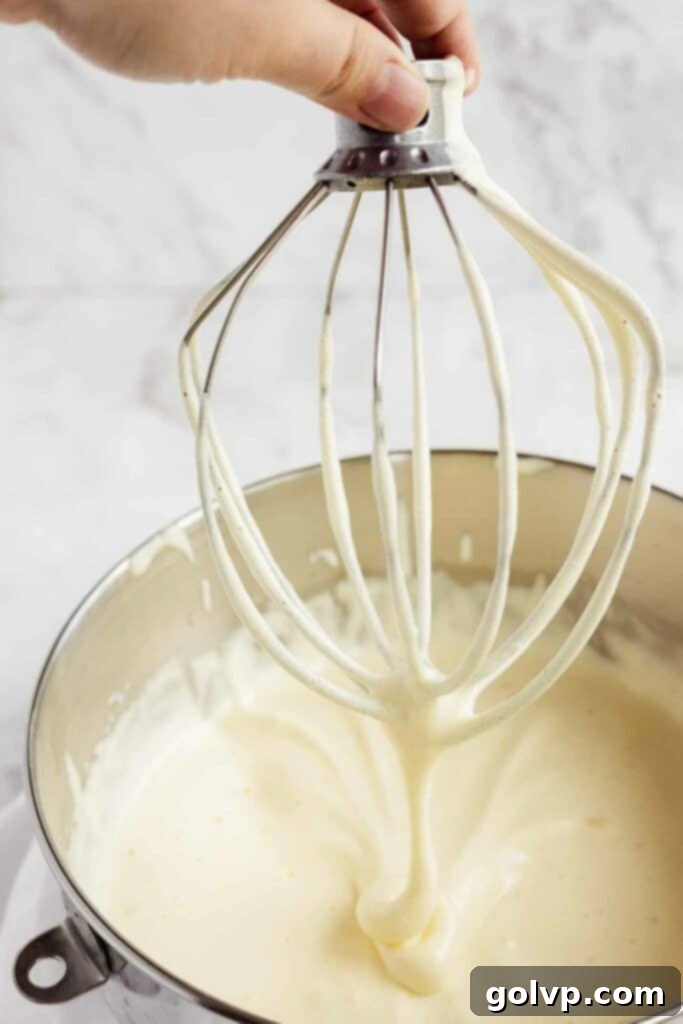
You’ll know your eggs are perfectly beaten when they have tripled in volume, becoming pale yellow, thick, and incredibly foamy. When you lift the whisk, the batter should fall back into the bowl in a distinct “ribbon.” If you can draw a figure eight with this ribbon of batter, and it holds its shape on the surface for about 10 seconds before slowly melting back into the rest of the mixture, you’ve hit the sweet spot. If it disappears too quickly, continue beating for another minute or two and re-test. This careful beating incorporates a significant amount of air, which is crucial for the cake’s signature fluffiness.
Once the eggs are perfectly aerated, the next critical step is gently folding in the dry ingredients. Sift the flour and baking powder directly over the beaten eggs. Using a spatula, carefully fold them in using a gentle, upward motion. The key is to stop folding as soon as no dry streaks of flour are visible. Overmixing at this stage will deflate the precious air you’ve just incorporated, resulting in a denser cake. Speed is also essential here: once the batter is mixed, pour it immediately and evenly into your prepared cake pans and get them into the preheated oven. Working quickly helps maintain the batter’s light structure, ensuring your vanilla sponge layers bake up as light and fluffy as possible. Remember to use room temperature eggs for optimal volume and stability!
Mastering the Art of Salted Caramel Sauce
This recipe provides clear, detailed instructions for crafting a truly luscious, golden, and perfectly salted caramel sauce from scratch. As mentioned, the recipe yields a generous amount – you’ll only need about half for your cake, leaving you with an excellent supply for future desserts or those delightful morning caramel lattes. We purposefully designed the recipe for a larger batch because it’s significantly more forgiving and easier to make successfully. A larger volume of sugar syrup heats more evenly, reducing the risk of burning or crystallizing, making it foolproof even for novice caramel makers.
While you absolutely can make this irresistible salted caramel sauce without a candy thermometer, using one can be a real game-changer. It eliminates the common guesswork and anxiety that often accompanies caramel making: “Did I burn it?”, “Is it underdone and won’t set?”, or “What strange reaction is happening in my pot?!” Our instructions meticulously guide you through the precise temperatures to achieve for perfect caramel, alongside crucial visual cues like color changes, foaming, and subtle wisps of smoke. This dual approach ensures that whether you have a thermometer or rely solely on your keen eye, you’ll be able to create a flawless, rich caramel sauce every single time.
Essential Tips for Preventing Caramel Crystallization
Crystallization can be a common frustration when making caramel, turning your smooth, golden liquid into a grainy mess. But with a few simple tricks, you can confidently prevent it and achieve silky-smooth results:
- **The Steam Bath Method:** Once your sugar, honey (if using), and water mixture reaches a gentle simmer, give it one final stir with a clean spoon. Immediately cover the pot with a tight-fitting lid and set a timer for exactly 1 minute. The steam trapped under the lid will condense and wash down any sugar crystals clinging to the sides of the pot, dissolving them back into the syrup. This ingenious step eliminates the need to meticulously brush down the sides of the pan with a wet pastry brush, saving you effort and ensuring a smoother process. After this minute, remove the lid and **do not stir the caramel again**. Just let it cook undisturbed.
- **Caramel’s Solo Performance:** This is a tip I learned from personal experience: caramel is a bit of a diva and prefers to be the sole focus on the stovetop! Avoid cooking anything else that might sputter or introduce any liquid particles into the caramel pot. I’ve had batches crystallize for no apparent reason, only for subsequent attempts to turn out perfectly once I cleared everything else from the stove. Give your caramel its dedicated space and attention.
- **Impeccable Cleanliness:** Ensure all your pots, pans, and utensils are spotlessly clean. Even the smallest sugar crystal or food particle can act as a “seed” for crystallization, causing the entire batch to seize up. Take a moment to wipe down your equipment thoroughly before you begin.
- **The Inverting Power of Lemon Juice (Optional):** For an extra layer of protection against crystallization, consider adding an optional ½ teaspoon of lemon juice at the very beginning of the cooking process. Lemon juice, an acid, works by breaking down some of the sucrose into glucose and fructose, effectively “inverting” the sugars. This creates a mixture of different sugar molecules that are less prone to interlocking and forming crystals, making your caramel more stable and smooth.
Troubleshooting: What if My Caramel Crystallized?
Even with the best precautions, sometimes caramel can still crystallize. Don’t despair! There are often ways to salvage it. For a deeper dive into fixing grainy caramel, this excellent article offers valuable insights: How to Fix Grainy Caramel Sauce.
If your caramel begins to crystallize after you’ve already added the cream and butter, the solution is often straightforward. Simply continue to heat the caramel gently over low heat, stirring continuously, until the sugar crystals dissolve again into the liquid. The key is patience. You might be surprised to find that once it melts down, the caramel will return to its smooth, luscious consistency, and you won’t notice any difference in flavor or texture in the final product!
Explore More Fruity Delights from My Kitchen:
- Mango Mascarpone Roll Cake – A tropical twist on a classic, perfect for a light and fruity dessert.
- Strawberry Cupcakes with White Chocolate Mousse Frosting – Indulgent and beautiful, these cupcakes are a dream for strawberry lovers.
- Blackberry Buttermilk Muffins with Crumble Topping – A delightful treat for breakfast or brunch, bursting with fresh blackberry flavor.
Ready to Bake Your Masterpiece!
Vanilla Sponge Cake
- Begin by preheating your oven to 180°C (350°F). Prepare three 6-inch round cake pans by lining their bottoms with parchment paper. For alternative pan sizes and adjustments, please refer to the notes section further down this page.
- Into a meticulously clean bowl of a stand mixer (or a large bowl if using an electric hand mixer), crack the six large, room-temperature eggs. Add the ¼ teaspoon of salt. With the whisk attachment, begin mixing on high speed. Gradually, in a slow, steady stream, pour the ⅔ cup of granulated sugar into the running mixer. Continue to beat the mixture on high speed. The eggs will dramatically increase in volume, becoming very pale, thick, and incredibly foamy. This process typically takes between 6 to 8 minutes in a stand mixer, and potentially up to 5 minutes longer with a handheld mixer. You’ll know the mixture has reached the perfect “ribbon stage” when you can lift the whisk and draw a figure eight with the falling batter that remains visible on the surface for approximately 10 seconds before slowly dissolving. If it disappears faster, continue beating until the desired consistency is achieved. Finally, gently mix in the ½ teaspoon of pure vanilla extract.
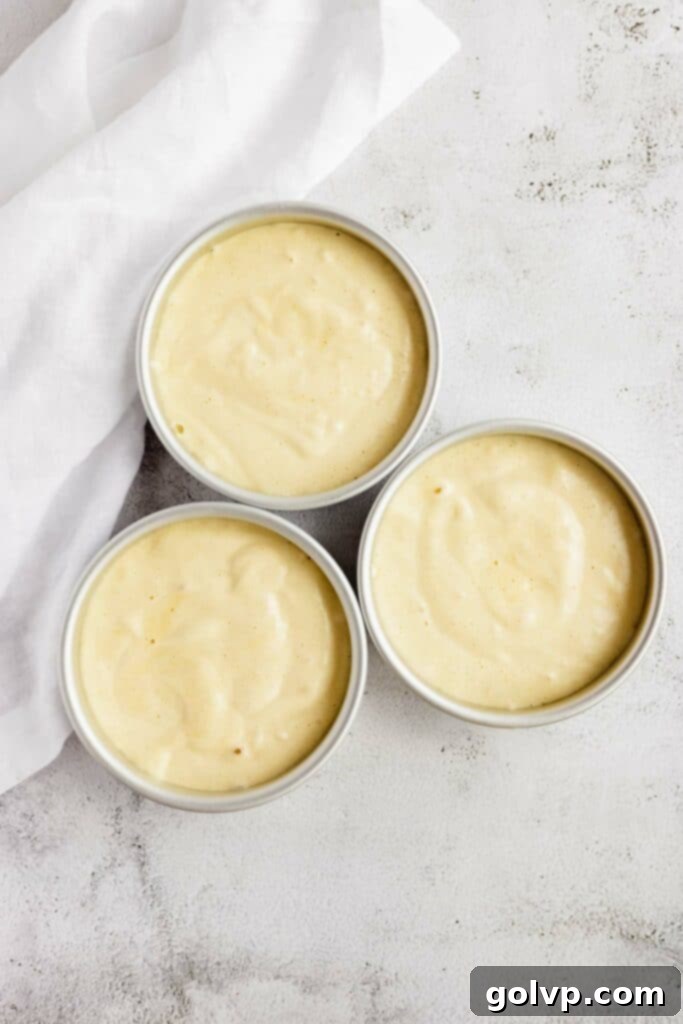
- Next, carefully sift the 1 cup of all-purpose white flour (120 g) and ½ teaspoon of baking powder directly over the beaten egg mixture in the bowl. Using a wide rubber spatula, delicately fold the dry ingredients into the egg mixture. Employ a gentle, upward motion to preserve the air in the batter. Stop folding immediately as soon as you no longer see any streaks of dry flour. Overmixing will cause the sponge to become dense. Promptly and evenly divide the airy batter among your three prepared baking pans.
- Carefully place the cake pans on the middle rack of your preheated oven. Bake for 18-20 minutes. Begin checking for doneness at the 18-minute mark. The sponge layers are ready when a wooden toothpick inserted into the center of a cake comes out clean, with no wet batter clinging to it.
- Once baked, remove the cake layers from the oven and allow them to cool completely within their pans on a wire rack. These vanilla sponge layers can be prepared a day in advance. Once cool, cover the pans tightly with plastic wrap and store them in the refrigerator. When you’re ready to assemble the cake, gently slide a thin knife or offset spatula around the edges of each sponge layer to loosen it, then invert the pan to release the cake. Carefully peel off the parchment paper from the bottoms.
Homemade Salted Caramel Sauce
- Plan ahead! It is crucial to make the salted caramel sauce at least several hours before you intend to assemble your cake, as it requires ample time to cool completely to room temperature and thicken to the right consistency.
- In a large, heavy-bottomed saucepan, combine the 2 cups of granulated sugar with ½ cup of water. Place the saucepan over medium-low heat, stirring continuously until the sugar granules have mostly dissolved into the water. Once dissolved, increase the heat to medium and bring the sugar mixture to a gentle simmer.
- As soon as it simmers, cover the pot with a tight-fitting lid for exactly one minute (using a timer is highly recommended!). After one minute, remove the lid. The trapped steam will have effectively dissolved any sugar crystals clinging to the sides of the pan, preventing crystallization without the need for a pastry brush. **It is critically important not to stir the caramel after this step.** Let it cook undisturbed.
- If you have a candy thermometer, carefully insert it into the caramel mixture, ensuring the tip does not touch the bottom of the pan. Continue to cook the syrup without stirring until it reaches a temperature between 300-310°F (149-154°C). If you are not using a thermometer, you’ll rely on visual cues: look for a deep, rich amber color, the mixture will begin to foam slightly, and you might notice faint wisps of smoke rising from the surface. These are all signs that your caramel is reaching perfection.
- Immediately remove the hot sugar syrup from the heat. Carefully, yet swiftly, add the ½ cup of cubed, room-temperature unsalted butter. Whisk gently but thoroughly to incorporate the butter. Be prepared for the mixture to bubble up and triple in size dramatically; this is why using a large pot is essential for safety. Once the butter is mostly incorporated, pour in the 1 cup of heavy cream (at least 35% fat) and stir in the ½ teaspoon of sea salt. Continue whisking until the mixture is smooth.
- Return the saucepan with the caramel back to the stove over low heat. Heat just until the mixture returns to a gentle simmer, stirring gently. This brief re-heating helps ensure everything is fully combined. Remove from heat immediately and carefully pour the hot caramel into a clean, heat-proof glass jar. Allow it to cool completely to room temperature. The sauce will appear quite thin when hot, but it will significantly thicken as it cools.
Dreamy Mascarpone Whipped Cream
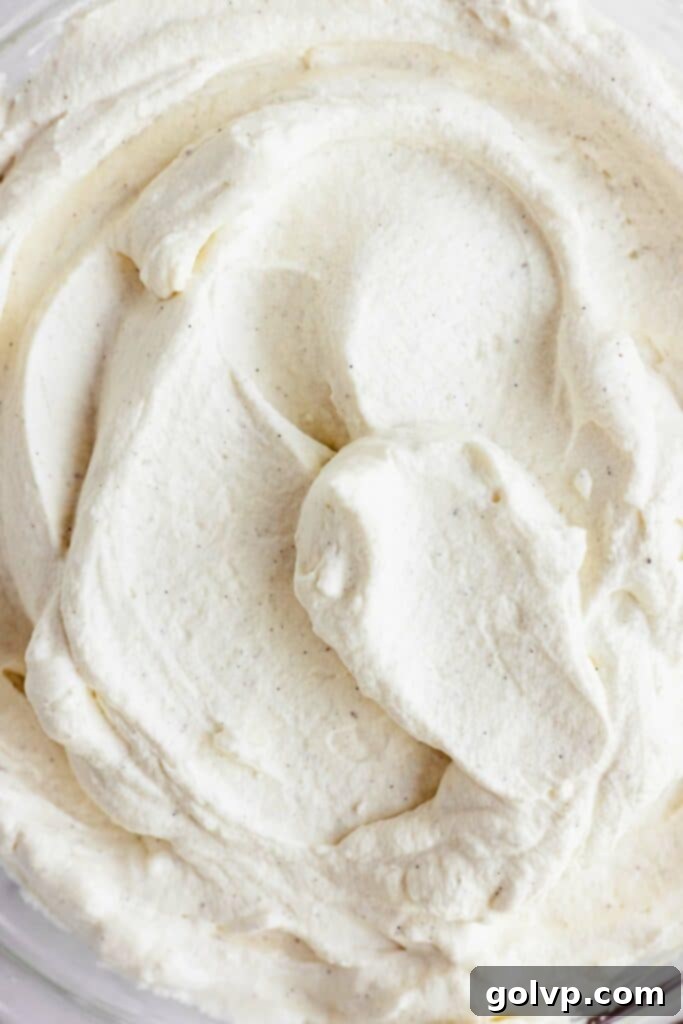
- In the bowl of a stand mixer fitted with the whisk attachment (or using a large bowl and an electric hand mixer), combine the 3 cups of cold whipping cream, ⅔ cup of powdered sugar, and 2 teaspoons of vanilla bean paste (or 1 teaspoon of pure vanilla extract). Whip on medium-high speed until soft peaks form. Next, add the ⅔ cup (120g) of softened mascarpone cheese. Continue whipping until the cream becomes thick, stiff, and holds its shape beautifully. Be vigilant and avoid over-whipping, as mascarpone cream can quickly turn grainy or even separate into butter if beaten for too long. Once perfect, refrigerate the whipped cream until you are ready to assemble the cake to keep it firm.
Cake Assembly: Layer by Layer
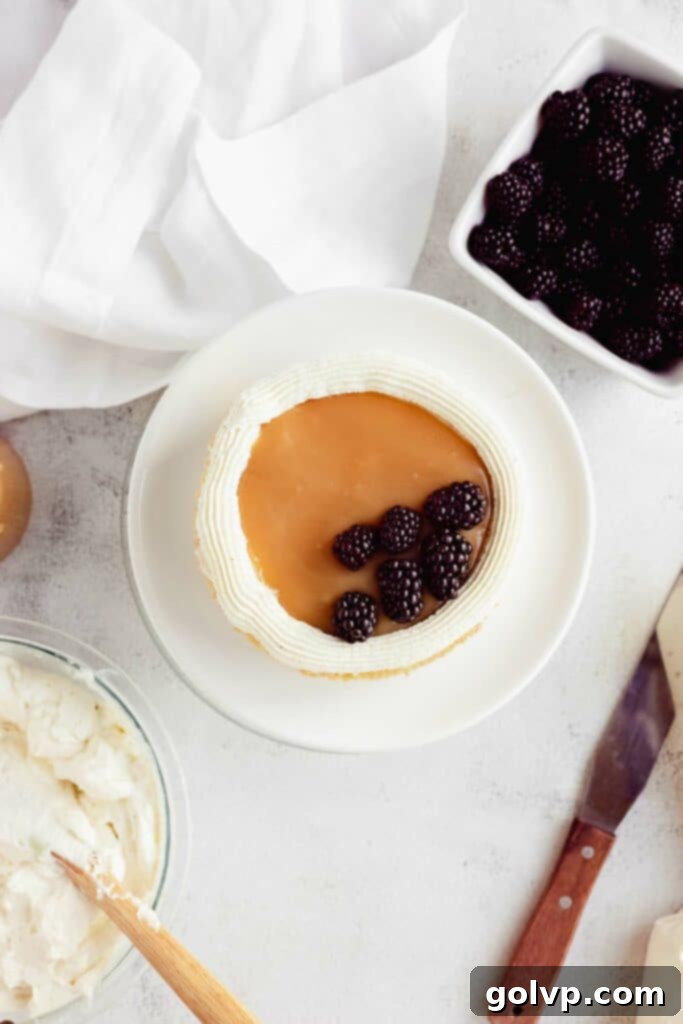
- To begin assembly, place a small dollop (about a tablespoon) of mascarpone frosting onto your serving plate or cake board. This acts as an anchor to prevent the cake from sliding. Carefully place your first cooled vanilla sponge layer on top. Using a piping bag fitted with a large round piping tip (or a large zip-top bag with a corner snipped off), pipe a generous border of mascarpone frosting around the entire circumference of the cake layer. This creates a dam to hold the luscious caramel filling. Inside this frosting border, spread a thick, even layer of your homemade salted caramel sauce. For a smooth application, try to use one continuous motion with your spoon or offset spatula, avoiding lifting it off the sponge as much as possible. Gently press whole, fresh blackberries into the surface of the caramel. Finally, cover this layer with a thick, even layer of mascarpone frosting.
- Carefully place the second cake layer on top of the frosted first layer, pressing down gently but firmly to secure it. Repeat the layering process: pipe a frosting border, spread a thick layer of salted caramel, press in fresh blackberries, and cover with another thick layer of mascarpone frosting. For the final layer, place the third cake sponge on top, flipping it so that the flat bottom side faces upwards. This creates a perfectly flat top surface for frosting.
- Now for the outer coating: using a long metal spatula or a bench scraper, spread the remaining mascarpone frosting all around the sides and top of the cake. To achieve a smooth “crumb coat” and prevent cake crumbs from showing through the final layer of frosting, try to spread the frosting in one continuous motion, minimizing how often you lift the spatula from the cake surface. Once the entire salted caramel blackberry cake is frosted, use your spatula or bench scraper to smooth out the sides and top, achieving a clean finish. You can now lift your spatula off the cake as needed to refine the smoothness.
- To complete your masterpiece, decorate the top of the blackberry caramel cake with additional fresh blackberries. For an extra touch of elegance, edible flowers can be arranged beautifully on top (this step is optional). Slice your cake and serve immediately, offering an extra drizzle of the leftover salted caramel sauce for those who desire more indulgence! Keep any remaining cake refrigerated until ready to enjoy. While it can be stored in the fridge for up to three days, this cake is truly at its peak and offers the most satisfying caramel “drip” on the day it is assembled. As it sits longer, the caramel will slowly seep into the sponge layers, creating a wonderfully moist texture, which is still incredibly delicious.
Happy baking, and enjoy every delightful bite! xx
Did you bake this incredible Salted Caramel Blackberry Cake? I would absolutely love for you to rate this recipe and share your thoughts and experiences in the comments section below! Your feedback is invaluable.
Don’t forget to share your beautiful creation on Instagram and tag @flouringkitchen so I can see and celebrate your baking success!
📖 Recipe
Salted Caramel Blackberry Cake
Mary
Pin Recipe
Shop Ingredients
Equipment
-
stand mixer or electric hand mixer
-
three 6″ round pans (see alternatives below recipe)
-
long metal spatula or bench scraper for smoothing down sides
-
candy thermometer (optional)
Ingredients
Vanilla Sponge
- 6 large eggs room temperature
- ¼ teaspoon salt
- ⅔ cup granulated sugar
- ½ teaspoon pure vanilla extract
- 1 cup all-purpose white flour (120 g)
- ½ teaspoon baking powder
Salted Caramel Sauce
- 2 cups granulated sugar
- ½ cup water
- 1 cup heavy cream (at least 35%)
- ½ cup unsalted butter cubed, room temperature
- ½ teaspoon sea salt
Mascarpone Whipped Cream
- 3 cups whipping cream
- ⅔ cup powdered sugar
- 2 teaspoon vanilla bean paste substitute with 1 teaspoon pure vanilla extract
- ⅔ cup mascarpone cheese (120 g)
- 1 pint blackberries (475 g)
- edible flowers to decorate, optional
Shop Ingredients on Jupiter
Instructions
Vanilla Sponge
-
Preheat oven to 180°C (350°F). Line the bottoms of three 6” round pans with parchment paper. See below recipe for alternative pans.
-
Crack the eggs into a clean bowl of a stand mixer. Add the salt and mix on high speed with the whisk attachment. Gradually pour the sugar into the stand mixer while it is running. The eggs will increase in volume and get very foamy. This may take 6-8 minutes. You will know it is ready when you can make a figure eight from the ribbon falling off the whisk onto the rest of the batter. The ribbon should sit on top of the batter for about 10 seconds before dissolving. If it dissolves faster than 10 seconds, continue to beat the eggs. If using an electric handheld mixer, this process may take up to 5 minutes longer. Add vanilla extract.6 large eggs, ¼ teaspoon salt, ⅔ cup granulated sugar, ½ teaspoon pure vanilla extract
-
Sift the flour and baking powder into the bowl with the beaten eggs. Using a spatula, carefully fold the flour into the egg mixture. Be gentle so as not to deflate the eggs. Stop folding as soon as you stop seeing streaks of flour in the batter. Divide the batter evenly into the prepared baking pans.1 cup all-purpose white flour, ½ teaspoon baking powder
-
Place the layers in the middle of your preheated oven. Bake for 18-20 minutes, checking for doneness at 18 minutes. It is ready once a toothpick inserted in the center comes out clean.
-
Remove from oven and let cool completely in the pans. The vanilla sponge can be made the day before. Cover the pans with plastic wrap and store in the fridge. When ready to use, slide a knife or spatula along the edge of the sponge and flip over to release the bottom. Peel the parchment off the bottoms.
Salted Caramel Sauce
-
In a large saucepan, combine the sugar and water. Slowly heat the mixture on medium low, stirring until the sugar mostly dissolves. Once the sugar dissolves, increase the temperature to medium and bring the sugar mixture to a simmer.2 cups granulated sugar, ½ cup water
-
Cover the pot with a tight-fitting lid for exactly one minute (use a timer) and then remove the lid. This helps dissolve the sugar crystals on the sides of the pan so that you don’t need to brush the sides with water. This step is very important as it prevents your caramel from crystallizing. Do not stir after this step.
-
Insert a candy thermometer into the pot, making sure it doesn’t touch the bottom. Heat the mixture to 300-310°F (149-154°C). Visual cues to look out for are a deep amber colour, slight foaming, and a few wisps of smoke.
-
Remove the sugar syrup from the heat and carefully add in the butter. Whisk carefully to incorporate. The mixture will bubble and triple in size, so it is important to have a large enough pot and to be very careful. Add the cream and salt.1 cup heavy cream (at least 35%), ½ cup unsalted butter, ½ teaspoon sea salt
-
Put the caramel back onto the heat and heat just until it comes back to a simmer. Remove from heat and carefully pour into a glass jar and let cool to room temperature.
Mascarpone Whipped Cream
-
In a stand mixer with the whisk attachment or in a large bowl with electric hand mixer, whip the cream, powdered sugar, and vanilla paste until soft peaks. Add the softened mascarpone and whip until the cream is thick and stiff. Do not over whip or it will turn into butter. Refrigerate until ready to use.3 cups whipping cream, ⅔ cup powdered sugar, ⅔ cup mascarpone cheese, 2 teaspoon vanilla bean paste
Assembly
-
On a large plate or cake board, spread a tablespoon of mascarpone frosting. Place the first cake layer on a large plate or cake board. With a pastry brush, brush a few tablespoons of the simple syrup onto the layer. Using a piping bag fitted with a large piping tip or a large zip top bag with the end cut off, pipe a border of frosting around the edge of the later. Spread a thick layer of caramel into the center. It helps to use one continuous motion, without lifting your spoon off of the sponge. Press whole blackberries into the surface. Repeat with the rest of the layers, caramel, frosting, blackberries, and the last cake layer on top (flipped so the bottom side is up).1 pint blackberries
-
Spread the remaining frosting all around the cake with a long metal spatula or a bench scraper. To prevent crumbs showing through the frosting, spread the cream in one continuous motion without lifting the spatula off the cake. Once the cake is fully frosted, smooth out the sides. You can lift your spatula off of the cake when smoothing.
-
Decorate the cake with more blackberries and edible flowers. Slice and serve with an extra drizzle of caramel. Keep the cake refrigerated until ready to eat. It can keep in the fridge for up to three days, but is best enjoyed the day that it is made.1 pint blackberries, edible flowers
Notes
For convenience and to break down the baking process, both the vanilla cake layers and the salted caramel sauce can be prepared a day in advance. Store the cooled cake layers, tightly wrapped in plastic, in the refrigerator. The cooled caramel sauce should be kept in a sealed jar in the fridge. If the caramel becomes too thick after refrigeration, gently warm it slightly (either in the microwave in short bursts or in a warm water bath) until it loosens to a pourable consistency.
This layered cake truly shines when served on the day it is assembled. At this point, the caramel retains its liquid, “oozing” quality, creating distinct, luscious pools when sliced. As the cake rests longer, the caramel will gradually soak into the sponge layers, making them incredibly moist and flavorful – an equally delicious experience, though the visual “drip” will be less pronounced.
Alternative Pans and Baking Adjustments:
- **Three 7-inch round pans:** Your cake layers will be slightly thinner and may bake a little faster. Start checking for doneness at 17 minutes. Fill and stack following the rest of the recipe instructions.
- **One 9×13-inch pan:** Bake for 18-20 minutes. Once cooled, you can slice the cake horizontally into two 9×7.5-inch layers for stacking. Proceed with filling and assembly as described. Alternatively, you can prepare this as a sheet cake: simply spread the cooled cake with caramel, mascarpone frosting, and blackberries, finishing with another generous drizzle of caramel.
- **Two 8-inch round pans:** These layers will be thicker than the 6-inch pans but thinner than a single 9-inch. Bake for approximately 18-20 minutes. Fill and stack according to the main recipe.
- **One 9-inch round pan:** Bake for 19-21 minutes. Once cooled, carefully slice the single cake horizontally to create two round layers. Then, fill and stack as per the recipe.
I’m short on time and don’t want to make homemade caramel. What can I use?
While this recipe guides you through making homemade salted caramel with ease, if you’re truly pressed for time, a high-quality store-bought dulce de leche can be a suitable substitute. Dulce de leche has a thick, rich consistency similar to our homemade caramel. I generally advise against using most standard store-bought caramel sauces (unless they are explicitly marketed as gourmet or “homemade-style”) as their flavor and texture often fall short compared to a fresh, homemade batch. The effort is truly worth it for the superior taste!
Do I need to frost the sides of the cake?
Absolutely not! If you prefer a more rustic or minimalist aesthetic, simply leave the sides of the cake unfrosted. Naked cakes, where the layers and fillings are visible, are incredibly popular and beautiful. You can always spoon any leftover mascarpone frosting onto each slice when serving for an extra touch of creamy indulgence.
What should I do with the leftover caramel sauce?
As the recipe makes a generous amount of salted caramel, you’ll have plenty left over! Store the remainder in a clean glass jar in your fridge, where it will keep well for up to 2 weeks. This versatile sauce is perfect for topping other desserts like ice cream, cheesecakes, or brownies, stirring into your morning coffee or hot chocolate for a gourmet touch, or simply enjoying by the spoonful – it’s a delightful treat on its own! 😉
