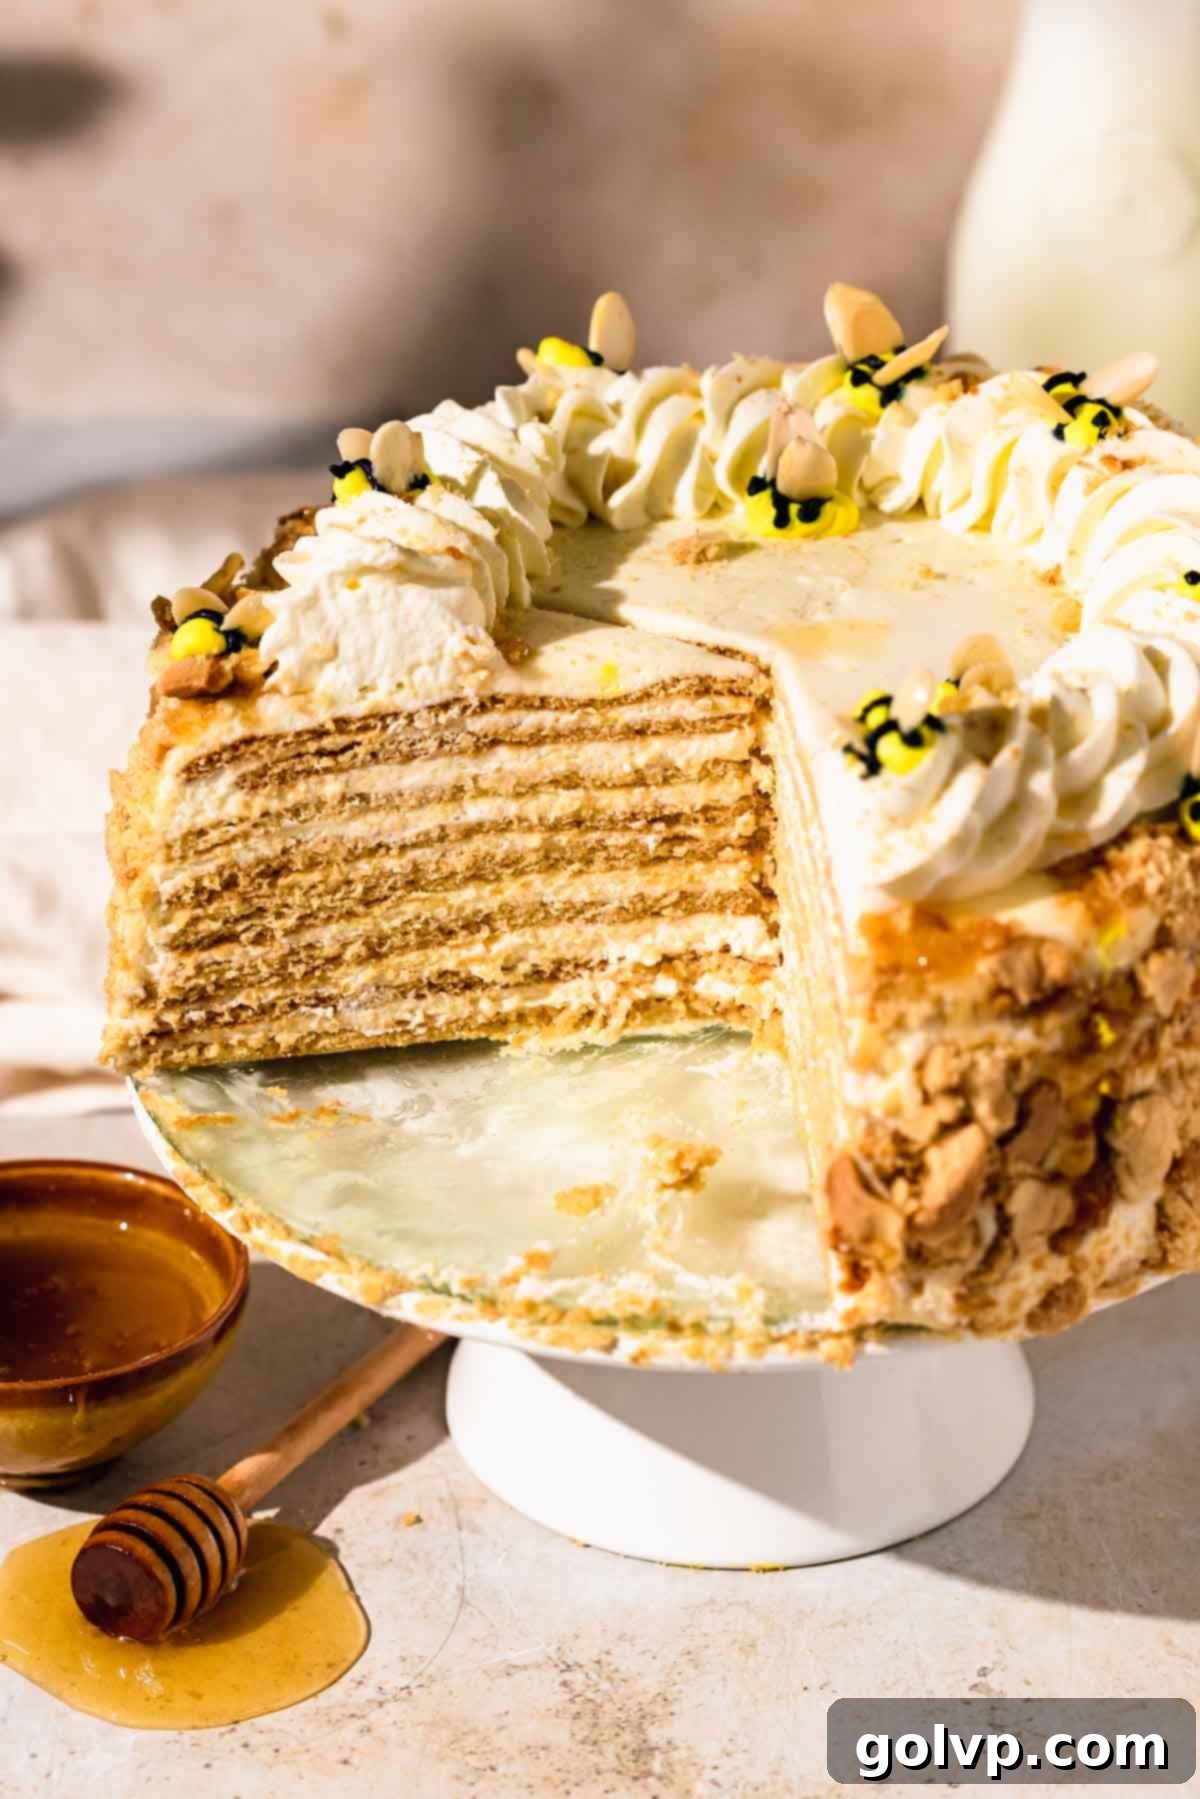
The Ultimate Medovik Honey Cake: Authentic Russian & Ukrainian Layer Cake with Tangy Sour Cream Filling
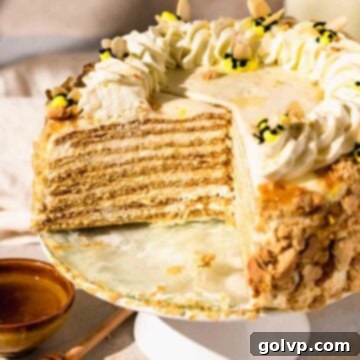
Prepare to fall in love with this extraordinary Medovik Honey Cake, a dessert so exquisite it graced my own wedding celebration. This isn’t just any cake; it’s a culinary masterpiece known for its incredibly soft, wonderfully moist, and delicately tangy profile, infused with the unmistakable aroma and flavor of floral honey. What truly sets this cake apart is its impressive architecture – a towering eight tender cake layers, perfectly complemented by an effortlessly prepared, four-ingredient sour cream filling. While rolling out each individual layer requires a touch of patience and dedication, the resulting ethereal texture and complex flavor make every moment spent in the kitchen utterly worthwhile. This traditional Russian and Ukrainian delight is designed to be made a day in advance, allowing its flavors to meld and mature, and it continues to impress even after several days of refrigeration, ensuring you’ll always be reaching for “just one more slice.”
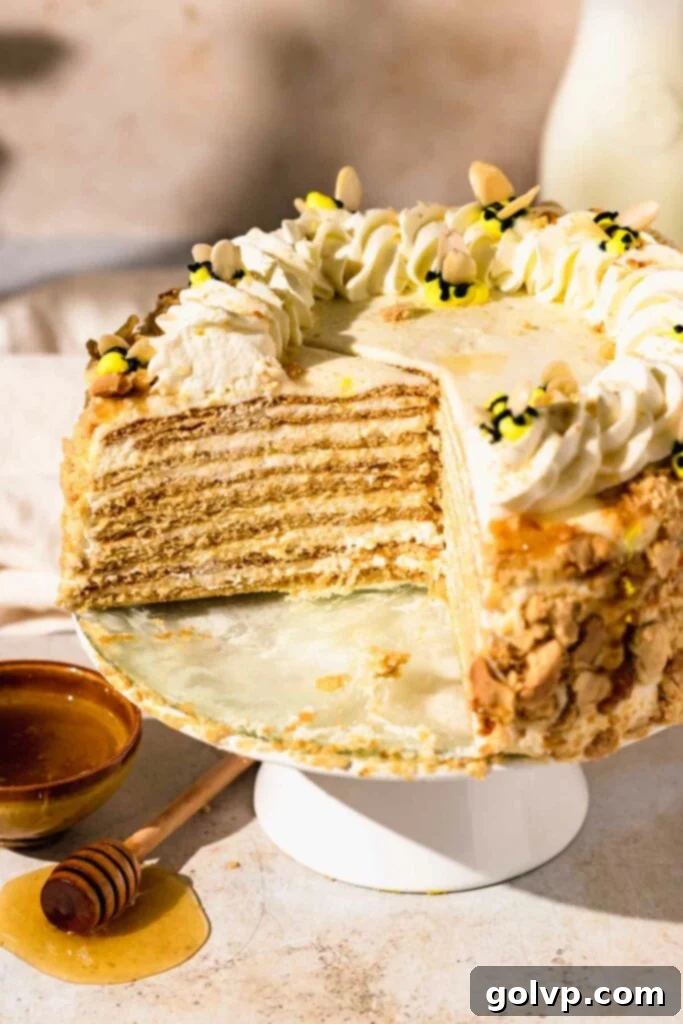
Purchasing the items in this post supports this blog, at no additional cost to you. As an Affiliate Product marketer and Amazon Associate, I earn from qualifying purchases.
Why You’ll Adore This Authentic Medovik Honey Cake Recipe:
- Unbelievably Soft and Velvety Texture: Each of the numerous cake layers is baked to an unparalleled softness, resulting in a melt-in-your-mouth experience that defines the Medovik. The unique dough and baking method contribute to a delicate, cookie-like yet tender crumb that becomes incredibly luscious as it soaks in the filling.
- Rich, Floral Honey Flavor: The distinctive taste of real honey shines through in every bite, offering a natural sweetness and a delicate floral note that is both comforting and sophisticated. This isn’t just a sweet cake; it’s a celebration of honey’s aromatic depth, making it truly irresistible.
- Perfectly Balanced Tangy Filling: The star of the show, beyond the honey-infused layers, is the luscious sour cream filling. Its subtle tanginess provides a refreshing counterpoint to the sweetness of the cake, reminiscent of a light cream cheese frosting but with an even airier quality. This balance is key to Medovik’s irresistible charm, preventing it from being overly rich.
- Charming Piped Bee Decorations: For an extra touch of whimsy and elegance, this recipe includes detailed instructions on how to pipe adorable little bees directly onto your cake using frosting. It’s a delightful decorative element that highlights the cake’s honey origins and adds a professional, personalized finish.
[feast_advanced_jump_to]
What is Medovik? A Traditional Russian Honey Layer Cake
Medovik, also known as Russian Honey Cake, is a beloved dessert originating from Eastern Europe, particularly popular in Russia and Ukraine. Imagine an elevated, more refined version of an icebox cake, but with a uniquely baked element. The cake layers are thinly rolled, giant cookie-like discs that are infused with a deep, rich honey flavor during baking. These thin layers are then generously spread with a light and airy sour cream-based whipped cream filling. The magic truly happens overnight as the filling gradually soaks into the cookie-like layers, transforming them from crisp to incredibly soft, moist, and luscious. This overnight resting period is crucial, allowing the textures to meld and the flavors to deepen, creating a harmonious balance of sweetness and tanginess. The result is a surprisingly light yet decadent cake, perfect for concluding any meal with a touch of elegance and tradition.
While the process of rolling out each individual cake layer may seem time-consuming at first glance, I assure you it’s an incredibly rewarding effort that contributes significantly to the cake’s signature texture. Thankfully, the accompanying sour cream filling is remarkably quick and easy to prepare, effectively balancing out the overall prep time. So, a little patience upfront leads to immense satisfaction in every delightful slice!
The Secret to Medovik’s Magic: Why Sour Cream Filling is Essential
The incorporation of sour cream into the Medovik’s filling is not just a preference; it’s a fundamental element that contributes significantly to the cake’s iconic taste and texture. Sour cream imparts a delightful tangy flavor that masterfully cuts through the sweetness of the honey-rich cake layers, creating a perfect equilibrium that prevents the cake from being overly cloying. This tartness is milder and fresher than that of cream cheese, offering a unique brightness. More importantly, as the assembled cake rests overnight (or even longer), the moisture from the sour cream is gradually absorbed by the delicate cake layers. This transformative process is what gives Medovik its signature unbelievably soft, moist, and tender texture, turning the initially cookie-like layers into a luxurious, almost pudding-like consistency. The filling itself remains incredibly light and airy, providing a cloud-like contrast to the dense, flavorful cake layers. It’s this beautiful interplay of moisture, tang, and sweetness that elevates Medovik to a truly unforgettable dessert experience.
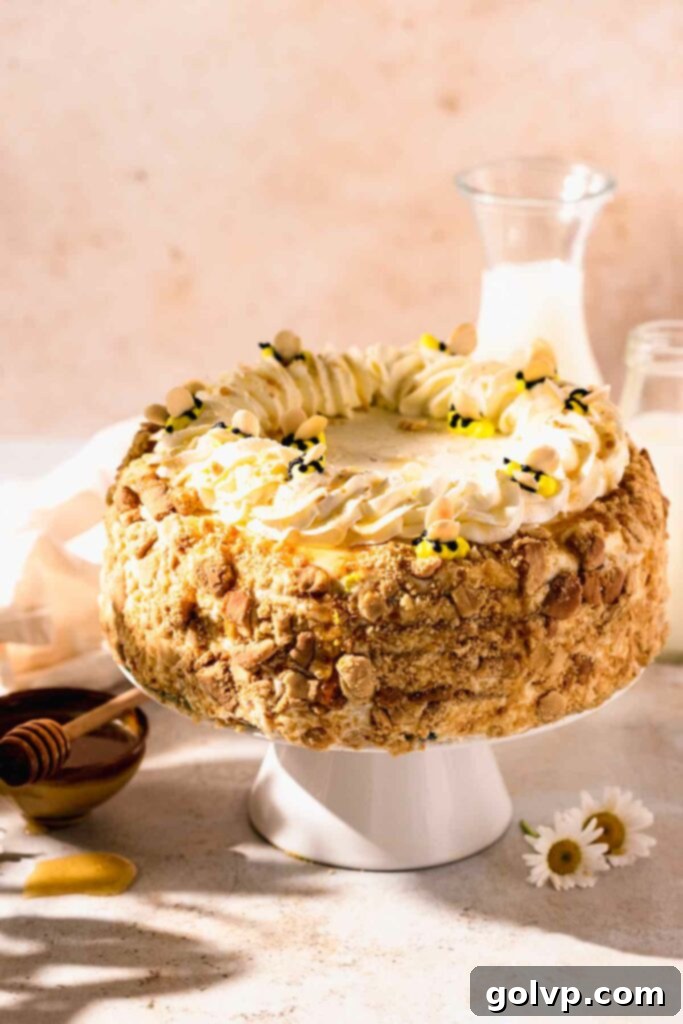
Exciting Medovik Flavor Variations to Try
While the traditional honey cake is magnificent on its own, there are several wonderful ways to personalize and “jazz up” your Medovik with additional flavors. Experimenting with these variations can introduce new dimensions to this classic dessert:
- Bright Lemon Zest: For a burst of citrusy freshness, add the finely grated zest of one lemon directly into the sour cream filling. The lemon’s bright aroma and tart notes will complement the honey beautifully and further enhance the tanginess of the cream, creating a delightfully vibrant flavor profile.
- Sweet & Earthy Prunes: Introduce a rich, deep fruitiness by sprinkling finely chopped pitted prunes in between each cake layer, on top of the sour cream filling. The prunes will soften as they absorb moisture from the cake, adding a wonderful chewiness and a subtly sweet, earthy complexity that is surprisingly traditional in some Eastern European desserts.
- Fresh Berry Topping: Before serving, elevate the visual appeal and add a juicy contrast by decorating the top of your honey cake with an assortment of your favorite fresh berries. Raspberries, blueberries, or sliced strawberries not only add vibrant color but also provide a refreshing tartness and lightness that pairs exquisitely with the rich honey and creamy filling.
- Warm Spiced Honey Cake: For a cozy, aromatic twist, consider adding a pinch of ground cinnamon, nutmeg, or even a touch of cardamom to the cake dough. These warm spices will enhance the natural honey flavor and give the cake a comforting, festive depth.
- Nutty Crunch with Walnuts or Pecans: If you enjoy a textural contrast, sprinkle finely chopped toasted walnuts or pecans over the filling between the layers, or press them into the sides of the cake for decoration. The nuts add a delightful crunch and a rich, earthy flavor that complements the honey.
Make-Ahead Tips for Your Medovik Honey Cake
One of the best qualities of Medovik is that it actually improves with time, making it an ideal make-ahead dessert for entertaining or simply enjoying over several days. The flavors deepen and the layers become exquisitely soft as they absorb the filling. You can certainly make and assemble the entire cake one or two days ahead of time. This resting period is crucial for achieving that signature moist and tender texture. It’s recommended to decorate the cake only after it has had ample time to sit, soak up the filling, and fully settle.
As the cake sits and absorbs moisture, it naturally settles and may slightly change in size, becoming more compact. This is precisely why I prefer to fully cover the cake in filling, allow it to sit overnight (or longer) to soak and settle completely, and then proceed with any final smoothing or decorative touches. This ensures a stable and beautifully finished cake.
For even longer planning, this honey cake can also be prepared one or two months in advance. To do this, assemble the cake as instructed, allow it to sit overnight to settle, but do *not* apply any final decorative frosting or crumbs. Once it’s firm and frozen solid after the overnight chill, wrap the entire cake tightly in several layers of plastic wrap, followed by a layer of aluminum foil, and store it in the freezer for up to two months. When ready to serve, thaw it slowly in the refrigerator overnight, then proceed with the crumb coating and any optional decorations. This method ensures you always have a delicious Medovik ready for any occasion!
Storage Recommendations for Peak Freshness
Due to the fresh dairy components like whipping cream and sour cream in its luscious filling, this honey cake absolutely needs to be refrigerated. For the best flavor and texture, serve Medovik cold, directly from the fridge, or allow it to sit at room temperature for a brief 10-20 minutes to slightly soften the layers and enhance its aromatic qualities. The cake will maintain its excellent quality and delightful texture when stored properly in an airtight container in the refrigerator for up to 4 days. As mentioned, it often tastes even better on the second or third day, as the flavors continue to meld and the cake layers become increasingly tender.
Should you have any delectable leftovers (which is rare!), they can be frozen for up to 2 months. Simply wrap individual slices or the remaining cake tightly in plastic wrap and then aluminum foil, or place them in an airtight freezer-safe container or bag. Thaw in the refrigerator overnight before serving to enjoy its revived softness and flavor.
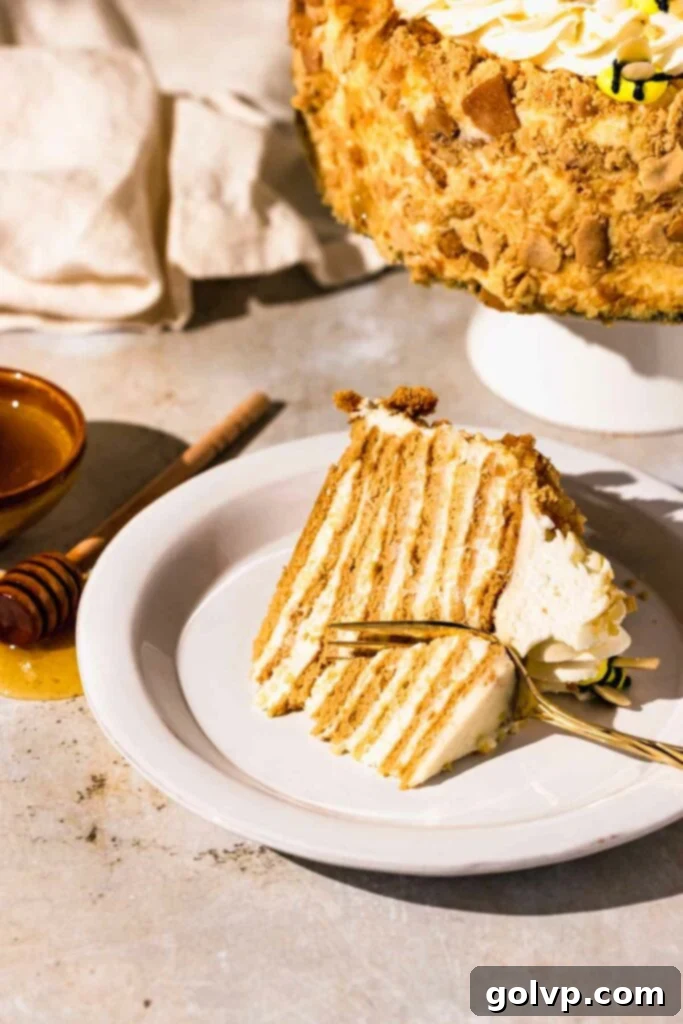
Key Ingredients for the Perfect Medovik Honey Cake
You’ll find the full, precise steps and ingredient measurements in the recipe card below. However, I highly recommend reading through these essential tips for each key ingredient to ensure your Medovik is a resounding success!
Honey: The star of this cake! Always opt for high-quality, real honey for the most authentic and rich floral flavor. The type of honey can slightly influence the final taste, so choose one you love. For easy measuring and cleanup, a fantastic trick is to lightly grease your measuring cup with a neutral oil or cooking spray before adding the honey; it will slide right out.
Sour Cream: This is fundamental for the signature tangy filling and moist texture. It is crucial to use full-fat sour cream. Low-fat or reduced-fat varieties contain more water and will result in a runny, unstable filling that won’t properly absorb into the cake layers. The higher the fat content, the creamier and more effective your filling will be.
Heavy Whipping Cream: To achieve that wonderfully light and airy filling, you need heavy whipping cream with a minimum fat content of 35% (or higher, often labeled as heavy cream or double cream). This high-fat content is essential for the cream to whip up properly and hold its shape. A pro tip for easier and more successful whipping: chill your mixing bowl and whisk (or stand mixer attachment) in the freezer for 5-10 minutes before you start. This extra cold environment helps the cream whip faster and achieve stiffer peaks.
All-Purpose Flour: Accuracy in flour measurement is paramount in baking, especially for delicate cake layers like these. The most precise method is to weigh your flour using a kitchen scale. If you don’t have a scale, measure properly by first stirring the flour in its bag or container to aerate it, then gently spooning it into your measuring cup until it overflows. Level off the excess with the flat edge of a knife, without packing the flour into the cup. This prevents over-measuring, which can lead to dry, tough cake layers.
Gel Food Coloring: For decorating the optional frosting bees, yellow and black gel food coloring are highly recommended. Unlike liquid food colorings, gel varieties are concentrated and produce vibrant colors without adding excess moisture to your frosting, which could thin it out and compromise its piping consistency.
Sliced Almonds: These are used to create the adorable bee wings. You can purchase presliced almonds for convenience. If you only have whole almonds, you can prepare them by soaking a handful in hot water for a few minutes. Once they cool enough to handle, peel off their skins, and then slice them thinly before they dry out. This makes them pliable and easier to work with for delicate decorations.
Crafting the Delicate Honey Cake Layers
Creating the signature thin, flavorful layers of Medovik requires precision and a loving hand. Follow these steps carefully to ensure tender, golden-brown discs that form the foundation of your magnificent cake.
Step 1 – Begin by preheating your oven to 180°C (350°F). Line a large cookie sheet or pizza pan with parchment paper, preparing your baking surface. In a separate, medium-sized bowl, lightly whisk your room temperature eggs until just combined, then set them aside. This ensures they are ready to be incorporated smoothly into the honey mixture without scrambling.
Step 2 – In a sturdy medium saucepan, combine the honey, granulated sugar, and unsalted butter. Place the saucepan over medium-low heat, stirring gently until all the ingredients are melted and thoroughly combined. Continue to heat until the mixture just barely comes to a simmer, with tiny bubbles forming around the edges. As soon as you notice this subtle simmering, immediately remove the saucepan from the heat to prevent scorching.
Step 3 – To the warm honey mixture, add the sea salt and whisk vigorously to ensure it’s fully dissolved. Next, add the baking soda. Whisk vigorously and continuously to break up any lumps and activate the baking soda. You’ll observe the mixture foaming up and lightening in color, which is a key reaction for the texture of the cake layers.
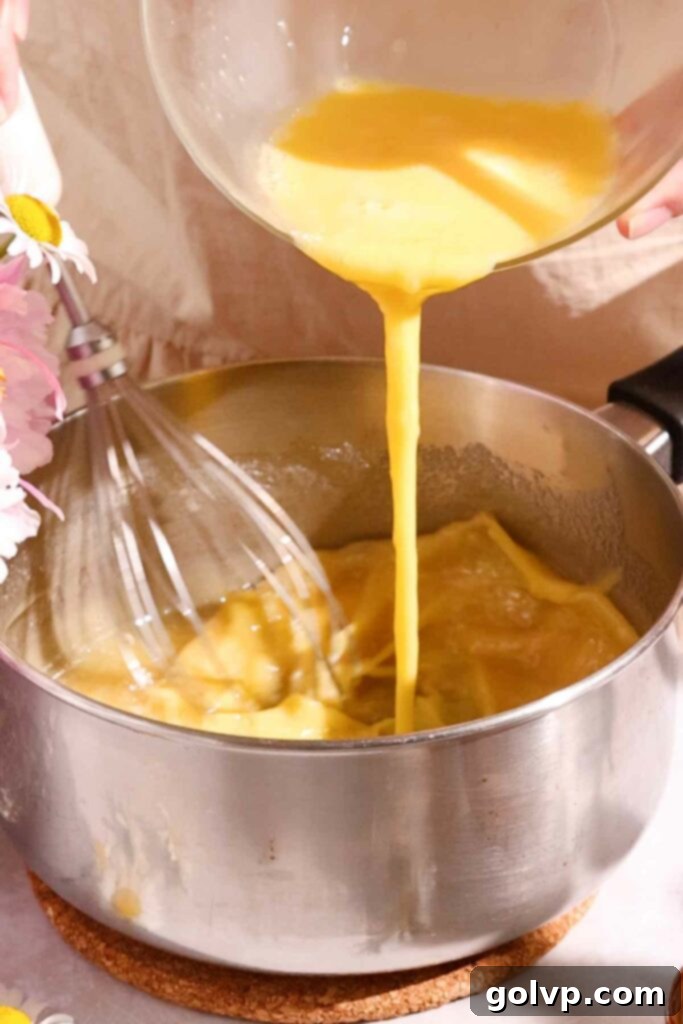
Step 4 – This is a crucial step to prevent the eggs from cooking prematurely. Slowly and gradually pour the previously whisked eggs into the hot honey mixture while continuously whisking the mixture vigorously. This steady stream and constant agitation will temper the eggs, combining them smoothly without creating scrambled bits.
Step 5 – Sift the measured all-purpose flour directly into the saucepan containing the honey-egg mixture. Using a spatula, gently fold the flour into the wet ingredients until a cohesive dough begins to form. Continue folding until the dough comes together and reaches a consistency similar to a thick cookie dough – it should be soft but manageable, not overly sticky.
Step 6 – For the best workability, proceed while the dough is still warm. Carefully transfer the entire dough out of the saucepan and onto a generously floured work surface. This warmth helps keep the dough pliable and easier to roll.
Step 7 – Gently shape the dough into a uniform ball. If you find the dough is too soft or sticky to handle, incorporate a few tablespoons of additional flour at a time, kneading it in thoroughly until the dough is no longer excessively sticky and holds its shape well. Divide the dough into 8 equal wedges, much like slicing a pizza. Take each wedge and roll it into a neat, individual ball.
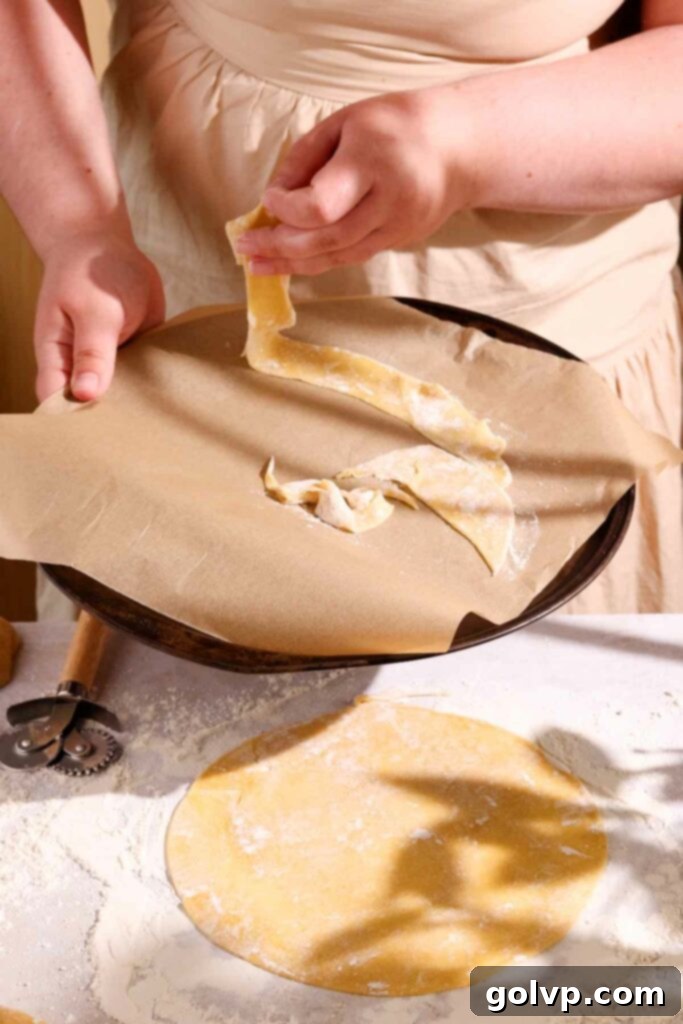
Step 8 – Working with one dough ball at a time, roll it out evenly into a circle approximately 9 inches in diameter. Aim for uniform thickness across the entire round. To achieve perfect, consistent cake layers, place an 8-inch round pan (or a plate of the desired size) on top of the rolled-out dough and use a sharp knife or pizza cutter to neatly trace and cut out a perfect circle. Carefully set the dough scraps aside; these will be baked and used later for decorating. *If your cake layers aren’t perfectly even after baking and cooling, don’t worry – you can trim them at that stage.*
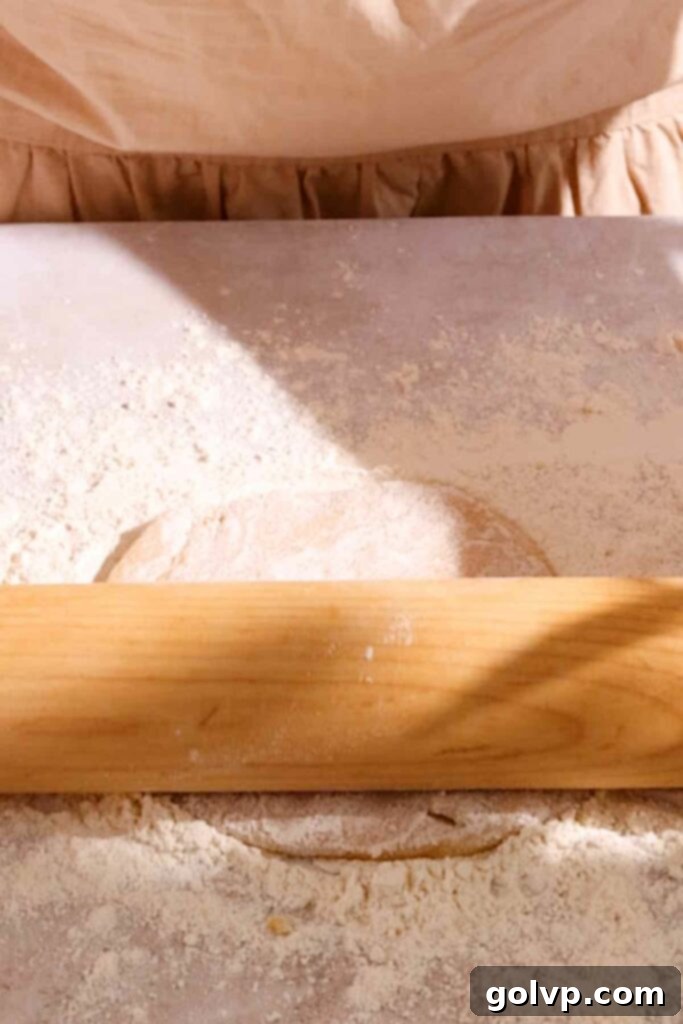
Step 9 – Carefully transfer the cut dough round onto your prepared baking sheet. Bake in the preheated oven for a short 4-5 minutes, or until the bottom of the layer is just slightly golden brown and the edges are firm. These thin layers bake very quickly and can burn easily, so it’s essential to keep a very close eye on them throughout the baking process.
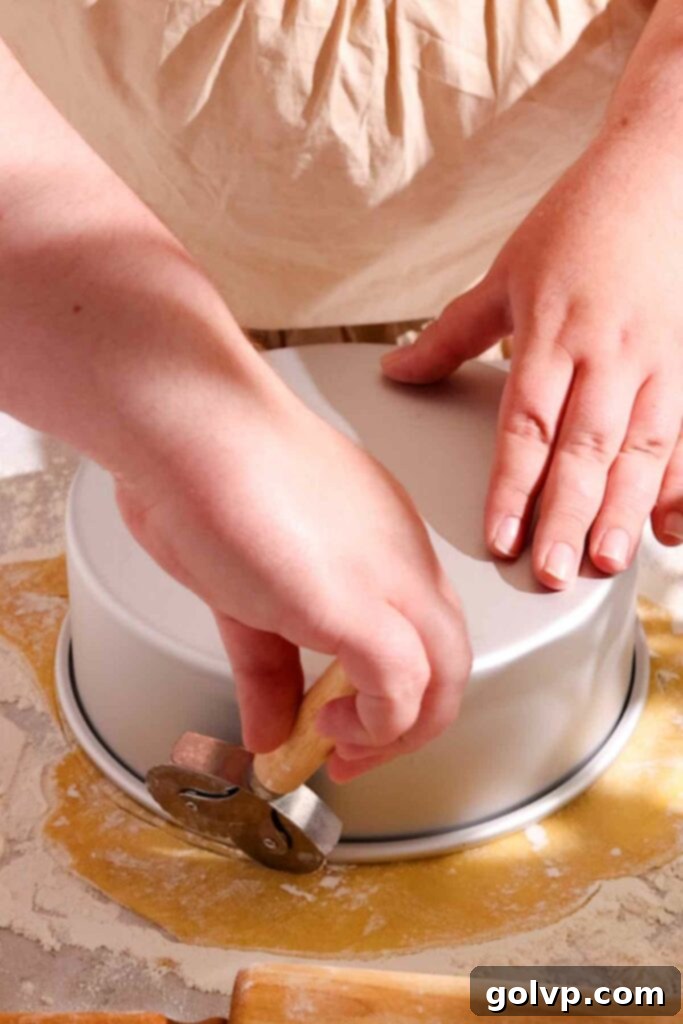
Step 10 – While one layer is baking, use this time efficiently to roll out another few layers. This continuous workflow helps speed up the process. Once baked, carefully remove the hot layers from the baking sheet and transfer them to a wire cooling rack to cool completely. They will crisp up slightly as they cool.
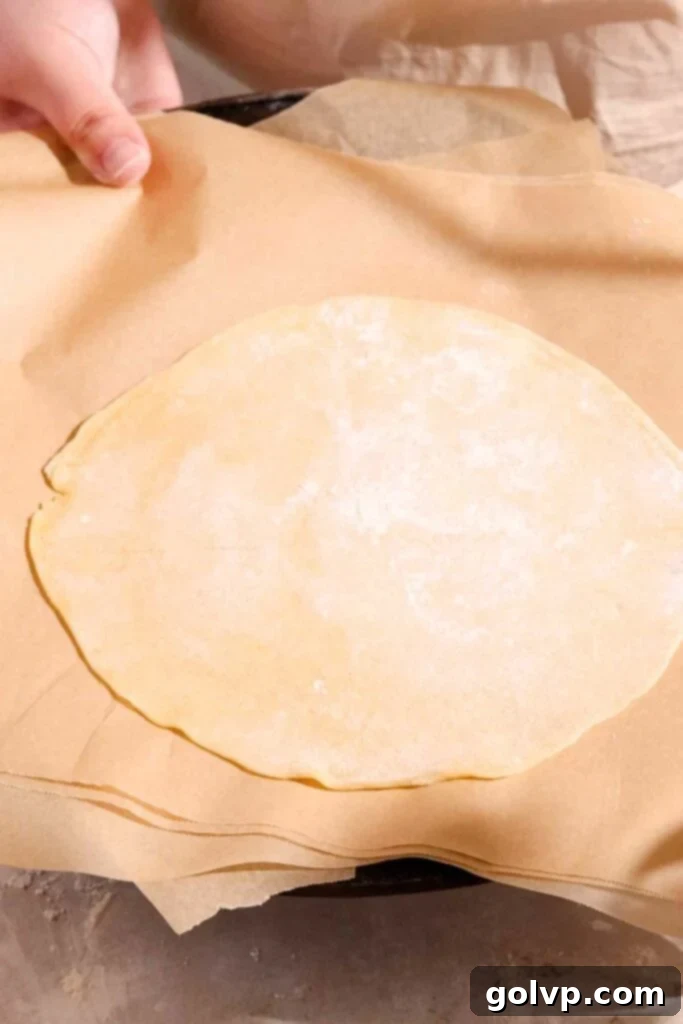
Step 11 – Continue this rhythm of rolling and baking until all the dough balls are transformed into beautiful, thin cake layers. Don’t forget to bake the dough scraps on a separate baking tray; these will be crucial for the traditional crumb coating. Once all layers are completely cooled, you can carefully stack them on top of each other to save space. While the cake layers finish cooling, you can begin preparing the creamy filling.
Crafting the Dreamy Sour Cream Filling
This simple yet essential four-ingredient filling is what gives Medovik its signature creamy texture and tangy balance. Follow these steps for a perfectly whipped and smooth filling.
Step 1 – For optimal whipping success, place a large mixing bowl (or the bowl of your stand mixer) and your whisk attachment (or hand mixer beaters) into the freezer for 5-10 minutes. Getting your equipment thoroughly chilled will help the heavy cream whip faster and achieve more stable, stiff peaks.
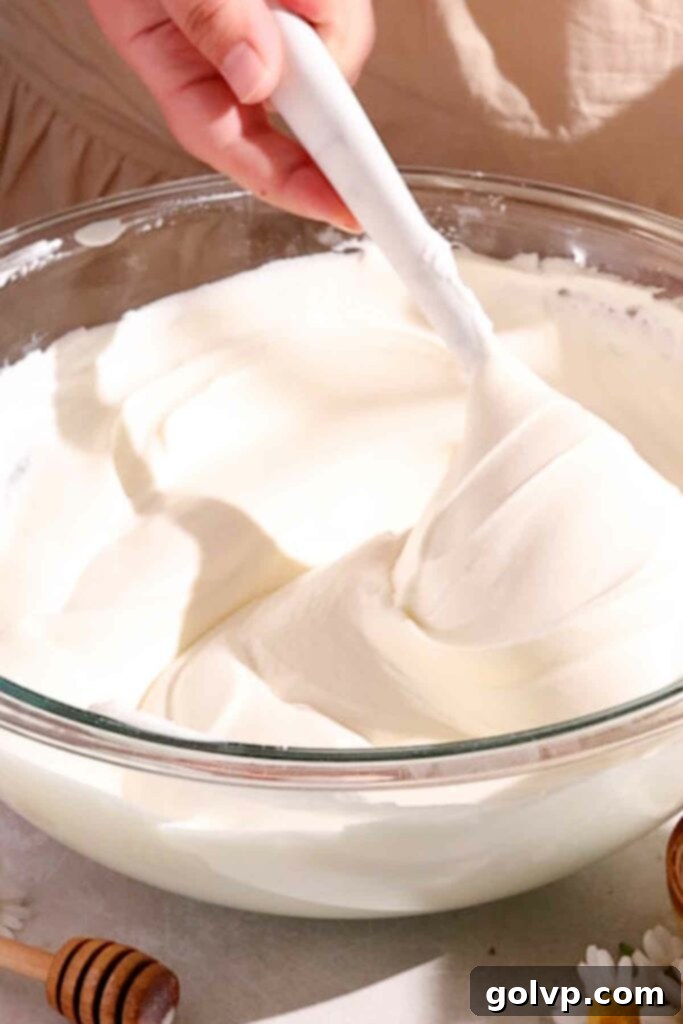
Step 2 – Pour the very cold heavy whipping cream into your chilled bowl. Begin whipping with an electric mixer on medium-high speed until medium-stiff peaks form. The cream should hold its shape when the whisk is lifted, but the tip of the peak might still have a slight curl or ‘floppy’ quality.
Step 3 – To the whipped cream, gently add the cold sour cream, powdered sugar, and pure vanilla extract. Continue to whip the mixture on medium speed until stiff peaks form, and the filling holds its shape firmly. Be vigilant and avoid overwhipping at this stage, as it can cause the mixture to become grainy or curdle due to the sour cream. Stop mixing as soon as the filling looks smooth, thick, and perfectly holds its form.
Assembling Your Magnificent Medovik Honey Cake
The assembly of the Medovik is a straightforward process of layering, but it’s where the cake truly begins to take its impressive form. Take your time to build a beautiful, tall dessert.
Step 1 – Have a large, flat serving plate or cake stand ready for assembly. To anchor your first cake layer, place a small tablespoon-sized dollop of the prepared filling onto the center of the plate. Carefully place the first baked honey cake layer directly on top of this filling, pressing down gently to secure it.
Step 2 – Spoon about a third of a cup of the creamy filling onto the first cake layer, spreading it evenly all the way to the edge using an offset spatula or the back of a spoon. Continue this layering process: cake layer, then filling, cake layer, then filling, until all eight delicate cake layers are used up. Remember to reserve a small amount of filling for generously coating the sides of the cake later.
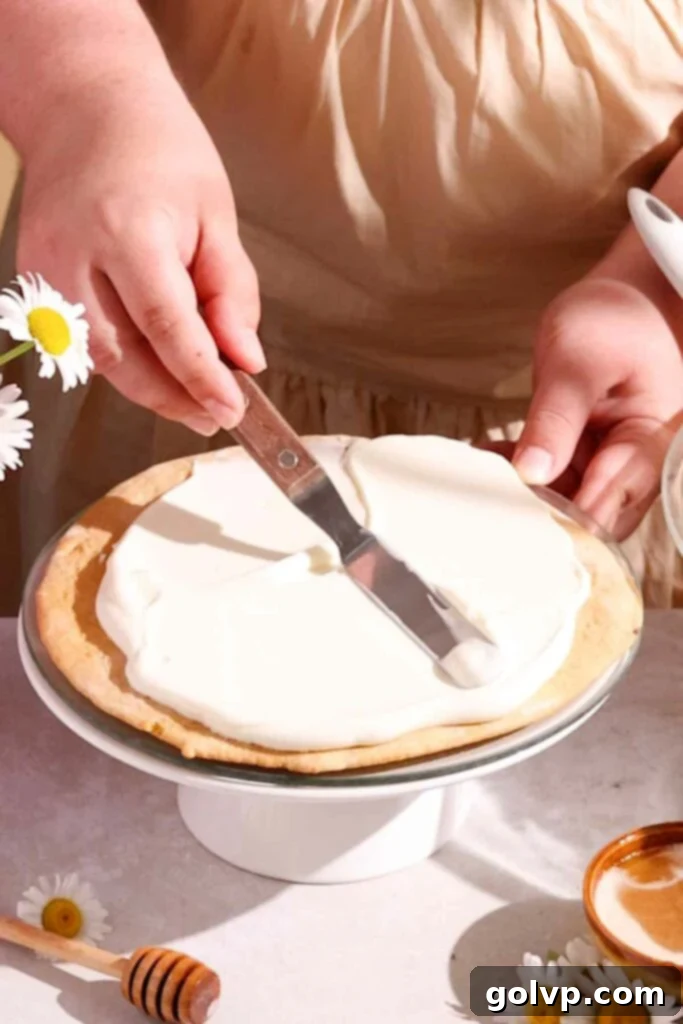
Step 3 – Once all layers are stacked, use an offset spatula to apply the remaining filling to completely cover the sides of the cake, ensuring they are fully saturated. This is important for the cake’s moisture absorption. If your tall cake begins to lean or slide at all, gently poke three skewers or chopsticks straight down through the cake layers in a triangle formation to provide support. This will help stabilize it as it chills. Transfer the cake to the refrigerator and chill overnight (at least 8 hours, but ideally 12-24 hours) to allow the layers to fully absorb all the wonderful moisture from the filling and for the cake to set.
Step 4 – Take the previously baked cake layer scraps and crumble them finely. You can use your hands, a food processor, or a rolling pin and a bag for this. Set these delicious crumbs aside; they are essential for the traditional Medovik exterior.
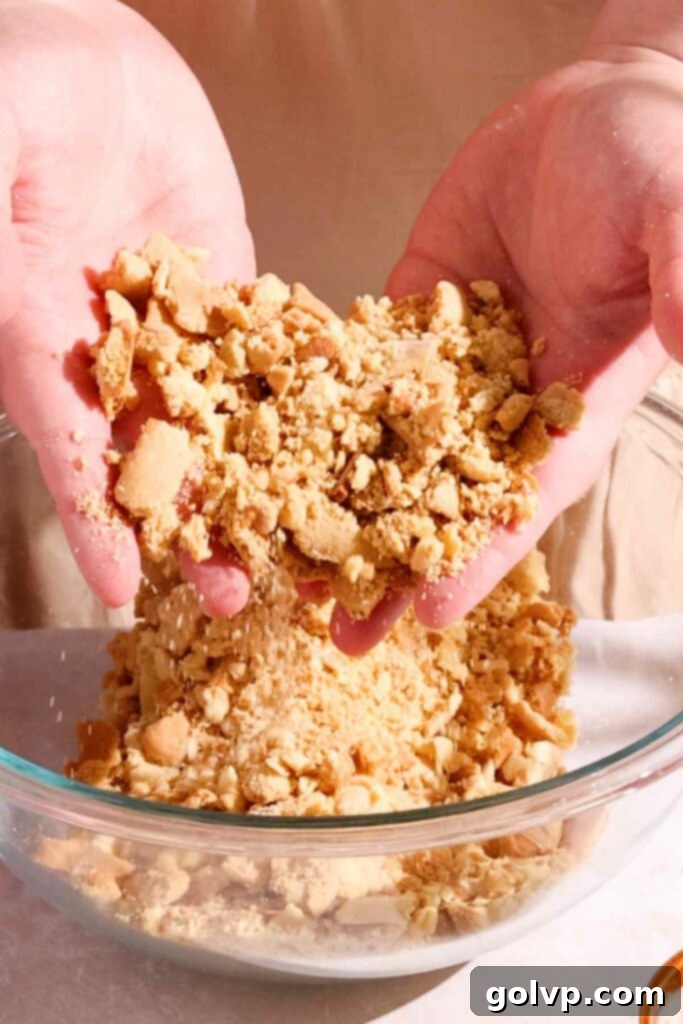
Step 5 – After the cake has thoroughly chilled and settled overnight, carefully remove it from the refrigerator. Use an offset spatula to smooth out any imperfections on the top and sides of the cake, ensuring a clean canvas. Now, gently press the prepared crumbs onto the sides of the cake, working your way around until it’s fully coated. At this point, your cake is ready to be sliced and served, or you can proceed with the optional decorative border and charming piped bees for an extra special touch.
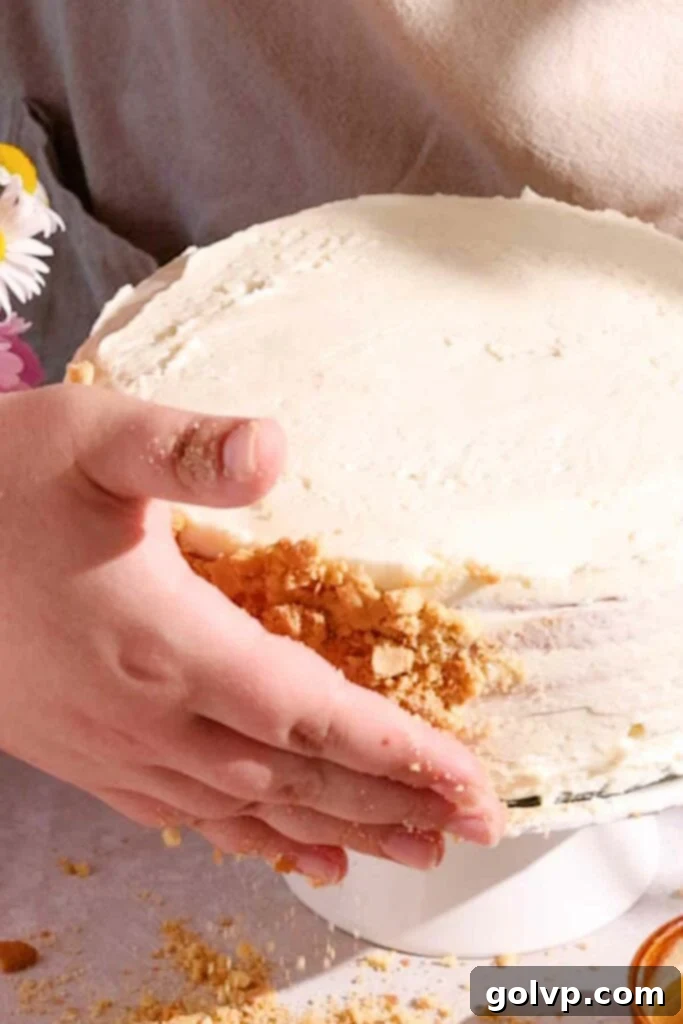
Optional: Decorative Border and Delightful Piped Bees
For those who wish to add an extra layer of charm and artistry to their Medovik, these optional decorations will transform your cake into a true showstopper. The little bees are a nod to the cake’s honey origins and add a whimsical touch.
Step 1 – In a medium mixing bowl, combine the softened cream cheese, vanilla extract, and powdered sugar. Mix with an electric mixer on low speed, then increase to medium until the mixture is completely smooth and free of lumps. Scrape down the sides of the bowl as needed.
Step 2 – In a separate large bowl (ideally one that has been chilled in the freezer along with the whisk for optimal results), whip the cold heavy cream to medium-stiff peaks. The cream should hold its shape relatively well, but the peaks will still be slightly soft and “floppy” at the tips.
Step 3 – Gently fold the cream cheese mixture into the whipped cream. Continue to whisk the combined frosting until firm, stiff peaks form and the frosting holds its shape beautifully. Exercise caution not to overwhip at this stage, as the cream cheese can cause the mixture to become grainy if overworked. Stop mixing as soon as the desired consistency is achieved.
Step 4 – Set aside approximately half a cup of this white frosting in one small bowl, and a smaller portion (a few tablespoons) in another separate bowl. Transfer the majority of the remaining white frosting into a piping bag fitted with your desired piping tip (a star or round tip works well for borders) or simply use a sturdy zippered bag with a small corner snipped off.
Step 5 – To the half cup of frosting you set aside, add a few drops of yellow gel food coloring. Carefully fold it in until a uniform, vibrant yellow color is achieved. To the smaller portion of frosting, add a tiny amount of black gel food coloring and mix gently until it’s a deep black hue.
Step 6 – Transfer the yellow-colored frosting into a separate piping bag. For the black frosting, use an even smaller piping bag or a zippered bag with a very tiny snip off the corner – you’ll need a finer line for the bee details. Cut a slightly larger opening from the yellow piping bag to create the bee bodies.
Step 7 – Using the white frosting piping bag, pipe a delicate rope border or any desired pattern around the top edge of your honey cake. Next, take the yellow piping bag and pipe short, oval or sausage shapes on the top surface of the cake to form the bodies of your bees. Finally, use the black frosting piping bag to pipe thin stripes across the yellow bee bodies and a tiny dot or line for their stingers.
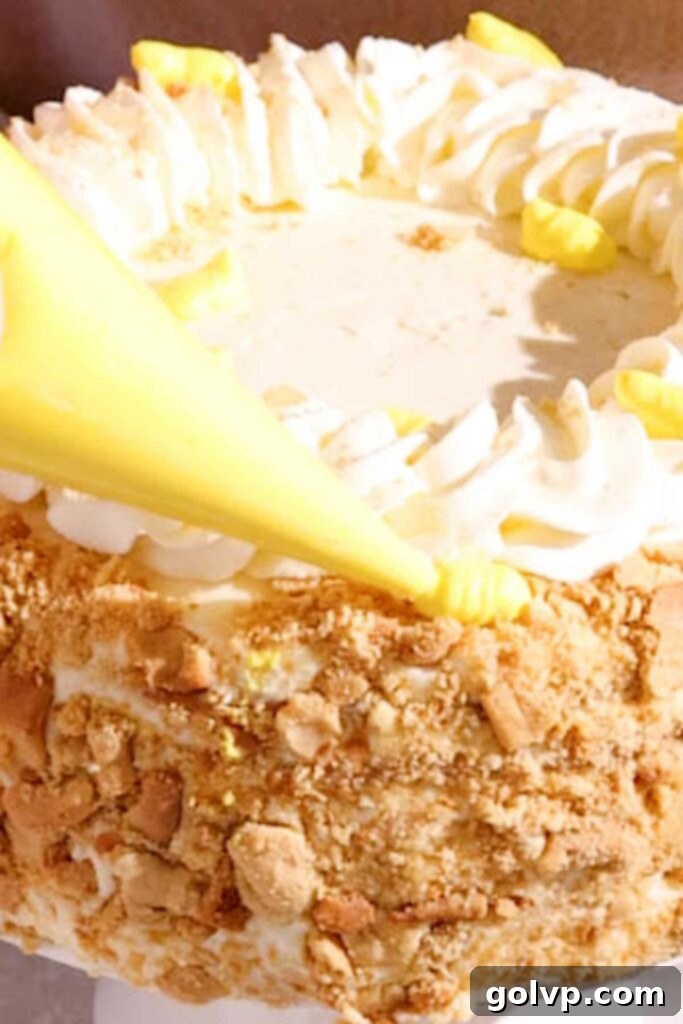
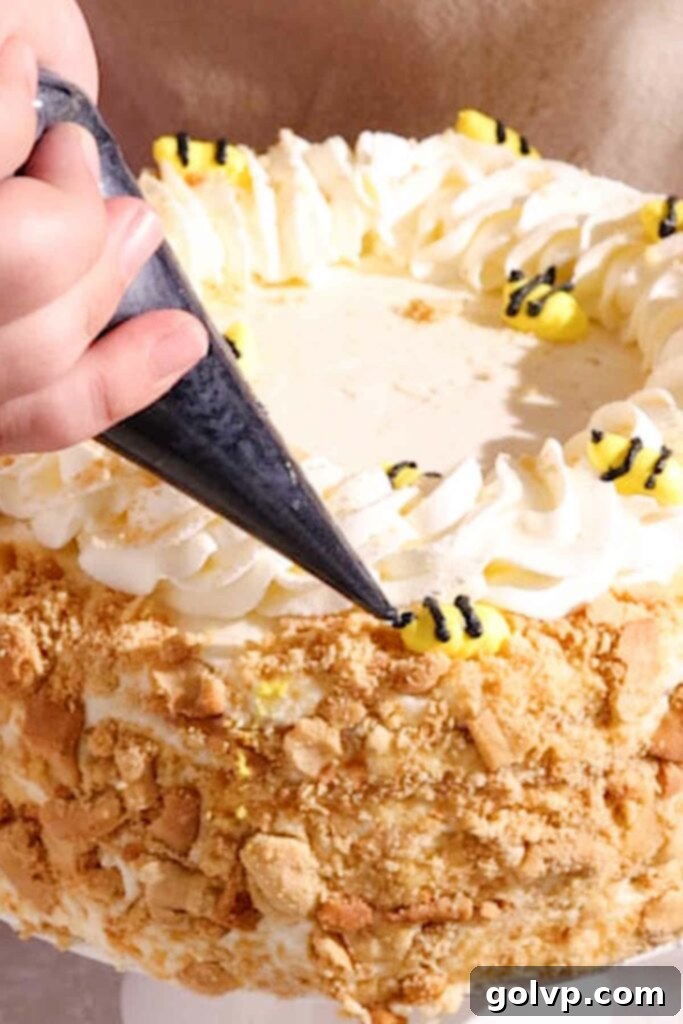
Step 8 – To complete your charming bees, delicately insert small, sliced almonds into the backs of the yellow bee shapes to create their wings. Your beautifully decorated Medovik Honey Cake is now ready! Slice it carefully with a sharp, warm knife (wipe between slices for clean cuts) and serve immediately, or refrigerate it for later enjoyment. It’s a delightful sight and an even more delightful taste.
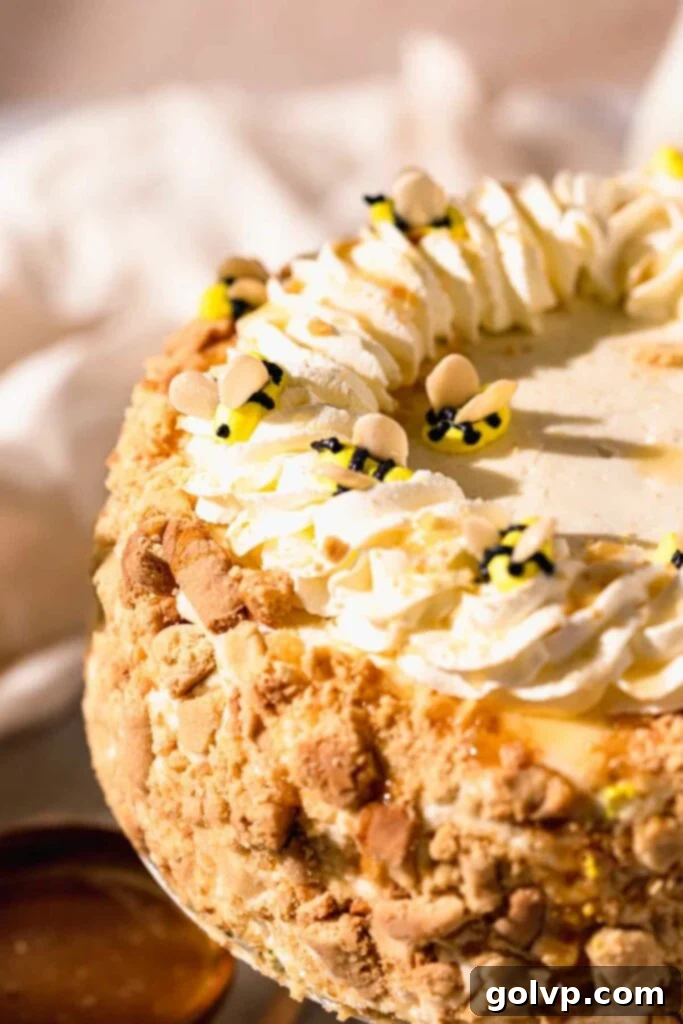
Frequently Asked Questions About Medovik Honey Cake
It’s common for a freshly assembled Medovik to feel a bit unstable, especially if the filling is very fresh. The consistency of your filling can vary depending on the specific brand and fat content of sour cream and whipping cream used. The good news is that this instability is temporary! As the cake rests overnight in the refrigerator, the cake layers gradually absorb the excess moisture from the filling, causing them to soften and plump up, which in turn makes the entire cake much more stable and firm. To provide immediate support and keep your cake together during this crucial resting period, simply poke three wooden skewers or chopsticks vertically through the top of the cake, inserting them in a triangular formation down to the bottom layer. This will act as an internal support system until the cake fully sets.
The stickiness of the dough can sometimes vary based on factors like humidity, the brand of flour, and even the exact temperature of your ingredients. If your dough feels too soft or sticky to roll effectively, don’t worry! This is an easy fix. Gradually add a few tablespoons of all-purpose flour at a time to the dough, kneading it in thoroughly after each addition, until the dough reaches a firm yet pliable consistency that is no longer overly sticky. Additionally, ensure your work surface is heavily floured before you begin rolling, and keep some extra flour nearby to dust your rolling pin and hands as needed. This will greatly help prevent sticking and make the rolling process much smoother.
Absolutely! Once your Medovik has chilled overnight and its layers have fully absorbed the filling, you can certainly cover and decorate it with your favorite buttercream frosting. Buttercream offers a different flavor profile and a firmer finish. However, I generally wouldn’t recommend using fondant for Medovik. As the cake settles and transforms during its resting period, the layers can slightly compact, which might cause fondant to wrinkle or crack. Buttercream, on the other hand, is much more forgiving.
Yes, you can definitely pipe the charming bee decorations using buttercream! The instructions for piping will remain the same, but you would simply substitute the stabilized cream cheese whipped cream (used for the optional border and bees) with your preferred buttercream recipe. For a convenient shortcut, you can even use good quality store-bought frosting for piping these smaller decorative elements. Just ensure your buttercream is a good consistency for piping – not too stiff, not too runny.
Yes, you can absolutely adapt this recipe to make smaller individual honey cakes or even cupcakes! For smaller cakes, you can roll out the dough to smaller circles or cut them into shapes. Adjust baking time accordingly, likely reducing it by a minute or two. For cupcakes, you could roll out the dough and cut out rounds that fit into a cupcake liner, or press small amounts of dough into cupcake molds. The layering would be simpler, perhaps just two or three mini layers per cupcake, with filling in between. This offers a delightful individual serving option!
Discover More Delicious Recipes:
- Mini Honey Apple Pies
- Lemonade Bundt Cake
- Chocolate Praline Cake
- Black Forest Cupcakes
Happy baking, and enjoy every incredible slice of your homemade Medovik!
Did you make this recipe? I would love for you to rate this recipe and hear what you think in the comments below! Share your creation on Instagram and tag @flouringkitchen. Follow me on Pinterestto save and for more recipe ideas.
📖 Recipe
Honey Cake Medovik
Mary
Pin Recipe
Shop Ingredients
Equipment
-
Rolling Pin
-
electric mixer for whipping the cream
-
Medium saucepan
-
Baking sheet pizza or round cookie sheets work the best
Ingredients
Layers
- 3 large eggs room temperature
- ½ cup honey
- ½ cup granulated sugar
- 3 tablespoons unsalted butter
- ⅛ teaspoon sea salt
- 1 teaspoon baking soda
- 4 cups all purpose flour 480g (more if needed)
Filling
- 3 cups sour cream cold
- 1 cup powdered sugar
- 1 teaspoon pure vanilla extract
- 2 cups heavy whipping cream cold
Border and bees (optional)
- 4 oz cream cheese softened
- ½ cup powdered sugar
- ½ teaspoon pure vanilla extract
- 1 cup heavy whipping cream cold
- yellow gel food colouring as needed
- black gel food colouring as needed
- 2 tablespoons sliced almonds for bee wings
Shop Ingredients on Jupiter
Instructions
Layers
-
Preheat oven to 180°C (350°F). Line a large cookie sheet or pizza pan with parchment paper. Whisk eggs in a separate bowl to combine, set aside for later.3 large eggs
-
In a medium saucepan combine honey, sugar, and butter. Heat on medium low heat until combined and comes to a simmer. As soon as it simmers, take it off the heat.½ cup honey, ½ cup granulated sugar, 3 tablespoons unsalted butter
-
Add salt, whisk to combine. Add baking soda and whisk vigorously to break up the lumps. It will foam up a bit.⅛ teaspoon sea salt, 1 teaspoon baking soda
-
Slowly pour the whisked eggs into the hot honey mixture. Whisk well to combine and to prevent scrambled eggs.
-
Sift flour into the saucepan. Use a spatula to fold the flour and form a dough. The dough should be as thick as a cookie dough.4 cups all purpose flour
-
Working while the dough is still warm, dump out the dough onto a heavily floured work surface.
-
Shape the dough into a ball. *Add more flour a few tablespoons at a time and mixing well if needed.* Cut into 8 equal wedges (like a pizza). Shape each wedge into a ball.
-
Working one by one, roll out one ball into approximately 9” circles. Try to roll it out as evenly as possible. Place an 8” round pan on top and use a knife or pizza cutter to trace out a circle. You can use a plate if you prefer. Set the scraps aside. *if the cake layers aren’t even you can trim them after baking and cooling*
-
Transfer the cut dough round into the prepared baking sheet. Bake in the preheated oven for 4-5 minutes, or until the bottom is slightly golden. They burn quickly so keep a close eye on them.
-
While it bakes, roll out another few layers. Let the layers cool on a cooling rack.
-
Roll out and bake until there are no more balls of dough left. Bake the scraps on a separate baking tray. You can stack the cooled layers on top of each other. Work on the filling while the cake layers cool completely.
Filling
-
Pop a large bowl or stand mixer bowl and whisk into the freezer for 5-10 minutes.
-
Pour the cream into the bowl and whip with a whisk until medium-stiff peaks.2 cups heavy whipping cream
-
Add sour cream, powdered sugar, and vanilla extract into the filling. Continue to whip until stiff peaks form – but don’t overwhip or else it will be grainy! Stop as soon as the mixture holds its shape well.3 cups sour cream, 1 cup powdered sugar, 1 teaspoon pure vanilla extract
Assembly
-
Have a large plate or cake stand ready. Place a tablespoon of filling onto the plate. Place a layer on top.
-
Add a layer of filling on top of the cake layer, about a third of a cup. Spread all the way to the edge. Continue layering cake layer, filling, cake layer, filling, until all are used up. Make sure to leave a bit of filling for the sides.
-
Use a spatula to cover the sides with the rest of the filling, fully saturating them. Poke three skewers or chopsticks right through the cake if it starts to lean and slide. Refrigerate overnight to allow the layers to absorb all the moisture.
-
Crumble the baked layer scraps. Set crumbs aside for later.
-
After chilling, use a spatula to smooth out the top and sides of the cake. Press the crumbs onto the sides of the cake. You can stop here or decorate the top with borders and bees.
Border and bees (optional)
-
In a medium bowl, combine cream cheese, vanilla, powdered sugar, and mix until smooth.4 oz cream cheese, ½ cup powdered sugar, ½ teaspoon pure vanilla extract
-
In a separate large bowl (chill the bowl and whisk in the freezer for easier whipping), whip the cream to medium stiff peaks. The cream should hold its shape but have floppy peaks.1 cup heavy whipping cream
-
Add the cream cheese mixture into the whipped cream. Combine with a whisk and whip until stiff peaks form and the cream holds its shape. Be careful not to over whip or it will become grainy.
-
Set aside about a half cup of frosting in one bowl and a few tablespoons of frosting in a separate bowl. Transfer the rest of the frosting into a piping bag fitted with a piping tip or a zippered bag with the end cut off.
-
Add yellow food coloring to the half cup of frosting. Carefully fold to combine. Add black food coloring to the smaller portion of frosting.yellow gel food colouring, black gel food colouring
-
Transfer the yellow and black food colouring to separate piping bags. Cut the tips off the piping bags – a smaller bit off the black bag and a larger opening off the yellow.
-
Pipe a rope border on top of the honey cake with the white frosting. Use the yellow piping bag to pipe short sausage shapes on top (bee bodies). Pipe stripes and a stinger with the black frosting.
-
Insert sliced almonds into the backs of the bee shapes for wings. Slice the cake and serve or refrigerate for later.2 tablespoons sliced almonds
Video
Notes
Make ahead:
The cake layers can be made a few days ahead of time. Wrap them tightly or store in an airtight container after they cool.
You can stack and fill the cake up to a day ahead of time.
