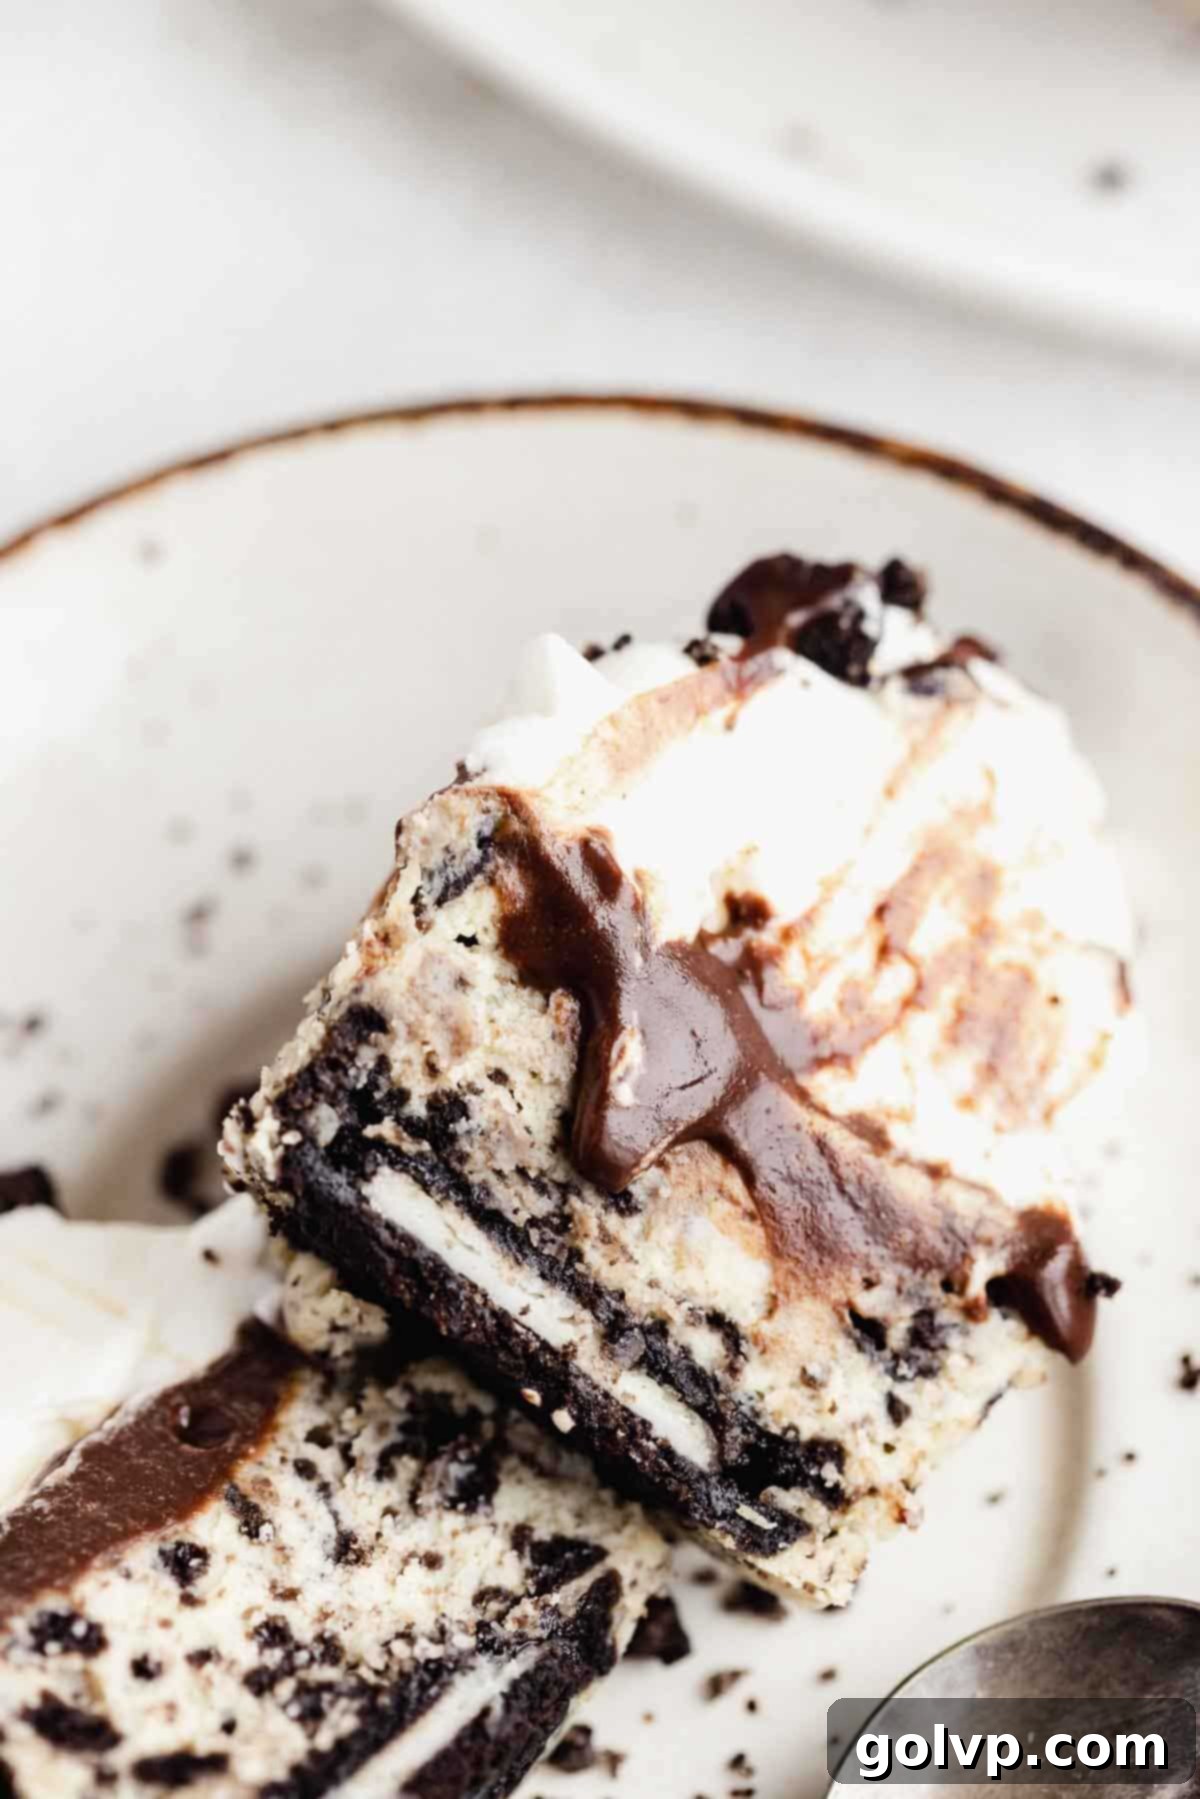
Decadent Mini Oreo Cheesecakes: Easy No-Water Bath Recipe with Rich Fudge & Whipped Cream
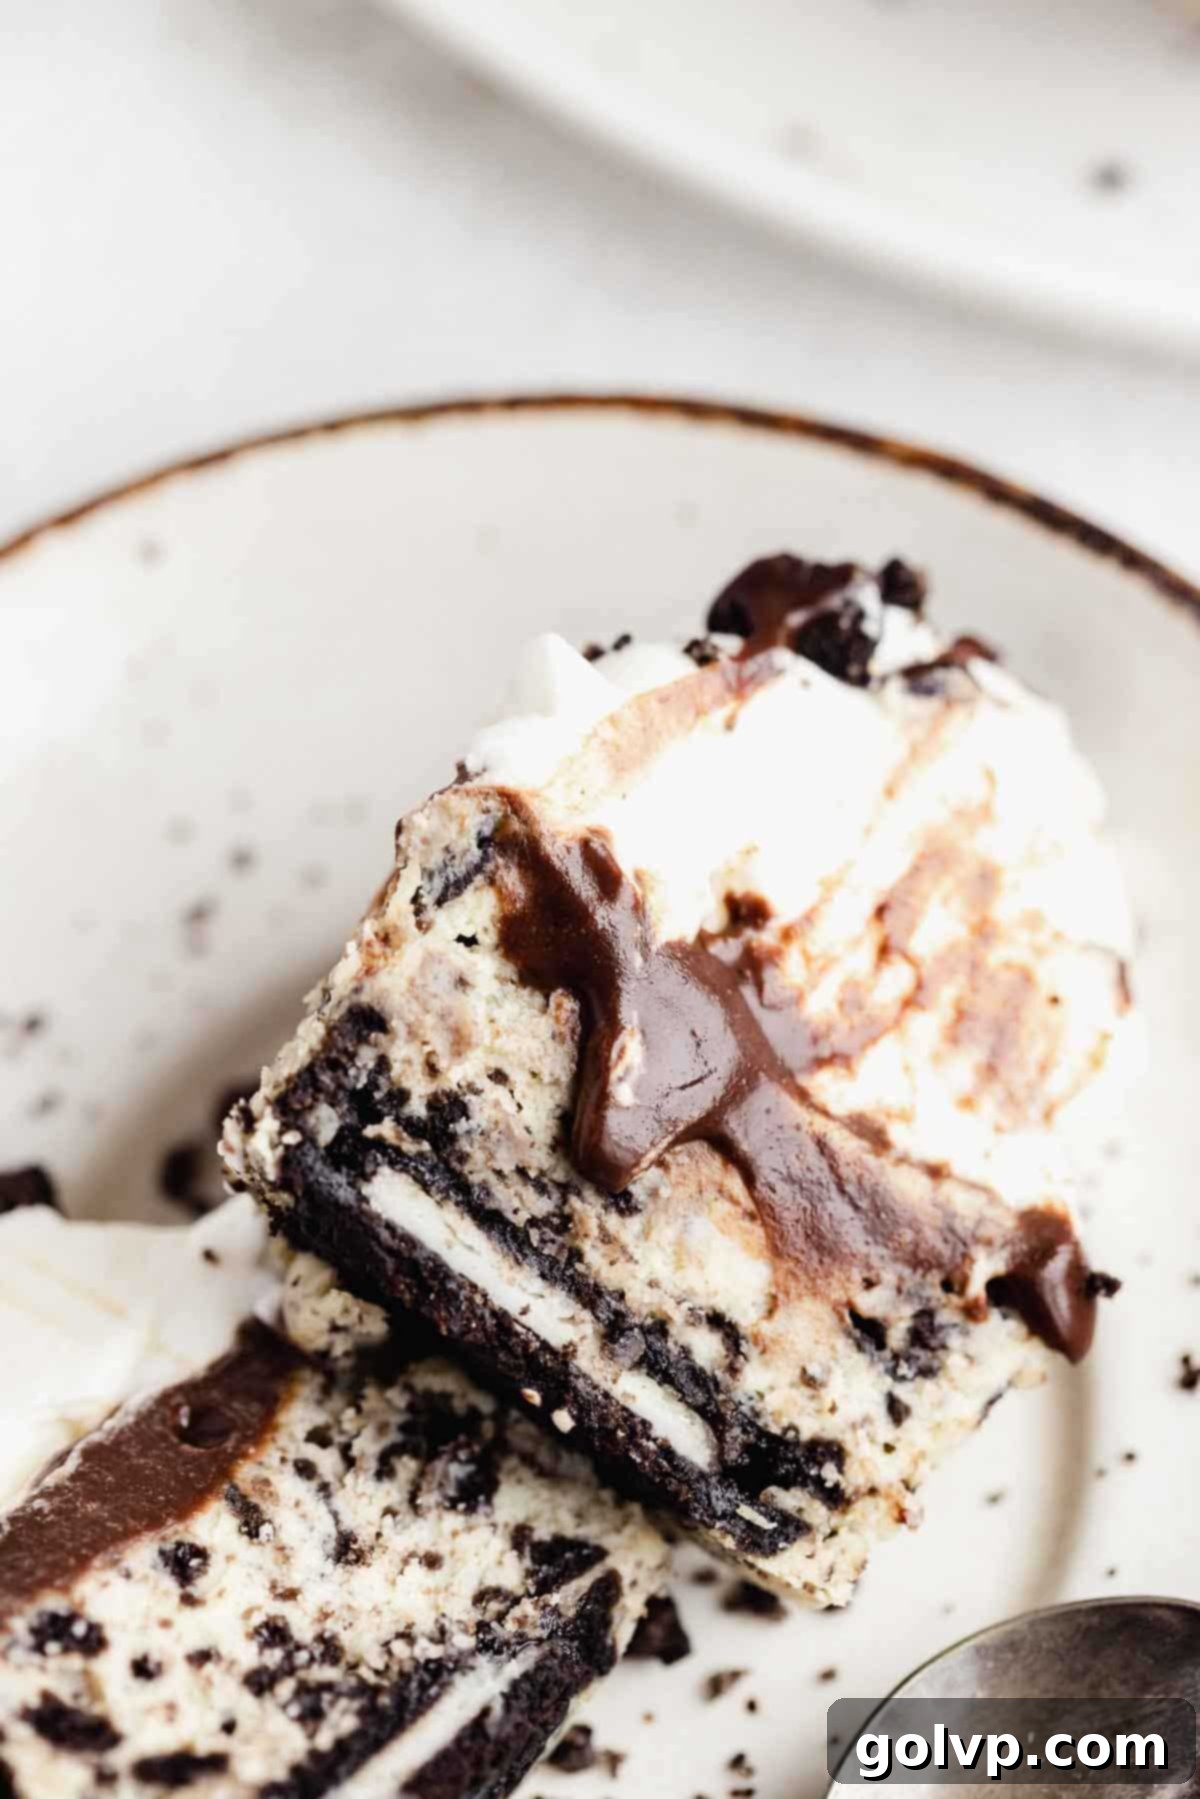
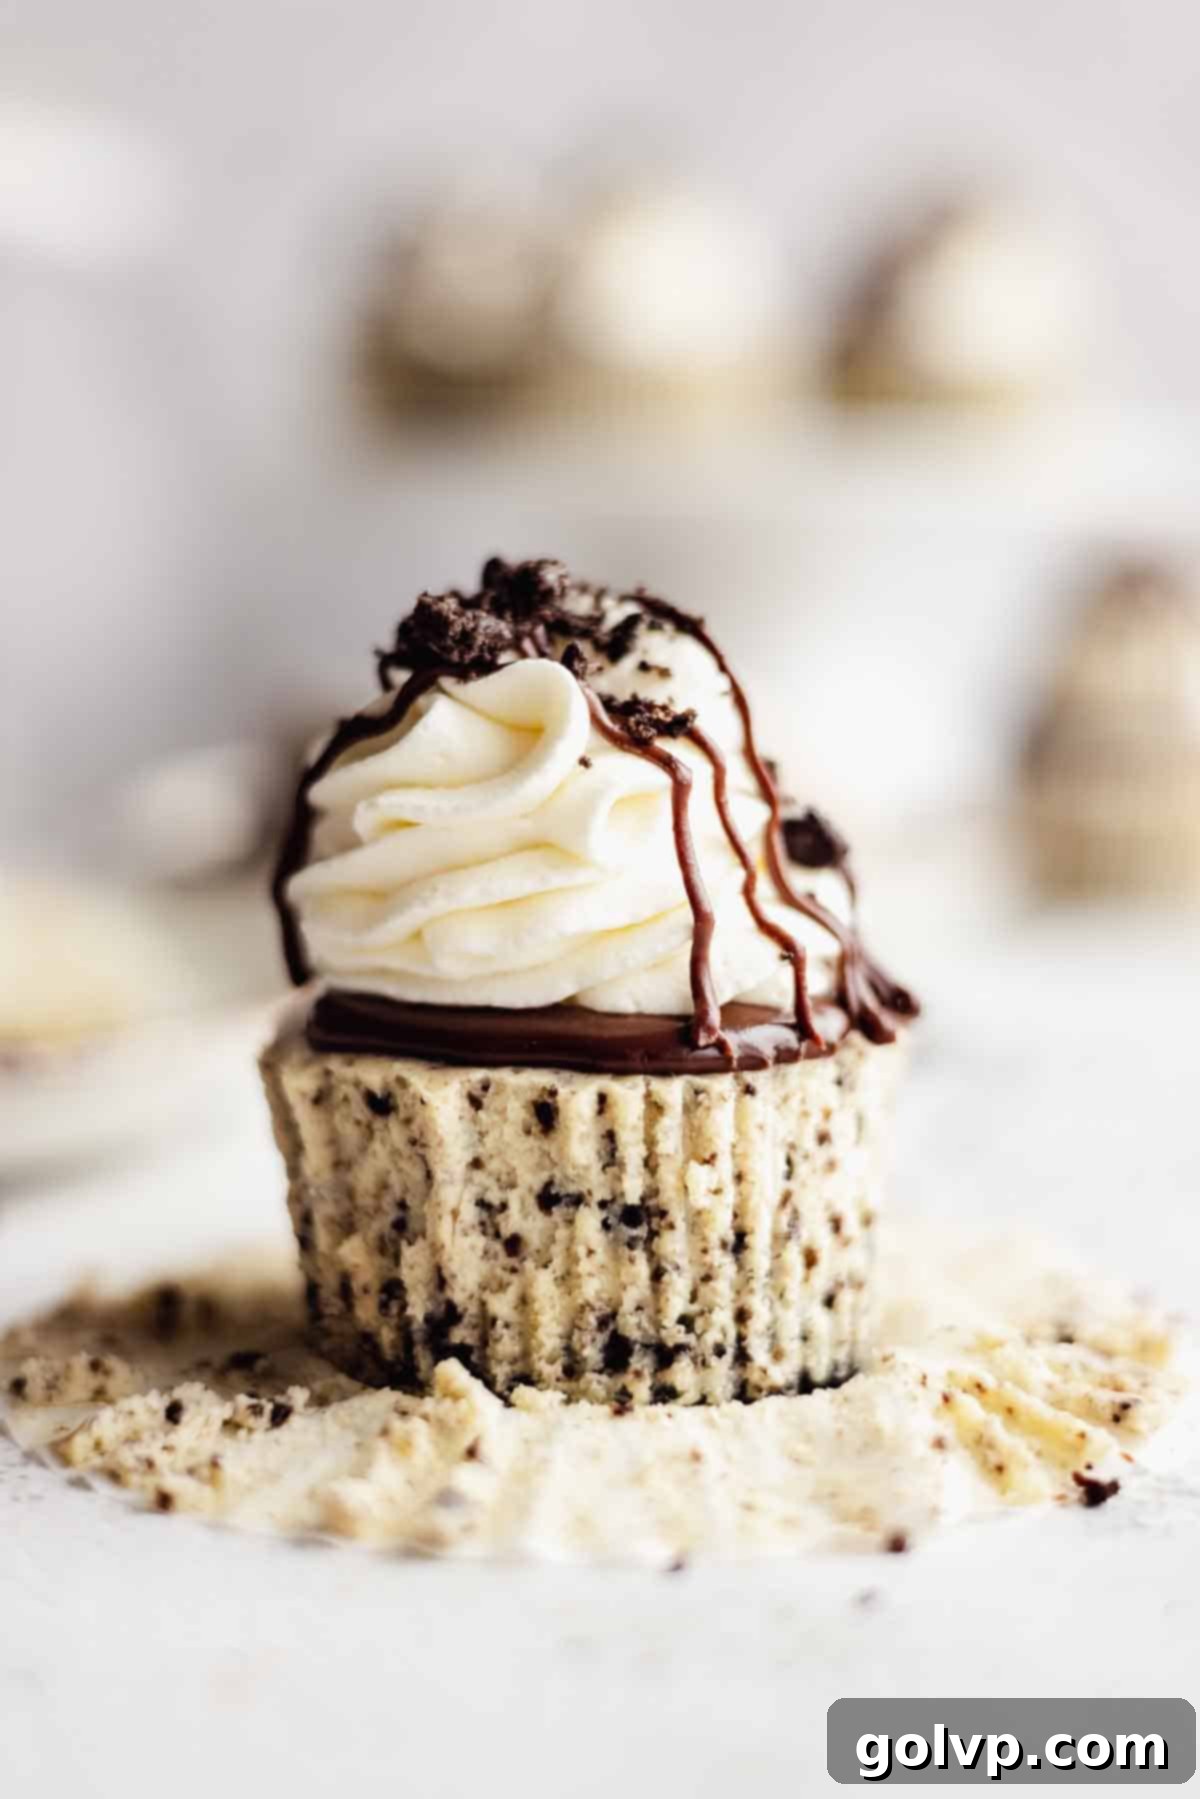
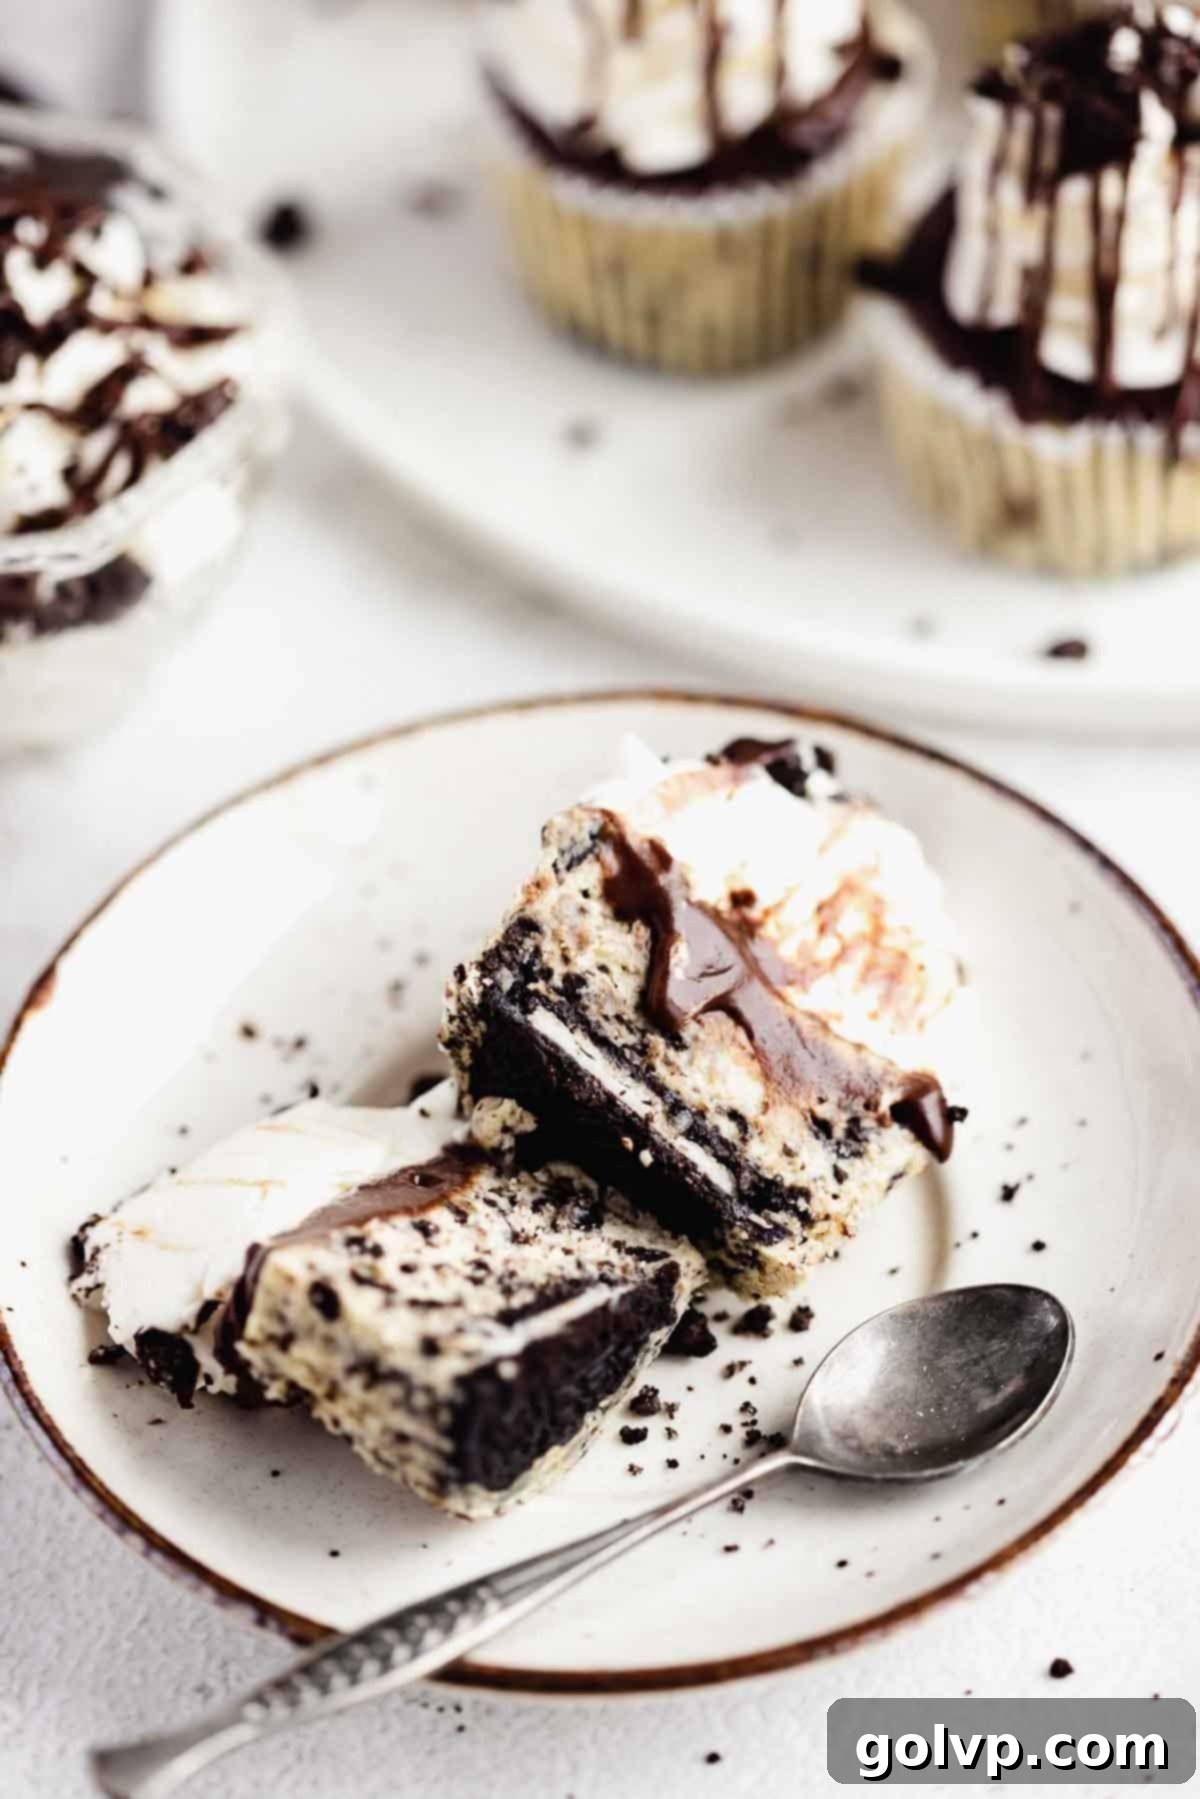
Prepare to be enchanted by these utterly irresistible Mini Oreo Cheesecakes! Each bite offers a symphony of textures and flavors, starting with a delightful whole Oreo cookie crust. This firm base supports a lusciously rich and incredibly creamy Oreo cheesecake filling, generously studded with crushed cookie pieces. But the indulgence doesn’t stop there. A decadent, smooth fudge sauce blankets the cheesecake, perfectly complementing the airy, fluffy whipped cream piped on top. These individual cheesecakes are truly packed full of intense Oreo flavor, promising a delightful treat for any occasion. What’s more, they are remarkably easy to make and require no complicated water bath during baking, making them accessible even for novice bakers. They truly embody the ultimate cookies and cream dessert experience, perfect for parties, gatherings, or simply satisfying a sweet craving.
Why You’ll Absolutely Love This Mini Oreo Cheesecake Recipe
These mini cheesecakes aren’t just delicious; they’re a dream to bake and enjoy. Here’s why this recipe will quickly become a favorite:
- Triple Oreo Delight: If you’re an Oreo lover, this recipe is tailor-made for you! We’ve incorporated Oreos into every component. You’ll find a sturdy whole Oreo cookie forming the crust, finely crushed Oreo crumbs mixed directly into the creamy cheesecake batter, and even more crushed Oreo cookies sprinkled generously on top for that perfect textural crunch. This multi-layered approach ensures that every single bite is bursting with authentic, satisfying Oreo flavor.
- Unbelievably Creamy Texture: Forget dry, crumbly cheesecakes. These mini versions are designed to be ultra-creamy and smooth, melting in your mouth with every forkful. The rich cheesecake filling is perfectly complemented by the silky fudge sauce and the light, ethereal whipped cream. The combination of these smooth textures creates an incredibly luxurious dessert experience that’s truly unmatched.
- Effortless Baking Experience: Making a full-sized cheesecake can often feel daunting, especially with the need for a water bath. This recipe simplifies the process dramatically! Baked conveniently in a standard cupcake tin, these mini Oreo cheesecakes eliminate the need for a water bath entirely, saving you time and stress. They are much easier to handle and bake, making them a fantastic option for bakers of all skill levels.
- Luxurious Fudge Sauce Layer: Elevating these cheesecakes to an even higher level of decadence is a rich layer of homemade fudge sauce nestled between the creamy cheesecake and the whipped cream. This indulgent chocolate ganache adds a deep, intense chocolate flavor and a wonderfully gooey texture that perfectly balances the tangy sweetness of the cheesecake and the lightness of the cream. It’s a touch that makes these mini treats feel extra special.
For another incredibly smooth and creamy dessert packed with Oreos, be sure to try our popular Oreo Tiramisu recipe, which shares that same delightful texture and intense cookie flavor.
Essential Ingredients for Perfect Mini Oreo Cheesecakes
Master these tips to guarantee success!
Detailed steps and a complete ingredient list can be found in the recipe card below.
- Oreos: The star of the show! You’ll need about 24 Oreos, which is typically one standard pack. Twelve cookies will form the individual crusts for your mini cheesecakes, while the remaining twelve will be crushed and folded into the creamy cheesecake batter, with a few extra reserved for garnish. Don’t worry if you have a few left over – they’re perfect for snacking or making these delightful cookies and cream cinnamon rolls. Other chocolate sandwich cookies can be substituted, but for authentic flavor, Oreos are best.
- Cream Cheese: Quality matters here. Always opt for a good quality, full-fat, brick-style cream cheese. Avoid the whipped or spreadable tubs, as they contain too much water and can lead to a less stable cheesecake. It’s crucial that the cream cheese is at room temperature before you begin mixing. This ensures it blends smoothly and evenly with the sugar, preventing any lumps and resulting in that signature silky cheesecake texture.
- Large Eggs: Like the cream cheese, your large eggs must be at room temperature. This is a critical detail for achieving a perfectly creamy and smooth cheesecake batter. Cold eggs can cause the batter to seize and become lumpy, impacting the final texture of your cheesecakes. Adding them one by one also helps in maintaining a consistent emulsion.
- Sour Cream: Full-fat sour cream is an absolute must for an ultra-rich, tangy, and smooth cheesecake. It adds moisture, a delicate tang that cuts through the sweetness, and contributes significantly to the creamy mouthfeel. Ensure it’s also at room temperature to incorporate seamlessly into the batter.
- Semisweet Chocolate Chips: These are the foundation for our luxurious fudge sauce. Semisweet chocolate provides a balanced richness without being overly sweet, creating a deep, intensely chocolatey, and wonderfully gooey ganache that truly elevates these mini cheesecakes. You can also use chopped dark chocolate for a more intense flavor or milk chocolate for a sweeter profile.
- Heavy Whipping Cream: This ingredient is used in two places: the fudge sauce and the glorious whipped cream topping. For the whipped cream, it’s vital that your heavy whipping cream is very cold, straight from the fridge. This ensures it whips up to stiff, fluffy peaks that hold their shape beautifully. Aim for cream with at least 35% milk fat for the best results. Vanilla extract is added to the whipped cream for a touch of aromatic sweetness.
How to Make Decadent Mini Oreo Cheesecakes: Step-by-Step Guide
Creating these delightful mini Oreo cheesecakes is a rewarding process. Follow these detailed steps for a perfect batch:
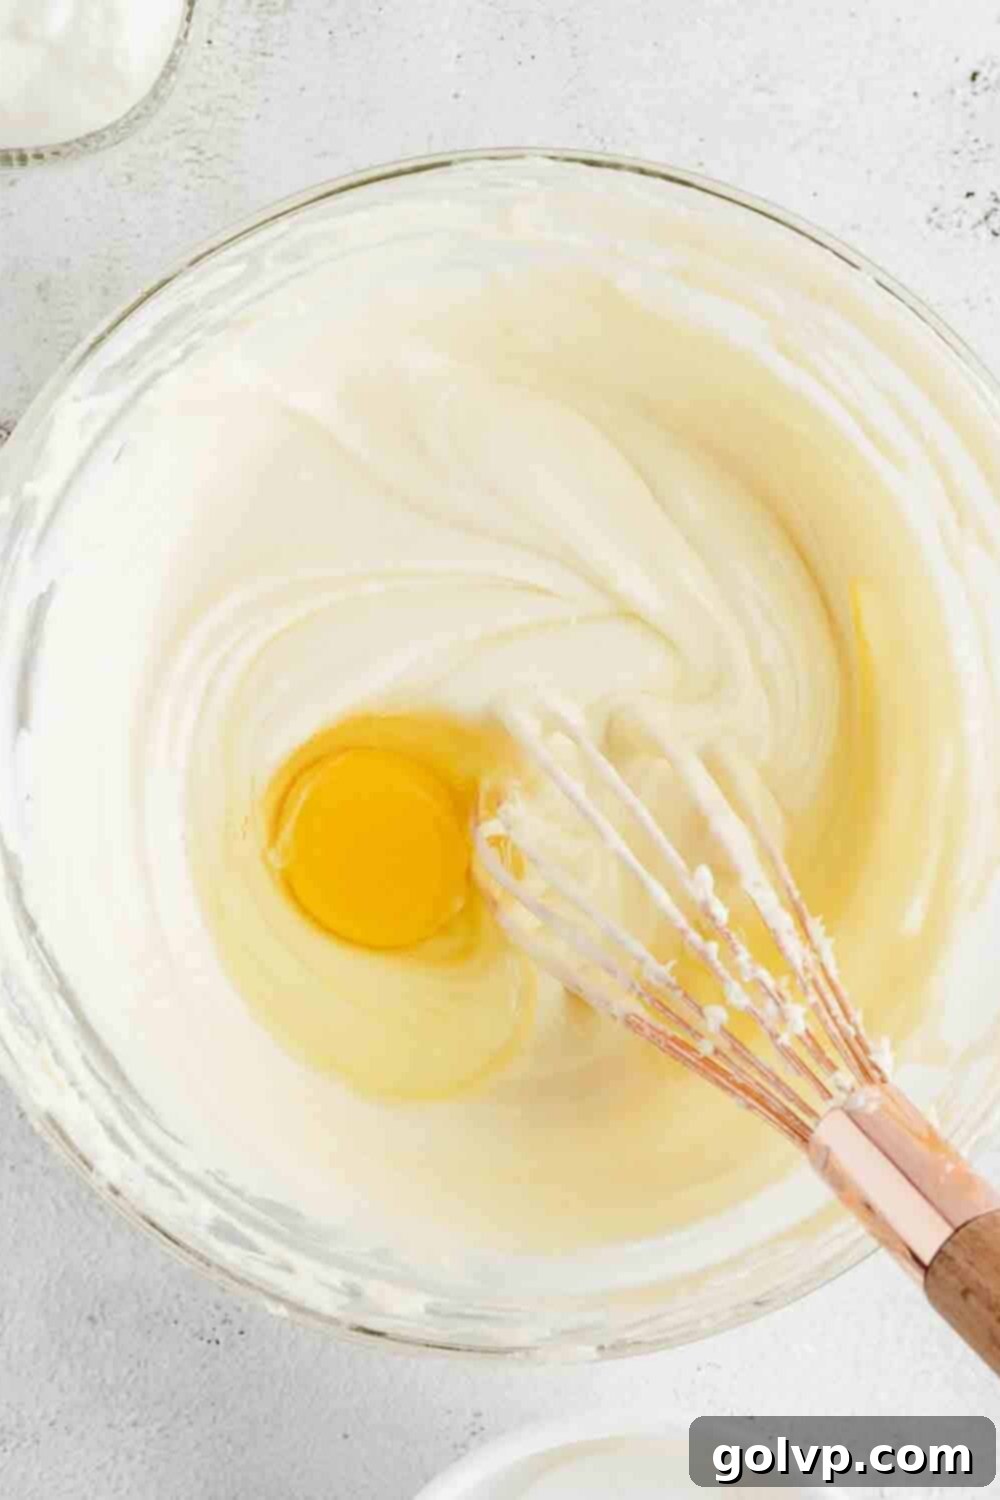
Step 1: Prepare the Creamy Cheesecake Batter. Begin by ensuring your room temperature cream cheese, granulated sugar, and a pinch of salt are combined in a large mixing bowl. Beat these ingredients together with an electric hand mixer or a sturdy whisk until the mixture is completely smooth and free of any lumps. Next, incorporate the vanilla extract. Add the large eggs one at a time, mixing just until each egg is fully incorporated before adding the next. This prevents overmixing and helps maintain a creamy texture. Finally, gently fold in the room temperature sour cream and the crushed Oreos, reserving a few tablespoons of the crushed cookies for garnishing later. Mix just until combined; avoid overmixing at this stage to prevent a tough cheesecake.
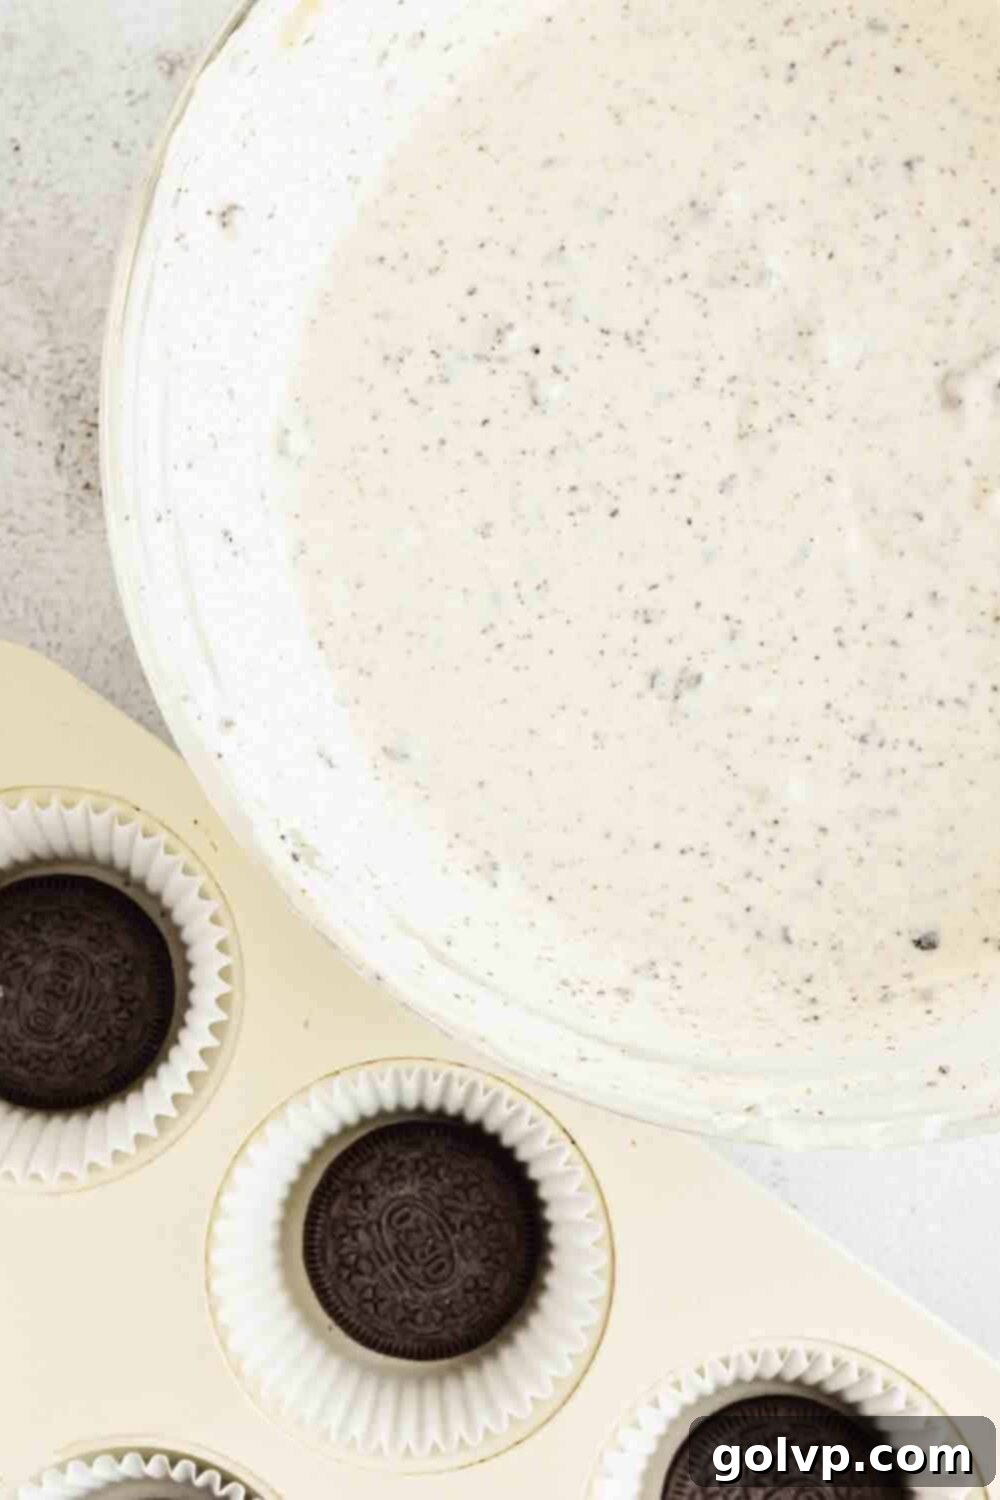
Step 2: Assemble and Bake the Mini Cheesecakes. Preheat your oven to 340°F (170°C). Line a standard 12-hole muffin tin with paper cupcake liners. Place one whole Oreo cookie at the bottom of each liner; these will form your delicious crusts. Carefully divide the prepared cheesecake batter evenly among the 12 lined muffin cups, filling them almost all the way to the top. Bake for exactly 15 minutes. After 15 minutes, turn off the oven but leave the cheesecakes inside with the oven door ajar for an additional 8 minutes. This gentle cooling period helps prevent cracks. The edges should appear set, with a slight jiggle in the center.
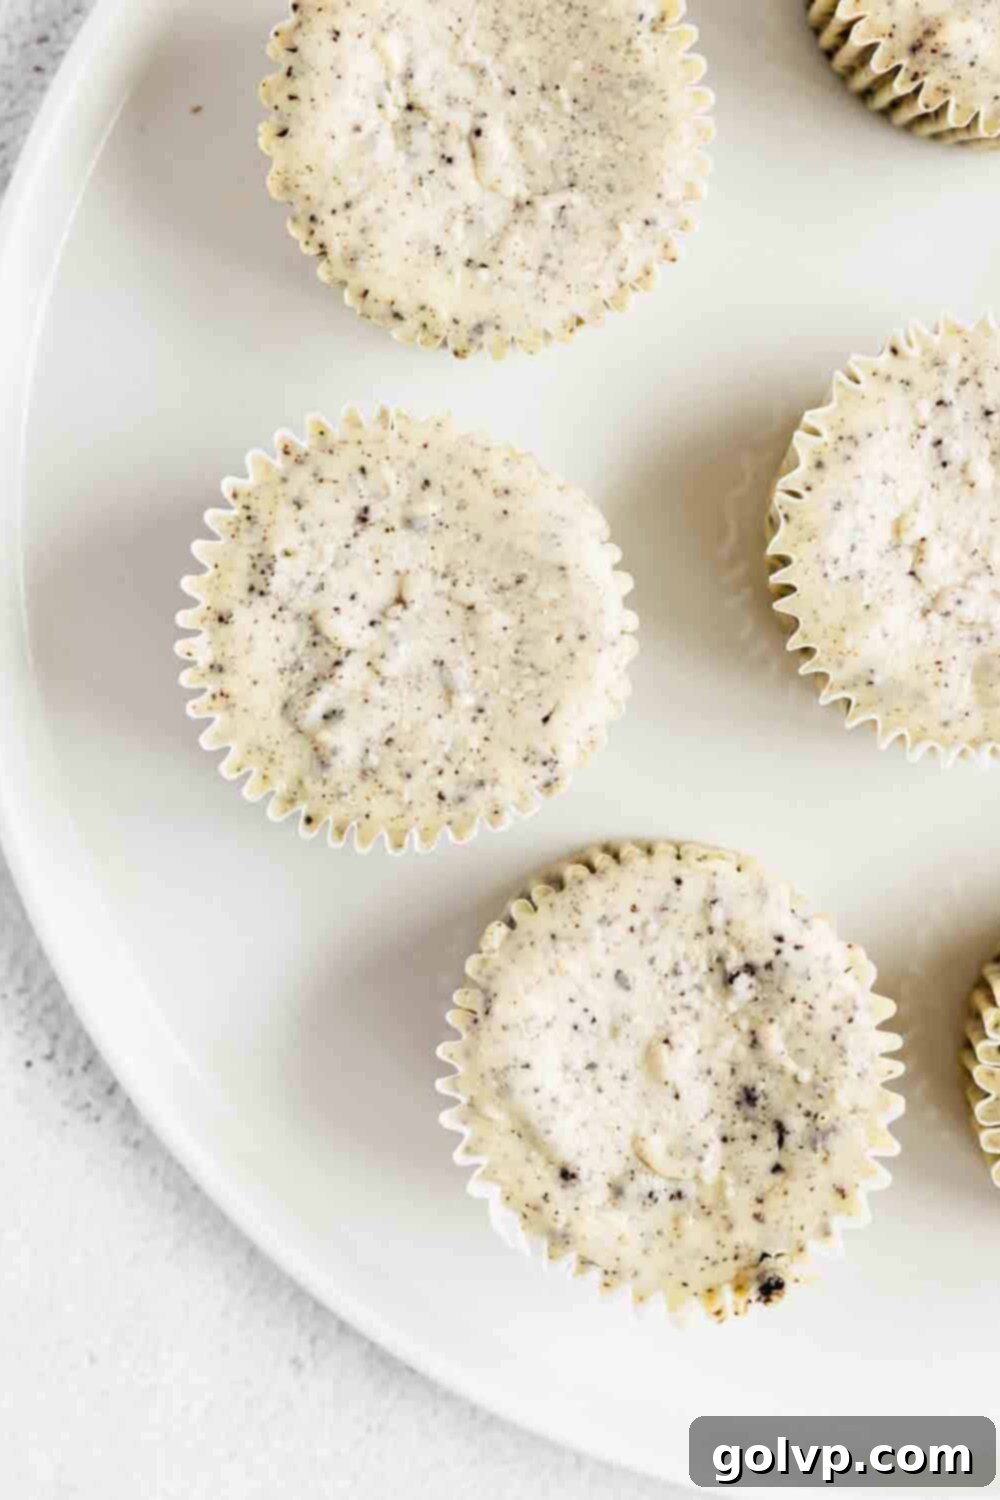
Step 3: Cool and Chill for Optimal Flavor. Once the gentle oven cooling period is complete, remove the muffin tin from the oven and let the mini cheesecakes cool completely to room temperature within their liners. This step is crucial for proper setting. Once cooled, carefully remove the cheesecakes from the muffin pan. Transfer them to an airtight container and refrigerate for at least 2 hours. Chilling allows the flavors to meld and deepen, and ensures the cheesecake achieves its firm, creamy texture. For best results and convenience, you can prepare and bake the cheesecake bases the day before, allowing them ample time to chill overnight.
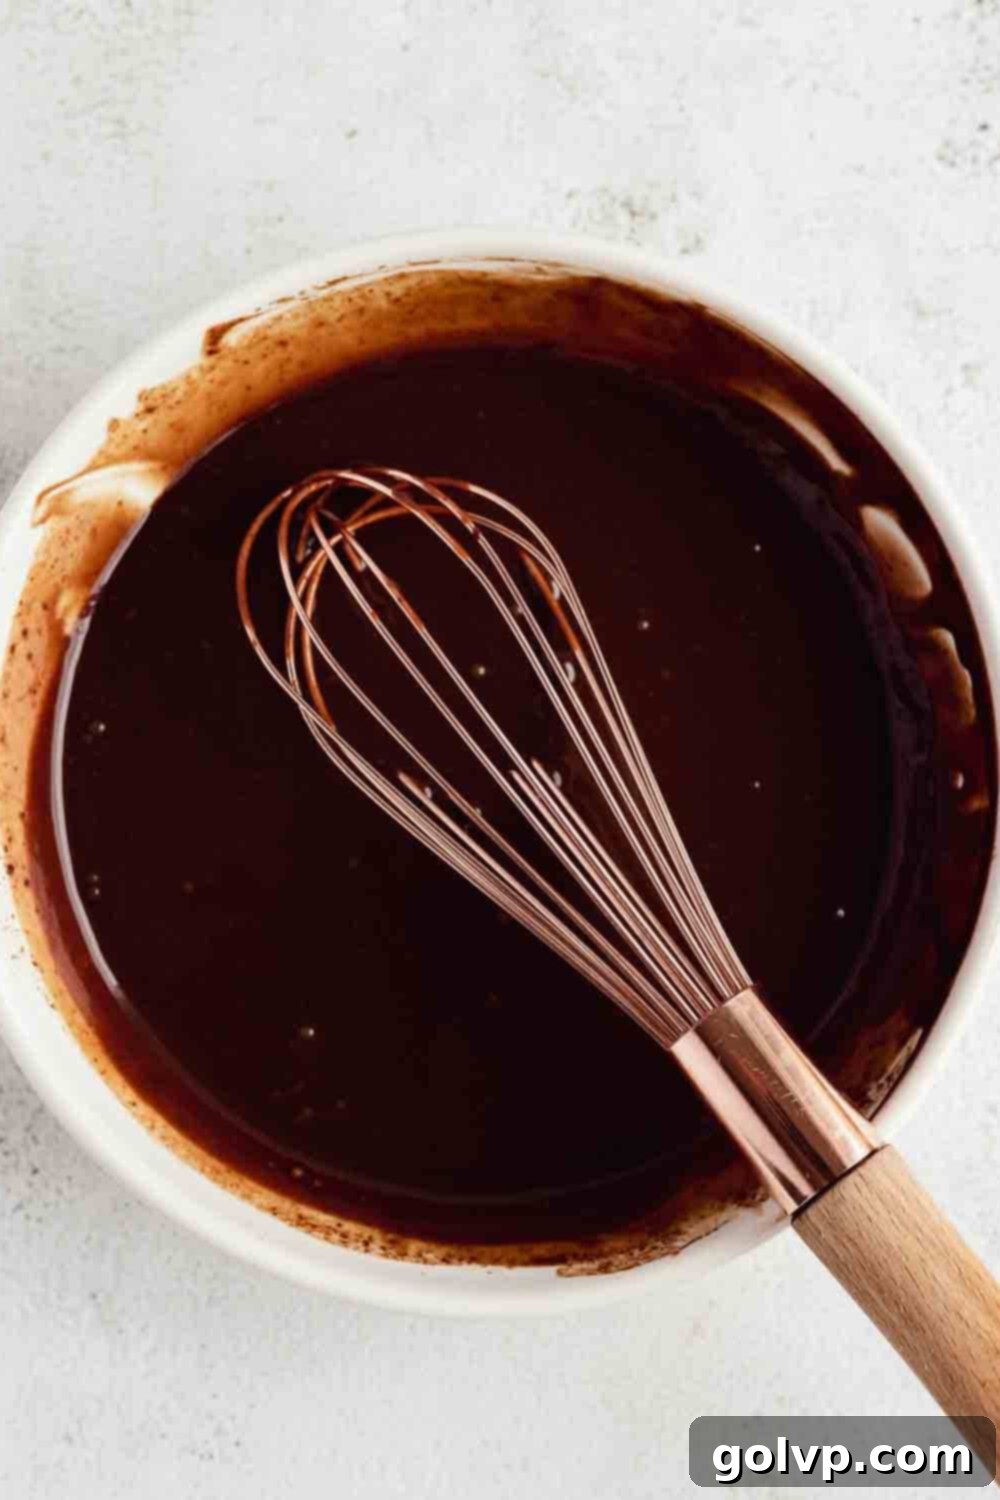
Step 4: Craft the Decadent Fudge Sauce. To make the rich chocolate fudge sauce, place your semisweet chocolate chips (or chopped chocolate) into a medium heat-proof bowl. In a small saucepan, bring the heavy whipping cream and a tiny pinch of salt (to enhance the chocolate flavor) to a gentle simmer. Once simmering, immediately pour the hot cream over the chocolate chips. Cover the bowl with a plate or lid and let it sit undisturbed for 5 minutes. This allows the heat from the cream to melt the chocolate evenly. After 5 minutes, uncover and whisk the mixture until it is completely smooth and glossy. Let the fudge sauce cool to room temperature before using; if you’re in a hurry, you can place it in the refrigerator for 5-10 minutes, stirring occasionally, until it reaches a spreadable consistency.
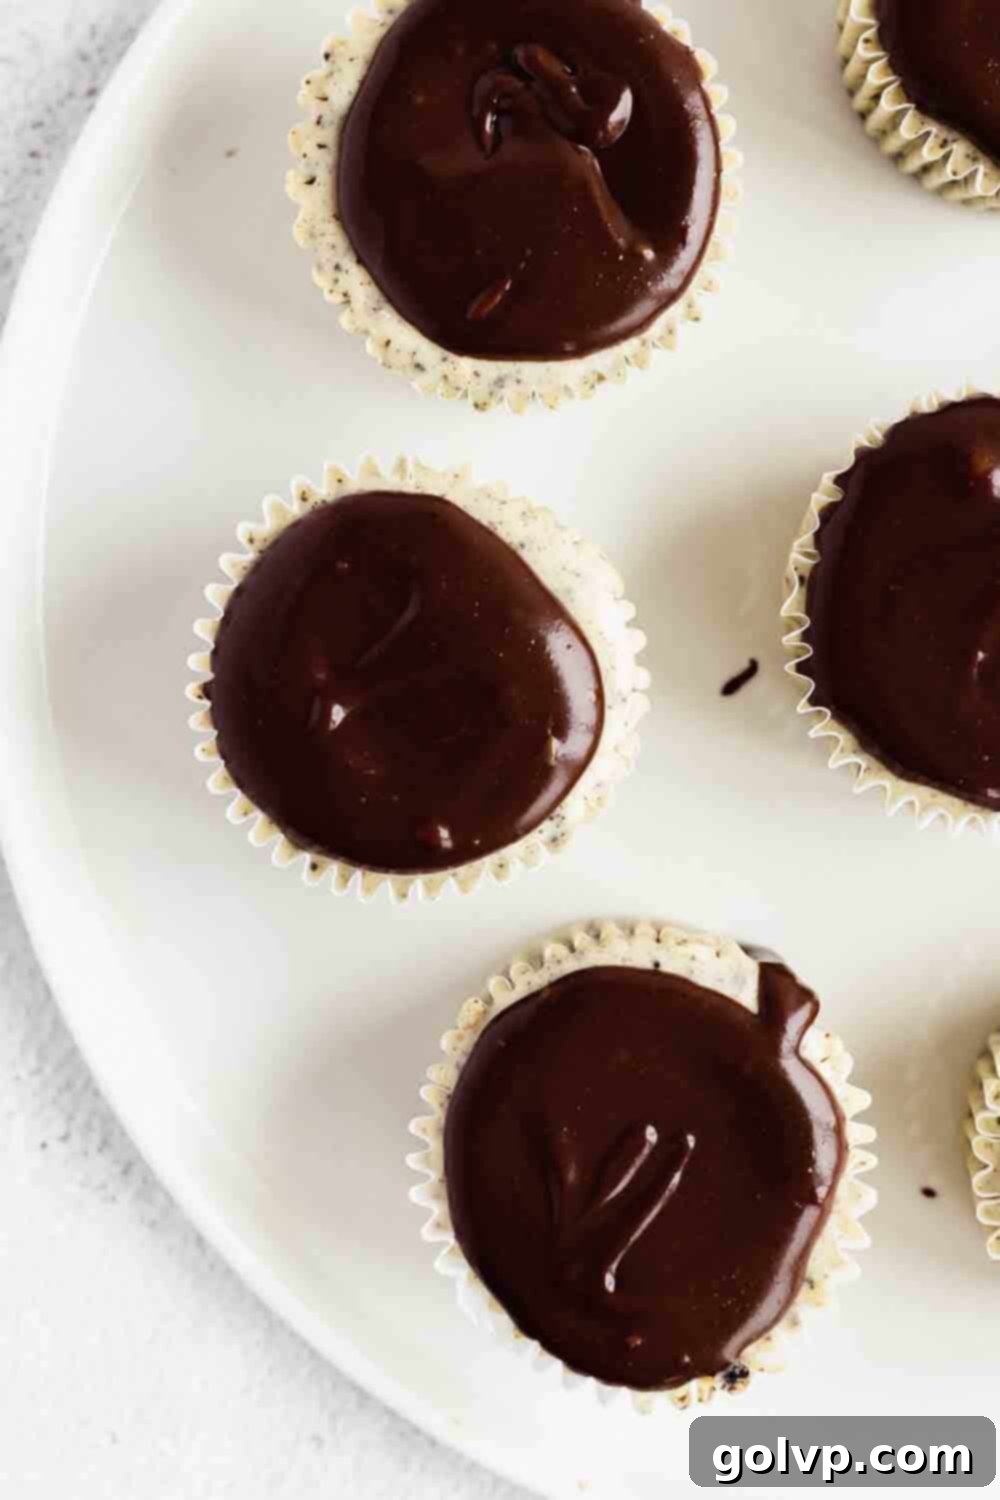
Step 5: Layer with Fudge and Whipped Cream. Once your mini cheesecakes are thoroughly chilled and the fudge sauce has cooled to a spreadable consistency, it’s time to assemble! Spoon one to two tablespoons of the delicious fudge sauce over the top of each mini cheesecake, gently spreading it to form an even layer. Next, using a piping bag fitted with your favorite decorative tip (or simply a spoon), pipe a generous dollop of the fluffy whipped cream frosting onto each cheesecake, directly on top of the fudge layer. For an extra touch of elegance and chocolatey goodness, drizzle a little more fudge sauce over the whipped cream. This can be done with a spoon or by snipping a tiny corner off a ziploc bag filled with sauce.
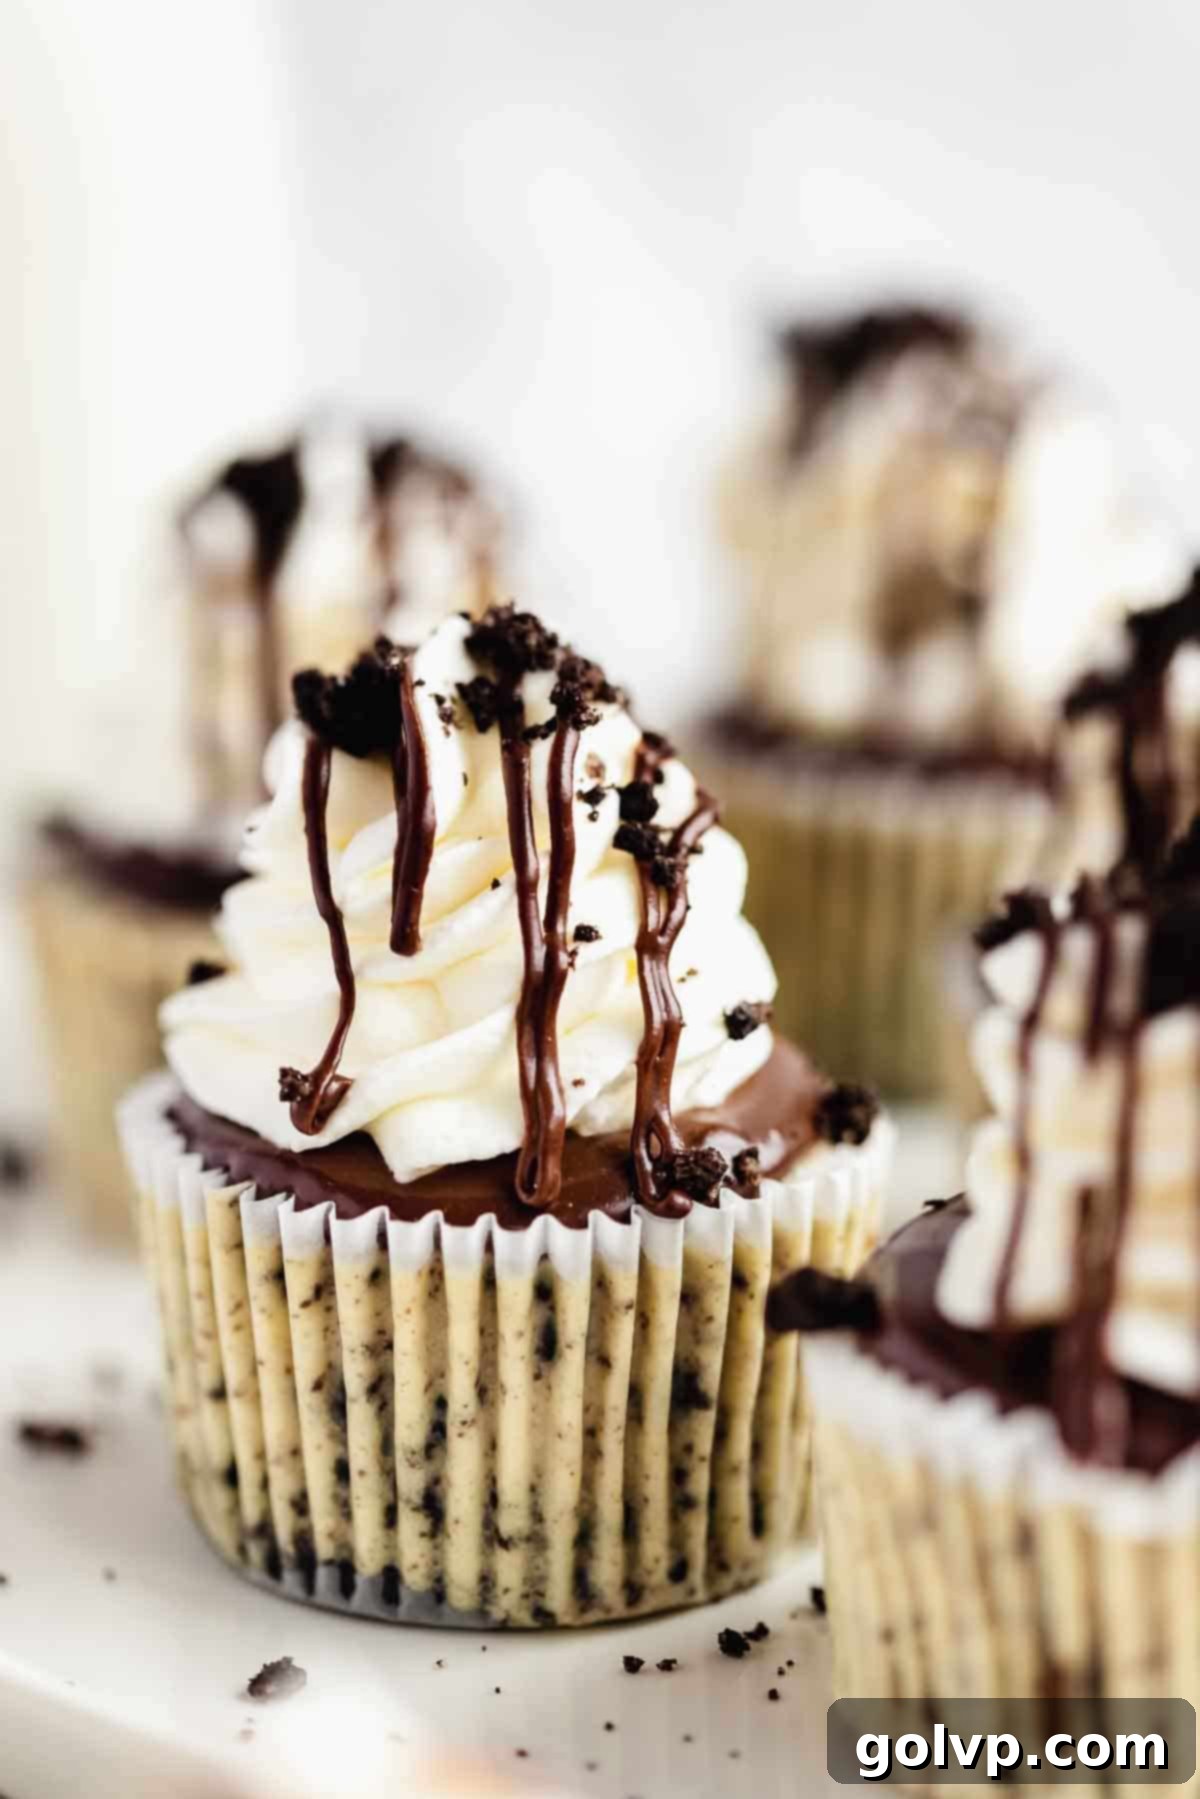
Step 6: Finish with Whipped Cream and Garnish. In a large bowl, combine the very cold heavy whipping cream, granulated sugar (to your desired sweetness, 3-4 tablespoons is a good start), and pure vanilla extract. Using an electric mixer, whisk on medium-high speed until stiff peaks form. Be careful not to overmix, as this can turn the cream grainy. Transfer the whipped cream to a piping bag fitted with your preferred tip. Pipe a beautiful dollop or swirl of whipped cream on top of each cheesecake. As a final flourish, drizzle a little more fudge sauce and generously sprinkle the remaining crushed Oreo cookie chunks and crumbs on top right before serving. Enjoy these delightful, layered mini treats!
Expert Tips for the Best Mini Oreo Cheesecakes
Achieving cheesecake perfection is easier than you think with these professional tips:
- Ensure Room Temperature Ingredients: This is arguably the most crucial tip for any cheesecake. Make sure your cream cheese, eggs, and sour cream are all at room temperature before you begin mixing. Cold ingredients will not emulsify properly, leading to a lumpy batter and a less smooth, potentially curdled texture in your final cheesecake. Plan ahead and take them out of the refrigerator at least 30 minutes to an hour before you start.
- Avoid Overmixing the Batter (Especially After Adding Eggs): When beating the cream cheese and sugar, you can mix until completely smooth. However, once you add the eggs, mix only until they are just incorporated. Overmixing introduces too much air into the batter, which can cause the cheesecake to puff up excessively in the oven and then crack or sink dramatically as it cools. We’re aiming for a dense, creamy texture, not a fluffy cake-like one.
- Chill Thoroughly for Optimal Setting and Flavor: Patience is a virtue when it comes to cheesecake. Chilling the baked cheesecakes for at least 2 hours (or even better, overnight) is essential. This allows the cheesecake to fully set and firm up, ensuring it holds its shape perfectly. More importantly, chilling allows the complex flavors to develop and deepen, transforming a good cheesecake into a truly great one. Don’t rush this step!
- Do Not Overbake: Mini cheesecakes bake quickly. Watch for the edges to be set, but the very center should still have a slight jiggle. This “jiggle” indicates that the center will finish cooking and set as it cools, resulting in a creamy texture. Overbaking leads to dry, cracked cheesecakes.
- Use High-Quality Ingredients: Since there are relatively few ingredients, the quality of each really shines through. Use full-fat, good-quality cream cheese and heavy cream for the richest, most decadent results.
Make-Ahead and Storage Solutions for Your Mini Oreo Cheesecakes
These mini Oreo cheesecakes are excellent for making ahead, which can be a real time-saver when entertaining or preparing for a busy week. The cheesecake bases themselves can be baked and chilled completely a day in advance. Simply follow the recipe up to the point where they are removed from the muffin tin and refrigerated. Store them in an airtight container in the refrigerator overnight. This allows them to fully set and enhances their flavor even further.
Once fully assembled with the fudge sauce and whipped cream, these mini Oreo cheesecakes will keep beautifully when refrigerated in an airtight container for up to 3 days. While they remain delicious, do note that the Oreo cookie at the very bottom will gradually absorb moisture over time, becoming slightly softer. For the absolute best texture and enjoyment, we recommend taking these individual cheesecakes out of the fridge for about 5-10 minutes before serving. This brief period at room temperature softens them slightly, allowing the creamy filling and fudge sauce to achieve their ideal consistency.
Crafting the Perfect Fudge Sauce for Your Cheesecakes
The fudge sauce in this recipe is not just any topping; it’s an incredibly easy, two-ingredient chocolate ganache that is guaranteed to be rich, glossy, and melt-in-your-mouth delicious. The beauty of this sauce lies in its simplicity and profound flavor. We achieve its deep chocolate profile by using quality semisweet chocolate chips. For an added layer of flavor that truly makes the chocolate sing, I always recommend adding just a tiny pinch of salt. This subtle addition doesn’t make the sauce salty but instead amplifies the chocolate’s natural complexity, creating a more balanced and irresistible taste.
The process is incredibly straightforward and takes less than 5 minutes of active time! Simply place your chocolate chips into a heat-proof bowl. In a separate small saucepan, gently bring heavy cream to a simmer. Once you see small bubbles forming around the edges of the cream, remove it from the heat and pour it directly over the chocolate chips. Cover the bowl and let it sit undisturbed for 5 minutes. This resting period allows the hot cream to gently melt the chocolate without scorching. After 5 minutes, uncover and whisk the mixture until it transforms into a smooth, shiny, and homogeneous sauce. And just like that – your luxurious, homemade fudge sauce is ready to elevate your mini cheesecakes!
Why a Water Bath is Unnecessary for Mini Cheesecakes
When baking a traditional, full-sized cheesecake, a water bath (bain-marie) is often considered essential. This technique provides a moist, even heat that helps the cheesecake bake slowly and uniformly, preventing the edges from overbaking and cracking while the center remains undercooked. It also helps to create that perfectly smooth, unblemished surface and creamy texture we all desire in a classic cheesecake.
However, the beauty of mini cheesecakes is that they defy this traditional requirement. Due to their significantly smaller size, mini cheesecakes bake through much faster and more evenly than their larger counterparts. The heat penetrates the smaller mass of batter more uniformly, reducing the risk of uneven baking or excessive cracking. By simply adjusting the oven temperature to a slightly lower heat (340°F / 170°C) and baking for a shorter duration, you can achieve the perfect, set cheesecake texture without the fuss and potential mess of a water bath. The gentle, controlled cooling process inside the turned-off oven further helps to prevent sudden temperature changes that can lead to cracks.
If you’re interested in tackling a full-sized baked cheesecake, our Red Velvet Oreo Cheesecake recipe uses a water bath, demonstrating how deceptively easy it can be to implement for stunning results. For an equally impressive chocolate hazelnut variation, be sure to try this gorgeous Nutella Cheesecake.
Mini Oreo Cheesecake Recipe FAQs
Preventing a split ganache (or fudge sauce) comes down to a few key factors. Firstly, always use a good quality baking chocolate, whether it’s semisweet, dark, or milk chocolate. Higher quality chocolate typically melts more smoothly. Secondly, it’s absolutely crucial to ensure that no water comes into contact with the chocolate during the melting process. Even a tiny drop of water can cause the chocolate to seize or split, resulting in a grainy texture. Finally, make sure the cream is hot enough to melt the chocolate but not boiling aggressively, and let it sit undisturbed over the chocolate for the recommended time before whisking.
If your ganache turns out grainy, don’t despair – it can often be salvaged! One common method is to place the bowl of grainy ganache over a larger bowl filled with hot (but not boiling) water, creating a makeshift double boiler. Whisk the ganache vigorously and continuously until it smooths out. Be extremely careful not to let any water splash into the ganache. Another trick is to add a half teaspoon of warm milk (or cream) to the grainy ganache and whisk vigorously. If it doesn’t come together, add another half teaspoon and continue whisking. The added liquid can help re-emulsify the chocolate and fat. For a more aggressive approach, you could try blending the ganache with an immersion blender or a regular blender (pulsing gently) to see if that helps it achieve a silky smooth consistency.
Chilling cheesecake before serving is a non-negotiable step for achieving the perfect flavor and texture. During baking, the cheesecake mixture heats up, causing the fats (from cream cheese, eggs, and sour cream) to soften and become fluid. As the cheesecake cools in the refrigerator, these fats solidify again, which is what allows the cheesecake to set and firm up into its characteristic dense, creamy texture. Beyond texture, chilling also plays a vital role in flavor development. The various ingredients have time to meld and harmonize, resulting in a much deeper, more complex, and balanced flavor profile that tastes infinitely better than a warm, unset cheesecake. It’s the final crucial step in creating an exceptional cheesecake experience.
More Indulgent Related Dessert Recipes
If you loved these mini Oreo cheesecakes, you’ll surely enjoy exploring more delightful recipes that feature beloved flavors and textures:
- Oreo Tiramisu
- Red Velvet Oreo Cheesecake
- Cookies and Cream Cinnamon Rolls – No Knead
- Oreo Pop Tarts
Did you make this recipe? We would love to hear your thoughts and see your creations! Please rate this recipe and share what you think in the comments section below. Don’t forget to share your delicious masterpiece on Instagram and tag @flouringkitchen. For more inspiring recipe ideas and to save your favorites, follow us on Pinterest!
📖 Recipe
Mini Oreo Cheesecakes
Mary
Pin Recipe
Shop Ingredients
Equipment
-
regular sized muffin pan
-
whisk
Ingredients
Cheesecake
- 24 Oreos (one pack) 12 for crusts and 12 to crush
- 16 oz cream cheese room temperature (500g), full fat, brick style
- ½ cup granulated sugar
- ⅛ teaspoon salt
- 1 teaspoon pure vanilla extract
- 2 large eggs room temperature
- ⅓ cup sour cream full fat, room temperature
Chocolate Fudge Sauce
- ¾ cup semisweet chocolate chips or use chopped dark chocolate, or chopped milk chocolate
- ½ cup heavy whipping cream 35% or higher
- ⅛ teaspoon salt
Whipped Cream Frosting
- 1 cup heavy whipping cream 35% or higher, chilled
- 3-4 tablespoon granulated sugar
- 1 teaspoon pure vanilla extract
Shop Ingredients on Jupiter
Instructions
Cheesecake Preparation
-
Preheat your oven to 340°F (170°C). Prepare a regular-sized muffin pan by lining 12 holes with paper muffin liners. Place one whole Oreo cookie at the bottom of each lined compartment to form the crust.24 Oreos (one pack)
-
Take 12 more whole Oreos and place them in a large plastic or silicone bag. Crush them into coarse pieces using a rolling pin or pulse them briefly in a food processor. Set aside for later.24 Oreos (one pack)
-
In a large mixing bowl, using an electric hand mixer or a sturdy whisk, beat the room temperature cream cheese, granulated sugar, and a pinch of salt together until the mixture is completely smooth and creamy. Ensure there are no lumps remaining.16 oz cream cheese, ½ cup granulated sugar, ⅛ teaspoon salt
-
Add the pure vanilla extract. Then, add the large eggs one by one, mixing only until each egg is just incorporated into the batter and smooth. Avoid overmixing once the eggs are added.1 teaspoon pure vanilla extract, 2 large eggs
-
Gently fold in the room temperature full-fat sour cream until just combined. Next, fold in most of the crushed Oreos you prepared earlier, reserving a few tablespoons for sprinkling on top as a garnish. Again, do not overmix at this stage.⅓ cup sour cream
-
Divide the prepared cheesecake batter evenly among the 12 muffin liners, filling them almost all the way to the top. Bake in the preheated oven at 340°F (170°C) for 15 minutes. After 15 minutes, turn the oven off completely but leave the cheesecakes inside for an additional 5-8 minutes with the oven door slightly ajar. The edges should appear set, but the center should still have a slight jiggle. Remove the cheesecakes from the oven and allow them to cool completely in the muffin tin before moving.
-
Once the cheesecakes have reached room temperature, carefully remove them from the muffin tins. Transfer them to an airtight container and refrigerate for a minimum of 2 hours to chill completely. This crucial chilling period allows the cheesecake to set properly and the flavors to fully develop. For convenience, the cheesecake bases can be made and baked the day before, then chilled overnight.
Chocolate Fudge Sauce
-
Place the semisweet chocolate chips (or chopped chocolate) into a medium heat-proof bowl. In a small saucepan, bring the heavy whipping cream and the ⅛ teaspoon of salt to a gentle simmer over medium heat.¾ cup semisweet chocolate chips, ½ cup heavy whipping cream, ⅛ teaspoon salt
-
Once the cream is simmering, immediately pour the hot cream over the chocolate chips. Cover the bowl with a plate or lid and let it sit undisturbed for 5 minutes. This allows the chocolate to melt evenly without direct heat.
-
After 5 minutes, uncover the bowl and whisk the mixture until it becomes completely smooth, glossy, and emulsified into a rich fudge sauce. Let the sauce cool to room temperature before using. If you need to speed up the cooling process, you can place it in the refrigerator for 5-10 minutes, stirring occasionally, until it reaches a spreadable consistency.
Whipped Cream Frosting
-
In a large bowl or the bowl of a stand mixer fitted with a whisk attachment, combine the very cold heavy whipping cream, granulated sugar (adjust to your sweetness preference, 3-4 tablespoons is a good starting point), and pure vanilla extract. Whisk on medium-high speed until the mixture reaches stiff peaks, meaning it holds its shape firmly. Be careful not to overmix, as this can cause the cream to become grainy or turn into butter.1 cup heavy whipping cream, 3-4 tablespoon granulated sugar, 1 teaspoon pure vanilla extract
-
Once the whipped cream is ready, transfer it to a piping bag fitted with your favorite decorative tip. Set it aside until ready for assembly.
Assembly of Mini Oreo Cheesecakes
-
Once the mini cheesecakes are thoroughly chilled and the fudge sauce has cooled to room temperature (and is spreadable), you can begin assembly. Spread one to two tablespoons of the delicious fudge sauce evenly over the top of each mini cheesecake. Next, pipe a beautiful tower or dollop of the whipped cream frosting onto each cheesecake, directly on top of the fudge layer. For an extra touch of decadence, drizzle a little more fudge sauce over the whipped cream. This can be done elegantly with a spoon or by using a small ziploc bag with the corner snipped off. Just before serving, generously sprinkle the remaining reserved crushed Oreo cookie chunks and crumbs on top for a final textural contrast and burst of flavor. Serve immediately and enjoy!
Notes
Make Ahead Option: For your convenience, the cheesecake bases can be prepared and baked a day in advance. After baking and cooling to room temperature, simply place the cheesecake bases in an airtight container and chill them in the fridge overnight. This allows for thorough setting and flavor development, and makes assembly on the day of serving quick and easy.
Key Tips for Success:
- Always use a high-quality, full-fat, brick-style cream cheese. This is essential for a rich, stable, and creamy cheesecake texture.
- Once you’ve added the eggs to the batter, avoid over-beating. Mix only until the eggs are just incorporated. Overmixing introduces excess air, which can lead to a less dense cheesecake and cracks during cooling.
- Do not overbake your mini cheesecakes. They should appear set around the edges but still have a slight gentle wobble in the very center when lightly shaken. They will continue to set as they cool.
- Allow the cheesecakes to chill completely in the refrigerator for several hours. This step is critical for the fats to re-solidify, ensuring a firm, sliceable texture and allowing the complex flavors to fully develop. Patience here will be rewarded with a superior dessert.
