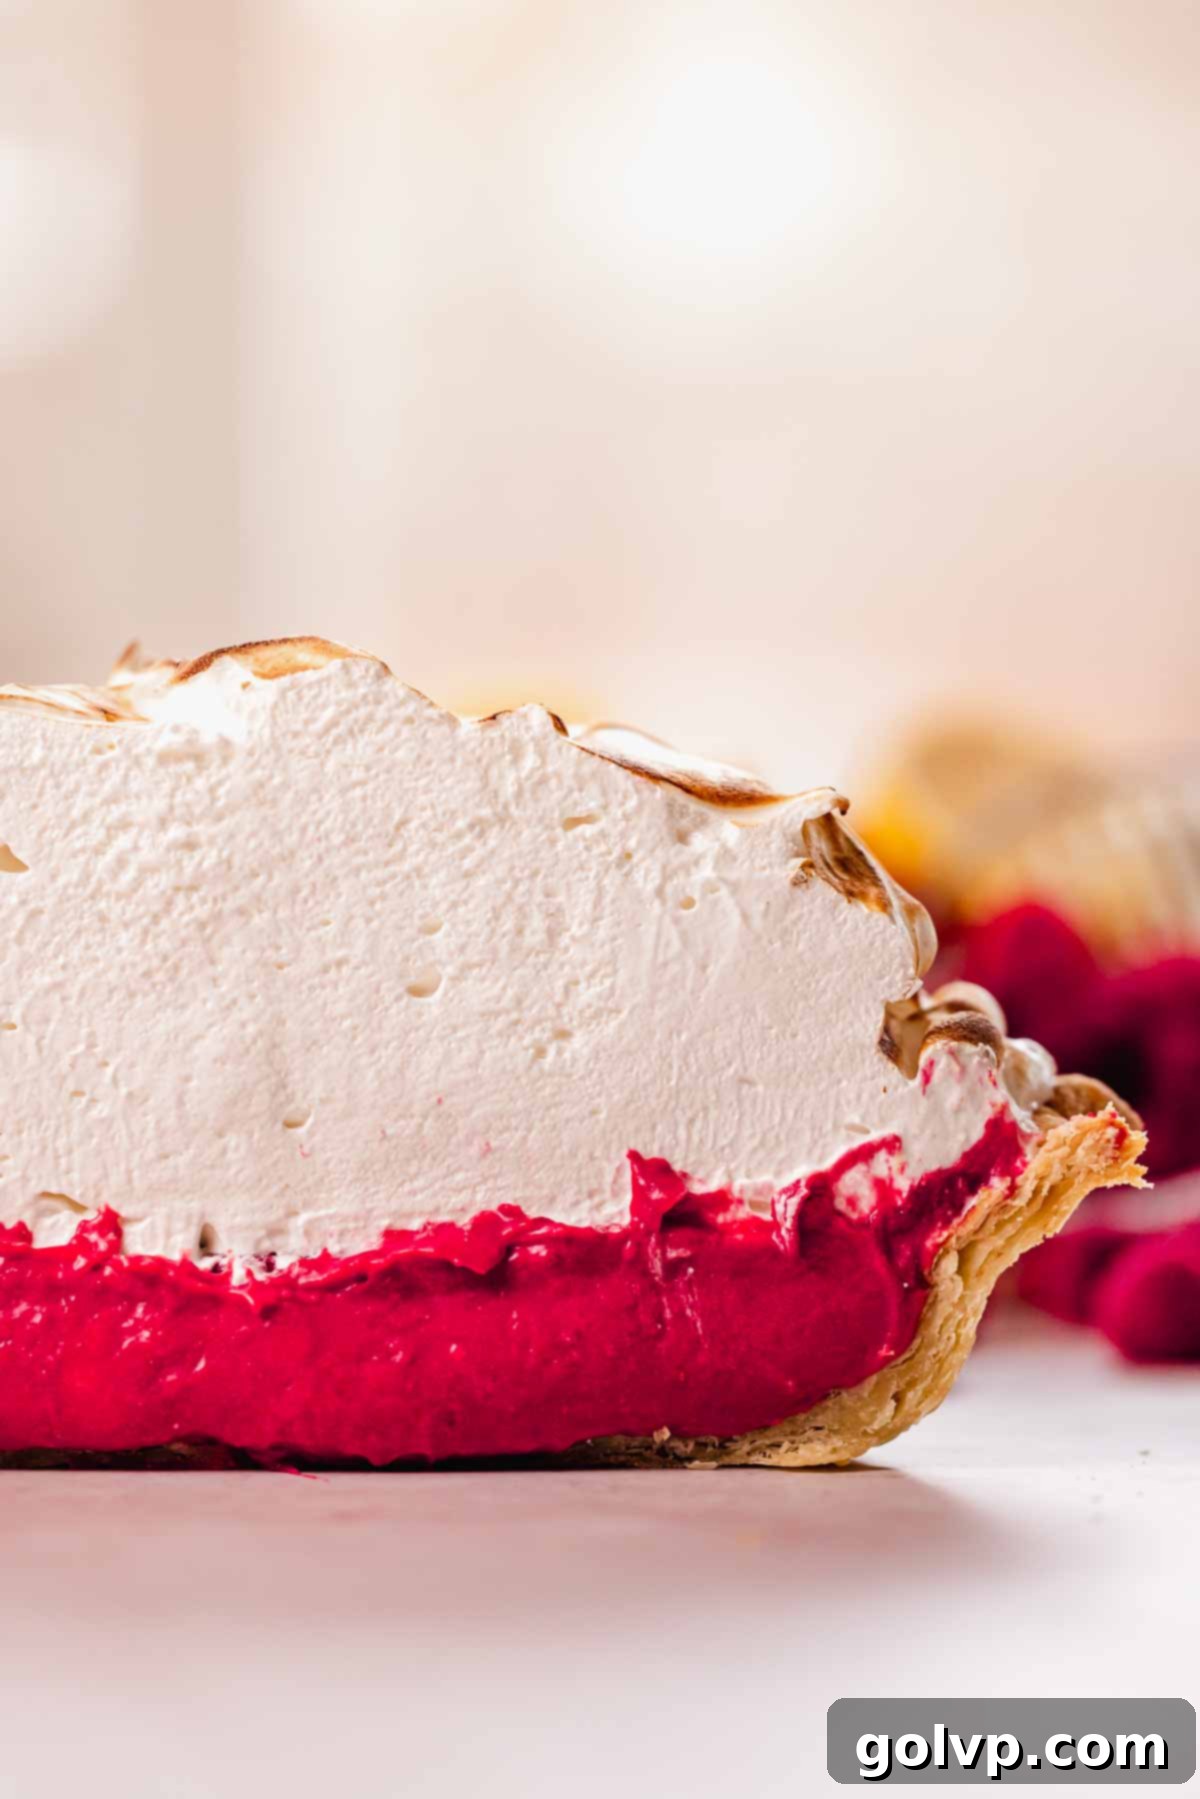
Decadent Raspberry Meringue Pie with Mile-High Italian Meringue and Flaky All-Butter Crust
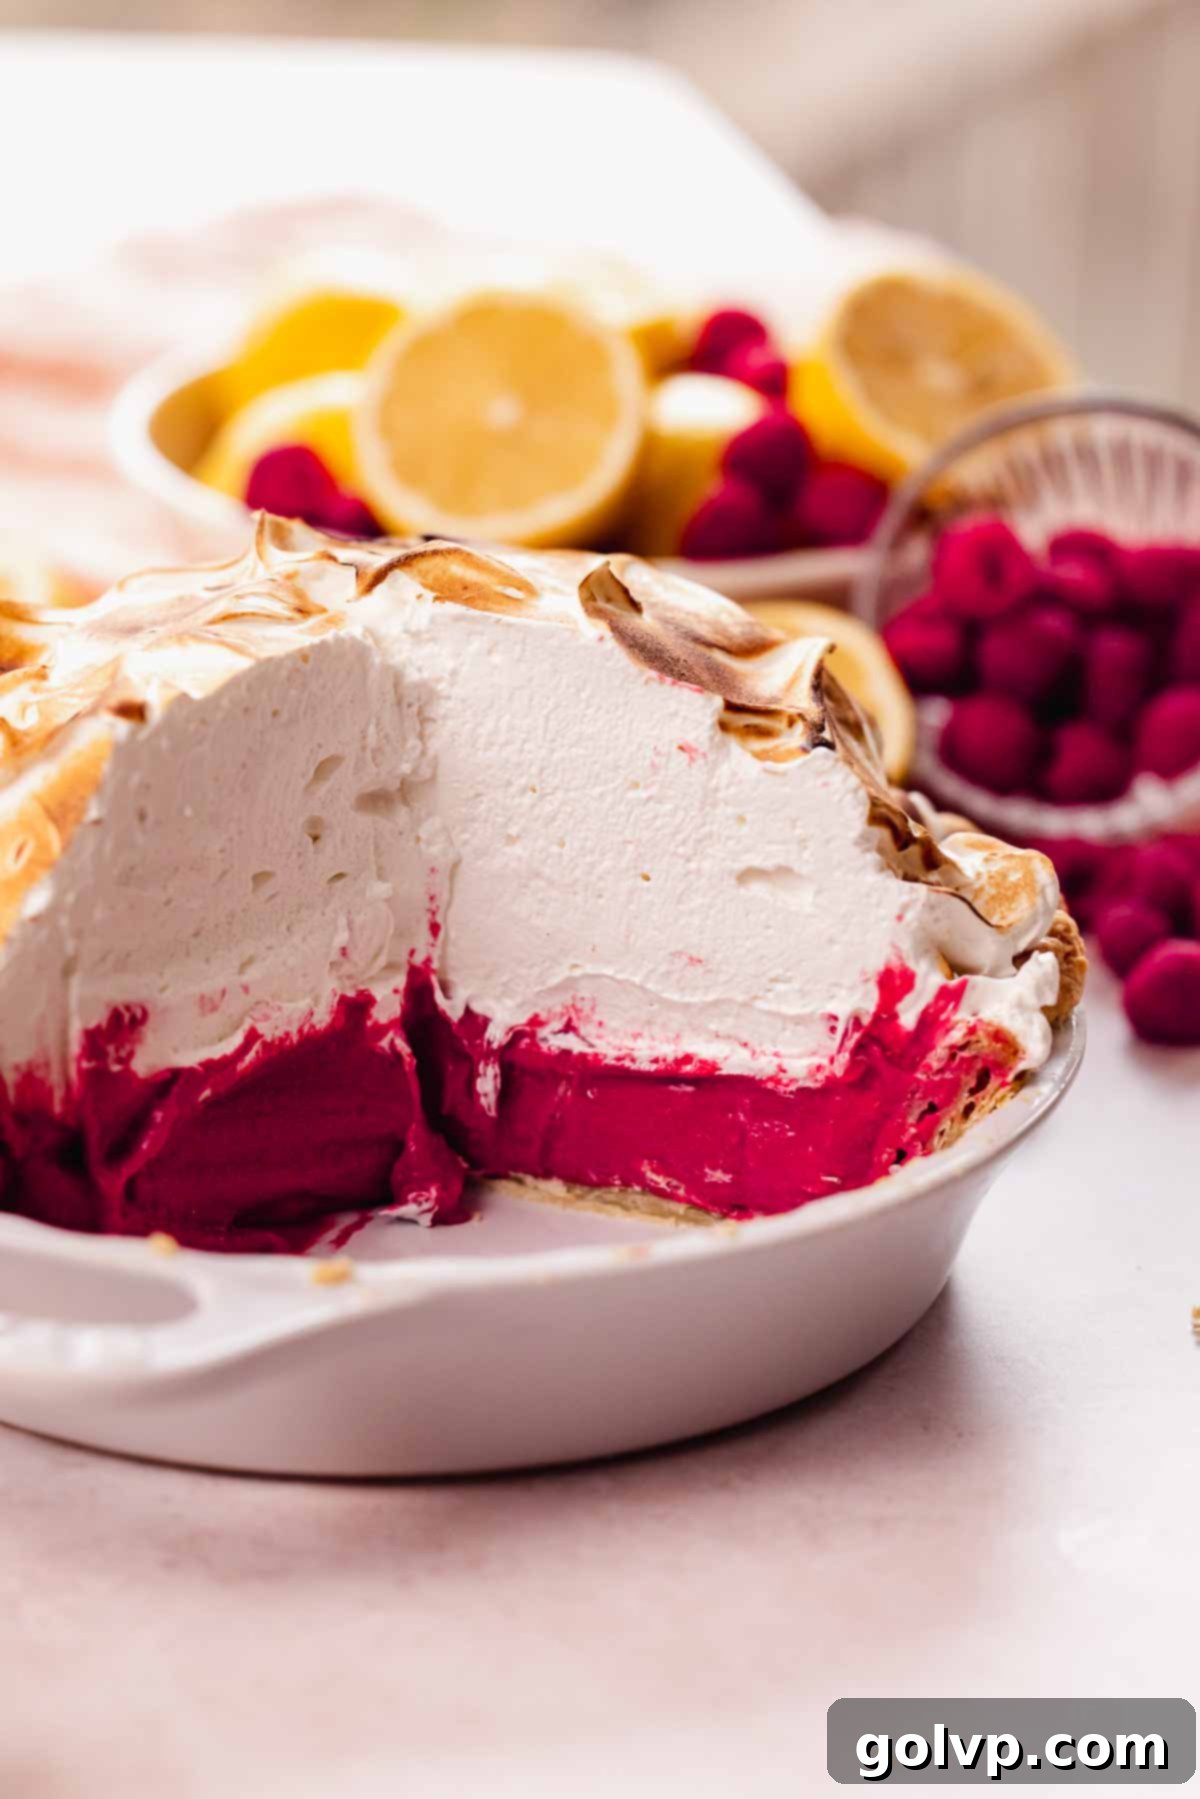
Prepare to be enchanted by this exquisite Raspberry Meringue Pie, a symphony of textures and flavors that will captivate your taste buds. This show-stopping dessert features a remarkably silky-smooth raspberry curd filling, crowned with a majestic tower of perfectly stable Italian meringue, all nestled within the flakiest, most tender all-butter pie crust imaginable. The raspberry curd itself is an absolute dream – lusciously creamy, wonderfully tangy, and bursting with an intense, pure raspberry flavor that truly shines through in every bite. We’ve ensured a generous, thick layer of this vibrant filling to create a delightful balance against the sweet, airy, and impressive “mile-high” meringue that floats above it.
Imagine your favorite classic lemon meringue pie, but infused with the vibrant, sweet-tart essence of ripe berries! This recipe delivers a truly tangy, sweet, and zest-kissed experience. For those who prefer a less prominent citrus note, you have the flexibility to omit the lemon zest from the filling, and rest assured, the pie will still be absolutely amazing. The lemon juice, however, plays a vital role in providing essential acidity and a nuanced flavor complexity that elevates the raspberry profile, so it’s best to keep that in. This beloved recipe, originally shared in 2021, has been thoughtfully updated with fresh photos, enhanced tips, and precise measurements, ensuring you utilize every egg yolk and white without any leftovers, streamlining your baking process for ultimate success and satisfaction.
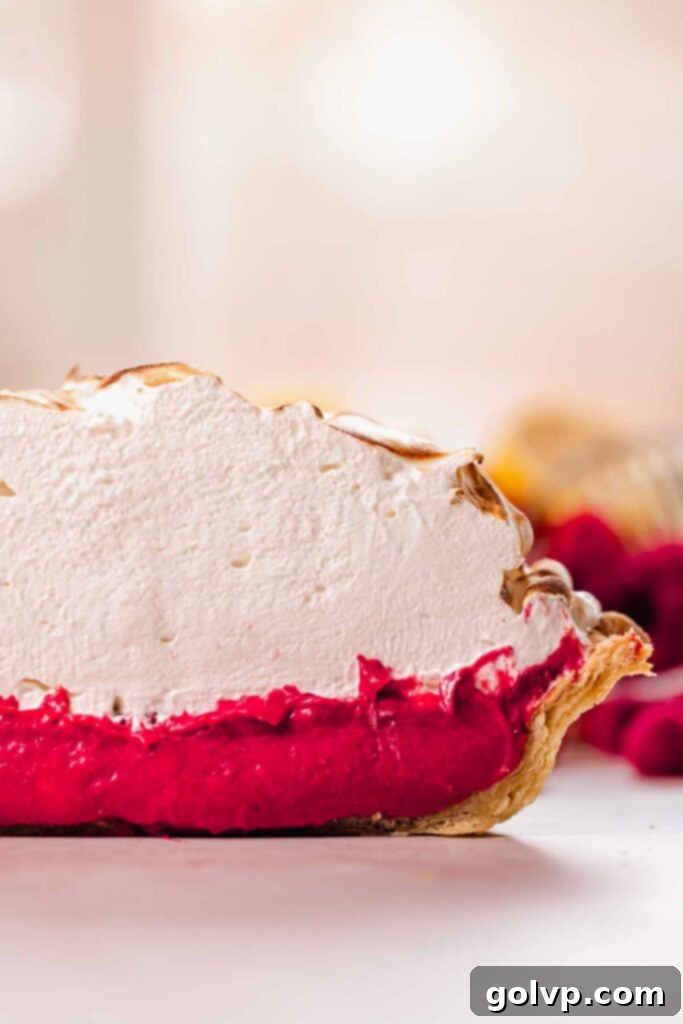
Why You’ll Adore This Raspberry Meringue Pie Recipe
This Raspberry Meringue Pie isn’t just a dessert; it’s an experience. Here’s why this recipe is destined to become a cherished favorite in your baking repertoire:
- Intense Raspberry Flavor: At the heart of this pie is an incredibly rich, creamy, and wonderfully tangy raspberry curd. We’re talking about a filling that’s absolutely packed with authentic raspberry flavor, making it a true delight for berry lovers. Whether you use fresh or frozen, the goal is maximum fruit impact, and this recipe delivers it beautifully.
- Mile-High Italian Meringue: For those who truly appreciate the ethereal lightness of meringue, this pie boasts a towering, cloud-like crown of stable Italian meringue. Unlike other meringues, Italian meringue is made with a hot sugar syrup, which not only ensures its incredible stability, preventing weeping and collapsing, but also cooks the egg whites, making it wonderfully safe to eat. Its fluffy texture and sweet counterpoint perfectly complement the tart filling.
- Flaky All-Butter Pie Crust: A truly exceptional pie begins with an exceptional crust. If you’re opting for a homemade foundation, this recipe guides you through every critical step to achieve a truly flaky, buttery, and satisfyingly crisp crust. The use of all butter not only imparts an unparalleled richness and flavor but also helps create those desirable layers, ensuring your crust remains perfectly crunchy and never gets soggy, even under a thick, luscious filling.
This dessert offers just a hint of lemon, beautifully enhancing the raspberry without overpowering it. If you’re not a fan of lemon, simply omit the lemon zest from the filling, and you’ll still achieve an absolutely fantastic result. Remember to keep the lemon juice, as its acidity is essential for the curd’s structure, brightness, and overall flavor complexity, creating a harmonious blend that defines this raspberry meringue pie.
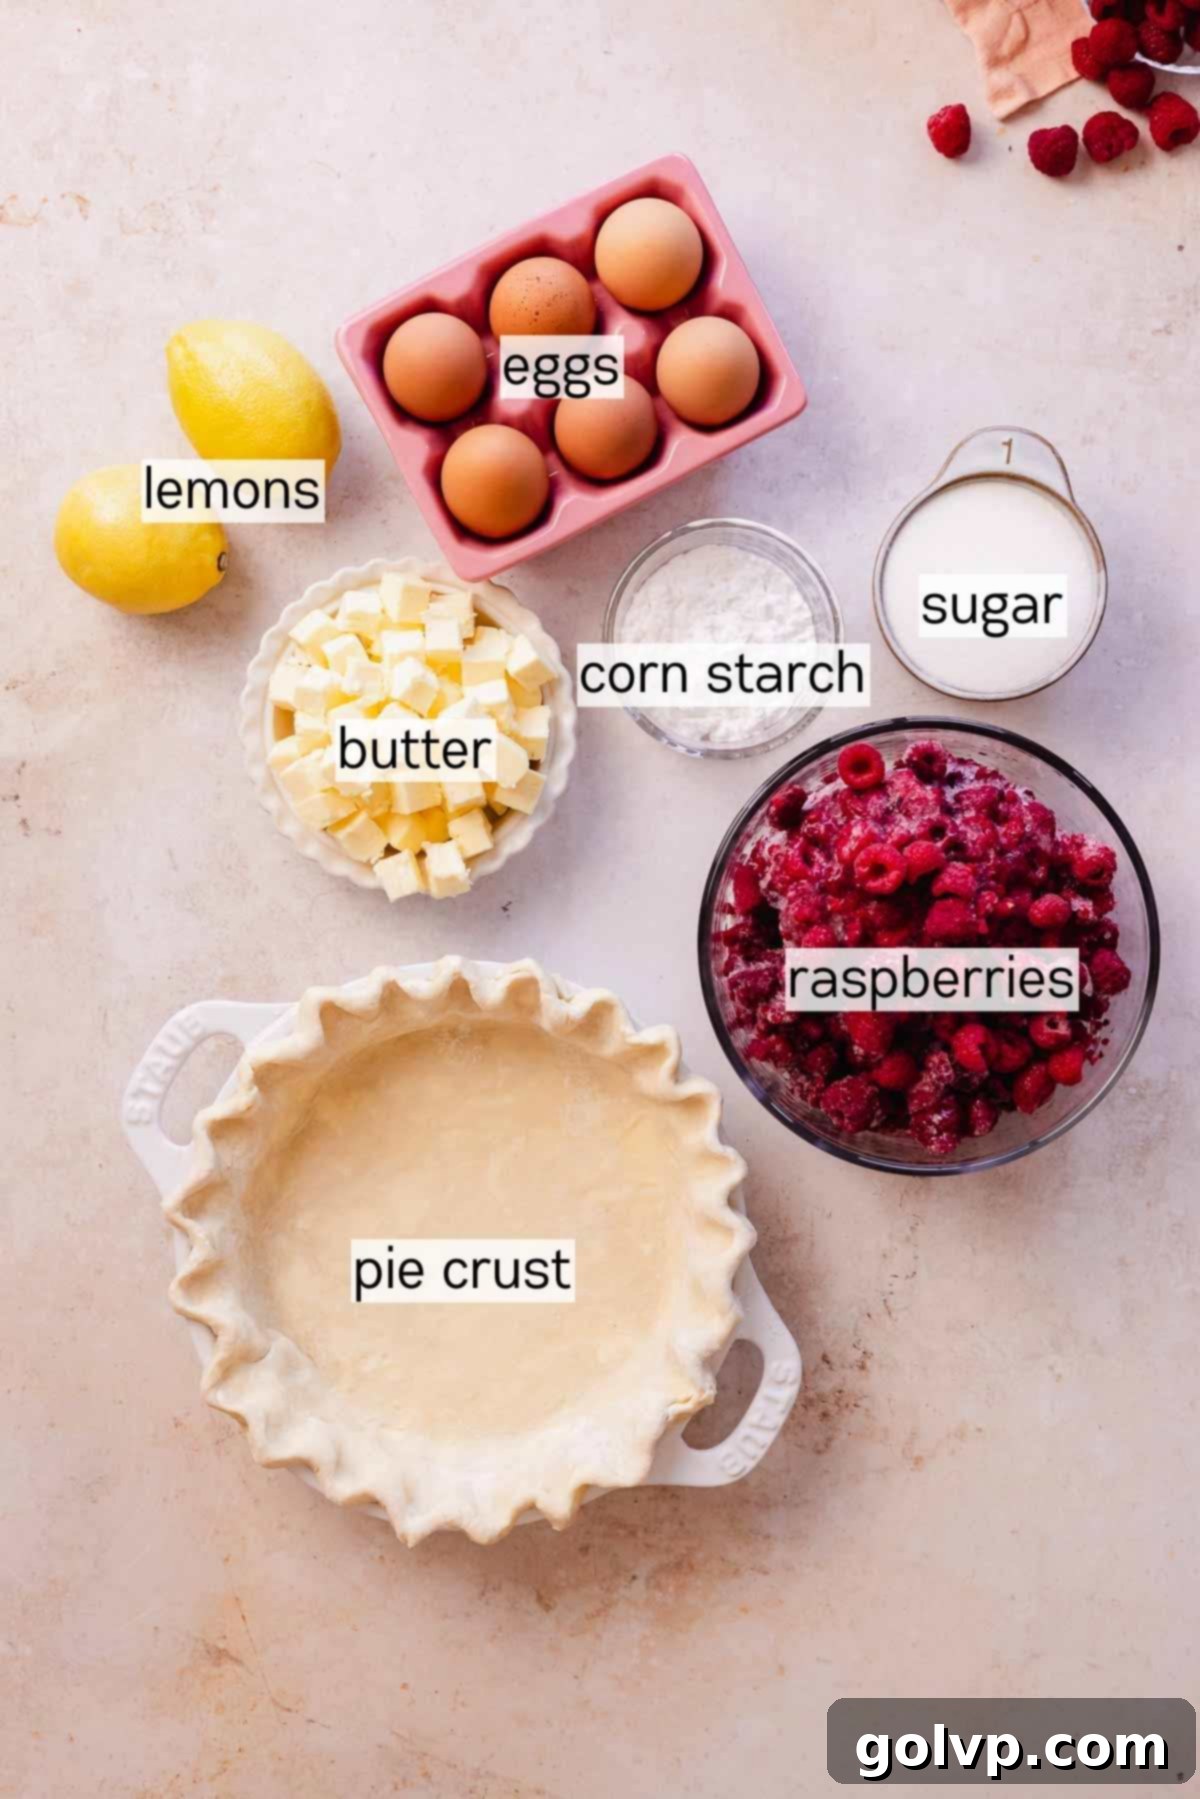
📝 Essential Ingredients for Success
To ensure your Raspberry Meringue Pie turns out perfectly, take a moment to read through these crucial tips for each ingredient.
For complete steps and precise measurements, refer to the recipe card below.
All-Purpose Flour: Accuracy is paramount when it comes to flour, especially in pie crusts. For the most consistent and precise results, always weigh your flour using a kitchen scale. If a scale isn’t available, you can measure it correctly with a measuring cup by first fluffing the flour with a spoon, then gently spooning it into your measuring cup without packing it down, and finally, scraping off any excess with a straight edge. This method prevents over-measuring and a tough crust.
Butter: For a truly flaky and tender pie crust, real butter is non-negotiable. You can use salted butter, just remember to omit the added salt from the crust recipe. The key here is to keep the butter exceptionally cold. I recommend cutting it into small cubes, approximately ½-inch (1 cm) in size, spreading them on a plate, and freezing them for about 10 minutes before incorporating them into the dough. This cold butter creates pockets of steam during baking, leading to those coveted flaky layers.
Ice Water: This essential ingredient maintains the cold temperature of the butter and dough throughout the mixing process. Using ice water prevents the butter from melting prematurely, which is critical for developing a perfect, tender, and beautifully flaky crust. The colder the water, the better your crust will turn out.
Vinegar: A secret weapon for pie crusts! A small amount of vinegar, such as apple cider vinegar (my preferred choice) or white vinegar, serves multiple purposes. It helps to inhibit gluten formation, resulting in a more tender crust, and also adds a subtle depth of flavor that balances the richness of the butter. Lemon juice can be used as a substitute if vinegar is not on hand.
Raspberries: This recipe welcomes both fresh and frozen raspberries with open arms. I often lean towards frozen raspberries due to their year-round availability and affordability. There’s no need to defrost them; simply add them directly to the saucepan when making the curd. They’ll thaw and cook down beautifully, releasing all their vibrant flavor.
Egg Yolks: The heart of our luscious curd! This recipe requires 10 egg yolks, a testament to the rich, smooth, and thick texture they impart. You’ll cleverly use one leftover egg yolk from the crust for the filling, and the remaining egg whites will form the base of your glorious Italian meringue. These yolks are crucial for achieving that signature silky consistency and deep richness in the raspberry curd.
Cornstarch: While egg yolks contribute significantly to thickening, they alone aren’t sufficient to create a curd firm enough to slice neatly into a pie – believe me, I’ve experimented! A touch of cornstarch provides the necessary additional thickening without altering the taste or compromising the perfectly smooth texture. For similar results, all-purpose flour or potato starch can be used as alternatives.
Lemons: Both the juice and zest of lemons play distinct and important roles. Lemon juice provides vital acidity, which not only brightens and enhances the natural raspberry flavor but also helps to set the curd and stabilize the egg whites in the Italian meringue (acting in lieu of cream of tartar). The lemon zest, on the other hand, adds a delightful burst of aromatic, zesty flavor. If you’re not keen on a strong lemon presence, feel free to omit only the zest, ensuring the pie remains amazing.
Egg Whites: The unsung heroes of our mile-high meringue! You’ll need the leftover egg whites from the curd filling. For the best meringue, day-old egg whites are often preferred as they whip up to greater volume. Store them in an airtight container in the refrigerator until you’re ready to create that impressive, airy topping.
👩🍳 Crafting Your Raspberry Meringue Pie: A Step-by-Step Guide
Flaky All-Butter Pie Crust: Step-by-Step
Creating a perfect pie crust is an art, and these steps will ensure yours is the flakiest foundation for your raspberry delight.
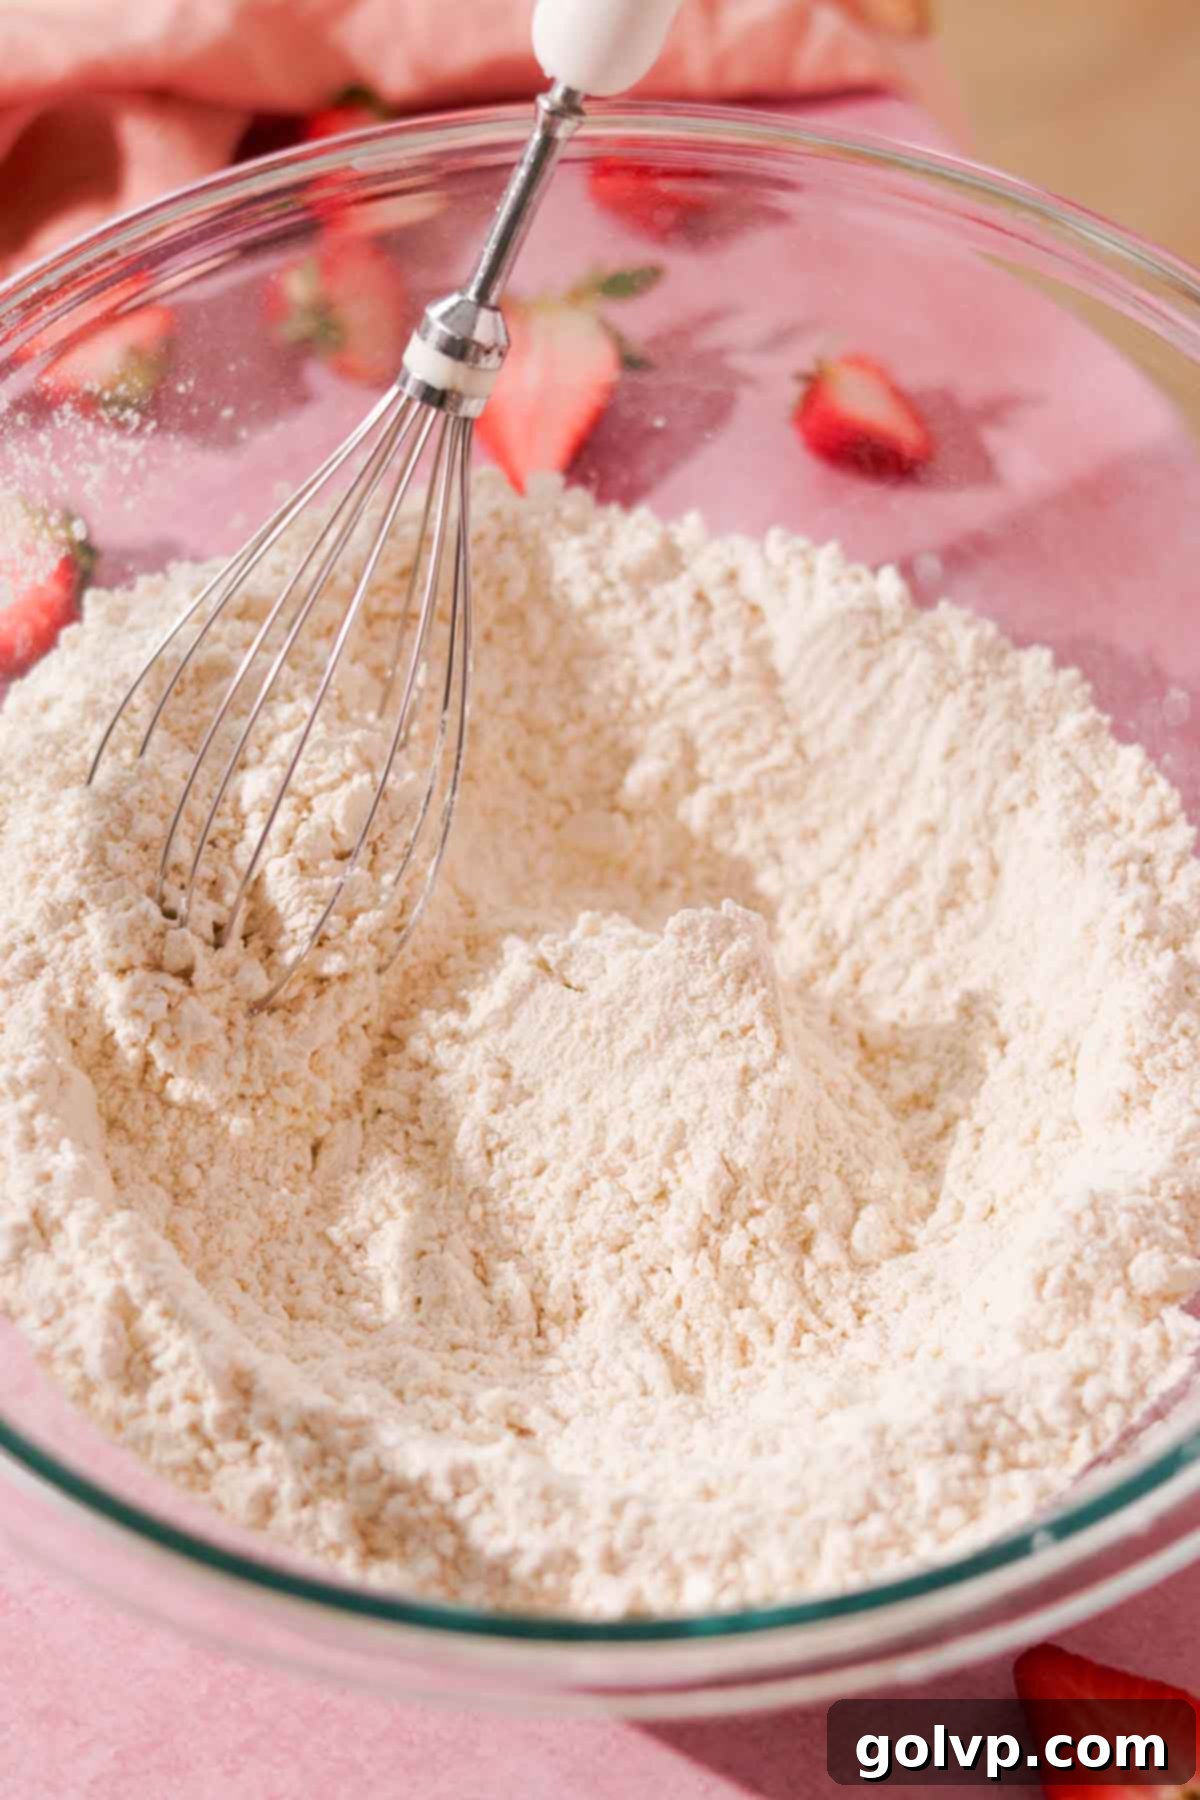
Step 1: Prepare Cold Ingredients. Begin by cutting your very cold butter into small, ¼-inch (0.6 cm) cubes. Spread these cubes evenly on a plate and place them in the freezer for at least 10 minutes to ensure they are thoroughly chilled. In a separate small cup, combine the ice water and vinegar; keep this mixture cold as well. In a large mixing bowl or the bowl of a food processor, thoroughly whisk together the all-purpose flour and salt until well combined. This ensures an even distribution of salt throughout the crust.
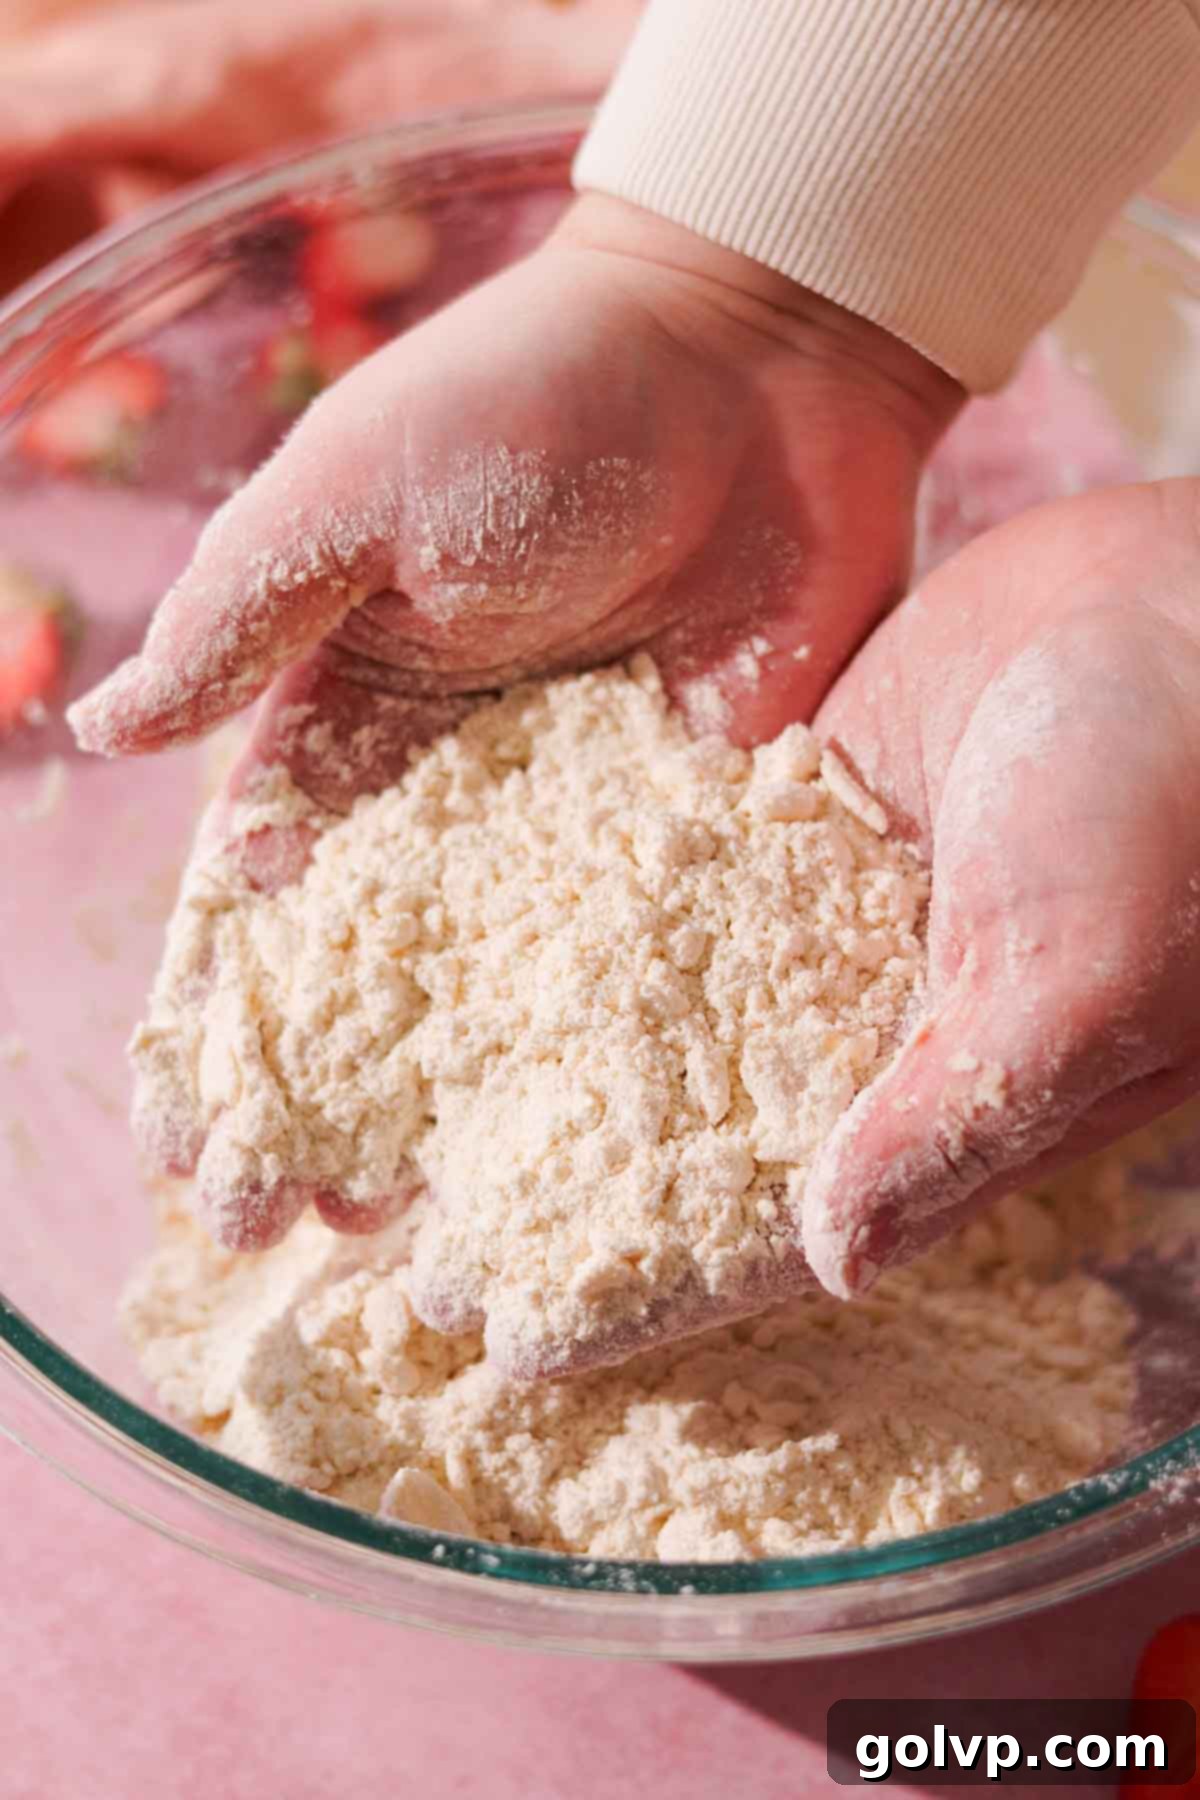
Step 2: Incorporate the Butter. Add the frozen butter cubes to the flour mixture. Using a pastry blender, two knives, or by pulsing a food processor, quickly cut the butter into the flour until it resembles coarse crumbs with some larger pea-sized pieces of butter still visible. If working by hand, use the tips of your fingertips to work in the butter, being careful not to overwork or melt it with the warmth of your hands. The varied sizes of butter are crucial for creating a flaky texture.
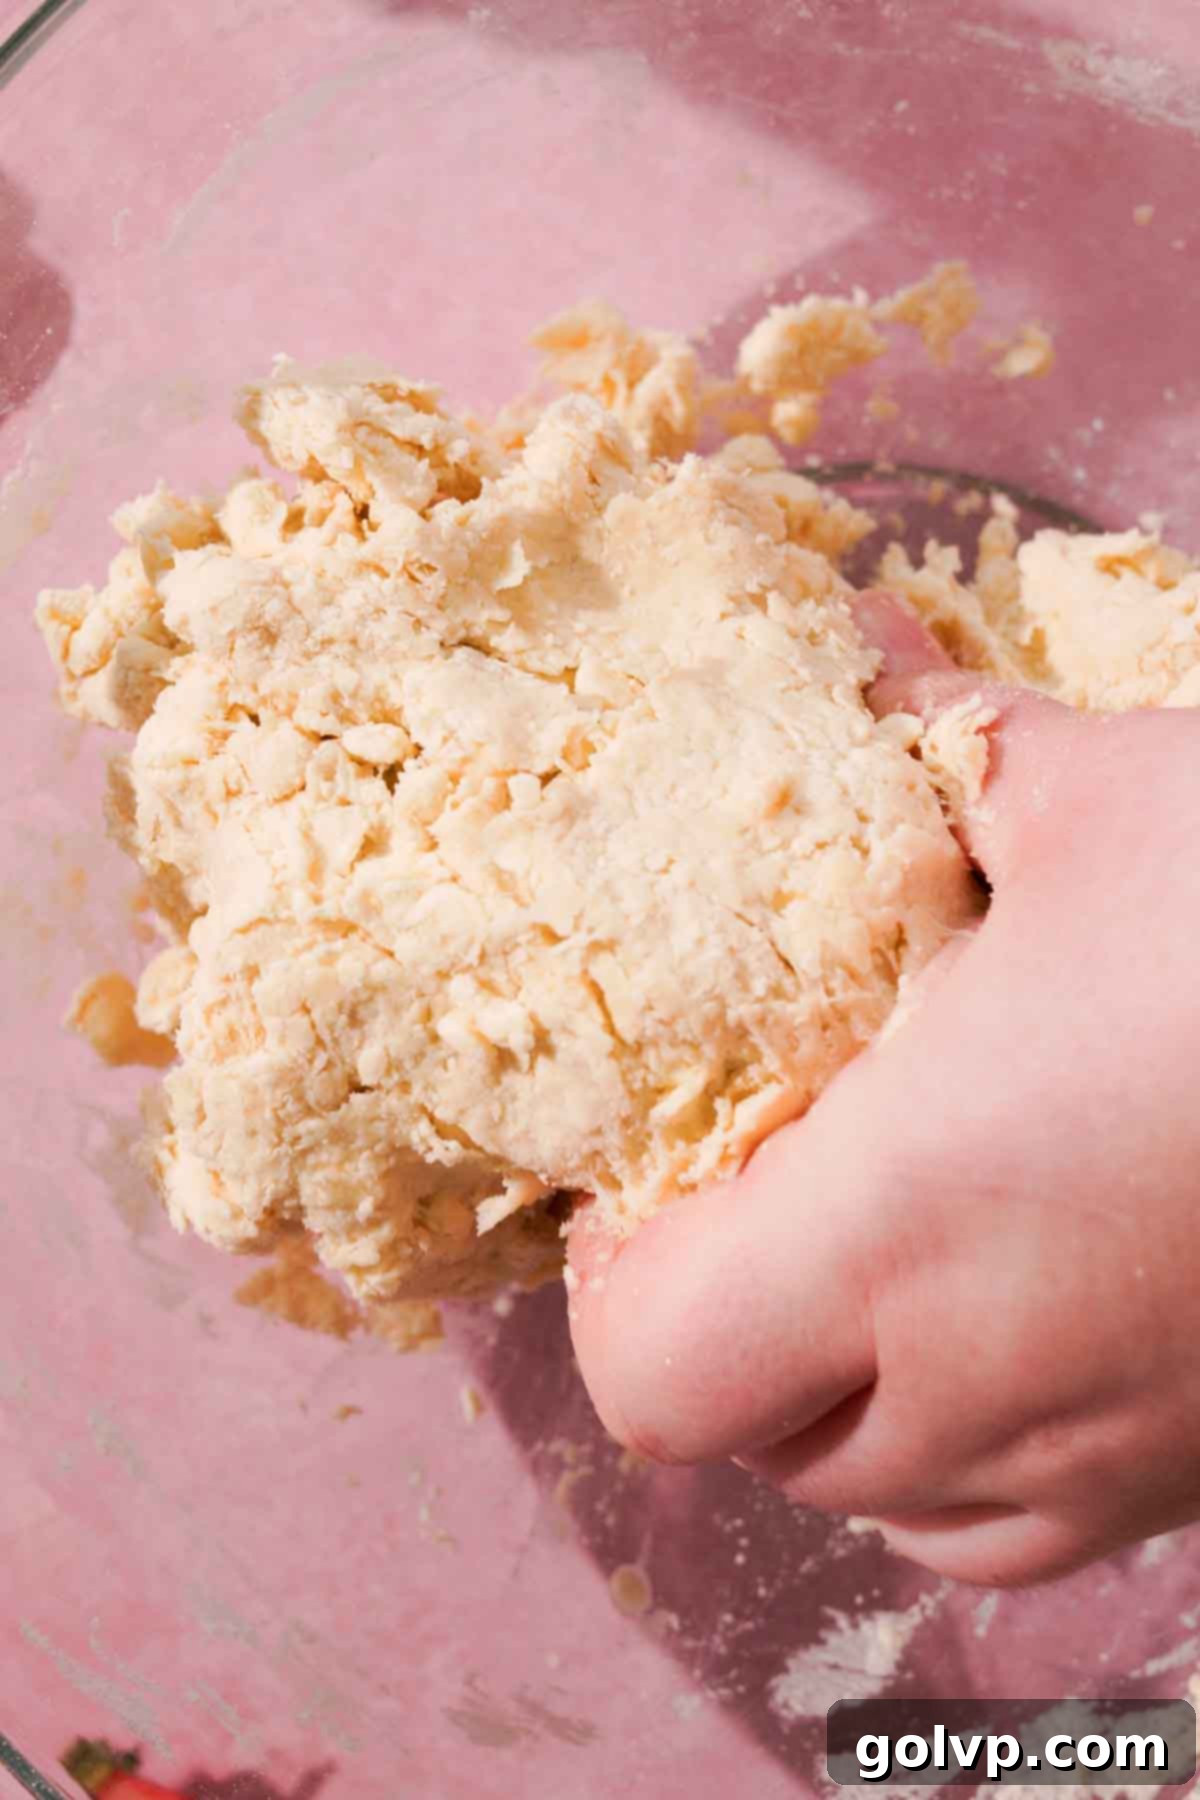
Step 3: Add Liquid Gradually. Gradually add the ice water and vinegar mixture to the flour and butter, one tablespoon at a time. Mix gently after each addition, just until the dough begins to come together. The goal is to hydrate the flour enough so that the dough can be pressed together, but it should still appear shaggy with some dry bits. Avoid adding too much liquid, as this can lead to a tough crust.
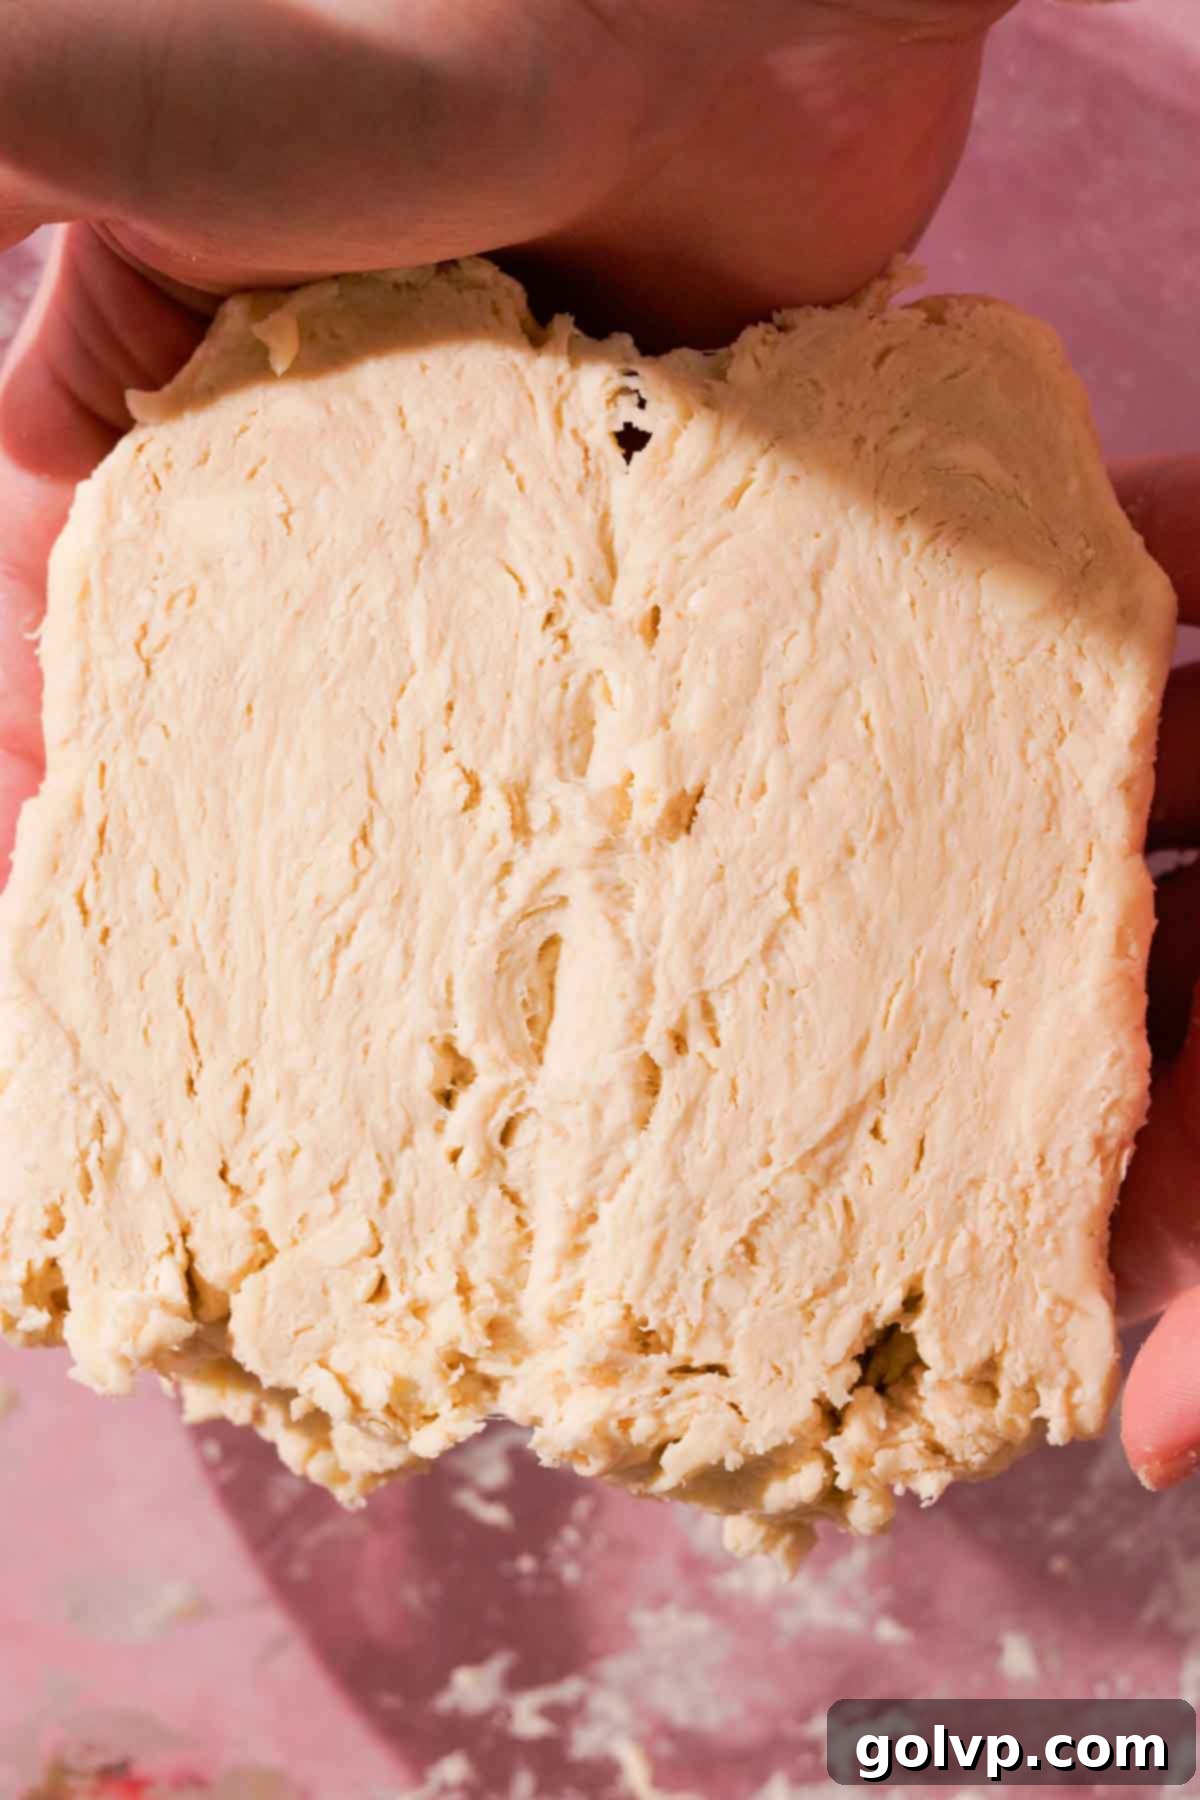
Step 4: Form and Chill the Dough. As soon as the dough just barely forms, gently gather it. On a lightly floured surface, flatten the dough slightly and fold it over itself twice. This simple technique helps to create beautiful, flaky layers within the crust and incorporates any remaining dry pockets. Shape the dough into a flat disk, wrap it tightly in plastic wrap, and refrigerate for a minimum of 30 minutes. Chilling is crucial for relaxing the gluten and firming the butter, making the dough easier to roll.
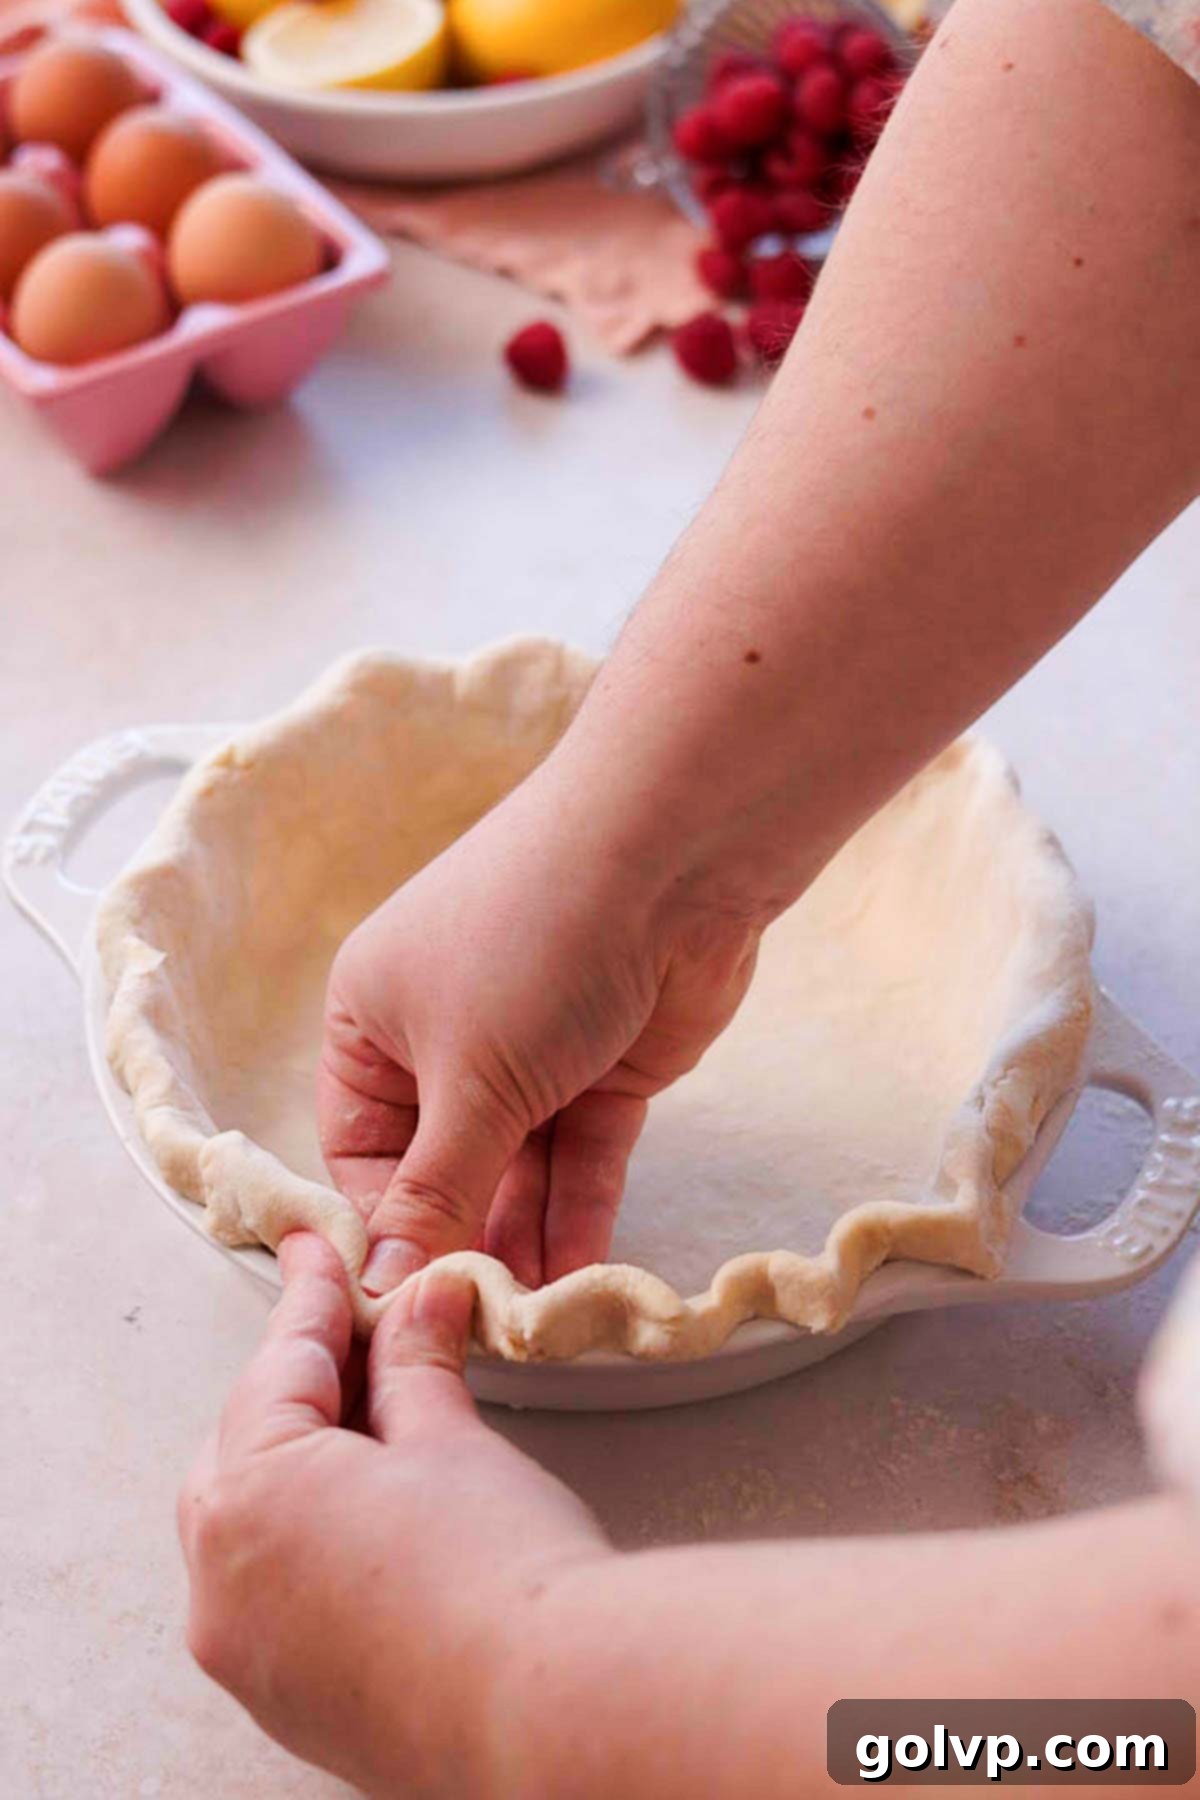
Step 5: Roll and Crimp the Crust. Remove the chilled dough from the fridge. On a lightly floured surface, roll it out evenly to a thickness of approximately ⅛ to ¼ inch (3-6 mm). Carefully transfer the rolled dough into an ungreased 9-inch pie plate. Allow the dough to gently fall into the contours of the plate without stretching it, as stretching can cause shrinkage during baking. Trim any excess dough, leaving about a 1-inch (2.5 cm) overhang. Tuck this overhang under the edge of the dough to create a sturdy, thick crust, then crimp the edges decoratively using your fingers or a fork.
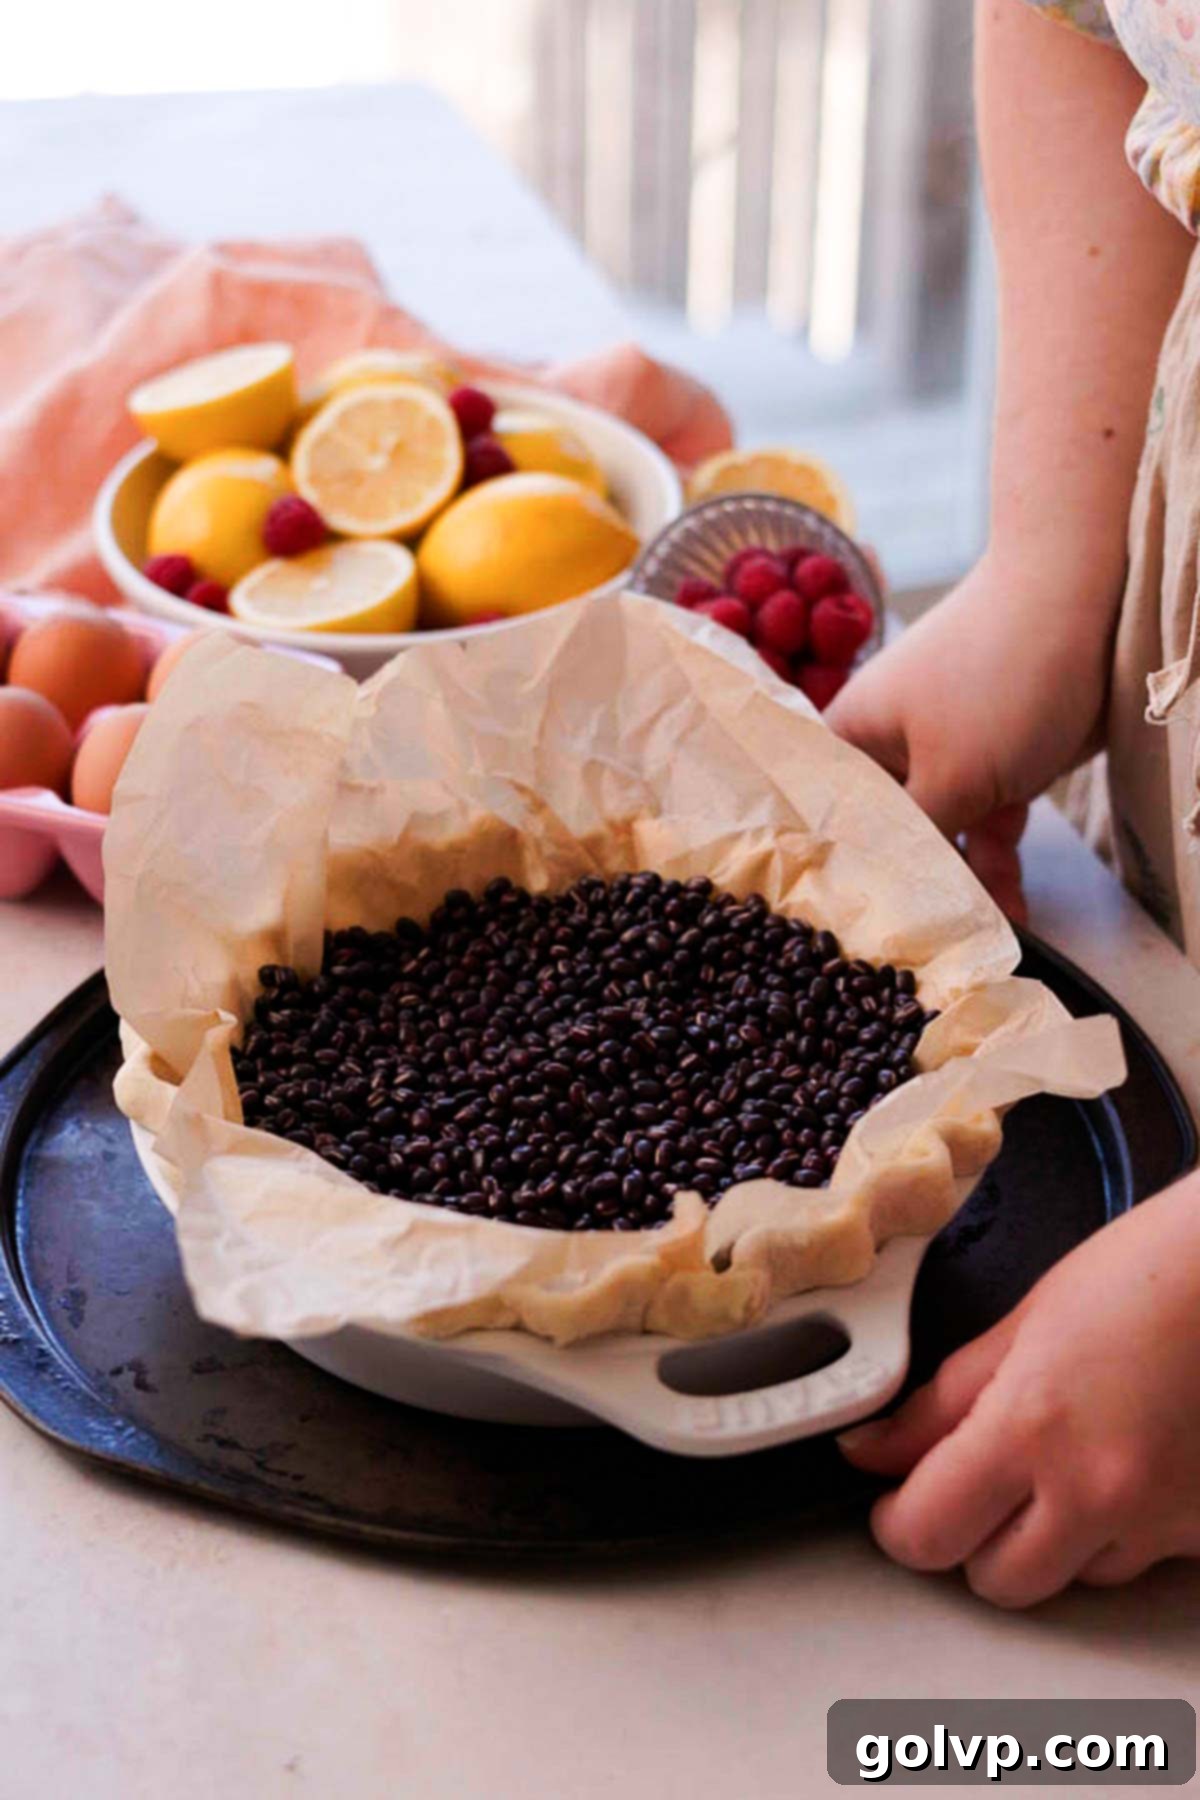
Step 6: Blind Bake the Crust (First Stage). Place the prepared pie crust back into the freezer for another 10 minutes to chill thoroughly. While it chills, preheat your oven to 365°F (185°C). Line the chilled crust with a piece of parchment paper, ensuring it covers the bottom and sides. Fill the parchment paper with pie weights, dry beans, or rice, pressing them right up against the edges to prevent the crust from shrinking or bubbling up during baking. Place the pie plate on a larger baking sheet (to catch any potential spills) and bake for 25 minutes.
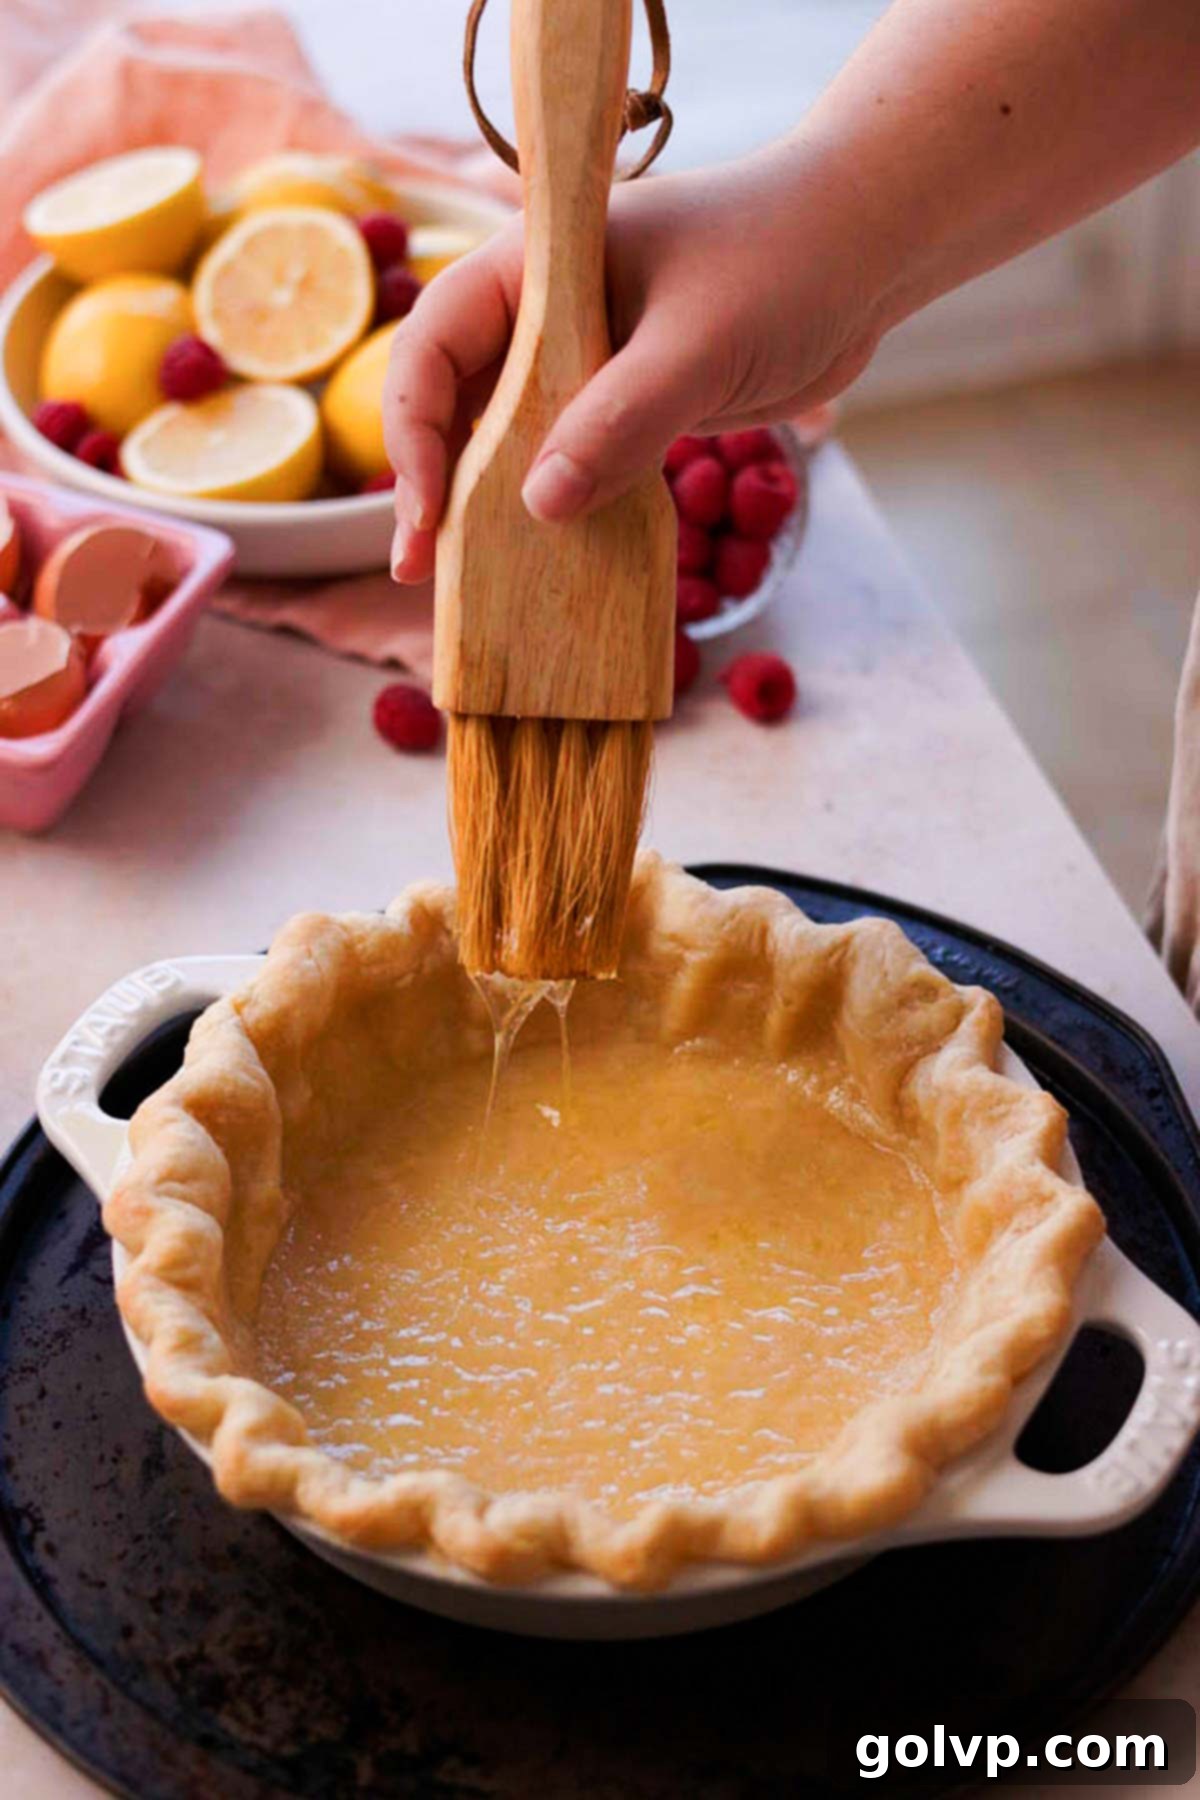
Step 7: Egg Wash and Cool. Carefully remove the pie crust from the oven. Gently lift the parchment paper containing the pie weights or beans and transfer them to a heat-safe bowl to cool. While the crust is still hot, brush the entire inside surface of the crust (avoiding the top crimped edge) with one whisked egg white. This egg wash creates a protective barrier, preventing the crust from becoming soggy once the filling is added, and helps to achieve a beautiful golden finish.
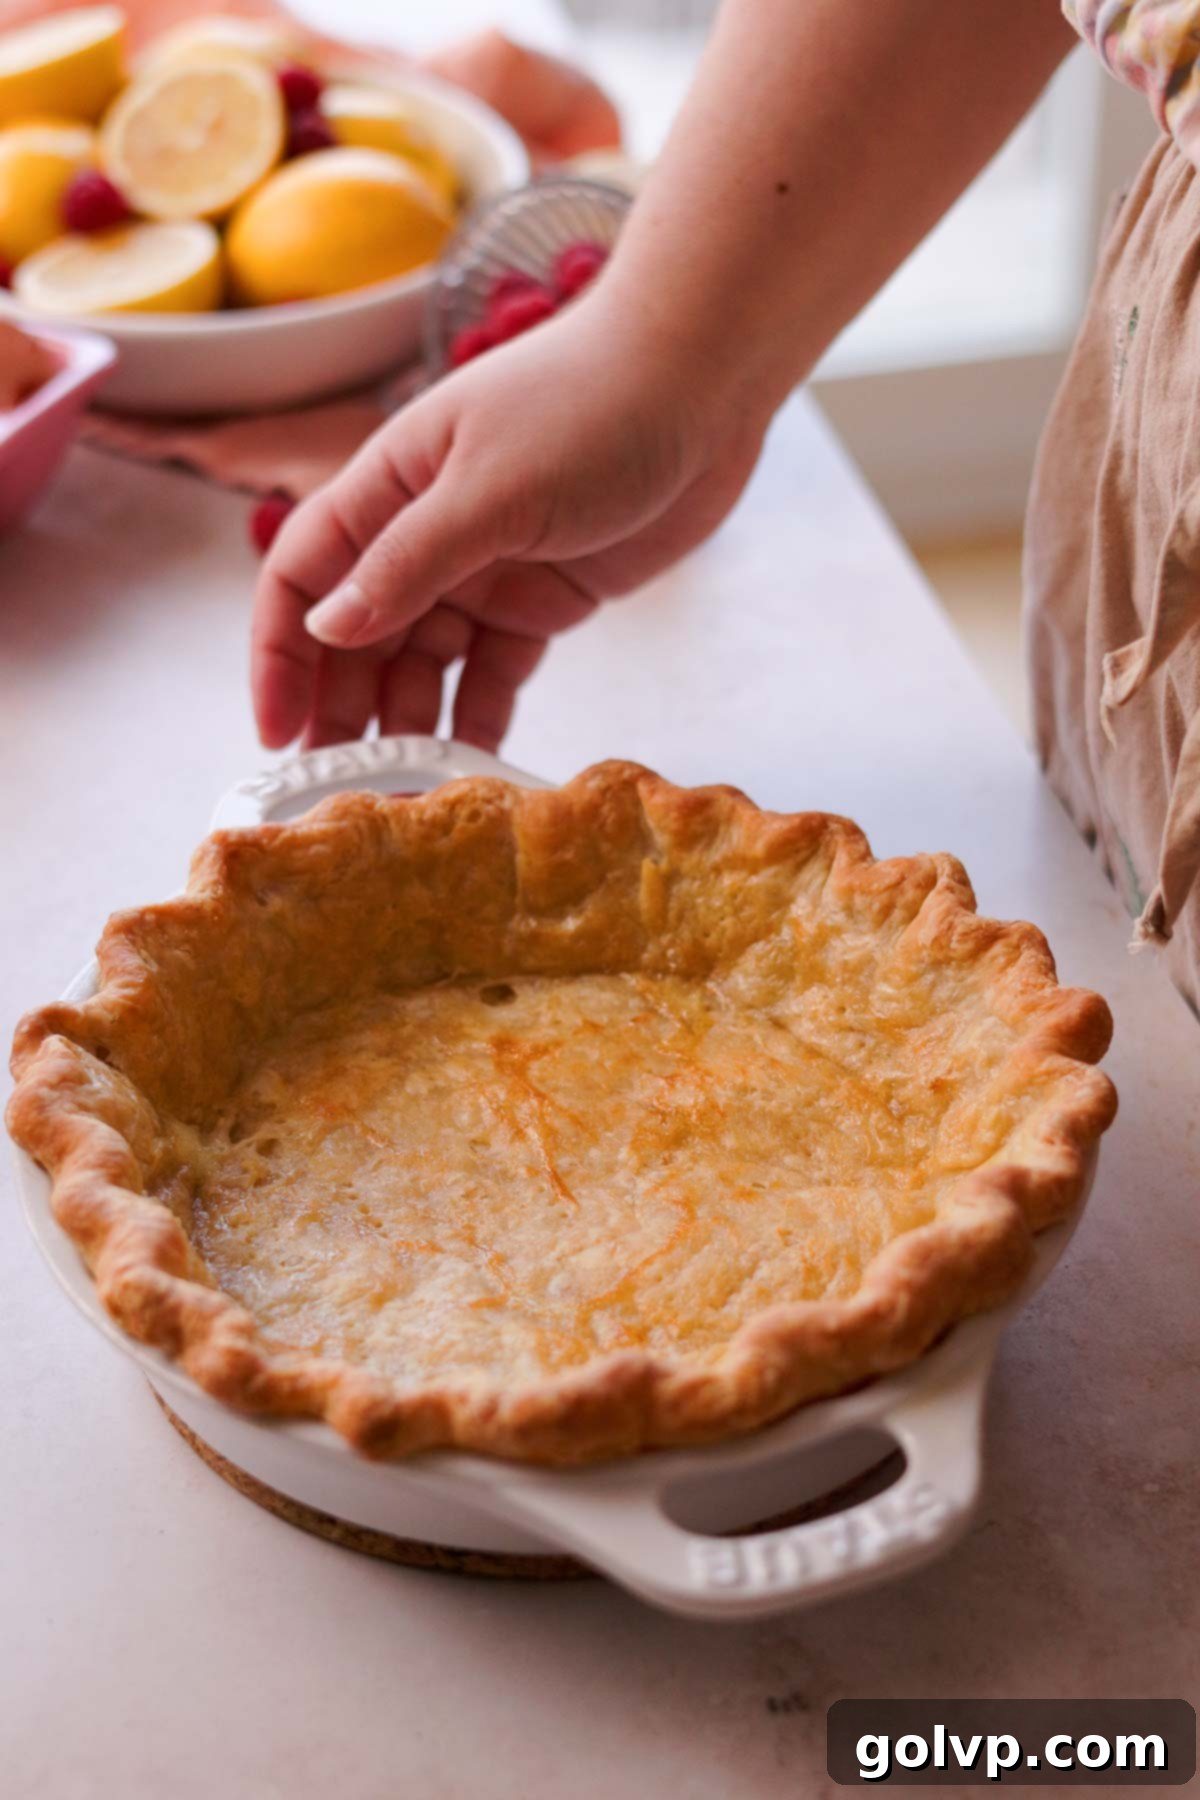
Step 8: Finish Blind Baking. Using a fork, lightly poke holes across the bottom of the crust. Return the crust to the oven and bake for an additional 15-20 minutes, or until it achieves a beautiful golden-brown color. If the edges begin to brown too quickly, loosely tent them with aluminum foil, leaving the center exposed, to prevent over-browning. While the crust finishes baking, you can begin preparing the delightful raspberry curd filling to save time.
Raspberry Curd Pie Filling: Step-by-Step
This luscious, vibrant curd is the heart of your pie. Follow these steps for a perfectly smooth and flavorful filling.
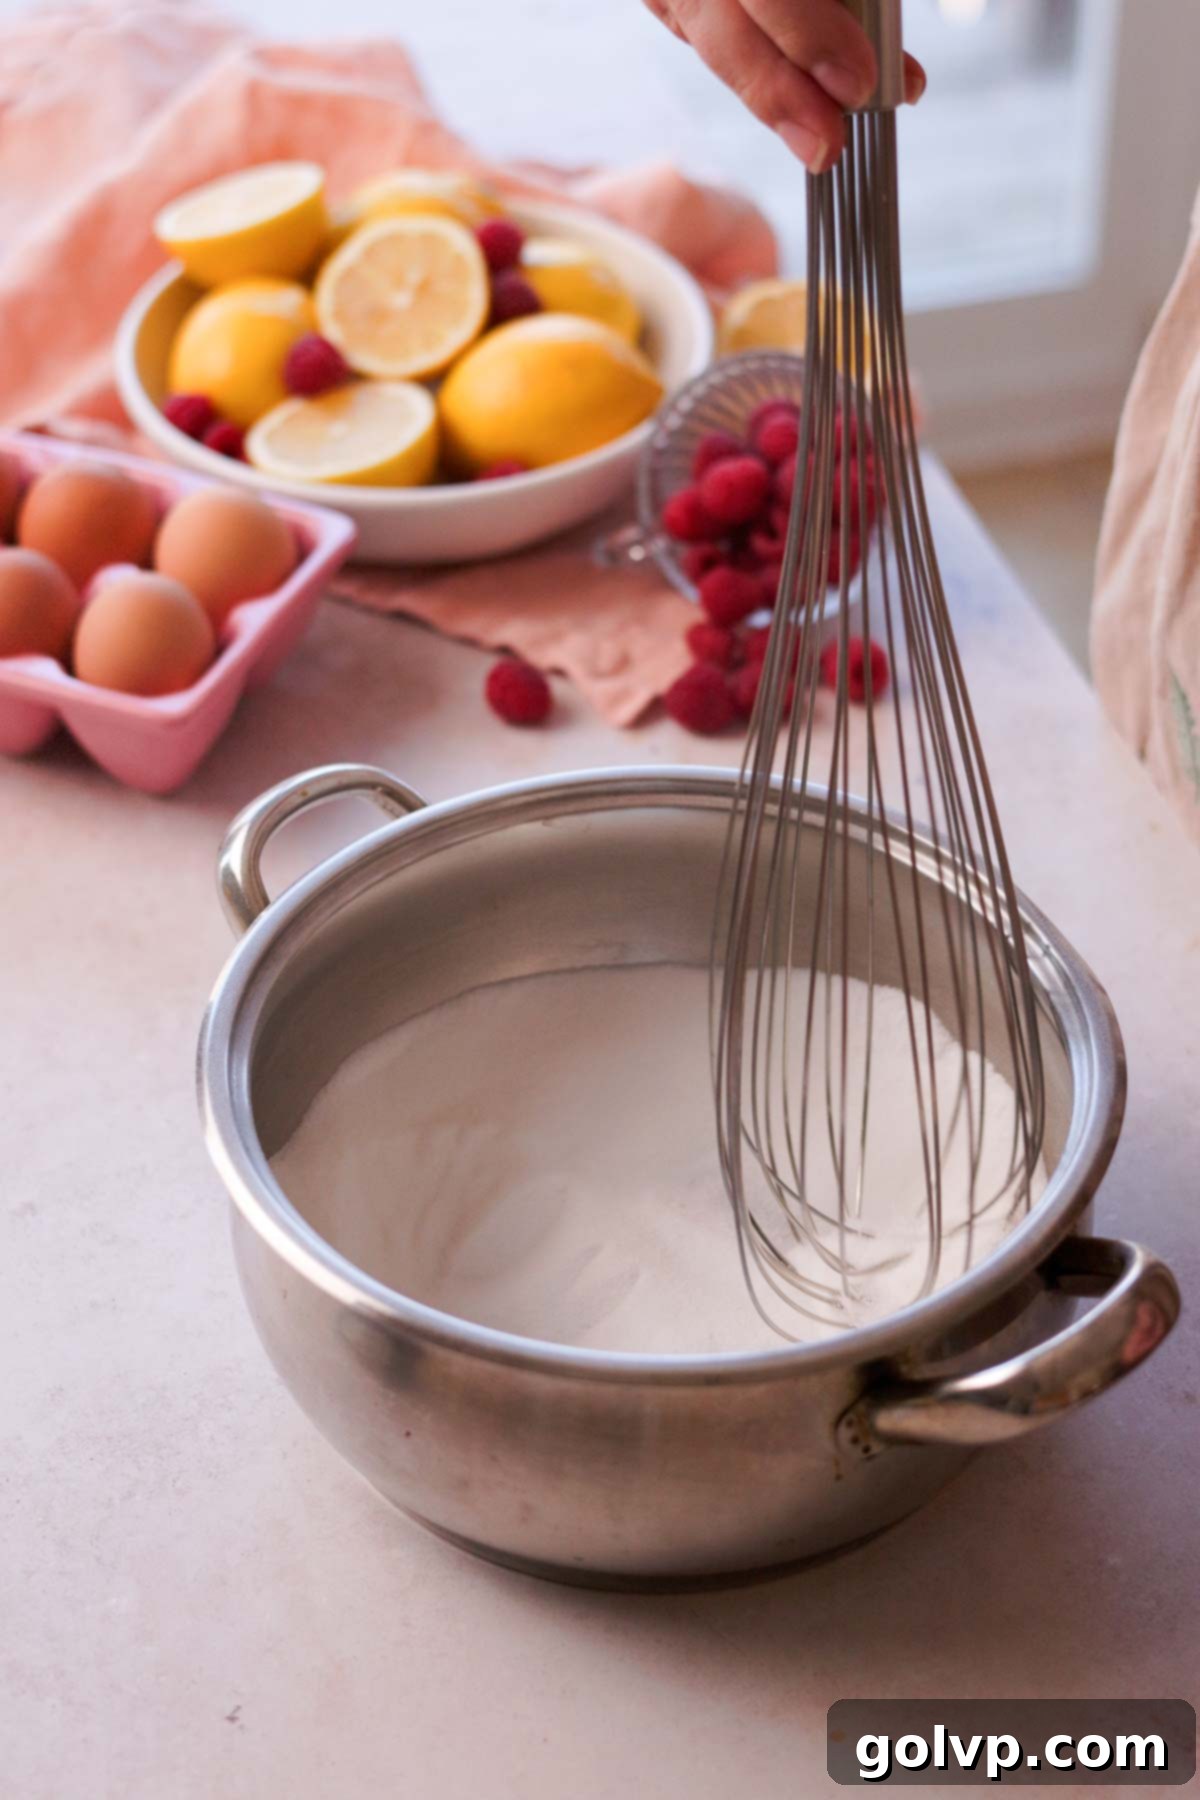
Step 1: Combine Dry Ingredients. In a heavy-bottomed saucepan, whisk together the granulated sugar and cornstarch until there are no visible lumps. This crucial step prevents the cornstarch from clumping when wet ingredients are added, ensuring a smooth, lump-free curd. A heavy-bottomed saucepan is recommended for even heat distribution, preventing the curd from scorching.
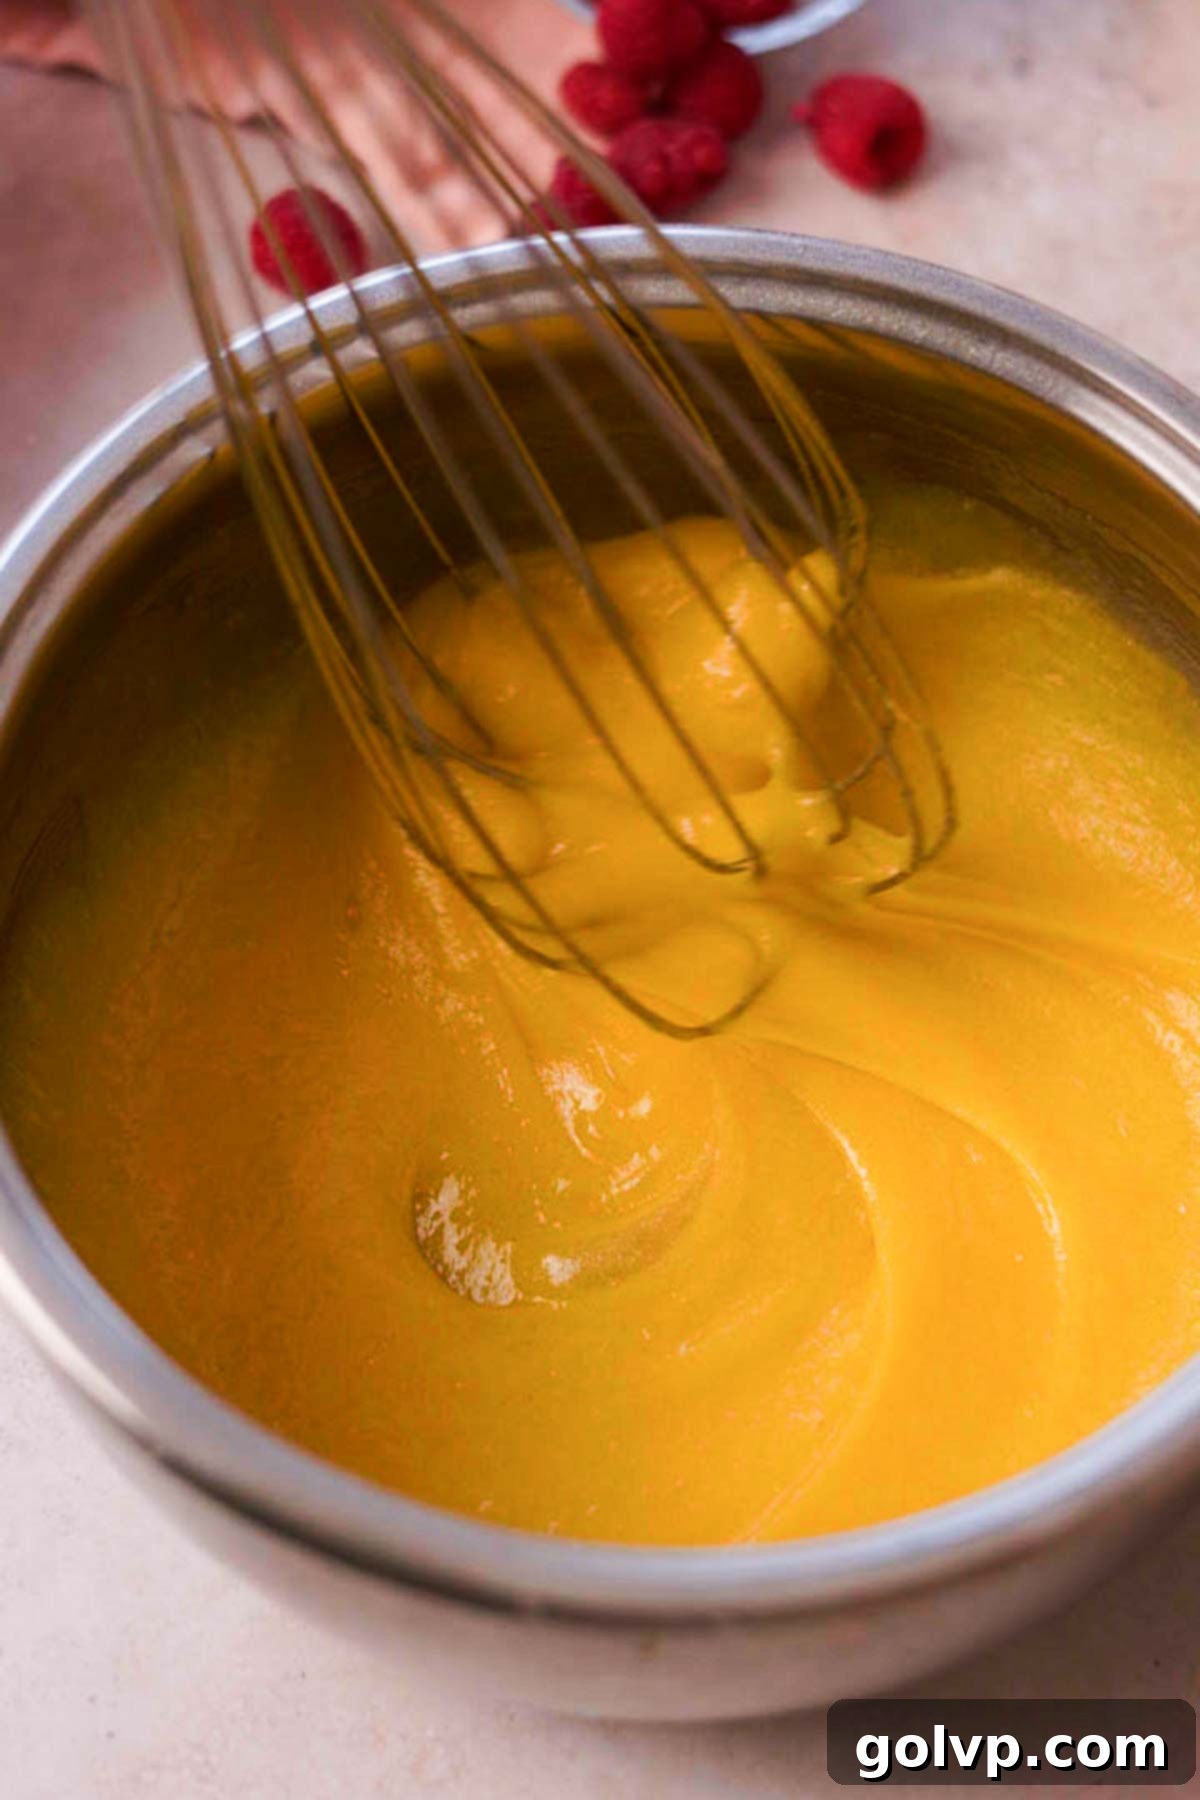
Step 2: Add Eggs. Carefully separate the yolks and whites from 6 large eggs. Place the whites into a clean, separate, airtight container and immediately refrigerate them for the Italian meringue; ensure absolutely no egg yolk contaminates the whites, as this will prevent them from whipping properly. Add the 6 egg yolks to the saucepan with the sugar and cornstarch. Also, add the single egg yolk you reserved from the pie crust egg wash, and crack one whole large egg directly into the saucepan. Whisk this egg and sugar mixture by hand briefly, just until all the yolks are broken up and combined.
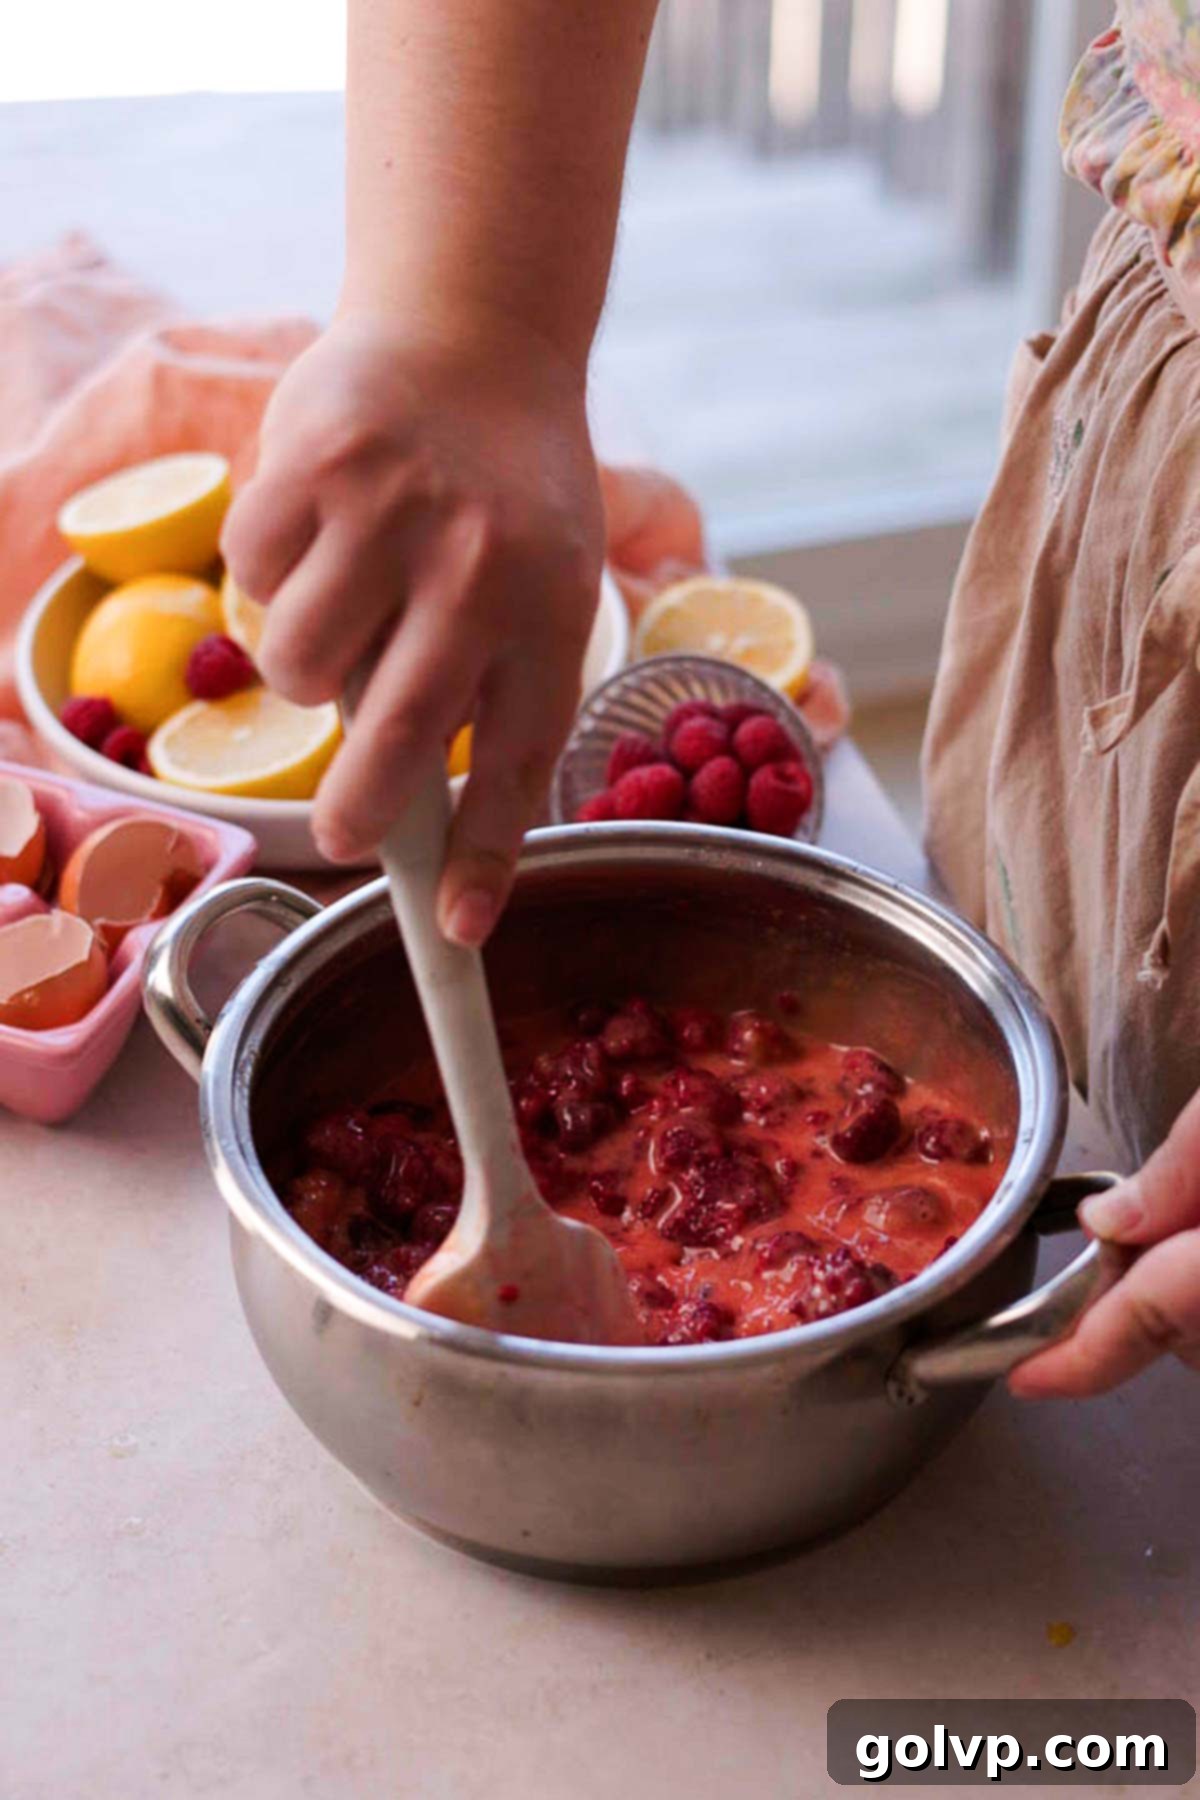
Step 3: Cook the Curd Base. Add the raspberries (fresh or frozen), lemon juice, and lemon zest (if using) into the egg mixture in the saucepan. Place the saucepan over medium-low heat. Stir the mixture constantly with a whisk or spatula, making sure to scrape the bottom and sides of the pan. This continuous stirring is vital to prevent the eggs from scrambling and the curd from sticking or burning, ensuring a uniformly smooth texture.
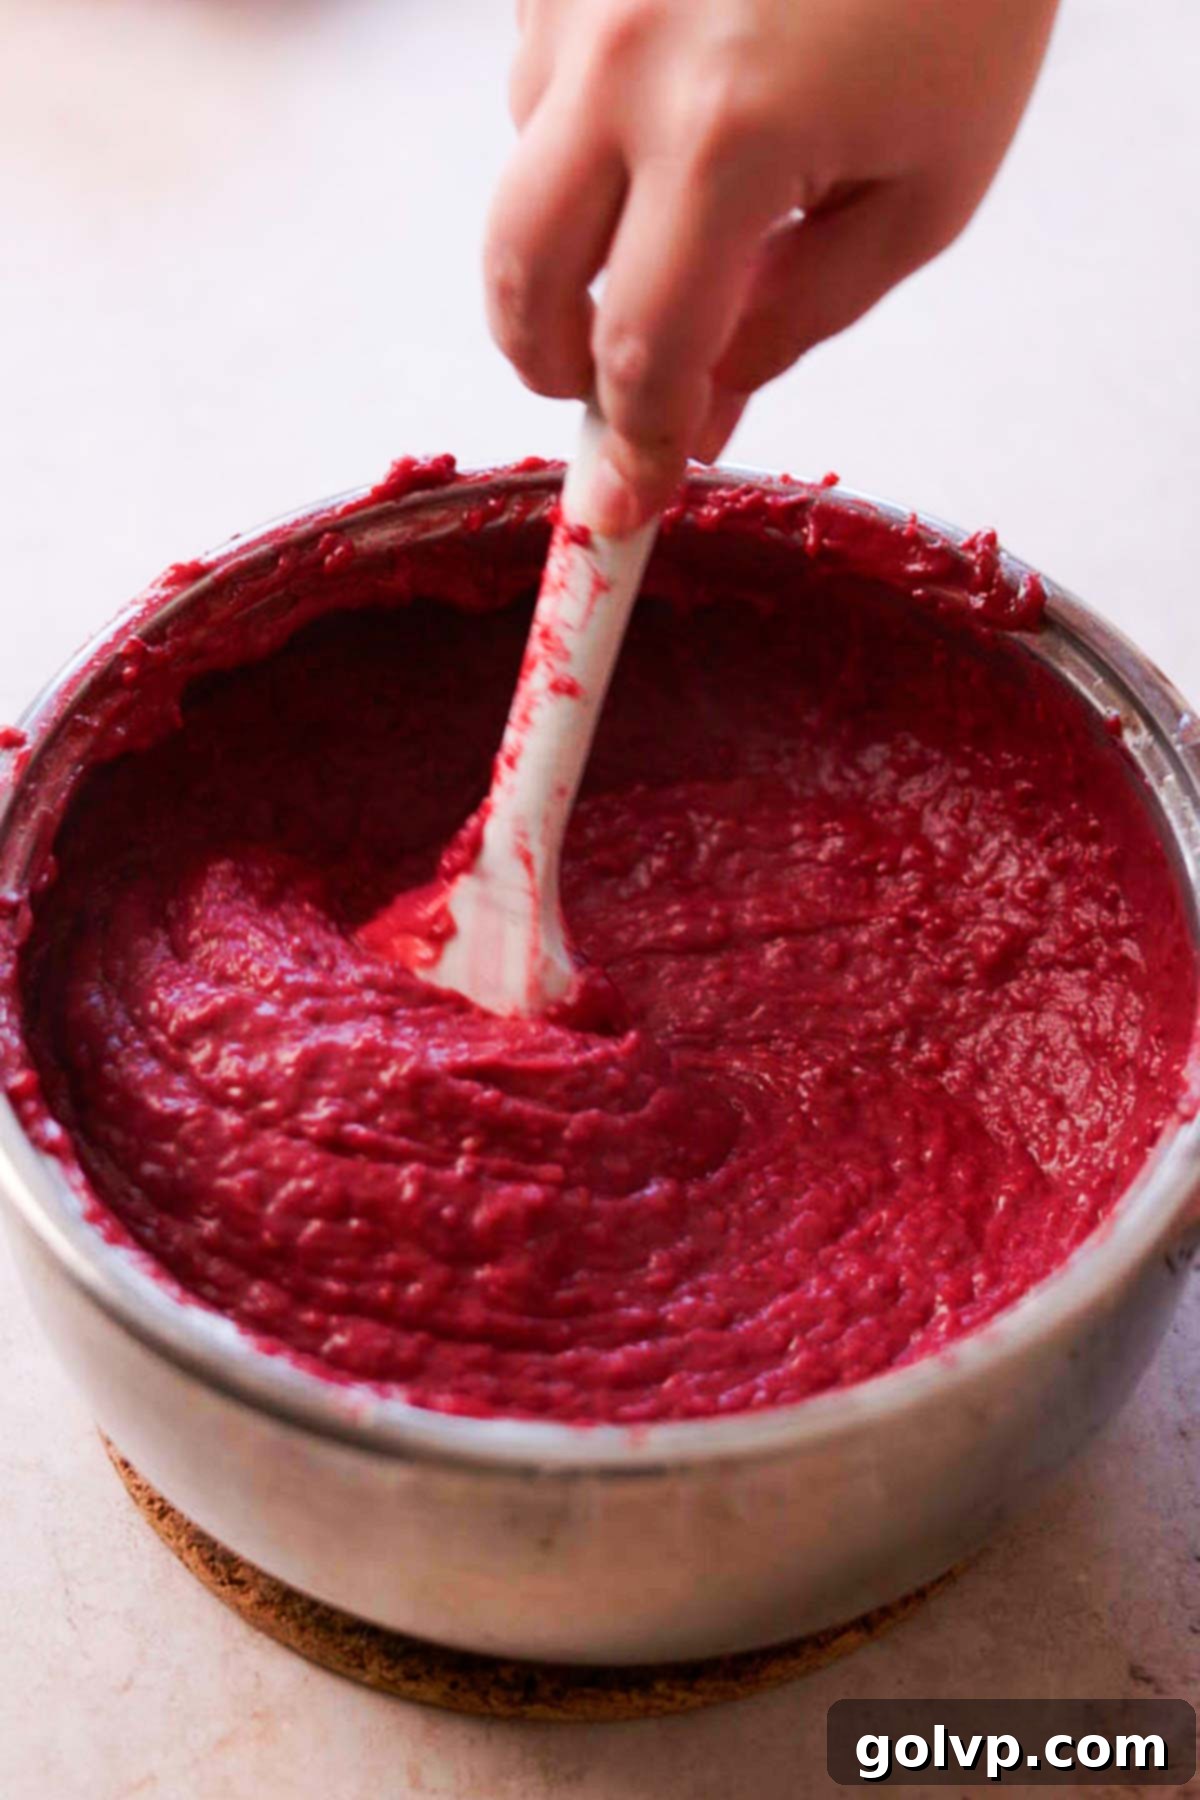
Step 4: Thicken and Enrich. Continue heating and stirring for about 10 minutes, or until the mixture comes to a gentle simmer and visibly thickens to a consistency resembling a thick porridge. It should coat the back of a spoon. Once thickened to your desired consistency, remove the saucepan from the heat. Add the unsalted butter and sea salt, then whisk vigorously on low heat until the butter is completely melted and fully incorporated into the curd, making it wonderfully glossy and rich.
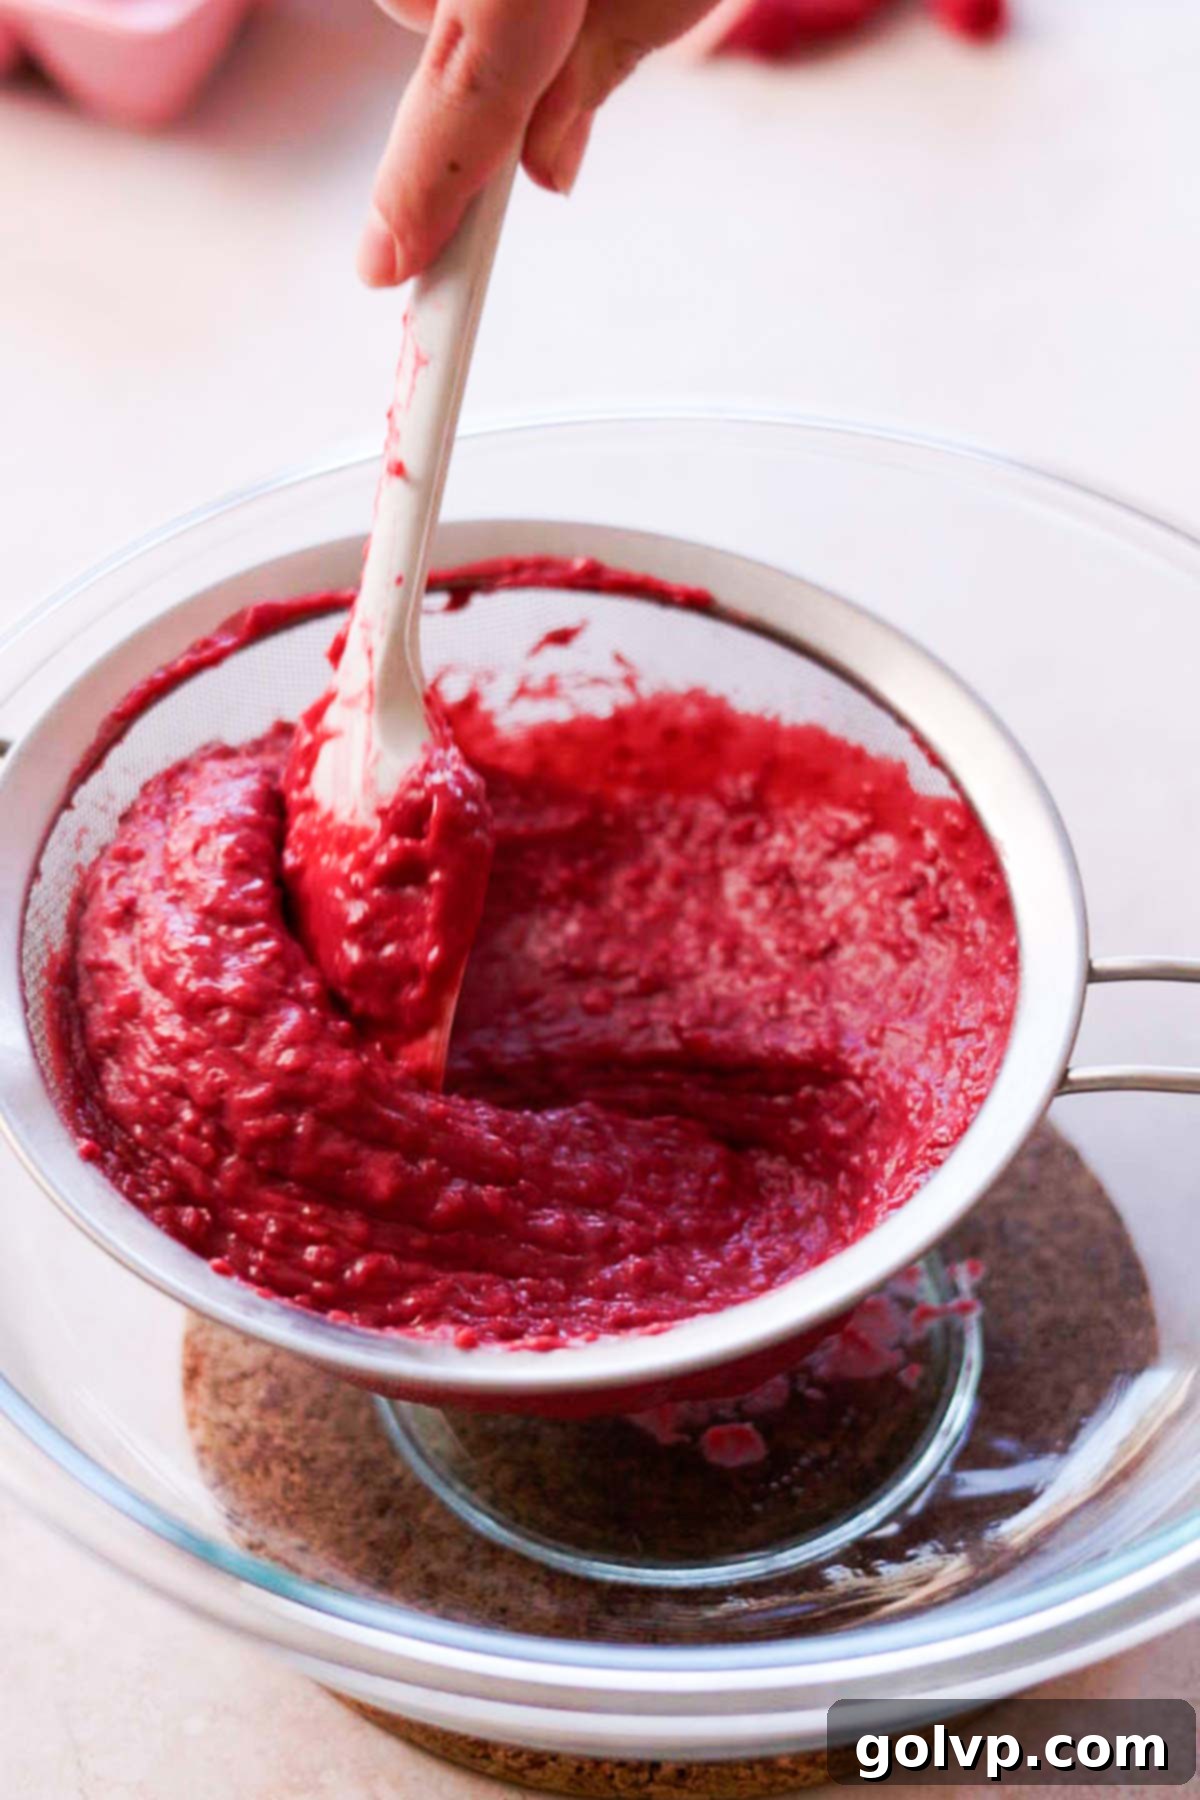
Step 5: Strain for Silkiness. For an ultimately smooth, seedless, and luxurious filling, strain the warm raspberry curd through a fine-mesh sieve or cheesecloth into a clean bowl. Work in batches, pressing the solids against the sieve with a spatula to extract all the flavorful liquid. This step may take around 10 minutes, but the resulting velvety texture is absolutely worth the effort, transforming your curd into pure indulgence.
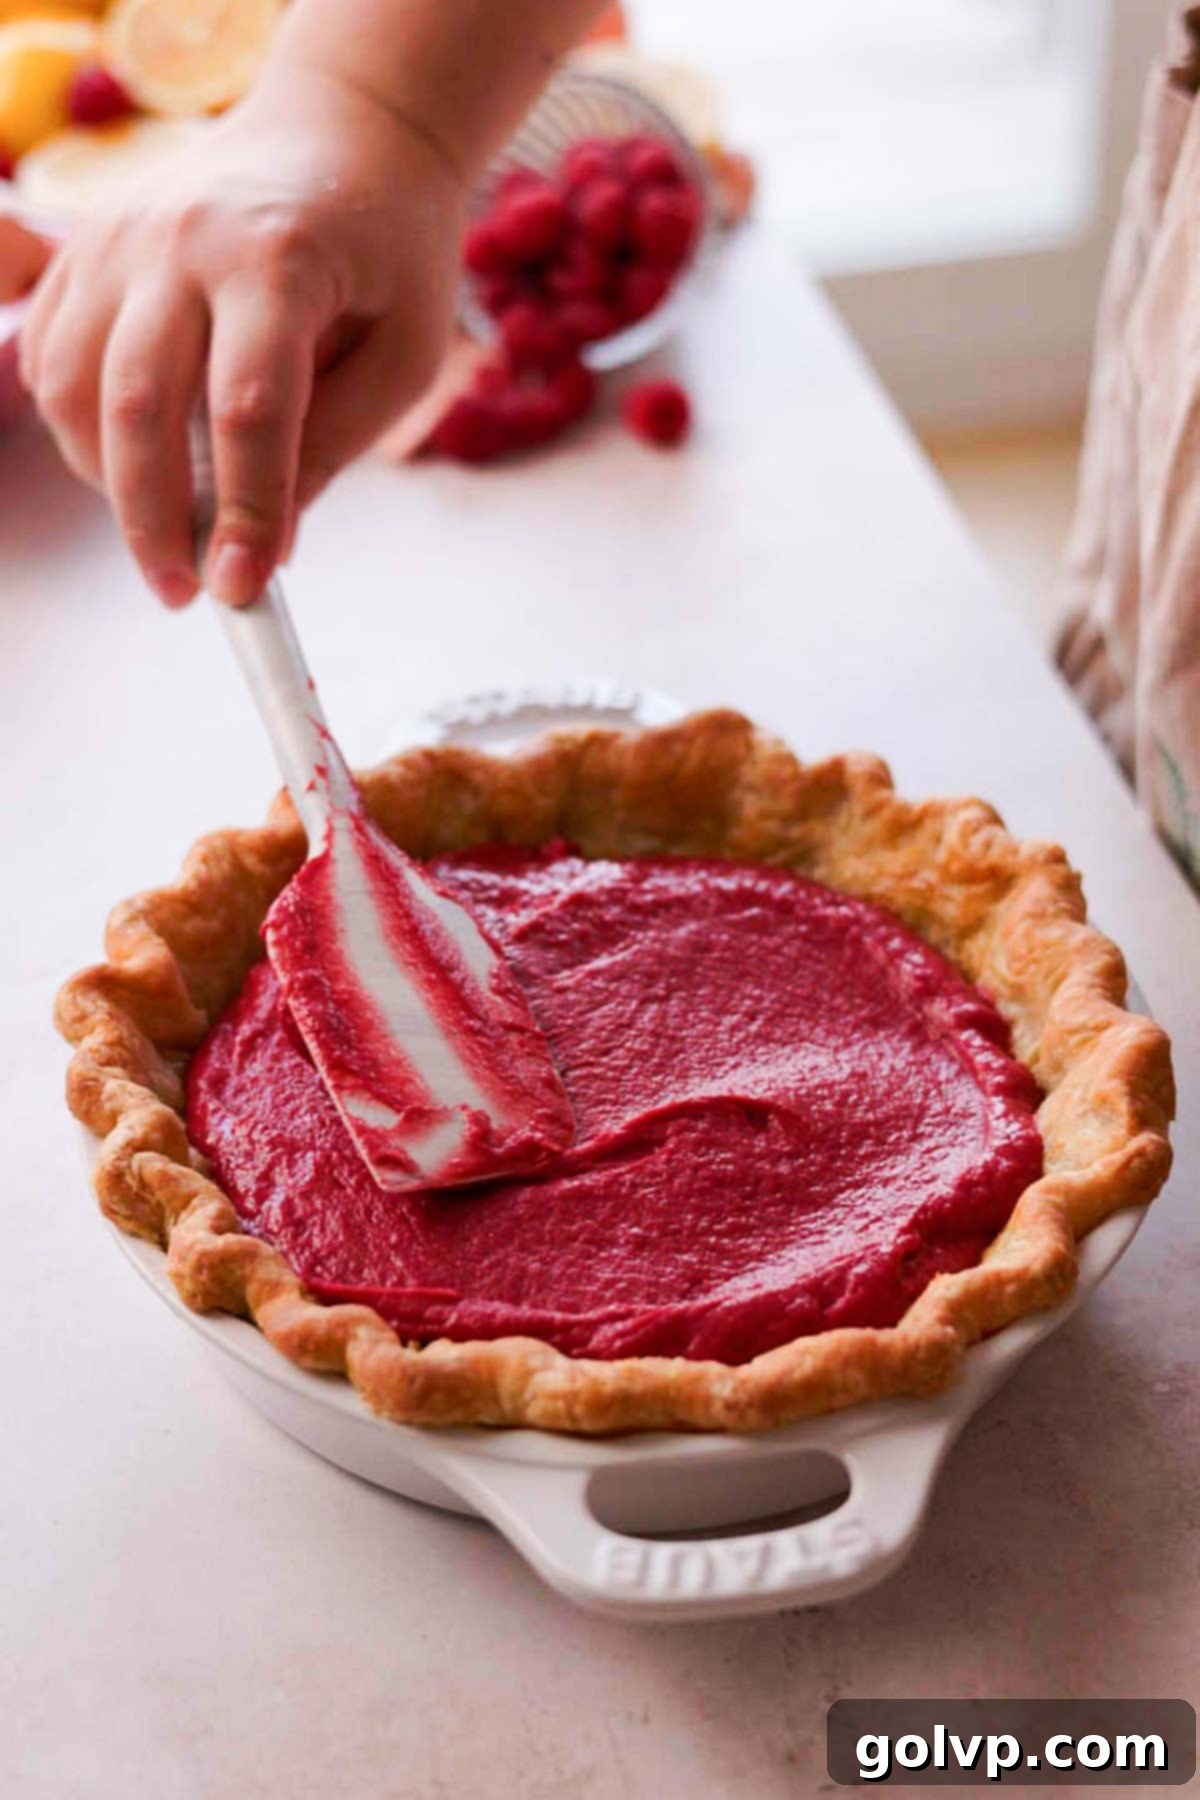
Step 6: Fill and Chill. Pour the still-warm, strained raspberry curd into your pre-baked and completely cooled pie crust. Gently smooth the top of the filling with a spatula to create an even surface. To prevent a skin or film from forming on the surface of the curd as it cools, press a piece of plastic wrap or parchment paper directly onto the surface of the filling. Refrigerate the pie until the filling is completely cooled and firmly set, which typically takes about 2-4 hours. Do not freeze the pie at this stage, as the cornstarch in the filling can lose its structure and texture when frozen and thawed.
Italian Meringue: Step-by-Step
Achieve a stable, shiny, and sky-high meringue with this Italian method.
Meringue Serving Tip: For the freshest appearance and best texture, prepare and top the meringue onto the pie no more than 6-8 hours before you plan to serve it. Store the pie uncovered in the refrigerator until ready to slice and enjoy.
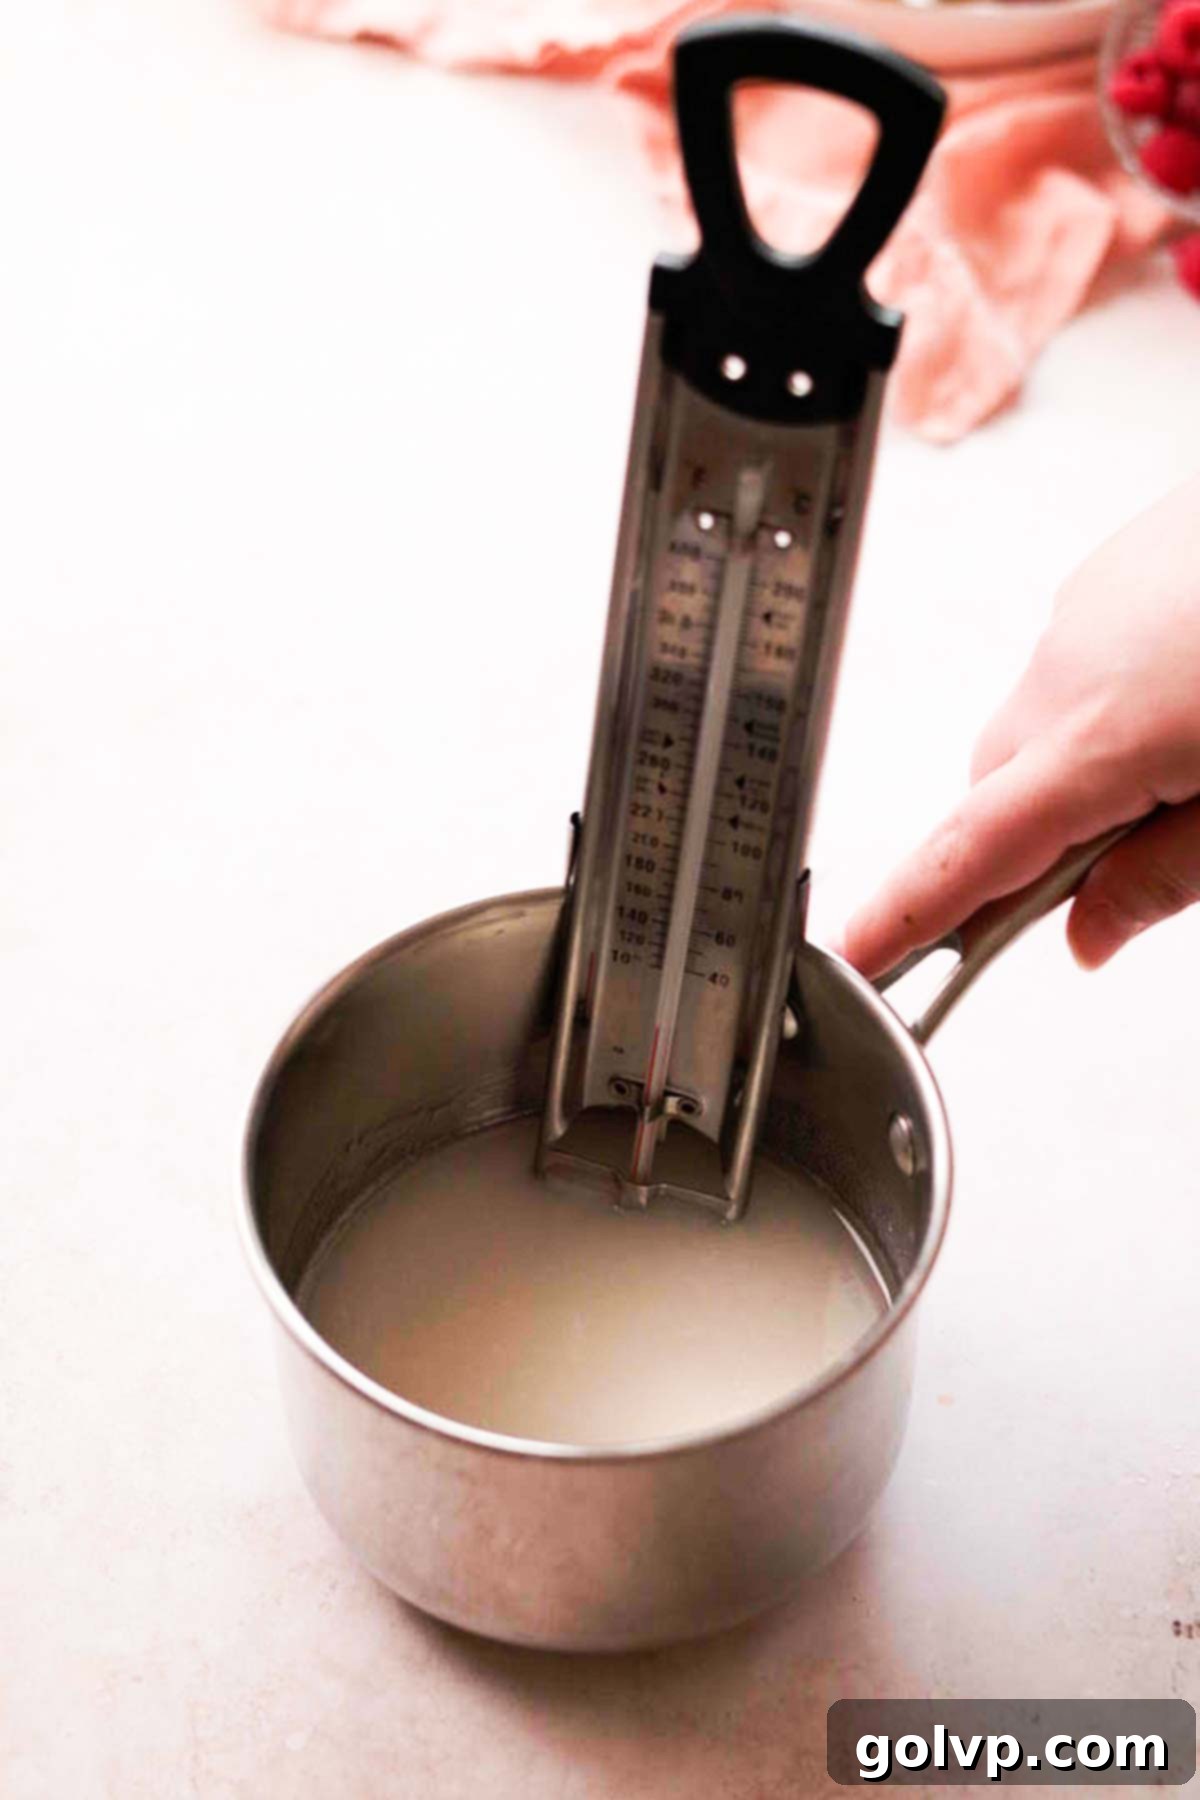
Step 1: Prepare the Sugar Syrup. In a small, heavy-bottomed saucepan, combine the granulated sugar and water, stirring just enough to moisten the sugar. Dip a pastry brush in water and use it to brush down any sugar crystals clinging to the sides of the saucepan; this prevents crystallization in your syrup. Insert a candy thermometer into the saucepan, ensuring it doesn’t touch the bottom. Bring the mixture to a simmer over low heat. Once the sugar has dissolved, stop stirring. Continue cooking the syrup until it reaches the soft ball stage, which is 235°F (115°C). While the sugar syrup is heating, proceed to the next step for the egg whites.
If you don’t have a candy or instant-read thermometer: You can test the sugar syrup’s readiness by carefully dropping a small amount into a cup filled with ice water. If the sugar forms a soft, pliable ball that can be picked up, it has reached the soft ball stage and is ready for use.
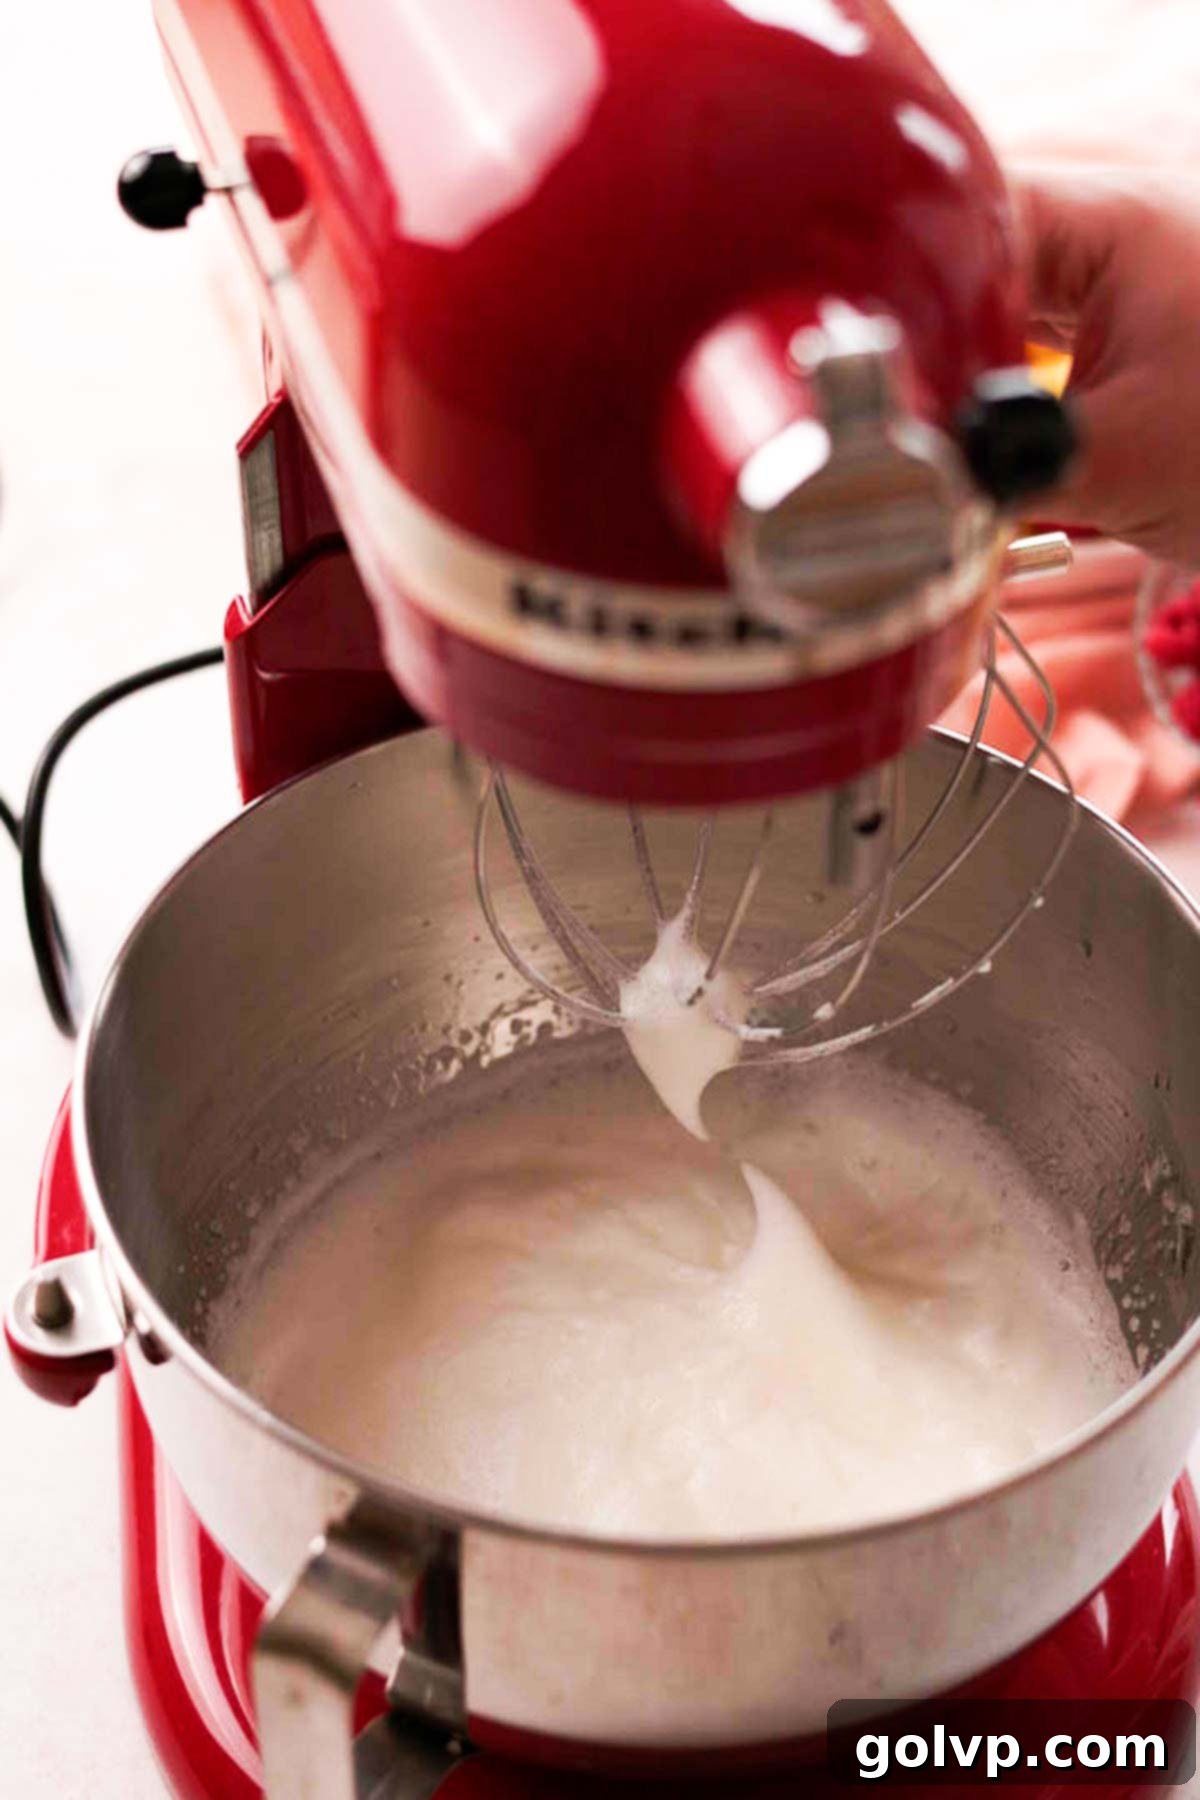
Step 2: Whip Egg Whites to Medium Peaks. While your sugar syrup is gently heating on the stove, begin beating the reserved egg whites with 1 teaspoon of lemon juice using the whisk attachment of a stand mixer (this is highly recommended for ease, though a hand mixer can work with more effort). Whip the egg whites until they form medium peaks – meaning they hold their shape but still have a slight curl at the tip when the whisk is lifted. The lemon juice helps to stabilize the egg whites.
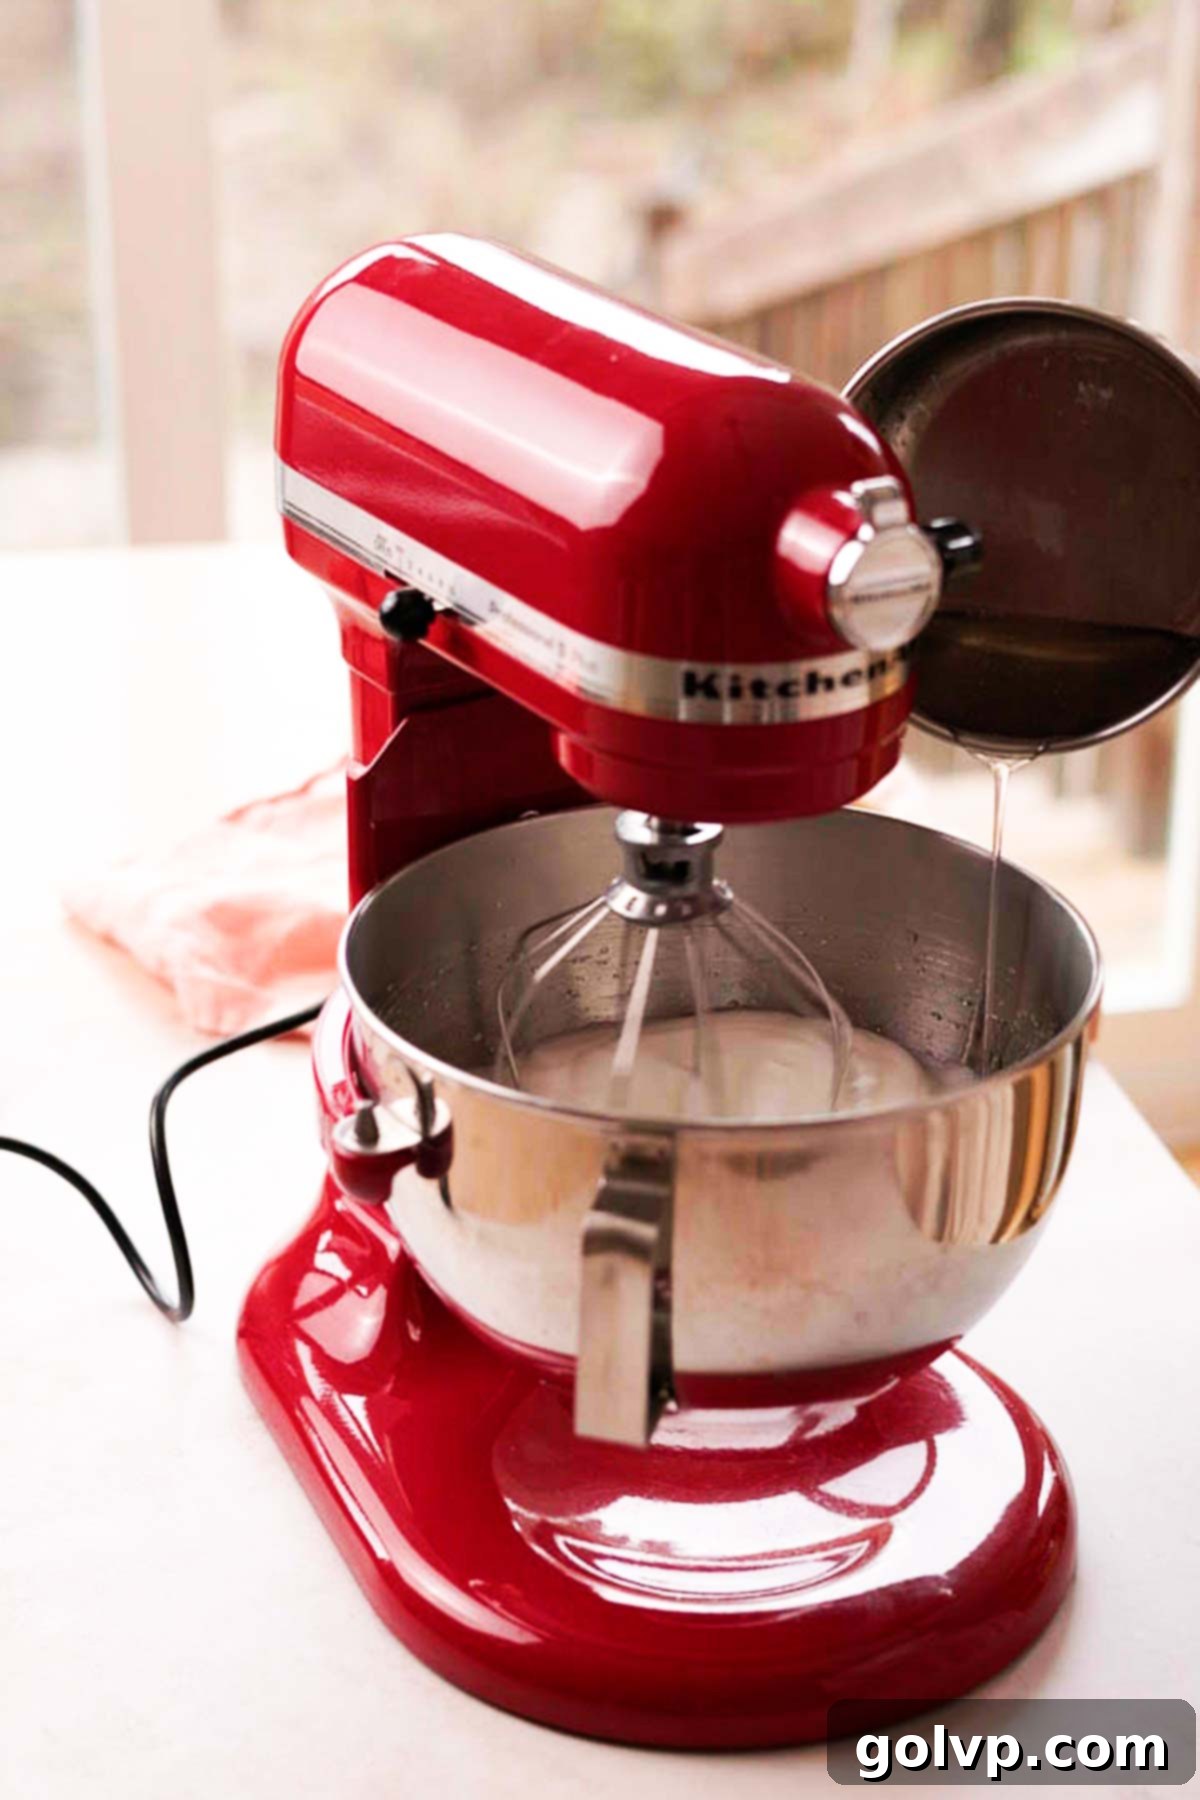
Step 3: Create the Meringue. Once the sugar syrup reaches 235°F (115°C) and your egg whites are at medium peaks, with the mixer running on high speed, slowly and carefully pour the hot sugar syrup in a thin, steady stream down the side of the mixing bowl (avoiding the whisk itself). Continue whipping. Add the vanilla extract and sea salt while the mixer is still running. Keep the mixer on high speed, whipping continuously until the egg whites have significantly increased in volume, become incredibly glossy, and the mixing bowl feels cool to the touch – indicating the meringue has cooled to room temperature. This process creates a stable, stiff, and shiny Italian meringue.
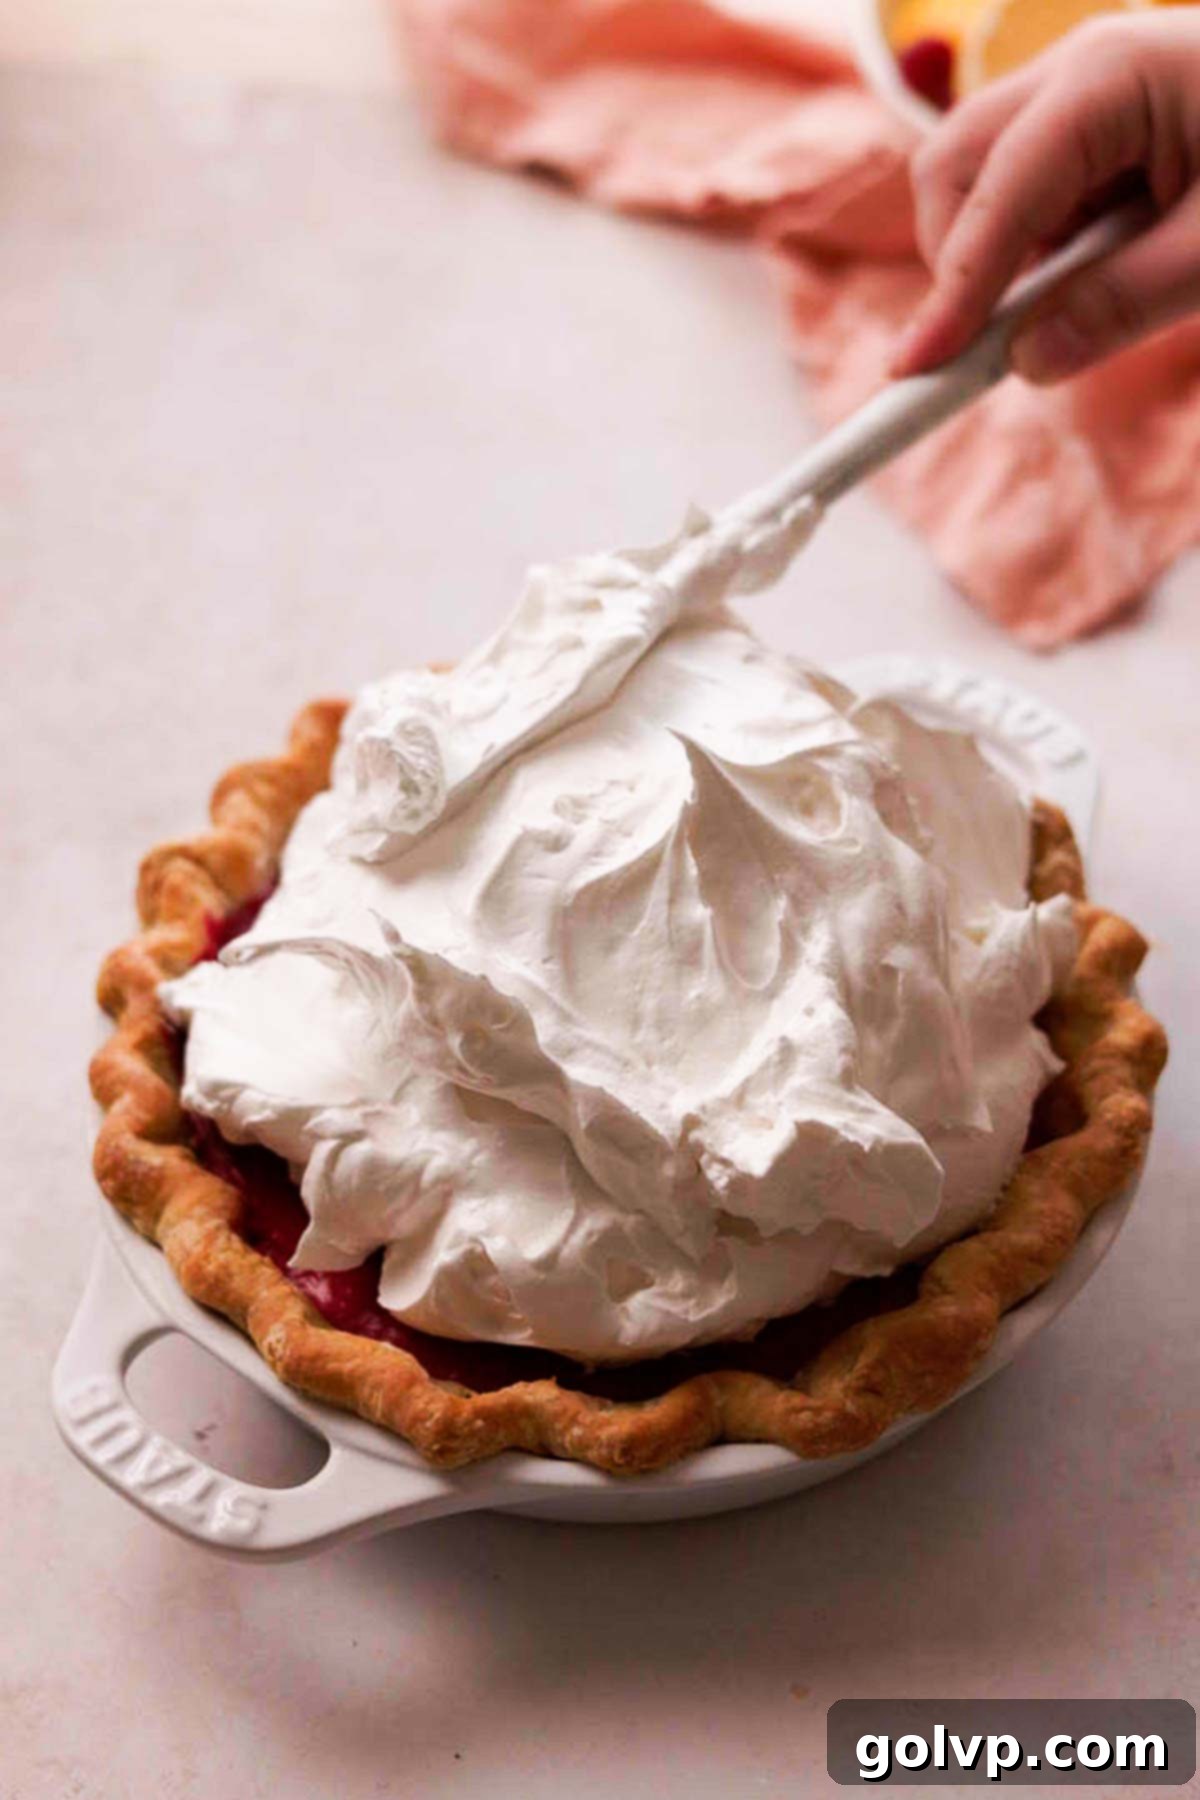
Step 4: Top the Pie with Meringue. Retrieve your chilled and set raspberry pie. Gently spread a thin layer of the Italian meringue over the entire surface of the raspberry curd, extending it all the way to the edges of the crust. This initial layer acts as a seal, preventing the filling from “weeping” moisture into the meringue. Once sealed, pile the remaining meringue high on top of the pie, creating an impressive mountain. Use the back of a spoon or a spatula to create decorative swoops and peaks, giving your meringue a beautiful, artisanal finish.
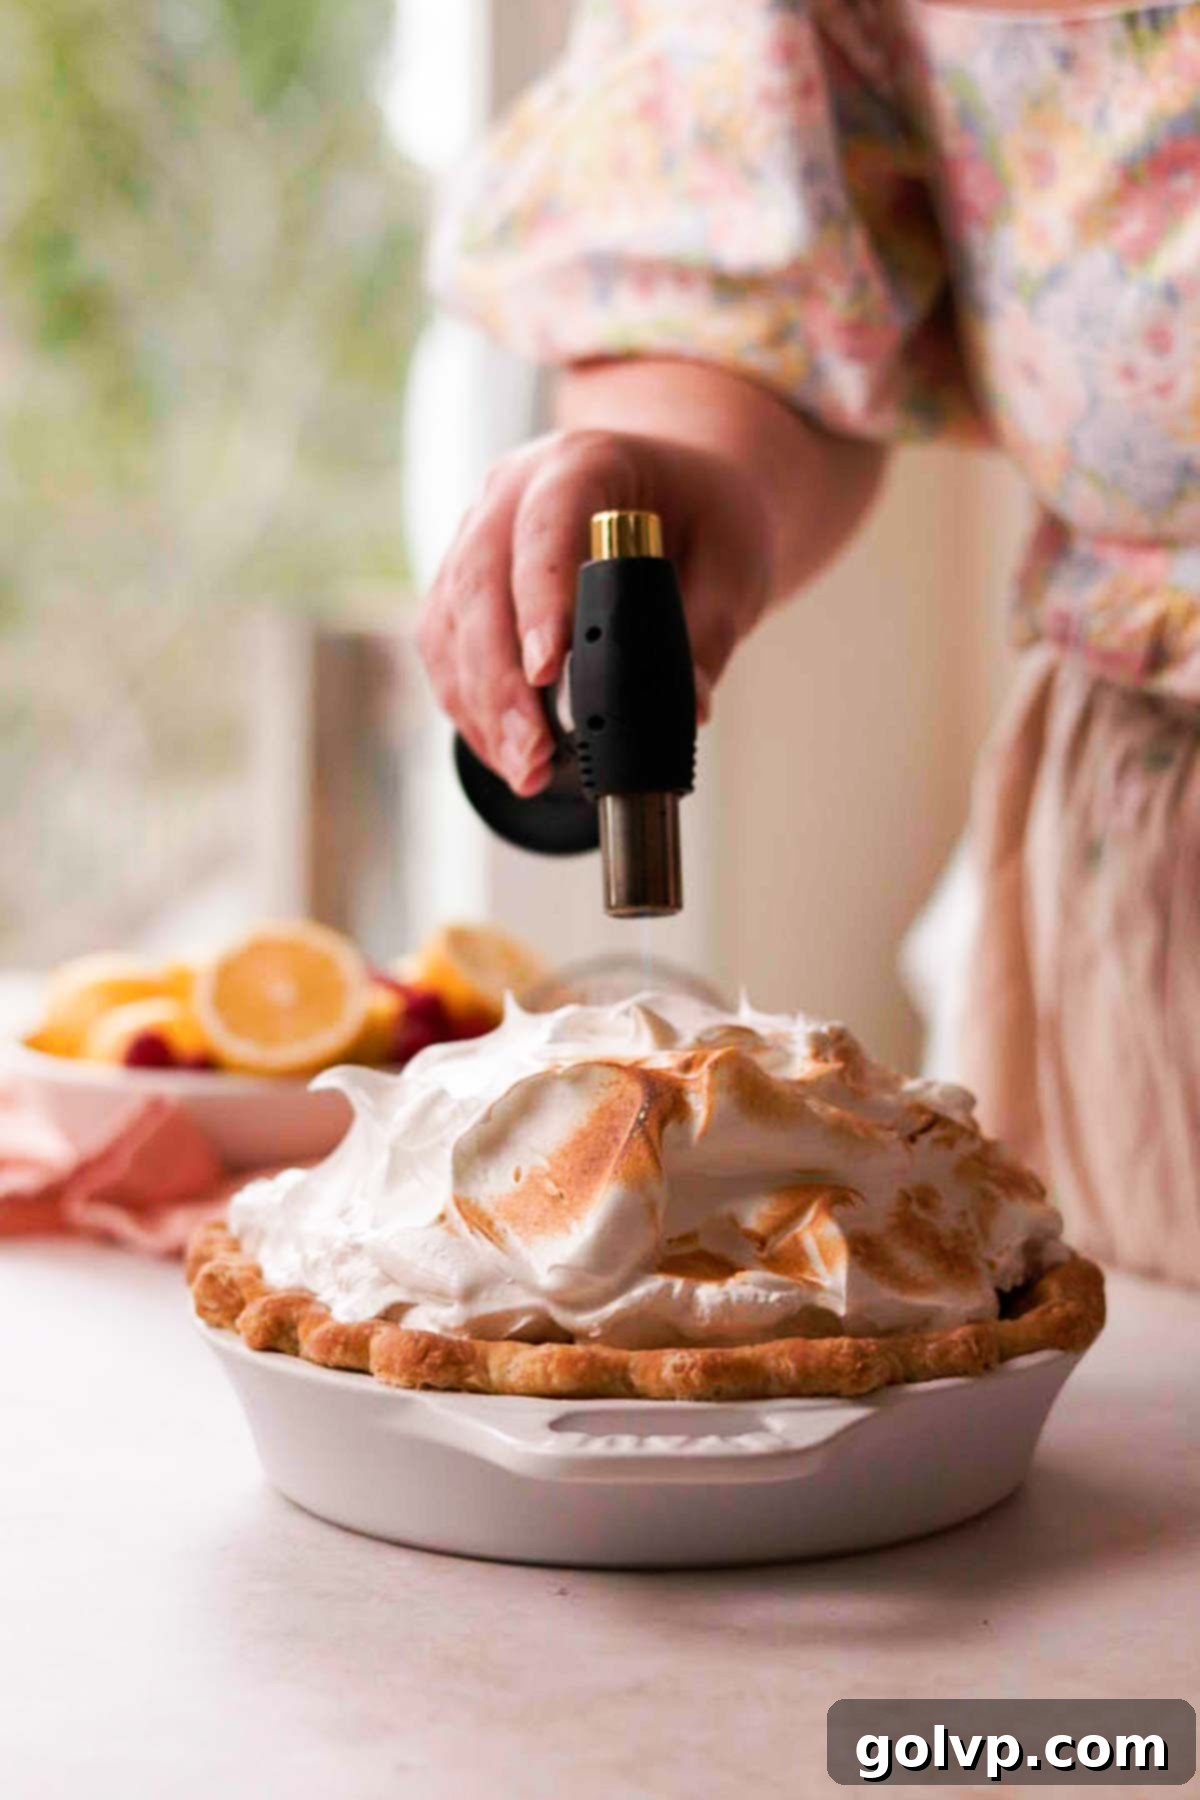
Step 5: Toast the Meringue. To achieve that beautiful golden-brown color and slightly caramelized flavor, use a kitchen torch to carefully toast the peaks and swoops of your meringue mountain. Move the flame constantly and evenly across the surface. Alternatively, you can use your oven’s broiler function. If using the broiler, place the pie on the top rack and watch it *very* closely – this process happens quickly. Rotate the pie frequently to ensure even toasting and prevent burning. Remove as soon as it reaches your desired golden hue.
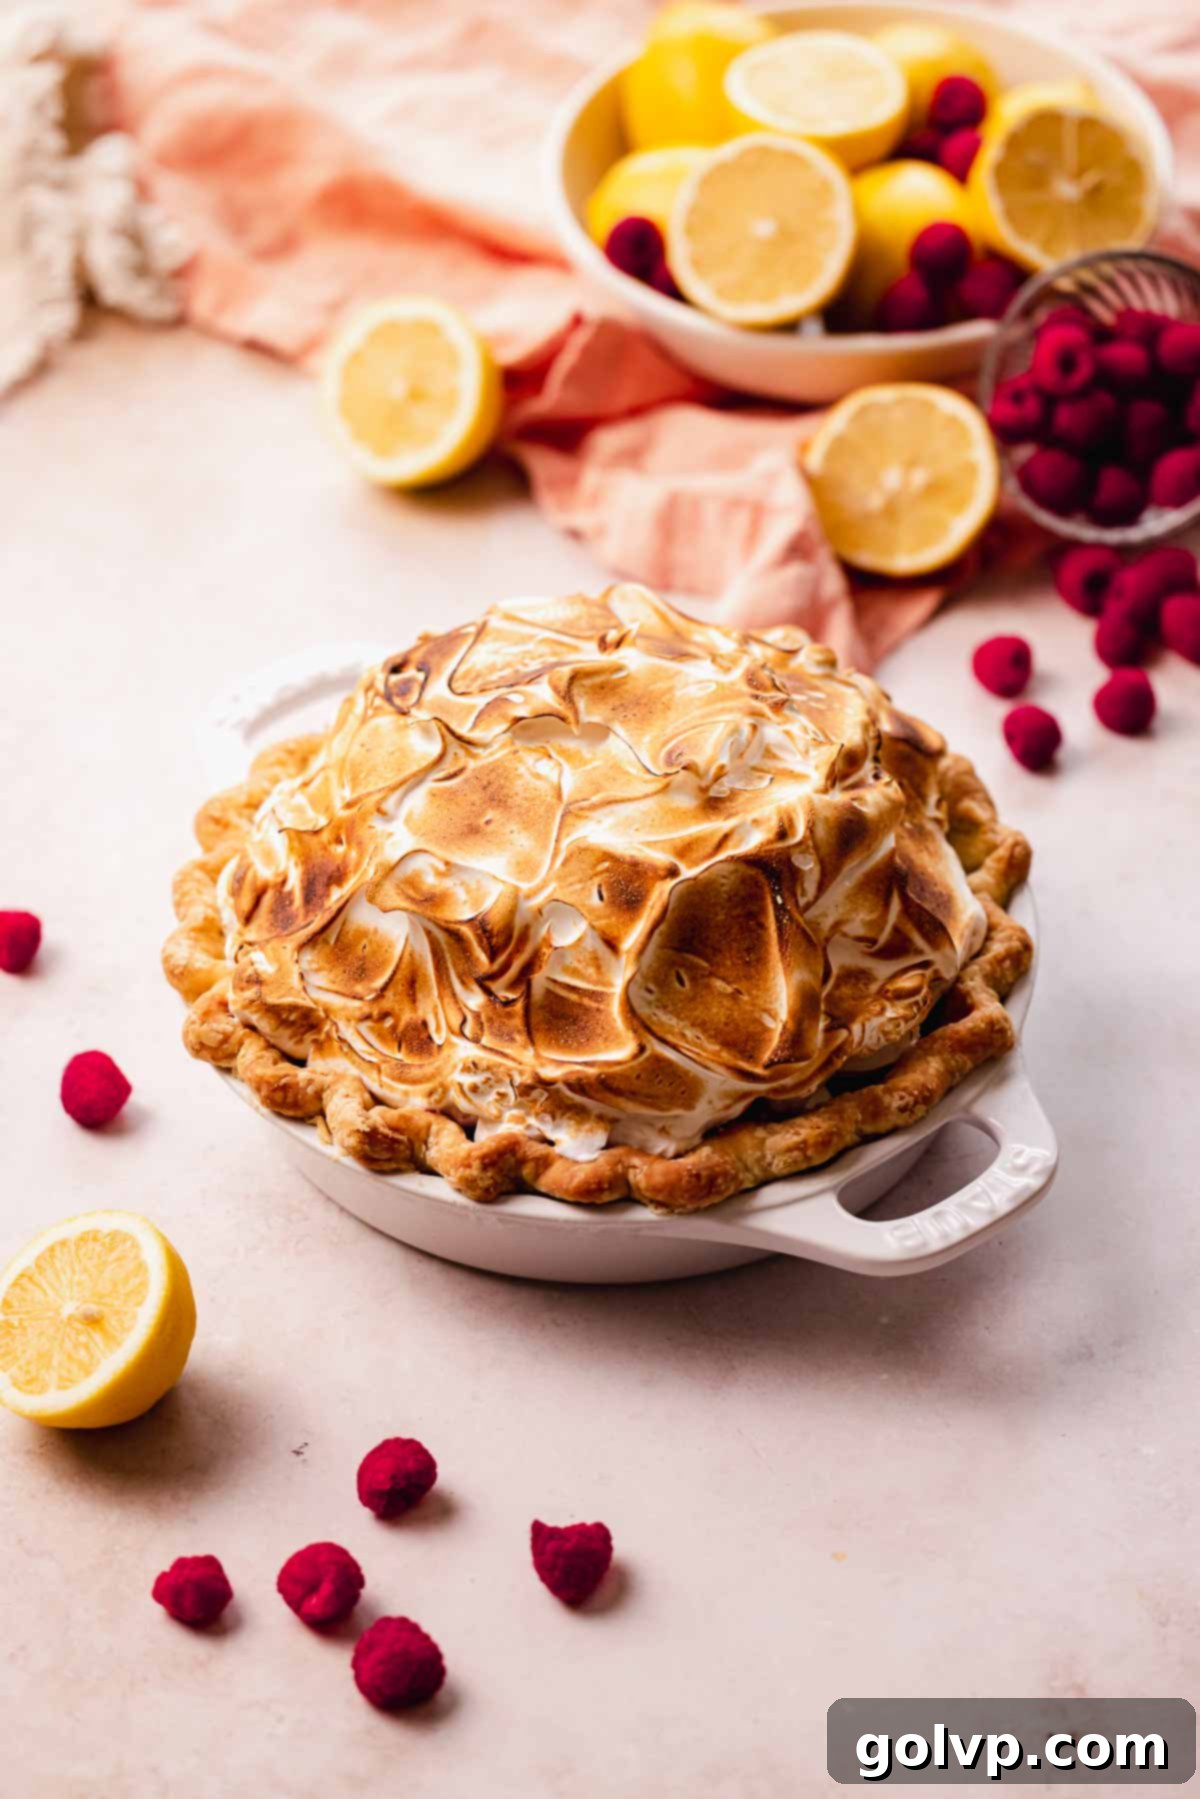
Step 6: Slice and Serve. Your stunning Raspberry Meringue Pie is now ready to be enjoyed! Slice and serve it immediately for the freshest experience. If preparing ahead, store the pie uncovered in the refrigerator for up to 8 hours before serving. While Italian meringue is quite stable, it may release a small amount of moisture (weep) if stored for longer periods. This is a natural occurrence and does not mean the pie is no longer good to eat; it simply affects the aesthetic slightly. Enjoy the fruits of your labor!
🥄 Make Ahead and Storage Tips
Proper storage is key to enjoying your delicious raspberry meringue pie. For any leftover slices, store the pie in an airtight cake carrier or a container large enough to accommodate its towering meringue. It should be refrigerated for up to 3 days. To help prevent the filling from oozing out of the cut sides as it sits, I recommend pressing a piece of parchment paper directly against the exposed filling. It’s important to note that this pie does not freeze well due to the cornstarch in the filling. If frozen, the cornstarch can cause the filling to lose its smooth, stable structure upon thawing, resulting in a watery texture.
While this raspberry meringue pie does involve several steps and components, the end result is incredibly rewarding! To make the process more manageable and stress-free, here’s a suggested timeline for preparing each element in advance:
The Pie Crust: This is a perfect component to tackle ahead of time. You can prepare the dough for the crust a day before you plan to bake it. It requires a significant resting period in the refrigerator before rolling, crimping, and baking, so an overnight chill works wonderfully. Alternatively, you can fully bake the pie crust and store it, well-wrapped, in the refrigerator for up to a day before assembling the pie. I’ve even successfully frozen a fully baked pie crust for up to a week. Preparing the crust in advance significantly breaks down the overall workload for assembly day.
The Raspberry Curd Filling: The filling can also be made and poured into the baked crust a day in advance. The curd needs ample time to cool completely and set firmly, which typically takes about 6 hours in the refrigerator. This firm set is essential for clean, beautiful slices. The unwhipped egg whites, separated for the meringue, will also store perfectly well in an airtight container in the fridge overnight and should still whip up beautifully the next day.
The Italian Meringue: For optimal freshness and stability, the Italian meringue should be made and spread onto the chilled pie within 6-8 hours of when you intend to serve it. While Italian meringue is very stable, topping it closer to serving time ensures its airy texture and pristine appearance are at their best.
🍓 Deep Dive into the Raspberry Curd Filling
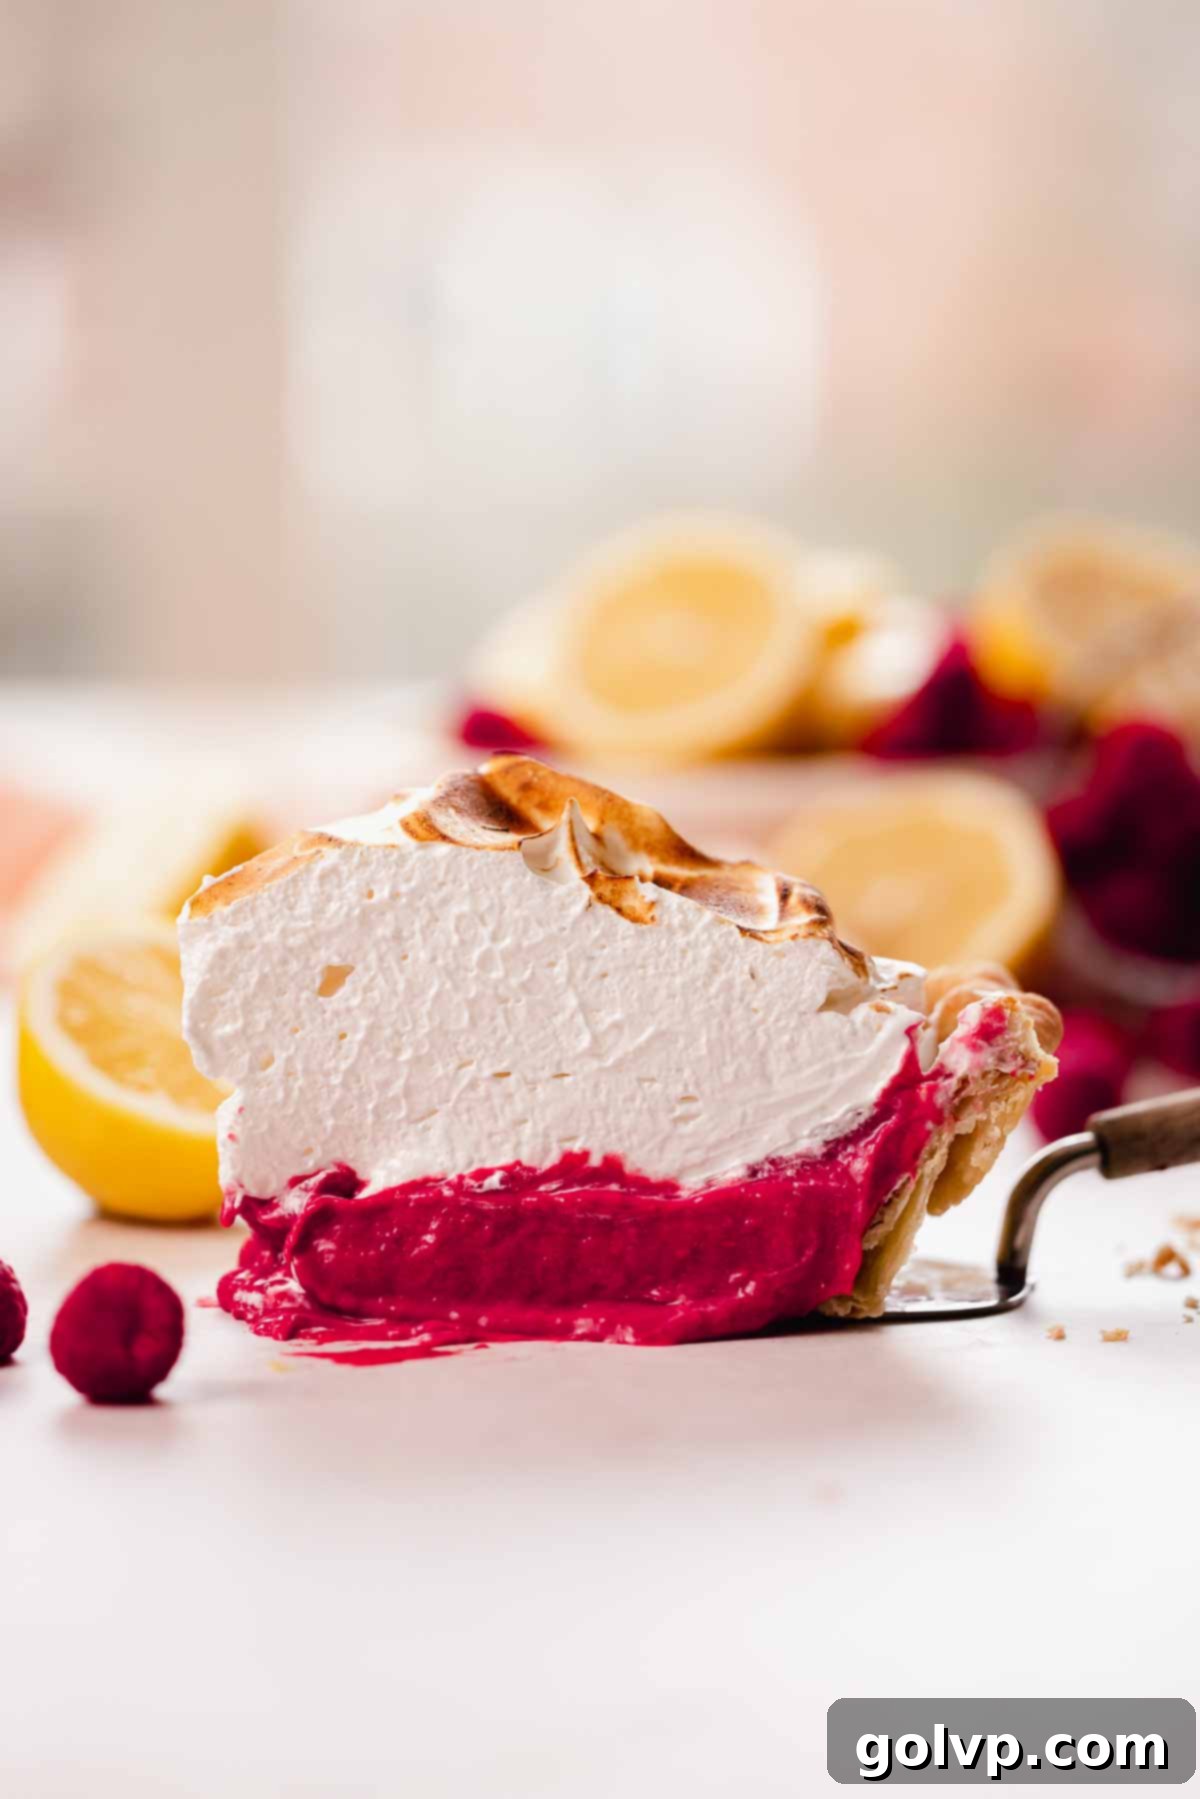
The vibrant, tangy heart of this pie is its exquisite raspberry curd filling, a recipe carefully adapted from my popular raspberry curd recipe. The key modification for this pie application was the strategic addition of a bit of cornstarch, ensuring the filling achieves that perfect, sliceable consistency. During the recipe development process, I explored various options, including increasing the number of egg yolks to thicken the curd. However, I found that no matter how many yolks I incorporated, it simply wasn’t enough to create a curd firm enough for a pie without using an absurdly large quantity of eggs. Cornstarch ultimately came to the rescue, providing the ideal structure without compromising the luscious, velvety smoothness or intense flavor of the curd. For those seeking alternatives, potato starch or even all-purpose flour can yield similar excellent results.
This filling is truly a triumph: velvety smooth on the tongue, incredibly rich, and intensely flavorful. It delivers a concentrated burst of raspberry goodness that is simply decadent. If you’re a true enthusiast of raspberries, I can almost guarantee you’ll be utterly obsessed with this filling – it’s that good! Its versatility extends beyond pies; I also incorporate a version of this delightful raspberry curd filling into my beloved lemon raspberry cake recipe, showcasing its incredible depth and adaptability.
🥧 All About the Italian Meringue Pie Topping
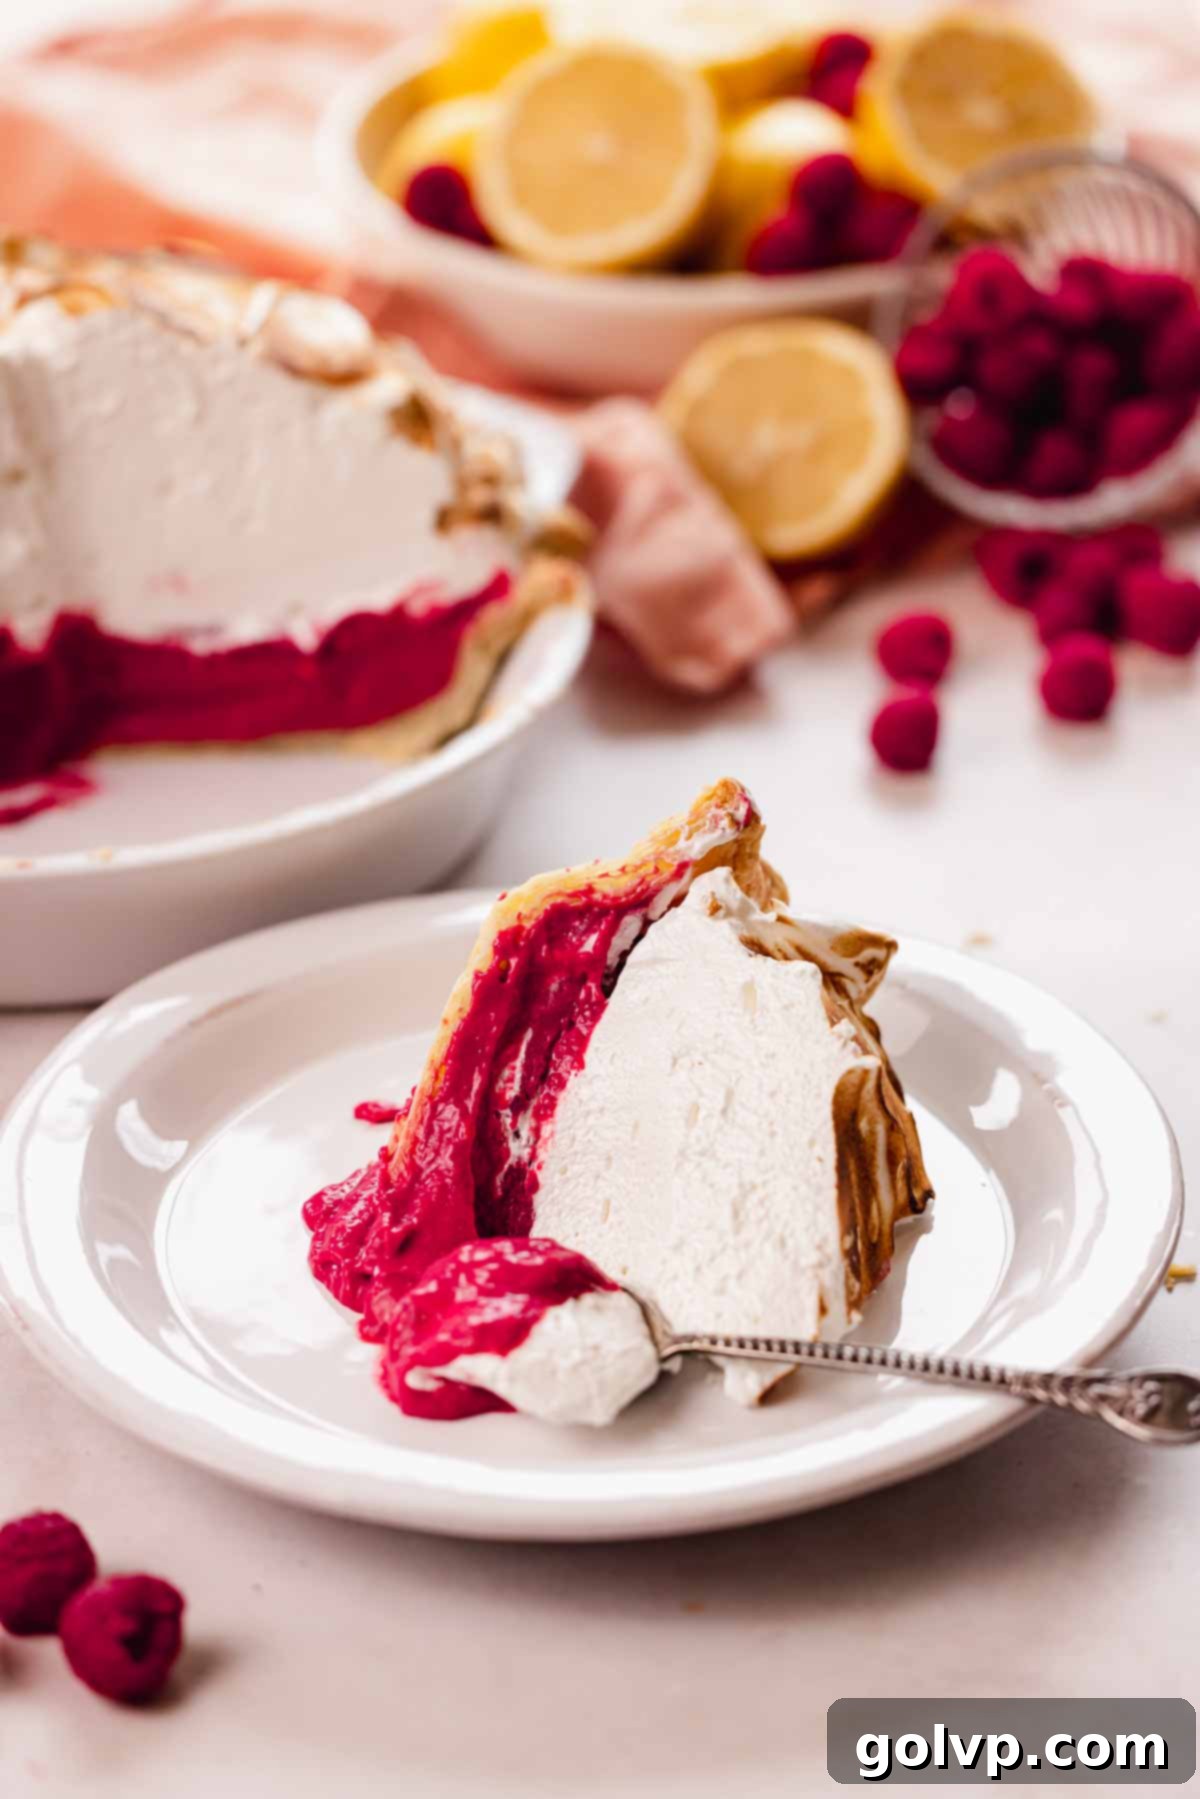
This Raspberry Meringue Pie is elevated by its magnificent, towering crown of Italian meringue. My preference for Italian meringue as a pie topping stems from its superior stability compared to other meringue varieties, such as French or Swiss. When you’re aiming for a “mile-high” meringue, piled high like a cloud on a pie, you absolutely need it to be as structurally sound and stable as possible to avoid weeping or collapsing over time. Italian meringue excels in this regard, holding its shape beautifully and maintaining its ethereal texture.
A significant advantage of Italian meringue is that you don’t have to worry about raw egg whites. The hot sugar syrup, cooked to the soft ball stage (235°F or 115°C), effectively cooks the egg whites as it’s incorporated, making the meringue safe to consume without further baking. If you find yourself in a pinch and need a quicker alternative, you could opt for a regular (French) meringue. However, if using French meringue, it’s crucial to top the pie immediately before serving, keep it chilled, and consume it within 24 hours due to the uncooked egg whites. For added peace of mind with regular meringue, consider using pasteurized egg whites. Alternatively, if you prefer the richness and slightly denser texture of a Swiss meringue, you can follow the detailed instructions provided in my lemon meringue pie cookies recipe to create that elegant topping.
📖 Recipe FAQs
Crust shrinkage can happen for a few reasons. Firstly, avoid overworking the dough; handle it as little as possible to prevent excessive gluten development. Secondly, ensure you create a thick border that extends slightly over the edge of the pie plate, giving it room to contract. Critically, make sure the crust is thoroughly chilled (preferably frozen for 10 minutes) right before it goes into the oven. Lastly, when blind baking, push your pie weights or beans firmly up against the edges of the crust to physically support it and prevent it from pulling away from the sides.
While technically possible, making Italian meringue without a stand mixer is considerably more challenging and physically demanding. The process requires continuous, high-speed whipping for approximately 10-15 minutes while slowly pouring in hot sugar syrup, which is difficult to do consistently by hand. A stand mixer provides the necessary power and frees up your hands, making the process much smoother and more successful.
If you don’t have a candy or instant-read thermometer, you can test the sugar syrup’s temperature using the “cold water test.” Drop a small amount of the hot sugar syrup into a cup of ice water. If the sugar forms a soft, squishy ball that holds its shape when removed from the water, it has reached the soft ball stage (235°F / 115°C) and is ready to be incorporated into your egg whites.
Achieving stiff peaks requires careful attention to detail. First, ensure that when you separate the egg yolks and whites, absolutely no trace of yolk gets into the whites. Any fat can prevent the whites from whipping. Second, your mixing bowl and whisk must be impeccably clean and completely oil-free. Wiping them down with a little lemon juice or vinegar before starting can help remove any unseen grease. Finally, confirm that your sugar syrup reaches the precise soft ball stage temperature (235°F / 115°C) before pouring it into the egg whites, as the heat and concentration of sugar are crucial for stability.
I strongly advise against reducing the sugar content in Italian meringue. The high sugar concentration is critical for two main reasons: it helps stabilize the egg whites, allowing them to hold their towering shape, and more importantly, it helps cook the egg whites to a safe temperature when the hot syrup is added. With less sugar, the meringue may not achieve the necessary stability or fully cook the egg whites, making it less safe and prone to weeping.
Absolutely! In fact, many bakers prefer day-old egg whites for meringue, as they tend to whip up to a greater volume. I frequently make and fill the pie with the raspberry curd a day in advance, storing the separated egg whites overnight, and have consistently achieved excellent Italian meringue the next day. Just ensure they are stored in a clean, airtight container in the refrigerator, and that no egg yolk bits are present.
🍋 More Related Recipes You’ll Love
- Strawberry Galette
- Raspberry Rolls Easy and Gooey
- Lemon Meringue Pie Cookies
- Raspberry Tiramisu
📖 Recipe
Raspberry Meringue Pie with Mile High Meringue
MaryEquipment
- 9″ round pie plate
Ingredients
Pie Crust (optionally, use a premade pie crust)
- ½ cup unsalted butter if using salted, omit salt
- ½ cup ice water
- ½ tablespoon vinegar apple cider and white vinegar work great
- 1 ¼ cup all purpose flour (150g)
- ¼ teaspoon sea salt
- 1 egg white whisked (reserve the yolk for the filling)
Raspberry Curd Pie Filling
- 1 cup granulated sugar
- 6 tablespoons corn starch
- 6 large egg yolks save egg whites for meringue
- 1 large egg whole
- 21 oz raspberries (600g) fresh or frozen
- 2 lemons zested
- ¼ cup lemon juice freshly squeezed (from the zested lemons)
- 1 cup unsalted butter if using salted, omit salt
- ¼ teaspoon sea salt
Italian Meringue
- 1 ½ cups granulated sugar
- 5 tablespoons water
- 6 large egg whites reserved, from the filling
- 1 teaspoon lemon juice reserved, from squeezed lemons
- 1 teaspoon pure vanilla extract
- ¼ teaspoon sea salt
Instructions
Pie Crust (optionally, use a premade pie crust)
- Cut the butter into small, ¼” cubes. Place them on a plate and freeze for 10 minutes. Meanwhile, mix together the ice water and vinegar in a separate cup.½ cup unsalted butter, ½ cup ice water, ½ tablespoon vinegar
- In a food processor or a large bowl, combine flour and salt. Mix well with a whisk or a spoon.1 ¼ cup all purpose flour, ¼ teaspoon sea salt
- Cut the butter into the flour mixture with a knife or by pulsing the food processor. You want larger pea sized pieces of butter with smaller breadcrumbs.
- Gradually, add the ice water mixture tablespoon by tablespoon into the flour and butter mixture, mixing just until a dough forms. There should still be some dry pieces – it shouldn’t be too wet.
- As soon as a dough forms, flatten and fold it two times to create layers. This will help incorporate any dry bits of dough. Shape into a disk and wrap with plastic wrap. Refrigerate for at least 30 minutes.
- Remove the dough from fridge and roll it out on a lightly floured surface to about ⅛ -¼ inch thick.
- Transfer into an ungreased pie plate and help the crust fall into the plate without stretching the dough. Trim any excess dough (if any), leaving a 1” or 2.5 cm overhang. Tuck the overhang under the dough to create a crust and crimp the crust with your fingers or a fork.
- Place the pie crust in the freezer for 10 minutes to chill again. Preheat oven to 365°F (185°C).
- Place a piece of parchment paper into the chilled crust and pour pie weights or dry, raw beans into the parchment paper. This is to weigh the pie crust down as it bakes. Bake on top of a larger baking sheet for 25 minutes.
- Remove the pie crust from the oven and very carefully transfer the parchment paper with beans into a heat safe bowl to cool. While the crust is still hot, brush 1 whisked egg white (reserve the yolk for the filling) from the raspberry curd all over the crust, avoiding the top edge.1 egg white
- Poke the bottom of the crust with a fork and place it back into oven to bake for 15-20 minutes or until golden brown. If the edges are browning too quickly, tent some aluminum foil all along the edges, leaving the middle exposed.You can start on the filling while it bakes.
Raspberry Curd Pie Filling
- In a heavy bottomed saucepan, whisk the cornstarch and granulated sugar to get rid of any lumps.1 cup granulated sugar, 6 tablespoons corn starch
- Separate the yolks and whites from 6 eggs. Place the whites into a separate container, making sure that no pieces of egg yolk get into the whites. Cover the whites and place them in the fridge for the meringue.6 large egg yolks
- Add the 6 egg yolks into the saucepan. Add the leftover egg yolk from the crust into the saucepan. Crack one whole egg right into the saucepan as well.Whisk the egg and sugar mixture by hand briefly, until all the yolks are broken up.1 large egg
- Add the raspberries, lemon juice, and lemon zest into the egg mixture. Heat on medium-low heat, stirring constantly so that it doesn’t burn.21 oz raspberries, 2 lemons, ¼ cup lemon juice
- Heat until it comes to a simmer and thickens, for about 10 minutes. It will become a thick porridge-like texture. Once thickened, add the butter and salt, and whisk to combine on low heat.1 cup unsalted butter, ¼ teaspoon sea salt
- Strain the raspberry curd through a mesh sieve or cheesecloth to remove the seeds. Work in batches to make it easier. This will take about 10 minutes but it’s so worth it for a smooth, seedless, creamy filling.
- Transfer the warm filling into the cooked and cooled pie crust, smoothing the top over. Press a piece of plastic wrap or parchment paper right onto the top of the curd so that it doesn’t form a film. Refrigerate until completely cooled and set, about 2-4 hours. Don’t freeze it because the filling won’t set when frozen due to the cornstarch.
Italian Meringue
- In a small saucepan, combine the sugar and water and stir. Use a pastry brush moistened with water to brush down any sugar crystals off the sides of the bowl. Insert a candy thermometer into the saucepan.1 ½ cups granulated sugar, 5 tablespoons water
- Let it come to a simmer on low heat. Once the sugar dissolves, stop stirring. Bring it to soft ball stage, 235°F (115°C). While the sugar syrup is heating up – work on the next step. If you don’t have a candy or instant read thermometer: you can test if the sugar syrup is up to temp by dropping it into a cup full of ice water. If the drop of sugar makes a soft and squishy ball, then it’s ready to go.
- While the sugar is getting to temperature, beat the egg whites and 1 teaspoon of lemon juice with the whisk attachment (in a stand mixer is ideal) until medium peaks form.6 large egg whites, 1 teaspoon lemon juice
- Slowly pour the hot sugar syrup into the side of the bowl with the mixer running on high speed. Add the vanilla extract and salt while the mixer is still running. Keep the mixer on high speed, whisking until the egg whites increase in volume and the bowl comes to room temperature.1 teaspoon pure vanilla extract, ¼ teaspoon sea salt
- Spread the meringue over the chilled and filled pie, starting with a thin layer, spreading it all the way to the crust, sealing in the filling. Pile the rest on top and make swoops with a spoon or spatula.
- Use a kitchen torch to toast the mountain of meringue. You can also use the broil function in your oven. Keep a close eye on it at all times so that it doesn’t burn, and rotate frequently.
- Slice and serve immediately or store uncovered in the fridge for up to 8 hours before serving. Italian meringue is quite stable, but it can weep a little moisture while it’s stored for longer. That doesn’t mean that it isn’t good to eat anymore!
