Zesty Lemon Tiramisu with Homemade Lemon Curd: A Bright, No-Bake Twist on a Classic
Prepare to tantalize your taste buds with this incredible lemon tiramisu – a dessert that’s not just tangy and zesty, but also wonderfully creamy and incredibly refreshing. It’s the perfect make-ahead treat, designed to impress without the stress of last-minute preparations. This delightful dessert offers a vibrant twist on the beloved classic tiramisu, making it ideal for any occasion, from casual summer gatherings to elegant dinner parties. Its star ingredient, homemade lemon curd, is surprisingly easy to whip up and infuses every layer with an intense, bright lemon flavor that truly sings. Whether you choose to add a hint of limoncello for an extra boozy kick or prefer to keep it non-alcoholic, this recipe promises a truly unforgettable experience. With lemon curd incorporated into both the creamy filling and the luscious topping, each spoonful delivers an explosion of tangy, zesty, and utterly creamy lemon goodness.

🍋 Why You’ll Adore This Lemon Tiramisu Recipe
There are countless reasons why this lemon tiramisu will become your new favorite dessert. It offers a fresh, vibrant departure from traditional tiramisu while retaining all the beloved creamy indulgence. Here’s why this recipe stands out:
- Rich Lemon Curd Flavor: The generous use of lemon curd, both in the filling and as a bright topping, makes this tiramisu incredibly creamy and delightfully tart. This isn’t just a hint of lemon; it’s a full-bodied, tangy citrus experience that will awaken your palate.
- Effortlessly Easy Preparation: While we highly recommend making your own lemon curd for the best flavor (and the recipe details how!), you can easily use good quality store-bought lemon curd to significantly cut down on preparation time. This makes the recipe accessible even for beginner bakers or those with a busy schedule.
- Perfect Make-Ahead Dessert: Tiramisu, by nature, is a dessert that improves with time. This lemon tiramisu requires an overnight chill to properly set and allow the flavors to meld and deepen. This means you can prepare it a day or even two in advance, freeing up your time on the day you plan to serve it. It’s ideal for entertaining or simply having a delicious dessert ready when a craving strikes.
- Irresistibly Creamy Texture: The mousse-like filling is whipped to perfection, resulting in a light, airy, and incredibly creamy texture that melts in your mouth. Unlike some heavier desserts, this tiramisu maintains a delightful lightness, making it perfectly satisfying without being overly rich.
- No Raw Eggs: Traditional tiramisu often contains raw egg yolks. This recipe cleverly replaces them with lemon curd and whipped cream, eliminating any concerns about raw eggs, making it safe for everyone, including pregnant individuals, the elderly, and young children. Plus, this substitution enhances the lemon flavor tremendously!
- A Refreshing Alternative: If you’re looking for a dessert that’s lighter and brighter than rich chocolate or coffee-based options, this lemon tiramisu is the perfect choice, especially during warmer months.
If you’re a fan of diverse tiramisu flavors, don’t miss out on exploring other exciting variations like my strawberry tiramisu, oreo tiramisu, and matcha tiramisu recipes. Each offers a unique spin on this classic Italian dessert!
❔ What Defines This as Tiramisu?
While this recipe might be a departure from the coffee and cocoa-dusted classic, it maintains the core structure and spirit of tiramisu. Traditional tiramisu is famously characterized by layers of coffee-soaked ladyfingers, enveloped in a rich, velvety filling made from whipped egg yolks combined with mascarpone cheese. Often, whipped egg whites are carefully folded into this mixture to achieve a light, airy, and creamy mousse-like consistency. The dessert is then chilled to allow the flavors to meld and the layers to set into a cohesive, sliceable cake.
Our lemon tiramisu adapts this beloved structure for a citrus-forward experience. To address common concerns about raw eggs, especially for at-risk groups like pregnant women, young children, or the elderly, we’ve innovatively replaced the raw egg yolks with luscious lemon curd. This brilliant substitution not only eliminates any bacteria risks associated with consuming raw eggs but also significantly boosts the vibrant lemon flavor profile of the dessert. In place of whipped egg whites, we incorporate beautifully whipped heavy cream, which provides the essential lightness and creaminess, resulting in a mousse-like filling that’s both indulgent and incredibly smooth. The ladyfingers, instead of being soaked in coffee, are briefly dipped in a fragrant lemon-infused syrup, continuing the bright citrus theme throughout every layer. This thoughtful adaptation ensures you get all the familiar creamy layers and delicate texture of a classic tiramisu, but with a refreshing, safe, and intensely lemony twist that’s truly delicious.
For another delightful, raw-egg-free variation, my strawberry tiramisu recipe utilizes a vibrant strawberry curd, offering a berry-infused take on this versatile dessert structure.
📝 Essential Ingredients for Lemon Tiramisu
Read through for all the tips you will need for success!
Full steps and ingredients in recipe card below.
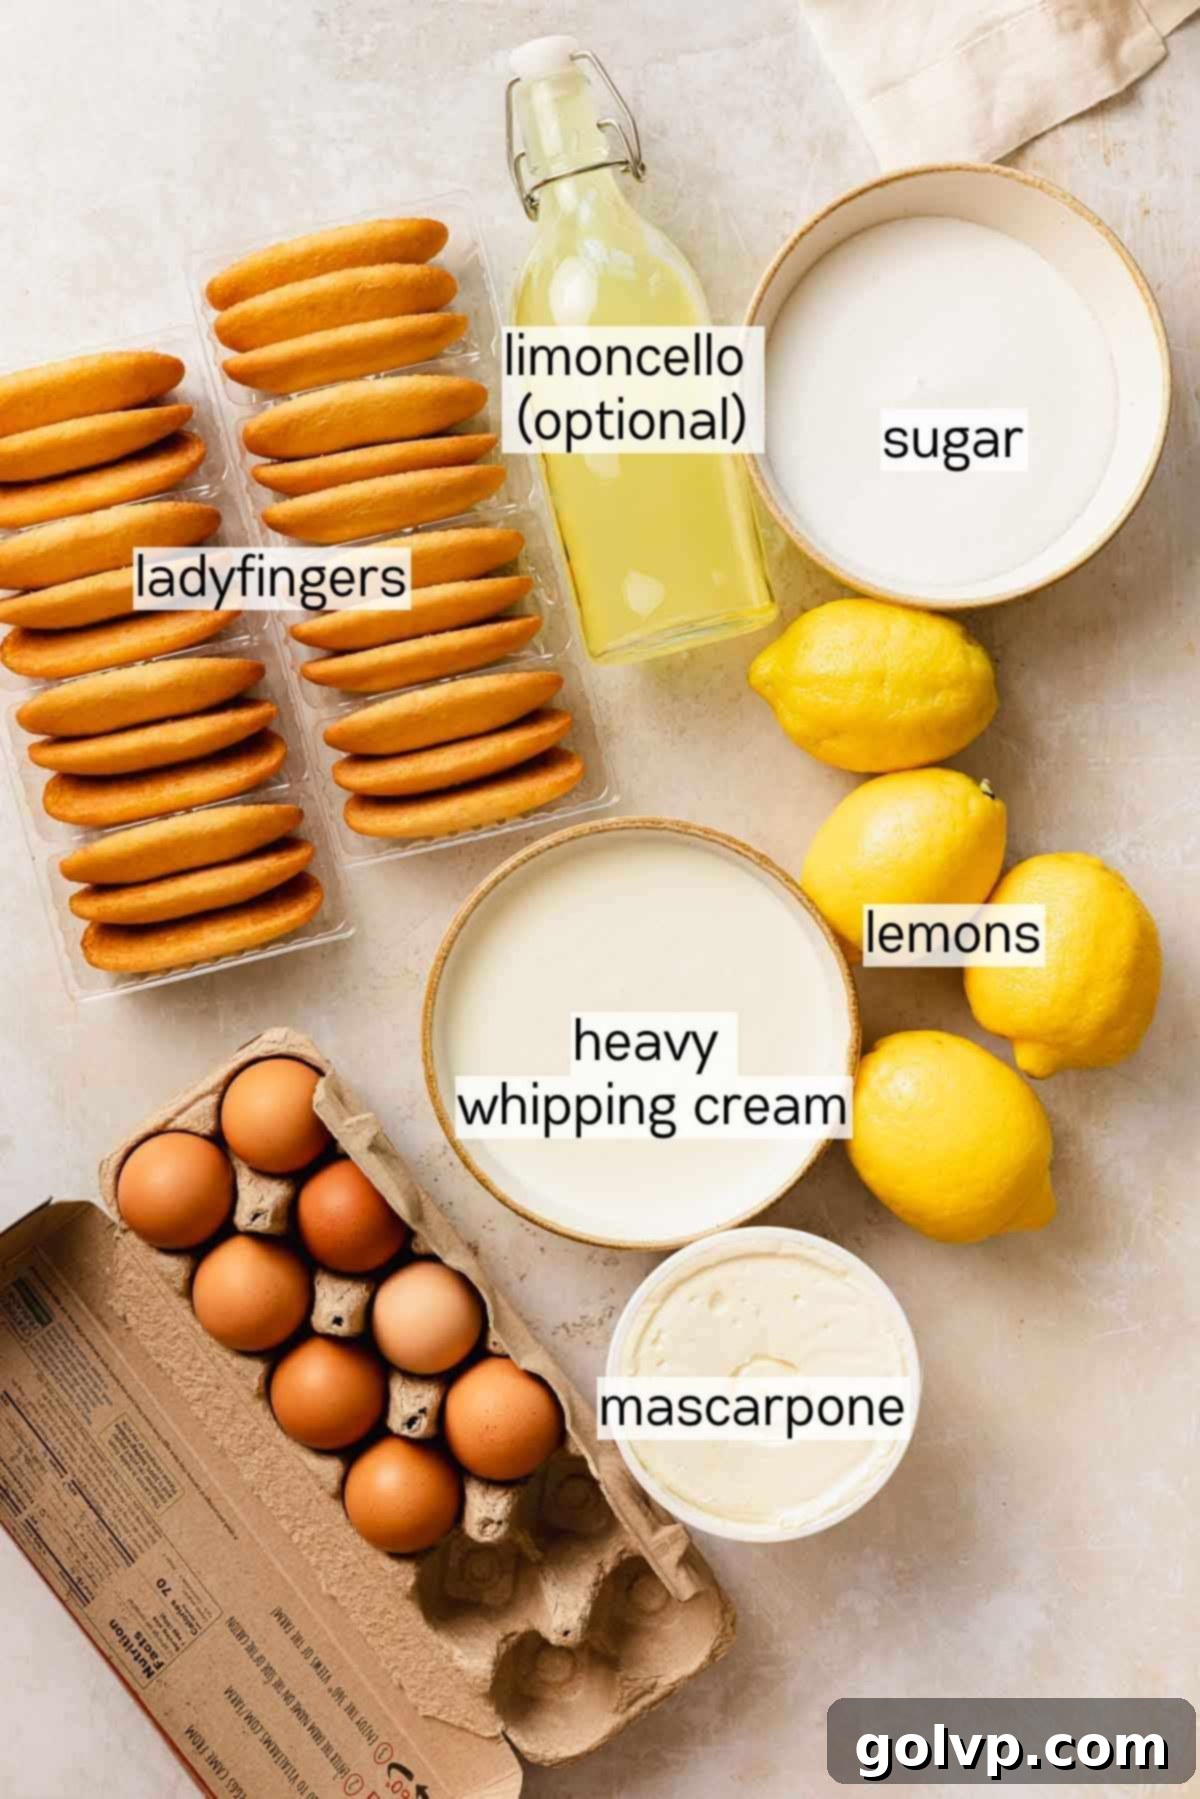
*butter isn’t pictured in the photo but is included in the ingredients*
- Lemons: Fresh lemons are absolutely paramount to the success of this tiramisu, as their bright, tangy flavor is infused throughout the dessert via the homemade lemon curd and the soaking syrup. You will need approximately 3-4 medium to large lemons in total. 2-3 lemons will be used for zesting and juicing to create the rich lemon curd, while one additional lemon will be dedicated to the lemon-infused syrup for the ladyfingers. Any extra lemon slices you choose for decoration are purely optional but add a beautiful visual touch. Always opt for fresh, firm lemons for the best flavor and juice yield.
- Eggs and Yolks: These are crucial for the lemon curd, acting as a natural thickener. The combination of egg yolks and whole eggs gives the curd its signature silky-smooth texture and rich consistency, essential for the creamy filling. Because the eggs are cooked thoroughly during the lemon curd preparation, you eliminate any concerns about consuming raw eggs in the tiramisu filling itself.
- Mascarpone Cheese: This Italian cream cheese is a non-negotiable ingredient for any tiramisu, providing the characteristic body, richness, and unparalleled creaminess to the filling. Its mild, slightly sweet flavor perfectly complements the tartness of the lemon. If you find yourself in a bind, you *could* substitute with cream cheese, but be aware that it will impart a tangier, cheesecake-like flavor, altering the traditional tiramisu profile. Avoid ricotta cheese entirely, as its grainy texture will prevent you from achieving the desired smooth, luxurious filling. Ensure your mascarpone is at room temperature for easy blending to prevent lumps.
- Heavy Whipping Cream (or Heavy Cream): For a truly light and airy filling, heavy whipping cream is essential. Look for cream with a fat content of 35% or higher to ensure it can be whipped to firm, stiff peaks. Once folded into the mascarpone and lemon curd mixture, the whipped cream incorporates air, transforming the filling into a fluffy, mousse-like delight. Make sure both your cream and your mixing bowl/whisk are thoroughly chilled for optimal whipping results.
- Limoncello (Optional): For adults seeking an authentic Italian twist, a splash of limoncello – a sweet, potent lemon-flavored liqueur – adds a wonderful depth and a delicate boozy kick to the tiramisu. It enhances the lemon flavor without overpowering it. If you prefer a non-alcoholic dessert, or are serving children, simply omit the limoncello from the lemon syrup without any compromise on flavor, as the fresh lemon syrup itself provides plenty of zest.
- Basil (Optional): This might seem like an unconventional addition, but a sprig of fresh basil infused into the lemon syrup introduces a subtle, aromatic, and slightly earthy floral note. It elevates the overall flavor profile, adding a layer of sophistication that beautifully complements the bright citrus, creating a more complex and memorable dessert experience. Don’t underestimate this small addition!
Did you know that the lemon curd in this recipe is incredibly versatile? You can easily substitute it with any other fruit-flavored curd to create entirely new tiramisu variations! Why not try making a luscious raspberry curd or even a vibrant blueberry curd for a delightful change?
👩🍳 Step-by-Step Guide: Crafting Your Lemon Tiramisu
Creating this exquisite lemon tiramisu is a rewarding process, broken down into three manageable stages: preparing the vibrant lemon curd, crafting the aromatic lemon syrup for soaking the ladyfingers, and finally, assembling the creamy, layered dessert. Follow these detailed steps for a perfect outcome every time.
Lemon Curd Step by Step
Tip: If opting for store-bought lemon curd for convenience, you will need approximately 2 ½ cups, which translates to about 725g or 26oz by weight.
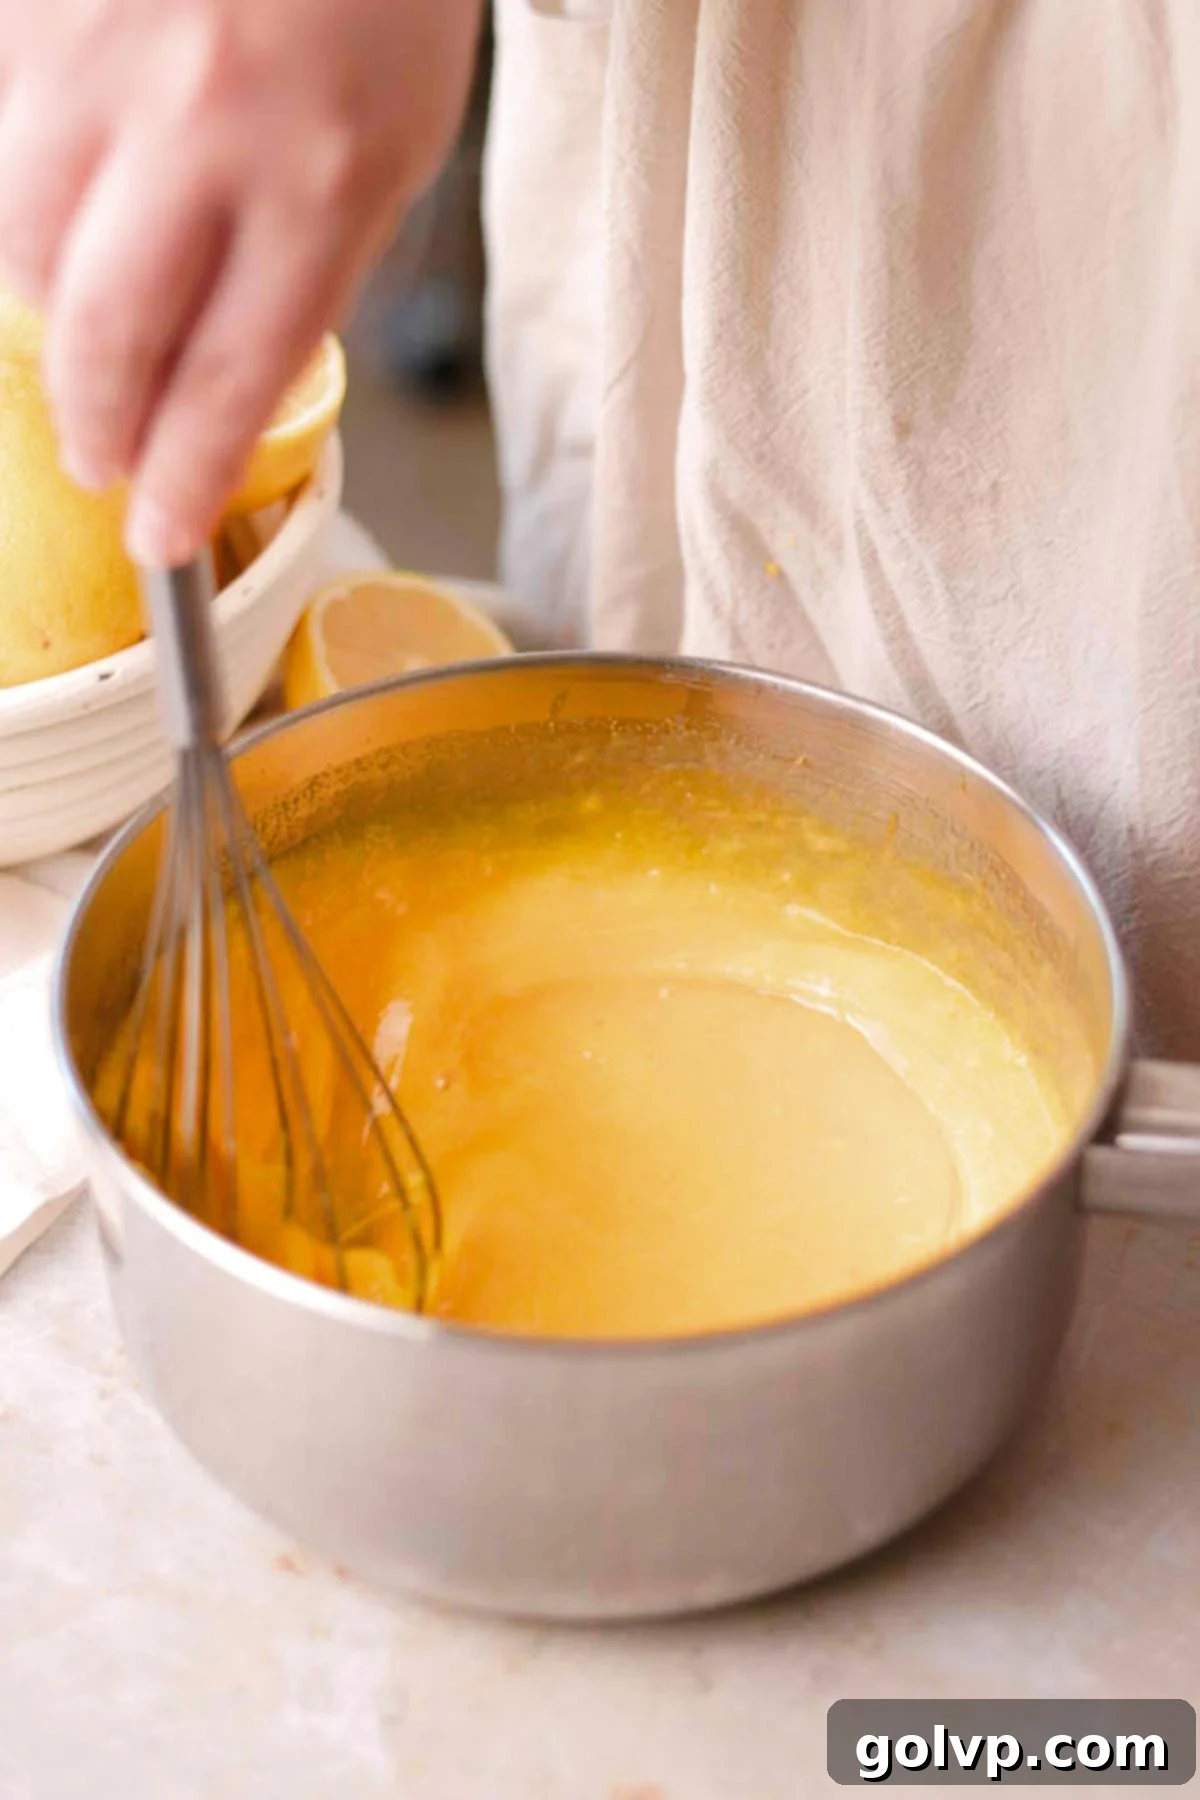
Step 1: In a medium-sized saucepan, ideally a non-metal or coated one to prevent any metallic aftertaste, combine your egg yolks, whole eggs, a pinch of sea salt, granulated sugar, fresh lemon zest, and freshly squeezed lemon juice. Whisk these ingredients together thoroughly until they are well combined and smooth. This initial whisking helps to break down the eggs and dissolve the sugar, ensuring a homogenous mixture before heating.
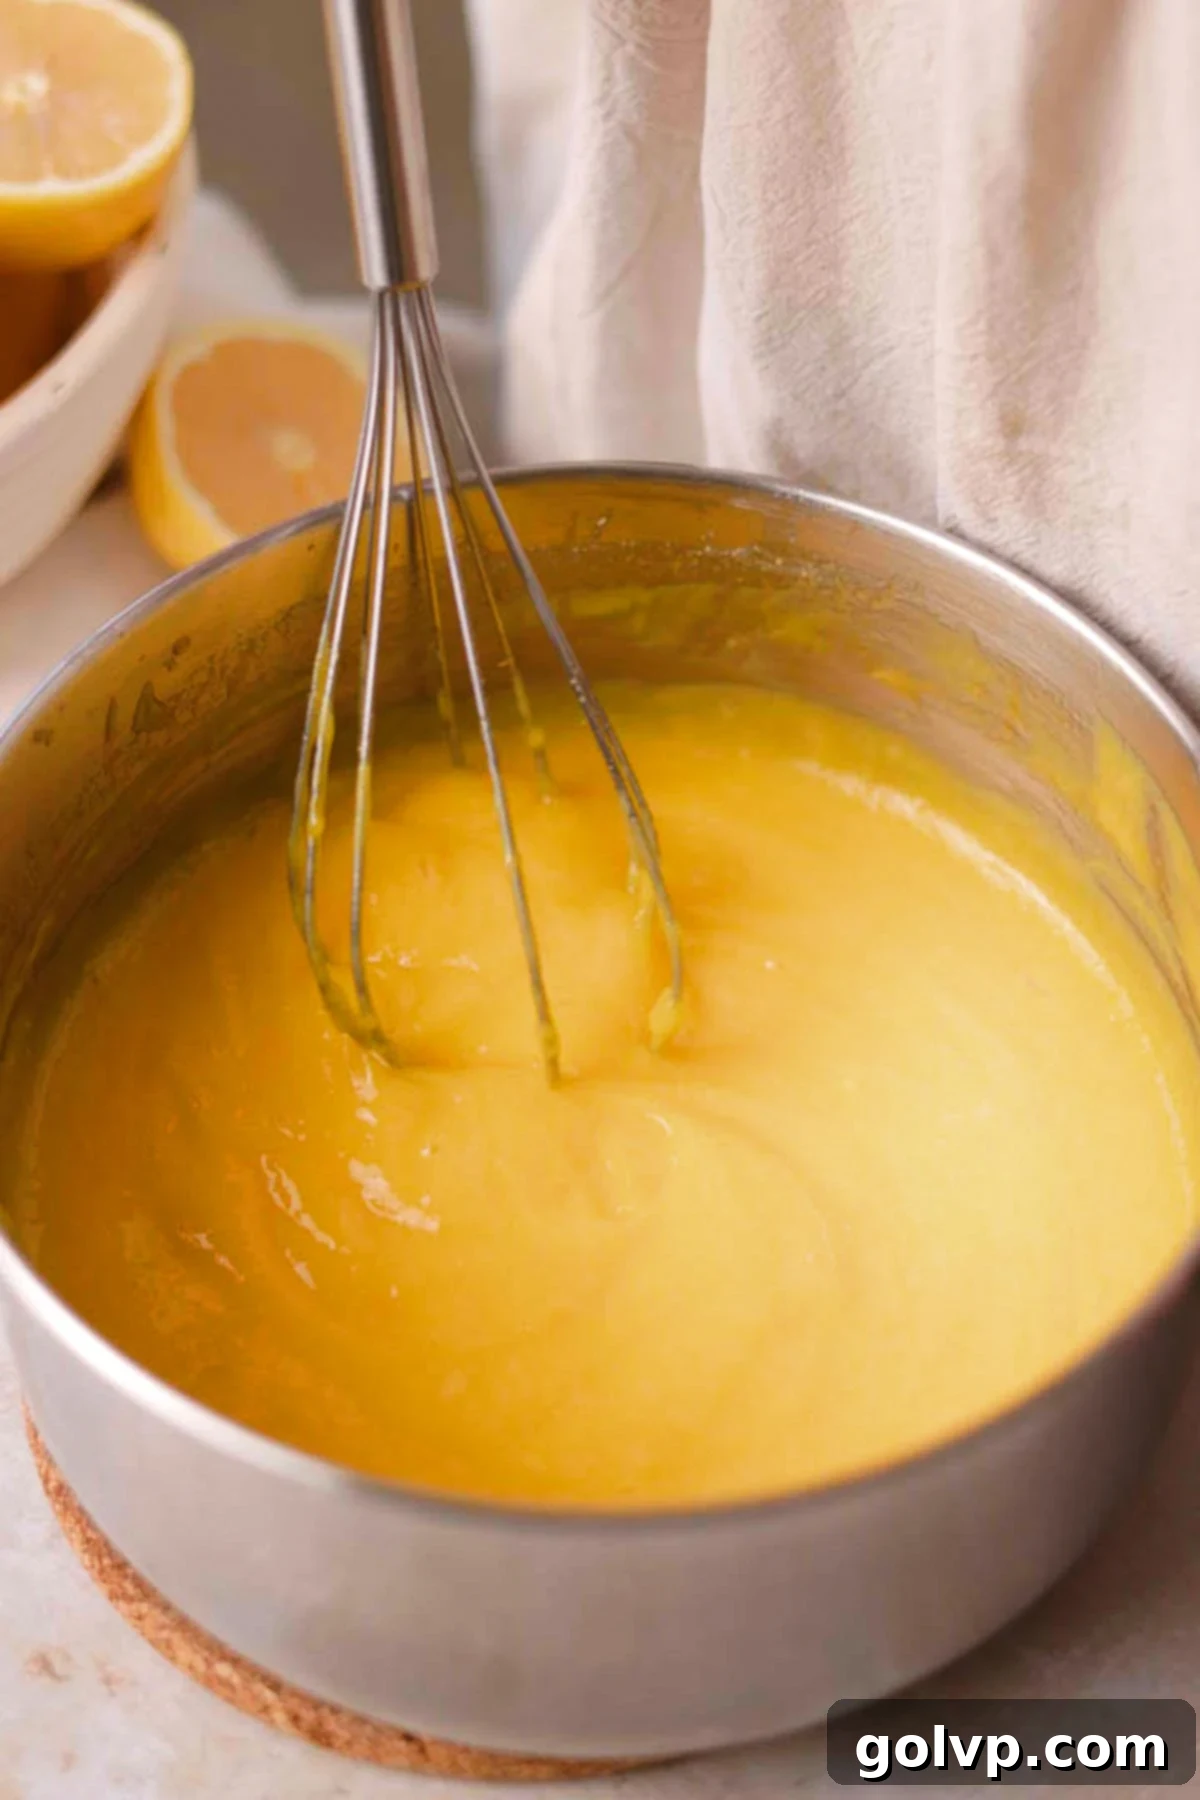
Step 2: Place the saucepan over medium heat, making sure to whisk or stir the mixture constantly. This continuous movement is crucial to prevent the eggs from scrambling and to ensure even thickening. Allow the lemon curd to come to a gentle simmer, where you see small bubbles appearing around the edges. Continue to cook, stirring, for approximately one minute after it begins to simmer, or until it visibly thickens to a consistency that coats the back of a spoon.
Pro lemon curd tip: To avoid a metallic flavor that can occur when lemon acidity reacts with certain metals, always use a non-metal saucepan or one with a non-reactive coating. Similarly, ensure you store the finished curd in a non-metal container.

Step 3: Once thickened, immediately strain the hot lemon curd through a fine-mesh sieve or a cheesecloth-lined strainer into a non-metal container. This step is essential for removing any small bits of cooked egg or lemon zest, resulting in an exquisitely smooth and velvety curd. Add the cold unsalted butter to the warm curd, allow it to sit for a minute or two to begin melting, then stir until the butter is fully incorporated and the curd is smooth and glossy.
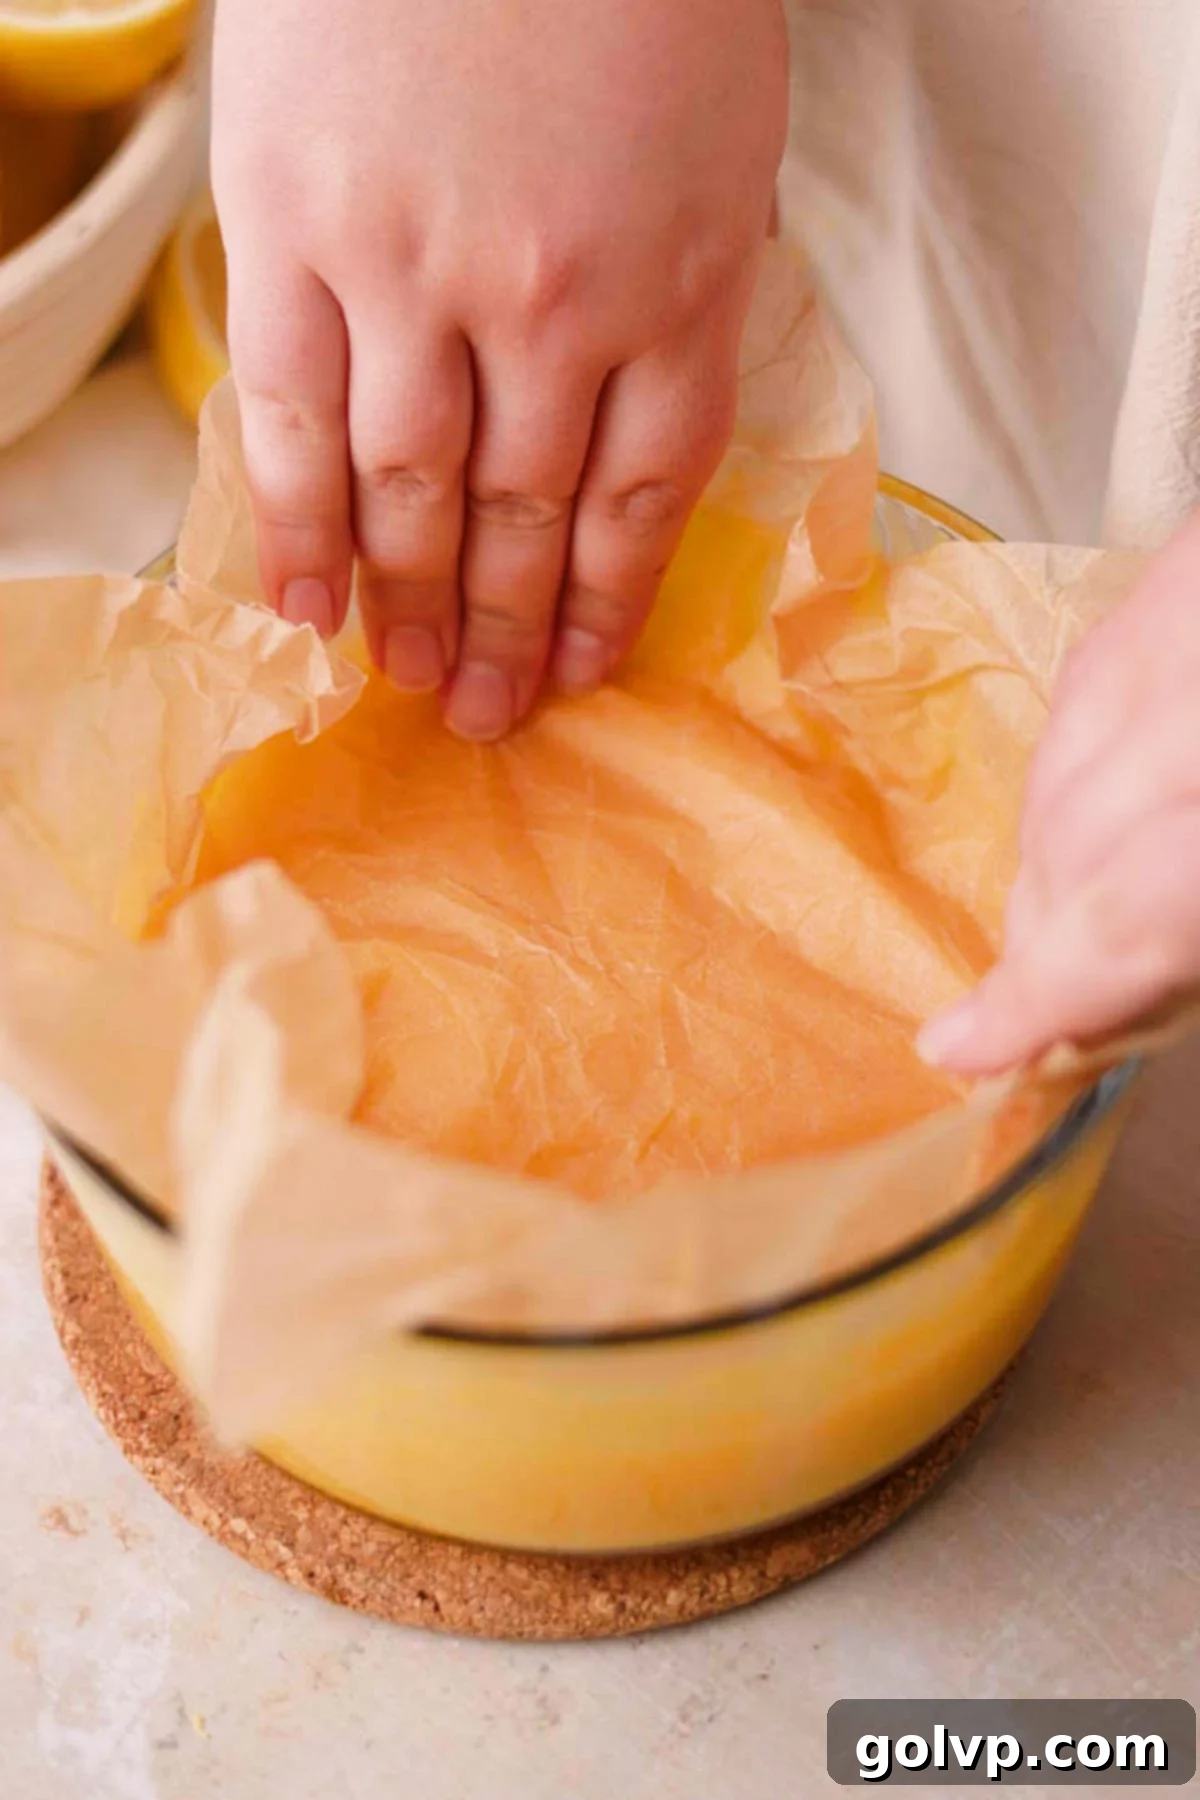
Step 4: To prevent a skin from forming on the surface of your lemon curd as it cools, cover it directly with a piece of plastic wrap or parchment paper. Press the wrap gently onto the surface of the curd, ensuring no air pockets. Refrigerate the lemon curd until it is completely cold and has thickened considerably, which typically takes several hours.
Lemon Syrup Step by Step

Step 1: While your luscious lemon curd is chilling and firming up in the refrigerator, it’s the perfect time to prepare the fragrant lemon syrup that will imbue your ladyfingers with even more citrusy goodness. In a small saucepan, combine water, granulated sugar, freshly squeezed lemon juice, the peeled zest from one lemon (ensuring no bitter white pith), and the optional sprig of fresh basil. The basil adds a subtle, herbaceous note that beautifully complements the lemon.
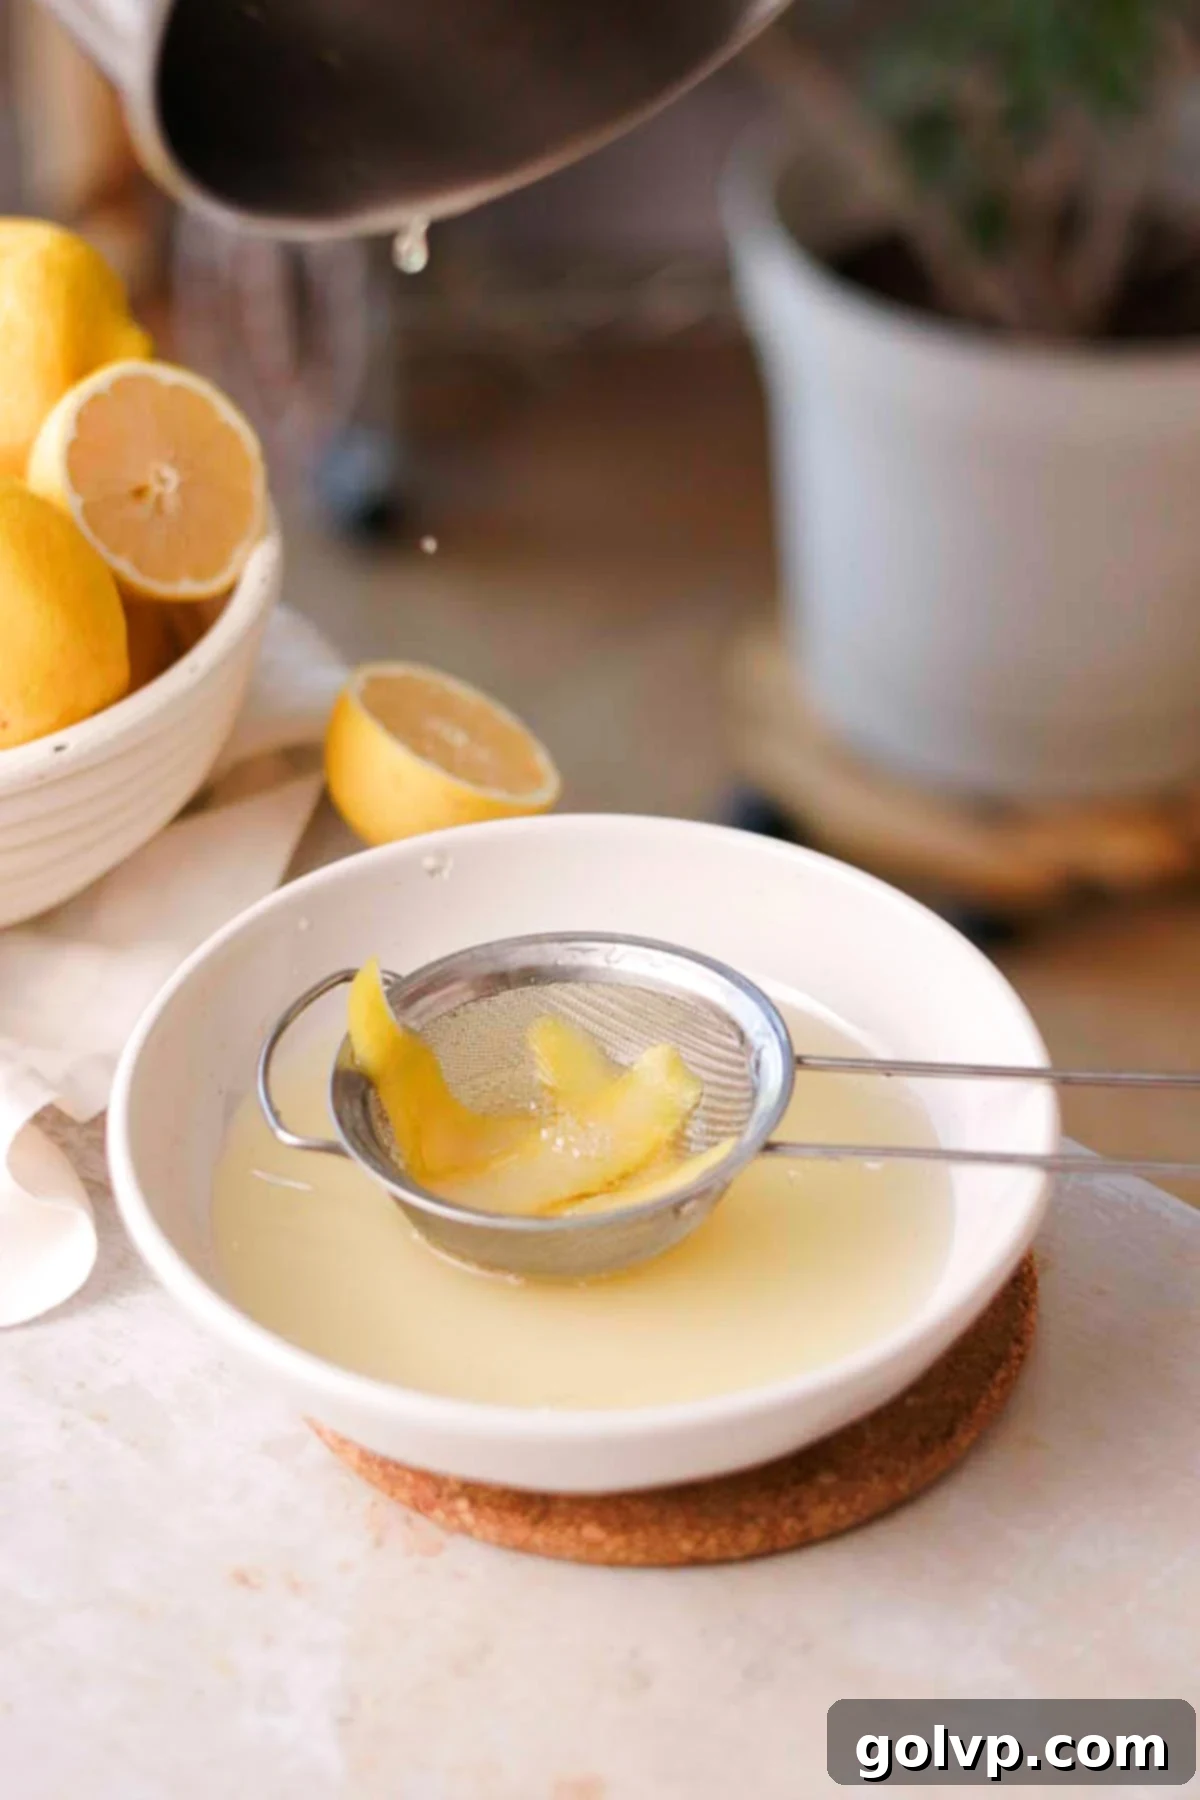
Step 2: Bring the mixture to a gentle simmer over medium heat, stirring occasionally until the sugar has completely dissolved. Once simmering, remove from the heat and allow the syrup to cool completely. Cooling is important so it doesn’t cook the ladyfingers. Once cool, strain the syrup through a fine-mesh sieve to remove the lemon peels and basil sprig, leaving behind a clear, aromatic liquid. Transfer the strained syrup to a wide, shallow bowl for easy dipping of the ladyfingers. If you are including limoncello, now is the time to stir it into the cooled syrup.
Filling and Assembly Step by Step
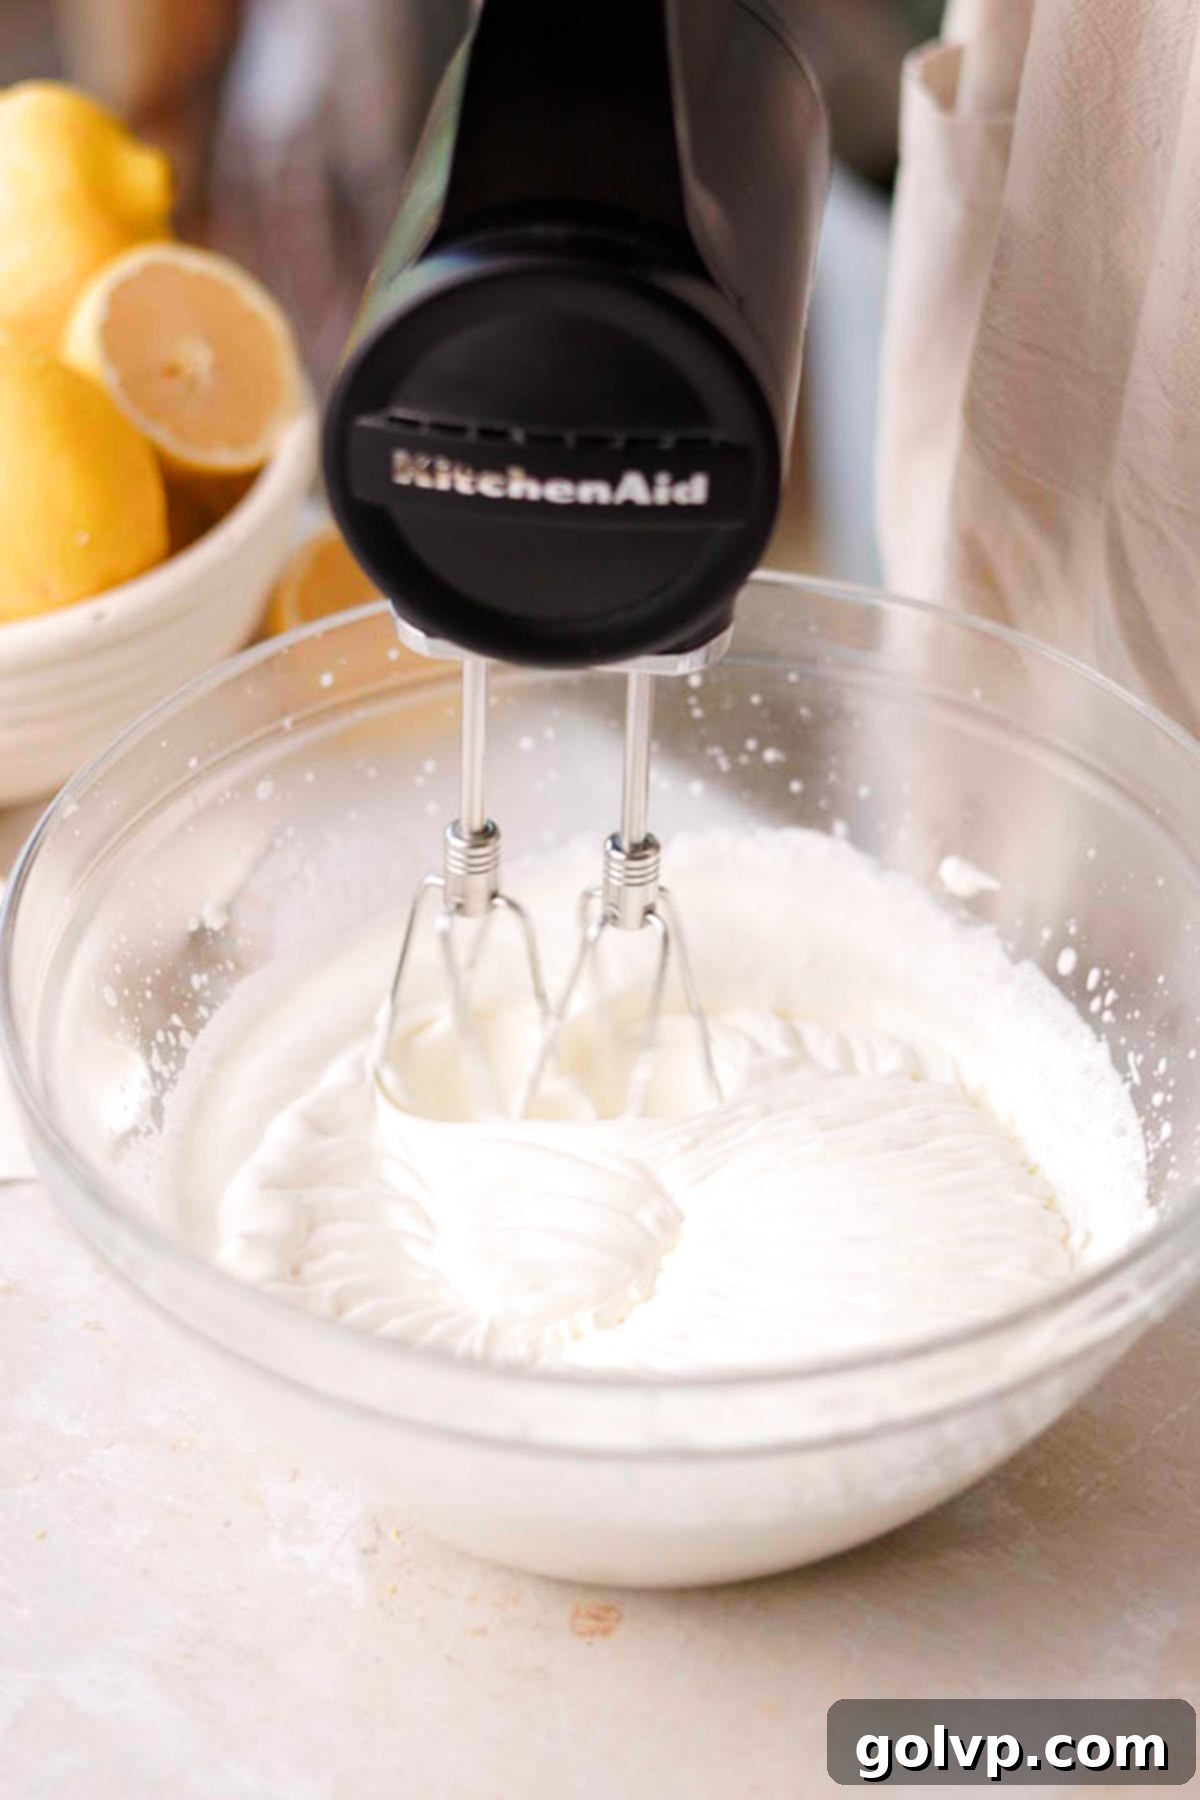
Step 1: For the best results when whipping cream, place your mixing bowl (preferably metal or glass) and whisk attachment (or beaters) in the freezer for about 5 minutes prior to whipping. Once chilled, pour the cold heavy whipping cream into the bowl. Using an electric mixer (handheld or stand mixer), whip the cream on medium-high speed until it forms stiff peaks. This means the cream will hold its shape firmly when the whisk is lifted.
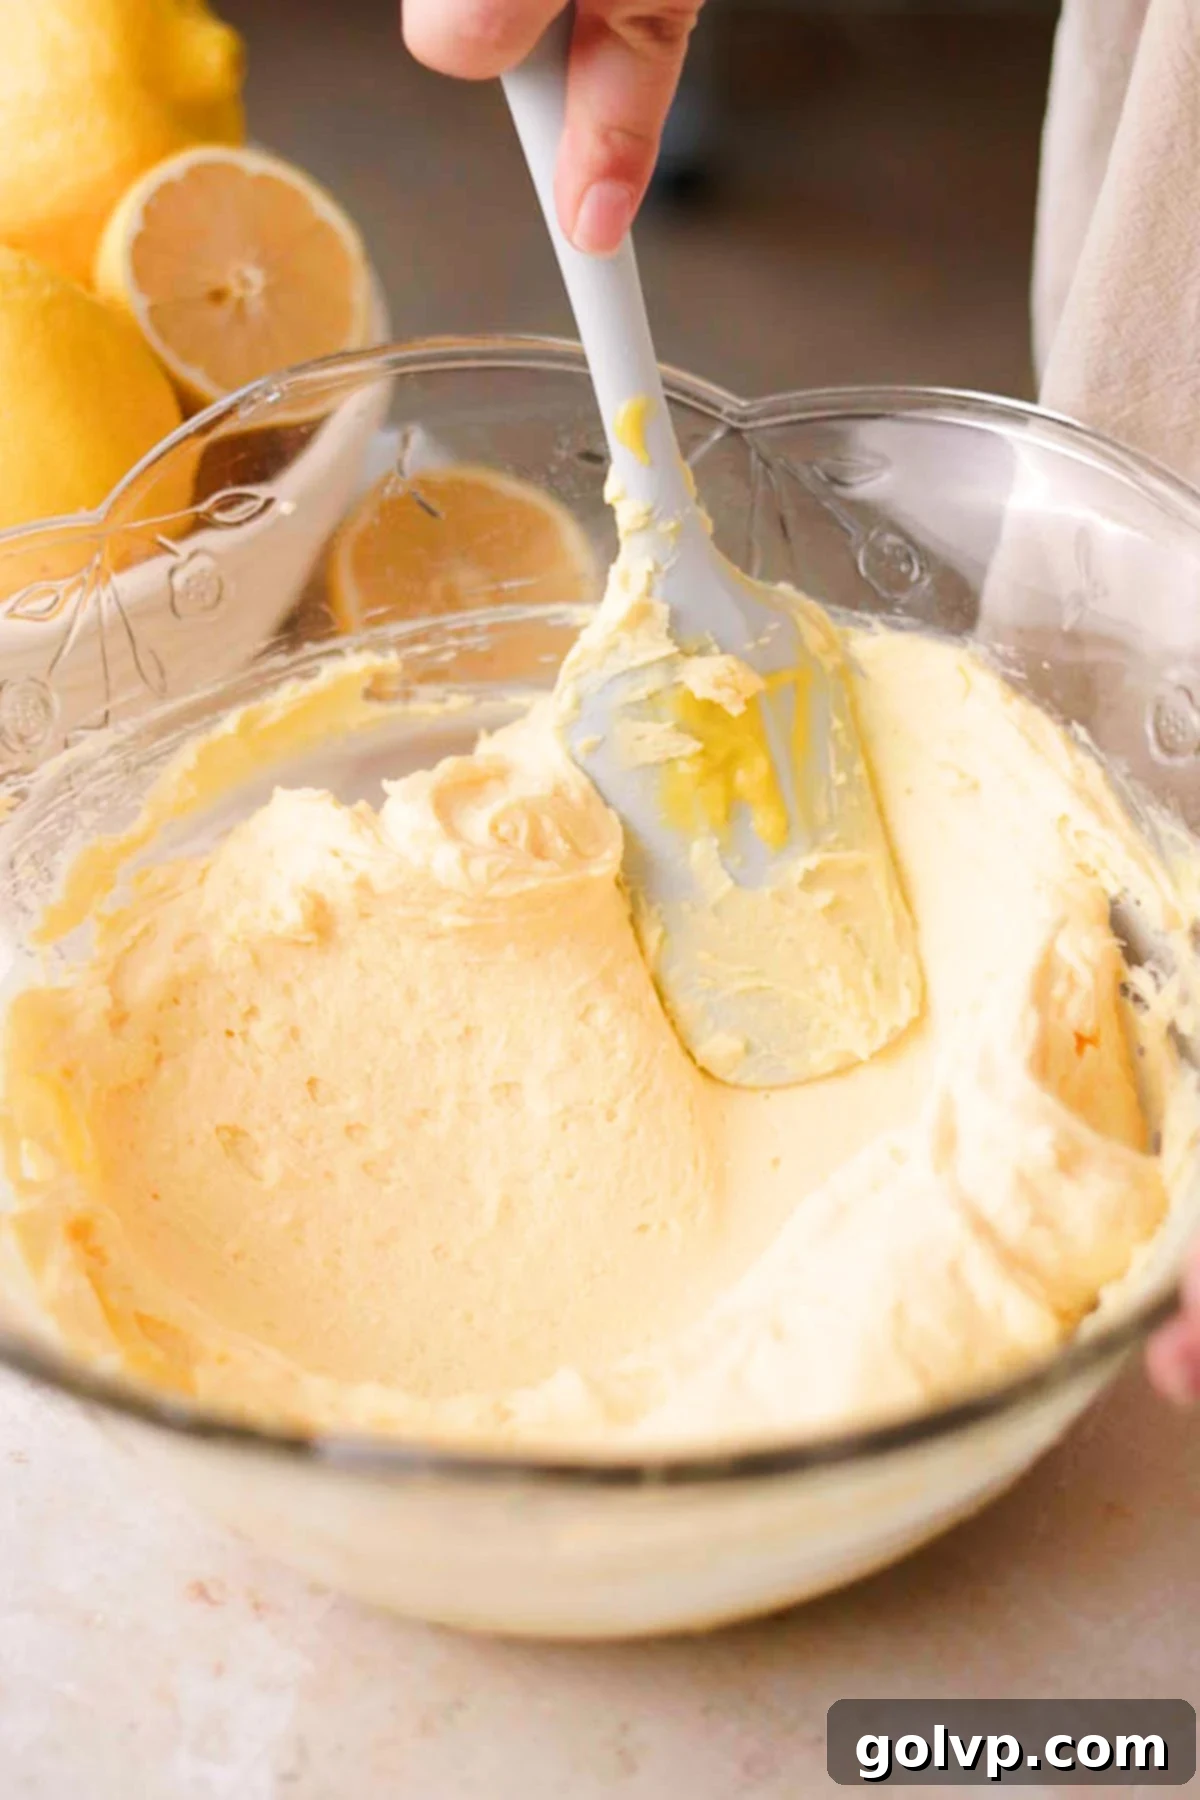
Step 2: In a separate, large mixing bowl, combine 1 ½ cups of your now-cold lemon curd (reserving the remaining curd for the topping later) with the full pound of room temperature mascarpone cheese. Whisk these two ingredients together until they are thoroughly combined and the mixture is smooth and free of lumps. Be careful not to overmix, as mascarpone can become grainy if overworked.
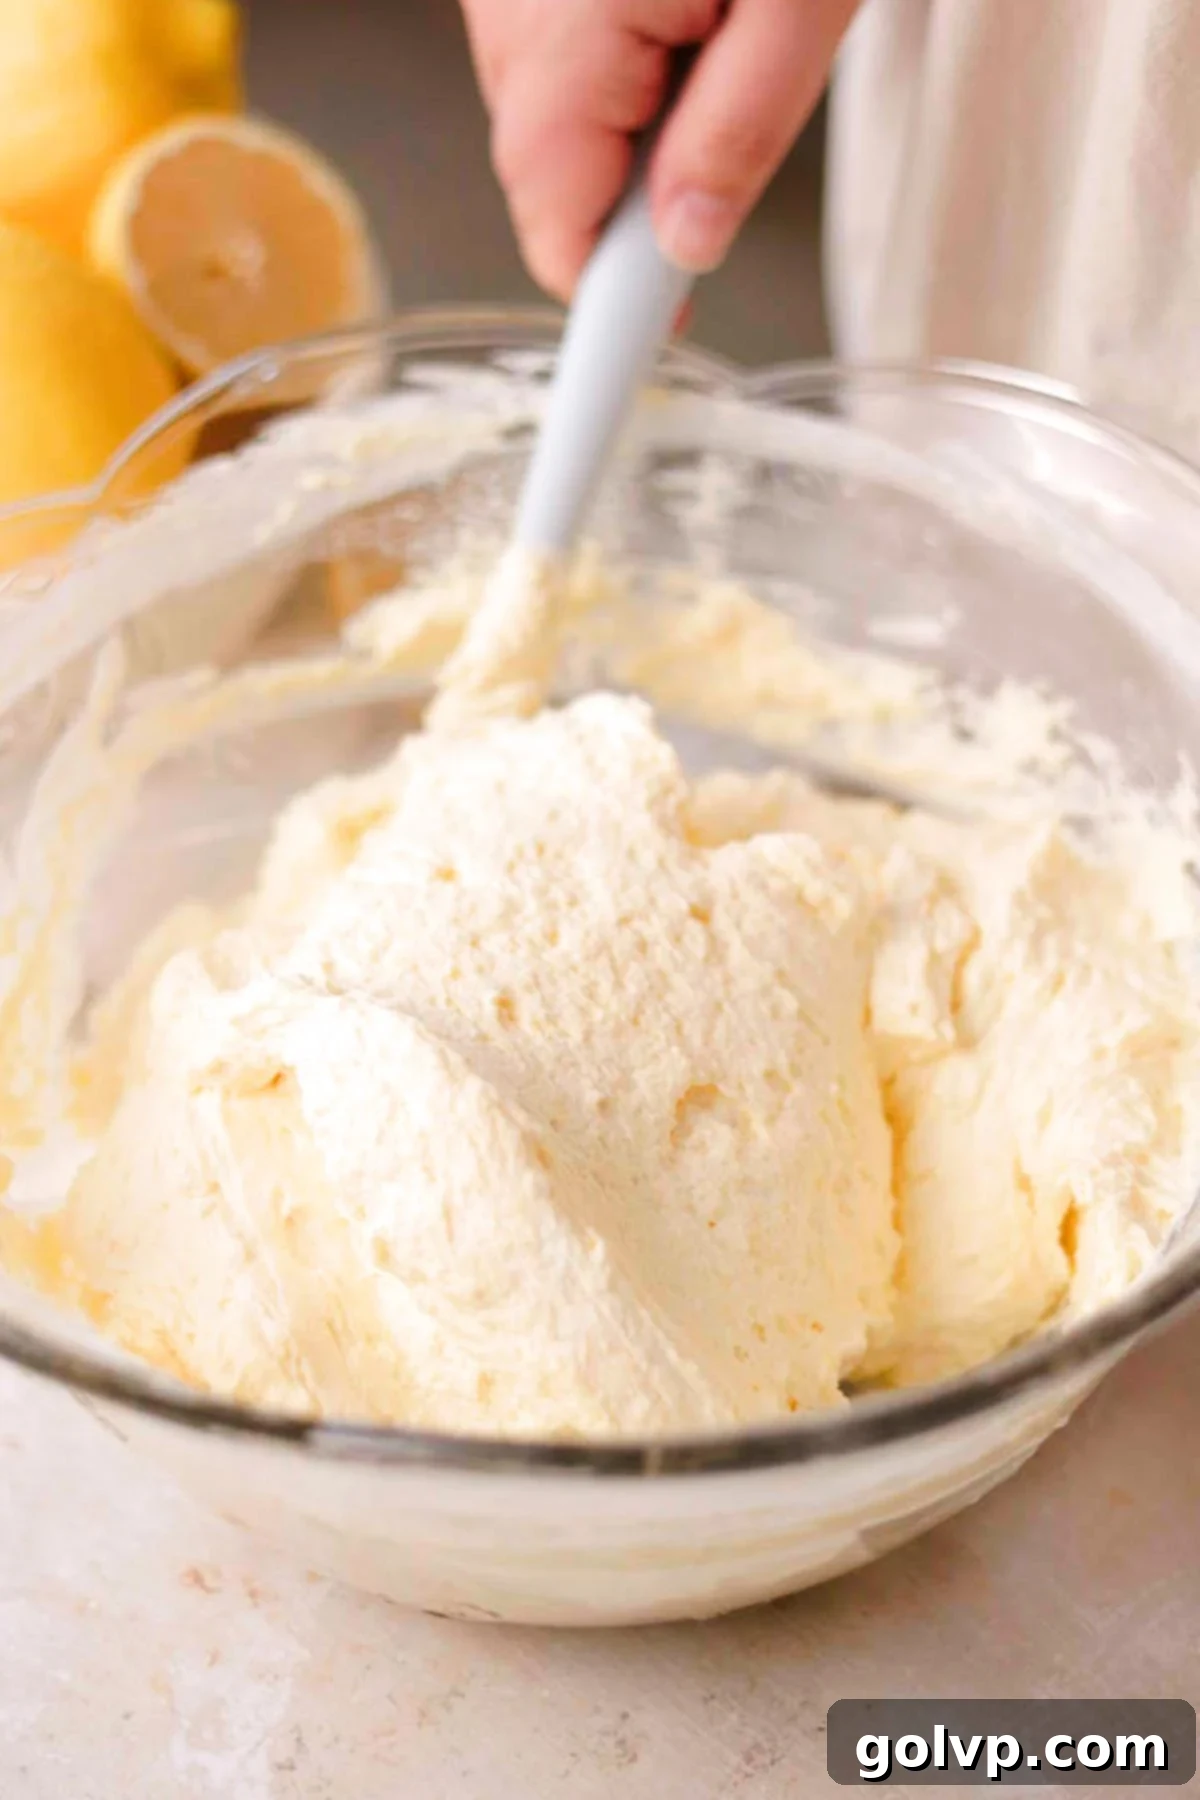
Step 3: Now, gently add the whipped cream into the lemon curd and mascarpone mixture. Using a whisk or a rubber spatula, carefully fold the whipped cream into the lemon mixture. The key here is to be very gentle, using a ‘cut and fold’ motion, to maintain as much of the air and volume in the whipped cream as possible. This ensures your tiramisu filling remains light and fluffy, giving it that desirable mousse-like texture.

Step 4: Prepare your chosen baking dish – a large casserole dish, approximately 8” by 11” or a similar non-metal dish, works perfectly. Take one ladyfinger at a time and quickly dip it into the lemon syrup. Do not over-saturate; a quick dip on both sides is usually sufficient, as they will continue to absorb moisture as the tiramisu chills. Arrange the dipped ladyfingers in tight, even rows on the bottom of your baking dish, covering the entire surface.

Step 5: Once the first layer of ladyfingers is in place, spoon half of the prepared lemon mascarpone filling over them. Use an offset spatula or the back of a spoon to gently spread the filling evenly, ensuring it reaches all the way to the edges of the dish. Next, repeat the ladyfinger dipping process, briefly soaking them in the lemon syrup one by one, and carefully arrange them in a single, tight layer on top of the first filling layer. Squeeze them in as tightly as possible to minimize gaps.
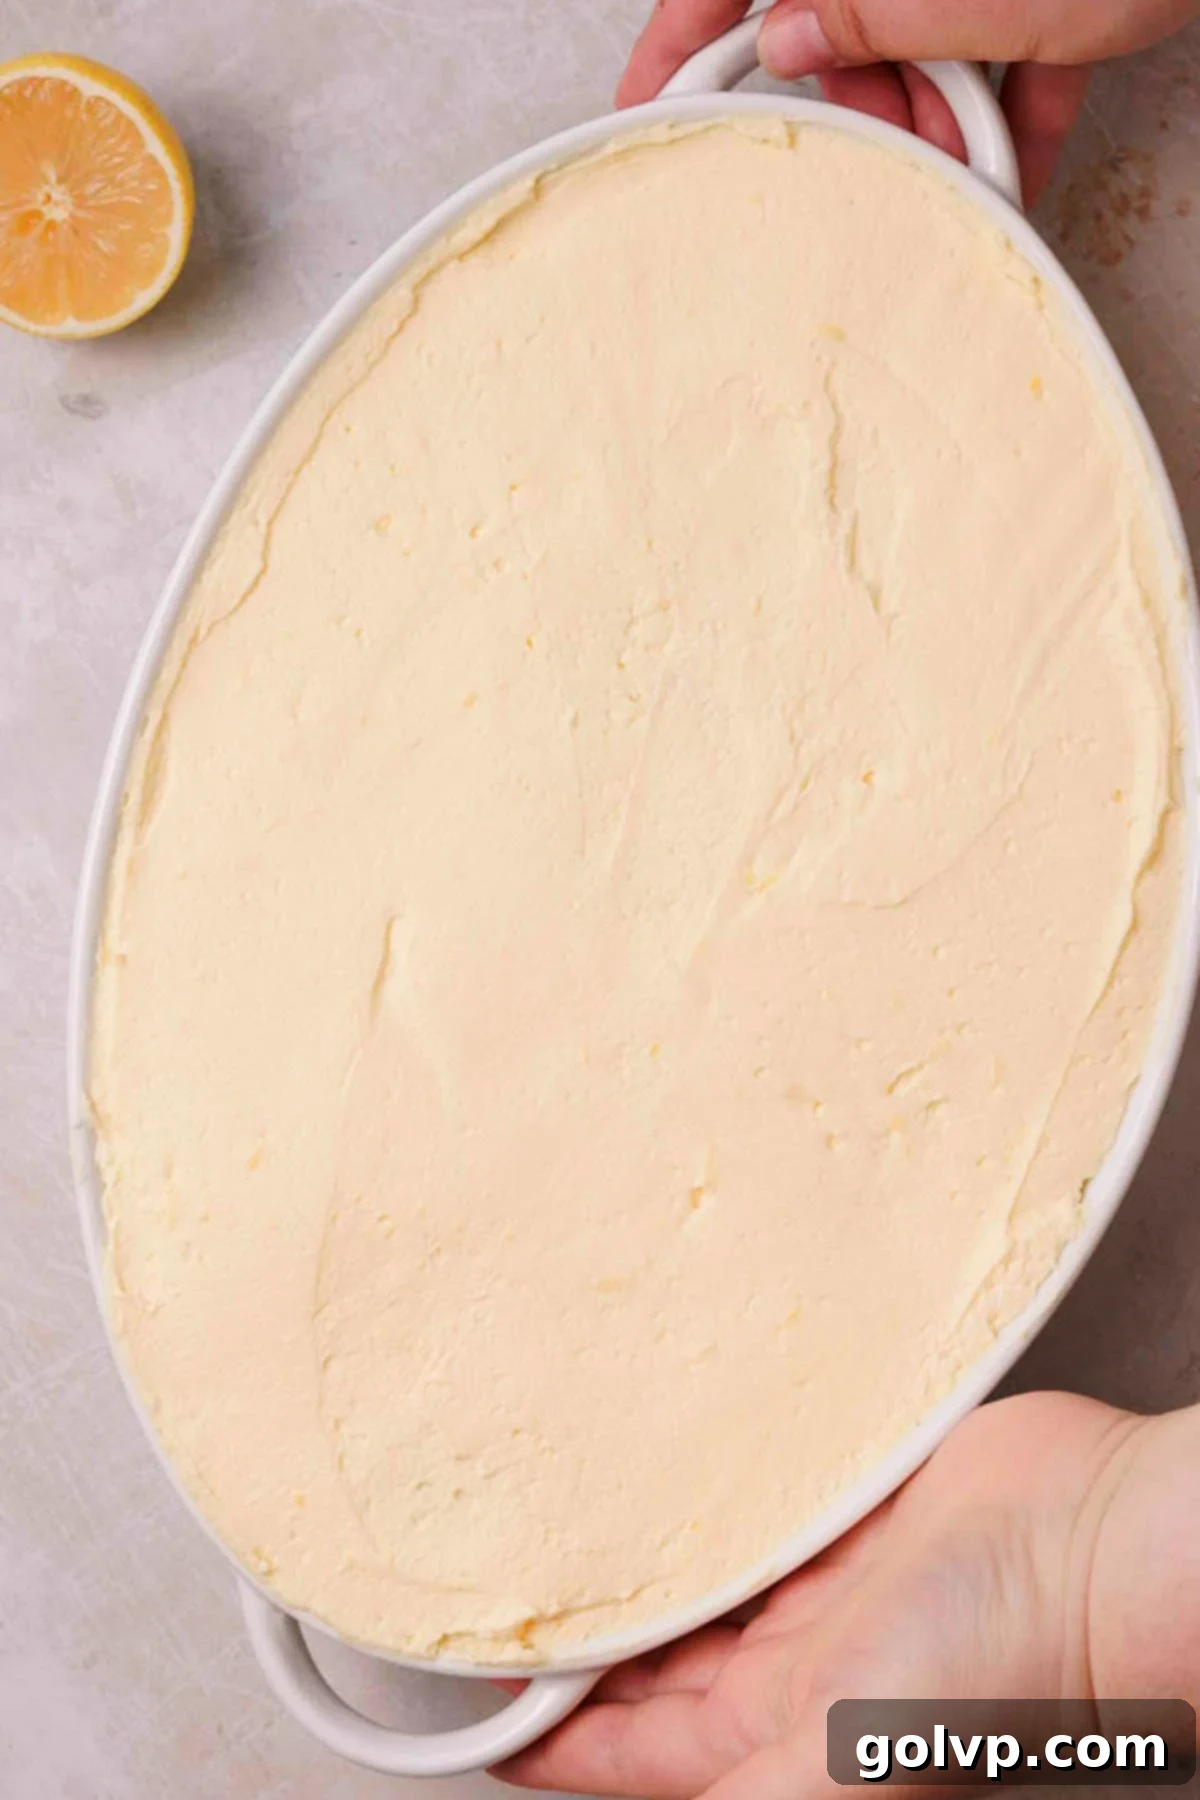
Step 6: Finally, spread the remaining half of the lemon mascarpone filling evenly over the second layer of ladyfingers, again ensuring it reaches the edges for a neat finish. Once all layers are complete, cover the baking dish tightly with plastic wrap. It is imperative to refrigerate the tiramisu for a minimum of 8 hours, or ideally overnight. This extended chilling time is crucial for the ladyfingers to soften completely as they absorb the syrup and for the filling to firm up and allow all the wonderful flavors to fully develop and meld together.

Step 7: Just before you are ready to serve this delightful dessert, retrieve the remaining lemon curd from the refrigerator. Spoon it generously over the top layer of the tiramisu, spreading it smoothly and evenly all the way to the edges of the dish to create a beautiful, glossy finish. For an extra touch of elegance and visual appeal, you can decorate the top with thinly sliced fresh lemon rounds or zest (optional). To serve, slice the tiramisu into individual portions with a sharp knife or scoop out servings with a spatula. Enjoy this bright and refreshing treat!
📝 Expert Tiramisu Tips for Perfection
Achieving a perfectly creamy and delicious lemon tiramisu is easier than you think, especially with these expert tips:
- Prioritize Non-Metallic Utensils and Dishes: This is a critical tip when working with lemon. The high acidity in lemon juice and zest can react with certain metals, particularly aluminum or unlined copper, imparting an unpleasant metallic aftertaste to your delicate lemon curd and overall tiramisu. Always opt for stainless steel, glass, ceramic, or non-reactive coated saucepans and mixing bowls when preparing your lemon curd and assembling the tiramisu. This simple precaution ensures the pure, bright flavor of the lemon shines through.
- Whip Cream to Stiff Peaks with Precision: The texture of your tiramisu largely depends on perfectly whipped cream. Ensure your heavy whipping cream is very cold, and for an extra boost, chill your mixing bowl and whisk attachment in the freezer for 5-10 minutes before starting. Whip the cream until it forms stiff peaks – meaning when you lift the whisk, the cream holds its shape firmly and doesn’t droop. When folding this whipped cream into the mascarpone and lemon curd mixture, do so gently, using a ‘cut and fold’ motion, to preserve as much of the incorporated air as possible. This aeration is what gives the tiramisu its light, ethereal, mousse-like texture.
- Allow Ample Chilling Time for Optimal Setting: Patience is truly a virtue when making tiramisu. This dessert absolutely requires a minimum of 8 hours, and ideally an overnight stay, in the refrigerator to fully set. This extended chilling period allows several crucial processes to occur: the ladyfingers have enough time to thoroughly absorb the lemon syrup, becoming wonderfully soft and cake-like; the creamy filling firms up to a sliceable consistency; and most importantly, all the individual flavors – the tangy lemon, rich mascarpone, and subtle basil – have ample time to meld and deepen, creating a harmonious and complex taste profile. Rushing this step will result in a soggy, unappealing dessert that lacks structural integrity.
🥄 Make Ahead and Storage Guidelines
One of the many virtues of tiramisu, and this lemon variation in particular, is its exceptional suitability as a make-ahead dessert. In fact, it’s not just convenient to prepare in advance; it actually tastes significantly better after a day or two in the fridge, as the flavors deepen and the textures fully meld. This makes it an ideal choice for entertaining, allowing you to focus on your guests rather than last-minute dessert preparations.
You can prepare the lemon curd up to three days in advance of assembling the tiramisu, storing it tightly covered in a non-metal container in the refrigerator. The lemon syrup can also be made a day or two ahead and stored in an airtight container in the fridge.
Once assembled, this lemon tiramisu will keep beautifully in an airtight container in the refrigerator for up to four days. To extend its shelf life even further, tiramisu freezes exceptionally well. Wrap the entire dish or individual slices tightly in plastic wrap, then an additional layer of aluminum foil, and freeze for up to two months. When frozen, it takes on a delightful ice cream-like texture, offering another unique way to enjoy this versatile dessert. Thaw in the refrigerator overnight before serving, or enjoy it partially frozen for a cool treat.

🍋 The Indispensable Role of Lemon Curd
Lemon curd is the heart and soul of this tiramisu, playing a dual and equally vital role. Firstly, it infuses the dessert with an unparalleled depth of rich, tangy lemon flavor that simply cannot be achieved with just lemon juice or zest. Its bright, concentrated citrus profile elevates every bite, making this tiramisu truly stand out. Secondly, and perhaps most ingeniously, the lemon curd serves as a brilliant and safe substitute for the raw egg yolks traditionally found in tiramisu fillings. By incorporating cooked lemon curd, we eliminate any concerns about the bacterial risks associated with raw eggs, making this dessert safe for consumption by everyone, including pregnant women, children, and the elderly.
While a good quality store-bought lemon curd can be used in a pinch for convenience, we wholeheartedly recommend making your own from scratch. The flavor and freshness of homemade lemon curd are significantly superior, providing a more vibrant and authentic taste experience. You will need a total of 2 ½ cups (approximately 725g or 26oz by weight) of prepared lemon curd for this recipe. My dedicated lemon curd recipe provides comprehensive, detailed instructions and tips on how to achieve the silkiest, most perfect lemon curd every single time, ensuring your tiramisu is nothing short of spectacular.
💧 Perfectly Soaking the Ladyfingers
In a refreshing departure from traditional tiramisu, which typically calls for coffee and sometimes liquor to soak the ladyfingers, this recipe embraces the lemon theme wholeheartedly. Instead, we use a custom-crafted lemon syrup, offering the option to infuse it with limoncello for an extra layer of zesty indulgence.
This specially formulated syrup is designed to perfectly complement the bright flavors of the tiramisu. It’s infused with aromatic lemon rind for depth, fresh lemon juice for a delightful tartness, and an optional sprig of basil. The basil adds a unique, subtle herbaceous note that elevates the overall profile, creating a more complex and sophisticated flavor experience. The process is simple: simmer the ingredients to allow the flavors to meld, then let it cool completely. Once cooled, strain out the lemon peels and basil, and if desired, stir in the limoncello. This creates a beautifully balanced syrup that imparts moisture and flavor without making the ladyfingers soggy.
The amount of syrup needed can vary based on the type and dryness of your ladyfingers, as well as the dimensions of your baking dish. Some ladyfingers are drier and more porous, requiring more liquid, while others are softer and absorb less. The ladyfingers I typically use are not fully dried, retaining a slight softness, which meant one batch of syrup was sufficient for my recipe. However, if you find your ladyfingers to be particularly dry or if you prefer a more saturated texture, you may need to double the syrup quantity. Always dip the ladyfingers quickly – a brief dunk on each side is often enough to moisten them without causing them to disintegrate, as they will continue to absorb moisture from the creamy filling as the tiramisu chills.
🍪 Choosing the Right Ladyfingers for Your Tiramisu
Ladyfingers are the traditional and ideal choice for tiramisu, forming the essential structural base and absorbing the flavorful soaking liquid. Also known as savoiardi or boudoirs, these light, airy, finger-shaped sponge cakes are renowned for their delicate texture and ability to soak up liquids without becoming completely mushy. For convenience, I often use store-bought ladyfingers as a fantastic shortcut, readily available in most major grocery stores in the cookie or international foods aisle, and also widely available online. However, if you have the time and desire for an extra special touch, making homemade ladyfingers can truly elevate your tiramisu to another level of perfection, offering an even fresher texture and taste.
The exact quantity of ladyfingers you’ll need can vary depending on the specific dimensions of your baking dish and the size of the ladyfingers themselves. For reference, I typically use two 5 oz (150g) packages of Milano giant ladyfingers. These specific ladyfingers tend to be slightly less dry than some traditional varieties, which means they require a bit less soaking time and syrup. If your ladyfingers are very dry and firm, you might need a bit more syrup and a slightly longer (but still quick!) dip to ensure they soften adequately.
If ladyfingers are hard to find in your area, or if you’re looking for an inventive twist, you have excellent substitution options. Golden Oreos or other vanilla-flavored sandwich cookies make a surprisingly delicious alternative. My Oreo tiramisu recipe, using chocolate Oreos, is a testament to how well non-traditional cookies can work as a replacement for ladyfingers, creating a fun, flavorful, and equally satisfying dessert experience. You can also use other types of vanilla biscuits or even a thin layer of sponge cake, cut to fit your dish, as long as they can absorb the lemon syrup effectively.
🍷 Understanding Limoncello
Limoncello is a vibrant, sweet, and intensely lemon-flavored Italian liqueur, traditionally made by infusing lemon zest (specifically from Sorrento lemons) in neutral alcohol, usually vodka or grappa, and then sweetening it with a simple syrup. Originating from Southern Italy, particularly around the Gulf of Naples, the Sorrentine Peninsula, and the coast of Amalfi, it’s a staple digestivo, typically served chilled after a meal.
In the context of this lemon tiramisu, limoncello plays a wonderful role in elevating the dessert’s profile. When added to the lemon syrup used for soaking the ladyfingers, it imparts a beautiful, zesty, and slightly boozy kick. This not only enhances the overall lemon flavor but also adds a layer of sophisticated warmth and depth, reminiscent of authentic Italian pastry. It’s an excellent ingredient for infusing any lemon dessert with an extra dimension of flavor, but it’s also perfectly delightful served on its own, ice-cold, as a refreshing aperitif or digestif. If you prefer to keep your tiramisu alcohol-free, simply omit the limoncello from the recipe; the fresh lemon syrup provides ample flavor on its own.

📖 Recipe Frequently Asked Questions (FAQs)
You’ll need approximately 3-4 fresh lemons in total. 2-3 lemons will be used for zesting and juicing to make the lemon curd, and 1 additional lemon will be used for the lemon-infused syrup that soaks the ladyfingers. Any lemon slices you use for decorative purposes on top of the finished tiramisu are extra and optional.
If ladyfingers are unavailable or you’re looking for a creative alternative, you can successfully substitute them with golden Oreos (or other vanilla sandwich cookies) or even plain vanilla cookies. My popular Oreo tiramisu recipe perfectly demonstrates that you don’t always have to stick to traditional ladyfingers to achieve a delicious tiramisu!
To make a gluten-free version of this lemon tiramisu, simply replace the standard ladyfingers with gluten-free ladyfingers, which are available in many specialty food stores or online. Alternatively, you can use slices of gluten-free sponge cake, cut to the appropriate size, as a base.
Yes, absolutely! Since the eggs in this recipe are primarily used to make the lemon curd, you can easily make this tiramisu egg-free by using your favorite brand or recipe for an egg-free lemon curd. Ensure you have approximately 2 ½ cups (or 725g / 26oz by weight) of egg-free lemon curd for the recipe.
Mascarpone cheese is truly a key ingredient that provides the signature richness and texture of tiramisu. While it’s highly recommended to use it, if you absolutely cannot find mascarpone, cream cheese can be used as a substitute. However, be aware that the flavor profile will shift, tasting more like a no-bake lemon cheesecake than a traditional tiramisu. Do not substitute with ricotta cheese, as its grainy texture will result in an undesirable, lumpy filling.
The quantity of ladyfingers can vary based on your baking dish’s dimensions and the specific brand you choose. For this recipe, I typically use two 5 oz (150g) packages of Milano giant ladyfingers. These tend to be a little softer and less dried out than some other brands, influencing how much syrup they absorb.
The amount of lemon syrup needed can fluctuate based on the specific type of ladyfingers you use (how dry they are) and how thoroughly you saturate them. If you find yourself running low, simply prepare another half or full batch of the lemon syrup ingredients to ensure all your ladyfingers are adequately moistened. My suggested quantity is based on using ladyfingers that are slightly softer and less dry, so adjust accordingly.
🍰 More Delightful Dessert Recipes
- Tangy Lemon Brownies
- Matcha Tiramisu
- Oreo Tiramisu
- Strawberry Tiramisu
Did you make this recipe? I would love for you to rate this recipe and hear what you think in the comments below! Share your creation on Instagram and tag @flouringkitchen. Follow me on Pinterestto save and for more recipe ideas.
📖 Recipe

Lemon Tiramisu with Lemon Curd
Mary
Pin Recipe
Shop Ingredients
Equipment
-
8” by 11” oval dish or any non-metal dish of similar size
Ingredients
Lemon Curd (2 ½ cups, 725g, or 26oz)
- 4 large egg yolks
- 4 large eggs
- ¼ teaspoon sea salt
- 1 ¼ cup granulated sugar
- 2 lemons zested
- ⅔ cup lemon juice freshly squeezed (from about 2-3 lemons)
- ½ cup unsalted butter
Lemon Syrup (see notes)
- ½ cup water
- ¼ cup granulated sugar
- 1 lemon peeled and juiced
- 1 sprig basil optional
- ¼ cup limoncello optional
Filling
- 1 ½ cups heavy whipping cream cold
- 1 ½ cups lemon curd about half of the prepared
- 1 lb mascarpone cheese room temperature
Assembly
- 2 packs ladyfingers (see notes)
- lemon slices for decorating
Shop Ingredients on Jupiter
Instructions
Lemon Curd
-
If using store bought lemon curd you will need 2 ½ cups, 725g, or 26oz by weight.
-
In a medium saucepan (preferably non-metal saucepan), combine egg yolks, whole eggs, salt, sugar, lemon zest, and lemon juice. Whisk to combine.4 large egg yolks, 4 large eggs, ¼ teaspoon sea salt, 1 ¼ cup granulated sugar, 2 lemons, ⅔ cup lemon juice
-
Heat on medium heat, whisking or stirring constantly. Let the lemon curd come to a simmer and thicken – approximately one minute after simmering.
-
Once thickened, strain the curd through a wire strainer or cheesecloth to remove the zest and any lumps. Transfer to a non-metal heat safe bowl. Add butter to the curd and let sit for a minute to melt. Stir until fully melted and smooth.½ cup unsalted butter
-
Cover with a piece of parchment paper or wrap placed directly on the surface and refrigerate until cold and thickened.
Lemon Syrup (see notes)
-
While the lemon curd chills, prepare the lemon syrup. Combine water, sugar, lemon juice, peeled lemon zest, and basil (optional).½ cup water, ¼ cup granulated sugar, 1 lemon, 1 sprig basil
-
Bring to a simmer on medium heat and let cool. Once cooled, strain out the lemon peels and set aside in a bowl for later. If using limoncello, add it in at this point.¼ cup limoncello
Filling
-
Chill your mixing bowl and whisk in the freezer for 5 minutes. Pour heavy whipping cream into the chilled mixing bowl and whip to stiff peaks (I recommend using an electric mixer).1 ½ cups heavy whipping cream
-
In a large bowl, combine half of the cooled lemon curd (set aside the other half in the fridge) and all of the mascarpone cheese. Whisk until fully combined and smooth. Do not overmix or the mascarpone will become gritty.1 ½ cups lemon curd, 1 lb mascarpone cheese
-
Add whipped cream into the lemon curd mixture. Gently fold with a whisk or spatula to combine, being careful not to deflate the whipped cream.
Assembly
-
Have a large, approximately 8” by 11” non-metal casserole dish ready. Briefly dip ladyfingers into the lemon syrup one at a time, placing them in tight rows inside the baking dish.2 packs ladyfingers
-
Add half the filling on top, spreading all the way to the edges. Dip ladyfingers into the syrup one by one and place in a single layer on top of the filling.
-
Add the rest of the filling on top of the second layer of ladyfingers. Spread it out all the way to the edge of the dish. Cover and refrigerate for 8 hours or overnight.
-
Before serving, top with remaining lemon curd and spread all the way to the edges. Slice or scoop with a spatula and serve. Add lemon slices and serve.lemon slices
Video
Notes
Storage: This lemon tiramisu will keep well in the fridge for up to four days. Freeze, wrapped tightly, for up to two months. It keeps really well in the freezer and tastes like ice cream when frozen.
Ladyfingers: Depending on the dimensions of your baking dish, you may need more or less ladyfingers. I used two 5 oz (150g) packages of Milano giant ladyfingers.
Ladyfinger substitutes: You can use your favorite vanilla cookies or sandwich cookies (like vanilla oreos) in a pinch.
