The Easiest Small Batch Chocolate Chip Cookies: Melted Butter, One Bowl, Pure Perfection
Jump to Recipe
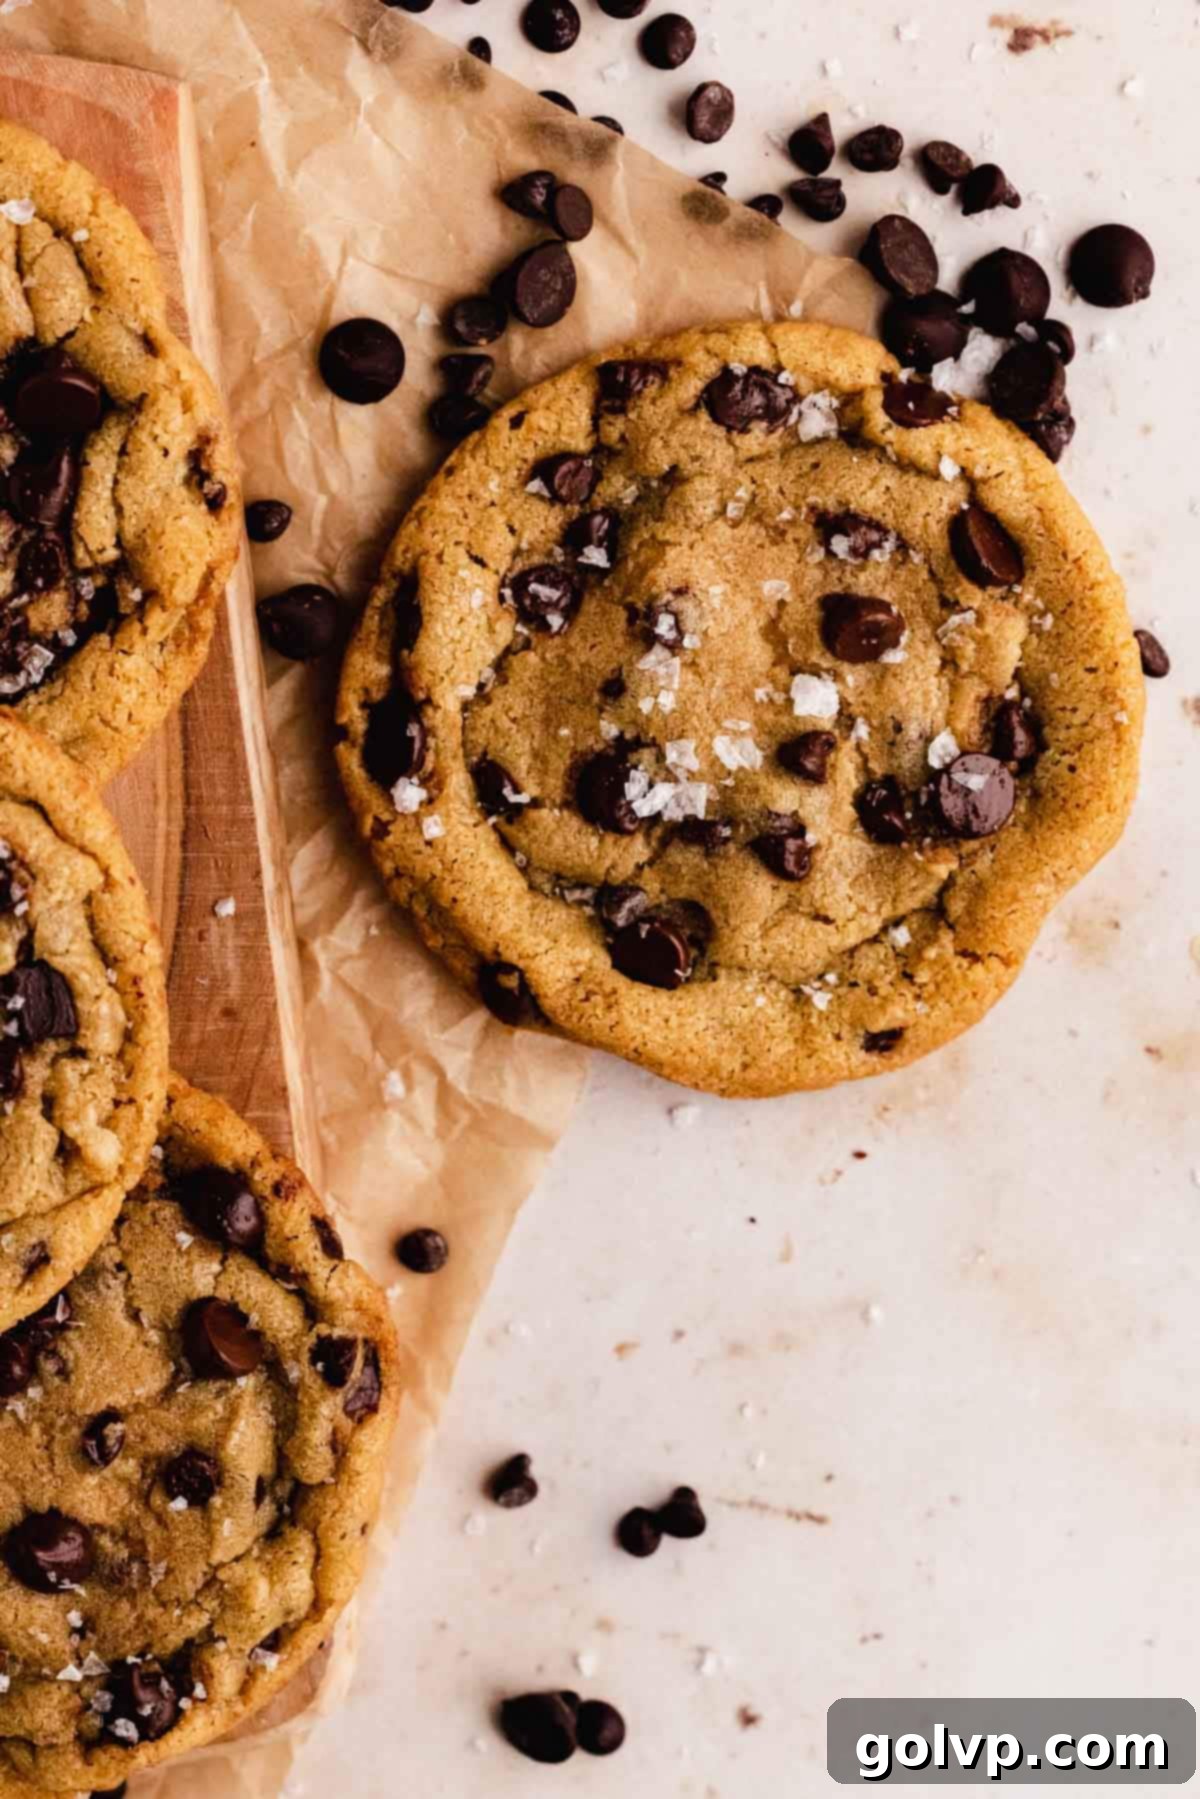
Craving warm, freshly baked chocolate chip cookies but don’t want a huge batch tempting you for days? Look no further! These incredible small batch chocolate chip cookies are designed for those moments when you desire just a few perfect treats. They boast beautifully crisp, golden edges, giving way to incredibly soft, gooey middles that practically melt in your mouth. What makes them truly stand out is their utter simplicity: they come together in a single bowl with melted butter, meaning you won’t need an electric mixer. All you require is a wire whisk, a large bowl, and a craving for something truly special. This recipe yields six magnificent, bakery-style cookies, perfect for sharing with a friend or enjoying over a couple of days. Plus, we’ve included helpful make-ahead instructions in the notes, allowing you to freeze leftover cookie dough for on-demand deliciousness anytime the mood strikes.
Purchasing the items in this post supports this blog, at no additional cost to you. As an Affiliate Product marketer and Amazon Associate, I earn from qualifying purchases.
Why You Will Absolutely LOVE This Small Batch Cookie Recipe
There are countless reasons why these small batch chocolate chip cookies will quickly become your new favorite. From their irresistible texture to their incredible ease of preparation, every aspect is designed for a delightful baking experience and an even more delightful eating experience.
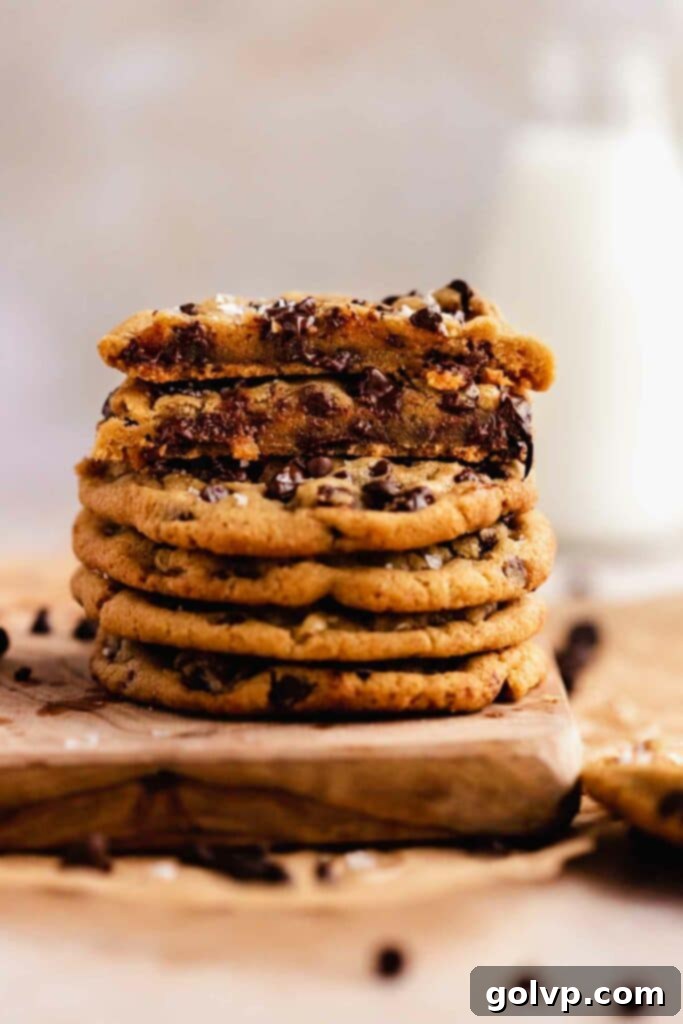
- Unmatched Texture: Prepare yourself for the ultimate cookie experience! Each bite delivers a harmonious blend of crisp, buttery edges and a wonderfully soft, chewy, and gooey center. The secret to this coveted texture lies in the melted butter, which helps create those signature golden, slightly crisp edges that beautifully contrast with the tender interior. It’s the perfect balance that every chocolate chip cookie connoisseur dreams of.
- Effortless Preparation: Say goodbye to waiting for butter to soften or hauling out heavy kitchen machinery. This recipe truly embraces simplicity. With just a wire whisk and a single large bowl, you can mix up your dough in minutes. The use of melted butter not only saves time but also makes the entire process incredibly straightforward, making these cookies accessible even for beginner bakers or those short on time.
- Perfect Chocolate Distribution: These cookies are loaded with a thoughtful combination of mini and regular-sized chocolate chips. This ensures an even distribution of rich, melty chocolate throughout every single bite, eliminating those disappointing moments of finding a cookie with too little chocolate. While semi-sweet is a classic choice, feel free to personalize your batch with milk, white, or even dark chocolate chips, or any other flavorful mix-ins you desire!
- Ideal Yield for Any Occasion: Making only six perfectly sized cookies, this recipe is a game-changer for individuals, couples, or small families. It’s the perfect solution for satisfying a cookie craving without being left with dozens of leftovers. No more overindulging or feeling obligated to eat an entire tray; just a fresh batch of warm, homemade cookies whenever you want them.
Your New Go-To Recipe for Perfect Chocolate Chip Cookies
The quest for the perfect chocolate chip cookie can be a long one, but this recipe consistently delivers. Its inherent simplicity, combined with the utterly divine texture, has made it a staple in many kitchens, including our own. The sheer ease of preparation, particularly not having to wait for butter to reach room temperature, is a huge time-saver and a major reason why bakers adore it. These cookies serve as an exceptional base for countless other variations, proving their versatility and robust flavor profile. Each and every time, they emerge from the oven with those desirable crispy edges and delightfully soft, chewy centers – a texture many consider the gold standard for the ultimate chocolate chip cookie.
The Secret Weapon: Why Melted Butter is Ideal for Chocolate Chip Cookies
While many cookie recipes call for softened butter, using melted butter is truly a game-changer for achieving a specific, highly desired cookie texture. Melted butter creates a cookie that consistently features those sought-after crisp, golden-brown edges while maintaining a wonderfully soft and gooey center. It’s the key to preventing a cakey texture and instead promoting a flatter, chewier cookie. The moisture from melted butter evaporates more quickly during baking, contributing to the crisp exterior. Furthermore, the fat in melted butter is already dispersed, leading to less air incorporation, which results in a denser, chewier crumb rather than an airy, cake-like one. Beyond the superior texture, the practical benefits are undeniable: no more tedious waiting for butter to soften on the counter, and absolutely no need for an electric mixer. A simple handheld whisk is all you need, making this recipe incredibly convenient and mess-free.
Achieving Bakery-Style Perfection: How to Get Perfectly Round Cookies
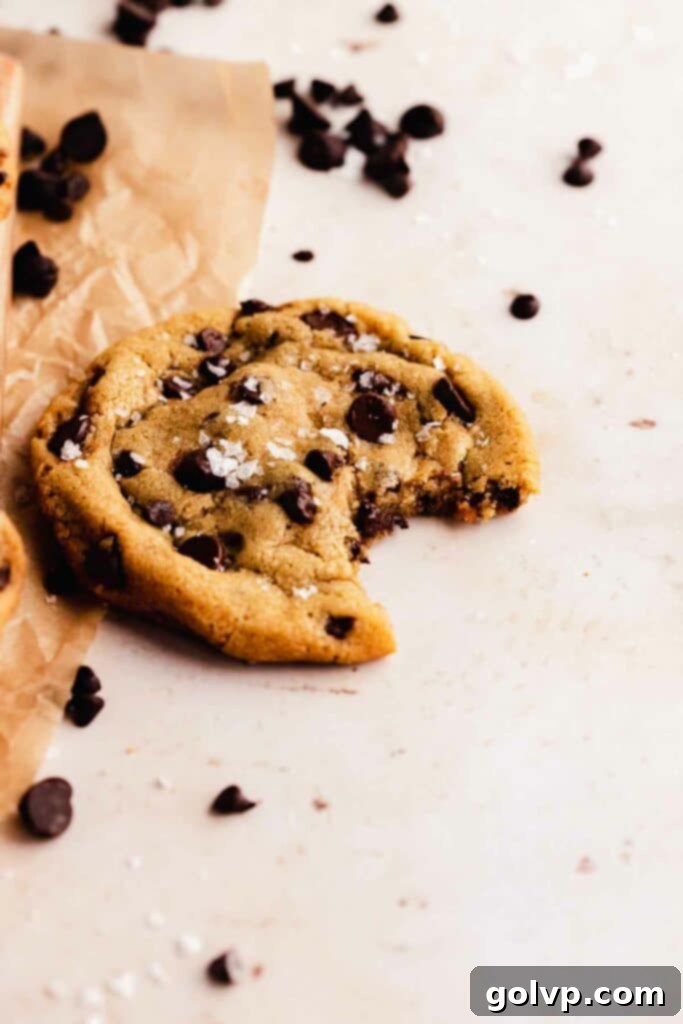
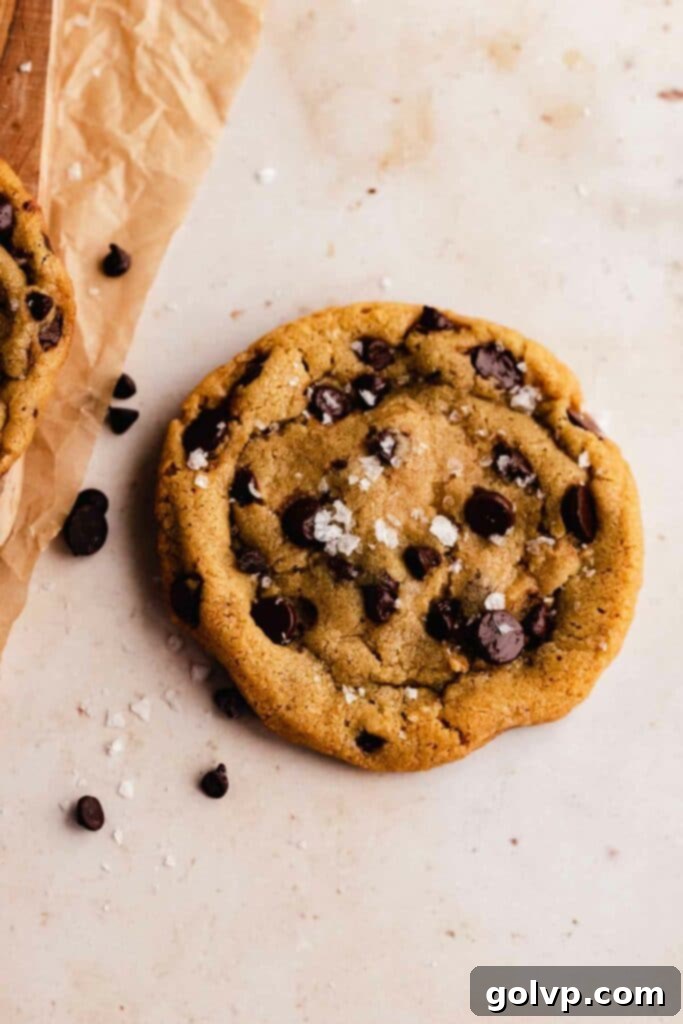
Even if your cookie dough scoops aren’t perfectly spherical, or if your cookies spread a little unevenly during baking, don’t fret! There’s a brilliant baker’s trick to ensure your small batch chocolate chip cookies look as good as they taste, achieving that picture-perfect round shape reminiscent of a professional bakery. While careful scooping or rolling certainly helps, this simple post-baking technique is a foolproof way to refine their appearance. As soon as the cookies are removed from the oven, while they are still hot and pliable on the baking sheet, grab a round cookie cutter that is slightly larger than your cookies, or even an inverted bowl. Place it over each warm cookie and gently swirl or “scoot” the cookie cutter (or bowl) around the edges of the cookie. This gentle motion coaxes the warm cookie back into a perfectly circular shape and can even help to create slightly thicker, more uniform edges. This quick and easy trick elevates the presentation of your homemade treats, making them truly irresistible. Once perfected, a sprinkle of flaky sea salt adds the final touch of elegance and flavor before serving.
Unleash Your Inner Pastry Chef: Adding Your Own Creative Twist
While these classic small batch chocolate chip cookies are perfect on their own, they also provide a fantastic canvas for culinary creativity. Don’t hesitate to experiment with different mix-ins to tailor them to your unique taste or whatever ingredients you have on hand. Elevate your baking game and infuse new flavors into this already beloved recipe. Here are some fantastic ideas to get you started:
- Vary Your Chocolate: Beyond the suggested mini and semi-sweet chips, try milk chocolate, dark chocolate, white chocolate, or even a blend of all three for a truly dynamic flavor. Chopped chocolate bars also work wonderfully, creating luxurious puddles of chocolate.
- Crushed Cookies: For a decadent treat, fold in crushed sandwich cookies (like Oreos) for an added layer of texture and flavor.
- Salty Pretzels: A handful of crushed pretzels introduces a delightful salty crunch that perfectly complements the sweet chocolate and chewy cookie dough.
- Chopped Candy Bars: Transform these cookies into a personalized candy bar delight by adding chunks of your favorite chocolate bars. Think Snickers, Heath, or Reese’s Peanut Butter Cups.
- Toasted Nuts: For a deeper, richer flavor and added crunch, toast pecans, walnuts, or almonds before folding them into the dough. The toasting process brings out their natural oils and enhances their nutty aroma.
- Dried Fruits: For a hint of chewiness and sweetness, consider adding dried cranberries, cherries, or chopped apricots.
- Spices: A pinch of cinnamon, nutmeg, or even a touch of chili powder can add an unexpected and delightful warmth to your cookies.
Smart Baking: Make-Ahead and Freezing Tips for Fresh Cookies Anytime
One of the best features of this small batch chocolate chip cookie recipe is how easily adaptable it is for make-ahead preparation. This means you can always have delicious, freshly baked cookies within reach, whether it’s for a spontaneous treat or a planned gathering. Preparing the dough in advance also allows the flavors to deepen and meld, resulting in an even more delicious cookie!
Refrigerating Cookie Dough: You can prepare and scoop the cookie dough balls a day or two in advance and store them in an airtight container in the refrigerator. The longer the cookie dough chills, the more time the flour has to fully hydrate and the flavors to develop and intensify, creating a richer, more complex cookie. Chilling also firms up the butter, which helps prevent excessive spreading during baking, ensuring your cookies maintain a perfect thickness and texture.
Freezing Cookie Dough: For ultimate convenience, freeze the scooped cookie dough balls for up to three months. Arrange the scooped dough balls on a baking sheet and freeze until solid, then transfer them to an airtight freezer-safe container or bag. This way, you have individual portions of dough ready to bake whenever a cookie craving strikes. When you’re ready to bake, simply place the frozen dough balls on a baking sheet and add a few extra minutes to the baking time. Baking from frozen often results in a wonderfully thick cookie with a perfectly gooey center.
Understanding Your Ingredients: Key Components for Cookie Success
Each ingredient in this small batch chocolate chip cookie recipe plays a crucial role in achieving that perfect balance of flavor and texture. Understanding their purpose will not only help you bake these cookies flawlessly but also empower you to troubleshoot or experiment with confidence.
Full steps and ingredients are detailed in the recipe card below. But read through these tips for all the insights you’ll need for guaranteed success!
- Chocolate Chips: We recommend a delightful mix of mini and regular semi-sweet chocolate chips for optimal chocolate distribution and varying textures of melty goodness. However, feel free to use your preferred type – milk, dark, or even white chocolate chips will work beautifully. For a truly luxurious touch, use finely chopped good-quality chocolate for those desirable chocolate puddles.
- Butter: The star of the show! Using a high-quality, real butter is paramount for the best flavor and texture. Melted butter, as discussed, is key to achieving those crisp edges and chewy centers. Ensure it’s melted and then cooled slightly before mixing to prevent cooking the egg yolk.
- Brown Sugar: This provides a wonderful depth of flavor thanks to its molasses content, contributing to the rich, caramel-like notes in the cookies. More importantly, brown sugar helps keep the cookies soft and chewy in the middle, preventing them from becoming too dry or brittle. Packed brown sugar ensures accurate measurement.
- Granulated Sugar: While brown sugar ensures chewiness, granulated sugar is essential for achieving those coveted crisp edges. Its crystalline structure helps promote spread and contributes to the golden-brown color and slight crunch that defines a perfect chocolate chip cookie.
- Egg Yolk: Instead of a whole egg, using just the egg yolk adds richness and helps bind the ingredients together without introducing too much liquid, which could lead to a tougher or cakey cookie. The extra fat from the yolk contributes significantly to the tender, gooey texture.
- All-Purpose Flour: The structural backbone of our cookies. For the most accurate and consistent results, we highly recommend weighing your flour using a kitchen scale. If you don’t have a scale, be sure to measure properly: fluff the flour in its bag, then spoon it gently into a measuring cup, leveling off the excess with the flat edge of a knife without packing it down. Over-measuring flour is a common baking mistake that can lead to dry, crumbly cookies.
- Baking Soda: This leavening agent reacts with the acidic brown sugar to create carbon dioxide gas, which helps the cookies rise slightly and spread, contributing to their classic flat, chewy profile. Ensure your baking soda is fresh for optimal results.
- Sea Salt: A pinch of fine sea salt in the dough balances the sweetness of the sugars and chocolate, enhancing all the other flavors. Flaky sea salt sprinkled on top after baking adds a gourmet touch and a delightful textural contrast.
Step-by-Step Guide to Baking Your Perfect Small Batch Chocolate Chip Cookies
Follow these detailed instructions carefully to ensure your small batch chocolate chip cookies turn out perfectly every time – crisp on the edges, soft in the middle, and bursting with chocolatey flavor.
-
Step 1 – Preheat & Prep: Begin by preheating your oven to 180°C (350°F). Line a baking sheet with parchment paper. This prevents sticking and makes for easy cleanup.
-
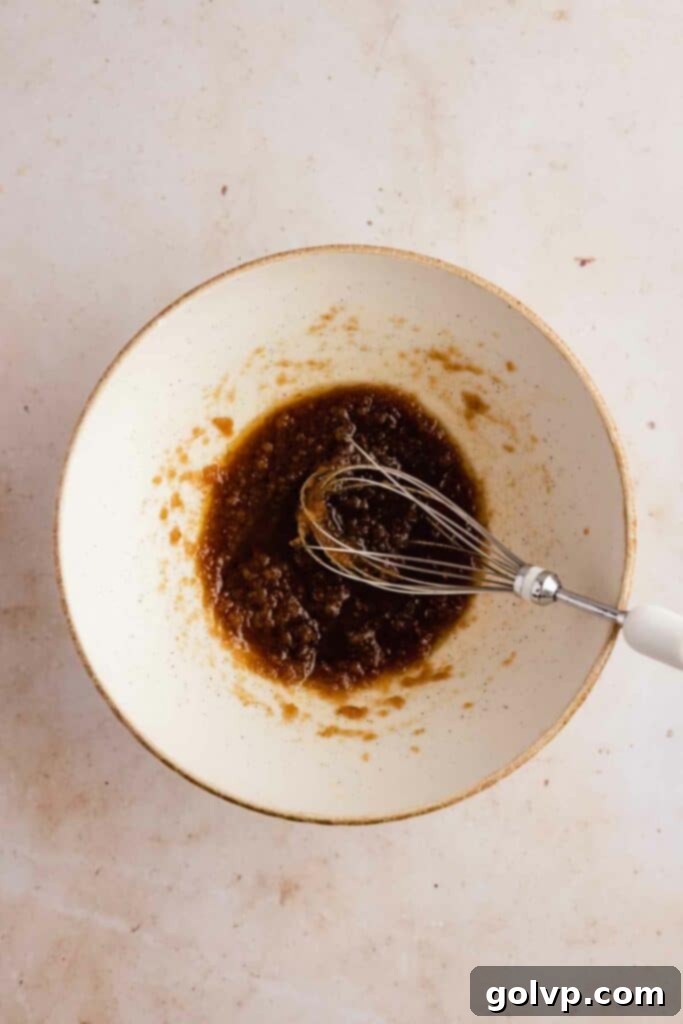
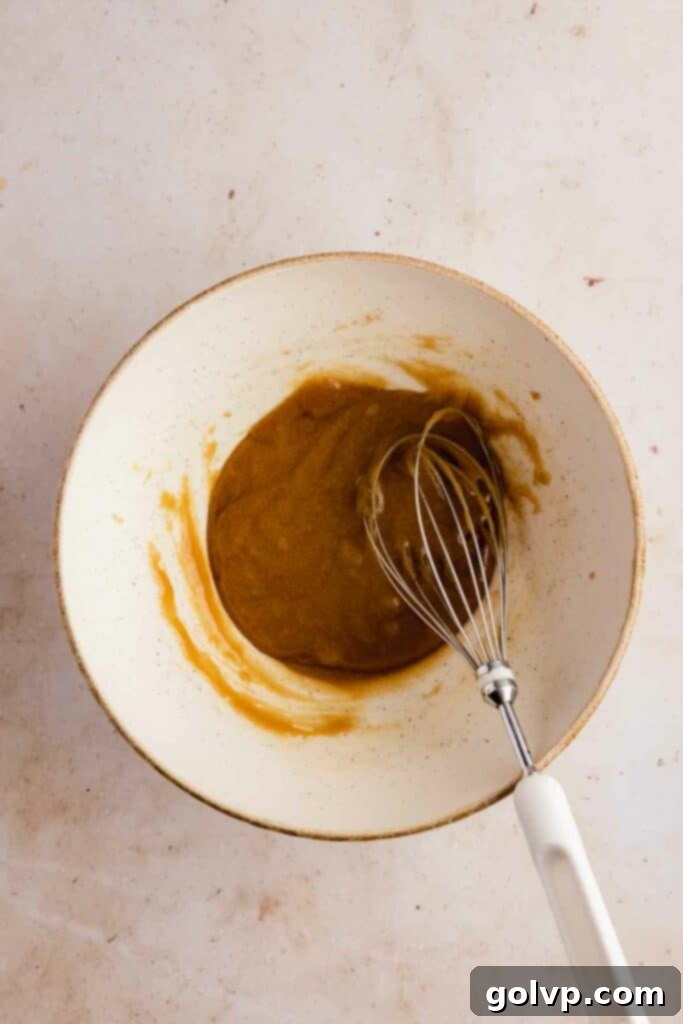
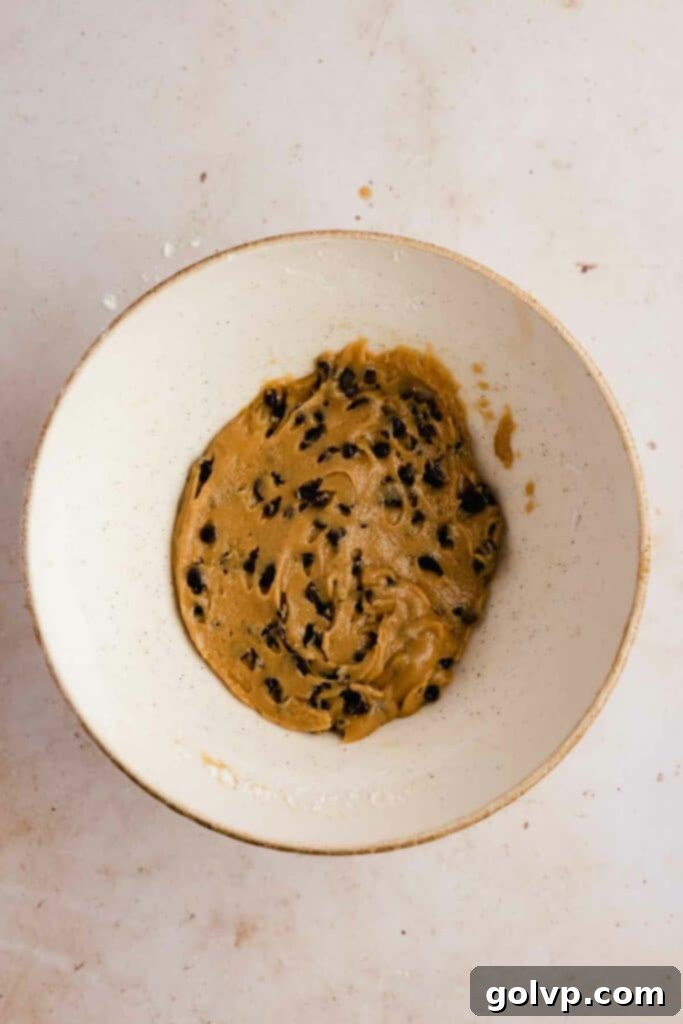
Step 2 – Combine Wet Ingredients: In a large mixing bowl, whisk together the melted and slightly cooled butter with both the brown sugar and granulated sugar until well combined and smooth. The melted butter ensures easy mixing and contributes to the final texture. Add the egg yolk and pure vanilla extract, then continue whisking vigorously until the mixture thickens slightly and lightens in color, indicating it’s well emulsified and airy.½ cup butter, ⅓ cup brown sugar, ¼ cup granulated sugar, ¼ teaspoon sea salt, 1 teaspoon pure vanilla extract, 1 egg yolk
-
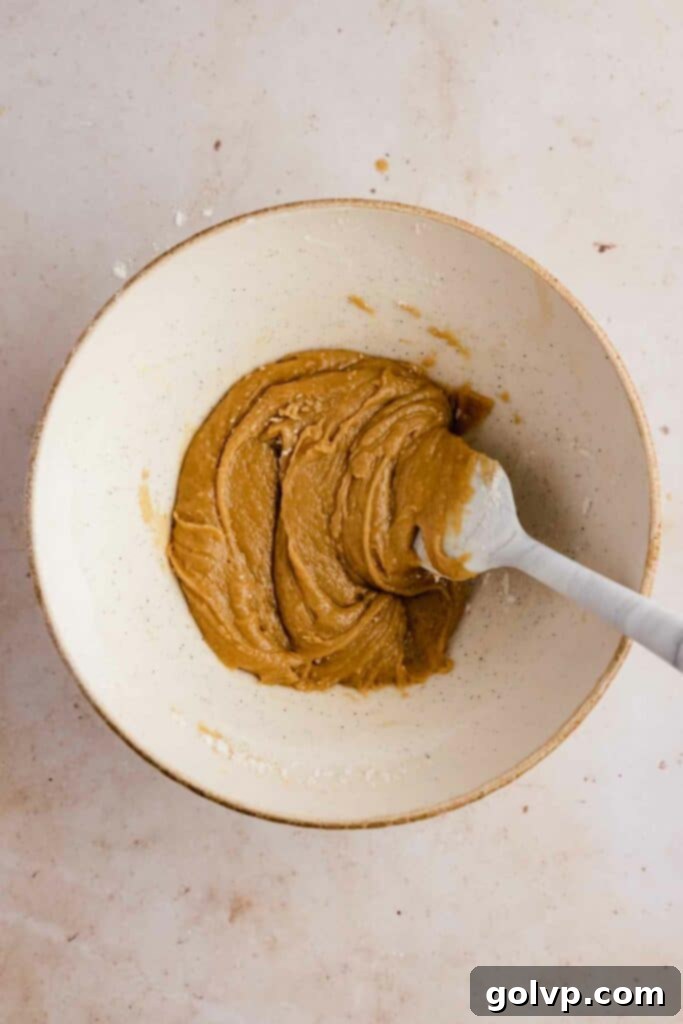
Step 3 – Fold in Dry Ingredients & Chocolate: Sift the all-purpose flour and baking soda directly into the same bowl with the wet mixture. Gently fold the dry ingredients into the wet until just combined and no streaks of flour remain. Be careful not to overmix, as this can lead to tough cookies. Incorporate ¾ cup of your chosen chocolate chips, reserving a few tablespoons for topping the dough balls later. If your dough feels too soft to scoop easily, pop it into the freezer for 5 minutes to firm up.⅔ cup all purpose flour, ¼ teaspoon baking soda, ¾ cup chocolate chips
-
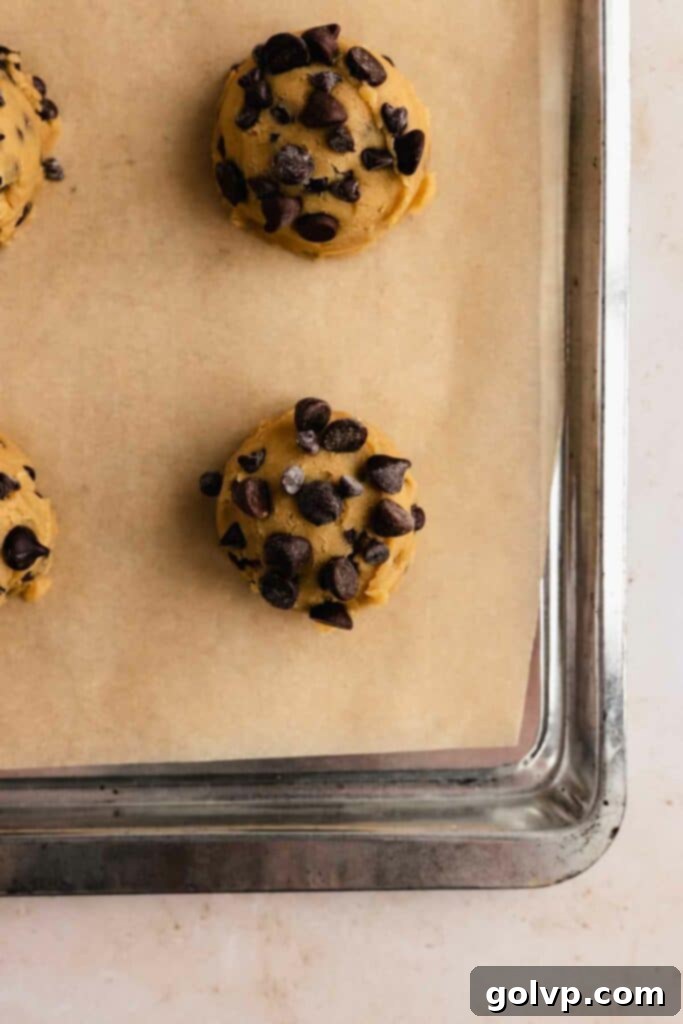
Step 4 – Scoop & Chill: Using a large cookie scoop, divide the dough into 6 equal balls. For an extra bakery-style touch, press the reserved chocolate chips onto the tops of the dough balls. Place the scooped dough onto a lined baking sheet or plate. Chilling the dough is a crucial step for the best texture and to prevent excessive spreading. Place the dough balls in the freezer for 15 minutes, or in the refrigerator for at least 45 minutes and up to 48 hours for even richer flavor development.¾ cup chocolate chips
-
Step 5 – Bake to Perfection: Arrange the chilled cookie dough balls onto your prepared baking tray, ensuring you leave at least 4 inches of space between each cookie to allow for proper spreading. This prevents them from merging into one giant cookie. Bake for 8-10 minutes. The cookies are ready when their edges are beautifully golden brown, the middles are puffed up, and they still appear slightly underdone and gooey in the center.
-
Step 6 – The Finishing Touches: Scoot & Serve: As soon as the cookies come out of the oven, immediately use the “scoot” method to perfect their round shape right on the hot baking sheet. Place an inverted bowl or a large round cookie cutter over each cookie and gently shake or swirl it around to even out the edges and make the cookie appear thicker and perfectly round. Finish by sprinkling the warm cookies with a pinch of flaky sea salt for an elevated taste and presentation. Serve warm and enjoy your perfectly baked small batch chocolate chip cookies!½ teaspoon flaky salt
Frequently Asked Questions (FAQ) About These Small Batch Cookies
Yes, chilling the cookie dough in this recipe is not just recommended, it’s extremely important for optimal results. Chilling serves several critical purposes: it firms up the melted butter in the dough, which significantly reduces spreading in the oven, ensuring your cookies achieve that desirable thickness. It also allows the flour to fully hydrate, leading to a more tender and chewy texture, and gives the flavors more time to meld and deepen, resulting in a richer, more complex taste. Don’t skip this step for truly bakery-worthy cookies!
While I haven’t personally tested this specific recipe with dairy-free butter or oil, traditional butter plays a crucial role in both the flavor and the unique crisp-then-gooey texture of these cookies. Dairy-free butter alternatives can sometimes yield different results, often affecting spread and crispness. Using oil would dramatically change the texture, likely leading to a greasier, less structured cookie. If you’re going dairy-free, you could try a high-quality dairy-free butter stick (not a spread), but be aware that the final texture might vary. Unfortunately, I cannot provide a confident recommendation without direct testing.
Absolutely, freezing cookie dough is one of the best ways to enjoy fresh cookies whenever you want them without the full preparation effort each time! Simply scoop the dough into individual balls as per the recipe, then arrange them on a baking sheet and freeze until solid. Once frozen, transfer them to an airtight container or freezer bag. They’ll keep well in the freezer for up to 3 months. When you’re ready to bake, there’s no need to thaw! Just place the frozen dough balls on your baking sheet and add a few extra minutes to the baking time (typically 2-4 minutes longer, depending on your oven). This method often results in wonderfully thick cookies with perfectly gooey centers.
Excessive spreading can be caused by several factors. The most common reasons include: your butter was too warm when mixed (ensure it’s melted but slightly cooled), you skipped or didn’t adequately chill the dough (chilling is vital for solidifying the butter and preventing spread), your oven temperature was too low (a hot oven sets the edges quickly), or you used too much leavening agent. Ensure you’re measuring ingredients accurately, especially the flour, and always chill your dough as specified in the recipe.
Explore More Delicious Baking Recipes:
- The Best Brown Butter Chocolate Chip Cookies
- Blueberry Cream Cheese Cookies – Soft & Chewy
- Toffee Cookies with Foolproof Homemade Toffee
Happy baking, and we hope you absolutely adore these easy small batch chocolate chip cookies!
Did you make this recipe? We would be thrilled if you could star rate this recipe and share your thoughts in the comments below. Your feedback helps us and other bakers! If you’re sharing your delicious creation on Instagram, don’t forget to tag @flouringkitchen. Also, follow us on Pinterestto save more inspiring recipes and discover new baking ideas.
📖 Recipe

Small Batch Chocolate Chip Cookies
Mary
Pin Recipe
Shop Ingredients
Equipment
-
1 large cookie scoop
-
1 Cookie sheet
Ingredients
- ½ cup butter melted and cooled slightly
- ⅓ cup brown sugar packed
- ¼ cup granulated sugar
- ¼ teaspoon sea salt
- 1 teaspoon pure vanilla extract
- 1 egg yolk
- ⅔ cup all purpose flour 80g
- ¼ teaspoon baking soda
- ¾ cup chocolate chips mini and semisweet
- ½ teaspoon flaky salt optional
Shop Ingredients on Jupiter
Instructions
-
Preheat oven to 180°C (350°F). Line a baking sheet with parchment paper.
-
In a large bowl whisk together melted butter, brown sugar, and granulated sugar. Add egg yolk and vanilla and whisk until thickened and lightens in colour.½ cup butter, ⅓ cup brown sugar, ¼ cup granulated sugar, ¼ teaspoon sea salt, 1 teaspoon pure vanilla extract, 1 egg yolk
-
Sift flour and baking soda right into the same bowl. Fold just until no more streaks remain. Add chocolate chips (reserve a few tablespoons of chocolate chips) and fold. Pop the dough into the freezer for 5 minutes if it’s too soft to scoop.⅔ cup all purpose flour, ¼ teaspoon baking soda, ¾ cup chocolate chips
-
Scoop the cookie dough into 6 large balls and push reserved chocolate chips onto the tops of the dough balls. Place onto a lined baking sheet or plate. Chill in the freezer for 15 minutes (or in the fridge for at least 45 minutes up to 48 hours).¾ cup chocolate chips
-
Place chilled cookie dough balls onto baking tray, leaving at least 4” between each cookie.
-
Bake for 8-10 minutes. The cookies are ready when the edges are golden brown and the middle is puffed and still a little underdone.
-
As soon as they are out of the oven, scoot the cookies to make them round right on the baking sheet: place a bowl flipped upside down or a large round cookie cutter over the cookie. Shake the bowl/cookie cutter around the cookie gently to even out the edges and make the cookie even thicker. Sprinkle the cookies with flaky salt and serve!½ teaspoon flaky salt
Video
Notes
Make ahead instructions:
For enhanced flavor and convenience, prepare and scoop the cookie dough a day or two in advance. Store the dough balls in an airtight container in the fridge until ready to bake.
To have cookies ready at a moment’s notice, freeze the scooped cookie dough for up to 3 months in an airtight container. When baking from frozen, add a few more minutes (typically 2-4 minutes) to the specified cooking time. Enjoy freshly baked cookies anytime!
