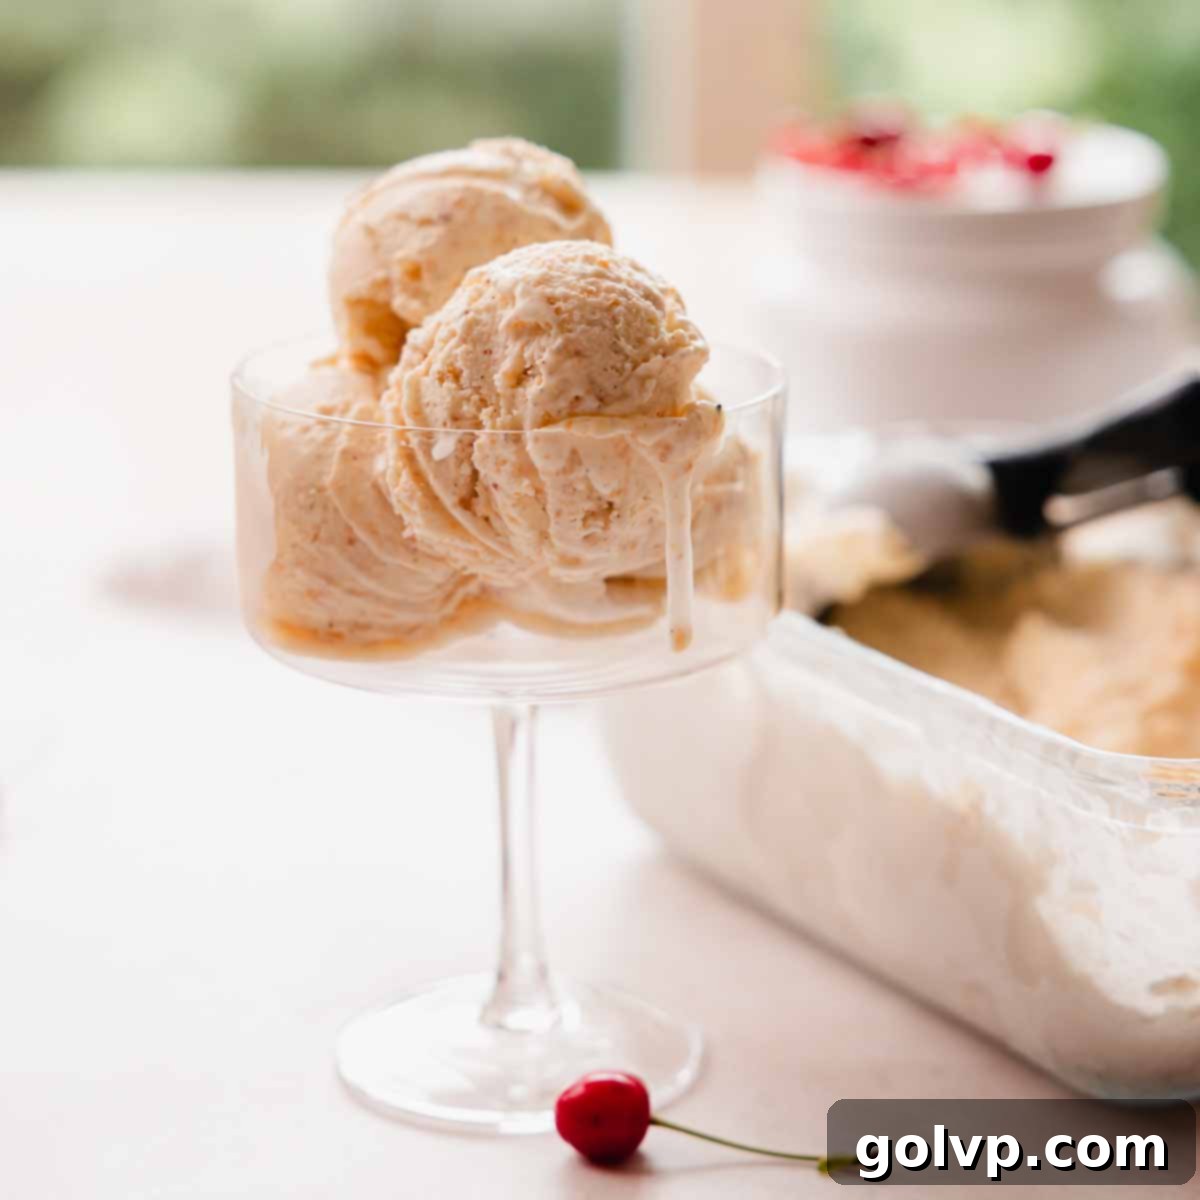
No-Churn Brown Butter Ice Cream: An Elevated Vanilla Dream with Crispy Bits
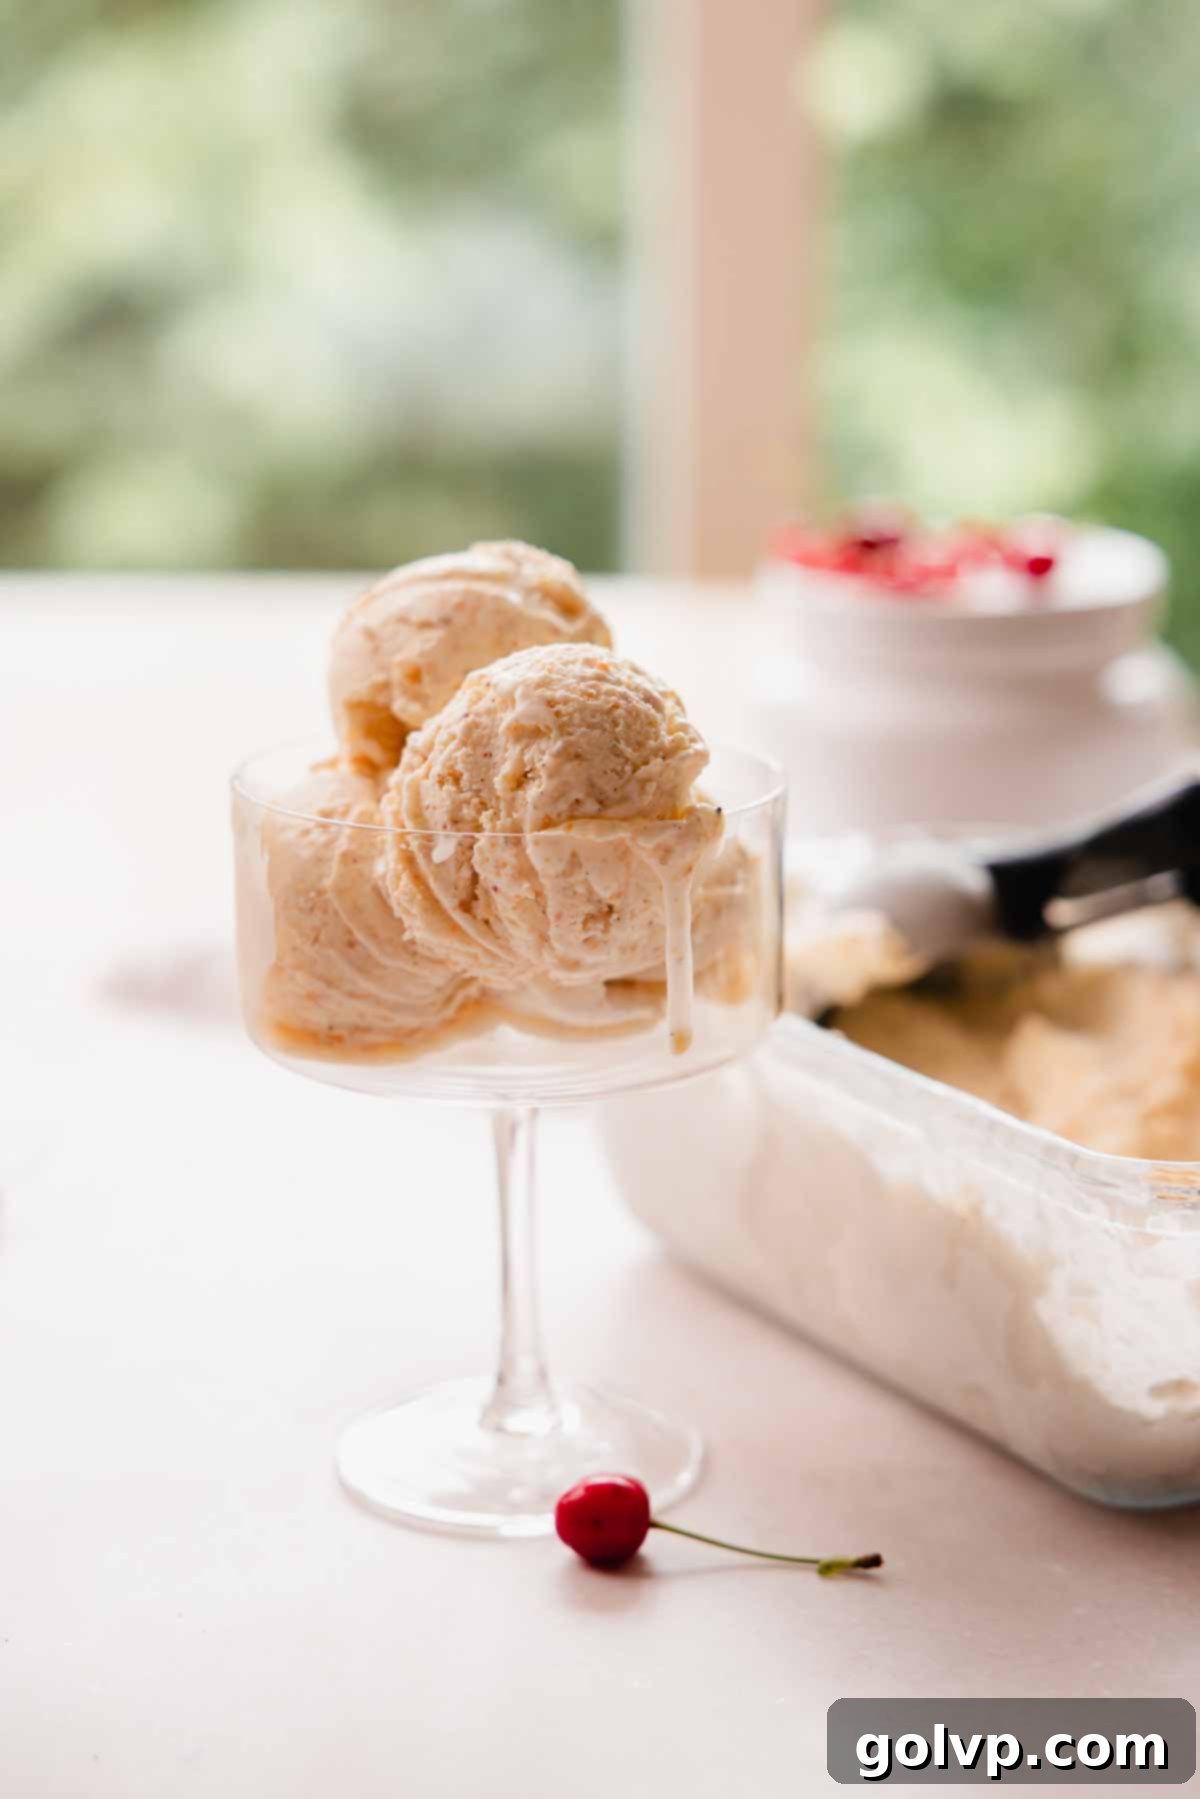
Prepare to elevate your dessert experience with this exquisite no-churn brown butter ice cream. Featuring delightful crispy bits of perfectly toasted brown butter and speckled with fragrant vanilla bean seeds, this recipe is incredibly easy to make and requires no specialized ice cream maker. It transforms the classic vanilla bean flavor into something truly extraordinary—a comforting yet sophisticated treat that pairs beautifully with almost any dessert or forms the ultimate base for a luxurious ice cream sundae. Each spoonful offers a rich and creamy texture, yet it’s perfectly balanced, never overwhelmingly buttery.
Throughout the summer months, I always keep a generous batch of this ice cream stashed in my freezer, ready for unexpected guests or a spontaneous sweet craving. It’s incredibly versatile: I love savoring it on its own, nestled over a warm, gooey cherry brownie, or enhanced with a spoonful of bright and tangy cherry curd swirled on top. Its deep, caramelized notes and creamy consistency make it a truly unforgettable indulgence.
Jump to Recipe
- Why You’ll Love This Recipe
- Key Ingredients
- How to Make Brown Butter Ice Cream
- Expert Tips
- Make Ahead and Storage
- Why Milk Powder Levels Up Brown Butter Flavor
- Serving Suggestions
- Recipe FAQs
- More Related Recipes
- Recipe Card
🍨 Why you’ll LOVE this No-Churn Brown Butter Ice Cream recipe
- Unforgettable Rich, Caramelized Flavor: The star of this show is undoubtedly the brown butter. Through a magical process of toasting butterfat and milk solids, you create a complex, nutty, and deeply caramelized flavor that perfectly complements and elevates the classic taste of vanilla bean. It’s not just butter; it’s butter transformed into a gourmet ingredient, adding layers of depth that regular vanilla ice cream simply can’t achieve.
- Effortlessly Creamy, No Ice Cream Maker Needed: Say goodbye to bulky equipment! This no-churn method relies on the perfect marriage of heavy whipping cream and sweetened condensed milk to create an incredibly rich, smooth, and velvety texture. You’ll be amazed at how a simple hand mixer (or stand mixer) can produce homemade ice cream that rivals any store-bought or churned variety, completely free of ice crystals.
- Minimal, Accessible Ingredients: You don’t need a pantry full of exotic items for this recipe. With just a handful of common, easy-to-find ingredients—butter, heavy cream, sweetened condensed milk, and vanilla—you can whip up this gourmet dessert anytime. The optional addition of milk powder further enhances the brown butter profile, but the core recipe remains wonderfully simple.
- Versatile for Any Occasion: Whether you’re hosting a dinner party, looking for a comforting treat on a quiet evening, or preparing a festive dessert, this brown butter ice cream fits the bill. Its balanced sweetness and sophisticated flavor profile make it a crowd-pleaser that can stand alone or act as a fantastic accompaniment to a wide range of other desserts.
Beyond being a standalone delight, this ice cream is also an incredible base for other creations. I’ve successfully used this brown butter ice cream in these truly delicious homemade puff pastry ice cream sandwiches, adding a unique depth of flavor that takes them to the next level.
📝 Key ingredients for the best No-Churn Brown Butter Ice Cream
Read through for all the tips you will need for success!
Full steps and ingredients in recipe card below.
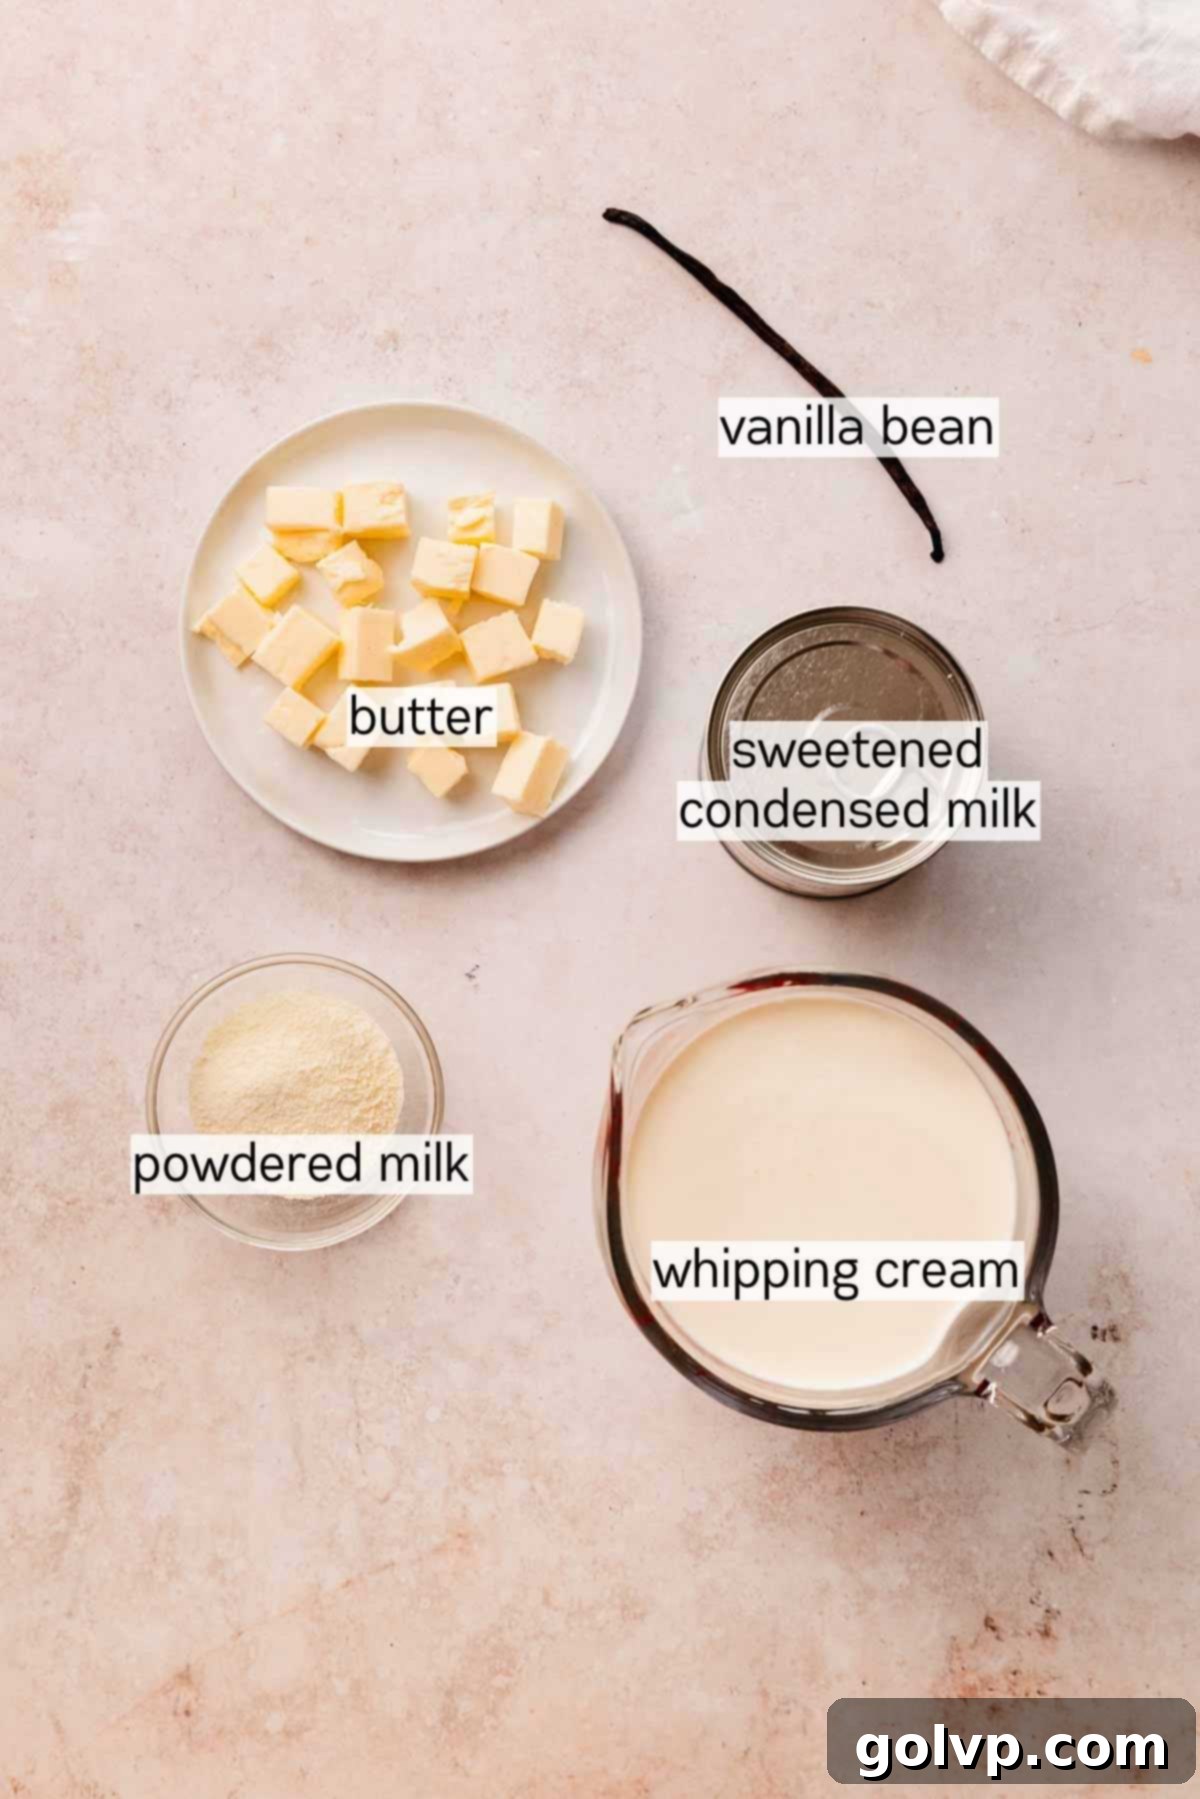
- Heavy whipping cream (35% or higher): This is the foundation of our creamy, no-churn ice cream. Using a cream with at least 35% fat content is crucial, as it whips up beautifully to create a stable, airy base. Ensure your cream is well-chilled before whipping, as cold cream yields a lighter, fluffier texture much more easily. The higher fat content prevents the formation of large ice crystals, contributing to that irresistible smooth mouthfeel.
- Unsalted Butter: The quality of your butter directly impacts the final flavor of your brown butter. Opt for a good quality, unsalted butter for the best results. Unsalted butter allows you to control the overall saltiness of the ice cream and, importantly, prevents any potential metallic aftertaste that can develop when salted butter is browned. The milk solids in the butter are what brown and provide those deep, nutty, caramelized notes.
- Milk powder (Skim or Whole): While optional, I enthusiastically recommend this ingredient! I’ve tested this recipe both with and without milk powder, and while it’s delicious either way, the milk powder truly amplifies the brown butter flavor and improves the texture. By adding extra milk solids, you get more particles to toast during the browning process, intensifying those desirable caramel notes. It also contributes to a slightly chewier, more substantial texture. Skim milk powder works wonderfully, and whole milk powder can also be used for an even richer profile.
- Vanilla Bean: A whole vanilla bean is a game-changer in this recipe. Its tiny black seeds not only add beautiful visual specks but also infuse the ice cream with an unparalleled depth of complex, aromatic vanilla flavor that a typical extract can’t replicate. If a whole vanilla bean is unavailable or too pricey, you can substitute with 1 tablespoon of vanilla bean paste, which still offers some visual appeal from the seeds and a robust vanilla essence.
- Sweetened Condensed Milk: Do not skip or substitute this! Sweetened condensed milk is indispensable for no-churn ice cream. It serves two vital functions: it sweetens the ice cream to perfection and, more critically, its high sugar and milk protein content are key to achieving a smooth, creamy consistency without an ice cream maker. The sugar acts as an antifreeze, preventing large ice crystals from forming, while the milk proteins contribute to an almost chewy, luxurious texture. Absolutely do not substitute with evaporated milk; they are entirely different products with distinct sugar and water content.
- Sea Salt: Just a small pinch of sea salt (about ¼ teaspoon) can dramatically enhance the overall flavor of your ice cream. Salt isn’t just for making things salty; it’s a powerful flavor enhancer that helps to balance the sweetness of the condensed milk and brings out the subtle, rich caramel notes of the brown butter and vanilla. Don’t omit it!
👩🍳 How to make homemade No-Churn Brown Butter Ice Cream
Ice cream step by step
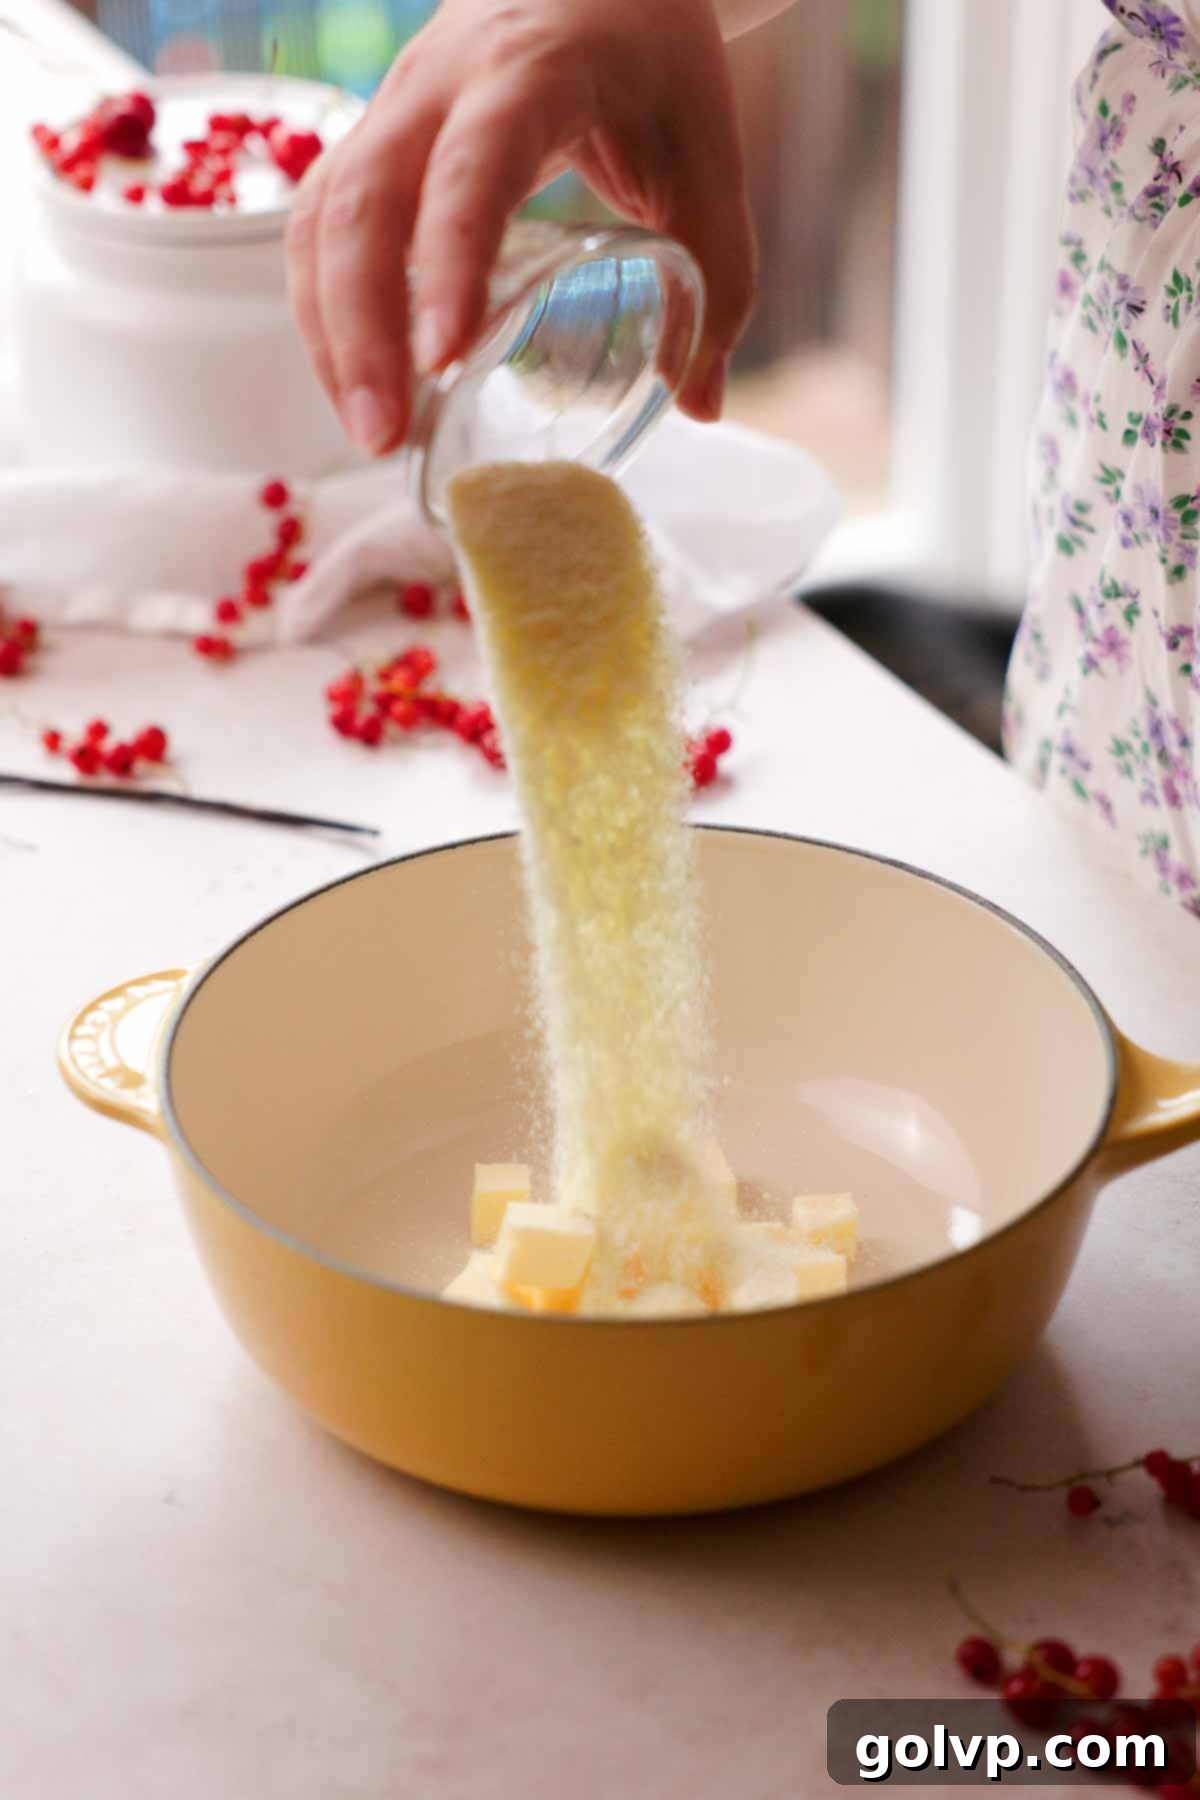
Step 1: Brown the Butter. In a small, light-colored saucepan (which helps you monitor the color), combine the unsalted butter and dry milk powder. Place the saucepan over medium-low heat. Stir constantly with a spoon or heat-proof spatula, ensuring the butter melts evenly and the milk solids don’t stick to the bottom and burn. This gentle, consistent stirring is key to perfect browning.
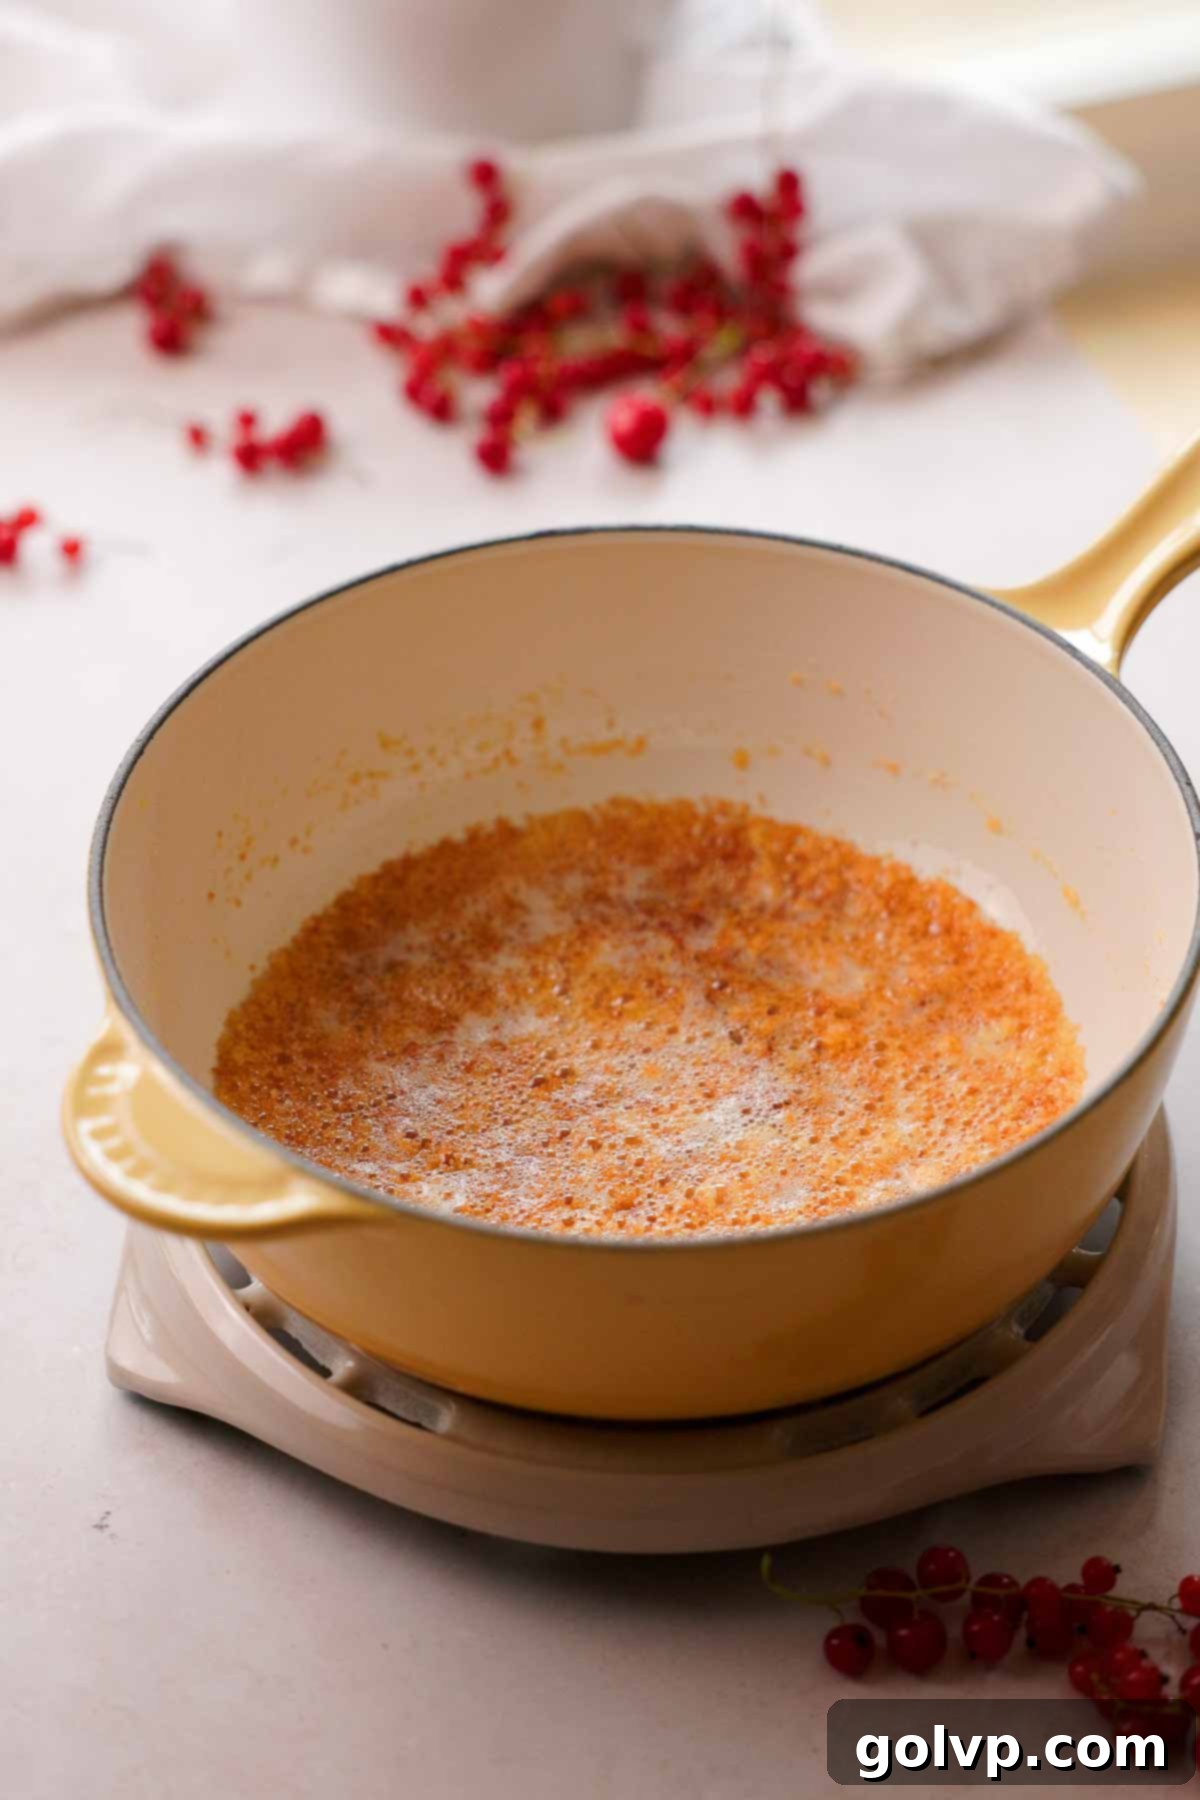
Step 2: Observe the Transformation. As the butter melts and heats, it will first foam up. This foam will then subside, and the butter will clarify. Keep stirring! Soon after, it will begin to foam up a second time, and you’ll notice the white milk solids at the bottom of the pan start to turn a deep golden brown, emitting a wonderfully nutty aroma. The moment these solids reach that beautiful caramel color, remove the pan immediately from the heat. Brown butter can go from perfect to burnt in a matter of seconds!
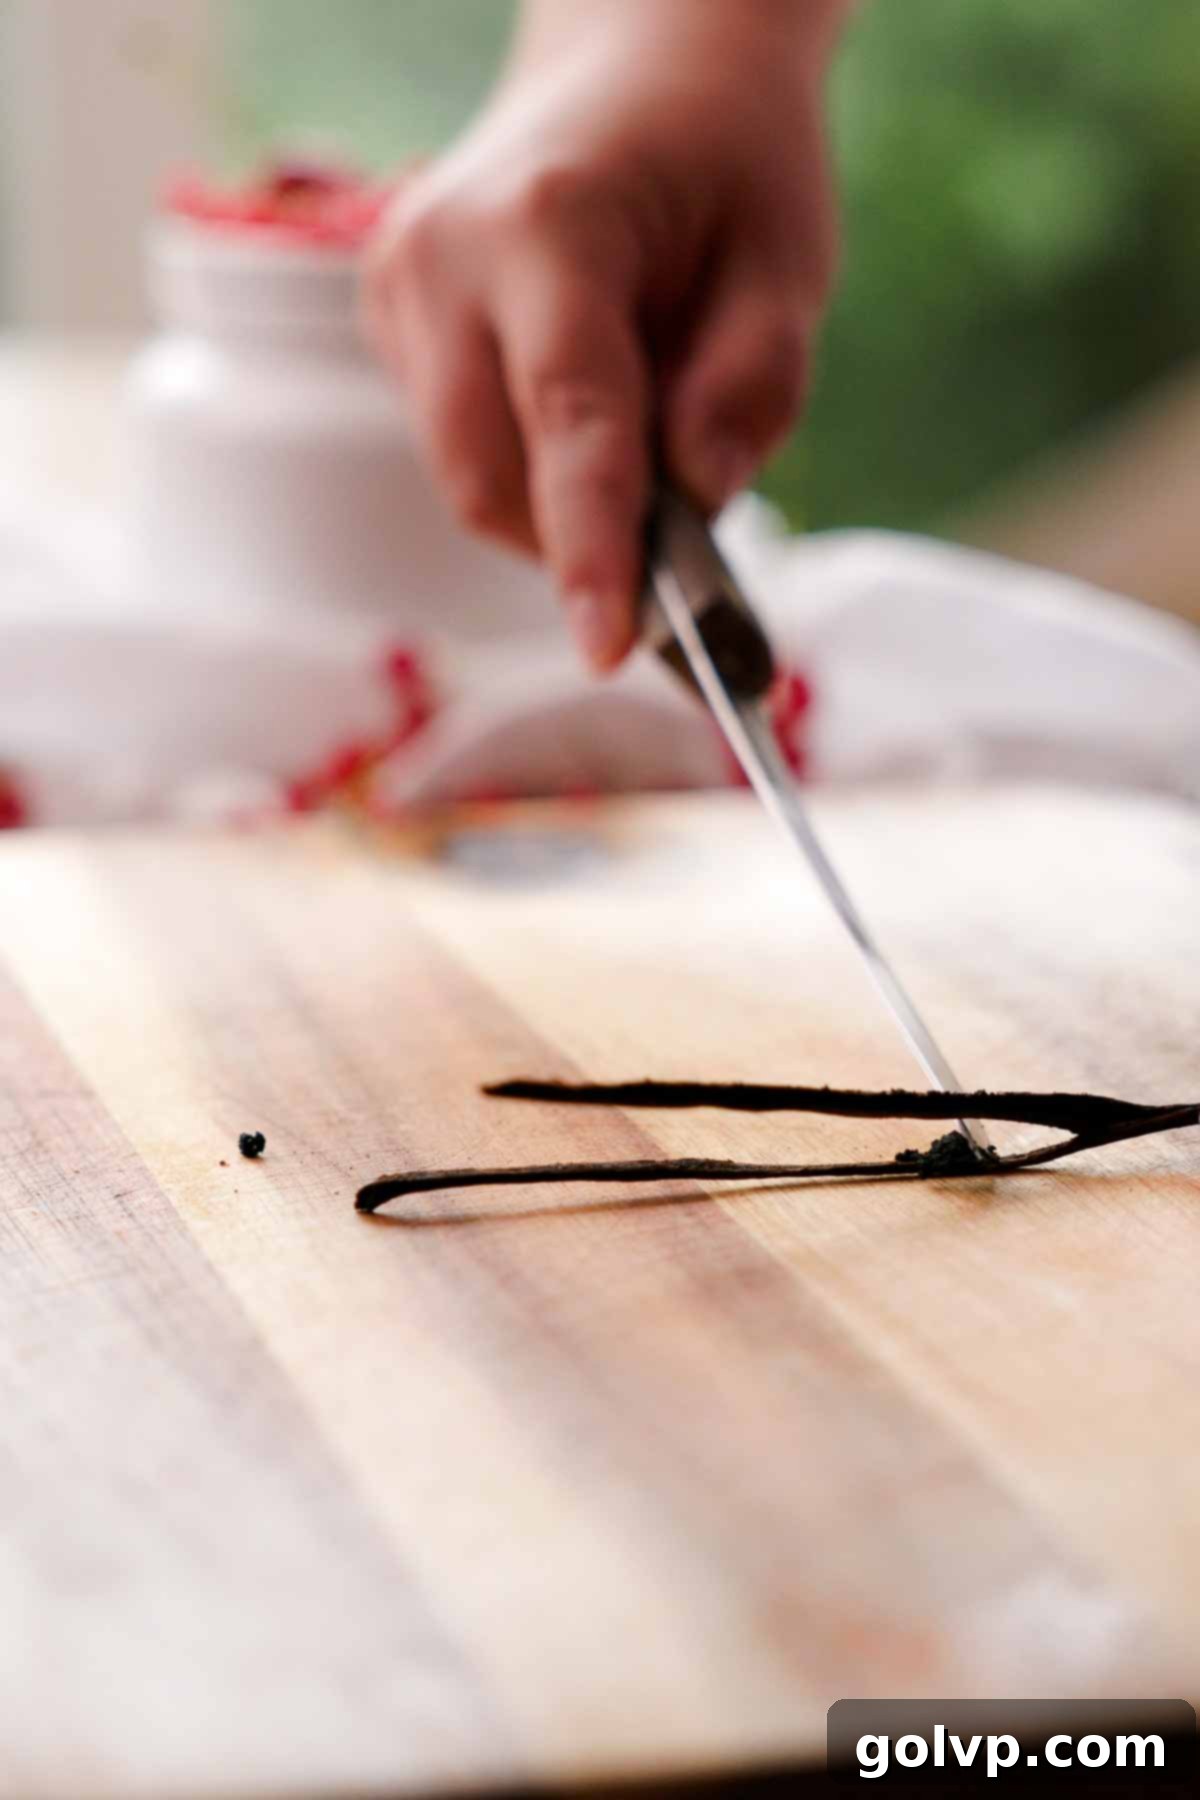
Step 3: Infuse with Vanilla. Carefully cut the vanilla bean in half lengthwise using a sharp knife. Use the back of the knife to scrape out the tiny, fragrant seeds. Add both the scraped seeds and the vanilla pod directly into the hot brown butter. Stir gently to ensure the seeds are well coated and allow them to infuse their rich flavor as the butter cools slightly. You want the butter to cool down enough so it won’t cook the cream when added, but still remain liquid.
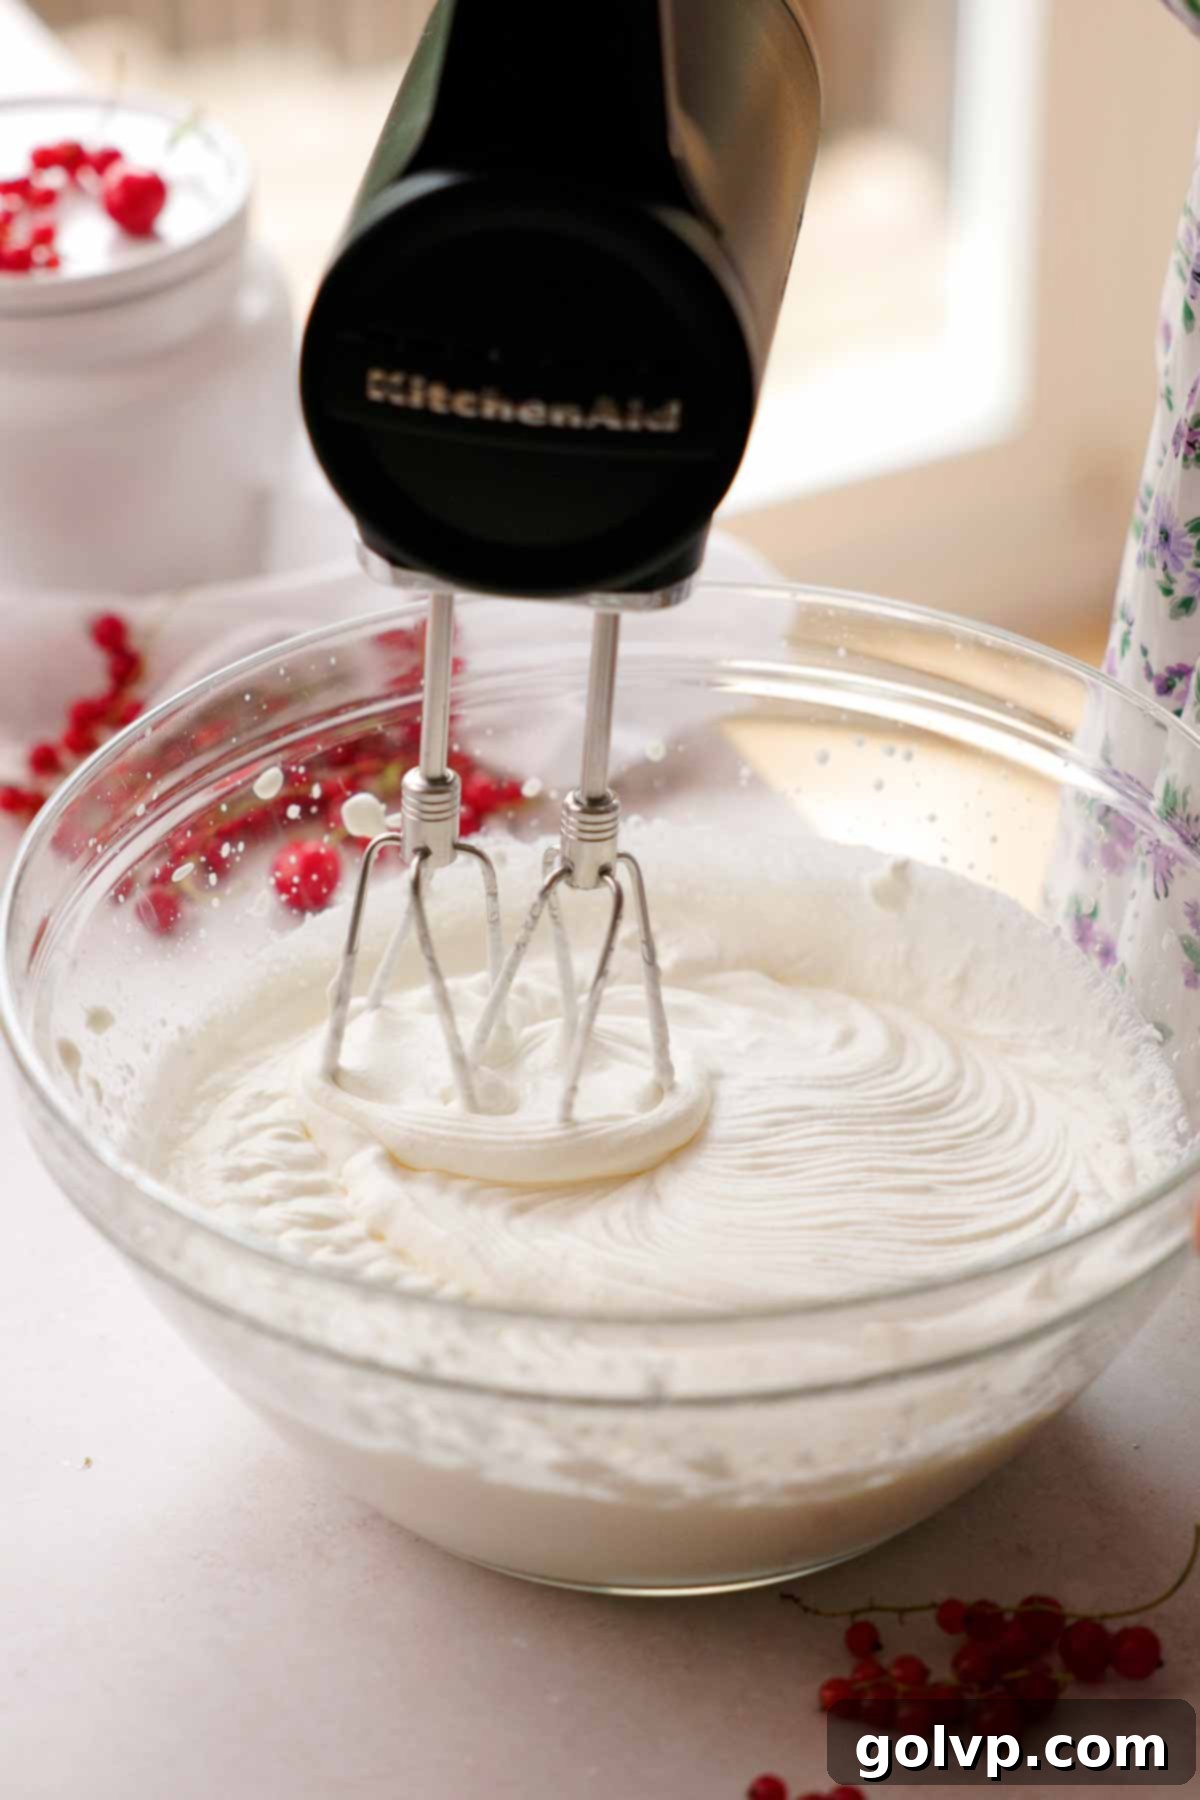
Step 4: Whip the Cream. In a separate, well-chilled large bowl (or the bowl of a stand mixer), add the heavy whipping cream. Using a whisk attachment, whip the cream on medium-high speed until it forms stiff peaks. Stiff peaks mean that when you lift the whisk, the cream holds its shape firmly. Be vigilant and avoid overwhipping, as this can lead to a grainy texture.
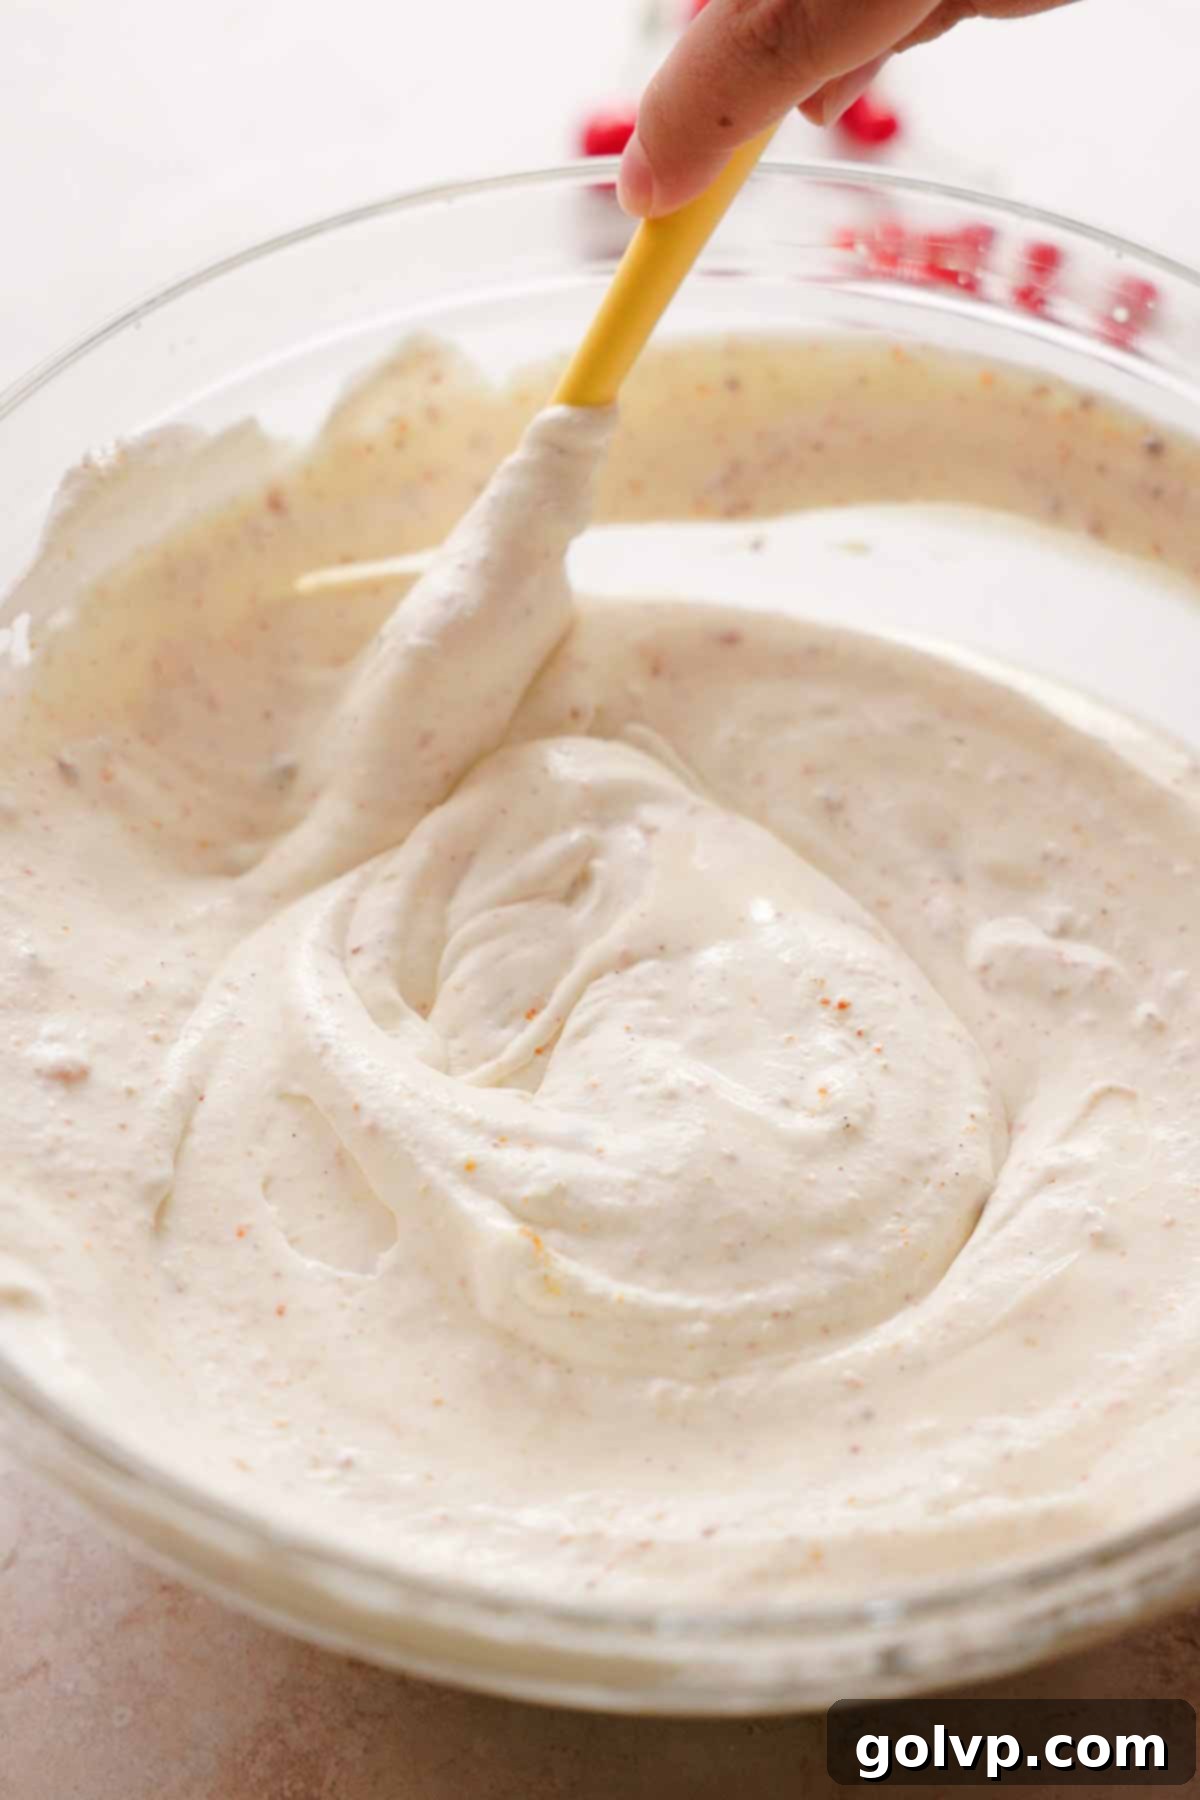
Step 5: Combine and Fold. Gently fold the sweetened condensed milk and sea salt into the whipped cream until just combined. Next, retrieve the vanilla pods from the slightly cooled brown butter, scraping off any excess butter and vanilla seeds back into the pan before discarding the pods. Pour the still-liquid brown butter (including all those lovely toasted bits and vanilla seeds) into the whipped cream mixture. Using a spatula, fold everything together carefully until no streaks remain and the mixture is uniformly incorporated. The goal is to maintain as much air in the whipped cream as possible.
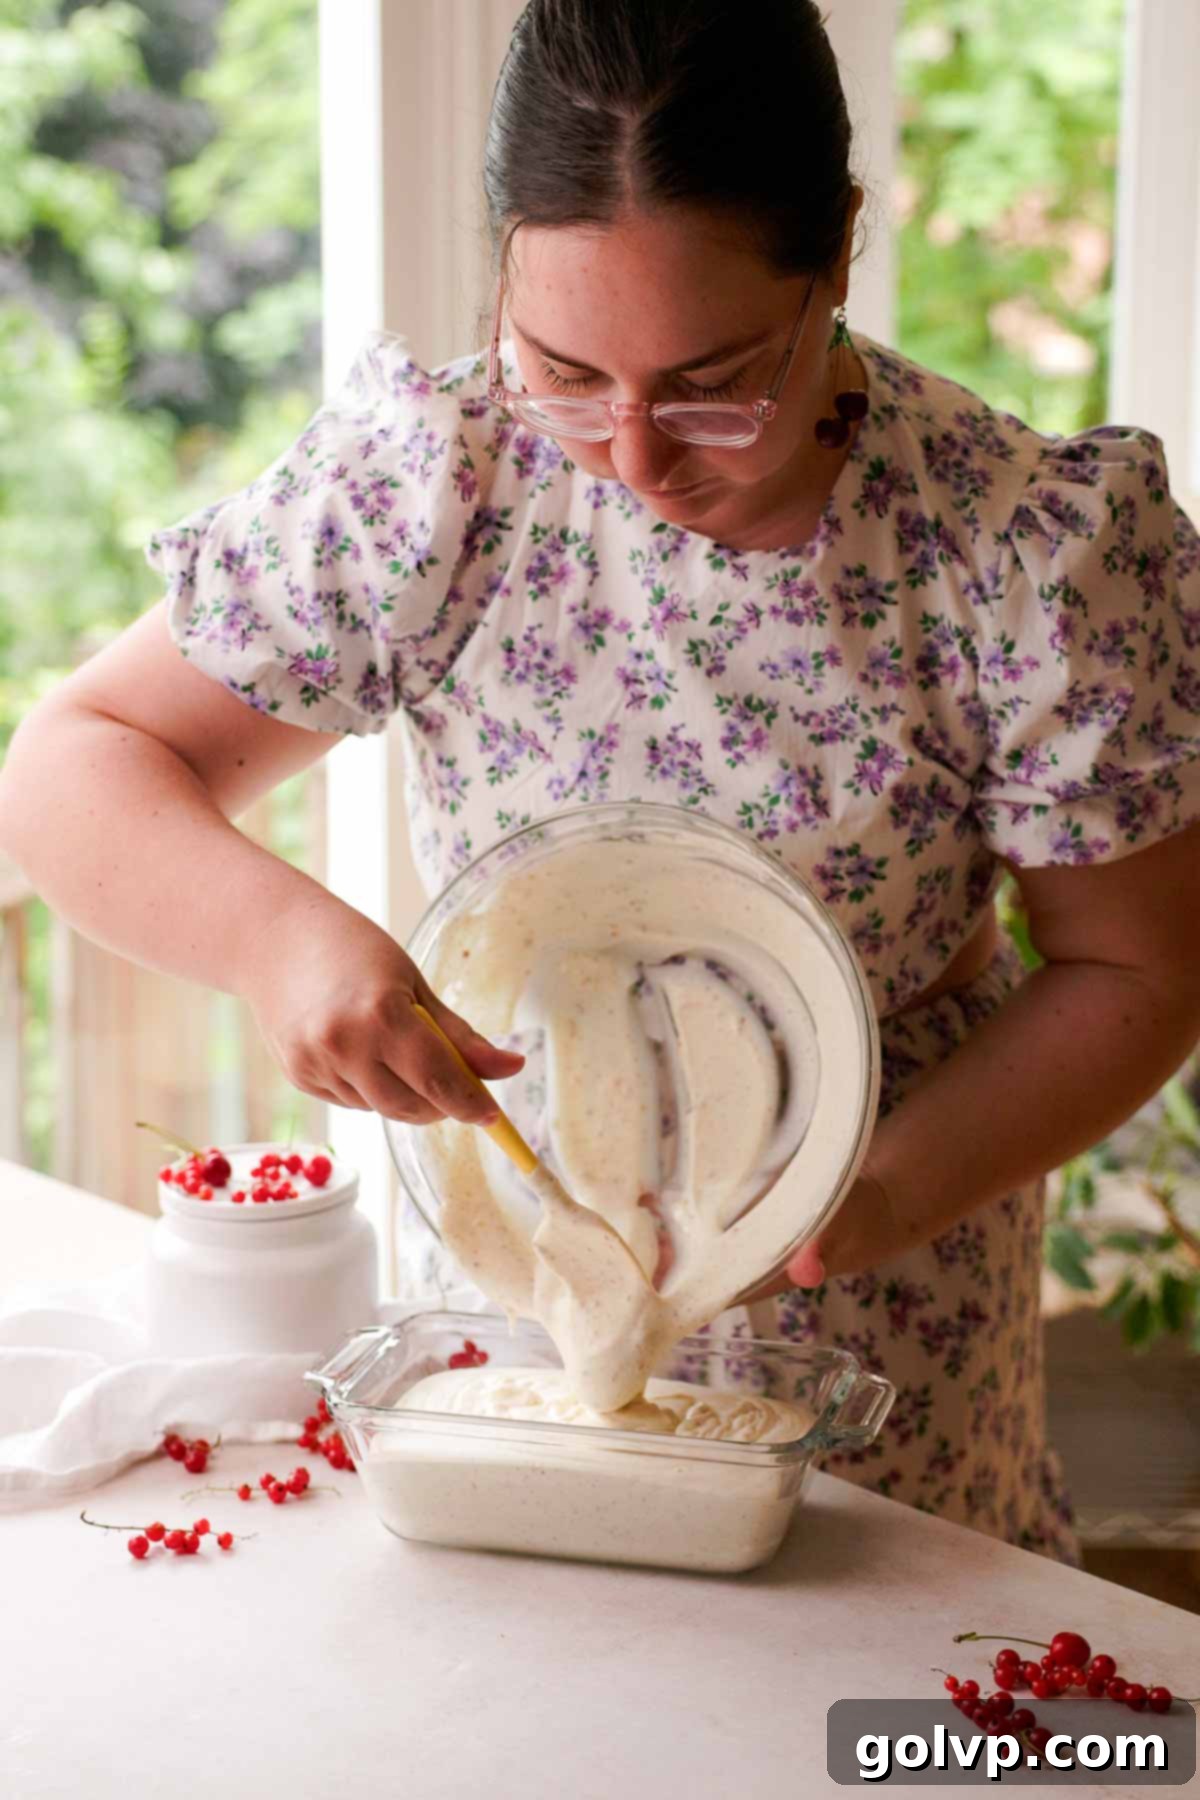
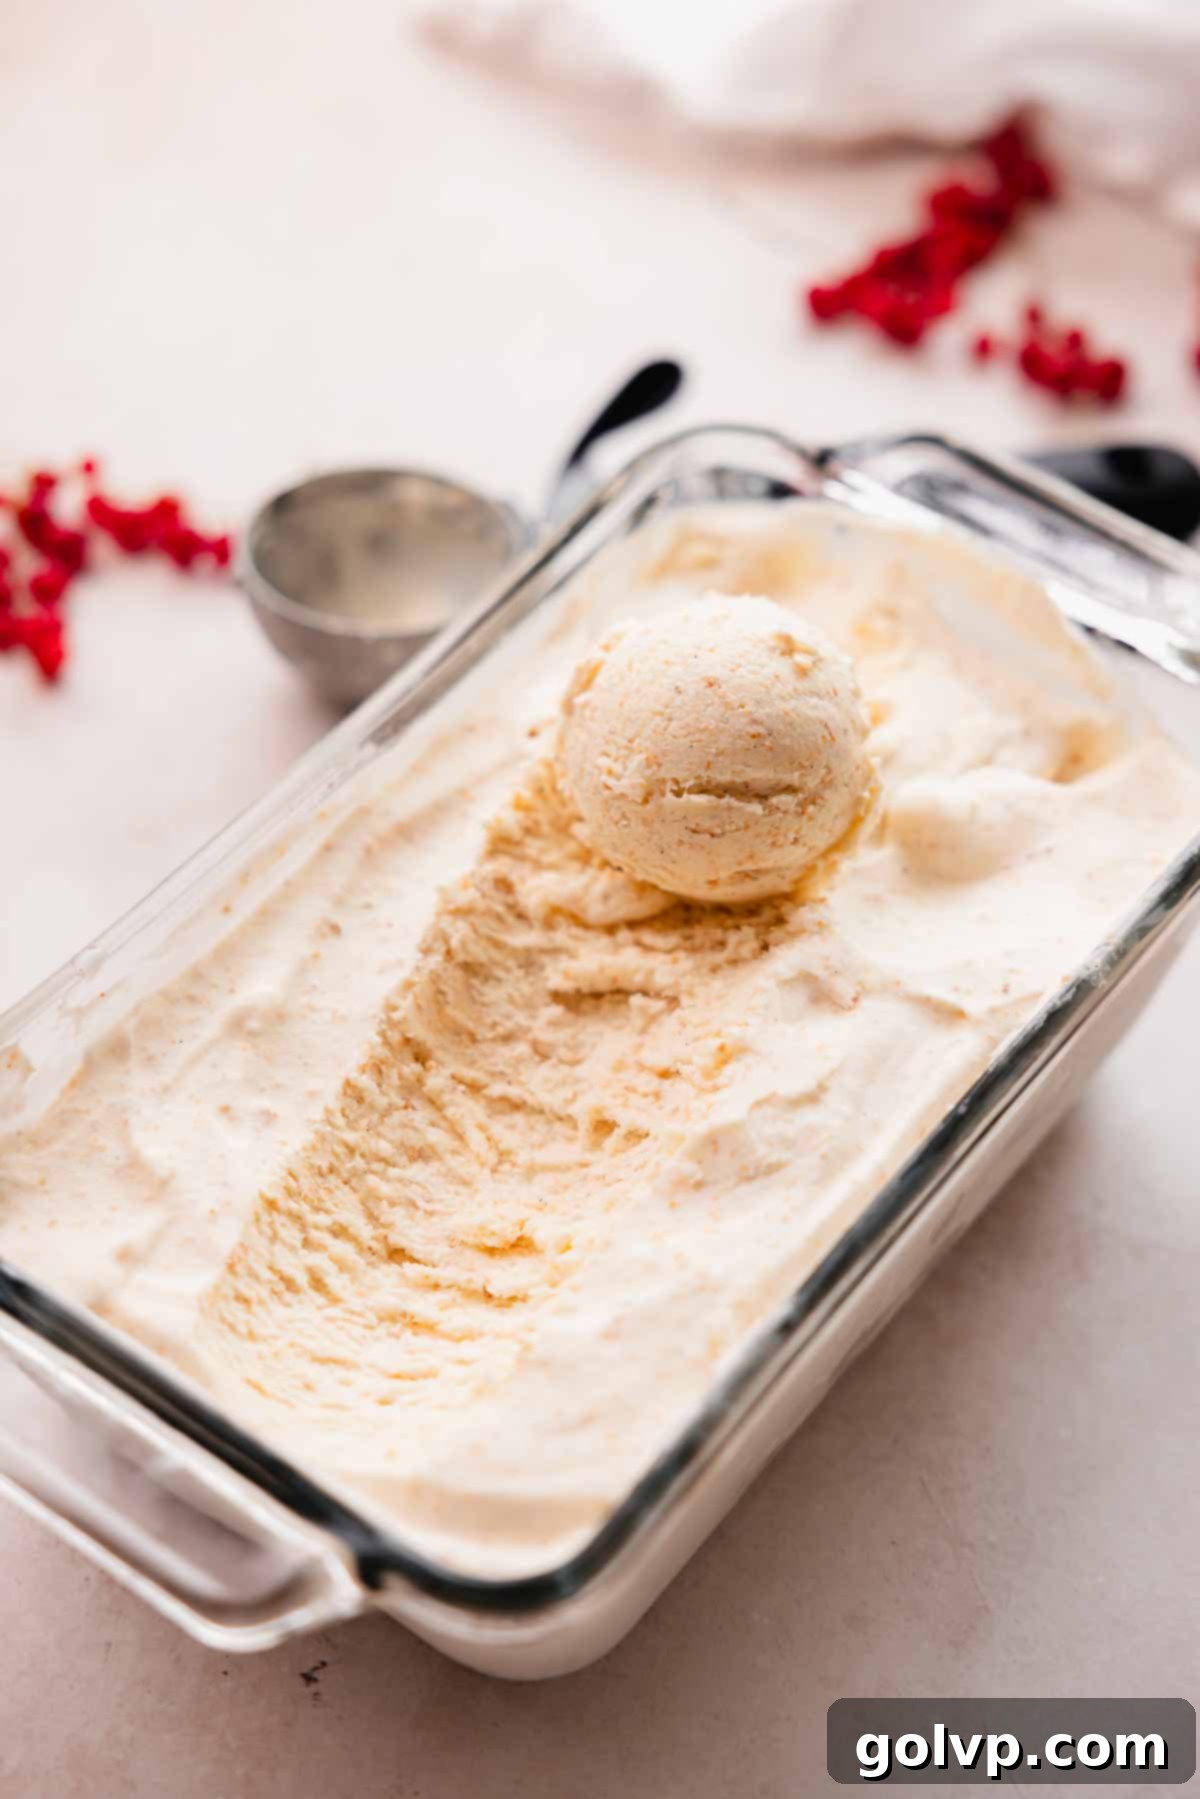
Step 6: Freeze to Perfection. Transfer the entire ice cream mixture into an airtight ice cream container or a standard loaf tin. Ensure the surface is as flat as possible. Cover the container tightly with a lid or plastic wrap, pressing the wrap directly onto the surface of the ice cream to minimize air exposure. Freeze for a minimum of 8 hours, or ideally, overnight, until the ice cream is completely solid. Once frozen, scoop generously and enjoy your homemade, no-churn brown butter ice cream!
✔️ Expert Brown Butter Ice Cream Tips for Success
- Don’t burn the butter: This is arguably the most crucial step for incredible brown butter flavor. You’re aiming for those beautiful, nutty milk solids to turn a deep golden brown, reminiscent of caramel. However, the line between perfectly browned and burnt is very thin. If the milk solids turn black or the butter develops a bitter aroma, it’s unfortunately burnt and should be discarded to avoid a harsh taste in your ice cream. Use a light-colored pan and stir constantly to prevent this.
- Whip the cream to stiff peaks (but don’t overwhip!): Achieving stiff peaks is essential for incorporating enough air into the mixture, which is what gives no-churn ice cream its light, airy, and creamy texture without the need for an ice cream maker. Overwhipping, however, can quickly turn your cream into a grainy, separated mess (closer to butter), which will negatively affect the final texture of your ice cream. Watch it closely; stop as soon as it holds its shape firmly.
- Ensure brown butter is slightly cooled but still liquid: When adding the brown butter to the whipped cream mixture, it should still be liquid but not piping hot. If it’s too hot, it can melt the whipped cream, deflating the air you worked so hard to incorporate. If it’s too cold, it might solidify and become difficult to mix evenly. A warm-to-touch liquid consistency is ideal.
- Chill your mixing bowl and whisk: For best results when whipping heavy cream, chill your mixing bowl and whisk attachment in the freezer for 10-15 minutes before you start. This helps the cream whip up faster and achieve stiffer peaks, contributing to a lighter, more stable ice cream base.
- Gentle folding technique: When combining the whipped cream with the condensed milk and brown butter, use a gentle folding motion with a spatula. This technique helps to preserve the airy volume of the whipped cream, which is vital for the light and creamy texture of your no-churn ice cream. Avoid vigorous stirring, which can deflate the mixture.
🥄 Make Ahead and Storage for Brown Butter Ice Cream
One of the many advantages of this delightful brown butter ice cream is how perfectly it lends itself to making ahead. It’s an ideal candidate for batch preparation, allowing you to have a gourmet dessert ready whenever a craving strikes, or to keep on hand for effortless entertaining.
To ensure optimal freshness and prevent freezer burn, store your homemade ice cream in an airtight container in the freezer. For an extra layer of protection against ice crystals forming on the surface, press a piece of plastic wrap directly onto the surface of the ice cream before sealing the container. Properly stored, this brown butter ice cream will maintain its quality and delicious flavor for up to one month.
It’s important to note that the longer you store this no-churn brown butter ice cream, the more likely you might observe some ice crystals forming on the very top surface. This is a natural occurrence due to moisture escaping and refreezing. However, rest assured, these ice crystals will typically only affect the superficial layer and won’t form inside the ice cream itself, preserving its smooth, creamy texture throughout.
❔ Why adding milk powder levels up the brown butter flavor?
The magic of brown butter lies in the Maillard reaction, a chemical process that occurs when amino acids and reducing sugars react in the presence of heat. During this reaction, the milk solids in the butter undergo a transformation, caramelizing and developing those distinctive nutty, toasted, and deeply aromatic flavors that we adore. These browned milk solids are what give brown butter its complex character and appealing visual specks.
To boost this already incredible flavor profile even further, adding dry milk powder is a clever and highly effective technique. Milk powder is essentially concentrated milk solids. By incorporating additional milk powder into your butter before browning, you significantly increase the amount of milk solids available for the Maillard reaction. This results in even more toasted, caramelized particles, yielding a brown butter with a much stronger, more pronounced, and intensely flavorful profile.
Since this ice cream flavor is primarily focused on the nuanced deliciousness of brown butter, the addition of milk powder truly helps to amplify and showcase that signature taste. It adds a depth that makes the brown butter flavor undeniable and utterly irresistible.
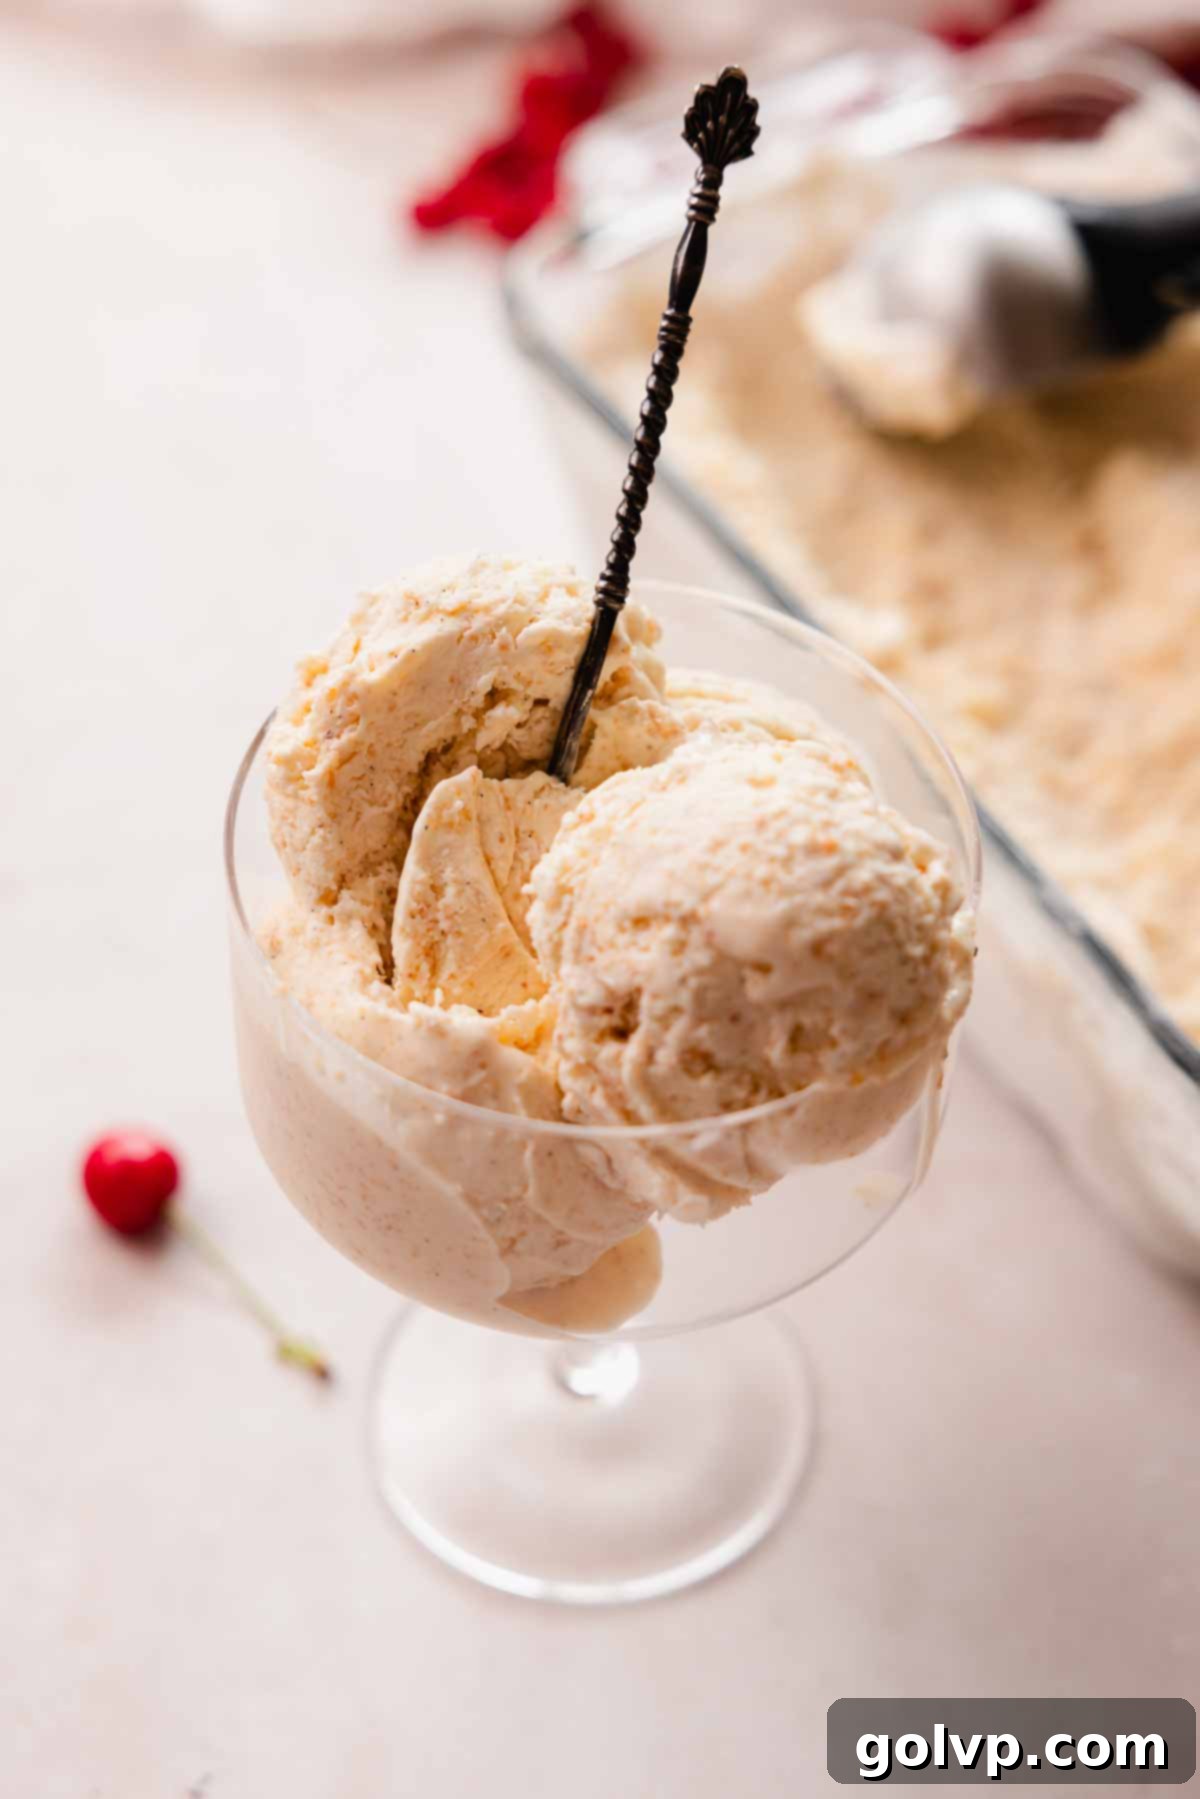
I have tried this brown butter ice cream recipe both with and without the addition of milk powder. While the ice cream without milk powder still delivers a pleasant brown butter taste, it is noticeably more subtle. Furthermore, with fewer toasted milk solids present, the texture of the ice cream without milk powder tends to be slightly smoother, lacking the delightful, almost crunchy bits that the extra browned solids provide. For the most robust flavor and satisfying texture, the milk powder is highly recommended.
🍒 Serving suggestions for your delectable Brown Butter Ice Cream
This brown butter ice cream is truly a universal and mild flavor, yet it’s incredibly robust and flavorful enough to be enjoyed entirely on its own. Much like a classic vanilla ice cream, its versatility knows no bounds, making it a perfect companion for virtually any dessert or a standalone star.
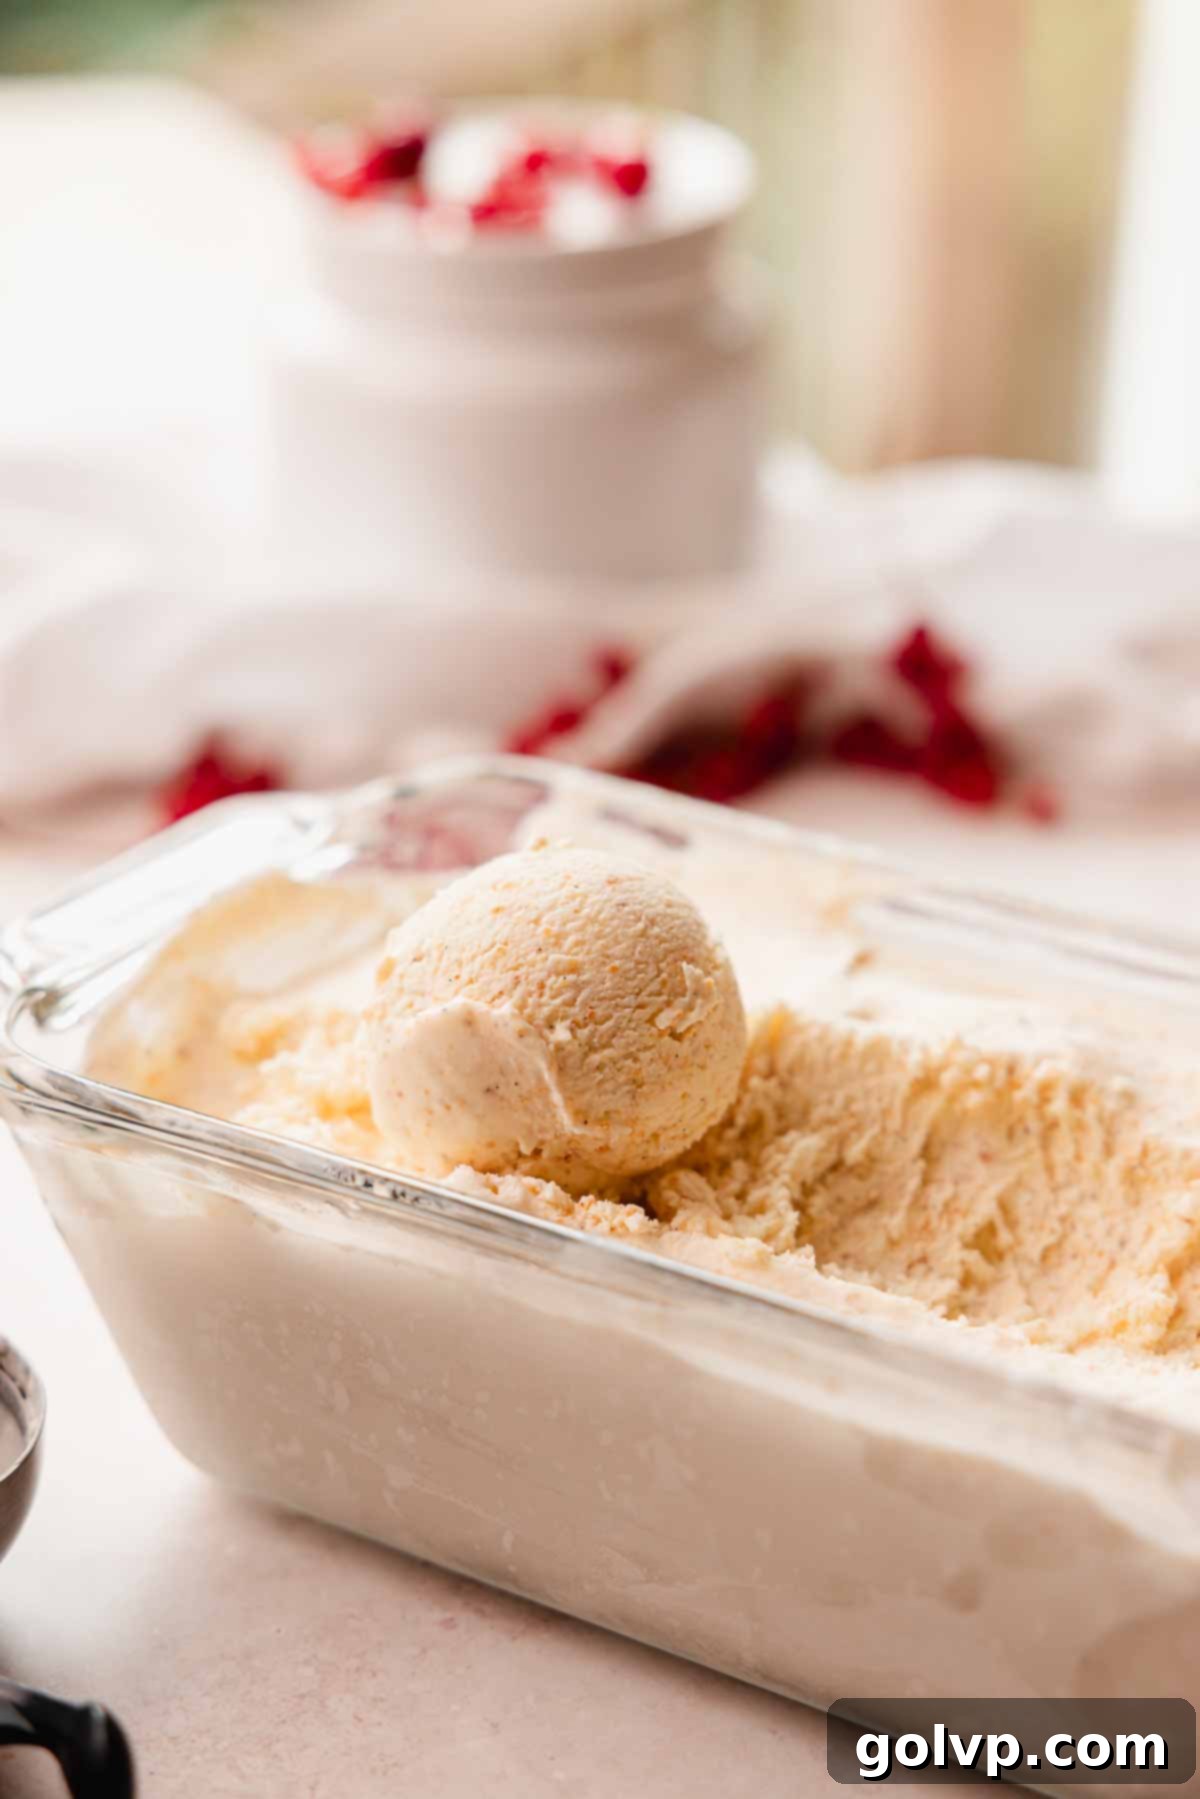
For those who wish to truly savor and appreciate the complex, toasty caramel notes of the brown butter, serve this ice cream simply in a crisp cone or a elegant bowl. Allow it to melt just slightly to fully release its aromatic symphony of flavors.
This ice cream excels as the perfect “à la mode” sidekick, effortlessly enhancing other desserts. Imagine a generous scoop melting gracefully over a warm, fudgy pecan pie brownie, or nestled beside a rustic strawberry crumble. It’s equally divine paired with delicate mini blueberry pies, where its creamy richness beautifully contrasts with the fruity fillings.
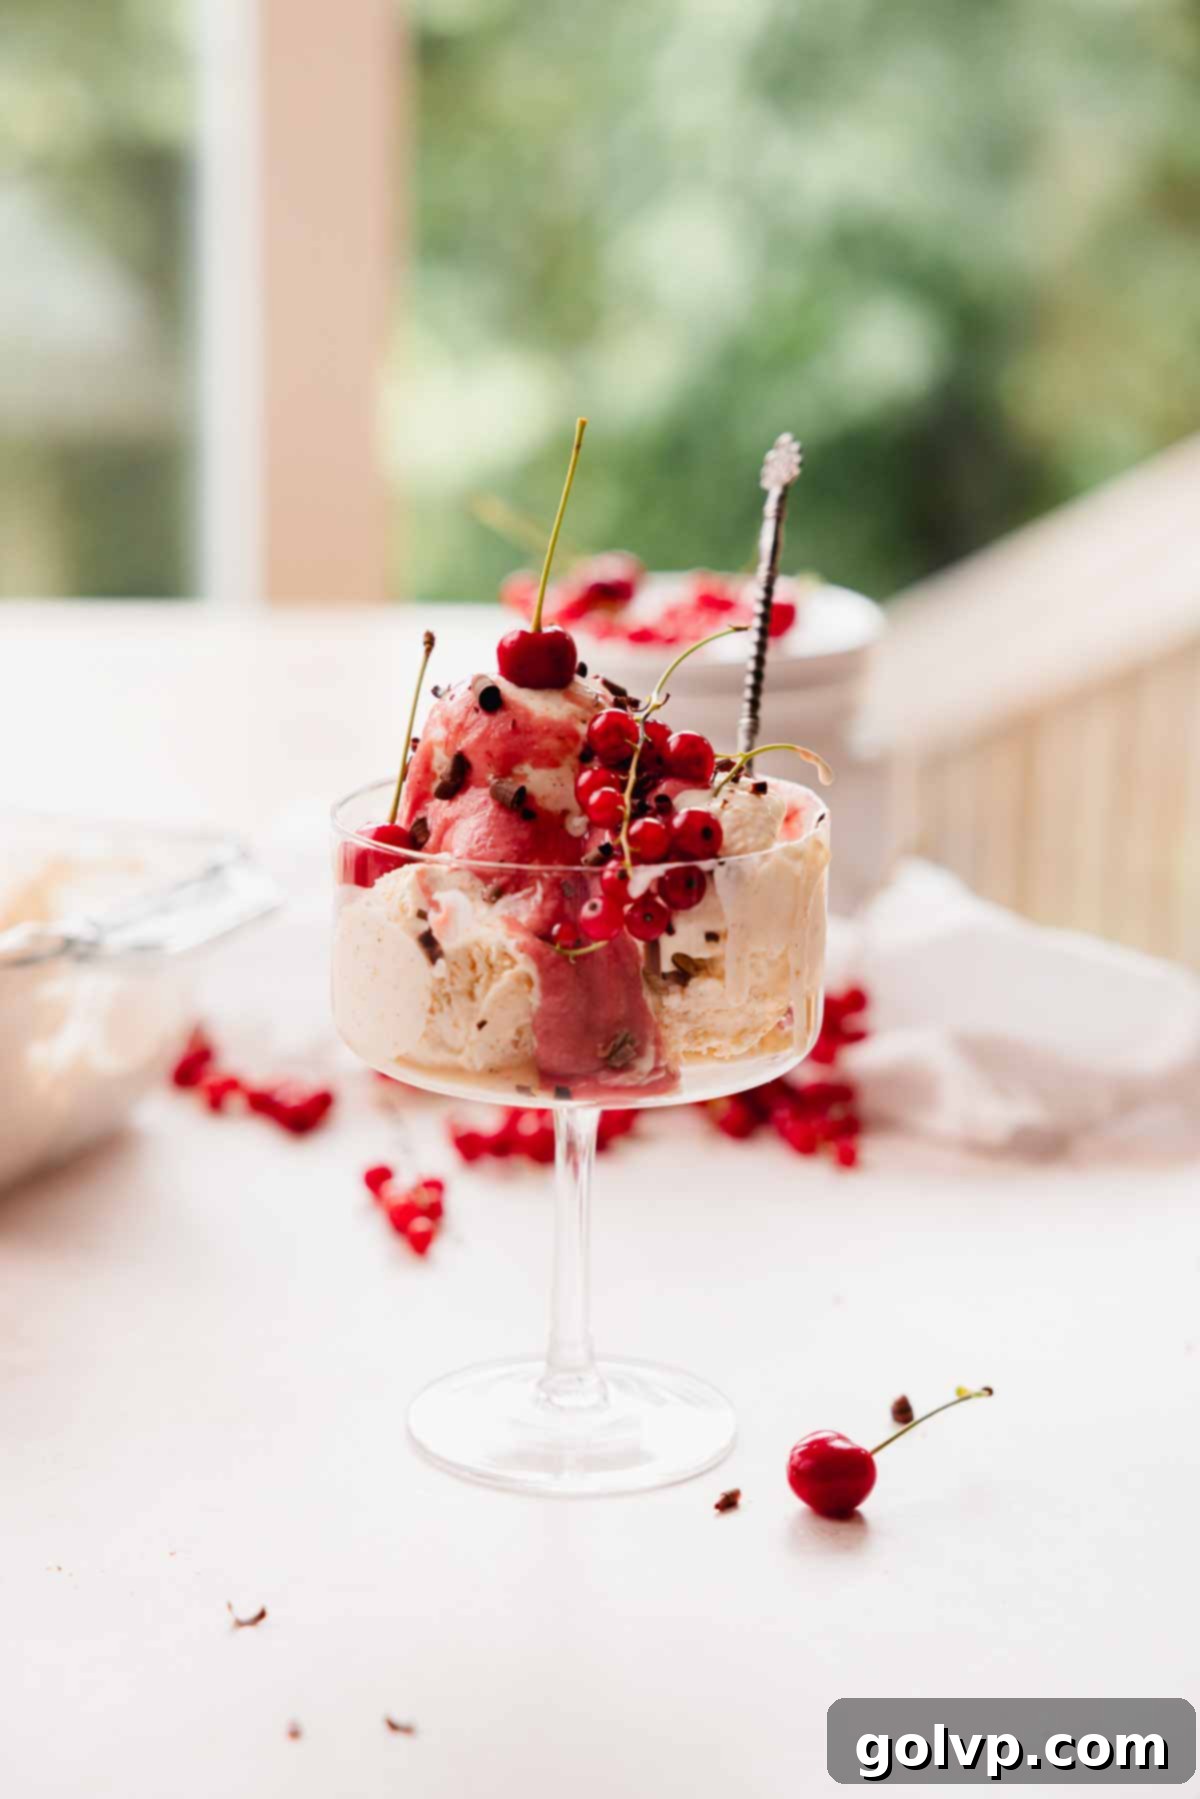
Lately, my absolute favorite way to serve it has been as a decadent sundae, generously topped with vibrant cherry curd. The bright, tart, and silken cherry curd creates a magnificent counterpoint to the deep richness, subtle sweetness, and profound caramel notes of the brown butter ice cream. This creates a truly unique and utterly delicious sundae experience that my friends and family consistently rave about!
To make it even more spectacular, especially in warmer months, crown your sundae with fresh, in-season cherries and a scattering of mixed berries. This combination results in a refreshing, creamy, and visually stunning summer dessert that is wonderfully easy to prepare in advance and keep ready for any gathering or personal indulgence. The play of textures and flavors—from the creamy ice cream and crunchy browned butter bits to the smooth curd and fresh fruit—is simply divine.
📖 Recipe FAQs for No-Churn Brown Butter Ice Cream
No, it is highly recommended that you do not substitute sweetened condensed milk with evaporated milk. These are two completely different products with distinct compositions. Evaporated milk is unsweetened and much thinner in consistency, essentially milk from which about 60% of the water has been removed. Sweetened condensed milk, on the other hand, is a concentrated milk product that contains a significant amount of added sugar. The sugar content in sweetened condensed milk is crucial for this no-churn ice cream recipe, as it acts as an antifreeze, preventing the formation of large, crunchy ice crystals and contributing to the smooth, creamy, and almost chewy texture. Using evaporated milk would result in an ice cream that is not sweet enough and has a very icy, rather than creamy, texture.
While this recipe will still yield delicious brown butter ice cream without the addition of milk powder, I strongly recommend including it. Milk powder significantly enhances the brown butter flavor by providing more milk solids to toast during the browning process, leading to a deeper, richer caramelized taste. It also contributes to a more substantial and slightly chewier texture. Milk powder is typically easy to find in most grocery stores and is a simple addition that truly elevates the overall experience. Without it, the brown butter flavor will be more subtle, and the ice cream’s texture will be notably smoother due to the absence of the extra browned milk solids.
Absolutely. I understand that whole vanilla beans can sometimes be a splurge. If you prefer not to use a whole vanilla bean, you can substitute it with 1 tablespoon of good quality vanilla bean paste. Vanilla bean paste is a fantastic alternative because it still contains those beautiful, distinctive vanilla specks, giving your ice cream a similar visual appeal and a rich, concentrated vanilla flavor that is far superior to regular vanilla extract.
It is generally recommended to use unsalted butter when making brown butter. Salted butter contains varying amounts of salt, which can make it difficult to control the final flavor profile of your ice cream. More importantly, when salted butter is browned, the salt can sometimes take on a metallic or slightly bitter taste, which would detract from the delicate, nutty, and caramelized notes you want in your brown butter ice cream. Using unsalted butter gives you complete control over the seasoning, allowing you to add salt precisely as needed (like the pinch of sea salt in this recipe) to enhance the flavors without any unwanted undertones.
The process of browning butter typically takes about 5 to 8 minutes, depending on the heat level and the type of pan you are using. It’s crucial to use medium-low heat and to stir constantly to ensure even browning and prevent burning. Keep a close eye on it, as the transition from perfectly golden brown to burnt can happen very quickly, especially in the final stages. The key indicators are the nutty aroma and the visual cues of the milk solids turning a deep golden-brown color.
🍦 More related recipes you’ll love
- Homemade Puff Pastry Ice Cream Sandwiches
- Lavender Ice Cream
- Carrot Cake Ice Cream
- Raspberry Cheesecake Ice Cream
Did you make this recipe? I would love for you to rate this recipe and hear what you think in the comments below! Share your creation on Instagram and tag @flouringkitchen. Follow me on Pinterestto save and for more recipe ideas.
📖 Recipe
Brown Butter Ice Cream
Mary
I always have a batch of this irresistible ice cream in my freezer, especially during the warmer months, ensuring I’m always ready for entertaining or a quiet moment of indulgence. It’s divine on its own, spectacular over a warm and fudgy cherry brownie, or enhanced with a swirl of vibrant cherry curd spooned generously on top.
Pin Recipe
Shop Ingredients
Equipment
-
electric mixer
Ingredients
- ¼ cup unsalted butter
- 3 tablespoons dry milk powder skim or whole (optional, but highly recommended)
- 1 whole vanilla bean or 1 tablespoon vanilla bean paste
- 2 cups heavy whipping cream
- 1 can sweetened condensed milk 300 mL, 14 oz
- ¼ teaspoon sea salt
Shop Ingredients on Jupiter
Instructions
-
In a small, light-colored saucepan, combine butter and dry milk powder. Melt it on medium-low heat, stirring continuously with a spoon or spatula to prevent the milk solids from burning at the bottom of the pan.¼ cup unsalted butter, 3 tablespoons dry milk powder
-
The butter will first foam up, then the foam will subside, and then it will start foaming up again as the milk solids begin to brown. At this crucial point, you’ll observe the white milk solids turning a rich, deep golden brown and emitting a distinctly nutty, caramelized aroma. Immediately remove the saucepan from the heat to prevent the brown butter from burning, as it transitions very quickly from perfect to bitter.
-
Carefully cut the vanilla bean in half lengthwise and use the back of a knife to scrape out the fragrant seeds. Add both the scraped vanilla seeds and the vanilla pod directly to the hot brown butter and stir to coat them thoroughly. Allow the mixture to cool slightly while you prepare the whipped cream, ensuring the butter remains in a liquid state.1 whole vanilla bean
-
In a well-chilled large bowl or the bowl of a stand mixer, whip the heavy cream using a whisk attachment until stiff peaks form. Be vigilant and take care not to overwhip, as this can lead to a grainy texture.2 cups heavy whipping cream
-
Gently fold the sweetened condensed milk and sea salt into the whipped cream until just combined.1 can sweetened condensed milk, ¼ teaspoon sea salt
-
Remove the vanilla pods from the brown butter mixture, carefully scraping off any clinging butter and vanilla seeds back into the pan before discarding the pods. Pour the still-liquid brown butter (including all the nutty, browned bits) into the whipped cream mixture. Using a spatula, gently fold all the ingredients together until they are well combined and no streaks of cream remain.
-
Transfer the completed ice cream mixture into an airtight ice cream container or a standard loaf tin. Cover the container tightly with a lid or plastic wrap, pressing the wrap directly onto the surface of the ice cream to minimize air exposure. Freeze for a minimum of 8 hours, or preferably overnight, until the ice cream is completely solid and firm. Once frozen, scoop generously and enjoy your perfectly creamy, homemade brown butter ice cream!
Notes
This brown butter ice cream is perfect to prepare in advance and store in your freezer, ensuring you always have a delightful treat on hand, whether for an impromptu craving or for entertaining guests. Store it tightly wrapped or in an airtight container in the freezer for up to one month. To best prevent ice crystals from forming on the surface, press a layer of plastic wrap directly onto the surface of the ice cream before sealing the container.
Tips for success:
- Don’t burn the butter: Aim for a deep golden-brown color for the milk solid specks in your brown butter. Over-browning will lead to a burnt, bitter flavor. Use a light-colored pan and stir frequently for best results.
- Whip the cream to stiff peaks: This step is critical for incorporating maximum air, which results in a light and incredibly creamy ice cream texture. However, be cautious not to overwhip the cream, as this can make it grainy or separated.
- Cool, but liquid, brown butter: Ensure your brown butter has cooled slightly before folding it into the whipped cream. It should still be liquid but not hot enough to melt the whipped cream, preserving its airy volume.
