Irresistible No-Knead Red Velvet Donuts with Luscious Custard Filling and Cream Cheese Glaze
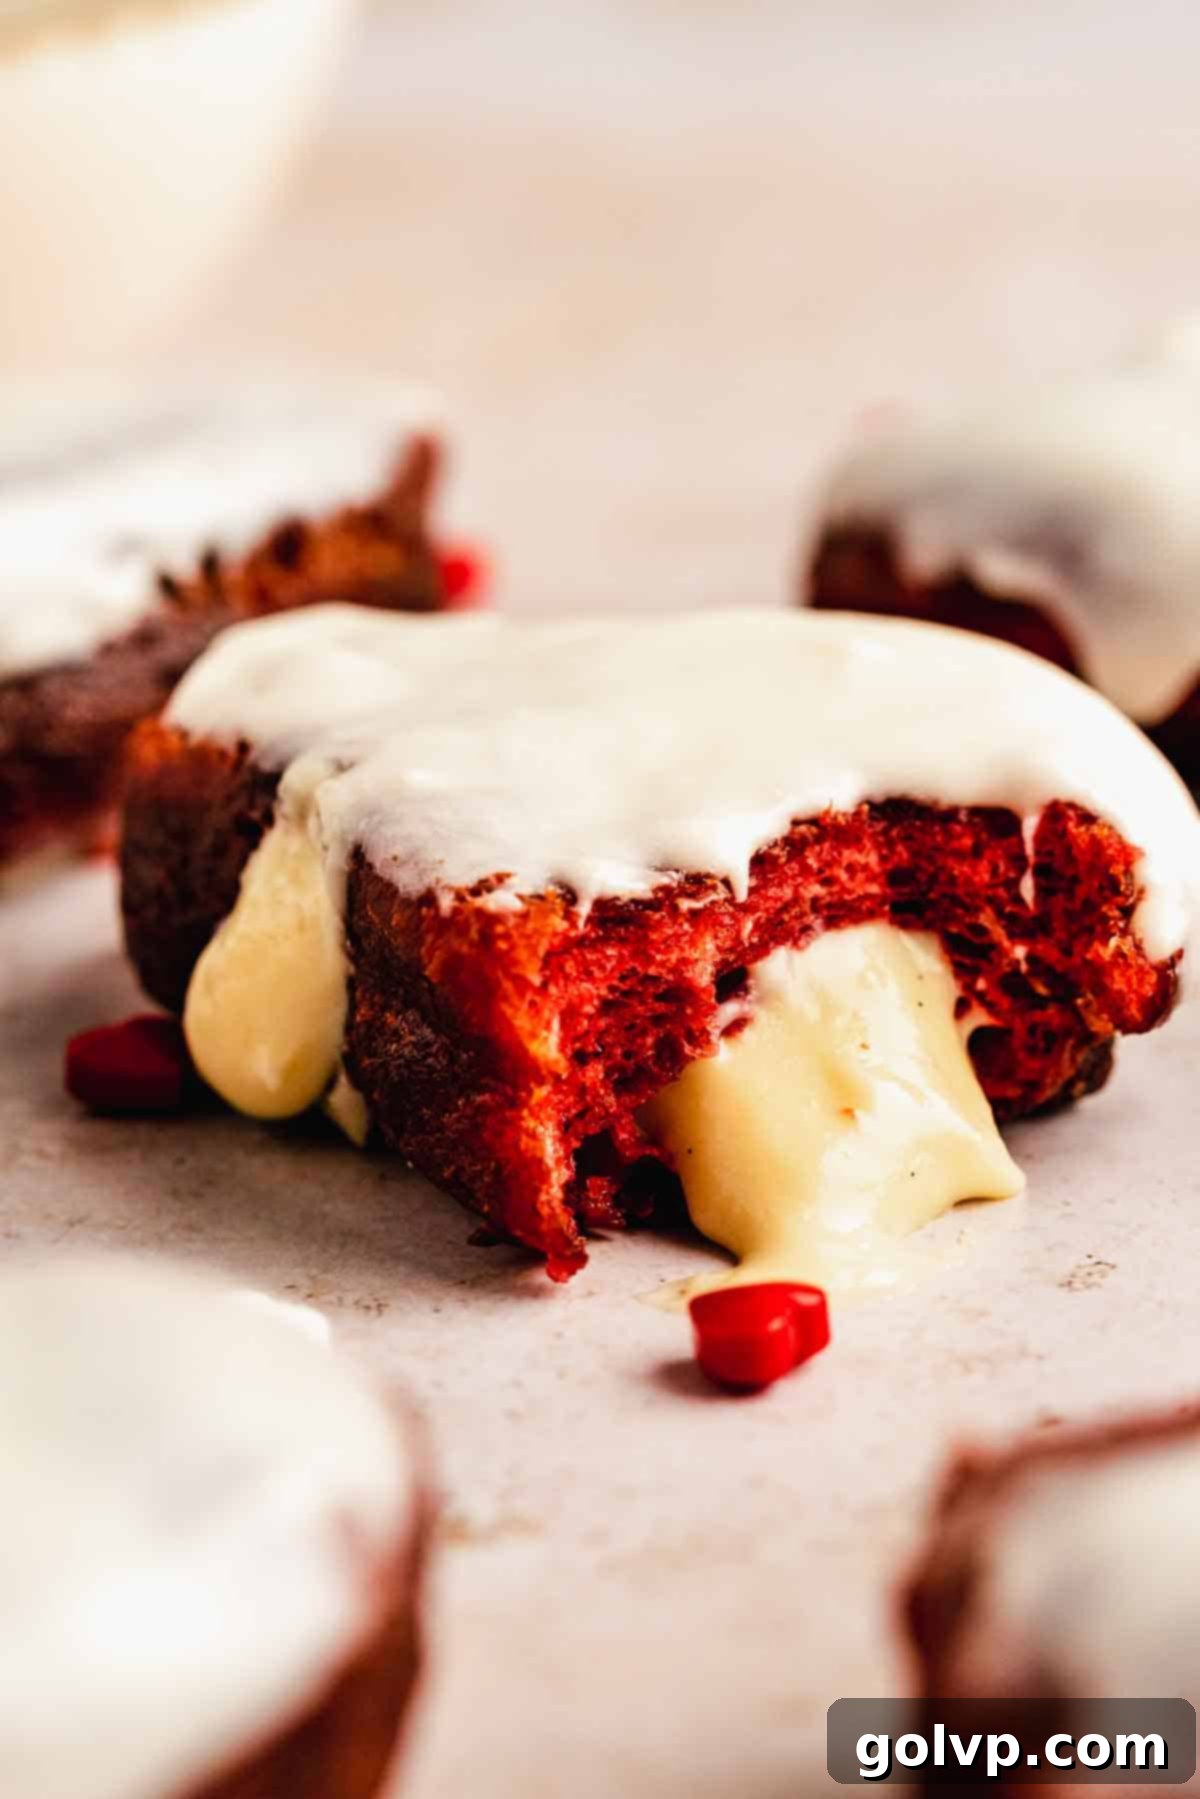
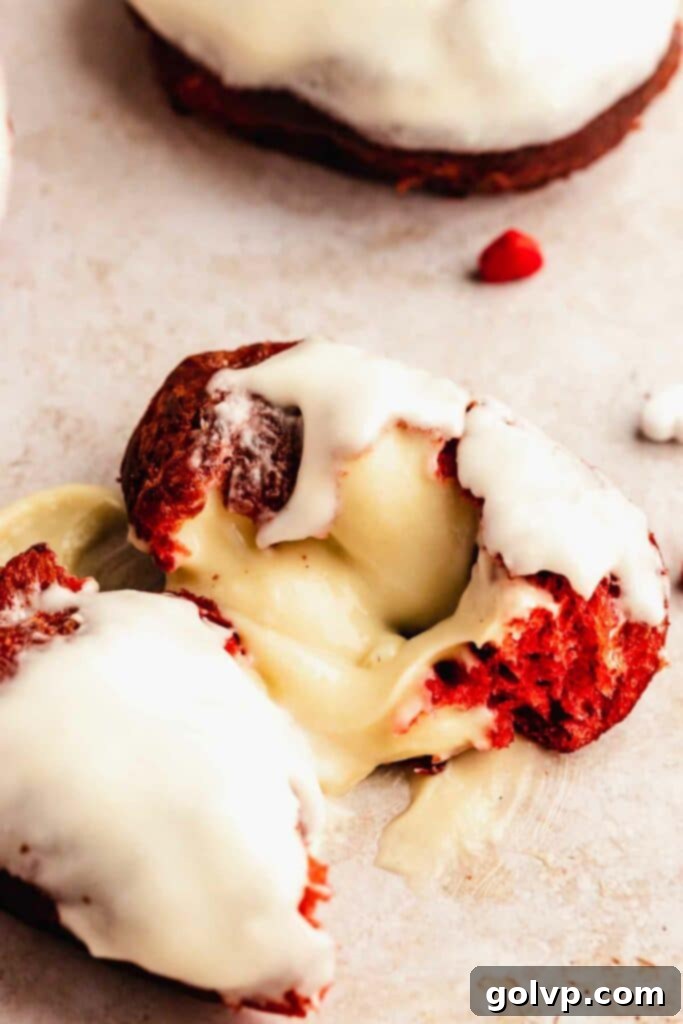
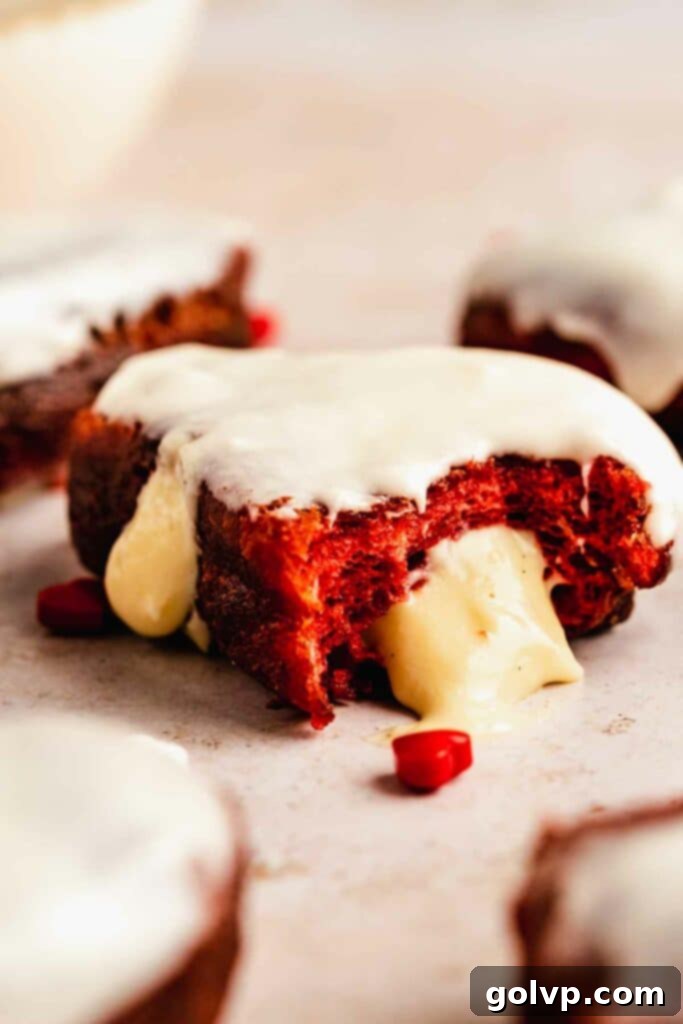
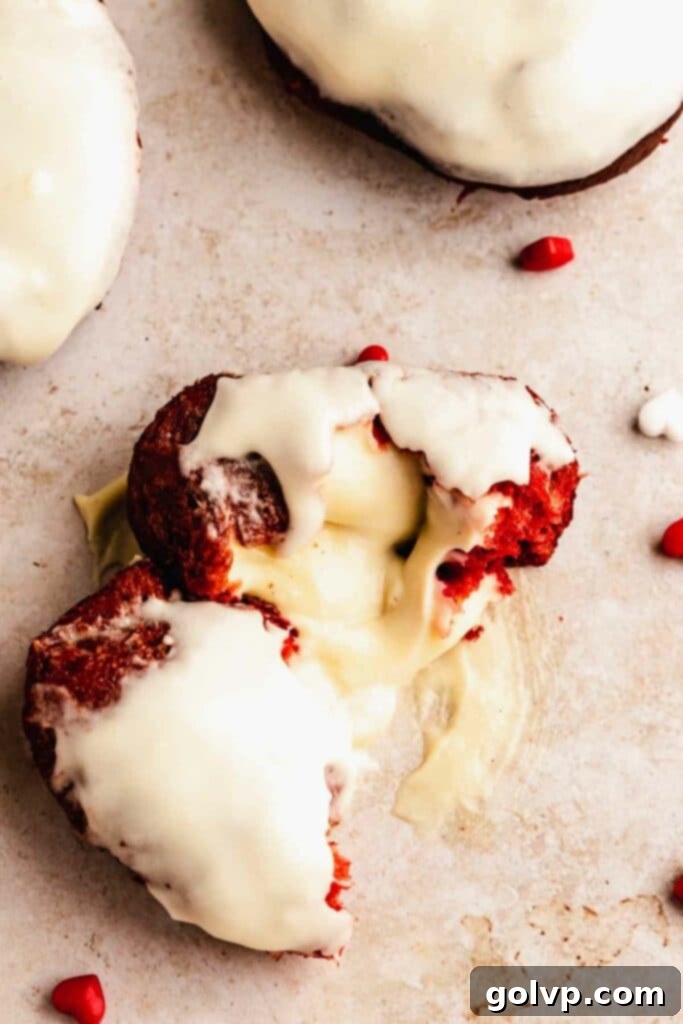
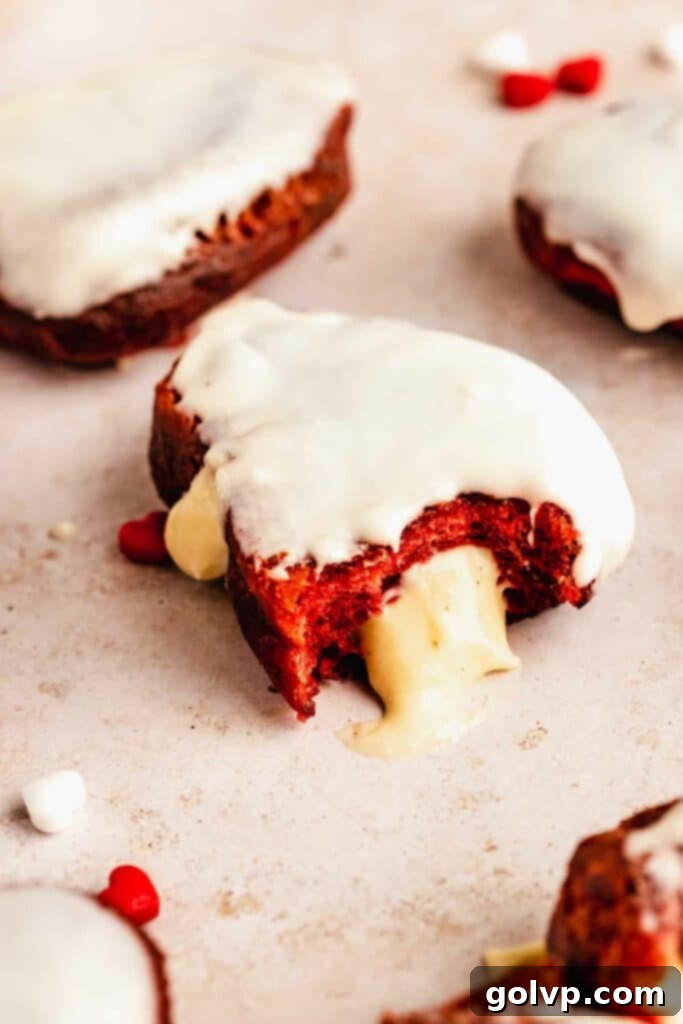
Prepare to fall in love with these incredible no-knead red velvet donuts, a truly delectable treat that brings the classic cake flavor to a pillowy, fried delight. Each donut boasts a vibrant red hue, a subtle hint of cocoa, and a unique tang that is perfectly balanced by an incredibly soft and fluffy interior and a delightful crisp exterior. The magic of this recipe lies in its simplicity – a fuss-free, no-knead dough that requires minimal effort but delivers maximum flavor and texture. To elevate these donuts to pure indulgence, they are generously filled with a rich, smooth vanilla custard and crowned with a luscious, tangy cream cheese glaze. Whether you’re crafting them into charming heart shapes for Valentine’s Day or simply seeking a show-stopping homemade dessert, these red velvet donuts are guaranteed to impress and satisfy. Forget complicated baking, because this recipe makes achieving gourmet donuts at home surprisingly easy.
Purchasing the items in this post supports this blog, at no additional cost to you. As an Affiliate Product marketer and Amazon Associate, I earn from qualifying purchases.
Why You’ll Adore These Red Velvet Donuts:
Get ready to discover your new favorite donut recipe! These red velvet delights are more than just a sweet treat; they’re an experience. Here’s why you’ll absolutely love making (and devouring) them:
- Effortless No-Knead Dough: Say goodbye to tired arms and complicated machinery! This recipe features a revolutionary no-knead dough that simplifies the entire process. Just a quick stir of the ingredients, a little patience for rising, and you’re well on your way to perfectly soft and fluffy homemade donuts. No electric mixer or extensive kneading is required, making it perfect for bakers of all skill levels.
- Authentic Red Velvet Flavor: These aren’t just red-colored donuts; they encapsulate the true essence of red velvet cake. Expect a vibrant, eye-catching red hue, a delicate cocoa flavor that’s subtly chocolatey, and that signature tangy note that sets red velvet apart. Beyond the taste, the donuts themselves are incredibly soft and fluffy, melting in your mouth with every bite.
- Signature Cream Cheese Glaze: What’s red velvet without cream cheese? This smooth, tangy, and sweet cream cheese glaze is the perfect complement, enhancing the subtle chocolate and a hint of sour cream in the donut dough. It ties all the classic red velvet flavors together beautifully, creating a harmonious and utterly irresistible combination.
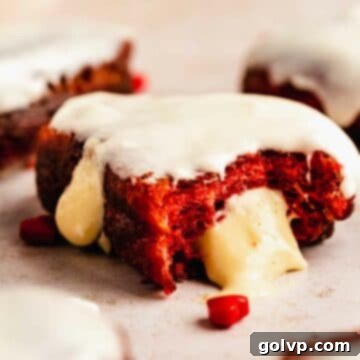
- Creamy Custard Filling: Prepare for a burst of lusciousness! Each donut is generously filled with a smooth, rich, and creamy custard that oozes out with every bite. It’s the ultimate indulgence and takes these homemade donuts from delicious to extraordinary. If custard isn’t your preference, feel free to leave them unfilled for a simpler treat, or opt for a light and airy homemade whipped cream filling for a different kind of deliciousness.
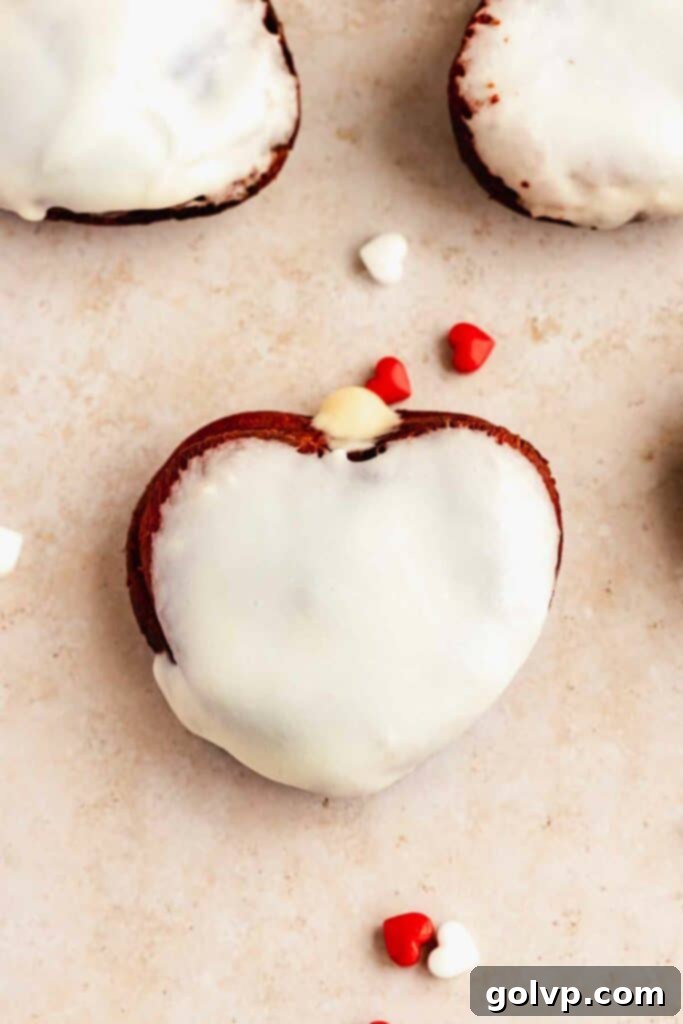
- Perfect for Special Occasions: While delightful any day, these donuts truly shine as a festive offering. Cut them into charming heart shapes, and they transform into the ideal Valentine’s Day treat or a thoughtful, heartfelt gift for someone special.
[feast_advanced_jump_to]
Crafting the Softest Fried Donut Dough Imaginable
You might be surprised at how easy it is to create such an incredibly soft and airy fried donut dough. The “no-knead” aspect is truly a game-changer, removing the intimidation often associated with yeast recipes. The secret lies in a simple, well-hydrated dough that develops gluten structure over time, rather than through vigorous kneading.
The first crucial step is to activate your yeast. Begin by dissolving the active dry yeast in a small amount of warm water, along with a pinch of sugar. This mixture should sit for 5-10 minutes. What you’re looking for is a frothy, foamy layer on top, which indicates that your yeast is alive and active. If you don’t see any foam, your yeast may be expired or inactive, and it’s best to start with a fresh packet to ensure your donuts rise beautifully.
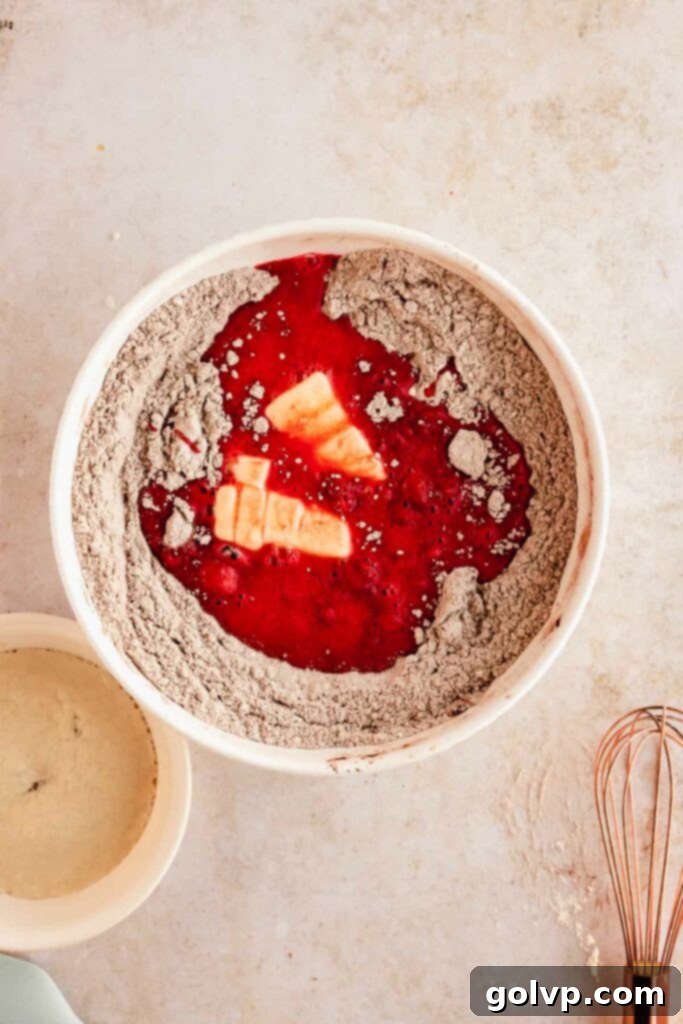
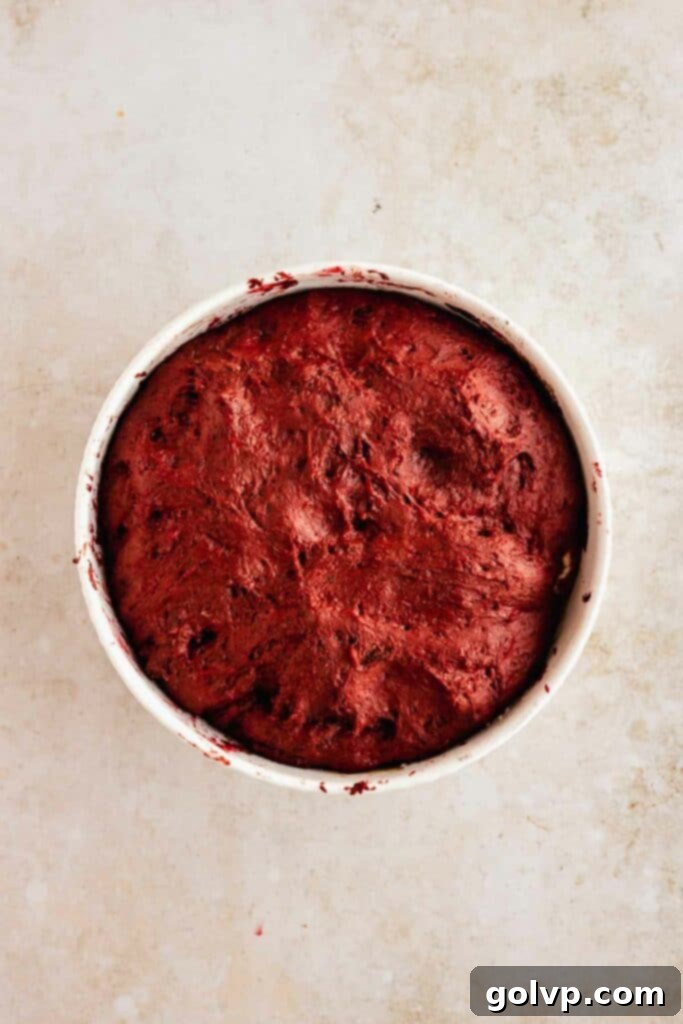
Once your yeast is bubbling, combine the dry ingredients – flour, cocoa powder, sugar, and salt – in a large mixing bowl. Create a well in the center of these dry ingredients. Into this well, pour the activated yeast mixture along with the remaining wet ingredients: softened butter, eggs, warm milk, red food coloring, vanilla extract, and sour cream. Stir everything together until a cohesive, yet wet and sticky dough forms. Resist the urge to add more flour at this stage, as the high hydration is key to the donut’s ultimate tenderness. Cover the bowl with a clean dish towel or plastic wrap and let it rise in a warm spot until it has doubled in size, typically around 45 minutes to an hour, depending on your room temperature.
After the first rise, gently punch down the dough to release the air. Turn it out onto a generously floured surface. Allowing the dough to rest for a few minutes before rolling makes it much easier to handle and prevents it from snapping back. Roll the dough to a thickness of approximately ¾ inch – this ensures plump, satisfying donuts. Use your favorite large cookie cutters, such as 3-4 inch circles or festive heart shapes, to cut out your donuts. Gather the scraps, gently re-roll them, and cut out more shapes until you’ve used most of the dough. Arrange the cut donuts on parchment-lined baking sheets, leaving ample space between each for a second rise. Let them rise again in a warm place until noticeably puffy and doubled in size, which should take another 30-45 minutes. This second rise is vital for achieving that signature fluffy texture.
Mastering the Art of Frying Your Donuts
Frying homemade donuts might seem daunting, but with the right tools and a little confidence, it’s actually quite straightforward and incredibly rewarding. The key to perfectly fried donuts – golden brown on the outside and thoroughly cooked and fluffy on the inside – lies in careful temperature control and proper technique.
You’ll need a large, heavy-bottomed pot, preferably shallow, to ensure even heat distribution and enough space for the donuts to float without overcrowding. Fill it with a generous amount of oil, leaving at least 4 inches of space from the top to prevent boil-overs. For safely handling the hot donuts, a wire spider is ideal, as it allows excess oil to drain quickly. Tongs can also be useful for gently placing the dough into the hot oil.
A good quality thermometer that clips to the side of your pot is your best friend here. A candy thermometer, designed for high temperatures, works perfectly. This tool is indispensable for monitoring the oil temperature accurately, which is the single most critical factor in successful frying. Without a thermometer, you risk either burning the exterior before the inside cooks or ending up with greasy, undercooked donuts. While it’s possible to check oil temperature without a thermometer using methods like testing with a small piece of dough or a wooden spoon, a thermometer offers precision and consistency that ensures the best results every time.
Achieving the Perfect Frying Temperature
The ideal temperature for frying these red velvet donuts is precisely 370°F (190°C). Maintaining this temperature is paramount. At this heat, the donuts will cook through evenly, developing a beautiful golden crust without absorbing too much oil, resulting in a light and tender interior. Deviations from this optimal temperature can significantly impact the outcome:
- Oil too hot = burnt donuts. The exterior will brown too quickly, leaving the inside raw or doughy.
- Oil too cold = very oily donuts. The donuts will absorb excessive oil, making them heavy, greasy, and unpleasant.
Always aim for that sweet spot of 370°F (190°C) for consistently perfect, fluffy fried red velvet donuts.
Ensuring Accuracy: How to Calibrate Your Frying Thermometer
Before you begin frying, it’s essential to ensure your thermometer is accurately calibrated. Even a slight inaccuracy can lead to significantly different frying results. A properly calibrated thermometer is the difference between perfectly golden, fluffy donuts and either burnt or greasy ones.
You can easily calibrate your thermometer using the hot water method. This involves submerging the thermometer in boiling water and checking if it reads 212°F (100°C) at sea level. However, it’s important to remember that the boiling point of water varies with altitude. You can find out what your local boiling point is here.
Taking a few minutes to calibrate your thermometer is a small step that yields big returns in terms of consistent and delicious frying results, ensuring your red velvet donuts are cooked to perfection every time.
Maintaining Optimal Frying Oil Temperature
Controlling the oil temperature throughout the frying process is vital for consistent results. Even with a thermometer, the temperature will fluctuate as you add cold dough or remove cooked donuts. Here’s how to effectively manage it:
- To decrease the temperature quickly: If your oil gets too hot, carefully add a small amount of fresh, cold oil. Alternatively, adding a few more pieces of dough (if you have scraps) can also help bring the temperature down as the oil transfers heat to the cooler dough.
- To increase the temperature: If the oil cools down too much, simply turn up the heat on your stove. However, do this gradually to avoid overheating.
The goal is to continuously adjust and keep the oil hovering around that ideal 370°F (190°C) mark. By paying close attention to your thermometer and making these small adjustments, you’ll ensure that each batch of your red velvet donuts fries perfectly, resulting in that coveted crisp exterior and soft, cooked interior.
Essential Ingredients for Perfect Red Velvet Donuts
While full steps and precise ingredient quantities are detailed in the recipe card below, take a moment to read through these tips for each key ingredient. Understanding their role will ensure your red velvet donuts turn out perfectly every time!
- Active Dry Yeast: This is the leavening agent that gives your donuts their wonderful rise and fluffy texture. Active dry yeast needs to be proofed (activated in warm liquid) first to ensure it’s alive and ready to work. While I prefer active dry, you can substitute with the same amount of instant dry yeast; instant yeast doesn’t strictly require proofing, but doing so can still give you peace of mind that it’s active.
- Red Food Coloring: For that iconic, vibrant red velvet color, gel food coloring is highly recommended. It provides a much more concentrated pigment than liquid food coloring, meaning you’ll achieve a deep red without introducing too much additional liquid that could alter the dough’s consistency. If you prefer a natural alternative, a high-quality natural powdered food coloring can be used for a similar effect. A pro tip: dissolving the food coloring in the warm milk before adding it to the dough helps distribute the color more evenly and intensely.
- Cocoa Powder: This provides the subtle yet essential chocolate flavor that defines red velvet. Dutch-processed cocoa powder is generally preferred for its richer, darker color and milder, less acidic chocolate flavor, which pairs beautifully with the tang of the sour cream and cream cheese. Natural cocoa powder can also be used for a slightly brighter, more pronounced chocolate note.
- Sour Cream: A crucial ingredient for tender, moist, and tangy donuts. Full-fat sour cream contributes significant moisture and a delightful tang that is characteristic of red velvet. This acidity also reacts with the cocoa powder (especially if using natural, non-Dutch processed), enhancing the red color. I do not recommend substituting with Greek yogurt, as its texture and acidity differ and could negatively impact the donut’s consistency.
- Heavy Whipping Cream: Essential for the luscious custard filling. For the best body and stability in your whipped cream, choose a heavy whipping cream with at least 32% milk fat (often labeled as 36% or higher). This ensures it whips up to firm peaks and holds its structure when folded into the chilled custard.
- All-Purpose Flour: The structural backbone of your donuts. Accuracy here is key! For the most consistent and accurate results, I strongly recommend weighing your flour using a kitchen scale. If you don’t have a scale, measure properly by first stirring the flour in its bag or container to aerate it, then gently spooning it into a dry measuring cup until it overflows. Level off the excess with the flat edge of a knife, without packing the flour into the cup. This method prevents over-measuring, which can lead to dense, dry donuts.
- Vanilla Bean: This imparts an exquisite, authentic vanilla flavor to your custard. Using a whole vanilla bean, split and scraped, allows the tiny black seeds to infuse the milk deeply, creating an unparalleled aromatic richness. If a whole vanilla bean isn’t available, you can substitute it with either 1 teaspoon of good quality vanilla bean paste (which will also give you those lovely flecks of vanilla seeds) or 1 teaspoon of pure vanilla extract for a more accessible option.
Crafting the Silky Smooth Custard Filling: A Step-by-Step Guide
A truly exceptional red velvet donut deserves an equally exceptional filling. This vanilla bean custard is the perfect companion, offering a rich, creamy, and fragrant contrast to the subtly chocolatey donut. Follow these steps for a flawless custard:
- Steep the Vanilla: Start by enhancing the flavor of your milk. Carefully slice a whole vanilla bean lengthwise and scrape out the fragrant seeds. Add both the seeds and the empty vanilla pod to a medium saucepan. Pour in the milk and a pinch of salt, then stir gently. Bring this mixture to a gentle simmer over medium-low heat. As soon as you see small bubbles forming around the edges, remove the saucepan from the heat, cover it, and let the vanilla steep for at least 15-20 minutes. This allows the vanilla to infuse deeply into the milk.
- Prepare the Yolks: While the vanilla steeps, in a separate medium bowl, whisk together the egg yolks and granulated sugar until just combined and pale yellow. The mixture should be smooth. Next, sift in the all-purpose flour and cornstarch, whisking vigorously until no lumps remain and you have a smooth, thick paste.
- Temper the Yolks: This is a crucial step to prevent the egg yolks from scrambling. Gradually pour about half of the warm (but not boiling) vanilla-infused milk into the egg yolk mixture, whisking constantly and thoroughly. This slowly raises the temperature of the yolks without cooking them.
- Cook the Custard: Pour the tempered egg yolk mixture back into the saucepan with the remaining warm milk. Place the saucepan back over medium-low heat. Now, whisk continuously and constantly, making sure to scrape the bottom and sides of the pot to prevent sticking and burning. The custard will gradually thicken. As soon as it reaches a thick, pudding-like consistency that coats the back of a spoon, immediately remove it from the heat.
- Strain & Chill: For an ultra-smooth, velvety custard, push the hot mixture through a fine-mesh wire strainer into a clean bowl or container. This will catch any small lumps or pieces of cooked egg. To prevent a skin from forming on the surface as it cools, press a piece of plastic wrap or parchment paper directly onto the surface of the hot custard. Refrigerate the custard until it is thoroughly chilled, ideally for at least 4 hours, or overnight.
- Fold in Whipped Cream: Just before you’re ready to fill your donuts, whip the cold heavy whipping cream in a separate bowl until it forms medium-stiff peaks. Gently fold the whipped cream into the thoroughly chilled custard using a whisk until the mixture is smooth, airy, and evenly combined. If your chilled custard is too thick to easily fold in the cream, you can loosen it by whisking in a tablespoon of milk at a time until it reaches the desired, pipeable consistency.
Effortless No-Knead Red Velvet Donut Dough: Step-by-Step
Creating this gorgeous red velvet dough is surprisingly simple, proving that you don’t need to be a seasoned baker to make incredible fried treats. Here’s how to master this easy no-knead recipe:
- Activate the Yeast: In a small bowl, combine the warm water, a teaspoon of sugar, and the active dry yeast. Stir gently until the yeast and sugar dissolve. Let this mixture sit undisturbed for 5-10 minutes. During this time, a foamy layer should form on the surface, which confirms your yeast is active and viable. If you don’t see this foam, discard the mixture and start again with fresh yeast.
- Combine Dry Ingredients: In a large mixing bowl, sift together the all-purpose flour and cocoa powder. Sifting prevents lumps and helps to aerate the flour. Add the remaining granulated sugar and sea salt, then stir these dry ingredients together thoroughly to ensure they are well combined.
- Integrate Wet Ingredients: Create a well in the center of your dry ingredients. Into this well, add the softened unsalted butter, room temperature large eggs, warm milk, red gel food coloring (pre-dissolved in the milk for better distribution), pure vanilla extract, and room temperature sour cream. Finally, pour in the activated yeast mixture.
- Mix the Dough: Using a sturdy spoon or spatula, stir all the ingredients together until a wet, sticky dough forms. It will not be a stiff dough; its stickiness is intentional and contributes to the final soft texture. Avoid overmixing, as you just want everything to be incorporated. Cover the bowl tightly with a clean kitchen towel or plastic wrap. Place the bowl in a warm, draft-free spot and let the dough rise until it has visibly doubled in size, which typically takes about 45 minutes to 1 hour (refer to the notes section for tips on creating a warm environment for rising).
- Prepare for Shaping: Once the dough has risen beautifully, gently punch it down to release the trapped gases. Turn the dough out onto a generously floured work surface. Let it rest for about 5 minutes; this brief rest allows the gluten to relax, making the dough much easier to roll out without it springing back.
- Roll and Cut: Using a floured rolling pin, roll the dough evenly to a thickness of approximately ¾ inch (about 2 cm). This thickness is crucial for plump, satisfying donuts. Use your chosen large cookie cutters (3-4 inch circles or festive heart shapes are perfect) to cut out individual donut shapes. Gently gather the dough scraps, lightly re-roll them, and cut out any remaining shapes. Place the cut donut shapes onto baking sheets lined with parchment paper, ensuring you leave a few inches of space between each donut, as they will rise again. Let these cut donuts rise in a warm place until they have doubled in size and appear puffy, usually another 30-45 minutes. This second rise is what gives them their airy, light texture after frying.
Frying Your Red Velvet Donuts: A Detailed Guide
Achieving that perfectly golden, crispy exterior with a soft, fluffy interior requires precision in frying. Follow these steps carefully to ensure delicious results and safe cooking:
- Prepare the Frying Station: Pour the vegetable oil (such as canola or peanut oil, which have high smoke points) into a large, dry, heavy-bottomed pot. Ensure there is at least 4 inches of space from the top of the oil to the rim of the pot to prevent oil from bubbling over. Securely clip a reliable candy or deep-fry thermometer to the side of the pot. Heat the oil gradually over medium heat until it consistently registers 370°F (190°C). While the oil heats, prepare a landing zone for your fried donuts: line a large tray with at least 4 layers of paper towels to absorb excess oil, and place a separate wire cooling rack next to it for the donuts to cool completely.
- Conduct a Practice Fry (and Season the Oil): Once the oil reaches the target temperature, it’s beneficial to perform a test. Drop a few small pieces of leftover dough scraps into the hot oil. Fry these on each side for 2-3 minutes, or until they achieve a beautiful golden brown color. Carefully remove them from the oil using tongs or a wire spider, gently shaking off any excess oil, and transfer them to the paper towel-lined tray. Once cool enough to handle, break one open to check if it’s cooked through. This step not only helps you get a feel for the frying time but also slightly “seasons” the oil, which can improve the flavor of your subsequent donuts.
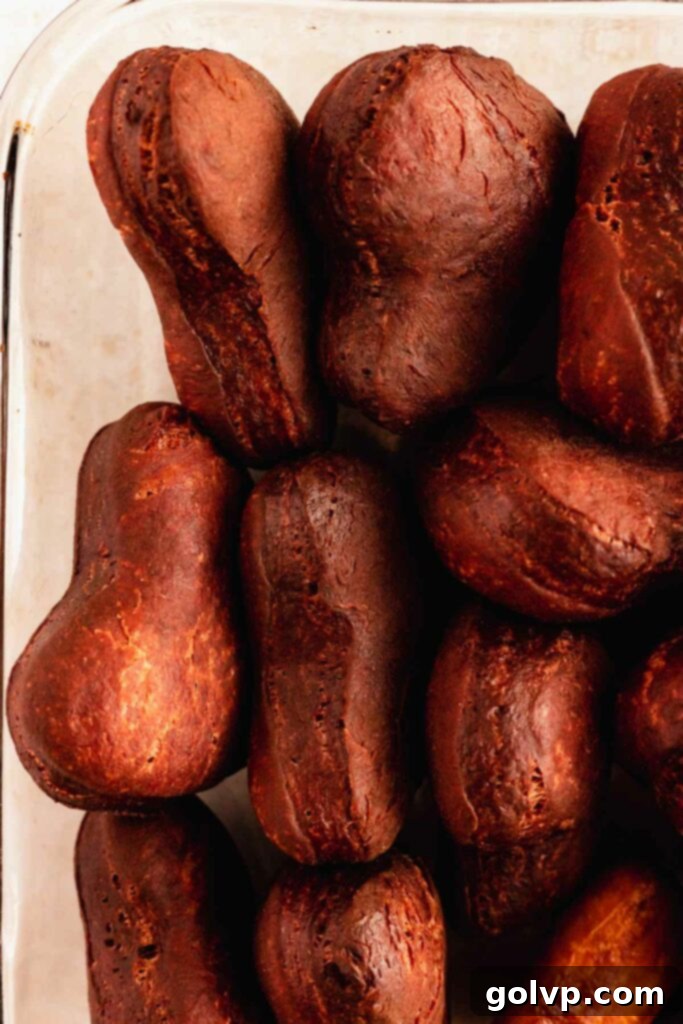
- Fry the Donuts in Batches: Working in small batches (do not overcrowd the pot, typically 2-3 donuts at a time to avoid dropping the oil temperature too much), carefully lower the risen red velvet donuts into the hot oil. Use a metal spatula or tongs for gentle placement, being extremely careful not to let your hands touch the hot oil. Fry each side for 2-3 minutes, or until they are evenly golden brown. Flip them gently using your tongs or spider. Once fried, remove the donuts, shake off excess oil, and place them on the paper towel-lined tray for a few moments. As the paper towel-lined tray fills up, transfer the cooled donuts to the wire cooling rack to finish cooling completely. It is crucial that the donuts cool entirely before proceeding with filling, as warm donuts can melt the custard or glaze.
Glaze & Assembly: Bringing Your Red Velvet Donuts to Life
With your perfectly fried and cooled donuts ready, it’s time for the crowning glory: the tangy cream cheese glaze and the luscious custard filling. This is where your red velvet donuts truly come alive!
- Prepare the Cream Cheese Glaze: While your donuts are cooling completely, prepare the irresistible cream cheese glaze. In a large mixing bowl or the bowl of a stand mixer fitted with the paddle attachment, beat together the softened unsalted butter, sifted powdered sugar, sea salt, and softened cream cheese until the mixture is light, fluffy, and completely smooth. Scrape down the sides of the bowl as needed. Add the pure vanilla extract and beat again until well incorporated. Gradually add the milk, one tablespoon at a time, beating after each addition, until you achieve your desired glaze-like consistency. For a thicker, more spreadable “frosting,” use less milk; for a thinner, drippable glaze, use more. Set the glaze aside at room temperature.
- Fill the Piping Bag: Take your thoroughly chilled custard (which should now have the whipped cream gently folded in, as per the custard instructions). Transfer this rich, creamy custard into a piping bag fitted with a medium-sized round tip, or simply use a large, sturdy zippered plastic bag with one corner snipped off to create an opening of about ½ inch.
- Fill the Donuts with Custard: Carefully take a cooled donut. Using a chopstick or the back of a small spoon, gently poke a hole through the top or side of each donut, creating a small cavity for the filling. Insert the tip of your piping bag into this hole and gently squeeze, filling the donut until it feels slightly heavy and you see a small amount of custard begin to ooze back out. This ensures each donut is generously filled.
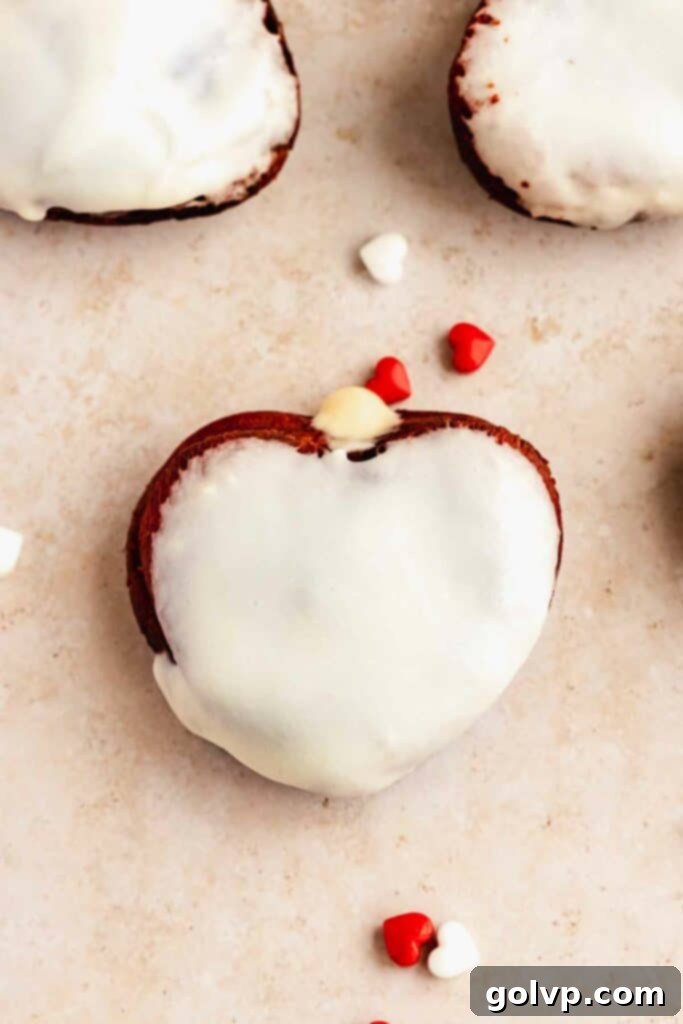
- Glaze and Serve: Now for the final touch! Take each filled donut and gently dip its top into the prepared cream cheese glaze. Allow any excess glaze to drip off for a moment, then place the glazed donut onto a wire cooling rack. Repeat with all remaining donuts. These freshly fried, custard-filled, and cream cheese-glazed red velvet donuts are truly at their absolute best when enjoyed the very same day they are made. So, gather your loved ones, or simply treat yourself, and dig in!
Frequently Asked Questions About Red Velvet Donuts
If, after cooking and chilling, your custard is too thick to easily fold in the whipped cream or to pipe, don’t worry! You can easily adjust its consistency. Add a tablespoon of cold milk at a time, whisking vigorously after each addition, until the custard loosens up to a smooth, pipeable consistency. Be patient and add gradually to avoid making it too thin.
For deep frying donuts, it’s crucial to use an oil with a high smoke point and a neutral flavor. Vegetable oil, peanut oil, canola oil, or sunflower oil are excellent choices as they meet these criteria and won’t impart unwanted flavors to your delicious red velvet donuts. Avoid using olive oil, as its smoke point is too low for deep frying, and it will likely burn and impart an undesirable flavor.
Absolutely! If you prefer to use natural food coloring, a powdered natural food coloring will work best. Powdered options tend to have a higher pigment concentration without adding excess liquid to your dough, which could affect its texture. Natural liquid food colorings might require larger quantities to achieve the desired vibrant red and could potentially make your dough too wet.
While this recipe is specifically designed for fried donuts to achieve that classic texture, you could potentially adapt it for baking. However, the texture will be significantly different – baked donuts are typically more cake-like and less airy. If you choose to bake, you would likely need to adjust baking times and temperatures. For optimal results with this specific dough, frying is highly recommended.
These red velvet donuts are truly best enjoyed on the same day they are fried and filled for optimal freshness, flavor, and texture. The custard can make them soften over time. If you have leftovers, store them in an airtight container in the refrigerator for up to 2-3 days. Bring them to room temperature before enjoying for the best experience.
Discover More Red Velvet Delights and Donut Inspiration:
If you loved these Red Velvet Donuts, you’re in for a treat! Explore these other fabulous recipes from our kitchen that feature the beloved red velvet flavor or other delightful donut creations:
- Red Velvet Bundt Cake with Cream Cheese Swirl
- Strawberry Donuts with Creamy Custard
- Decadent Red Velvet Oreo Cheesecake
- Red Velvet Mini Conversation Heart Cakes
Happy baking and happy indulging!
Did you make this recipe? I would love for you to rate this recipe and hear what you think in the comments below! Share your creation on Instagram and tag @flouringkitchen. Follow me on Pinterestto save and for more recipe ideas.
📖 Recipe
Red Velvet Donuts with Custard Filling & Cream Cheese Glaze
Mary
Pin Recipe
Shop Ingredients
Equipment
-
Deep-fry Thermometer
-
Wire Spider or Tongs
-
Large Heavy-Bottomed Pot
-
Piping Bag (or large zippered plastic bag)
Ingredients
LUSCIOUS CUSTARD FILLING
- 1 whole vanilla bean
- 1 cup whole milk
- ⅛ teaspoon sea salt
- 3 large egg yolks
- ¼ cup granulated sugar
- ⅓ cup all purpose flour
- 1 teaspoon cornstarch
- ½ cup heavy whipping cream
NO-KNEAD RED VELVET DONUTS
- ½ cup warm water
- 1 teaspoon granulated sugar
- 1 packet active dry yeast
- 5 cups all purpose flour 600g
- ¼ cup cocoa powder Dutch processed is preferred but natural works too
- ⅛ teaspoon sea salt
- ½ cup granulated sugar
- ¾ cup unsalted butter softened
- 2 large eggs room temperature
- 1 teaspoon pure vanilla extract
- ¼ teaspoon red gel food colouring dissolve in milk first for even color
- 1 cup warm milk
- ¾ cup sour cream room temperature
- 100 oz vegetable oil I used canola; approximately 3 L or 0.8 gallon
CREAM CHEESE GLAZE
- 4 tablespoons unsalted butter softened
- 2 cups powdered sugar sifted
- ⅛ teaspoon sea salt
- 4 oz cream cheese softened
- 1 teaspoon pure vanilla extract
- 2-6 tablespoons milk
Shop Ingredients on Jupiter
Instructions
LUSCIOUS CUSTARD FILLING
-
Slice the vanilla bean lengthwise and scrape out the seeds. Add both the seeds and the pod to a medium saucepan along with the milk and salt. Stir, bring to a gentle simmer over medium-low heat, then turn off the heat to let the vanilla steep for 15-20 minutes, allowing the flavors to infuse.1 whole vanilla bean, 1 cup milk, ⅛ teaspoon sea salt
-
In a separate bowl, whisk egg yolks and granulated sugar until just combined. Sift in the flour and cornstarch, whisking until smooth and no lumps remain. Gradually pour half of the warm vanilla-infused milk into the yolk mixture, whisking continuously to temper the eggs.3 large egg yolks, ¼ cup granulated sugar, ⅓ cup all purpose flour, 1 teaspoon cornstarch
-
Pour the tempered egg yolk mixture back into the saucepan with the remaining hot milk. Cook over medium-low heat, whisking constantly and scraping the bottom and sides to prevent sticking. Continue whisking until the custard thickens to a pudding-like consistency. Remove immediately from heat.
-
For a silky-smooth custard, press the hot mixture through a fine-mesh wire strainer into a clean container. Place a piece of plastic wrap or parchment paper directly onto the surface of the custard to prevent a skin from forming as it cools. Refrigerate until thoroughly chilled (at least 4 hours, or overnight).
-
Just before filling the donuts, whip the cold heavy whipping cream in a separate bowl until it forms medium-stiff peaks. Gently fold the whipped cream into the thoroughly chilled custard with a whisk until smooth and combined. If the custard is too thick, whisk in milk one tablespoon at a time until it reaches a pipeable consistency.½ cup heavy whipping cream
NO-KNEAD RED VELVET DONUTS
-
In a small bowl, combine the ½ cup warm water, 1 teaspoon sugar, and 1 packet active dry yeast. Stir to dissolve and let stand for 5-10 minutes until a foam forms on top, indicating the yeast is active. If no foam appears, your yeast may be inactive, and you’ll need to use a fresh packet.½ cup water, 1 packet active dry yeast, 1 teaspoon sugar
-
In a large bowl, sift together the all-purpose flour and cocoa powder. Stir in the ½ cup granulated sugar and ⅛ teaspoon sea salt. Create a well in the center. Add the softened butter, eggs, warm milk, ¼ teaspoon red gel food coloring (dissolved in milk first), vanilla extract, sour cream, and the activated yeast mixture to the well.5 cups all purpose flour, ¼ cup cocoa powder, ⅛ teaspoon sea salt, ½ cup granulated sugar, ¾ cup unsalted butter, 2 large eggs, 1 teaspoon pure vanilla extract, 1 cup milk, ¾ cup sour cream, ¼ teaspoon red gel food colouring
-
Stir until a wet, sticky dough forms. Cover the bowl with a towel and place it in a warm spot to rise until doubled in size, which should take about 45 minutes (refer to notes for rising tips).
-
Once risen, gently punch down the dough to release the air. Turn it out onto a generously floured surface and let it rest for 5 minutes to make rolling easier.
-
Roll out the dough to ¾” thick. Use large cookie cutters (3-4” circles or hearts) to cut out shapes. Re-roll the scraps as needed (saving the very last bits for a test fry). Transfer the cut donuts to parchment-lined baking sheets, leaving a few inches of space between them for a second rise. Let them rise in a warm place until doubled in size and puffy, approximately 30-45 minutes.
-
Pour the 100 oz vegetable oil into a dry, large, heavy-bottomed pot, leaving at least 4 inches of space to the top. Clip a deep-fry thermometer to the side. Heat the oil until it reaches 370°F (190°C). While heating, prepare a tray lined with 4 layers of paper towel and a separate cooling rack.100 oz vegetable oil
-
Once the oil is hot, drop the pieces of scrap dough into the oil for a practice fry. Fry on each side for 2-3 minutes or until golden brown. Remove with tongs or a spider, gently shake off excess oil, and place onto the paper towel-lined sheet. Once cooled, check the inside to ensure it’s cooked through. This helps gauge your frying time and seasons the oil.
-
Carefully drop the risen donuts into the oil, 2-3 at a time, avoiding overcrowding and splashes. Fry for 2-3 minutes per side until golden brown. Remove with a spider or tongs, gently shaking off excess oil, and place on the paper towel-lined tray briefly, then transfer to the wire cooling rack. Allow all donuts to cool completely before filling.
GLAZE & ASSEMBLY
-
While the donuts cool, make the cream cheese glaze. In a large bowl or stand mixer, beat the 4 tablespoons unsalted butter, 2 cups sifted powdered sugar, ⅛ teaspoon sea salt, and 4 oz softened cream cheese until light and fluffy. Add 1 teaspoon pure vanilla extract and beat. Gradually add 2-6 tablespoons milk, 1 tablespoon at a time, until a desired glaze-like consistency is achieved. (Less milk for a thicker frosting, more for a thinner glaze). Set aside.4 tablespoons unsalted butter, 2 cups powdered sugar, ⅛ teaspoon sea salt, 4 oz cream cheese, 1 teaspoon pure vanilla extract, 2-6 tablespoons milk
-
Fill a piping bag (or a large zippered plastic bag with a corner snipped off) with the chilled custard (with whipped cream folded in).
-
Using a chopstick or the back of a spoon, poke a small hole into the side or top of each cooled donut. Insert the piping bag tip into the hole and gently squeeze to fill the donut with custard until it feels heavy and slightly bulging.
-
Dip the top of each filled donut into the cream cheese glaze. Gently shake off excess glaze and place onto a cooling rack to set. For the best flavor and texture, these red velvet donuts are best enjoyed the same day they are fried and filled. Enjoy!
Notes
Optimal Dough Rising Environment
Yeast doughs thrive in warm, draft-free environments. I achieve this by preheating my oven to 180°C (350°F) for just 1 minute, then immediately turning it off. This creates a perfectly warm, cozy spot for the dough to rise without getting too hot. It’s important that the oven is *not* hot (i.e., above 55°C or 130°F), as excessive heat will kill the yeast, preventing the dough from rising. The butter and sugar content in this rich dough also necessitate a consistently warm environment for proper proofing.
Important Frying Safety Guidelines
Deep frying can be dangerous if proper precautions aren’t taken. Please observe the following safety rules:
- Keep Water Away from Hot Oil: This is paramount. Water reacts violently with hot oil, causing it to sputter, pop, and potentially result in severe burns or even a grease fire. Ensure your hands, all utensils, and the donuts themselves are completely dry before coming into contact with the hot oil.
- Maintain Adequate Headspace: Always ensure you have at least 3-4 inches of empty space from the surface of the oil to the top rim of your pot. This prevents the oil from boiling over when the donuts are added or when the oil naturally expands during heating.
- Use a Heavy-Bottomed Pot: A heavy-bottomed pot provides better heat distribution and stability, reducing the risk of hot spots and making the frying process safer and more consistent.
- Never Leave Hot Oil Unattended: Always stay near your pot of hot oil. Temperatures can rise quickly, and vigilance is key to preventing accidents.
- Know How to Handle a Grease Fire: In the unlikely event of a grease fire, do NOT use water. Turn off the heat immediately and smother the flames with a tight-fitting lid, a metal baking sheet, or baking soda.
