Gooey Strawberry Lemon Butter Cake: An Irresistibly Easy, No-Mixer Delight
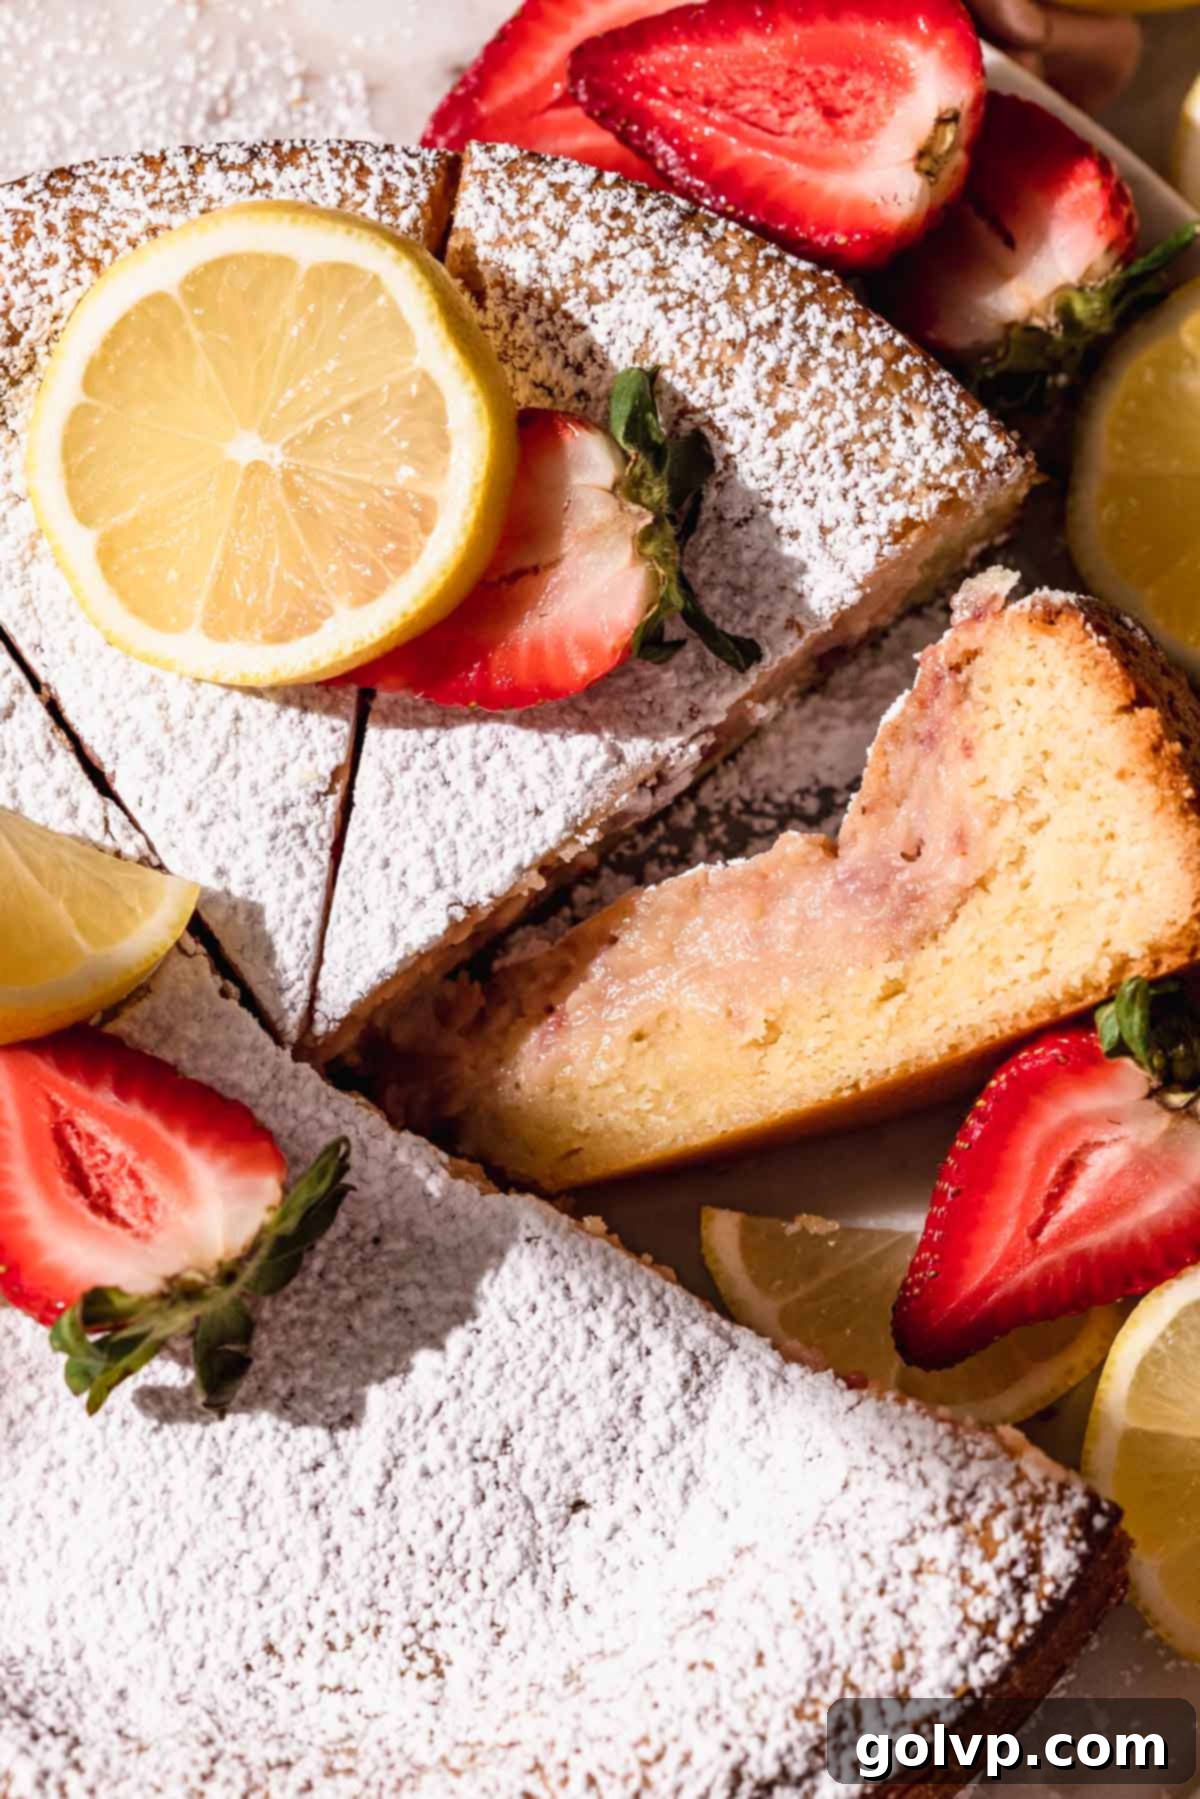
Prepare to fall in love with this incredible Strawberry Butter Cake! It’s an absolute dream for anyone craving a dessert that’s both wonderfully gooey and bursting with fresh strawberry and zesty lemon flavor. What makes it even more special? It’s surprisingly simple to bake, requiring no electric mixer, thanks to a clever one-bowl batter that uses melted butter. The magic happens as the vibrant strawberry filling bakes directly into the cake, creating a luscious, irresistible gooey center. Imagine the best parts of strawberry lemon bars blended seamlessly with the creamy richness of cheesecake – that’s exactly the delightful experience this dessert delivers.
Purchasing the items in this post supports this blog, at no additional cost to you. As an Affiliate Product marketer and Amazon Associate, I earn from qualifying purchases. Your support helps keep new recipes coming!
Why You Will Absolutely LOVE This Gooey Strawberry Butter Cake Recipe:
- Unbelievably Gooey: The star of this cake is its unbelievably gooey, almost custard-like filling that bakes right into the center. It’s a perfect harmony between a creamy cheesecake and a tender fruit custard, offering a luxurious texture that melts in your mouth.
- Effortlessly Easy: Don’t let its decadent appearance fool you – this recipe is a breeze to make! Both the buttery cake base and the fruity filling come together with minimal effort. The entire cake batter is prepared in just one bowl, and since it uses melted butter, there’s absolutely no need for an electric mixer. It’s truly a beginner-friendly dessert that yields impressive results.
- Richly Buttery Crust: The base of this cake is a wonderfully rich and zesty lemon-infused butter crust. It provides the perfect structural and flavor contrast to the sweet, gooey strawberry filling. Every bite offers a delightful balance of crumbly, buttery goodness and a bright citrus kick.
- Bursting with Strawberry Lemon Flavor: We use fresh, mashed strawberries to infuse the filling with natural, vibrant berry flavor and beautiful color. Paired with the bright notes of fresh lemon zest and juice in both the cake and filling, this dessert offers a refreshing, summery taste reminiscent of a homemade strawberry lemonade.
- Simple Ingredients, Big Flavor: This recipe relies on readily available, fresh ingredients that combine to create an extraordinary flavor profile without any complicated steps or exotic components.
- Versatile Serving Options: Whether you prefer it warm and ultra-gooey or chilled for a firmer, cheesecake-like slice, this cake adapts to your preference. It’s perfect for any occasion, from a casual family dessert to a special gathering.
Crafting the Perfect Lemon Butter Cake Batter Base
The foundation of any great cake lies in its base, and for this Strawberry Butter Cake, we start with a brilliantly simple yet incredibly flavorful lemon cake batter. The secret to its intense aroma and zestiness without relying on artificial extracts is a technique that’s as easy as it is effective: rubbing lemon zest into sugar.
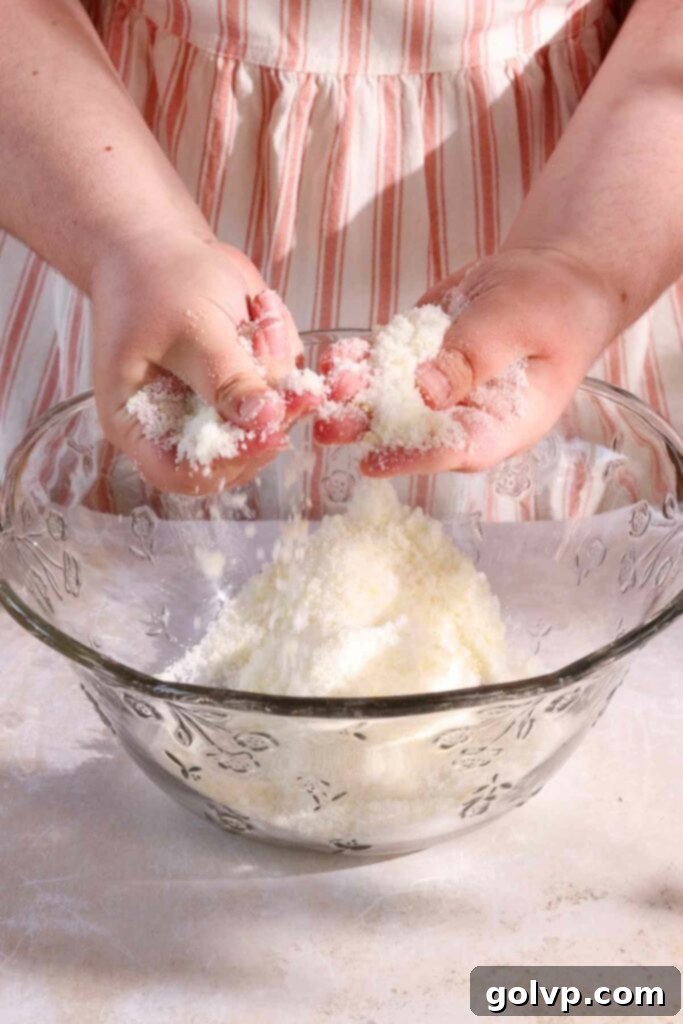
By taking fresh lemon zest and massaging it together with granulated sugar using your fingertips, you release the essential oils from the zest. This process not only infuses the sugar with a powerful, natural lemon fragrance but also moistens the sugar, preparing it to beautifully integrate with the other ingredients. You’ll notice the sugar turn a pale yellow and become wonderfully fragrant – a sign that it’s ready to work its magic in your cake.
True to its “easy-to-make” promise, the entire cake batter comes together in a single bowl. This eliminates the need for multiple dirty dishes and, crucially, an electric mixer. We use melted butter for the base, which contributes to a supremely buttery and tender crumb. Melted butter mixes effortlessly, making the preparation process quick and seamless. Simply whisk together the wet ingredients – your lemon-infused sugar, melted butter, egg, and a touch of salt – until they’re smooth and thoroughly combined. Then, sift the dry ingredients (flour and baking powder) directly into the same bowl and fold gently until just combined. The goal is to mix until no dry streaks remain, ensuring a thick, uniform batter without overmixing, which can lead to a tough cake.
This simple, one-bowl approach not only saves time and cleanup but also ensures a consistently rich and flavorful base that perfectly complements the luscious strawberry filling. It’s a testament to how straightforward baking can be when you have the right techniques and ingredients.
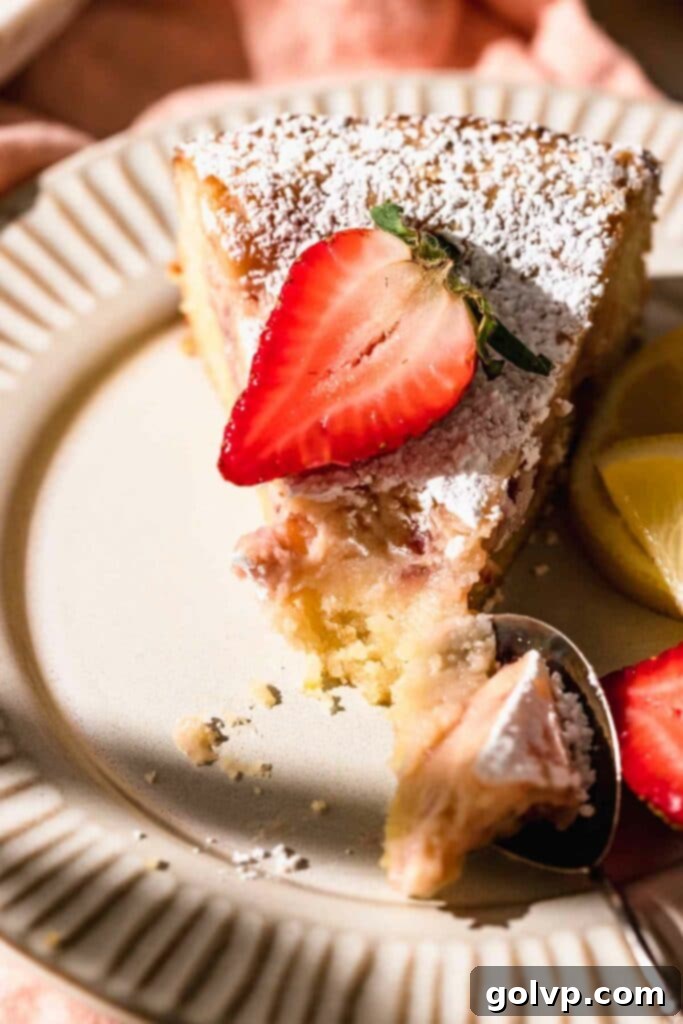
The Irresistible Gooey Strawberry Filling
The heart and soul of this spectacular cake is its signature gooey strawberry filling. This isn’t just any filling; it boasts a rich, creamy texture that beautifully marries the tang of cream cheese with the sweet, bright notes of fresh strawberries. Think of it as a decadent cross between a strawberry cheesecake and a silky custard, but with a unique gooeyness that defines a true butter cake.
The key to its vibrant flavor and delightful texture lies in using fresh, mashed strawberries. Mashing the strawberries, whether with a potato masher for a rustic texture or simply with a fork for a smoother consistency, ensures that their natural sweetness and slight tartness are fully integrated into the creamy base. This also adds a beautiful visual appeal and small pockets of real fruit in every bite.
Combined with softened full-fat cream cheese for that essential tang and richness, powdered sugar for an ultra-smooth consistency and sweetness, and a touch of lemon juice to enhance the fruit flavors, this filling is simply divine. A hint of cornstarch helps to achieve that perfect gooey, yet set, texture during baking. Once this dreamy mixture is poured over the buttery lemon cake base, it bakes down into a thick, luxurious layer that perfectly complements the crust below.
Exciting Flavor Variations & Twists
While the Strawberry Lemon Butter Cake is a standout on its own, its versatility makes it a fantastic canvas for various flavor explorations. This particular recipe is a delightful offshoot of my beloved gooey lemon butter cake, which itself is a modern twist on the classic St. Louis butter cake. The core concept of a rich, buttery crust topped with a sweet, gooey filling allows for endless creativity.
If you’re a fan of citrus, you absolutely must try the original lemon version for a pure, zesty experience. For something a little different, my lime butter cake version offers a tropical, tangy punch that’s equally refreshing. But don’t stop there!
Consider these exciting variations:
- Berry Bliss: Substitute strawberries with other fresh berries like raspberries, blueberries, or even a mixed berry medley. Each berry will bring its unique flavor profile, from the tartness of raspberries to the sweetness of blueberries.
- Peach Perfection: In summer, replace strawberries with ripe, finely diced or mashed peaches for a warm, comforting twist. A hint of cinnamon or nutmeg could elevate this further.
- Tropical Treat: Try mashed mango or pineapple for a tropical escape. Be mindful of the moisture content and adjust cornstarch slightly if needed.
- Chocolate Swirl: For chocolate lovers, consider swirling a small amount of melted dark chocolate or chocolate ganache into the strawberry filling before baking for a decadent chocolate-strawberry combination.
- Spiced Apple: During autumn, a spiced apple filling (cooked down slightly to reduce moisture) could transform this into a cozy fall dessert, perhaps with a sprinkle of streusel on top.
Each variation maintains the signature gooey texture and buttery base, offering a fresh take on this easy and adaptable dessert. Feel free to experiment with your favorite fruits and spices to create your own unique butter cake masterpiece!
Make-Ahead Tips & Storage Solutions
This Strawberry Butter Cake is wonderfully versatile, whether you’re planning ahead for a gathering or simply want to enjoy slices over several days. Here’s how to best store and serve it to maintain its deliciousness.
Serving Suggestions for Optimal Texture:
For the most authentic and truly decadent gooey texture, I highly recommend serving this cake slightly warm, perhaps just a few minutes after it comes out of the oven, or gently rewarming individual slices. The warmth enhances the melt-in-your-mouth quality of the filling, making it extra luscious and comforting.
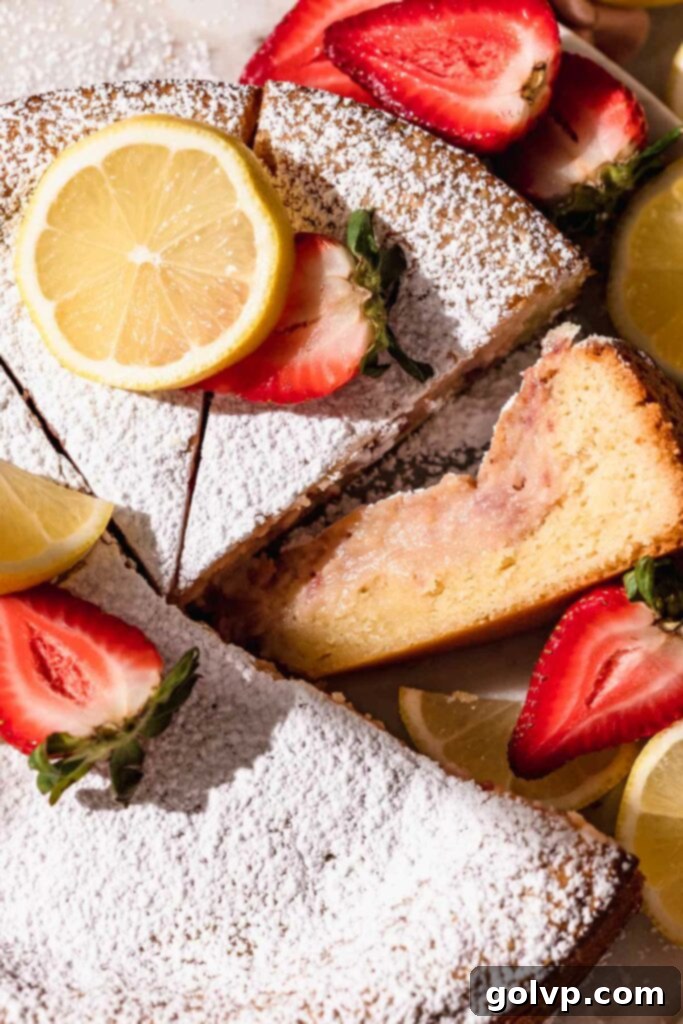
If you prefer a firmer, more cheesecake-like texture that holds its shape beautifully for cleaner slices, chill the strawberry butter cake in the refrigerator for at least a few hours, or even overnight. Once firm, you can sprinkle it generously with powdered sugar for a lovely finish before serving. This chilled version is particularly delightful on a warm day.
Storage for Freshness:
To keep your Strawberry Butter Cake fresh and delicious, store it in an airtight container. A dedicated cake carrier is ideal for this, as it protects the cake from being crushed and maintains moisture. It will keep beautifully in the fridge for up to 3 days. Any longer, and the texture might start to change slightly, though it will still be enjoyable.
Freezing for Later Enjoyment:
Planning ahead or have leftovers? This cake freezes exceptionally well! Cut the cake into individual slices – this makes thawing and serving much easier. Wrap each slice tightly in parchment paper first to prevent them from sticking together in the freezer, then place them in an airtight freezer-safe container or a heavy-duty freezer bag. The cake slices can be frozen for up to 2 months.
When you’re ready to enjoy a frozen slice, simply transfer it from the freezer to the refrigerator overnight to thaw, or let it come to room temperature on the counter for a quicker thaw. You can also gently rewarm it in the microwave for that fresh-baked, gooey experience.
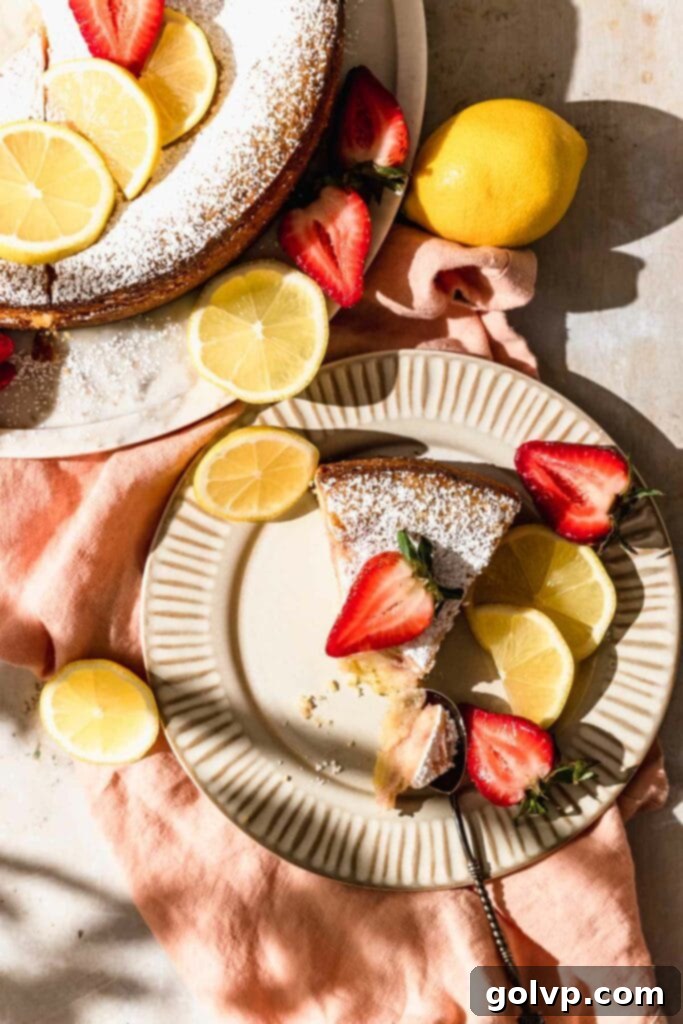
Essential Ingredients for Your Strawberry Butter Cake Success
Achieving the perfect gooey texture and vibrant flavor in your Strawberry Butter Cake starts with understanding the role of each key ingredient. While the full list is in the recipe card below, these insights will help ensure your baking success!
- Cream Cheese: For that signature rich and tangy gooey filling, opt for full-fat, brick-style cream cheese. This is crucial for both flavor and texture. Low-fat or whipped cream cheese contains more water and less fat, which will prevent your filling from setting properly and result in a less decadent consistency. Ensure it’s softened to room temperature for a smooth, lump-free mixture.
- Lemons: Fresh lemons are indispensable for this recipe. The lemon zest is rubbed with sugar for the cake batter, infusing it with a wonderfully fragrant, natural citrus aroma. This method extracts maximum flavor without needing artificial extracts. You’ll also need freshly squeezed lemon juice, which plays a vital role in brightening the strawberry filling, balancing its sweetness, and preventing it from tasting overly rich.
- Powdered Sugar: Also known as confectioners’ sugar, this ingredient is key for the filling. Its fine texture dissolves easily, contributing to the incredibly smooth and gooey consistency of the strawberry filling. It also provides the perfect level of sweetness without graininess.
- Strawberries: Always use fresh strawberries for this recipe. Frozen strawberries contain excess moisture that can dilute the flavor and prevent the filling from setting correctly, leading to a watery result. Mash them thoroughly with a potato masher or a fork to release their juices and create small, tender pieces within the filling.
- All-Purpose Flour: Accuracy in measuring flour is paramount for the right cake texture. For the most consistent and best results, I highly recommend weighing your flour using a kitchen scale. If you don’t have a scale, use the “spoon and level” method: stir the flour in its bag or container, then gently spoon it into your measuring cup. Level off the excess with the flat edge of a knife, without packing it down. Over-measured flour can lead to a dense, dry cake.
- Unsalted Butter: Using unsalted butter gives you control over the total salt content in your recipe. For both the cake batter (melted and cooled) and greasing the pan, high-quality butter will yield the best flavor and a truly buttery crust.
- Large Egg & Egg Yolks: A large egg in the cake batter provides structure and moisture. The egg yolks in the filling contribute to its richness, color, and help in thickening and setting the gooey custard-like texture. Ensure eggs are at room temperature for better emulsification.
- Baking Powder: This leavening agent gives the cake base a light lift and tender crumb. Make sure your baking powder is fresh for optimal activation.
- Cornstarch: A small amount of cornstarch in the filling is a secret weapon for achieving that ideal gooey, yet set, consistency. It acts as a thickener, preventing the filling from becoming too runny.
- Sea Salt: A pinch of sea salt in both the cake and filling enhances all the other flavors, balancing the sweetness and making everything taste brighter and more complex. Don’t skip it!
Step-by-Step Guide: Preparing the Lemon Butter Cake Batter
Crafting the buttery lemon base for this delightful cake is incredibly straightforward. Follow these steps to ensure a perfect foundation:
- Step 1 – Prepare Your Pan & Preheat Oven: Begin by preheating your oven to 340°F (170°C). This ensures the oven is at the correct temperature when your cake is ready to go in. Take an 8-inch or 9-inch round springform pan. Generously grease the bottom and sides with a piece of cold butter – this helps prevent sticking and adds to the rich crust. For extra insurance and easy removal, add a round of parchment paper to the bottom of the pan. (See notes section if you are using a regular, non-springform pan for alternative lining instructions.)
-
Step 2 – Infuse Sugar with Lemon Zest: In a large mixing bowl, combine the granulated sugar and the freshly zested lemon. Now, here’s the fun part: use your clean fingertips to rub the sugar and lemon zest together. This action helps to release the aromatic oils from the lemon zest, infusing the sugar with an intense, natural lemon flavor. Continue rubbing until the sugar looks slightly pale yellow and smells wonderfully fragrant.

Rubbing lemon zest into sugar extracts maximum flavor for the cake base. -
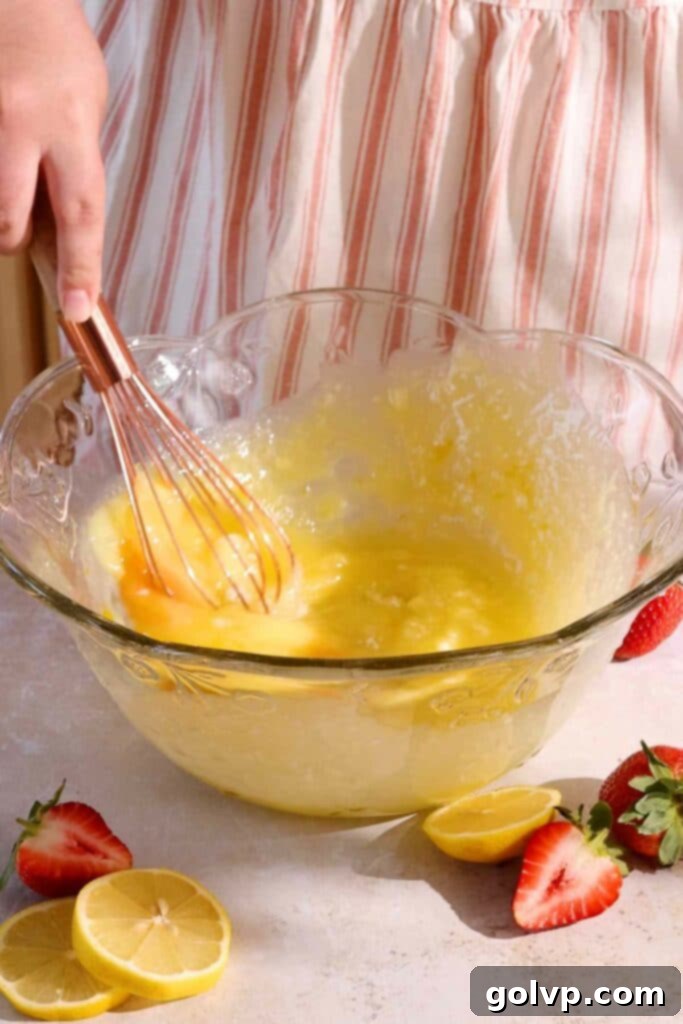
Step 3 – Whisk in Wet Ingredients: To the fragrant lemon sugar, add the melted butter (ensure it’s cooled slightly so it doesn’t cook the egg), sea salt, large egg, and freshly squeezed lemon juice. Using a wire whisk, vigorously whisk these ingredients together until the mixture is completely combined and smooth. There should be no lumps, and the texture should be uniform.

Ensure all wet ingredients are smoothly combined for a consistent cake batter. - Step 4 – Incorporate Dry Ingredients: Sift the all-purpose flour and baking powder directly into the same bowl with the wet ingredients. Sifting helps to aerate the flour and prevent lumps, resulting in a lighter cake. Using a spatula, gently fold the dry ingredients into the wet. Mix only until no more dry streaks of flour remain and a thick, cohesive batter forms. Be careful not to overmix, as this can develop the gluten too much and lead to a tough cake.
-
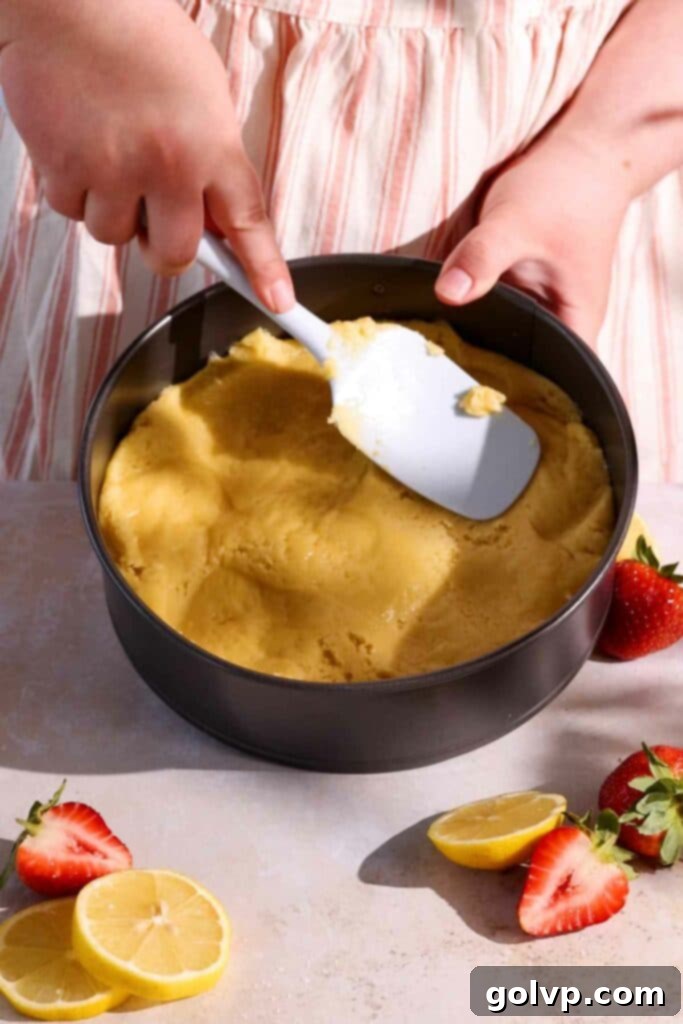
Step 5 – Spread Batter in Pan: Transfer the prepared cake batter into your greased and parchment-lined baking pan. Use a spatula or the back of a spoon to spread the batter out evenly across the bottom of the pan, creating a smooth, consistent layer. Set this aside while you prepare the filling.

An even layer of cake batter ensures a balanced crust for your butter cake.
How to Create the Dreamy Gooey Strawberry Filling
This creamy, fruity filling is what makes the Strawberry Butter Cake so irresistible. Here’s how to prepare it to perfection:
-
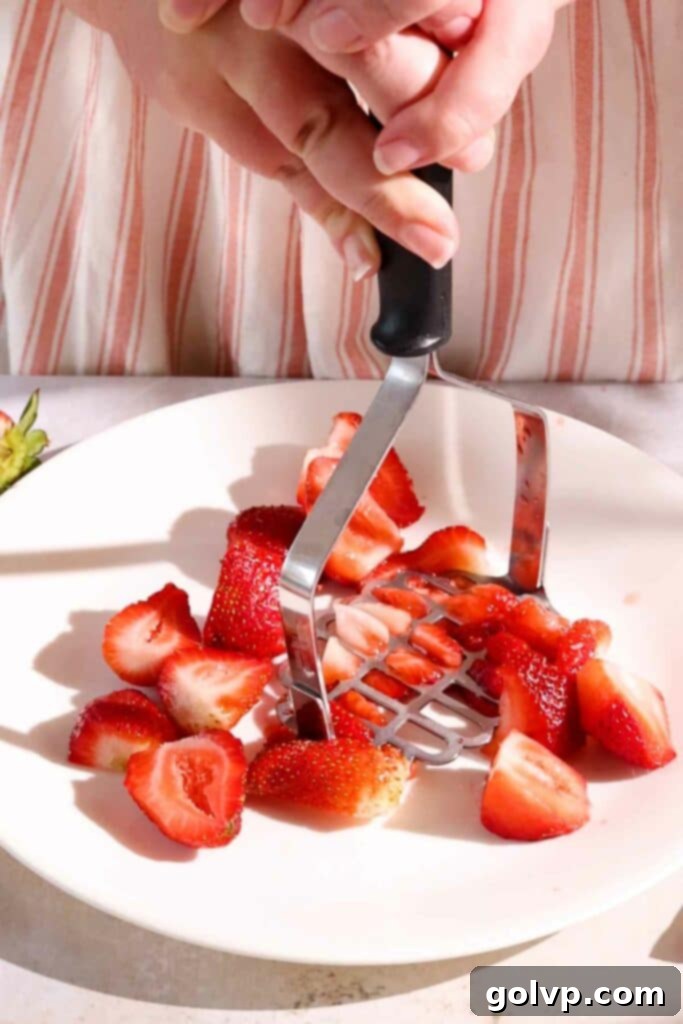
Step 1 – Mash the Strawberries: Take your fresh strawberries and place them in a bowl. Using a potato masher or even a sturdy fork, mash them down until they are broken up, juicy, and have some texture. This ensures a beautiful burst of fruit flavor and color throughout the filling. Measure out ⅓ of a cup of the mashed strawberries and set this portion aside for later.

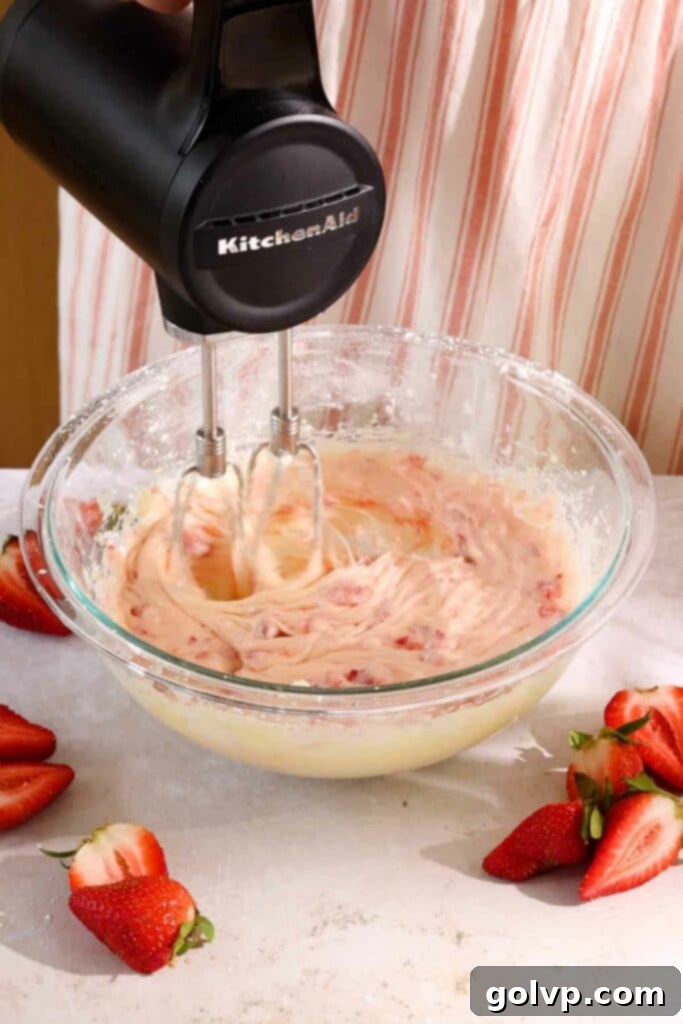
Freshly mashed strawberries are essential for the filling’s texture and flavor. - Step 2 – Combine Filling Ingredients: In a separate large bowl, combine the softened full-fat cream cheese, powdered sugar, a tablespoon of fresh lemon juice, the two large egg yolks, cornstarch, and a pinch of sea salt. Using a wire whisk or a hand mixer on low speed, beat these ingredients together until the mixture is completely smooth and creamy. Make sure to scrape down the sides of the bowl with a spatula periodically to ensure everything is fully incorporated. Beat again until impeccably smooth – lumps of cream cheese are not welcome here!
-
Step 3 – Fold in Mashed Strawberries: Now, add the measured ⅓ cup of mashed strawberries to your smooth cream cheese mixture. Gently fold them in until they are just combined. You want to see the lovely flecks and streaks of strawberry throughout the filling.

The creamy strawberry filling should be perfectly smooth before baking. -
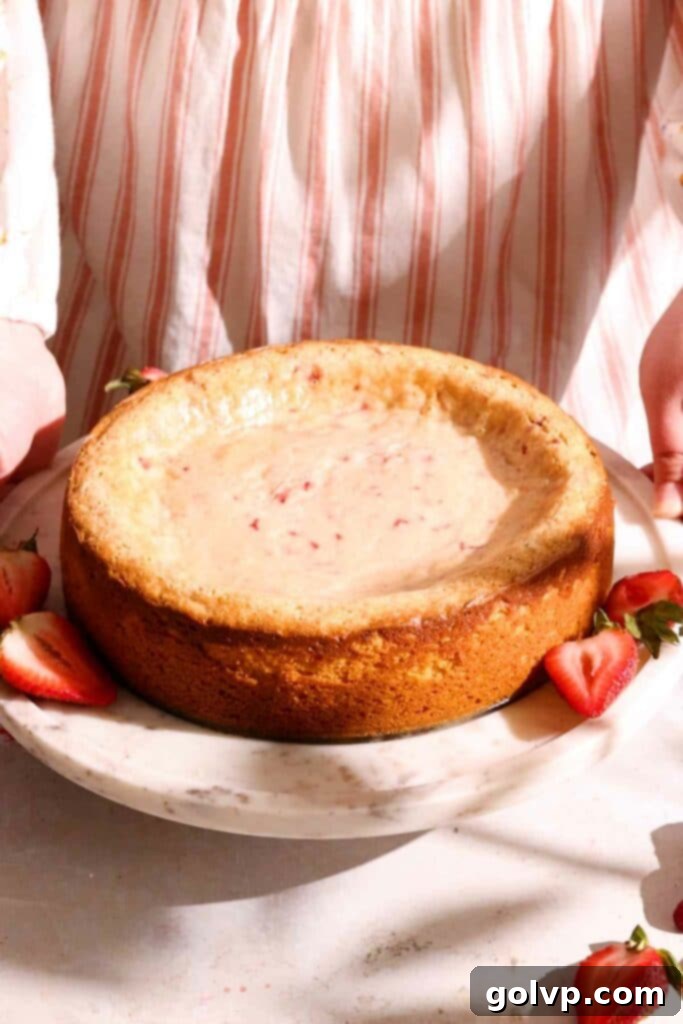
Step 4 – Assemble and Bake: Carefully pour the strawberry filling evenly over the prepared lemon cake batter in your springform pan. Use a spatula to gently spread it out to the edges. Transfer the pan to your preheated oven and bake for 45-55 minutes. The cake is done when the edges are beautifully golden brown and the middle looks puffed up. Crucially, the center will still be jiggly – don’t worry, this is exactly what you want! It will set further as it cools. If you notice the top browning too quickly, loosely tent the cake with a piece of aluminum foil to prevent burning.

The beautifully baked strawberry butter cake, ready to cool and reveal its gooey interior. - Step 5 – Cool, Garnish & Serve: Once baked, remove the cake from the oven and let it cool in the pan on a wire rack for at least 10 minutes. This allows it to set slightly before you release the sides of the springform pan or carefully lift it out if using a regular pan. Slide the cake onto a serving plate. For a final touch, generously sprinkle the top with powdered sugar. Serve the cake at room temperature for an extra gooey indulgence, or chill it for a few hours (or overnight) for a firmer, more sliceable texture, similar to a cheesecake.
Frequently Asked Questions About Strawberry Butter Cake
It’s a common concern with gooey butter cakes! Even when fully baked, the center will still be quite jiggly when you gently shake the pan. The key indicators are that the edges will be visibly set and beautifully golden brown, and the middle will appear puffed up. As the cake cools, the gooey center will continue to set and firm up to its ideal consistency. Trust the jiggly center!
I strongly advise against using frozen strawberries for this recipe. Frozen berries contain a significantly higher moisture content compared to fresh ones. This excess water will release during baking, making the filling too watery and preventing it from setting into that desirable gooey, firm-yet-jiggly texture. It could also make the cake soggy. Stick to fresh strawberries for the best results.
While you technically could bake a version of this in a muffin pan, this particular recipe is optimized for an 8-inch or 9-inch round (or square) baking pan. The magic of a gooey butter cake really shines when baked as a single, larger cake and then cut into generous individual bars or slices after it has cooled and set. Baking it in individual muffin cups might alter the cake-to-filling ratio and baking time, potentially affecting the signature gooey texture that makes this recipe so special. For the intended experience, I recommend sticking to the recommended pan size and cutting into portions afterwards.
Discover More Delicious Recipes from Flouring Kitchen:
- Lemon Butter Cake
- Lemon Victoria Sponge with Lemon Curd
- Strawberry Cinnamon Rolls
- Strawberry Donuts
Happy baking! We hope you enjoy making and devouring this wonderfully gooey and flavorful Strawberry Butter Cake as much as we do.
Did you make this recipe? We would love for you to rate it and share your thoughts in the comments below! Tag us on Instagram @flouringkitchen to show off your delicious creation. For more inspiring recipe ideas and baking tips, make sure to follow us on Pinterest.
📖 Recipe
Strawberry Butter Cake
Mary
Pin Recipe
Shop Ingredients
Equipment
-
nine inch springform round baking pan
Ingredients
Cake Batter
- 1 cup sugar
- 1 lemon zested
- 1 cup butter melted and cooled
- ¼ teaspoon sea salt
- 1 large egg
- 3 tablespoons lemon juice freshly squeezed
- 2 ¾ cup flour
- 2 ½ teaspoon baking powder
Filling
- 4-5 large strawberries
- 8 oz cream cheese softened
- 2 cups powdered sugar
- 1 tablespoon lemon juice
- 2 large egg yolks
- 1 ½ teaspoon cornstarch
- ⅛ teaspoon sea salt
- 4 tablespoons powdered sugar
Shop Ingredients on Jupiter
Instructions
Cake Batter
-
Preheat oven to 340°F (170°C). Grease the bottom and sides of an 8” or 9” round springform pan with a piece of cold butter. Add a round of parchment paper to the bottom. See notes for if you don’t have a springform pan.
-
In a large bowl, combine sugar and lemon zest. Rub the sugar and zest together with your fingers until fragrant and the sugar looks pale yellow.1 cup sugar, 1 lemon
-
Add melted and cooled butter, salt, egg, and lemon juice. Whisk until completely combined and smooth.1 cup butter, ¼ teaspoon sea salt, 3 tablespoons lemon juice, 1 large egg
-
Sift flour and baking powder right into the same bowl. Fold just until no more dry streaks remain and a thick batter forms.2 ¾ cup flour, 2 ½ teaspoon baking powder
-
Transfer batter into prepared baking pan and spread out to an even layer. Set aside.
Filling
-
Mash strawberries with a potato masher. Measure ⅓ of a cup and set aside.4-5 large strawberries
-
Combine cream cheese, powdered sugar, lemon juice, egg yolks, cornstarch, and salt in a large bowl. Beat together until smooth. Scrape down the bowl and beat again. You can use a wire whisk for this.8 oz cream cheese, 2 cups powdered sugar, 1 tablespoon lemon juice, 2 large egg yolks, 1 ½ teaspoon cornstarch, ⅛ teaspoon sea salt
-
Add mashed strawberries and mix again.
-
Pour the filling over the cake batter and spread it out to the edges. Bake in preheated oven for 45-55 minutes, or until the edges are golden brown and the middle is puffed. The middle will be jiggly when done. If you see it browning too quickly, tent the top with a piece of aluminum foil.
-
Let cool for 10 minutes before releasing the sides of the pan or lifting out the cake. Slide it onto a serving plate and sprinkle with powdered sugar. Serve at room temperature for extra gooey-ness or chill for a firmer texture.4 tablespoons powdered sugar
Video
Notes
If using a regular round pan, line the bottom and sides with parchment paper to be able to lift it out easily. This creates “sling” handles for convenient removal.
The edges of the cake will be set, firm, and golden brown. The middle, however, will still be noticeably puffed up and jiggly when you gently shake the pan. If you observe any small bubbles around the middle, it’s a good indication that it’s nearly perfect. Remember, it will continue to set as it cools to room temperature. If the edges are getting too dark but the middle isn’t puffed or jiggly enough, you can loosely tent the top of the cake with a piece of aluminum foil to prevent further browning, reduce the oven temperature by 10-15°F, and continue baking until the center looks ready.
For an ultra gooey texture, I recommend serving the cake when it’s slightly warm at room temperature. The warmth enhances the melt-in-your-mouth quality of the filling.
For a firmer texture, similar to a traditional cheesecake slice, chill the cake in the refrigerator for a few hours or even overnight. This allows the filling to fully firm up. Sprinkle with powdered sugar just before serving for a beautiful presentation.
