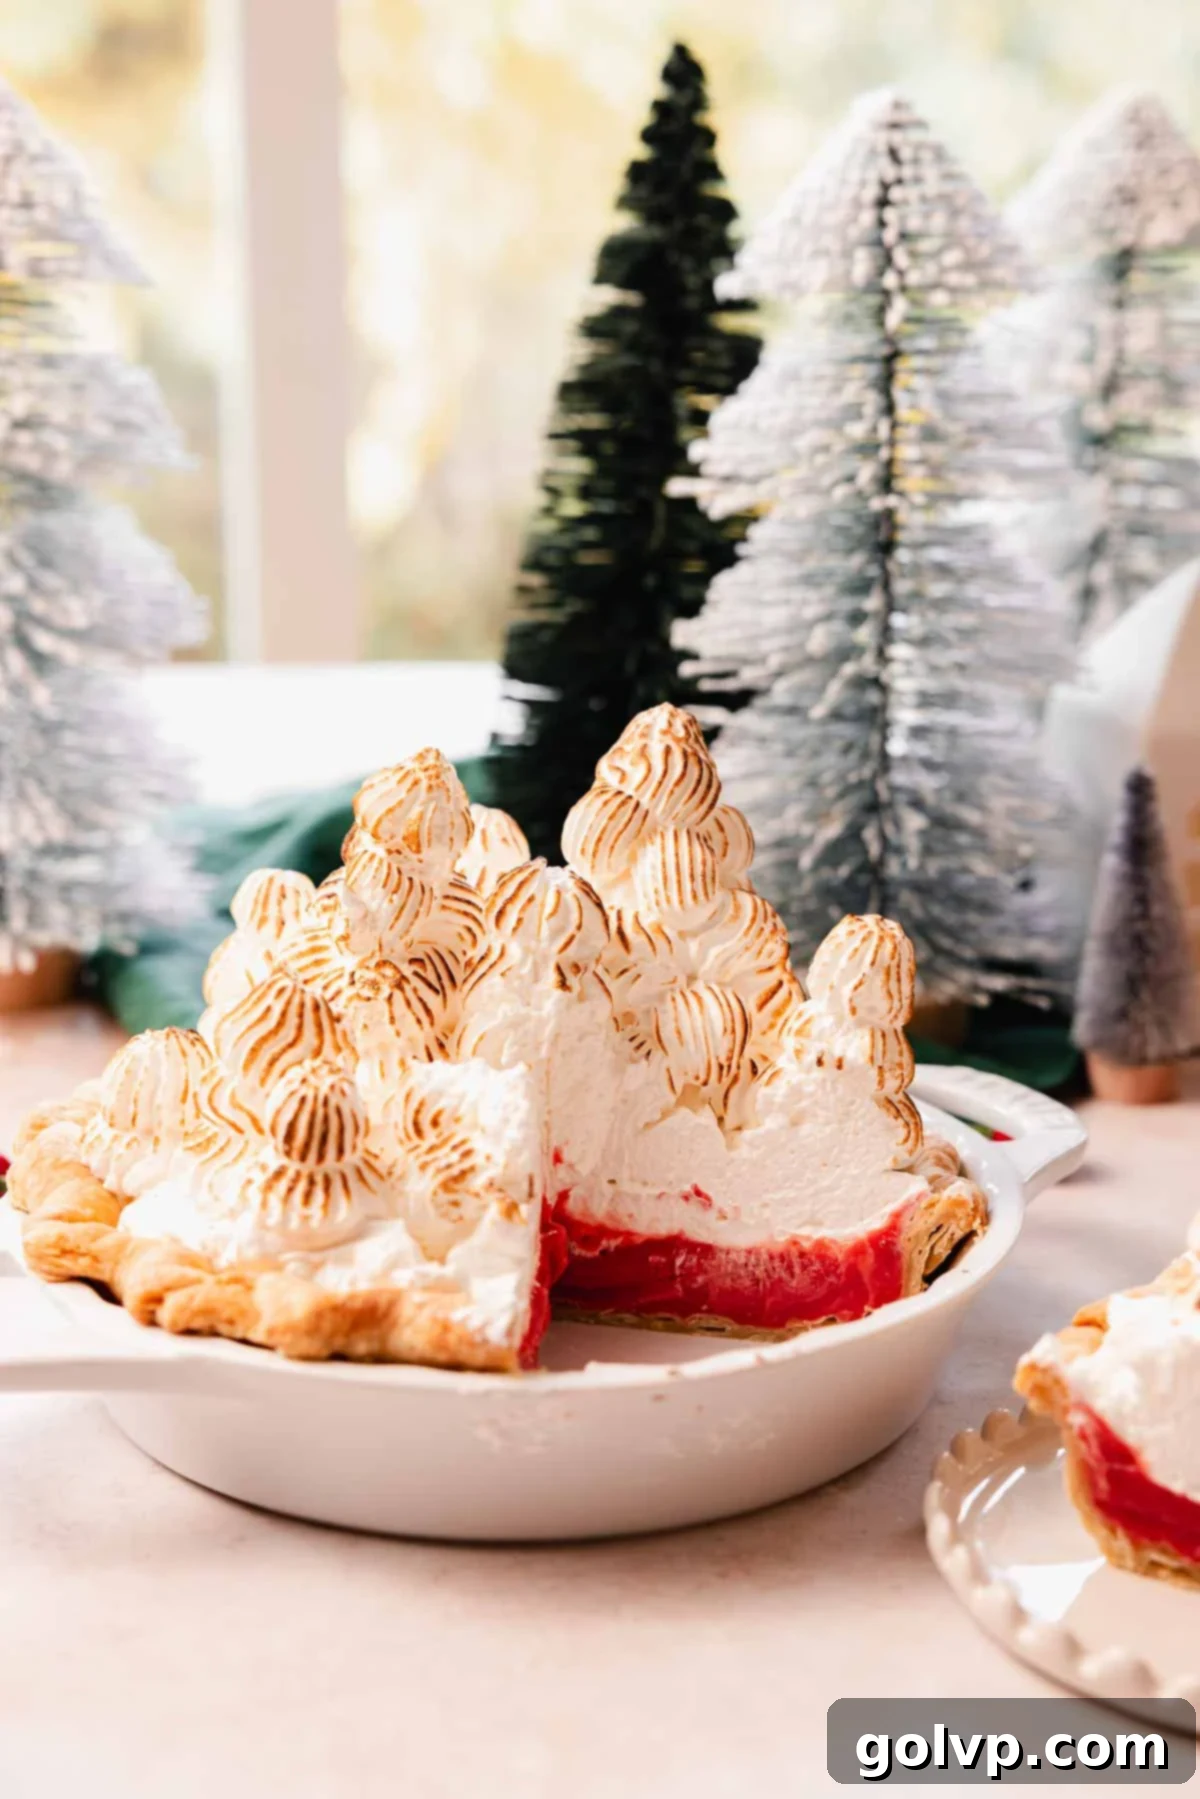
Homemade Tart Cherry Meringue Pie: A Showstopping Dessert with Mile-High Meringue
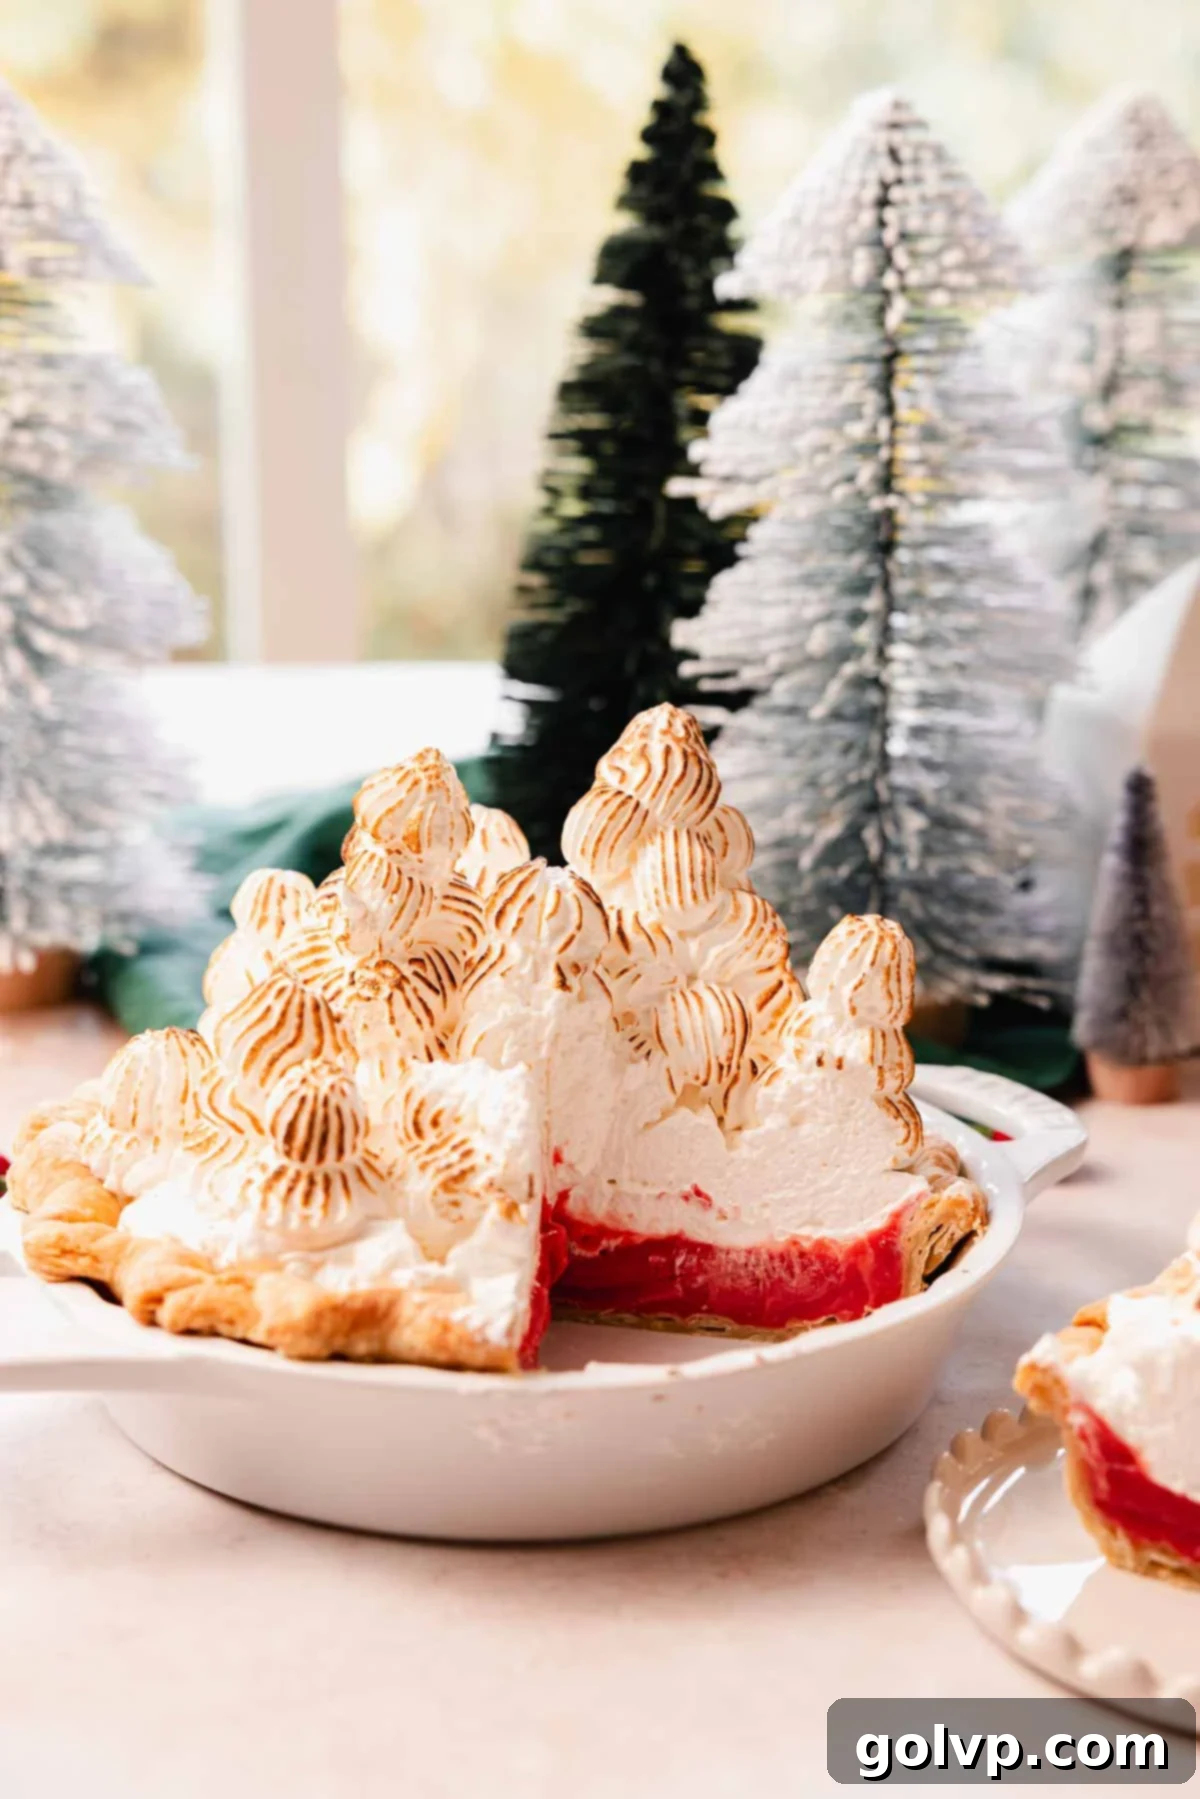
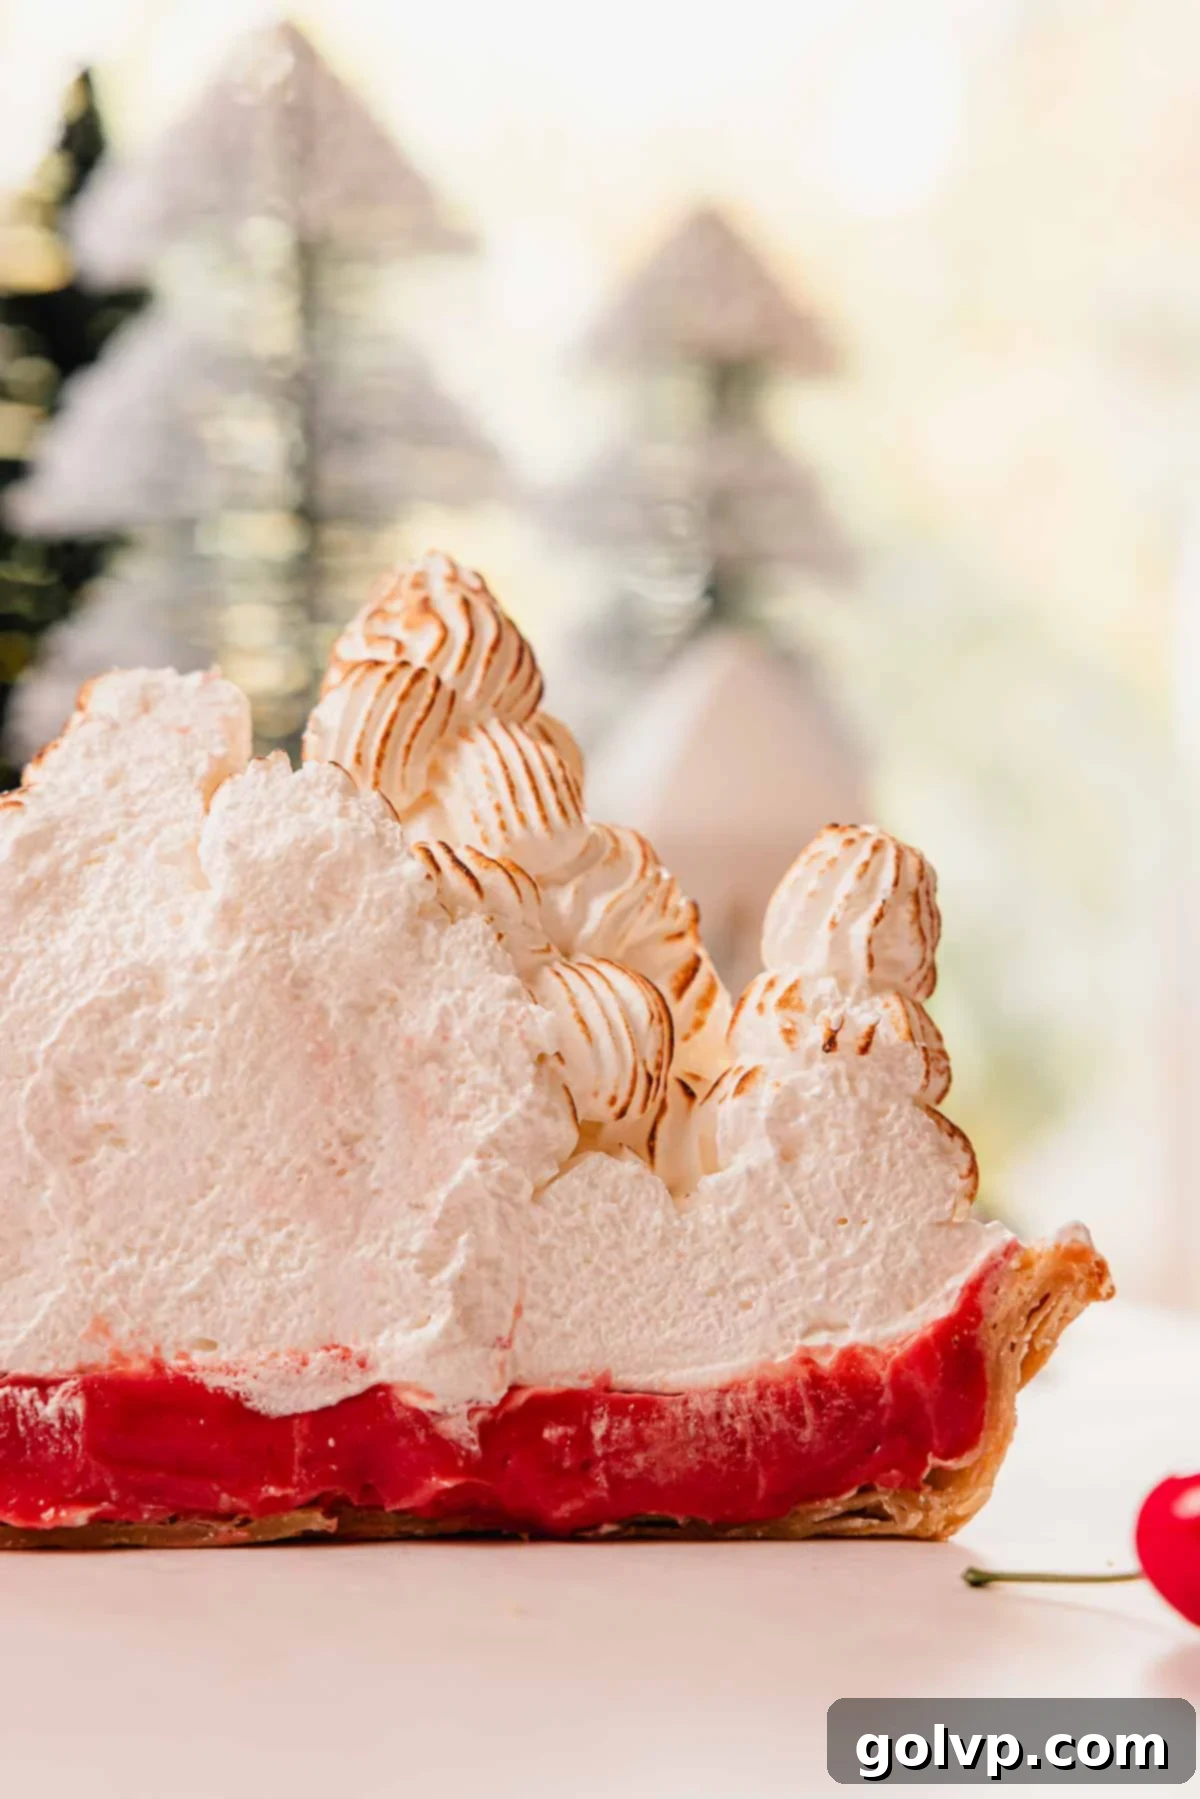
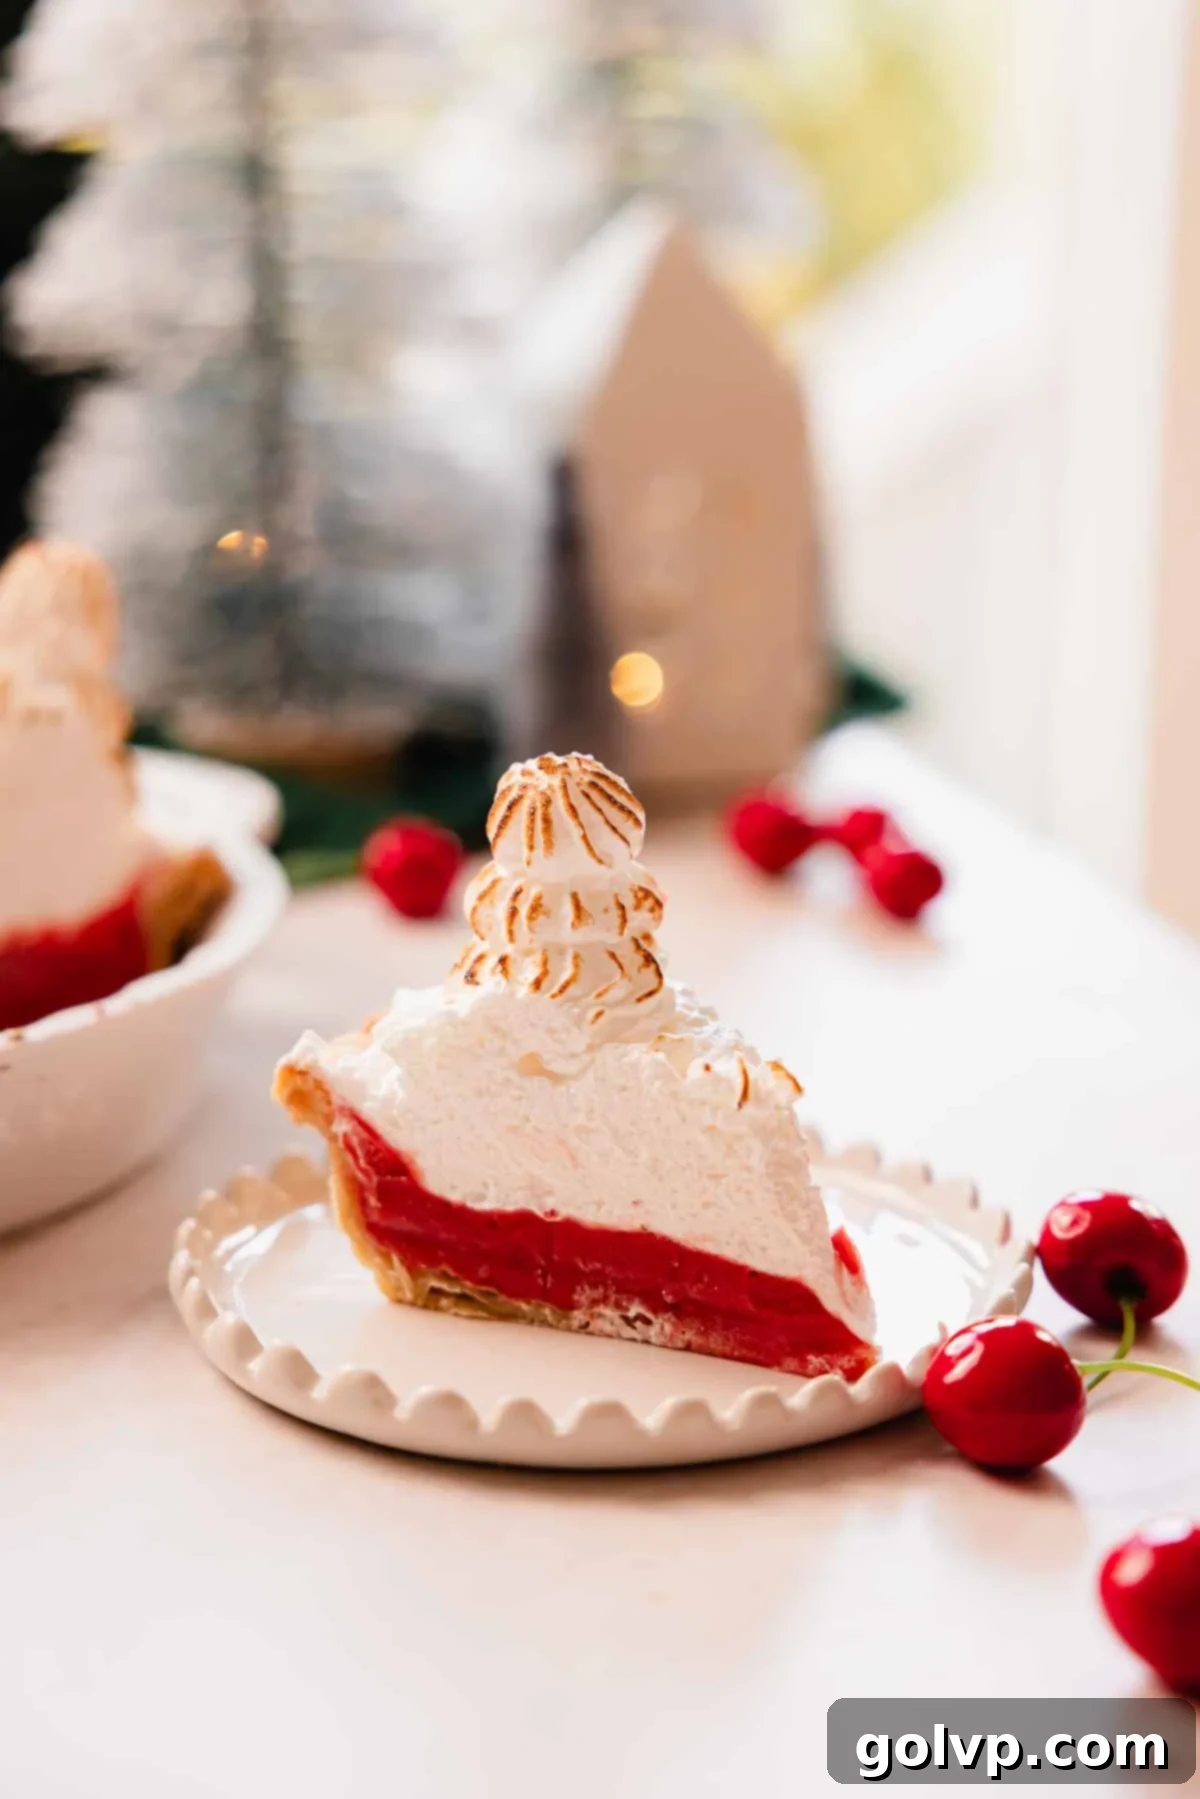
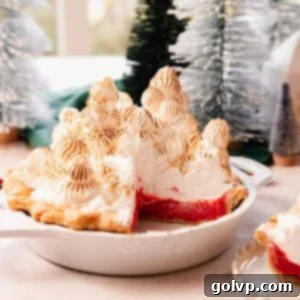
Prepare to create a truly unforgettable dessert with this exquisite tart cherry meringue pie. Imagine a buttery, flaky pie crust cradling a luscious, creamy, and vibrantly tart cherry curd filling, all crowned with an impressive, sky-high Italian meringue. This isn’t just any pie; it’s a culinary masterpiece designed to be the centerpiece of your holiday table or any special gathering. Made with intensely flavorful U.S.-grown Montmorency cherries, the filling offers a perfect balance of sweet and tart that will awaken your taste buds and leave everyone craving more. The crisp, all-butter pie crust provides the ideal foundation, while the stable Italian meringue, piped into elegant, snow-capped ‘trees,’ ensures a visually stunning presentation that holds its shape beautifully without collapsing.
While this magnificent pie does involve several steps, don’t be intimidated! This comprehensive recipe is designed to guide you through each stage, even offering suggestions on how to spread the work across multiple days. The effort invested is undoubtedly worth it, as the result is a breathtaking dessert that will be talked about and cherished for years to come. Get ready to impress your guests with this unique, flavorful, and architecturally stunning cherry meringue pie.
This recipe is proudly presented in partnership with the Utah Red Tart Cherry Marketing Board, celebrating the finest U.S.-grown Montmorency cherries.
🍒 Why You’ll Adore This Cherry Meringue Pie
- Exquisite Tart Cherry Curd Filling: At the heart of this pie lies a filling made from local U.S. Montmorency cherries. These bright red beauties boast an incredibly intense, mouthwatering flavor profile that perfectly balances vibrant sweetness with a delightful tang. Unlike other cherry varieties, Montmorency cherries retain their bold character through baking, creating a truly exceptional curd that’s both creamy and bursting with authentic cherry essence. Each bite delivers a refreshing burst of bright, fruity flavor that truly sets this pie apart.
- Spectacular Mile-High Meringue: Beyond its incredible taste, this pie is a feast for the eyes, thanks to its dramatic Italian meringue topping. Piped high like a whimsical, snow-covered forest, the stable Italian meringue creates a stunning visual impact. Its sturdy structure ensures it won’t weep or collapse, maintaining its impressive height and marshmallow-like texture for days. This towering meringue doesn’t just look good; it adds a delightful airy sweetness that perfectly complements the rich, tart filling.
- The Quintessential Holiday Showstopper: More than just a dessert, this cherry meringue pie is an experience. It’s festive, elegant, and uniquely captivating, making it the ideal choice for any holiday celebration or special occasion. The interplay of textures—from the crisp pie crust and silky curd to the fluffy, toasted meringue—combined with the complex sweet-tart flavor of Montmorency cherries, ensures that every slice is a memorable culinary adventure. It’s a true showstopper that promises to be the talk of the table.
📝 Key Ingredients for Success
For optimal results and a truly delicious pie, be sure to read through all the tips and ingredient details!
Full step-by-step instructions and ingredient quantities are in the recipe card below.
Tart Montmorency Cherries: These are the star of our pie and crucial for achieving that signature sweet and tart flavor. Montmorency cherries are readily available in the freezer section of most grocery stores, health food stores, and farmer’s markets year-round. When shopping, look specifically for labels like “red tart U.S. cherries” or “Montmorency cherries.” Their bright red color and intense, tangy-sweet flavor are unmatched. Unlike imported tart cherries, which can travel thousands of miles, choosing U.S.-grown Montmorency cherries not only supports local farmers but also guarantees peak freshness and superior flavor, as they are typically picked and flash-frozen very quickly after harvest to lock in their vibrant taste.
Lemon: Fresh lemon juice plays a critical dual role in this recipe. In the cherry curd filling, a touch of lemon juice brightens and intensifies the natural cherry flavor, making it pop even more. It also contributes to a more vivid, appealing red color in the curd. For the Italian meringue, a small amount of lemon juice helps stabilize the egg whites, allowing them to whip up into an incredibly airy, tall, and resilient meringue that holds its shape beautifully.
Eggs: This recipe is thoughtfully designed to utilize both egg yolks and egg whites efficiently, ensuring no part goes to waste. You’ll need six egg yolks for the rich, creamy cherry curd, while the six egg whites from those same eggs are carefully reserved to create the majestic Italian meringue. Additionally, two whole large eggs are incorporated into the cherry curd, contributing to its luxurious texture and perfect set.
Pie Crust: While the recipe provides detailed instructions for crafting a homemade all-butter pie crust, which we highly recommend for its superior flavor and flaky texture, you do have options. A store-bought pie crust can be used to save time, but it will still need to be blind-baked according to the instructions provided. However, we genuinely encourage making the homemade version – it’s a rewarding process, especially for the holidays, and can be prepared a day or two in advance. A homemade crust truly elevates this pie to an unparalleled level of deliciousness.
Butter: Butter is a foundational ingredient here, contributing richness and structure throughout the pie. In the all-butter pie crust, it’s essential for achieving that characteristic flakiness and golden-brown perfection. In the cherry curd, butter is vital for creating a silky-smooth, luxurious texture and an irresistible mouthfeel that makes the filling incredibly decadent.
This exceptional pie recipe draws inspiration from my widely popular raspberry meringue pie, a recipe that garnered immense acclaim. The overwhelming positive feedback from my audience compelled me to create an equally sumptuous and showstopping cherry version.
🍒 Why Tart Montmorency Cherries Are The Best Choice
Tart cherries, particularly the Montmorency variety, are uniquely suited for baking and cooking compared to their sweeter counterparts. Their higher acidity and more concentrated flavor profile mean that their vibrant cherry essence truly shines through when cooked or baked. This intensity prevents the flavor from becoming bland or muted, which can sometimes happen with sweet cherries. When it comes to making curds, the tarter the fruit, the more dynamic and delicious the end result. Sour cherries, with their perfect balance of tang and natural sweetness, were quite simply made to be transformed into a luscious, pucker-inducing curd.
Montmorency cherries are the most widely cultivated tart cherry variety in the United States. Because fresh tart cherries are incredibly delicate and have a very short shelf life, you’ll find them much more commonly available frozen in grocery store freezer sections throughout the year. This convenient availability means you can enjoy the exquisite flavor of farm-fresh cherries no matter the season. I’ve personally found high-quality U.S.-grown Montmorency cherries at health food stores, larger supermarkets, and even specialized baking suppliers, as they are a beloved staple in the baking community, especially for pies.
When selecting your cherries, prioritizing U.S.-grown Montmorency cherries is a wonderful way to support hardworking local farmers. Beyond the ethical considerations, these cherries offer distinct advantages in your baking. They possess a brighter, more appealing red color compared to imported varieties like “Morello,” and they are far less prone to “bleeding” their color into the surrounding ingredients, ensuring a cleaner, more attractive pie filling. Crucially, local Montmorency cherries are harvested at their peak ripeness and immediately flash-frozen, capturing their optimal flavor and nutritional value. This process allows us to enjoy the taste of summer’s bounty in our baked goods all year long, guaranteeing a superior taste and vibrant color for your cherry meringue pie.
👩🍳 How to Make Tart Cherry Meringue Pie: Step-by-Step Guide
Crafting the Perfect Pie Crust
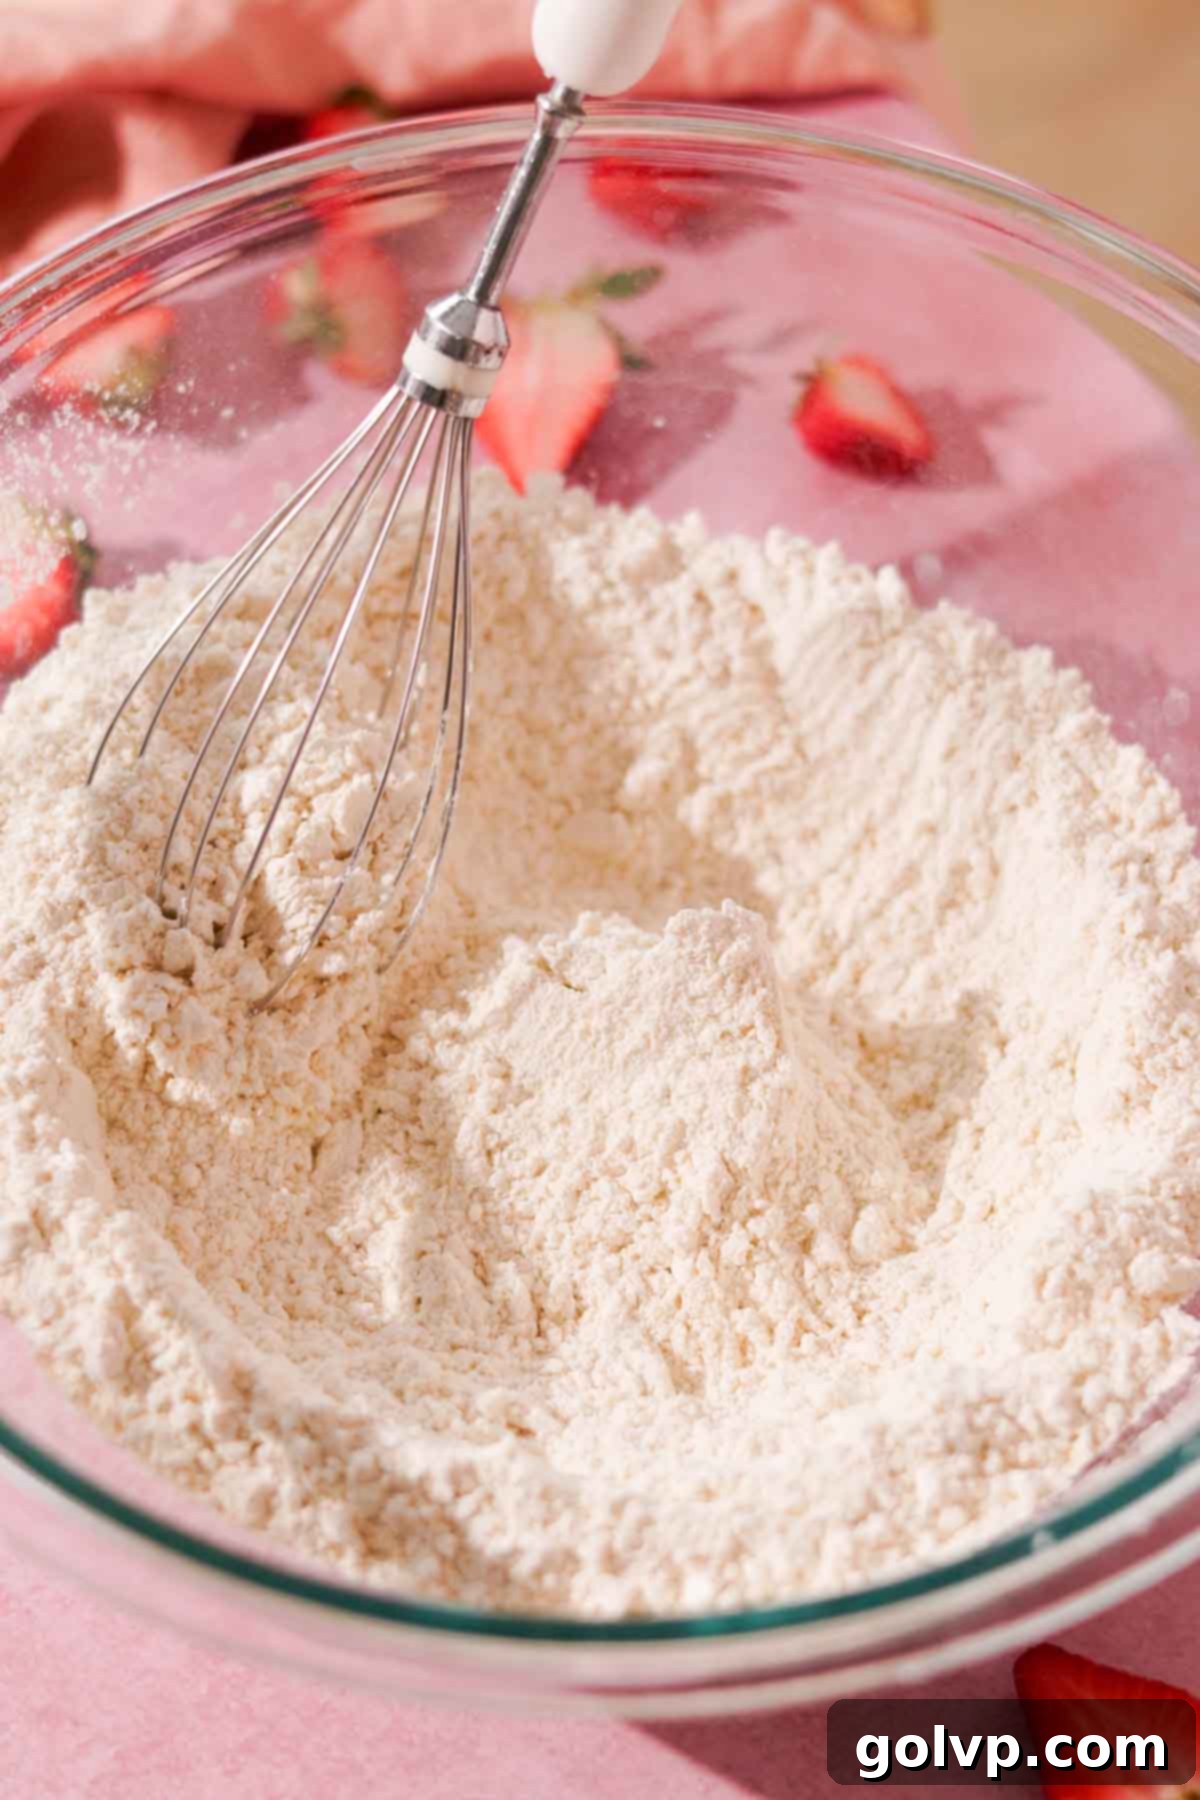
Step 1: In a large mixing bowl, thoroughly combine the all-purpose flour and sea salt. Next, add the cubed, frozen unsalted butter. Using your fingertips, quickly work the butter into the flour mixture, flattening the cubes as you go. The goal is to incorporate the butter without overworking it, which helps create a flaky crust. Work swiftly to keep the butter as cold as possible.
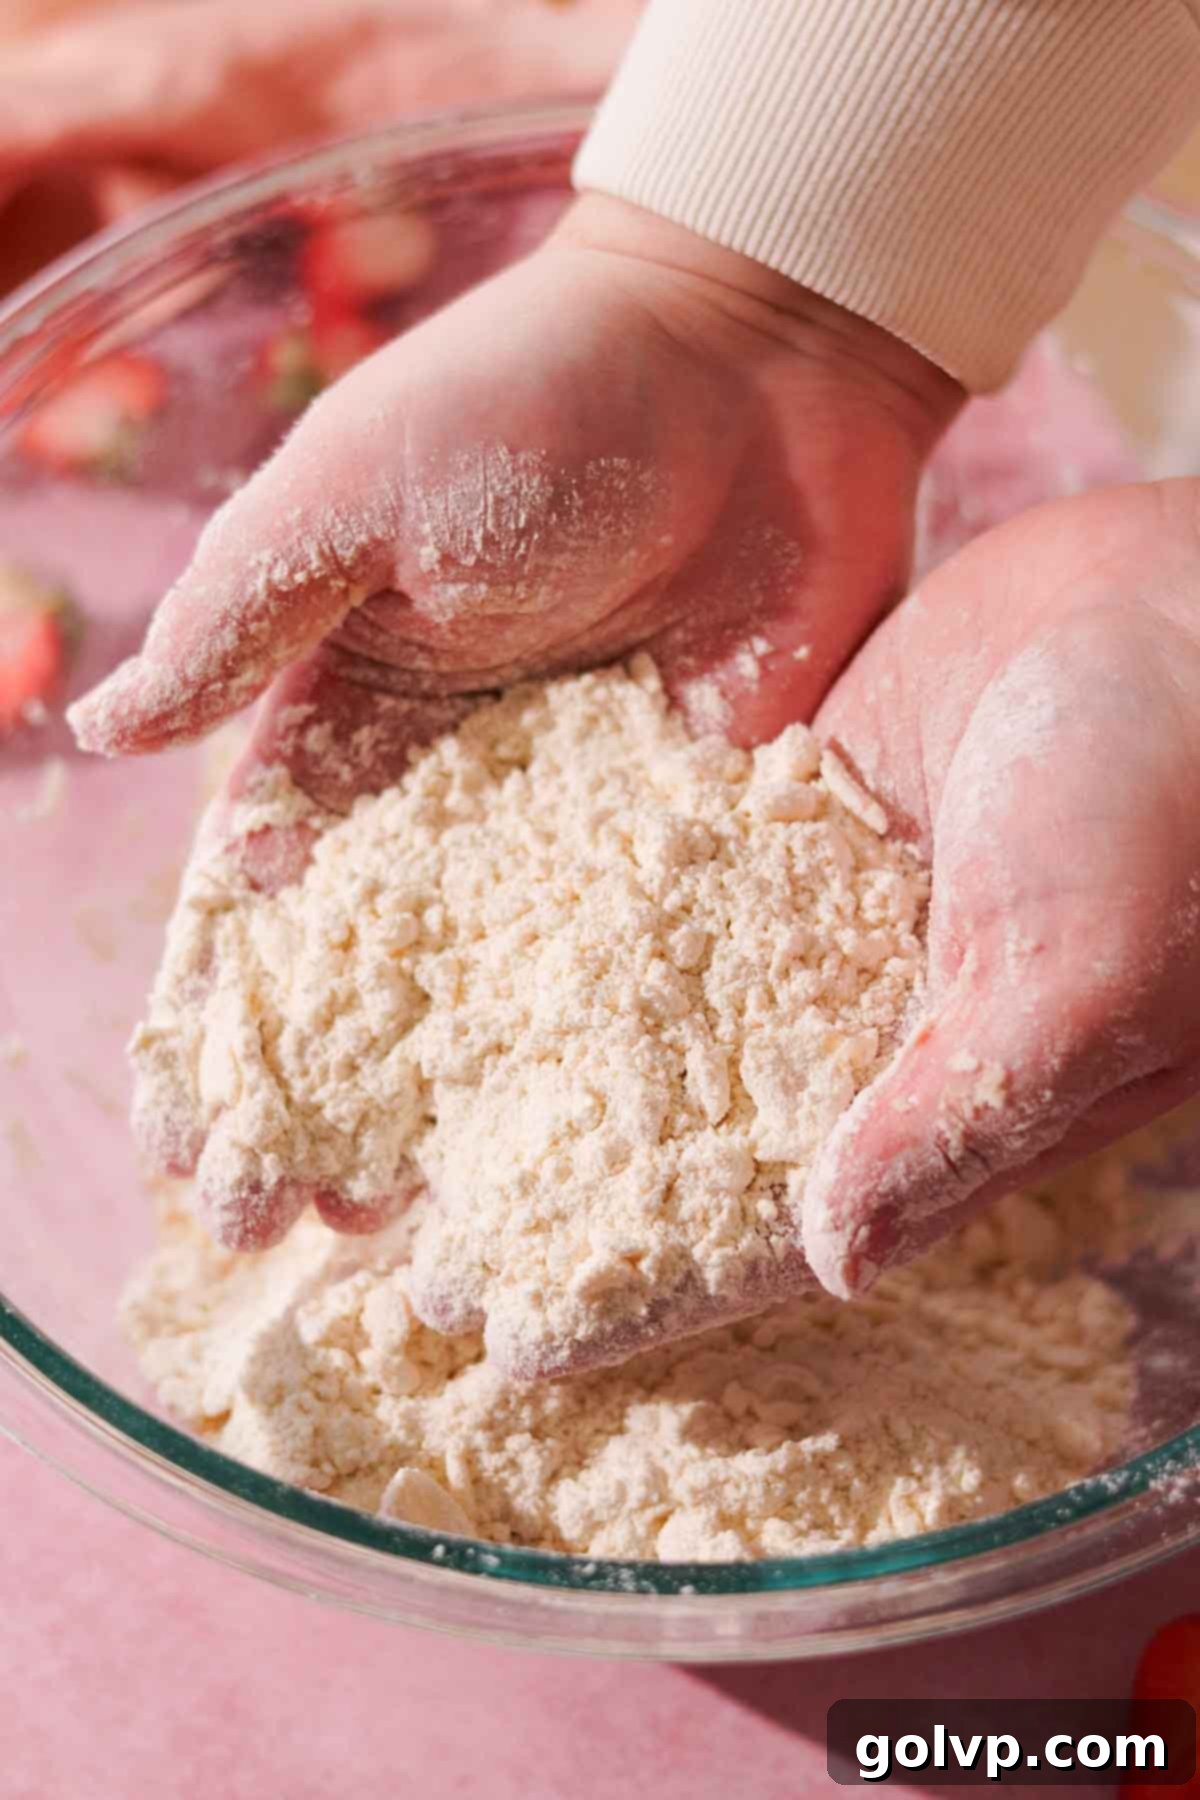
Step 2: Continue working the butter into the flour until the mixture resembles small peas coated in flour. This texture is crucial for achieving a perfectly flaky pie crust. Avoid mixing until it’s completely smooth; you want visible pieces of butter. These butter pockets will create steam during baking, separating the layers of dough for that desired flakiness.
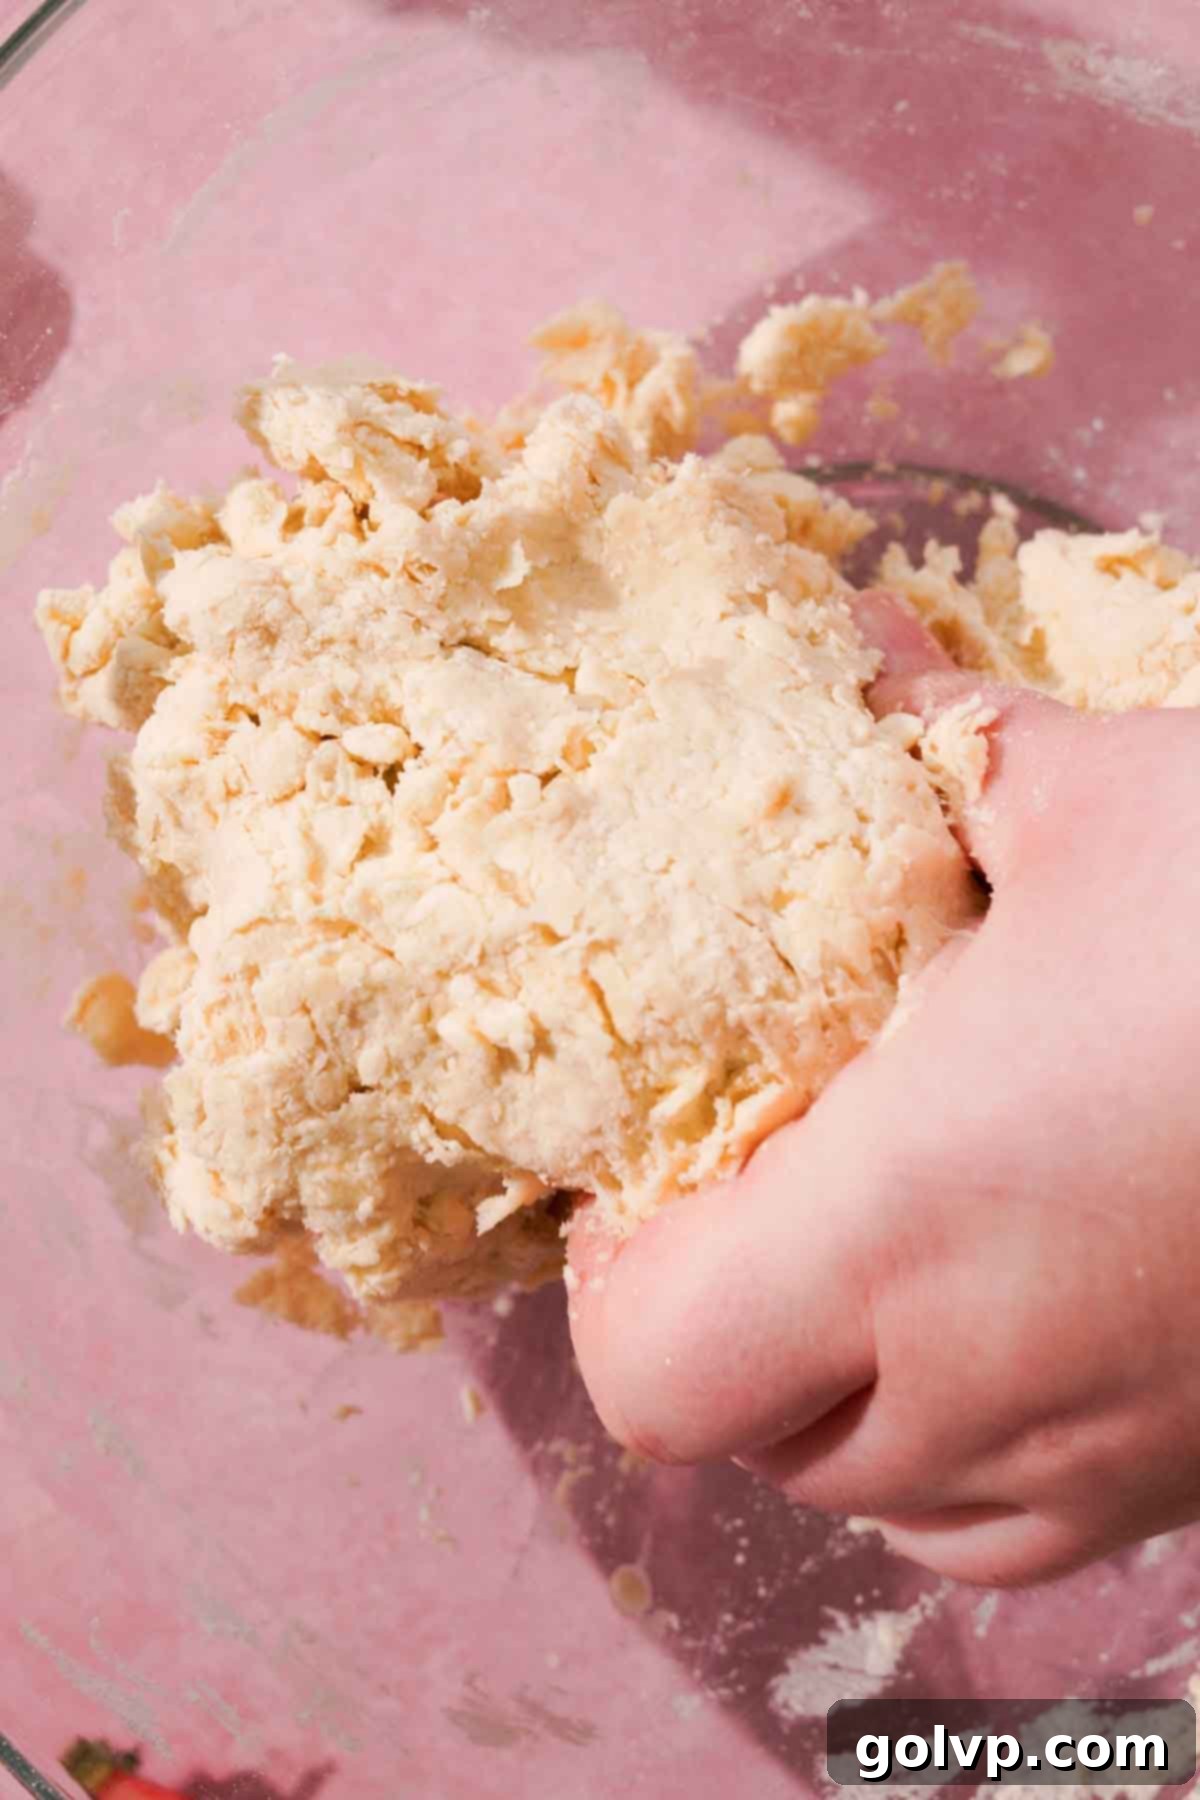
Step 3: In a separate small bowl, whisk together the ice water and vinegar. Gradually add this water mixture to the flour and butter, one tablespoon at a time, stirring the dough until it just begins to come together. Be careful not to add too much liquid. Once the dough forms a shaggy ball, gently press it into a disk, wrap it tightly in plastic wrap, and refrigerate for at least 30 minutes. For best results, you can prepare the dough a day or two in advance and chill it overnight.
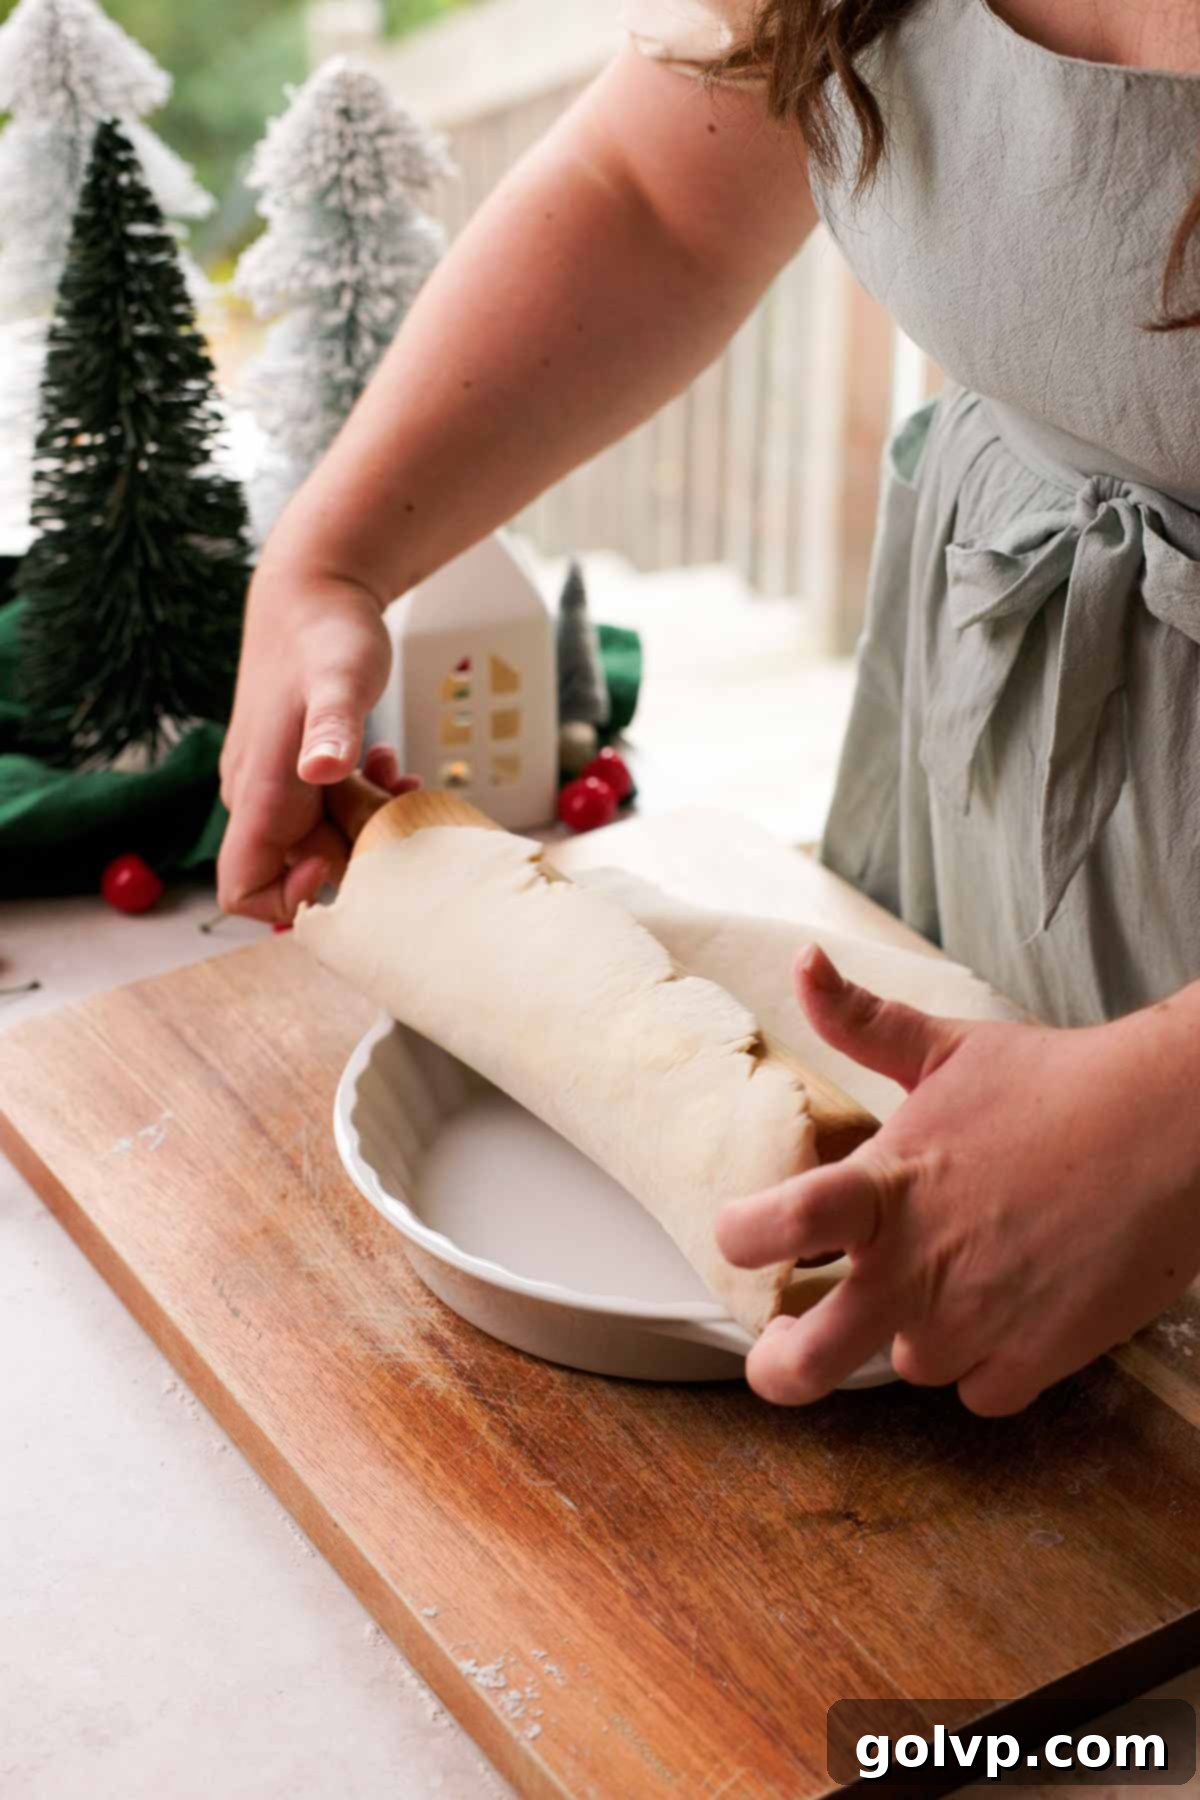
Step 4: On a lightly floured surface, roll out the chilled pie dough into a circle approximately 12 inches in diameter. Carefully transfer the rolled-out dough into a 9-inch round pie plate. Ensure the dough is settled snugly into the bottom and sides of the plate without stretching it, which can cause it to shrink during baking.
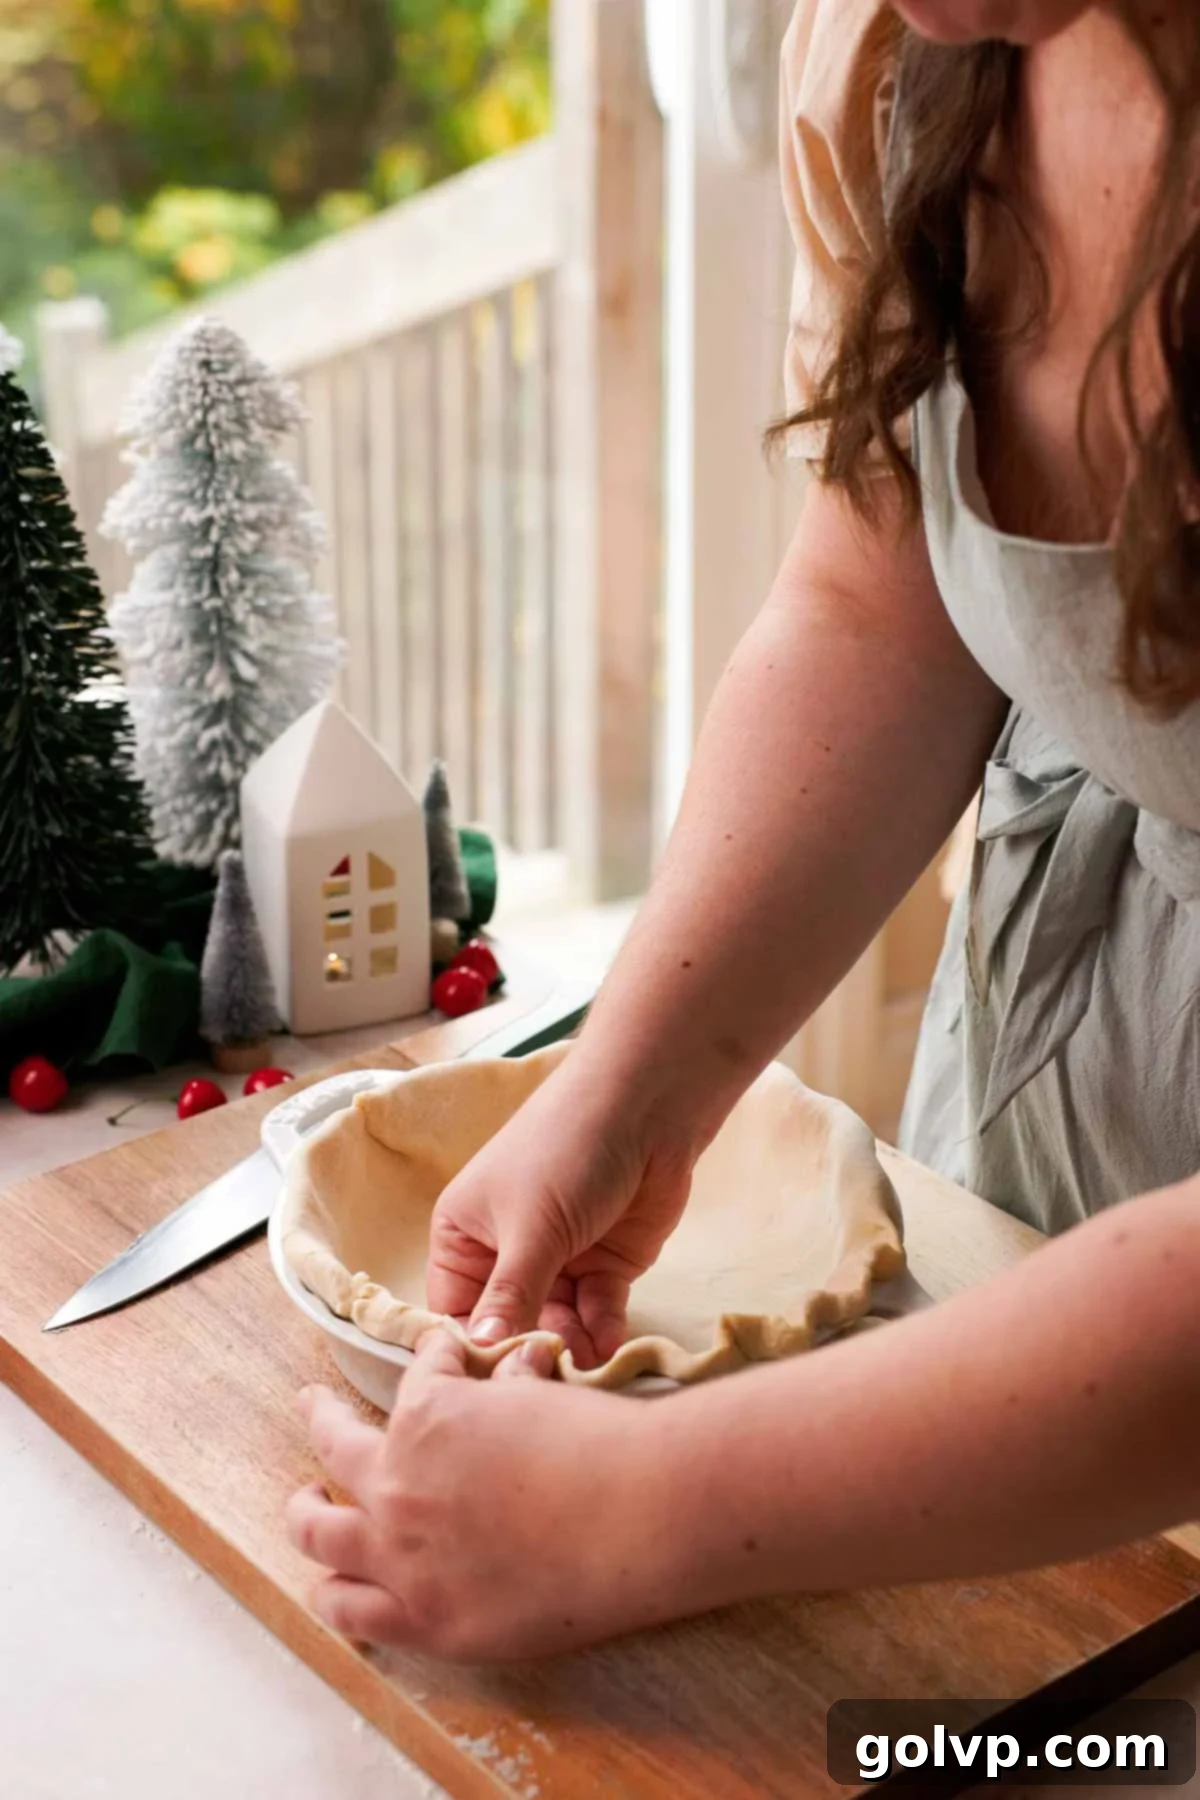
Step 5: Trim any excess dough, leaving about a 1-inch overhang. Tuck the edges of the dough underneath itself to create a thicker, more substantial crust edge. Then, crimp the edges decoratively using a fork or your fingers to create a beautiful, finished border. This not only looks appealing but also helps prevent the crust from slumping during baking.
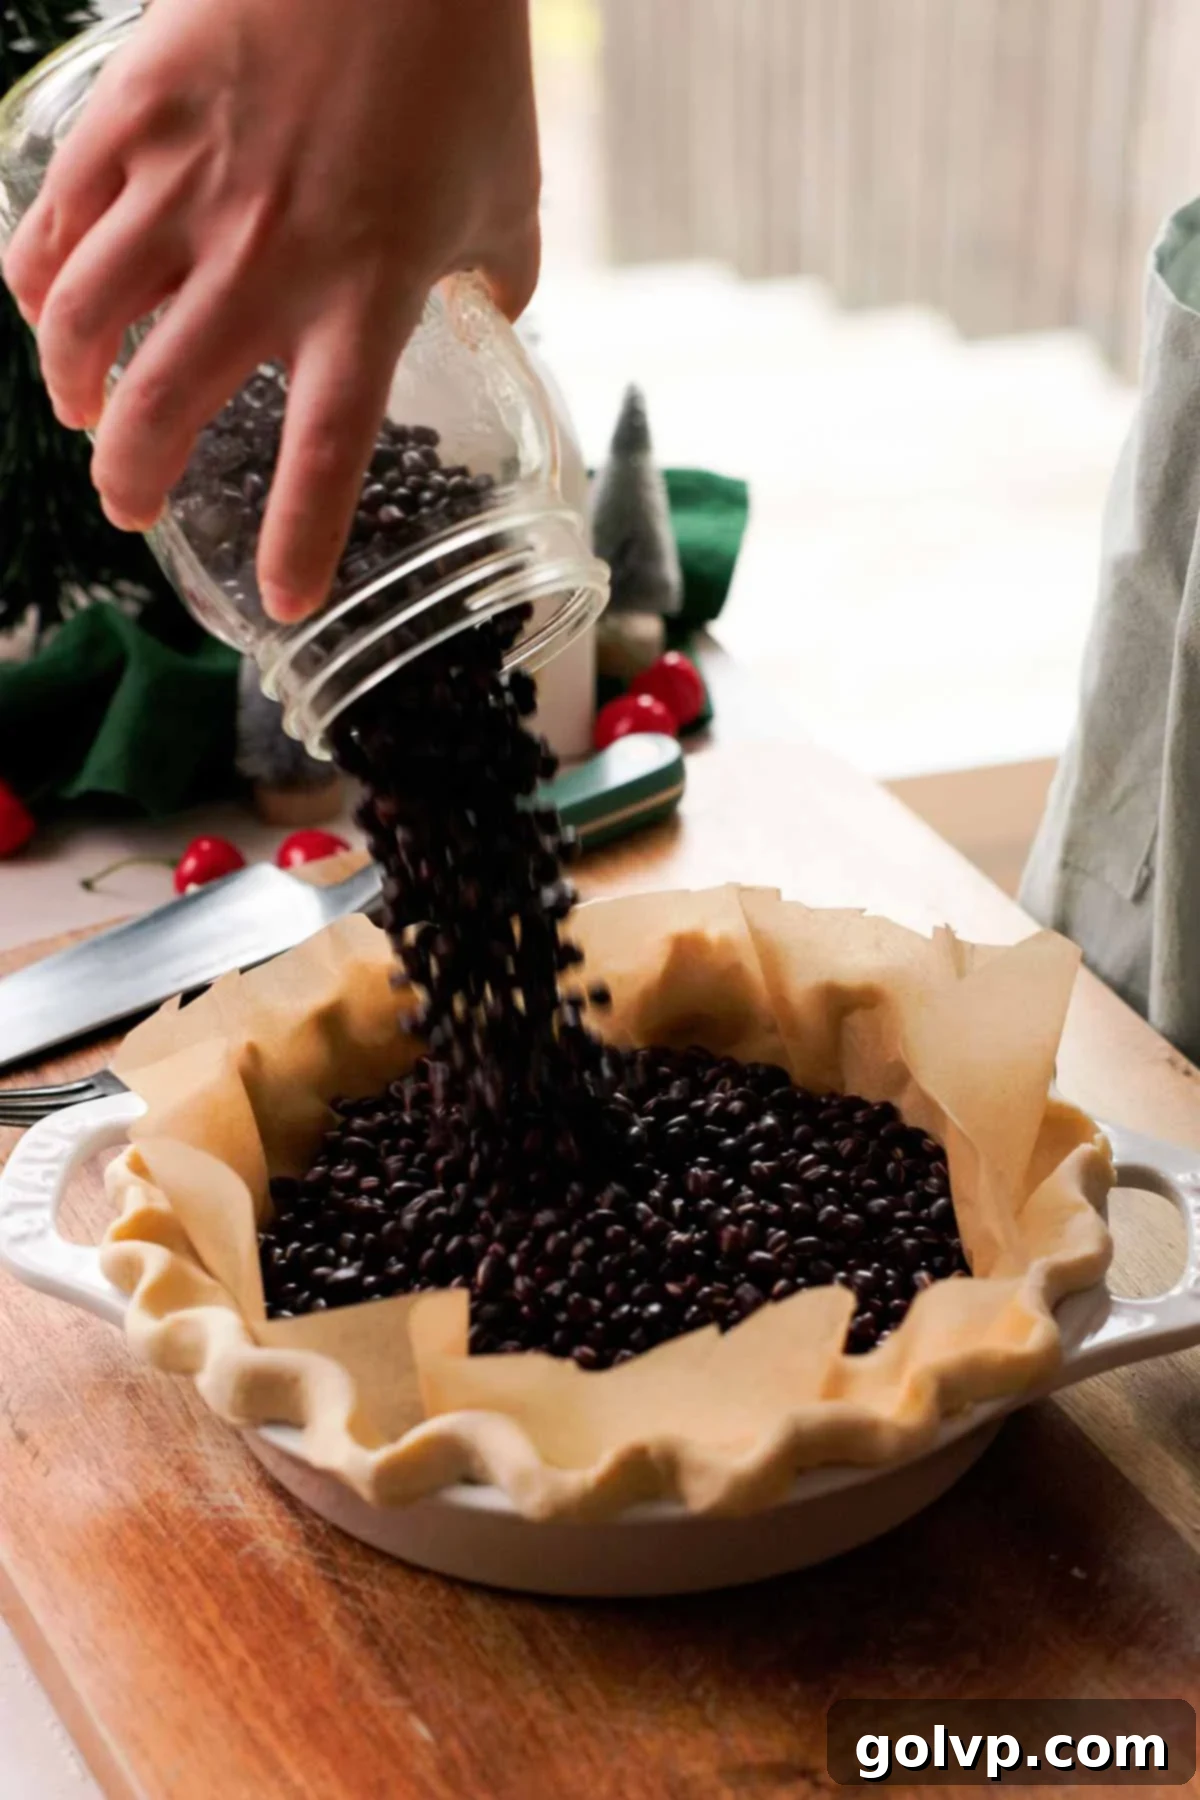
Step 6: Using a fork, lightly prick the bottom of the pie crust all over. This helps steam escape and prevents the crust from puffing up unevenly. Line the prepared crust with a piece of parchment paper or foil, pressing it gently against the bottom and sides. Fill the lined crust with dry beans or rice, which act as pie weights to keep the crust from shrinking or bubbling during blind baking.
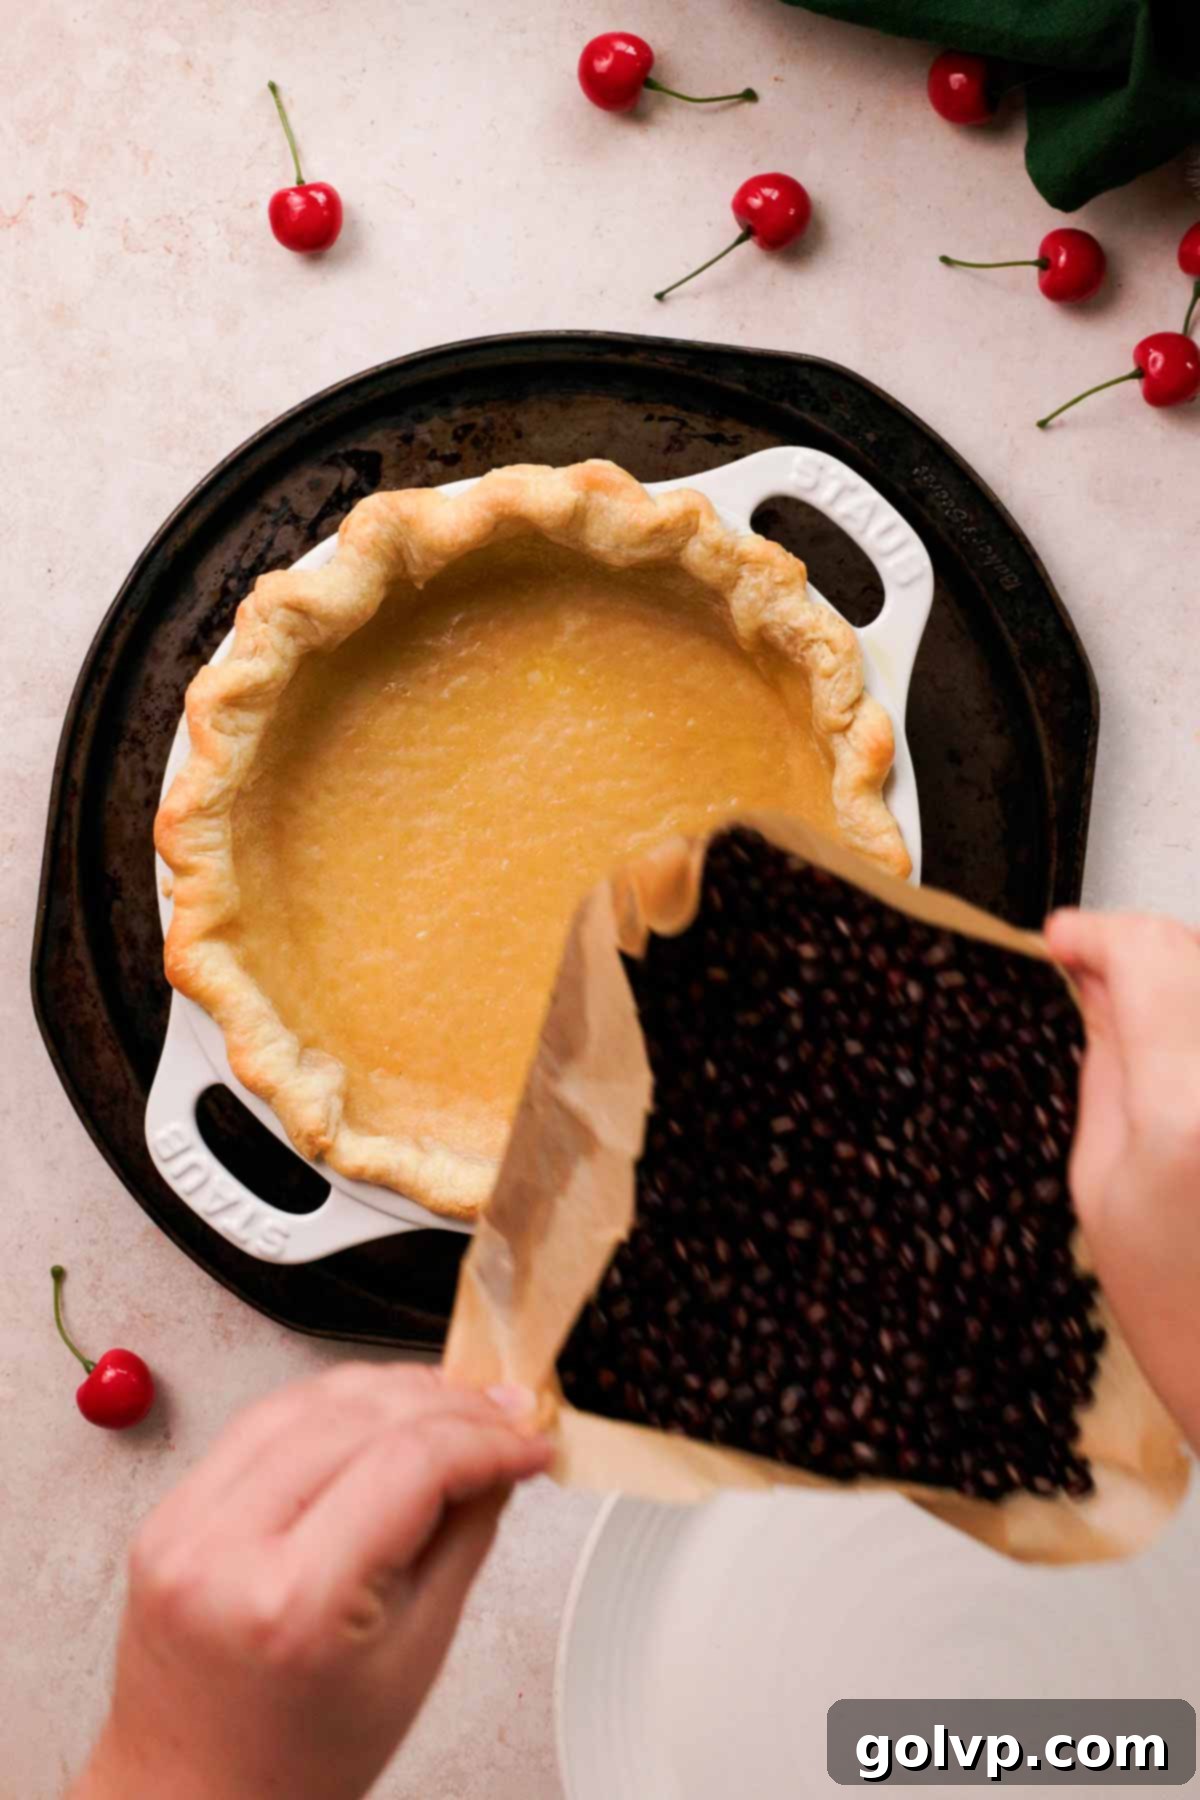
Step 7: Place the pie plate on a baking sheet to catch any potential spills and for easier handling. Bake in a preheated oven at 355°F (190°C) for 25 minutes. After this initial bake, carefully remove the parchment paper along with the pie weights. Return the crust to the oven and bake for an additional 20-25 minutes, or until it’s beautifully golden brown and fully cooked through. Allow the baked crust to cool completely before filling.
Preparing the Velvety Cherry Curd Pie Filling
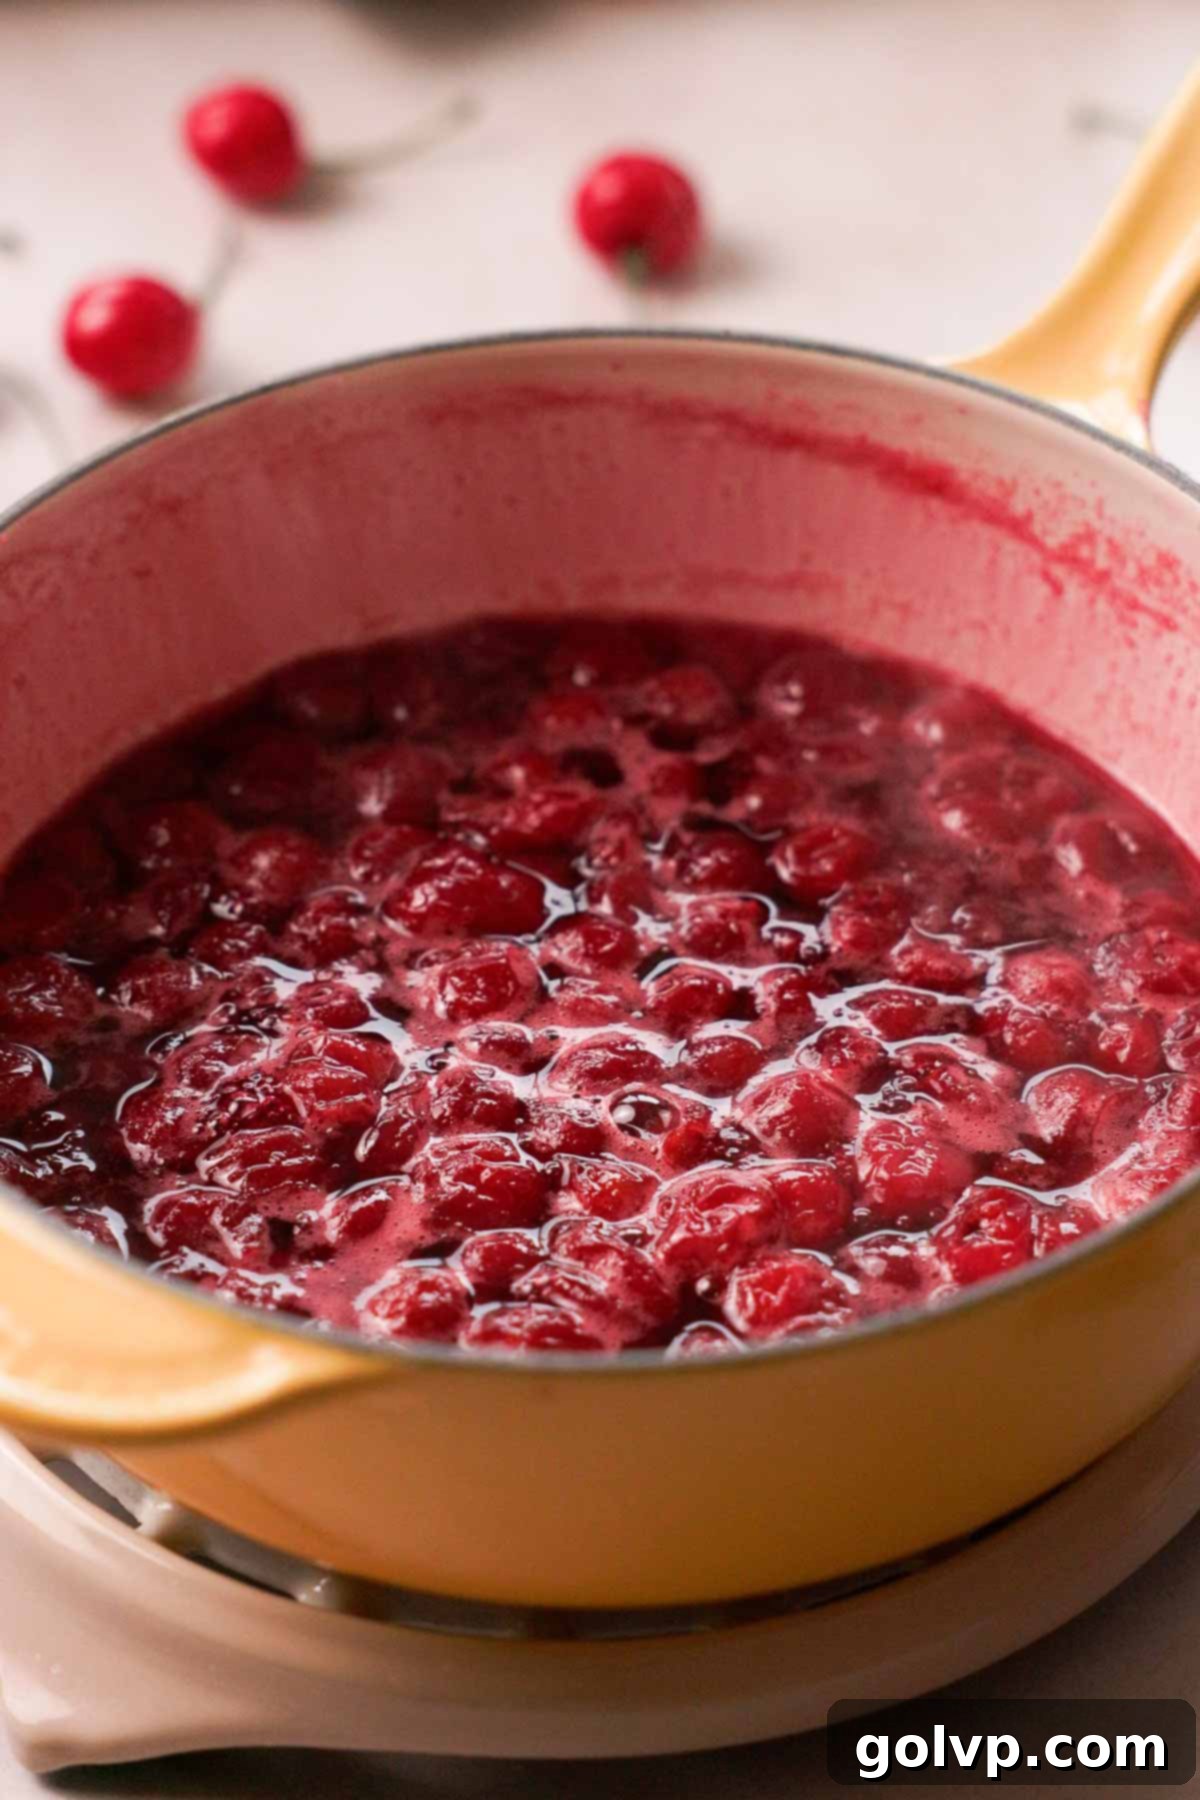
Step 1: In a medium, non-metal saucepan (to prevent a metallic taste), combine the frozen tart cherries, ¾ cup of granulated sugar, and fresh lemon juice. Heat the mixture over low heat, allowing it to gently simmer. Continue to cook, stirring occasionally, until the mixture has reduced by half, aiming for a total of two cups of liquid and solids. This reduction concentrates the cherry flavor beautifully.
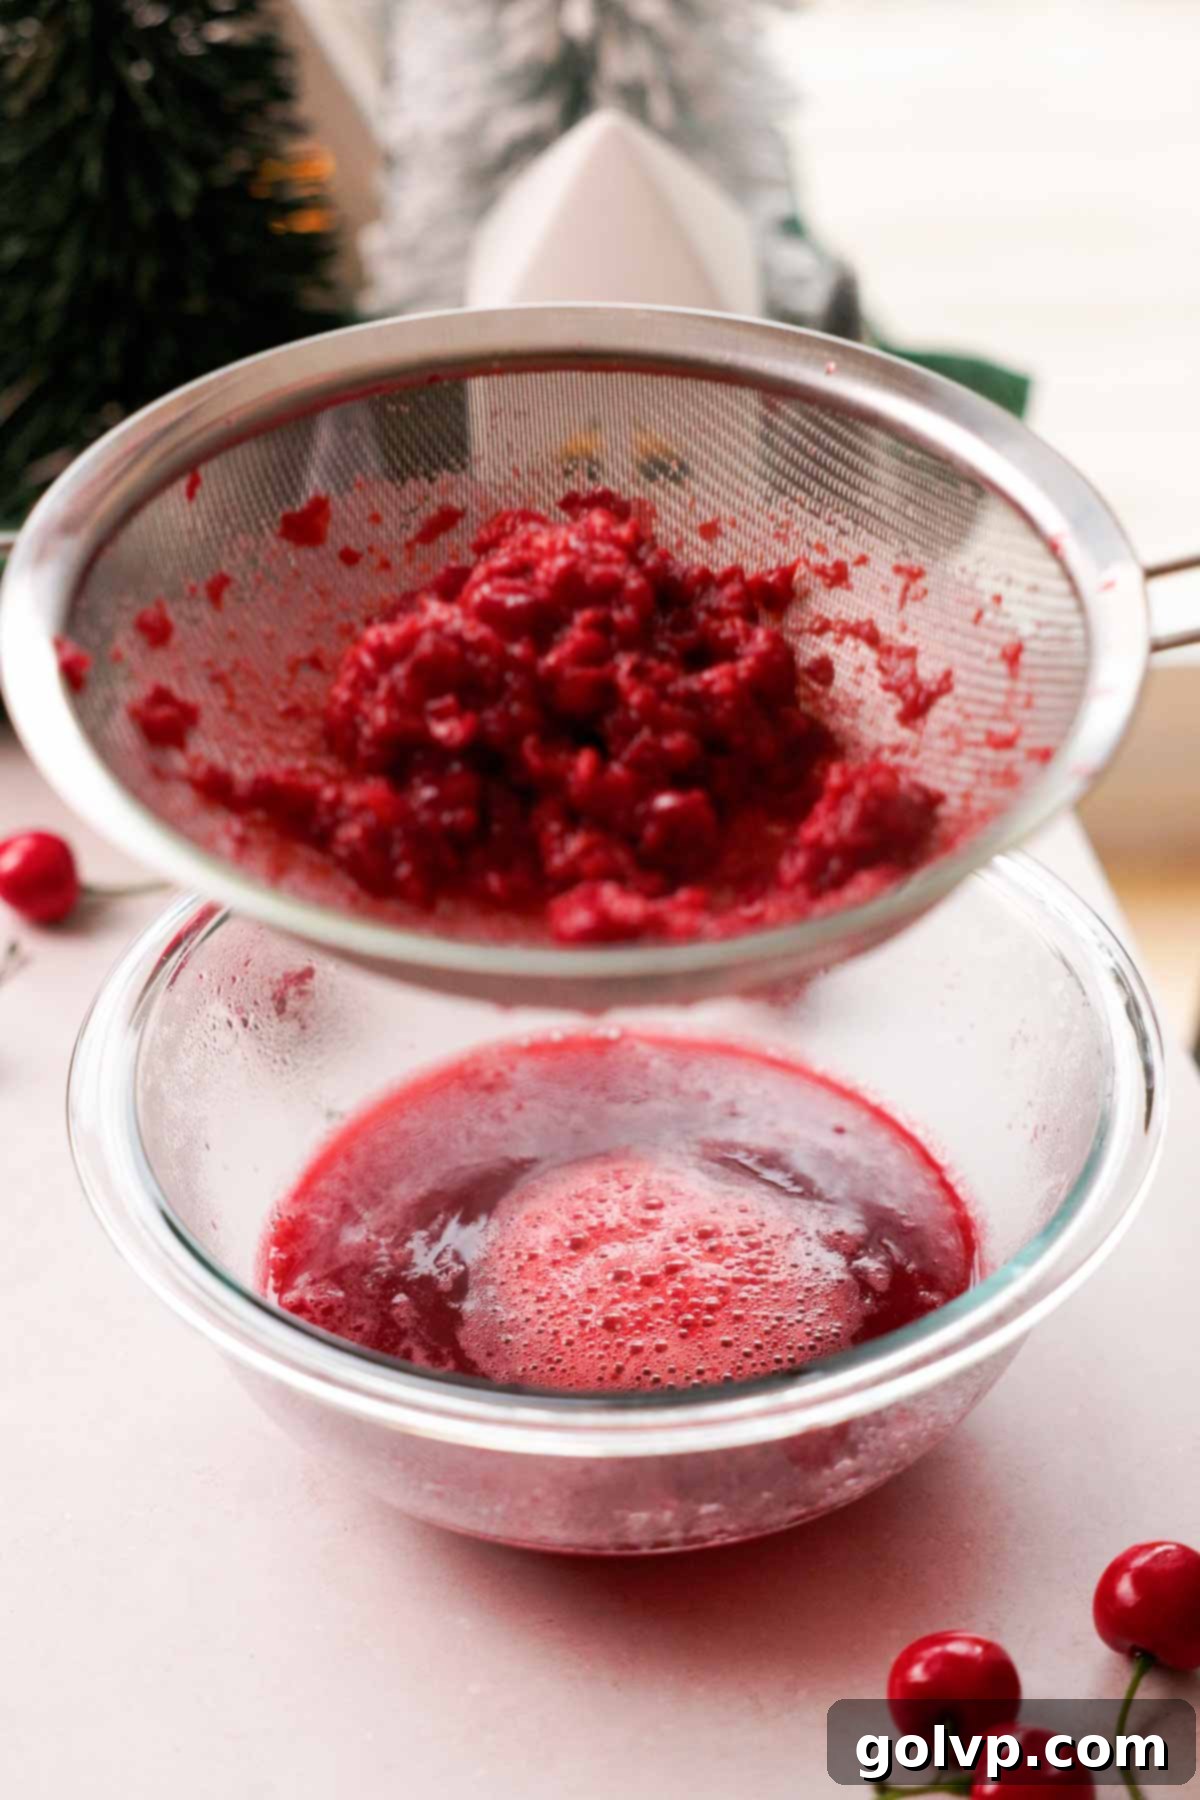
Step 2: Once the cherry mixture has reduced, carefully pour it through a fine-mesh sieve set over a bowl. Use the back of a spoon or a rubber spatula to press firmly on the solid cherry bits, extracting as much vibrant, flavorful liquid as possible. Discard the remaining cherry pulp. This straining step ensures a perfectly smooth and silky cherry curd.
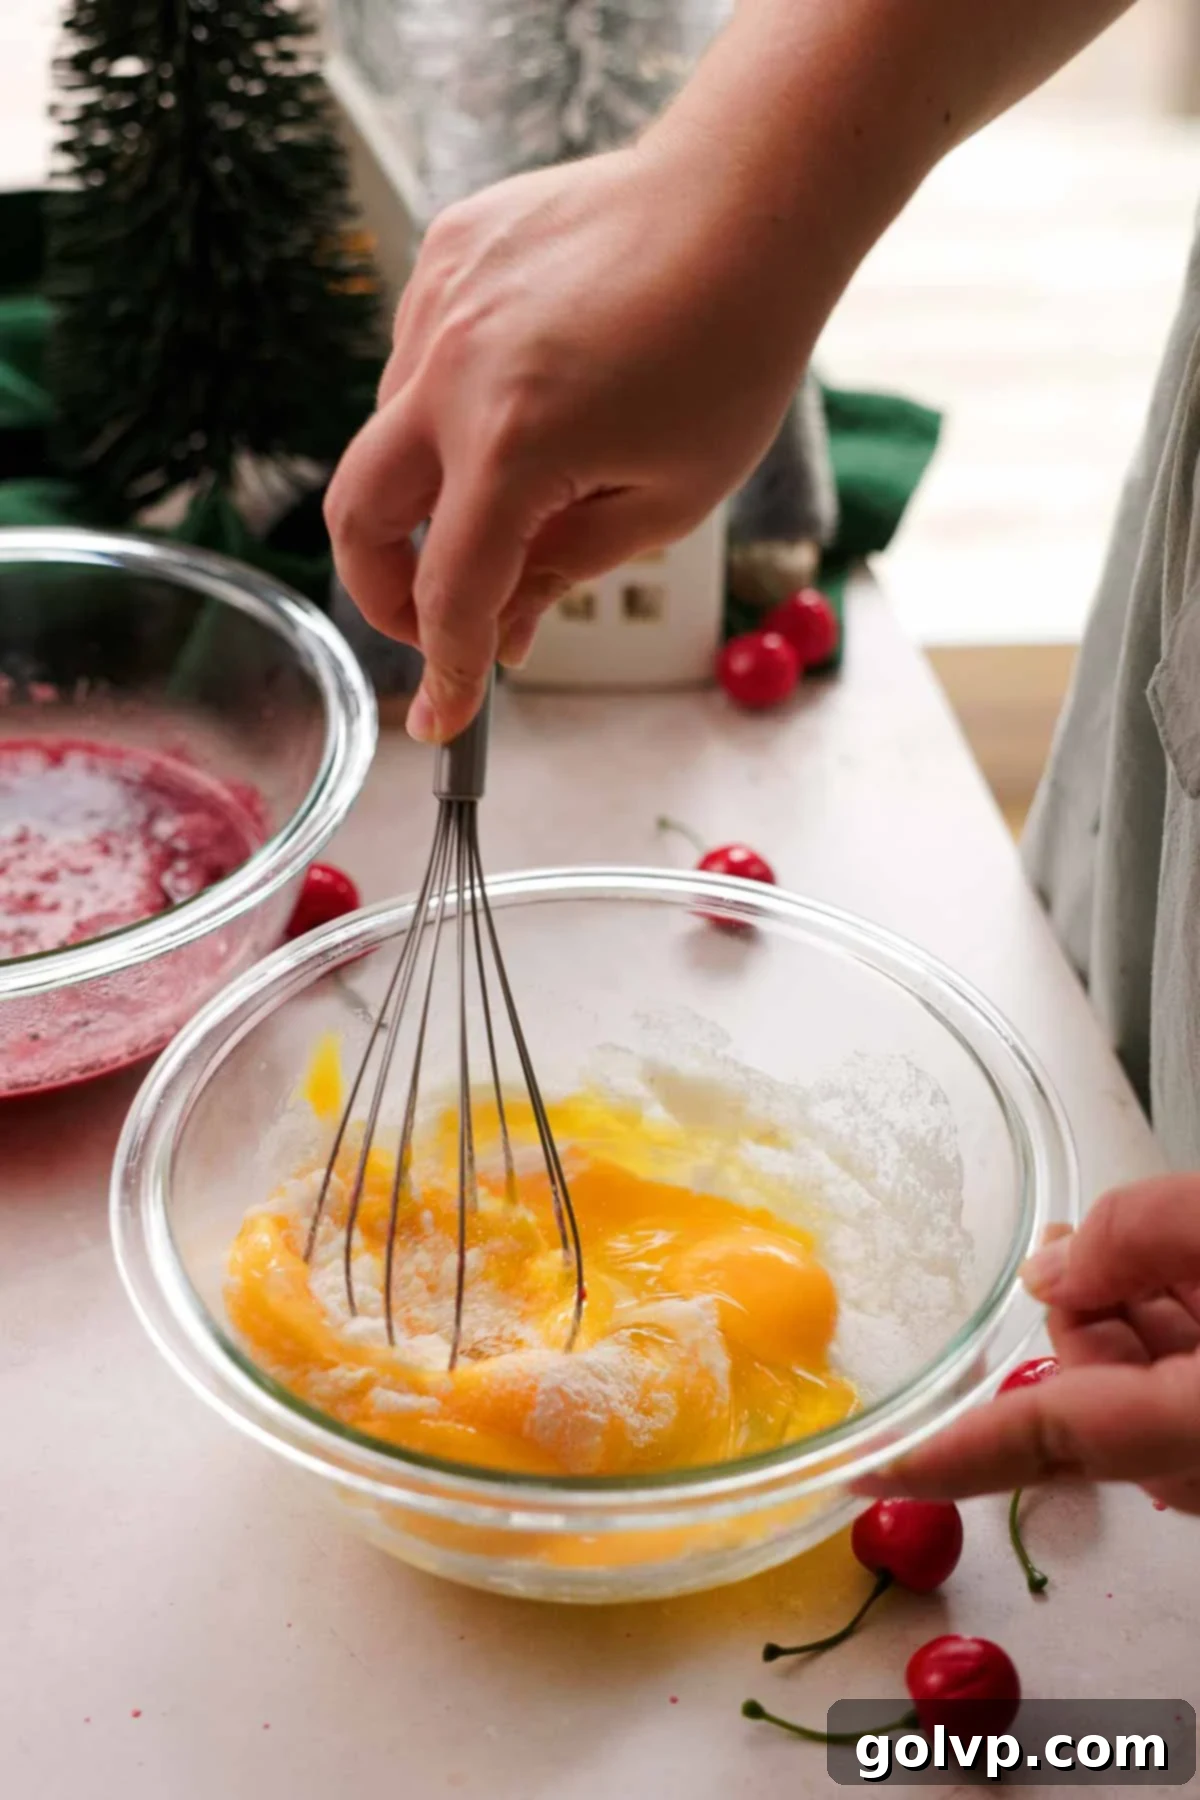
Step 3: In a separate medium bowl, whisk together the remaining ¼ cup of granulated sugar with the cornstarch until well combined. Add the two whole large eggs and the six reserved egg yolks to this mixture. Whisk vigorously until the mixture is smooth and pale yellow. This cornstarch-egg mixture will be the thickening agent for our curd.
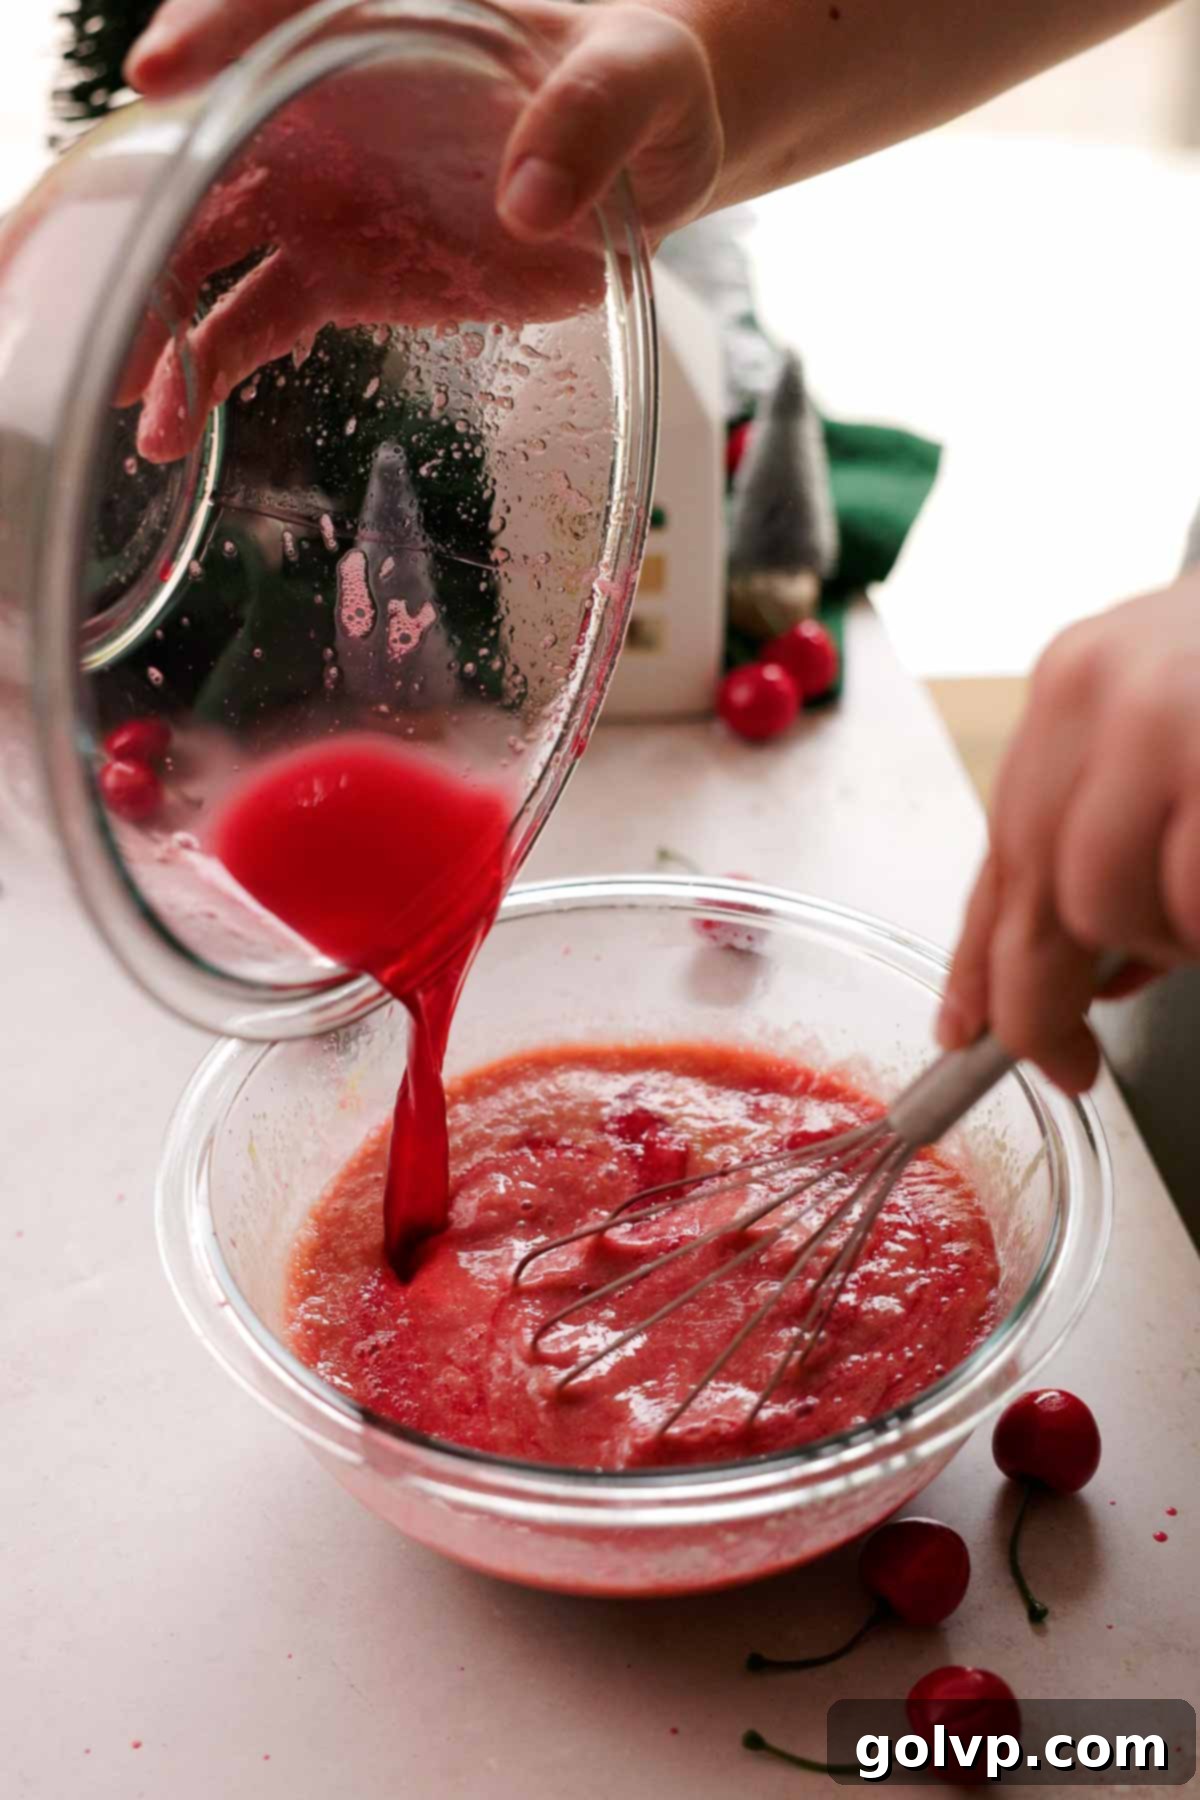
Step 4: Gradually temper the egg mixture by slowly whisking in the hot, strained cherry syrup. Pour a thin stream of the hot syrup into the egg mixture while continuously whisking to prevent the eggs from scrambling. Once about half of the syrup is incorporated, pour the entire mixture back into the saucepan. Add the butter and sea salt. Cook over medium-low heat, stirring constantly with a spatula, until the curd visibly thickens and coats the back of the spoon. It should be thick enough for the spatula to leave a trail when drawn across the bottom of the pan.
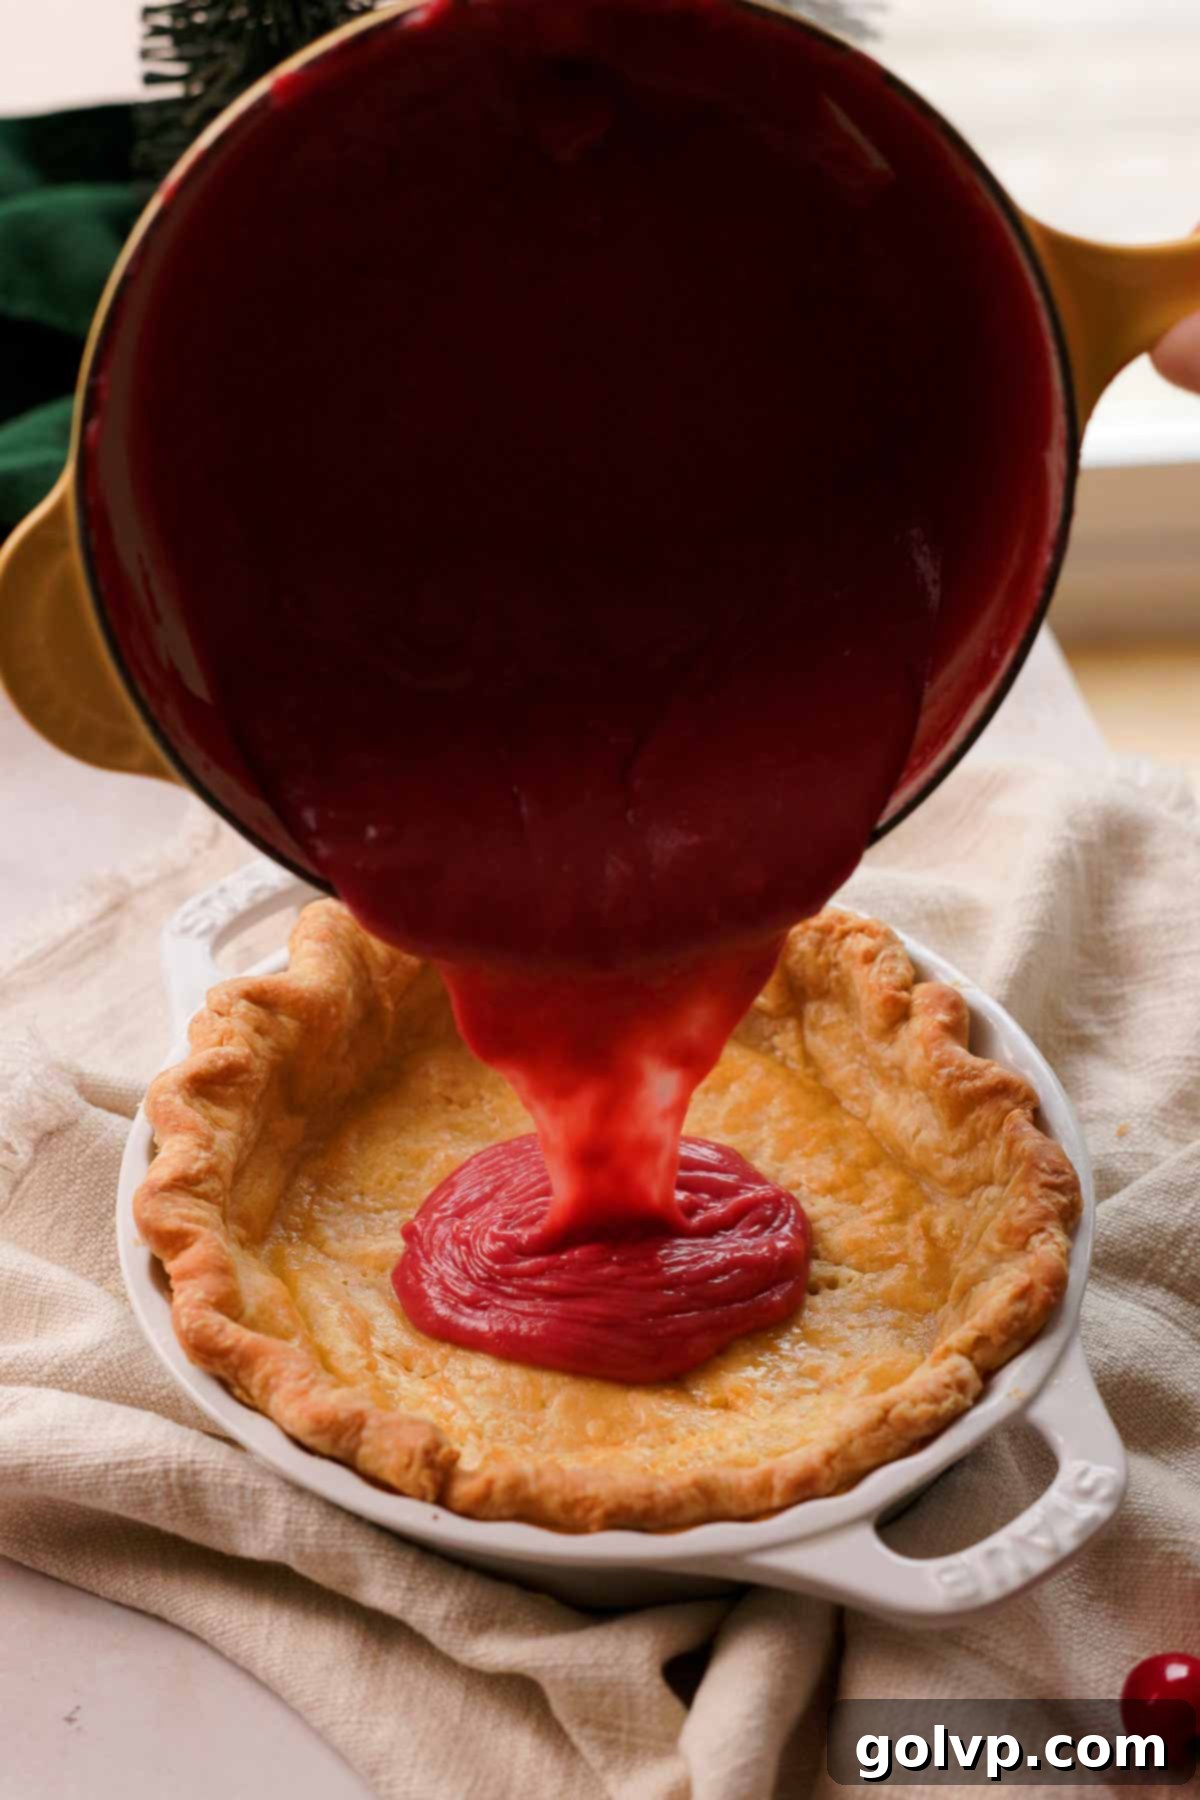
Step 5: Immediately pour the hot, thickened cherry curd into the cooled, blind-baked pie crust. Gently shake the pie plate to ensure the filling spreads evenly to the edges.
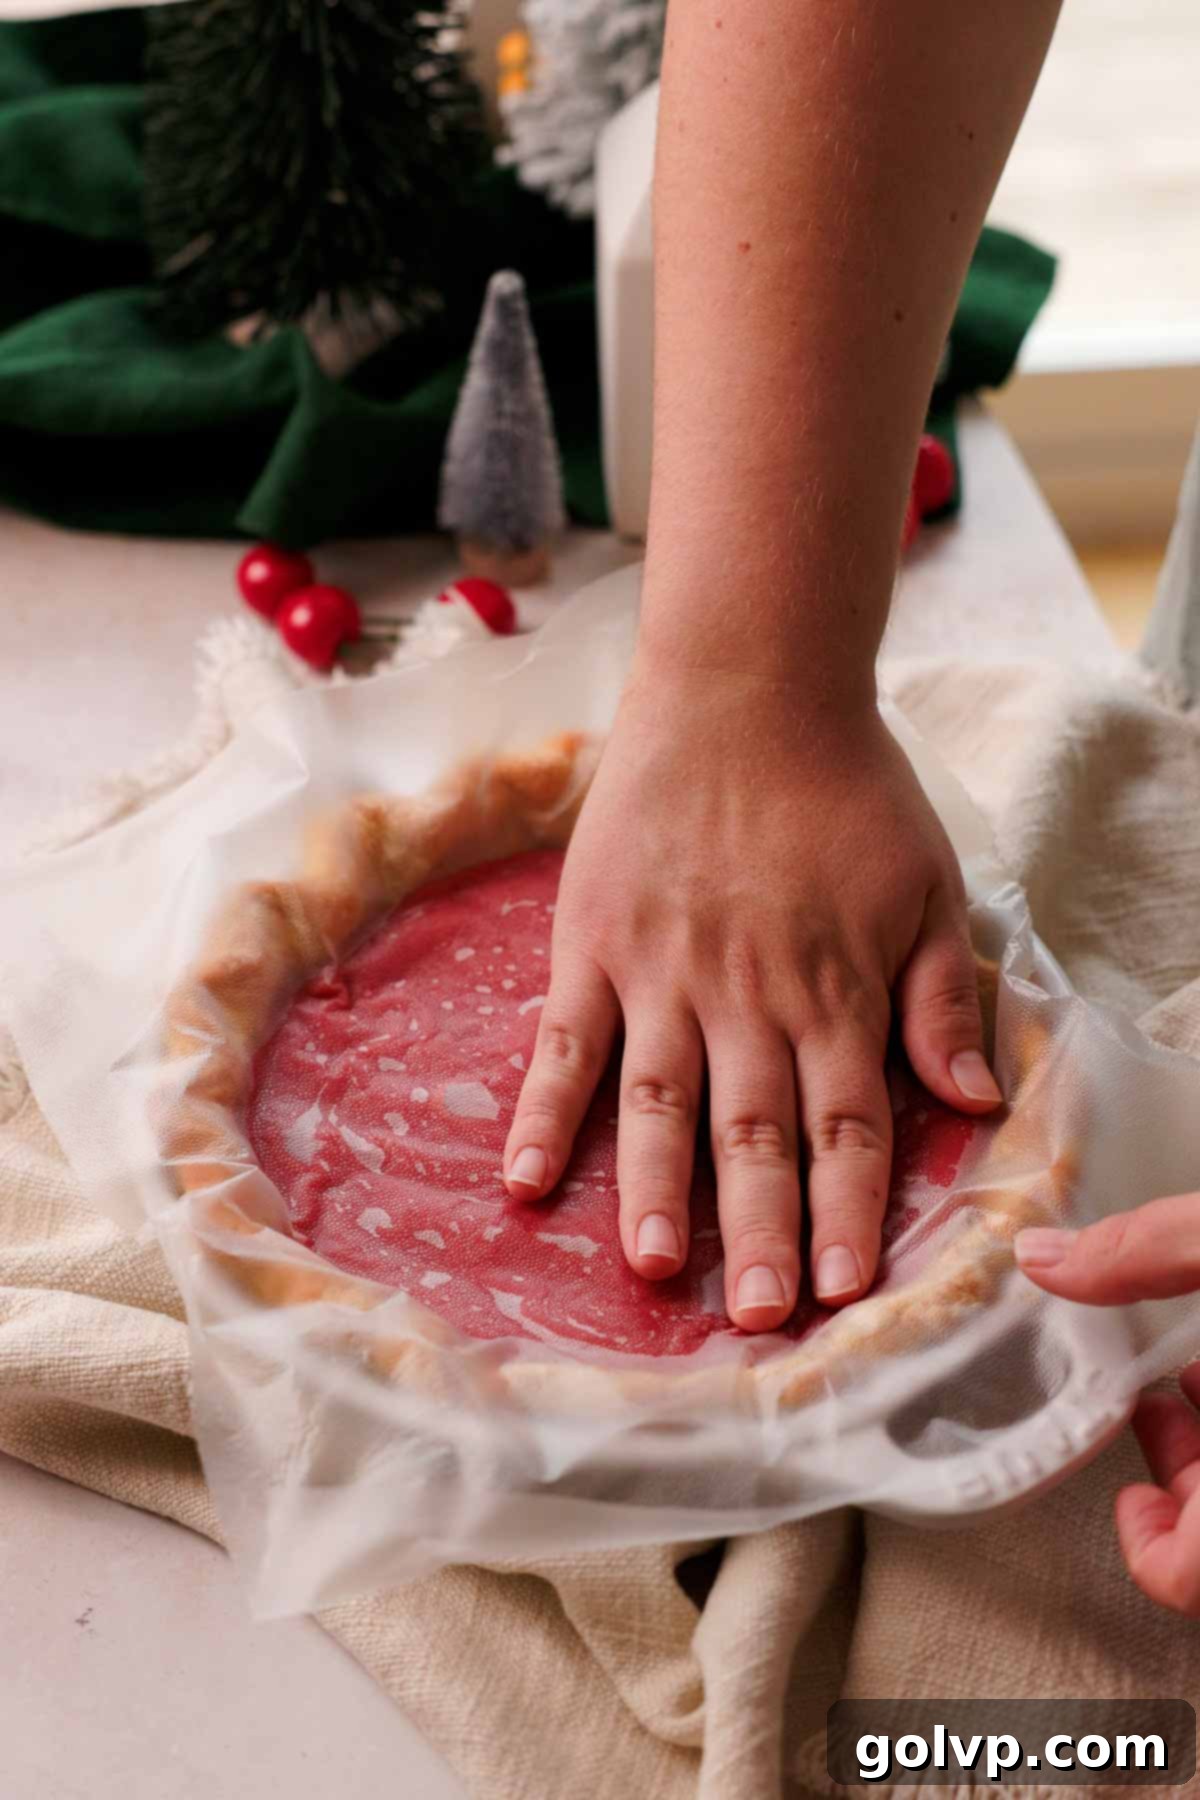
Step 6: To prevent a “skin” from forming on the surface of the curd as it cools, press a piece of cling film directly onto the top of the hot cherry filling. Ensure it makes full contact. Refrigerate the pie for at least 3-4 hours, or ideally overnight, until the curd is completely set and firm enough to slice cleanly.
Creating the Stable Italian Meringue
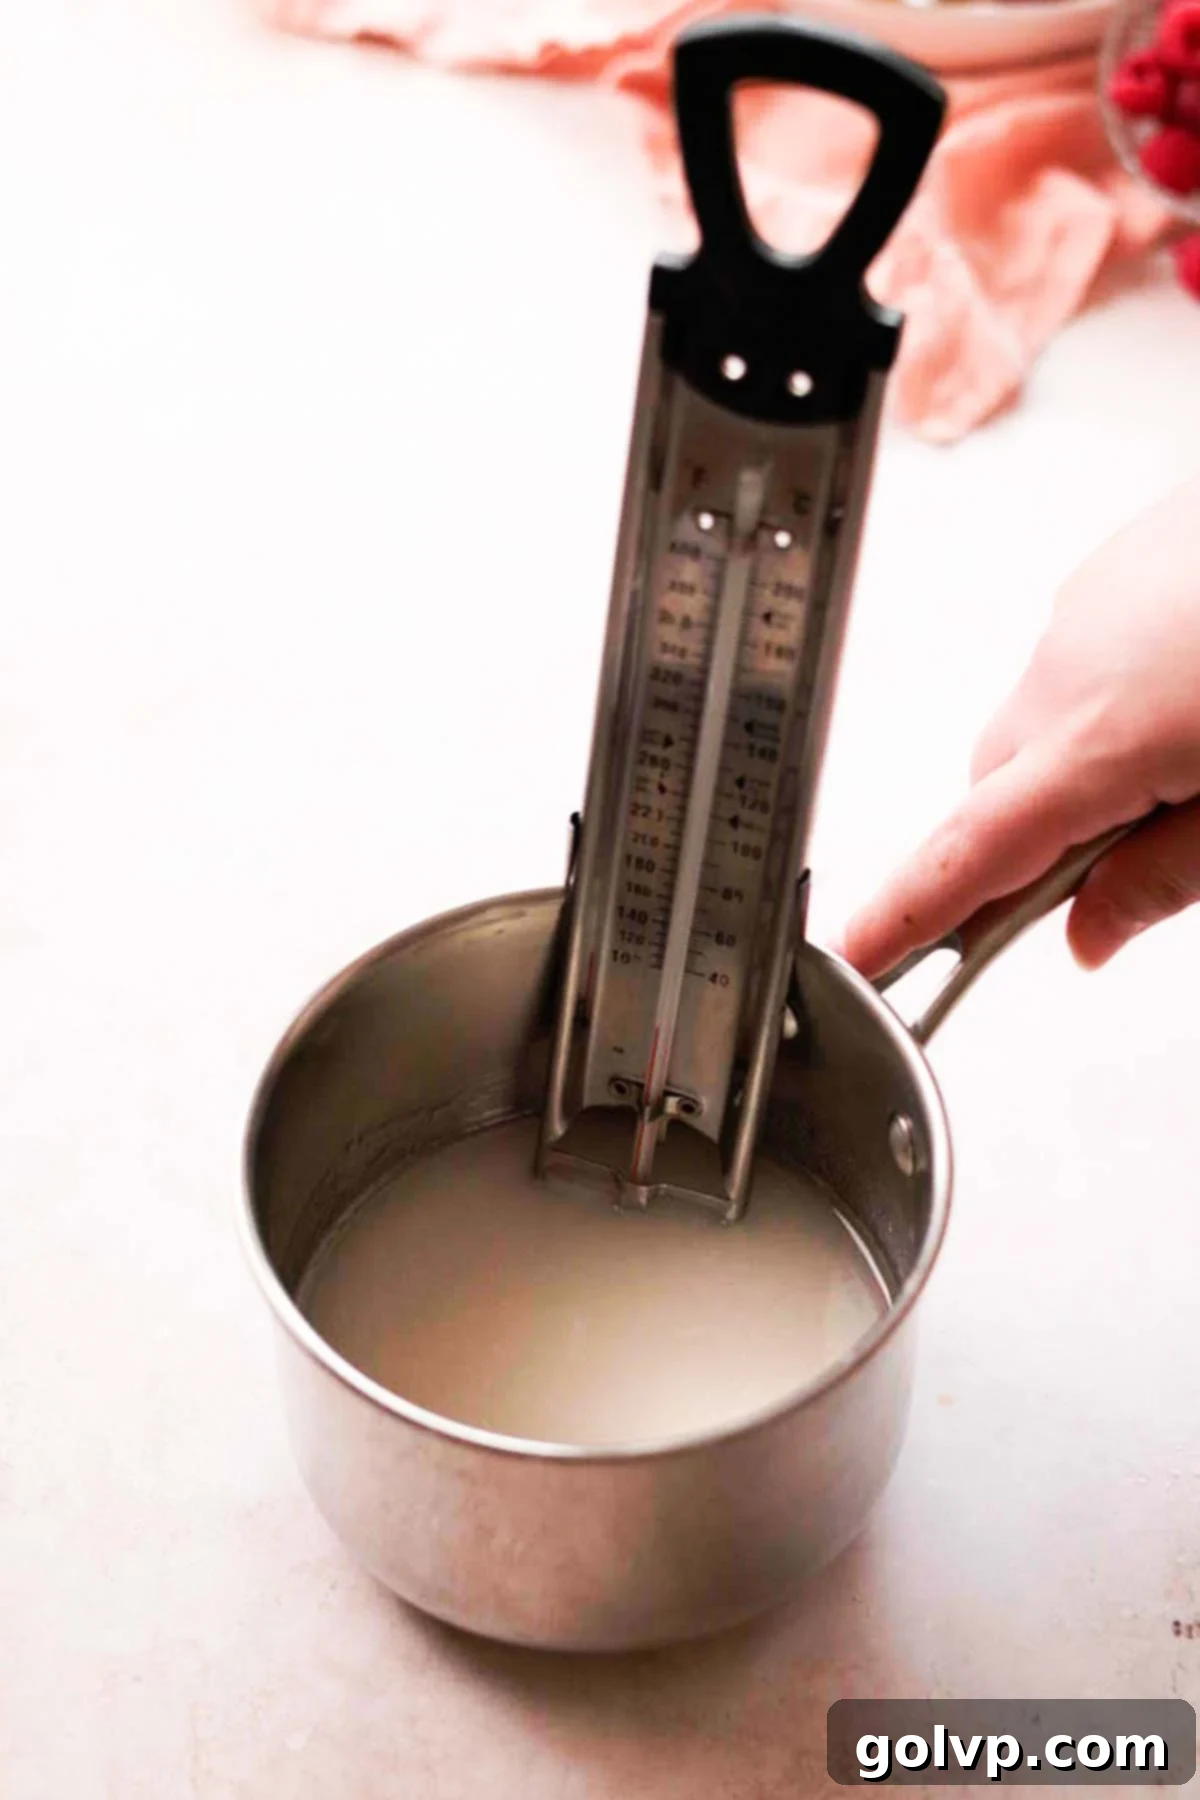
Step 1: In a small, heavy-bottomed saucepan, combine the granulated sugar and water. Heat the mixture over medium-low heat, stirring occasionally until the sugar dissolves and the syrup begins to simmer. Insert a candy thermometer, ensuring it doesn’t touch the bottom of the pan. Continue simmering the sugar syrup, without stirring, until it reaches 235°F (115°C), which is the soft ball stage. This precise temperature is crucial for a stable meringue.
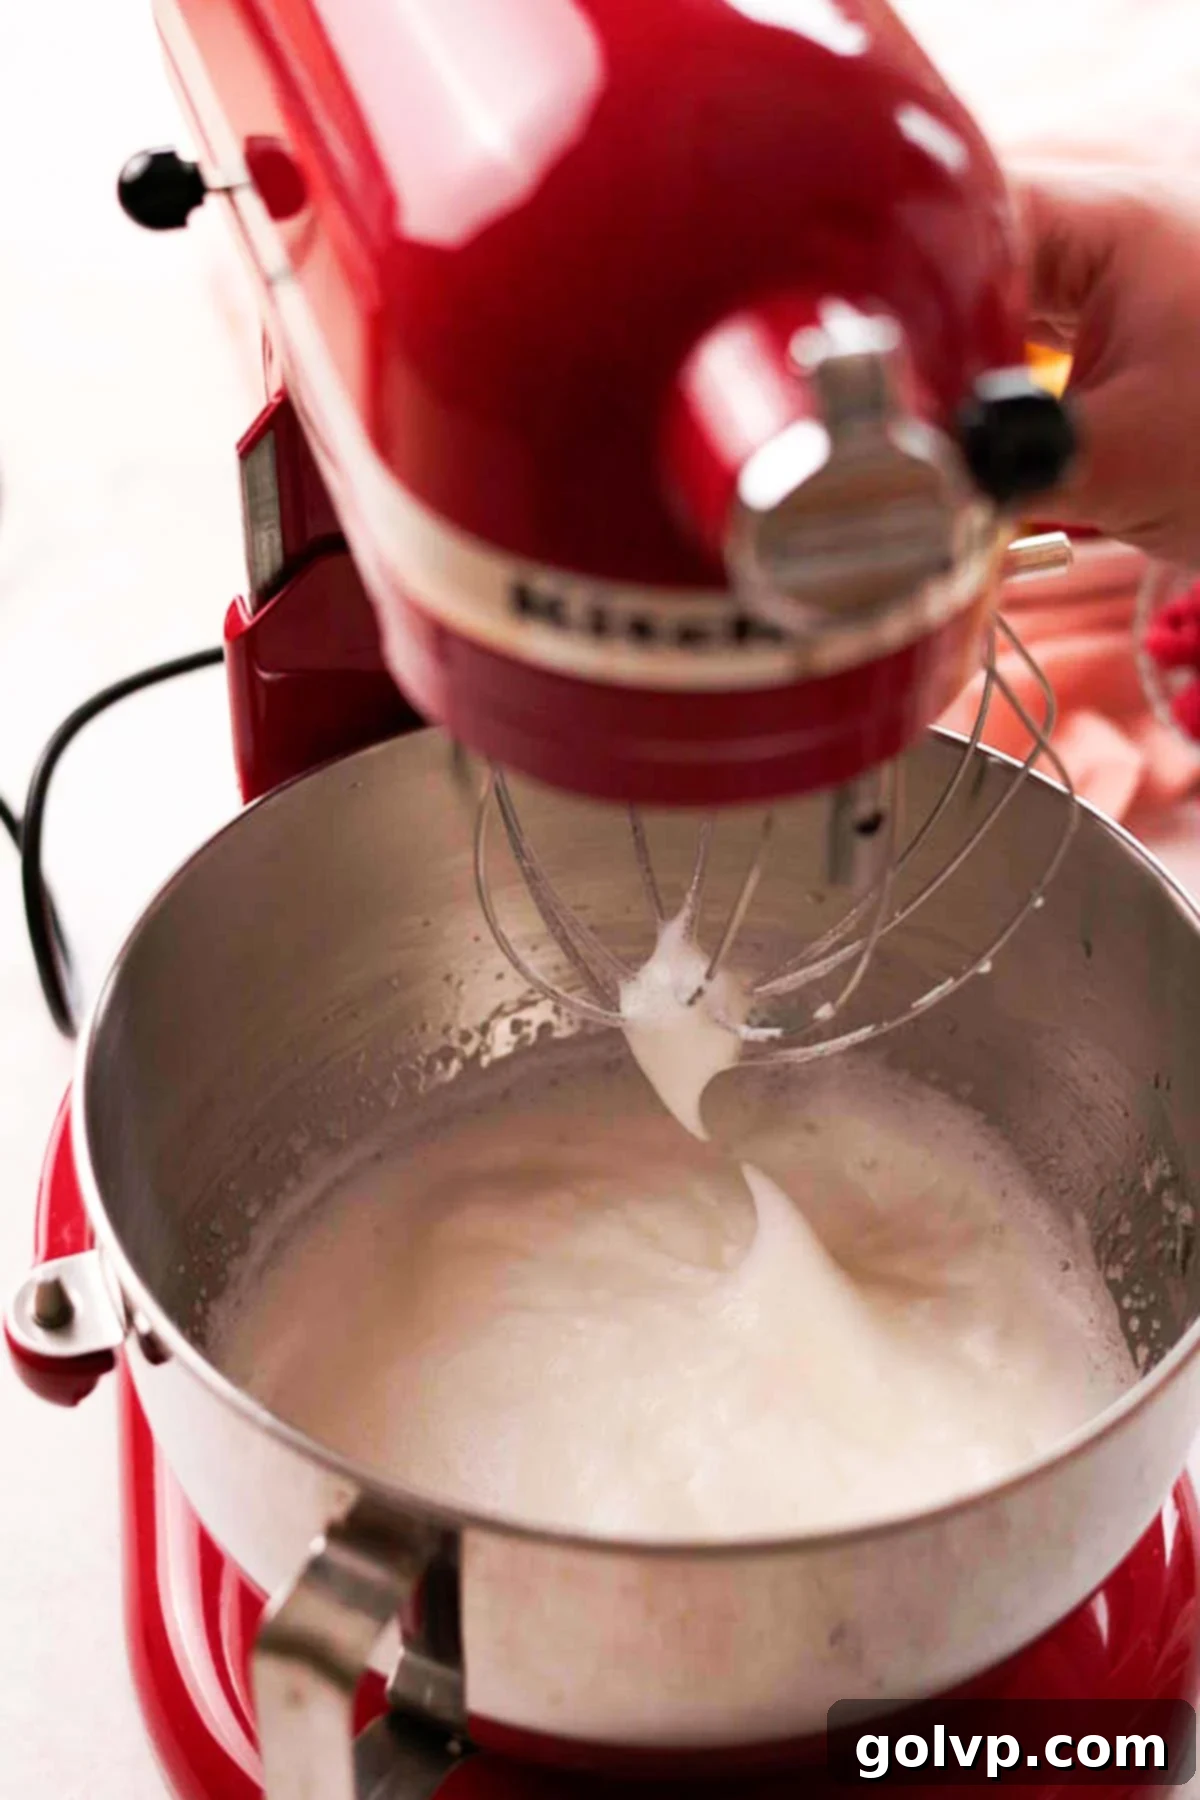
Step 2: While the sugar syrup is heating, place the reserved egg whites into the clean bowl of a stand mixer fitted with the whisk attachment, or into a large bowl if using an electric hand mixer. Add the teaspoon of lemon juice. Begin whipping the egg whites on medium speed. Increase the speed to medium-high and whip until they form firm, medium-stiff peaks. The peaks should hold their shape but still have a slight curl at the tip.
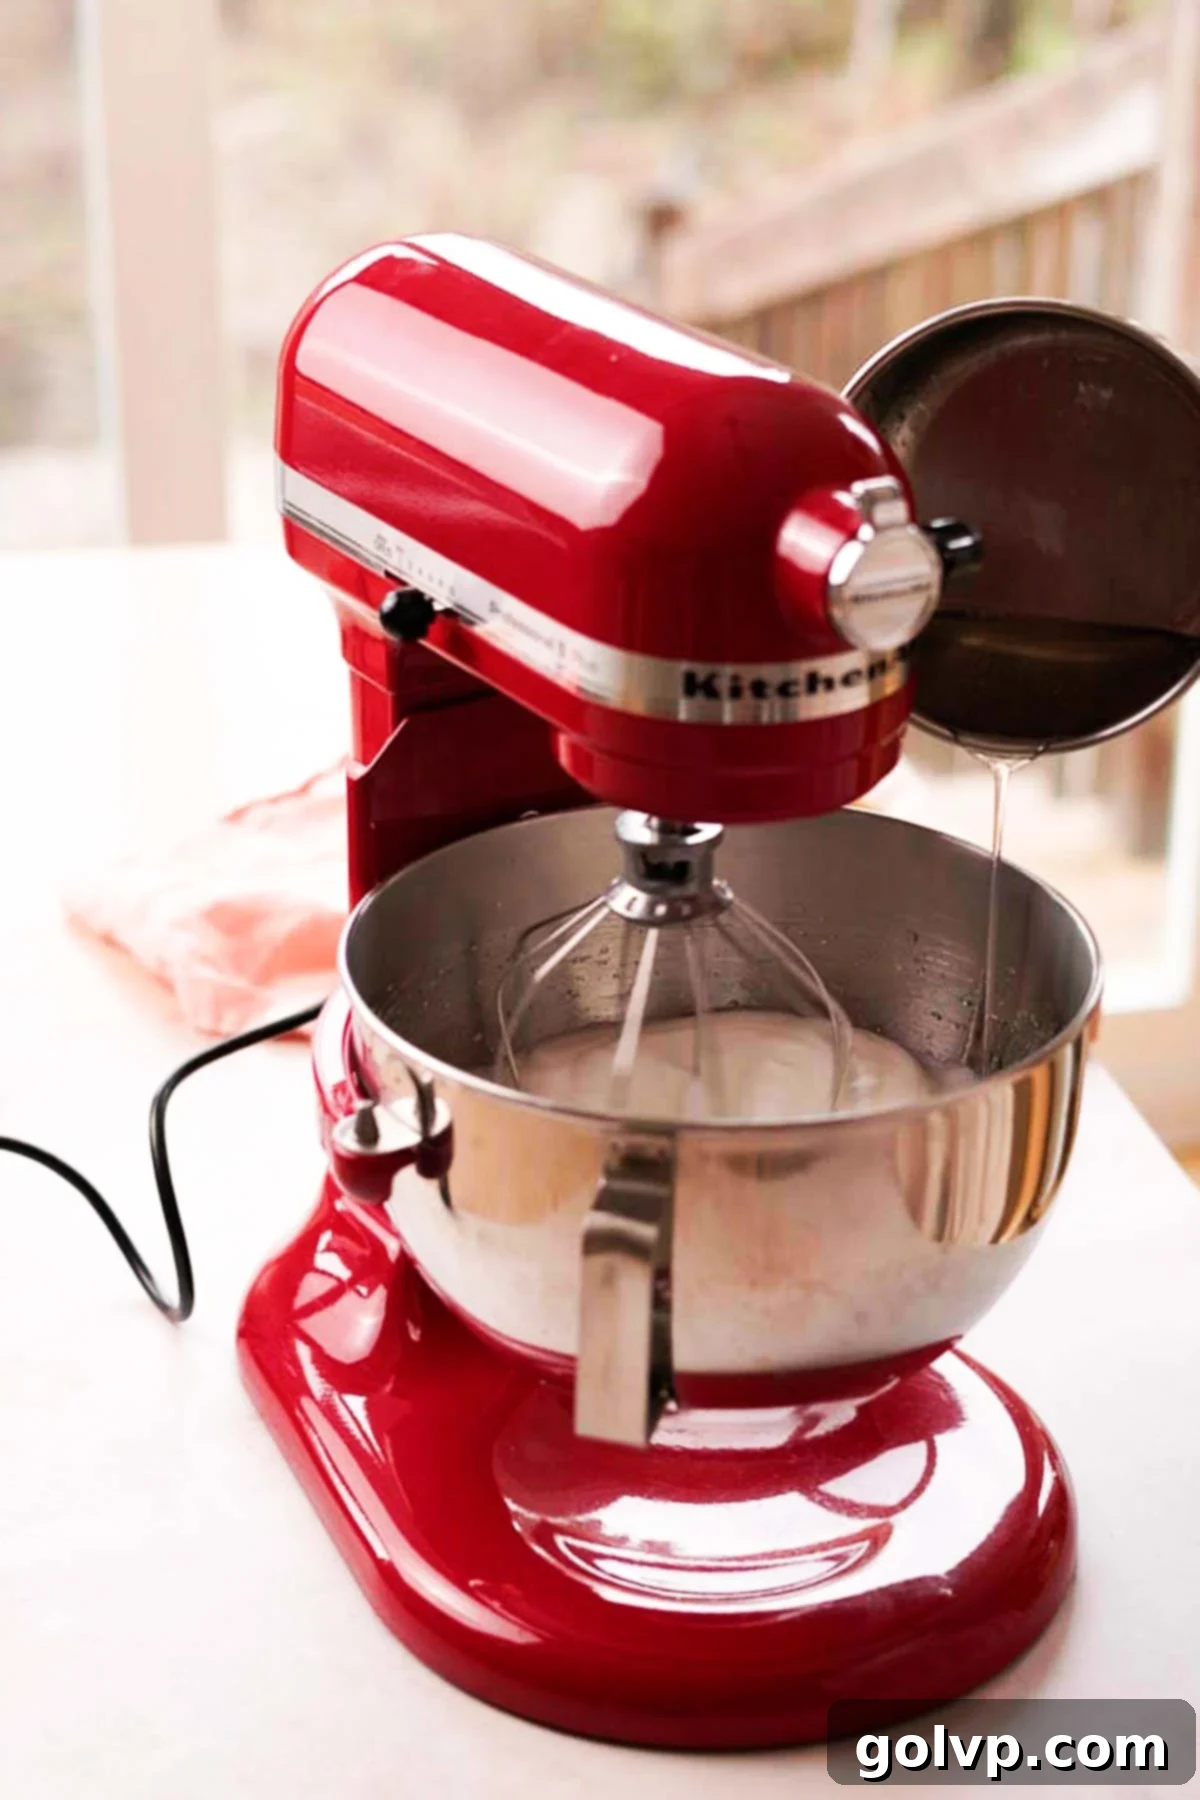
Step 3: Once the sugar syrup reaches the correct temperature (235°F/115°C), immediately and carefully remove it from the heat. With the mixer running on medium-high speed, slowly and steadily pour the hot sugar syrup in a thin stream down the side of the mixer bowl, avoiding contact with the whisk itself. After all the syrup has been added, incorporate the pure vanilla extract. Continue mixing on high speed until the meringue is very thick, glossy, and the mixing bowl is no longer warm to the touch (this ensures the meringue is fully cooled and stable).
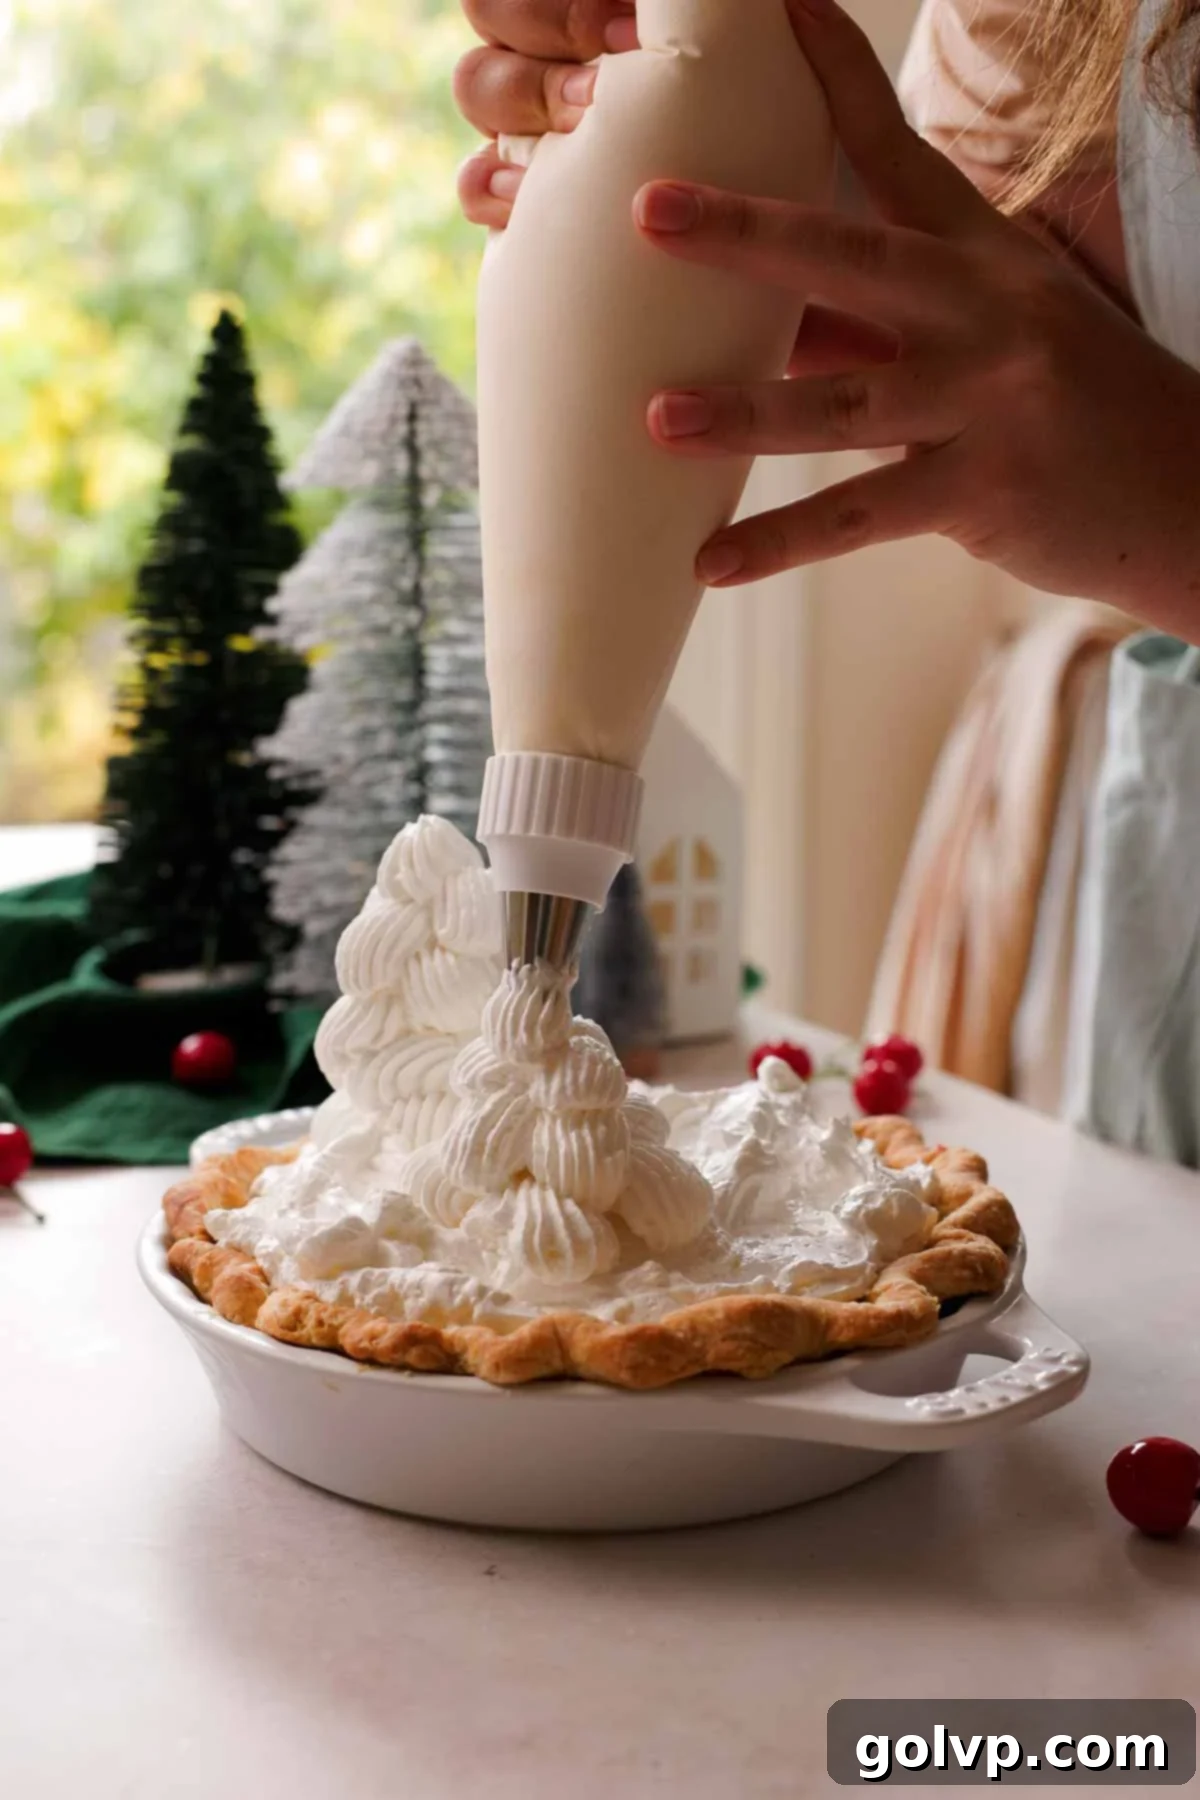
Step 4: Retrieve the chilled pie from the refrigerator and carefully remove the cling film from the curd. Using an offset spatula, spread a thick, even layer of Italian meringue (about two inches deep) over the entire surface of the cherry curd, ensuring it reaches all the way to the edges of the crust. This layer creates a seal that prevents the meringue from shrinking. Transfer the remaining meringue into a piping bag fitted with a large open star tip, or use a sturdy storage bag with a corner snipped off. Pipe dramatic dollops of meringue, stacking them gently to create impressive, tall “trees” across the surface of the pie, mimicking a beautiful winter forest.
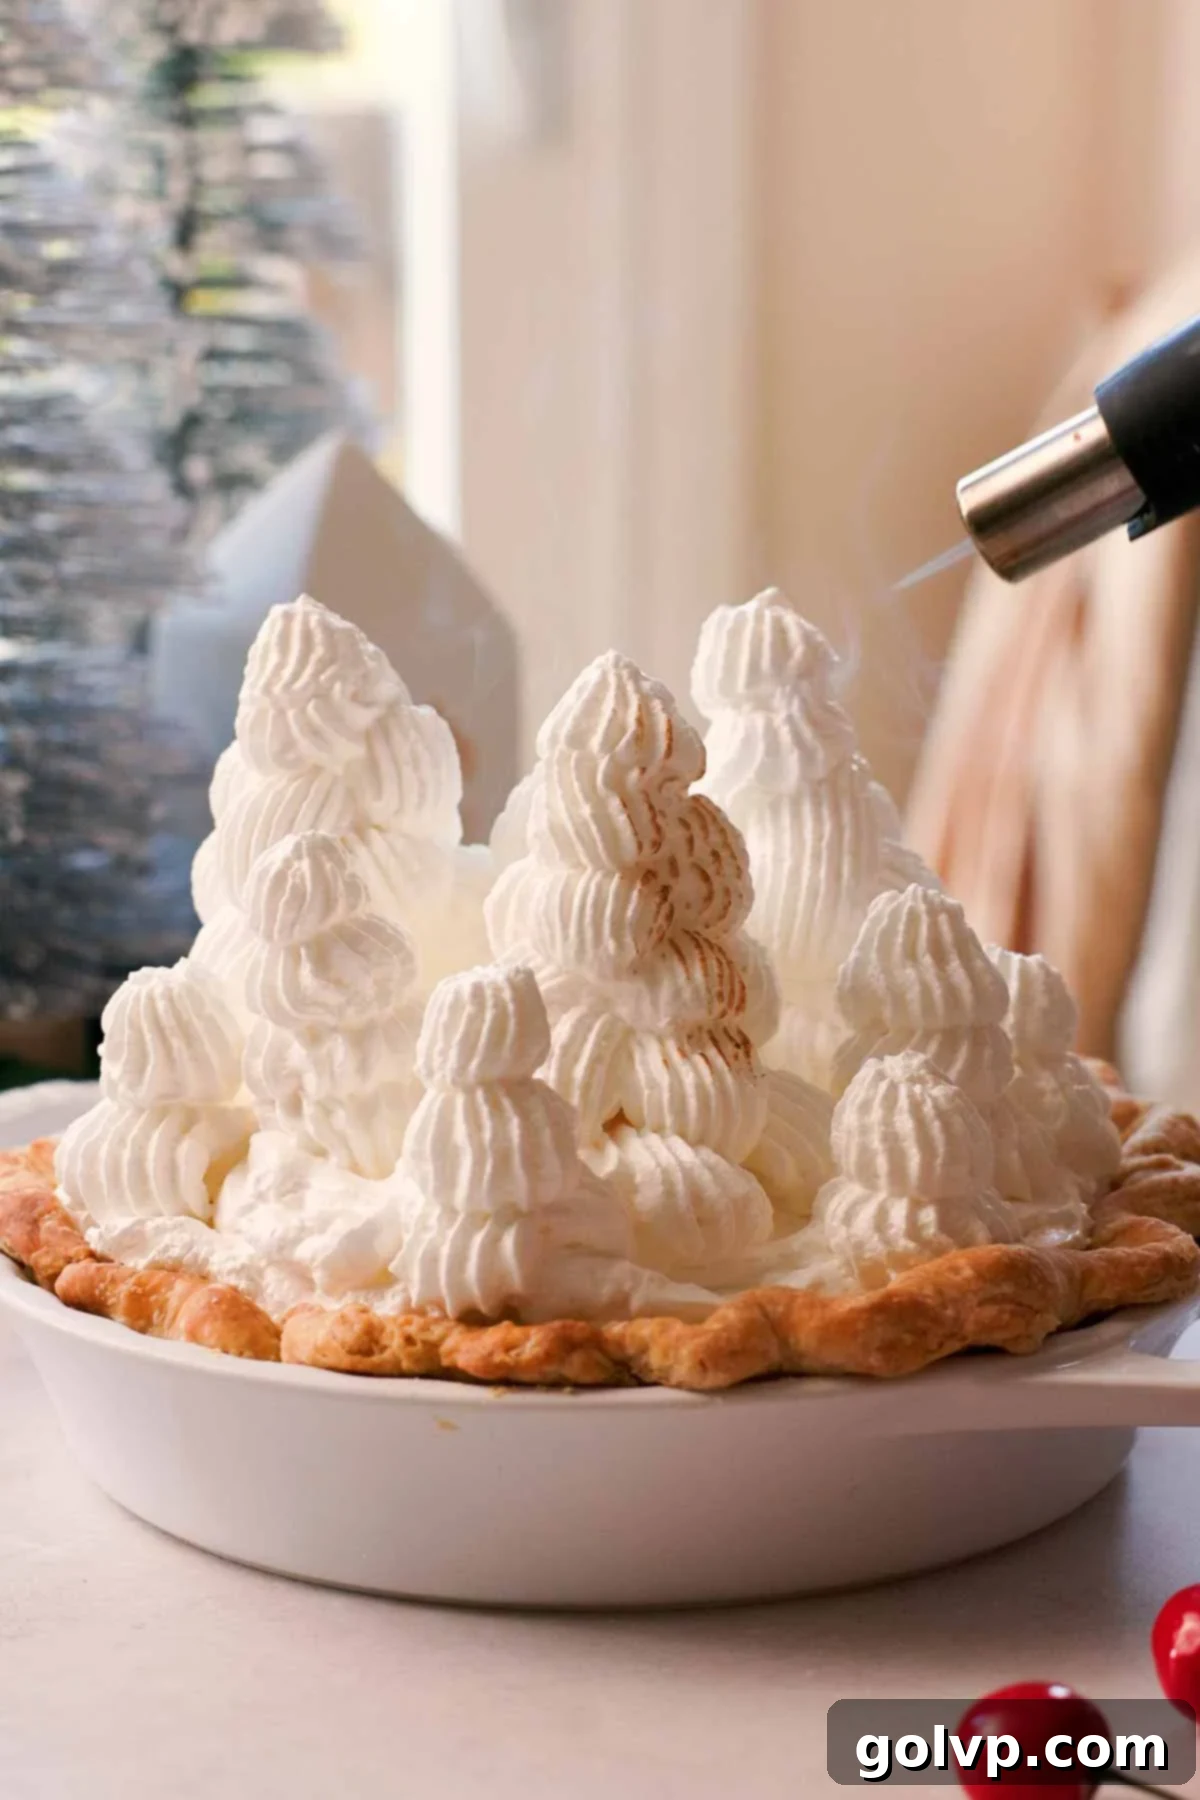
Step 5: For that beautiful golden-brown finish and added flavor, use a kitchen torch to carefully and evenly toast the meringue “trees.” Move the flame continuously to avoid burning any spots, aiming for a delightful golden hue. The toasted meringue adds another layer of flavor and texture. Once toasted to your liking, the pie is ready to be sliced and served immediately for optimal enjoyment!
✔️ Expert Meringue Pie Tips for Perfection
- Opt for a Non-Metal Coated Saucepan: When preparing the cherry curd, it is highly recommended to use a non-metal coated saucepan. The acidity of tart cherries can react with certain metals, potentially imparting an undesirable metallic aftertaste to your delicate curd. To further ensure purity of flavor, always mix and store the curd in glass or non-reactive (non-metal) containers.
- Master the Art of Tempering Eggs: This step is critical for a smooth, lump-free curd. By gradually adding the hot cherry syrup into the whisked eggs and continuously whisking, you slowly raise the temperature of the eggs. This gentle heating process prevents the eggs from cooking too rapidly and turning into unappetizing scrambled bits. Patience and steady whisking are key here.
- Stir Constantly While Cooking Curd: Once the egg mixture is returned to the saucepan, it’s essential to stir the curd constantly with a spatula. This continuous motion ensures that the curd cooks evenly and thickens uniformly, preventing lumps from forming and keeping the bottom from scorching. The result will be an incredibly silky, smooth, and luxurious cherry curd.
- Invest in Italian Meringue for Superior Stability: While other meringues exist, taking the extra time to prepare Italian meringue is a game-changer for this pie. The process of slowly pouring hot sugar syrup into whipping egg whites essentially cooks them, resulting in an exceptionally stable, glossy, and marshmallow-like meringue that holds its lofty shape and won’t weep or collapse for several days. This stability makes it ideal for make-ahead purposes and ensures a stunning presentation. Swiss meringue is another viable option, but Italian meringue often proves faster and more hands-off due to the continuous mixer operation.
🥄 Make Ahead and Storage Tips
To preserve the pristine quality of your spectacular cherry meringue pie, store any leftovers in a cake carrier and refrigerate for up to 3 days. I find it helpful to press a piece of parchment paper directly against any cut surfaces of the pie; this small step prevents the exposed filling from drying out, oozing, or forming an unsightly crust as it sits in the fridge. Please note that this pie does not freeze well due to the cornstarch in the filling. When thawed, cornstarch-thickened fillings tend to lose their structural integrity and become watery.
Despite its impressive appearance, this cherry meringue pie involves several components, which might seem daunting. However, the satisfaction of creating it is immense! To make the process more manageable, here’s a timeline outlining how far in advance you can prepare each individual component, allowing you to enjoy a stress-free baking experience:
The Crust: You can prepare the pie dough a day or two before you plan to bake it. It requires a significant resting period in the refrigerator before rolling, crimping, and baking, so preparing it overnight works wonderfully. Alternatively, you can bake the crust completely and then refrigerate it for a full day ahead of assembling the pie. I’ve even successfully frozen a blind-baked crust for up to a week. Getting the pie crust done in advance significantly streamlines the entire pie-making process.
The Filling: The tart cherry curd filling requires ample time to properly set and firm up in the refrigerator to ensure clean, beautiful slices. Therefore, you can easily make the filling and pour it into the baked crust the day before you plan to serve the pie. The unwhipped egg whites, which are reserved for the meringue, will also store perfectly well in an airtight container in the fridge overnight and will still whip up beautifully the next day.
The Meringue: For the freshest and most visually appealing meringue, I recommend whipping it up and topping the pie within 24 hours of serving. After applying the meringue, make sure to use a tall cake carrier or a large, inverted bowl to cover the pie while it’s stored in the fridge. This protects your beautifully piped “trees” from being accidentally smashed or deflated until you are ready to present and serve your magnificent dessert.
🥧 How to Transform Curd into a Stable Pie Filling
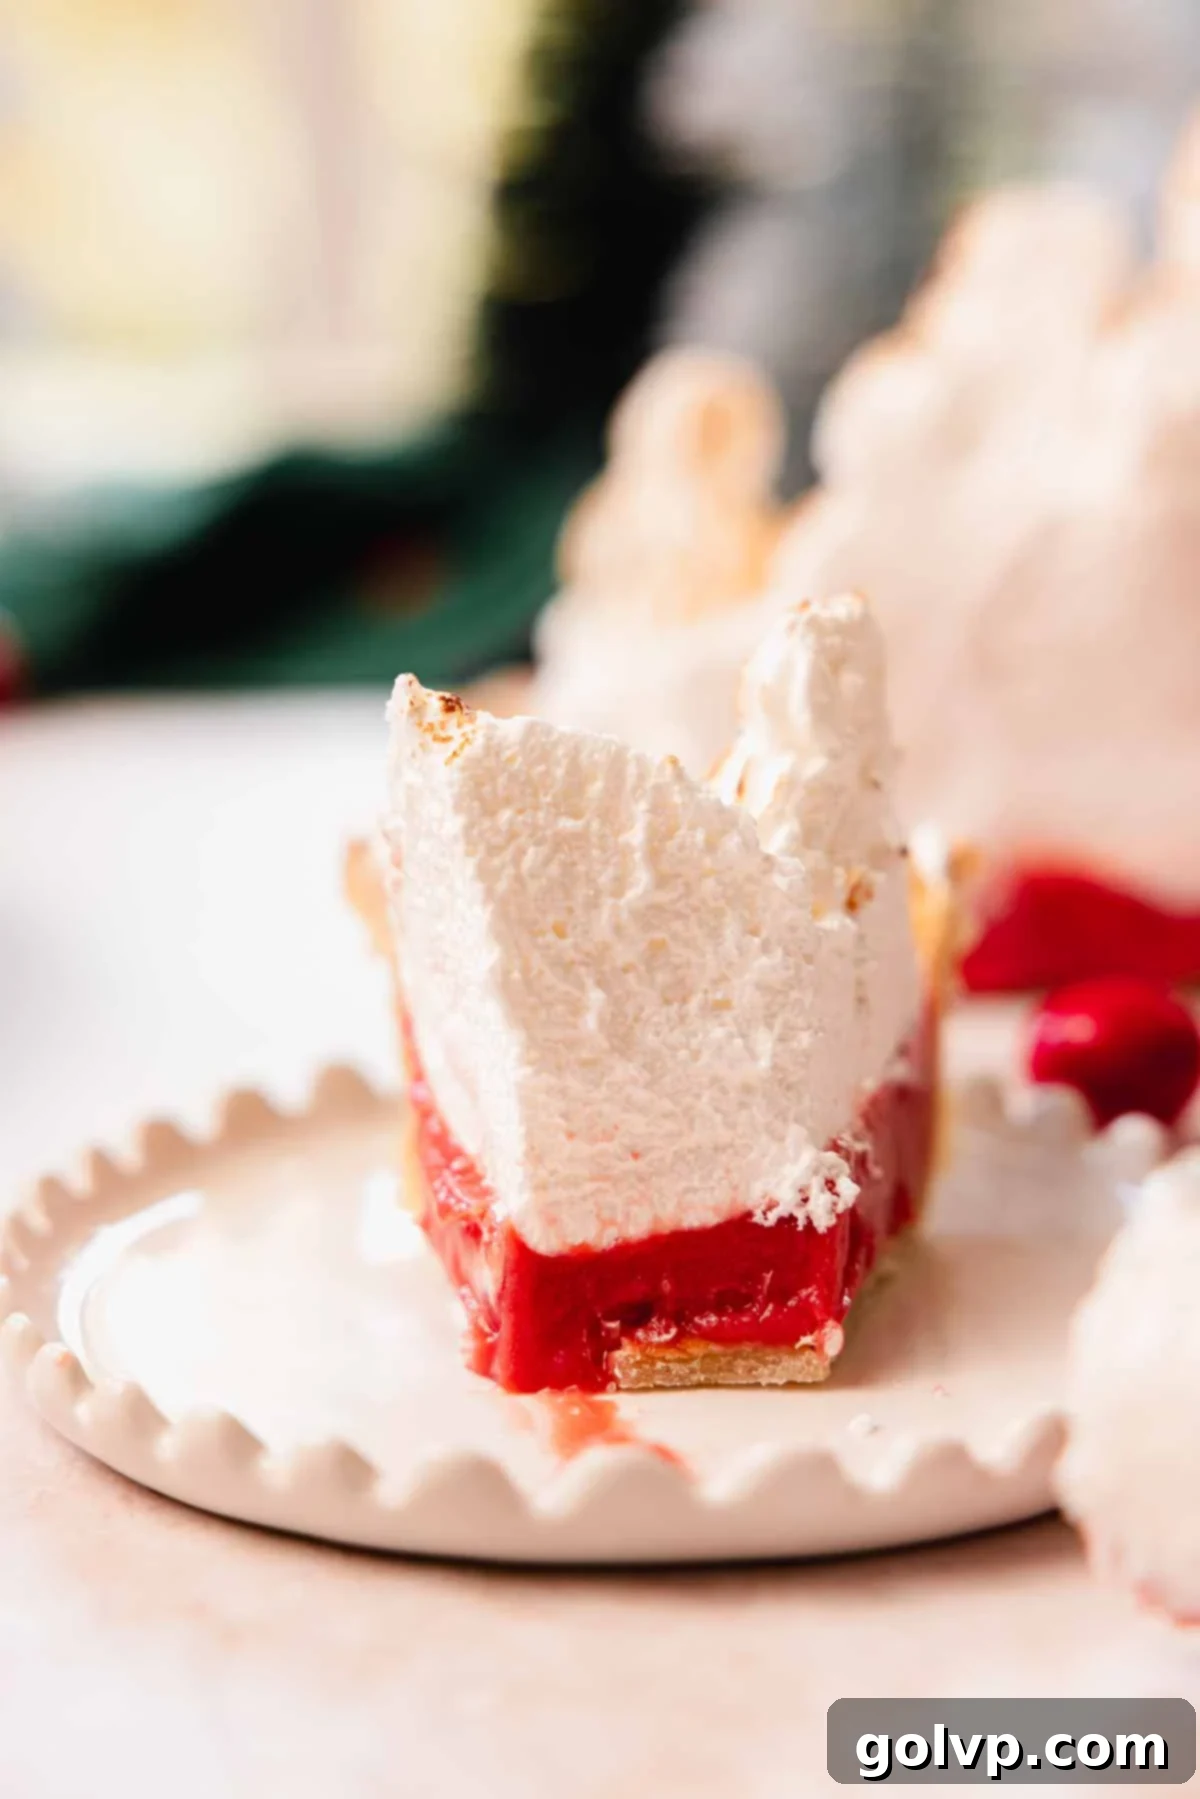
The delicious filling for this cherry meringue pie is skillfully adapted from my popular cherry curd recipe. The key modification for a pie-specific application is the addition of a bit of cornstarch. This seemingly small ingredient plays a crucial role in ensuring the filling is not only stable but also perfectly sliceable, holding its shape beautifully when cut.
During the recipe development phase, I experimented with simply increasing the number of egg yolks to thicken the curd sufficiently for a pie. However, no matter how many extra egg yolks I added, the curd still lacked the necessary firmness and structural integrity required for a clean slice, unless I used an impractically large quantity of yolks. Cornstarch proved to be the ideal solution, providing just the right amount of thickening power to create a perfectly set and smooth filling that cuts like a dream.
For those who might be sensitive to corn or prefer alternative starches, you can successfully substitute arrowroot starch or potato starch for cornstarch, achieving similar excellent results in terms of thickening and texture. However, if you plan on freezing the pie (though generally not recommended for cornstarch-thickened fillings), I highly advise using arrowroot starch or potato starch instead of cornstarch. Cornstarch has a tendency to lose much of its thickening properties and become watery after the freezing and thawing process, which can compromise the texture of your pie filling.
📖 Recipe FAQs
No, sweet cherries, commonly sold for snacking, are not suitable for this pie. They lack the necessary acidity and robust flavor intensity of tart cherries, and their moisture content is significantly different. Using them would result in a pie that is overly sweet, less flavorful, and potentially has a runnier filling that doesn’t set properly.
If, despite your best efforts at constant stirring and tempering, your cherry curd develops some lumps, don’t worry! You can easily fix this. Simply pour the warm curd into a blender or use an immersion blender and process until it becomes perfectly smooth and velvety. Alternatively, you can press the curd through a fine-mesh sieve with the back of a spoon to remove any lumps.
While a candy thermometer provides the most precise results, you can perform a “soft ball stage” test if you don’t have one. Keep a glass of ice water next to your stove. When you believe the sugar syrup is ready, carefully drop a small amount of the hot syrup into the ice water. If the syrup forms a soft, pliable, and squishy ball that you can pick up with your fingers, it has reached the correct temperature (235°F / 115°C) and is ready to be incorporated into the egg whites.
Achieving stiff peaks for Italian meringue requires strict attention to a few crucial details. First, ensure that when you separate the egg yolks and whites, absolutely no trace of yolk gets into the whites, as fat inhibits whipping. Second, your mixing bowl and whisk attachment must be impeccably clean and completely oil-free; you can wipe them down with lemon juice or vinegar as a precautionary measure. Lastly, verify that your sugar syrup reaches the precise temperature of 235°F (115°C) and is poured slowly into the egg whites while the mixer is running, ensuring the whites cook properly.
Absolutely! I frequently prepare and fill the pie with the cherry curd the day before, and I’ve never encountered any issues using egg whites that have been refrigerated overnight for the Italian meringue. Just ensure they are stored in a clean, airtight container in the refrigerator, and that no egg yolk bits have contaminated them. Bringing them to room temperature for about 30 minutes before whipping can also sometimes help.
If you opt for a simpler, spread-out meringue topping rather than piping intricate “trees,” you can certainly use your oven’s broiler to toast the meringue. However, if you choose to pipe on the distinctive tall meringue trees as demonstrated in this recipe, I highly recommend using a kitchen blow torch. A torch offers much greater control, allowing for even toasting of individual peaks without the risk of burning the delicate tips, which can easily happen under a hot oven broiler.
🥧 More Related Recipes You’ll Love
- Raspberry Meringue Pie with Mile High Meringue
- Cherry Curd
- Lemon Meringue Pie Cookies
- Lemon Meringue White Hot Chocolate
Did you make this recipe? I would love for you to rate this recipe and hear what you think in the comments below! Share your creation on Instagram and tag @flouringkitchen. Follow me on Pinterestto save and for more recipe ideas.
📖 Recipe
Cherry Meringue Pie
MaryEquipment
- electric mixer
- 9 inch round pie plate
- parchment paper
- candy thermometer
Ingredients
Pie Crust
- 1 ¼ cups all purpose flour 150g
- ¼ teaspoon sea salt
- ½ cup unsalted butter cubed and frozen for 10 minutes
- ½ cup ice water
- 1 teaspoon vinegar apple cider or white vinegar
Cherry curd
- 4 cups frozen tart red cherries 500g, Montmorency cherries
- ¾ cup granulated sugar
- 3 tablespoons lemon juice freshly squeezed
- ¼ cup granulated sugar
- 2 tablespoons cornstarch
- 2 large eggs
- 6 large egg yolks reserve egg white for meringue
- ⅓ cup unsalted butter
- ¼ teaspoon sea salt omit salt if using salted butter
Italian Meringue
- 1 ½ cups granulated sugar
- 5 tablespoons water
- 6 large egg whites reserved from the curd
- 1 teaspoon lemon juice
- 1 teaspoon pure vanilla extract
Instructions
Pie crust
- Combine flour and salt in a large bowl. Add cubed frozen butter butter and work it into the dough with your fingers by flattening the cubes into the flour, working quickly. Stop once the mixture resembles peas covered in flour.1 ¼ cups all purpose flour, ¼ teaspoon sea salt, ½ cup unsalted butter
- Combine the ice water and vinegar in a separate bowl. Add the water mixture gradually, tablespoon by tablespoon, and stir the dough mixture. Stop adding as soon as the dough starts to come together. Squish it into a disk, wrap, and let rest in the fridge for at least 30 minutes (can be made a day or two ahead of time).½ cup ice water, 1 teaspoon vinegar
- Roll out the crust on a floured surface to about 12 inches in diameter and transfer it into a pie plate. Tuck the edges underneath the edge to create a thicker crust, and crimp the edges with a fork or your fingers. Poke the bottom with a fork, cover with a piece of parchment paper or foil, and fill with dry beans or rice.
- Place the crust on a cookie sheet and bake at 355°F (190°C) for 25 minutes. Then, carefully remove the parchment paper with the beans and bake for another 20-25 minutes until golden brown all over.
Cherry Curd
- Combine frozen cherries, ¾ cup of sugar, and lemon juice in a medium saucepan. Simmer on low heat until it reduces by half – there should be two cups total of liquid and solids.4 cups frozen tart red cherries, ¾ cup granulated sugar, 3 tablespoons lemon juice
- Strain the cherry liquid through a sieve, smashing the solid bits to remove as much liquid as possible.
- Whisk together ¼ cup of sugar with the cornstarch. Add two whole eggs, six egg yolks, and whisk. Gradually whisk in the hot cherry syrup.¼ cup granulated sugar, 2 tablespoons cornstarch, 2 large eggs, 6 large egg yolks
- Pour the mixture back into the saucepan, add butter and salt, and cook until thickened – stirring with a spatula constantly to prevent lumps.⅓ cup unsalted butter, ¼ teaspoon sea salt
- Pour the hot cherry mixture into the baked crust. Press cling film right onto the top of the cake to prevent a film from forming. Refrigerate until set, about 3-4 hours or overnight.
Italian Meringue
- Combine sugar and water in a small saucepan. Heat on medium-low heat until simmering, then add a candy thermometer and continue simmering until it’s at 235°F (115°C), soft ball stage.1 ½ cups granulated sugar, 5 tablespoons water
- While the syrup comes to temperature, add egg whites into a stand mixer or a large bowl with an electric mixer. Add the lemon juice and whip to medium- stiff peaks.6 large egg whites, 1 teaspoon lemon juice
- While the mixer is on medium-high speed, slowly pour the syrup into the side of the bowl of egg whites. Then add the vanilla extract. Keep mixing until all of the syrup is added and the bowl is no longer hot.1 teaspoon pure vanilla extract
- Remove the pie from the oven and remove the wrap on top. Use a spatula to spread out a thick two inch layer of meringue all the way to the edges of the pie.
- Transfer the rest of the meringue into a piping bag with a large open star tip – or a storage bag with the edge cut off. Pipe dollops one on top of the other to make trees. Use a kitchen torch to toast the trees.
Notes
- Ideally, use a non-metal coated saucepan to prevent a metallic aftertaste in the cherry curd.
- Gradually add the hot cherry sauce into the eggs to prevent lumpy scrambled cherry curd filling
- Stir constantly to prevent lumps in the cherry curd when cooking
- Spend the extra time to make Italian meringue for a stable, marshmallow like meringue that won’t collapse for a few days
