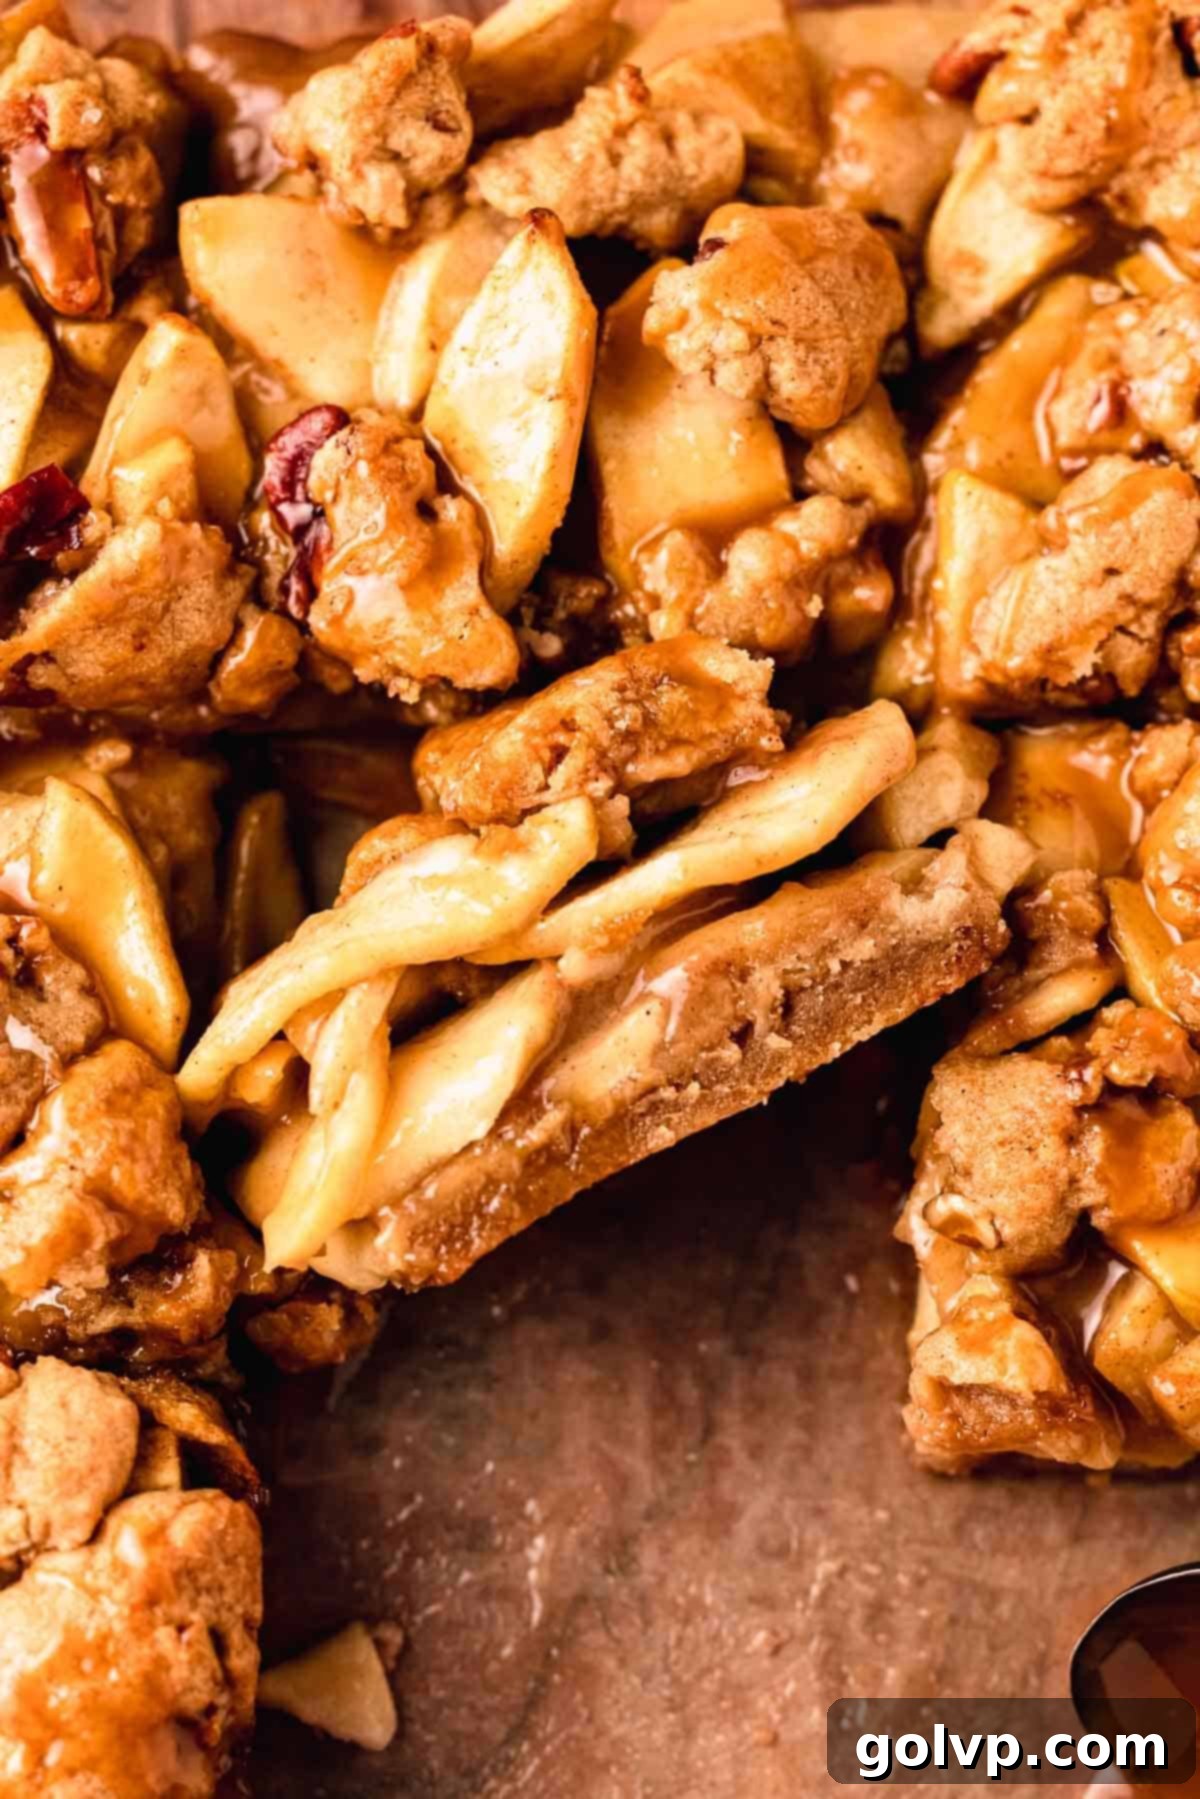
Irresistible Salted Caramel Apple Pie Bars: Your New Favorite Fall Dessert
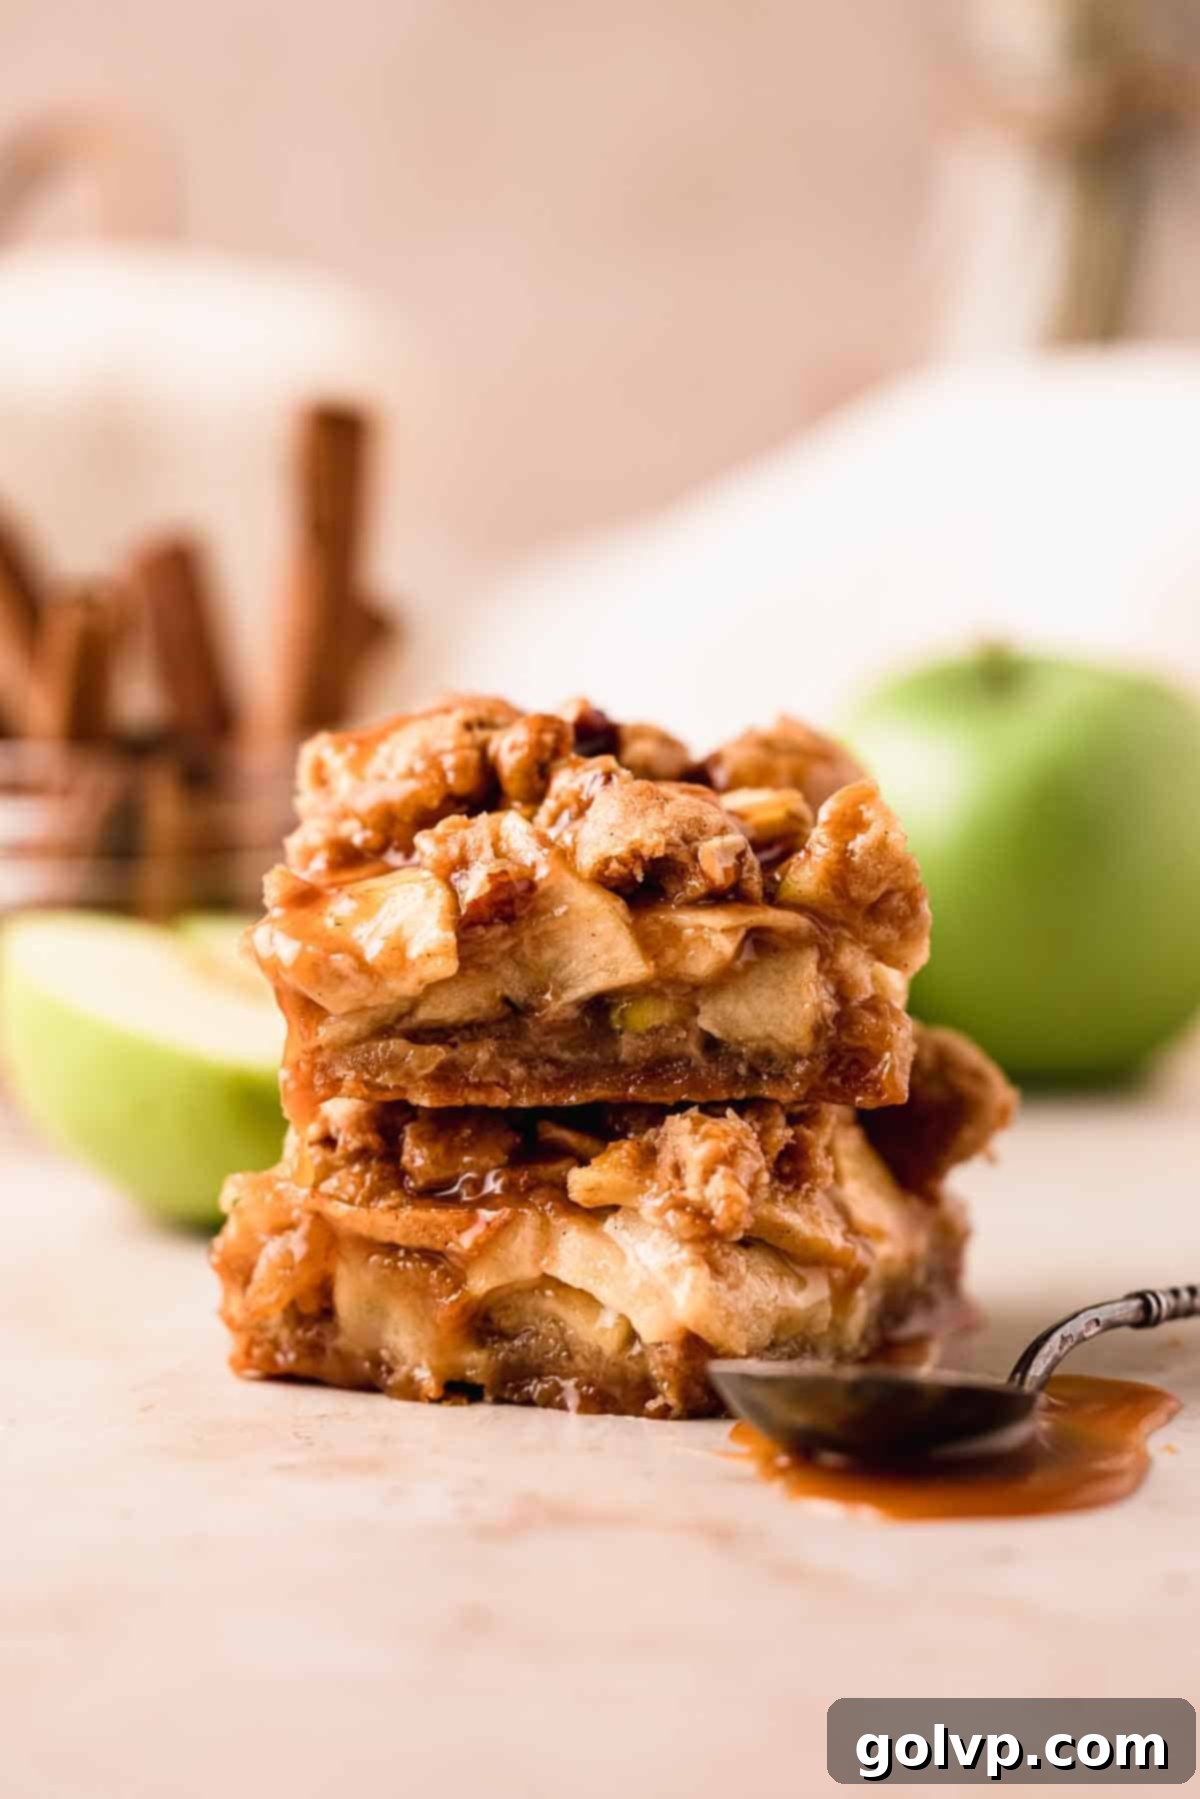
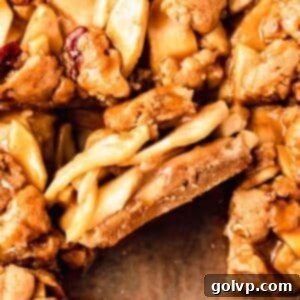
Prepare to fall in love with these incredible salted caramel apple pie bars, a delightful dessert that combines the best of classic apple pie with an irresistible twist. Featuring a crisp, buttery brown sugar shortbread base, a luscious caramel apple filling, a perfectly crunchy crumble topping, and generously drizzled with homemade salted caramel sauce, these bars are a true celebration of autumn flavors. What truly sets this recipe apart is the secret ingredient: salted caramel sauce is baked right into the apple filling, infusing every bite with deep, rich flavor.
While this comprehensive guide provides all the knowledge you need to master a homemade salted caramel sauce from scratch – a process less intimidating than it seems, even without a candy thermometer – you can absolutely opt for a high-quality store-bought version for a convenient shortcut. These bars offer a fantastic, easier-to-make and serve alternative to a traditional pie, making them perfect for potlucks, family gatherings, or a cozy evening treat. Pair them with a perfectly spiced and flavorful pumpkin spice chai latte for an ultimate autumnal experience. If you’re a fan of apple desserts, you might also enjoy this delicious apple cake, also packed with tender apple slices.
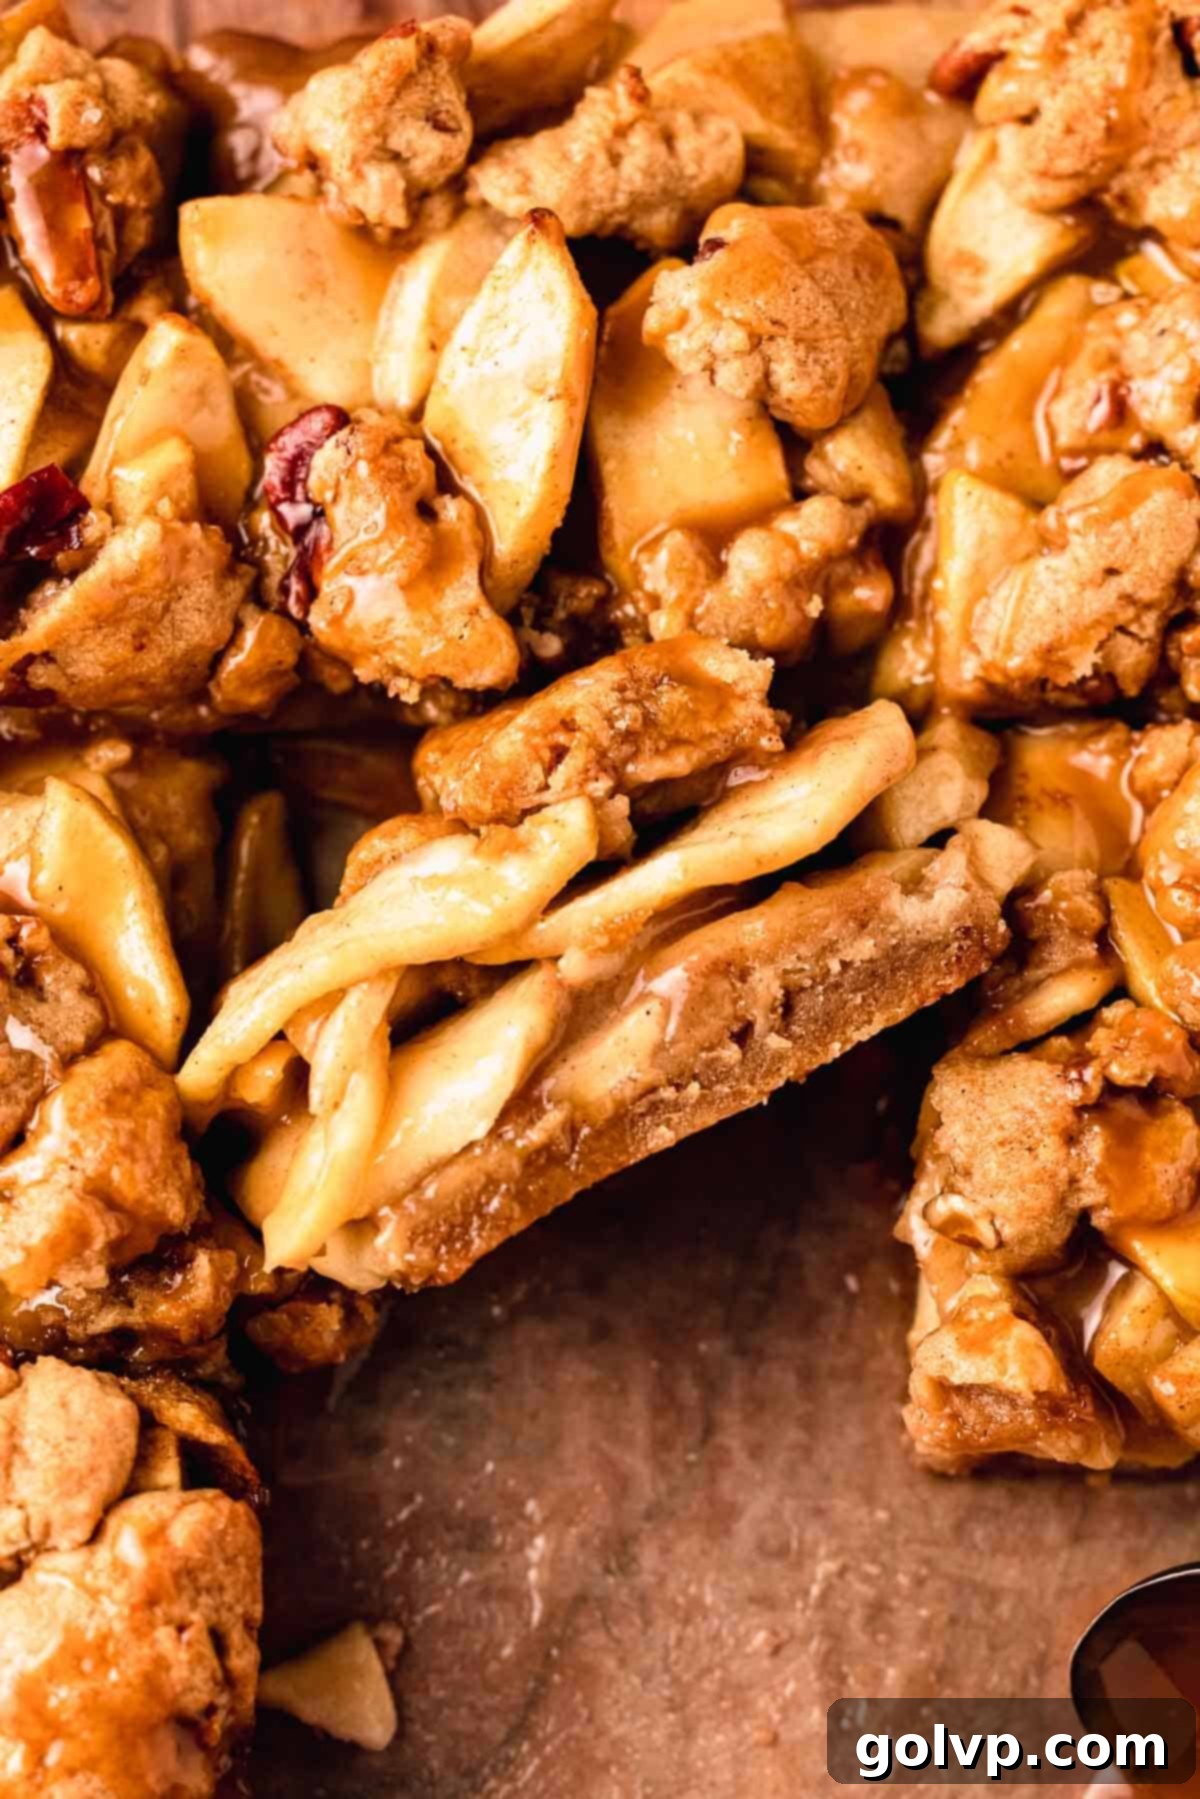
✨ Why You’ll LOVE These Salted Caramel Apple Pie Bars:
- Perfect Homemade Caramel: This recipe guides you through making a successful, silky-smooth salted caramel sauce, proving it’s not as daunting as it appears. Our method doesn’t even require a candy thermometer, making it accessible for home bakers of all skill levels. The depth of flavor from homemade caramel truly elevates these bars.
- Flavorful Apple Filling: The heart of these bars lies in their exceptional apple filling. Crisp apple slices are generously tossed with aromatic cinnamon, a touch of flour to achieve that perfect gooey consistency, and a generous swirl of our signature salted caramel sauce. This combination ensures a filling that’s wonderfully sweet, warmly spiced, and rich with caramel notes without being overly soft.
- Crisp Shortbread Base & Crumble: Consistency is key, and our brown sugar shortbread recipe delivers on all fronts. Both the sturdy base and the irresistible crumble topping are made from the same versatile dough, saving you time and effort. The base is pre-baked for a short period, guaranteeing a super crisp, buttery foundation that stands up beautifully to the moist apple filling every single time.
- Easier Than Pie: Forget the fuss and potential frustration of rolling out delicate pie crusts and achieving perfect slices. These apple pie bars are significantly easier to assemble, bake, and cut into neat, individual servings, making them ideal for entertaining or simply enjoying with less stress in the kitchen.
- Comforting Fall Flavors: With a harmonious blend of sweet apples, warm cinnamon, rich brown sugar, and decadent salted caramel, these bars encapsulate all the cozy, inviting flavors of autumn. They are the quintessential fall treat, perfect for celebrating the season.
📝 Key Ingredients for Success
Crafting these delectable caramel apple pie bars involves three harmonious components: the luxurious salted caramel sauce, the tender and flavorful apple filling, and the sturdy yet crumbly brown sugar crust. The brilliant part? The crust and the crumble topping are made from the exact same versatile dough, offering a significant time-saving advantage without compromising on taste or texture. This clever design streamlines the baking process, allowing you to create a complex-tasting dessert with remarkable ease.
If you’re a fan of traditional pie crusts, you might also enjoy these mini blueberry pies or our savory-sweet pumpkin hand pies.
Salted Caramel Sauce Essentials
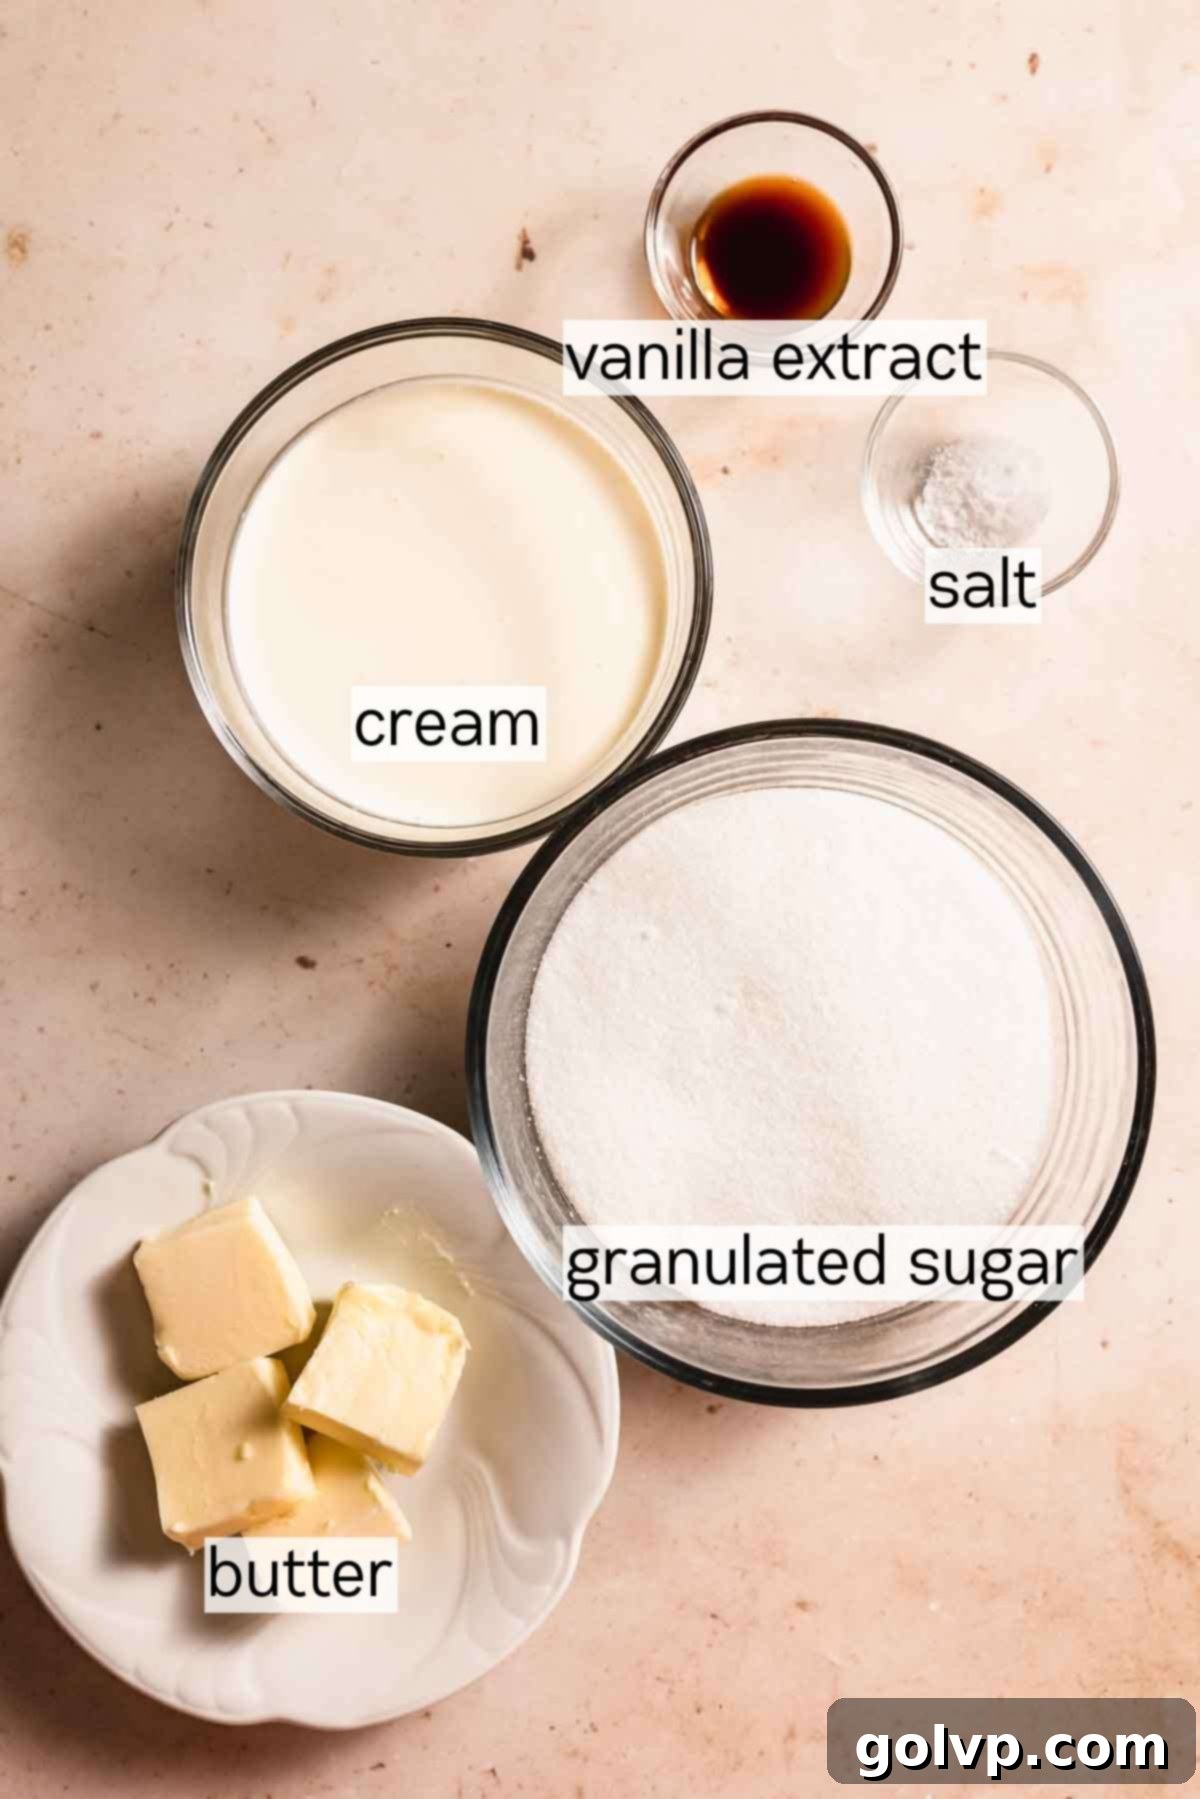
While a store-bought salted caramel sauce is a perfectly acceptable shortcut when you’re short on time, we highly encourage you to try making it from scratch. Homemade caramel offers unparalleled depth of flavor and a wonderfully smooth texture that simply can’t be matched. Plus, it’s surprisingly simple to make, especially when you follow our detailed steps and crucial tips.
- Granulated Sugar: For the best caramel, we strongly recommend using regular granulated sugar. In our experience, alternative sugars like cane sugar can behave differently and may not yield the same consistent, successful results when caramelized.
- Heavy Whipping Cream: This is a non-negotiable ingredient for rich, thick caramel. Ensure your cream has a milkfat content of 35% or higher. Do not substitute with lighter creams like half-and-half, as the caramel sauce will not achieve the desired luxurious thickness and consistency. The higher fat content contributes to both the texture and the indulgent flavor.
Caramel Apple Filling Delights
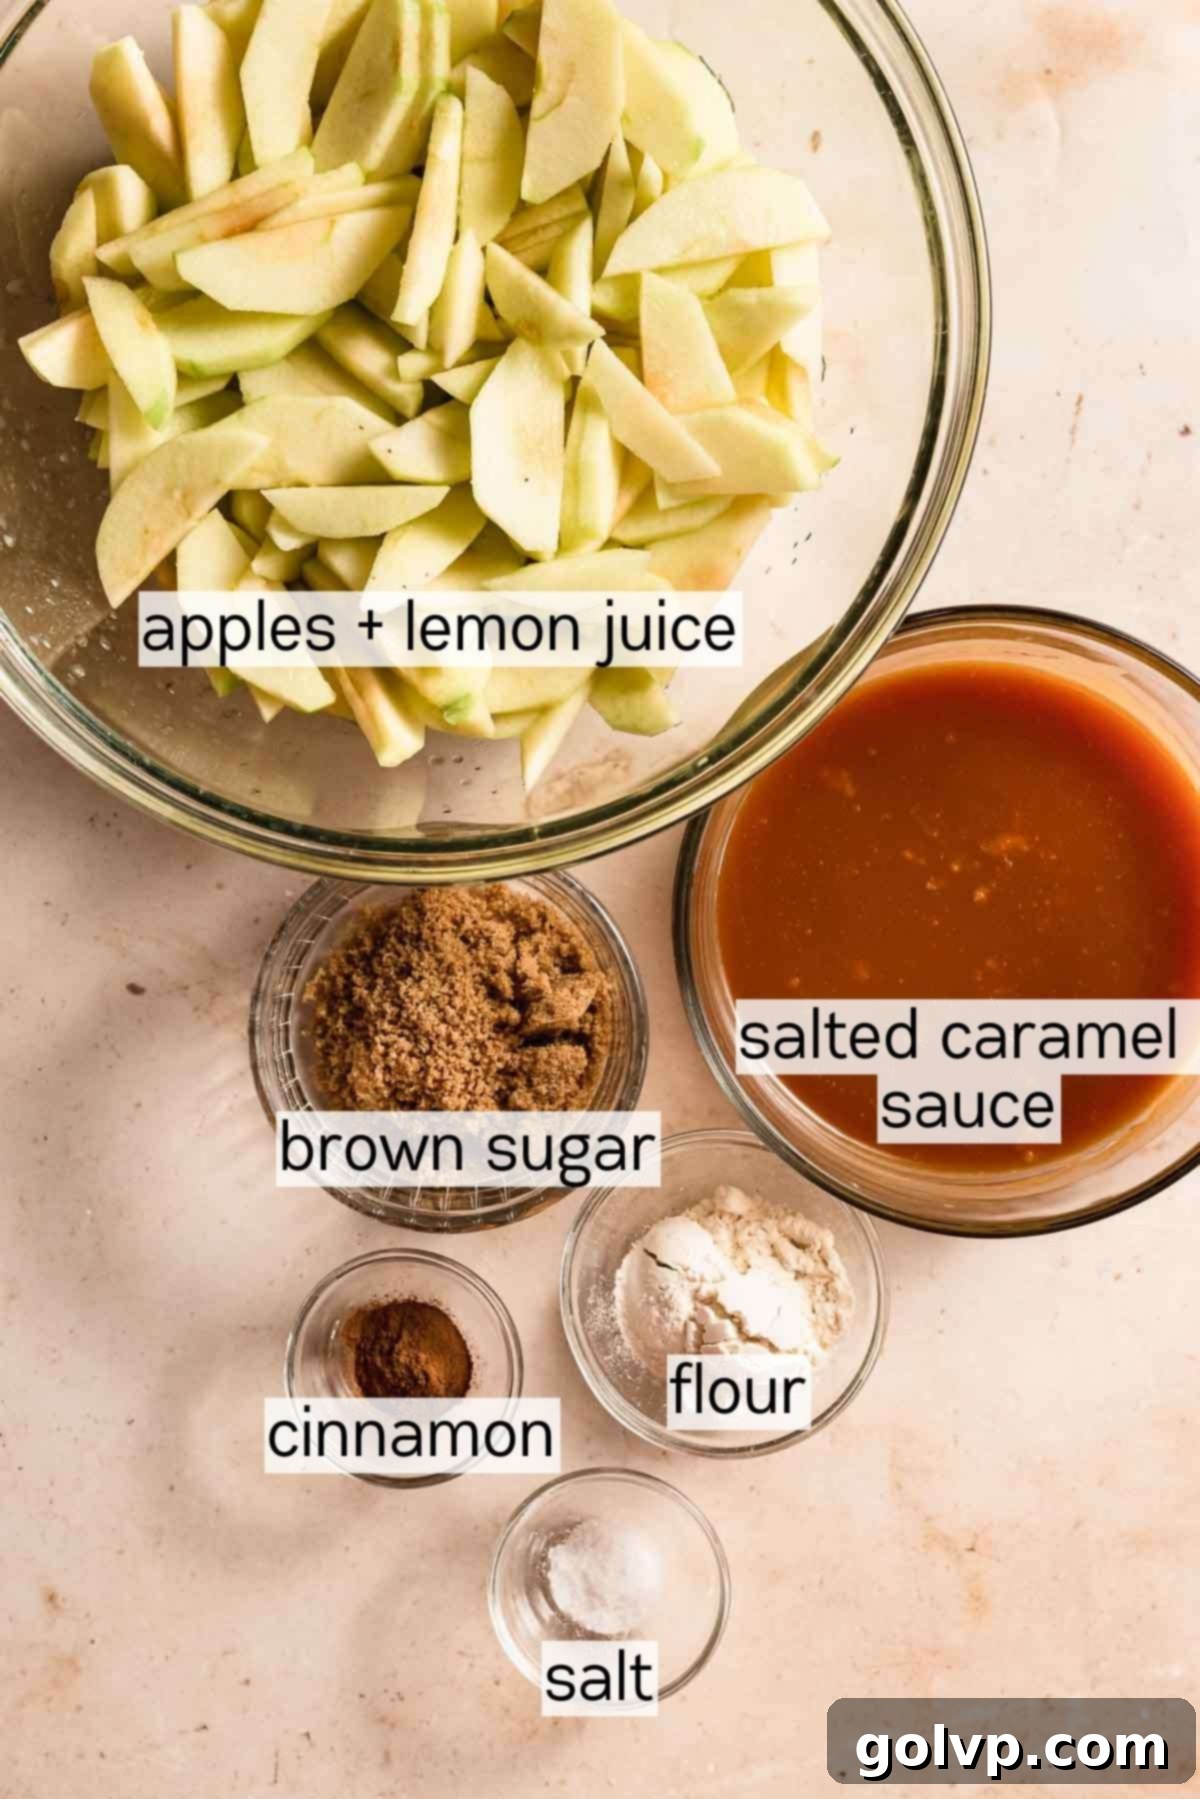
The apple filling is a symphony of classic apple pie flavors, enhanced by the sweet and salty notes of caramel sauce and brown sugar, creating a truly irresistible core for our bars.
- Apples: The choice of apple variety profoundly impacts the final flavor and texture. For optimal results, select tart and firm apples that hold their shape well during baking. Granny Smith and Northern Spy are excellent choices, as their tartness beautifully balances the sweetness of the caramel and brown sugar, resulting in a more complex and flavorful filling. Avoid overly sweet or soft apple varieties, which can become mushy.
- Cinnamon: We use just enough cinnamon to infuse the filling with a comforting warmth without overpowering the delicate apple and caramel flavors. It provides that classic apple pie essence. If cinnamon isn’t your preference, you can certainly omit it or substitute it with a pinch of freshly grated nutmeg for a different warm spice note.
- Caramel Sauce: As mentioned, this recipe includes instructions for making your own luscious salted caramel sauce, but a high-quality store-bought caramel sauce works perfectly if you’re looking for a quick and easy option. The caramel in the filling melds with the apples, creating a wonderfully gooey and rich texture.
Buttery Brown Sugar Crust and Crumble Perfection
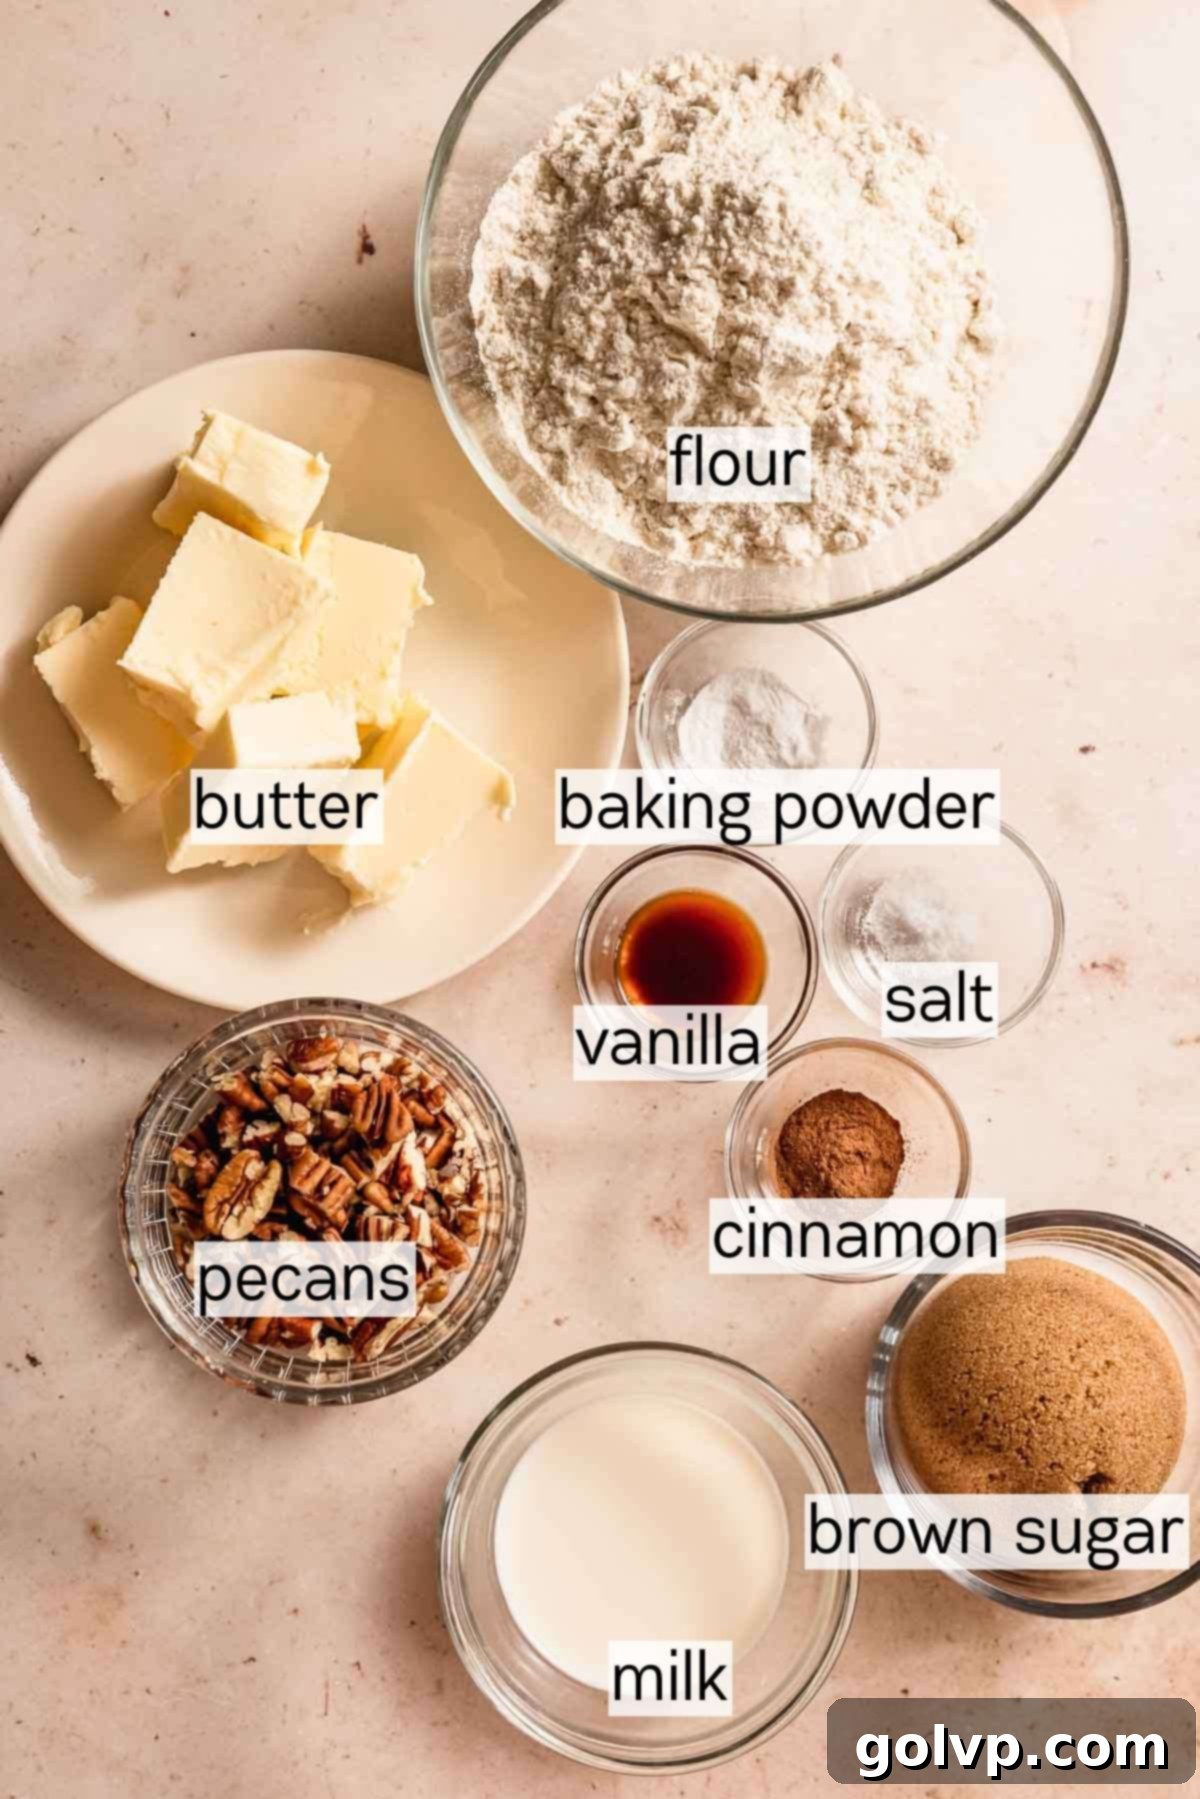
The foundation and crown of these pie bars are a delightfully crisp and buttery brown sugar shortbread, providing the perfect textural contrast to the soft apple filling.
- All-Purpose Flour: Accurate measurement of flour is crucial for achieving the ideal shortbread texture. For the most precise results, we highly recommend weighing your flour using a kitchen scale. If you don’t have a scale, properly measure by fluffing the flour in its bag, then gently spooning it into a measuring cup without packing it down. Level off any excess with the flat edge of a knife.
- Pecans: Roughly chopped pecans are sprinkled on top of the crumble, adding a wonderful nutty crunch that toasts beautifully in the oven as the bars bake. Their earthy flavor complements the caramel and apples. If pecans aren’t to your liking, feel free to omit them or substitute with another favorite nut, such as walnuts or almonds, or even pumpkin seeds for a nut-free option.
- Butter: The quality of your butter directly translates to the richness and crispness of your shortbread crust and the luxuriousness of your caramel sauce. Always opt for a good quality, real butter (unsalted is generally preferred in baking, allowing you to control the salt content, but if using salted, adjust added salt accordingly). Softened butter is key for creaming it properly with sugar.
- Brown Sugar: Brown sugar is a star in this crust, imparting a beautiful golden color and a complex, molasses-rich flavor that pairs exquisitely with the caramel and apples. While you could technically substitute with granulated sugar for a milder taste, we strongly encourage you to try the brown sugar version – it truly makes the shortbread sing!
Read through for all the tips you will need for success!
Full steps and ingredients in recipe card below.
✔️ Ingredient Substitutions for Dietary Needs
These apple pie bars are naturally egg-free, making them suitable for those with egg allergies. Here are some simple ingredient substitutions you can make to cater to other dietary requirements:
- Gluten-Free: To make these bars gluten-free, simply replace the all-purpose flour in both the filling and the crust with a high-quality 1:1 gluten-free baking flour blend. Ensure your chosen blend contains xanthan gum, or add a small amount if it doesn’t, for optimal texture.
- Nut-Free: If you need a nut-free version, easily omit the pecans from the topping. For an added crunch, you can substitute them with toasted pumpkin seeds or sunflower seeds, which offer a delightful texture and earthy flavor without nuts.
👩🍳 How to Make Salted Caramel Apple Pie Bars: Step-by-Step Guide
Follow these detailed step-by-step photos and instructions to perfectly create each delicious component of your salted caramel apple pie bars. Precision and patience are your best tools!
How to Make Salted Caramel Sauce (Dry Method)
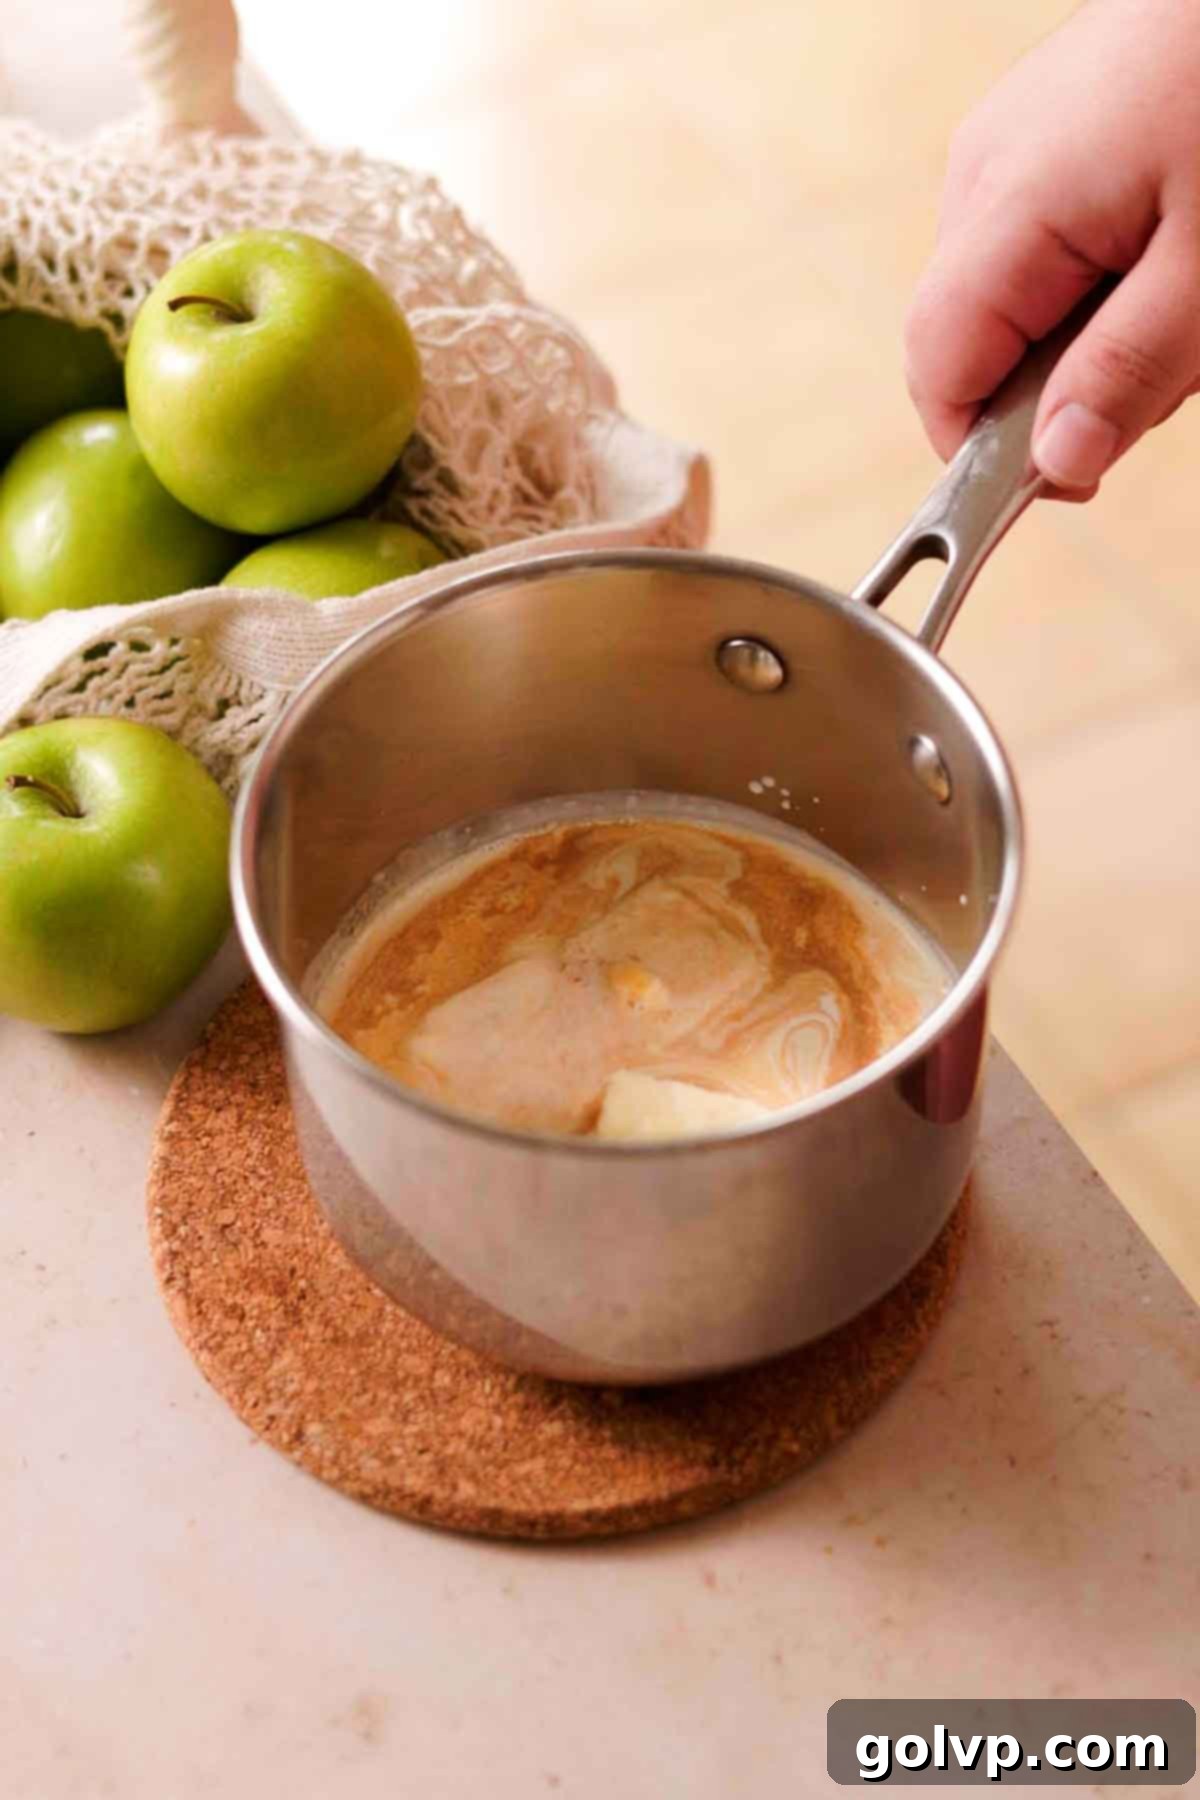
Step 1: In a small saucepan, combine the heavy cream, butter, sea salt, and vanilla extract. Heat this mixture gently over low heat until it just comes to a simmer, then immediately remove it from the heat and set aside. Heating the cream mixture in advance is a crucial step to prevent the caramel from seizing or crystallizing later.
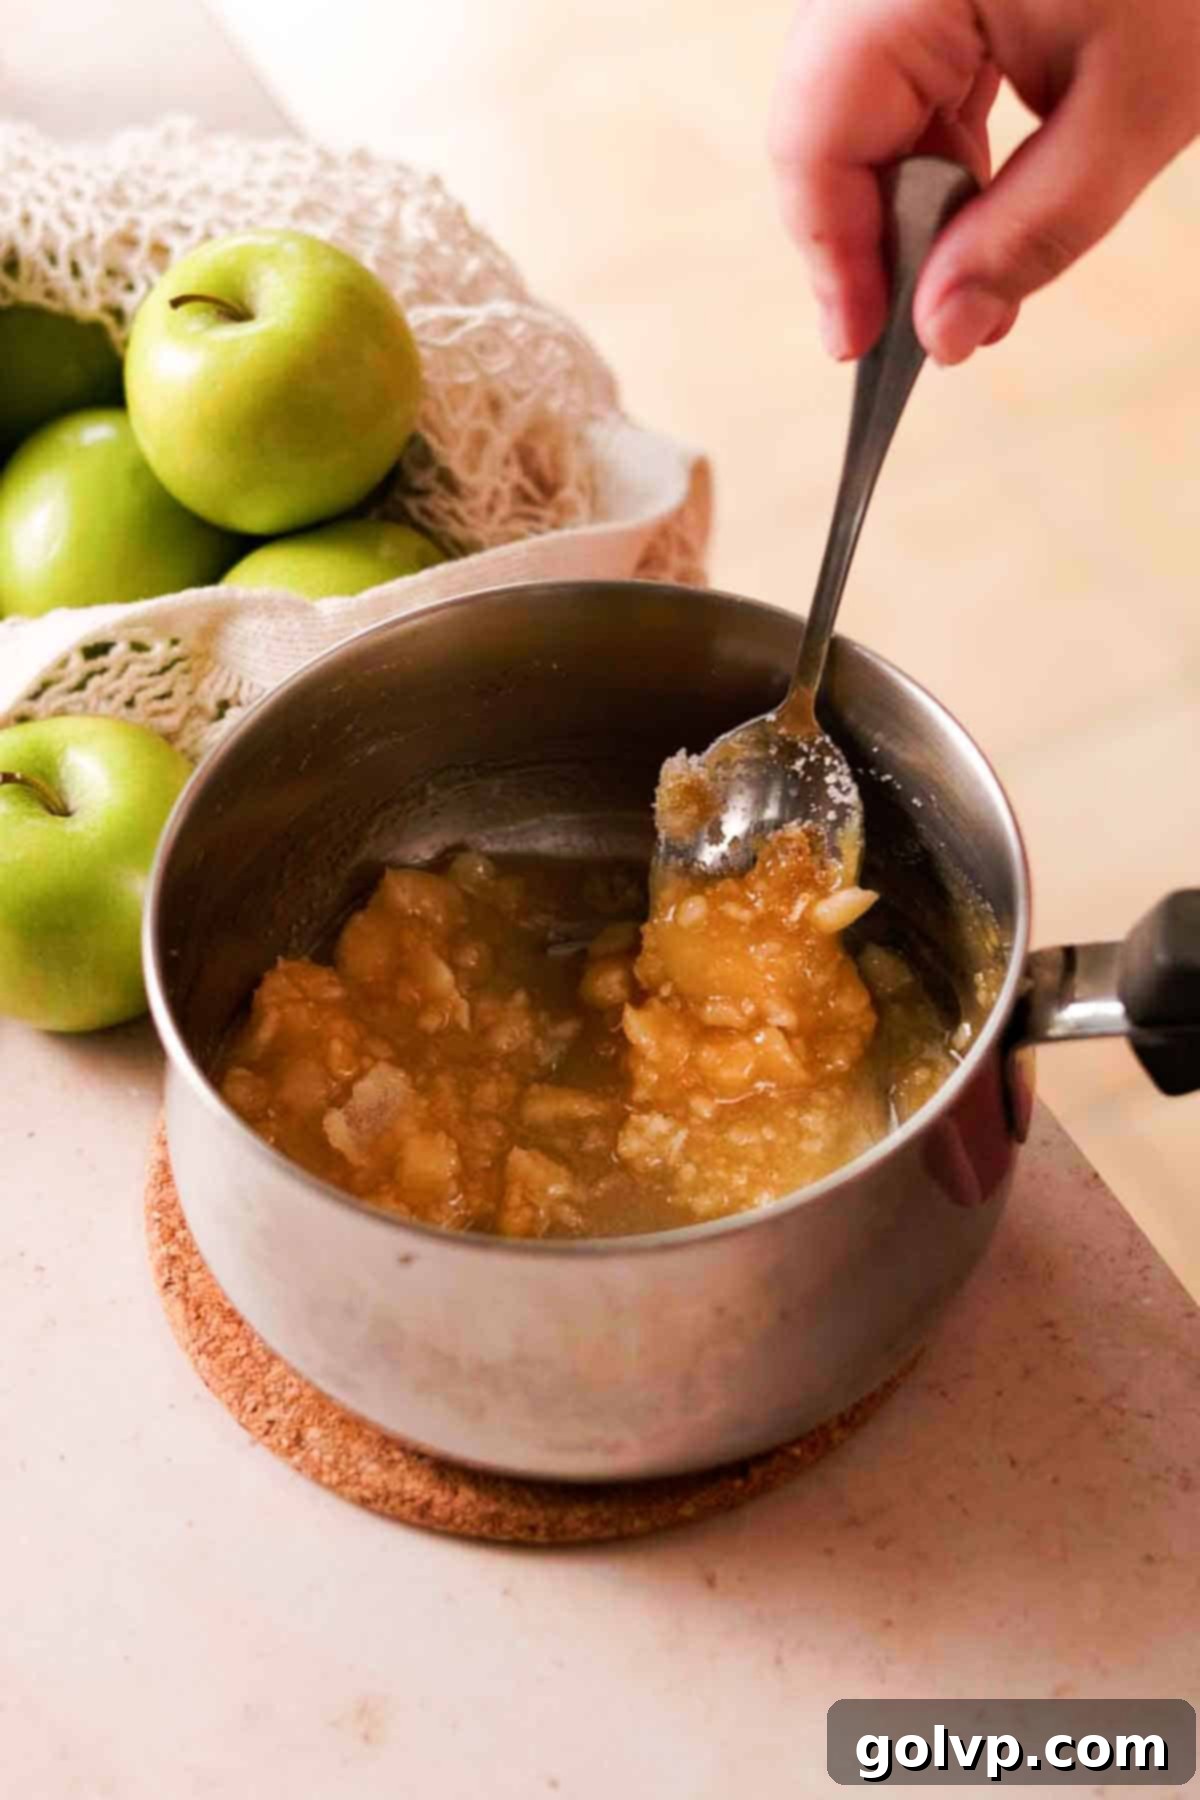
Step 2: Pour the granulated sugar into a medium-sized, heavy-bottomed saucepan. Begin heating it over medium-low heat, stirring constantly with a heatproof spatula or wooden spoon. The sugar will initially clump up, resembling wet sand, and then gradually start to melt and liquefy. Continuous stirring ensures even melting and prevents hot spots that can lead to burning.
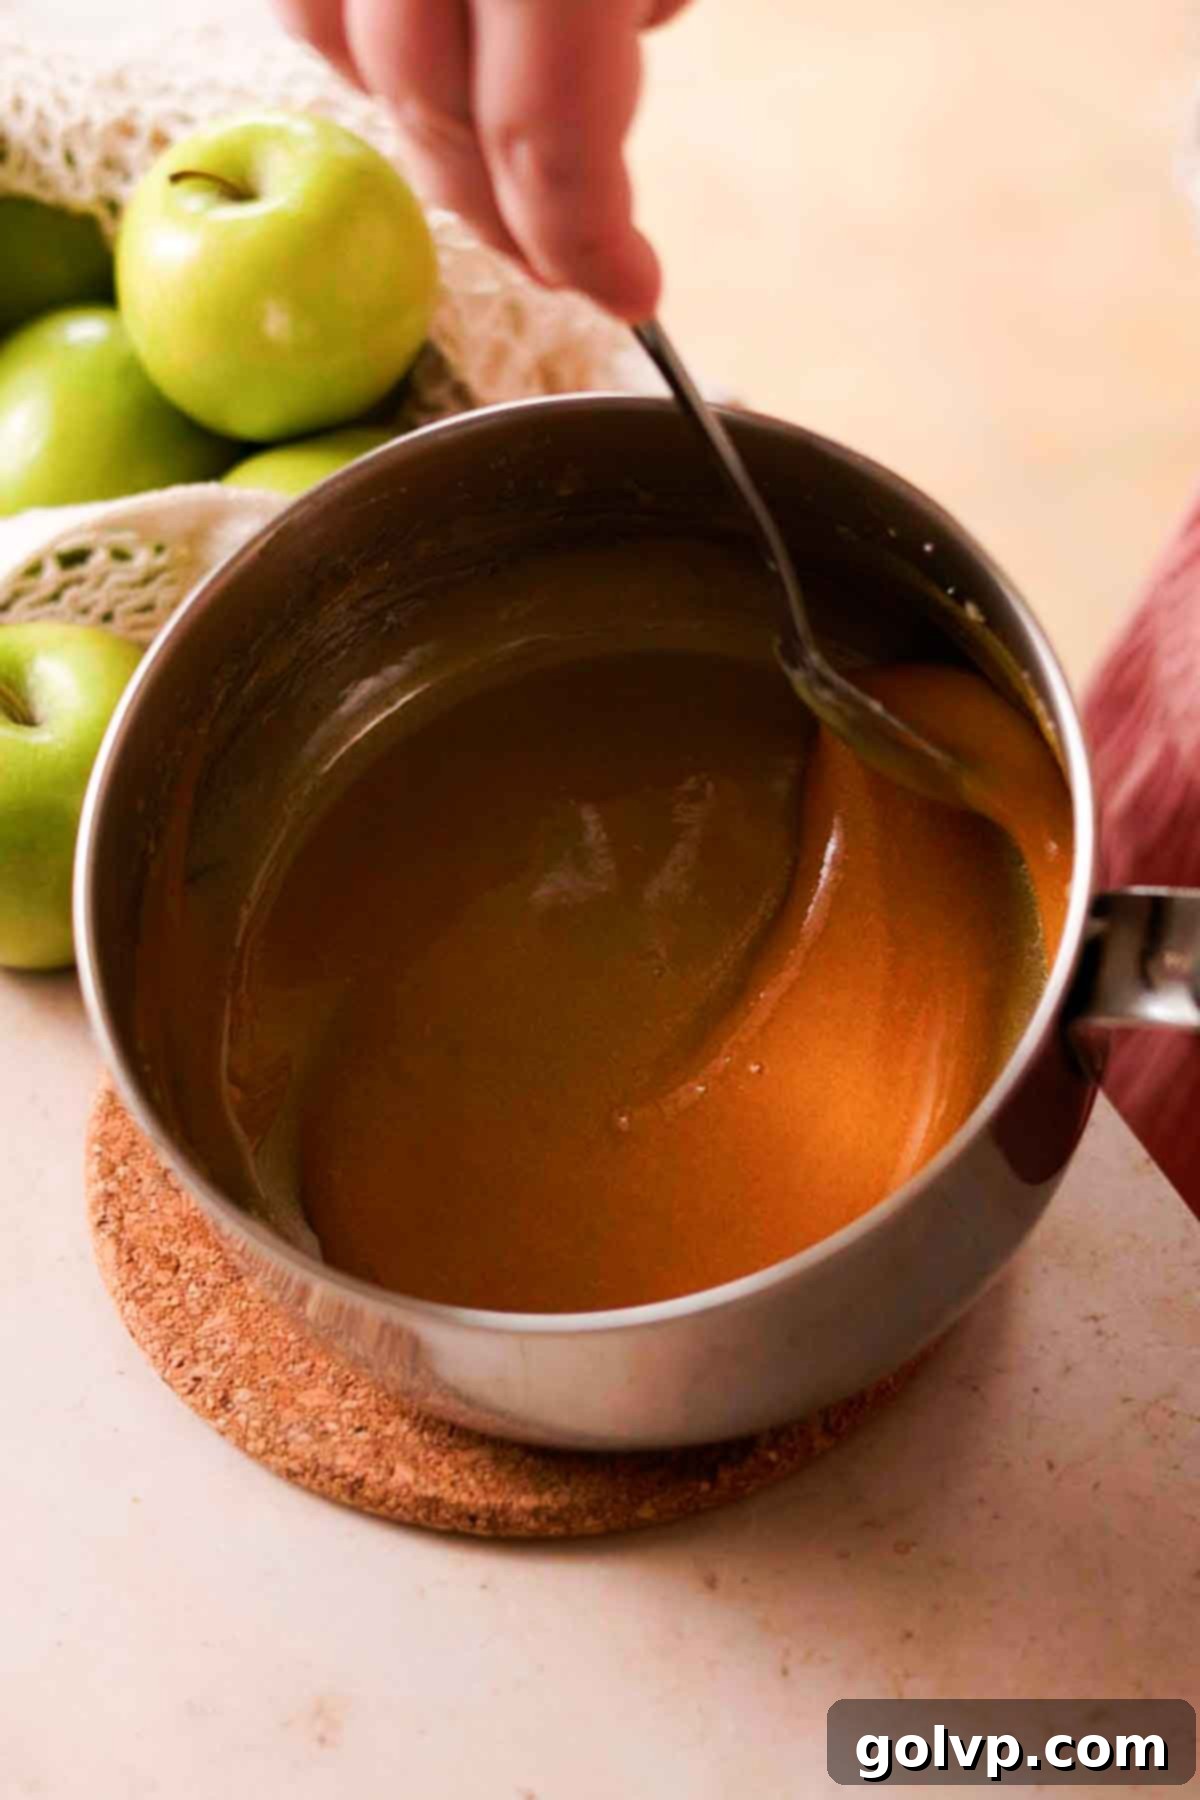
Step 3: Continue stirring until all the sugar clumps have completely dissolved and the caramel transforms into a beautiful, rich amber color. This stage requires vigilance; as soon as it reaches the desired deep golden hue, immediately remove the saucepan from the heat. Overcooking even slightly can lead to a bitter, burnt taste, so act quickly!
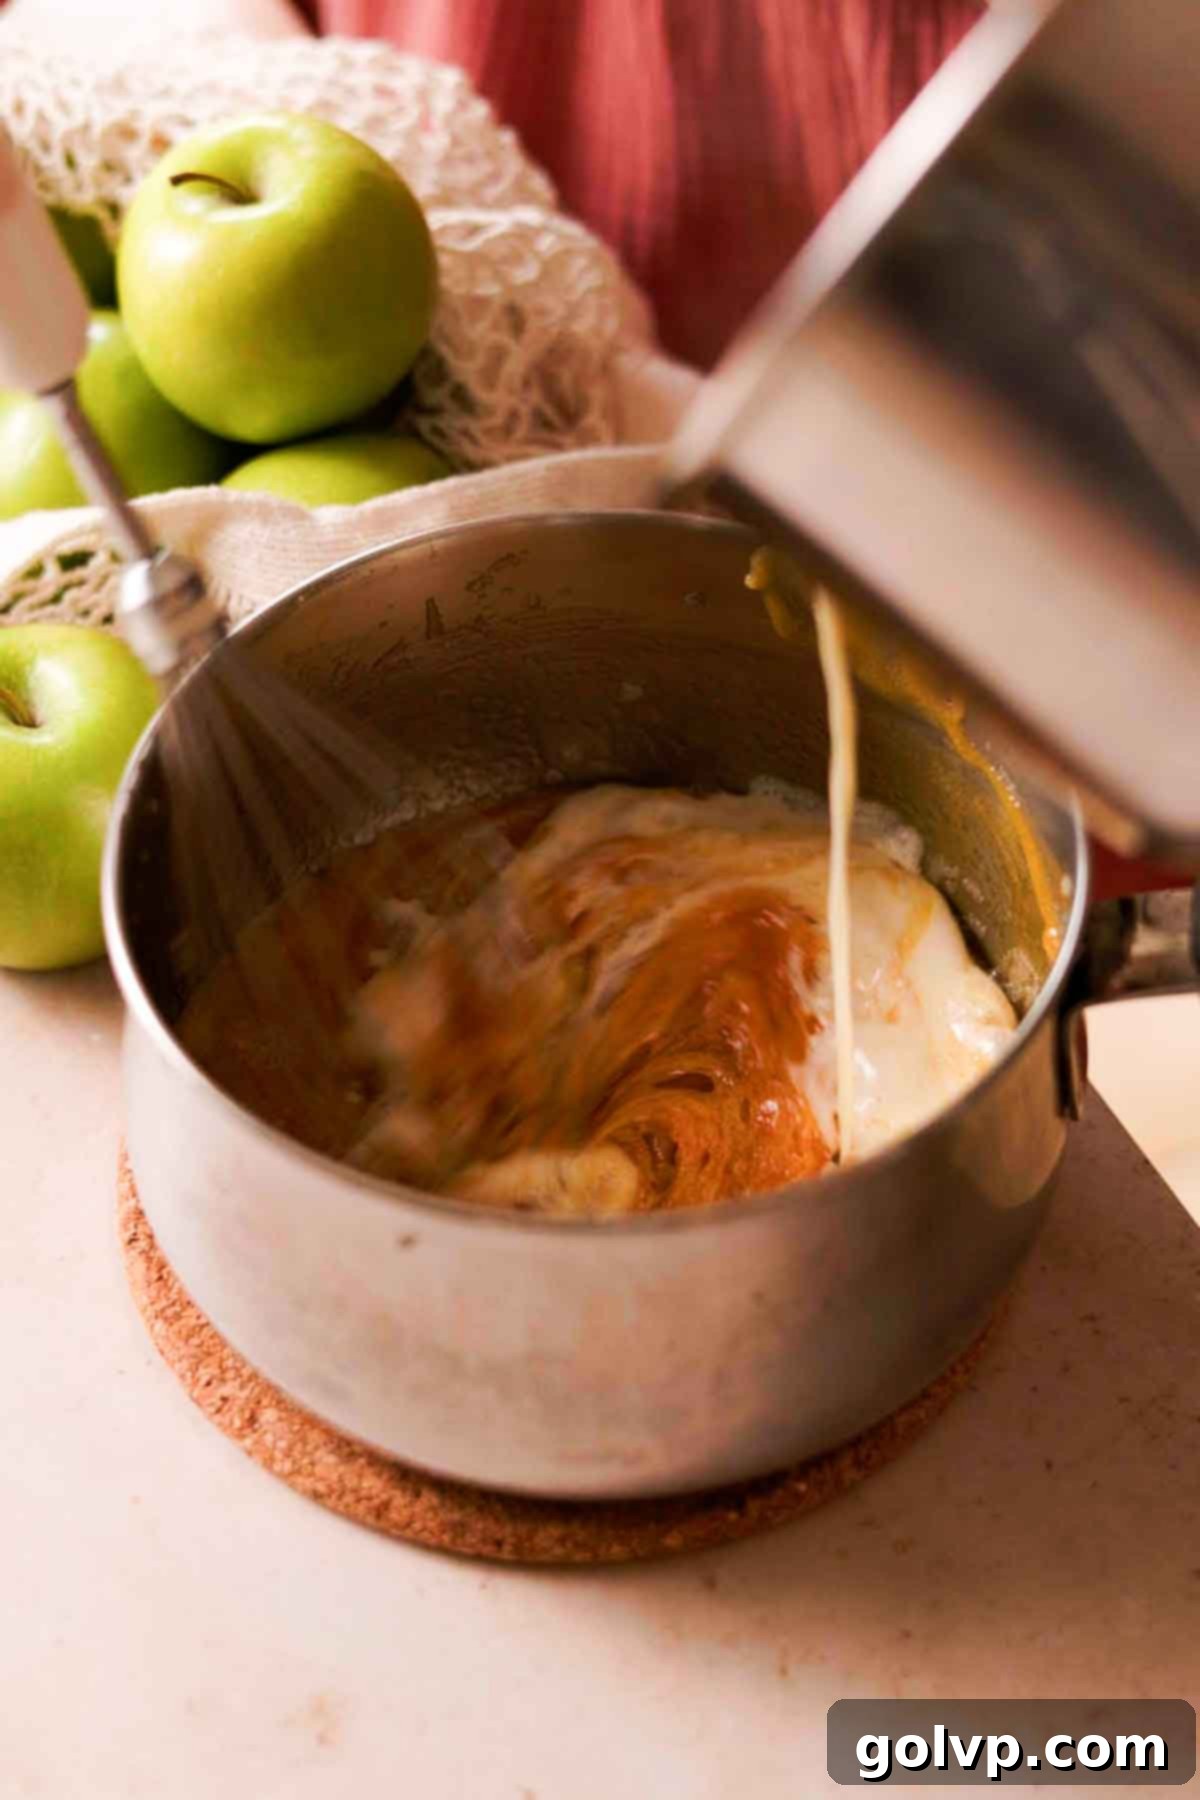
Step 4: Working swiftly and with extreme caution, gradually pour the hot cream mixture into the hot caramelized sugar. It will bubble up vigorously, so be prepared! Whisk continuously and vigorously as you pour, especially during the initial additions. Continue whisking until the mixture is completely smooth and thoroughly combined. You can optionally return it to low heat for one minute while whisking to further thicken the caramel. Once smooth, transfer the caramel to a heatproof jar or container and allow it to cool completely to room temperature. It will thicken significantly as it cools.
Tip: When incorporating the hot cream into the caramelized sugar, pour it in very gradually, especially at the beginning, while whisking extremely vigorously. This rapid emulsification helps prevent the caramel from crystallizing or forming stubborn lumps. If you do encounter some lumps, don’t panic – check our tips section for troubleshooting advice.
How to Make a Caramel Apple Filling
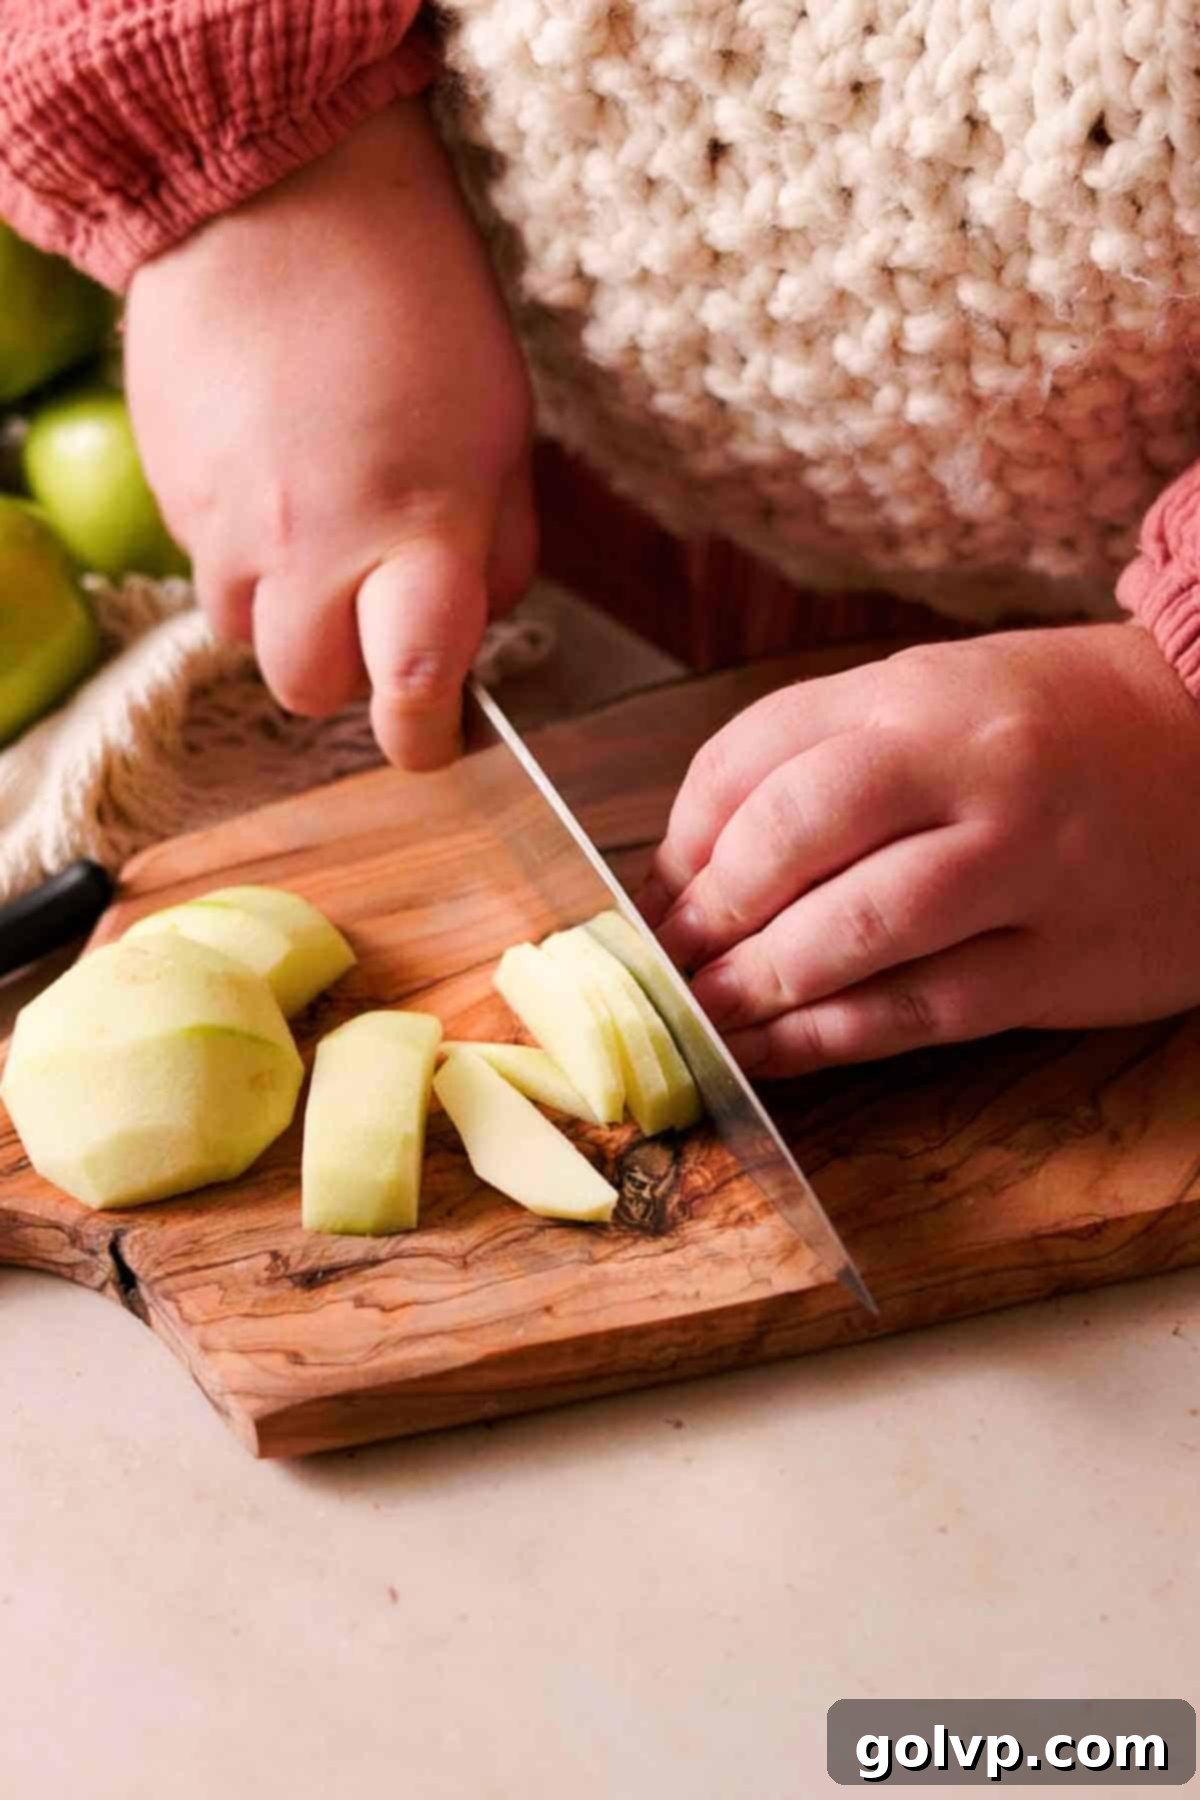
Step 1: Begin by peeling and coring your chosen apples, then slice them into even, relatively thin pieces. Aim for slices that are not too thin, as they will cook down considerably; you want them to retain some texture and bite in the final bar. Uniform slices ensure even cooking.
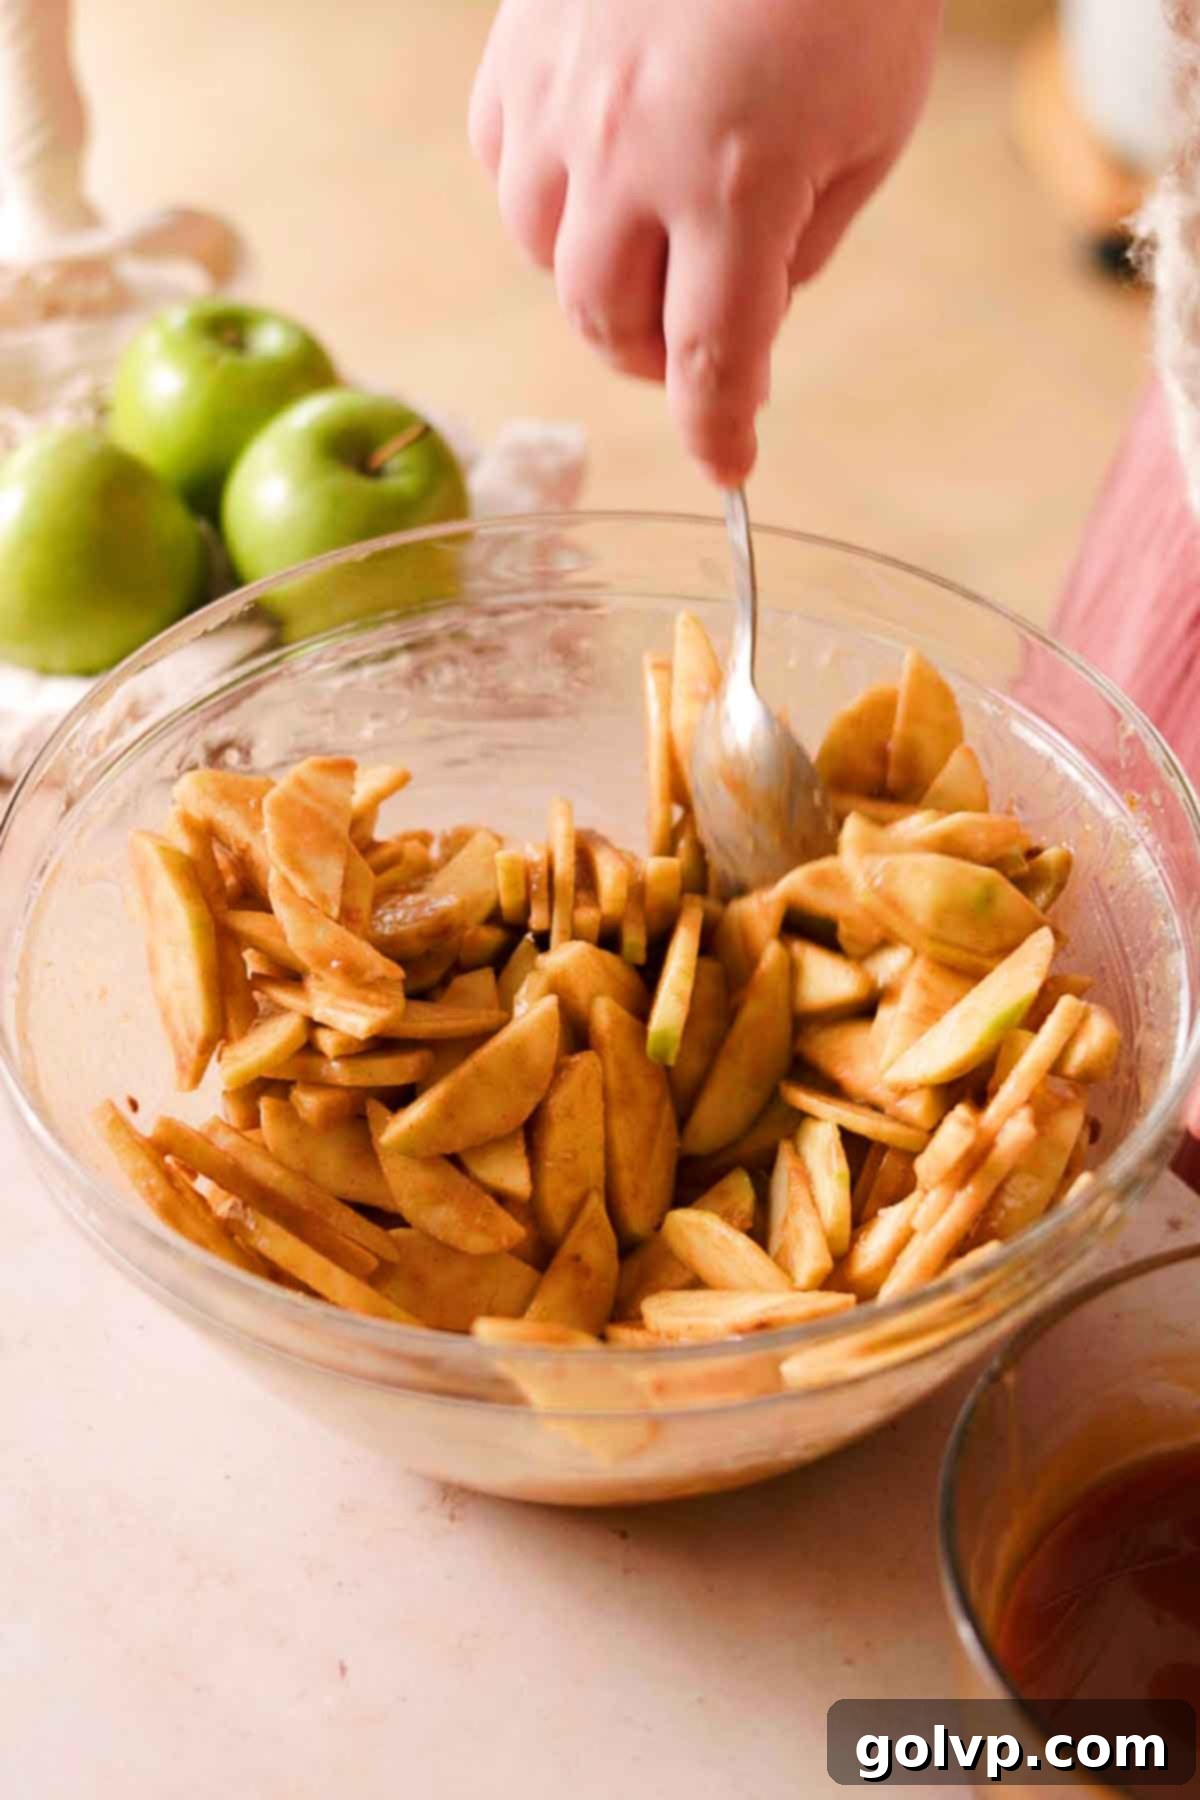
Step 2: Transfer the sliced apples to a large mixing bowl. Add the remaining filling ingredients: brown sugar, salted caramel sauce, all-purpose flour (which helps to thicken the juices), cinnamon, and fresh lemon juice. Mix everything thoroughly with a spoon or your hands until all the apple slices are evenly coated. Set this mixture aside while you prepare the crust.
Tip: For the most vibrant flavor and ideal texture in your baked goods, always choose a tart, firm apple variety like Granny Smith or Northern Spy. These apples will retain their shape and provide a delightful tangy contrast to the sweet caramel, preventing the bars from being overly cloying.
How to Assemble and Bake the Apple Pie Bars
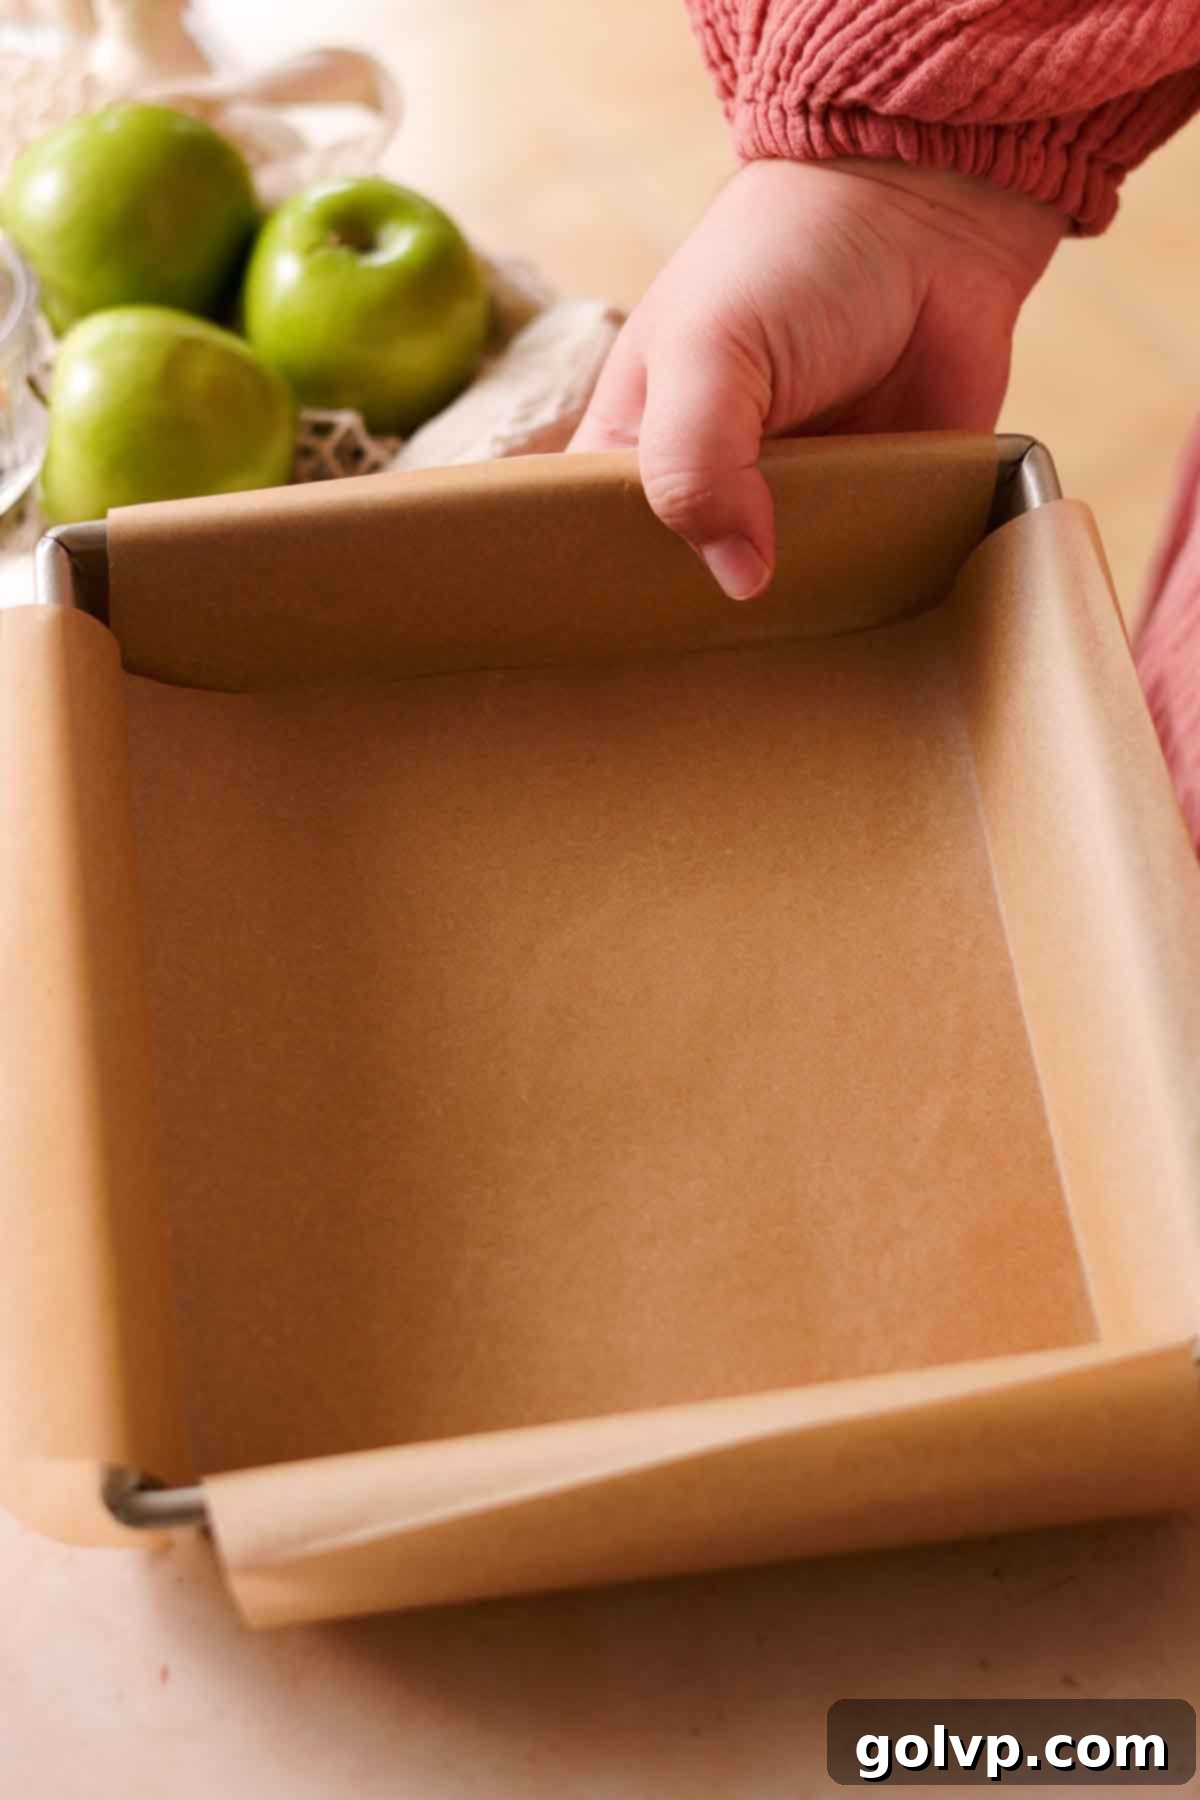
Step 1: Prepare your baking pan by lining an 8″ or 9″ square baking pan with two long strips of parchment paper. Arrange them in a cross pattern, ensuring there’s plenty of overhang on all sides to create “handles” that will allow you to easily lift the baked bars out of the pan. This step is crucial for clean removal. Preheat your oven to 355°F (180°C).
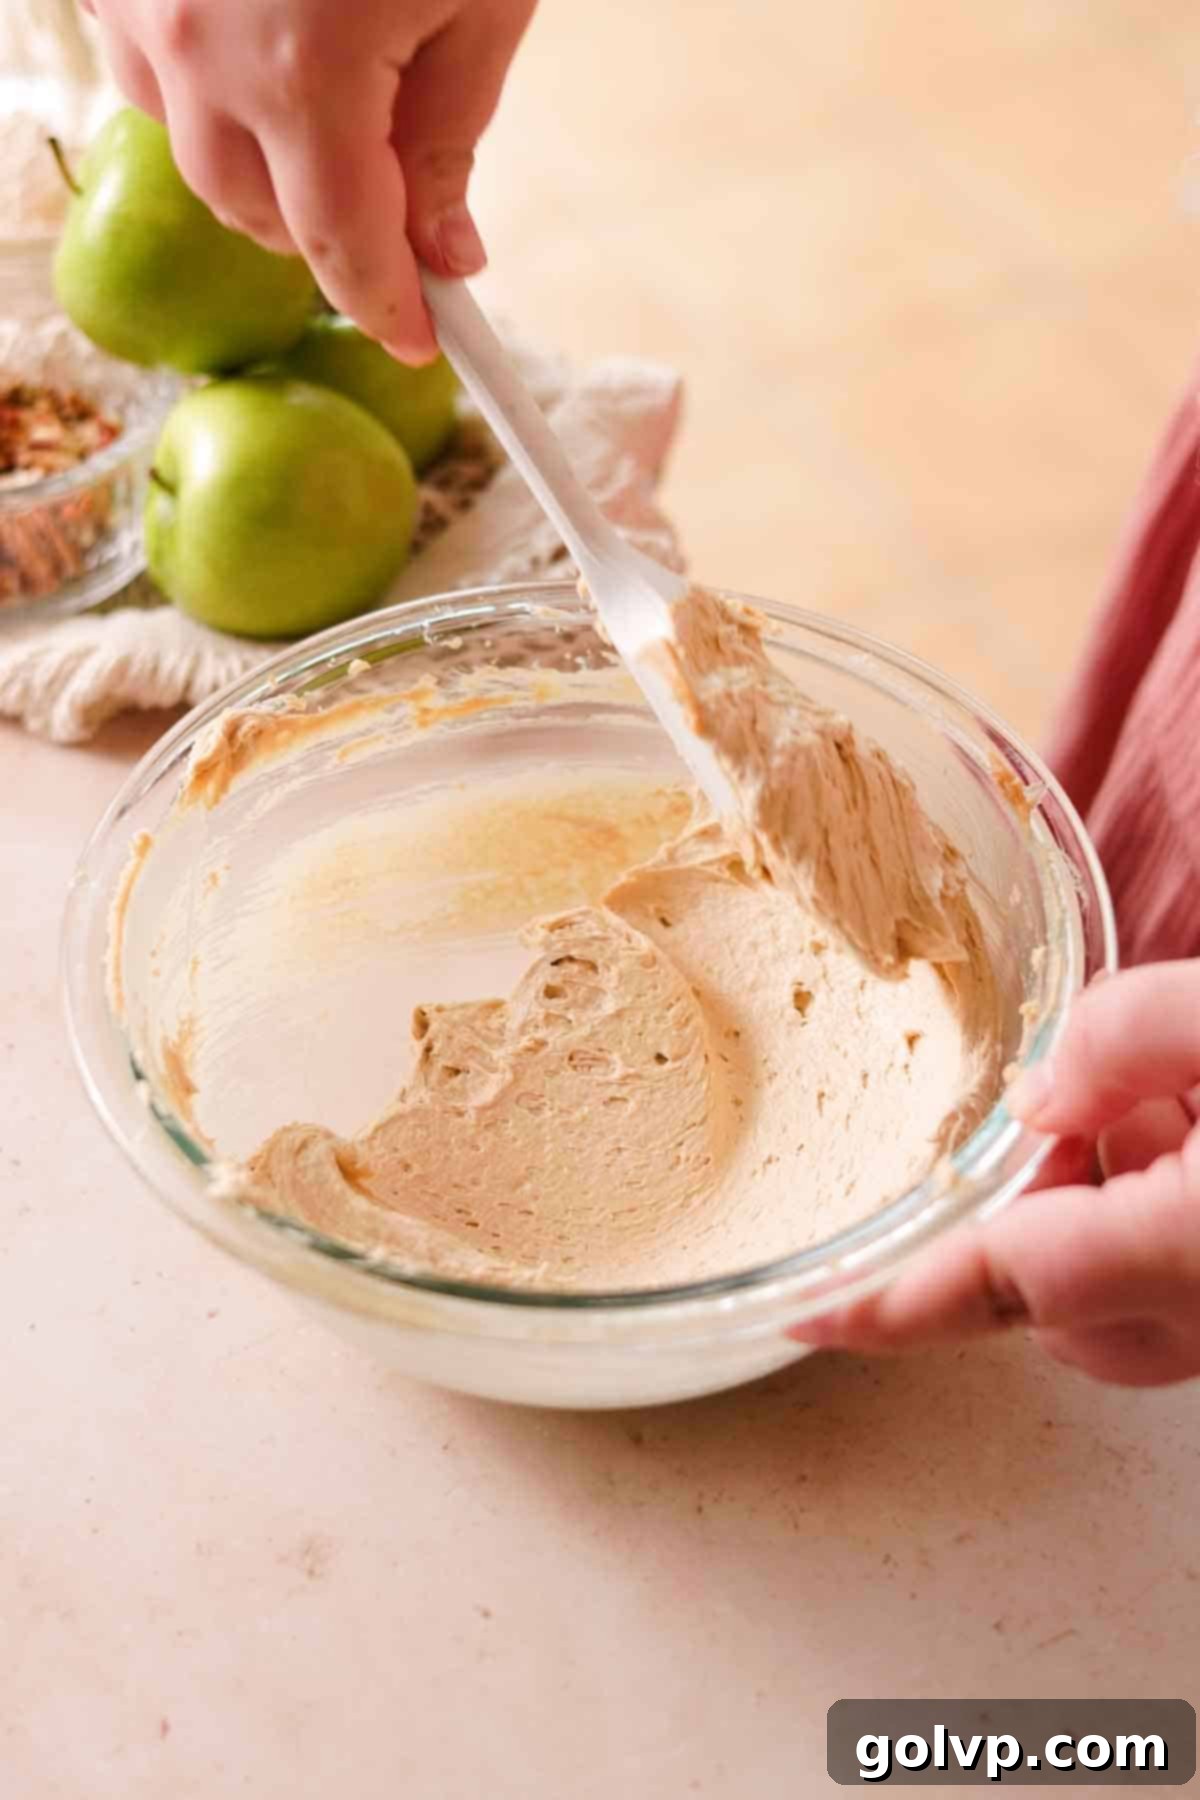
Step 2: In a large mixing bowl or the bowl of a stand mixer fitted with the paddle attachment, beat the softened butter and brown sugar together on medium speed for about 5 minutes. Continue mixing until the mixture becomes noticeably light in color and fluffy in texture, and has increased in volume. Scrape down the sides of the bowl frequently to ensure even mixing. Stir in the vanilla extract and sea salt until just combined.
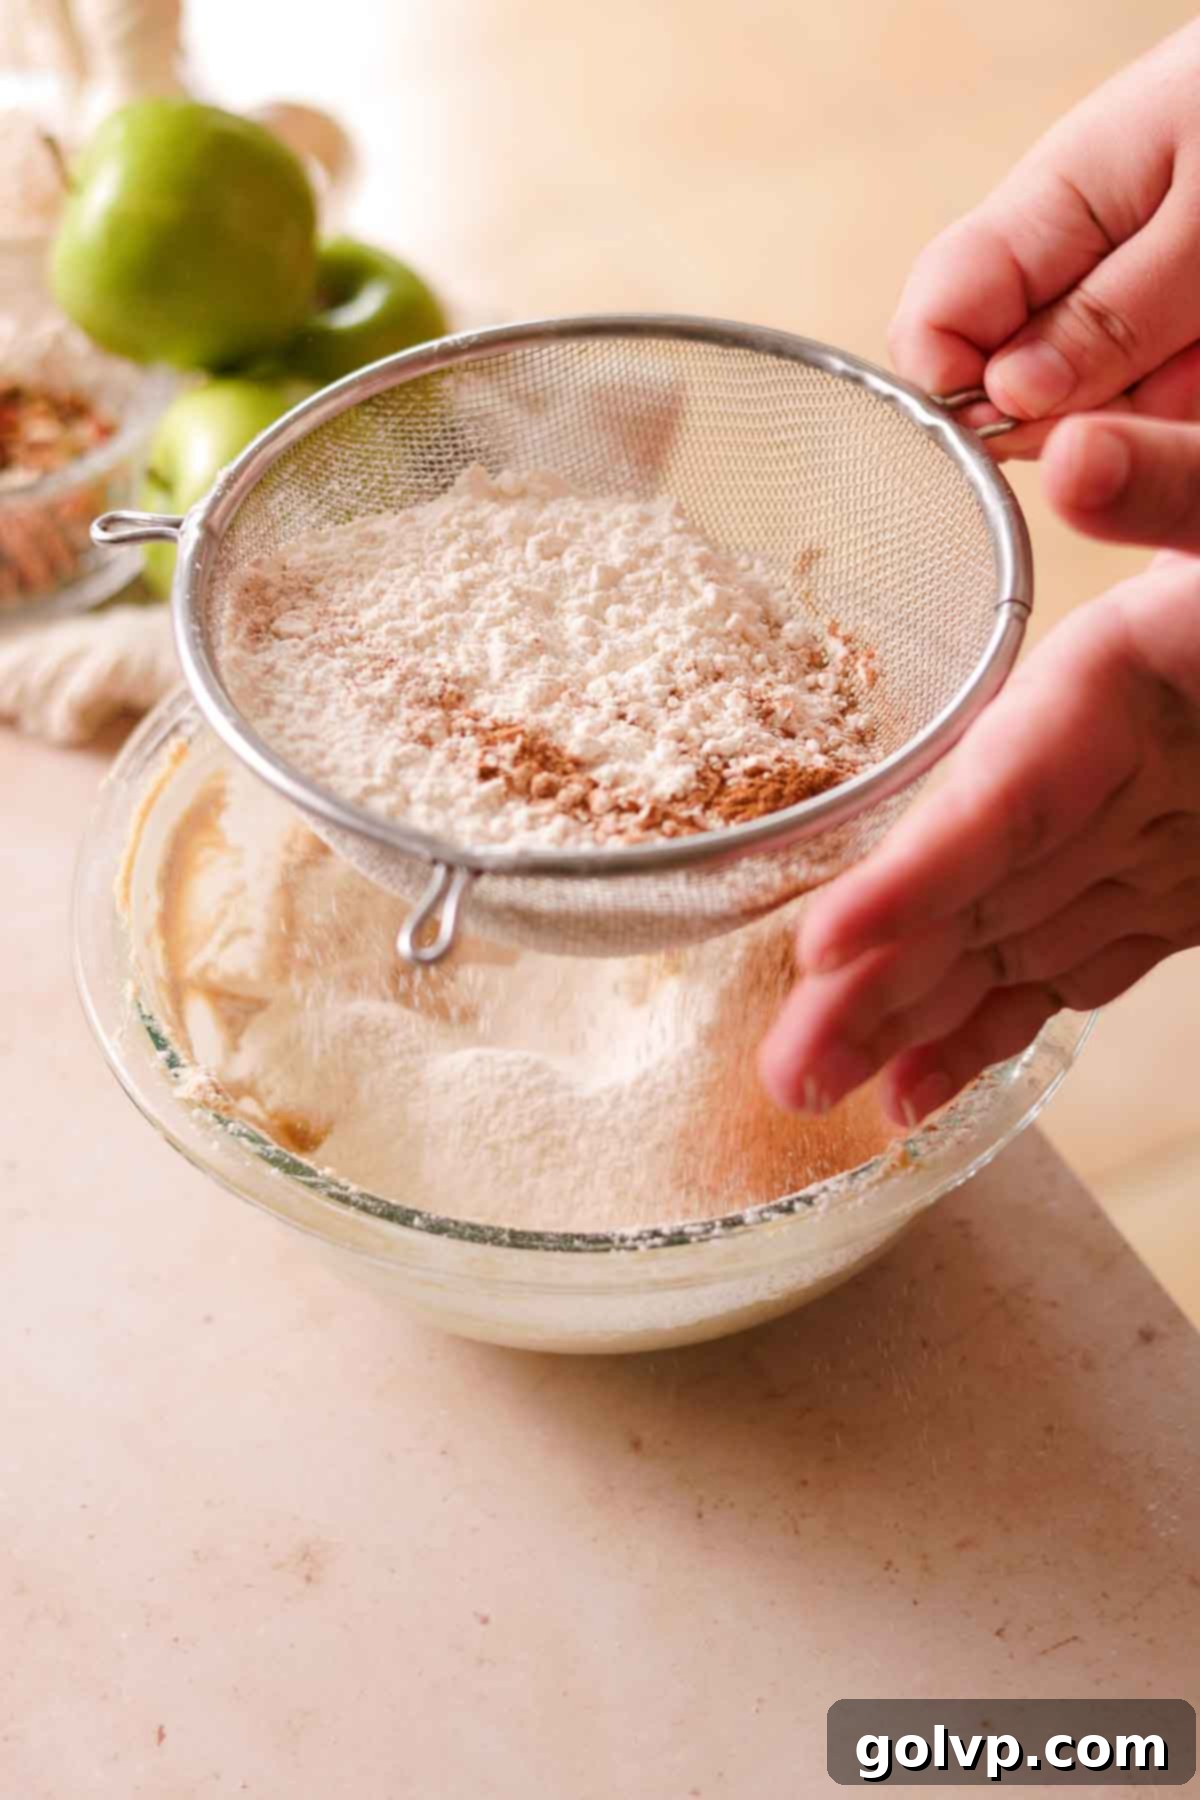
Step 3: Sift the all-purpose flour, baking powder, and ground cinnamon directly into the same bowl containing the creamed butter and sugar mixture. Sifting helps to eliminate lumps and ensures a light, uniform dough.
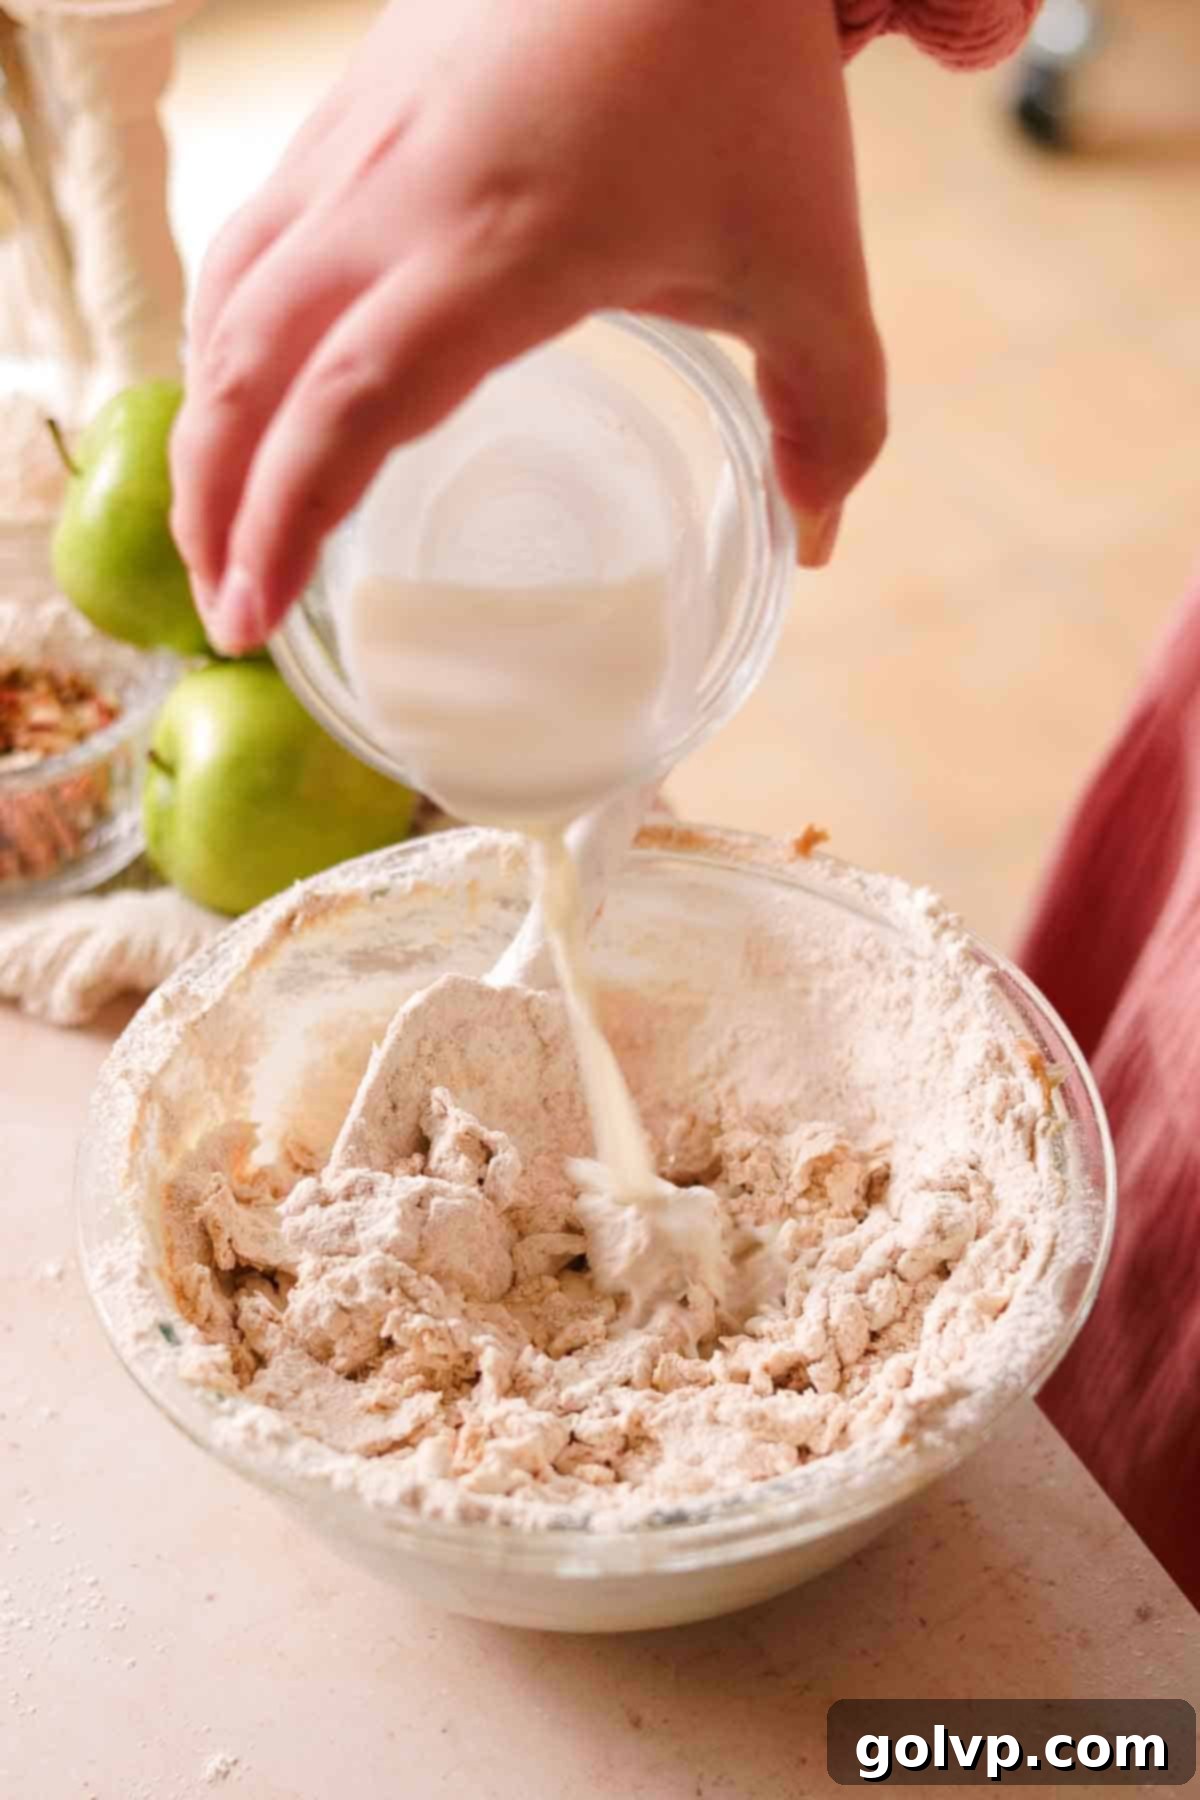
Step 4: Gently fold the dry ingredients into the wet mixture until just combined and a cohesive dough begins to form. Be careful not to overmix, as this can result in a tough shortbread. Add the milk, one tablespoon at a time, continuing to fold until the dough comes together and is no longer crumbly. The dough should be soft but manageable.
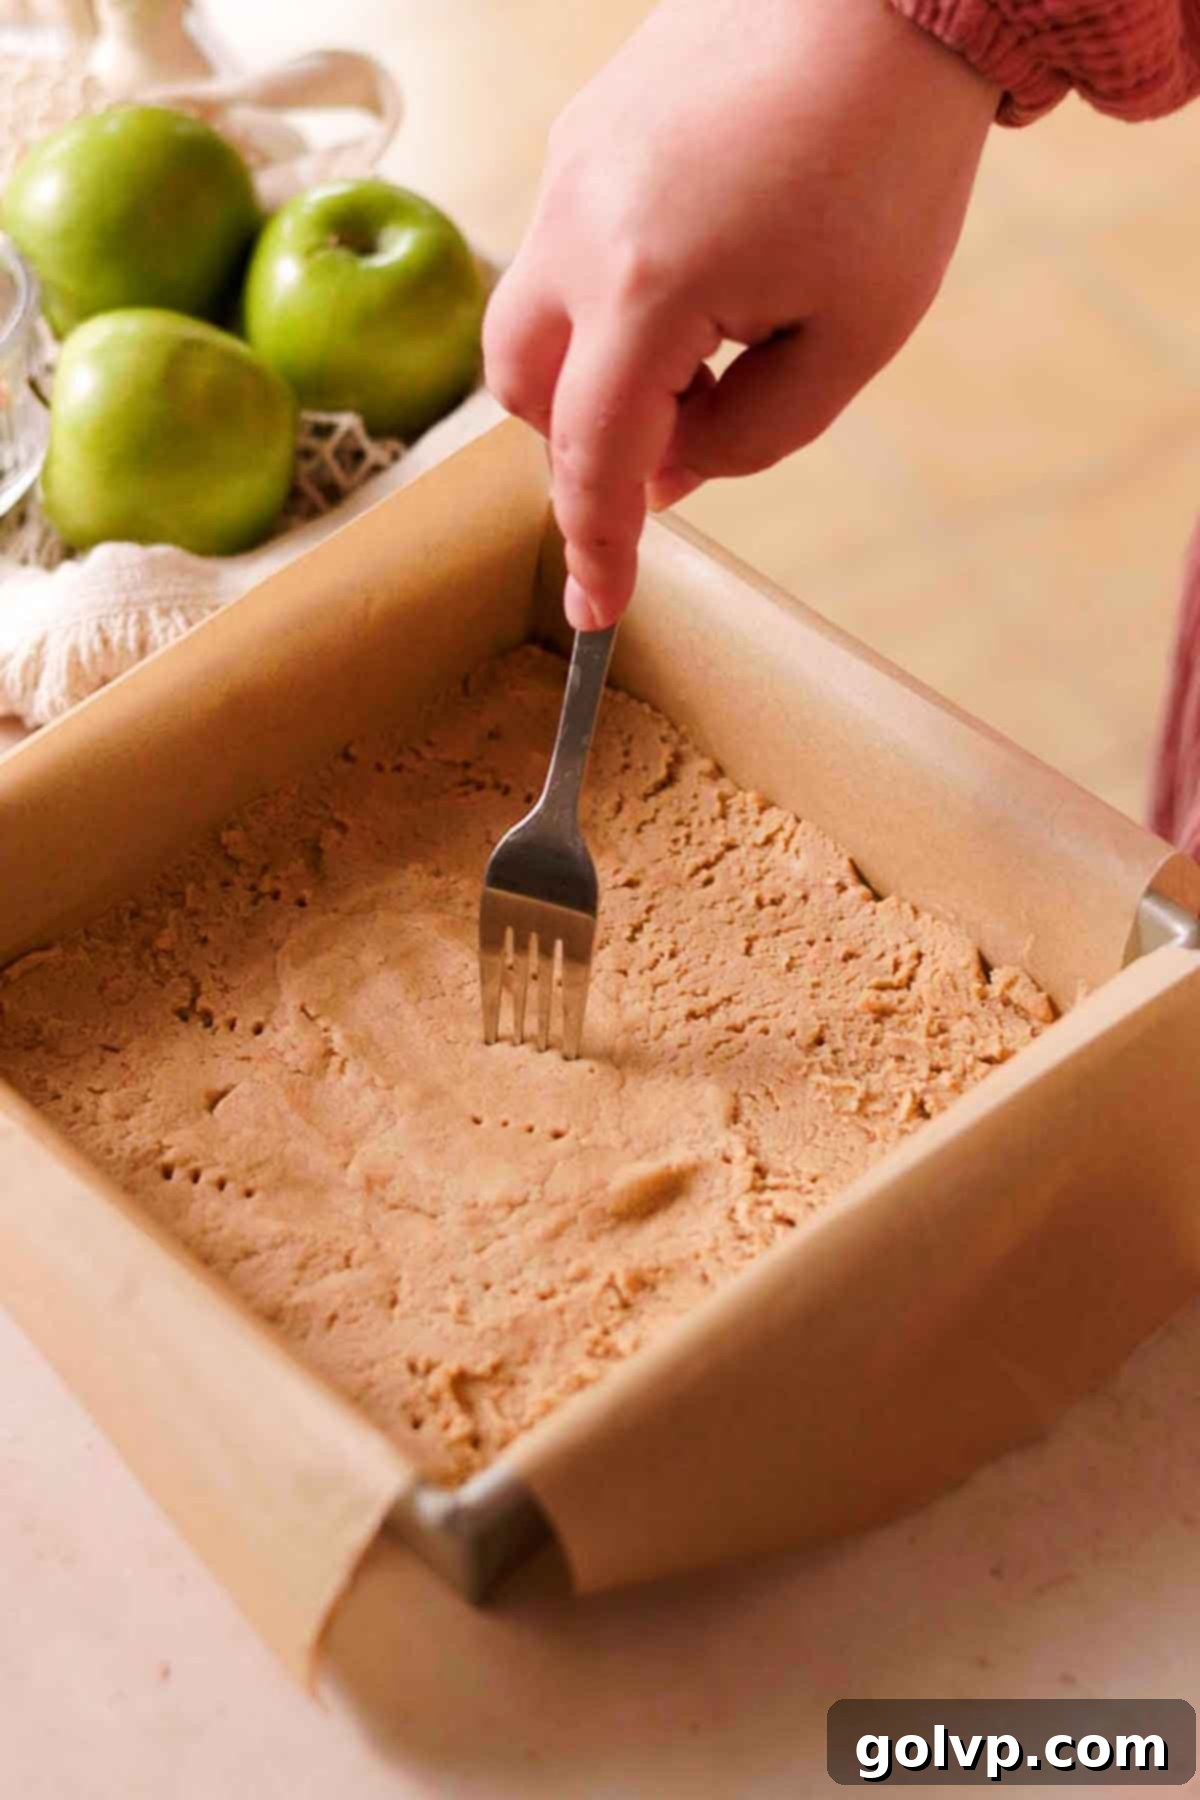
Step 5: Take approximately three-quarters of the prepared shortbread dough and press it evenly into the bottom of the lined baking pan using your hands or the back of a spatula. Ensure it forms a consistent layer. Prick the surface of the dough all over with a fork to allow steam to escape and prevent puffing. Bake this base for 10-12 minutes, just until it’s lightly golden and set.
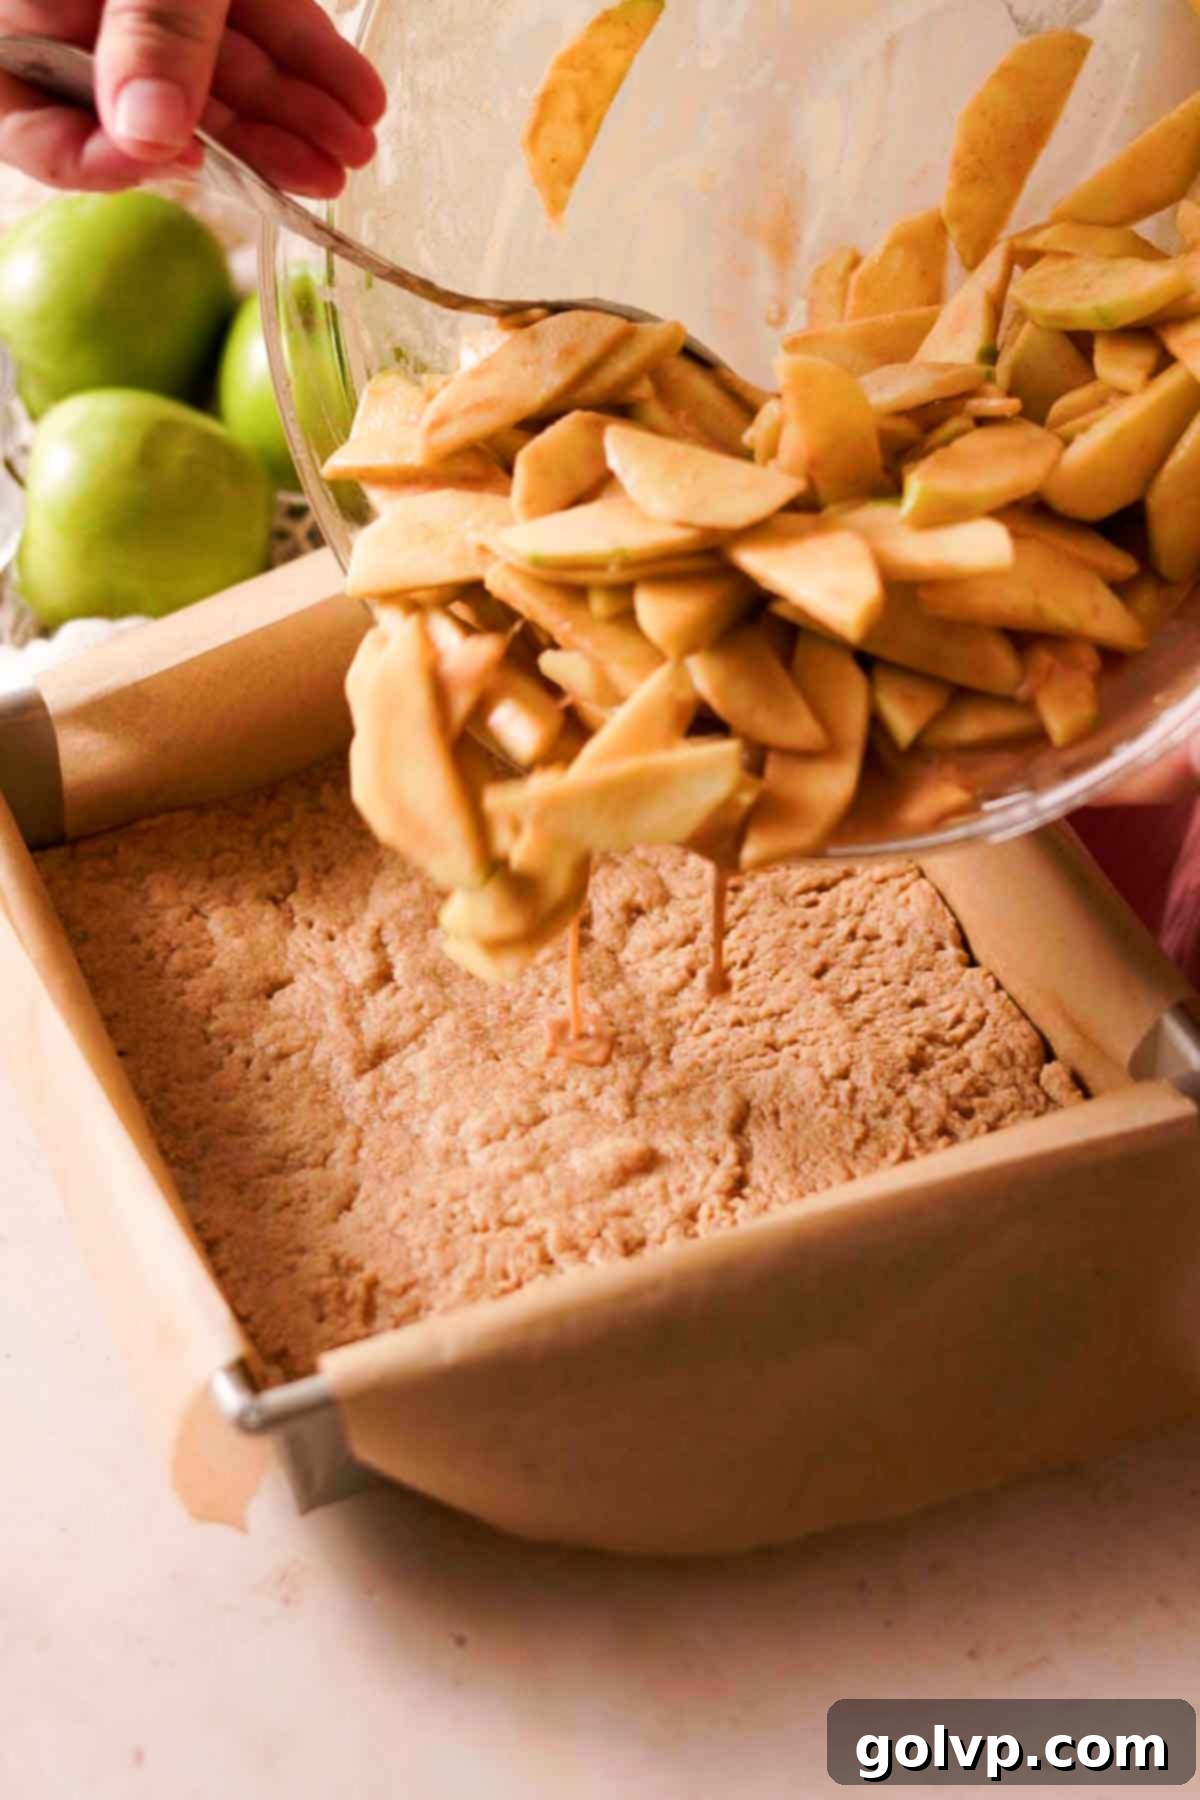
Step 6: Carefully spread the prepared caramel apple filling evenly over the pre-baked shortbread crust. Ensure any accumulated liquids from the apple mixture are also poured over the apples, as these juices will combine with the caramel to create a rich, gooey filling during baking.
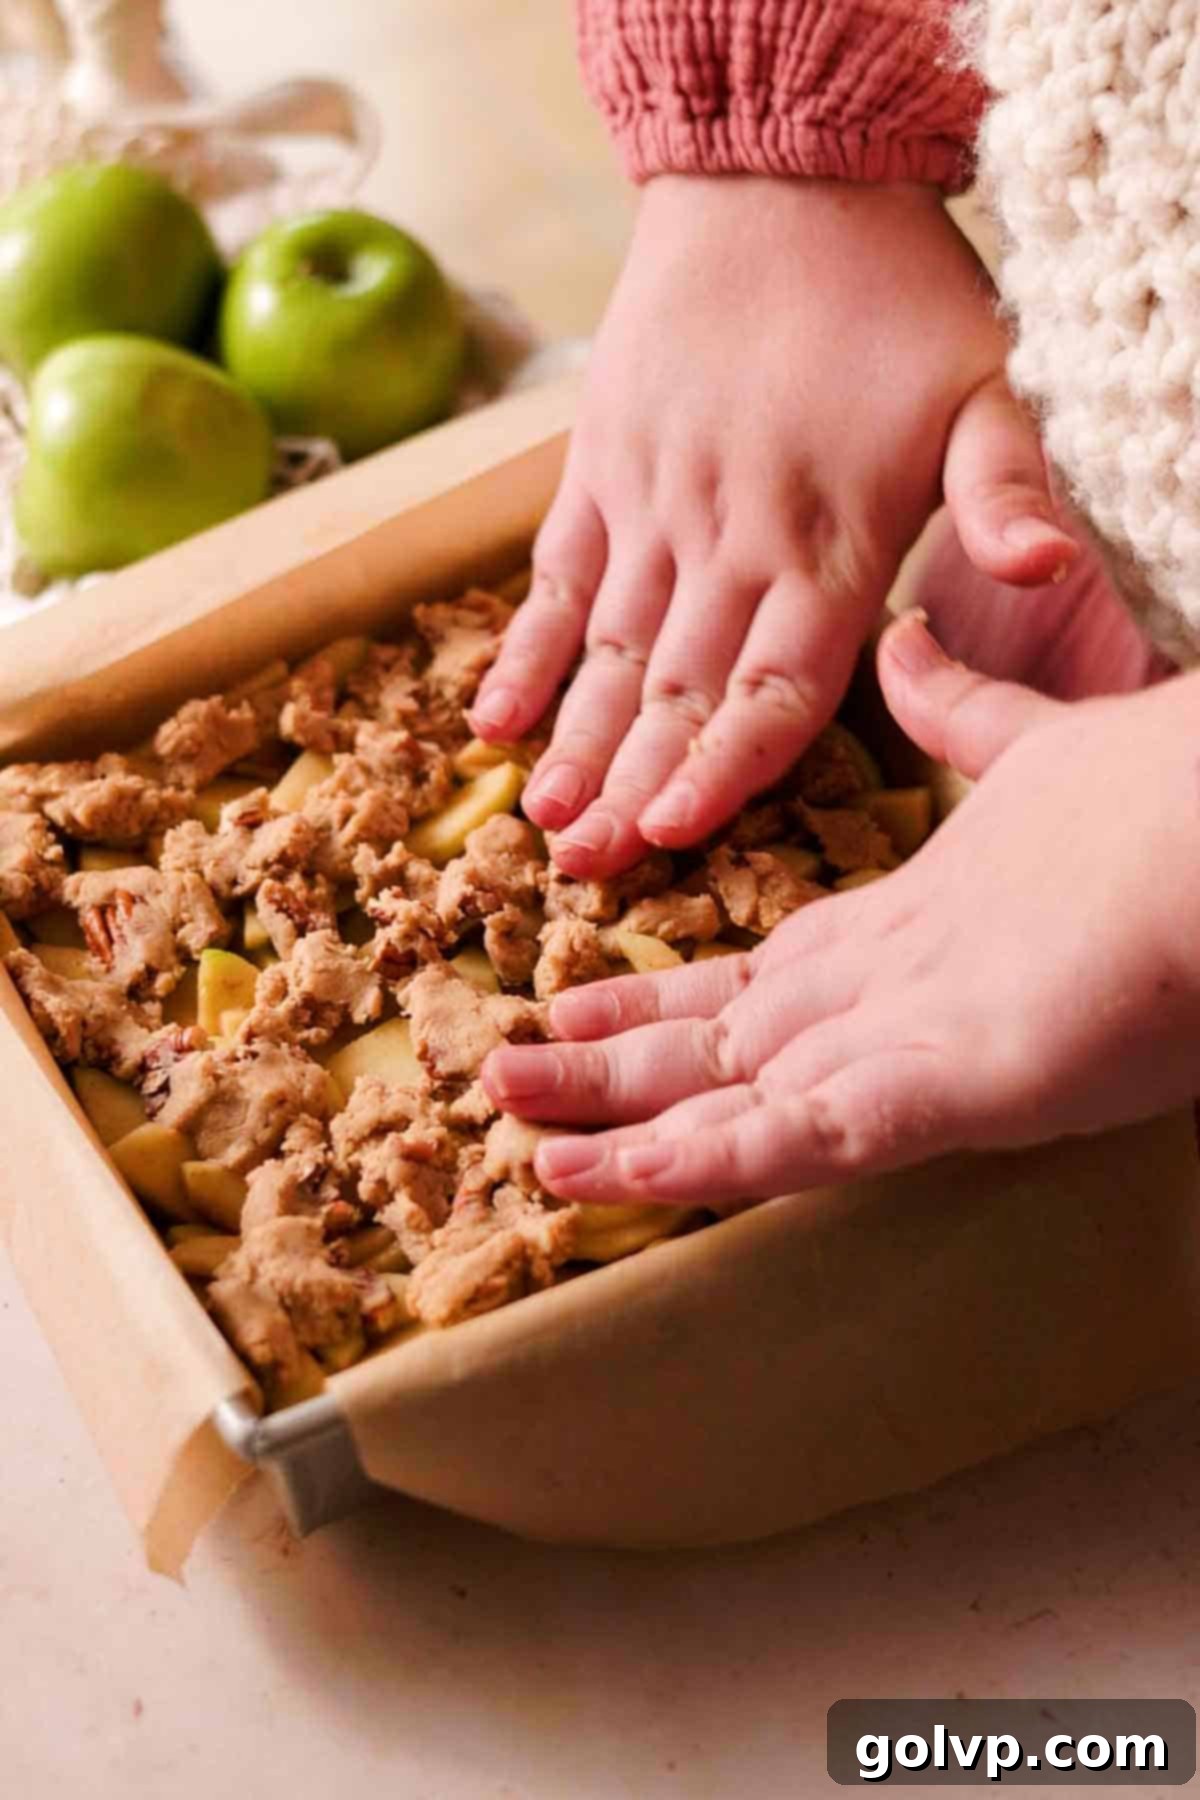
Step 7: Crumble the remaining quarter of the shortbread dough evenly over the apple filling. This forms your delightful streusel topping. Sprinkle the chopped pecans over the crumble, then gently press them down slightly to ensure they adhere and toast beautifully. Bake the bars for 40-50 minutes, or until the edges are golden brown and the filling is bubbling enticingly. The baking time can vary depending on your desired filling consistency.
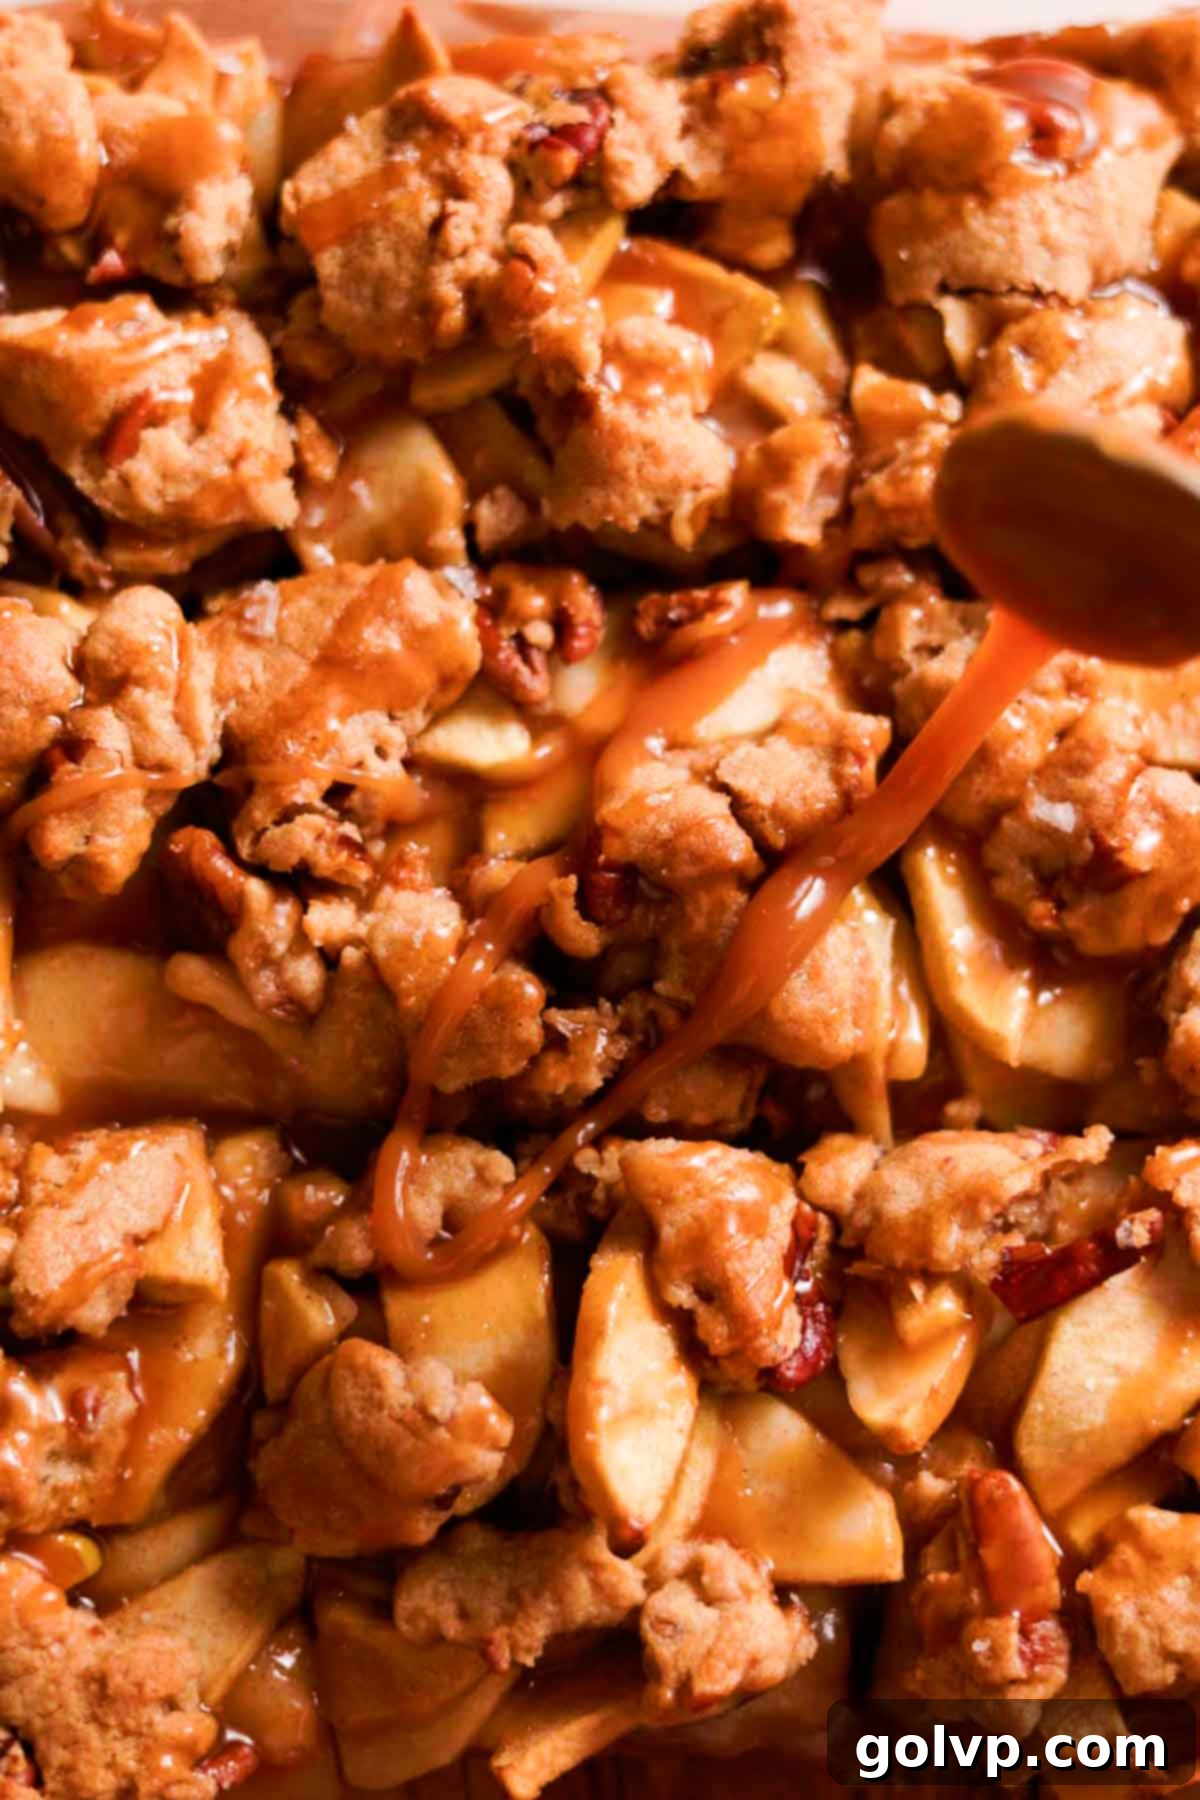
Step 8: Once baked, remove the pan from the oven and allow the bars to cool completely to room temperature while still in the pan. This is crucial for them to set properly. Once cooled, use the parchment paper handles to lift the entire slab of bars out onto a cutting board. Slice them into squares using a serrated knife for clean cuts. Finally, generously drizzle the cooled salted caramel sauce over each bar and, for an extra touch, sprinkle with flaky sea salt. Serve and enjoy!
Tip: Adjust baking time to your preference for the apple filling. Bake for approximately 40 minutes for a gooier, slightly firmer apple texture with more crunch. For a softer, jammy filling, extend baking to 50-60 minutes, ensuring you keep a close eye to prevent the crumble topping from burning.
🍬 Wet VS Dry Caramel Comparison: Understanding Your Options
Both wet and dry caramel methods share the same fundamental goal: to caramelize sugar into a rich, golden liquid, which is then typically combined with cream and/or butter to form a sauce. While the end result is quite similar in flavor, the techniques themselves have distinct pros and cons that can influence a baker’s preference and success. Understanding these differences can help you choose the method that best suits your comfort level and ingredients.
If you’re interested in making a different kind of sweet sauce, check out this banoffee cake with a delightful homemade toffee sauce recipe.
Dry Caramel Method: Our Preferred Foolproof Technique
The dry caramel method is our recommended approach for its reliability, especially for those new to caramel making. It involves heating sugar in a dry saucepan until it melts and caramelizes.
Pros: A significant advantage of the dry method is its reduced tendency to crystallize. By avoiding water, you eliminate a common trigger for sugar crystallization, making it a more forgiving process. There’s also a certain satisfaction in watching the sugar slowly transform and stirring it as it melts.
Cons: This method demands constant attention and stirring to prevent the sugar from burning unevenly. Hot spots can quickly lead to burnt, bitter patches if not managed carefully.
This is my personal favorite method because it offers a nearly foolproof path to perfect caramel, provided you maintain continuous stirring. The process involves pouring granulated sugar directly into a clean, dry saucepan and heating it over medium-low heat. The sugar will gradually begin to liquefy, forming clumps before melting completely. Throughout this transformation, consistent stirring is vital to ensure even melting and to prevent any part of the sugar from scorching. Once all granules and clumps have melted and the sugar achieves that beautiful, golden amber color, you simply remove it from the heat, carefully incorporate the heated cream, butter, vanilla, and salt, and whisk until smooth. Voila, perfect caramel!
Wet Caramel Method: A Different Approach
The wet caramel method involves dissolving sugar in water first, then boiling the mixture until the water evaporates and the sugar caramelizes. This method, while sometimes quicker initially, comes with its own set of challenges.
Pros: Once the sugar has fully dissolved in the water and the mixture begins to boil, you generally don’t need to stir it. This can feel less hands-on during the active boiling phase compared to the dry method.
Cons: The primary drawback of the wet method is its susceptibility to crystallization. Even a single sugar crystal on the side of the pot can cause the entire batch to crystallize and become grainy, rendering it unusable. In my experience, the wet method crystallizes roughly one out of every three attempts.
With the wet caramel method, sugar and water are brought to a simmer. Once the sugar completely dissolves, it is crucial not to stir the mixture. Any disturbance can introduce sugar crystals, leading to a grainy texture, which means you’d have to start over. The mixture is simply boiled until the water evaporates and the sugar caramelizes to a deep amber hue. At that point, the cream, butter, vanilla, and salt are added, and the mixture is whisked smooth. To mitigate crystallization with the wet method, some recipes suggest adding corn syrup, but I personally prefer to avoid corn syrup as it can subtly alter the taste and texture of the caramel sauce.
For an example of a recipe utilizing a wet caramel sauce, you can explore this delicious salted caramel cake recipe.
❔ Essential Tips to Prevent Caramel from Crystallizing
Caramel sauce can be notoriously finicky, often prone to crystallizing or lumping up when liquids like cream, butter, vanilla extract, and salt are introduced. However, by following these two critical steps, you can significantly reduce the risk and achieve a perfectly smooth, luscious caramel every time:
- Pre-Heat the Cream Mixture: This is arguably the most important step. Before you even begin caramelizing your sugar, combine the cream, butter, vanilla extract, and salt in a separate small saucepan and heat it until it just reaches a gentle simmer. Keep it warm. The key here is to minimize the temperature shock when the hot sugar meets the cream. A large temperature difference between the super-hot caramelized sugar and cold cream is the primary culprit behind crystallization and clumping. By pre-heating the cream, you make the transition much smoother.
- Whisk Vigorously and Gradually: When it’s time to combine the hot cream mixture with the hot caramelized sugar, proceed with extreme caution and speed. Begin by adding the hot cream mixture little by little, especially the first few splashes. As you add each increment, whisk the caramel vigorously and continuously. This rapid, forceful whisking helps to thoroughly incorporate the cream and prevent the sugar molecules from re-forming into crystals or creating stubborn lumps. You might observe a small amount of crystallization forming on the sides of the pot; this is generally acceptable. Just make sure not to scrape down the sides of the pot when pouring out your finished caramel, as these stray crystals could contaminate the smooth sauce.
❔ The Importance of Pre-Baking the Pie Bar Crust
Pre-baking the shortbread crust is a seemingly small step that makes a significant difference in the final texture of your apple pie bars. This brief bake ensures that your crust achieves an exceptional crispness that it wouldn’t otherwise get when immediately topped with the moist caramel apple filling. Without this crucial step, the moisture from the apple filling could easily seep into the unbaked dough, resulting in a soggy, gummy, or underdeveloped crust that lacks that delightful buttery crunch we all love. Essentially, you’d end up with a less-than-ideal foundation for your bars.
The good news is that pre-baking the crust only takes a quick 10-12 minutes, which is just enough time to mix together your apple filling. This efficient timing means you’re not adding much to your overall preparation time, but you are guaranteeing a superior, crisp, and buttery cookie-like base that perfectly complements the gooey, spiced apple topping. It’s the secret to achieving that coveted textural contrast in every bite!
📖 Recipe Frequently Asked Questions (FAQ)
Yes, absolutely! Pre-baking the shortbread crust for a short period is essential. This initial bake allows the crust to firm up and achieve a beautiful crispness before it’s covered with the moist apple filling. Without this step, the moisture from the apples can make the crust soggy or gummy during the main bake. It doesn’t need to be fully cooked through during the pre-bake, just 10-12 minutes to set it and begin the crisping process is perfectly sufficient.
For the best apple pie bars, it’s crucial to select firm and tart apple varieties. Our top recommendations are Granny Smith or Northern Spy. These apples hold their shape exceptionally well during baking, preventing a mushy filling. Their tartness also provides a wonderful counterbalance to the sweetness of the caramel and brown sugar, creating a more complex and balanced flavor profile that prevents the bars from being overly sweet.
You can certainly use a good quality store-bought caramel sauce if you’re looking to save time in the kitchen. It’s a convenient shortcut that still yields delicious results. To ensure your bars still have that “salted caramel” kick, we recommend adding a pinch of extra sea salt directly into the apple filling mixture and perhaps sprinkling a little flaky sea salt over the finished bars before serving. This will enhance the overall flavor balance.
Absolutely! If you already have a tried-and-true caramel recipe that you love and trust, feel free to use it for these apple pie bars. The goal is to create a delicious dessert, and your favorite caramel sauce will certainly contribute to that. Just make sure it’s a salted caramel or add a pinch of salt to your preferred recipe for that perfect flavor balance.
🍂 Discover More Delicious Fall Recipes
- Apple Cider Bundt Cake
- Banoffee Cake
- Butterscotch Blondies with Butterscotch Cream Cheese Frosting
- Snickerdoodle Cheesecake Bars
Did you make these recipes? We’d love to see your delicious creations! Share your photos on Instagram and tag @flouringkitchen. Follow me on Pinterest to save these recipes and discover even more inspiring ideas.
📖 Recipe
Salted Caramel Apple Pie Bars
Mary
Pin Recipe
Shop Ingredients
Equipment
-
8″ or 9″ square baking pan
Ingredients
Salted caramel sauce
- 4 tablespoons butter
- ⅔ cup heavy whipping cream
- 1 teaspoon pure vanilla extract
- ½ teaspoon sea salt
- 1 cup granulated sugar
Shortbread Crust
- ¾ cup butter softened
- ½ cup brown sugar packed
- ¼ teaspoon sea salt
- 1 teaspoon pure vanilla extract
- 2 cups all purpose flour 240g
- 1 teaspoon cinnamon ground
- ½ teaspoon baking powder
- 3 tablespoons milk
- ¼ cup pecans chopped and raw
- ½ teaspoon flaky salt optional
Caramel Apple Filling
- 5 medium-large apples Granny Smith or Northern spy
- 1 tablespoon brown sugar
- 4 tablespoons salted caramel sauce
- 2 tablespoons all purpose flour
- ½ teaspoon cinnamon ground
- 1 tablespoon lemon juice freshly squeezed
Shop Ingredients on Jupiter
Instructions
Salted Caramel Sauce
-
In a small saucepan, combine the butter, heavy cream, vanilla extract, and sea salt. Heat this mixture gently over low heat until it just comes to a simmer, then immediately remove it from the heat and set aside. This crucial step reduces temperature shock and helps prevent crystallization later.4 tablespoons butter, ⅔ cup heavy whipping cream, 1 teaspoon pure vanilla extract, ½ teaspoon sea salt
-
Add the granulated sugar into a clean, medium-sized, heavy-bottomed saucepan. Heat on medium-low heat, stirring constantly with a heatproof spatula or wooden spoon to ensure even melting and prevent burning. The sugar will first clump up, then gradually melt and liquefy.1 cup granulated sugar
-
As soon as all of the sugar is melted and has transformed into a rich, golden amber color (be vigilant not to let it get too dark, or it will taste bitter), immediately remove the saucepan from the heat. Carefully and gradually add the heated cream mixture in four additions. Whisk vigorously as you pour and in between each addition to ensure proper emulsification. If the mixture appears to separate or form lumps, continue whisking vigorously; it should come back together. Refer to the caramel tips and troubleshooting section in the recipe notes for more assistance if needed.
-
Optionally, place the saucepan back on low heat for one minute, whisking constantly, to further thicken the caramel sauce. Remove from heat and pour the finished caramel into a heat-safe jar or container to cool completely to room temperature. It will thicken considerably as it cools.
Caramel Apple Filling
-
Peel, core, and slice the apples into even, medium-thin pieces. Transfer them to a large mixing bowl. Add the brown sugar, 4 tablespoons of the prepared salted caramel sauce, all-purpose flour, ground cinnamon, and fresh lemon juice. Mix all ingredients thoroughly until the apple slices are evenly coated. This ensures every bite is infused with flavor.5 medium-large apples, 1 tablespoon brown sugar, 4 tablespoons salted caramel sauce, 2 tablespoons all purpose flour, ½ teaspoon cinnamon, 1 tablespoon lemon juice
Shortbread Crust and Assembly
-
Line an 8″ or 9″ square baking pan with two long strips of parchment paper, overlapping them to create “handles” on all sides for easy lifting of the finished bars. Preheat your oven to 355°F (180°C).
-
In a stand mixer fitted with the paddle attachment (or a large bowl with an electric hand mixer), combine the softened butter, brown sugar, and sea salt. Beat on medium-high speed until the mixture is light, fluffy, and significantly increased in volume, approximately 5 minutes. Stop and scrape down the sides of the bowl a few times during beating to ensure everything is well incorporated. Stir in the pure vanilla extract until just combined.¾ cup butter, ½ cup brown sugar, 1 teaspoon pure vanilla extract, ¼ teaspoon sea salt
-
Sift the all-purpose flour, baking powder, and ground cinnamon directly into the bowl with the creamed butter mixture. Using a spatula, gently fold the ingredients until they just come together and no dry streaks of flour remain. Be careful not to overmix the dough. Add the milk, one tablespoon at a time, folding until the dough forms a cohesive ball.2 cups all purpose flour, 1 teaspoon cinnamon, ½ teaspoon baking powder, 3 tablespoons milk
-
Take approximately three-quarters of the shortbread dough and press it evenly into the bottom of the prepared pan, forming a uniform crust. Use your fingers or the back of a spatula to ensure an even layer. Prick the entire surface of the base with a fork several times to prevent it from puffing up. Bake for 10-12 minutes, or until the edges are lightly golden and the crust is set but not fully cooked through. While it bakes, finish preparing your apple filling.
-
Evenly spread the prepared caramel apple filling over the warm, pre-baked shortbread crust. Take the remaining uncooked shortbread dough and crumble it over the top of the apple filling. Then, sprinkle the chopped pecans over the crumble topping. Gently press the topping down slightly to help it adhere. Bake for an additional 40-50 minutes, or until the topping is golden brown and the apple filling is bubbling around the edges. For a crispier, gooier filling, bake closer to 40 minutes. For a softer, jam-like filling, bake for 50-60 minutes, but watch carefully to prevent the topping from burning. Once baked, remove from the oven and allow the bars to cool completely to room temperature inside the pan; this is crucial for proper setting.¼ cup pecans
-
Once completely cooled, use the parchment paper handles to carefully lift the entire slab of bars out of the baking pan and transfer it to a cutting board. Use a sharp serrated knife to cut the bars into 9 even pieces. Generously drizzle each square with any leftover salted caramel sauce. For an extra touch of flavor and texture, sprinkle with flaky sea salt just before serving. Enjoy your irresistible salted caramel apple pie bars!½ teaspoon flaky salt
Video
Notes
Make Ahead: To simplify your baking process, the homemade caramel sauce can be prepared a few days in advance. It stores beautifully in an airtight container in the fridge for up to 10 days. The pie bars themselves can also be baked a day ahead; store them wrapped tightly in the fridge overnight. Before serving, gently warm the bars and then drizzle with the caramel sauce for a fresh touch.
Caramel Sauce Tips for Success:
Stir Constantly: When making the dry caramel, it is crucial to continually stir the granulated sugar. This vigilance prevents uneven melting and scorching, which can lead to a bitter, unpleasant taste. As soon as all the sugar is melted and turns a rich golden amber color, remove it from the heat immediately. If it starts bubbling excessively and develops a burnt smell, you’ve gone too far, and it’s best to start over.
Heat the Cream: A key to preventing crystallization is to pre-heat the cream, butter, vanilla, and salt mixture. Bringing it to a simmer before adding it to the hot caramelized sugar minimizes the temperature difference between the two components. This temperature shock is a common cause of sugar seizing and forming stubborn lumps or crystals.
Whisk Vigorously and Gradually: When combining the hot heavy cream with the hot caramelized sugar, speed and force are your allies. Add the cream mixture slowly, in small increments, while whisking very vigorously. Pay particular attention during the first few splashes of cream. This aggressive whisking ensures the mixture emulsifies smoothly and helps prevent the sugar from lumping up or crystallizing.
You may notice some slight crystallization on the very sides of the saucepan; this is generally acceptable. However, avoid scraping the sides of the pot when pouring out the finished caramel, as these crystals could introduce graininess into your otherwise smooth sauce.
Troubleshooting Lumpy Caramel: If your caramel sauce does become grainy or lumpy after adding the cream, don’t despair! You can often salvage it by returning the saucepan to low heat and simmering gently, stirring constantly. This heat can help to re-dissolve some of the sugar lumps. While it might not achieve perfectly silky smoothness, it can significantly improve the texture.
