Irresistible Mini Honey Apple Pies: A Refined Sugar-Free, Flaky Crust Delight
Jump to Recipe
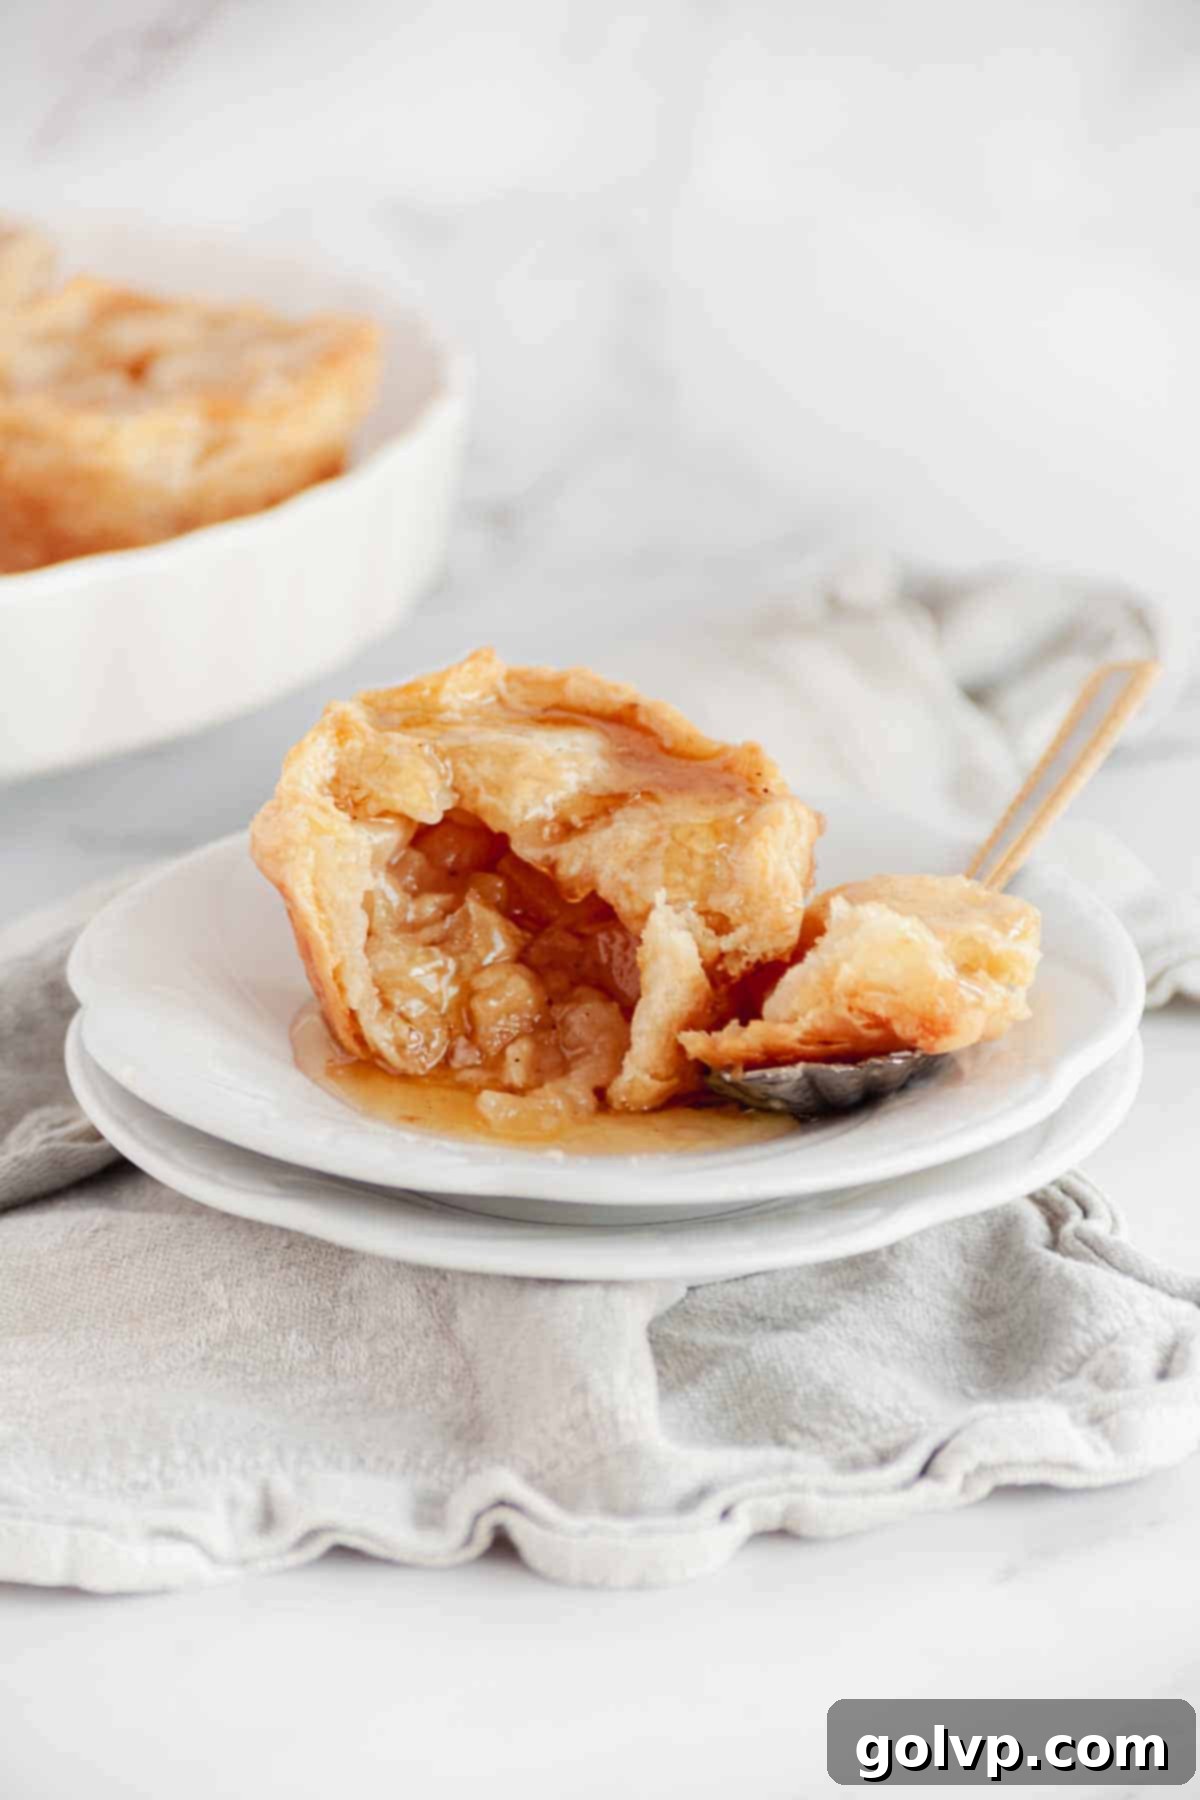
Prepare to fall in love with these delightful mini honey apple pies – a dessert you never knew you needed! We’ve taken the beloved classic apple pie, transformed it into adorable individual portions, and replaced all refined sugars with natural honey. The result is a truly irresistible treat featuring an incredibly flaky, all-butter crust generously filled with a warm, sumptuously gooey apple mixture. The subtle warmth from cinnamon perfectly complements the sweet apples, making these mini pies the ultimate comfort food, a charming brunch item, or both!
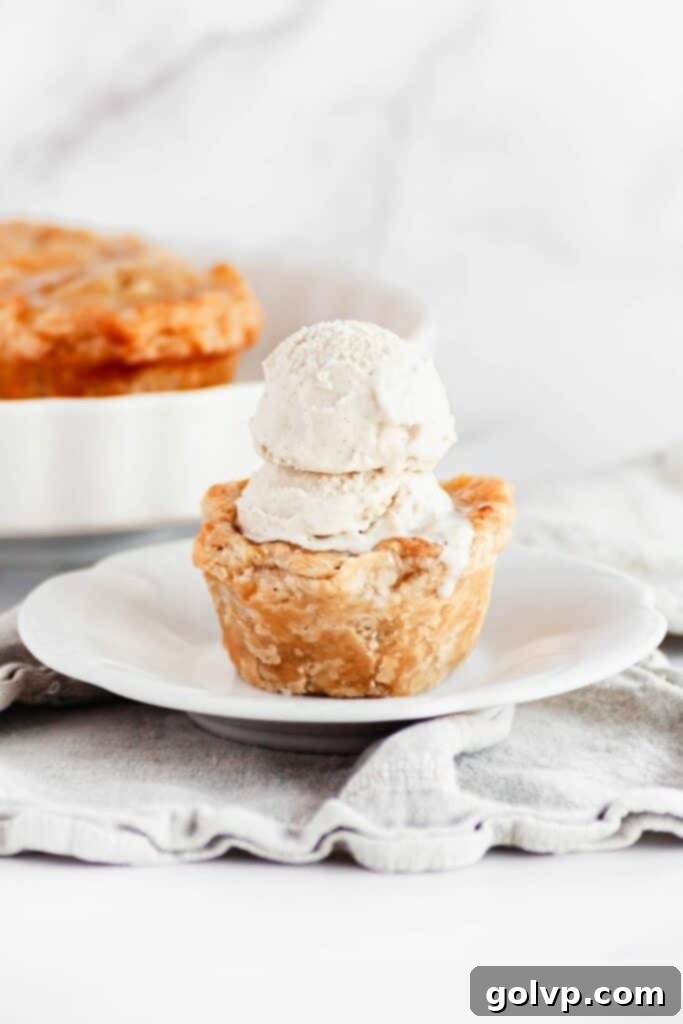
Serving them warm with a scoop of creamy vanilla ice cream and an extra drizzle of raw, local honey elevates them to pure dessert perfection. What makes these mini pies even better? They’re practically healthy too! Our recipe is completely refined sugar-free, relying solely on the natural sweetness of apples and the golden richness of honey for that perfect balance of flavor.
Many pie enthusiasts, including myself, find that the higher crust-to-filling ratio in these mini honey apple pies is far more satisfying than a traditional 9-inch pie. This is primarily due to my absolute obsession with this particular all-butter pie crust. It’s so flaky and tender, you might even mistake it for puff pastry – but trust us, it’s much simpler to prepare at home!
And here’s a little baking secret: don’t even think about discarding any leftover pie crust scraps! Simply lay them out in a single layer on a baking sheet and bake them in a 180°C (350°F) oven until they turn lightly golden brown and irresistibly crispy, typically around 20 minutes. These make for a delicious, well-deserved snack (and reward) after all your hard work crafting these pies. Nobody needs to know they ever existed, just enjoy your secret baker’s treat!

Unlocking the Secret to an Exceptionally Flaky Pie Crust
Achieving a truly flaky crust is the cornerstone of any great pie, and it’s particularly important for these mini honey apple pies where the crust is a star. The key lies in understanding a few fundamental principles:
- Very Cold Butter: This is arguably the most crucial element. When cold butter is incorporated into the flour, it creates tiny pockets within the dough. As the pie bakes, the water in the butter turns into steam, which then pushes apart these layers of dough, resulting in that coveted flaky texture. If the butter melts before baking, these layers merge, leading to a tough, dense crust.
- Minimal Handling: Overworking pie dough is the enemy of flakiness. The more you handle the dough, especially with warm hands, the more the butter melts, and the more gluten develops. While gluten provides structure in bread, too much of it in pie crust leads to a tough, chewy texture rather than a tender, flaky one. Work quickly and gently.
- Strategic Folding (Lamination): This technique, often associated with puff pastry, is a fantastic way to enhance flakiness in a standard pie crust. By folding the dough a few times after forming it and before its final chill, you’re essentially creating more distinct layers of butter and dough. These layers will then separate beautifully during baking, contributing to an incredibly tender and airy crust.
The Unexpected Role of Vinegar in Pie Dough
You might be surprised to see apple cider vinegar in our pie crust recipe, but it plays a subtle yet significant role. While some bakers claim vinegar helps prevent overworking the dough by inhibiting gluten production, the amount typically added is so small that its direct impact on gluten formation is minimal. However, vinegar does contribute in other valuable ways:
- Reduces Oxidation: As pie dough rests, especially for extended periods, it can begin to oxidize, sometimes leading to a grayish discoloration. The acidity in vinegar helps to slow down this oxidation process, ensuring your crust browns beautifully and evenly in the oven.
- Enhances Flavor Depth: Beyond its technical contributions, a touch of vinegar adds an extra layer of subtle flavor to the pie crust. It provides a slight tang that beautifully offsets the richness of the all-butter crust, creating a more complex and well-rounded taste profile. This nuanced flavor makes the crust even more addictive!

Let’s Get Baking! Crafting Your Mini Honey Apple Pies
Now that we’ve covered the secrets to a perfect crust and filling, it’s time to bring these elements together to create your delicious mini honey apple pies. Follow these detailed steps for a successful bake:
Mastering the All-Butter Pie Crust
- Combine Dry Ingredients: In the bowl of a food processor, combine the all-purpose flour and salt. Pulse briefly, about 2-3 times, to ensure they are well incorporated. This step ensures even seasoning throughout the crust.
- Incorporate Cold Butter: Add the very cold, cubed unsalted butter to the flour mixture. Pulse in short bursts (typically 5-8 pulses) until the mixture resembles very coarse bread crumbs, with some pea-sized pieces of butter still visible. It’s crucial not to over-process; those small butter chunks are what create the flaky layers.
- Prepare Liquid Mixture: In a separate small bowl, whisk together the ice water and apple cider vinegar. The ice water ensures the butter remains cold, and the vinegar adds that subtle flavor and helps with browning.
- Add Liquid Gradually: With the food processor running, add the water mixture tablespoon by tablespoon into the crumb mixture. Pulse after every few additions. Stop adding liquid as soon as the dough just begins to come together and clump up in the food processor. You likely won’t need all of the liquid; I often have about a quarter cup left over, so don’t feel obligated to use it all. The goal is just enough moisture for the dough to form.
- Shape and Fold the Dough: Transfer the dough to a clean bowl and quickly gather it into a ball, minimizing handling to keep the butter cold. Gently flatten the ball into a disk with your hands, then fold this disk in half. Repeat this flattening and folding process two more times. This folding technique helps create those beautiful, distinct layers in your flaky crust.
- Chill the Dough: Reshape the folded dough back into a disk and cut it in half. Form each half into a separate disk, wrap tightly in plastic wrap, and refrigerate for at least 30 minutes. This chilling period is essential for the butter to firm up and for the gluten to relax, making the dough easier to roll and ensuring a tender crust.
Crafting the Honey Apple Filling
- Prepare the Apples: Begin by peeling and coring your chosen apples (tart varieties like Granny Smith or Northern Spy work wonderfully for balancing sweetness). Cut the apples into small, uniform 1cm cubes. Place these cubed apples into a large saucepan. Add the fresh lemon juice (which prevents browning and brightens the flavor), honey, butter, and ground cinnamon.
- Cook the Apple Mixture: Cook the apple mixture over medium-low heat, stirring occasionally, until the apples begin to release their liquid. Then, increase the temperature to medium heat and simmer for 7-10 minutes. Continue stirring occasionally during this time; the goal is to soften the apples slightly and reduce the amount of liquid by about a quarter, concentrating the flavors.
- Prepare the Slurry: While the apples are cooking, whisk together the all-purpose flour (or cornstarch for a gluten-free option) and cold water in a small bowl until you have a smooth, lump-free slurry. This will be your thickener.
- Thicken the Filling: Pour the prepared slurry into the simmering apples and stir well, ensuring there are no clumps. Continue cooking, stirring constantly, for just a few minutes until the liquid visibly thickens to a glossy consistency. Immediately remove the filling from the heat and allow it to cool completely to room temperature. For best results, you can even refrigerate it overnight, which allows the flavors to meld beautifully.
Assembly of Your Mini Pies
- Roll Out Bottom Crusts: Take one half of the chilled dough from the refrigerator. On a lightly floured surface, roll it out evenly to an ⅛” (3mm) thickness. Using the bottom of a 4-inch diameter bowl or glass as a guide, cut out as many circles as possible, placing them close together to minimize scraps. Gather the scraps and place them back in the refrigerator. Repeat this process with the second half of the dough until you have a total of twelve 4-inch diameter circles. Work quickly to prevent the dough from warming too much.
- Roll Out Top Crusts: With the remaining rolled-out dough, cut out twelve 3.5-inch diameter circles, using a slightly smaller glass or cookie cutter. Combine any remaining scraps with the refrigerated scraps from the previous step, re-roll, and continue cutting until you have all twelve smaller circles for the pie tops.
- Line Muffin Tins: Gently place the larger 4-inch dough rounds into each individual cup of a regular-sized muffin tin. Press the dough lightly against the sides of the tins, allowing it to fall naturally into the bottom without stretching. You want to ensure the dough is evenly distributed and conforms to the shape of the tin without significant folds.
- Add the Filling: Spoon the cooled apple filling into each bottom crust, filling each about two-thirds of the way. Avoid overfilling, as the filling will expand slightly during baking.
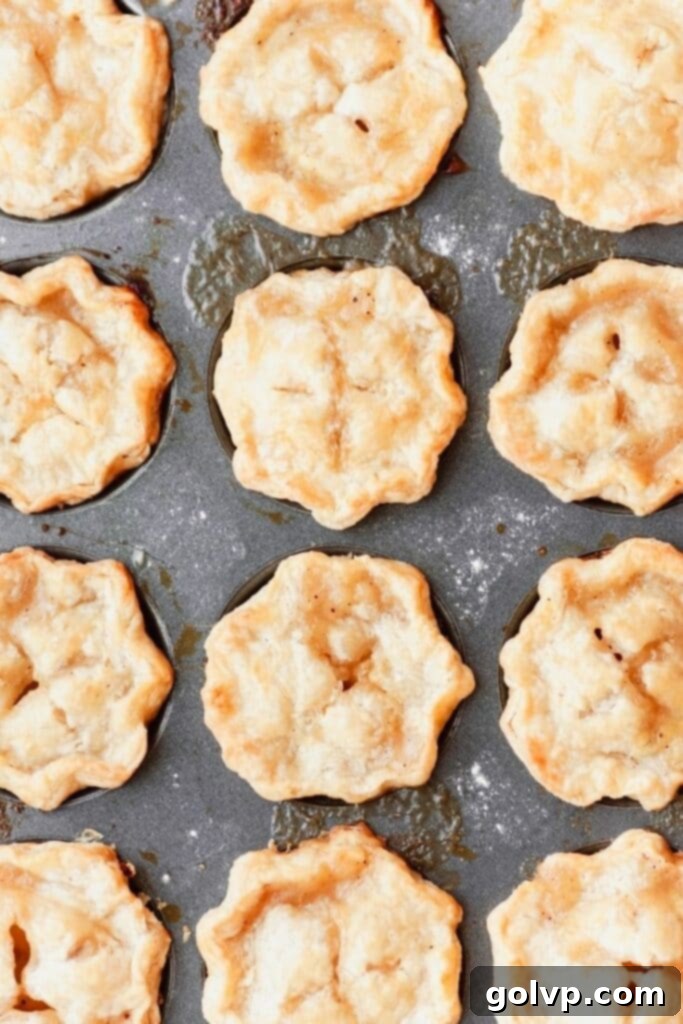
- Seal the Pies: Place a smaller 3.5-inch dough circle on top of the filling for each pie. Press the edges of the top and bottom crusts together firmly to form a secure seal. Once sealed, use your fingers to crimp the edges of each pie, creating a decorative wavy pattern. This not only looks beautiful but also helps to prevent the filling from leaking out during baking.
- Final Chill: Transfer the assembled pies to the refrigerator for 20 minutes, or to the freezer for 10 minutes. This crucial chilling step allows the butter in the crust to firm up one last time before baking, which is vital for maintaining a super flaky texture. While they chill, whisk together the large egg and whole milk in a small bowl to create your egg wash. Set aside.
Baking Your Golden Mini Pies
- Preheat Oven: Preheat your oven to 180°C (350°F). Ensure it’s fully preheated for consistent baking results.
- Prepare for Baking: Using a pastry brush, gently brush the top of each pie with the egg wash, ensuring an even and thorough coating. This will give your pies a beautiful golden-brown sheen. With a small, sharp knife, make a small X-shaped cut into the center of the top crust of each pie. These vents are essential to allow steam to escape during baking, preventing the crust from puffing up excessively or bursting.
- Bake to Perfection: Bake the pies for 40-45 minutes. Begin checking them every 5 minutes after the 35-minute mark. The pies are ready when their tops are a deep golden brown and appear crispy. To confirm the bottom crust is also perfectly baked and crispy, carefully use a metal spatula to gently lift out one pie and peek at its underside.
- Cooling: Once baked, remove the pies from the oven and let them cool in the muffin tins for exactly 5 minutes. This brief cooling period helps them firm up slightly. After 5 minutes, use a spatula to gently lift each pie out of the muffin tin and transfer them to a wire cooling rack to cool completely. It’s important not to let the pies cool entirely in the muffin tins, as they can become very difficult to remove without breaking once fully set.
- Enjoy!: These mini honey apple pies are best enjoyed warm, ideally with a generous scoop of vanilla ice cream, a drizzle of extra honey, or any of your favorite apple pie toppings like a sprinkle of nuts or a dollop of whipped cream.
Happy baking! xx
Did you make this recipe? I would love for you to rate this recipe and hear what you think in the comments!
Share your creation on Instagram and tag @flouringkitchen
📖 Recipe

Mini Honey Apple Pies
Mary
Pin Recipe
Shop Ingredients
Equipment
-
Food Processor
-
regular sized muffin tin
Ingredients
Pie Crust
- 2 ½ cup all-purpose flour (300g)
- ¼ teaspoon salt
- 1 cup unsalted butter cut into small (1cm) cubes
- 1 cup ice water
- 1 tablespoon apple cider vinegar
Filling
- 4 large apples tart (granny smith and northern spy are great options)
- 1 lemon squeezed
- ½ cup honey raw
- 3 tablespoon unsalted butter (42g)
- ½ teaspoon ground cinnamon
- 1 ½ tablespoon all-purpose flour or cornstarch
- 2 ½ tablespoon cold water
Egg Wash
- 1 large egg
- 1 tablespoon whole milk
Shop Ingredients on Jupiter
Instructions
Pie Crust
-
Combine the flour and salt in a food processor and pulse to incorporate.2 ½ cup all-purpose flour, ¼ teaspoon salt
-
Add the cubed cold butter and pulse until the mixture resembles very coarse bread crumbs with pea sized pieces of butter. This takes about 5-8 pulses.1 cup unsalted butter
-
Mix together the ice water and apple cider vinegar in a separate bowl.1 cup ice water, 1 tablespoon apple cider vinegar
-
Add the water mixture tablespoon by tablespoon into the crumb mixture, pulsing after every few tablespoons. Once the dough just starts to come together (you will notice it start to clump up in the food processor), stop adding the liquid. You should not need to use all of the liquid; I usually have a quarter of it left over.
-
Fold the dough: Into a bowl, gather the dough into a ball, working quickly so that the butter doesn’t melt. Flatten out the ball into a disk with your hands and fold that disk in half. Repeat this flattening and folding another 2 times.
-
Shape the dough back into a disk and cut in half. Shape each half back into a disk, wrap in plastic wrap, and let rest in the fridge for at least 30 minutes.
Filling
-
Prepare the apples: Peel and core the apples. Cut the apples into small (1cm) cubes. Place the cubed apples into a large saucepan. Add the lemon juice, honey, butter, and cinnamon to the apples.1 tablespoon apple cider vinegar, 4 large apples, 1 lemon, ½ cup honey, 3 tablespoon unsalted butter, ½ teaspoon ground cinnamon
-
Cook the apple mixture, stirring on medium-low heat until the apples release their liquid. Bring up the temperature to a medium heat and simmer for 7-10 minutes, stirring occasionally to soften the apples and to reduce the amount of liquid by a quarter.
-
Make the slurry: While the apples are cooking, whisk together the flour and water in a small bowl to make a smooth slurry.1 ½ tablespoon all-purpose flour, 2 ½ tablespoon cold water
-
Pour the slurry into the apples and stir well so that there are no clumps. Continue cooking, stirring constantly, until the liquid thickens. This should take only a few minutes. Take the filling off the heat and let cool to room temperature or refrigerate overnight.
Assembly
-
Bottom crust: Take out the first half of the dough from the refrigerator. On a lightly floured surface, roll it out to ⅛” (3mm) thickness. Using the bottom of a bowl or glass as a guide, cut out as many 4” diameter circles as you can. Try to cut them out as close to each other as possible, so that there are fewer scraps. Place the scraps in the refrigerator. Roll out the second half of the dough the same way and continue cutting out 4” diameter circles until there are a total of twelve. When working with the crust, work as quickly as possible to prevent the dough from getting too warm.
-
Top crust: With the remaining rolled out dough, cut out as many 3.5” diameter circles (using the bottom of a glass as a guide). Re-roll the scraps with the refrigerated scraps from the previous step, and keep cutting out circles until there are twelve.
-
Mold the bottom crusts: Gently place the larger rounds of dough into each individual muffin tin, pressing the dough into the sides of the tins to remove any large folds of dough. You do not want to stretch the dough, just let it fall into the bottom of each tin and gently press your fingers to even out the crust.
-
Spoon the filling into each bottom crust, filling each up two thirds of the way.
-
Seal the pies: Place the top crust onto each pie and press the edges of the crusts together, forming a seal. Once the edges are sealed, crimp the crust of each pie with your fingers to make a wavy pattern (see photos above the recipe). This will help prevent the pies from leaking while they are baking.
-
Chill: Let the pies chill in the refrigerator for 20 minutes, or in the freezer for 10 minutes. While they are chilling, whisk together the egg and milk for the egg wash. Set aside.1 large egg, 1 tablespoon whole milk
Bake
-
Preheat oven to 180°C (350°F).
-
Brush the top of each pie with egg wash with a pastry brush, making sure to coat the whole surface. With a small knife, make an X-shaped cut into the top of each pie to let steam escape while baking.
-
Bake the pies for 40-45 minutes, checking them every 5 minutes after 35 minutes. The tops will be golden brown and crispy when ready. Use a metal spatula to help lift out a pie to peek at the bottom. The bottom crust should be crispy and browned as well.
-
Remove the pies from the oven and let them cool in the muffin tins for 5 minutes. Using a spatula to help, gently remove the pies from the tin and place them on a cooling rack to cool completely. Do not let the pies cool in the muffin tins because they will be very difficult to remove once they cool completely.
-
Enjoy! Best served warm with ice cream, honey, or your favourite apple pie toppings!
Notes
- Dough Folding for Flakiness: Folding the pie dough a few times is key to creating those beautiful flaky layers. Perform this step as quickly as possible to minimize gluten formation, which can lead to a tough crust.
- Keep Dough Cold: Always keep the pie dough refrigerated when not actively working with it, and handle it as little as possible. Preventing the butter from melting is crucial for developing all those delicious flaky layers.
- Chill Before Baking: Do not skip refrigerating the assembled pies before baking! This step is vital as it helps to firm up the butter in the crust, ensuring it remains wonderfully flaky in the oven.
- Proper Cooling: Avoid letting the pies cool completely in the muffin tins. Once they are fully cooled, they become very difficult to remove without potentially breaking. Transfer them to a cooling rack after the initial 5-minute rest in the tins.
