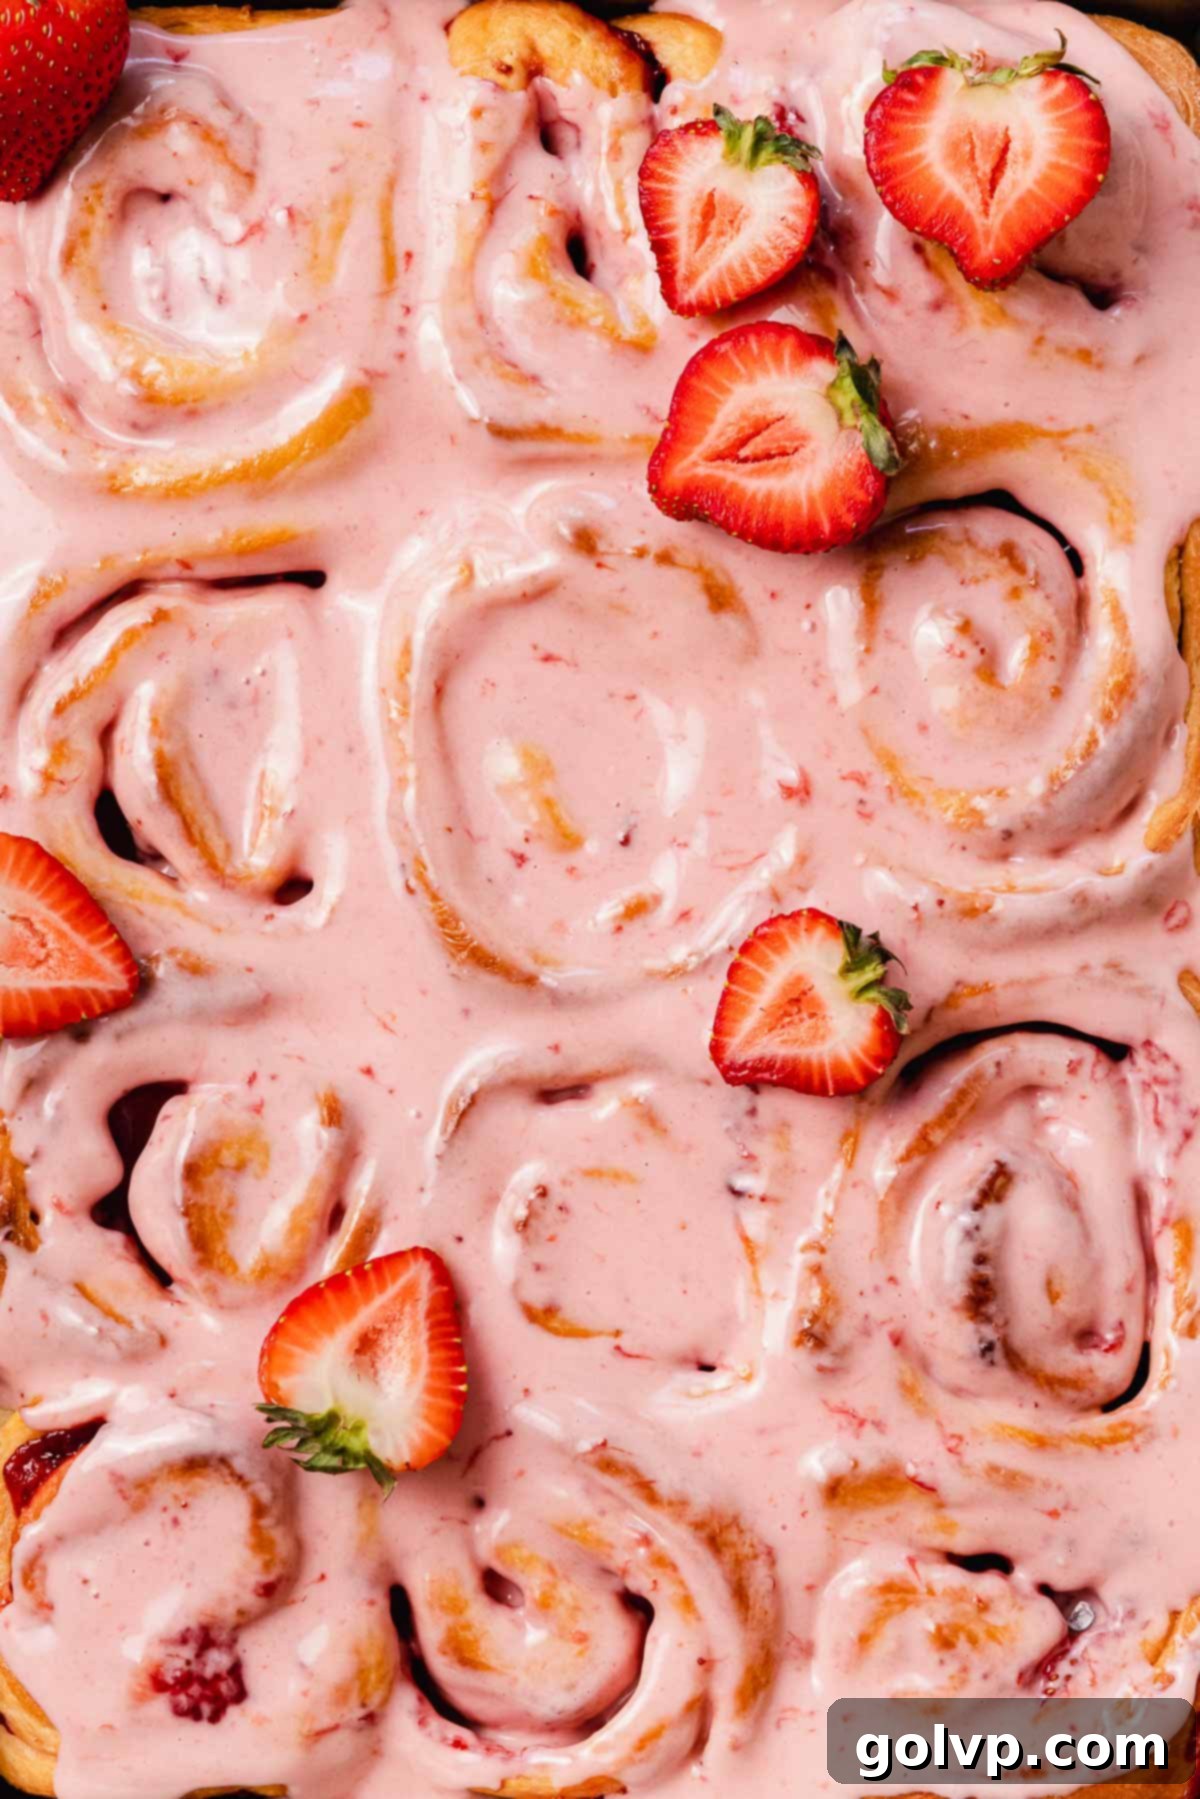
The Ultimate No-Knead Strawberry Cinnamon Rolls with Irresistibly Gooey Cream Cheese Glaze
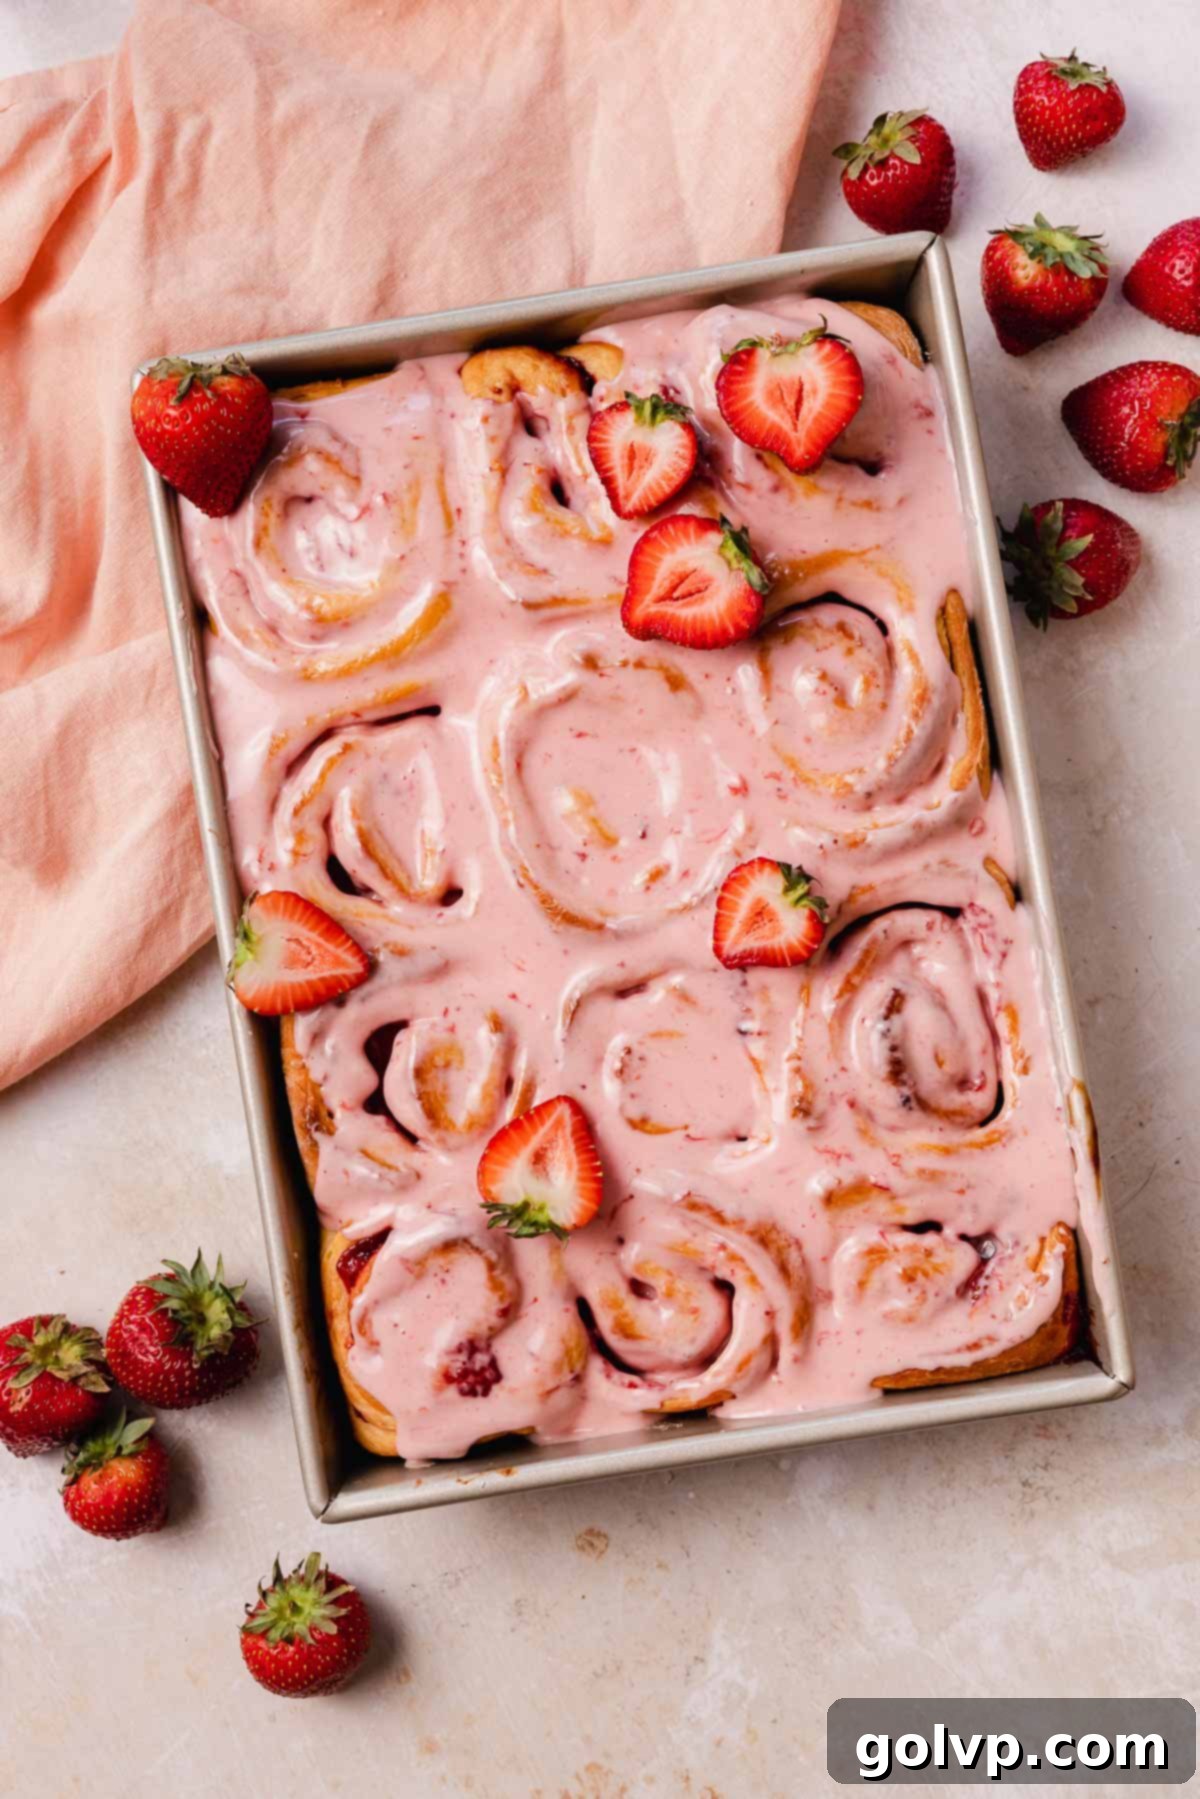
Prepare to fall in love with these extraordinary strawberry cinnamon rolls! Imagine biting into a cloud of pure bliss: soft, incredibly fluffy, and generously packed with an unbelievably gooey, vibrant strawberry filling. Each roll is then lavishly topped with a luscious, tangy strawberry cream cheese glaze that perfectly complements the sweet fruit. What makes this recipe truly special is our signature no-knead dough. It’s wonderfully buttery and remarkably easy to prepare, requiring minimal effort for maximum indulgence. The secret to their unparalleled moistness lies within the strawberry filling itself, which gently steams the dough as it bakes, guaranteeing that every single bite is exceptionally soft and delightfully gooey. These aren’t just cinnamon rolls; they’re a celebration of fresh strawberry flavor, designed for easy baking and unforgettable enjoyment.
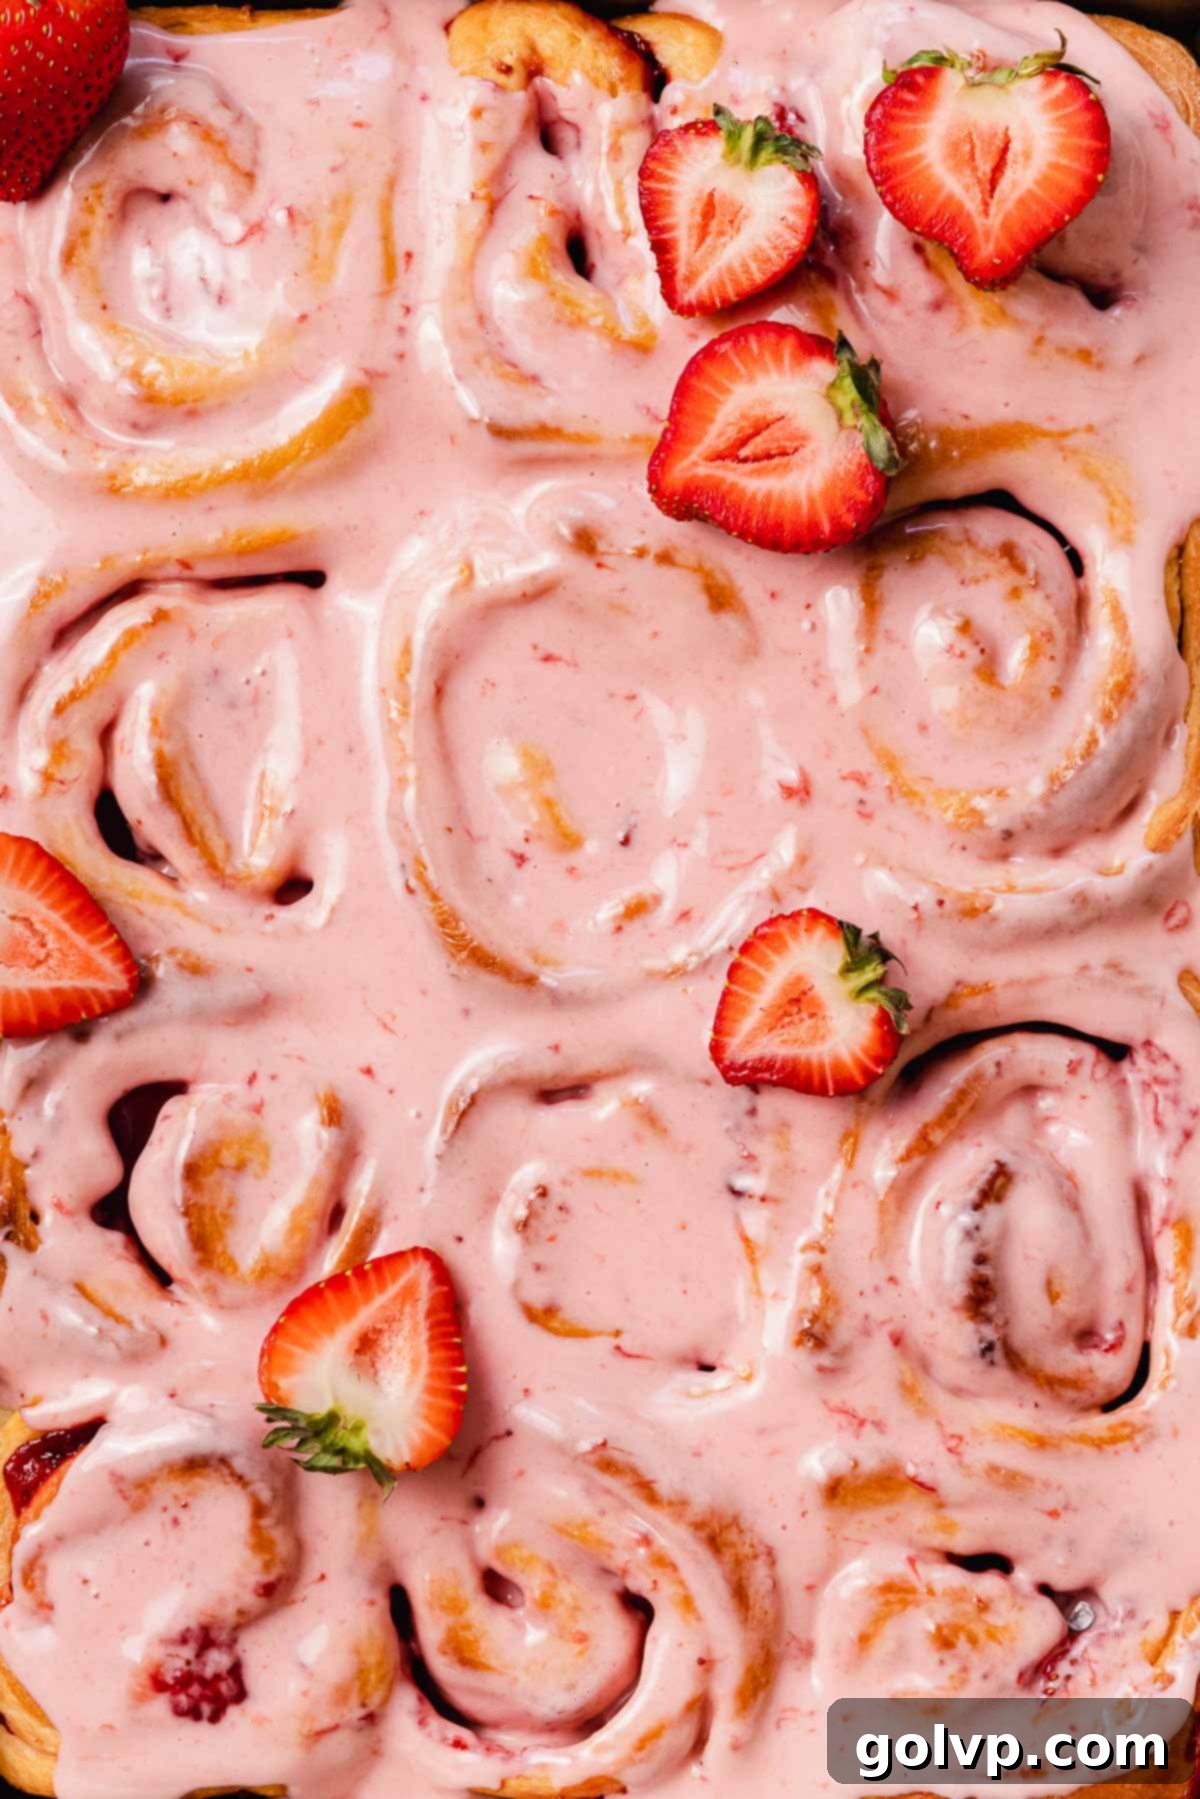
🍓 Why You’ll Adore These Strawberry Cinnamon Rolls
- Unbelievably Gooey Texture: Forget dry, crumbly rolls! Our strawberry cinnamon rolls are designed to be supremely gooey from the inside out. The secret is a generous, rich strawberry filling that infuses moisture into every layer, ensuring your rolls remain incredibly soft and tender for days. Each bite offers a satisfying pull-apart experience that’s truly irresistible.
- Effortlessly Easy “No-Knead” Dough: Say goodbye to strenuous kneading! This recipe utilizes a brilliant no-knead dough method, making the entire process surprisingly simple and accessible for bakers of all skill levels. Despite the minimal effort, the dough consistently bakes up incredibly soft, light, and fluffy, providing the perfect foundation for our delicious rolls.
- Decadent Strawberry Cream Cheese Glaze: What’s a cinnamon roll without a lavish topping? Ours features a quick and easy, three-ingredient strawberry-flavored cream cheese glaze. It’s perfectly tangy, wonderfully creamy, and adds a beautiful blush pink hue, elevating both the taste and visual appeal of these delightful treats.
- Bursting with Fresh Strawberry Flavor: These rolls are a true celebration of strawberries! They boast a luscious cooked strawberry filling, enhanced with the vibrant texture of freshly chopped strawberries rolled directly into the dough. Furthermore, the accompanying cream cheese glaze is infused with real strawberry goodness, delivering an intense, authentic berry flavor throughout.
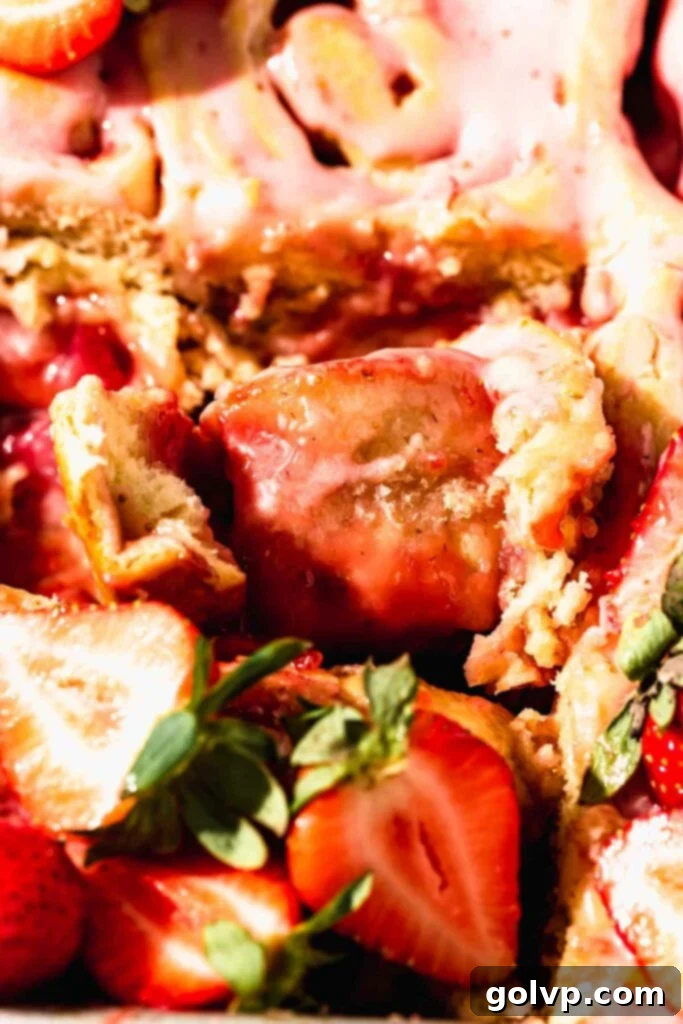
📝 Essential Ingredients for Perfect Strawberry Rolls
To achieve the best results, understanding the role of each ingredient is key. Dive into these tips before you start!
Full, precise steps and ingredient measurements are provided in the comprehensive recipe card below.
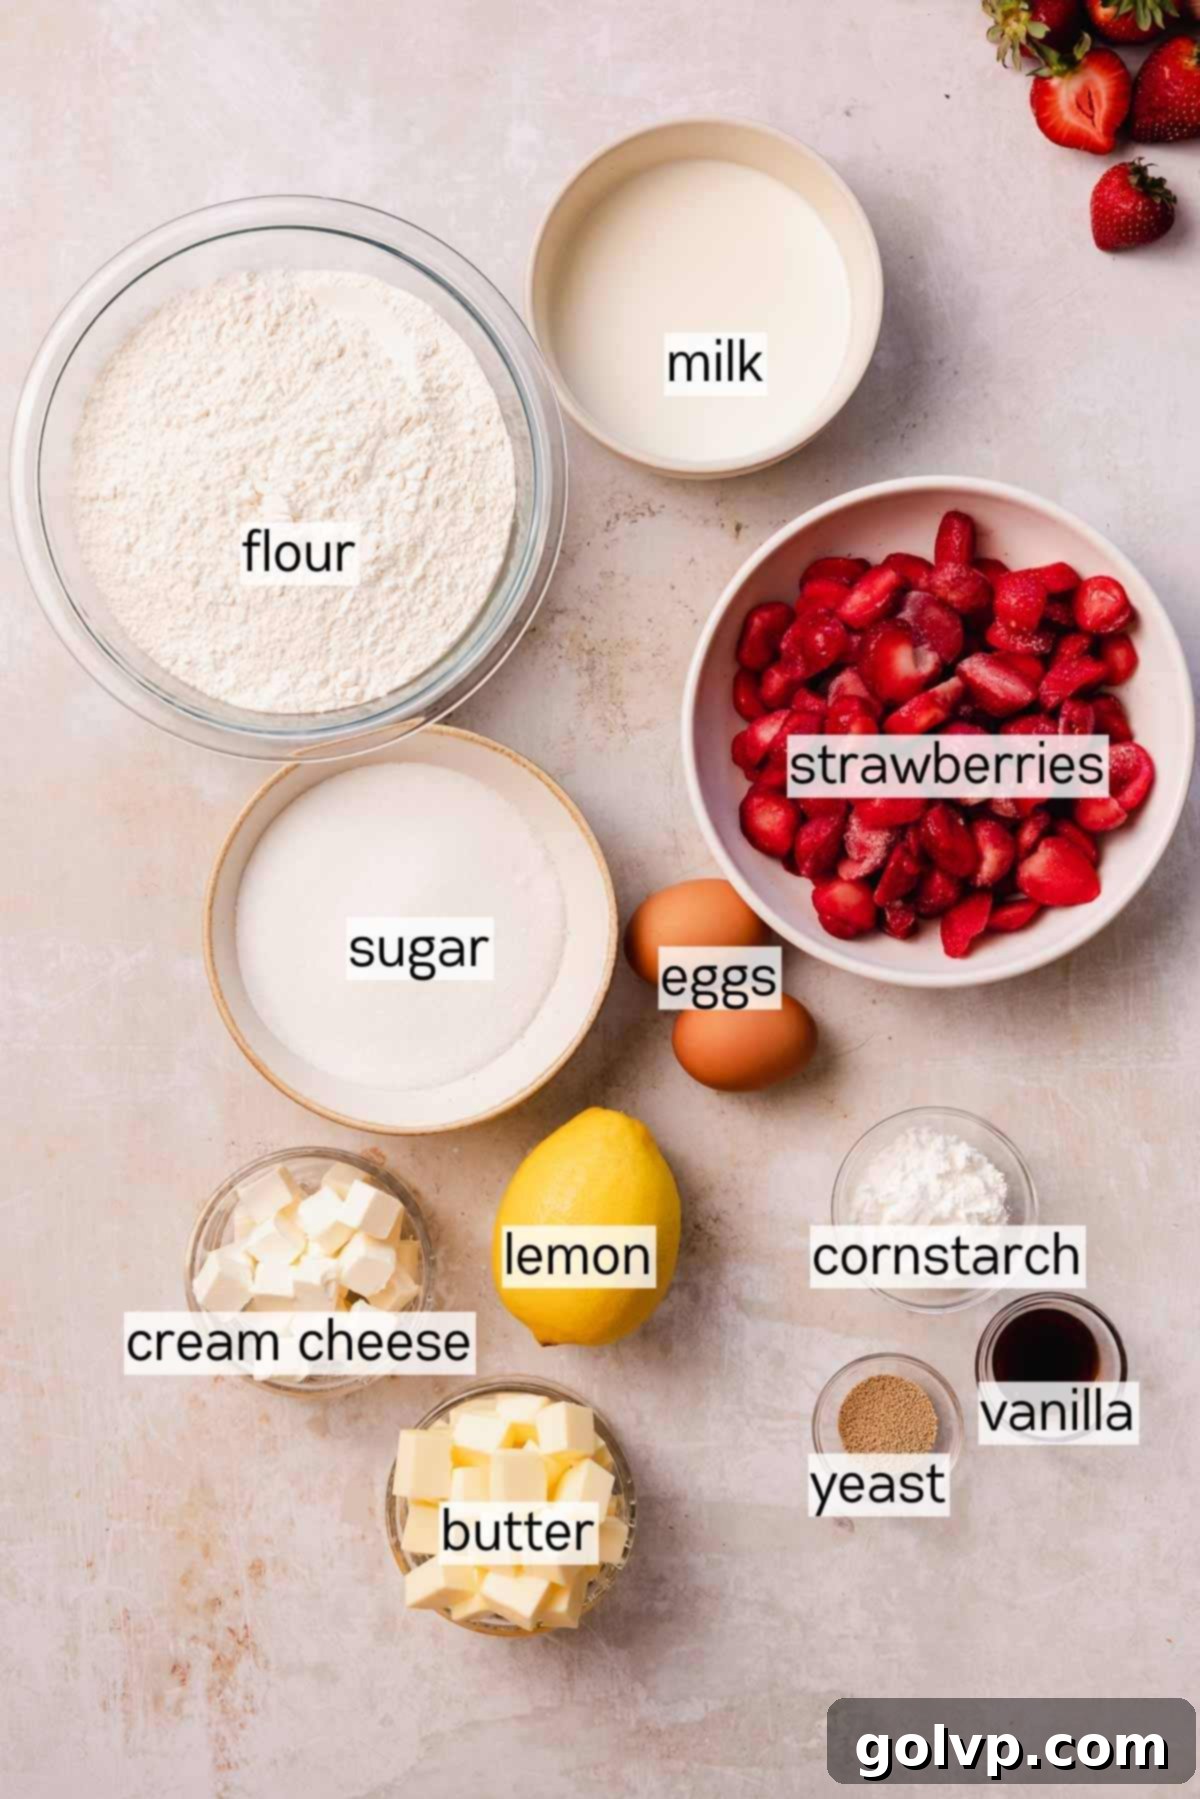
- Strawberries: These are the star of the show! Our recipe ingeniously uses both a smooth, cooked strawberry sauce for gooeyness and diced fresh strawberries for bursts of natural flavor and texture within the rolls. While frozen strawberries work perfectly for the sauce, we highly recommend using fresh, finely chopped strawberries to sprinkle into the roll before baking. This layering ensures a delightful textural contrast and an intense fruity aroma in every bite.
- Cornstarch: This essential ingredient acts as a thickening agent for our luscious strawberry filling, preventing it from becoming too watery during baking. It helps create that signature gooey consistency. If cornstarch isn’t available, you can easily substitute it with arrowroot starch or even a small amount of all-purpose flour, though cornstarch provides the clearest finish.
- Lemon Zest & Juice: A touch of lemon is crucial for brightening the overall flavor profile of the strawberry filling. The lemon juice adds a subtle tang, enhancing the natural sweetness of the strawberries without making the filling overtly tart. The zest contributes aromatic oils, providing a fresh, zesty lift. If you’re not keen on a pronounced lemon flavor, you can omit the zest, but definitely keep the juice for its balancing effect.
- Butter: For truly rich and tender cinnamon rolls, high-quality, real butter is non-negotiable. It contributes significantly to the dough’s softness and the filling’s decadent texture. Avoid using margarine, as its higher water content and softer composition can negatively impact the final consistency of both the dough and the filling. Plant-based butter can be a suitable alternative if you require a dairy-free option, but ensure it’s a good quality brand designed for baking.
- Yeast: This recipe calls for active dry yeast, which requires blooming in warm water and sugar to ensure it’s alive and active before mixing into the main dough. This step is vital for a successful rise. If you prefer, instant dry yeast can also be used; it can be mixed directly into the dry ingredients without prior proofing, saving a step while still delivering excellent results.
- All-Purpose Flour: Precision in measuring flour is paramount for achieving the perfect dough consistency. The most accurate method is to weigh your flour using a kitchen scale. If you don’t have one, use the “spoon and level” method: gently fluff the flour in its bag or container with a spoon, then lightly spoon it into your measuring cup until it overflows. Finally, level off the excess with the flat edge of a knife, ensuring not to pack the flour down.
- Cream Cheese: To create a gloriously smooth and tangy cream cheese glaze, always opt for full-fat cream cheese. Its richness and creaminess are essential for achieving the desired flavor and luxurious texture that will perfectly coat your warm strawberry rolls. Make sure it’s softened to room temperature for effortless blending.
👩🍳 How to Make Strawberry Cinnamon Rolls
Strawberry Sauce Step-by-Step
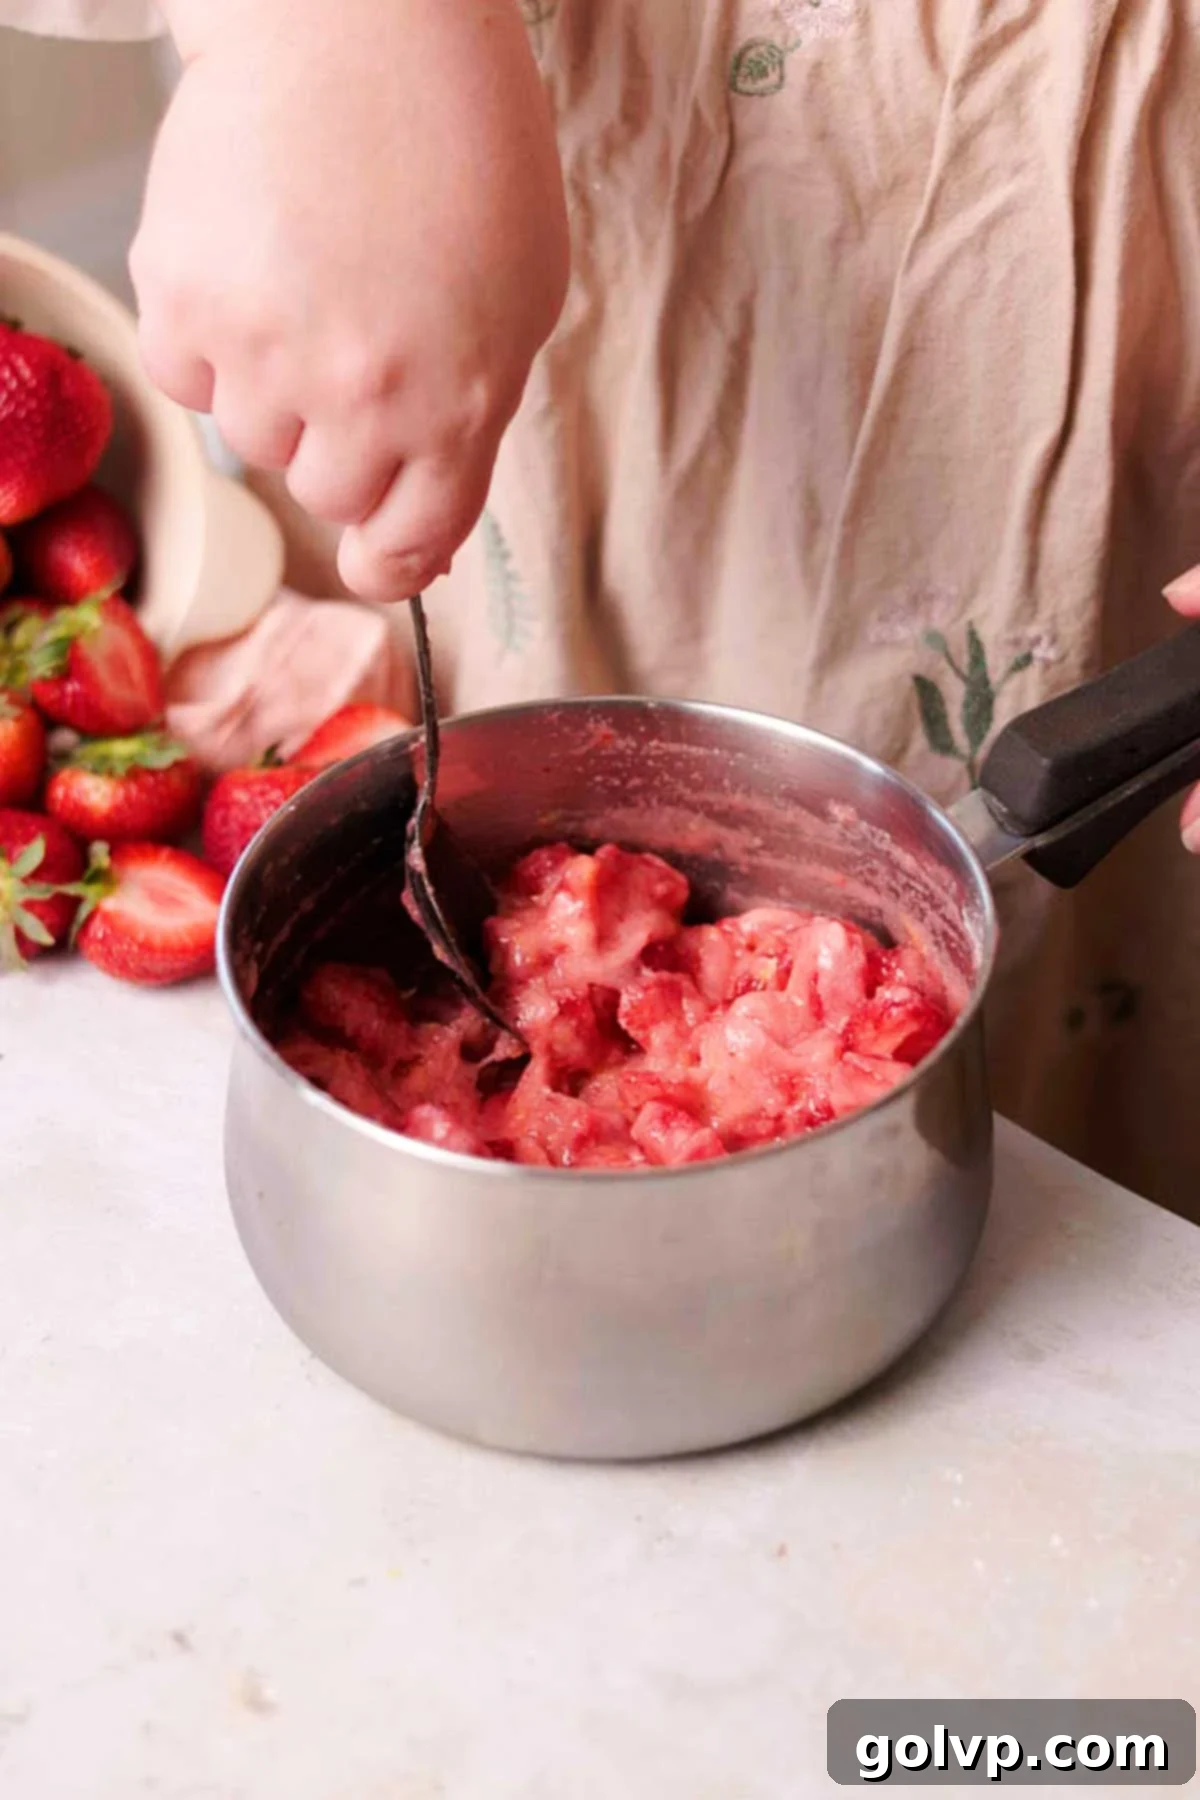
Step 1: Prepare the Strawberry Base. In a medium-sized saucepan, combine your de-stemmed and chopped strawberries (whether fresh or frozen), granulated sugar, cornstarch, freshly squeezed lemon juice, and grated lemon zest. Place the saucepan over medium heat. Begin stirring continuously to help the strawberries release their natural juices and prevent sticking. Bring the mixture to a gentle simmer, ensuring it doesn’t boil aggressively. Continue stirring frequently, as this is crucial for even thickening, until the sauce reaches a luscious, syrupy consistency, similar to a pie filling. This process typically takes about 5-7 minutes once simmering begins.
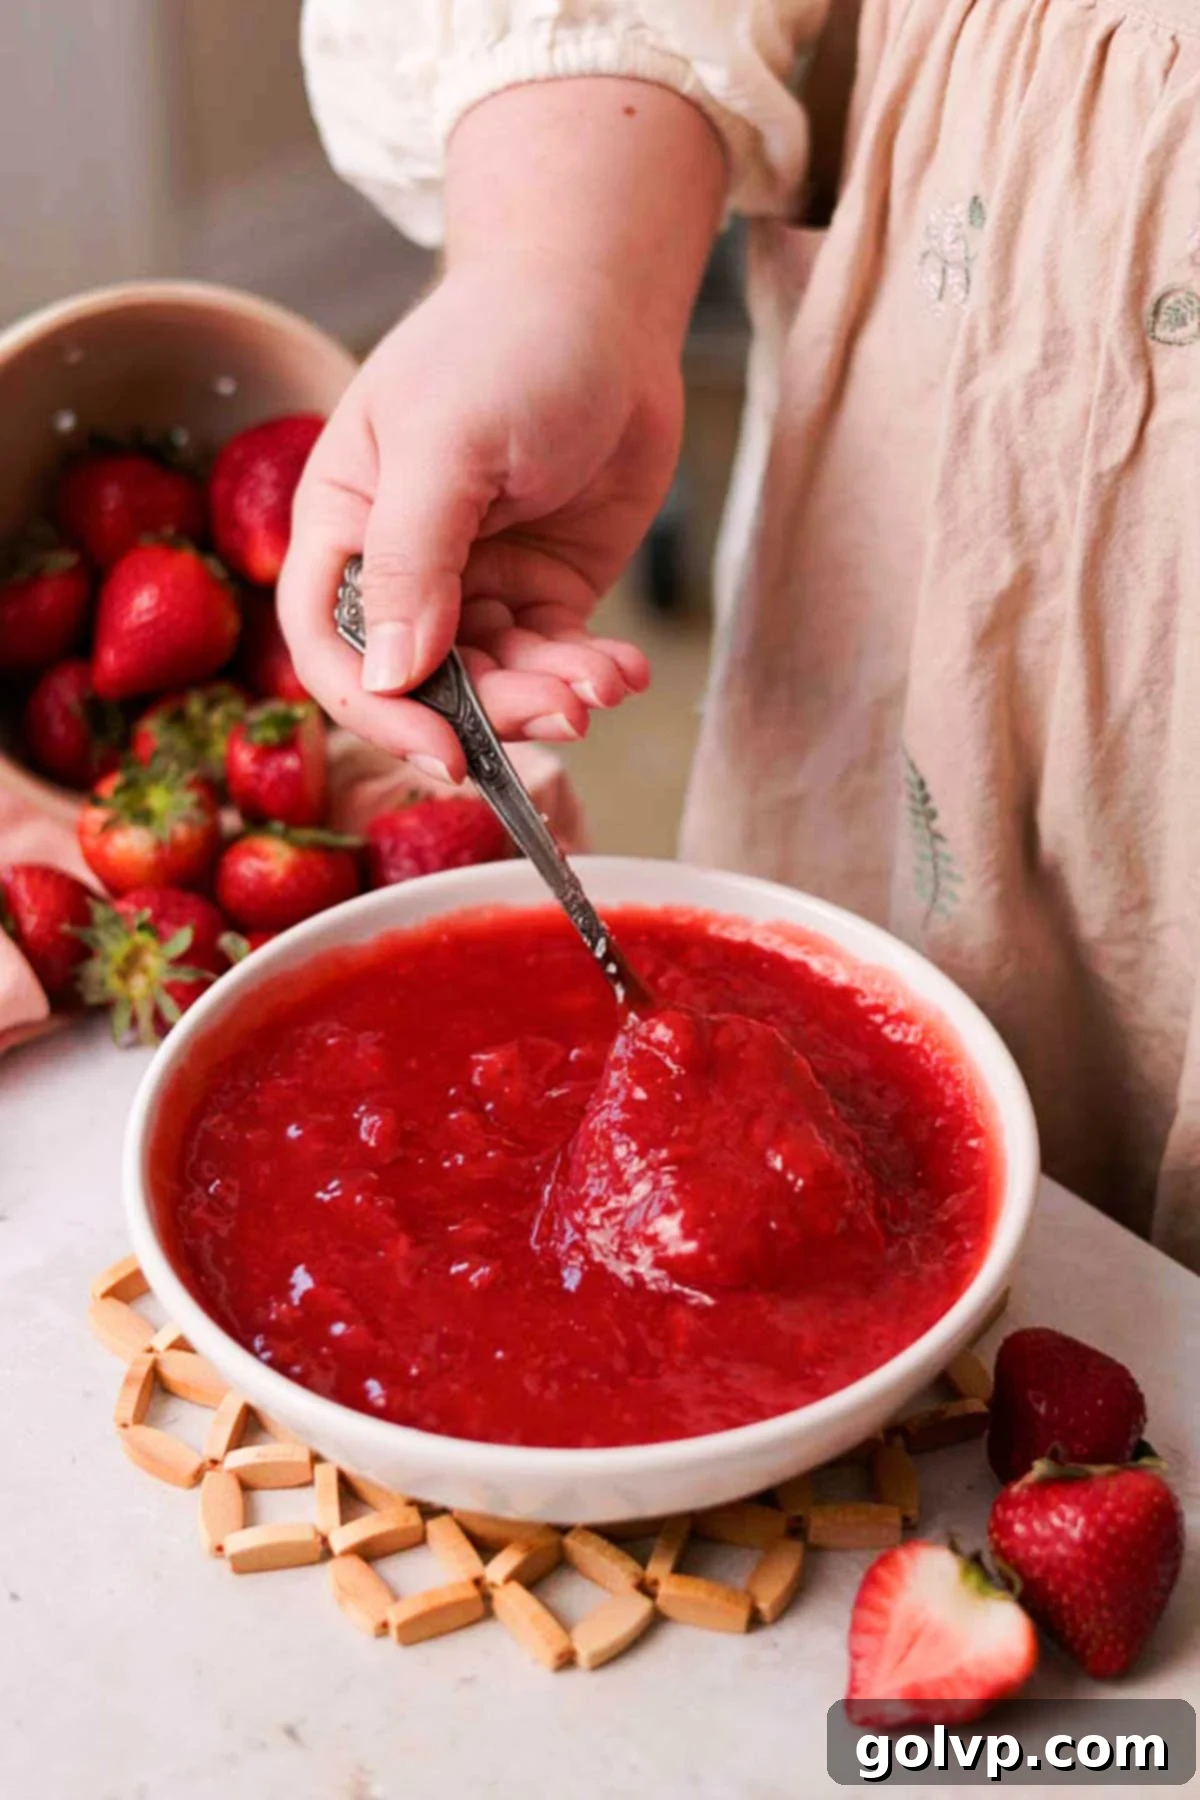
Step 2: Finish the Filling. Once the strawberries have softened considerably and the mixture has thickened (usually after about 5 minutes of simmering), remove the saucepan from the heat. For a smoother filling, use an immersion blender or a standard blender to break down the strawberry pieces to your desired texture. If you prefer a chunkier filling, a potato masher works perfectly. Immediately add the cold butter to the hot strawberry mixture. Whisk vigorously until the butter is completely melted and thoroughly incorporated, creating a glossy, rich sauce. Transfer the finished strawberry filling to a heat-proof bowl and refrigerate it. Chilling is essential as it helps the filling to set further and makes it easier to spread on the dough later.
Cinnamon Roll Dough Step-by-Step
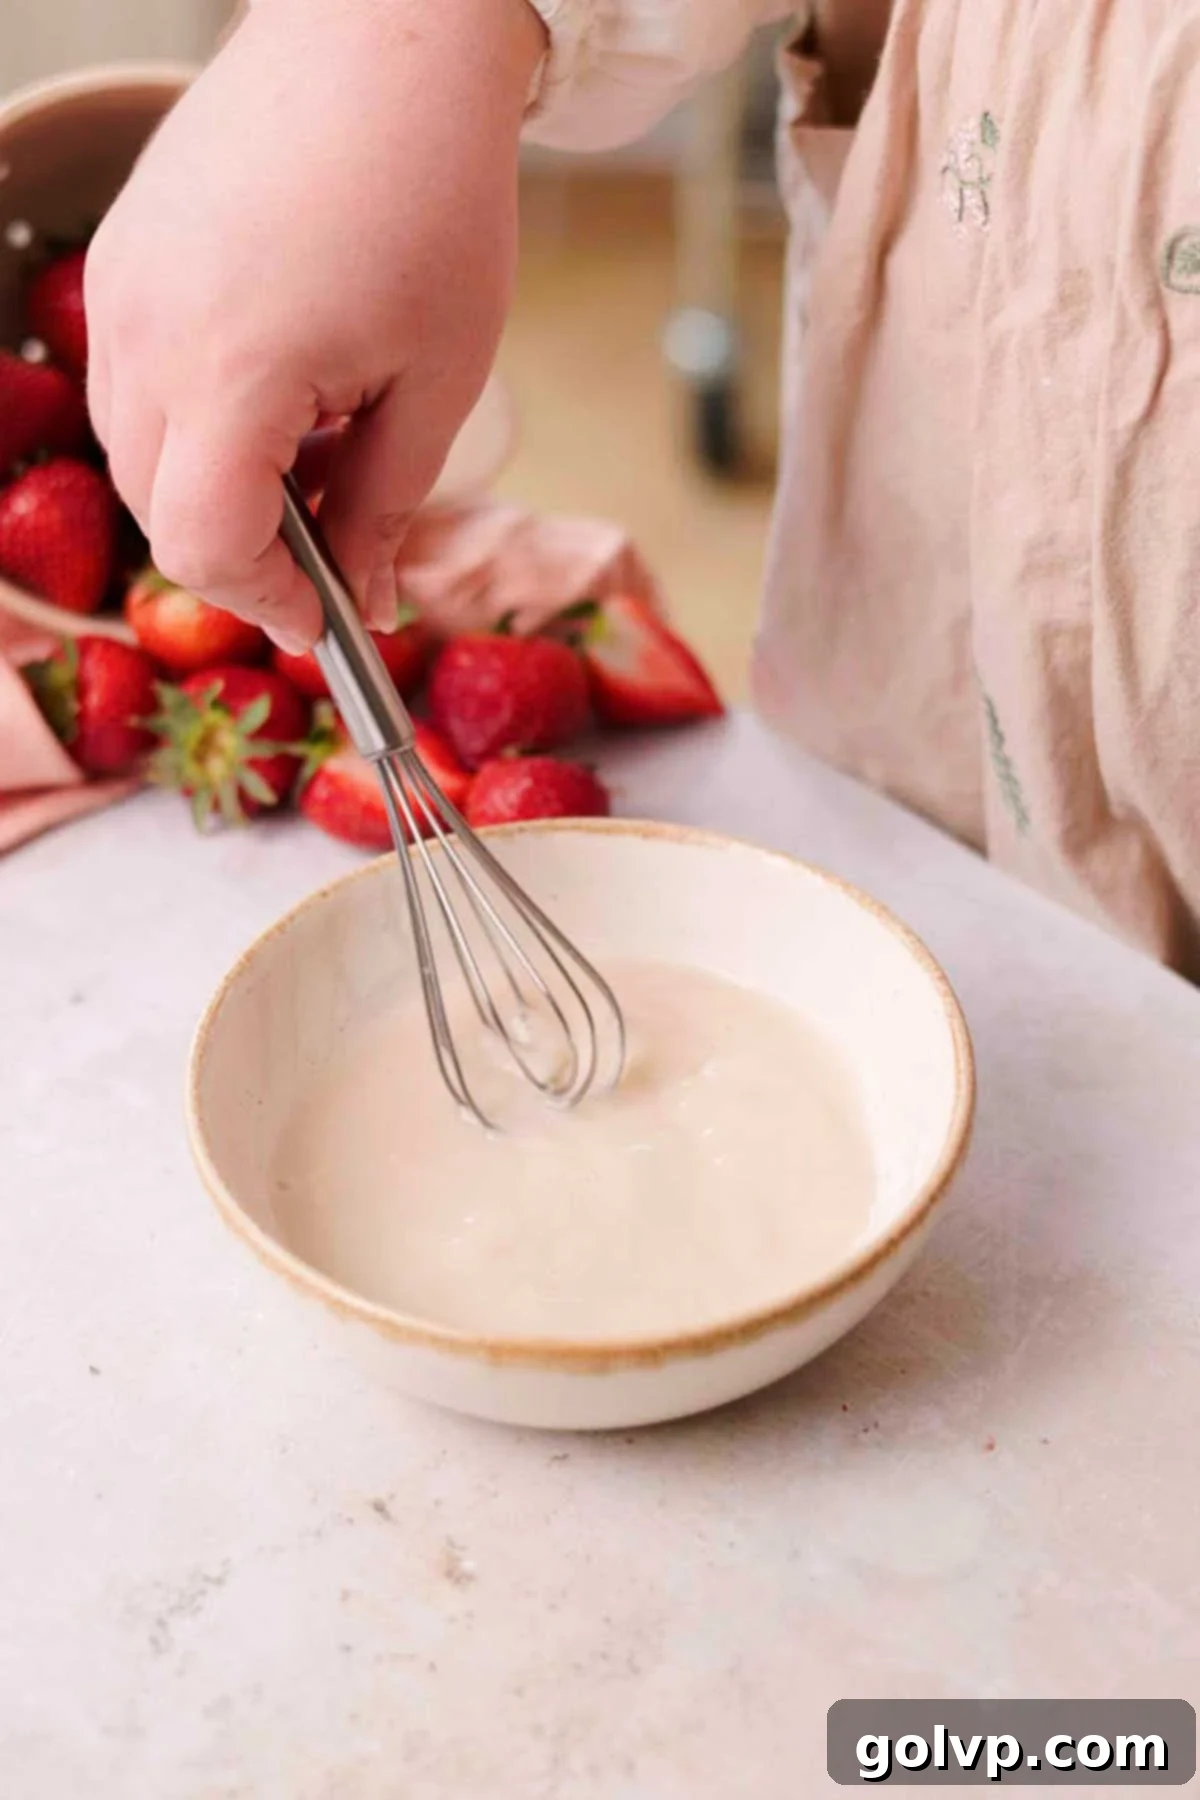
Step 1: Activate the Yeast. In a small bowl, combine the warm water and a teaspoon of granulated sugar. Sprinkle the active dry yeast over the top of this mixture. Gently stir it to ensure the yeast is fully submerged, then let it sit undisturbed for about 5-10 minutes. You’ll know your yeast is active and healthy when it becomes foamy and bubbly on the surface. If no foam appears after 10 minutes, your yeast may be expired or inactive, and you’ll need to start again with a fresh batch. While the yeast is proofing, you can begin preparing the other dough ingredients.
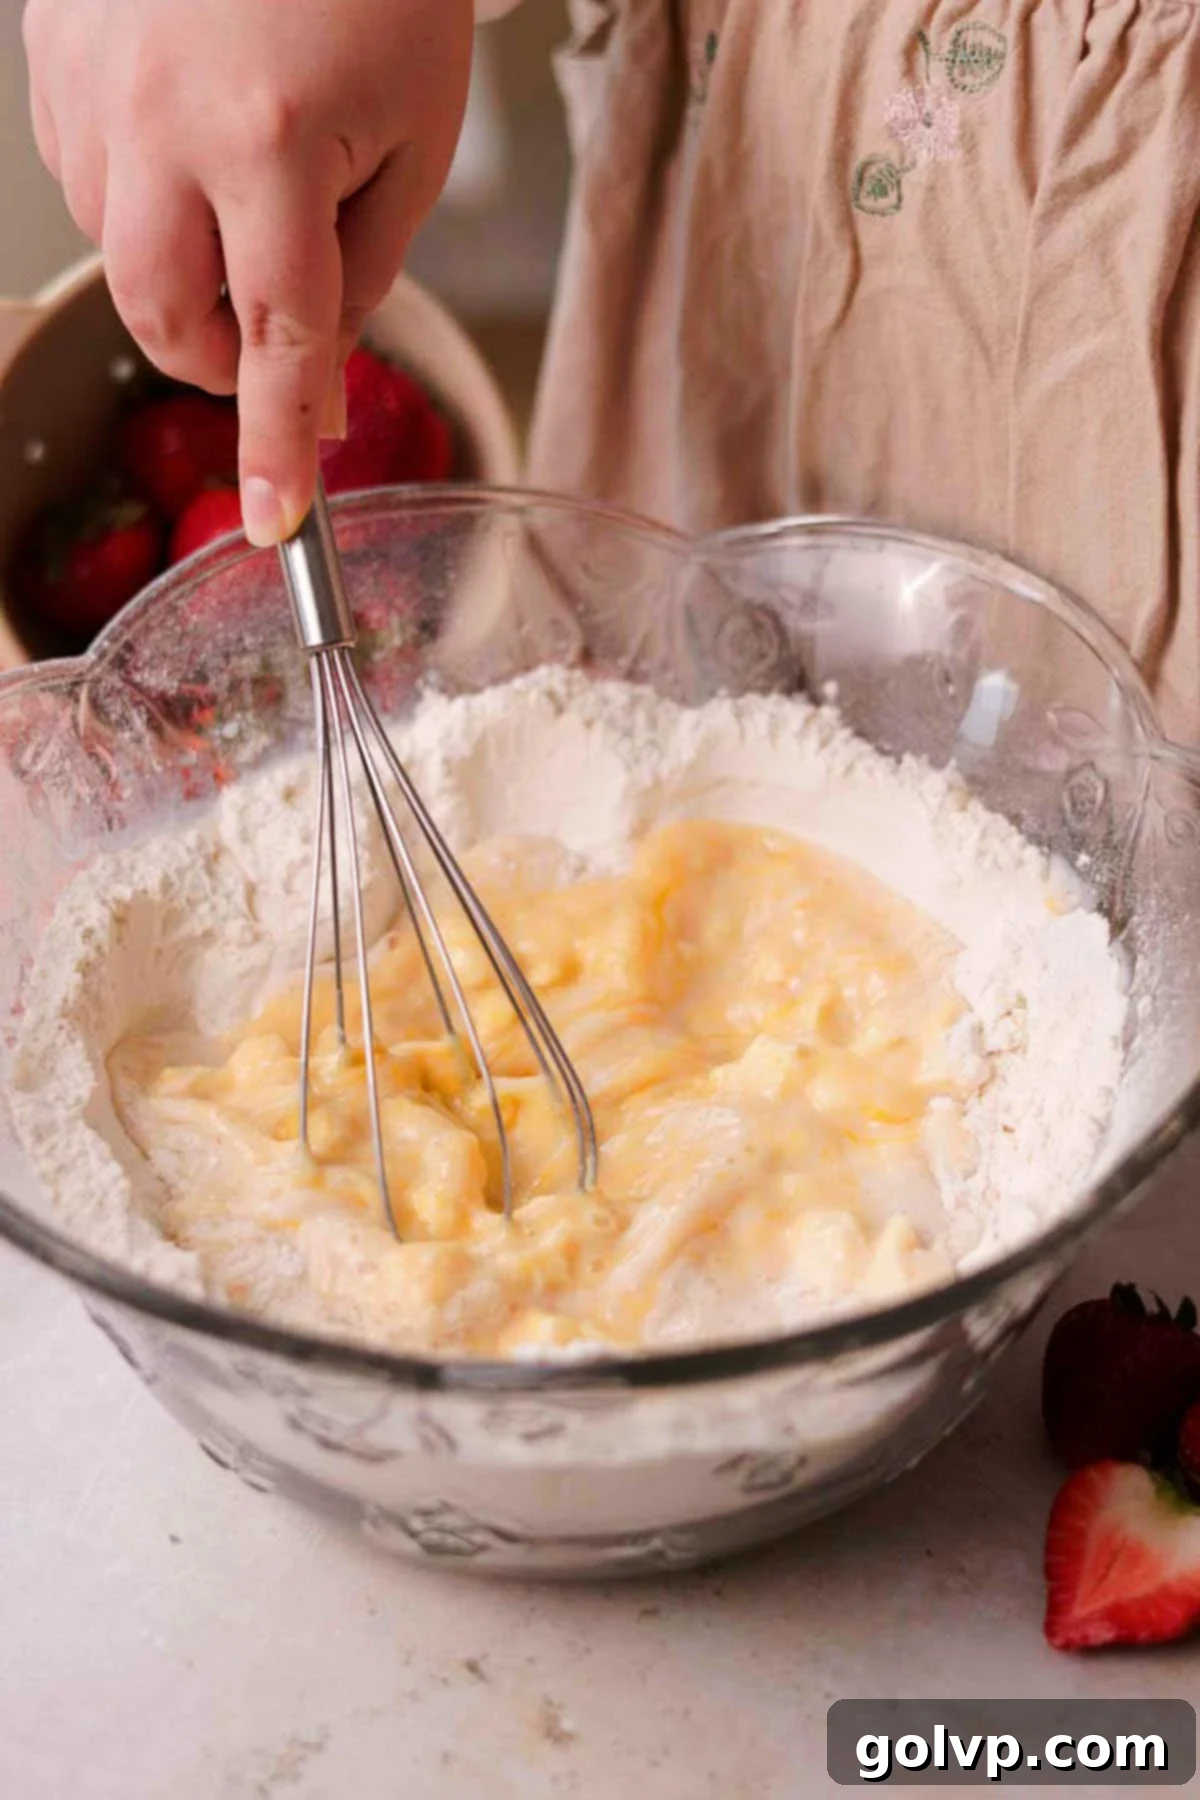
Step 2: Combine Dry and Wet Ingredients. In a separate, large mixing bowl, whisk together the all-purpose flour, the remaining granulated sugar, and sea salt until thoroughly combined. Create a significant well in the center of the dry ingredients. Pour the softened butter, large eggs, pure vanilla extract, warm milk, and your activated, foamy yeast mixture into this well. Begin by whisking just the wet ingredients together within the well to create a smooth liquid. Then, gradually incorporate the surrounding dry ingredients into the wet, using a sturdy large spoon or spatula. Continue stirring until a shaggy, cohesive dough starts to form.
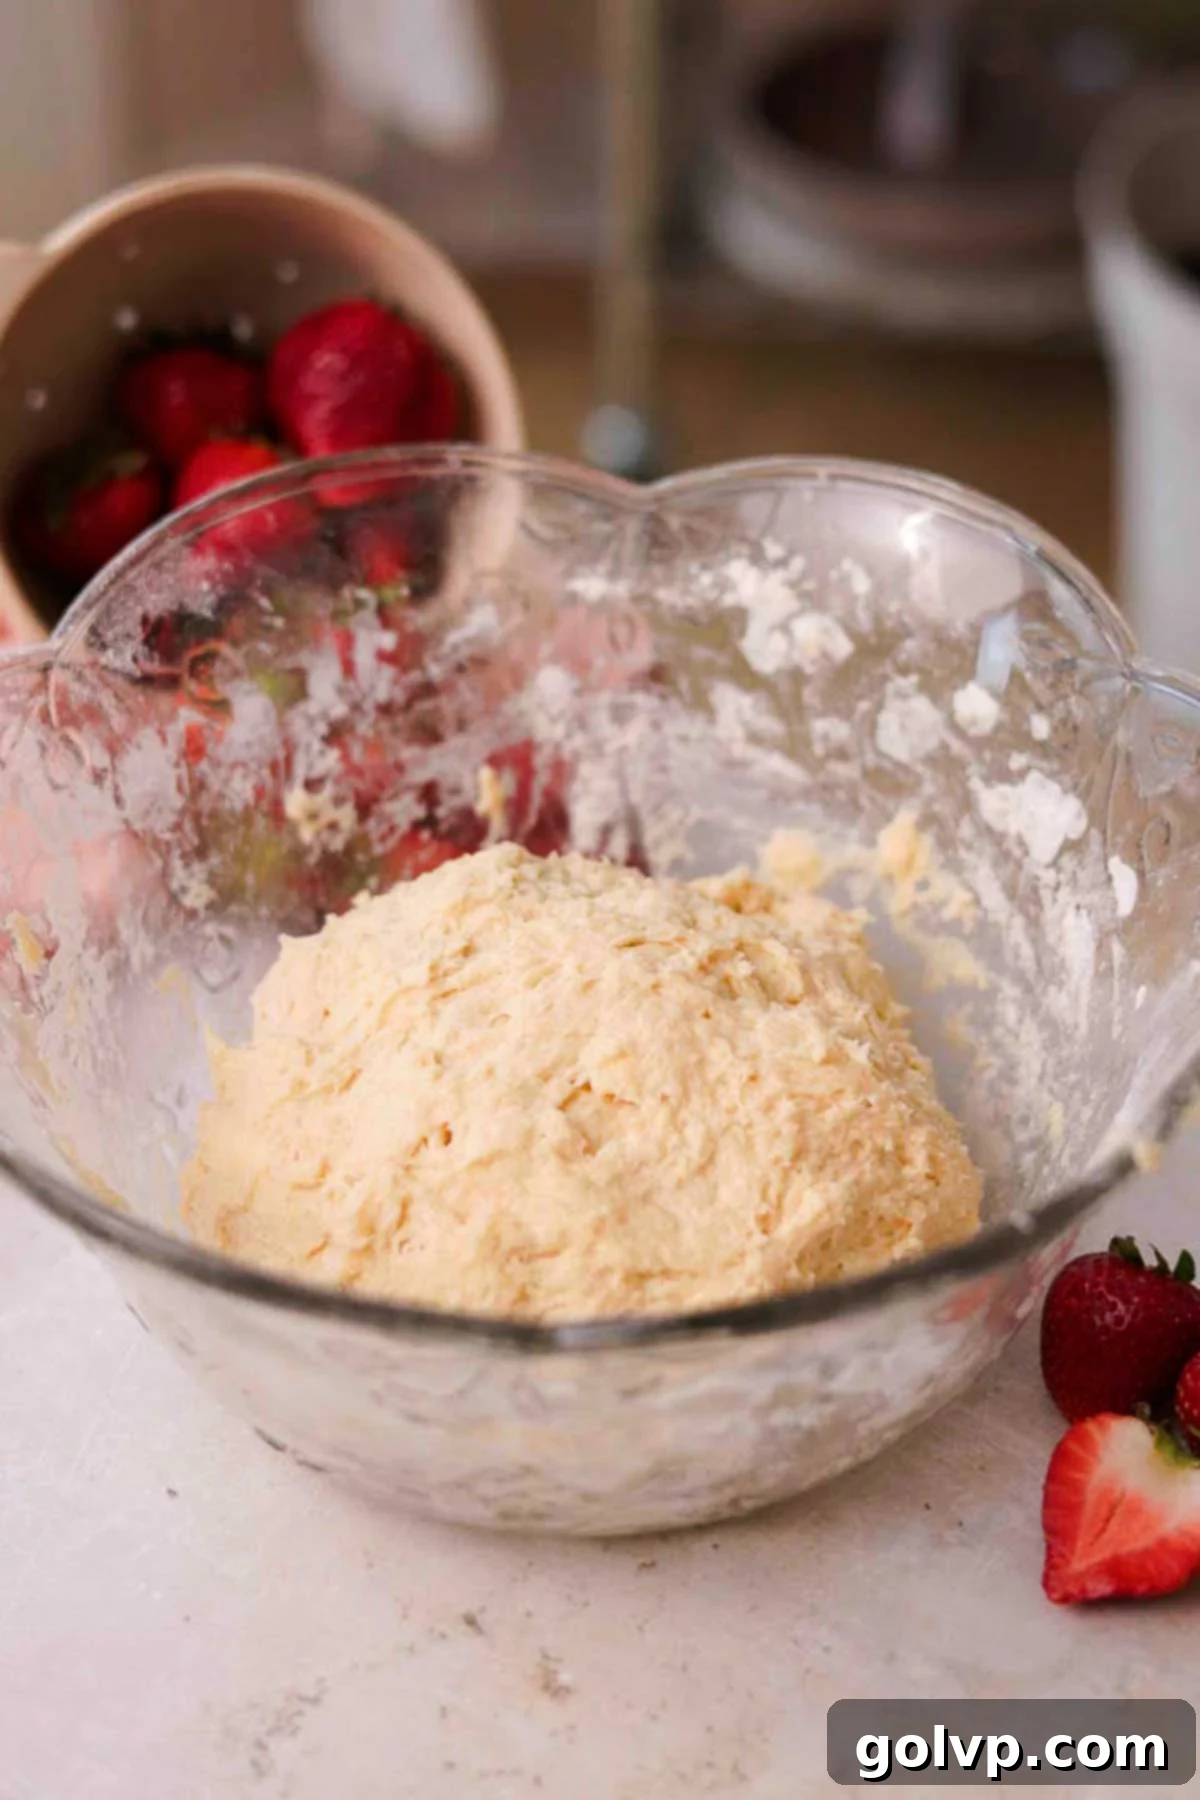
Step 3: Form the Dough. Discard your spoon and use your clean hands to continue mixing the dough. Work it gently until all the flour is fully incorporated and a cohesive mass forms. At this stage, the dough will be quite sticky and might appear a bit shaggy or uneven – this is perfectly normal for a no-knead dough! Avoid the urge to add more flour unless it’s excessively wet, almost like a batter. The dough’s texture will become smoother and more manageable after its initial rise.
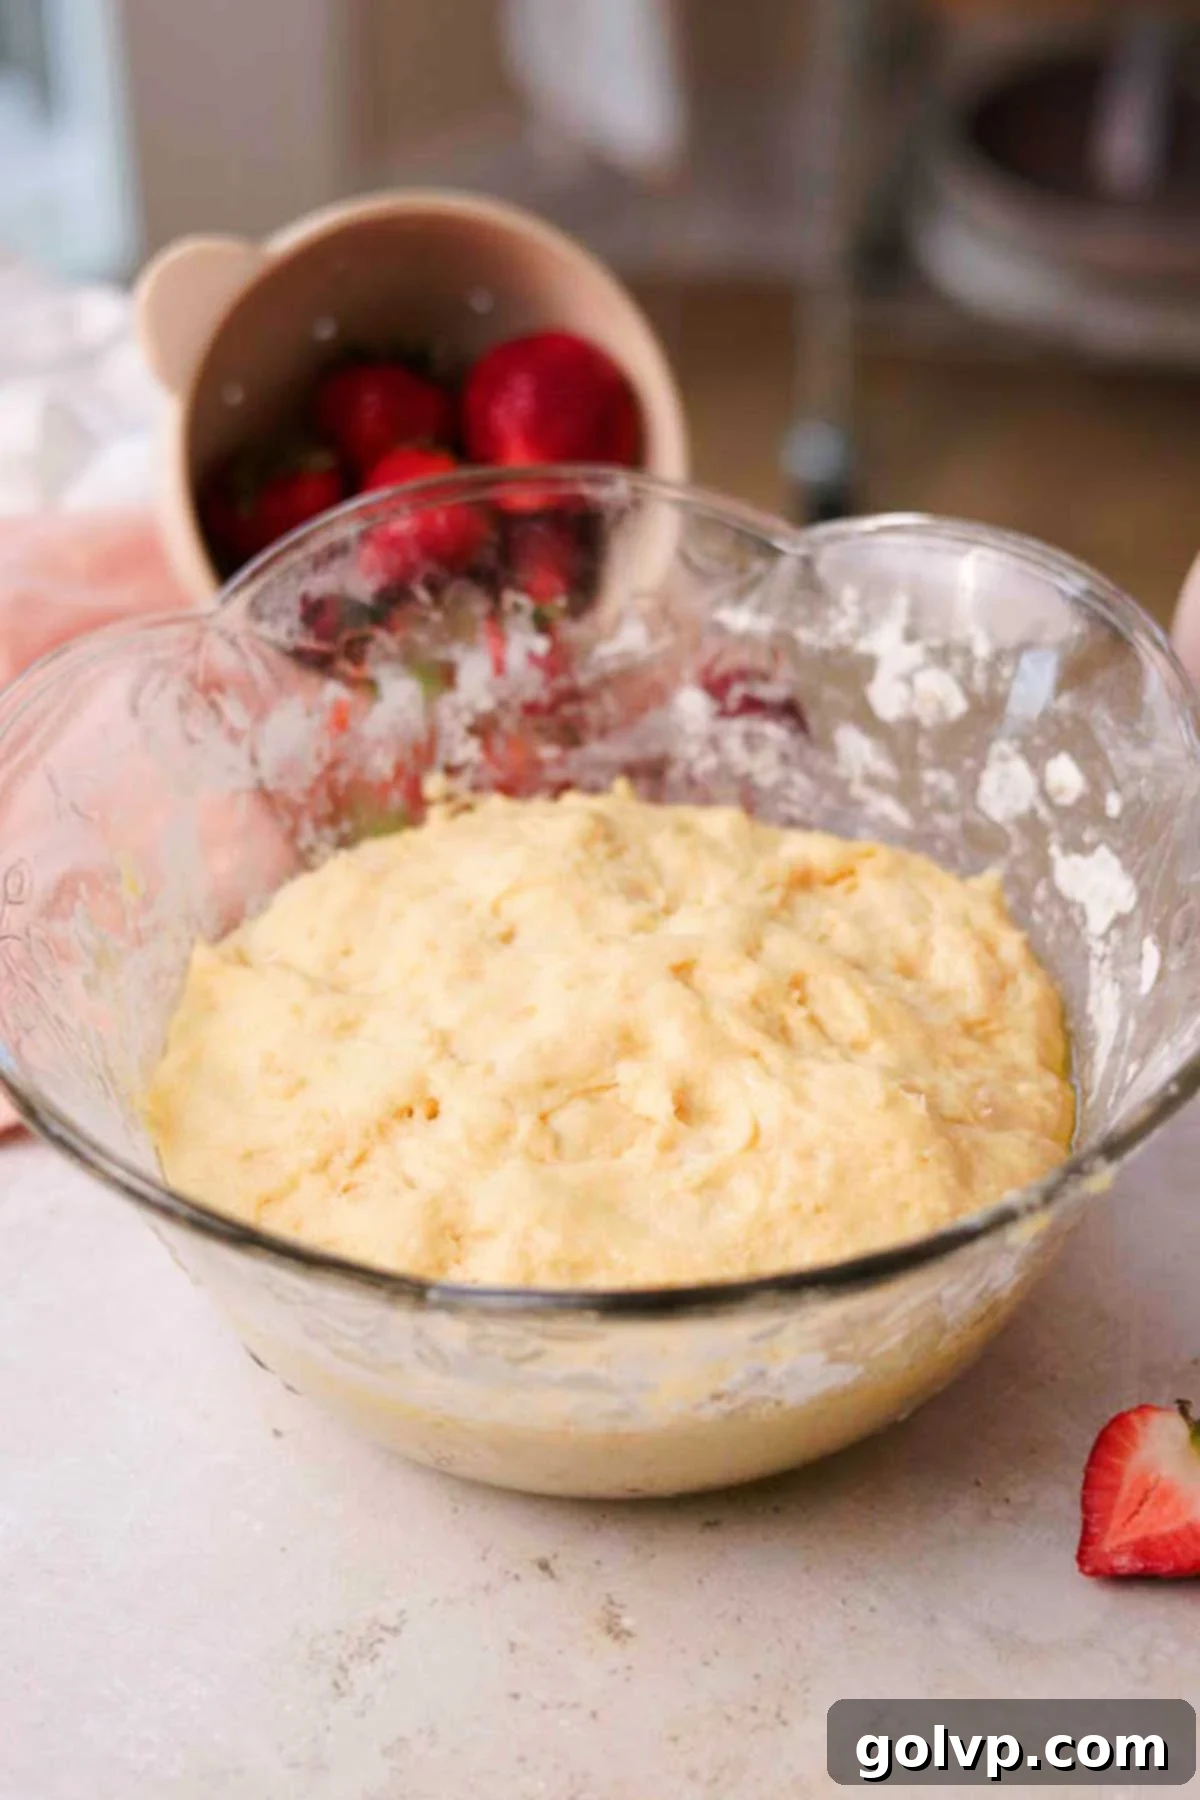
Step 4: First Rise. Once the dough has come together, cover the bowl tightly with a clean kitchen towel or plastic wrap. Transfer the bowl to a warm, draft-free location (refer to the expert tips section for ideal rising conditions). Allow the dough to rise until it has visibly doubled in size, which typically takes around 40 minutes, though this can vary based on your room temperature and yeast activity. While the dough is rising, take this opportunity to generously butter a 9”x12” (or 9”x13”) baking pan, ensuring every corner is coated to prevent sticking and promote a golden crust.
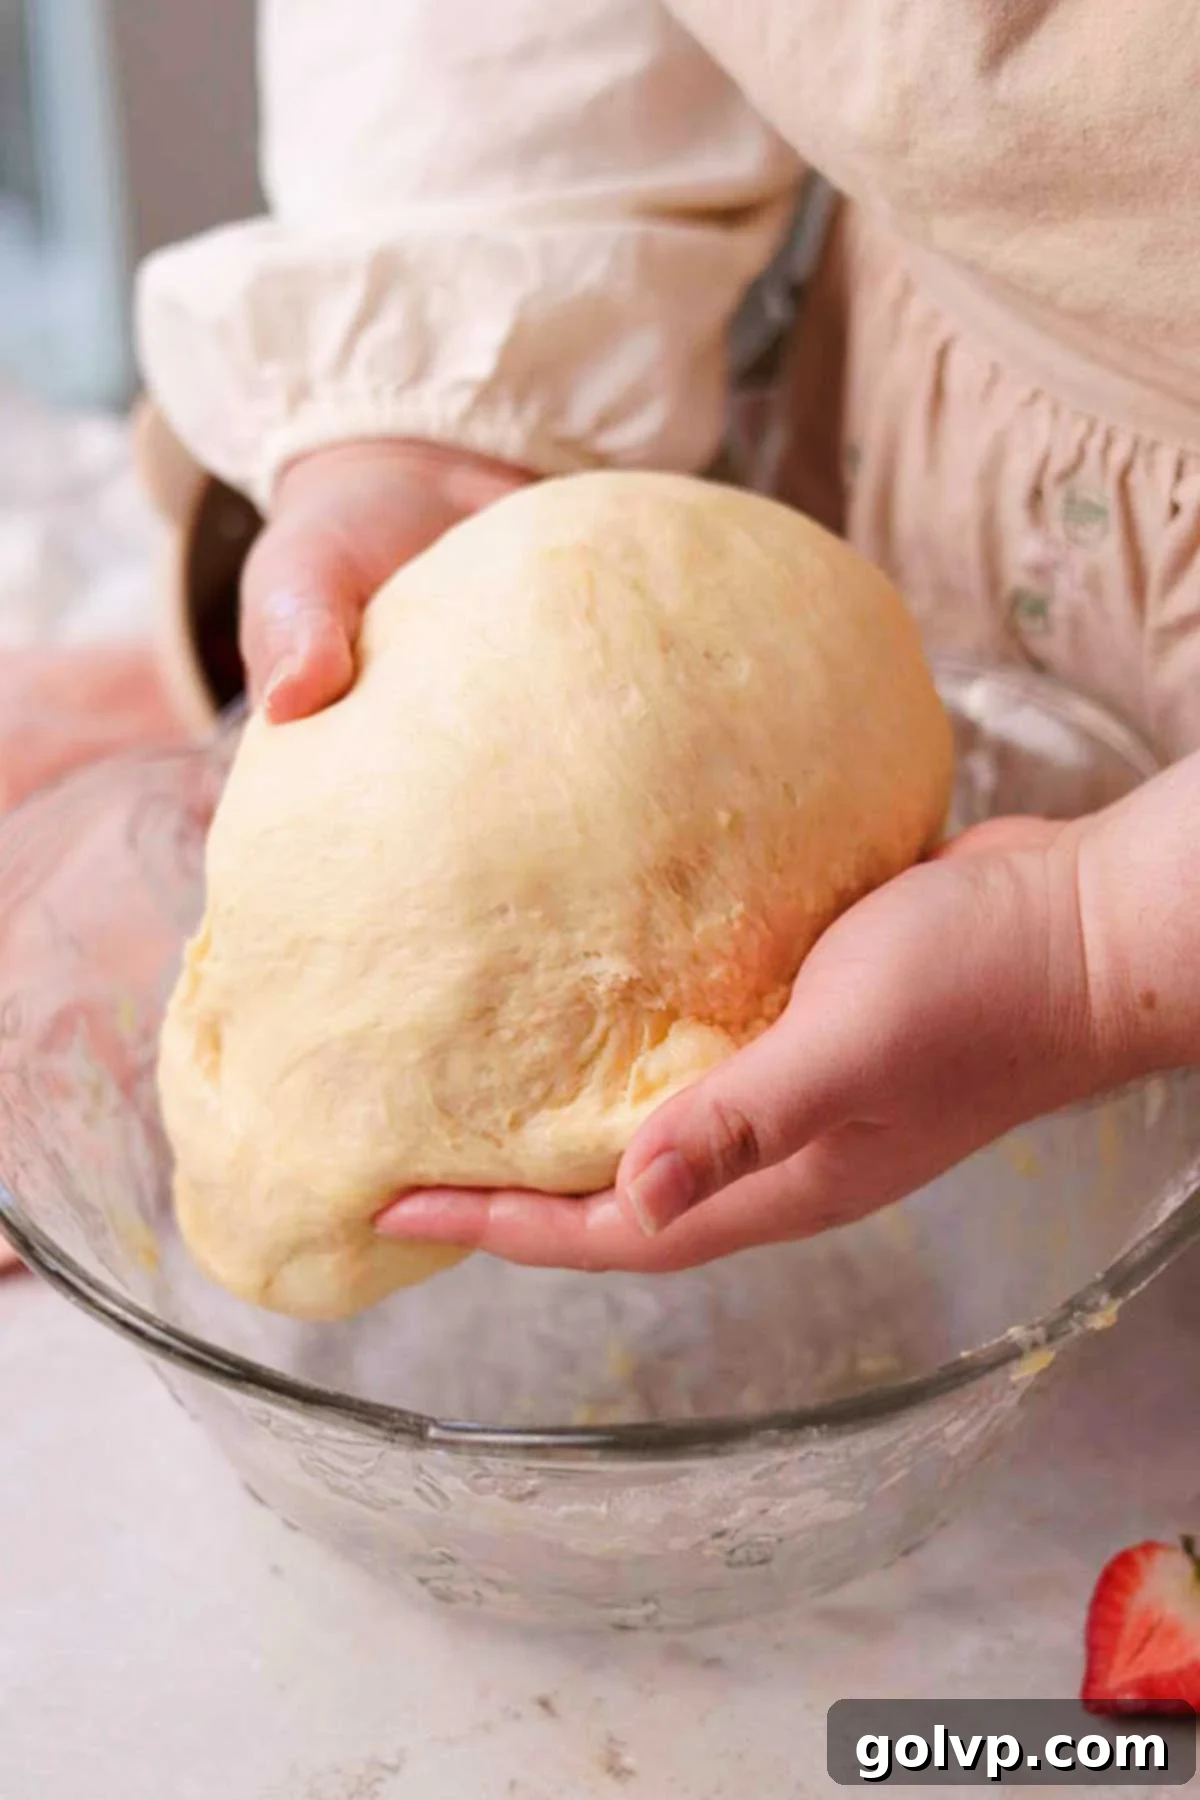
Step 5: Deflate and Refine the Dough. After the first rise, gently ‘punch down’ the dough to release the accumulated gases. This isn’t aggressive kneading; rather, it’s a gentle deflation. Turn the dough out onto a lightly floured surface. Briefly flatten and fold the dough a few times, perhaps 3-4 folds. This short manipulation helps to further develop the dough’s structure and distribute the ingredients evenly. You’ll notice a remarkable transformation: the dough will become much smoother, more elastic, and supple, indicating it’s ready for shaping.
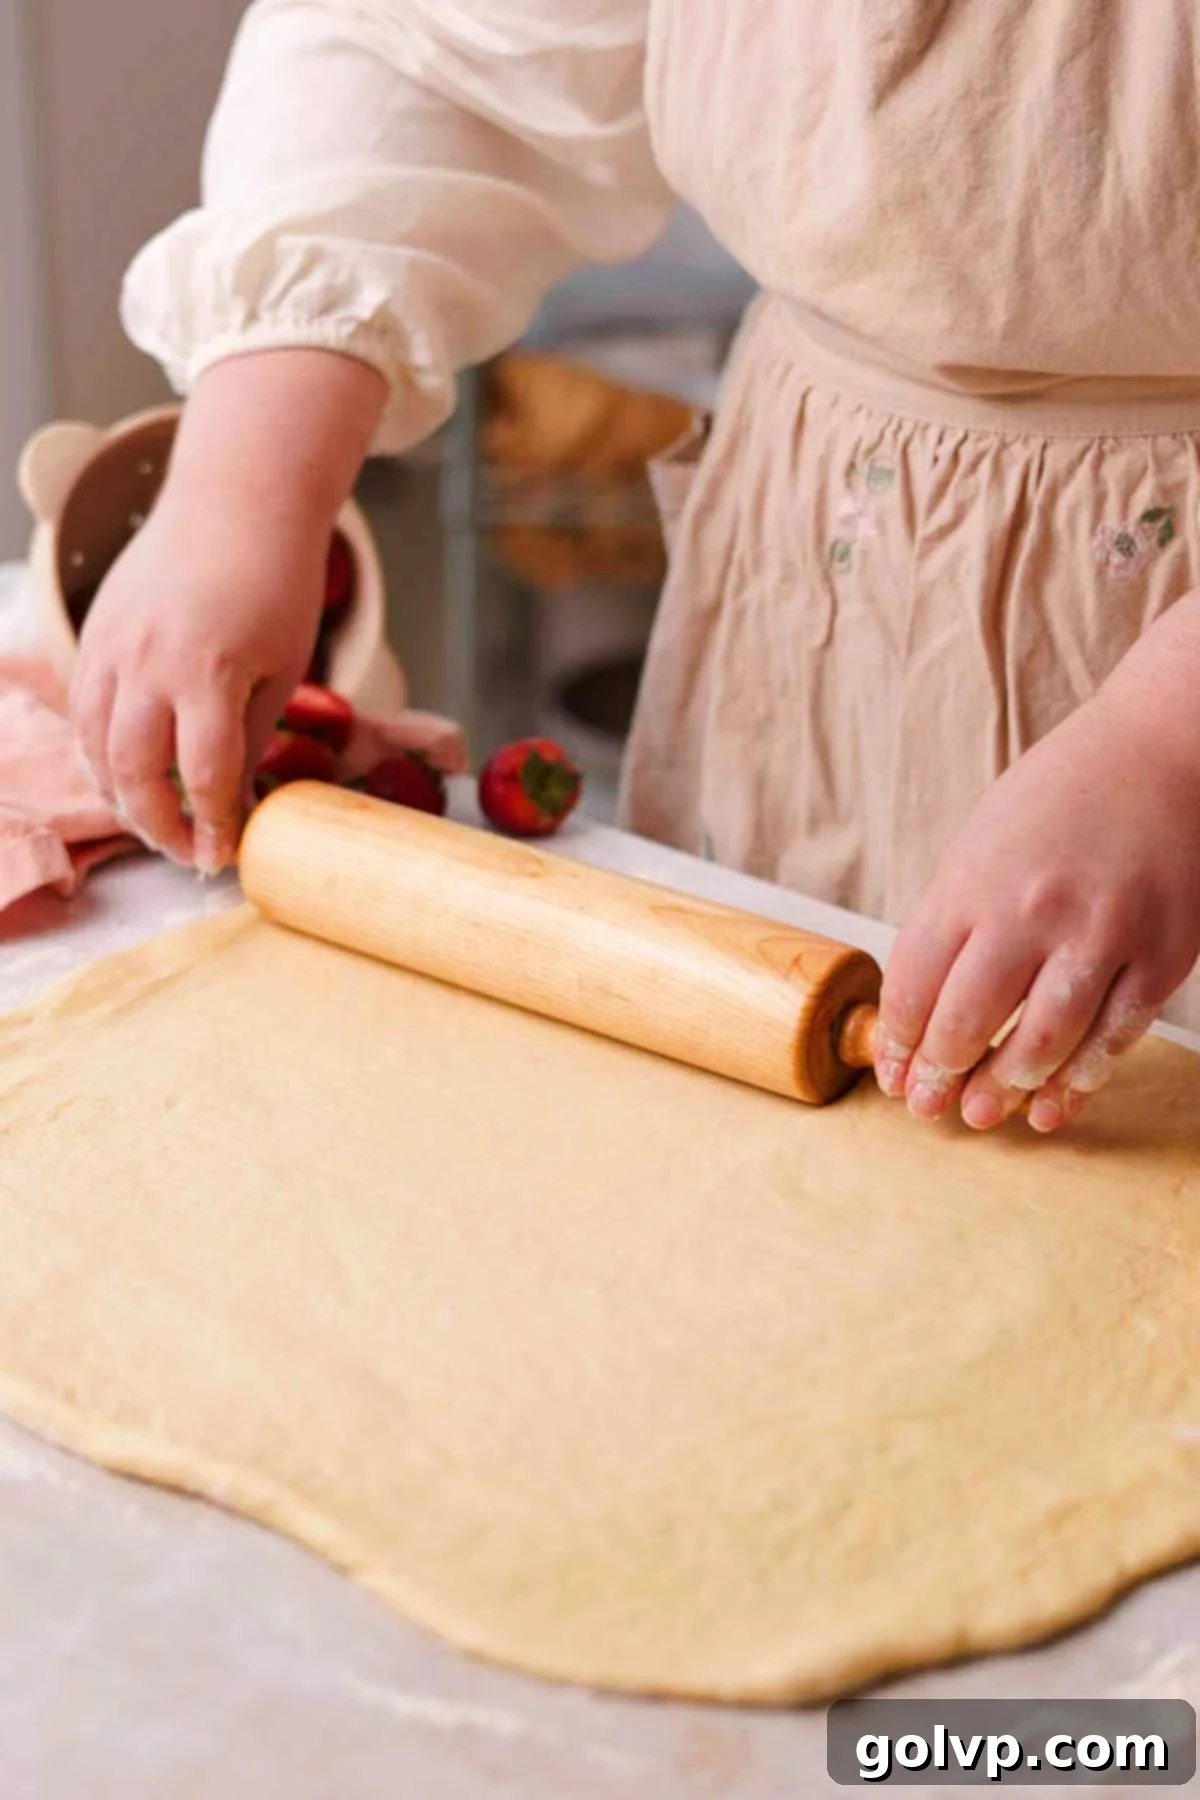
Step 6: Roll Out the Dough. Lightly flour your work surface and your rolling pin. Transfer the now smooth and supple dough onto the prepared surface. Using your rolling pin, carefully roll the dough into a large, even rectangle. Aim for dimensions of approximately 18 inches by 24 inches. The key here is to maintain an even thickness throughout the rectangle, ensuring uniform baking of your rolls. Don’t worry if it’s not perfectly geometric; a slight variation won’t affect the delicious outcome.
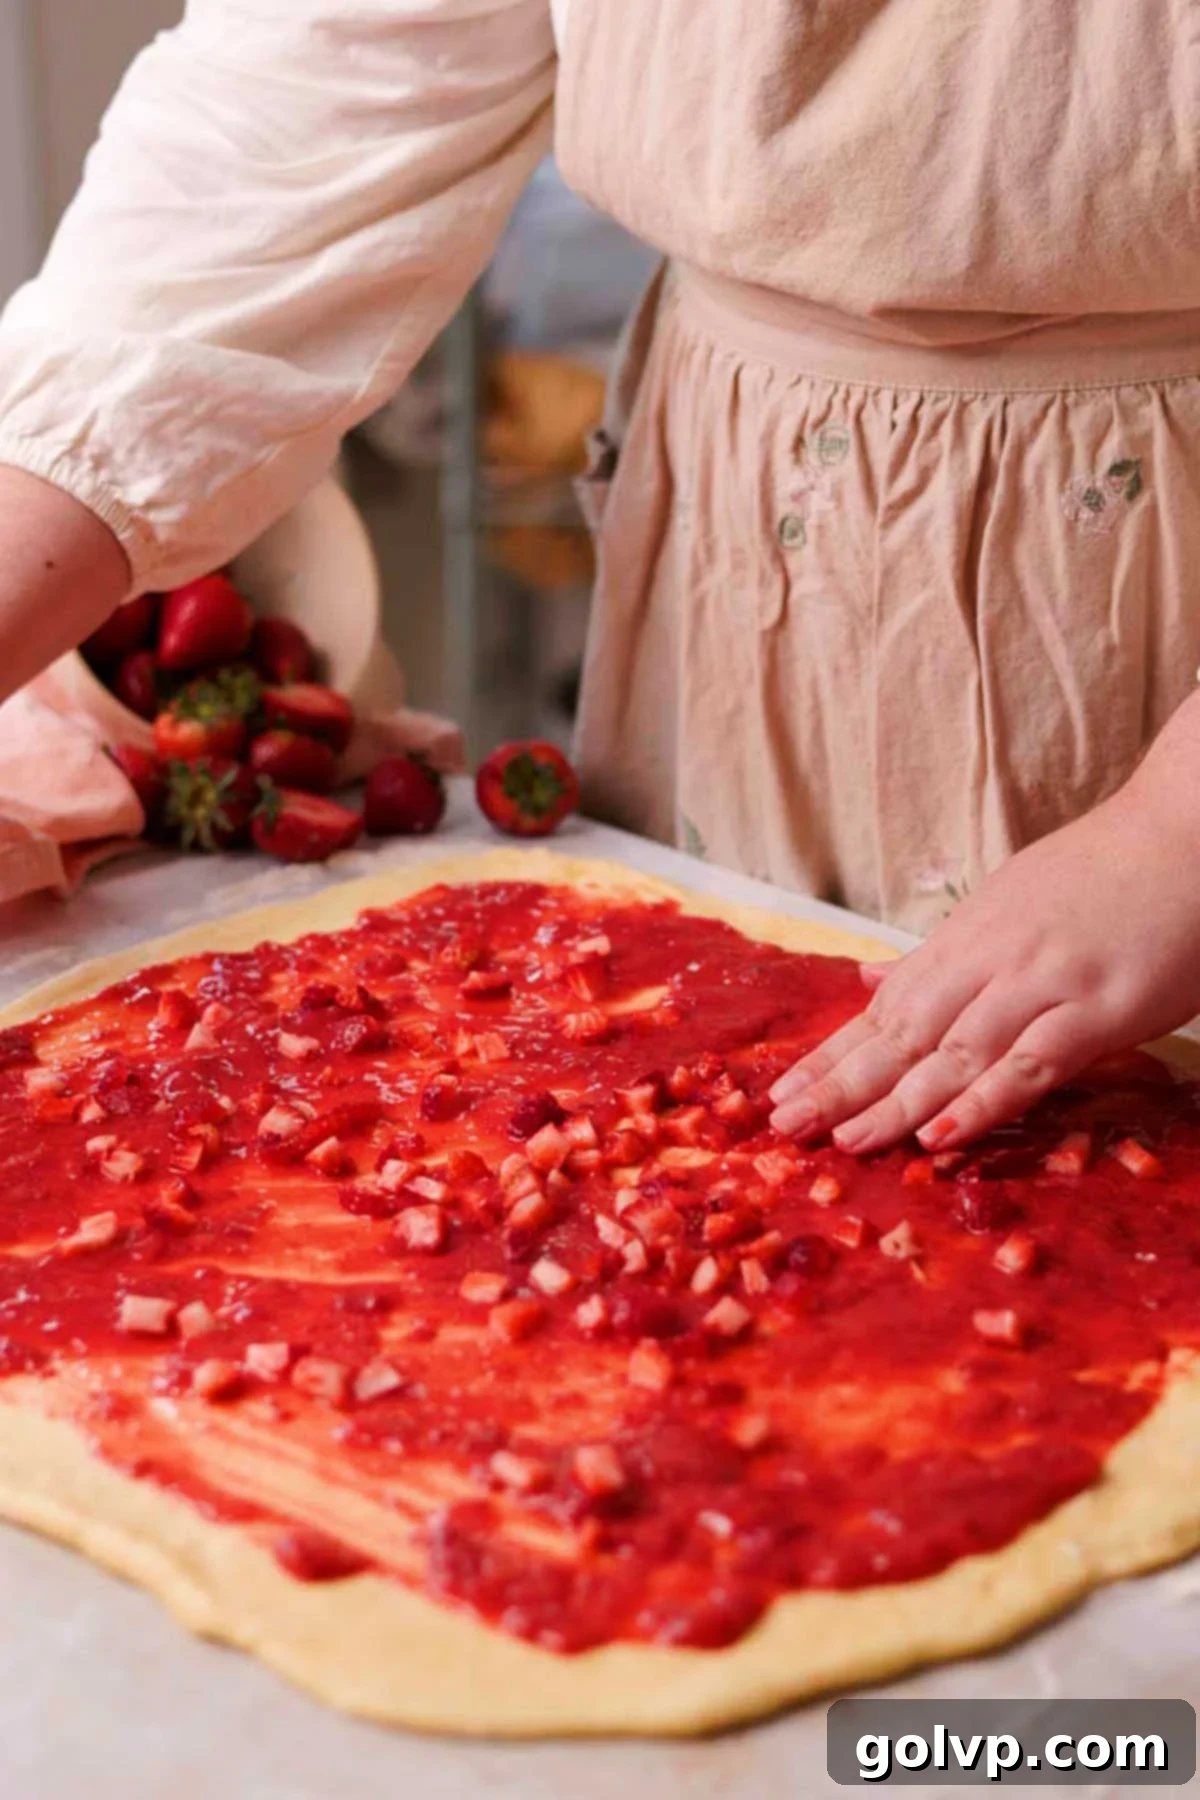
Step 7: Spread the Strawberry Filling. Before applying the filling, remember to reserve about a quarter cup of the prepared strawberry sauce for the cream cheese glaze later. Now, generously spread the remaining cooled strawberry filling evenly over the rolled-out dough rectangle. Make sure to leave a clean 1-inch border along all edges of the dough; this will help seal the roll properly. Finally, sprinkle the fresh, chopped strawberries uniformly over the layer of strawberry filling, adding another dimension of fresh fruit flavor and texture.
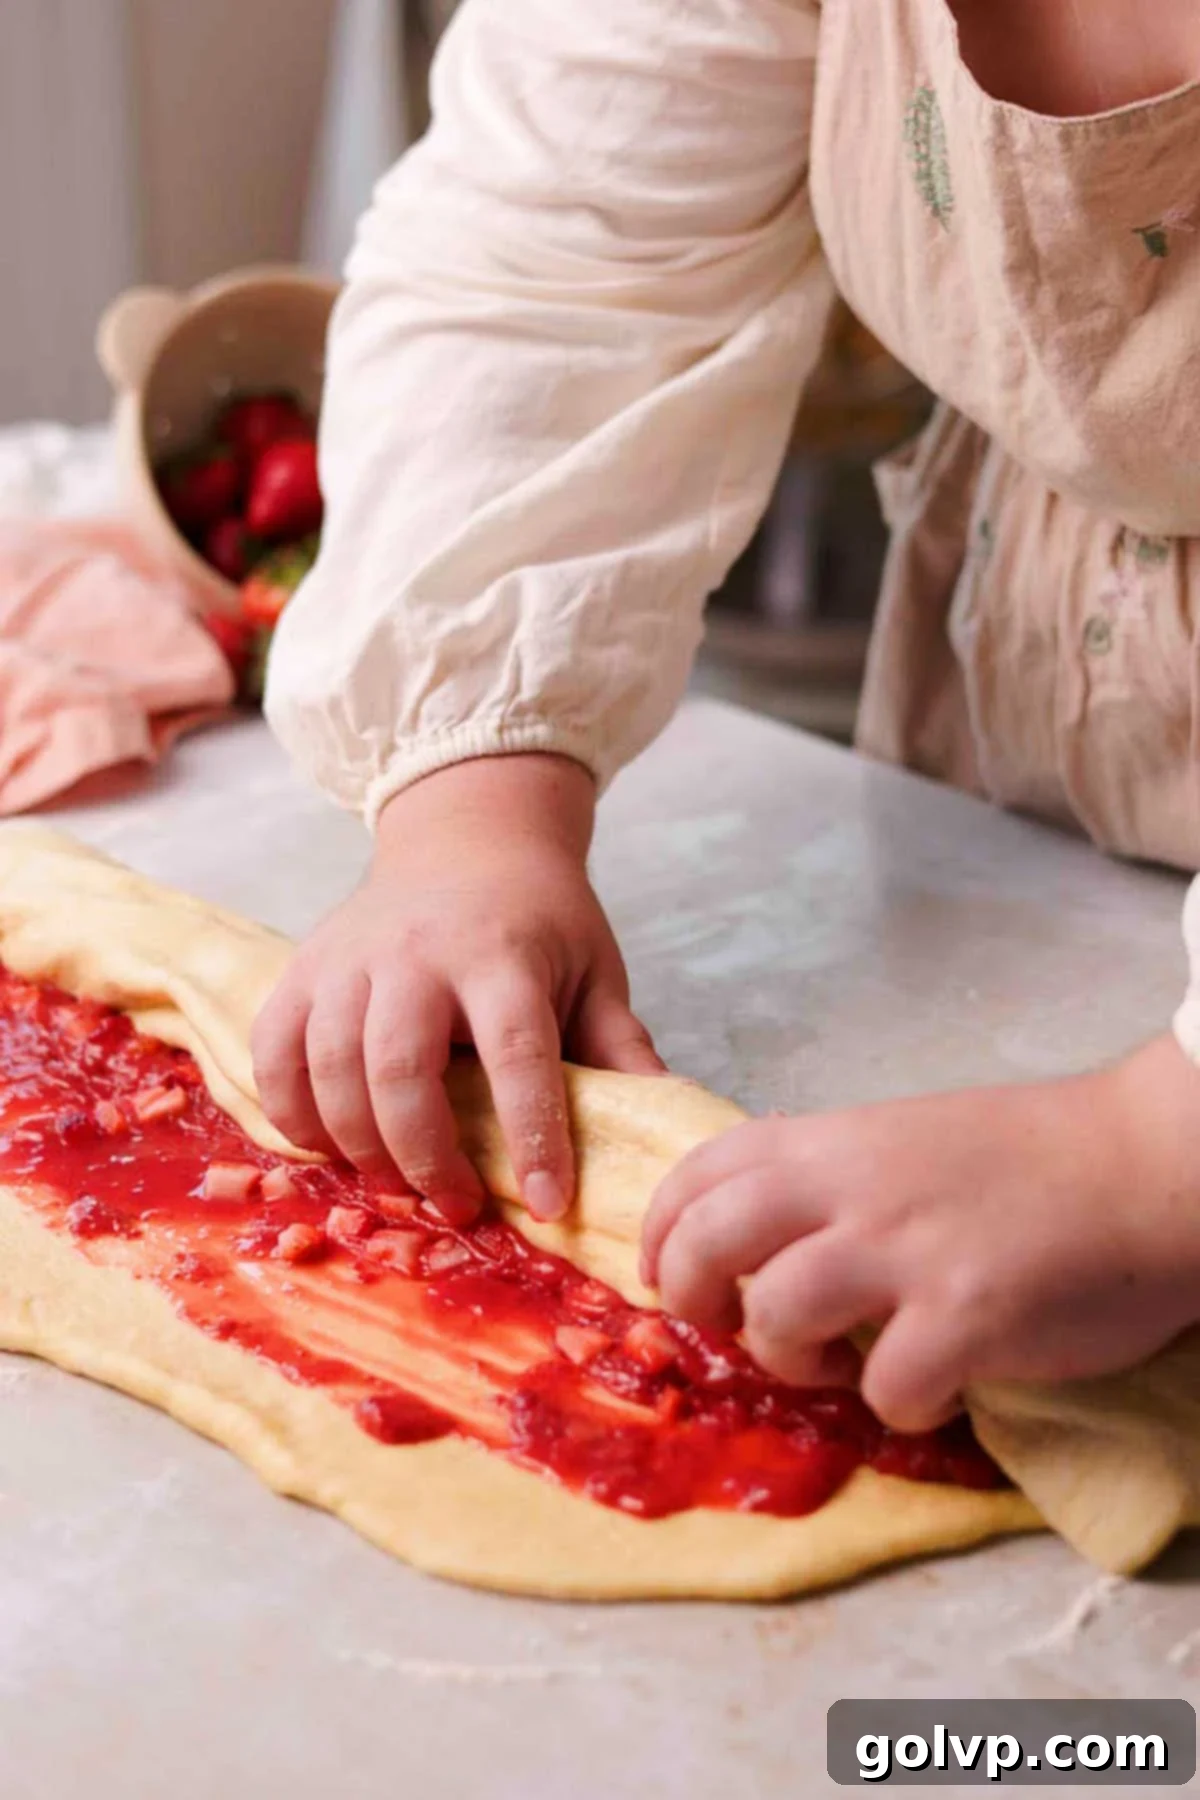
Step 8: Roll and Mark for Cutting. Starting from one of the long edges of the dough, carefully and snugly roll the dough into a tight log. Try to keep the roll as consistent as possible to ensure beautifully shaped cinnamon rolls. Once rolled, gently pinch the seam to seal it. To achieve uniform rolls, lightly mark the log into 12 equal portions. A simple trick is to first mark the center, then mark the centers of each half. Finally, divide each of those four sections into three smaller, equal segments, giving you 12 perfect divisions.
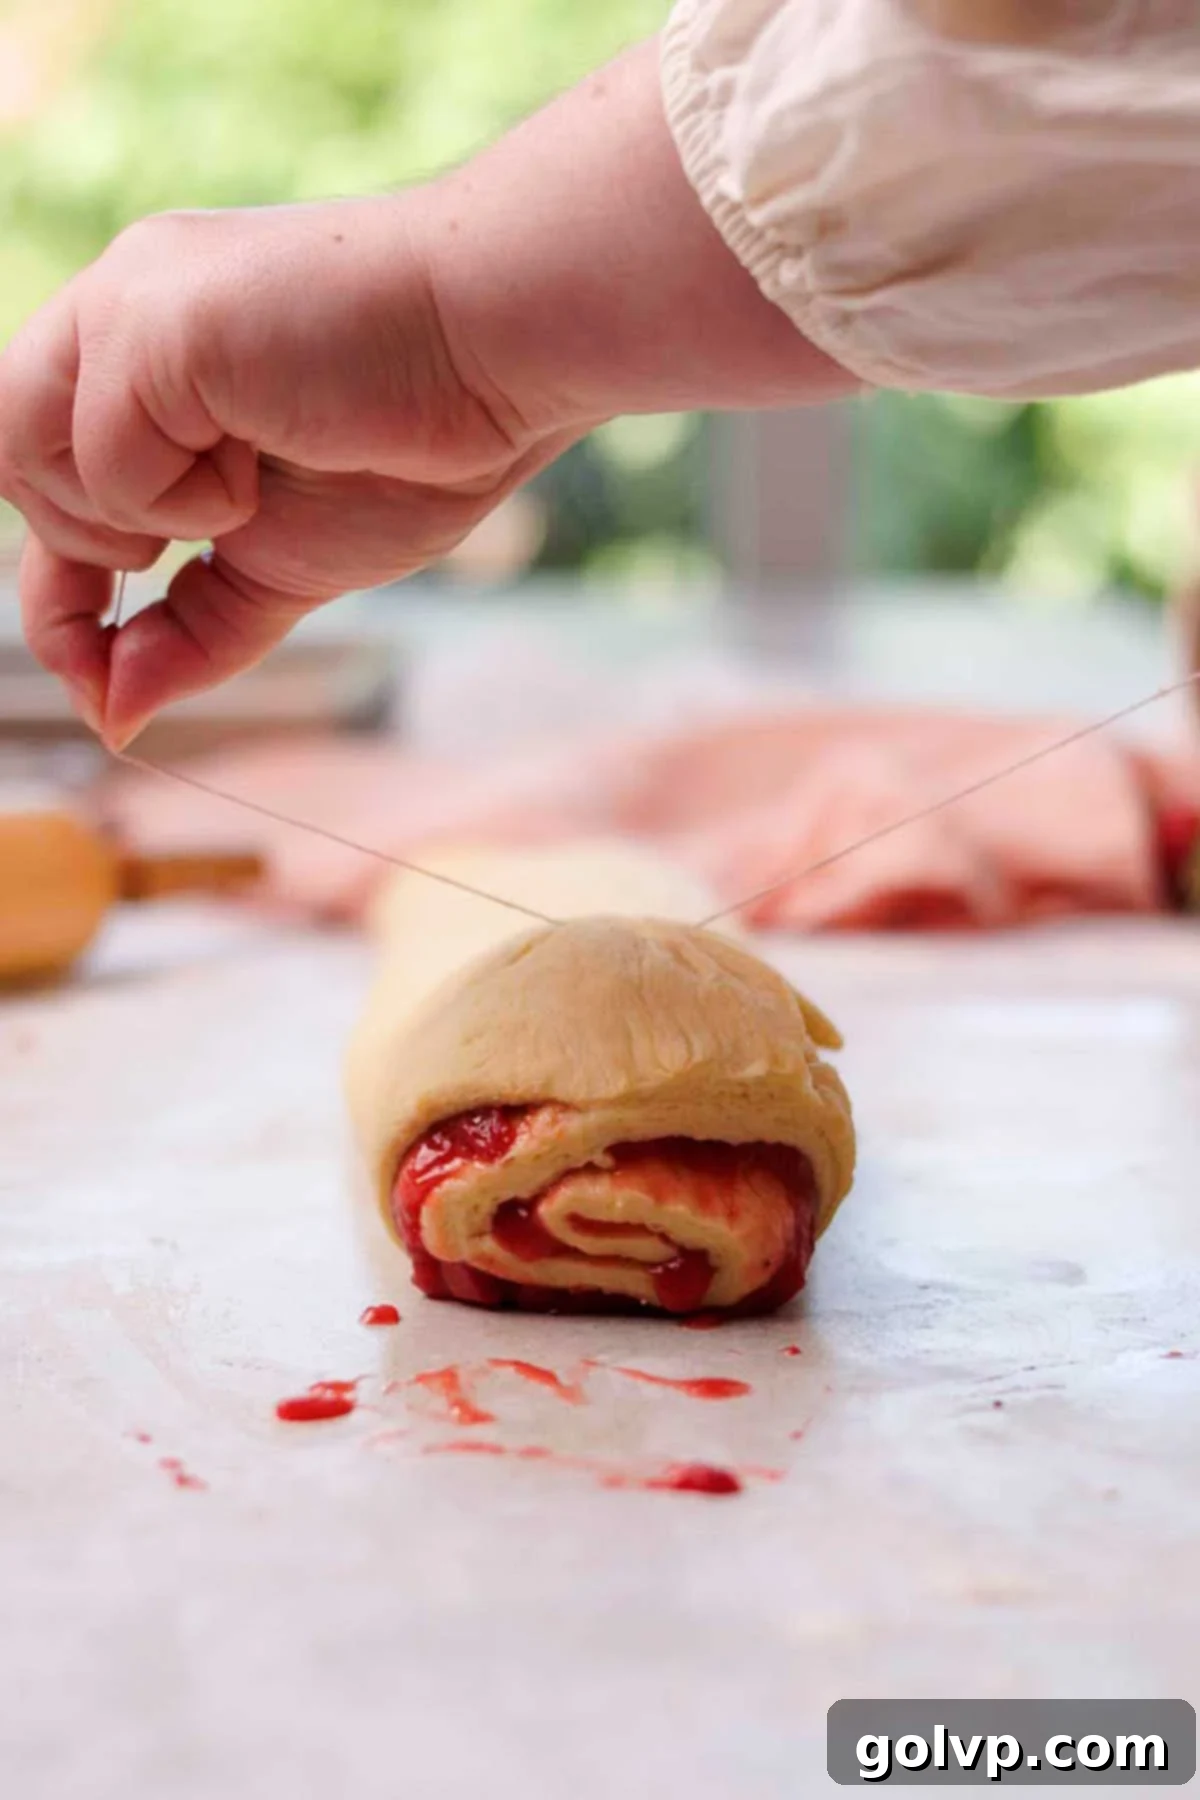
Step 9: Cut the Rolls. For the cleanest cuts that preserve the beautiful swirl of the rolls, avoid using a knife. Instead, take a piece of unflavored dental floss or a thin cotton string. Slide it under the marked log, bring the ends up, cross them over each other, and pull firmly to cut through the dough. This method prevents the rolls from getting squished, ensuring they maintain their perfect circular shape. Gently transfer each freshly cut roll to your prepared, buttered baking pan, arranging them with a little space in between. If any filling escapes during cutting or transfer, simply scoop it back onto the top of the respective roll.
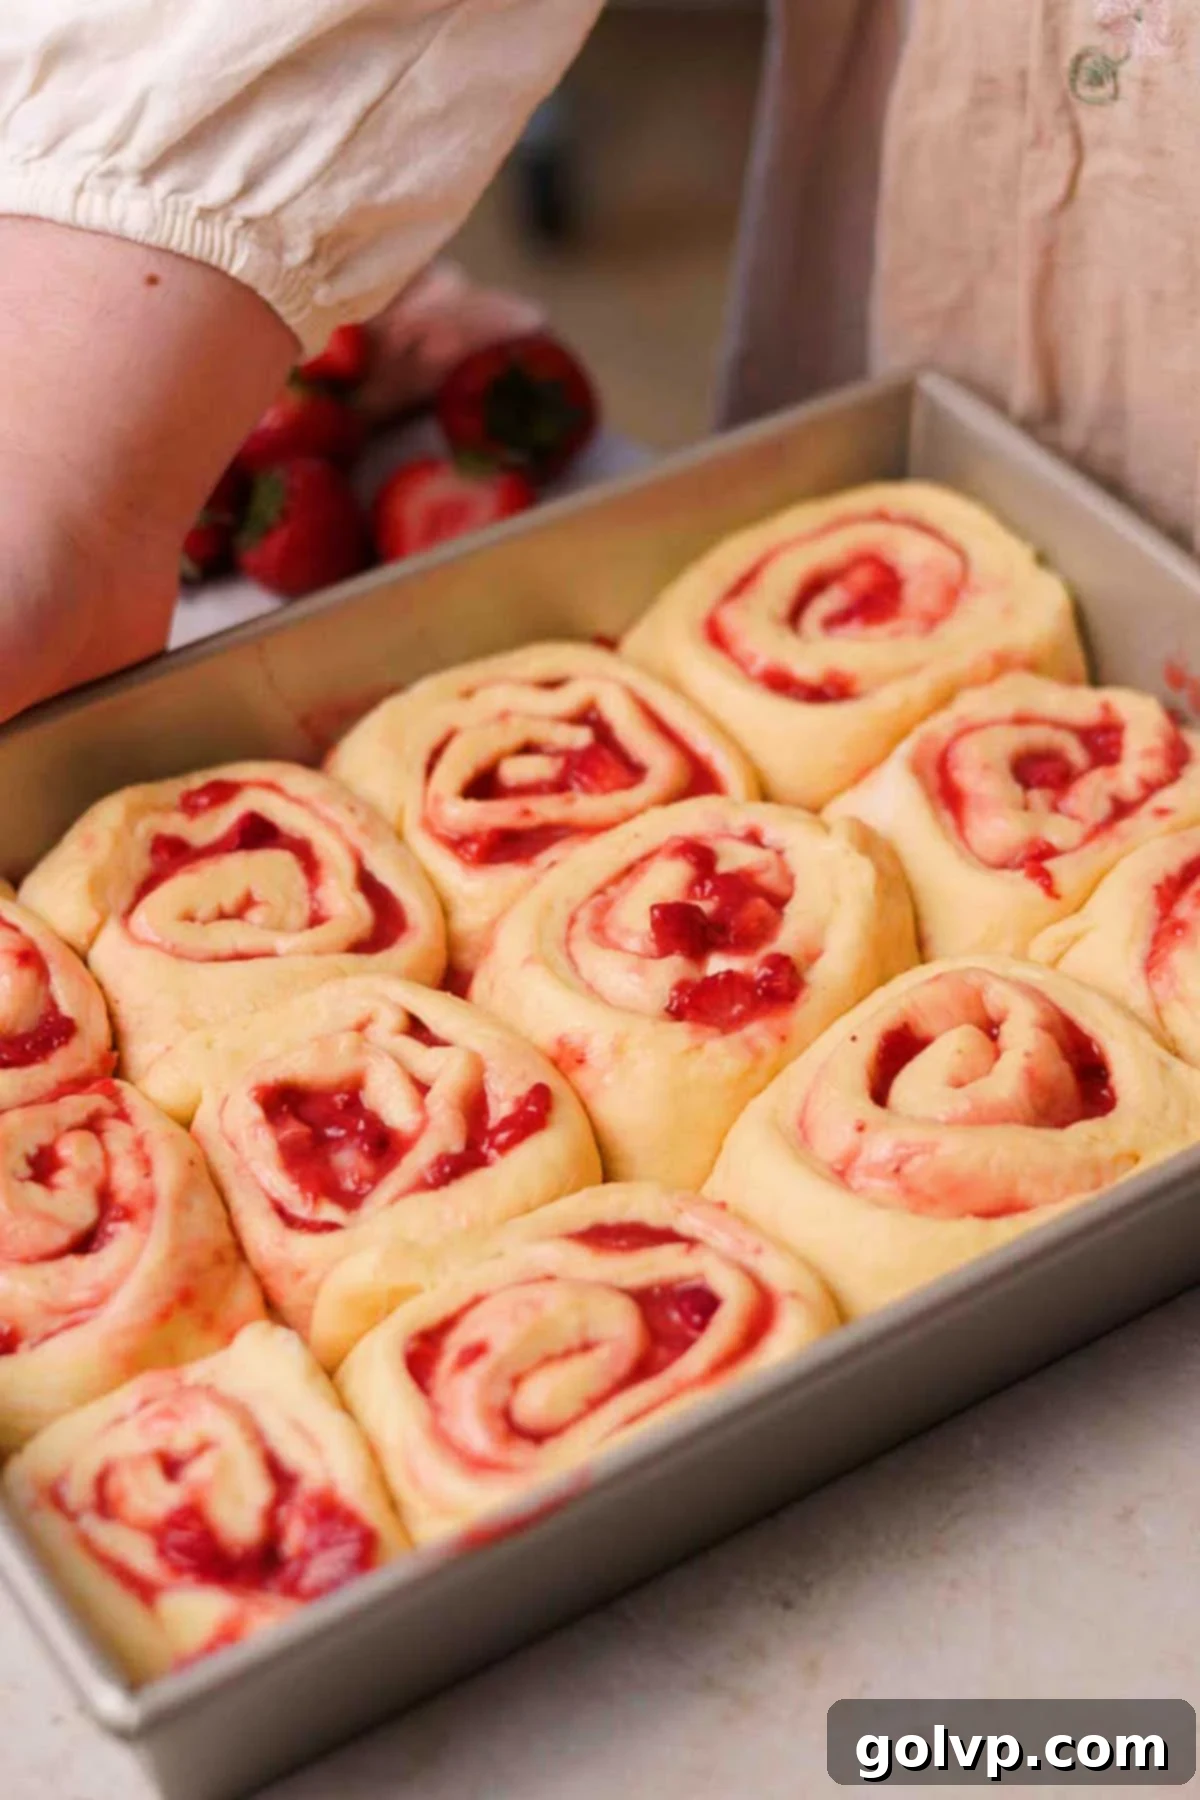
Step 10: Second Rise and Bake. Cover the baking pan loosely with plastic wrap or a kitchen towel and let the assembled rolls undergo their second rise in a warm spot for about 15 minutes, or until they look visibly puffy and have nearly doubled in size, filling out the pan. While they’re rising for the second time, preheat your oven to 180°C (350°F). Once risen, bake the strawberry cream cheese rolls for 25-30 minutes, or until their tops are beautifully golden brown and the edges are lightly caramelized. As they bake, you can start preparing the delightful strawberry cream cheese glaze.
Strawberry Cream Cheese Glaze Step-by-Step
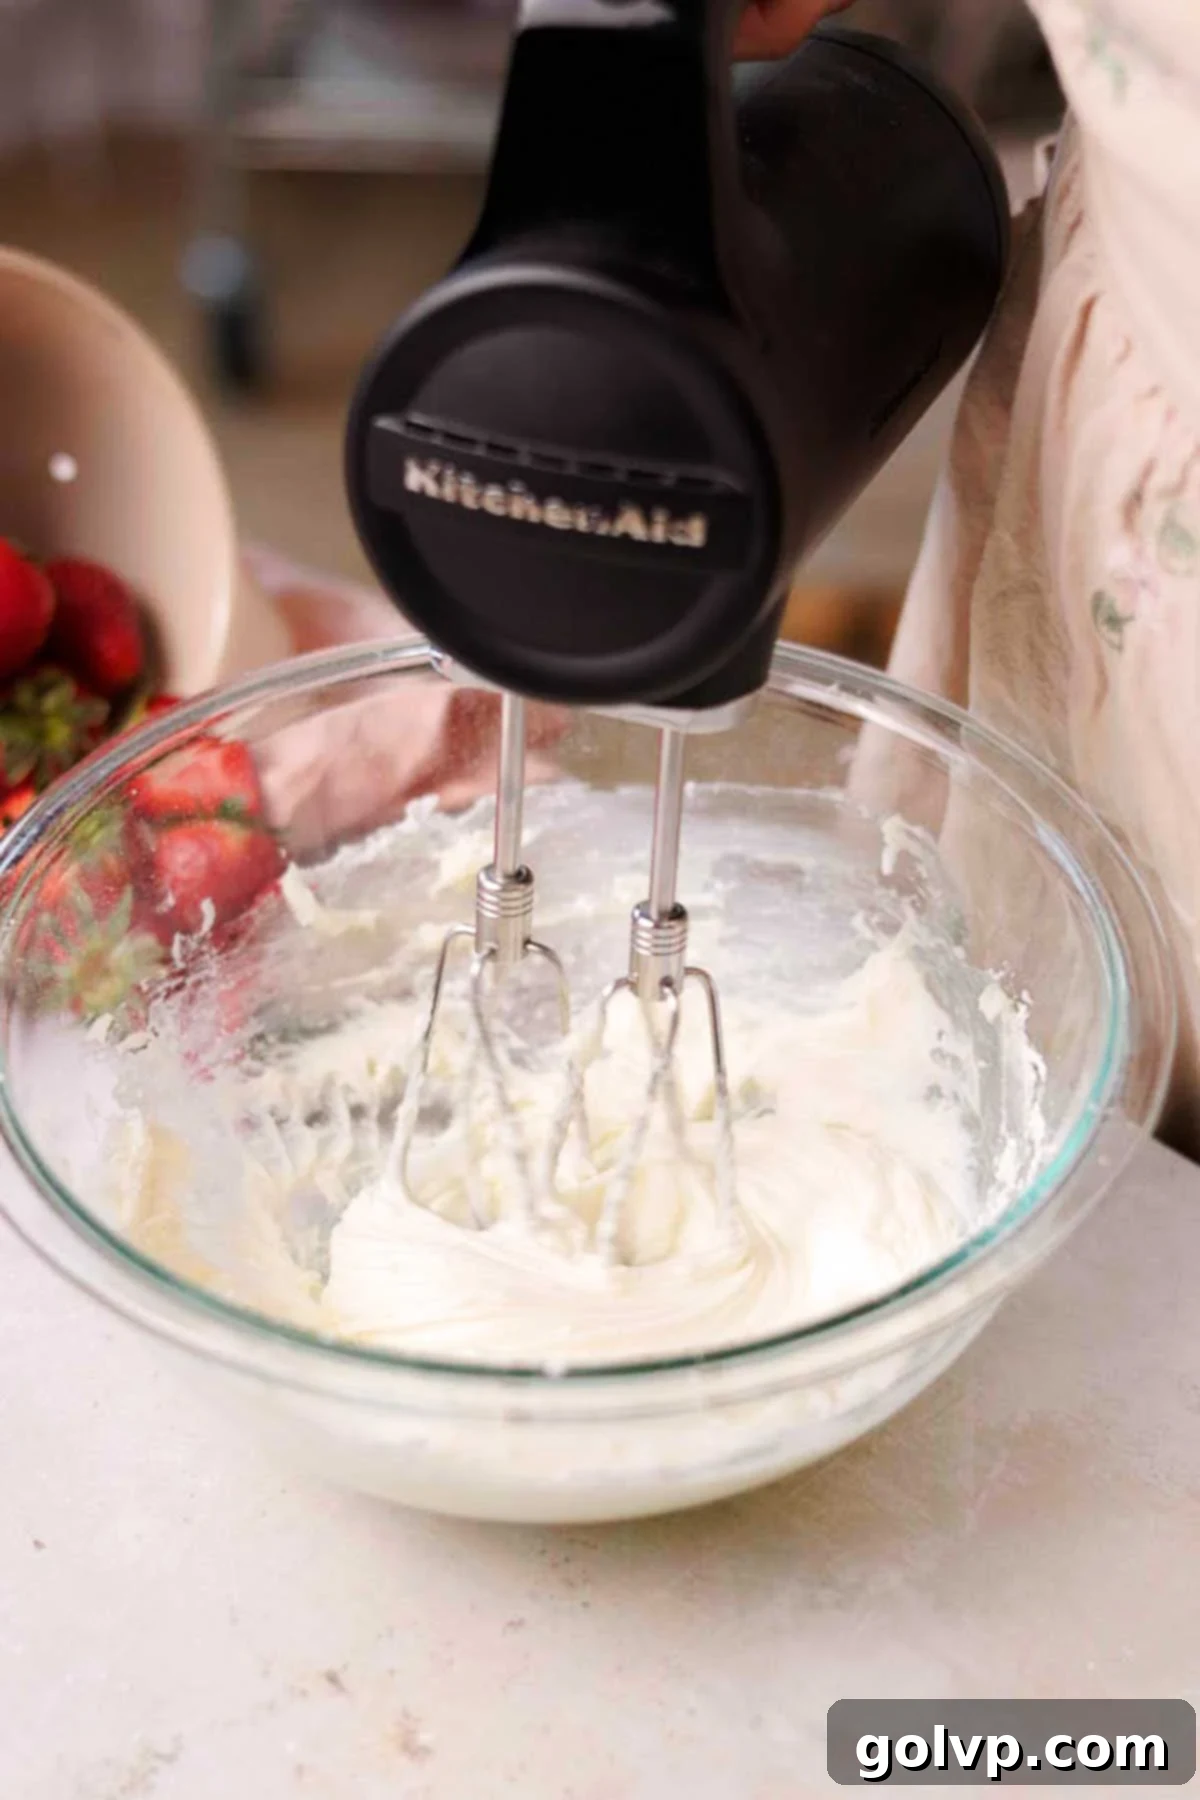
Step 1: Prepare the Glaze Base. In a large mixing bowl, combine the softened cream cheese with the sifted powdered sugar. Using an electric mixer (or a whisk and some elbow grease), beat these two ingredients together until the mixture is completely creamy, smooth, and free of any lumps. Ensure the cream cheese is at room temperature for the best, most uniform consistency.
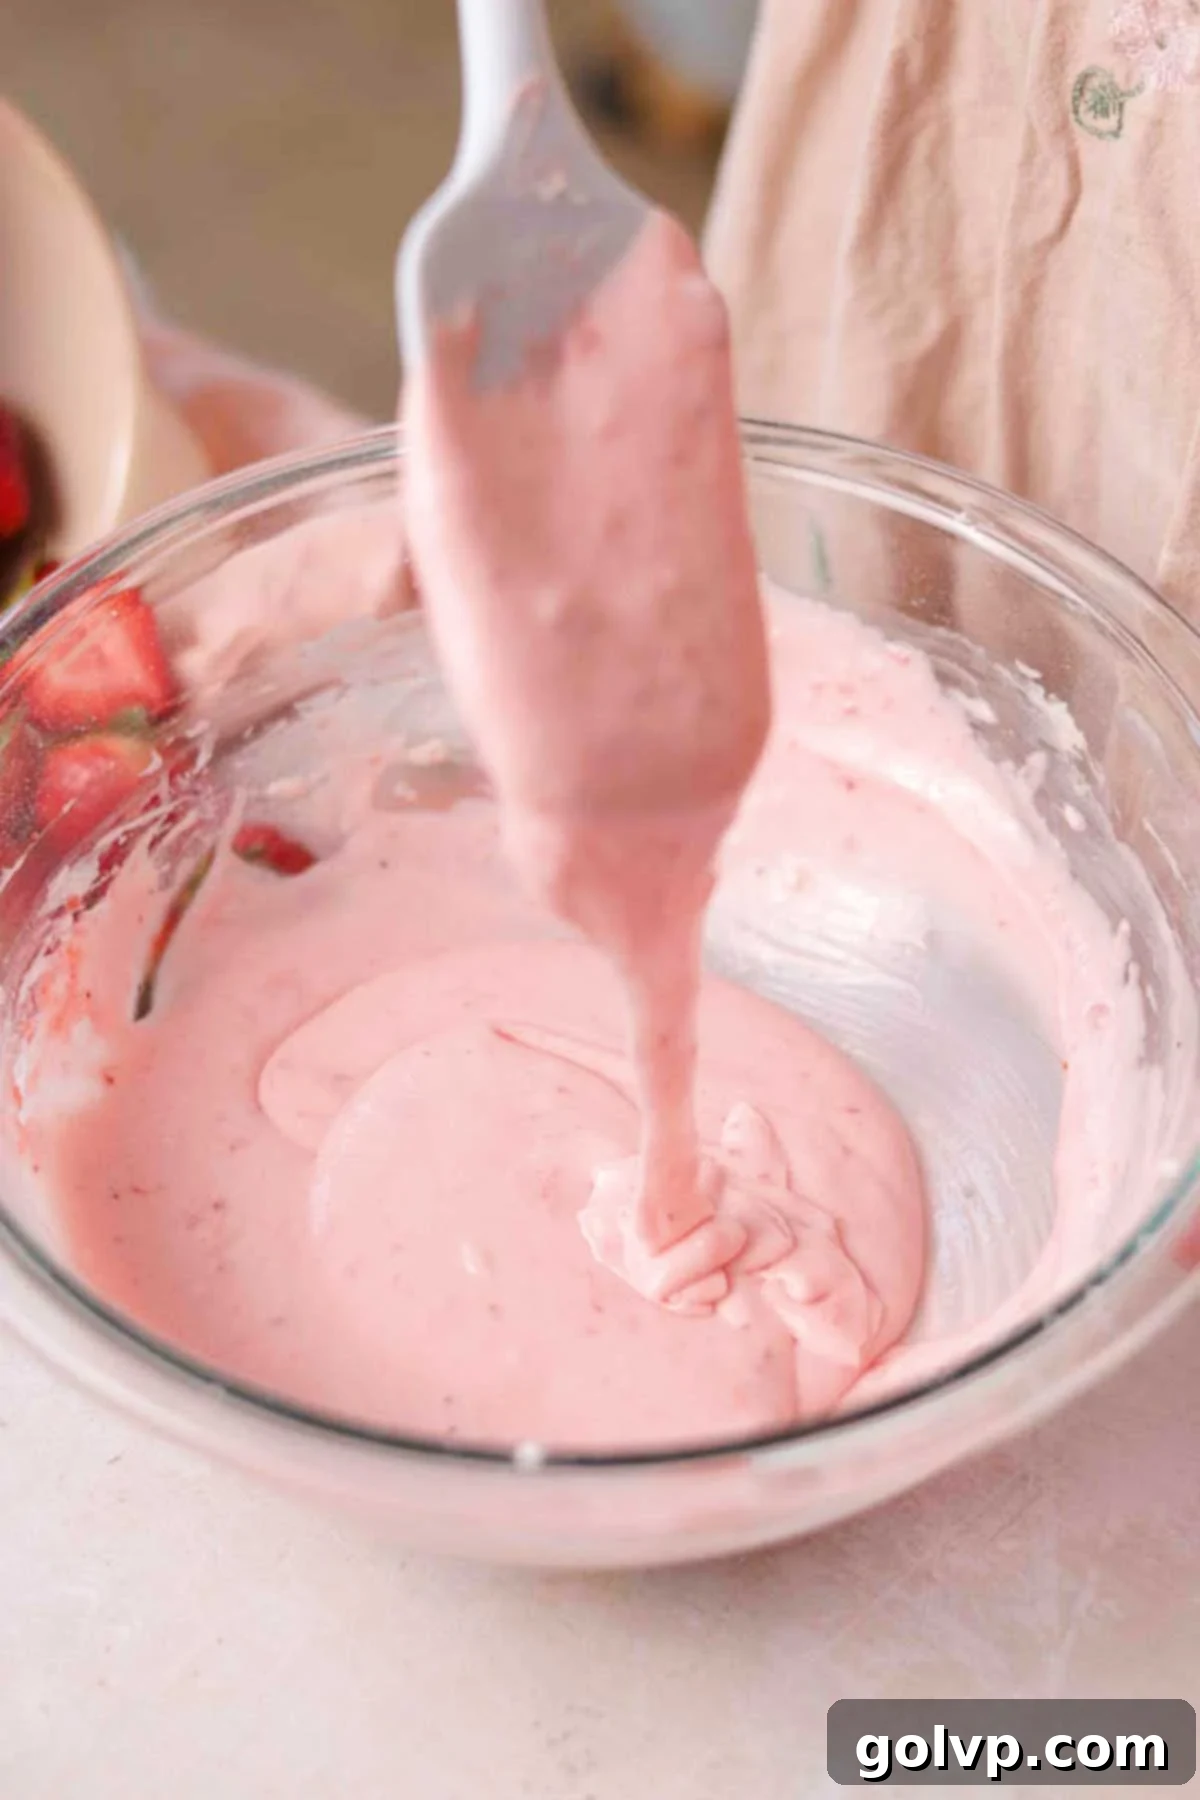
Step 2: Flavor with Strawberry. Now, add the previously reserved quarter cup of strawberry sauce into the cream cheese and powdered sugar mixture. Continue to beat with the electric mixer until the strawberry sauce is thoroughly incorporated and the glaze achieves a uniform, beautiful light pink color. The resulting glaze should have a wonderfully smooth, slightly runny consistency, perfect for generously drizzling over the warm rolls.
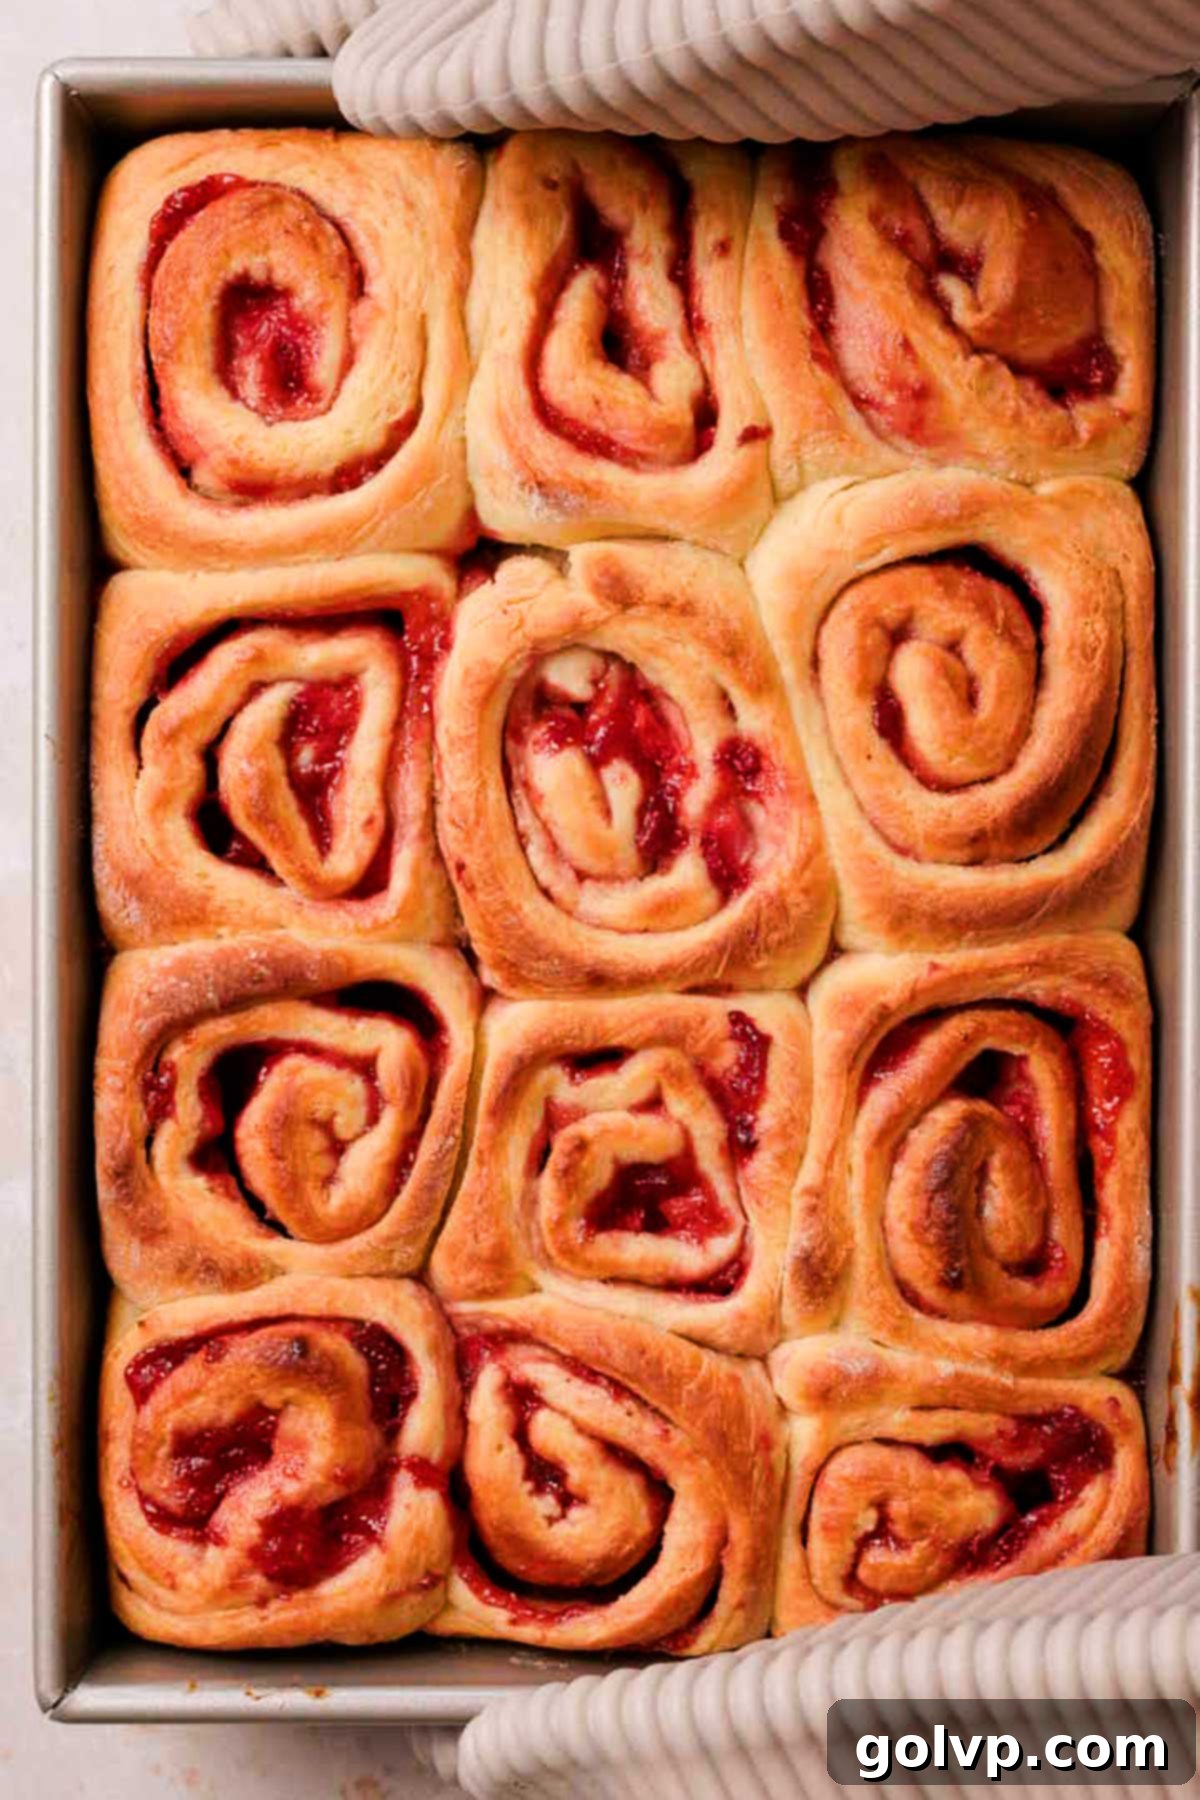
Step 3: Cool the Rolls. Once the strawberry cinnamon rolls are baked to golden perfection, remove them from the oven. Allow them to cool slightly within the baking pan for approximately 10 minutes. This crucial cooling period helps the rolls settle, become even gooier, and prevents the glaze from melting too quickly when applied.
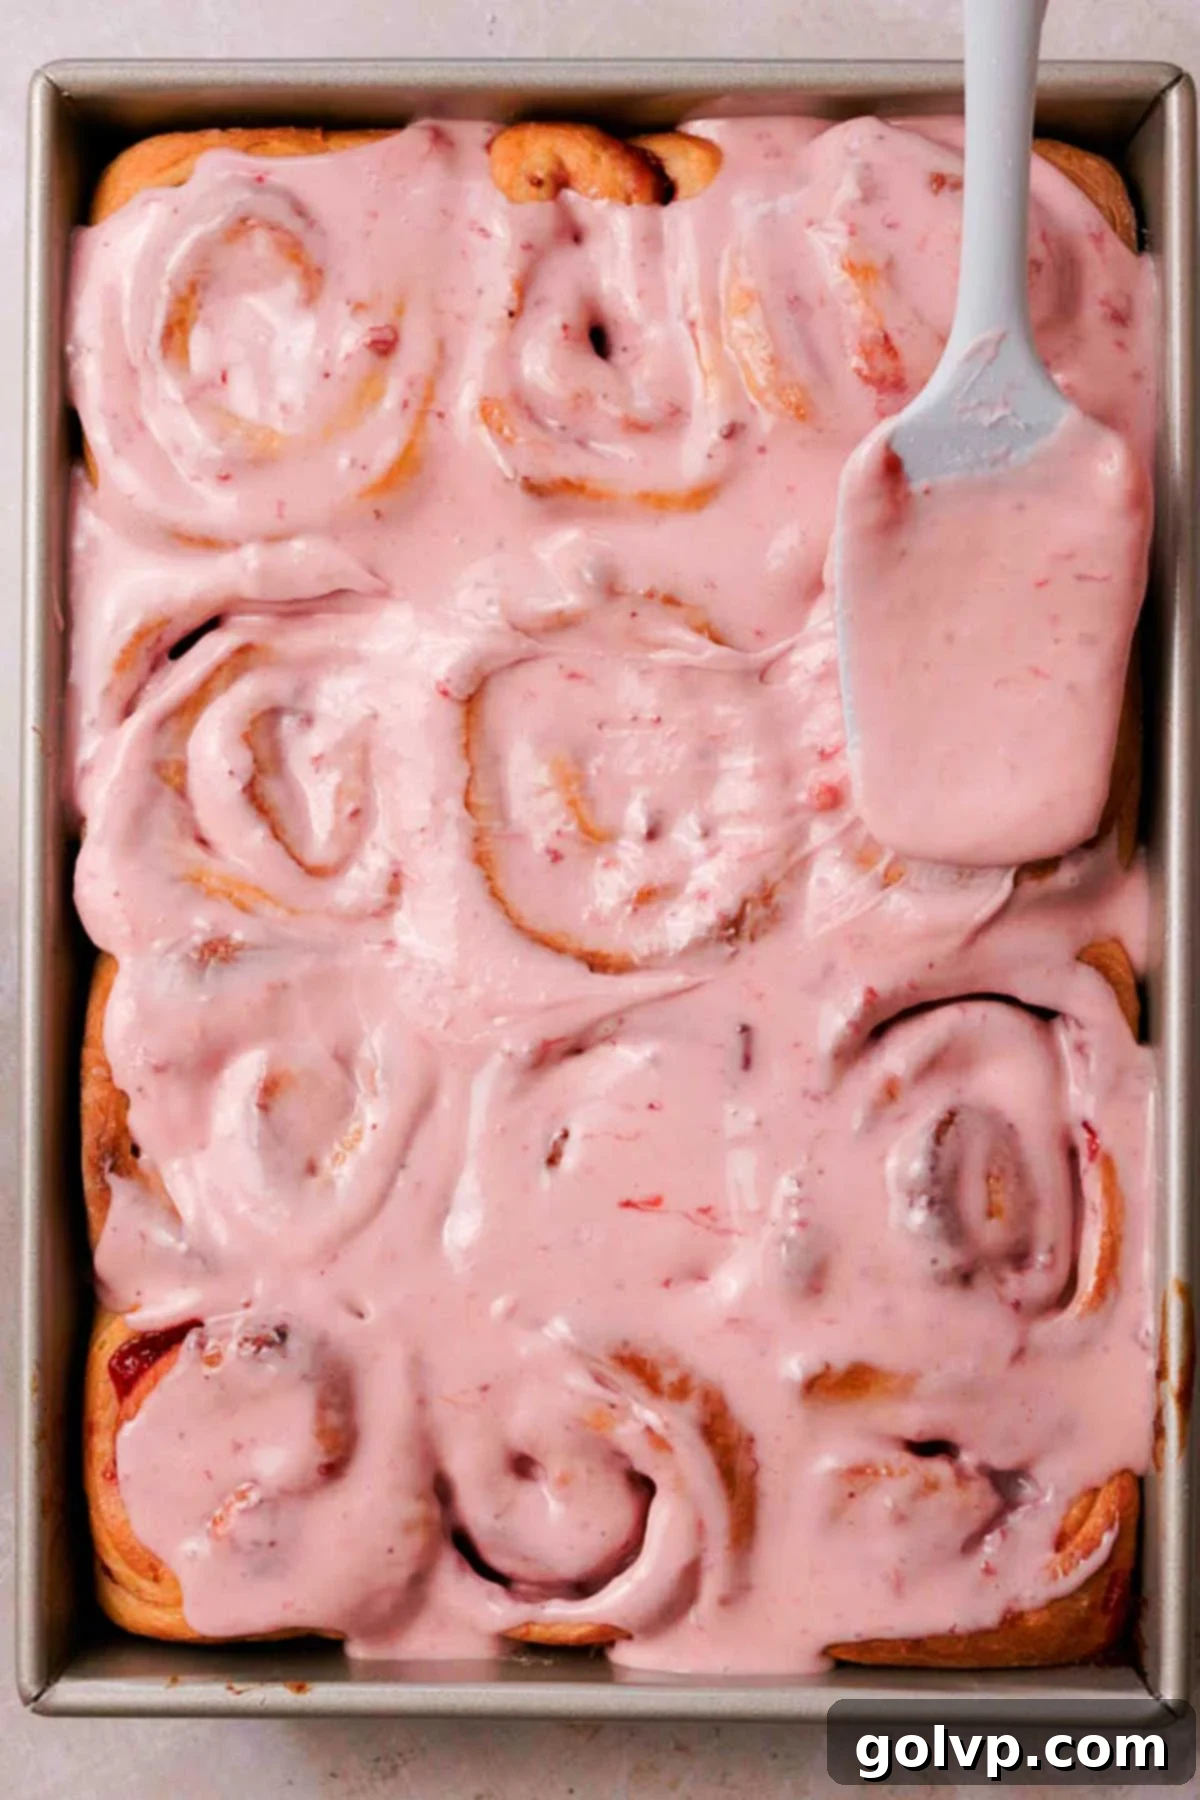
Step 4: Glaze and Serve. While the rolls are still warm, but not piping hot, generously spoon or spread all of the prepared strawberry cream cheese glaze over them. Don’t be shy! Allow the luscious glaze to melt slightly and gently seep into all the nooks and crevices of the rolls, infusing every part with its tangy sweetness. These strawberry cinnamon rolls are absolutely best served warm, allowing their soft texture and gooey filling to shine. Get ready to enjoy a truly delightful treat!
✔️ Expert Tips for Flawless Strawberry Rolls
- Accurate Flour Measurement is Key: For consistent and professional baking results, always use a digital kitchen scale to weigh your flour. This is the most precise method. If a scale isn’t available, employ the “spoon and level” technique: lightly fluff the flour in its container, then gently spoon it into your dry measuring cup. Do not pack it down. Use a straight edge (like the back of a knife) to level off the top, ensuring you have just the right amount without compacting it.
- Resist the Urge to Over-Knead: This is a “no-knead” dough for a reason! Excessive handling or kneading can develop too much gluten, resulting in tougher rolls. The beauty of this recipe lies in its minimal interaction; the less you fuss with the dough, the more incredibly soft, tender, and light your baked rolls will be. Trust the process and let the rising do the work.
- Utilize Unflavored Floss or String for Cutting: To achieve beautifully round, perfectly shaped cinnamon rolls with intact swirls, bypass using a traditional knife. A knife can compress and distort the dough. Instead, opt for a piece of unflavored dental floss or a thin, strong cotton string. Simply slide it under the dough log where you want to cut, cross the ends over the top, and pull them firmly to slice cleanly through. This technique yields visually appealing, uniform rolls every time.
- Prioritize Proper Dough Rising: The rising (or proofing) stages are non-negotiable for fluffy, airy rolls. This time allows the flour to fully hydrate and the yeast to produce carbon dioxide, creating tiny air pockets that expand the dough. Skipping or rushing these steps will result in dense, heavy rolls. Patience during proofing is rewarded with a gorgeous, soft, and pull-apart structure that makes these rolls so delightful. Ensure a warm, draft-free environment for optimal rising.
🥄 Storage Instructions for Maximum Freshness
To keep your strawberry cinnamon rolls tasting their best, store any leftovers in an airtight container or a heavy-duty freezer bag. They will remain fresh and delicious in the refrigerator for up to 4 days. For longer storage, you can freeze them for up to 3 months. When you’re ready to enjoy them again, it’s essential to reheat them. A quick warm-up in the microwave or oven will restore their incredible softness and bring back that irresistible gooey texture, making them taste as if they were freshly baked.
🌠 Overnight Baking Option: Fresh Rolls for Breakfast!
For a truly special morning treat without the early wake-up call, these strawberry cinnamon rolls can be prepared the night before. Follow all the instructions up to the point where the assembled rolls are placed in the baking pan for their second rise. Instead of letting them rise, tightly wrap the baking tray with plastic wrap or aluminum foil, ensuring it’s completely sealed to prevent drying. Immediately place the wrapped tray in the refrigerator for up to 12 hours. It’s crucial not to refrigerate them for longer than this period, as the dough might over-proof, leading to a less desirable texture.
When you’re ready to bake and enjoy, remove the chilled rolls from the refrigerator. Let them sit at room temperature for about 10-20 minutes, giving them a chance to warm up slightly and finish their second rise, filling out any small gaps in the pan. Once visibly puffy, proceed to bake them according to the recipe instructions. This overnight method is perfect for stress-free holiday breakfasts or simply to enjoy warm, freshly baked rolls on a lazy weekend morning.

🍩 The Magical No-Knead Dough: Soft, Buttery, and Effortless
The foundation of these incredible strawberry cinnamon rolls is my absolute favorite, tried-and-true no-knead dough. This recipe is a culinary revelation, consistently producing a buttery-soft and wonderfully tender dough that’s surprisingly easy to manage. Its versatility is truly remarkable; I’ve successfully adapted it for a variety of beloved baked goods, from rich Chocolate Tahini Babka to delightful Blueberry Cinnamon Rolls. You can even find a modified version of this very dough gracing my popular Strawberry Donut Recipe!
The beauty of this dough lies in its simplicity. Forget the lengthy, labor-intensive process of traditional kneading; here, you merely combine all the ingredients with a stir, then allow time for it to rise. That’s truly all there is to it! The reward is an exceptionally soft, incredibly fluffy, and rich dough that will amaze your taste buds. No one will ever guess that you achieved such a professional-quality texture without a single minute of strenuous kneading.
Key ingredients like eggs, milk, and butter play a vital role in keeping this no-knead dough profoundly soft and irresistibly fluffy. These rich components contribute to a tender crumb that holds up beautifully. This is also why it’s particularly important to gently reheat any stored rolls before serving. When chilled, the fats in the dough solidify, making the rolls firm. A quick warm-up, however, melts those fats, bringing back their glorious softness and signature gooeyness, making them just as delicious as when they first came out of the oven.
📖 Recipe FAQs
Yes, absolutely! It’s completely normal for this dough to be quite sticky immediately after you’ve mixed all the ingredients together. This is a characteristic feature of a high-hydration, no-knead dough, designed for maximum tenderness. Don’t worry if it doesn’t feel like a traditional bread dough at this initial stage. As it rests and undergoes its first rise, the flour will progressively absorb the liquids, and the dough will become less sticky and more manageable, taking on a more conventional dough-like appearance. However, if your mixture is excessively sticky and appears more like a runny pancake batter rather than a soft dough, you can carefully add a small amount of extra all-purpose flour, one tablespoon at a time, until it reaches a more cohesive, albeit still sticky, consistency.
The most common reason for a dough not rising is inactive yeast. The initial step of “blooming” the yeast in warm water and a little sugar is primarily a test to confirm its viability. If, after 5-10 minutes, your yeast mixture doesn’t develop a noticeable foamy layer on top, it indicates that your yeast is no longer active. In this scenario, it’s best to discard that mixture and start fresh with a new packet or batch of active dry yeast. Ensure your water is warm (around 105-115°F or 40-46°C) but not too hot, as excessive heat can kill the yeast cells, preventing your dough from rising.
A warm, draft-free environment is ideal for dough rising. One effective method I highly recommend is using your oven. Briefly preheat your oven to its absolute lowest temperature setting for just a few minutes, then immediately turn it off. This creates a gently warm space. Place your covered bowl of dough inside the turned-off, warm oven. Be careful not to let the oven become too hot (the internal temperature should not exceed 130°F or 55°C), as extreme heat will kill the yeast cells, preventing your dough from rising. Other suitable warm spots include a sunny windowsill (if not too hot), near a warm appliance, or even in a microwave that has been briefly run with a cup of water to create a steamy, warm interior.
For achieving perfectly round, un-squished cinnamon rolls with beautifully preserved swirls, the absolute best method is to use a piece of unflavored dental floss or strong sewing string. Traditional knives tend to compress the soft dough, distorting the shape of the roll. To use the string method, first mark where you want each cut. Then, slide a length of floss or string underneath the dough log at your desired cut point. Bring the ends of the string up and cross them over the top, pulling firmly but gently. The string will slice cleanly through the dough, leaving you with consistently round and attractive rolls, showcasing that gorgeous strawberry-filled spiral.
Absolutely! Achieving 12 perfectly even pieces is simpler than it seems with this clever trick. Once your dough log is rolled and sealed, gently mark the exact midpoint of the log. Next, mark the midpoint of each of those two halves. Now you have four marked sections. Finally, divide each of those four sections into three equal parts. This systematic approach ensures that you will have 12 precise divisions. Once all your marks are in place, use the aforementioned dental floss or string method to make your cuts, pulling through at each mark for uniformly sized, beautiful rolls every time.
You have flexibility when it comes to the strawberries! For the cooked strawberry filling, frozen strawberries work exceptionally well. Since they’re going to be cooked down into a rich, gooey sauce anyway, the difference in final texture and flavor compared to fresh strawberries is minimal. However, for the chopped strawberry pieces that you sprinkle onto the dough before rolling, I highly recommend using fresh strawberries. Their vibrant color and slightly firmer texture provide a wonderful contrast to the cooked filling. If fresh strawberries are entirely out of season or unavailable, you can either omit the fresh pieces or substitute them with frozen strawberry slices. Crucially, if using frozen slices for this part, do not defrost them before adding them to the cinnamon rolls, as this can introduce excess moisture and alter the dough’s consistency.
🍞 More Related Recipes You’ll Love
- Blueberry Cinnamon Rolls
- Cinnamon Roll Muffins
- Strawberry Donuts
- Cookies and Cream Cinnamon Rolls – No Knead
Did you make this recipe? I would love for you to rate this recipe and hear what you think in the comments below! Share your creation on Instagram and tag @flouringkitchen. Follow me on Pinterestto save and for more recipe ideas.
📖 Recipe

Strawberry Cinnamon Rolls
Mary
Pin Recipe
Shop Ingredients
Equipment
-
9 by 13 inch baking pan (9 by 12 will also work)
Ingredients
Filling
- 3 cups strawberries destemmed and chopped (fresh or frozen), 18oz
- 1 cup granulated sugar
- ⅛ teaspoon sea salt
- 1 lemon juiced and zested
- 3 tablespoons cornstarch
- ¼ cup butter cold
Dough
- ½ cup warm water
- 1 teaspoon granulated sugar
- 2 ¼ teaspoons active dry yeast 7g or 1 packet
- 5 cups all purpose flour 600g
- ⅓ cup granulated sugar
- ⅛ teaspoon sea salt
- ¾ cup butter very soft
- 2 large eggs
- 1 tablespoon pure vanilla extract
- ¾ cup warm milk
- 1 cup strawberries fresh, chopped, 9oz
Strawberry Cream Cheese Glaze
- 4 oz cream cheese softened
- 2 cups powdered sugar sifted
- ¼ cup strawberry filling reserved from filling the rolls
Shop Ingredients on Jupiter
Instructions
Filling
-
Combine de-stemmed strawberries (fresh or frozen), sugar, cornstarch, lemon juice, salt, and grated lemon zest in a medium saucepan. Heat on medium heat, stirring to release the juices. Let come to a simmer. Stir frequently – cook until thickened.3 cups strawberries, 1 cup granulated sugar, ⅛ teaspoon sea salt, 1 lemon, 3 tablespoons cornstarch
-
Once the strawberries become soft (5 minutes of simmering), take it off the heat. Use a blender or a potato masher to break up the strawberry pieces. Add butter and whisk to melt and combine. Refrigerate until ready to use.¼ cup butter
Dough
-
Dissolve yeast and sugar in warm water. Let sit for 10 minutes until it gets foamy. If it doesn’t foam, try a different batch of yeast. Work on the rest of the dough while it foams.½ cup warm water, 1 teaspoon granulated sugar, 2 ¼ teaspoons active dry yeast
-
In a large bowl combine flour, sugar, salt, and stir. Make a well in the middle and add the butter, eggs, vanilla, milk, and yeast mixture. Whisk to combine the wet ingredients, then switch to a large spoon to stir the dough together.5 cups all purpose flour, ⅓ cup granulated sugar, ⅛ teaspoon sea salt, ¾ cup butter, 2 large eggs, 1 tablespoon pure vanilla extract, ¾ cup warm milk
-
Use your hands to mix until a cohesive dough forms. It will be sticky and won’t be completely smooth. It will come together after it rises. Cover the bowl with a dish cloth and place in a warm place (see notes) to rise until doubled, about 40 minutes. Butter a 9”x12” baking pan while it rises.
-
Punch down the dough, and flatten and fold the dough a few times to make sure everything is mixed well. It will become smooth and supple. Transfer onto a floured surface. Roll the dough into a large rectangle, about 18” by 24”.
-
Set aside a quarter cup of the filling for the frosting. Spread the strawberry filling on top of the dough, leaving a 1” border on all the edges. Sprinkle the reserved chopped fresh strawberries on top.1 cup strawberries
-
Beginning at the long edge, carefully roll into a log. Mark the roll into 12 equal pieces. I do this by marking it in half, each half in half again, and each of the remaining pieces into thirds.
-
Using a piece of string or unflavored floss, wrap the string around the log and pull to cut. Using a string to cut instead of a knife prevents the roll from getting squished – they hold their shape better. Scoop up each cut roll with your hands and place on the prepared baking pan. Scoop up any filling that escapes back on top of the roll.
-
Let rise until doubled in size in a warm place, about 15 minutes. Preheat oven to 355°F (180°F). Bake the strawberry cream cheese rolls for 25-30 minutes or until the rolls are golden brown on top. Work on the glaze while it bakes.
Strawberry Cream Cheese Glaze
-
Combine the softened cream cheese and powdered sugar in a large bowl. Beat until creamy and smooth. Add the reserved strawberry sauce into the glaze and beat well.2 cups powdered sugar, 4 oz cream cheese, ¼ cup strawberry filling
-
Let the baked rolls cool for 10 minutes inside the pan. Spread all of the glaze over the rolls, letting it seep in through all of the crevices. Best served warm!
Video
Notes
Storage: To keep your strawberry cinnamon rolls tasting their best, store any leftovers in an airtight container or a heavy-duty freezer bag. They will remain fresh and delicious in the refrigerator for up to 4 days. For longer storage, you can freeze them for up to 3 months. When you’re ready to enjoy them again, it’s essential to reheat them. A quick warm-up in the microwave or oven will restore their incredible softness and bring back that irresistible gooey texture, making them taste as if they were freshly baked.
Overnight strawberry cinnamon rolls:
For a truly special morning treat without the early wake-up call, these strawberry cinnamon rolls can be prepared the night before. Follow all the instructions up to the point where the assembled rolls are placed in the baking pan for their second rise. Instead of letting them rise, tightly wrap the baking tray with plastic wrap or aluminum foil, ensuring it’s completely sealed to prevent drying. Immediately place the wrapped tray in the refrigerator for up to 12 hours. It’s crucial not to refrigerate them for longer than this period, as the dough might over-proof, leading to a less desirable texture.
When you’re ready to bake and enjoy, remove the chilled rolls from the refrigerator. Let them sit at room temperature for about 10-20 minutes, giving them a chance to warm up slightly and finish their second rise, filling out any small gaps in the pan. Once visibly puffy, proceed to bake them according to the recipe instructions. This overnight method is perfect for stress-free holiday breakfasts or simply to enjoy warm, freshly baked rolls on a lazy weekend morning.
Tips for success:
