Jump to Recipe
Ultimate Giant Valentine’s Heart Cookie: Easy, Gooey & Cream Cheese Frosted
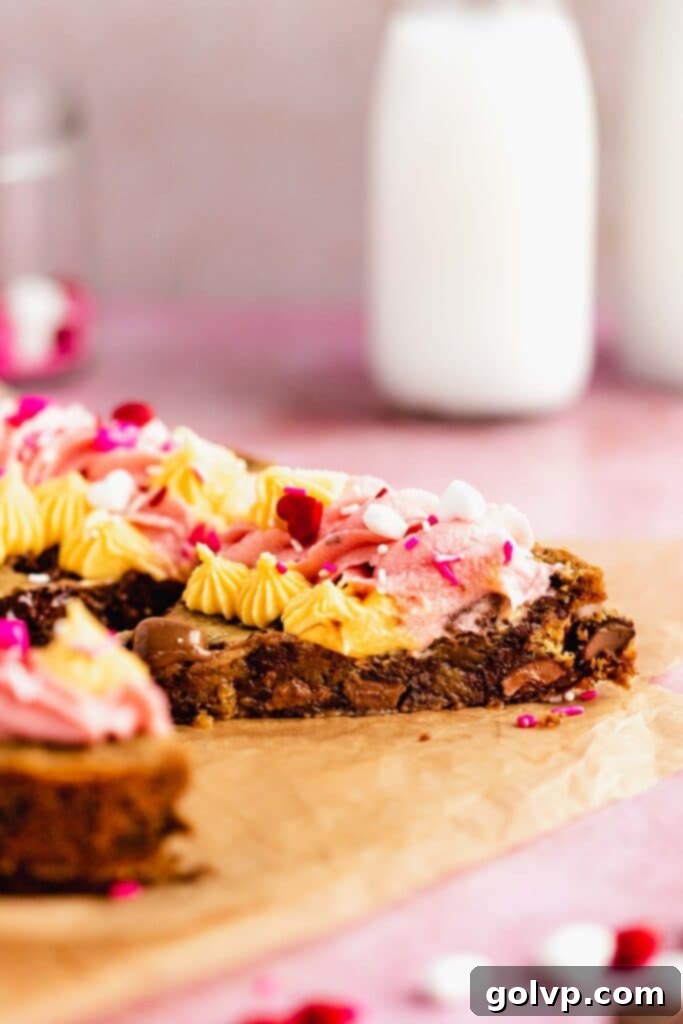
Prepare to fall in love with this spectacular **Giant Valentine’s Heart Cookie**! It’s the perfect showstopper for Valentine’s Day, anniversaries, or any celebration where a little extra love is in order. Imagine a colossal, soft, and incredibly gooey chocolate chip cookie, baked into a charming heart shape, then generously topped with a rich, fluffy, and perfectly balanced whipped cream cheese frosting. This isn’t just a cookie; it’s a cookie cake experience designed for sharing and pure indulgence.
What makes this recipe truly special is its incredible ease. The cookie dough comes together effortlessly in just one bowl, requiring nothing more than a simple handheld whisk – no electric mixer needed for the cookie itself! We use melted butter, eliminating the need to wait for butter to soften, and there’s absolutely no chill time required. This means you can go from craving to a warm, freshly baked cookie in record time. The light and airy whipped cream cheese frosting provides a delightful counterpoint to the rich, chocolatey cookie, creating a harmonious balance of flavors and textures that will have everyone reaching for a second slice.

Purchasing the items in this post supports this blog, at no additional cost to you. As an Affiliate Product marketer and Amazon Associate, I earn from qualifying purchases. Your support helps keep delicious recipes coming!
Why You Will Absolutely LOVE This Giant Heart Cookie Recipe:
This isn’t just another cookie recipe; it’s a celebration! Here are compelling reasons why this Giant Valentine’s Heart Cookie will become your new favorite:
- Giant & Impressive: Forget baking individual cookies for a crowd. This recipe delivers a magnificent cookie cake that’s not only easier to prepare but also makes a stunning centerpiece for any gathering. It boasts beautifully crisp edges that give way to an irresistibly soft and gooey center, offering the best of both cookie worlds. Slice it up and serve it like a cake – perfect for sharing the love!
- Perfectly Gooey Texture: The hallmark of a truly great cookie is its texture, and this recipe absolutely nails it. The middle of this heart-shaped delight remains incredibly soft and wonderfully gooey, without ever being undercooked. This ideal texture ensures it slices cleanly and, even better, stays deliciously soft for days, allowing you to enjoy leftovers (if there are any!) just as much as the first slice.
- Dreamy Whipped Cream Cheese Frosting: Elevate your cookie game with our signature, super fluffy whipped cream cheese frosting. It’s light, airy, and provides a delightful tangy sweetness that perfectly complements the rich chocolate cookie. The vibrant frosting border adds a festive touch, making it ideal for a Valentine’s Day party or any special occasion. It’s truly the icing on the cake… or, in this case, the cookie!
- Effortless to Make: Simplicity is key! Our cookie dough is a dream to whip up in just one bowl, saving you on cleanup. There’s zero chill time required, thanks to the use of melted butter, meaning no tedious waiting for butter to soften or dough to firm up. You don’t even need an electric mixer for the cookie dough – a simple whisk does the job perfectly. While an electric mixer is recommended for the ultra-fluffy frosting, you can always opt for store-bought frosting for an even quicker shortcut. This recipe is designed for maximum deliciousness with minimal fuss.
Why Giant Cookie Cakes are the Ultimate Celebration Dessert
There’s a special magic about a giant cookie cake that individual cookies just can’t quite capture. For a Valentine’s Day party, an anniversary, or even a birthday, a beautifully frosted giant heart cookie cake instantly elevates the festivity. The sheer size makes it an impressive centerpiece, easily serving multiple guests without the fuss of baking dozens of small treats.
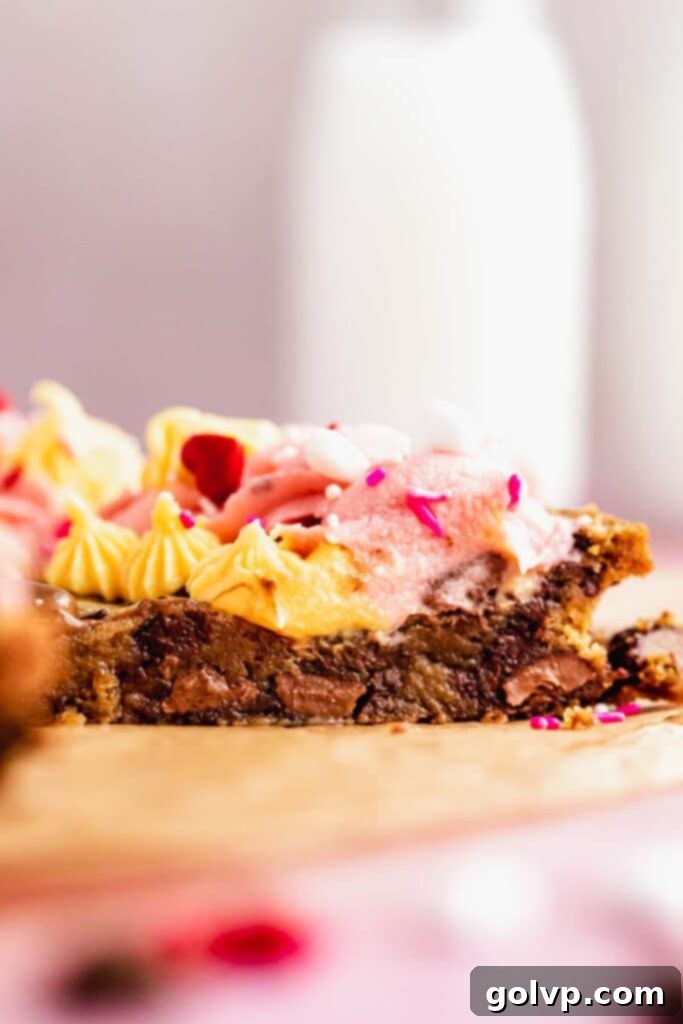
My favorite aspect, however, is the superior texture. While the edges bake up perfectly crisp and golden, the generous thickness of a giant cookie ensures its middle remains wonderfully soft, tender, and delightfully gooey. This textural contrast is what makes each slice so satisfying – a tender bite from the center complemented by a slightly chewy edge. It truly offers the best of both worlds, making it a crowd-pleaser every time.
Achieving the Perfect Soft and Gooey Center
The secret to this giant Valentine’s heart cookie’s irresistible soft and gooey middle, which remarkably stays soft for days (when served at room temperature), lies in a slight underbake. You want the cookie to emerge from the oven with golden-brown edges, but the very center should still appear slightly shiny and a tad soft to the touch. Don’t worry, it’s not raw! This subtle underbaking allows residual heat to continue cooking the cookie as it cools outside the oven, resulting in that coveted, perfectly sliceable, and wonderfully gooey texture. Patience during the cooling process is key to achieving this decadent outcome.
Mastering a Perfectly Pipeable Cream Cheese Frosting (No Gloopy Mess!)
Cream cheese frosting can be notoriously tricky, often turning out too soft, runny, or “gloopy,” which makes piping a beautiful design nearly impossible. But fear not! With these expert tips, you’ll achieve a stable, fluffy, and perfectly pipeable cream cheese frosting every time, ideal for decorating your stunning heart cookie.
- Choosing the Right Cream Cheese: This is perhaps the most critical factor. Always opt for **full-fat, brick-style cream cheese**. Avoid using low-fat or whipped cream cheese varieties, as they contain higher water content and will inevitably lead to a runny, gloopy frosting. For optimal texture, allow the cream cheese to soften at room temperature for just about 10-15 minutes. It should be slightly pliable but still cool to the touch, not overly warm or mushy.
- Butter Temperature is Key: Just like with the cream cheese, the butter’s temperature is crucial. It needs to be genuinely softened, but not melted or greasy. A good test is to gently press your finger into the butter; it should leave a slight indent without your finger sinking in or leaving a greasy residue. If your butter is too soft (e.g., melted or very warm), the frosting will likely turn out too soft and difficult to pipe.
- Heavy Whipping Cream for Fluffiness and Stability: Instead of milk, I highly recommend using heavy whipping cream (at least 32% milk fat). Cream adds richness and helps to loosen the frosting to the perfect consistency without making it watery or gloopy. Add it gradually, one tablespoon at a time, beating just enough (about 5-10 seconds after each addition) until the frosting reaches a light, fluffy, and spreadable texture. Be careful not to overbeat, as this can sometimes make the frosting a little grainy, though it will still taste delicious!
How to Rescue a Gloopy Cream Cheese Frosting
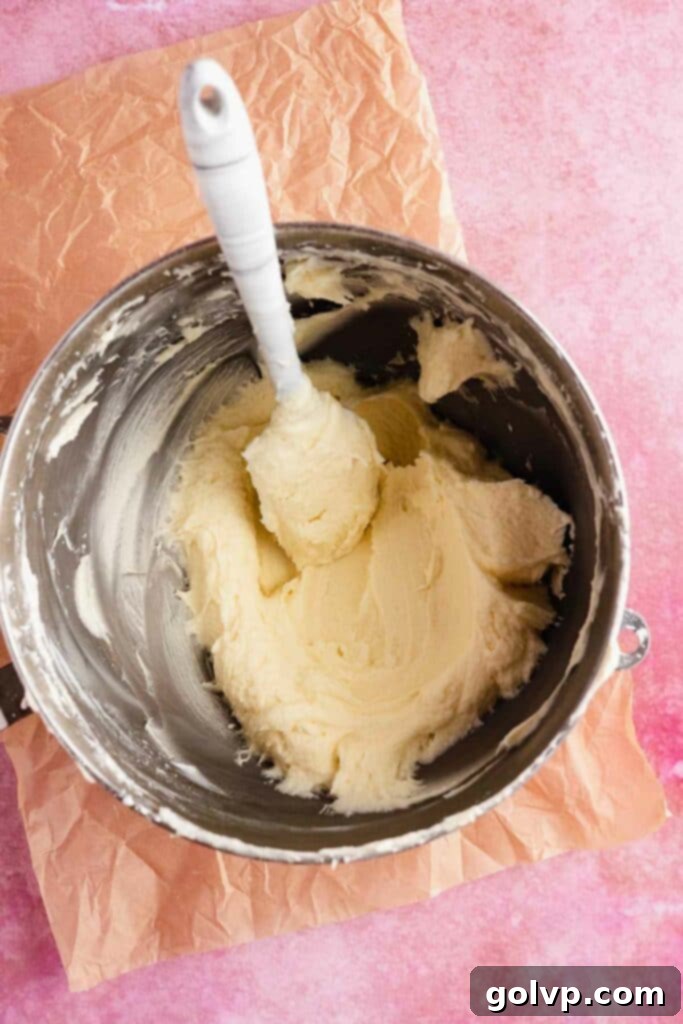
Even with the best intentions, sometimes frosting can go awry. If your cream cheese frosting ends up too runny or “gloopy” to pipe, don’t despair! It’s usually an easy fix. Simply pop the entire bowl of frosting into the refrigerator for 10-20 minutes. The chilling process will help firm up the butter and cream cheese. Once chilled, take it out and beat it again for a minute. If it’s still too soft, gradually add powdered sugar, a quarter cup at a time, beating well after each addition, until it reaches your desired thick, pipeable consistency. This method effectively re-emulsifies the frosting and firms it up.
Essential Ingredients for Your Perfect Heart Cookie
You’ll find the complete steps and detailed ingredient list in the recipe card below. However, I highly recommend reading through these tips for each key ingredient to ensure your baking success and achieve the best possible results!
- Butter: For both the cookie and the frosting, the quality of your butter matters. Use a good quality unsalted butter for the richest flavor. If you only have salted butter on hand, simply omit the additional salt listed in the recipe. Ensure butter is melted for the cookie dough and perfectly softened (not greasy) for the frosting.
- Brown Sugar: This ingredient is crucial for the cookie’s signature flavor and chewy texture. I specifically recommend using old-fashioned light brown sugar (packed) as it contributes a deep, molasses-rich sweetness and helps create that wonderful soft, gooey middle.
- Chocolate Chips: A mix of chocolates adds depth! I love combining mini semisweet chocolate chips for their classic flavor and even distribution with festive milk chocolate hearts. I often find these heart-shaped chocolates in the baking aisle of my grocery store, right alongside other chocolate chips, especially around Valentine’s Day. If you can’t find heart shapes, chopped milk chocolate or regular milk chocolate chips will work just as wonderfully for that delightful melty chocolate experience.
- All-Purpose Flour: Accuracy in measuring flour is paramount for the right cookie texture. For the most consistent and best results, I strongly recommend weighing your flour using a kitchen scale. If you don’t have a scale, measure properly by first stirring the flour in its bag to aerate it, then gently spooning it into your measuring cup. Level off any excess with the flat edge of a knife, being careful not to pack the flour down into the cup.
- Cream Cheese: As highlighted earlier, always use **full-fat, brick-style cream cheese**. This type of cream cheese has the right fat content and firmness to create a stable and pipeable frosting. Anything else, like whipped or spreadable cream cheese, will result in a frosting that is too watery and gloopy, making it impossible to work with for decorating.
- Heavy Whipping Cream: To achieve that light, fluffy, and utterly delightful frosting texture, use heavy whipping cream with at least 32% milk fat. This high fat content allows the frosting to whip up beautifully, adding airiness and helping to prevent it from becoming gloopy or dense. It’s key for that perfect piped swirl!
Step-by-Step Guide to Your Delicious Heart Cookie
Follow these detailed steps carefully to create your magnificent Giant Valentine’s Heart Cookie. Remember, paying attention to ingredient temperatures and mixing techniques will lead to the best results!
Full steps and ingredients are in the recipe card below. But read through these for all the tips you will need for success!
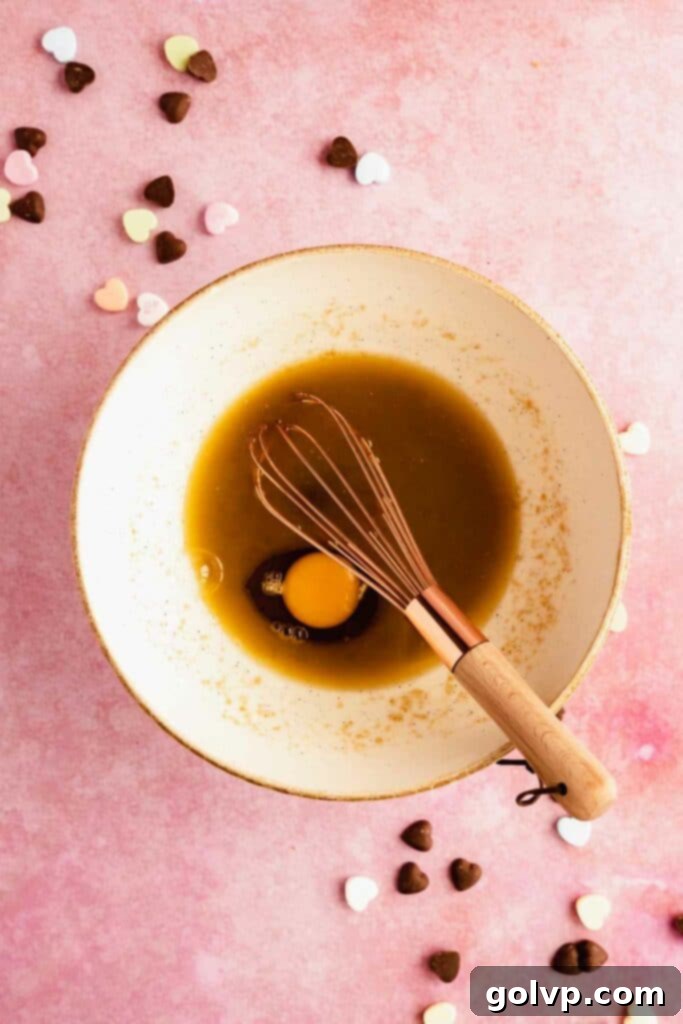
Step 1 – Prepare Pan & Combine Butter and Sugar: Begin by preheating your oven to 180°C (350°F). Lightly grease a 9-inch heart-shaped springform pan with a cold pat of butter to ensure easy release. In a large mixing bowl, combine the melted butter, brown sugar, granulated sugar, and salt. Whisk these ingredients together by hand until they are thoroughly combined and smooth, ensuring no lumps of sugar remain. This forms the foundational wet mixture for your cookie dough.
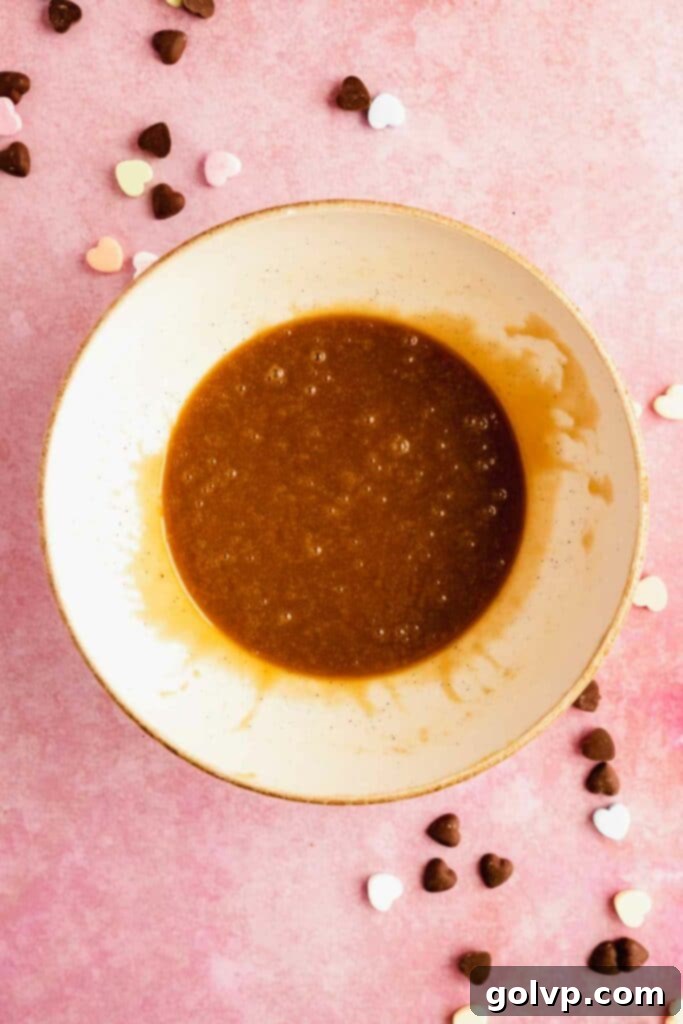
Step 2 – Add Wet Ingredients: Into the same bowl, add the large egg and pure vanilla extract. Continue to whisk vigorously by hand for approximately 30 seconds. You’ll notice the mixture begin to thicken slightly and lighten in color, indicating that the egg and sugar are properly emulsifying, which contributes to the cookie’s chewy texture.
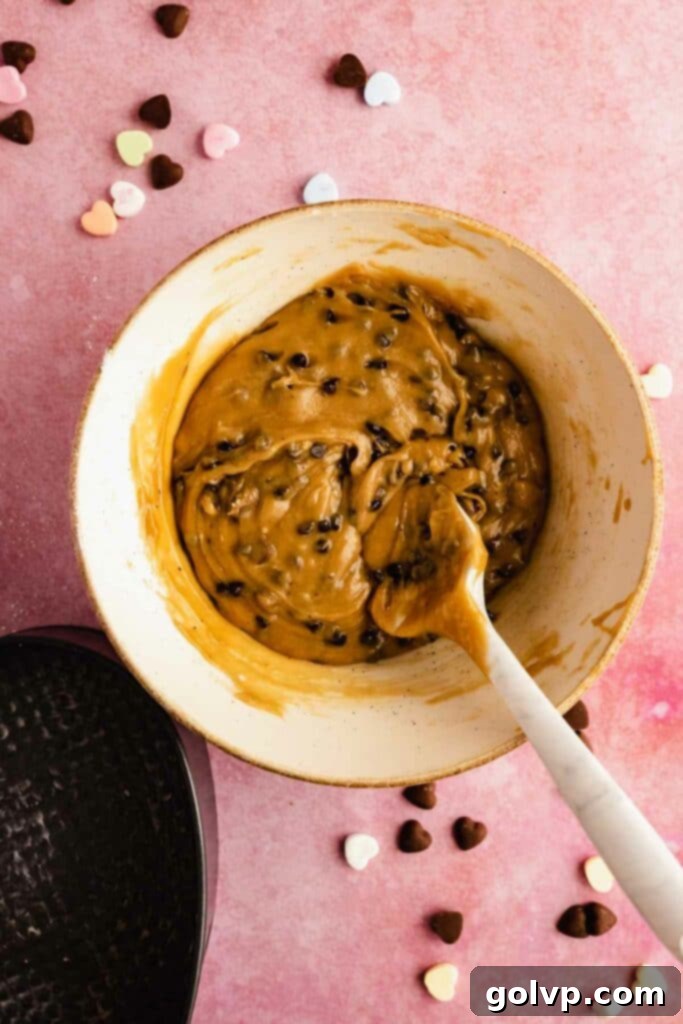
Step 3 – Incorporate Dry Ingredients: Now, it’s time for the dry ingredients. Sift the all-purpose flour and baking soda directly into the wet mixture in the bowl. Sifting prevents clumps and ensures even distribution. Add your desired chocolate chips, reserving a few tablespoons aside for decorating the top later. Using a spatula or wooden spoon, gently fold the dry ingredients into the wet until just combined. Be careful not to overmix, as this can lead to a tough cookie. Stop folding as soon as no more streaks of flour are visible.
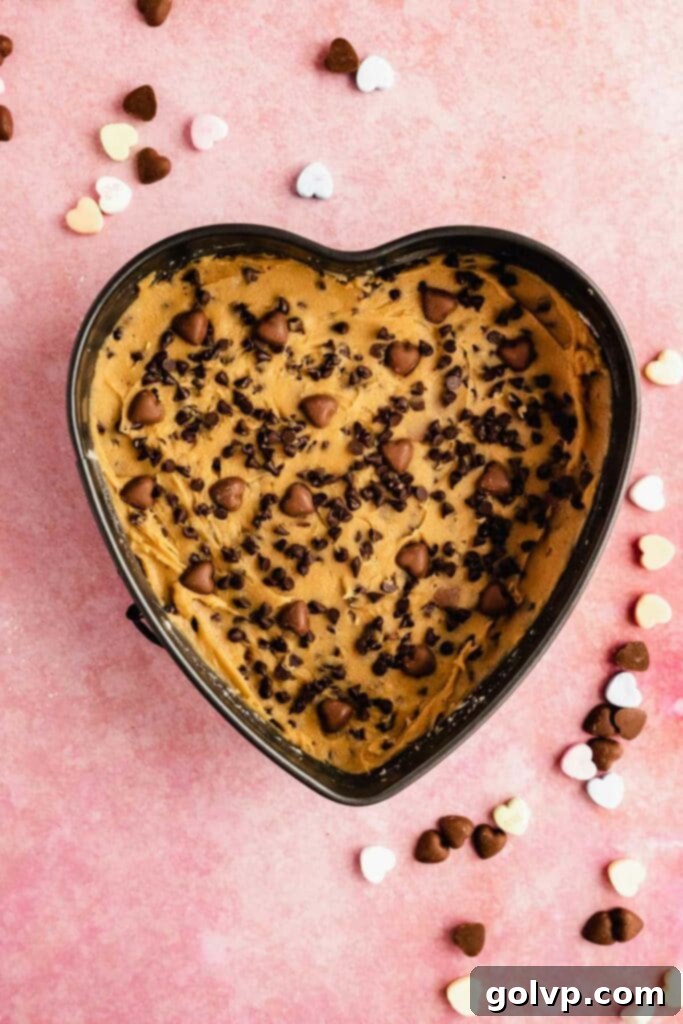
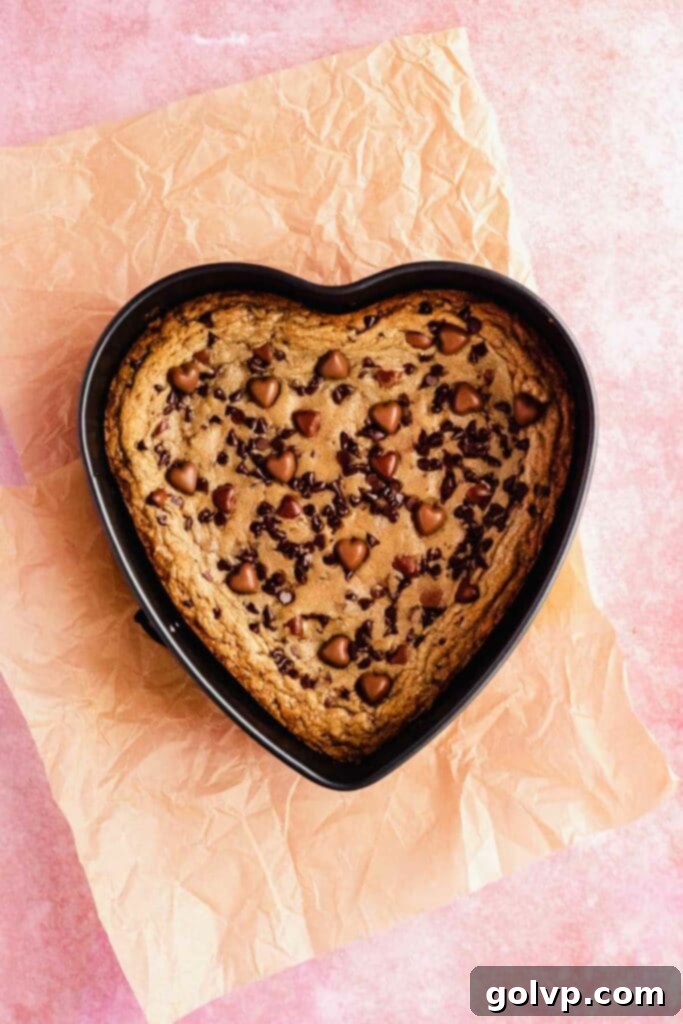
Step 4 – Fill and Prepare for Baking: Carefully spread the prepared cookie dough evenly into the greased heart-shaped springform pan. Use the back of a spoon or a small offset spatula to smooth the top for an even bake. Sprinkle the reserved chocolate chips over the surface of the dough for a beautiful presentation. As a precaution against any potential leakage from the springform pan, place the heart pan into a larger baking pan or on a foil-lined baking sheet before transferring it to the oven.
Step 5 – Bake to Perfection: Bake your giant heart cookie for 22-25 minutes. After about 15 minutes of baking, loosely tent the pan with aluminum foil. This prevents the edges from browning too quickly while allowing the center to continue cooking. The cookie is ready when its edges are golden brown, but the middle still appears slightly underbaked and shiny. This underbaked center is crucial for achieving that desired gooey texture as the cookie continues to set outside the oven. While your cookie cools completely on a wire rack, you can begin preparing the cream cheese frosting.
Step 6 – Craft the Cream Cheese Frosting: In a separate large bowl, using an electric mixer, beat together the softened unsalted butter, powdered sugar, and a pinch of salt until the mixture is incredibly light and fluffy. This will take several minutes. Be sure to scrape down the sides of the bowl a few times during this process to ensure everything is thoroughly combined. Add the pure vanilla extract and beat briefly. Then, add the slightly softened cream cheese, one small piece at a time, beating well after each addition until smooth. Scrape down the bowl once more and beat again to ensure a homogeneous, lump-free frosting.
To achieve the perfect fluffy consistency, add the heavy whipping cream one tablespoon at a time, beating well in between each addition until the frosting loosens slightly and becomes significantly lighter and airier. Once the desired consistency is reached, use a spatula to gently fold the frosting by hand. This step helps to beat out any large air bubbles, resulting in a super smooth and pipeable frosting.
Step 7 – Color and Prepare Piping Bags: Divide the prepared cream cheese frosting evenly into two separate bowls. Add a few drops of pink gel food coloring to one bowl and yellow gel food coloring to the other. Mix each bowl thoroughly with a spatula until the colors are vibrant and evenly distributed. Transfer each colored frosting into a separate piping bag fitted with your chosen piping tips. I used a Wilton 1M tip for the pink frosting (perfect for swirls) and a Wilton 4B tip for the yellow frosting (great for dollops or stars). If you don’t have piping tips, large Ziploc bags with a corner snipped off will also work in a pinch.
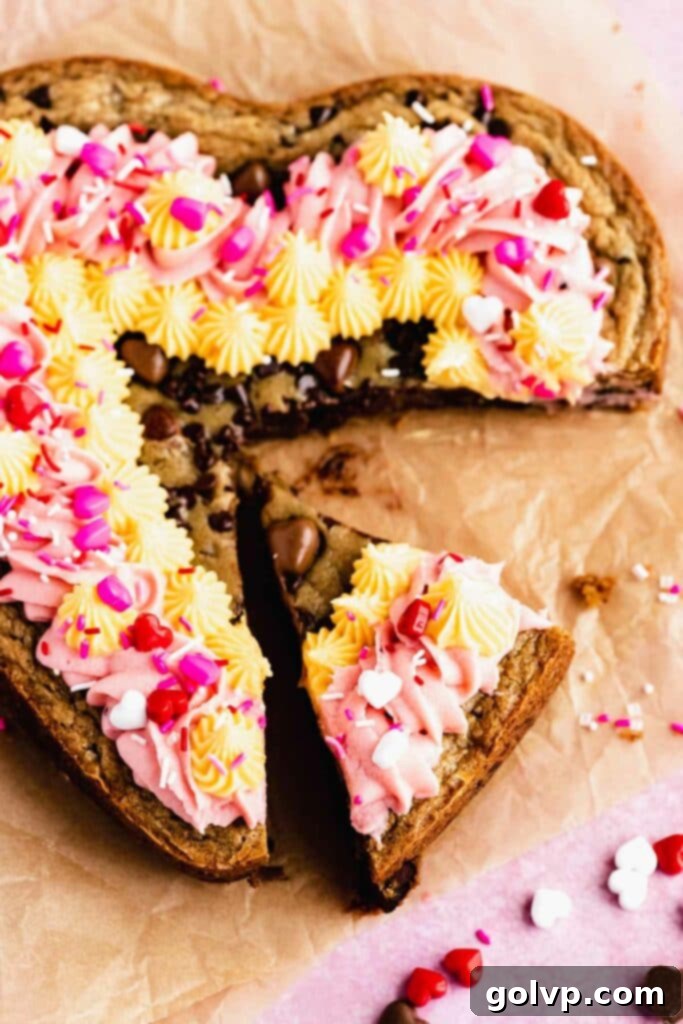
Step 8 – Decorate and Serve: Once the giant heart cookie has cooled completely, it’s time for the fun part! Using the piping bag with pink frosting, pipe a beautiful swirl border all along the outer edge of the cookie. Next, pipe a second border using dollops of yellow frosting just inside the pink border. For an extra decorative touch, add additional dollops of yellow frosting on top of the pink border. Finish by generously scattering sprinkles and optional candy hearts over the entire frosted cookie. Carefully slice your magnificent creation and serve immediately to enjoy its soft, gooey perfection!
Frequently Asked Questions (FAQ)
Don’t fret if your frosting turns out a bit too soft! The best way to firm up a gloopy cream cheese frosting is to place it in the refrigerator for about 10 to 20 minutes. This chilling period helps solidify the butter and cream cheese. Once it’s had a chance to chill, take it out and give it another good beat with an electric mixer. If it’s still not quite thick enough to pipe, gradually add powdered sugar, about a quarter cup at a time, beating well after each addition until you reach your desired pipeable consistency. This method works wonders!
I often find festive heart-shaped milk chocolate chips, like Hershey’s, in the baking aisle of my grocery store, typically located right next to the regular chocolate chip varieties, especially during the Valentine’s Day season. If you’re unable to find them, don’t worry! Small milk chocolate hearts or even chopped milk chocolate pieces will work beautifully as a substitute, providing the same delicious chocolatey goodness and a charming look. Regular milk chocolate chips are also a perfect alternative.
Absolutely! If you prefer American buttercream or simply don’t have cream cheese on hand, you can easily adapt the frosting recipe. To swap it out, simply replace the cream cheese with an equal amount of softened unsalted butter. Follow the rest of the frosting instructions, beating the butter with the powdered sugar, vanilla, and heavy cream until you achieve a light, fluffy American buttercream that’s perfect for piping and decorating your giant cookie cake. It will still be a delicious and festive option!
Discover More Sweet Delights!
If you loved this Giant Valentine’s Heart Cookie, be sure to explore some of our other delightful and easy-to-make recipes perfect for any occasion:
- Heart Shaped Chocolate Chip Cookies
- Strawberry Cinnamon Rolls
- Fresh Strawberry and White Chocolate Cupcakes
Happy baking, and enjoy creating these beautiful and delicious treats!
Did you make this recipe? I would love for you to rate this recipe and hear what you think in the comments below! Share your beautiful creation on Instagram and tag @flouringkitchen. Follow me on Pinterestto save and for more irresistible recipe ideas.
📖 Recipe

Giant Valentine’s Heart Cookie Cake with Cream Cheese Frosting
Mary
Pin Recipe
Shop Ingredients
Equipment
-
1 9-inch heart shaped spring-form pan
-
Large mixing bowls
-
Handheld whisk
-
Electric mixer (handheld or stand mixer for frosting)
-
Piping bags and tips (e.g., Wilton 1M, 4B)
-
Rubber spatula
Ingredients
Giant Heart Cookie
- 1 cup unsalted butter melted
- ¾ cup brown sugar packed
- ½ cup granulated sugar
- ½ teaspoon sea salt
- 1 tablespoon pure vanilla extract
- 1 large egg room temperature is best
- 1 ½ cup all purpose flour (180g, weighed for accuracy)
- ½ teaspoon baking soda
- 1 cup mini semisweet chocolate chips
- ½ cup milk chocolate chips or heart-shaped milk chocolates
Fluffy Cream Cheese Frosting
- ¾ cup unsalted butter softened to room temperature
- 2 ½ cups powdered sugar
- 1 teaspoon pure vanilla extract
- 3 oz cream cheese full-fat, brick-style, softened for 10 minutes
- 2-4 tablespoons heavy whipping cream at least 32% milk fat
- Pink gel food colour
- Yellow gel food colour
- 2 tablespoons sprinkles for decoration
- 2 tablespoons candy hearts (optional, for extra festivity)
Shop Ingredients on Jupiter
Instructions
Giant Heart Cookie
-
Preheat your oven to 180°C (350°F). Prepare your 9-inch heart-shaped springform pan by greasing it thoroughly with a cold bit of butter to prevent sticking.
-
In a large mixing bowl, combine the melted unsalted butter, ¾ cup packed brown sugar, ½ cup granulated sugar, and ½ teaspoon sea salt. Whisk these ingredients vigorously by hand until they are fully incorporated and smooth, forming the base of your rich cookie dough.1 cup unsalted butter, ¾ cup brown sugar, ½ cup granulated sugar, ½ teaspoon sea salt
-
To the butter-sugar mixture, add 1 large room temperature egg and 1 tablespoon pure vanilla extract. Continue to whisk by hand for about 30 seconds. This step is important as it helps to emulsify the ingredients, thickening the mixture and lightening its color, which contributes to the cookie’s final texture.1 tablespoon pure vanilla extract, 1 large egg
-
Sift 1 ½ cups all-purpose flour and ½ teaspoon baking soda directly into the same bowl containing the wet ingredients. Add 1 cup mini semisweet chocolate chips and ½ cup milk chocolate chips (or hearts), but remember to reserve a few tablespoons of chocolate chips for sprinkling on top of the cookie later. Gently fold the ingredients together with a spatula until no dry streaks of flour remain. Be careful not to overmix the dough.1 ½ cup all purpose flour, ½ teaspoon baking soda, 1 cup mini semisweet chocolate chips, ½ cup milk chocolate chips
-
Spread the cookie dough evenly into the greased heart-shaped springform pan, ensuring it fills the pan to the edges. Smooth the top surface of the dough with a spatula. Sprinkle the reserved chocolate chips over the top for a decorative finish. To prevent any potential mess in your oven, place the heart pan inside a larger baking pan before baking, just in case the springform pan leaks.
-
Bake for 22-25 minutes. After approximately 15 minutes of baking, lightly tent the pan with aluminum foil. This prevents the top and edges from browning too quickly. The cookie is perfectly baked when its edges are golden brown, but the very middle still appears slightly shiny and underbaked. This ensures a wonderfully gooey center. Remove from the oven and allow it to cool completely on a wire rack before frosting. Begin preparing your cream cheese frosting while the cookie cools.
Fluffy Cream Cheese Frosting
-
In a large bowl, using an electric mixer (stand or handheld), beat together ¾ cup softened unsalted butter and 2 ½ cups powdered sugar until the mixture is very light and fluffy. This should take several minutes. Be sure to stop and scrape down the sides and bottom of the bowl a few times during mixing to ensure all ingredients are fully incorporated and smooth.¾ cup unsalted butter, 2 ½ cups powdered sugar
-
Add 1 teaspoon pure vanilla extract to the butter mixture and beat until just combined. Next, add 3 oz of full-fat cream cheese, softened for about 10 minutes, one small piece at a time. Beat well after each addition, ensuring the cream cheese is fully incorporated and the frosting remains smooth. Scrape down the bowl thoroughly once more and beat again to eliminate any lumps.1 teaspoon pure vanilla extract, 3 oz cream cheese
-
Gradually add 2-4 tablespoons of heavy whipping cream, one tablespoon at a time, beating well after each addition to achieve your desired consistency. The frosting will transform, becoming noticeably lighter and much fluffier. Once it reaches the perfect spreadable and pipeable texture, use a rubber spatula to gently fold the frosting by hand. This final step helps to remove any larger air bubbles, resulting in a beautifully smooth finish for your decorations.2-4 tablespoons heavy whipping cream
-
Divide the finished cream cheese frosting evenly into two separate bowls. Add a few drops of pink gel food color to one bowl and yellow gel food color to the second. Mix each color thoroughly with a spatula until the shades are vibrant and consistent. Transfer the pink frosting into one piping bag fitted with a Wilton 1M piping tip (or similar star tip) and the yellow frosting into another piping bag fitted with a Wilton 4B tip (or similar round/star tip). Alternatively, use large Ziploc bags with a corner snipped off if you don’t have piping bags/tips.Pink gel food colour, Yellow gel food colour
-
Once your giant heart cookie is completely cooled, it’s time to decorate! Using the pink frosting, pipe a beautiful swirl border all along the outer edge of the cookie. Next, pipe another border using delightful dollops of yellow frosting just inside the pink border. For an extra touch of whimsy, pipe additional dollops of yellow frosting on top of the pink border. Finish by sprinkling 2 tablespoons of festive sprinkles and 2 tablespoons of optional candy hearts over the entire frosted cookie. Slice, serve, and enjoy your stunning creation!2 tablespoons sprinkles, 2 tablespoons candy hearts
Notes
Storage: If you have any delicious leftovers, store the frosted cookie in an airtight container or a dedicated cake carrier in the refrigerator. Before serving again, allow the cookie to come to room temperature for at least 30 minutes. This will soften both the cookie and the frosting, bringing back that delightful, tender texture.
Make-Ahead Tips: This recipe is wonderful for preparing in advance! You can make the cookie dough and spread it into your heart-shaped baking pan. Cover the pan tightly with plastic wrap and chill the cookie dough in the refrigerator for up to 48 hours. When you’re ready to bake, simply take it out of the fridge and proceed with baking as directed on the day you plan to serve. This makes party planning a breeze!
