Irresistible Slice and Bake Chocolate Peppermint Sugar Cookies: Your Ultimate Holiday Treat
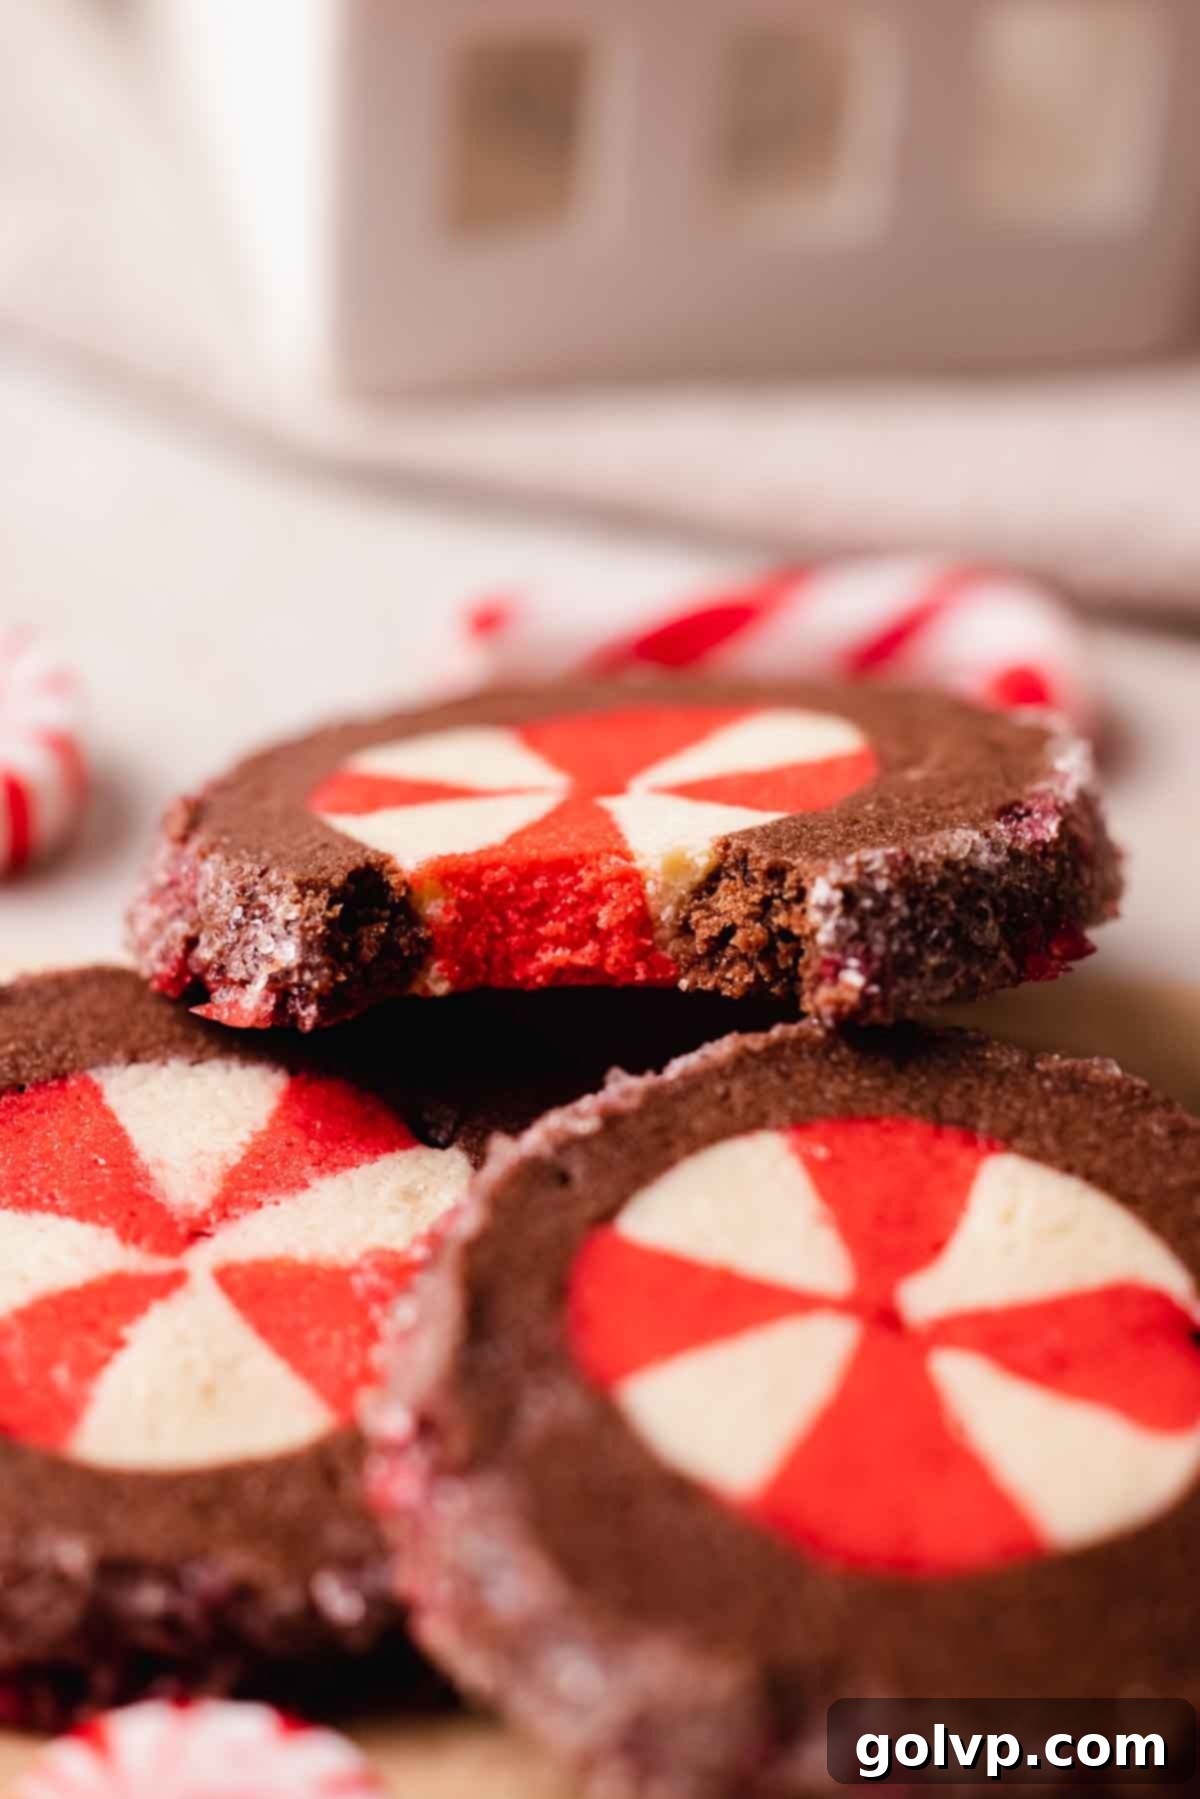
Prepare to fall in love with these incredible slice and bake peppermint sugar cookies! Combining the classic cheer of peppermint with a rich chocolate base, these cookies offer crisp, buttery edges and wonderfully soft, chewy centers. What truly sets them apart is the charming and easy-to-create peppermint candy design nestled in the middle of each cookie. Inspired by nostalgic holiday favorites like Pillsbury’s iconic seasonal cookies, this recipe brings a touch of magic to your baking. The refreshing burst of peppermint perfectly complements the deep chocolate flavor, creating a balanced and utterly delicious treat that isn’t overpoweringly minty. Best of all, their slice-and-bake nature makes them incredibly convenient for busy holiday seasons – prepare the dough ahead of time and bake fresh cookies whenever a craving strikes!
These stunning cookies are more than just a dessert; they’re a showstopper, perfect for cookie exchanges, an impressive addition to your Christmas cookie boxes, or simply a delightful indulgence for your family. If you’re looking for more versatile holiday baking, you’ll also adore these Christmas thumbprint cookies, a single batch of which can yield over seven different delightful flavors!

❄️ Why You’ll Adore This Recipe for Peppermint Sugar Cookies
These chocolate peppermint sugar cookies are destined to become a cherished part of your holiday baking tradition. Here’s why this recipe stands out:
- Stunning Peppermint Pinwheel Design: Each cookie is a little work of art! The vibrant red and white peppermint pinwheel design in the center is incredibly eye-catching and surprisingly straightforward to achieve. It adds a festive touch that makes these cookies perfect for gifting or impressing guests. No need for elaborate frosting; the design speaks for itself!
- Perfectly Balanced Chocolate Peppermint Flavor: Forget the overpowering, toothpaste-like mint; these sugar cookies strike the ideal balance. They boast a refreshing and cooling peppermint sensation that beautifully complements the rich, deep chocolate flavor of the cookie itself. It’s a harmonious blend that’s both invigorating and comforting, making every bite a delight.
- Effortless Slice and Bake Convenience: This is a game-changer, especially during the busy holiday season! The “slice and bake” method means you prepare the dough once, form it into a log, chill it, and then simply slice off as many cookies as you want to bake at a time. This guarantees perfectly round cookies every time and eliminates the need for messy rolling or cookie cutters, saving you valuable time and effort.
- Ideal for Make-Ahead Baking: Planning is key for holiday entertaining, and these cookies excel in that department. Since the dough log stores beautifully in the freezer for up to two months, you can have a batch ready to bake at a moment’s notice. This makes them the ultimate make-ahead Christmas cookie, allowing you to enjoy warm, freshly baked treats without the last-minute stress.
📝 Key Ingredients for Perfect Peppermint Cookies
For flawless results, pay close attention to these key ingredients and tips!
Full step-by-step instructions and precise measurements are detailed in the recipe card below.
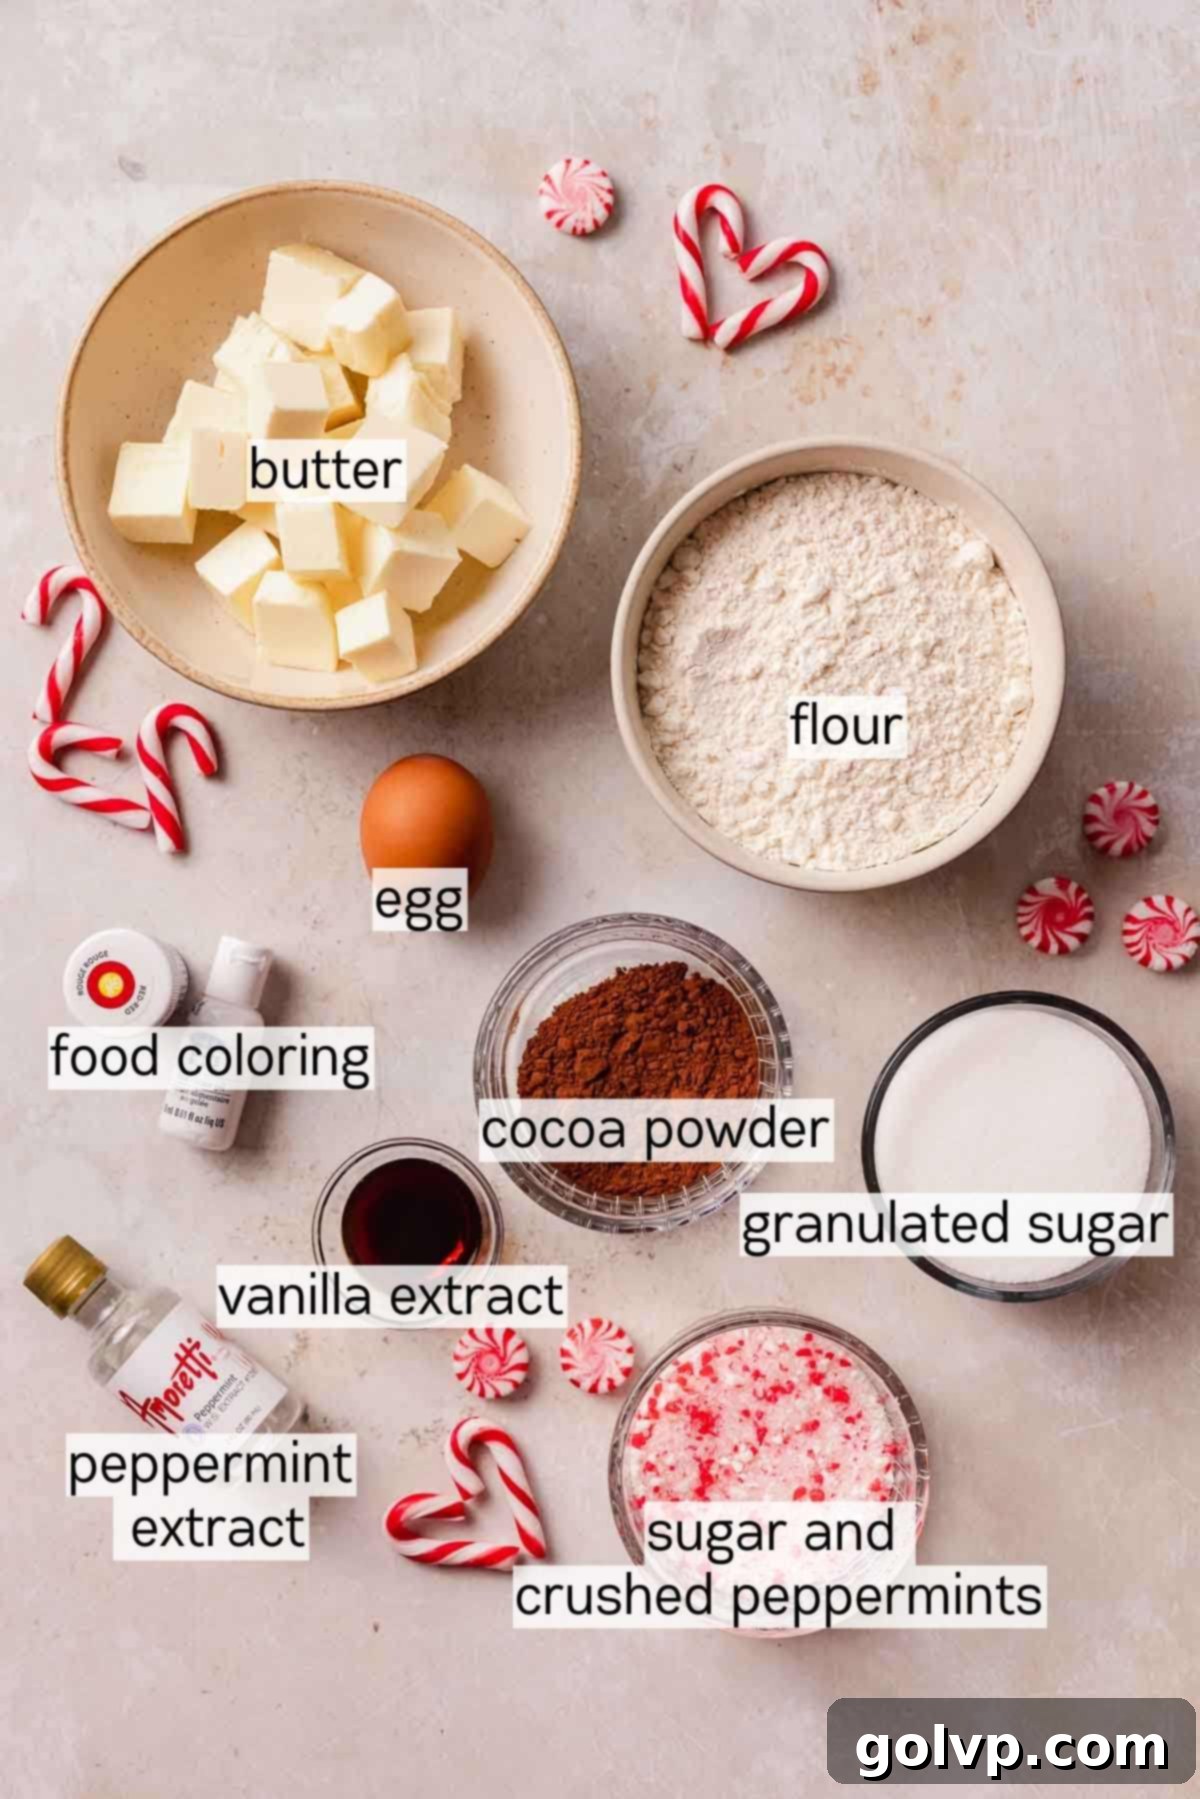
- Unsalted Butter: Opting for unsalted butter is crucial for superior baking. Salted butter contains varying amounts of salt and, more importantly, a higher water content, which can negatively impact the texture and spread of your cookies. By using unsalted butter, you gain precise control over the saltiness, ensuring a perfectly balanced flavor profile and the desired crisp-chewy texture.
- Dutch-Processed Cocoa Powder: To achieve that rich, dark, and intensely chocolatey flavor that beautifully contrasts with the peppermint, Dutch-processed cocoa powder is essential. Unlike natural cocoa powder, Dutch-processed cocoa is alkalized, which gives it a darker color and a smoother, less acidic taste, enhancing the overall depth of flavor in your chocolate cookie dough.
- White Gel Food Coloring (Optional): While not strictly necessary, a few drops of white gel food coloring in the “white” portion of your peppermint design will make the color pop significantly. This extra step ensures a striking contrast against the red and chocolate dough, making your pinwheel design even more vibrant and appealing.
- Red Gel Food Coloring: For the iconic bright red stripes of your peppermint design, gel food coloring is highly recommended. Its concentrated nature means you need only a small amount to achieve a vivid, rich color without adding excess moisture to your cookie dough. Liquid food coloring can dilute the dough and result in a less intense hue, so stick with gel for the best visual impact. Powdered food coloring is also a viable alternative.
- All-Purpose Flour: Accuracy in flour measurement is paramount for consistent cookie results. The most reliable method is to weigh your flour using a kitchen scale. If a scale isn’t available, remember to properly measure by first stirring the flour in its bag to aerate it, then gently spooning it into a measuring cup, and finally leveling off the excess with the flat edge of a knife, without packing it down.
- Peppermint Extract: This is where the magic happens! Peppermint extract infuses these cookies with their signature refreshing and cooling flavor. For a truly authentic and long-lasting minty taste in your baked goods, I highly recommend using a high-quality extract like this Amoretti peppermint extract. A little goes a long way, ensuring your cookies taste of refreshing peppermint, not artificial sweetness.
👩🍳 How to Craft These Enchanting Chocolate Peppermint Sugar Cookies
Creating these beautifully designed slice and bake cookies is a fun and rewarding process. Follow these detailed steps to achieve perfect results every time.
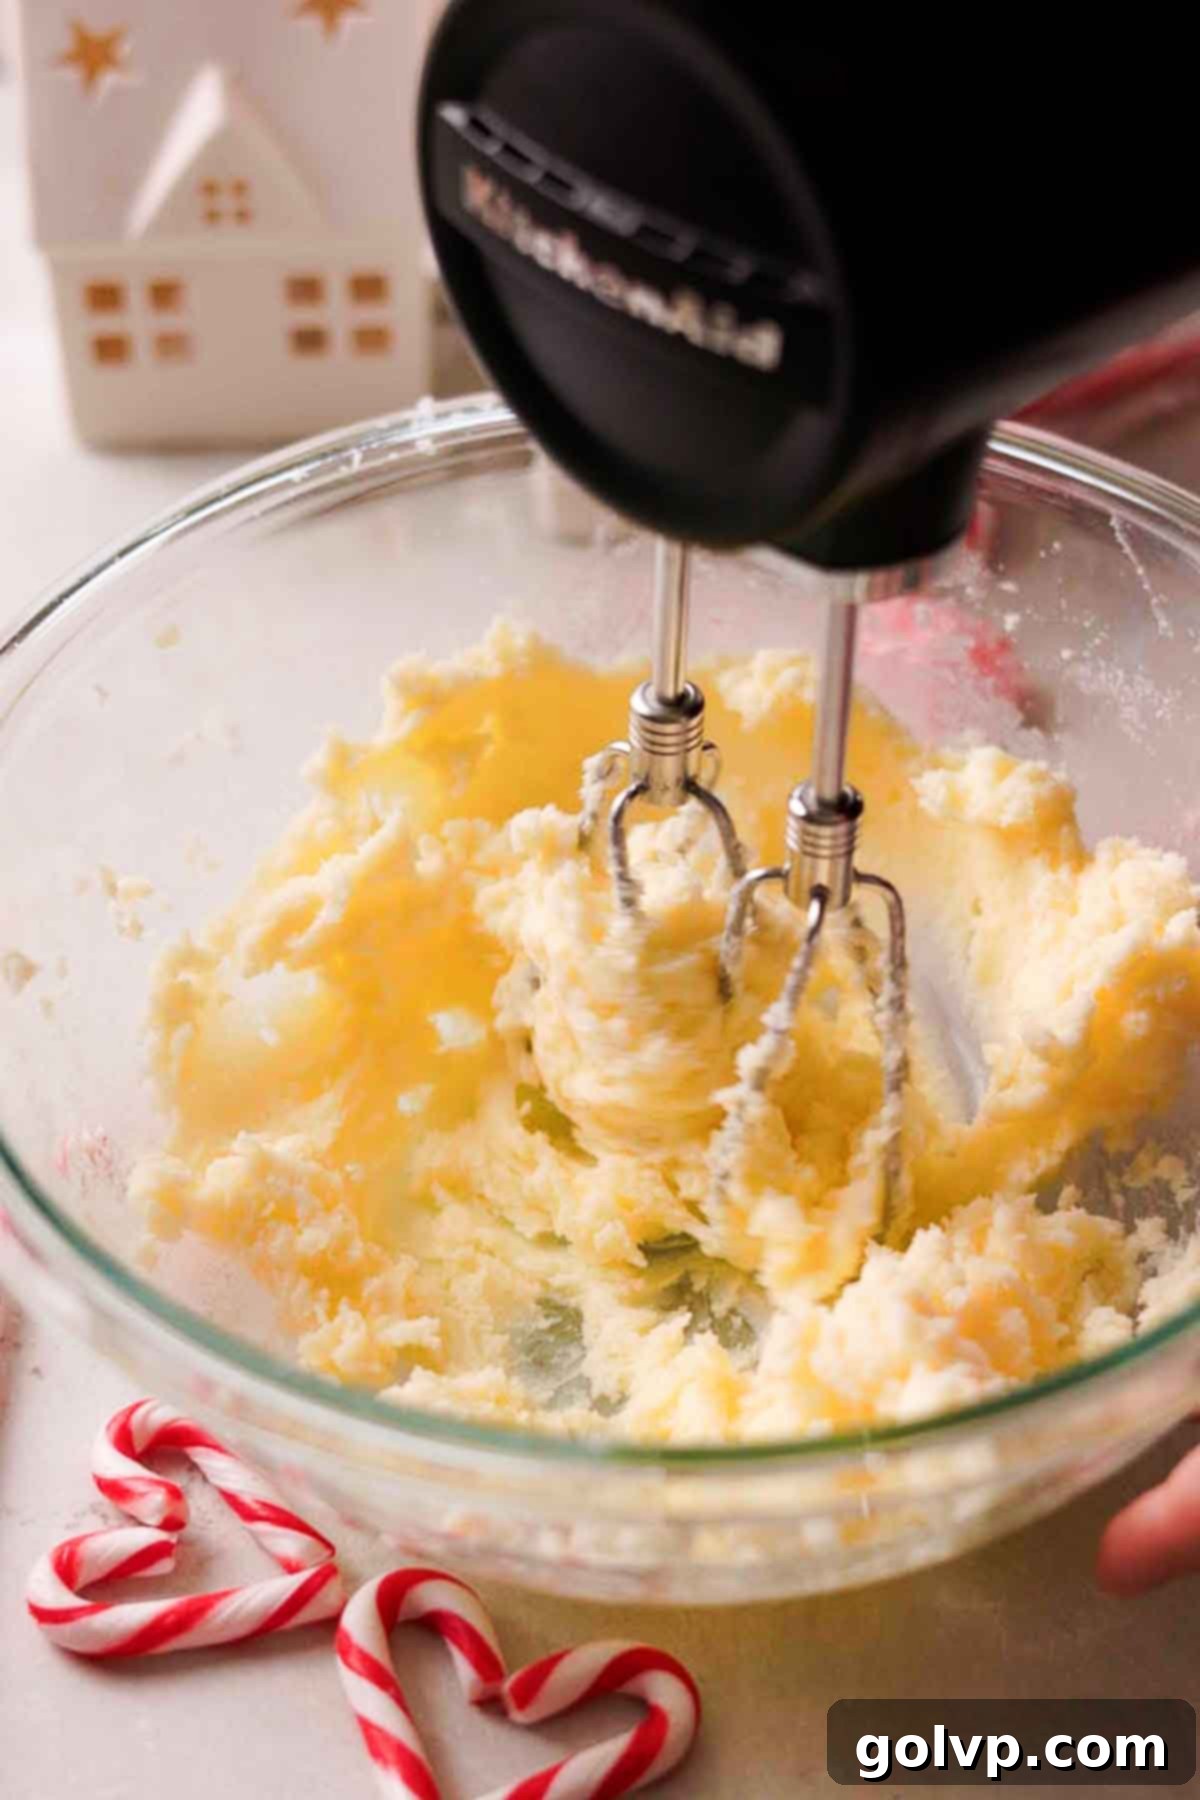
Step 1: In a spacious mixing bowl, or the bowl of your stand mixer fitted with the paddle attachment, combine the slightly softened butter and granulated sugar. Beat them together on low speed just until they are evenly combined. It’s important *not* to cream them until light and fluffy for this recipe, as over-aerating the butter and sugar can cause the cookies to spread too much during baking, ruining the intricate design. Next, add the sea salt, vanilla extract, peppermint extract, and the room-temperature egg. Mix again on low speed until all ingredients are just incorporated. Don’t worry if the mixture appears slightly separated or “split” at this stage; it will come together with the flour.
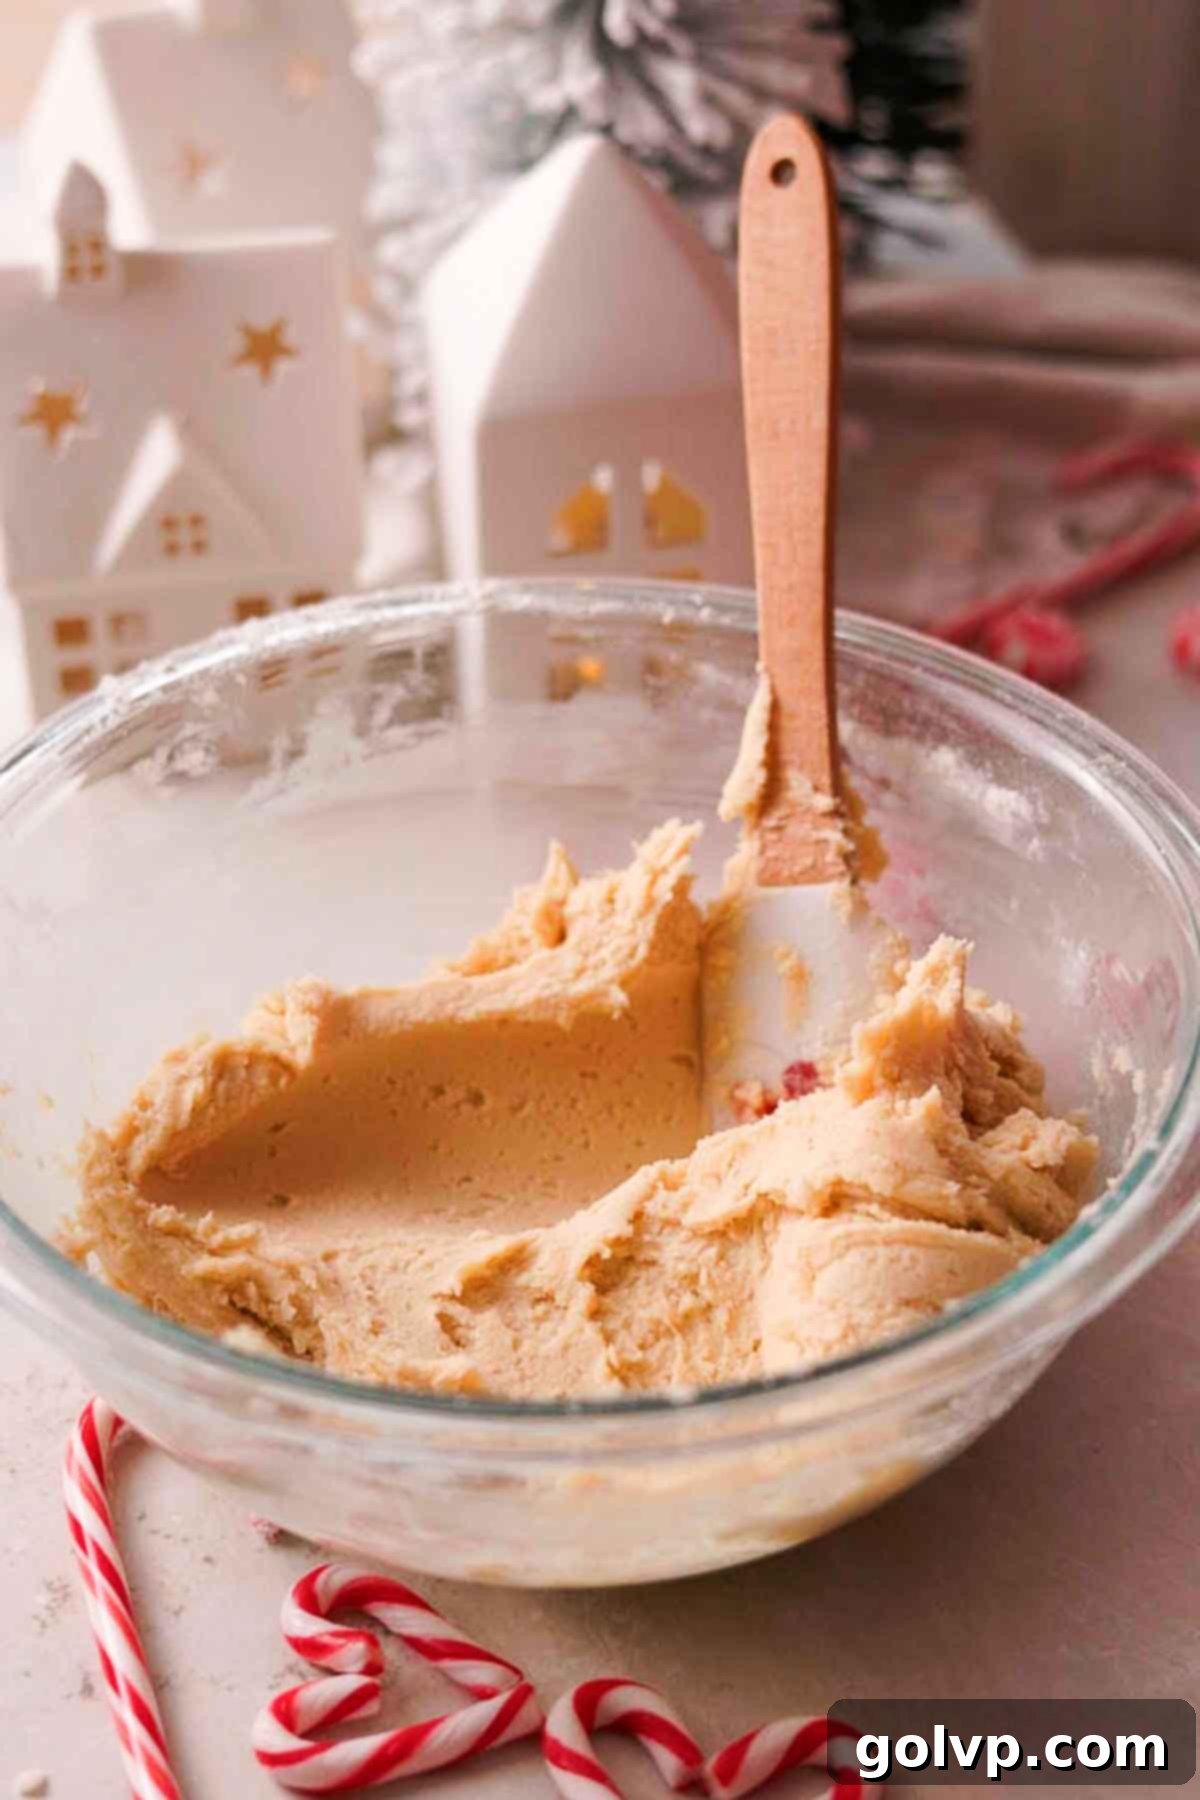
Step 2: Sift the all-purpose flour directly into the bowl with the wet ingredients. This helps prevent lumps and ensures a smooth dough. Mix with your mixer on low speed or use a sturdy spatula until the flour is just incorporated and a cohesive dough forms. Be careful not to overmix, as this can develop the gluten too much, leading to tough cookies. Once the dough comes together, cut off approximately one-third of the total dough and set this smaller portion aside for the colored peppermint core.

Step 3: Now, focus on the smaller section of dough you set aside. Divide this portion in half. Into one half, gradually add red gel food coloring, one drop at a time, mixing thoroughly after each addition until you achieve a vibrant, rich red color. Once colored, roll this red dough into a short, thick log, approximately four inches in length. Place this log on a piece of parchment paper and immediately transfer it to the freezer to chill for about 20 minutes, or until it is completely firm and frozen solid. This firming step is crucial for maintaining the sharp edges of your design.
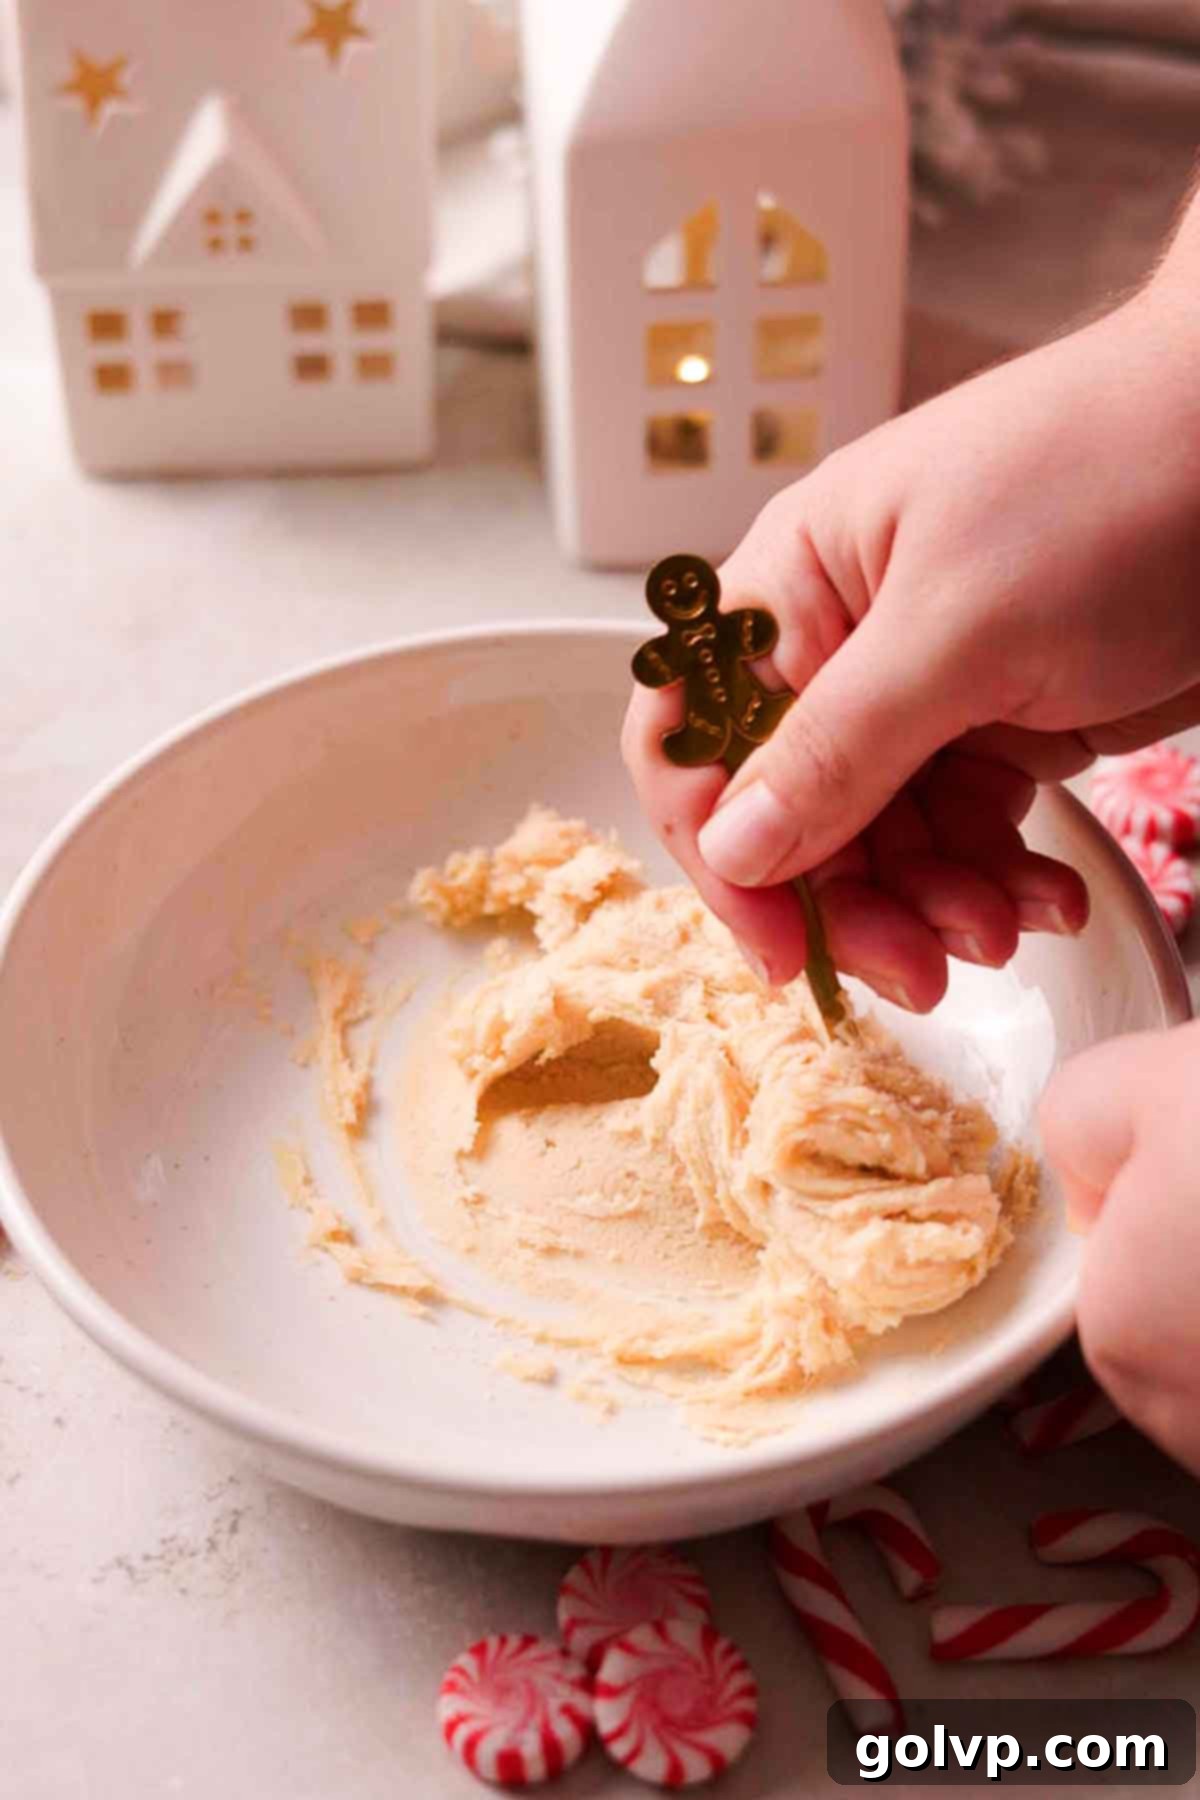
Step 4: Take the other half of the smaller dough portion. For a brighter contrast in your peppermint design, you can optionally color this dough white. Add a few drops of white gel food coloring at a time, mixing well until the dough is uniformly white. Similar to the red dough, shape this white dough into a short, thick log, roughly four inches long, on a separate piece of parchment paper. Place this log into the freezer alongside the red one for about 20 minutes, ensuring it becomes completely frozen and firm.
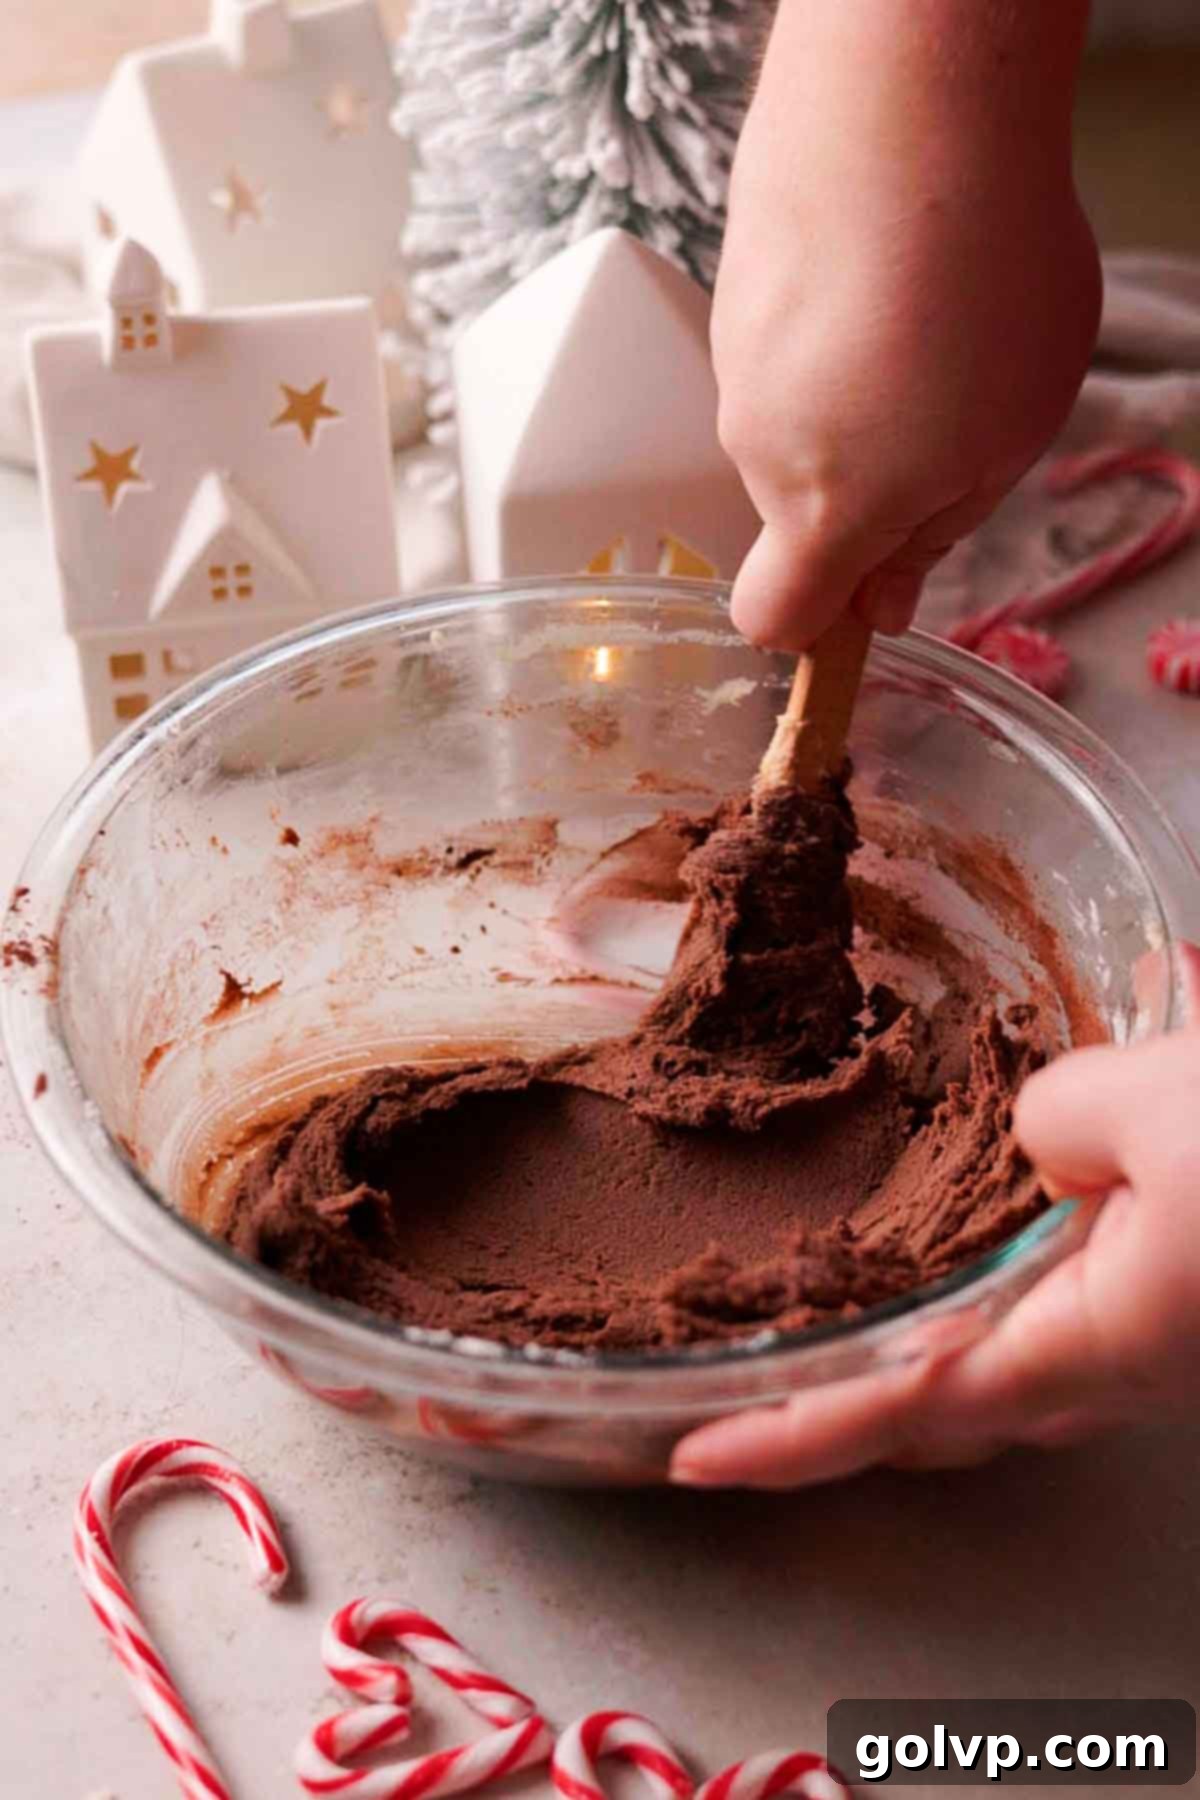
Step 5: Now, return to the larger portion of dough you initially set aside. Add the Dutch-processed cocoa powder to this dough. Mix thoroughly, either with your mixer or by hand, until the cocoa powder is completely incorporated and you have a smooth, rich chocolate cookie dough. Set this chocolate dough aside at room temperature while you continue preparing the colored logs. Keeping it at room temperature will make it more pliable for the next steps.
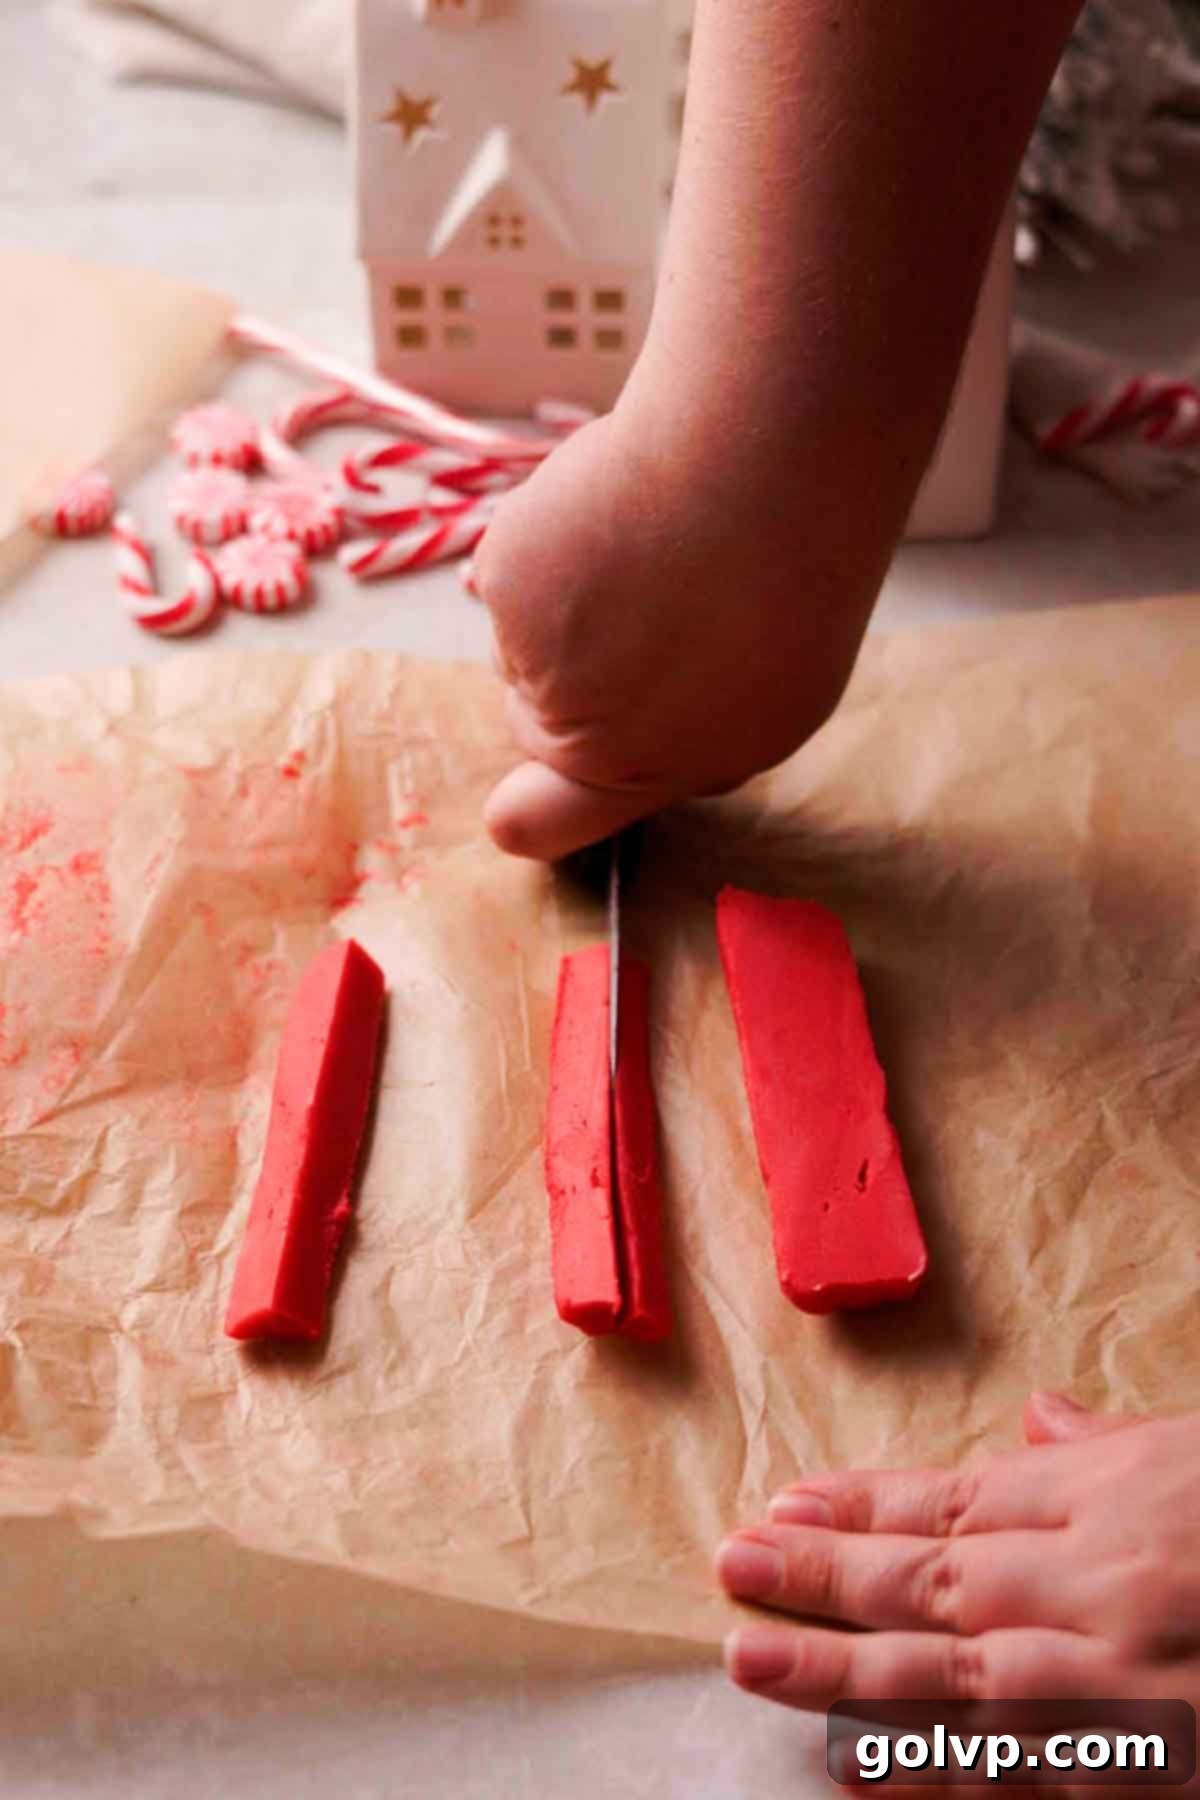
Step 6: Once both the red and white dough logs are completely frozen and solid, remove one from the freezer. Using a sharp knife, carefully cut the log in half lengthwise. Then, take each of those halves and cut them in half lengthwise again, creating four long, rectangular wedges. Repeat this process one more time, cutting each of those four wedges in half lengthwise. You should now have eight equally sized, long, rectangular wedges of the same color. Repeat this entire cutting process with the remaining colored dough log (the other color) to get another eight wedges.
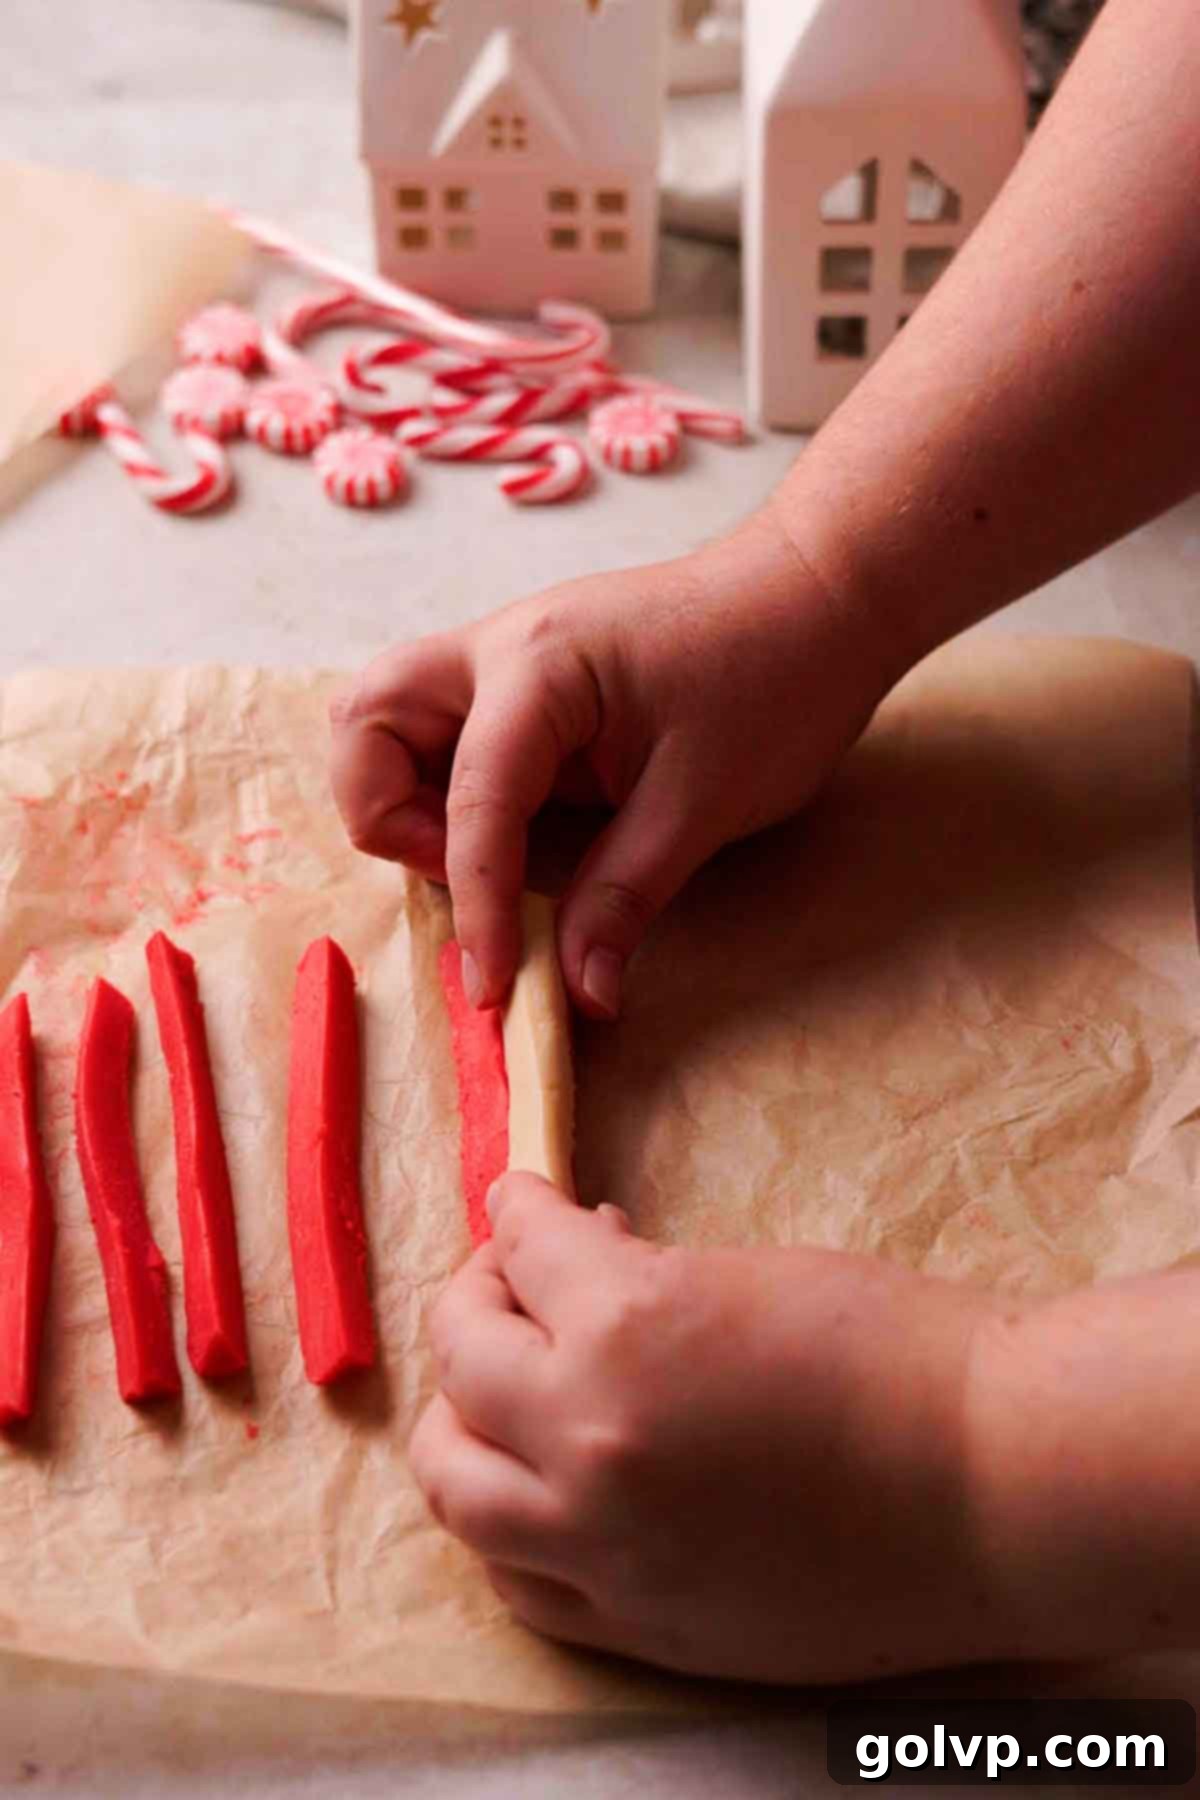
Step 7: Now for the fun part – assembling the peppermint pattern! Take your red and white wedges. Begin to build two new logs by carefully sticking the wedges back together, alternating colors as you go (e.g., red, white, red, white). Arrange four wedges side-by-side for each log. As you press them together, ensure they adhere well and use your fingers to gently smooth out any potential gaps, especially in the very center where the wedges meet. This step is crucial for a clean, defined pinwheel design when sliced.
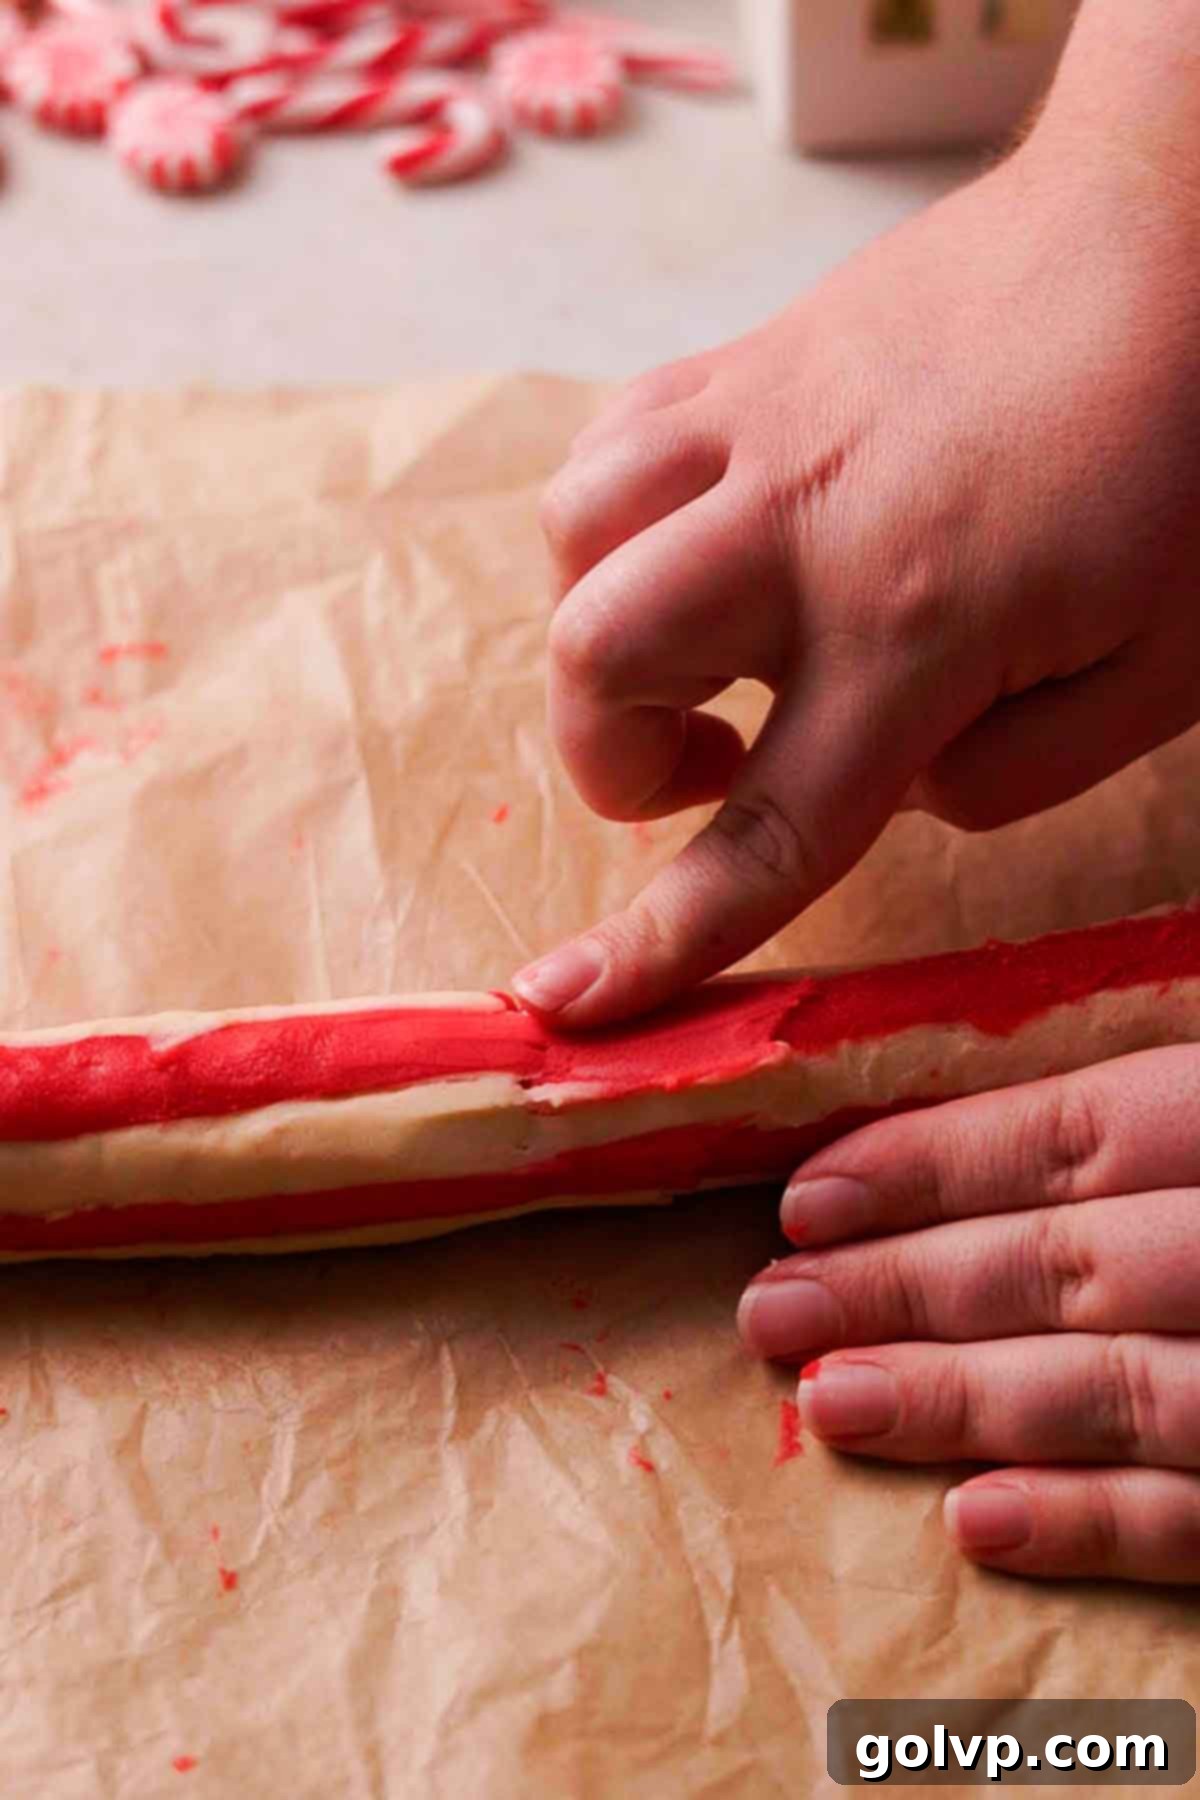
Step 8: Once you have your two alternating-color logs, carefully bring them together. Connect the two logs by pressing their ends firmly together, effectively making one single, longer log with the red and white peppermint pattern running through its entire length. Smooth out the cookie dough with your fingers at the point where they join to ensure a seamless connection. Wrap this combined log tightly in parchment paper and place it back in the freezer for about 10 minutes. This short chill will help it firm up and hold its shape before the next step.
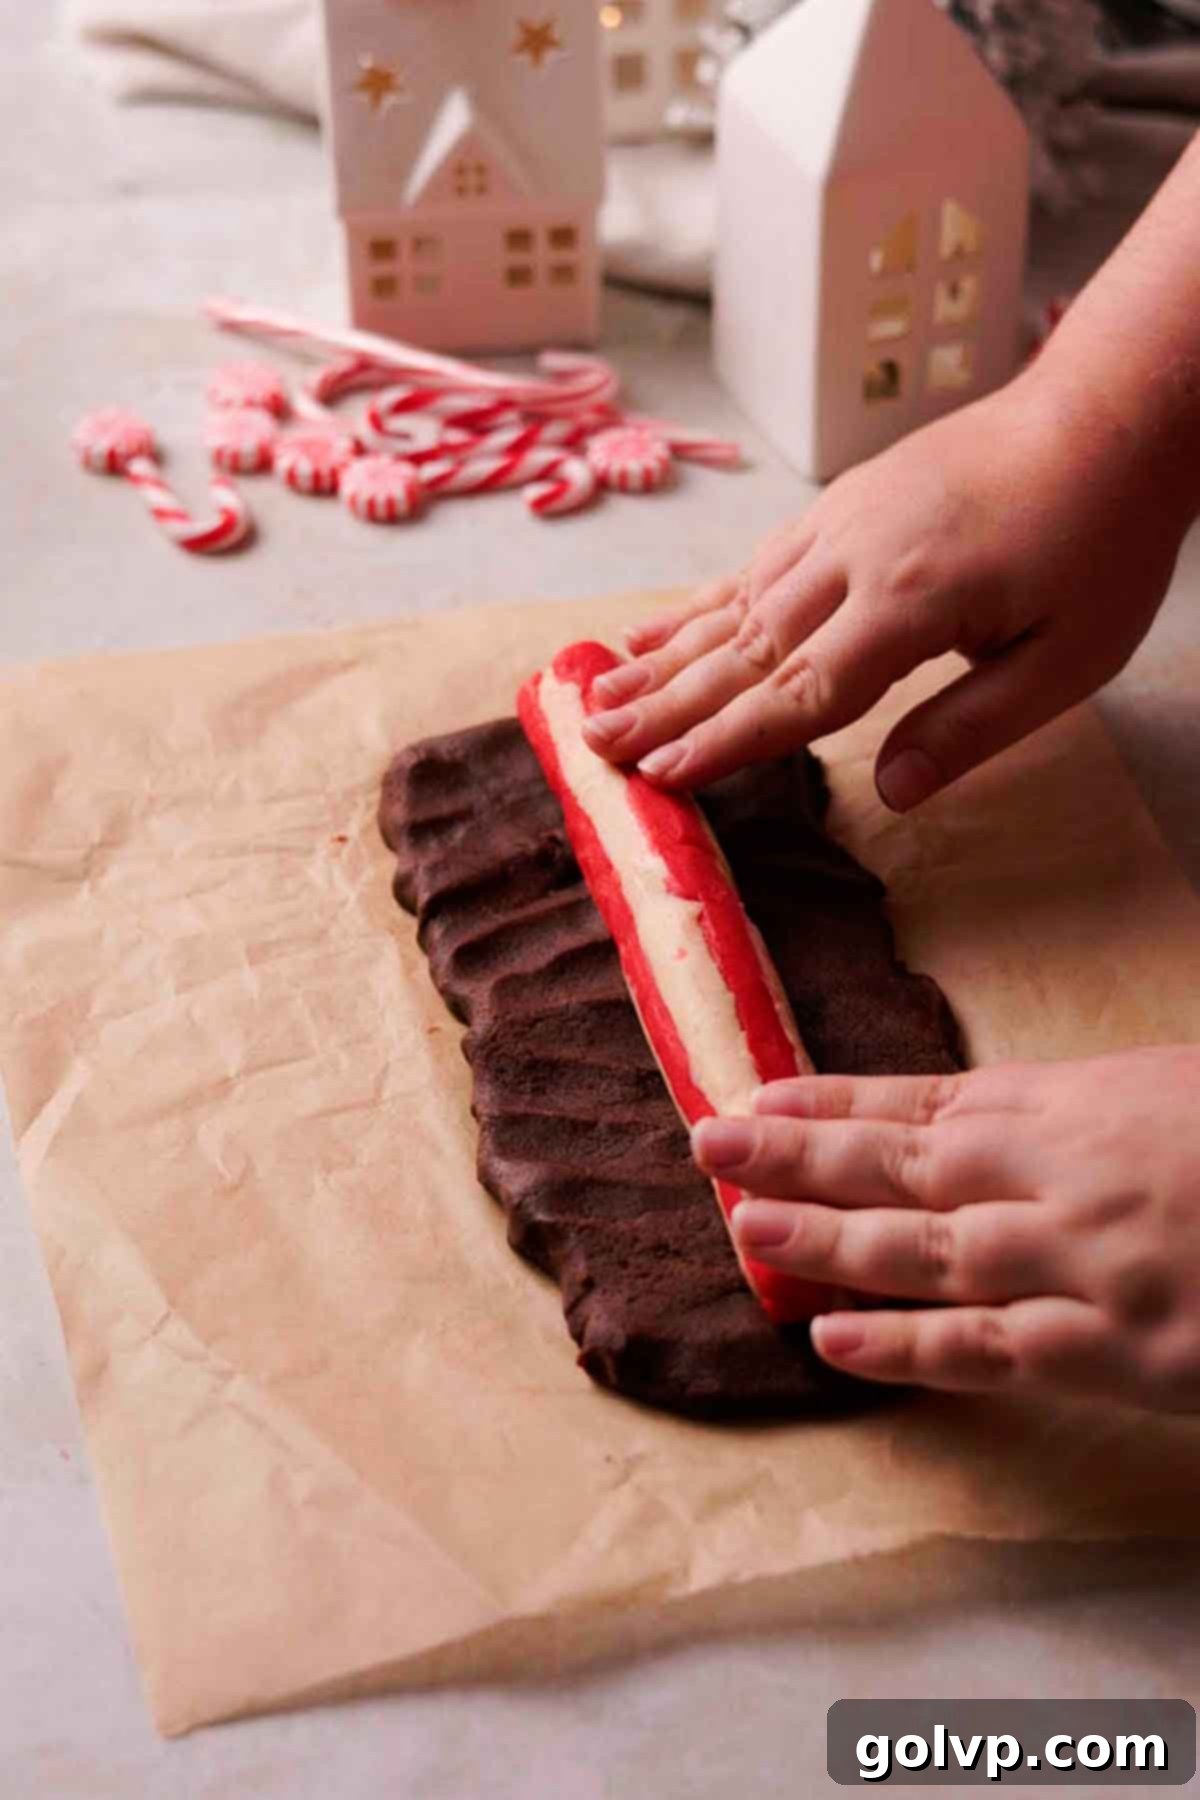
Step 9: Lay out a large piece of fresh parchment paper on your work surface. Take the chocolate cookie dough that you prepared earlier (from Step 5) and flatten it out evenly on the parchment paper. Shape it into a rectangular sheet. The long edge of this chocolate dough rectangle should be approximately the same length as your newly formed red and white peppermint log. Aim for a thickness that will fully encase the peppermint log.
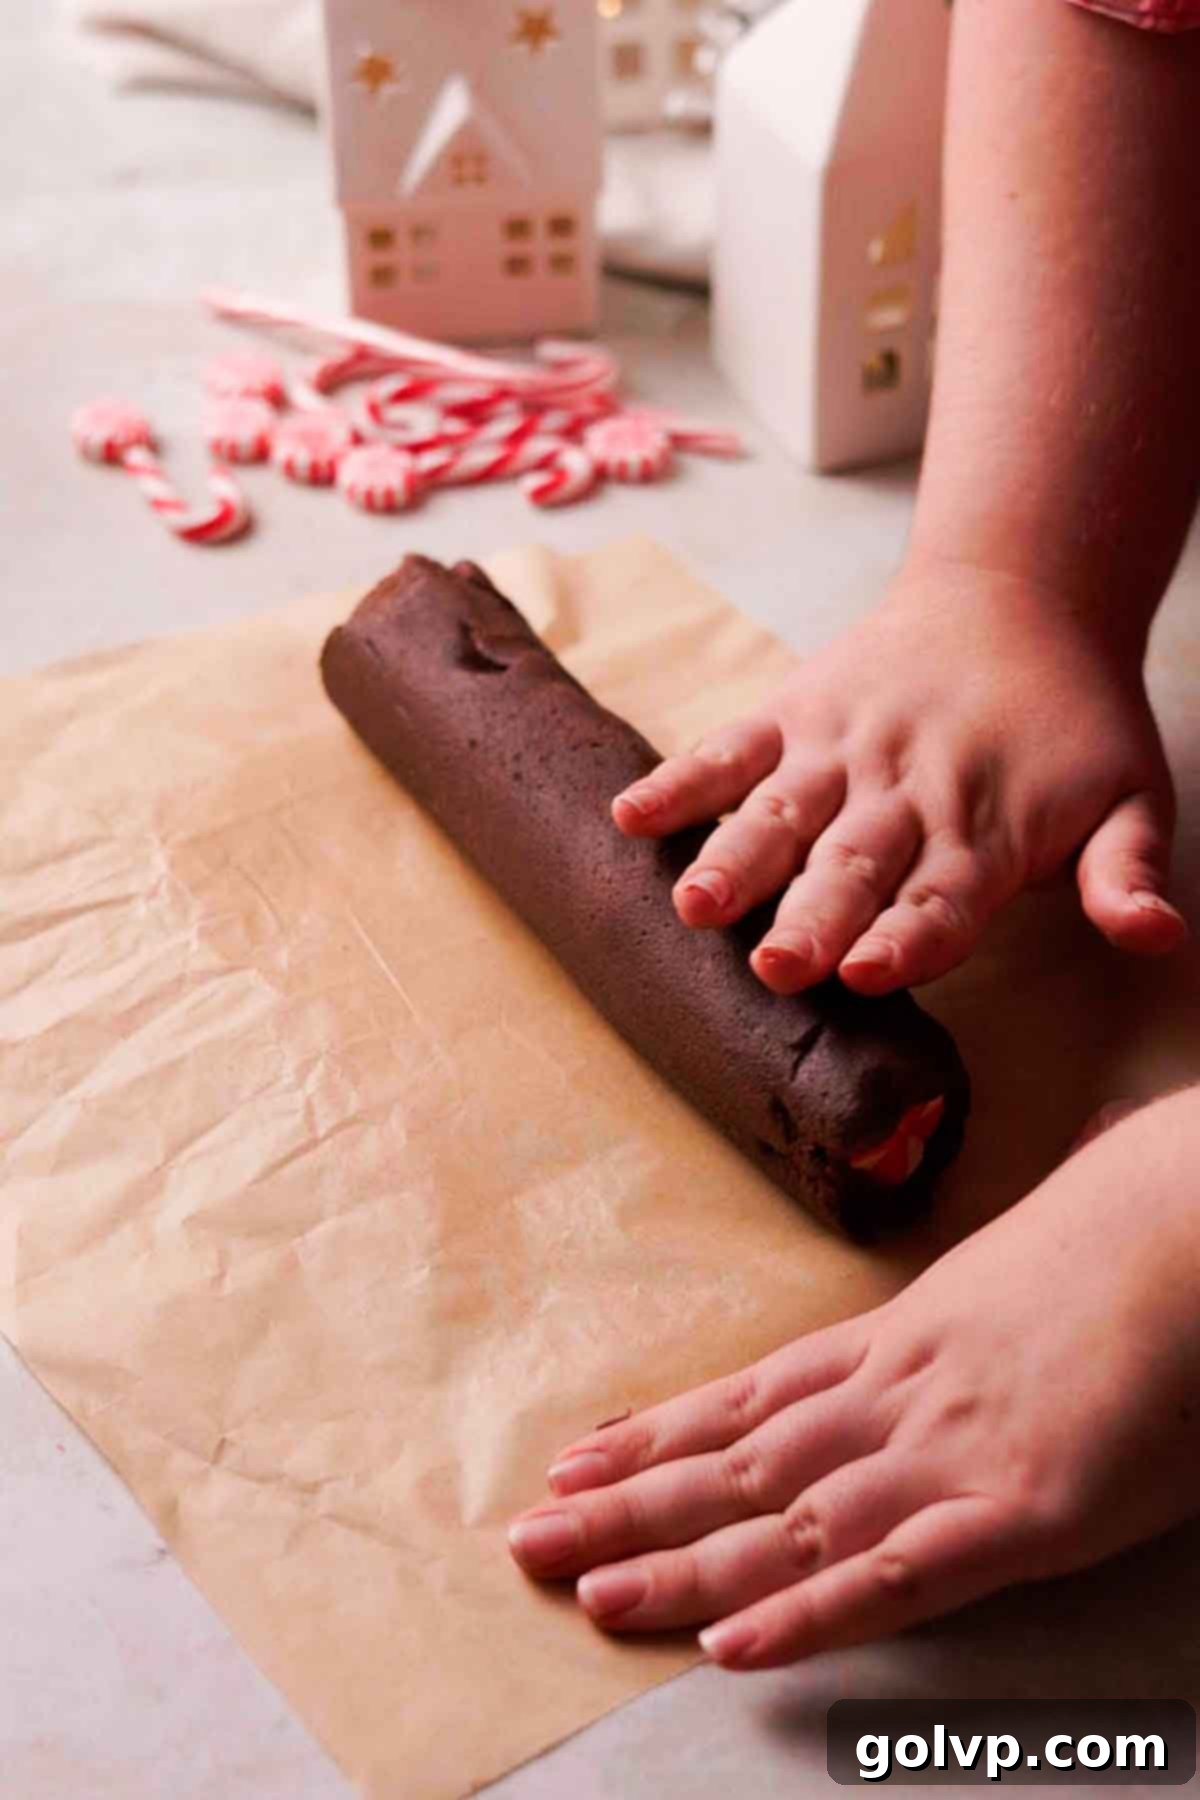
Step 10: Once the red and white log is sufficiently firmed up from the freezer, carefully remove it. Place this patterned log centrally onto your rolled-out chocolate cookie dough. Use the parchment paper beneath the chocolate dough to help you gently wrap the chocolate dough completely around the peppermint log, ensuring it’s fully enclosed. If you notice areas where there’s too much chocolate dough, gently trim it away. If there isn’t enough to fully cover, patch it with excess dough from elsewhere. Once covered, roll the entire log gently on the parchment paper to create a smooth, uniform cylindrical shape. Ensure the chocolate layer is even all around.
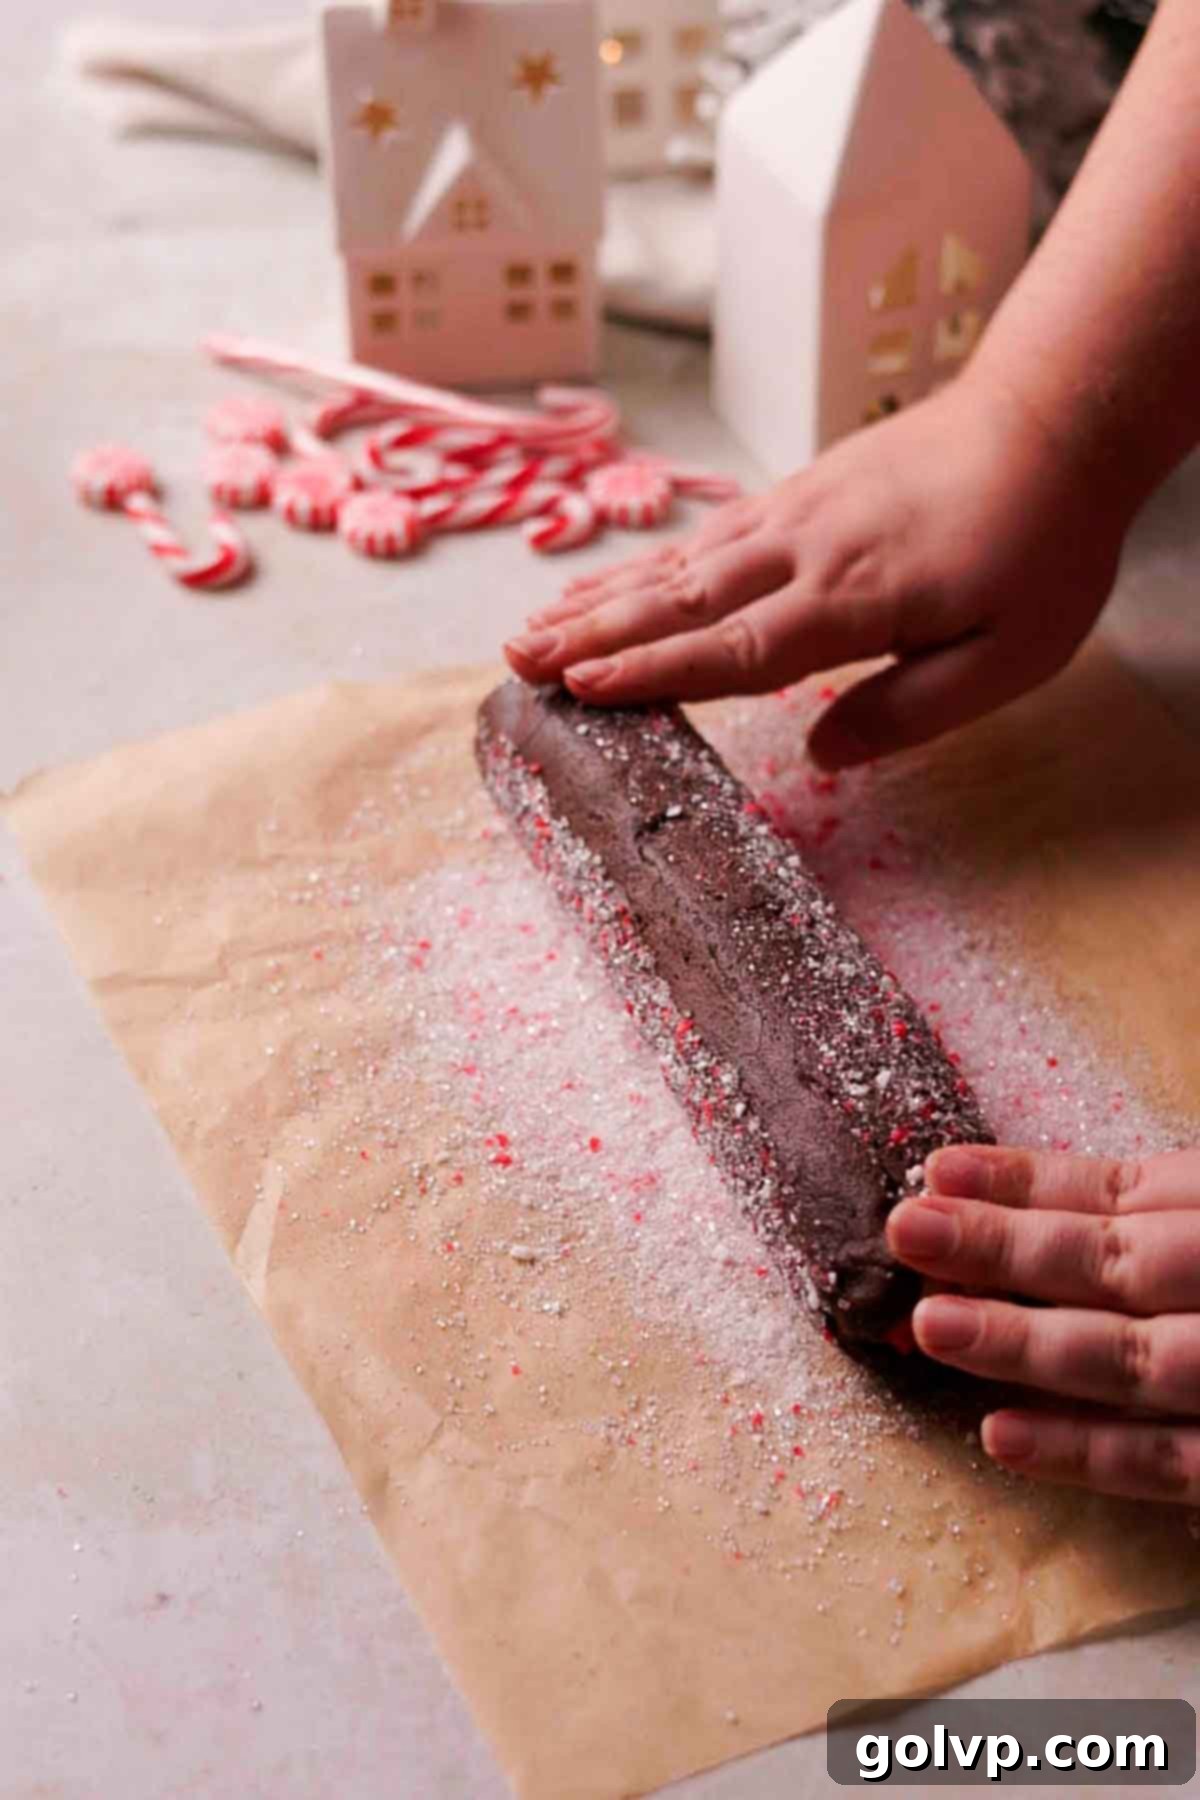
Step 11: In a shallow dish or directly on a clean piece of parchment paper, combine the coarse sugar and the crushed peppermint candies (or crushed candy canes). Sprinkle this festive sugar mixture generously onto the parchment where your cookie log is. Roll the entire log in the sugar mixture, coating all sides liberally. This creates a beautiful, sparkling finish and adds an extra burst of peppermint flavor and texture to the cookie’s exterior. Once coated, wrap the log tightly in parchment paper once more and return it to the freezer to chill completely for about 20-30 minutes. This final chill is vital for easy slicing and to prevent the cookies from spreading excessively during baking.
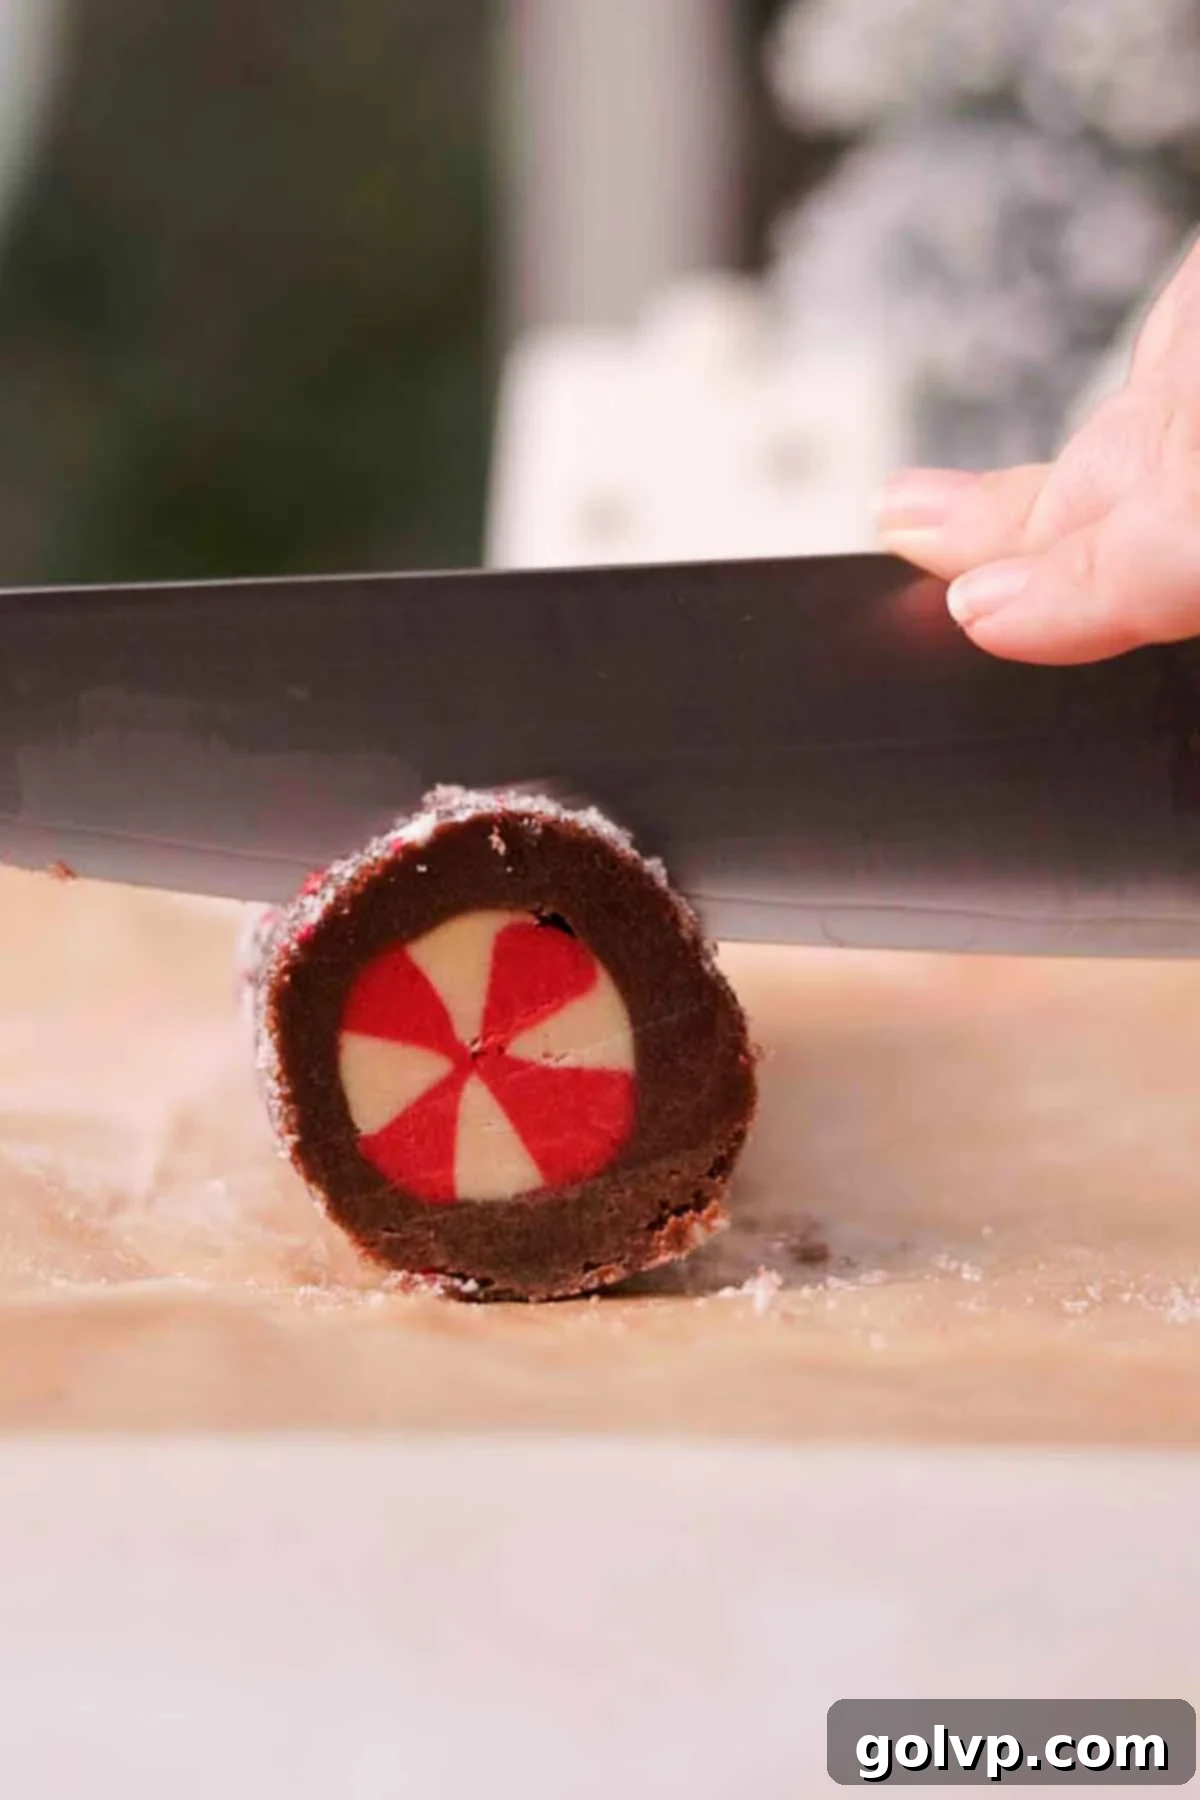
Step 12: While your cookie log is chilling for its final firm-up, preheat your oven to 355°F (180°C). Once the log is perfectly firm, transfer it to a sturdy cutting board. Using a very sharp knife, carefully slice the log into uniform ½-inch thick rounds. Arrange these peppermint sugar cookie slices onto a baking sheet lined with parchment paper or a non-stick baking mat, ensuring you leave at least 1-2 inches of space between each cookie to allow for proper spreading. Bake for approximately 9-11 minutes, or until the tops of the cookies no longer appear shiny. The centers should still be slightly soft and appear a little underbaked; this is the secret to their wonderfully soft and chewy texture.
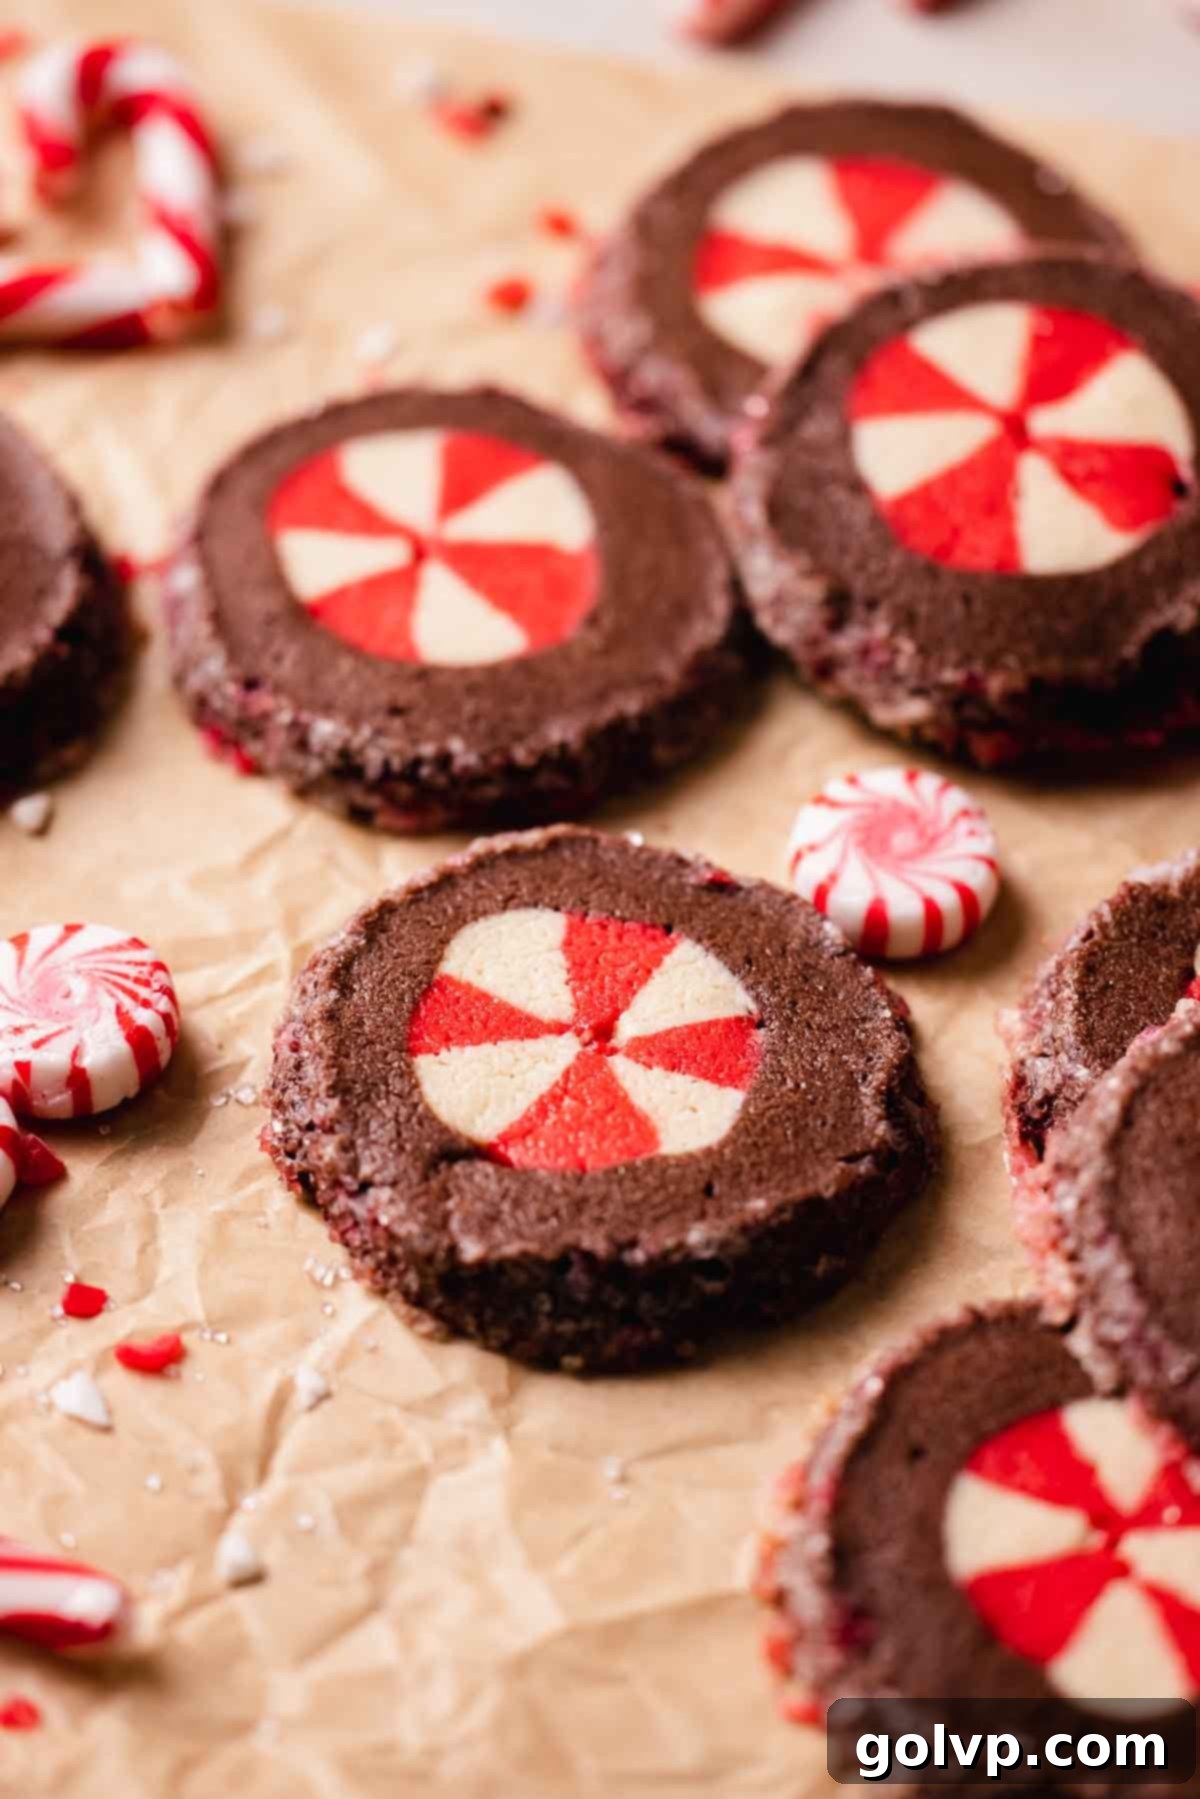
Step 13: As soon as the chocolate peppermint sugar cookies are removed from the oven, allow them to rest on the hot baking sheet for just 1-2 minutes to set slightly. Then, using a thin, flexible spatula, carefully transfer the warm cookies to a wire cooling rack. Allow them to cool completely on the rack. They will continue to firm up as they cool, achieving that perfect crisp edge and chewy interior. Repeat the baking process with any remaining cookie dough slices.
✔️ Expert Slice and Bake Sugar Cookie Tips for Success
Achieving perfectly shaped and delicious slice and bake cookies with a beautiful design requires a few key techniques. Keep these expert tips in mind for your best batch yet:
- Work with Slightly Softened Butter, Don’t Over-Cream: This is perhaps the most critical tip for preserving the cookie design. Your butter should be just slightly softened (meaning you can indent it with your finger, but it’s not squishy) to allow it to combine with the sugar. Crucially, do NOT cream the butter and sugar until they are light and fluffy. Over-creaming incorporates too much air into the dough, which will cause the cookies to spread excessively in the oven, distorting and potentially ruining your intricate peppermint pattern. Mix them just until they are evenly combined and smooth.
- Maintain Chilled Dough Logs: Throughout the entire shaping process, it is essential to keep your dough logs thoroughly chilled, even frozen at specific stages. Cold dough is firm and much easier to handle and cut precisely. Whenever you’re not actively working with a dough portion, pop it back into the freezer. This ensures your lines remain sharp and prevents the dough from becoming too sticky or losing its shape.
- Press and Smooth for Seamless Designs: When assembling the red and white wedges to form the peppermint pattern, take extra time to firmly press and smooth the different colored doughs together. Any air pockets or loose connections will result in holes or blurred areas in your final design. Pay particular attention to the center of the log, ensuring all wedges are tightly fused. Gentle rolling on parchment paper can also help consolidate the log without distorting the pattern.
- Avoid Overbaking for Ultimate Texture: For that coveted soft and chewy middle with crisp edges, resist the urge to overbake these cookies. They are ready when the tops just lose their wet, glossy sheen – typically around 9 to 11 minutes, depending on your oven. The centers will still appear quite soft and slightly underbaked when you pull them out, but they will continue to set as they cool on the baking sheet. Overbaking will lead to dry, crumbly cookies and diminish their delightful chewiness.

🥄 Make Ahead and Storage for Convenience
These slice and bake sugar cookies are the epitome of convenience, making them perfect for preparing well in advance. For the unbaked dough, simply wrap the entire cookie log tightly in parchment paper, then place it into an airtight freezer bag. It can be stored in the freezer for up to 2 months. When you’re ready for freshly baked cookies, just remove the log from the freezer, let it sit for a few minutes to soften slightly (just enough to slice), cut off the desired number of ½-inch thick slices, and bake as per the instructions. This allows you to enjoy warm, homemade cookies on demand, with minimal effort!
Once baked, these delicious peppermint sugar cookies will stay fresh and flavorful when stored at room temperature in an airtight container for up to 3 days. If you prefer, they can also be refrigerated, which may extend their freshness slightly. I haven’t personally tested them for longer storage periods or for mailing, so I can’t guarantee their quality beyond three days. For best results, enjoy them fresh from the oven or within a few days of baking!
🎅 Why I Adore Slice and Bake, Copycat Pillsbury-Style Cookies for the Holidays
During the festive season, anything that simplifies baking without sacrificing quality or visual appeal is a true blessing. These chocolate peppermint sugar cookies embody that philosophy perfectly. They are, hands down, the best make-ahead holiday cookies to keep stashed in your freezer. Imagine the joy of having a beautifully patterned cookie log ready to go – all you have to do is slice and bake a fresh batch whenever guests arrive or a sweet craving strikes! It’s an invaluable hosting trick that keeps your home smelling of warm, festive goodness throughout the holiday season.
Beyond their make-ahead convenience, one of the biggest reasons I champion slice and bake Pillsbury-style cookies is their incredible visual impact without the usual fuss. These are truly showstopper cookies, yet you completely bypass the time-consuming steps of rolling out dough and using cookie cutters. That tedious process often takes up so much precious time and can be quite messy. With slice and bake, you achieve perfectly round, uniformly sized cookies every single time, simply by slicing them from a log.
The intricate design that runs through the center of the log is genuinely stunning and uniquely charming. What’s even better is that there’s absolutely no need to decorate the cookies after baking. This eliminates the extra effort of preparing frosting or icing, applying it, and then worrying about it getting smudged or ruined when transporting or storing the cookies. These cookies emerge from the oven already picture-perfect, saving you significant time and stress, allowing you to focus more on enjoying the magic of the holidays!
❔ Why Does This Recipe Emphasize Not Creaming Butter and Sugar Until Light and Fluffy?
This is a critical instruction in this particular recipe, and it’s all about preserving the beautiful, crisp design within your cookies. Traditional cookie recipes often call for creaming butter and sugar until they are light and fluffy, a process that incorporates a significant amount of air into the mixture. While this is desirable for some cookies that benefit from a softer, cakier texture, it’s detrimental for intricately designed slice and bake cookies. The excess air trapped in the dough would cause the cookies to spread significantly more in the oven. This increased spreading would inevitably distort, blur, and potentially completely ruin the sharp lines and distinct pattern of your peppermint pinwheel design. Therefore, for these cookies, it’s essential to mix the butter and sugar just until they are evenly combined, ensuring the dough remains dense enough to hold its shape and maintain its stunning festive pattern.
📖 Recipe FAQs
Absolutely! While designed for slice and bake, this versatile cookie dough works wonderfully for roll-out cookies too. To do so, simply chill the entire batch of dough (without forming the patterned log) in the refrigerator for at least an hour until firm. Then, roll it out between two sheets of parchment paper to your desired thickness and use your favorite cookie cutters. Bake according to the general instructions, adjusting baking time slightly if your cookies are thinner or thicker.
Yes, you certainly can! If you prefer a pure vanilla flavor for the main cookie, simply omit the cocoa powder from the larger portion of dough (Step 5). Keep in mind, however, that the beautiful red and white peppermint design in the middle will not stand out as dramatically without the dark contrast of the chocolate cookie dough. For a more pronounced visual pop, I highly recommend using the white gel food coloring in the white part of your peppermint pattern to ensure it remains distinct against the vanilla base.
Yes, chilling (and even freezing) the cookie dough is absolutely crucial for these slice and bake cookies, especially because they feature an intricate design. Working with cold, firm dough makes it significantly easier to shape, cut, and handle, ensuring the integrity of your peppermint pattern. If you attempt to slice into a warm or overly soft log of dough with a design in the center, the dough will smear, blur, and completely lose its definition, resulting in an unrecognizable pattern. Patience with chilling ensures a picture-perfect cookie.
That’s an exciting idea! While this recipe focuses on the round peppermint pinwheel, I encourage creative experimentation with cookie dough and designs. If you’re confident in your dough-shaping skills and can figure out how to arrange the red and white dough to mimic a candy cane swirl within the log, go for it! Baking is all about having fun and trying new things.
Absolutely! If you’re short on time or simply prefer a simpler cookie, you can easily make these without the full peppermint design. You can choose to make them as plain vanilla peppermint sugar cookies (omitting cocoa powder and food coloring) or just chocolate peppermint sugar cookies (omitting food coloring for the center). Simply roll the entire batch of dough into a straightforward log, chill it well, and then slice and bake according to the instructions. They will still be incredibly delicious!
These slice and bake sugar cookies, once baked, tend to be quite sturdy while still maintaining their desirable soft and chewy texture. This makes them a good candidate for shipping. While I haven’t personally sent them through the mail to confirm, their robust nature suggests they should travel well. If you do decide to ship them, please share your experience in the comments below – your feedback would be incredibly helpful for others!
☃️ Discover More Festive Recipes
- Christmas Thumbprint Cookies
- Slice and Bake Peppermint Shortbread Cookies
- Peppermint Fudge
- Soft Gingerbread Cookies
Did you give this recipe a try? I’d absolutely love to hear your thoughts and see your creations! Please take a moment to rate this recipe and share your experience in the comments section below. Don’t forget to tag @flouringkitchen on Instagram with your photos. For more delightful baking ideas and inspiration, be sure to follow me on Pinterest!
📖 Recipe

Chocolate Peppermint Pinwheel Sugar Cookies
Mary
Pin Recipe
Shop Ingredients
Equipment
-
Cookie sheet
-
Parchment paper
-
Cooling rack
Ingredients
- ¾ cup unsalted butter softened slightly
- ¾ cup granulated sugar
- ½ teaspoon sea salt
- 1 teaspoon vanilla extract
- ½ teaspoon peppermint extract
- 1 large egg room temperature
- 2 cups all purpose flour 240g
- 2 tablespoons cocoa powder dutch processed
- red gel food coloring as needed
- white gel food coloring optional
- ¼ cup coarse sugar for coating
- 2 tablespoons crushed peppermint candies or crushed candy canes
Shop Ingredients on Jupiter
Instructions
-
In a large bowl or stand mixer, beat together the slightly softened butter and granulated sugar until just combined (avoid creaming until light and fluffy). Incorporate the sea salt, vanilla extract, peppermint extract, and the room-temperature egg, mixing until just blended. A slightly split appearance is normal at this stage.¾ cup butter, ¾ cup granulated sugar, ½ teaspoon sea salt, 1 teaspoon vanilla extract, ½ teaspoon peppermint extract, 1 large egg
-
Sift the all-purpose flour directly into the bowl. Mix with a mixer or spatula until a cohesive dough forms. Cut off about one-third of this dough and set it aside for coloring.2 cups all purpose flour
-
Divide the smaller dough portion in half. Add red gel food coloring, drop by drop, to one half, mixing until vibrant. Roll into a 4-inch log on parchment paper and freeze for 20 minutes until solid.red gel food coloring
-
Color the other half of the smaller dough white with gel food coloring (optional, for brighter contrast). Shape into another 4-inch log on parchment and freeze for 20 minutes until completely frozen.white gel food coloring
-
Add the Dutch-processed cocoa powder to the larger, remaining dough portion. Mix thoroughly to create a uniform chocolate cookie dough, then set aside at room temperature.2 tablespoons cocoa powder
-
Once both red and white logs are frozen, remove one. Cut it in half lengthwise, then cut each half in half lengthwise again, and repeat once more. You should have eight equal rectangular wedges. Repeat this process with the other colored log.
-
Assemble two new logs by carefully sticking the wedges together, alternating colors (e.g., red, white, red, white). Press them firmly to minimize gaps, especially in the center, ensuring a smooth join for a crisp design.
-
Connect the two alternating-color logs by pressing their ends together. Smooth the seam with your fingers. Wrap the unified log in parchment paper and freeze for about 10 minutes to firm up its shape.
-
On a large piece of parchment paper, flatten the chocolate cookie dough into a rectangle roughly the same length as your red and white patterned log.
-
Remove the firm red and white log from the freezer and place it onto the chocolate dough. Use the parchment paper to help wrap the chocolate dough evenly around the log, trimming excess or patching as needed. Roll gently to create a smooth, cylindrical log.
-
Mix the coarse sugar and crushed peppermint candies. Sprinkle onto parchment paper. Roll the log in this mixture, coating it liberally. Wrap in parchment and freeze for 20-30 minutes until completely chilled.¼ cup coarse sugar, 2 tablespoons crushed peppermint candies
-
Preheat oven to 355°F (180°C). Place the chilled log on a cutting board and slice into ½-inch rounds with a sharp knife. Arrange cookies on a parchment-lined baking sheet, leaving 1-2 inches space. Bake for 9-11 minutes, or until tops are no longer shiny and centers are slightly soft.
-
Remove cookies from the oven and let them rest on the baking sheet for a minute or two. Then, transfer them with a spatula to a cooling rack to cool completely.
Notes
The unbaked cookie log can be wrapped tightly and stored in an airtight freezer bag for up to 2 months. Simply slice and bake from frozen whenever you desire fresh cookies!
Storage:
Baked peppermint sugar cookies keep well in an airtight container at room temperature or refrigerated for up to 3 days, maintaining their delicious flavor and texture.
Tips for Success:
- Ensure butter is only slightly softened, and do not over-cream butter and sugar; mix just until combined to prevent spreading.
- Keep all cookie dough logs well-chilled in the freezer while working with them to maintain sharp designs.
- When forming the peppermint design, firmly press and smooth the colored doughs together to avoid gaps and ensure a clean pattern.
- Do not overbake. For a perfectly soft and chewy texture, remove cookies from the oven once their tops lose their sheen, even if they appear slightly underbaked in the center.
Nutrition
