The Ultimate Basque Burnt Cheesecake: Achieve a Perfectly Creamy, Gooey Center and Rich Caramelized Crust
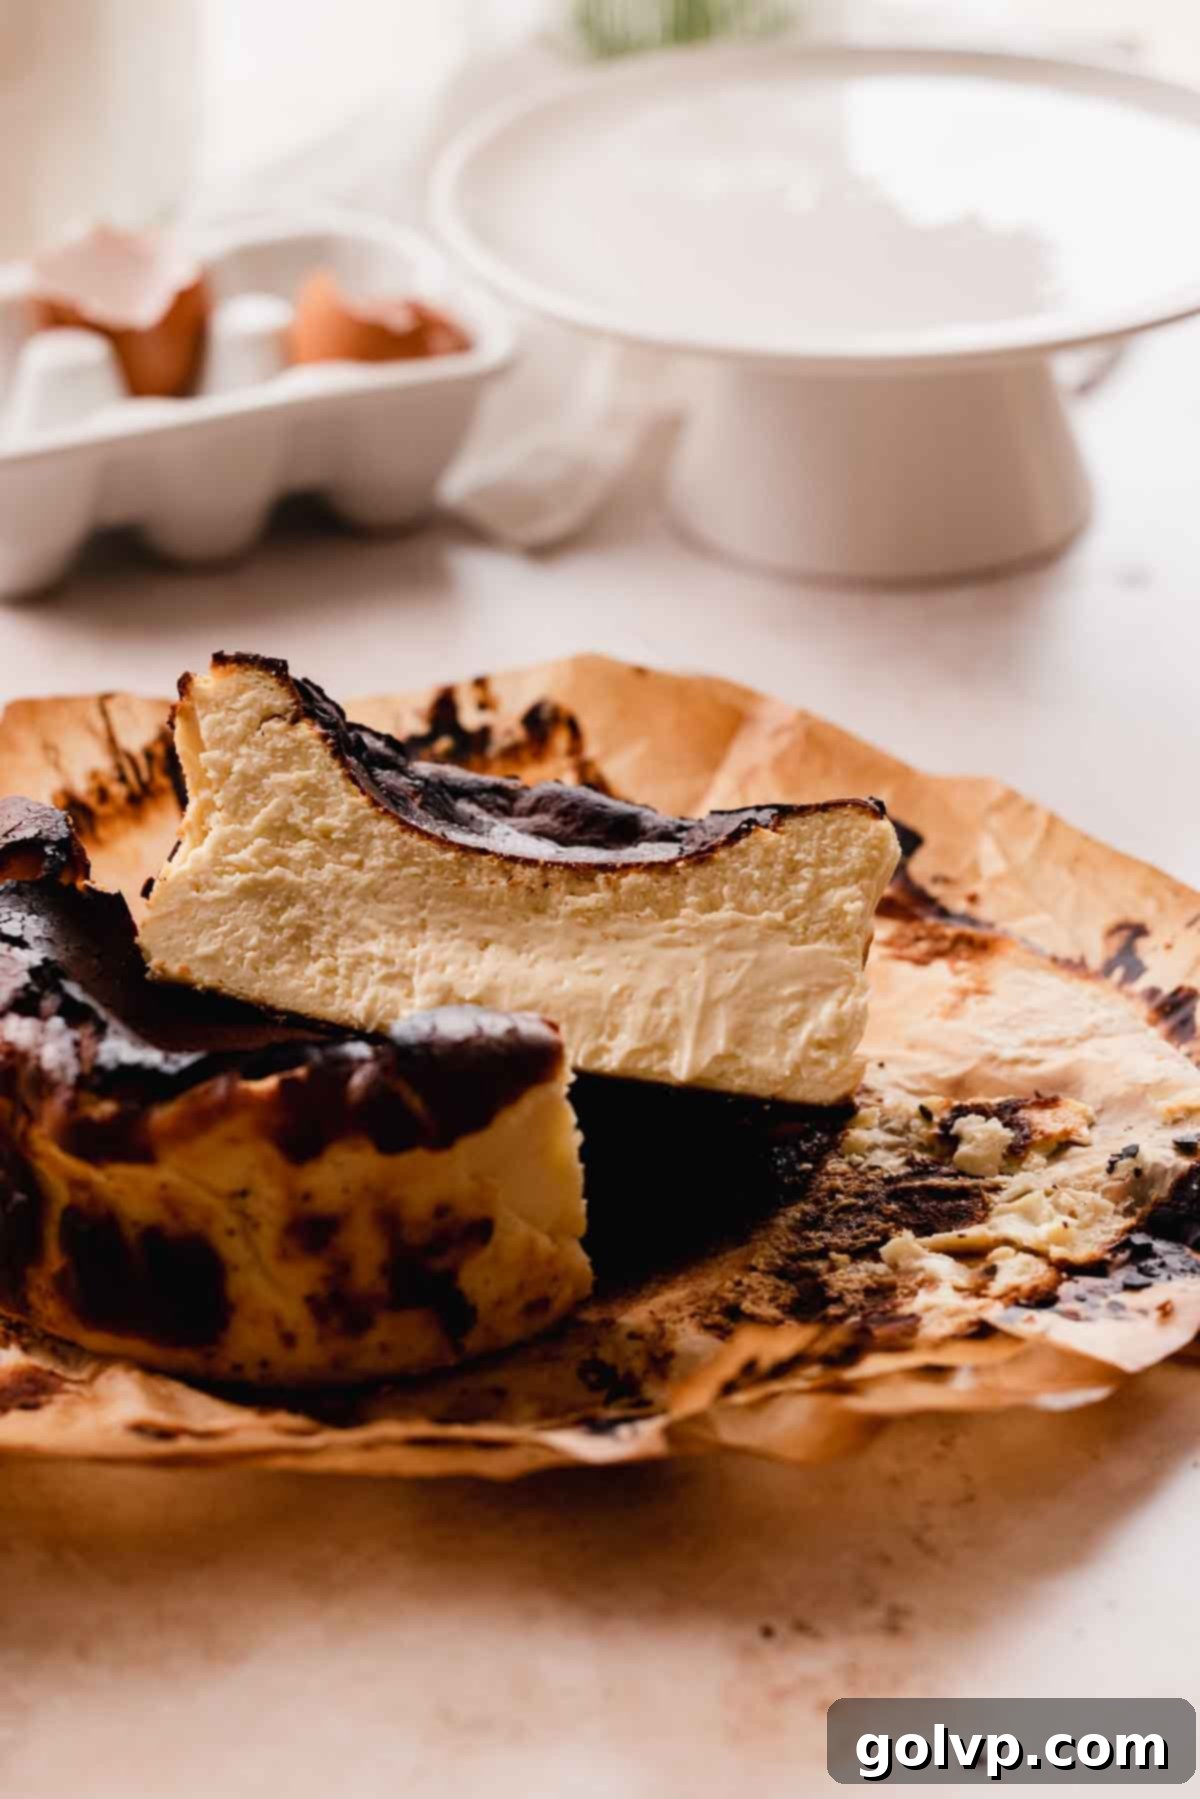
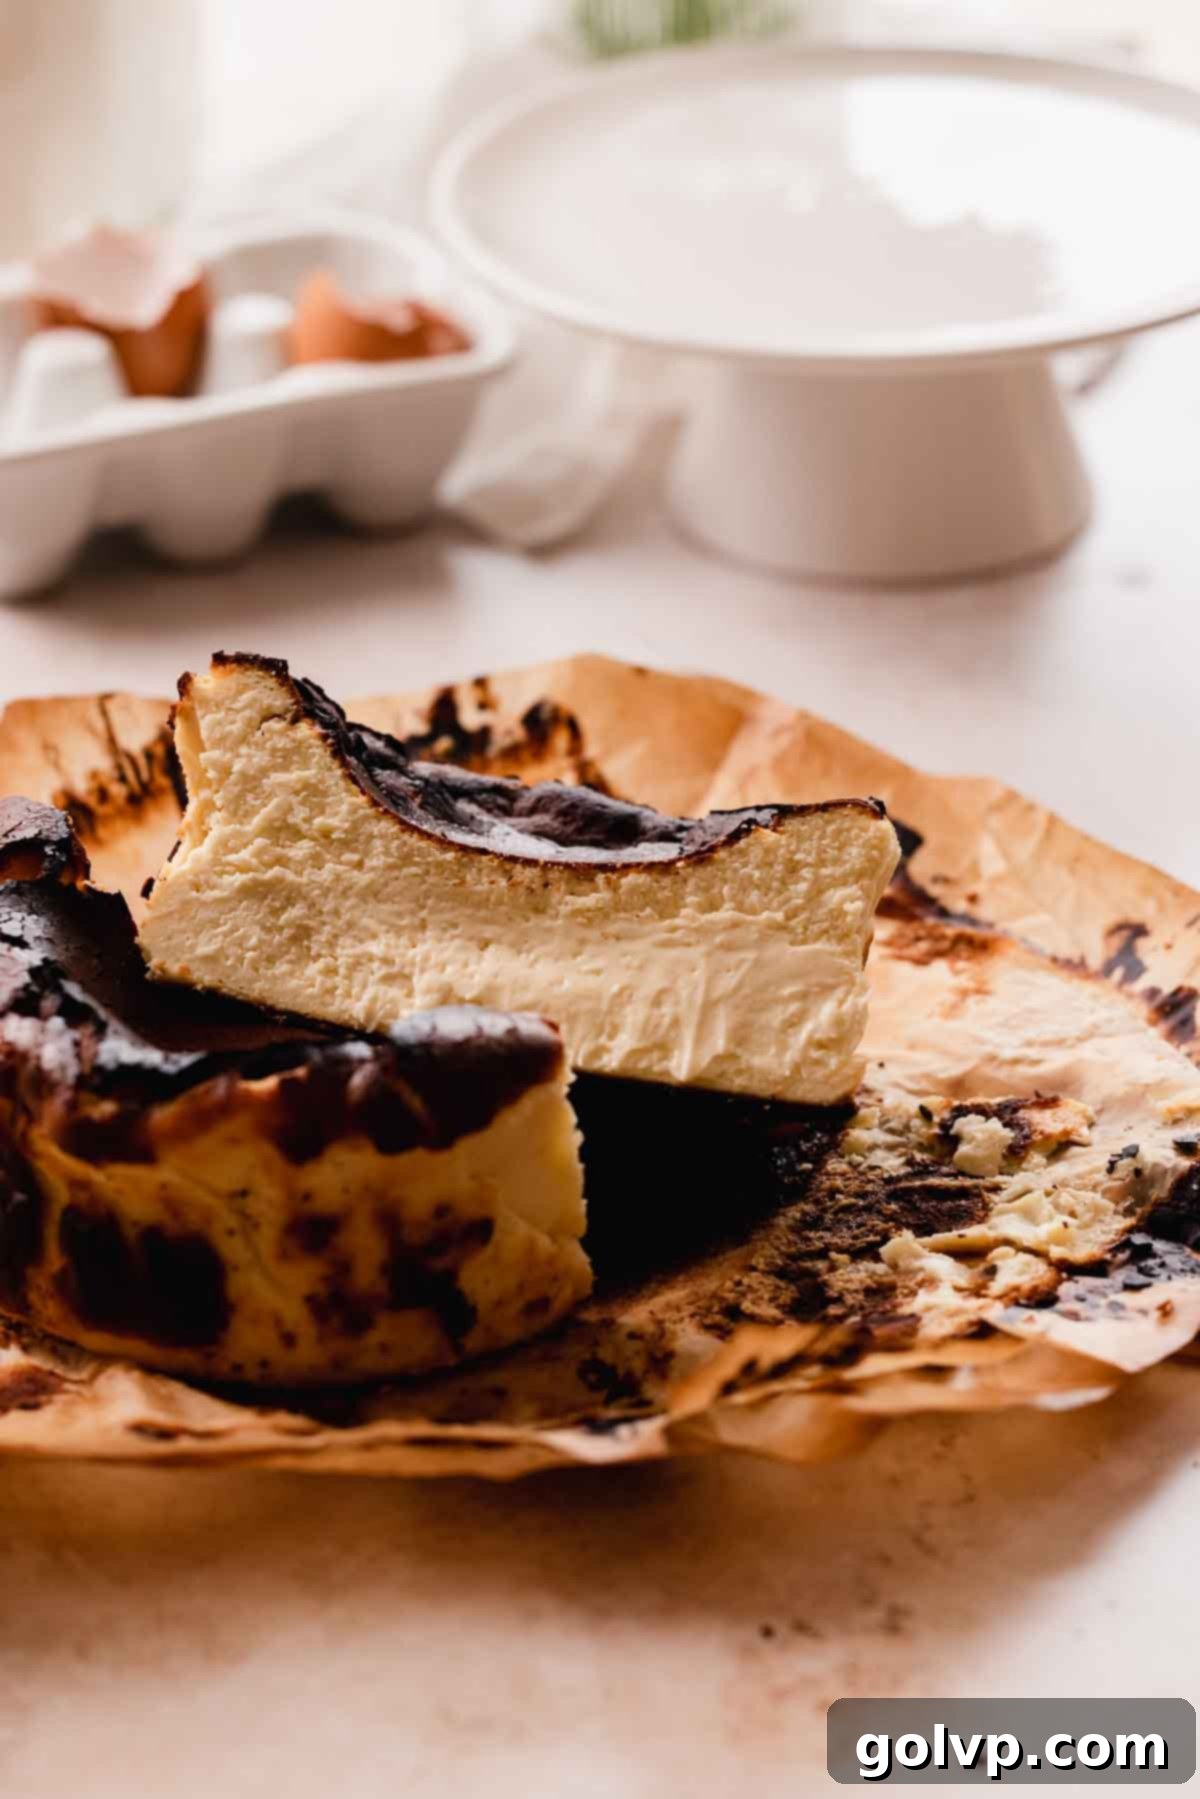
Prepare to fall in love with a cheesecake unlike any other. This Basque burnt cheesecake is renowned for its irresistibly smooth, ultra-creamy, and slightly gooey interior, all encased in a dramatic, deeply caramelized crust. What makes it truly remarkable is that this luxurious dessert is crafted from just six core ingredients (plus a pinch of salt), making it surprisingly simple to master. This comprehensive, step-by-step recipe guides you through every detail needed to achieve that signature blackened crust and the exquisitely creamy, almost molten center that miraculously still holds its shape when sliced.
Despite its striking appearance, rest assured, this cheesecake doesn’t taste burnt in the slightest! The dark, rich exterior is the result of the Maillard reaction and caramelization of sugars, brought about by the high-heat baking of the protein and delicious fats in the batter. This process imparts a deep, complex chocolate-caramel flavor to the crust that is utterly addictive. One of the greatest joys of making a Basque burnt cheesecake is the liberation from the typical anxieties of traditional cheesecakes – no need to fret about cracking or an overly pale top. In fact, burning is not just allowed, it’s encouraged!
This recipe provides all the essential tips and tricks to guarantee a perfect, creamy, and delightfully gooey center that remains perfectly set. If you’re someone who tends to overbake or “burn” other desserts, this is your moment to shine! Embrace the char and discover the magic within.
🍰 Why You’ll Adore This Basque Burnt Cheesecake Recipe
There are countless reasons why this particular Basque burnt cheesecake will quickly become your new favorite dessert. From its effortless preparation to its unparalleled taste and texture, it’s designed to impress with minimal fuss.
- Effortlessly Easy & Low Fuss: Basque burnt cheesecakes are celebrated for their simplicity. Unlike their delicate New York counterparts, there’s no need for a fussy crust to prepare, nor the dreaded water bath during baking. This means less time in the kitchen and more time enjoying your delicious creation. It’s truly a beginner-friendly recipe that yields professional results.
- Naturally Crustless with a Stunning Caramelized Skin: While there isn’t a traditional graham cracker or cookie crust, the high-heat baking process creates an incredible, deeply caramelized “skin” on the outside of the cheesecake. This unique exterior is rich, intensely flavored, and possesses a wonderful chewiness that perfectly complements the creamy interior. It develops a captivating chocolate-caramel note, transforming into a crust-like layer that’s bursting with flavor – and no, it doesn’t taste bitter or burnt, just beautifully browned!
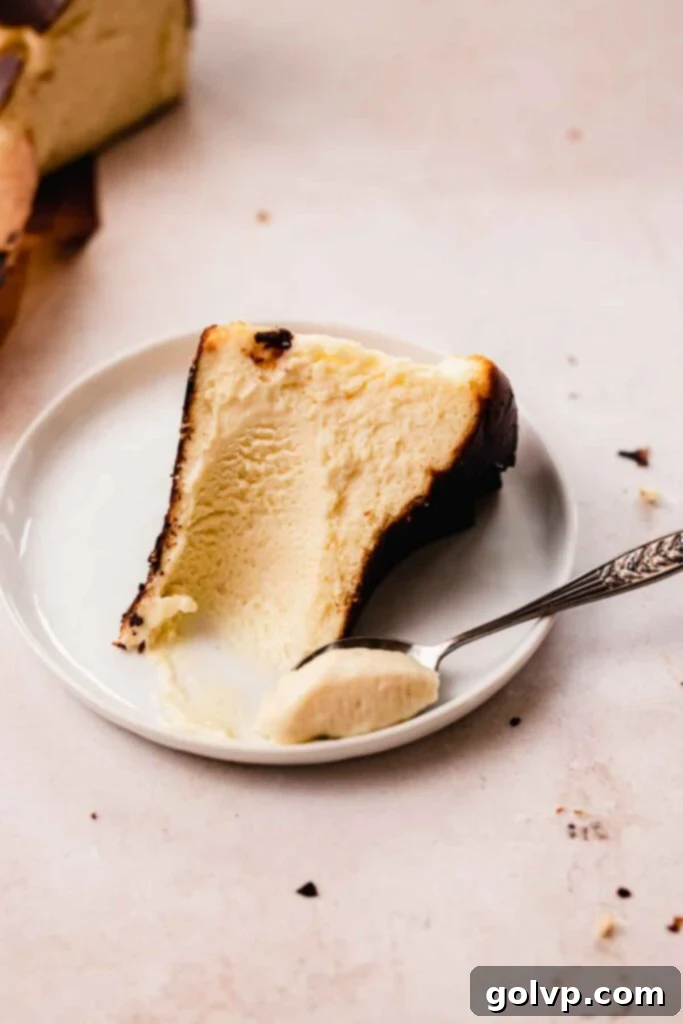
- Perfectly Creamy & Gooey Center: Achieving the quintessential Basque burnt cheesecake texture – that ultra-creamy, slightly gooey, yet still perfectly set center – was my mission. After extensive testing and retesting (five times to be precise!), I’ve fine-tuned this recipe to ensure every slice boasts that traditional, almost custard-like interior that gracefully holds its shape but melts in your mouth.
- Ideal 6-inch Size: This recipe yields a perfect 6-inch cheesecake, making it smaller and less intimidating than the typical 9-inch versions. This size is wonderful for smaller gatherings, intimate dinners, or when you simply crave a delightful treat without committing to a massive dessert. Its compact nature also means quicker baking and cooling times.
📝 Essential Ingredients for Success
For flawless results, delve into these ingredient insights!
Find the complete step-by-step instructions and full ingredient list in the recipe card below.
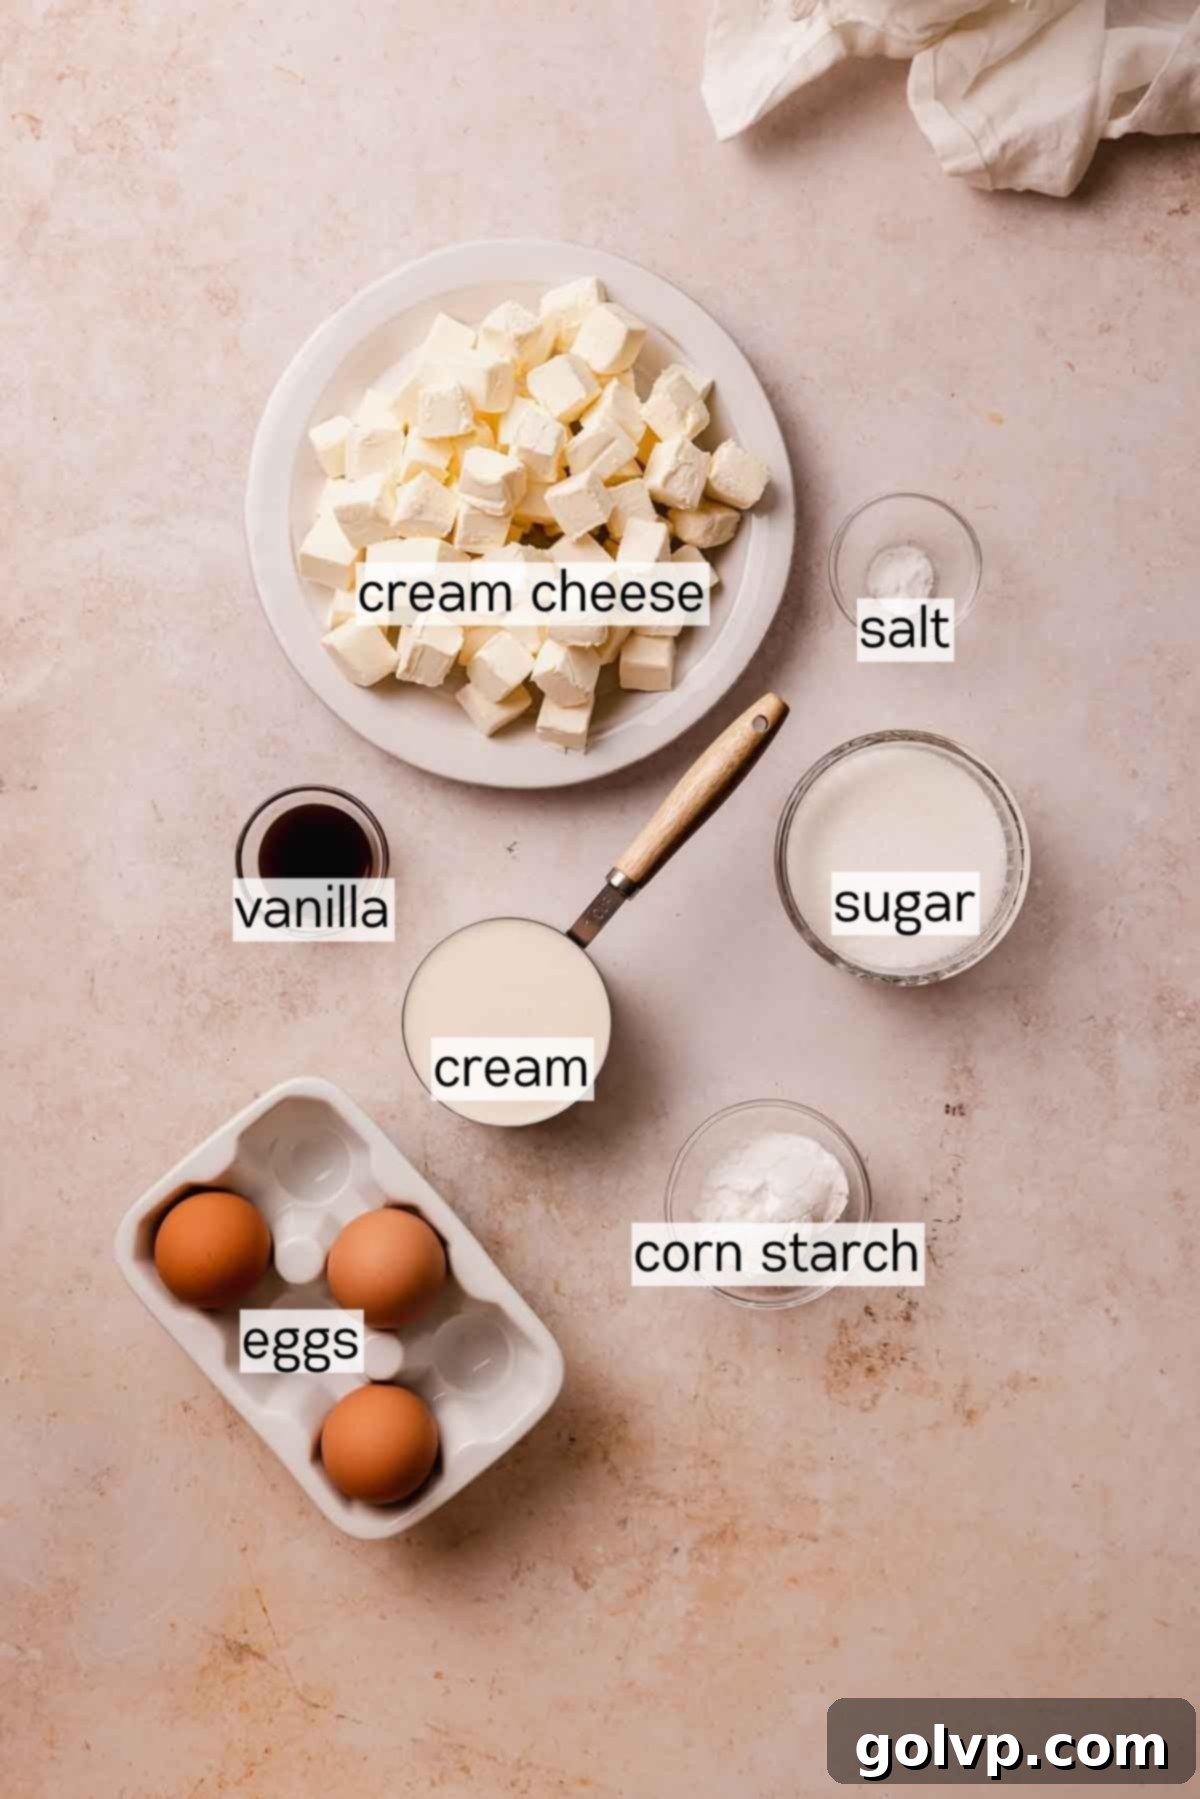
Cream cheese: The foundation of any great cheesecake! For this recipe, using a high-quality, full-fat, brick-style cream cheese is absolutely paramount. It provides the necessary richness and structure to achieve that signature creamy and set texture. Avoid spreadable cream cheese from tubs, as these often contain more water and stabilizers that can compromise the final consistency. You’ll need two 8oz blocks, softened to room temperature for smooth blending.
Granulated sugar: Beyond adding sweetness, sugar plays a crucial role in the caramelization process that creates the unique “burnt” crust. It also contributes to the overall tender texture of the cheesecake.
Sea salt: A small but mighty ingredient, salt enhances all the other flavors, balancing the sweetness and adding depth to the rich dairy notes of the cheesecake.
Heavy whipping cream: Full-fat cream is essential here. I specifically used 35% whipping cream, which provides the necessary fat content for the cheesecake to set beautifully and contribute to its luxurious, custardy mouthfeel. Lower-fat creams will not yield the same rich texture or proper setting.
Eggs: Whole eggs act as a crucial binding agent, bringing the cheesecake batter together and contributing significantly to its custardy, smooth interior texture. Ensure your eggs are at room temperature for seamless incorporation into the batter.
Cornstarch: This is the secret ingredient for achieving that perfect gooey-yet-set center. Cornstarch helps to stabilize the cheesecake and prevents the middle from becoming too liquidy or overly firm. I’ve experimented with various thickeners, and starch consistently delivers the best results. For those who might not have cornstarch, potato starch works wonderfully too! In fact, if you have potato starch on hand, you must try my cottage cheese cheesecake recipe, which is specifically optimized for it.
While I’ve tested Basque cheesecake with all-purpose flour and cake flour, the interior texture is consistently superior when using starch instead of flour. This updated recipe now exclusively utilizes the starch method for an even more exquisite result.
Pure vanilla extract: A splash of vanilla rounds out the flavors, adding a warm, aromatic note that complements the rich cream cheese and caramelized crust beautifully.
👩🍳 Step-by-Step Guide to Making Basque Burnt Cheesecake
Follow these detailed steps to create your own perfectly “burnt” masterpiece.
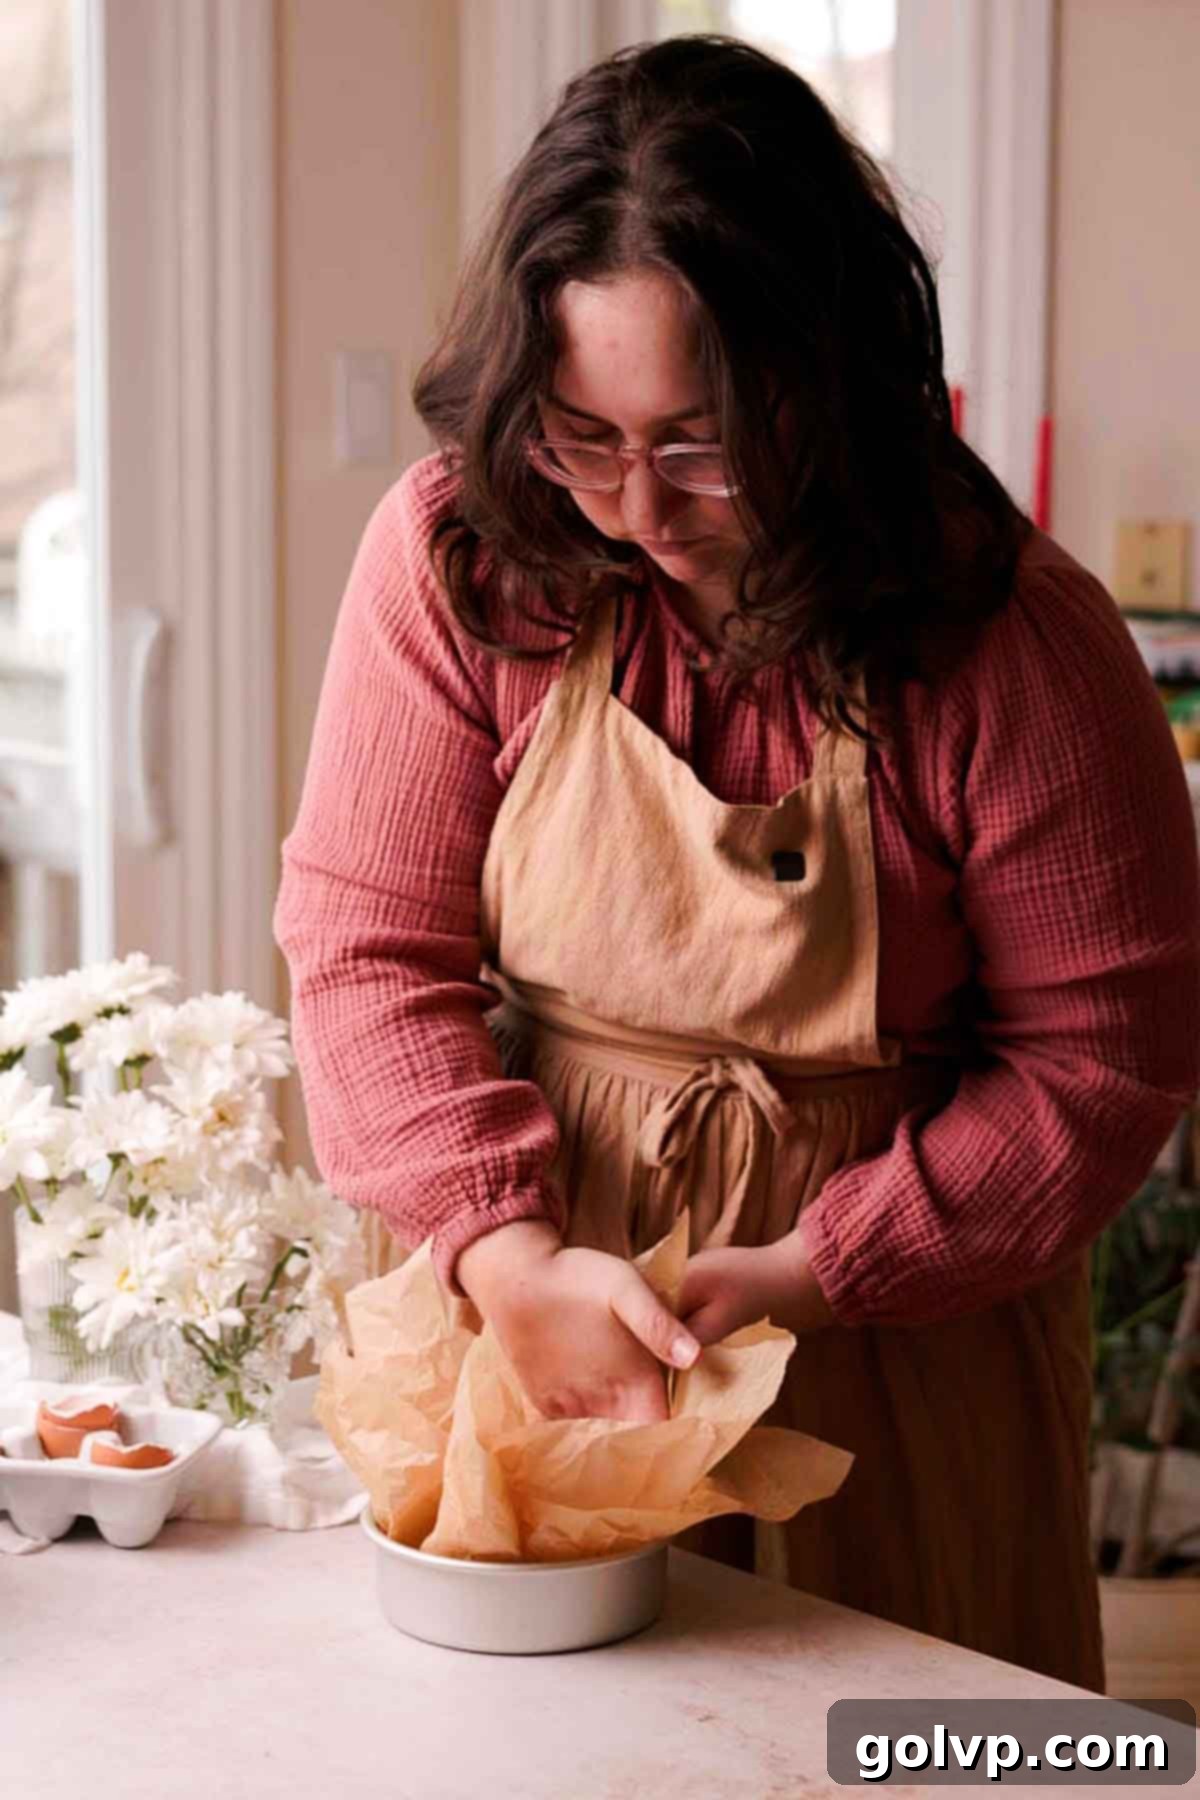
Step 1: Prepare Your Oven and Pan. Begin by preheating your oven to a blazing 500°F (260°C) at least 20 minutes before you start mixing. This high temperature is critical for achieving the characteristic burnt crust. Next, line the inside of a 6” or 7″ round baking pan (it should be at least 2.5” tall) with two layers of parchment paper. Crumple the parchment paper first, then smooth it out to make it more pliable. This helps it conform to the pan’s shape. Critically, leave a generous 3-4 inches of extra parchment paper sticking out above the rim of the pan. The batter will rise significantly above the pan’s lip during baking, and this excess parchment will act as a collar to contain it.
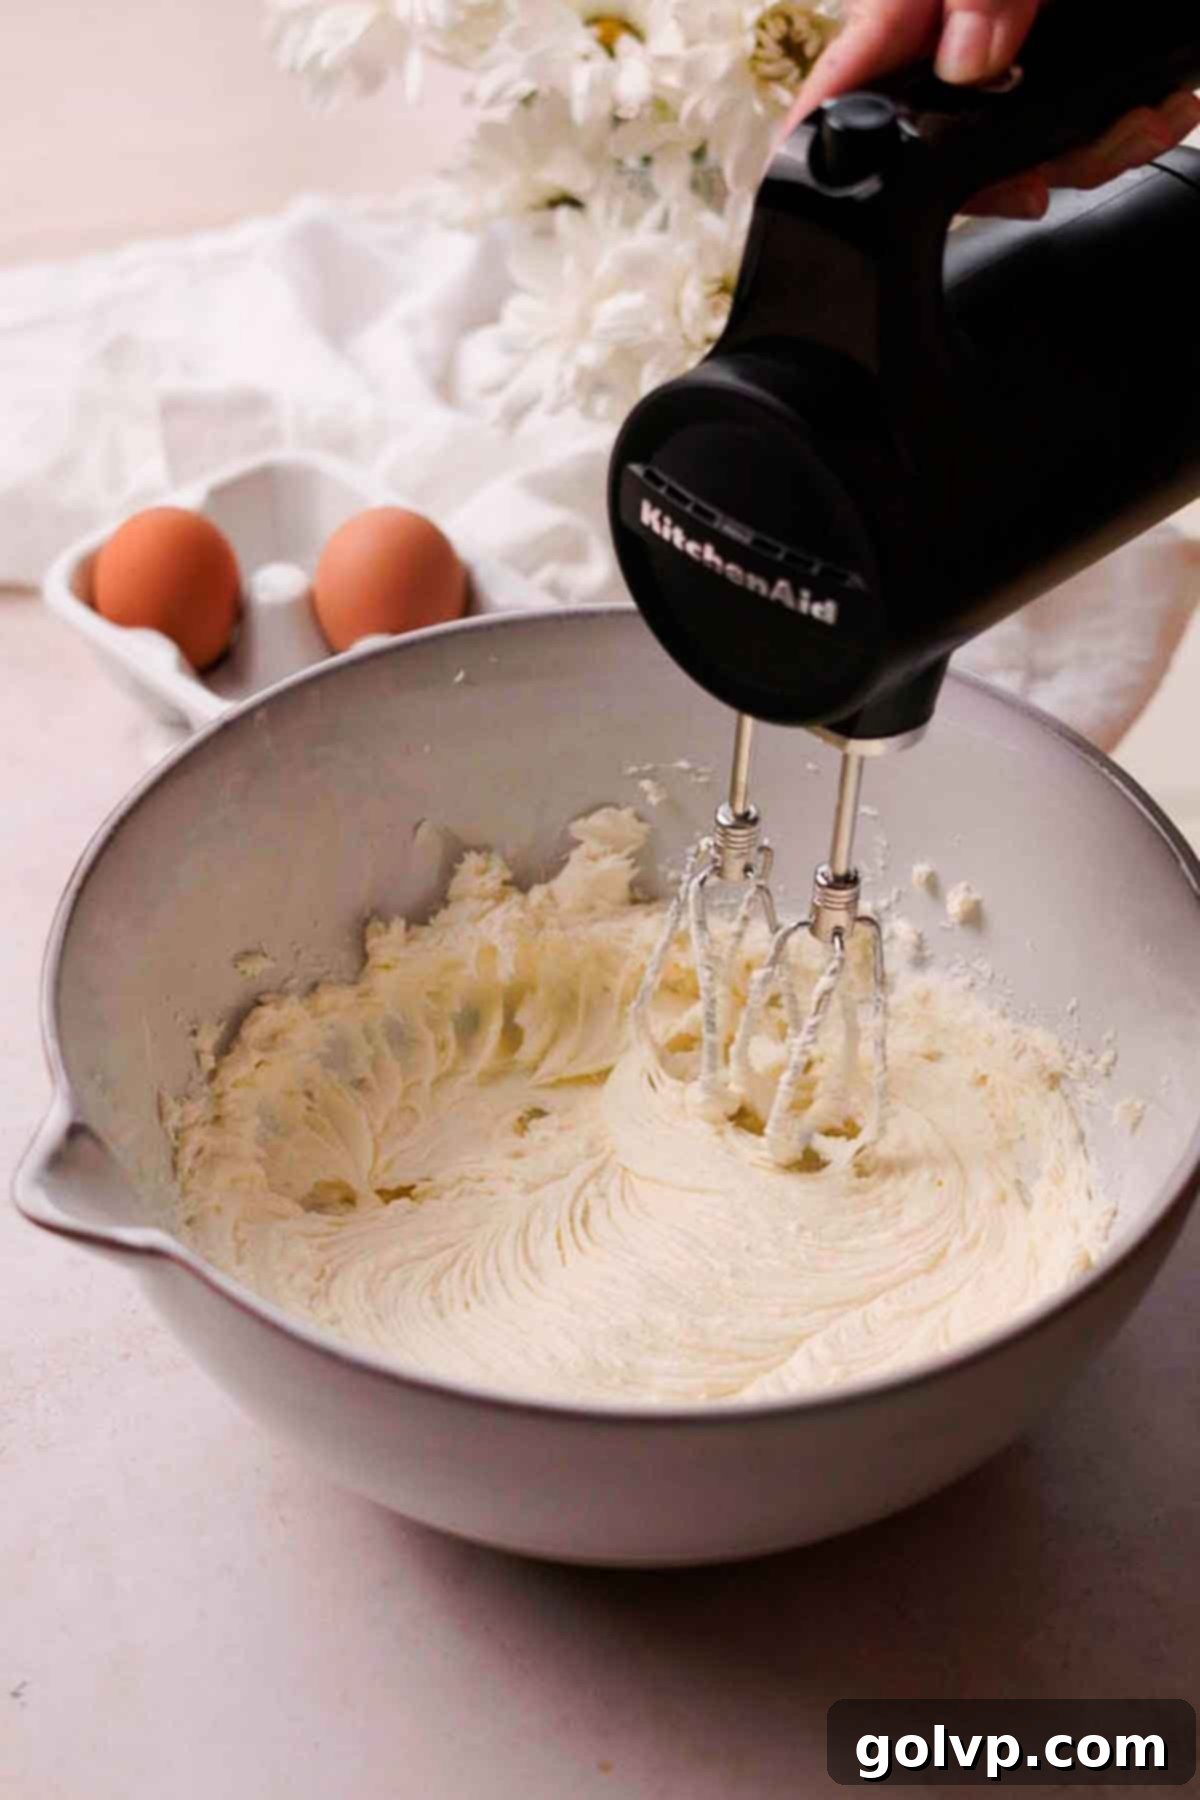
Step 2: Combine Cream Cheese, Sugar, and Salt. In a large mixing bowl or the bowl of a stand mixer fitted with the paddle attachment, combine your softened cream cheese, granulated sugar, and sea salt. Beat these ingredients together on medium speed until the mixture is completely smooth and lump-free. Be sure to stop and scrape down the sides and bottom of the bowl frequently with a rubber spatula. This ensures all ingredients are thoroughly incorporated and prevents any unmixed pockets, which could lead to an uneven texture.
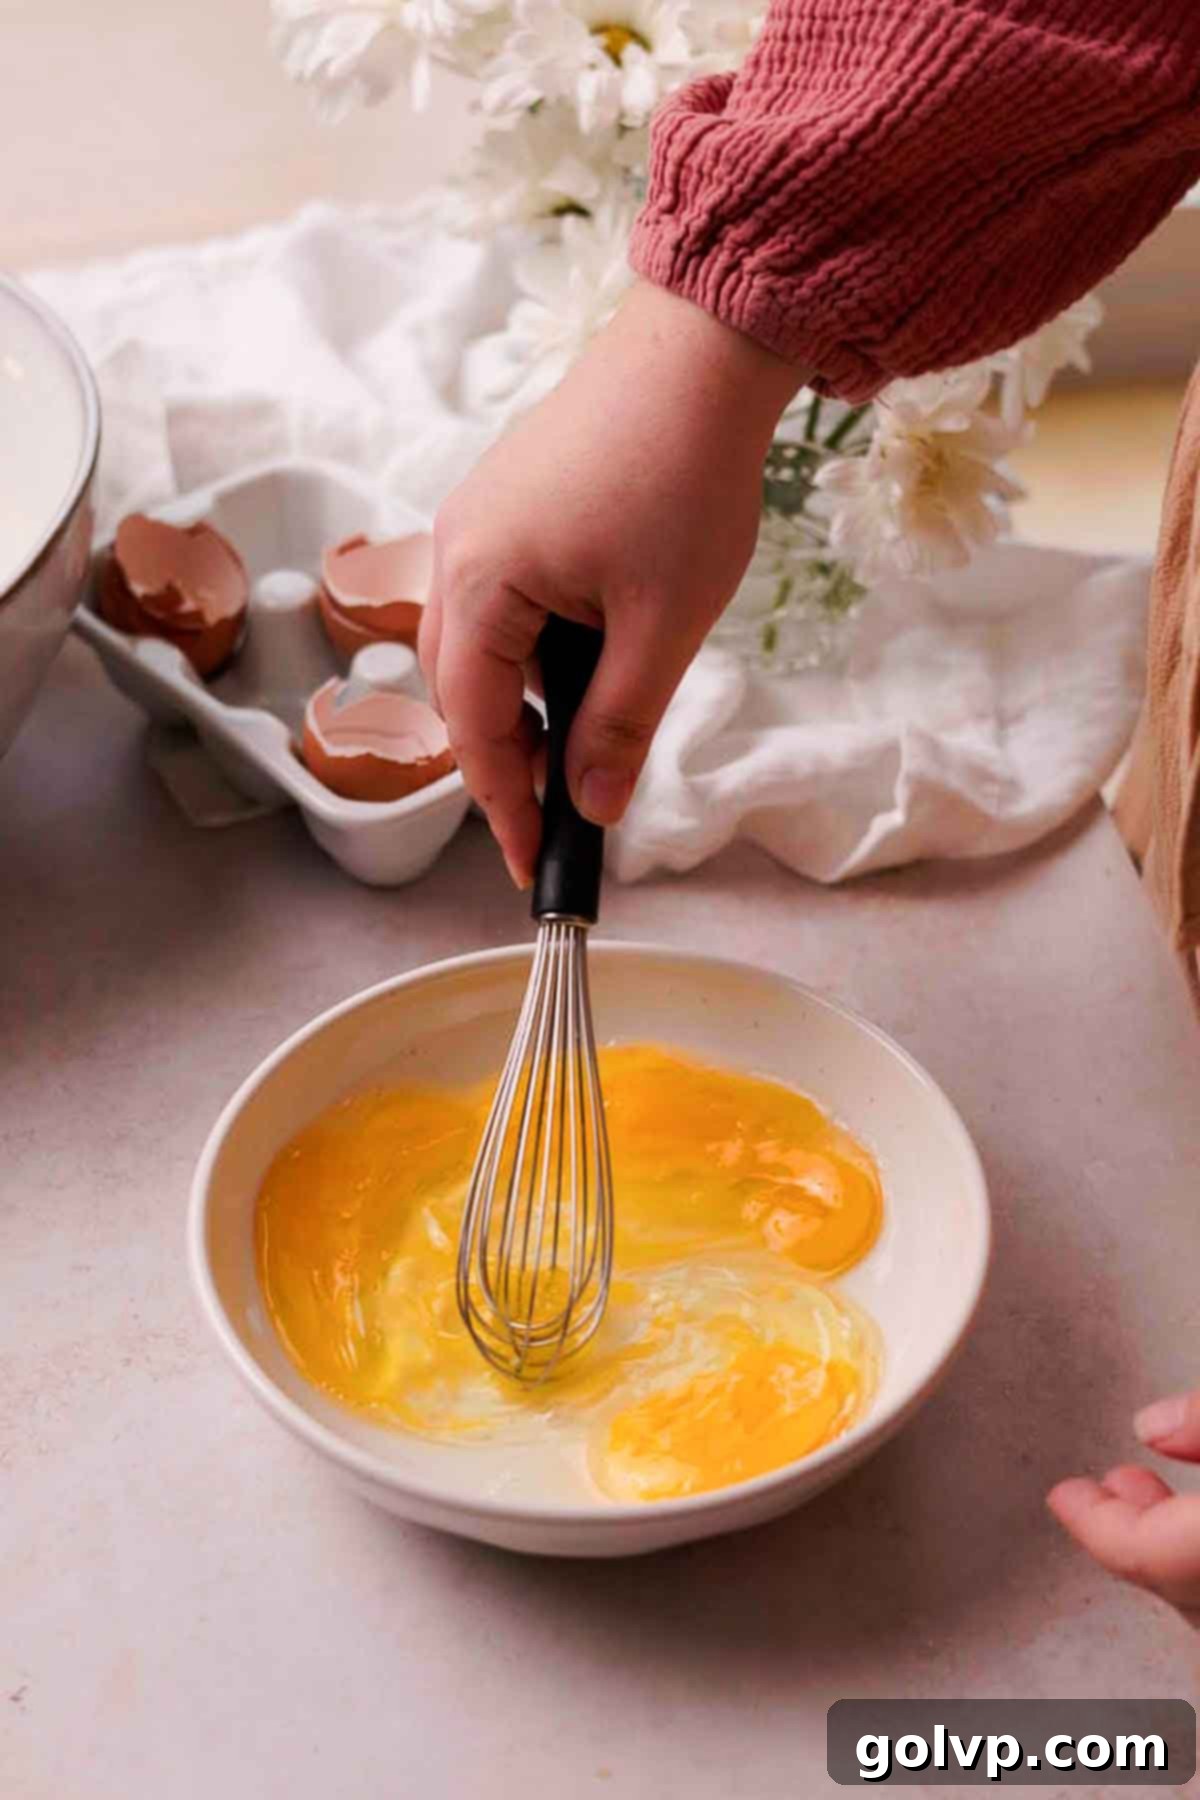
Step 3: Prepare the Eggs. In a separate, smaller bowl, gently whisk the eggs just until the yolks and whites are combined. Avoid over-whisking, as you don’t want to incorporate too much air into the eggs. Lightly whisked eggs will blend into the cheesecake batter more easily, creating a smoother final texture without excessive aeration, which can sometimes lead to cracking.
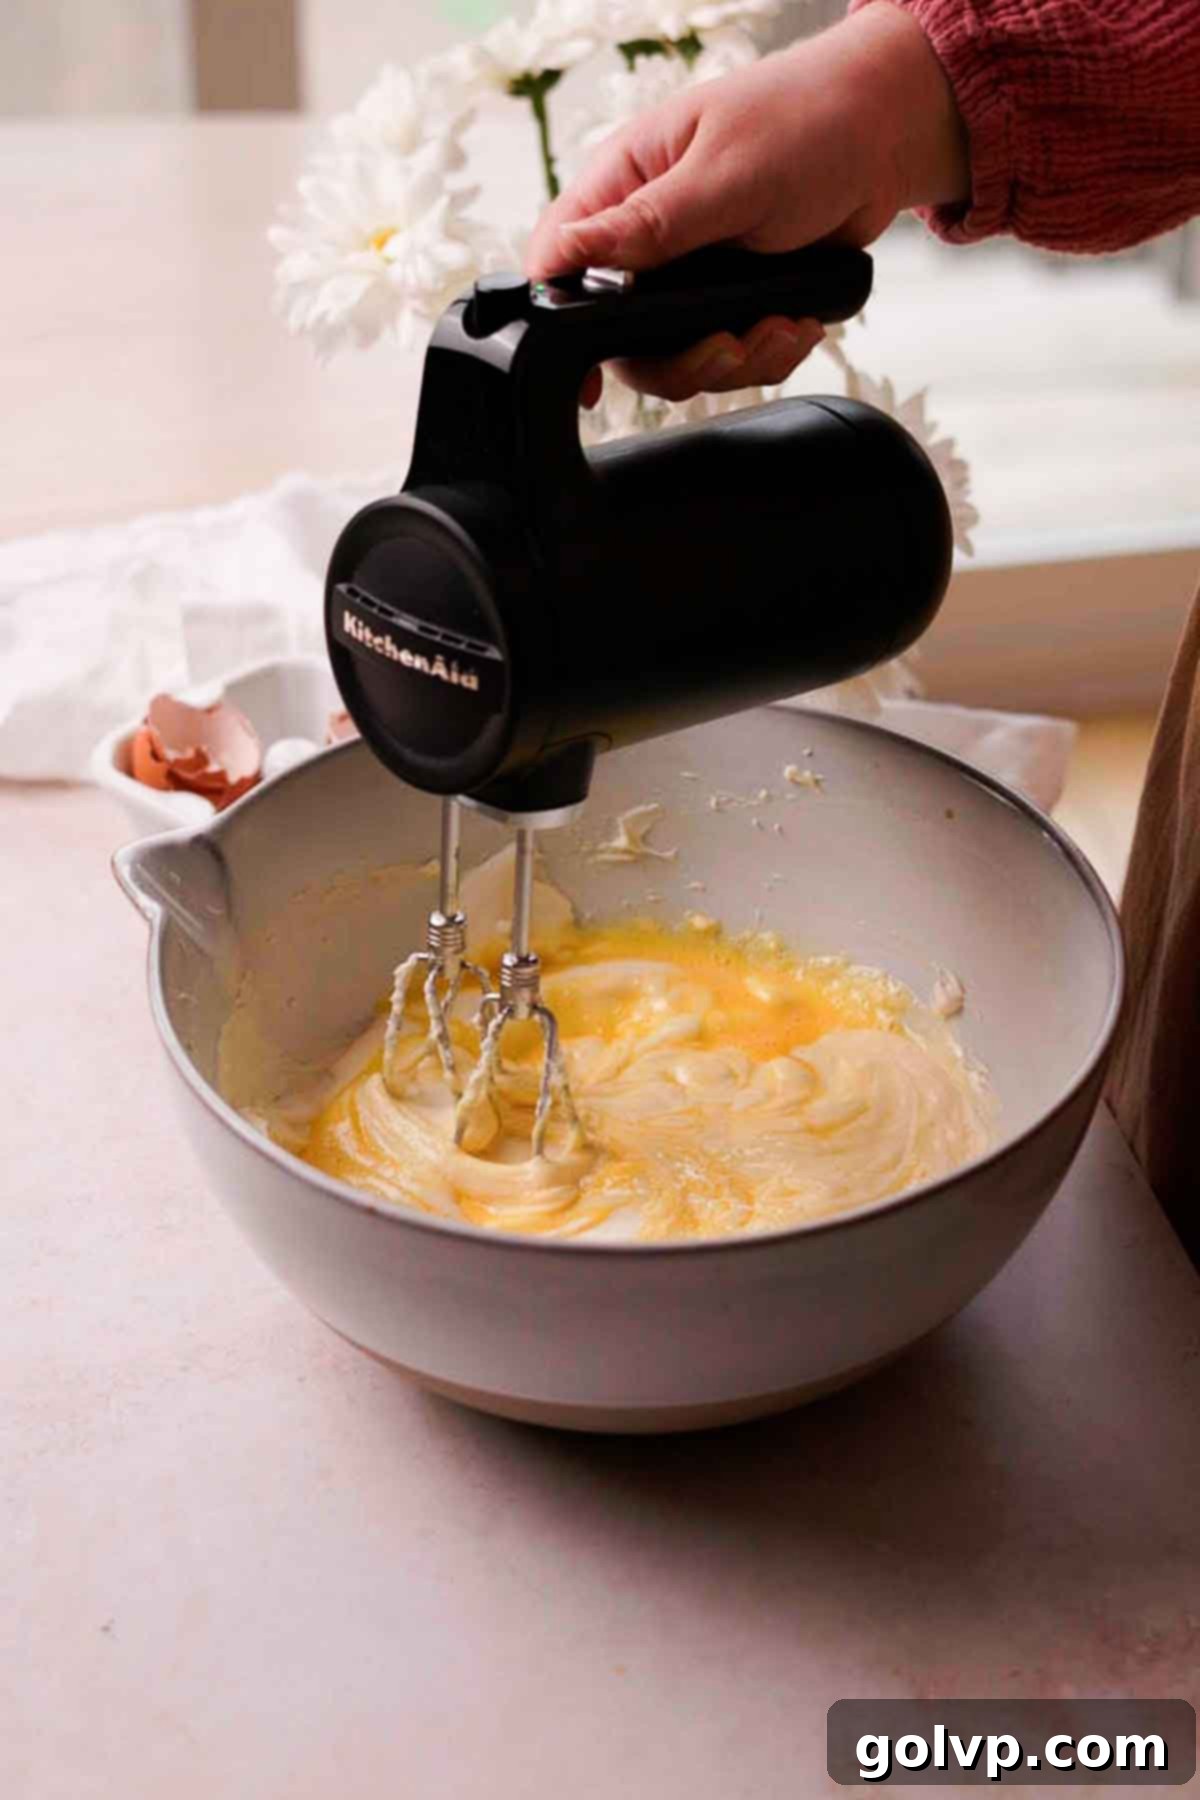
Step 4: Gradually Add Eggs to Batter. Pour half of your lightly whisked eggs into the cream cheese mixture. Blend with an electric mixer on the lowest speed setting, mixing just until the eggs are fully incorporated. Stop, scrape down the sides of the bowl again, then add the remaining half of the eggs. Continue blending on the lowest speed, mixing only until the eggs are just incorporated. Overmixing at this stage can introduce too much air, which can affect the final texture and cause more cracks.
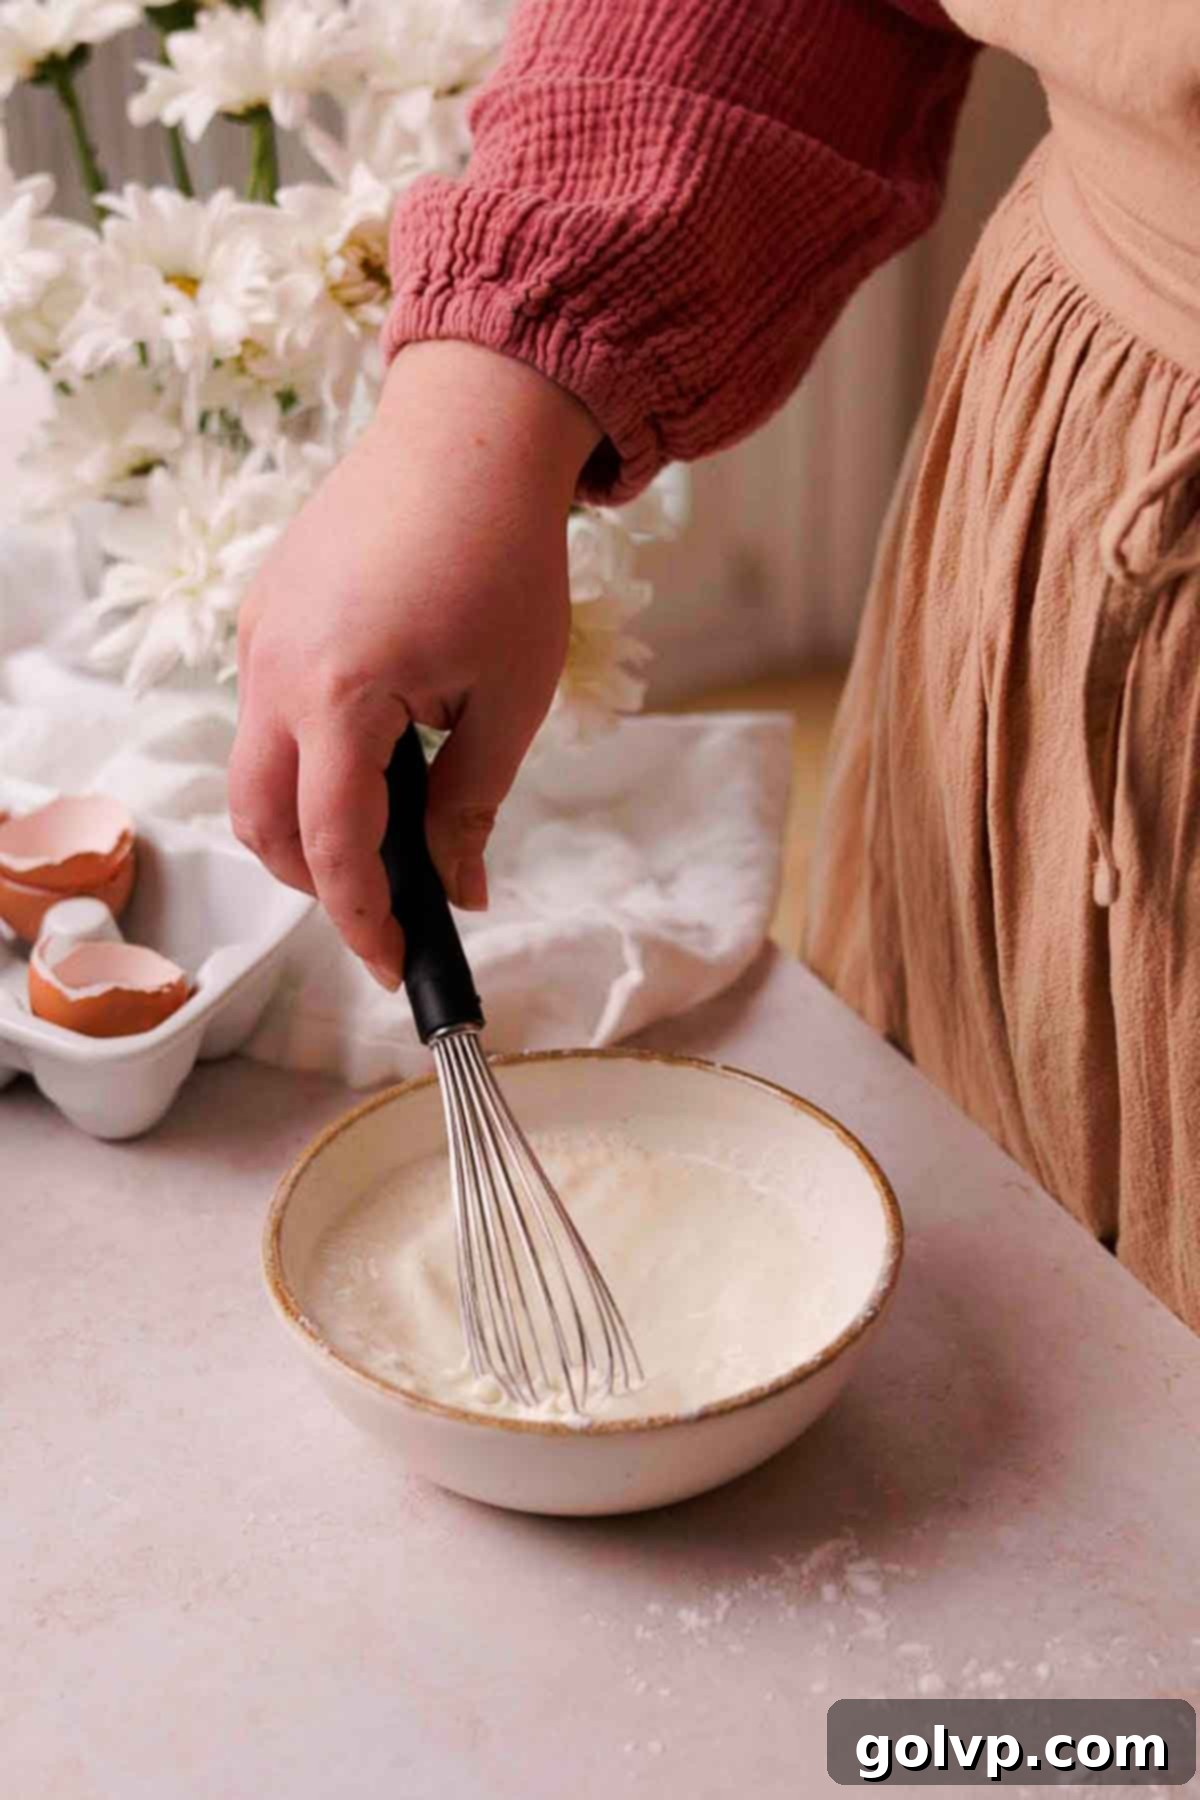
Step 5: Prepare the Cream and Starch Mixture. In yet another separate bowl, pour the heavy whipping cream. Evenly sprinkle the cornstarch (or potato starch) over the surface of the cream. Whisk vigorously until the starch is completely dissolved and no lumps remain. Mixing the starch into the cream first helps to prevent lumps from forming when it’s added to the thicker cheesecake batter.
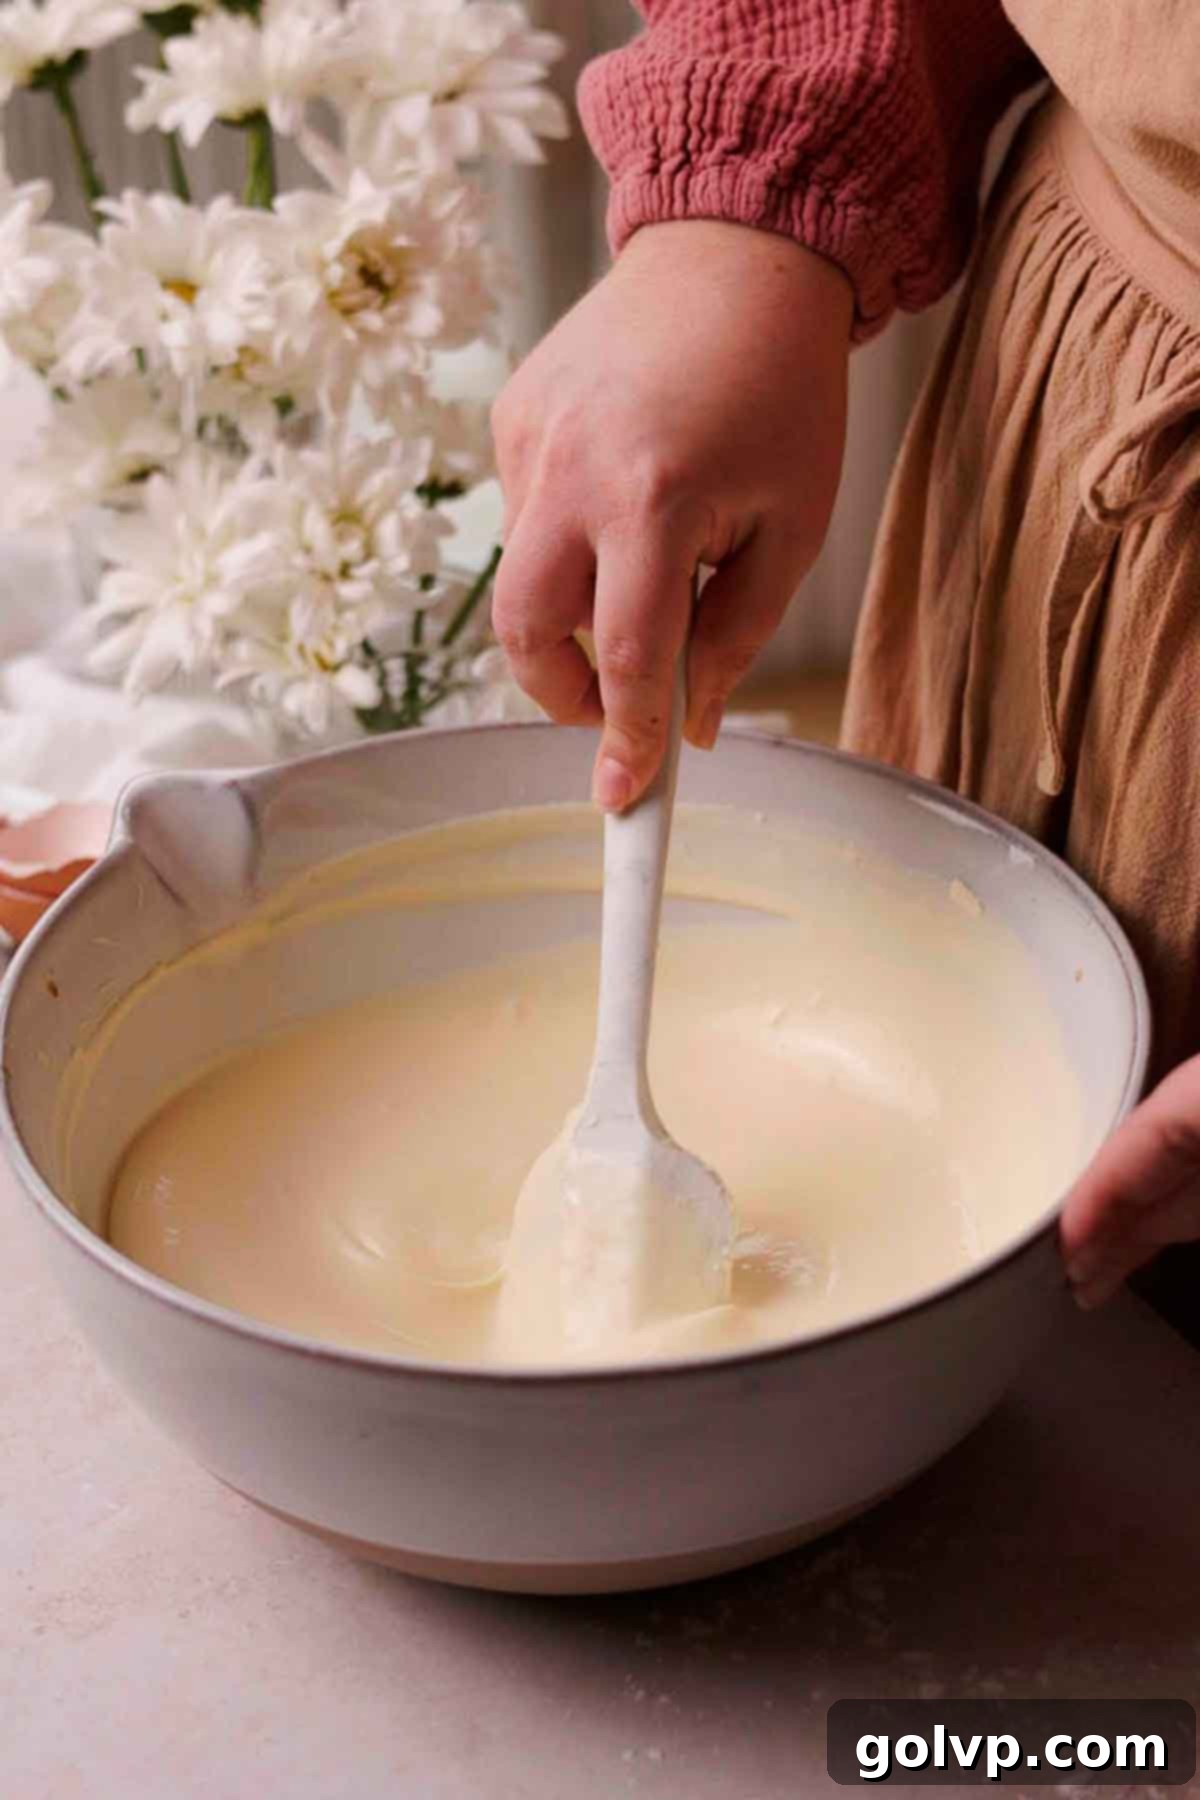
Step 6: Combine All Ingredients. Pour the prepared cream and starch mixture, along with the pure vanilla extract, into the main cheesecake batter. Using a rubber spatula, gently fold and stir all the ingredients together. Ensure you reach down to the bottom and scrape the edges of the bowl thoroughly to achieve a thin, smooth, and homogenous batter. This final mixing step should be gentle to avoid incorporating excess air.
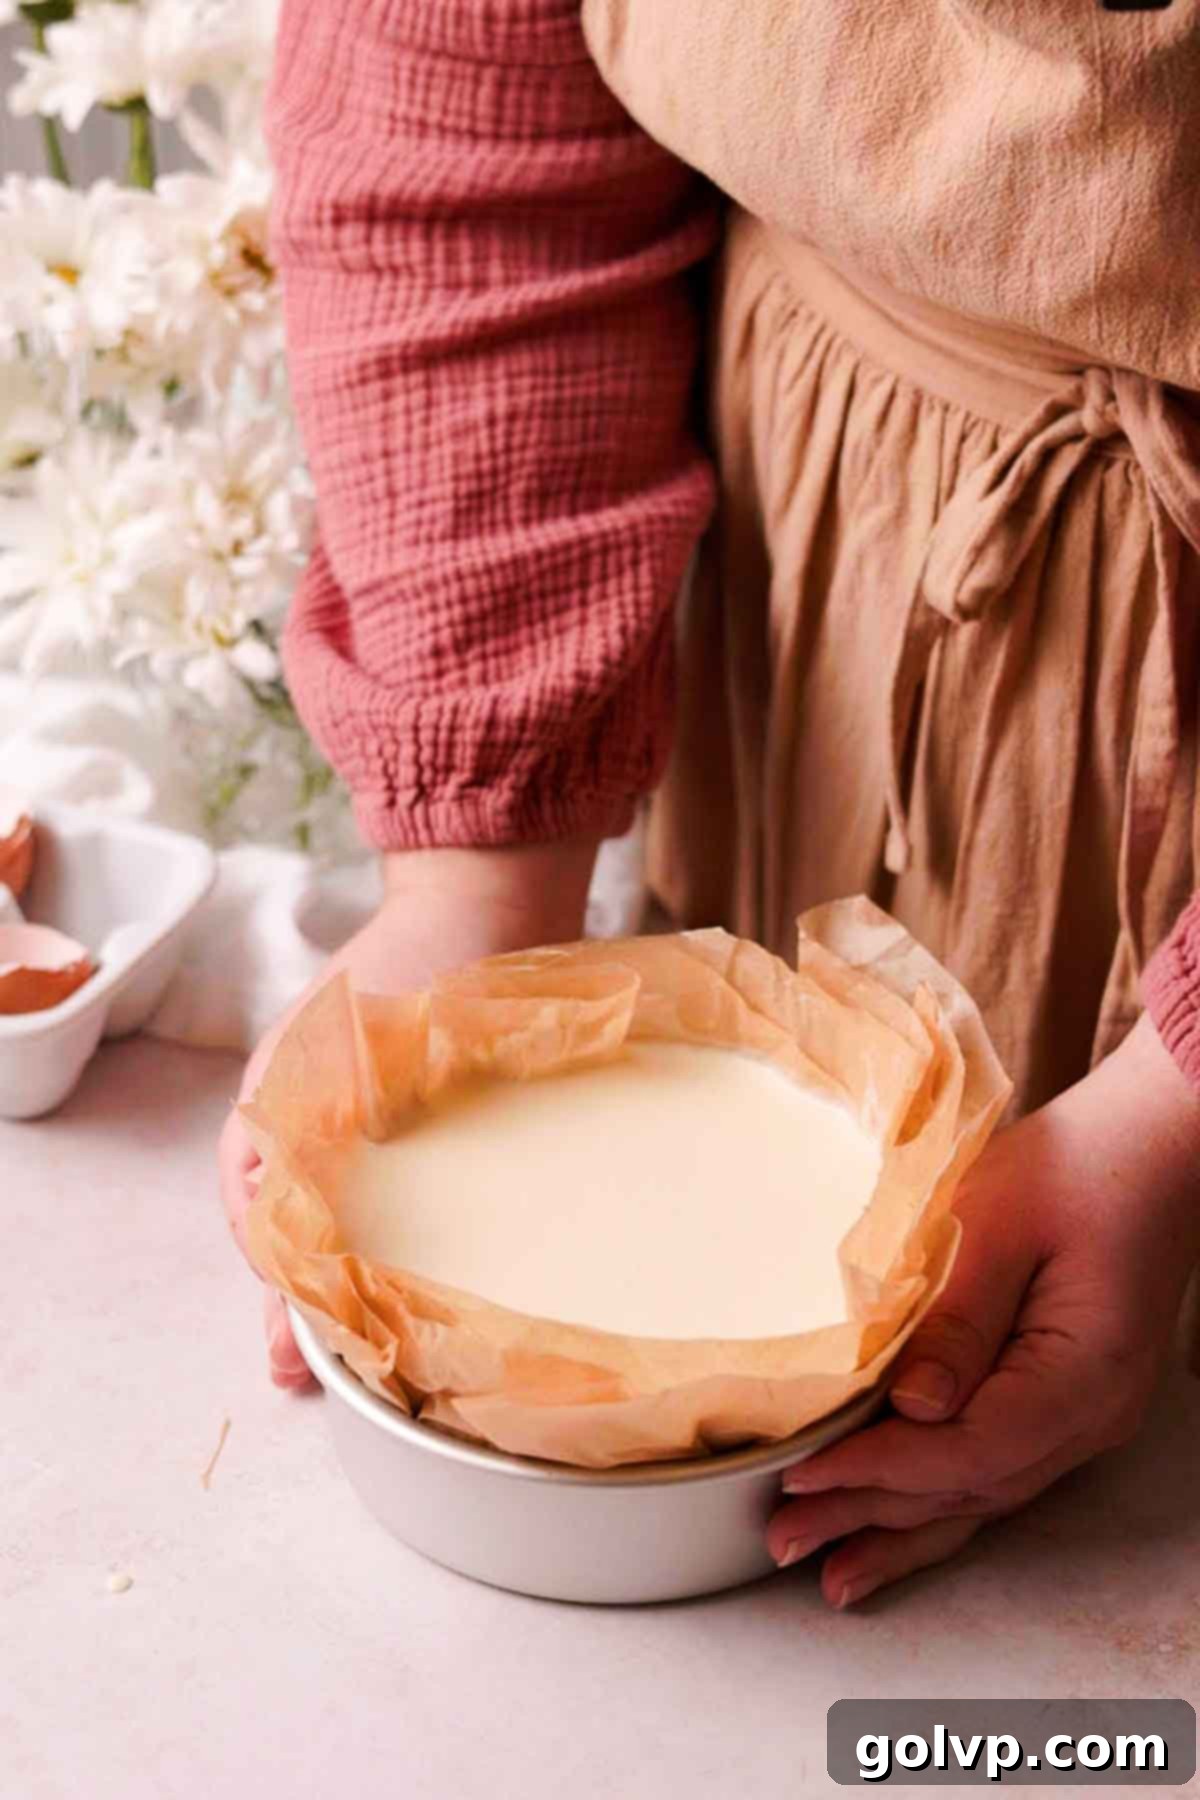
Step 7: Pour Batter and Prepare for Baking. Carefully pour all of the thin cheesecake batter into your parchment-lined baking pan. If your pan is on the shorter side, as mine is, the batter will likely fill up above the lip of the pan. Don’t worry, this is precisely why you left the extra parchment paper sticking out – it will securely hold the batter in place during baking. Gently smooth out any significant creases in the parchment paper that might be pushing into the cheesecake batter. Finally, trim the excess parchment paper, leaving only about 2 inches extending over the batter. This ensures proper browning without obstruction.
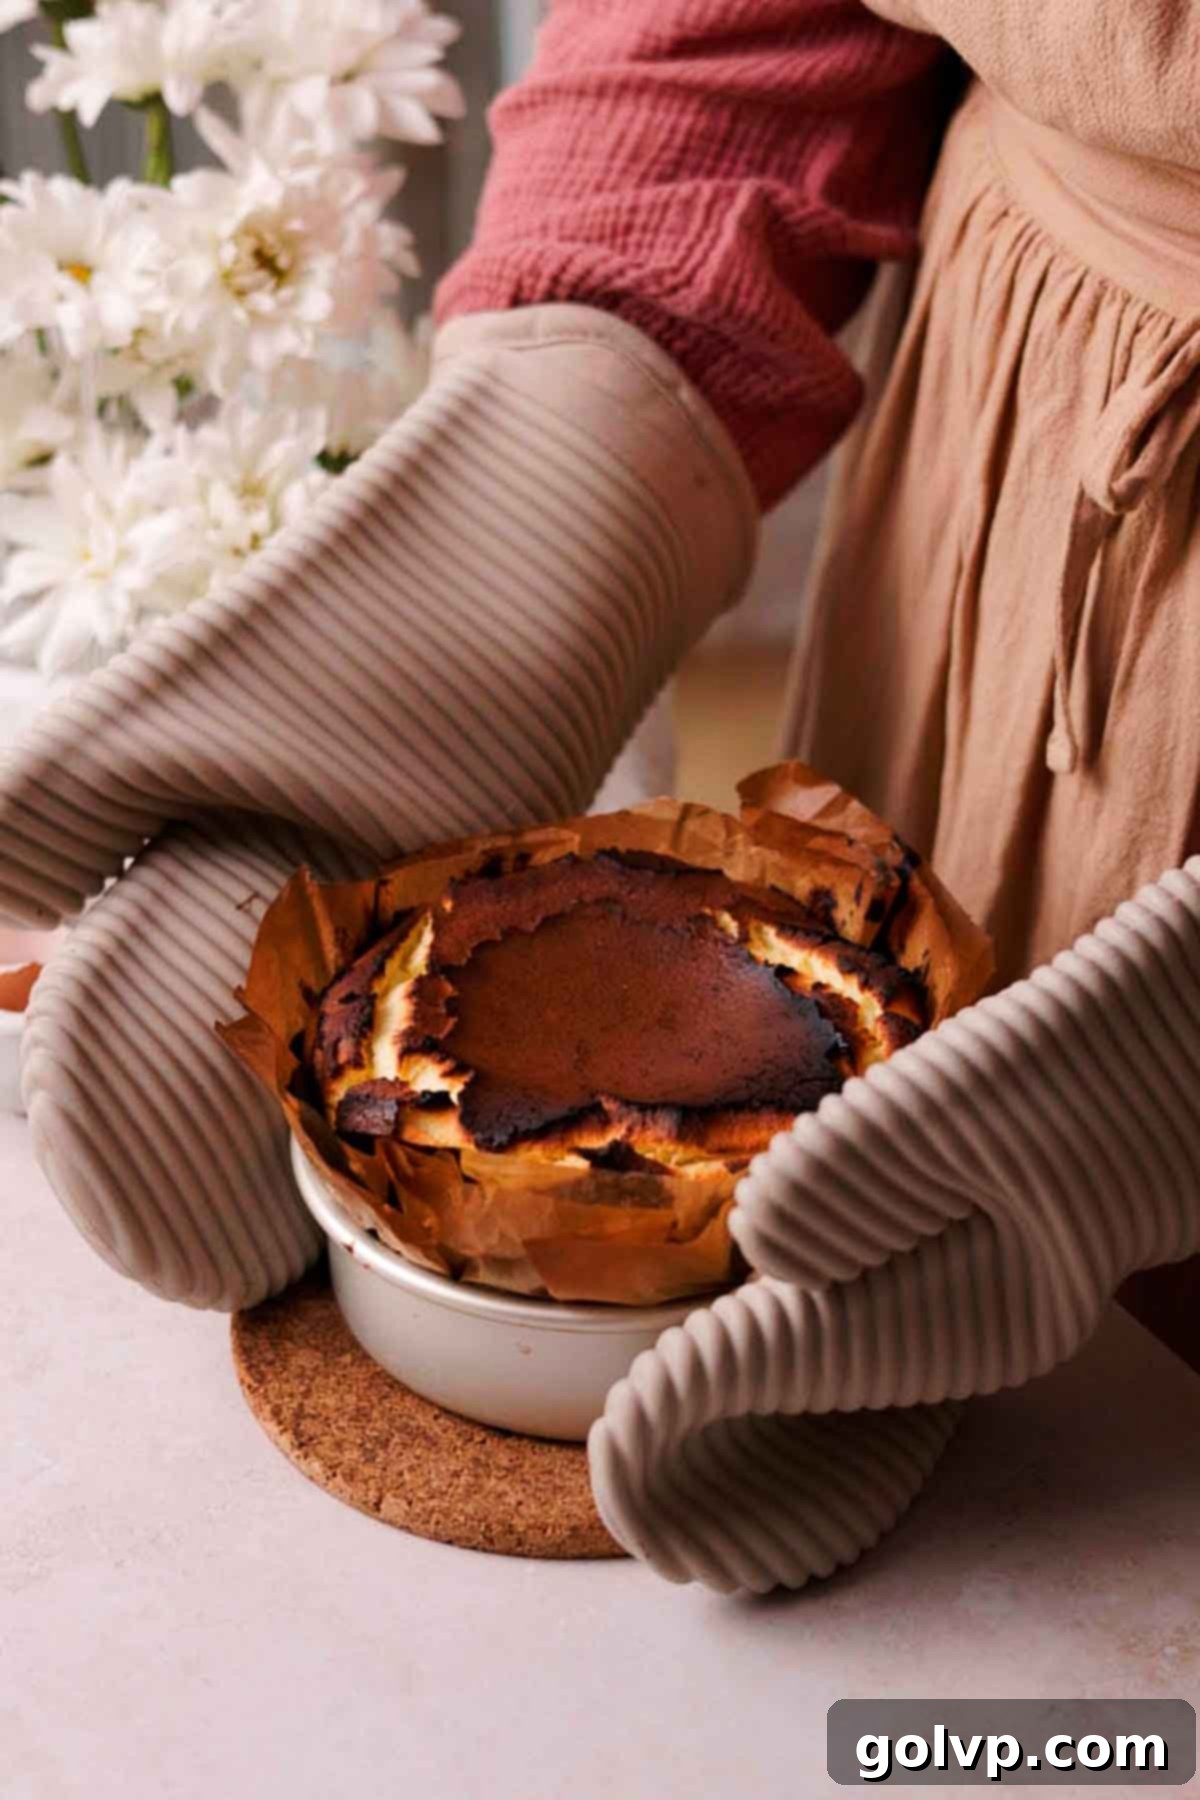
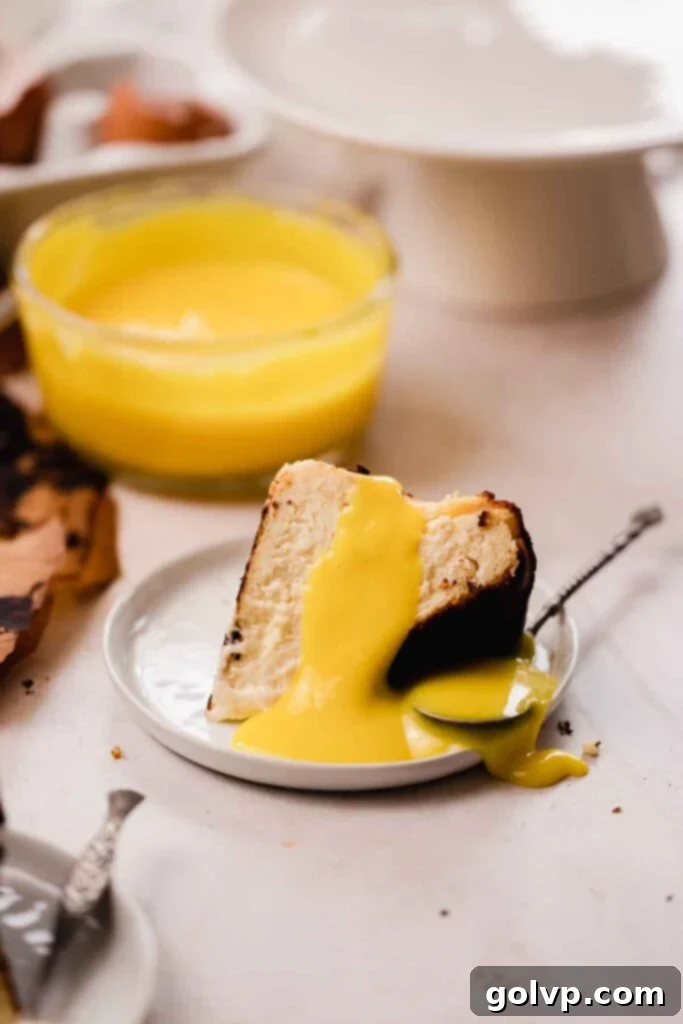
Step 8: Bake, Cool, and Chill. Bake the cheesecake for 25-30 minutes in your preheated 500°F (260°C) oven. The cheesecake is ready when its top is a very dark brown, significantly puffed, and still jiggly in the center when gently shaken. Don’t be alarmed if the surface cracks; this is completely normal for Basque cheesecakes and adds to their rustic charm. For a cheesecake with a very gooey interior, aim for the 25-minute mark. If you prefer a slightly firmer texture, bake for approximately 30 minutes. My ideal bake time was 26 minutes, but oven temperatures can vary significantly, so trust your visual cues. Remove the cheesecake from the oven and allow it to cool completely to room temperature on a wire rack. As it cools, it will deflate and continue to set. Once at room temperature, refrigerate the cheesecake for at least 4-6 hours, or ideally overnight. Chilling is essential for the flavors to fully develop and for the cheesecake to reach its perfect creamy, set-yet-gooey consistency. Serve chilled or at room temperature, either on its own or with a warm drizzle of lemon curd over each slice. Absolutely delicious!
✔️ Expert Basque Cheesecake Tips for Perfection
Achieving Basque burnt cheesecake perfection is within reach with these crucial tips:
- Scrape Down the Bowl Constantly: Because Basque cheesecake batter is relatively thin, lumps can easily hide at the bottom or sides of the bowl. Consistently stopping to scrape down the bowl when mixing and adding ingredients is vital. This meticulous step prevents any unmixed cream cheese or sugar from creating a lumpy, uneven cheesecake batter, ensuring a silky smooth final product.
- Watch the Cheesecake in the Oven Like a Hawk: The high baking temperature means things can change quickly. Your cheesecake is perfectly done when it boasts a rich, very dark brown, almost blackened color, is dramatically puffed up (it will deflate later), and still has a distinct jiggly center. Keep a close eye on it through the oven door. If you start to see smoke or the edges begin to sparkle like charcoal, it means you’ve truly overdone it, and the crust will likely be bitter.
- Ensure Perfect Bake and Browning: To guarantee that stunning, deeply browned crust and proper internal set, preheat your oven for a full 20 minutes before placing the cheesecake inside. This ensures the oven has reached and stabilized at the high temperature. Once baking, resist the urge to open the oven door, as this will cause significant heat loss and disrupt the browning and setting process.
- Chill Thoroughly Before Serving: Chilling is not just an optional step; it’s essential. Refrigerating the cheesecake for at least 4-6 hours (or ideally overnight) helps the center firm up, allowing the internal structure to fully set. More importantly, chilling deepens and harmonizes the flavors, making each bite even more satisfying. It also makes slicing much cleaner and easier. You can then choose to serve the cheesecake chilled for a firmer, more dense texture, or allow it to come to room temperature for a softer, gooier, and more luscious experience.
🥄 Make Ahead & Storage Instructions
Basque burnt cheesecake is an excellent make-ahead dessert, a true savior for entertaining or busy schedules, primarily because it requires thorough chilling to reach its peak flavor and texture.
Make Ahead: To fully develop its beautiful flavor and exquisite texture, it’s highly recommended to prepare your cheesecake the day or night before you plan to serve it. This extended cooling and chilling period in the fridge is crucial for the internal structure to set properly and for the rich, caramelized notes to meld harmoniously.
Storage: Store the entire cheesecake or any leftover slices in the fridge. For optimal freshness, place it in an airtight container or a dedicated cake carrier. When properly stored, it will maintain its deliciousness for up to 4 days.
Freezing for Longer Storage: If you wish to store it for an extended period, leftover slices can be frozen for up to 2 months. To do this effectively, wrap individual slices tightly in plastic wrap, then place them in an airtight freezer bag or container. For convenience, I recommend adding a small piece of parchment paper between individual slices before freezing. This allows you to easily take out just one slice at a time, defrost it in the refrigerator for a few hours, and enjoy a perfectly preserved treat whenever a craving strikes!
🔥 Mastering the Art of the Perfect Blackened Crust
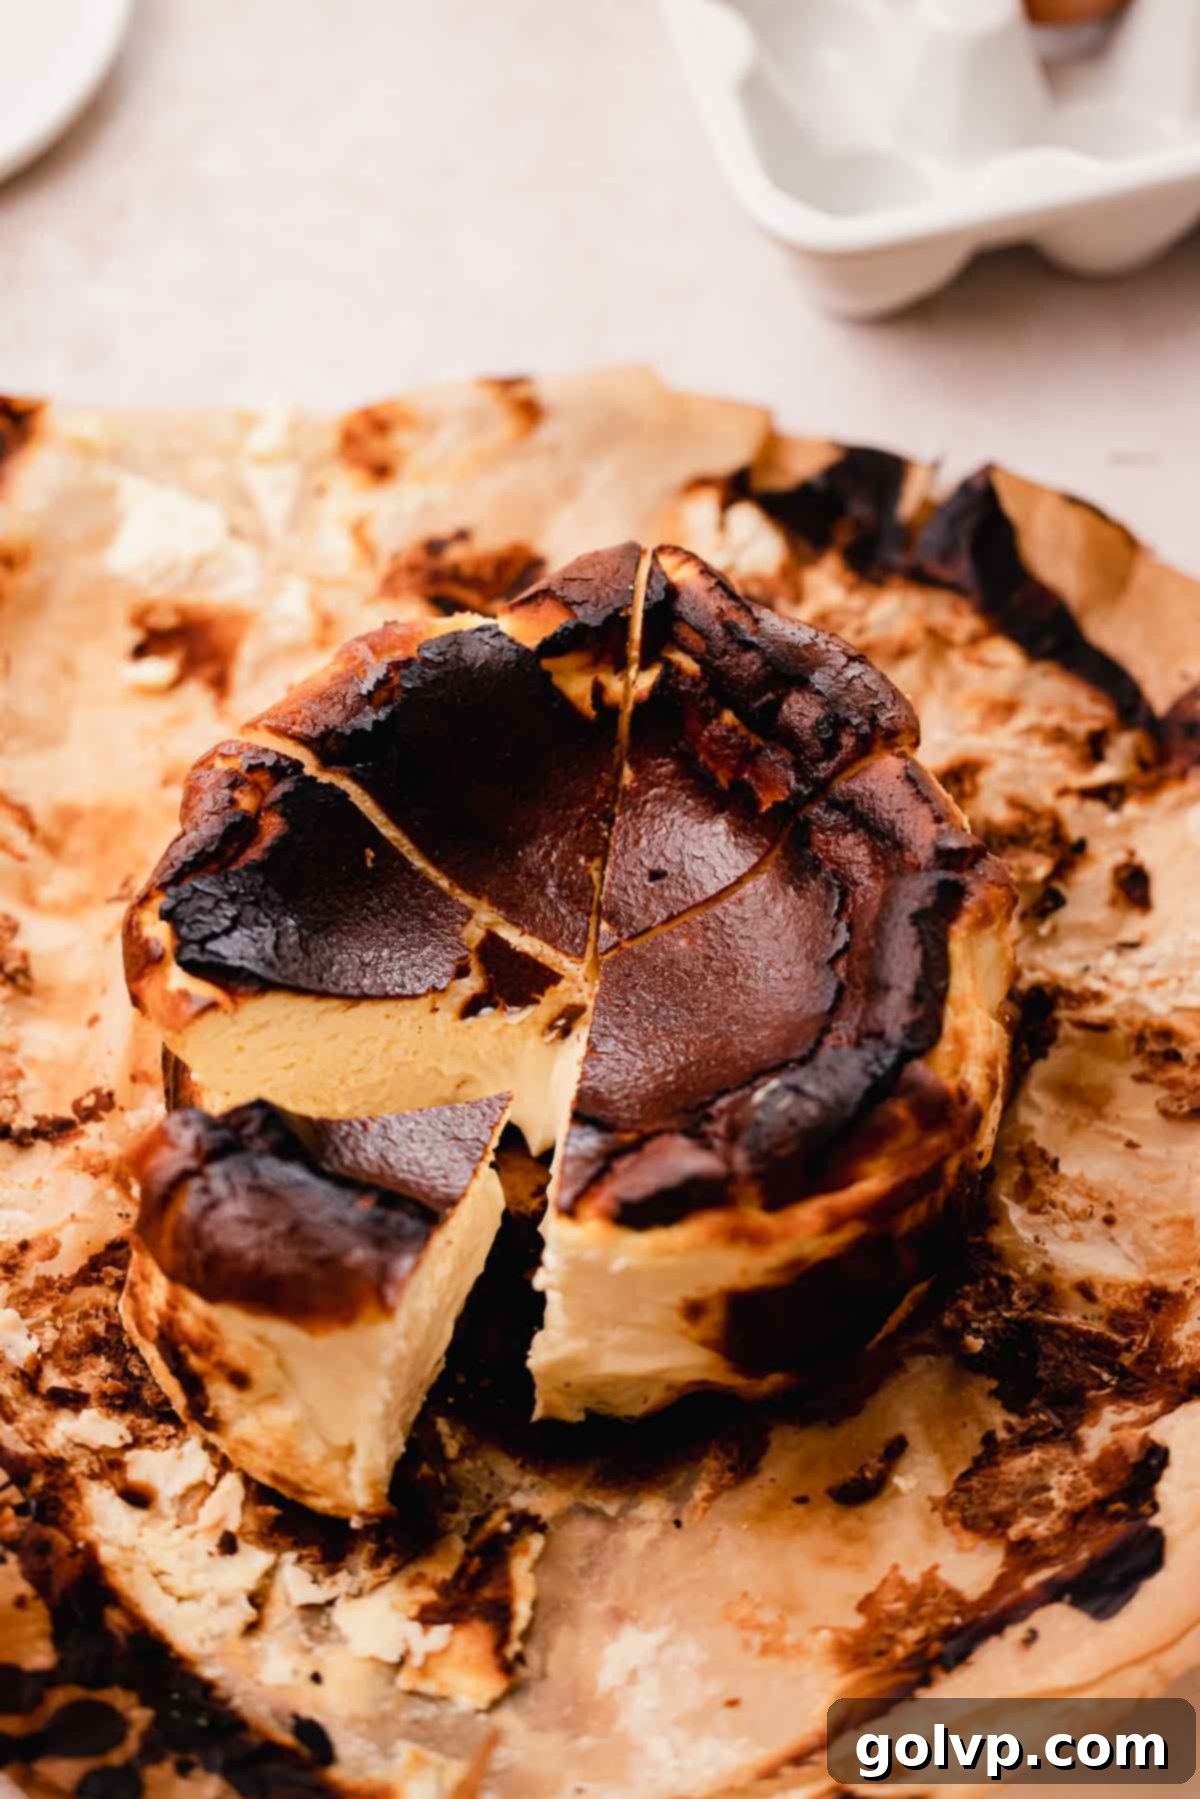
Achieving the striking, deeply colored exterior of a Basque burnt cheesecake is surprisingly straightforward, yet requires a keen eye. The fundamental principle is to bake the cheesecake at an intensely high temperature. This extreme heat facilitates rapid browning and caramelization on the surface, while the creamy, silky-smooth interior cooks just enough to set beautifully. Unlike a delicate New York-style cheesecake, such as this tangy lemon raspberry cheesecake, where overbaking is a common pitfall, a burnt cheesecake is far more forgiving – within limits.
Because oven temperatures and actual cooking times can vary significantly between appliances, here’s my recommended approach for perfect results: Place your cheesecake in the preheated oven and set a timer for 25-30 minutes. Begin checking its progress at the 20-minute mark. At this point, the crust should have developed a medium brown color. If, upon checking, it already appears very dark or black, gently reduce your oven temperature by about 15-20 degrees Fahrenheit and continue monitoring closely for the remaining 5-10 minutes of baking. It is indeed possible to overdo it and genuinely burn the cheesecake to a bitter crisp. You’ll know it’s truly overbaked when the edges start to sparkle and resemble charcoal – this is your cue that it’s gone too far.
Given the incredibly high baking temperature, it is entirely normal for the surface of the Basque burnt cheesecake to crack. These cracks occur because the outer edges and top cook and firm up much faster than the moist, liquidy interior. However, as the cheesecake cools and naturally deflates, these cracks tend to become far less noticeable, often blending into the rustic aesthetic. So, simply ignore them during the baking process!
When the cheesecake is ready to be removed from the oven, it will still have a significant wobble and jiggle in the center when you gently move the pan. Do not worry about this; it is exactly what you want! The residual heat within the cheesecake will continue to cook it gently as it cools, allowing it to set to that ideal, perfectly creamy, and slightly gooey consistency as it rests and chills.
🌍 Basque Cheesecake: A Rich History and Delicious Variations
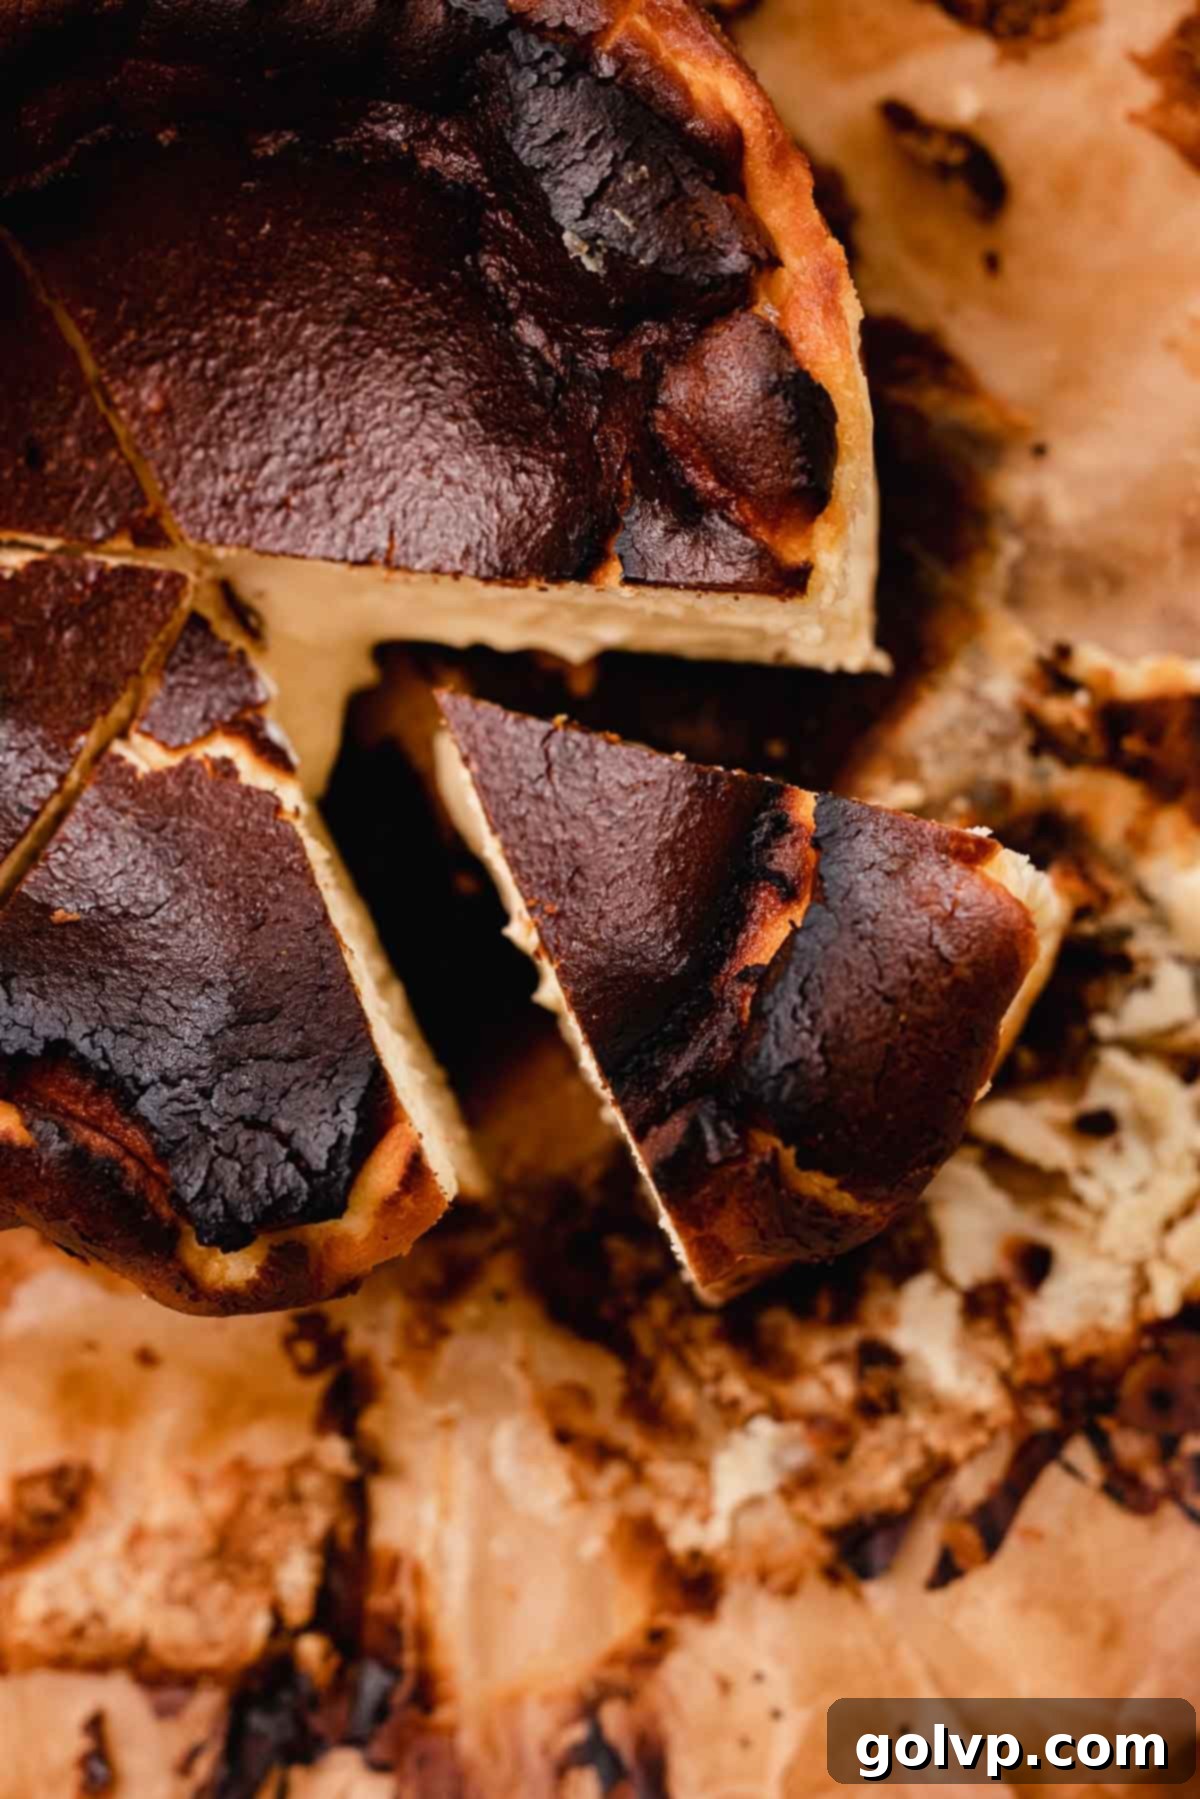
The original Basque cheesecake, known locally as “tarta de queso” or “burnt cheesecake,” hails from the vibrant Basque Country in Spain, specifically popularized by La Viña restaurant in San Sebastián. This unconventional dessert emerged from the region’s rich culinary tradition, where rustic, flavorful dishes are highly prized. It quickly gained international fame for its distinctive appearance and even more distinctive texture, challenging conventional cheesecake norms by embracing a dark, caramelized exterior.
The traditional recipe is beautifully simple, typically made from a modest list of ingredients: cream cheese, sugar, eggs, a touch of flour (though starch, as in this recipe, is often preferred for a gooier center), and heavy cream. However, the versatility of this cheesecake invites delicious experimentation. Adventurous bakers can explore variations by incorporating other pungent cheeses, such as tangy goat cheese or a hint of savory blue cheese, which add a sophisticated depth to the classic flavor profile. These variations often pair wonderfully with the sweet, caramelized notes of the “burnt” crust.
The desired texture of Basque cheesecake also offers a spectrum of preferences. Some enthusiasts prefer their Basque burnt cheesecake baked at such an extreme temperature that the interior remains almost liquid, oozing delightfully when sliced. This ultra-gooey style is a testament to its rustic, unpretentious charm. Others favor a firmer texture, one that still holds its shape beautifully while maintaining a smooth, airy, and fluffy consistency.
This particular version of Basque cheesecake strives for and achieves the perfect in-between texture: it’s robust enough to hold its shape with a firmer, fluffier exterior, yet surprises with a wonderfully gooey and creamy center that is utterly sliceable. It’s a harmonious balance that respects tradition while delivering an exceptionally satisfying culinary experience.
📖 Recipe Frequently Asked Questions
When the Basque burnt cheesecake first emerges from the oven, it will be quite jiggly and noticeably gooey. This is a critical stage, as the cheesecake continues to cook gently from its residual heat even after being removed from the oven. As it gradually cools to room temperature and then further chills in the refrigerator, the fats within the cream cheese and heavy cream begin to re-solidify. This process is essential for achieving that beautifully firm-yet-creamy texture and for the flavors to fully meld and deepen, resulting in a richer, more satisfying bite.
If you prefer an even gooier, smoother texture for serving, you can slice the cheesecake once it’s thoroughly chilled and then allow the individual slices to come to room temperature before enjoying. This slight warming will soften the interior to an almost custard-like consistency.
I’ve thoroughly tested both the convection bake and regular oven settings for this Basque burnt cheesecake recipe. Ultimately, I found that the regular oven setting consistently produced superior results.
Using the regular setting yielded a cheesecake with a noticeably creamier middle that was still perfectly set. In contrast, the convection setting resulted in a less creamy interior and caused the cheesecake to crack significantly more on the surface. Additionally, I found that I had to bake it for a longer duration with the convection setting because it struggled to achieve the desired dark brown top.
However, it’s crucial to remember that every oven is unique and performs differently. What works best for my oven might not be ideal for yours! Always keep a close eye on your cheesecake through the oven door, and avoid opening it prematurely, as this will lead to significant heat loss and disrupt the baking process.
The texture of a Basque cheesecake is a truly delightful and unique experience, often described as a perfect cross between the dense richness of an American cheesecake and the airy, jiggly lightness of a Japanese cheesecake. It shares a similar fluffy quality with Japanese cheesecakes, providing a wonderfully soft and tender mouthfeel. Simultaneously, it retains the creamy, indulgent, and distinct cream cheese flavor that is the hallmark of an American cheesecake. What truly sets it apart is its gloriously gooey, almost molten middle, which is perfectly cooked without being runny or underbaked. This combination creates a dessert that is both comforting and surprisingly elegant.
This recipe is perfectly scaled to make one 6-inch cheesecake. It’s highly advisable not to bake this recipe in a pan larger than 7 inches in diameter. Using a larger pan will cause the cheesecake to bake faster through the middle, significantly increasing the risk of it being overdone and losing its characteristic gooey center.
If you opt to use a springform pan, it is absolutely crucial to ensure that the entire pan is completely covered and sealed with parchment paper, leaving no gaps or holes, to prevent any leaks during baking. To do this, line both the bottom and sides with two generous layers of parchment paper. Press and crease the paper firmly into the sides so that it clings tightly to the shape of the pan. The weight of the batter will help to secure the parchment further, ensuring a leak-proof bake and a beautifully shaped cheesecake.
🧀 Explore More Delightful Cheesecake Recipes
- Cottage Cheese Cheesecake [Zapekanka]
- Lemon Curd Cheesecake
- Mini Oreo Cheesecakes
- Lemon Raspberry Cheesecake
📖 Recipe
Creamy Basque Burnt Cheesecake
MaryEquipment
- electric mixer
- parchment paper
- 6″ or 7″ round pan (at least 2.5″ tall)
Ingredients
- 16 oz cream cheese full fat, brick style, softened
- ⅔ cup granulated sugar
- ¼ teaspoon sea salt
- 3 large eggs room temperature
- 1 cup heavy whipping cream 35%
- 3 tablespoons cornstarch potato starch, arrowroot starch, and cake flour can also work
- 1 tablespoon pure vanilla extract
Instructions
- 20 minutes before starting, preheat oven to 500°F (260°C).
- Line the inside of a 6” or 7″ round pan (at least 2.5” tall) with two layers of parchment paper. Leave a 3-4 inches of extra parchment paper sticking out of the top – the batter will extend above the lip of the pan so it’s important to have the parchment paper sticking out to hold in the extra batter.
- In a large bowl or stand mixer, blend together softened cream cheese, sugar and salt. Scrape down the sides of the bowl and blend again to make sure the batter doesn’t have any lumps.16 oz cream cheese, ⅔ cup granulated sugar, ¼ teaspoon sea salt
- In a separate bowl, whisk together the eggs just until combined. This will help them blend into the cheesecake batter easier without adding too much air.3 large eggs
- Pour half of the whisked eggs into the cream cheese batter and blend with an electric mixer on the lowest speed until it’s all mixed in. Scrape down the bowl and add the second half of the eggs. Blend again on the lowest speed setting just until incorporated.
- Add the heavy cream into another separate bowl. Sprinkle the cornstarch on top and whisk it in to break up any lumps.1 cup heavy whipping cream, 3 tablespoons cornstarch
- Pour the cream mixture and vanilla extract into the cheesecake batter and stir with a spatula, making sure to scrape the bottom and edges of the bowls to get a thin and smooth batter.1 tablespoon pure vanilla extract
- Carefully pour all of the cheesecake batter into the lined baking pan. If you have a shorter pan Like I do, it’ll fill up above the lip of the pan but don’t worry – the parchment paper will hold it in.
- Smooth out the parchment paper creases to make sure that they’re not sticking into the cheesecake. Trim the parchment paper that is sticking up to only leave about 2 inches extending over the batter.
- Bake for 25-30 minutes, until the top is very dark brown, puffed, and jiggly. It’s ok if the cheesecake cracks. For a gooey-er cheesecake, bake for 25 minutes. For a firmer cheesecake, bake for about 30 minutes. I baked mine for 26 minutes but ovens can vary.
- Remove it from the oven and let it cool down to room temperature. Then, refrigerate for at least 4-6 hours or overnight. Serve chilled or room temperature, on its own or with warm lemon curd poured over each slice. Delicious!
Video
Notes
- Scrape down the bowl constantly to get a smooth, even cheesecake batter.
- The cheesecake is ready when it’s a rich dark brown color, puffed, and jiggly – keep an eye on it!
- Preheat the oven 20 minutes before starting and don’t open the oven door as it bakes.
- Chill before serving to set and deepen the flavor.
