The Ultimate Guide to Bakery-Style Lemon Poppy Seed Scones: Perfectly Moist & Fluffy
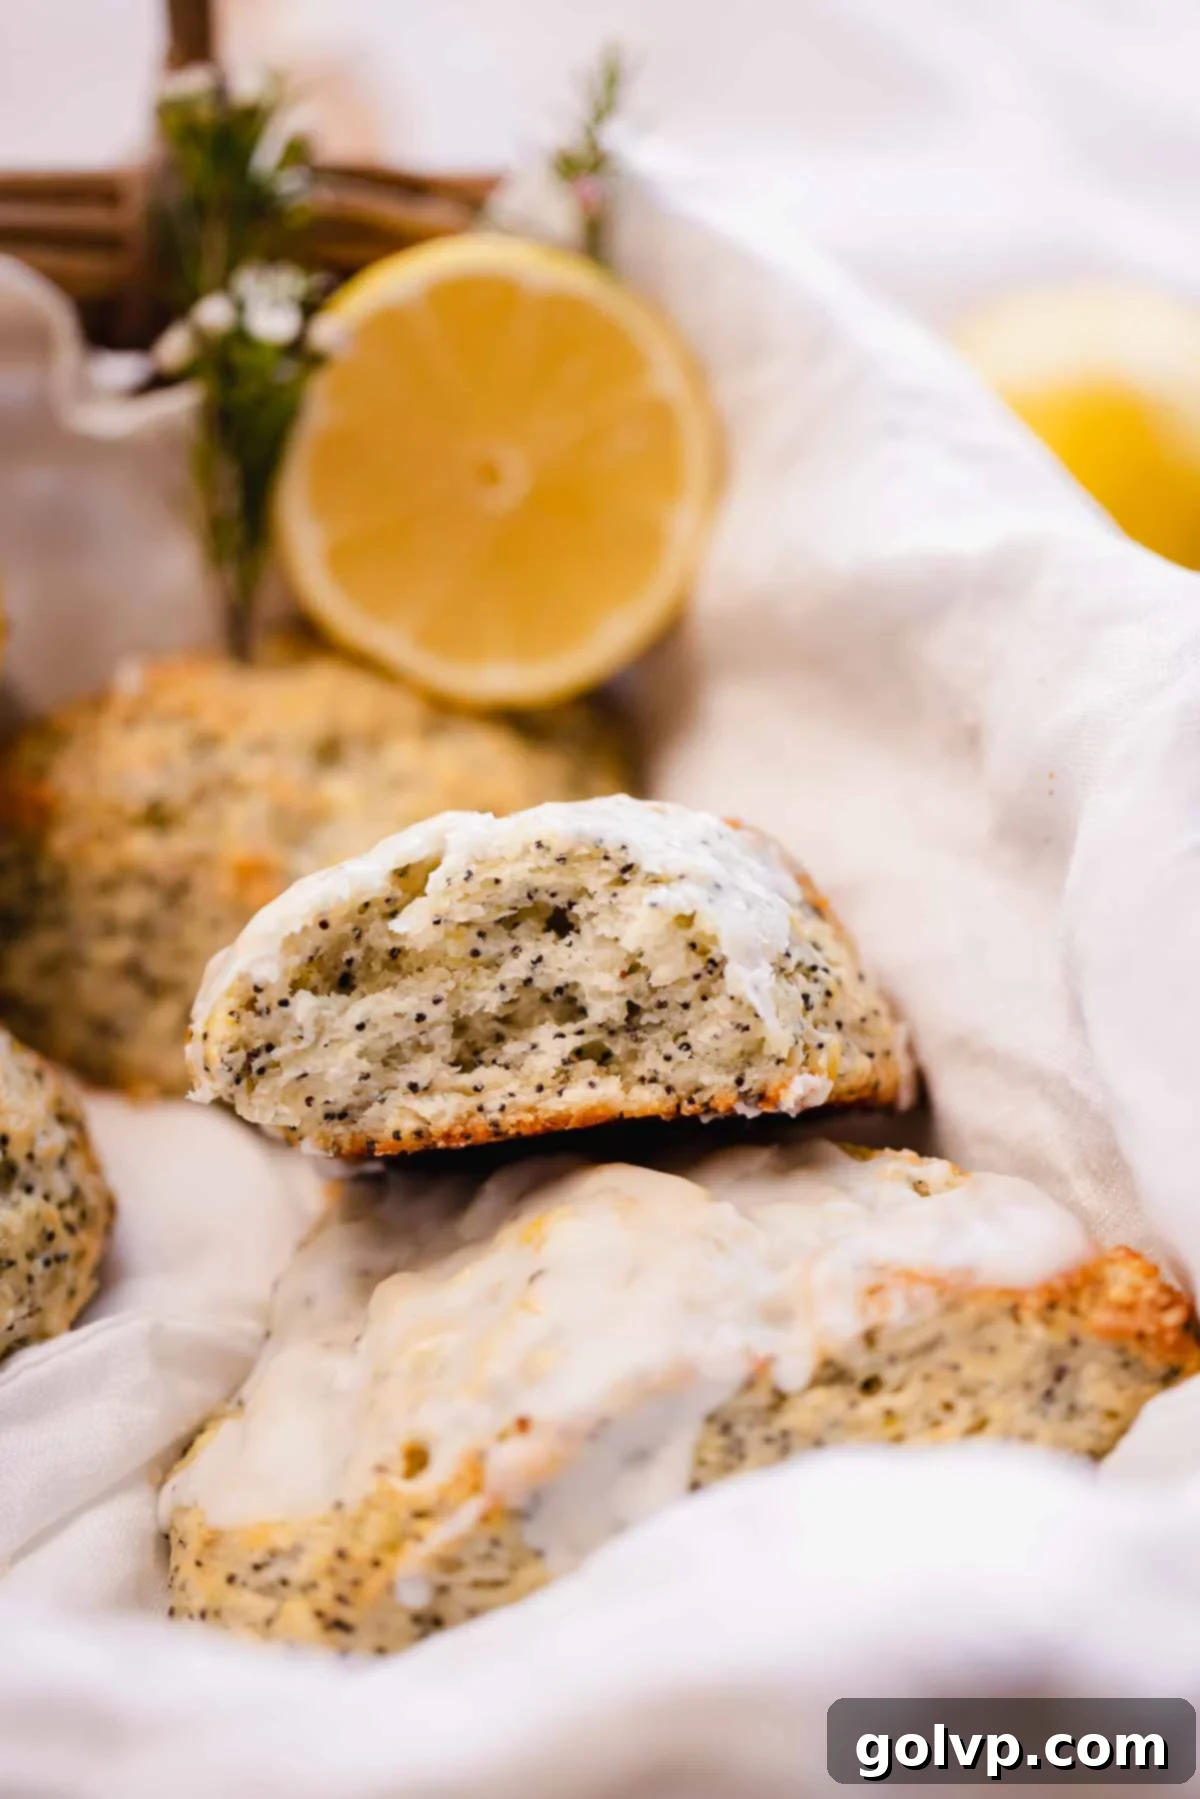
Prepare to fall in love with these extraordinary Lemon Poppy Seed Scones! They are the epitome of scone perfection – fluffy, tender, and incredibly moist on the inside, with that coveted bakery-style crunchy top. Bursting with bright, zesty lemon flavor from fresh lemon juice and abundant lemon zest, perfectly balanced by the subtle tang of Greek yogurt. The poppy seeds add a delightful, unique texture and a hint of nutty flavor that makes these scones truly irresistible. Finish them with a sweet and tangy lemon glaze for an extra touch of indulgence, or enjoy them simply with butter, clotted cream, or your favorite fruit curds.
After extensive retesting and careful refinement, this scone recipe has been perfected to deliver super moist and soft results every time. I’ve poured countless hours into testing to bring you all the essential tips and tricks for achieving tall, flaky scones that are never dry. You’ll be absolutely thrilled with the delicious outcome!

[feast_advanced_jump_to]
🍋 Why You’ll Adore This Lemon Poppy Seed Scone Recipe
These lemon poppy seed scones aren’t just a treat; they’re an experience. Here’s why this recipe will become your new favorite:
- Classic Lemon Poppy Seed Flavor: Experience the perfect harmony of bright, zesty lemon and delicate, nutty poppy seeds. This timeless combination is incredibly satisfying, offering a burst of freshness and a delightful textural contrast in every bite.
- Unbelievably Moist & Fluffy Texture: Forget dry, crumbly scones! This recipe has been meticulously tested and optimized to achieve the ideal balance between a tender, cakey interior and a subtle flakiness. The result is a scone that melts in your mouth, consistently moist and wonderfully airy.
- Irresistible Tangy Lemon Glaze: Elevate your scones with a simple yet exquisite lemon glaze. This sweet and tangy topping not only adds a beautiful sheen but also intensifies the lemon flavor, providing a vibrant contrast to the rich scone.
- Signature Crunchy Top: Just like your favorite bakery scones, these feature a fantastic crunchy top. A generous sprinkle of coarse sugar before baking creates a caramelized, golden crust that adds an extra layer of deliciousness and visual appeal.
📝 Essential Ingredients for Perfect Lemon Poppy Seed Scones
For flawless results, take a moment to read through these crucial tips for each ingredient.
Find the complete list of steps and ingredients in the comprehensive recipe card below.
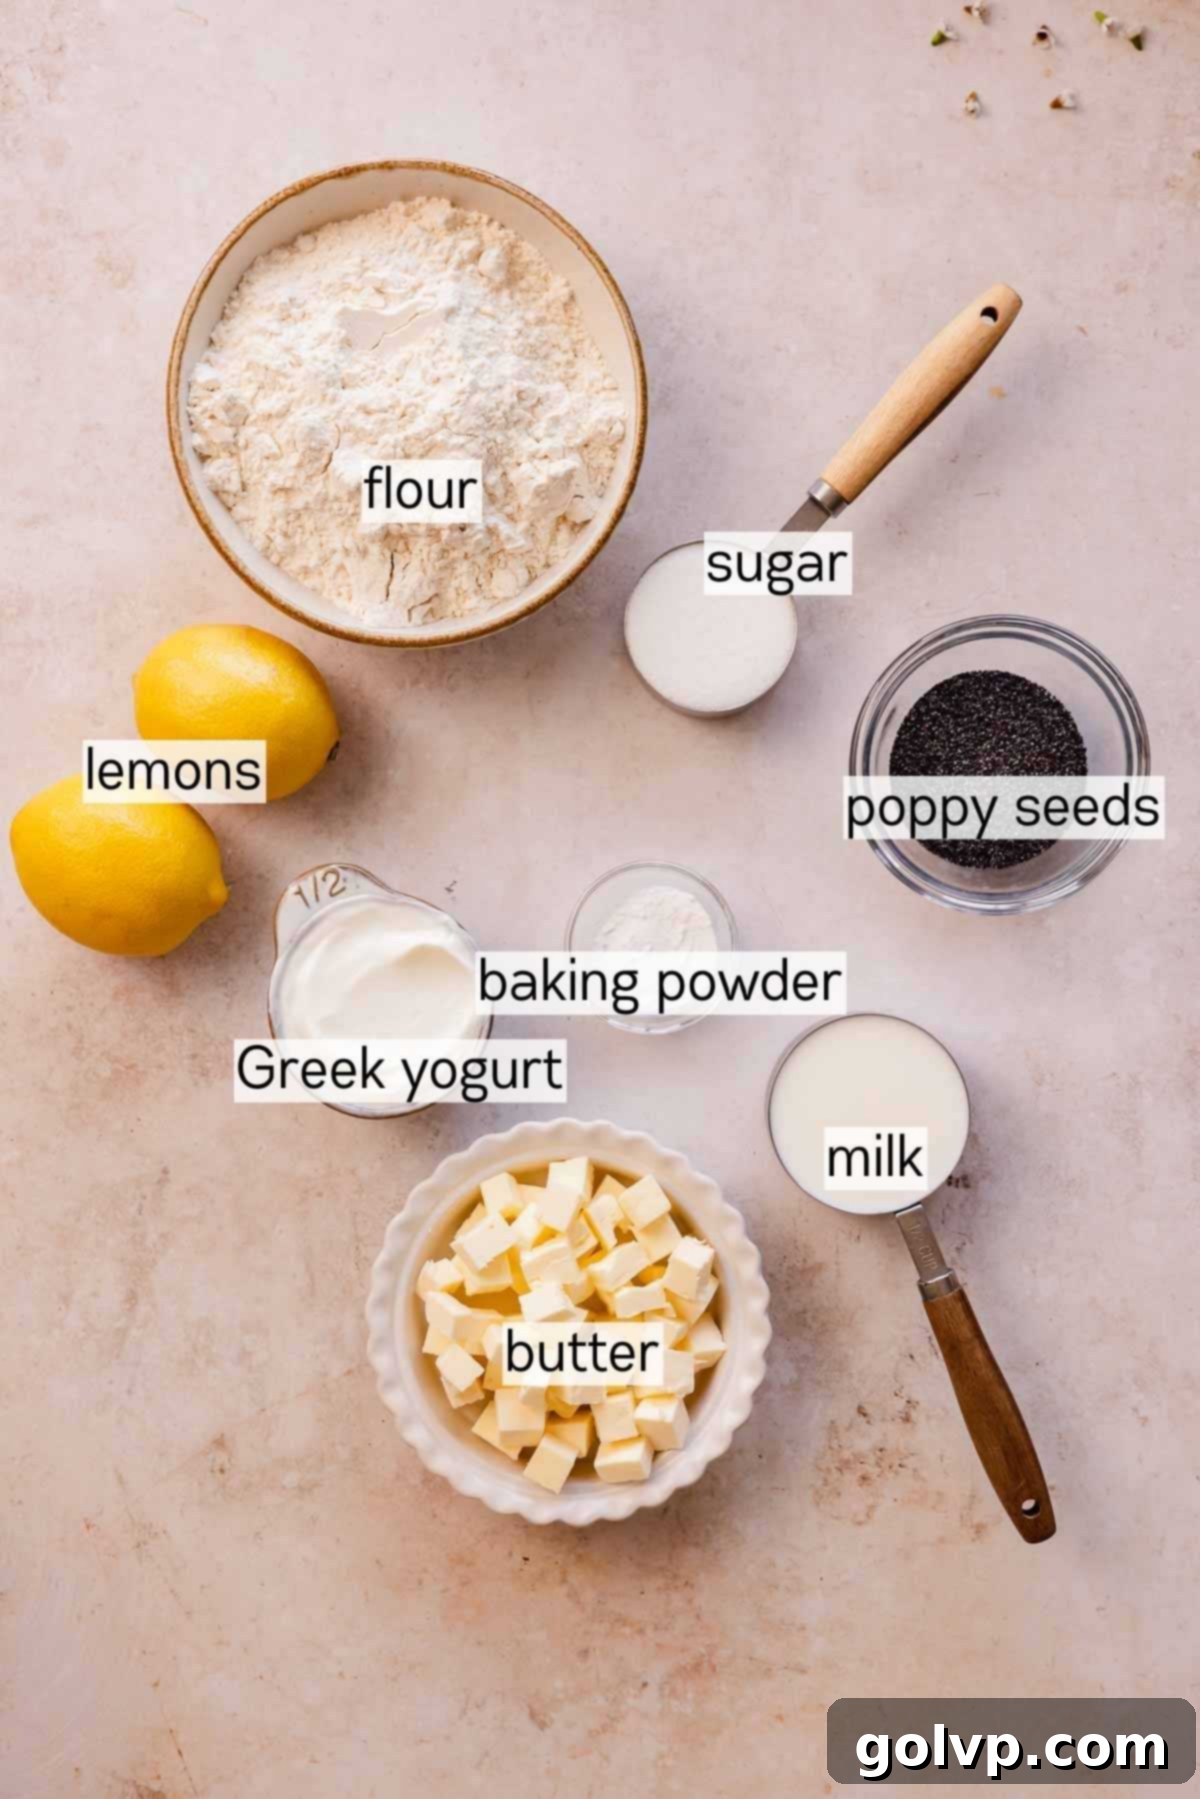
Fresh Lemons: You’ll need the bright, aromatic zest from two lemons for the scone dough, which provides the primary burst of lemon flavor. A portion of the fresh lemon juice will also be incorporated into the dough for tang and moisture. Don’t let the remaining juice go to waste – it’s perfect for crafting the tangy lemon glaze, ensuring maximum lemon impact throughout your scones.
Poppy Seeds: These tiny seeds are not just for visual appeal; they impart a delicate, earthy flavor and a crucial, delightful crunch to the texture of your scones. Before adding them to your dough, a quick check to ensure they haven’t gone rancid will guarantee the best taste. If you’re a true poppy seed aficionado, you absolutely must try my Ukrainian poppy seed roll – it’s a rich, flavorful treat packed with an abundance of poppy seeds!
Plain Greek Yogurt: This ingredient is a game-changer for scone texture and flavor! My extensive testing revealed that Greek yogurt is the clear winner over sour cream. It provides a superior tangy note that beautifully cuts through the richness of the butter, creating a perfectly balanced scone. While sour cream can be substituted and works well, Greek yogurt offers a distinctly better tang. Crucially, do not use regular yogurt, as its thinner consistency will make your dough too wet and difficult to handle, compromising the scone’s structure.
All-Purpose Flour: Precision is paramount in baking, especially with flour. Always weigh your flour using a kitchen scale for the most accurate results. If a scale isn’t available, measure correctly by fluffing the flour with a spoon, then gently spooning it into your measuring cup without packing it down. Level off any excess with a straight edge to ensure you don’t add too much flour, which is a common culprit for dry scones.
Baking Powder: Essential for lift and an airy, fluffy texture, baking powder should not be confused with baking soda. To quickly check if your baking powder is still active, mix about half a teaspoon with a bit of boiling water. If it fizzes and foams, it’s still good to go and will give your scones the rise they deserve!
High-Quality Butter: As these are butter-based scones, the quality of your butter significantly impacts the final flavor. Opt for a good quality butter, preferably European-style, known for its higher fat content and richer taste. If you choose to use salted butter, remember to omit the added salt from the recipe to prevent your scones from becoming overly salty.
Serving Toppings: While delicious on their own, these scones truly shine with accompaniments. Serve them warm with rich, good quality butter, traditional clotted cream, or a dollop of your favorite jam. For an extra special touch, I highly recommend pairing them with a vibrant fruit curd! Explore my zesty lemon curd, tangy luscious raspberry curd, naturally sweet blueberry curd, or bright strawberry curd for an unforgettable treat.
👩🍳 Crafting Your Perfect Lemon Poppy Seed Scones: A Step-by-Step Guide
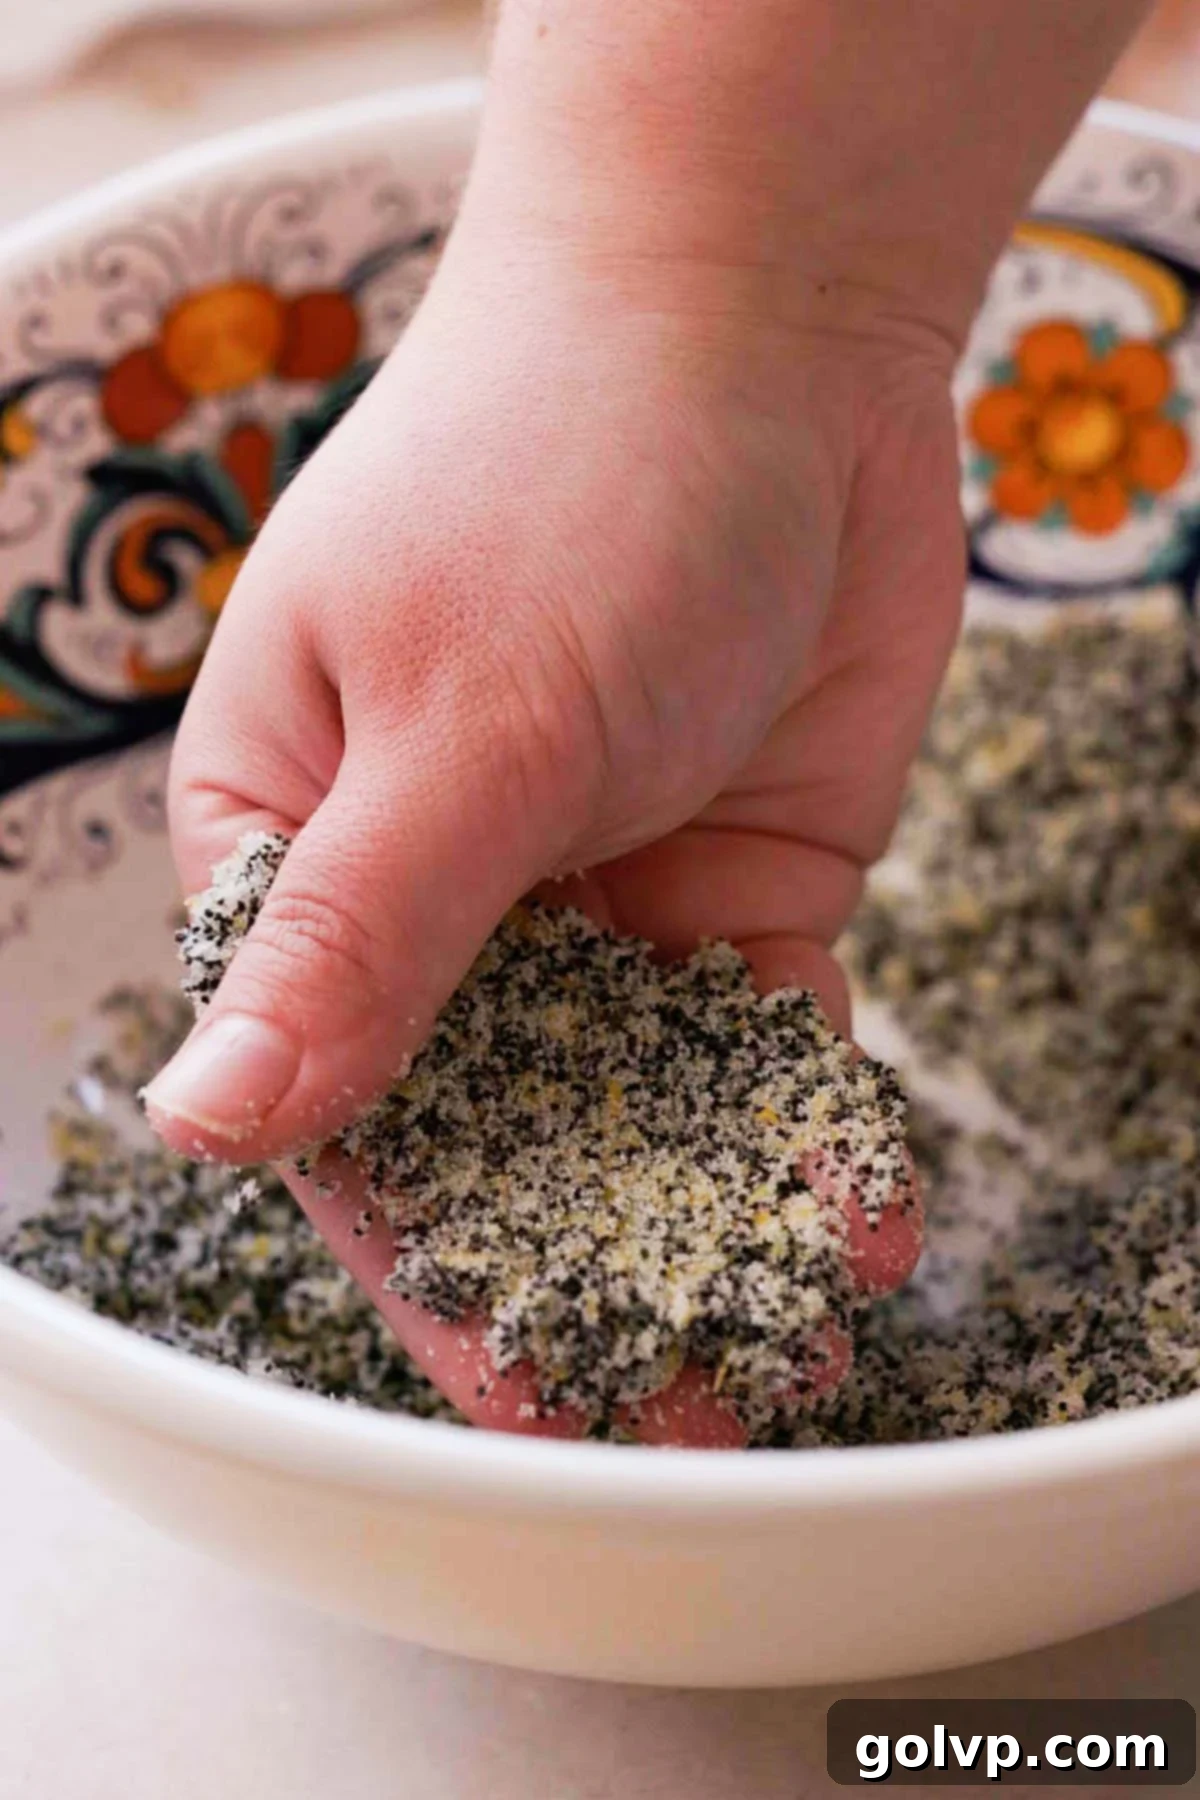
Step 1: Prepare the Butter and Zest. Begin by cutting your cold unsalted butter into small, uniform cubes. Spread these cubes on a plate and place them in the freezer for about 5 minutes. This quick chill ensures the butter stays extra cold, which is vital for flaky scones. While the butter is chilling, combine the granulated sugar, poppy seeds, and finely grated lemon zest in a large mixing bowl. Use your fingertips to gently rub this mixture together. This process releases the fragrant oils from the lemon zest, infusing the sugar with intense lemon flavor and aroma.
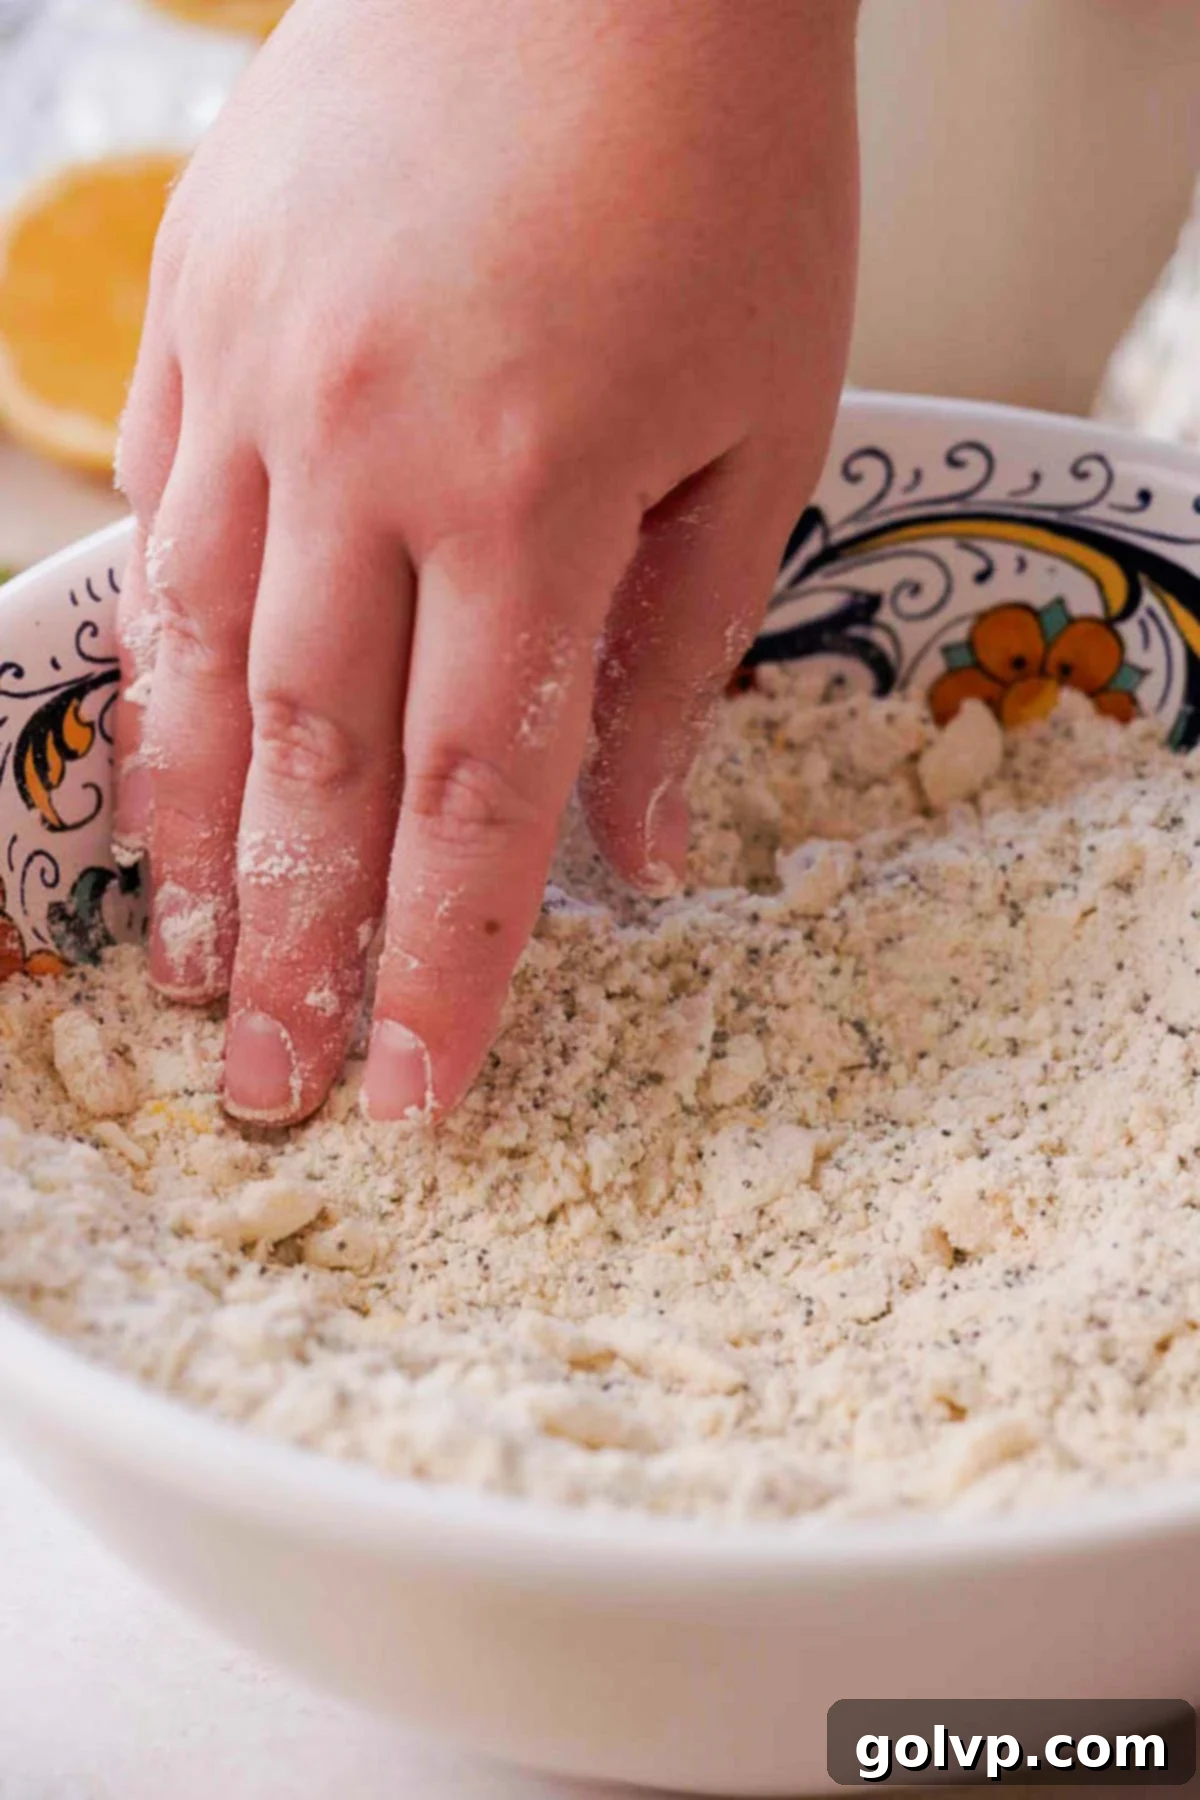
Step 2: Incorporate Dry Ingredients and Butter. To the lemon-sugar mixture, add the pre-measured all-purpose flour, baking powder, and a pinch of sea salt. Stir these dry ingredients together thoroughly until well combined. Next, add the frozen butter cubes. Using a food processor, a pastry cutter, or even your fingertips (working very quickly to avoid melting the butter), cut the butter into the flour mixture. Continue until the mixture resembles coarse crumbs, with some larger pea-sized pieces of butter still visible. These pockets of cold butter are what create the wonderful flakiness in your baked scones.
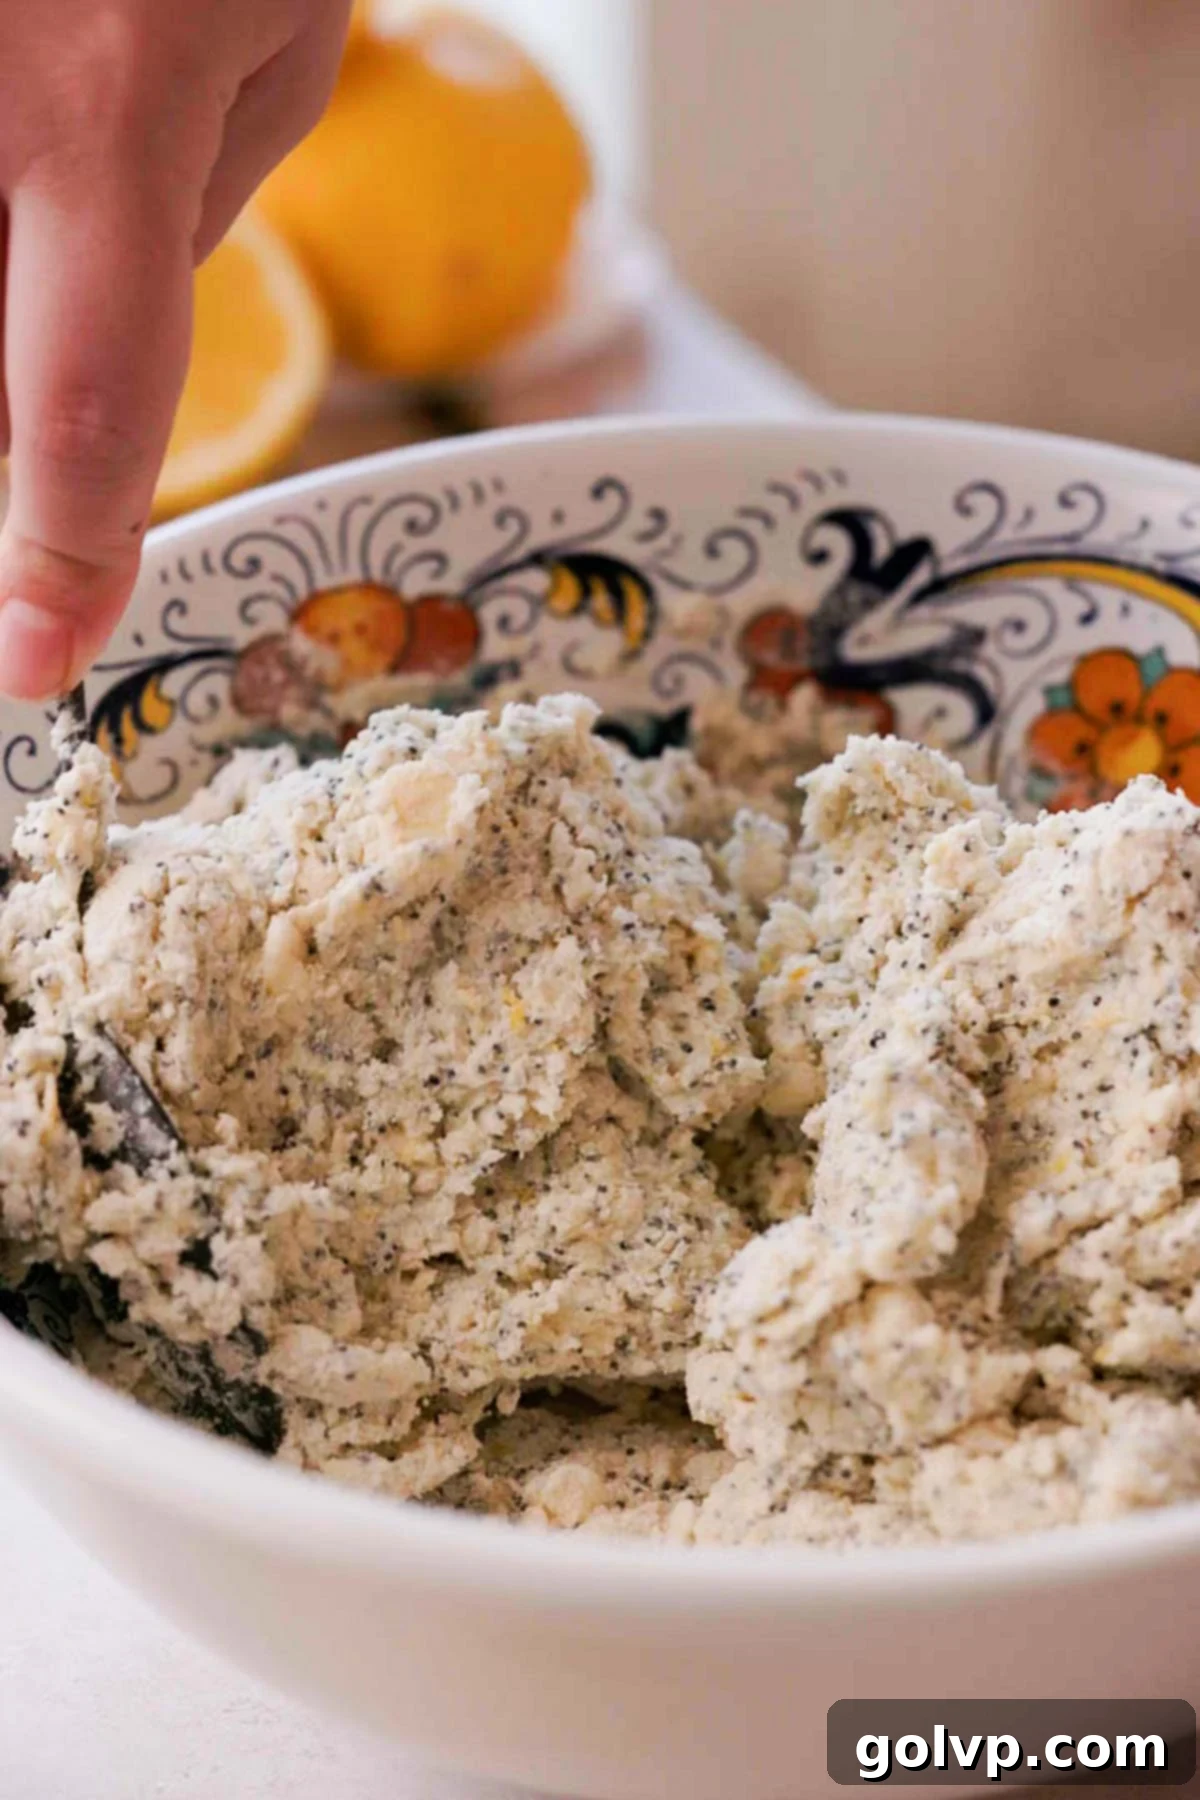
Step 3: Mix in Wet Ingredients. Create a small well in the center of your butter and flour mixture. Pour in the cold Greek yogurt (or sour cream), cold milk, fresh lemon juice, and pure vanilla extract. Using a spoon, gently stir the ingredients together. Mix just until the dough begins to clump and come together. It’s important not to overmix at this stage; a few dry bits remaining in the bowl are perfectly fine and even desirable, as they contribute to a tender scone.
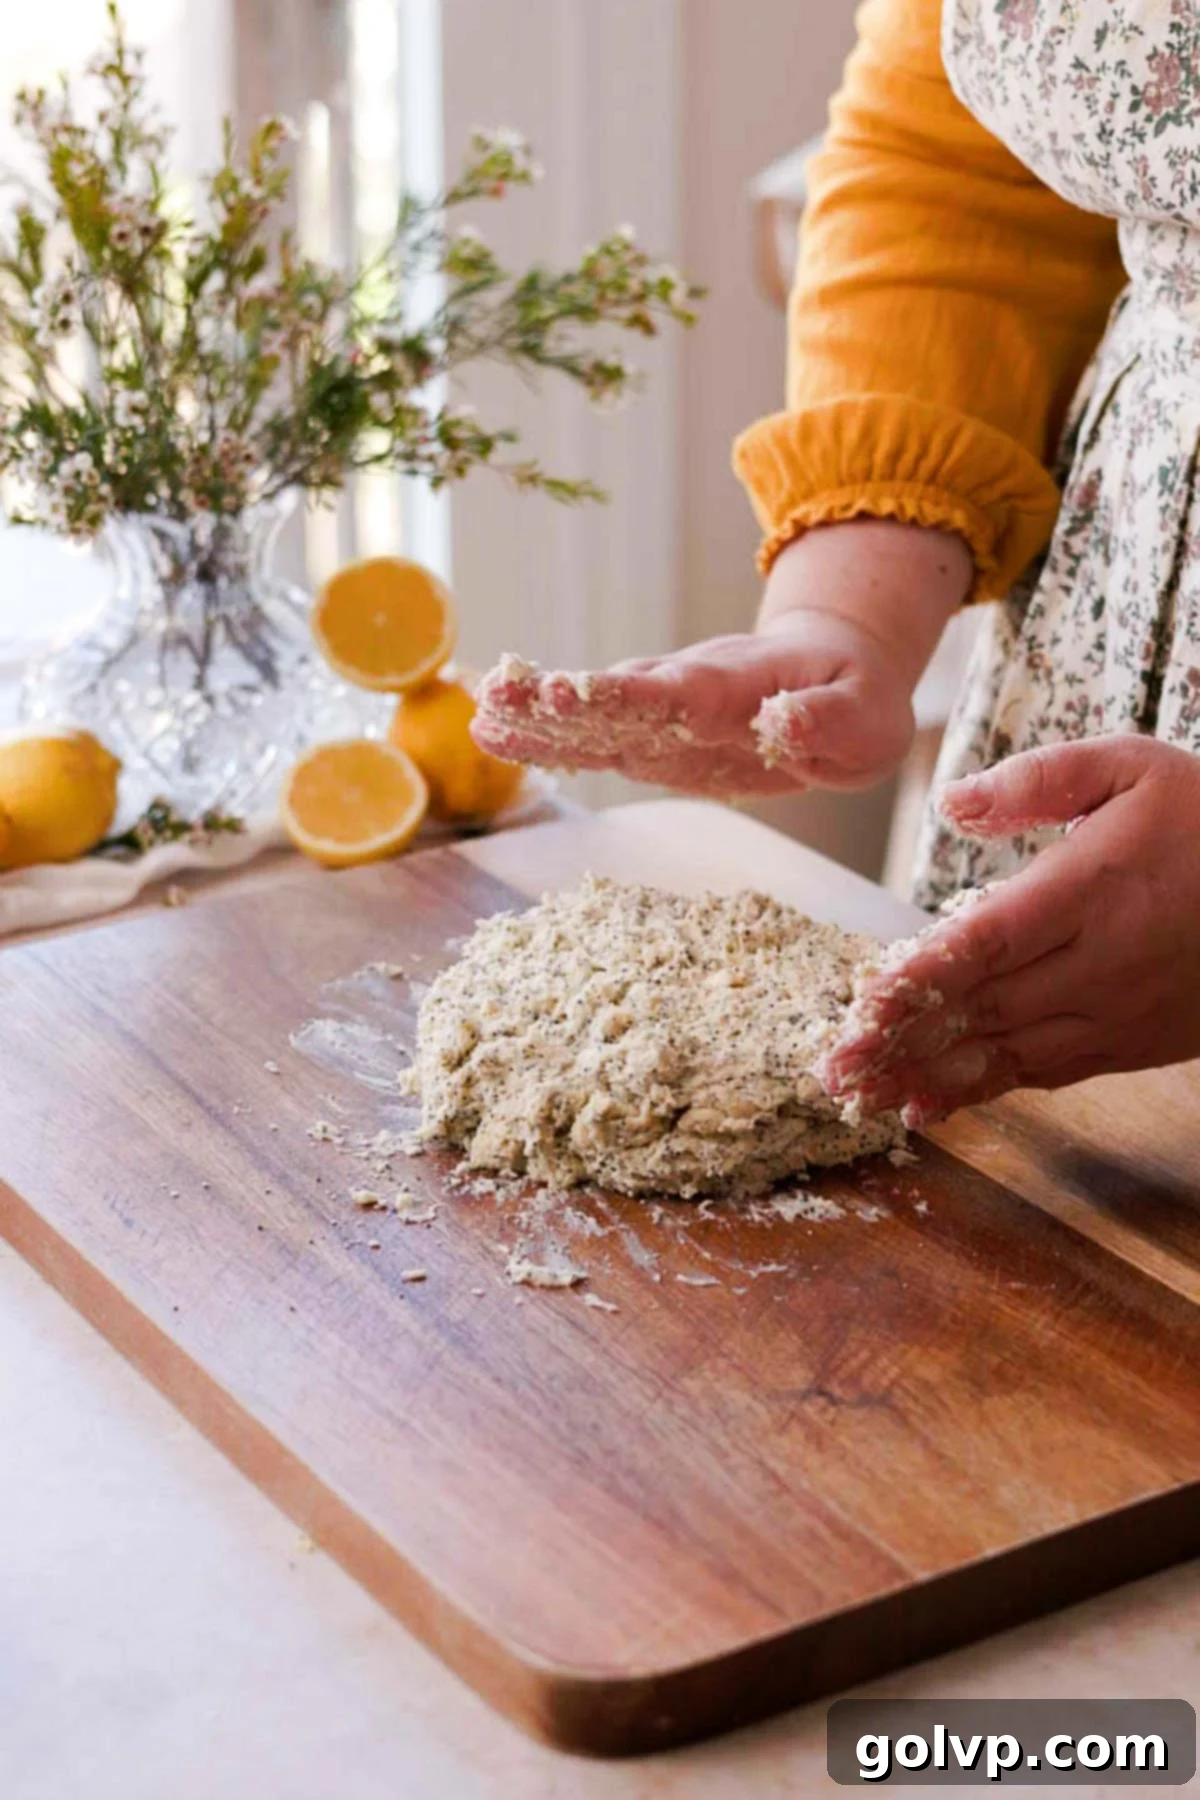
Step 4: Form and Chill the Dough. Turn the slightly shaggy dough out onto a piece of parchment paper. Gently gather it into a ball. Lightly flatten the ball, then fold it over onto itself. Repeat this flattening and folding process two more times. This minimal handling helps develop some layers without overworking the gluten or melting the butter. Work very quickly during this step to keep the butter as cold as possible. Finally, gently form the dough into a uniform circle, approximately 20 cm (8 inches) in diameter. Transfer the parchment paper with the dough to the freezer for 10-20 minutes to chill thoroughly – this firming up of the butter is essential for a good rise.
Expert Scone Tip: Resist the urge to sprinkle extra flour on your work surface or dough. Adding too much flour can lead to dry, tough scones. Instead, lightly moisten your fingertips with water to prevent sticking while handling the dough. A little stickiness is normal and okay!

Step 5: Preheat Oven and Prepare Egg Wash. While your scone dough is chilling in the freezer, preheat your oven to 420°F (215°C). In a small bowl, whisk together one large egg and one tablespoon of milk to create a smooth egg wash. This will give your scones a beautiful golden sheen and help the coarse sugar adhere. If you prefer, or have an egg allergy, heavy cream can be used as an alternative to brush on top.
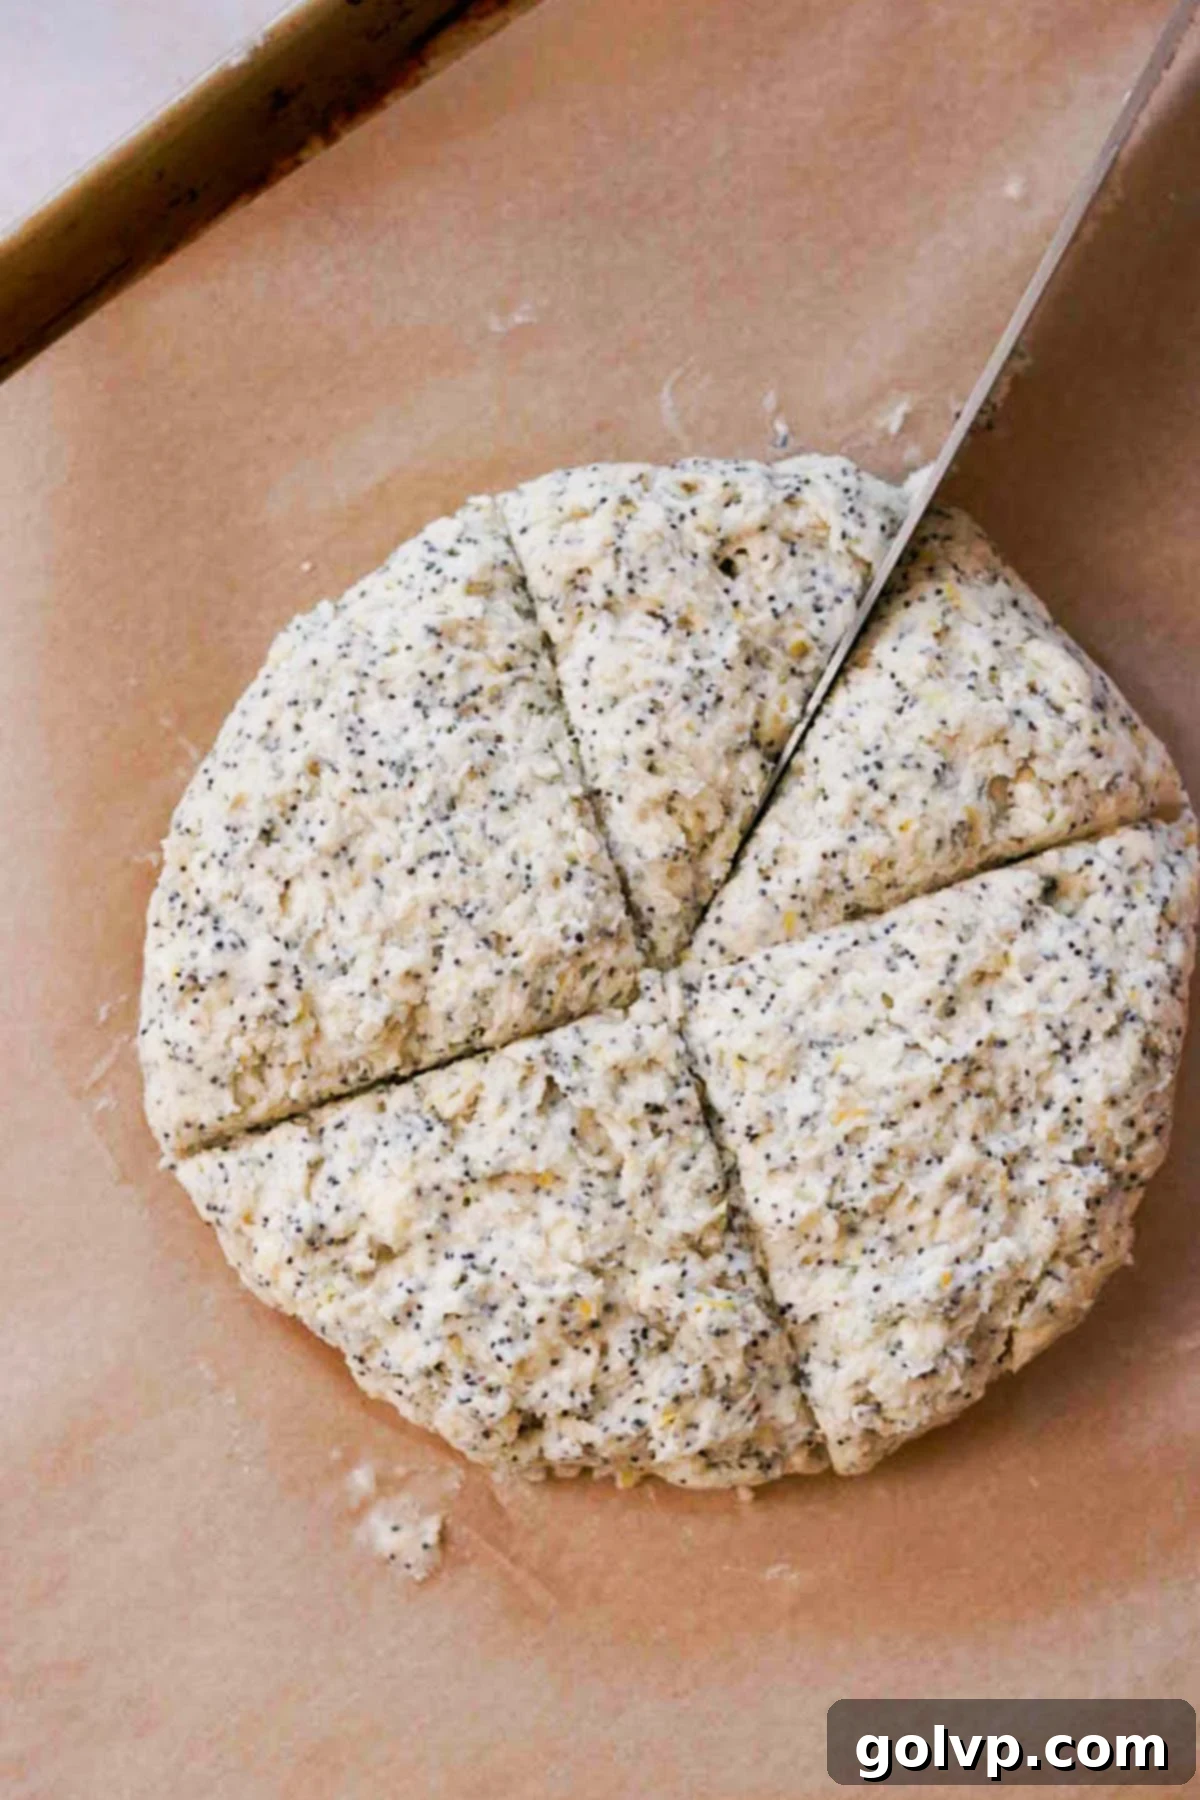
Step 6: Cut and Arrange Scones. Once the dough is thoroughly chilled, transfer it to a clean cutting surface. Cut the round dough into 8 equal wedges – first into quarters, then each quarter in half. Carefully lift each scone wedge and arrange them on a baking sheet lined with parchment paper, ensuring at least 2 inches (5 cm) of space between each scone to allow for proper expansion during baking.
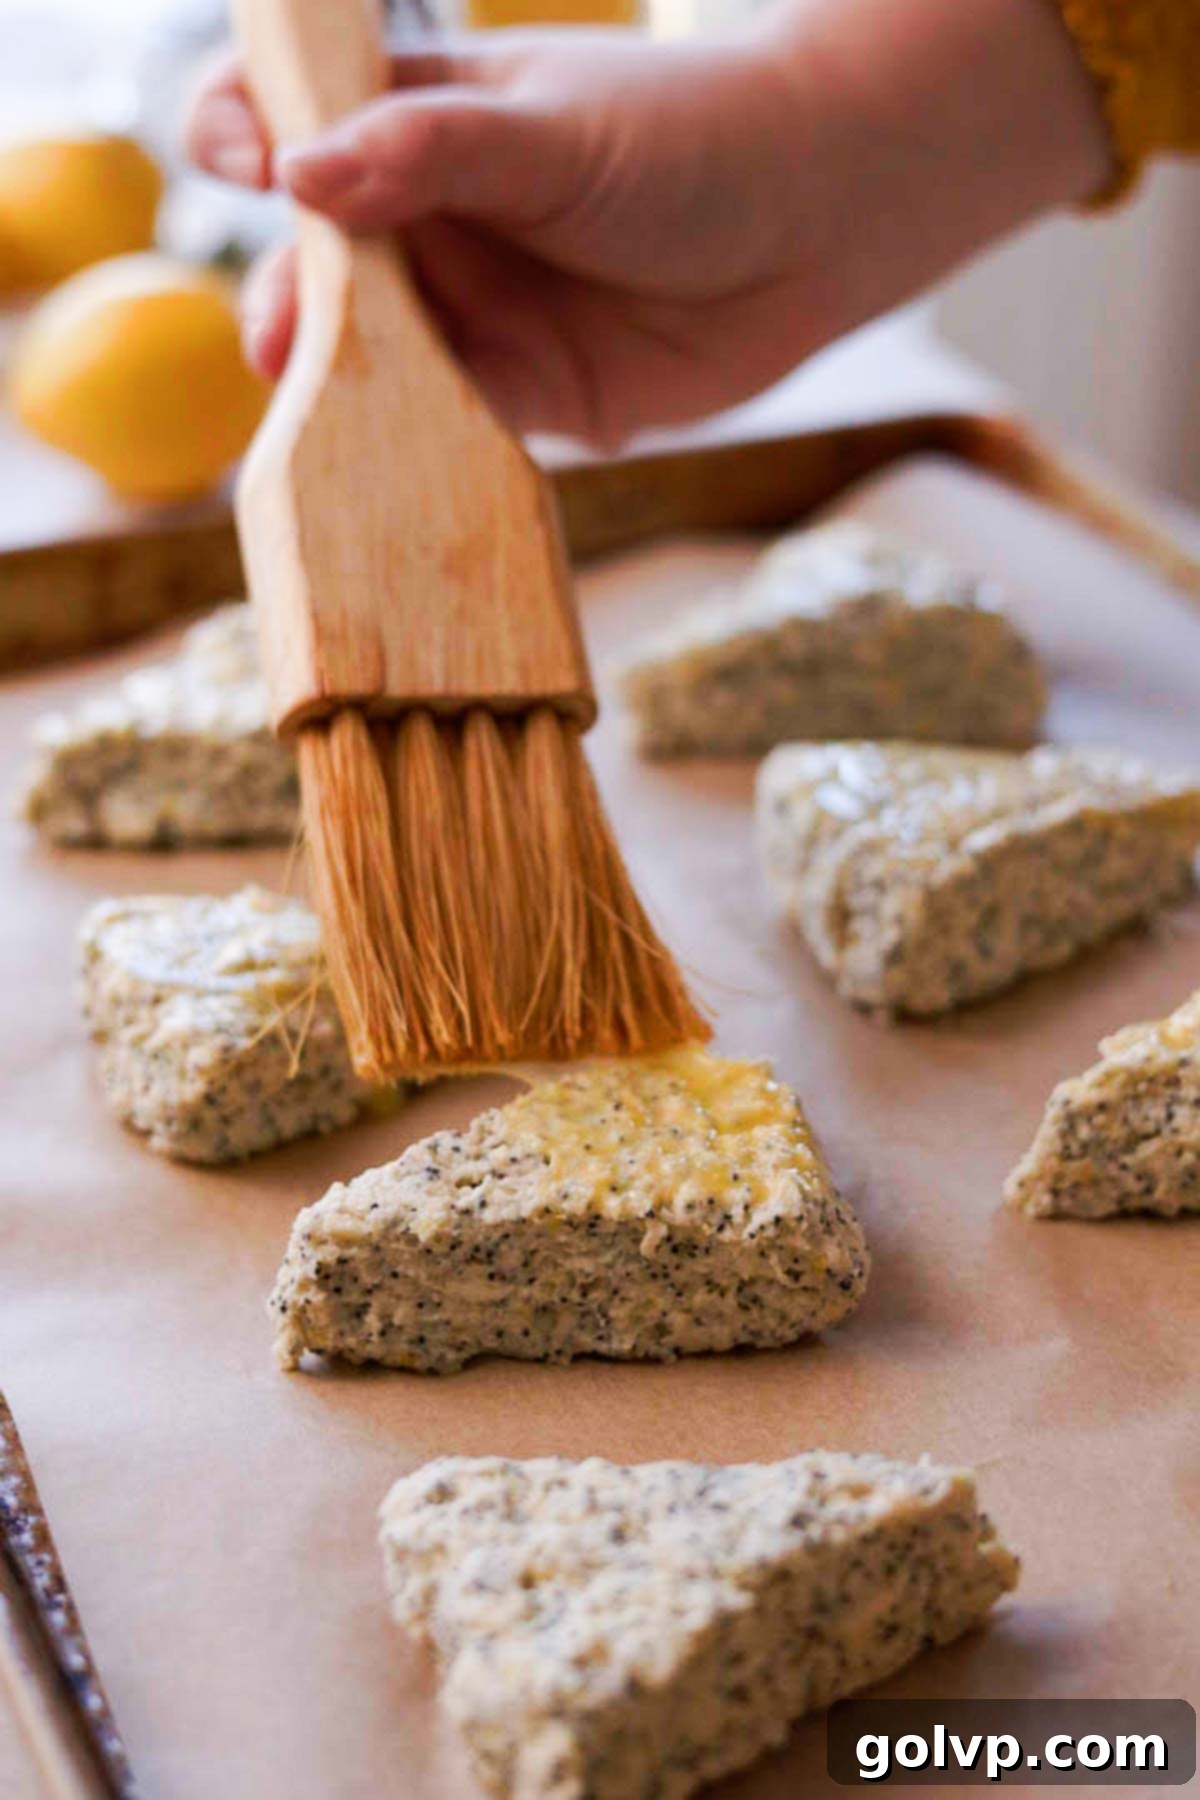
Step 7: Egg Wash and Bake. Gently brush the tops of the scones with the prepared egg wash, being careful to avoid letting any drip down the sides. This is crucial for maximizing their rise. Immediately sprinkle a generous amount of coarse sugar over the egg-washed tops to create that desired crunchy, bakery-style crust. Transfer the baking sheet to the preheated oven and bake for 15-18 minutes, or until the bottoms are golden brown and the tops are beautifully crunchy and golden. To test for doneness, insert a toothpick into the center of a scone; it should come out clean with just a few moist crumbs attached.
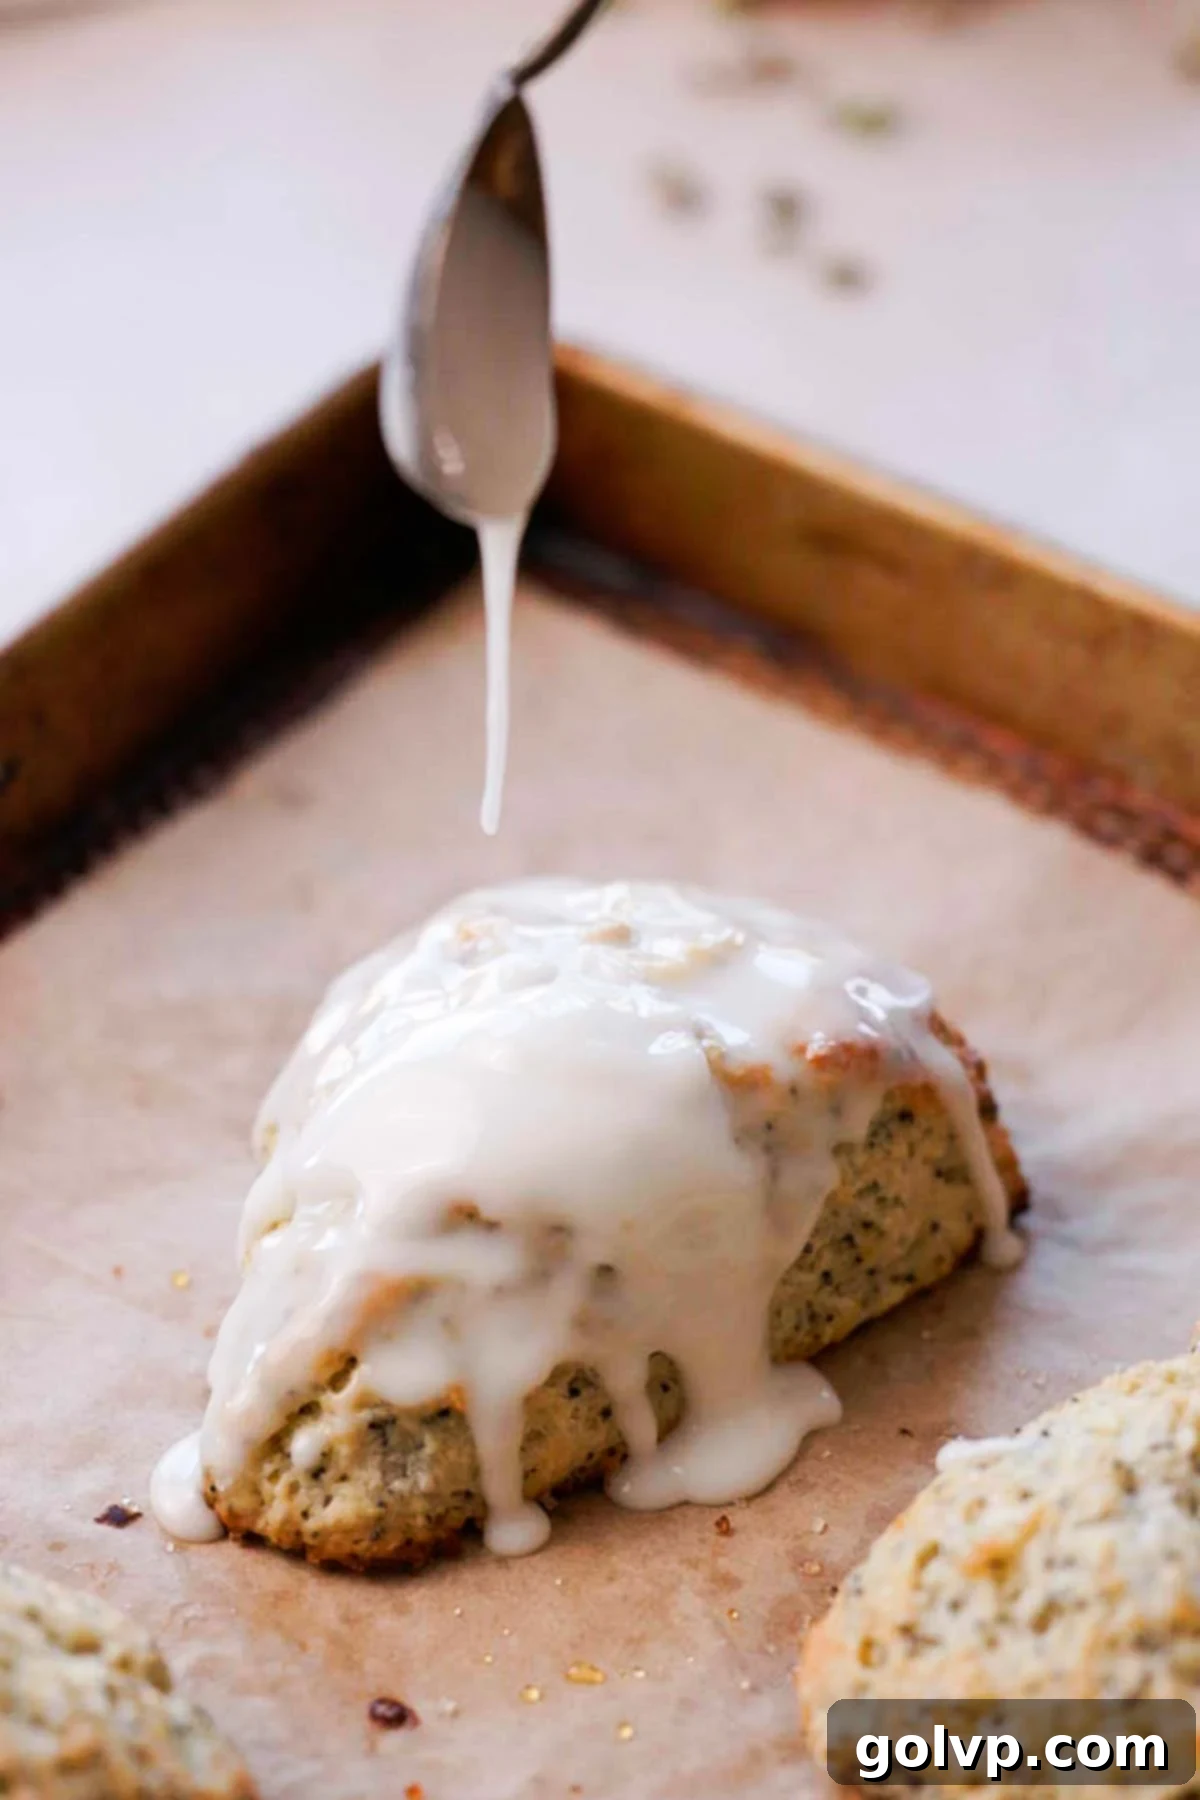
Step 8: Prepare and Apply Lemon Glaze (Optional). While the scones cool slightly, whisk together the powdered sugar and fresh lemon juice in a small bowl. Add additional lemon juice sparingly, a teaspoon at a time, until you reach your desired consistency. I prefer a thicker glaze that coats the scones generously without dripping off completely. You can either dip the tops of the cooled scones directly into the glaze for a full coating or elegantly drizzle the glaze over them with a fork. Allow the glaze to set for about five minutes on a parchment-lined baking tray or a wire rack before serving, giving it a chance to firm up beautifully.
✔️ Top Tips for Scone Baking Success
Achieving perfectly moist, flaky, and tall scones is easier than you think with these expert tips:
- Weigh Your Flour for Precision: The single most impactful tip for consistent scone success is to weigh your flour. Too much flour can lead to dense, dry scones. A kitchen scale ensures you use the exact amount specified, guaranteeing the right dough consistency and a tender crumb.
- Always Freeze the Butter: Cold butter is the secret to flaky scones. Cutting butter into small cubes and freezing them for at least 5-10 minutes before incorporating them into the flour mixture ensures they remain solid longer. As these cold butter pockets melt in the oven, they release steam, creating delightful layers and a flaky texture.
- Maintain Cold Dough and Minimal Handling: Throughout the entire process, strive to keep your butter and dough as cold as possible. Work quickly and handle the dough minimally. Excess warmth from your hands can melt the butter, which will hinder the formation of those crucial flaky layers. Chilling the dough again before baking also makes it easier to handle and promotes a better rise.
- Avoid Extra Flour on Your Work Surface: Resist the temptation to flour your work surface heavily. This can inadvertently add too much extra flour to your dough, leading to dry and tough scones. Instead, lightly moisten your fingers with a tiny bit of water if the dough feels too sticky. A slight stickiness is normal for a properly hydrated scone dough.
- Brush Egg Wash Only on Tops: When applying the egg wash, be very careful to brush it only onto the tops of the scones. If egg wash drips down the sides, it can seal the edges of the dough, preventing the scones from rising as high as they should in the oven. A clean side allows for maximum vertical expansion.
- Do Not Overbake Your Scones: Overbaking is the enemy of moist scones! Keep a close eye on them. As soon as the bottoms are golden brown and the tops are crunchy and lightly golden, remove them from the oven. A toothpick inserted into the center should come out clean with only a few moist crumbs attached. Every minute extra in the oven can contribute to dryness.

🥄 Make Ahead and Storage Solutions
These lemon poppy seed scones are undeniably best enjoyed fresh on the day they are baked, when their moisture and tender crumb are at their peak. However, if you have leftovers, they can be stored in an airtight container or bag at room temperature for up to 3 days. For optimal texture, if storing them in the refrigerator, I highly recommend reheating them briefly before serving to restore their delightful softness.
For ultimate convenience, you can easily prepare these scones in advance and freeze the unbaked pieces. Simply cut the dough into wedges as instructed, but do not apply the egg wash. Arrange the unbaked scones in a single layer on a baking sheet and freeze them completely until solid. Once frozen, transfer the solid scone pieces to a freezer-safe bag or container, where they can be stored for up to 3 months. When you’re ready for a fresh scone, simply brush them with egg wash and bake directly from frozen, following the original baking instructions. You may need to add an extra minute or two to the baking time. This method allows you to enjoy a warm, freshly baked scone anytime without the full effort of baking from scratch.
Baked lemon poppy seed scones can also be frozen, without the lemon glaze, in an airtight bag or container for up to 2 months. Thaw them at room temperature or gently reheat them in the oven before serving.

🥐 Achieving the Ultimate Scone Texture
Through extensive recipe development and valuable feedback, a key discovery was made: including eggs in scone dough often results in a drier finished product. This is because eggs, once cooked and set in the oven, don’t contribute as much lasting moisture to the scone as other ingredients. Our perfected recipe, designed to be eggless in the dough, yields wonderfully moist, cakey scones with a tender crumb that effortlessly breaks apart. While they may not achieve the extreme flakiness of a traditional British scone, they offer a far more moist and enjoyable eating experience, striking a delightful balance that keeps them from being overly dry or crumbly.
💧 Simple Two-Ingredient Lemon Glaze
An optional, yet highly recommended, finishing touch for these lemon poppy seed scones is a vibrant, tangy two-ingredient lemon glaze. This simple glaze perfectly complements the scones, offering a delightful balance of sweetness and tartness that enhances the overall lemon flavor profile. It’s incredibly easy to make, requiring just powdered sugar and freshly squeezed lemon juice.
My husband is a firm believer that the glaze completes the scone, while I often prefer them without, enjoying the unadulterated crunch of the coarse sugar topping. Why not try making a batch with both glazed and unglazed scones to discover your personal preference? You can artfully drizzle the glaze over the scones using a fork, or for a more generous coating, simply dip the tops of the cooled scones directly into the glaze, as I often do.

☕ Delightful Serving Suggestions
These lemon poppy seed scones are incredibly versatile and perfect for any occasion. The most classic way to enjoy them is warm, generously slathered with rich clotted cream and a dollop of your favorite fruit jam. If clotted cream is hard to find, a good quality pat of butter makes for a wonderful substitute. And, of course, no scone experience is complete without a perfectly brewed cup of tea on the side!
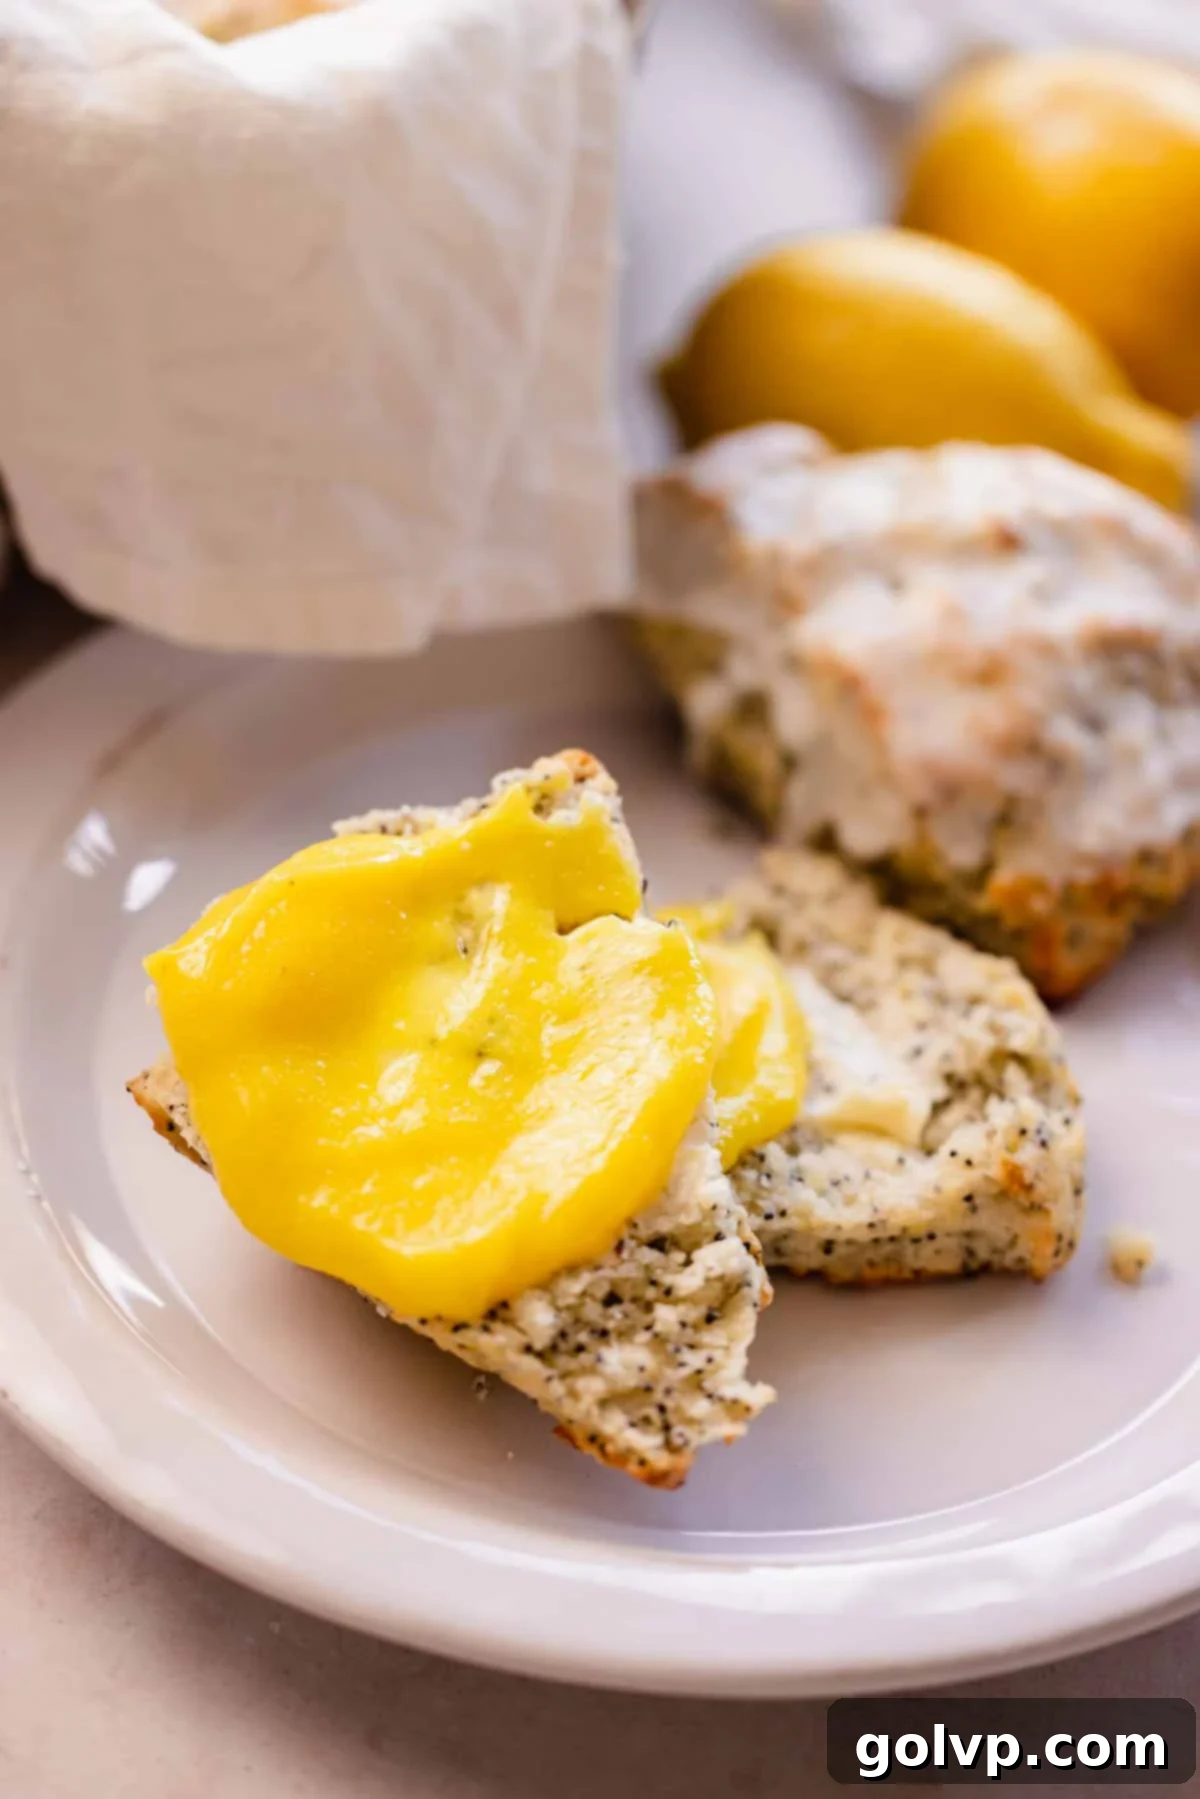
For those feeling a bit more adventurous or looking to elevate their serving, consider pairing these scones with a luscious fruit curd. My homemade lemon curd is an excellent choice, adding another layer of bright, tangy lemon flavor. Alternatively, explore other vibrant options like my popular luscious homemade raspberry curd, sweet blueberry curd, or zesty strawberry curd. These lemon poppy seed scones truly make a perfect addition to your breakfast, brunch, afternoon tea, or dessert spread.
📖 Lemon Poppy Seed Scones: Recipe FAQs
Freezing the butter is a critical step for achieving wonderfully flaky scones. Simply refrigerated butter can melt too quickly as you work it into the dough, leading to a less tender texture. Frozen butter, cut into small pieces, remains cold and solid for a longer duration, allowing you ample time to incorporate it into the flour mixture without it fully softening. As these tiny, frozen butter pieces melt during baking, they create pockets of steam, which are responsible for those coveted flaky layers. I recommend cutting your butter into small, 1 cm (½ inch) cubes and freezing them on a plate for about 10 minutes to ensure they are firm and easy to work with.
It is essential to only brush the tops of your scones with egg wash and avoid getting any on the sides. The egg wash, when it bakes, creates a crust. If this crust forms on the sides of the scone, it can seal the dough and prevent it from expanding upwards as much as possible in the oven. By keeping the sides clear, your scones are free to rise to their maximum height, resulting in a taller, lighter texture and that desirable golden, crunchy top.
My go-to egg wash recipe for scones consists of 1 large egg whisked together with 1 tablespoon of whole milk or 2% milk until smooth. For a dairy-free option, non-dairy milk works perfectly as a substitute for regular milk in the egg wash. If you prefer an egg-free alternative, brushing the tops of your scones with heavy cream will also provide a beautiful golden finish. Regardless of your choice for the wash, the coarse sugar sprinkled on top is crucial for creating that signature bakery-style crunch and sparkle.
The secret to achieving those coveted bakery-style scones with an irresistible crunchy top lies in two simple steps: an egg wash and a generous sprinkle of coarse sugar before baking. The egg wash helps the sugar adhere and creates a beautiful golden-brown color, while the coarse sugar caramelizes in the oven, forming a crisp, sparkling crust. I often use a sparkling coarse sugar, typically found in the cake decorating aisle of most grocery stores, for an extra professional touch, but turbinado cane sugar also works wonderfully.
These versatile scones are delightful with a range of toppings. The most popular choices include a generous dollop of clotted cream, a pat of good quality butter, and your favorite fruit jam. For a more sophisticated touch, or to enhance the lemony flavor, consider serving them with a vibrant lemon curd or another fruit curd. These scones make a perfect addition to any breakfast spread, brunch, afternoon tea, or dessert table.
☕ More Delicious Recipes to Explore
- Lemon Rolls with Lemon Curd
- Ukrainian Poppy Seed Roll
- Lemon Butter Cake
- Lemon Shortbread Cookies
Did you try this amazing recipe? I would absolutely love for you to rate it and share your thoughts in the comments section below! Don’t forget to share your delicious creations on Instagram and tag @flouringkitchen. For more inspiring recipe ideas and saves, be sure to follow me on Pinterest.
📖 Recipe

Lemon Poppy Seed Scones
Mary
Pin Recipe
Shop Ingredients
Equipment
-
parchment paper
Ingredients
Scone Dough
- ½ cup unsalted butter cold
- ½ cup granulated sugar
- 3 tablespoons poppy seeds
- 2 lemons zested
- 2 ¼ cups all purpose flour (270g)
- 1 tablespoon baking powder
- ¼ teaspoon sea salt
- ½ cup greek yogurt or sour cream, cold
- ½ cup milk cold
- 2 tablespoons lemon juice freshly squeezed (reserve the rest for the glaze)
- 1 teaspoon pure vanilla extract
Egg Wash (alternatively, use heavy cream)
- 1 large egg
- 1 tablespoon milk
- 2 tablespoons coarse sugar for sprinkling on top
Lemon Glaze (optional)
- 1 cup powdered sugar
- 1 tablespoon freshly squeezed lemon juice or more, as needed
Shop Ingredients on Jupiter
Instructions
Scone Dough
-
Cut the butter into small cubes, place on a plate, and freeze for 5 minutes. While it freezes, get started on the sugar and zest in the next step.½ cup unsalted butter
-
In a large bowl, combine sugar, poppy seeds, and grated lemon zest. Rub the mixture together with your fingers until fragrant and moistened.½ cup granulated sugar, 3 tablespoons poppy seeds, 2 lemons
-
Add flour, baking powder, and salt into the sugar mixture. Stir to combine.2 ¼ cups all purpose flour, 1 tablespoon baking powder, ¼ teaspoon sea salt
-
Using a food processor, pastry cutter, or a knife, cut the butter into the flour mixture until it resembles crumbs with larger pea sized pieces. You can also use your finger tips to work in the butter, working quickly.
-
Make a well in the center of the butter and flour mixture and add the Greek yogurt, milk, lemon juice, and vanilla extract. Stir with a spoon until it starts clumping and forming a dough. You want some dry bits to still be there.½ cup greek yogurt, ½ cup milk, 2 tablespoons lemon juice, 1 teaspoon pure vanilla extract
-
Turn the dough onto a piece of parchment paper and gather it into a ball. Flatten the ball and fold. Repeat two times. Work very quickly to not melt the butter.
-
Form the dough into a circle about 20 cm (8”) in diameter. Place in the freezer for 10-20 minutes to chill.
-
Preheat the oven to 420°F (215°C). Whisk together the egg and milk for the eggwash. Alternatively, you can use heavy cream to brush on top of the scones.1 large egg, 1 tablespoon milk
-
Cut the dough into 8 equal wedges (Cut into quarters, and each of the quarter in half). Lift and place on a baking sheet lined with parchment paper with at least 2 inches (5 cm) of space in between.
-
Brush the tops of the scones with the egg wash and sprinkle with coarse sugar for a crunchy topping. Try not to get any egg wash on the sides of the scones.2 tablespoons coarse sugar
-
Bake the scones for 15-18 minutes – until the bottoms are golden brown and the tops are crunchy. A toothpick inserted into the center should come out clean with a few crumbs attached.
Lemon Glaze (optional)
-
Whisk together the powdered sugar and lemon juice. Add more lemon juice as needed to get desired thickness. I had my glaze very thick so that it does not all drip off the scones.1 cup powdered sugar, 1 tablespoon freshly squeezed lemon juice
-
Dip the tops of the scones into the glaze or drizzle on top. Let the glaze firm up for five minutes on a parchment lined baking tray or on a wire rack.
-
Serve with clotted cream, jam, and lemon curd – and enjoy!
Video
Notes
Baked lemon poppy seed scones can also be frozen without the lemon glaze in an airtight bag or container for up to 2 months.
Make ahead: You can freeze the unbaked scone pieces – place the cut pieces without egg wash on a baking sheet in a single layer to freeze completely before transferring into a freezer safe bag or container to freeze for up to 3 months. Brush the scones with egg wash and bake them from frozen according to the baking instructions. You may need to add a minute or two to the baking time. This allows you to have a fresh scone or two whenever you like, without having to make them from scratch that day.
How to get moist and flaky scones:
- Weigh flour with a scale
- Use frozen butter (cut in small 1 cm cubes)
- Do not overwork the dough and handle it as little as possible
- Fold and chill the dough before baking
- Careful to not get any egg wash on the sides of the scones
- Don’t overbake the scones or they will be too dry!
Egg wash options:
- Brush the tops with heavy cream – this is a great egg free alternative
- The coarse sugar on top of the egg wash is required if you want that signature bakery style crunch. I use coarse sparkling sugar. You can also use turbinado cane sugar.
